There’s something almost magical about biting into a perfectly cooked ear of corn dripping with melted butter—the kernels bursting with natural sweetness, the butter coating your hands and face, and suddenly you understand why corn has been a summer staple for generations. But here’s the thing most people don’t realize: making truly great buttery corn on the cob isn’t actually complicated. In fact, the secret isn’t fancy techniques or obscure ingredients—it’s understanding that corn is already perfect on its own, and your job is simply to treat it right and let the butter do what it does best.
The methods you’ve probably tried before—boiling corn for 15 minutes, grilling it wrapped in foil, or microwaving it to death—they all work, technically. But they leave you with either waterlogged kernels, unevenly cooked corn, or something that tastes more like the cooking method than like actual corn. What you’re about to learn is the genuinely easy way, the way that consistently produces juicy, sweet, tender corn with a natural golden color and the kind of buttery richness that makes people ask you for your “secret recipe.” Spoiler alert: the secret is just knowing when to cook it, how long to cook it, and which butter trick transforms good corn into unforgettable corn.
This isn’t about complicated timing or special equipment you don’t already have. Whether you’re feeding a crowd at a summer barbecue, cooking a weeknight dinner, or bringing corn to a potluck, this method works every single time—and it takes fewer than 15 minutes of hands-on time, start to finish.
The Surprising History Behind America’s Favorite Vegetable
Corn as we know it today is actually a product of human cultivation going back thousands of years. Native peoples in what is now Mexico domesticated corn from a wild grass called teosinte, and by the time European explorers arrived in the Americas, corn was already deeply woven into countless cultures and cuisines. What’s wild is that the sweet corn we enjoy eating fresh today—the kind you pick up at farmers’ markets in summer—is a relatively recent development, coming from selective breeding in the 20th century.
Before the 1920s and 1930s, most corn was tough, starchy, and meant for grinding into flour or feeding livestock. The golden, juicy, naturally sweet corn at your grocery store is a triumph of agriculture that only became commonplace in the last 80 or so years. This matters because it means we live in a genuinely privileged moment—we have access to the best corn that humans have ever grown. The butter part has been there longer, of course, melting over hot corn since pretty much as long as butter has existed.
What modern cooking taught us is that overcooking kills the delicate sweetness and leaves you with mealy, tough kernels. The easy way respects what’s already there and simply brings out what nature gave you.
Why This Simple Method Actually Works Better Than Everything Else
Most cooking methods for corn make the same fundamental mistake: they apply too much heat for too long, breaking down the natural sugars and toughening the tender starches inside each kernel. Boiling sounds traditional, but it actually leeches flavor directly into the water. Steaming is better but still slow. Grilling gives you char, which some people love, but uneven cooking is almost inevitable.
The easy method works because it uses moderate heat, precise timing, and relies on the natural moisture already present in fresh corn. You’re not drowning the corn, scorching it, or treating it like it needs rescue. You’re simply warming it through to tenderness while keeping every bit of its natural sweetness intact. The butter isn’t cooked on; it’s added after, so it stays silky and pure rather than getting hot enough to brown or burn.
Think of it this way: you’re not trying to force the corn to become something it isn’t. You’re creating the exact environment where corn’s best qualities—sweetness, tenderness, and that subtle nutty undertone—can shine brightest. The butter is then the vehicle that carries all that flavor onto your taste buds and makes the whole experience feel luxurious.
Picking the Right Corn (and Yes, It Actually Matters)
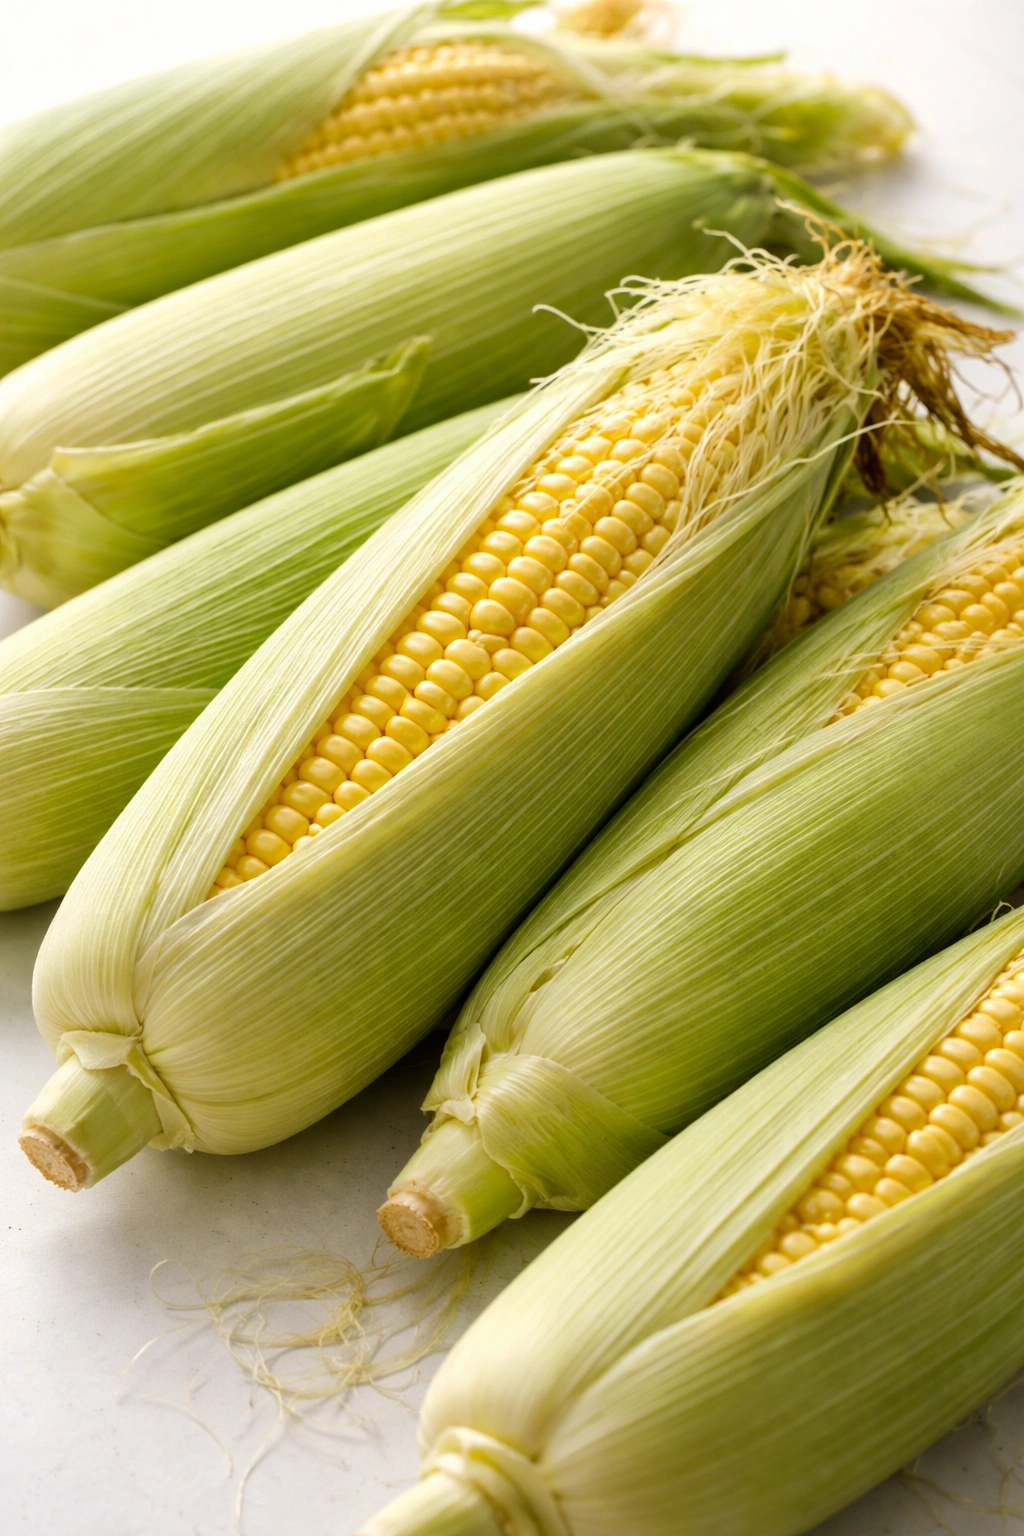
The single most important thing you can do for this recipe happens before you even turn on the stove: choose truly fresh corn. This matters more than any cooking technique ever will. Corn’s sugars start converting to starch the moment the ear is picked, which is why that ear sitting in your grocery store’s bin for three days tastes noticeably less sweet than corn bought from a farmers’ market or farm stand where it was picked that morning.
Look for ears with bright green, tightly wrapped husks with no dried-out brown patches. The silk should look fresh and slightly moist, not dried and brittle. When you gently squeeze the ear through the husk, you should feel plump kernels—not shriveled or soft spots. The color of the kernels visible at the stem end should be pale yellow to golden; pale yellow corn tends to be sweeter than the deep gold varieties, though both can be excellent.
One pro tip that most people miss: if you can, ask the produce person when the corn arrived that day. Buying corn within 4-6 hours of delivery to the store makes an enormous difference in the final result. If you’re buying from a farmers’ market, chat with the farmer—they’ll tell you exactly when it was picked, and if they picked it yesterday morning, it’s still in that beautiful window where the sugars haven’t started converting yet.
Equipment and Timing Overview
Yield: Serves 4 to 6 | Makes 6 to 8 ears of corn
Prep Time: 10 minutes
Cook Time: 8 to 12 minutes (depending on the method you choose)
Total Time: 20 minutes
Difficulty: Beginner — Literally no special skills required. You’re warming corn and adding butter. The only thing you need to avoid is overcooking, and this method makes that nearly impossible.
Best Served: Immediately while still warm from the pot or grill, with butter still melting into the kernels.
You’ll need one simple piece of equipment: either a large pot with water and a steamer insert, a grill, or even a microwave if you’re truly in a hurry (it’s not the prettiest method, but it does work). A pastry brush for applying melted butter is helpful but not required—you can also use a butter knife and just slather it on. Corn holders, though cute, are entirely optional.
What You’ll Need: The Ingredient List
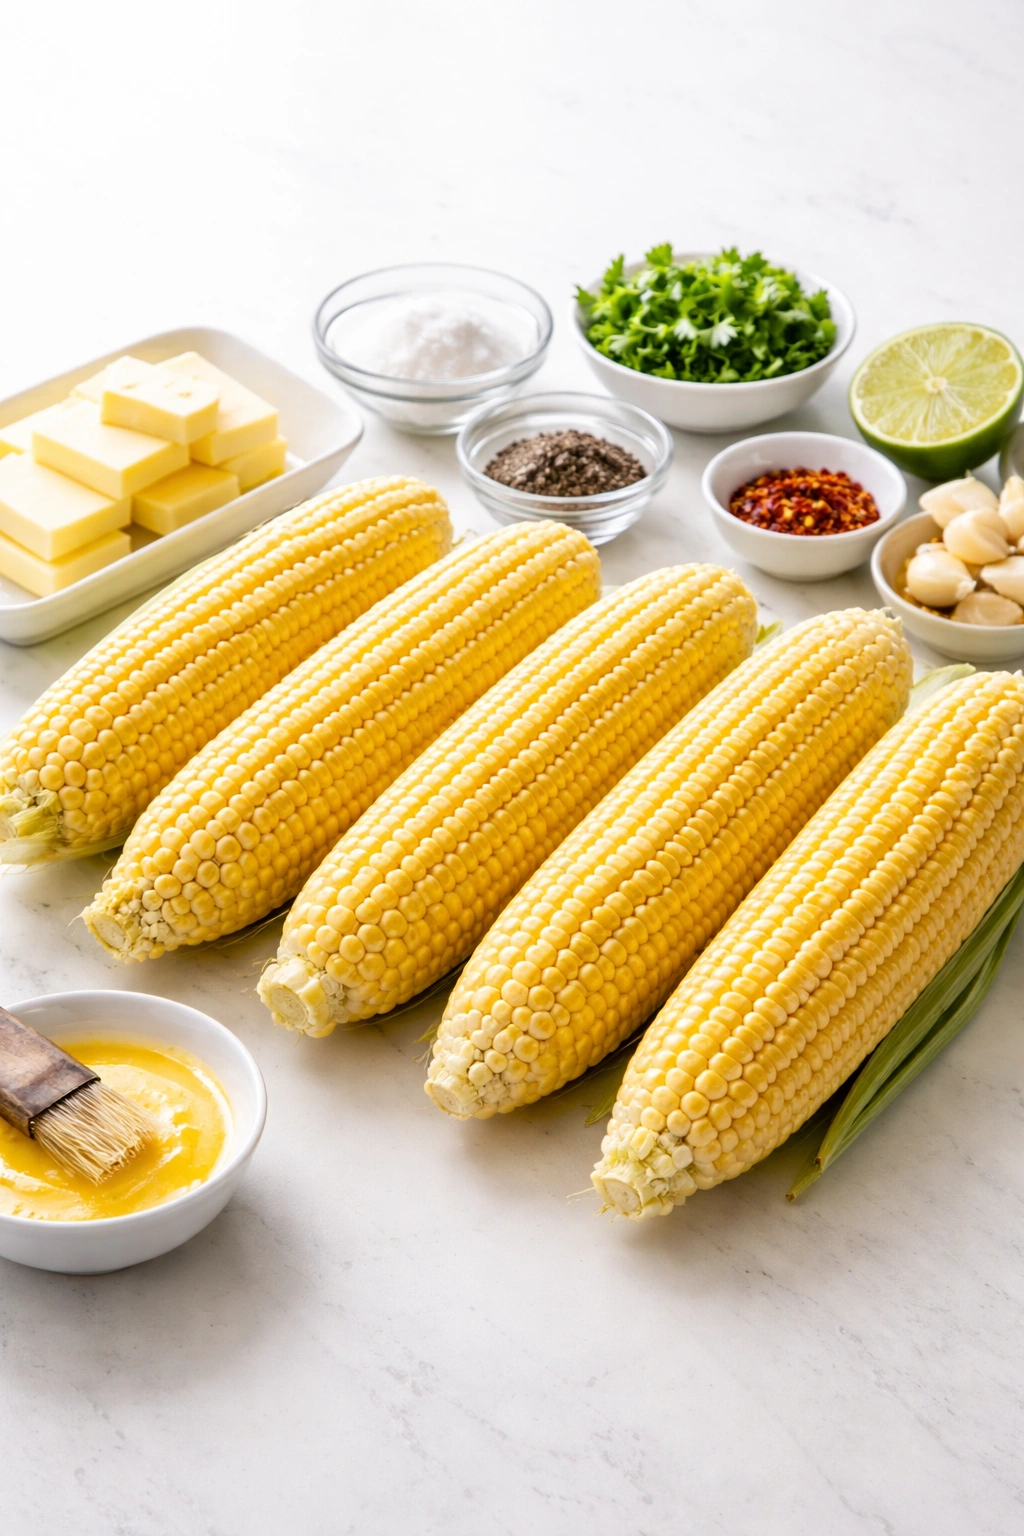
For the Corn:
- 6 to 8 fresh ears of corn, husks and silk removed
- 4 to 6 tablespoons unsalted butter (about ¾ to 1 stick), softened to room temperature or melted
- Fine sea salt, to taste
- Freshly cracked black pepper, to taste
Optional Flavor Additions:
- 2 tablespoons fresh herbs (such as fresh thyme, basil, or parsley), finely chopped
- 1 clove garlic, minced and mixed into softened butter
- ½ teaspoon smoked paprika, sprinkled over butter
- Juice of ½ fresh lime, squeezed over warm corn
- 2 tablespoons freshly grated Parmesan cheese
- ¼ teaspoon cayenne pepper for subtle heat
- 1 tablespoon fresh lime zest mixed with softened butter for a bright zing
The simplest approach is honestly the best: just butter, salt, and pepper. The corn itself is the star. But these additions are here if you want to play around once you’ve made the basic version a few times and want to explore flavor combinations.
The Step-by-Step Method That Never Fails
Prepare the Corn:
-
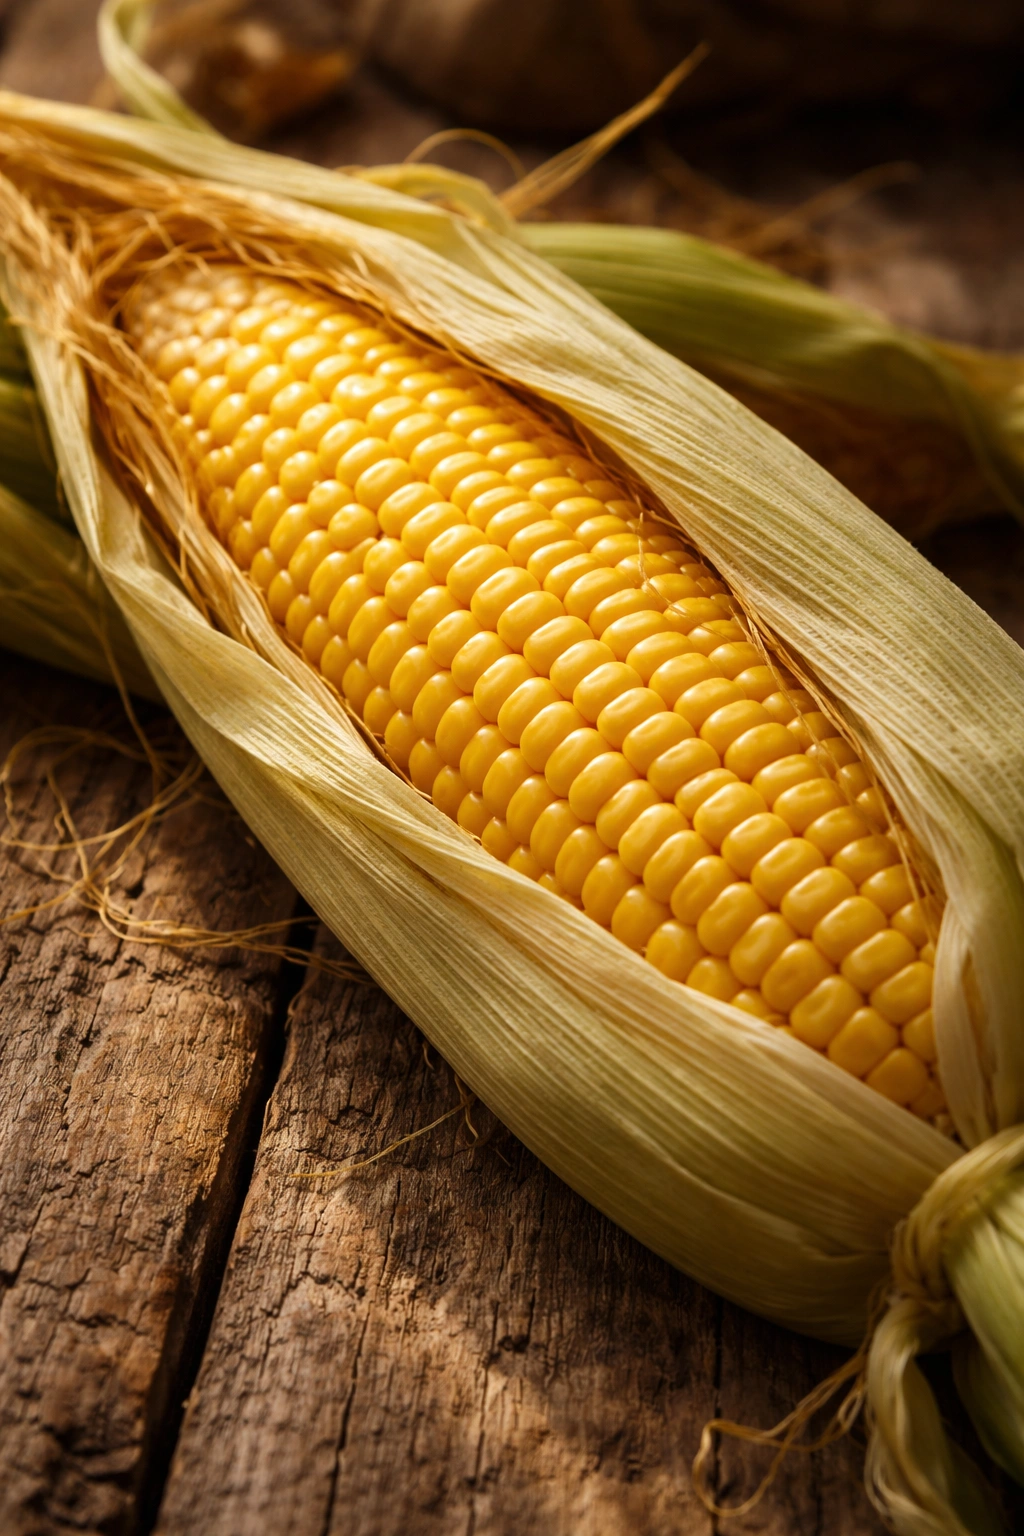
Pull back the husks on each ear without removing them completely, and pull away the silk strands—use a soft brush or your hands under cool running water to get every bit of silky strand off. The silk will cook into unpleasant little bits if you leave it behind, so take 30 seconds per ear and do this properly.
-
Once the silk is removed, trim the stem end if it’s rough or splintery. Pull the husks back up if you want to use them for presentation, or leave them off if you prefer; it doesn’t affect cooking at all.
-
Cut or break the ears in half if you prefer shorter pieces (this makes them easier to handle and easier to fit in smaller pots or grilling baskets). You can also keep them whole if you prefer—cooking time is nearly identical either way.
Boiling Method (Simplest, Most Reliable):
-
Fill a large pot with enough water to cover the corn by about 2 inches. Bring the water to a rolling boil over high heat—this should take about 5 minutes while you’re finishing your corn prep.
-
Once the water is at a hard boil, carefully add the prepared corn and stir gently so all pieces are submerged. The water will stop boiling momentarily; wait for it to return to a boil.
-
Once the water returns to a full boil, set a timer for exactly 6 to 8 minutes. This is the critical window—do not exceed 8 minutes. At 6 minutes, test a kernel by piercing it with a fork; the inside should be tender but not mushy, and the corn should be heated through. If it still feels slightly firm, cook for 1-2 minutes more, but 8 minutes is the absolute maximum.
Advertisements -
Using tongs or a slotted spoon, carefully remove the corn from the boiling water and place it on a clean kitchen towel or paper towels to drain for about 1 minute. This stops the cooking process and lets excess water evaporate so the butter adheres better.
Steaming Method (For Maximum Flavor Retention):
-
Fill a large pot with 1 inch of water and position a steamer basket or collapsible steamer insert so it sits about ½ inch above the water level. Bring the water to a gentle boil over medium-high heat.
-
Arrange the corn pieces in the steamer basket in a single layer. Cover with a tight-fitting lid and steam for 8 to 10 minutes, until a fork pierces a kernel easily and the corn is heated through and tender.
-
Transfer the corn to a clean towel or paper towel to drain and cool for 1 minute while you prepare your butter.
Grilling Method (For Occasional Char and Smokiness):
-
Preheat your grill to medium-high heat (about 400°F / 200°C if using a temperature gauge). Oil the grill grates lightly so the corn doesn’t stick.
-
Place the prepared corn directly on the grates, or use a grilling basket if you prefer to contain them. Grill for 10 to 12 minutes, rotating occasionally with tongs every 3 minutes or so, until the kernels are tender when pierced and the corn has light golden-brown marks on the outside.
-
Transfer to a plate immediately to stop the cooking.
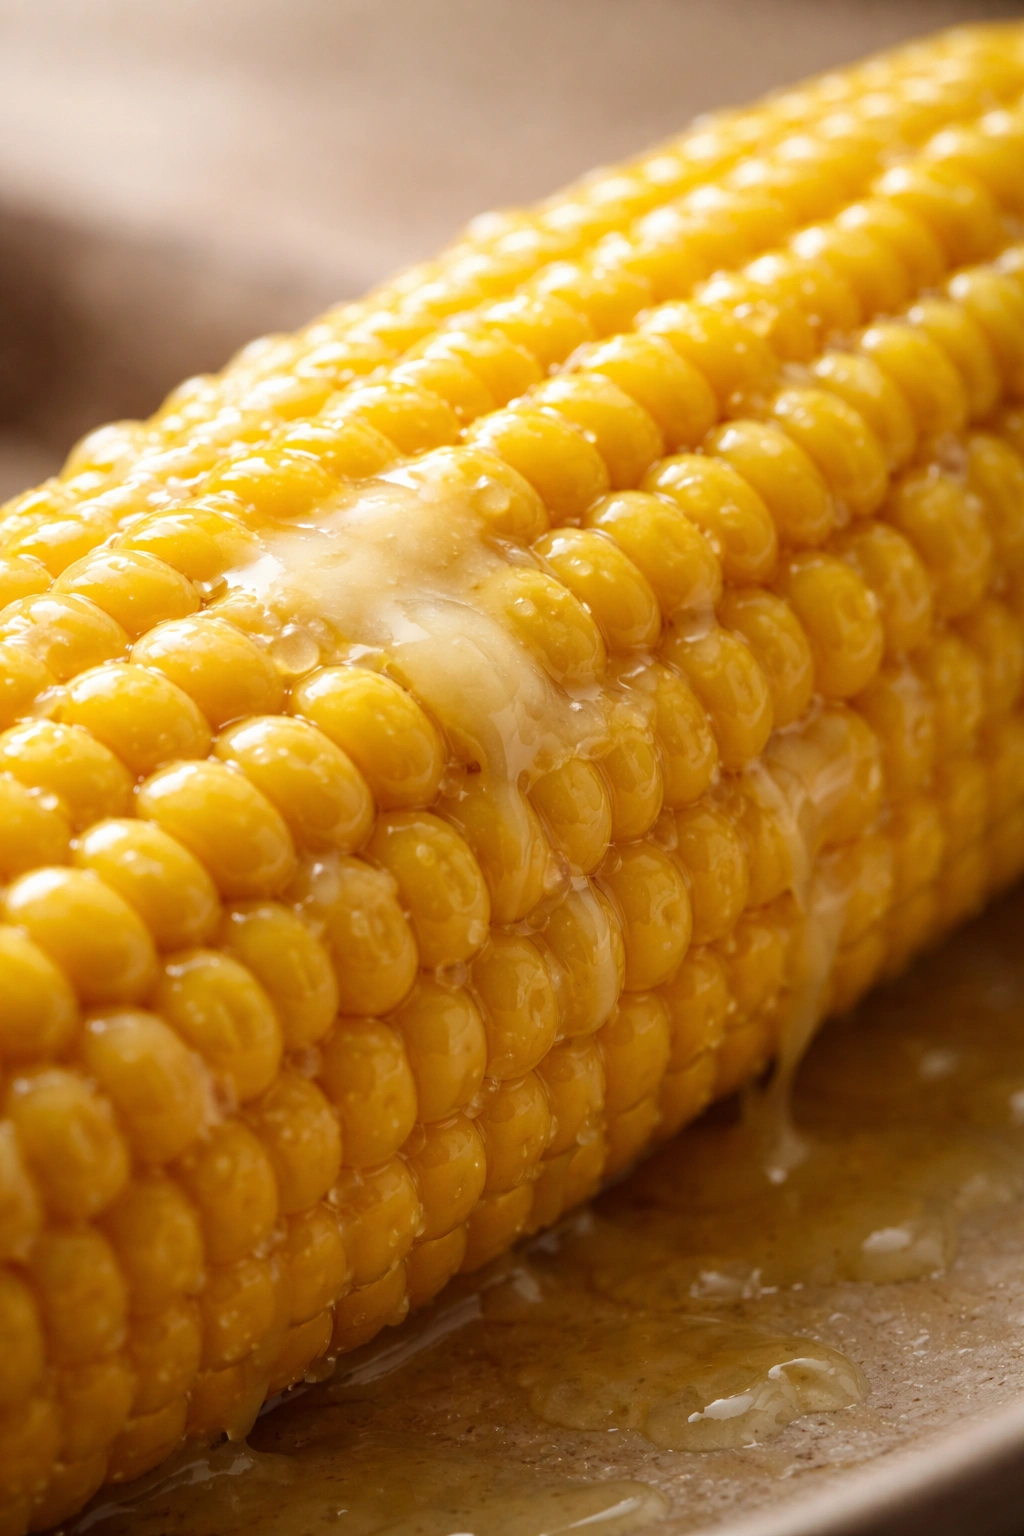
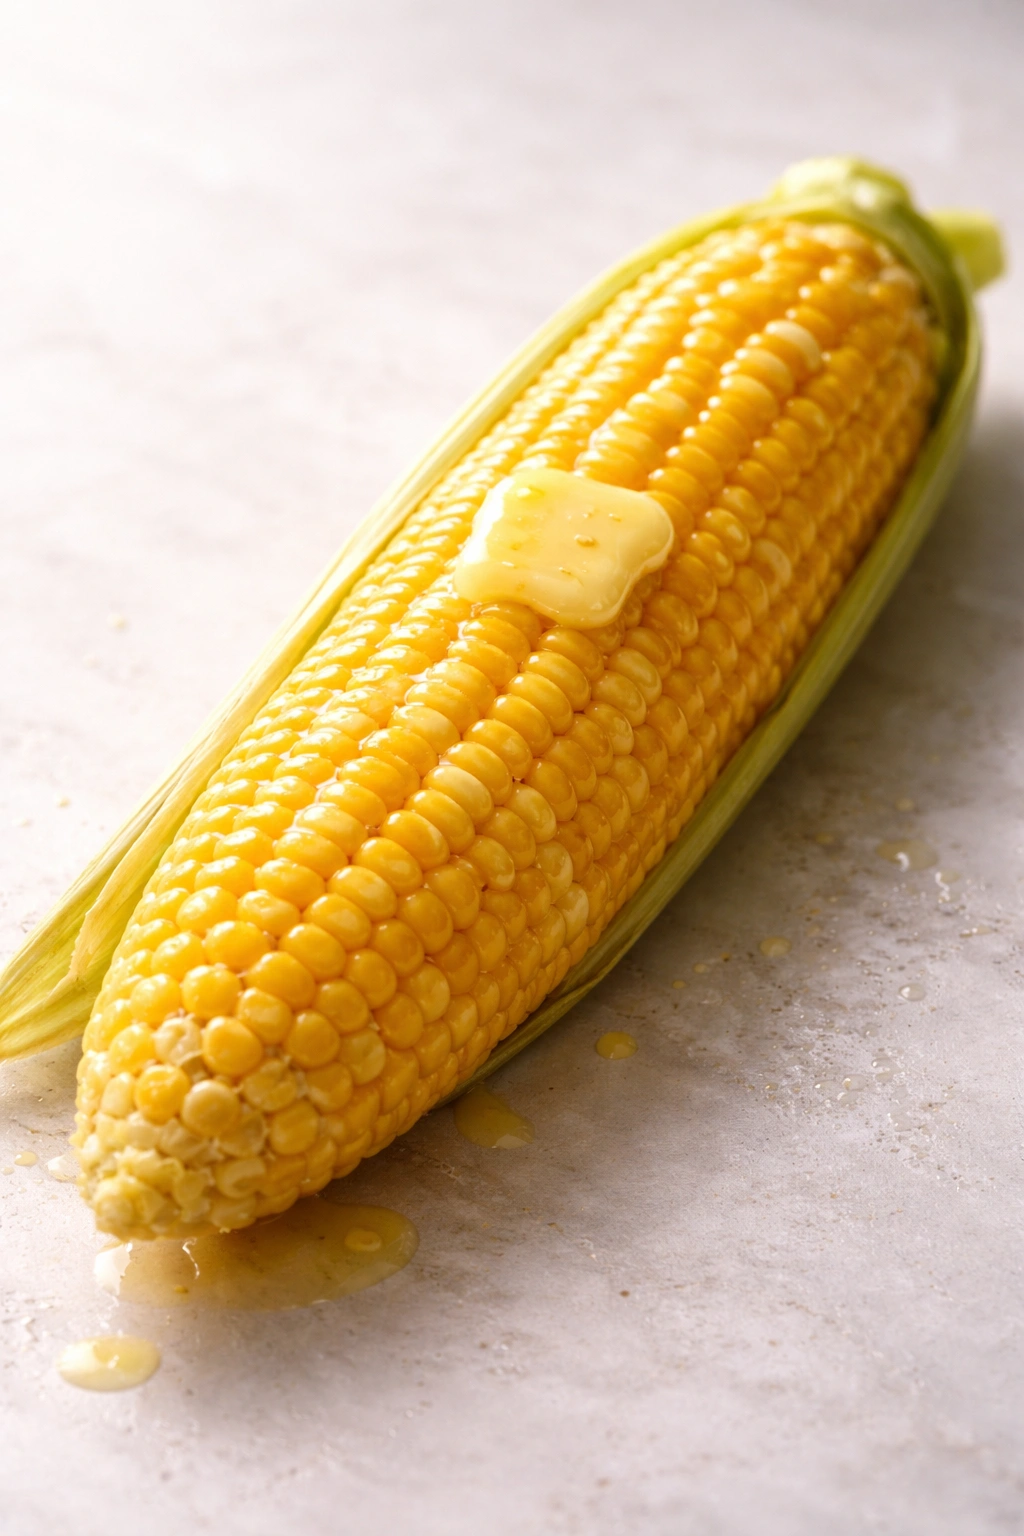
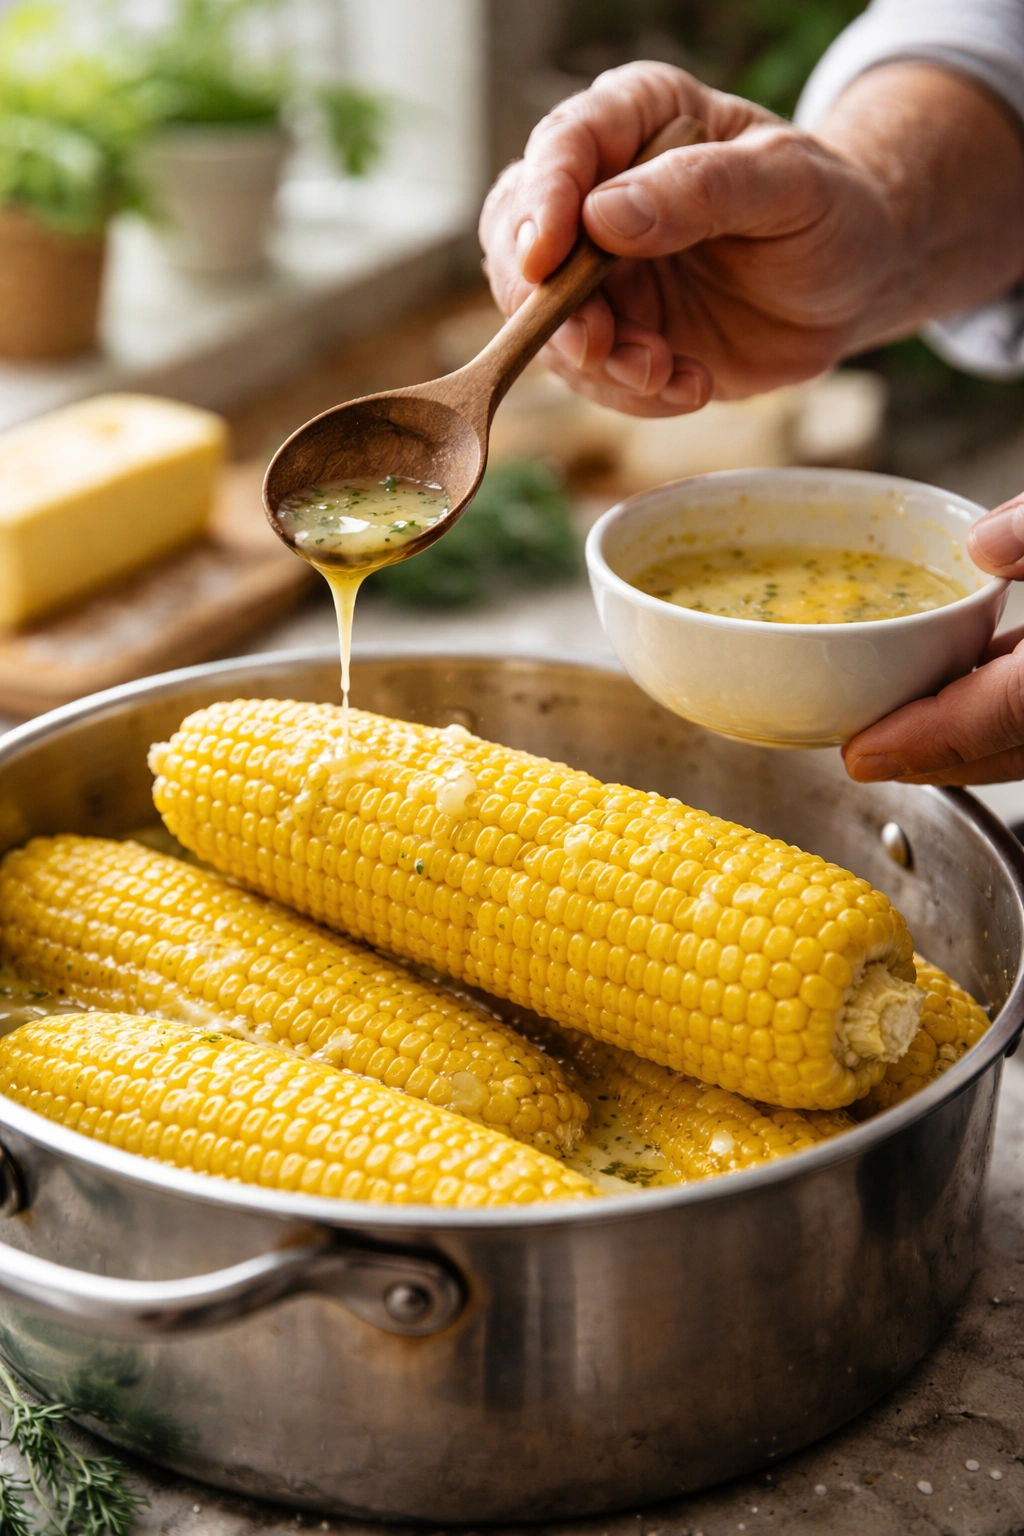
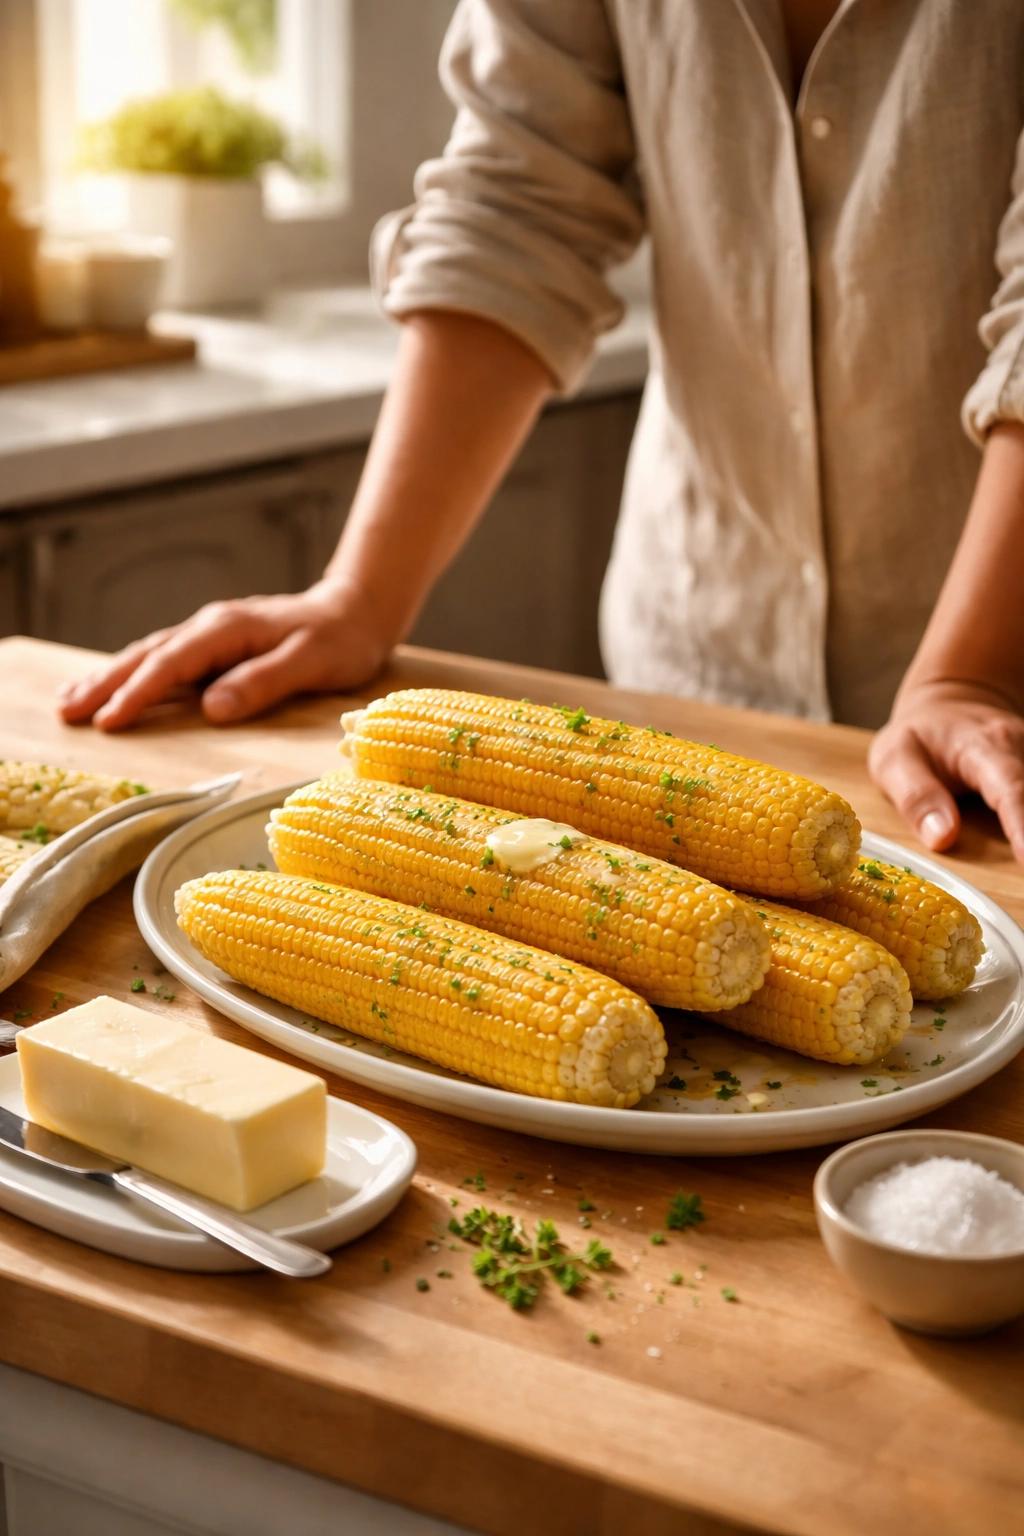
Add the Butter and Season:
-
While the corn is still warm (but no longer steaming hot—warm hands can work with it), brush or slather each piece generously with softened butter. If you’re using melted butter with added herbs or garlic, apply it with a pastry brush in a thin, even coating, or just use the back of a spoon to spread it on.
-
Immediately sprinkle each piece with a small pinch of fine sea salt and a few grinds of fresh black pepper. The heat of the corn will help the butter and seasonings adhere and meld together.
-
If using optional flavor additions, apply them now while the butter is still warm and slightly tacky—it acts like glue to hold the seasonings in place.
-
Serve immediately while still warm. The butter should be melting into every kernel, and the whole thing should feel luxurious and irresistible.
Tips That Come From Real Experience
The biggest mistake people make is overcooking. It’s tempting to think “just a few more minutes” will make it more tender, but corn reaches maximum tenderness at around 8 minutes and then starts breaking down. Set a timer and stick to it. If your corn is truly fresh and properly selected, 6-7 minutes is usually perfect.
Here’s something most recipes don’t mention: the quality of the butter absolutely matters. Use real butter, not margarine, and use unsalted butter so you can control the salt level yourself. Salted butter works in a pinch, but unsalted gives you more flexibility. Cold butter won’t coat the warm corn evenly, so either let it soften to room temperature beforehand (which takes about 20 minutes on the counter) or melt it gently and let it cool to warm before applying—that’s the sweet spot where it’s spreadable but still has that rich, luxurious mouthfeel.
If you’re cooking a huge batch for a crowd, you can actually keep cooked corn warm in a covered pot with a damp towel inside for up to 30 minutes. This prevents it from drying out. Add the butter just before serving rather than ahead of time.
The water method truly is the most foolproof for beginners. Grilling is gorgeous but demands attention—any method where the corn is directly on heat requires regular rotation or you’ll end up with some pieces burned and others undercooked. Steaming is actually underrated; it preserves more of corn’s natural flavor because nothing leeches into water, but it’s slightly slower than boiling.
Variations That Actually Make Sense

Mexican Street Corn Butter: Mix 2 tablespoons of softened butter with 2 tablespoons of fresh cilantro, minced, plus juice of ½ lime and a tiny pinch of chile powder. Apply to warm corn, then roll each ear in a shallow bowl of crumbled cotija cheese or feta. It’s tangy, spicy, rich, and completely different from classic buttered corn, but made in the same five minutes.
Garlic Herb Butter: Mince one clove of fresh garlic very finely and mix it into 4 tablespoons of softened butter along with 1 tablespoon of finely chopped fresh parsley, 1 teaspoon of fresh thyme, and a pinch of salt. Let this mixture sit for at least 10 minutes so the garlic flavors infuse the butter, then spread generously on warm corn. The garlic cooks slightly from the heat of the corn without becoming harsh.
Smoked Paprika Butter: For a Spanish-inspired twist, mix 4 tablespoons of softened butter with ¾ teaspoon of smoked paprika, a tiny pinch of sea salt, and a crack of pepper. The smoke flavor is subtle but transforms the corn into something slightly savory and sophisticated—perfect alongside grilled meats.
Honey Butter Corn: Whisk together 3 tablespoons of softened butter with 2 teaspoons of raw honey and a pinch of fine sea salt. The honey creates a subtle sweetness that complements corn’s natural sugars rather than overpowering them. Apply while the corn is warm so the honey melts in evenly.
Cajun Spiced Version: Mix 4 tablespoons of butter with ½ teaspoon of paprika, ¼ teaspoon of garlic powder, ¼ teaspoon of onion powder, a pinch of cayenne pepper, and a pinch each of dried thyme and oregano. This is buttery corn with serious personality—perfect for a casual seafood boil atmosphere.
Parmesan and Black Pepper: Simply brush warm corn with melted butter, then immediately coat it in finely grated Parmigiano-Reggiano cheese (the real stuff, not the green can) and loads of freshly cracked black pepper. The cheese gets a little crispy from the heat, and you get this incredible umami-salty depth that’s honestly more addictive than plain butter alone.
You can also cook the corn, cool it completely, and use it in corn salads, add it to pasta, mix it into cornbread batter, or freeze it for later use. The cooking method stays the same; the storage just changes.
Storage, Reheating, and Make-Ahead Strategies
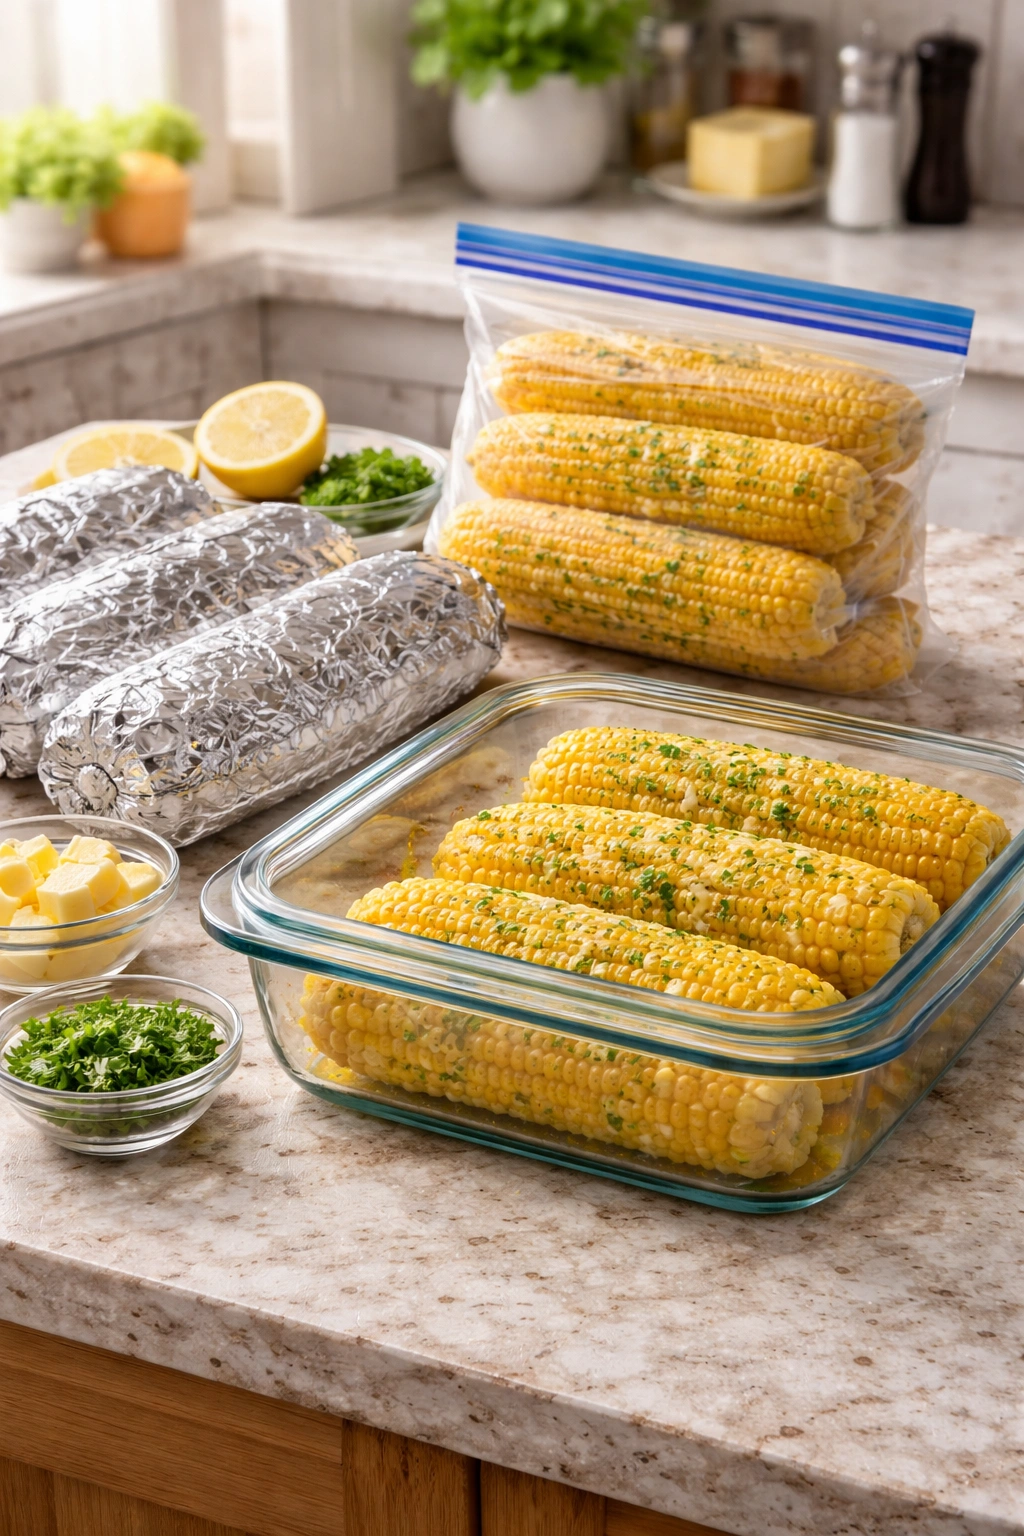
Cooked buttered corn tastes best fresh, honestly, but it does keep. Wrapped loosely in foil or stored in an airtight container, buttered corn will last 3 to 4 days in the refrigerator. The butter will solidify, and the corn won’t taste quite as vibrant, but it’s still perfectly edible.
To reheat refrigerated corn, wrap each ear in a slightly damp paper towel and microwave for 45 seconds to 1 minute, or place it on a plate, cover with a lid or foil, and warm it in a 350°F (175°C) oven for about 10 minutes. Both methods warm it through without drying it out. If the butter has solidified, just add a tiny pat of fresh butter on top after reheating and it’ll melt right in.
Frozen corn can be cooked from frozen using any of the methods above—just add 2-3 minutes to the cooking time. Buttered corn freezes fine in an airtight container or wrapped tightly in foil for up to 2 months, though the texture is slightly softer when thawed. It’s best used in recipes after thawing rather than served as a standalone side, since the freeze-thaw cycle changes the kernel texture slightly.
If you want to make butter ahead, that’s smart. Mix your flavored butter (garlic herb, smoked paprika, whatever you choose) and store it in the refrigerator in a small container or even shaped into a log wrapped in parchment paper. Just slice off what you need and let it soften slightly before spreading on warm corn. This actually improves the flavor because the herbs have more time to infuse.
The Best Things to Serve Alongside Buttery Corn
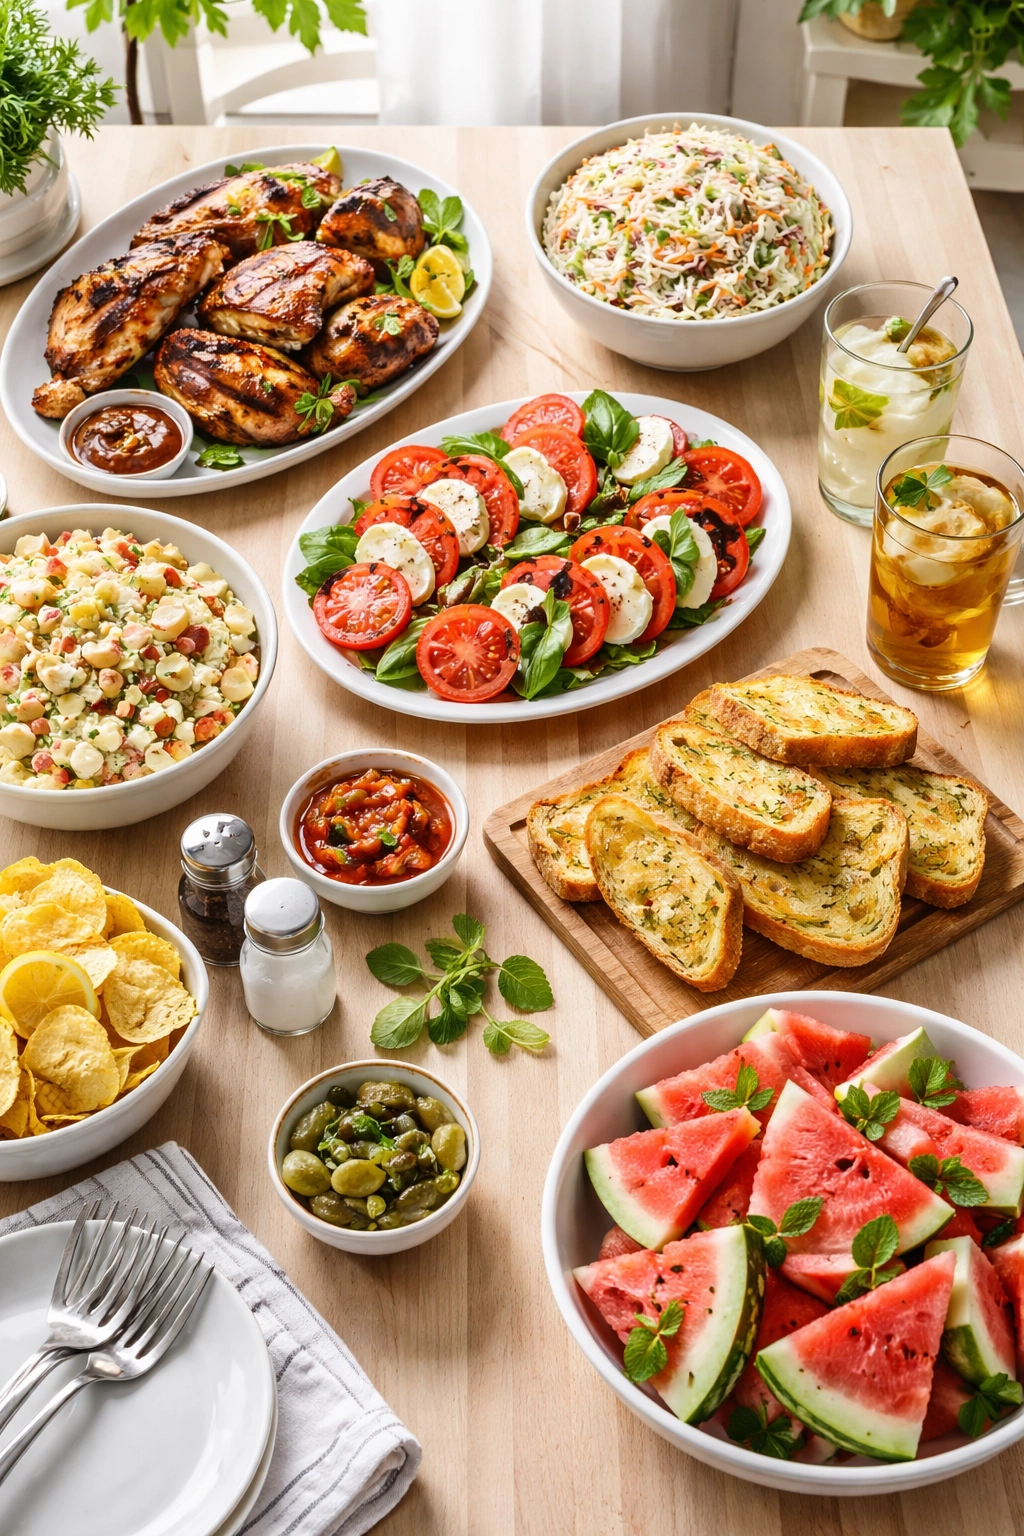
Buttered corn on the cob is inherently luxurious, so pair it with foods that won’t compete. Grilled chicken breasts, steak, or fish all shine next to corn—the sweet corn provides balance to the savory protein. At summer barbecues, corn is often the star carb alongside simple grilled vegetables like zucchini or bell peppers that have been dressed with just olive oil and salt.
Cold coleslaw is a classic pairing because the cool, slightly acidic slaw cuts through the richness of the butter beautifully. A crisp green salad with a vinaigrette does something similar. Cornbread is obvious but glorious—warm buttered corn alongside warm cornbread is basically asking for extra butter on top of butter, which some might say is the best problem in the world.
Corn pairs beautifully with other summer vegetables: fresh tomatoes, green beans, and zucchini all feel natural on the same plate. If you’re doing a seafood-forward meal, grilled shrimp or lobster with buttered corn feels like luxury—there’s a reason corn and lobster are such iconic paired flavors.
For drinking alongside, keep it simple and summery. Ice-cold lemonade, fresh iced tea, or a crisp beer all let the corn shine. Avoid heavy wines or anything with strong tannins; you want something refreshing that complements without competing.
Final Thoughts
The beautiful thing about this method is that it respects corn for what it actually is: a naturally sweet vegetable that doesn’t need rescuing or rescue techniques. It needs attention—good selection, proper timing, good butter—but not complexity. When you nail this, you’ll notice the difference immediately. The corn will taste like actual corn, amplified and enriched, not like the boiling water or the grill or the kitchen equipment.
Once you’ve made buttered corn this way a few times, you’ll develop an intuition for it. You’ll know which ears look best at your market, you’ll feel comfortable timing it by touch and appearance rather than constantly checking the clock, and you’ll understand exactly how long to let it cool before buttering so the butter spreads evenly without sliding off.
The real secret—and there actually is one—is simply understanding that you’re working with the corn, not against it. Good corn, moderate heat, precise timing, real butter, and nothing else. That’s it. That’s the whole technique. Everything else is just showing up with decent ingredients and paying attention for about 15 minutes while your hands get buttery and delicious.