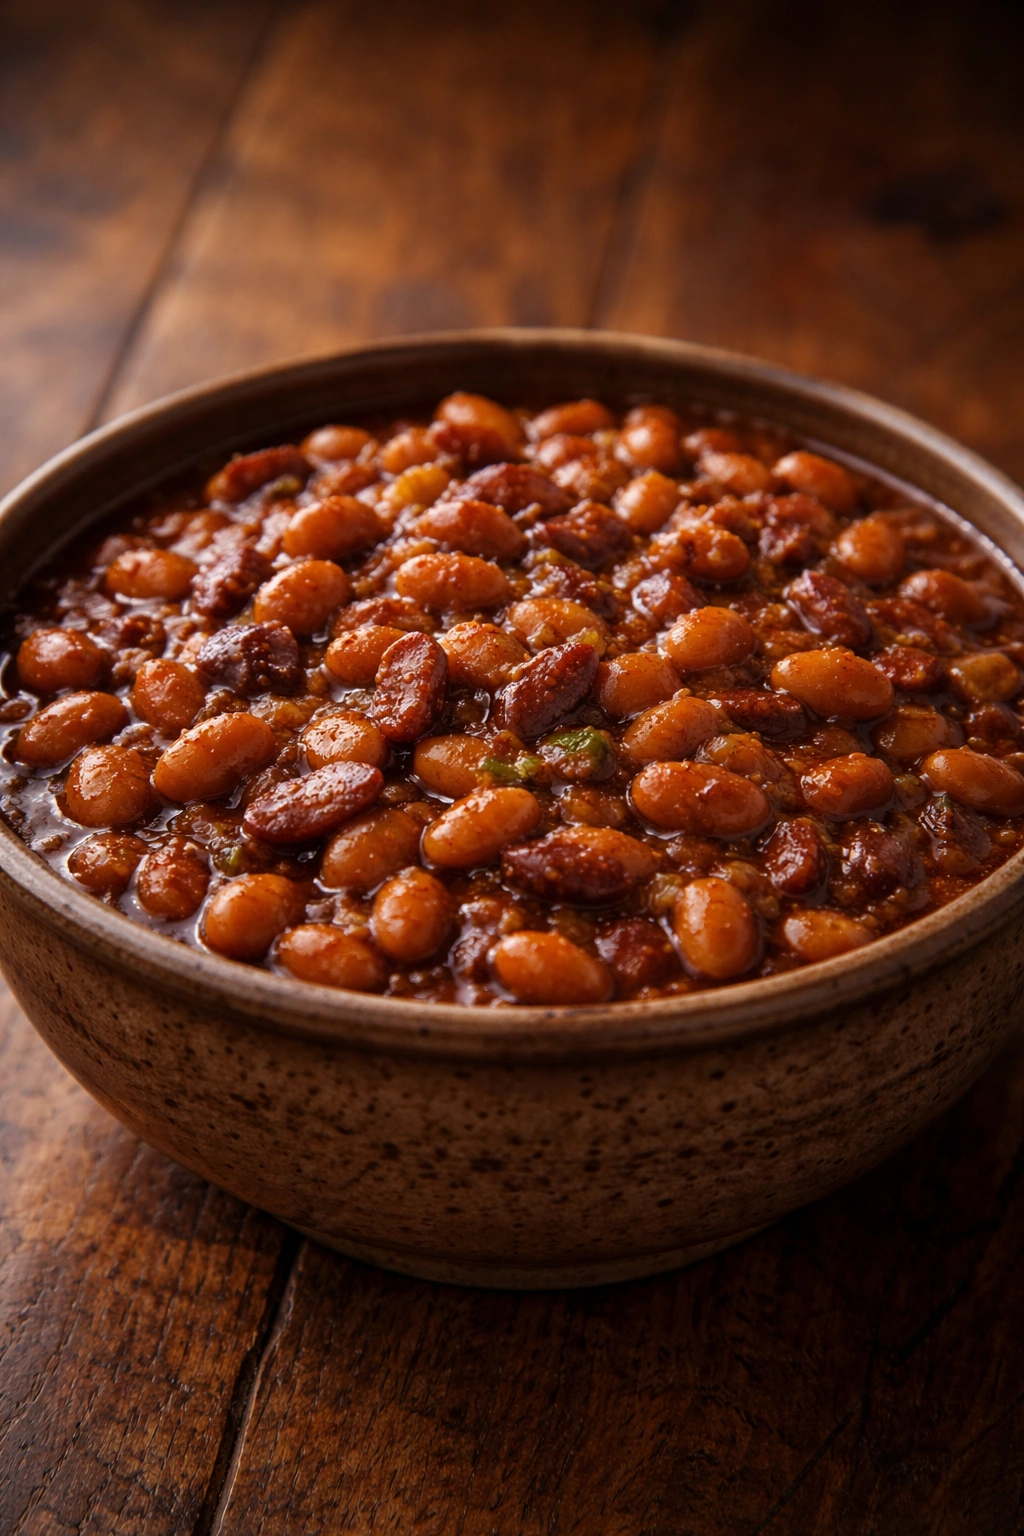
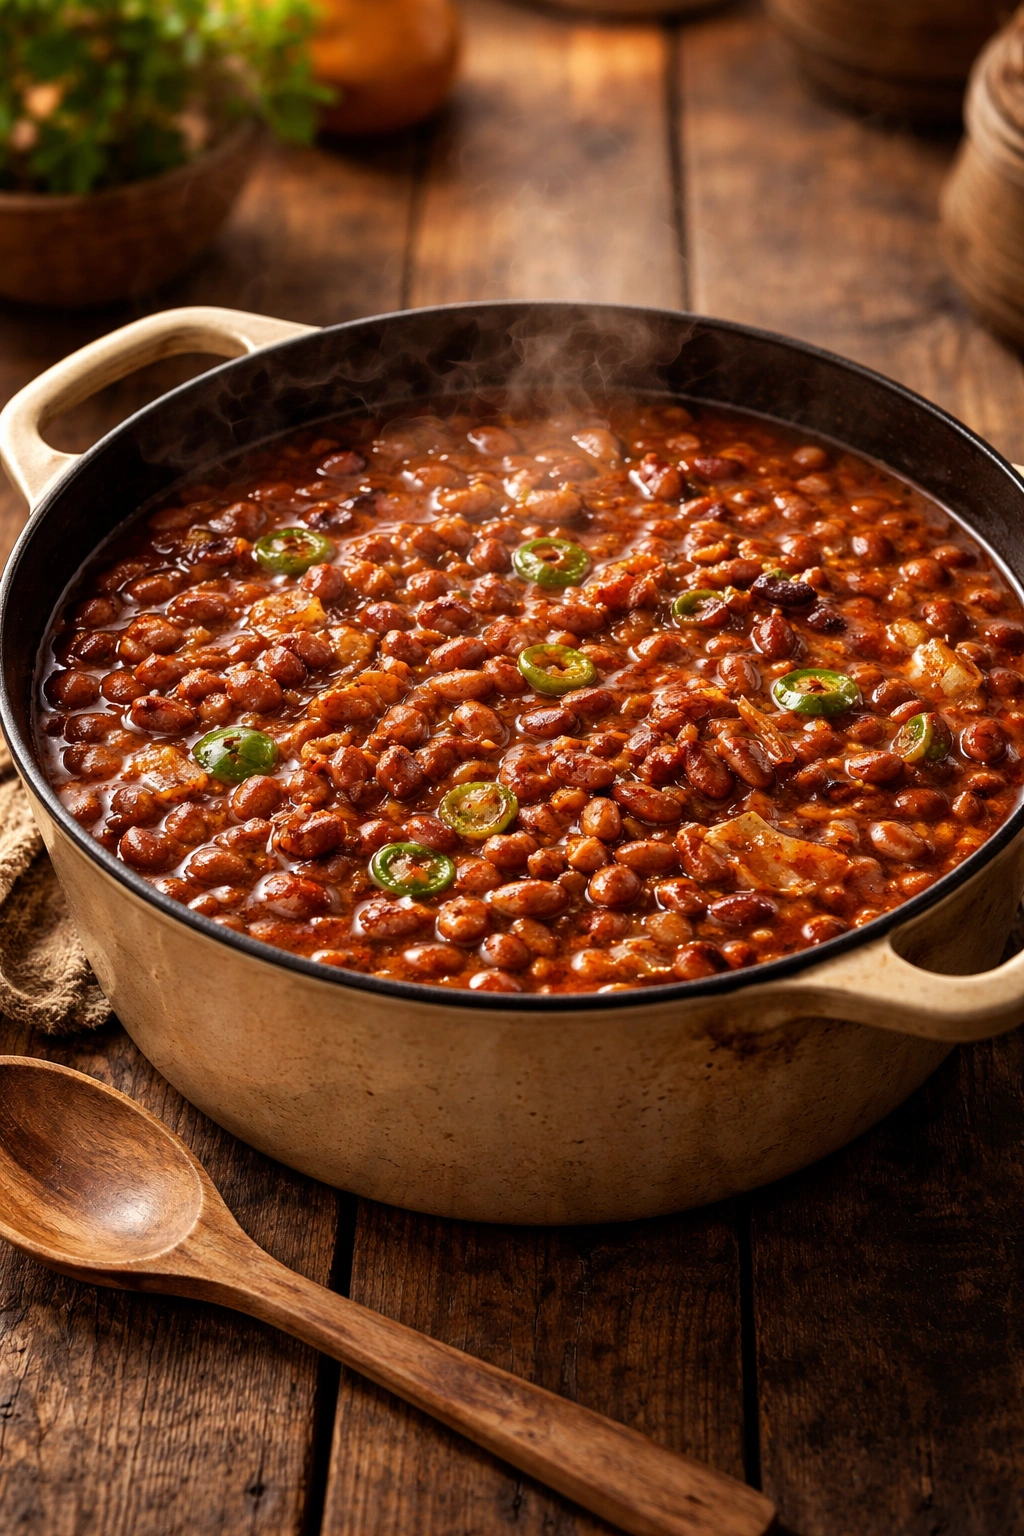
There’s something about a pot of slow-simmering beans at a barbecue that signals you’re not just throwing some hot dogs on a grill — you actually care about feeding people well. Cowboy pinto beans are the real deal: smoky, rich, salty in all the right ways, and loaded with bacon, brown sugar, and just enough heat to make people keep coming back for more. The best part? They actually improve while you’re tending the grill, taste even better the next day, and cost about half of what you’d spend on side dishes from a restaurant.
This isn’t a health food masquerading as comfort food. This is the kind of side dish that makes people forget they were hungry for salad. It’s the dish that disappears first from the buffet table, the one someone will ask you to bring to every gathering after they’ve tasted it. And here’s something a lot of home cooks miss: truly great cowboy beans aren’t actually that complicated. They just require patience, bacon, and understanding what actually makes them taste the way they should.
What Makes Cowboy Pinto Beans a BBQ Essential

Cowboy pinto beans sit at the exact intersection of practicality and pure satisfaction. They cook low and slow, which means you can set them going in the morning and forget about them for hours while you’re managing the grill, the guests, the coolers, and everything else that BBQ demands. They don’t require constant attention or last-minute fussing.
The flavor profile — smoky, salty, slightly sweet, with underlying heat — complements literally every BBQ protein you could possibly serve. They pair as well with brisket as they do with pulled pork, ribs, chicken, or even grilled sausages. They’re also the rare side dish that actually tastes better as leftovers because the flavors deepen and marry together overnight.
There’s also something fundamentally reassuring about showing up to a gathering with a pot of homemade beans instead of buying them premade or bringing a bagged salad mix. People notice effort. They taste effort. And beans make that effort visible in a way that feels both humble and genuinely generous.
Choosing Your Beans and Ingredients

Not all pinto beans are created equal, and if you start with mediocre beans, no amount of bacon and brown sugar is going to transform them into something truly special. Look for beans that are uniform in size, free of pebbles or discolored ones, and ideally from a source that’s been stocked regularly. Beans that have been sitting on a shelf for months take longer to cook and sometimes never fully soften properly.
Dried pinto beans will always give you more control over flavor and texture than canned beans. Canned beans can work in a pinch, but they lack the ability to fully absorb the bacon fat, brown sugar, and spice that make cowboy beans distinct. They also tend to break apart more easily when stirred repeatedly. If you absolutely must use canned, skip the long simmer and just heat them through with all the other ingredients for about 30 minutes, checking that they don’t get mushy.
The bacon matters significantly more than you’d think. Use thick-cut bacon if you can find it — it adds more smoke flavor and creates larger, meatier pieces rather than tiny, insignificant bits. Save the bacon fat that renders out; you’ll use it to sauté your aromatics, and that fat carries flavor that oil simply cannot match. This is non-negotiable.
Mastering the Balance of Sweet and Savory
This is where most homemade cowboy beans go sideways. People either make them so sweet they taste like baked beans (which is a completely different dish), or they skimp on the brown sugar and end up with something that tastes one-dimensional and flat.
The secret is understanding that brown sugar and savory spices don’t compete — they amplify each other. Brown sugar won’t make the beans taste dessert-like if you’re using actual barbecue spices like chili powder, cumin, and a pinch of cayenne. The sweetness acts as a base that lets those savory spices shine brighter. It’s the same principle that makes barbecue sauce work.
Taste as you go, especially in the last 30 minutes of cooking. Add a spoonful of beans to a small bowl, taste, and adjust. Need more salt? Add it by the half-teaspoon. Want more heat? Cayenne and black pepper are your friends. Want them richer? That’s more bacon fat or a splash more bourbon (if you’re using it). By the time you taste-test, you’ve cooked long enough that you’re not going to ruin anything by adjusting.
The Secret to Depth: Bacon and Smokiness
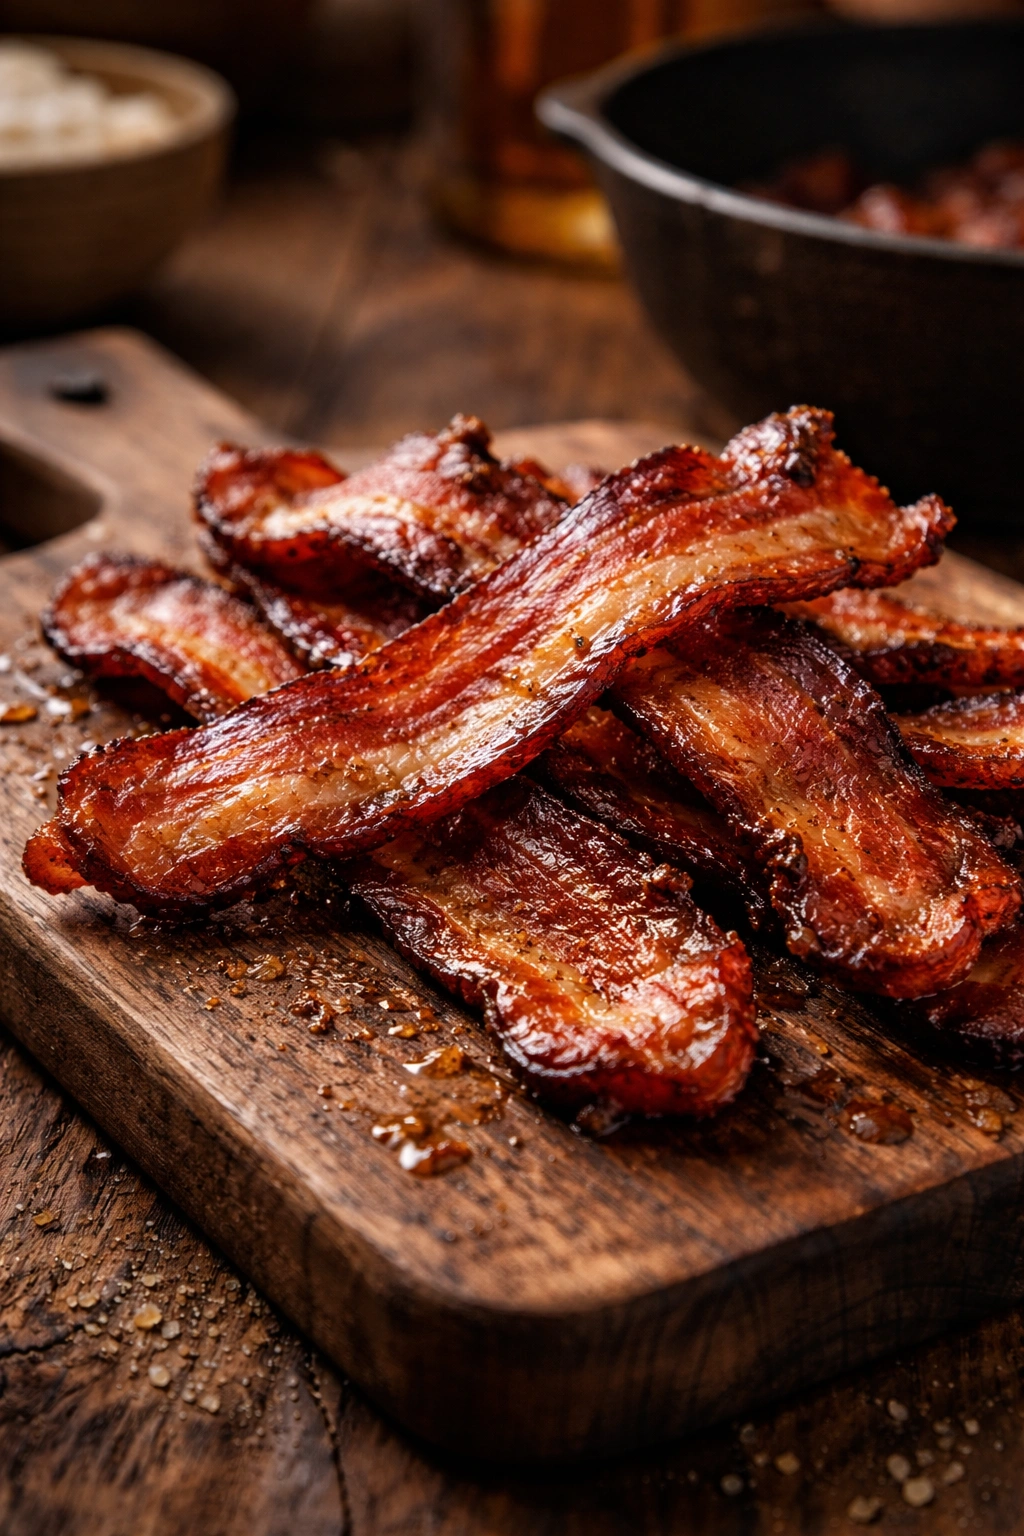
Bacon does three things in this dish that nothing else can replicate. First, it renders fat that carries all the savory, smoky flavor throughout the beans. Second, the bacon pieces themselves add texture and meatiness. Third, the Maillard reaction that happens when you cook bacon creates deep, complex flavors that brown sugar and spices alone can’t create.
Don’t skip the step of cooking the bacon until it’s fully crispy. Cook it longer than you normally would — until it’s almost burned in places, still bendable but really dark. This pulls maximum flavor out of it. Let it cool, crumble it, and set aside. Save every drop of that rendered fat.
Smoked paprika is the other secret depth-builder. Regular paprika is bright and flat; smoked paprika adds an actual smoke flavor that ties the whole dish together. You only need a teaspoon, but that teaspoon carries the impression of outdoor cooking and long hours over wood smoke. It makes people taste this and think of backyard barbecues even if it was technically made in a kitchen.
How to Cook Beans So They’re Actually Tender
Cooking dried beans successfully is actually a learned skill, not magic. The whole process takes about 90 minutes to 2 hours depending on how old your beans are and how hot your cooking surface is.
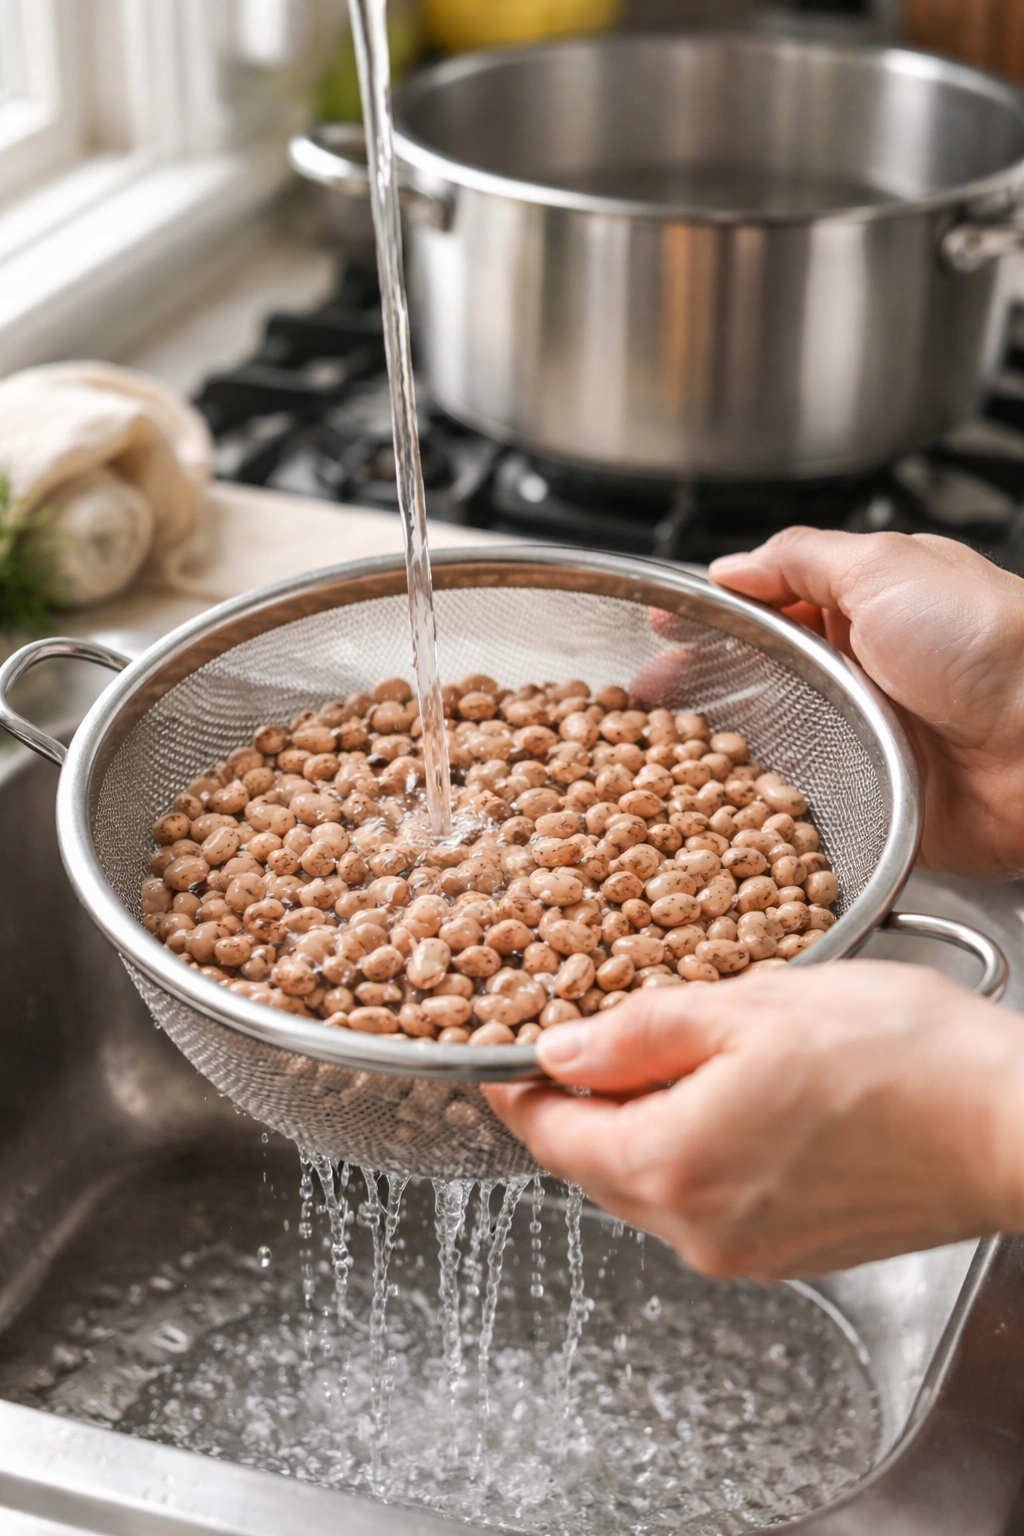
Start by rinsing your dried beans in a colander under cold water. This removes some of the starch and any dust. Some people swear by soaking them overnight, and that does help with cooking time, but it’s not absolutely necessary for pinto beans. If you do soak them, soak for 8-12 hours, then drain and rinse before cooking.
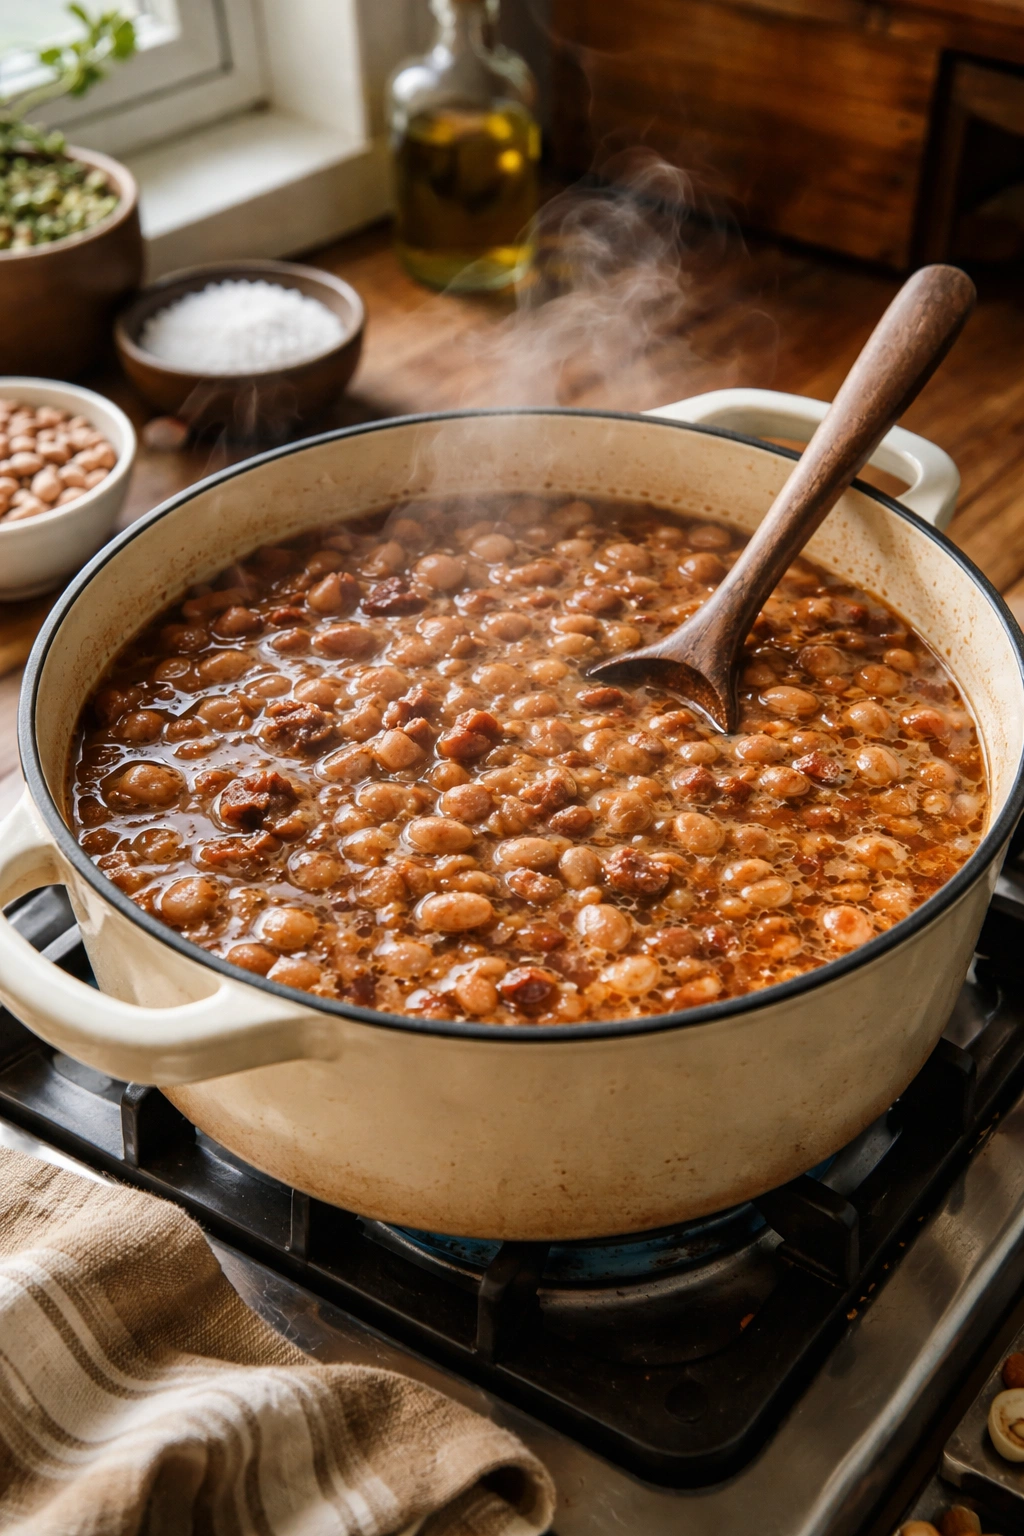
Put your rinsed beans in a heavy pot with fresh cold water, using about three parts water to one part beans. Bring to a boil over medium-high heat, then immediately reduce to a simmer. The initial boil helps relax the bean skins so they soften evenly. Once you hit a gentle simmer, that’s where you stay for the next hour or more. Beans never actually want a rolling boil — they’ll break apart and turn to mush if you cook them too aggressively.
After about 40-45 minutes of simmering, add salt. Yes, salt. The old advice about waiting to salt beans is outdated. Salt actually helps beans cook evenly and absorb liquid properly. Start with a teaspoon of salt per pound of dried beans, taste at the 90-minute mark, and adjust from there.
You’ll know your beans are done when you can squeeze one between your thumb and forefinger and it crushes easily. No resistance, no hard bit in the middle — just soft, yielding bean. That’s when they’re ready for the next step.
When and How to Add the Flavorings
Timing is crucial here, and most recipes get it wrong by adding all the flavorings from the beginning. You want to layer flavors in stages so they don’t all taste like one muddled thing.
Once your beans are about three-quarters cooked (maybe 70 minutes into the simmer), that’s when you add your sautéed onions, garlic, bell peppers, and the crumbled bacon. The vegetables have a chance to soften and meld with the beans without falling completely apart or losing their brightness.
At the 90-minute mark, when you’re confident the beans are almost done, that’s when you add your brown sugar, spices, hot sauce, Worcestershire sauce, and any liquid smoke or bourbon you’re using. These flavorings are too volatile to add early — they taste muddy and one-dimensional if they cook for too long. Added at the end, they taste fresh and distinct while still becoming part of the overall flavor.
Let everything cook together for another 10-15 minutes so the flavors marry, then taste and adjust seasoning. This is your final chance to fix anything that’s off before people eat it.
Yield: Serves 10 to 12 people | Makes about 8 cups Prep Time: 20 minutes Cook Time: 2 hours 15 minutes (including bean cooking time) Total Time: 2 hours 35 minutes Difficulty: Beginner — The steps are straightforward and forgiving. If your beans take a little longer to cook, that’s fine. There’s no rushed timing or technique that requires real skill.
Ingredients and Components
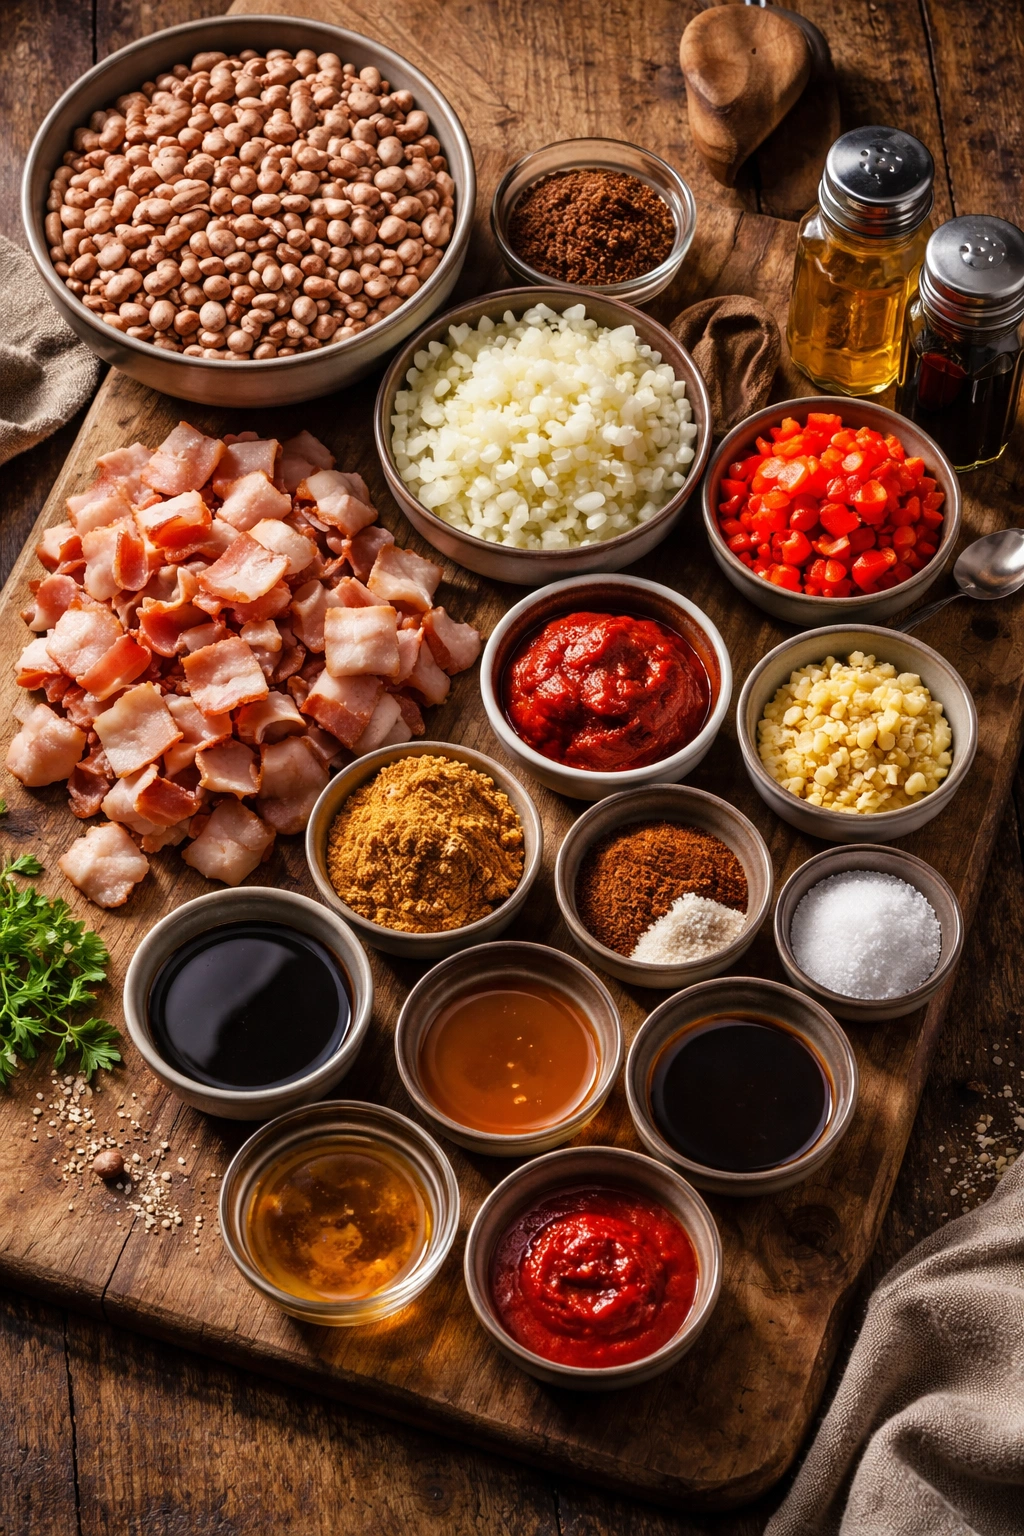
For the Beans:
- 1 pound (about 2 cups) dried pinto beans, rinsed and picked through for pebbles
- 8 cups water (plus more if needed for simmering)
- 1 teaspoon salt (plus more to taste at the end)
For the Seasoning Base:
- 8 slices thick-cut bacon, chopped into ½-inch pieces
- 1 large yellow onion, finely diced
- 1 red bell pepper, seeded and finely diced
- 4 cloves garlic, minced
- 2 tablespoons tomato paste
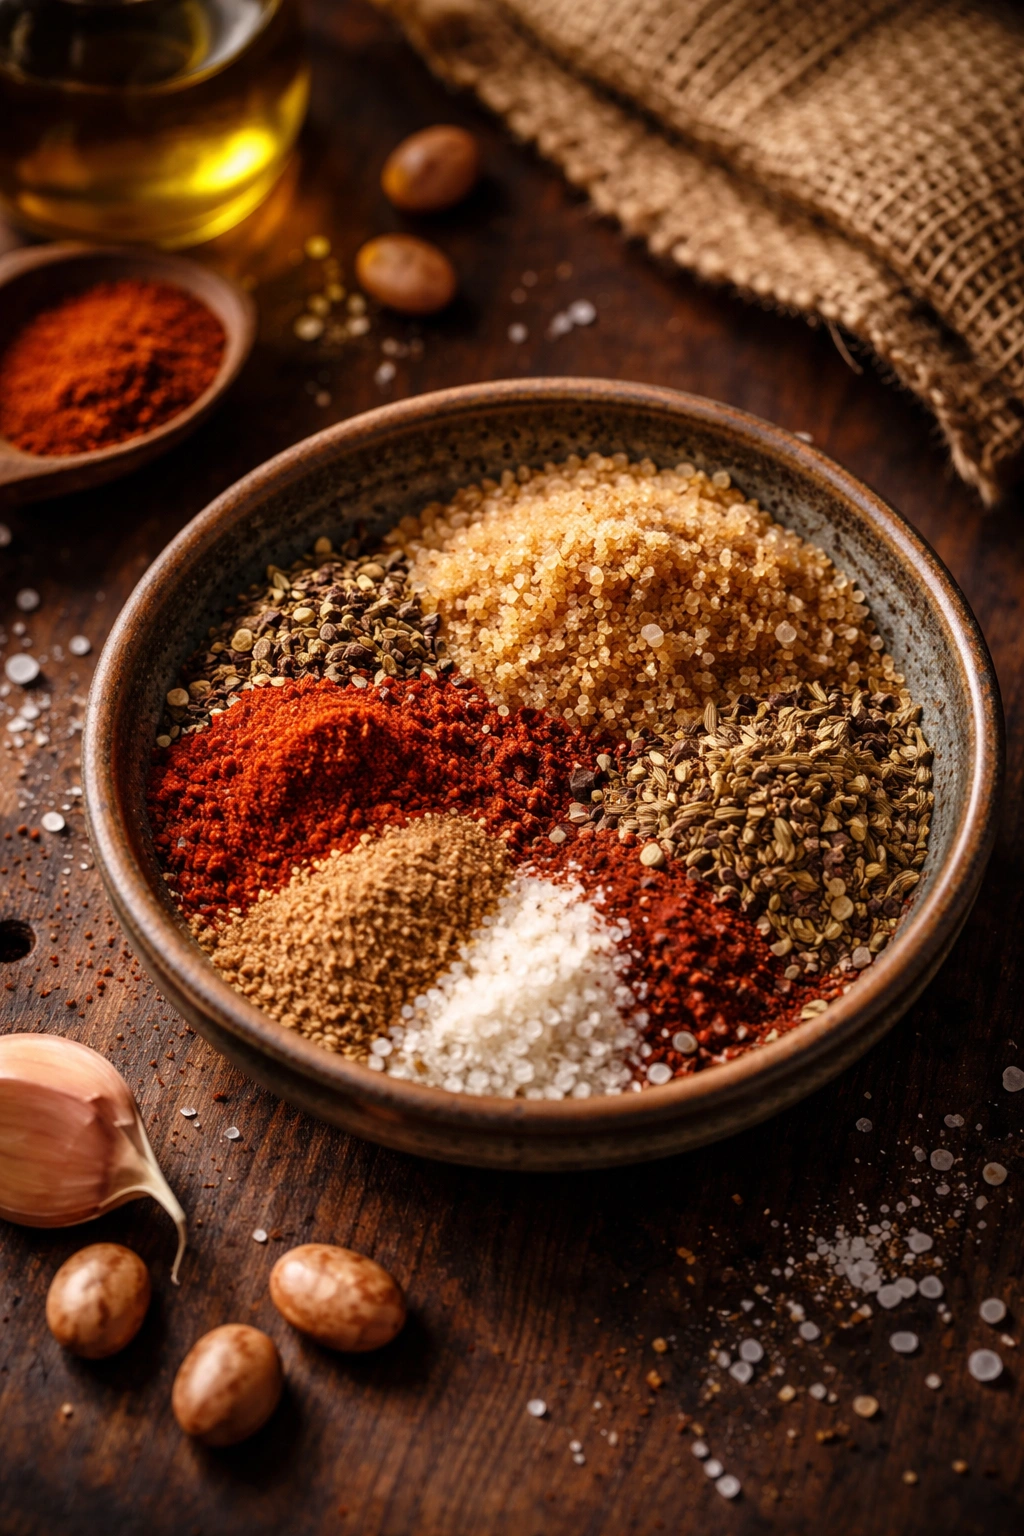
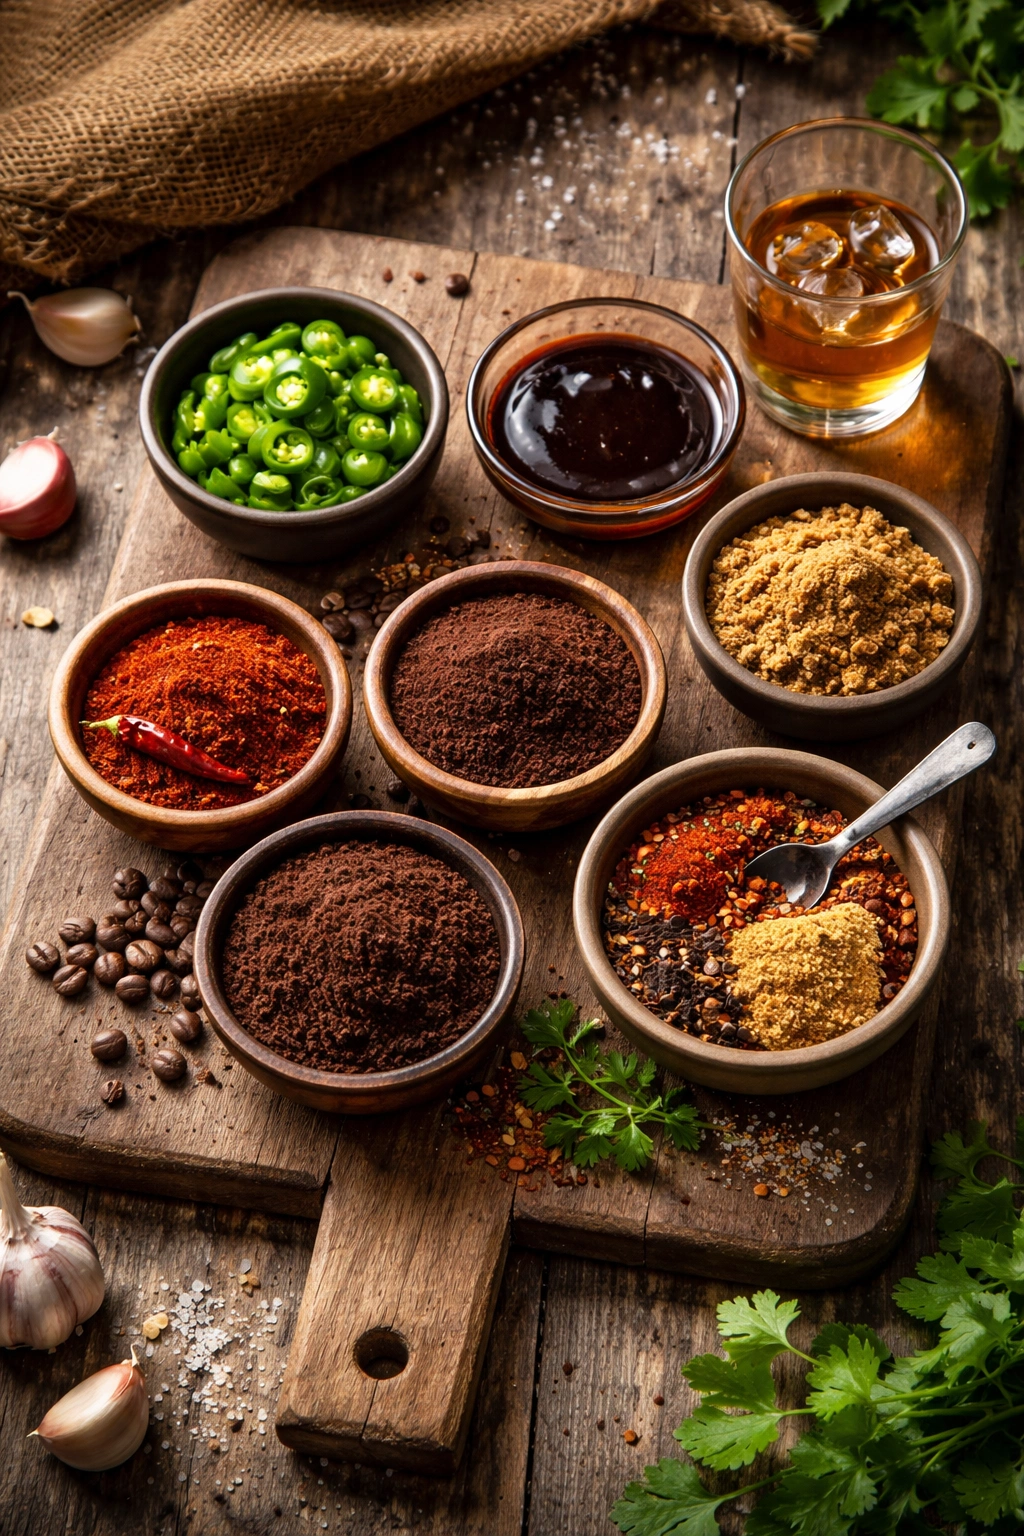
- 3 tablespoons packed brown sugar
- 2 tablespoons chili powder
- 1½ tablespoons smoked paprika
- 1½ teaspoons ground cumin
- ½ teaspoon cayenne pepper (or to taste for more heat)
- ½ teaspoon freshly ground black pepper
For the Flavor Finish:
- 3 tablespoons Worcestershire sauce
- 2 tablespoons hot sauce (such as Frank’s RedHot or similar)
- 1 tablespoon cider vinegar or white vinegar
- 1 tablespoon bourbon or whiskey (optional but recommended)
- ½ teaspoon liquid smoke (optional but adds authentic depth)
- Salt and fresh black pepper to taste
Step-by-Step Instructions
Prepare and Simmer the Beans:
-
Rinse the dried pinto beans in a fine-mesh colander under cool running water, picking through them with your fingers to remove any discolored beans, pebbles, or debris. This takes 2-3 minutes and is worth doing carefully.
-
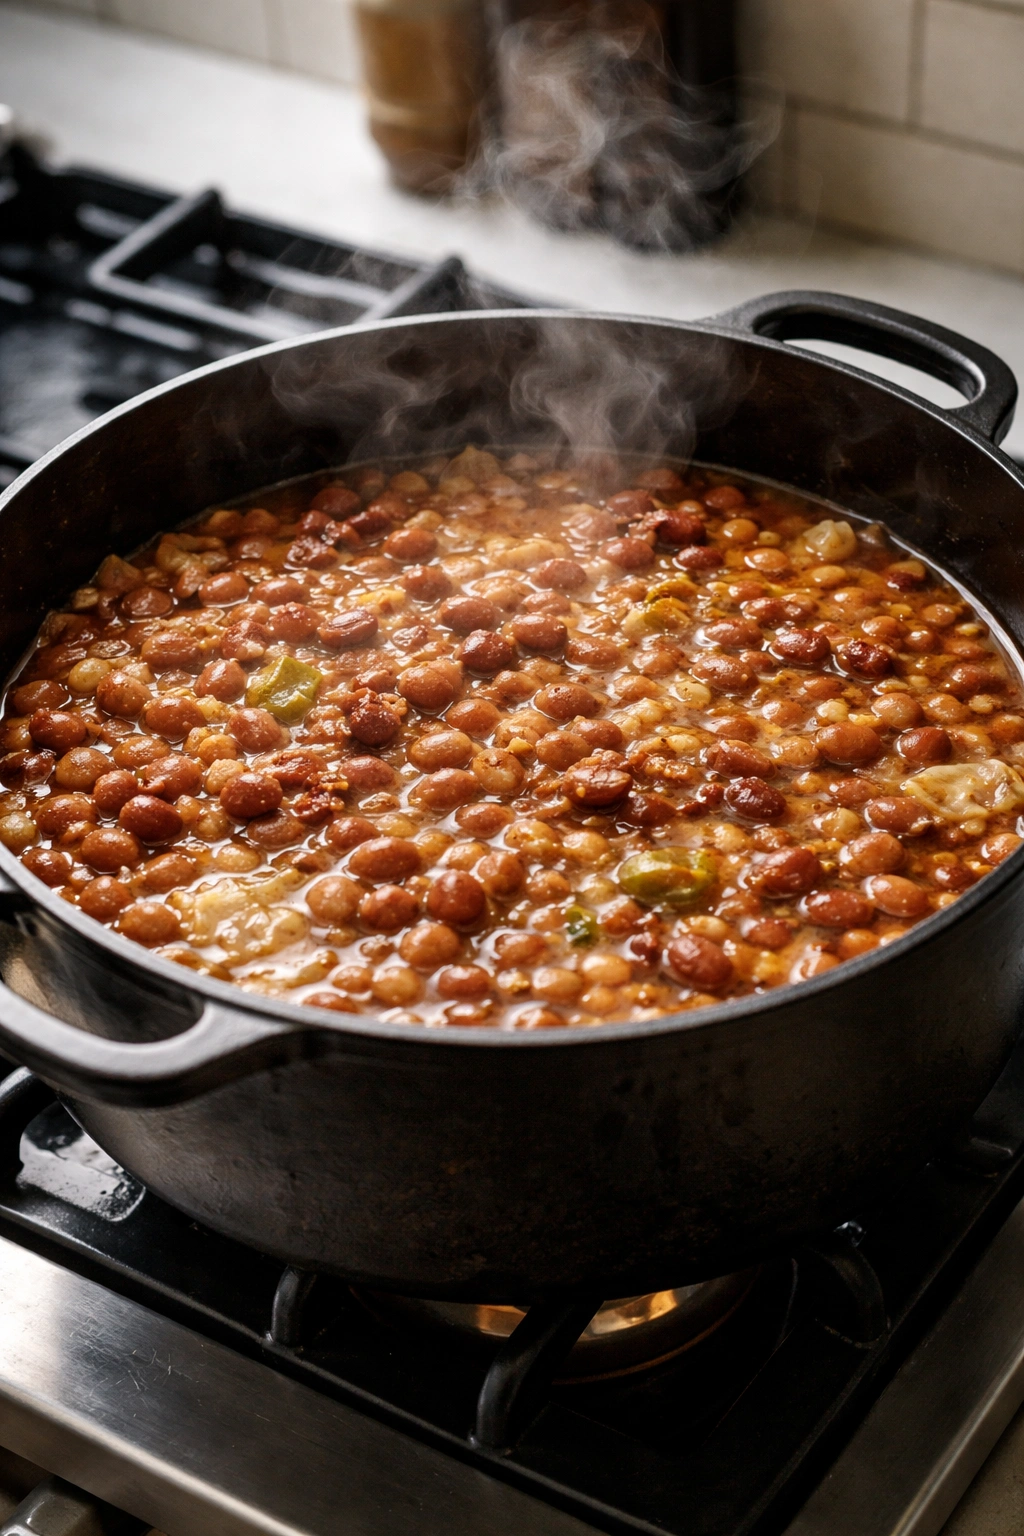
Place the rinsed beans in a large, heavy-bottomed pot (at least 6-quart capacity) and add the 8 cups of fresh cold water. Bring to a boil over medium-high heat — this usually takes about 10-12 minutes. Once the water reaches a rolling boil, stir the beans once to ensure even cooking, then immediately reduce the heat to low or medium-low so the beans maintain a gentle, barely-bubbling simmer. Do not skip the initial boil step — this helps the beans cook evenly.
Advertisements -
Simmer the beans uncovered for about 40 minutes, until they’re about halfway cooked (they should be soft enough to cut with a wooden spoon but still have some firmness inside). This is when you’ll add the first teaspoon of salt. Stir it in and continue simmering.
-
Continue cooking the beans for another 30-40 minutes, until a bean crushes easily between your thumb and forefinger with zero resistance. This should bring your total bean cooking time to about 70-90 minutes depending on the age and size of your beans. The beans don’t need to be completely soft at this stage — they’ll continue cooking as you add ingredients and simmer together.
Build the Flavor Base:
-
While the beans are finishing their initial cooking, prepare your aromatics and bacon. Cook the chopped bacon in a large skillet over medium heat, stirring occasionally, until the bacon is dark, crispy, and has rendered most of its fat — about 10-12 minutes. Dark, fully rendered bacon gives you much more flavor than lightly cooked bacon. Using a slotted spoon, transfer the cooked bacon to a paper towel-lined plate to cool. Leave about 3 tablespoons of the rendered bacon fat in the skillet (drain off any excess if there’s significantly more).
-
Add the diced onion and bell pepper to the bacon fat in the skillet and sauté over medium heat for about 5-6 minutes, stirring occasionally, until the onion is translucent and the pepper is softened but still has some brightness to it. This is when the vegetables pick up all that bacon flavor.
-
Add the minced garlic to the skillet and cook for another 1-2 minutes, just until the raw garlic smell disappears and it becomes fragrant. Stir in the tomato paste and cook for another minute, stirring constantly so it coats the vegetables and doesn’t burn.
-
Add all the dry spices — chili powder, smoked paprika, cumin, cayenne, and black pepper — and stir constantly for about 1-2 minutes. This bloom step is essential. Cooking the spices in the hot fat for a minute activates their essential oils and makes them taste vibrant rather than dusty or flat. You should smell a shift in the aroma from dusty to rich and toasty.
-
Add the brown sugar to the skillet and stir until it dissolves into the fat and vegetables, creating a paste-like mixture. Cook for about 1 minute so the sugar begins to caramelize slightly.
Combine and Finish:
-
Once your beans have reached the tender stage (around the 90-minute mark), add the seasoned vegetable and bacon mixture to the pot. Stir gently to distribute everything evenly throughout the beans. Add the crumbled cooked bacon back in as well.
Advertisements -
Add the Worcestershire sauce, hot sauce, cider vinegar, bourbon (if using), and liquid smoke (if using). Stir everything together thoroughly, making sure the spices and flavorings are evenly distributed and not settling at the bottom.
-
Let the beans simmer together for another 10-15 minutes so the new flavors meld with the bean cooking liquid. This creates a cohesive, unified taste rather than distinct, separate flavors.
-
Taste a spoonful of beans (let it cool for a moment first). Evaluate for salt, heat, and overall flavor balance. Add more salt if needed by the ½-teaspoon, more cayenne if they need more heat, or a splash more vinegar if they need brightness. Adjust slowly — you can always add more, but you can’t take flavor out. Let any new additions cook for another 2-3 minutes before final tasting.
-
Once the flavors are balanced exactly how you want them, remove from heat. The beans can sit in their cooking liquid at room temperature for up to an hour before serving, or you can let them cool completely and refrigerate them if you’re making them ahead.
For Campfire or Outdoor Cooking:
- If you’re cooking these at the actual barbecue or campfire rather than beforehand, you can still make it work. Cook the beans and vegetables in a Dutch oven or large camping pot set over a cooler part of the fire or on a side burner. The longer, gentler heat from a campfire actually produces excellent results — the beans cook evenly and absorb more of the smoky ambient flavor. Just keep a close eye on the liquid level so it doesn’t boil down completely, adding hot water as needed to keep the beans submerged.
Common Mistakes That Ruin the Pot
Most of the problems people encounter with cowboy beans come from rushing or overcomplicating. You’re working with just beans and basic ingredients — the mistakes tend to be pretty straightforward to avoid.
Cooking the beans too hard or too fast is the number-one culprit. A rolling boil makes beans break apart and turn mushy. They need a gentle, barely-bubbling simmer the entire time. If your beans are breaking apart into mush by the time they’re done, you were cooking too hot.
Adding salt too late is the opposite mistake. Salt actually helps beans cook evenly and absorb flavors. Add it at the 40-minute mark, not at the end. Waiting to salt beans is outdated food science.
Skipping the sauté of vegetables and spices is another common shortcut that costs you dearly. Just dumping everything into the pot raw means the spices taste dusty and the vegetables don’t have time to blend their flavors. That 5-minute sauté makes a profound difference.
Not tasting and adjusting at the end means you’re hoping for the best instead of knowing you have exactly the flavor you want. Taste, adjust, let it cook another few minutes, taste again. This takes 10 minutes and transforms the dish from mediocre to memorable.
Cooking beans for way too long after everything is added. Once you’ve added your final flavorings, you only need 10-15 minutes for them to marry together. More than that and the individual flavors start to muddy together and taste one-note. The vegetables can also start falling apart. Hit your target flavor and then stop cooking.
Tips for Cooking at a Campfire or Outdoor Grill
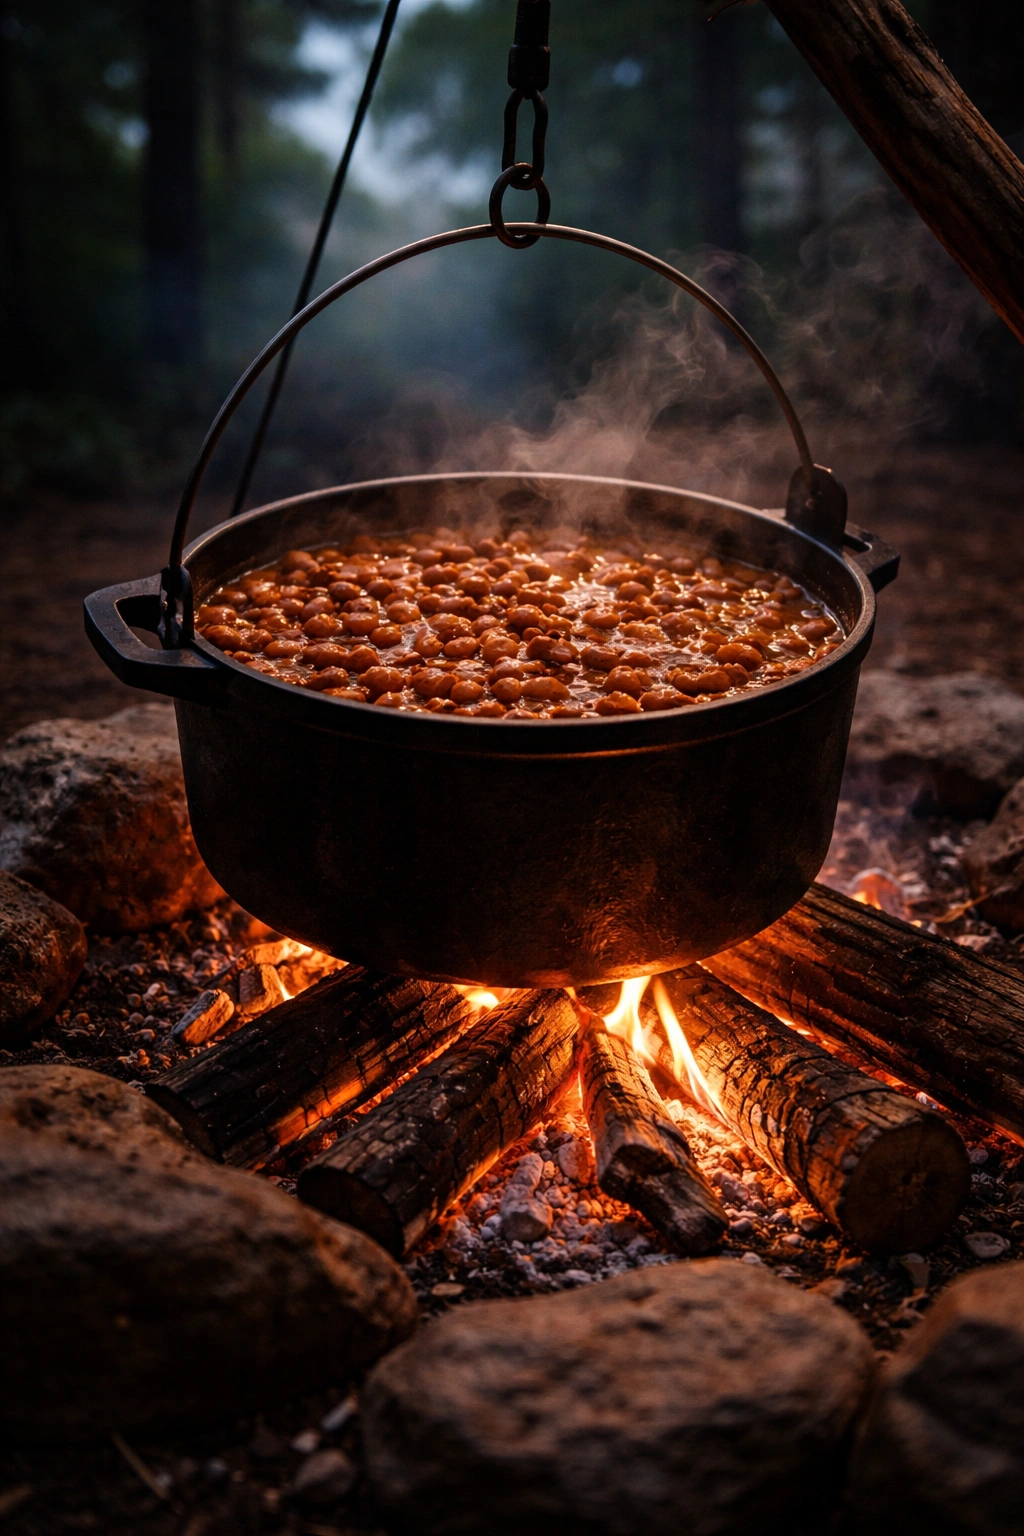
Outdoor cooking of beans is actually where this dish shines because the ambient smoke flavor adds an extra dimension you can’t replicate in a kitchen. But it requires slightly different handling.
Use a Dutch oven if you’re cooking directly over fire, or a large camping pot if you’re using a side burner. Cast iron is ideal because it distributes heat so evenly. You want the pot set where the beans maintain a steady, gentle simmer — not bubbling rapidly and definitely not sitting cold. For fire cooking, this usually means positioning it over the cooler edge of your coals or on a side grate where it’s not directly over flames.
Keep an eye on the liquid level throughout cooking. Outdoor heat sources are less controllable than a home stove, and outdoor air is often drier, so liquid evaporates faster. If the beans start looking dry or the liquid line drops below the surface of the beans, add hot water by the quarter-cup. Cold water will shock the system and make the beans cook unevenly.
If you’re cooking the beans entirely at the campfire from start to finish, do your initial bean simmering first (that 70-90 minute stage) before you add guests, food, and chaos to the scene. Get that part locked in, then add your seasonings once you’re settled and can taste and adjust. This way you’re not troubleshooting in front of hungry people.
Smoke and BBQ are natural partners, so don’t be shy about the liquid smoke ingredient if you’re cooking indoors. If you’re cooking over actual fire and getting actual smoke, you can skip the liquid smoke entirely. If you’re cooking on a home stove, that ½ teaspoon of liquid smoke is what creates the authentic taste you’re going for.
Make-Ahead Strategy and Reheating
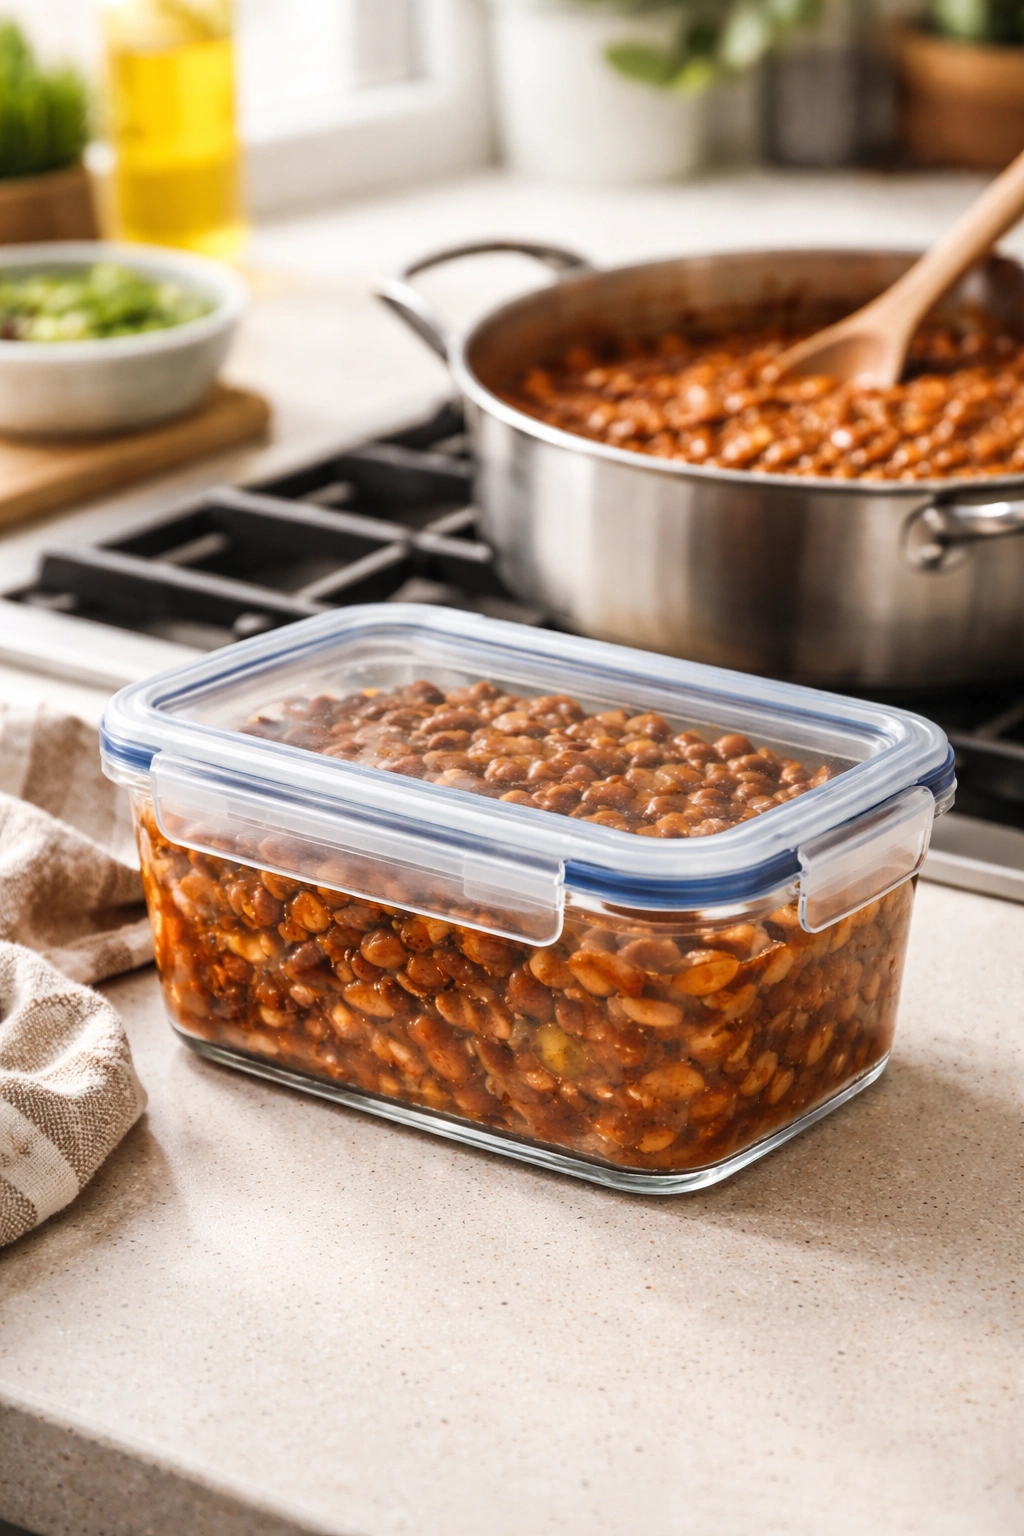
These beans are genuinely one of the best dishes to make ahead of time. The flavor actually deepens overnight as the spices settle in and the beans fully absorb the cooking liquid. Make them the day before your gathering, store them in the refrigerator, and just reheat them gently before serving.
To make ahead, follow all the steps completely through to the final tasting and adjustment. Let the beans cool to room temperature, then transfer them to an airtight container and refrigerate for up to 5 days. They’ll keep significantly longer if you freeze them, up to 3 months, though the texture of the beans themselves degrades slightly in the freezer (they can become mealy).
Reheating is straightforward: transfer the beans to a pot or Dutch oven and warm them over medium-low heat, stirring occasionally. If they’ve thickened too much during storage, add a splash of warm water or beef broth to loosen them back up. Heat until steaming but not boiling — a gentle warm-through takes about 15 minutes depending on how much you’re reheating. Don’t blast them with high heat or they’ll break apart.
If you’ve frozen your beans, thaw them overnight in the refrigerator before reheating. Reheating from frozen works but takes longer and can result in uneven heating. Thawing first ensures the beans warm evenly throughout.
The night-before-cooking method is honestly the best way to do this for a party. You get better flavor, you eliminate last-minute stress, and you only have to reheat briefly. Your guests get beans that taste carefully made rather than rushed.
Variations That Keep the Spirit
The base formula is flexible enough to adjust based on what you’re serving alongside it, what region you’re cooking in, or just what sounds appealing at the moment.
For a Campfire Cowboy Version, add 1-2 tablespoons of diced jalapeños right along with the other vegetables. Some people also add a splash of bourbon whiskey (2-3 tablespoons) for authenticity. The alcohol cooks off but leaves behind a subtle depth.
For a Texas Twist, swap half the brown sugar for molasses (so 1½ tablespoons brown sugar plus 1½ tablespoons molasses). This makes them earthier and slightly more bitter, which some people prefer. Also bump up the chili powder to 3 tablespoons if you want heat to be more prominent.
For a Spicier Version, increase the cayenne to 1 full teaspoon, add 1-2 diced jalapeños to the vegetable mix, and use hot sauce generously (up to 3-4 tablespoons if you want real heat). Some people also add a pinch of smoked ghost pepper powder if they want genuine fire, but start with just the jalapeños and cayenne first.
For a Deeper, Richer Version, add 2-3 tablespoons of coffee (or cold brew concentrate) and 1 tablespoon of cocoa powder. These additions sound unusual but they deepen the brown sugar and spice flavors without making anything taste like coffee or chocolate. Use them sparingly.
For a Vegetarian Version, skip the bacon entirely and instead add 2 tablespoons of olive oil and 1 tablespoon of smoked paprika for the smoky depth that bacon would provide. Cook the vegetables in that oil and build the rest of the recipe the same way. It won’t taste identical but it will be genuinely delicious.
For Small Batch Cooking, the recipe halves easily. Use ½ pound beans, 4 slices bacon, and cut all the other ingredients in half. The cooking time remains roughly the same since you’re still managing the same ratio of liquid to beans.
Serving Suggestions and Pairings
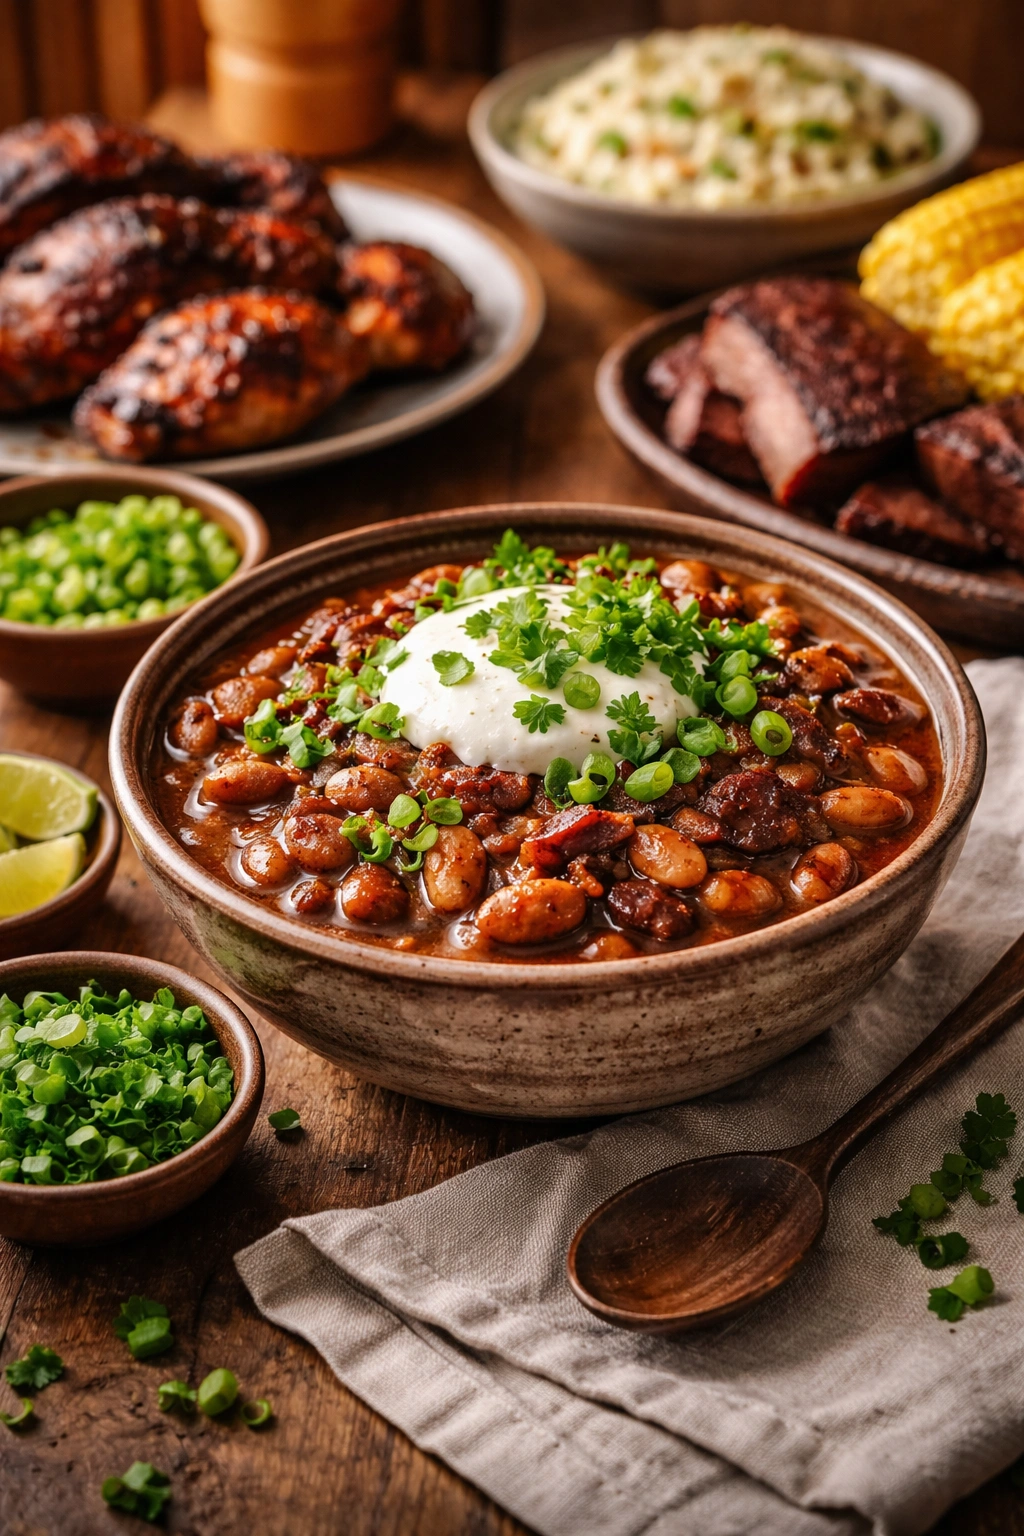
Cowboy pinto beans are the rare side dish that works equally well alongside any BBQ protein — pulled pork, brisket, ribs, smoked chicken, or grilled sausages all welcome these beans on the same plate.
They’re best served hot or warm, straight from the pot or reheated. A dollop of fresh sour cream or crema on top adds coolness and richness that complements the spice. A handful of fresh cilantro scattered over top adds brightness. Sliced green onions add a sharp bite. Any or all of these toppings elevate a bowl of beans from side dish to a fully realized component of the meal.
Pair them with simple sides: coleslaw (the cool crunch and vinegar balance the heat), cornbread (for sweetness and texture contrast), or a bright, acidic salad to cut through the richness. In a full BBQ spread, these beans occupy the role that baked beans would at a traditional picnic, but they’re more interesting and more food.
They also hold their own as a main dish for leftovers. Eat them straight from the fridge with some cheese and tortillas, or warm them gently and serve over rice. They’re genuinely satisfying and filling, which is something you don’t always get from traditional side dishes.
For a crowd, figure that each person will eat about ¾ cup of beans. This recipe makes about 8 cups, so it feeds about 10-12 people as a side dish. If it’s a main dish component, plan on closer to 1 full cup per person.
Storage and Leftovers
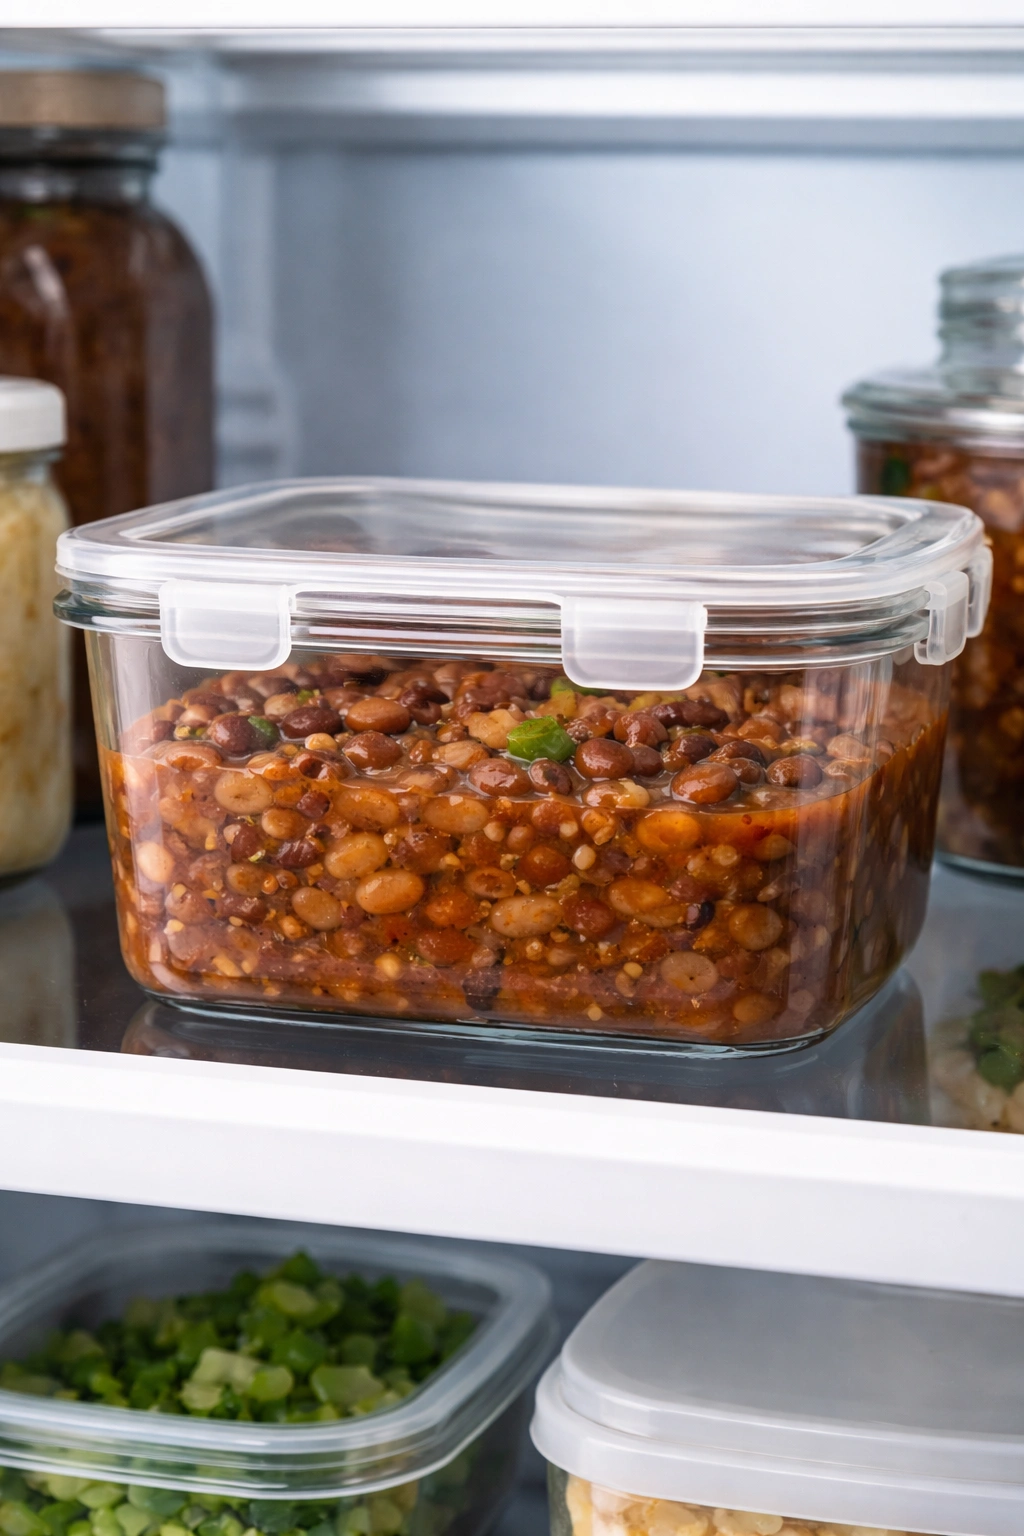
Stored properly, these beans keep for up to 5 days in the refrigerator in an airtight container. After that, even though they might still be safe to eat, the flavor starts to become flat and one-dimensional. Use within 5 days for best taste.
Freezing works, as mentioned above, for up to 3 months. Use freezer-safe containers or bags, leaving a bit of headspace if using containers because the beans expand slightly as they freeze. Thaw overnight in the refrigerator before reheating.
Don’t throw away leftover beans. They’re excellent over rice, in tacos, on a loaded baked potato, or folded into scrambled eggs with cheese and breakfast sausage. They’re also great puréed into a paste and spread on sandwiches, or thinned out and served as a sauce over grilled proteins.
If your leftover beans have been sitting in the fridge for a few days and the flavors have dulled, don’t resign yourself to eating them that way. Add a splash of hot sauce, a pinch of cayenne, or even a dab of mustard to wake them back up. Taste and adjust, just like you would have with the fresh batch. Leftovers respond really well to these little tweaks.
Final Thoughts
The beauty of cowboy pinto beans is that they prove you don’t need fancy ingredients or complicated techniques to feed people something genuinely memorable. What you need is patience, quality beans, good bacon, and willingness to taste and adjust.
These beans exist in that perfect middle ground — easy enough for a beginner cook to succeed with, but nuanced enough that an experienced cook can layer flavors and make them distinctly their own. You show up to a gathering with a pot of these and you’ve made a statement that you care about the meal and the people eating it.
Make them the day before if you can. Reheat them gently just before serving. Taste one spoonful before you bring them out — if they need a pinch more salt or heat, give them that 30 seconds. That attention to detail is what transforms good beans into the ones people remember and ask you to bring back.