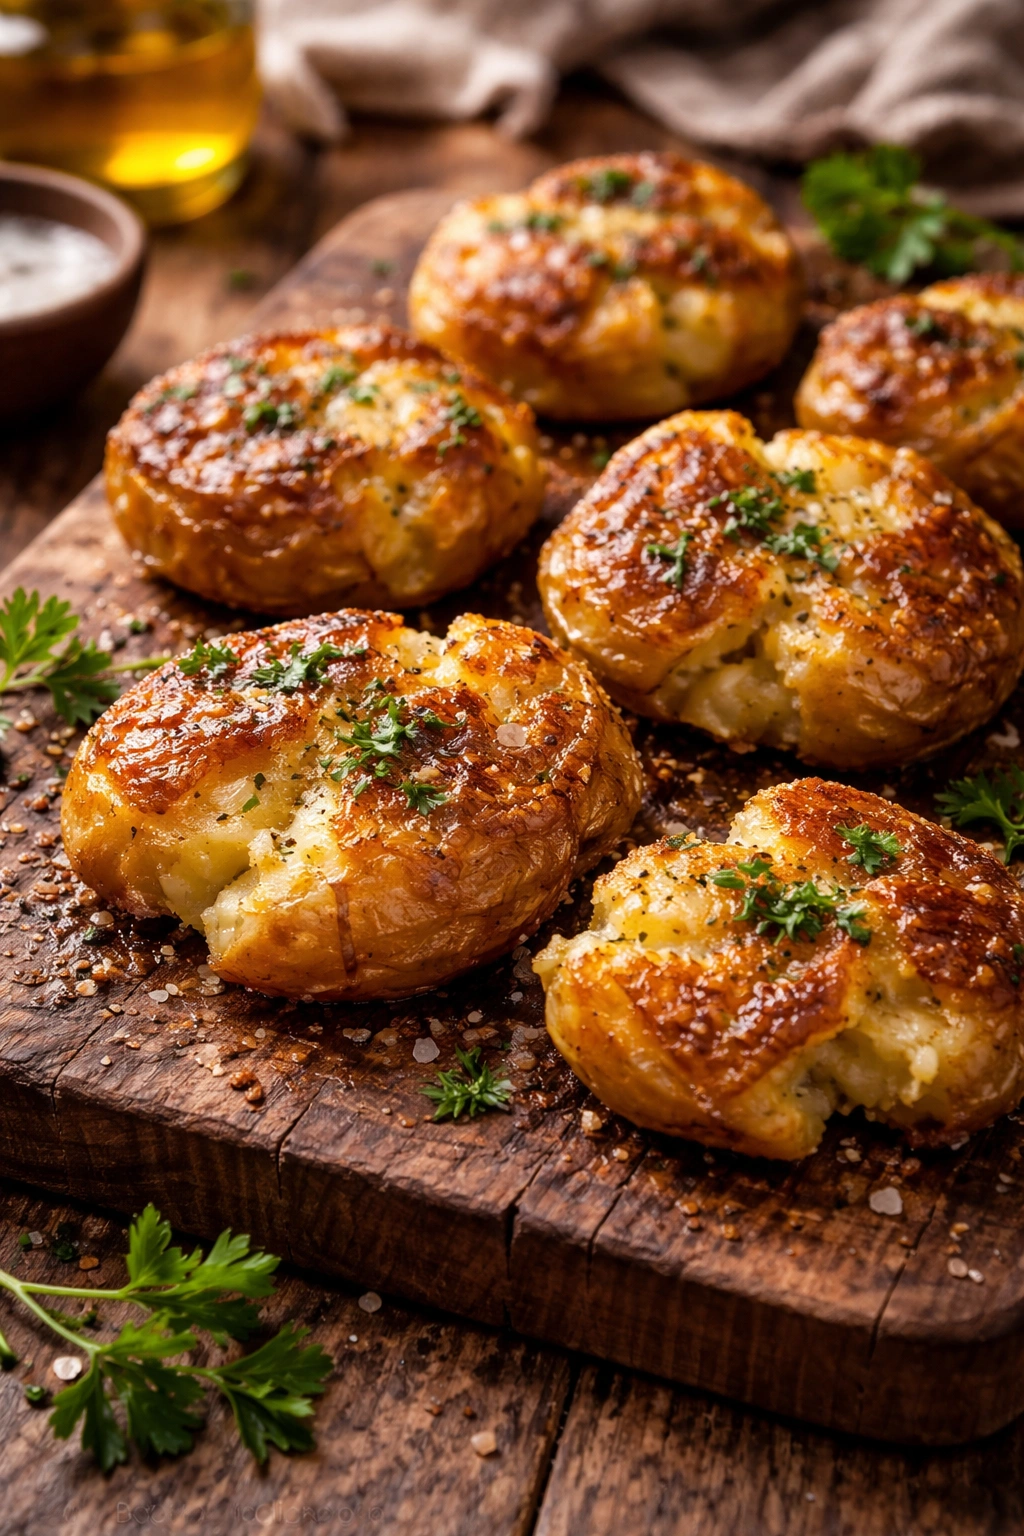
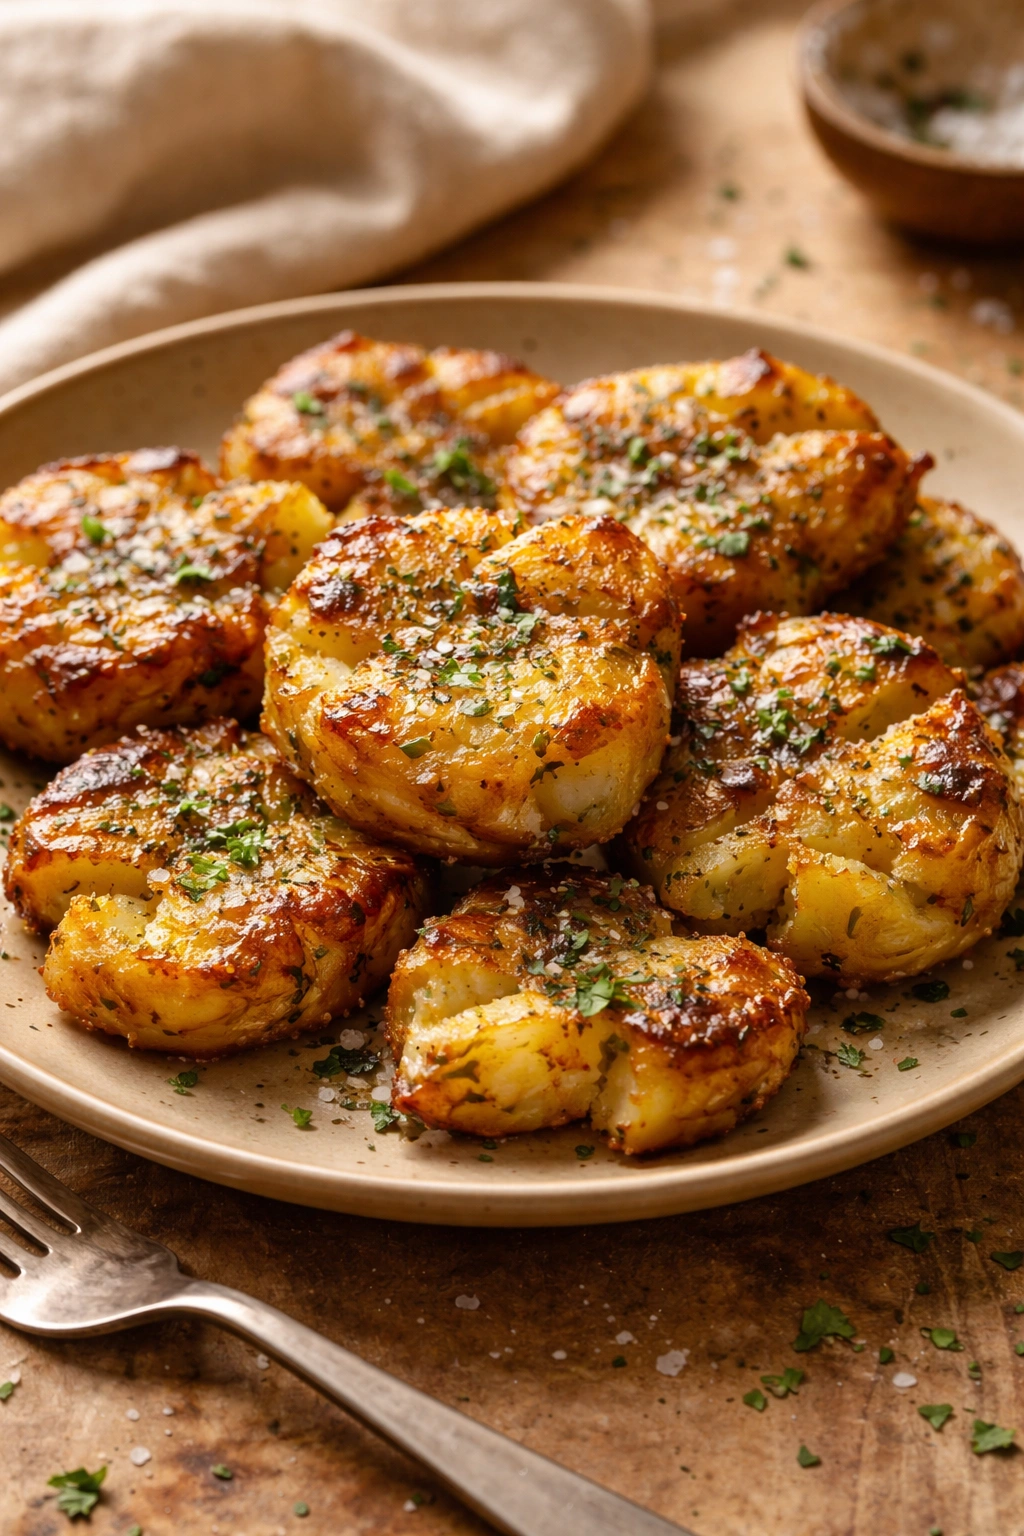
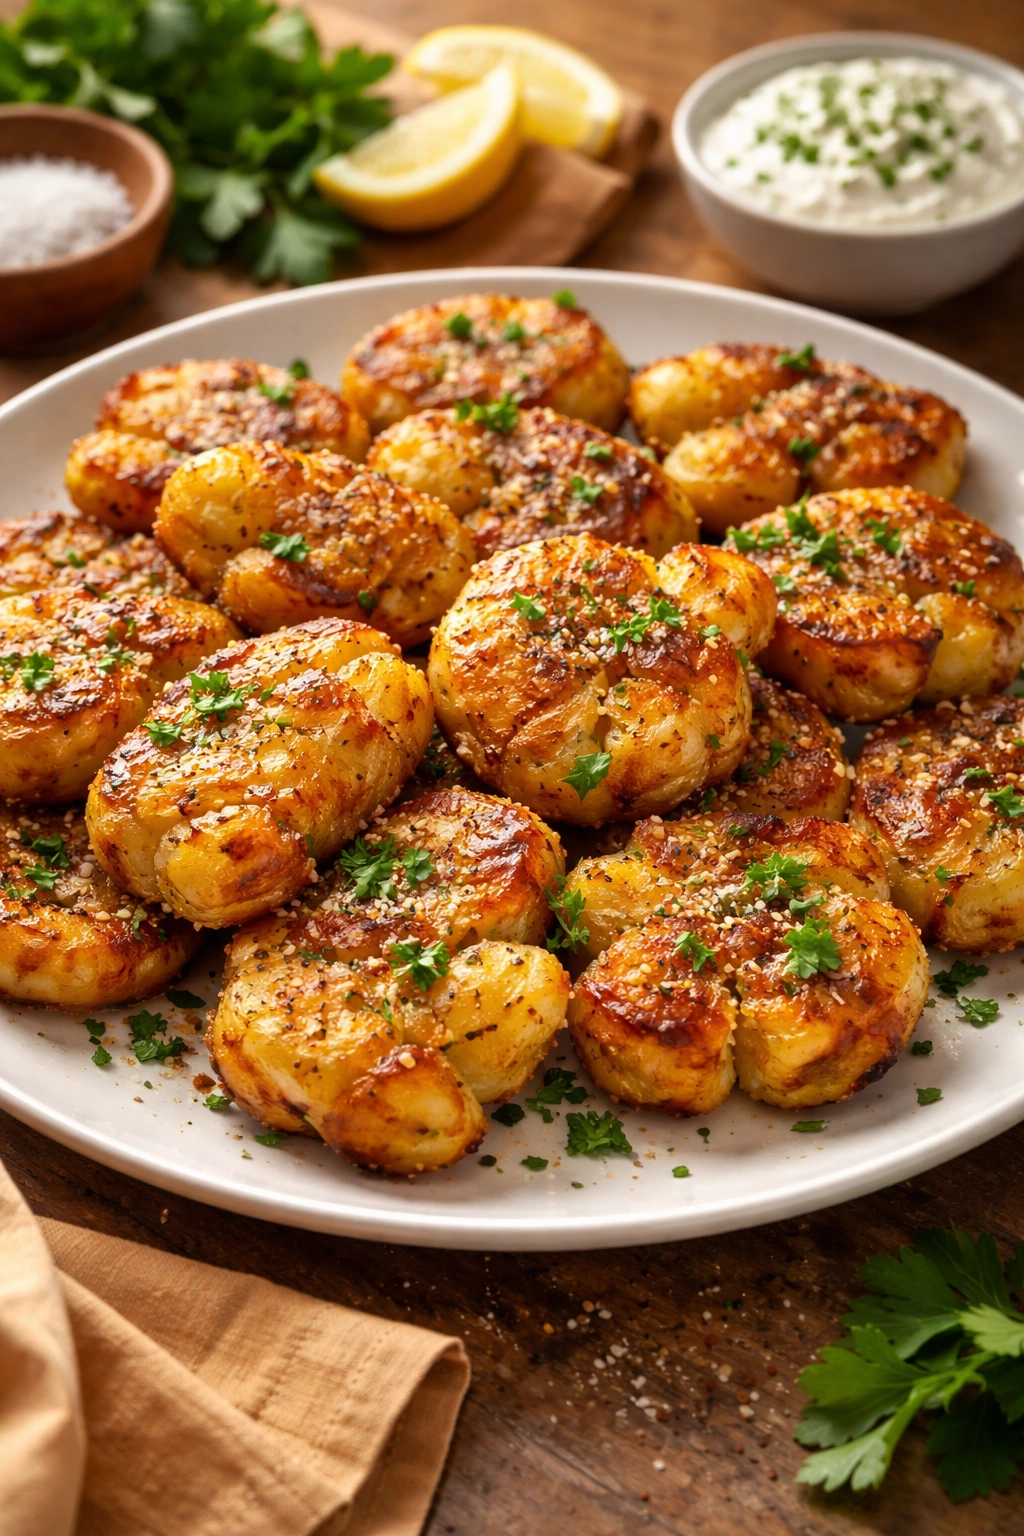
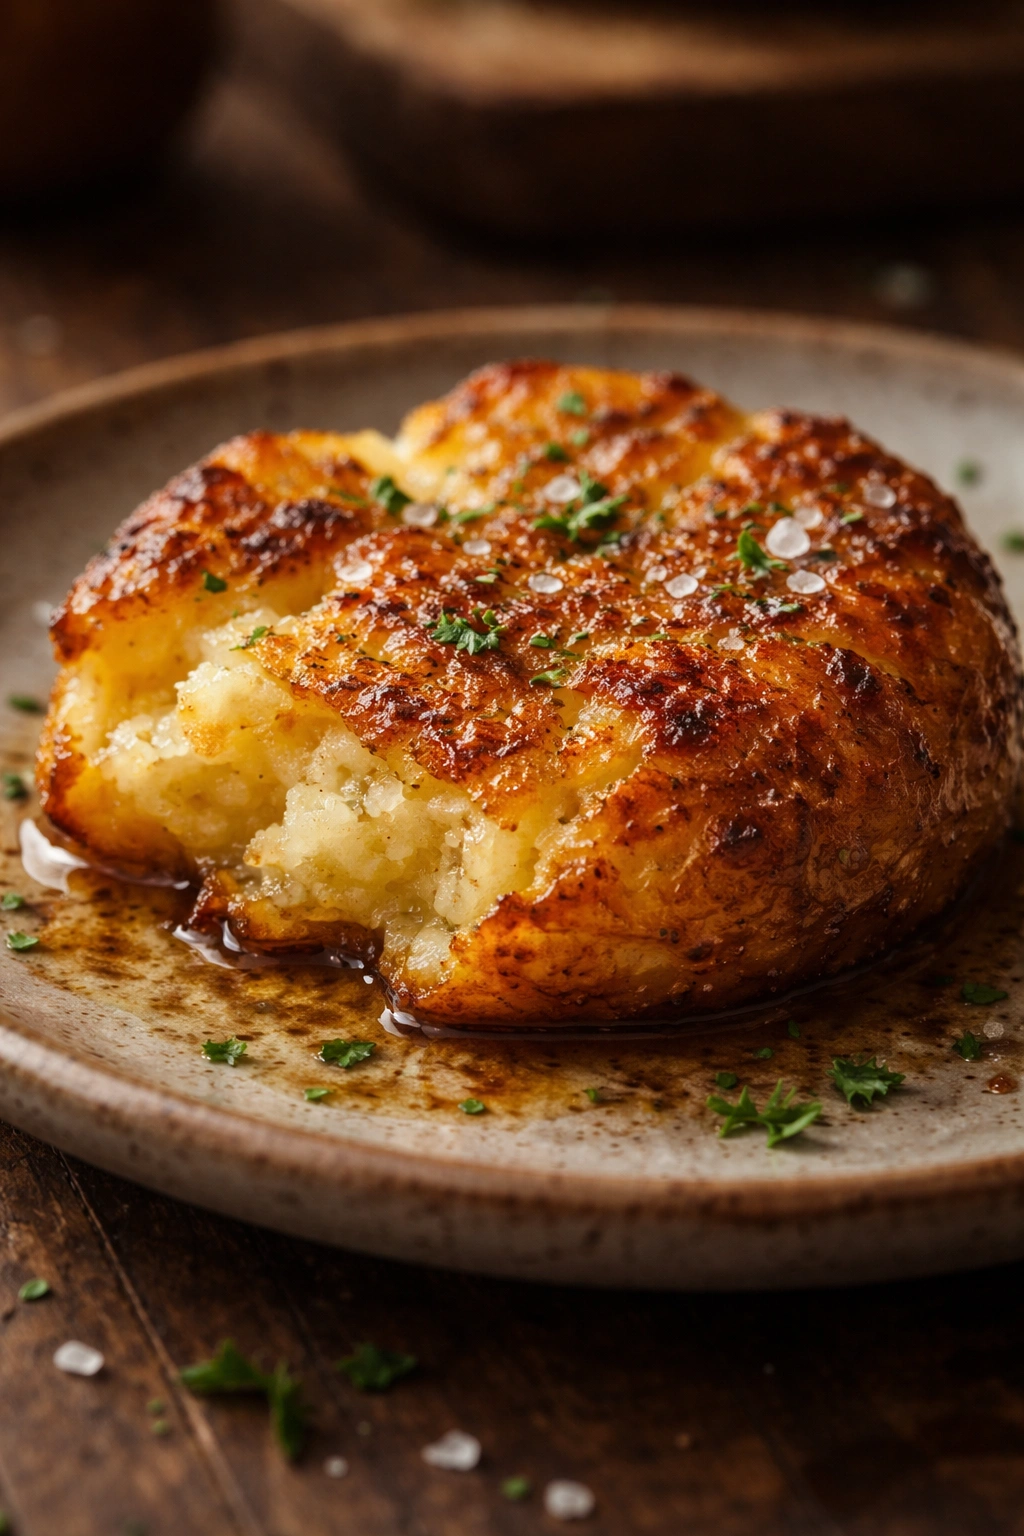
Most people settle for ordinary mashed potatoes—the kind that slump on the plate, fluffy and forgettable. But there’s a completely different version out there, one that rewards a little extra effort with something genuinely spectacular: crispy, buttery smashed potatoes with a golden, crunchy crust on top and a silky, creamy interior underneath. We’re talking about a dish that’s elegant enough for a dinner party but homey enough to serve whenever you want your family to actually be excited about side dishes.
The secret isn’t in some exotic ingredient or special equipment you don’t already own. It’s about understanding how potatoes work—what happens when you treat them with intention, season them at the right moments, and use a specific technique to build both texture and flavor. The crispiness comes from a clever two-stage cooking method. The richness comes from brown butter and careful cream incorporation. The texture comes from knowing exactly how much to mash, and when to stop.
The effort really does pay off. You’re looking at maybe 45 minutes total, with hands-on work scattered across that time rather than all at once. In exchange, you get a side dish that makes people ask for the recipe—and that tastes so good you might find yourself making them as a main course on a quiet weeknight, just because you can.
Why These Aren’t Ordinary Mashed Potatoes
Standard mashed potatoes are built to be soft and uniform—which is fine if that’s what you actually want. But the moment you add a crispy exterior and truly buttery flavor, you’re in a completely different category. This version uses a roasting step first to concentrate the potato flavor and remove surface moisture. That moisture removal is critical. Wet potatoes can never get crispy; they’ll steam before they can brown. So the initial roast isn’t just about flavor—it’s structural preparation for what comes next.
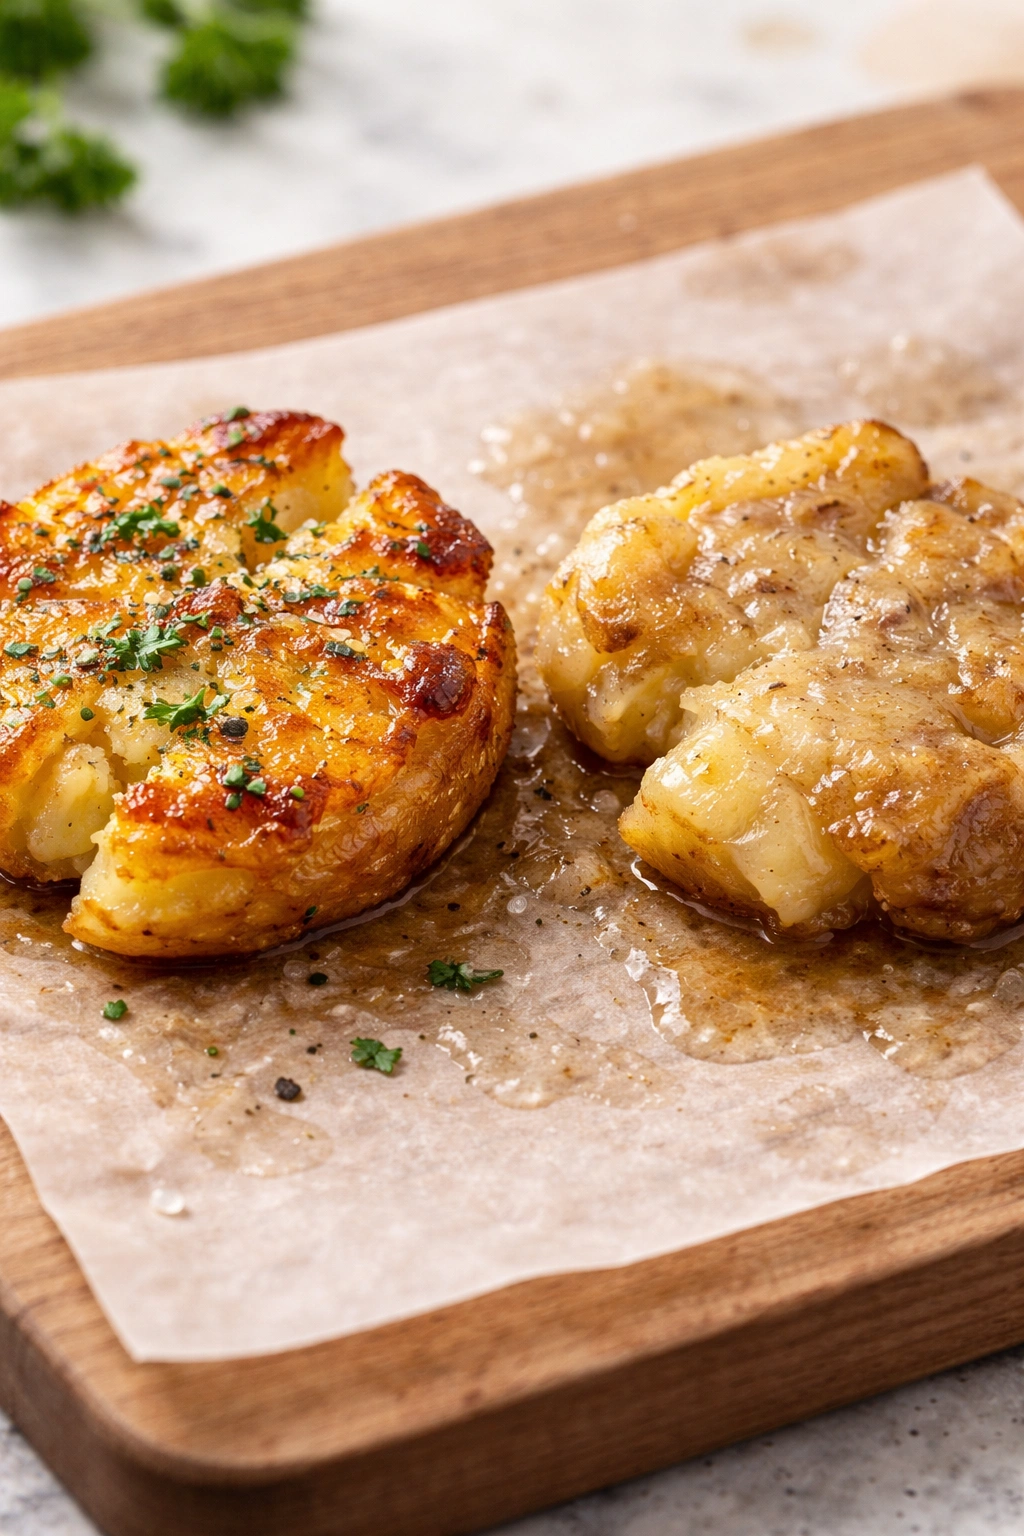
The crispy exterior develops from a shallow pan-searing step that happens after you’ve mashed and plated the potatoes. You’re essentially finishing them like you’d finish a steak or a piece of fish: a quick, high-heat sear in butter just before serving. The bottom and edges that touch the hot pan turn golden and crunchy, while the interior stays creamy and warm. This final step takes about five minutes and transforms the whole dish.
The flavor profile is deeply buttery without being heavy. Traditional mashed potatoes use butter stirred into the hot potato base, and some of that richness gets lost to the heat. Here, you’re making brown butter separately—letting it cook until the milk solids caramelize—and then incorporating it at a lower temperature so every note of that nutty, complex flavor stays intact. You taste butter, not just fat.
Choosing the Right Potatoes for Maximum Crispiness

The potato variety you choose determines everything about texture. You want a starchy potato, not a waxy one. Russets are the gold standard here—they have enough starch to give you that fluffy, light texture, and low moisture relative to their size. Burbanks work too. What you’re avoiding is anything labeled “waxy” (like red potatoes or fingerlings), because those stay too dense and won’t give you the fluffy-yet-crispy combination you’re after.
Size matters too. You want potatoes that are roughly similar in size so they cook evenly. If you’re buying russets, aim for medium ones—about the size of your fist. Avoid the giants if you can; they often have thick, dense cores that cook unevenly. If you end up with a mix of sizes, cut the large ones down so everything is similar.
The skin is worth paying attention to. You’ll be peeling these potatoes before cooking, so look for russets with thin, unblemished skin. Any dark spots, soft spots, or sprouting eyes are signs of age or damage. Fresh potatoes not only taste better; they mash more smoothly because the starch structure is still intact and properly hydrated.
Essential Equipment and Ingredients You’ll Need
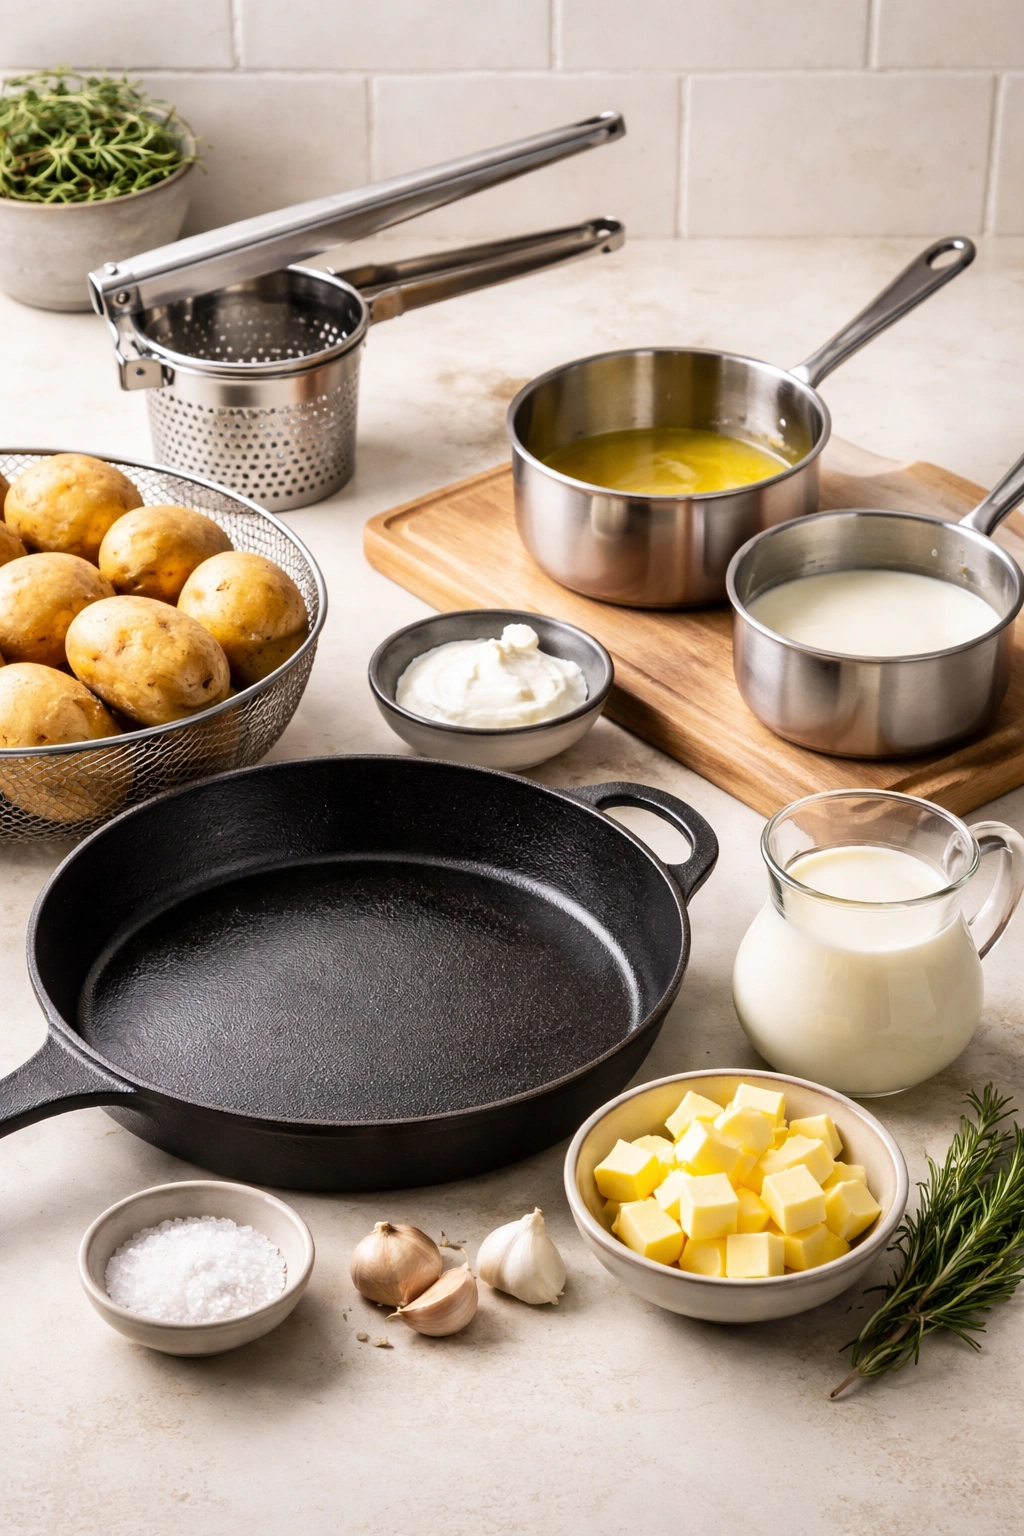
You don’t need anything fancy, but having the right tools makes this genuinely easier. A sturdy potato ricer is essential—this isn’t something you want to skip. A ricer creates tiny, uniform pieces that mash evenly and absorb cream and butter beautifully. A hand masher can work in a pinch, but you’ll likely end up with lumps, and you’ll spend more time working the potatoes, which means overdeveloping the gluten in their starch and making them gluey. A ricer respects the potatoes and does the job in seconds.
You’ll also want a heavy-bottomed skillet—cast iron is ideal, but stainless steel works perfectly. The heavier the pan, the more even the heat distribution, and the better your crispy crust will be. A medium saucepan for warming cream, a separate small saucepan for browning the butter, and a sturdy wooden spoon for final assembly round out what you need.
For ingredients, you’re going to use real butter—not margarine, not oil. Salt (kosher salt is easiest to control), heavy cream that’s actually heavy cream (not half-and-half), and potatoes. Some recipes sneak in garlic or herbs at this stage, which is fine, but the foundational version showcases the potatoes and butter. You can always add complexity once you’ve mastered the base technique.
Preparing Your Potatoes for Success
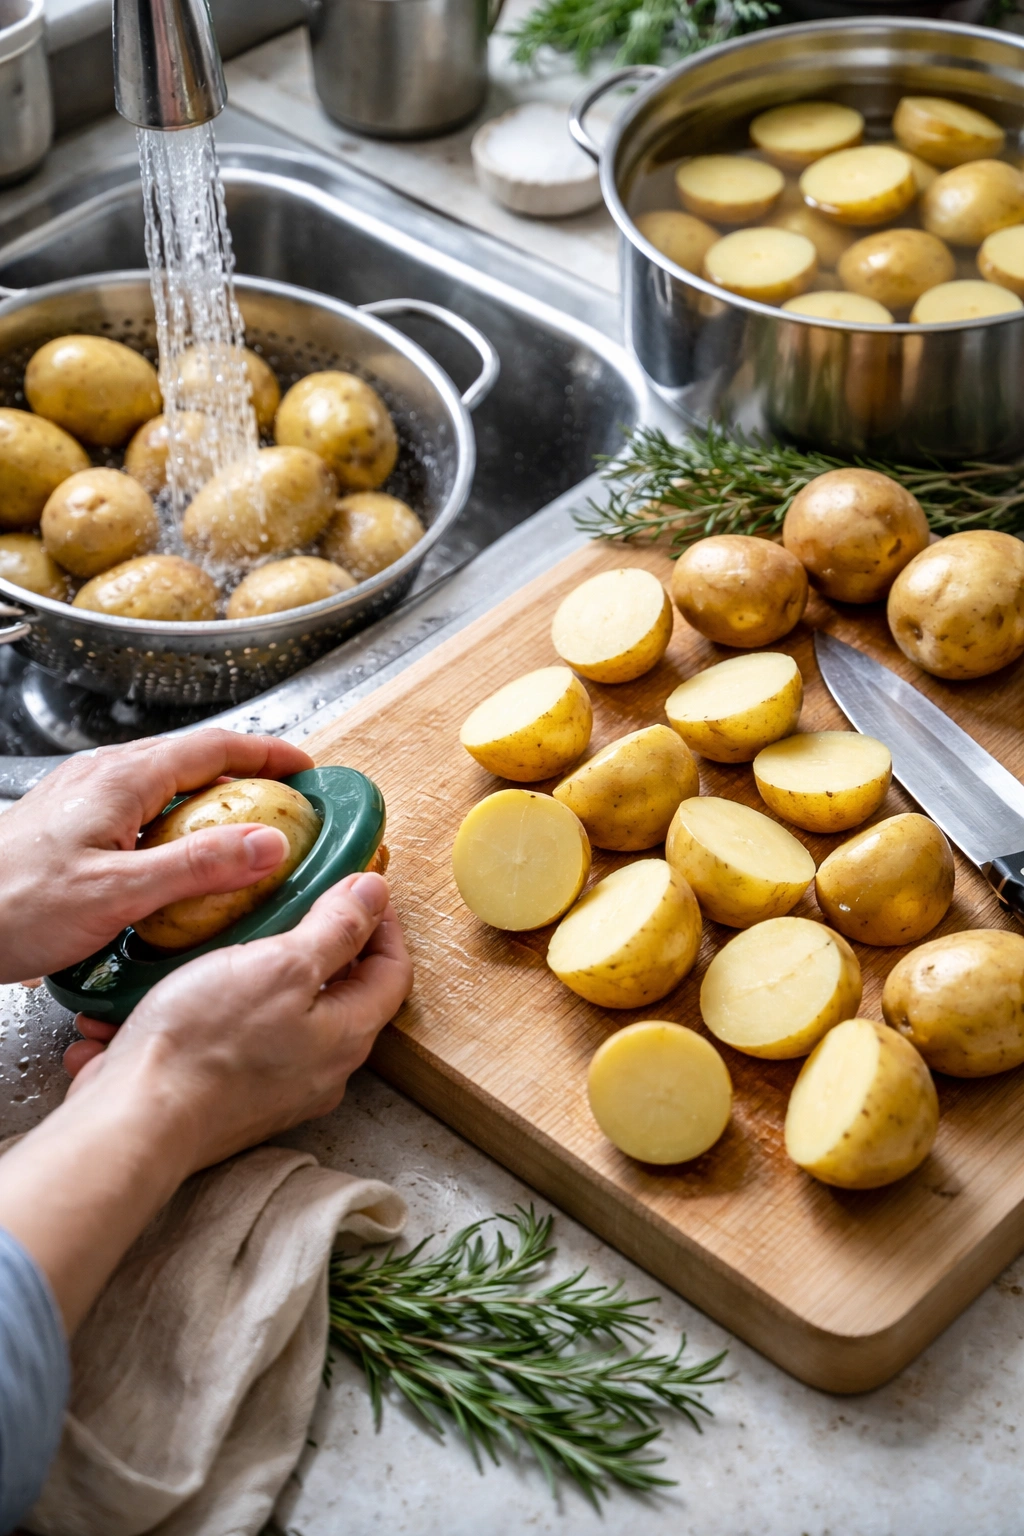
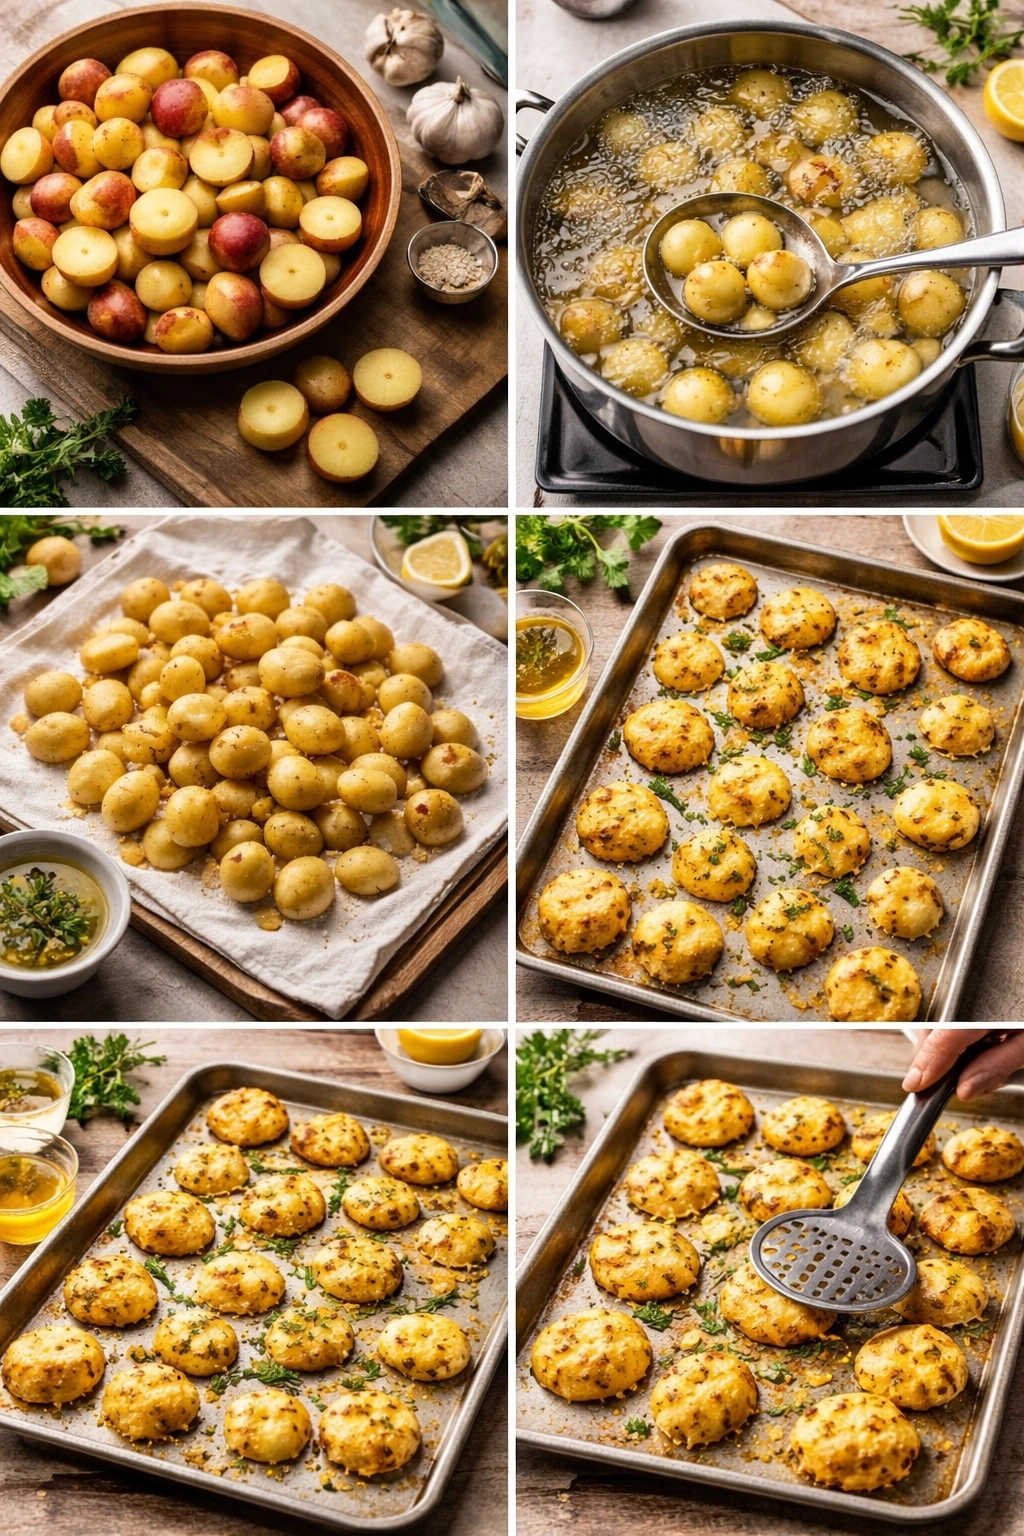
Start by scrubbing your potatoes under cold running water to remove any clinging soil. Don’t peel them yet. Cut each potato into roughly even halves or quarters, depending on size. You want pieces that’ll cook in about 20-25 minutes—not so small that they fall apart, not so large that the centers stay hard while the edges overcook.
Place the cut potatoes in a pot of cold, salted water. Using cold water (rather than hot) and starting from cold ensures even cooking throughout. Bring the water to a boil and maintain a gentle, rolling boil—not a furious rolling boil that breaks the potatoes apart. Cook for about 20 minutes, then test with a fork. They should be completely tender all the way through, soft enough to break easily with minimal pressure.
Drain the potatoes in a colander and let them sit there for a minute or two to drain excess water. Don’t rinse them—that starch on the surface is part of what makes them fluffy when mashed. Once they’ve drained, spread them out on a clean kitchen towel and let them sit for about 3-4 minutes. The residual heat helps evaporate any remaining surface moisture. This is a small step that makes a real difference.
The Dual-Cooking Method That Creates the Crispiness
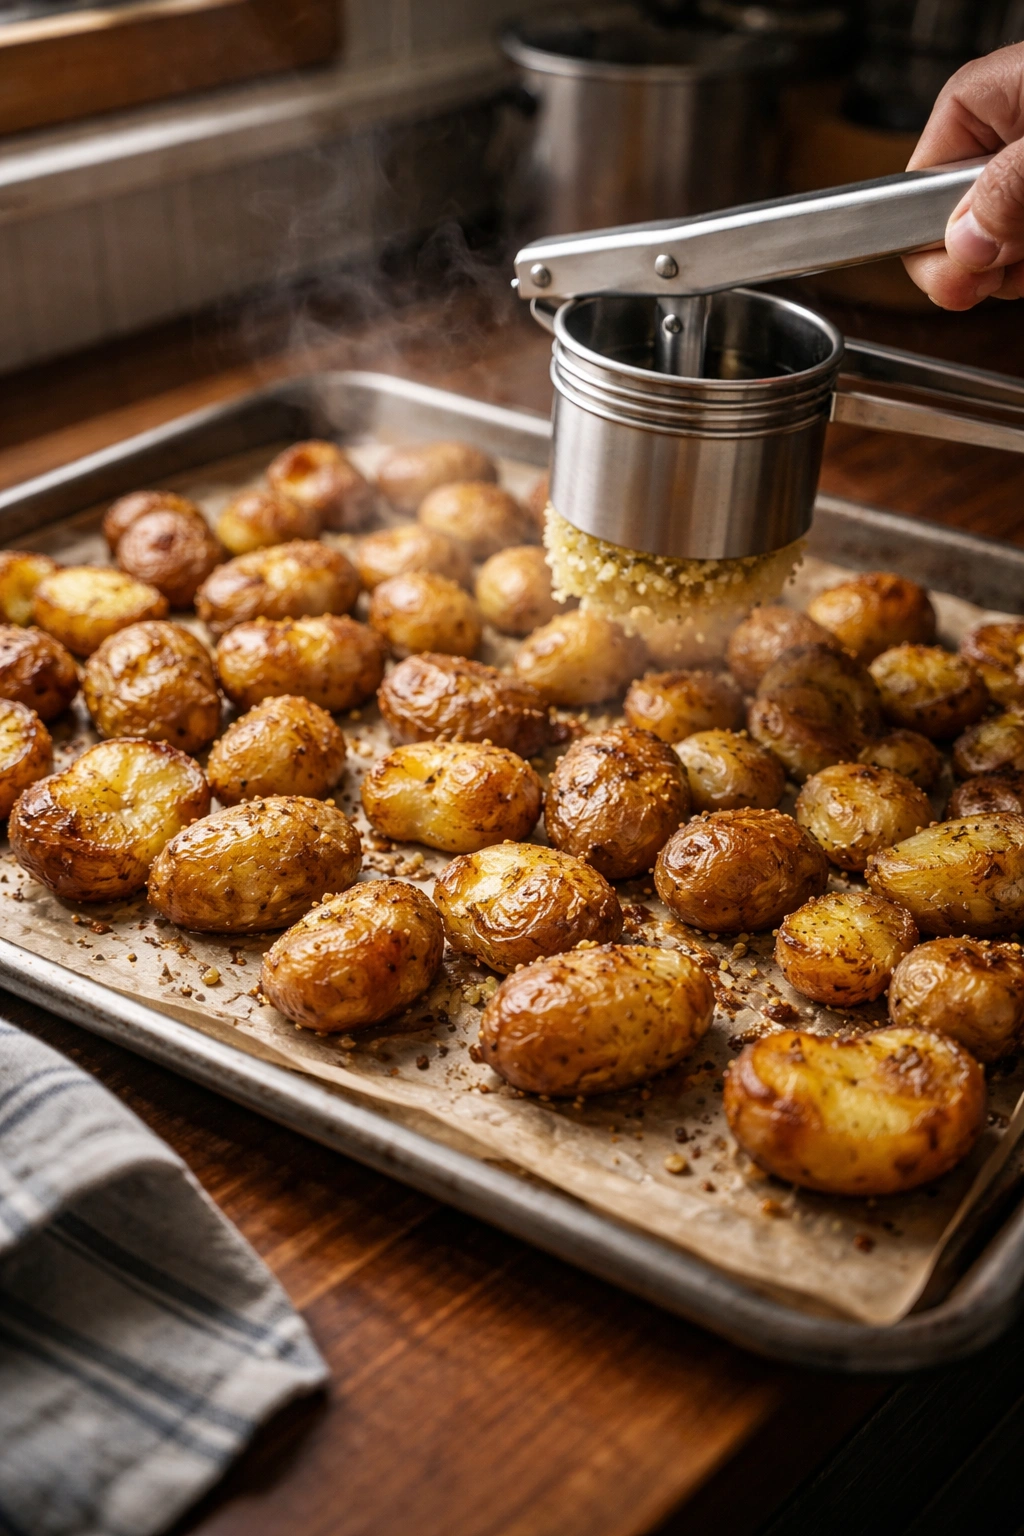
After draining and resting, it’s time for the first critical step: roasting. Preheat your oven to 350°F and spread the still-warm, slightly-dried potatoes on a baking sheet in a single layer. Toss them lightly with a pinch of salt and a small amount of neutral oil (about 1 teaspoon). Roast for about 15 minutes. You’re not trying to brown them heavily here—you’re driving off any remaining internal moisture and concentrating the potato flavor. The heat should be gentle enough that the outsides don’t darken, but warm enough that you can see a faint steam rising from them as they roast.
Pull them out and let them cool for just a few minutes—not until they’re completely cold, but cool enough to handle safely. This roasting step is what separates these smashed potatoes from ordinary ones. You’re literally removing water, which sounds like you’re drying them out, but what you’re actually doing is intensifying everything that makes potatoes taste like potatoes.
Once they’ve cooled slightly, press them through a ricer into a large bowl. If you don’t have a ricer, use the finest grater holes on a box grater, pressing gently. Work quickly while they’re still warm. Warm potatoes absorb cream and butter better than cold ones, and the warmth helps everything incorporate smoothly.
The Browned Butter and Cream Technique
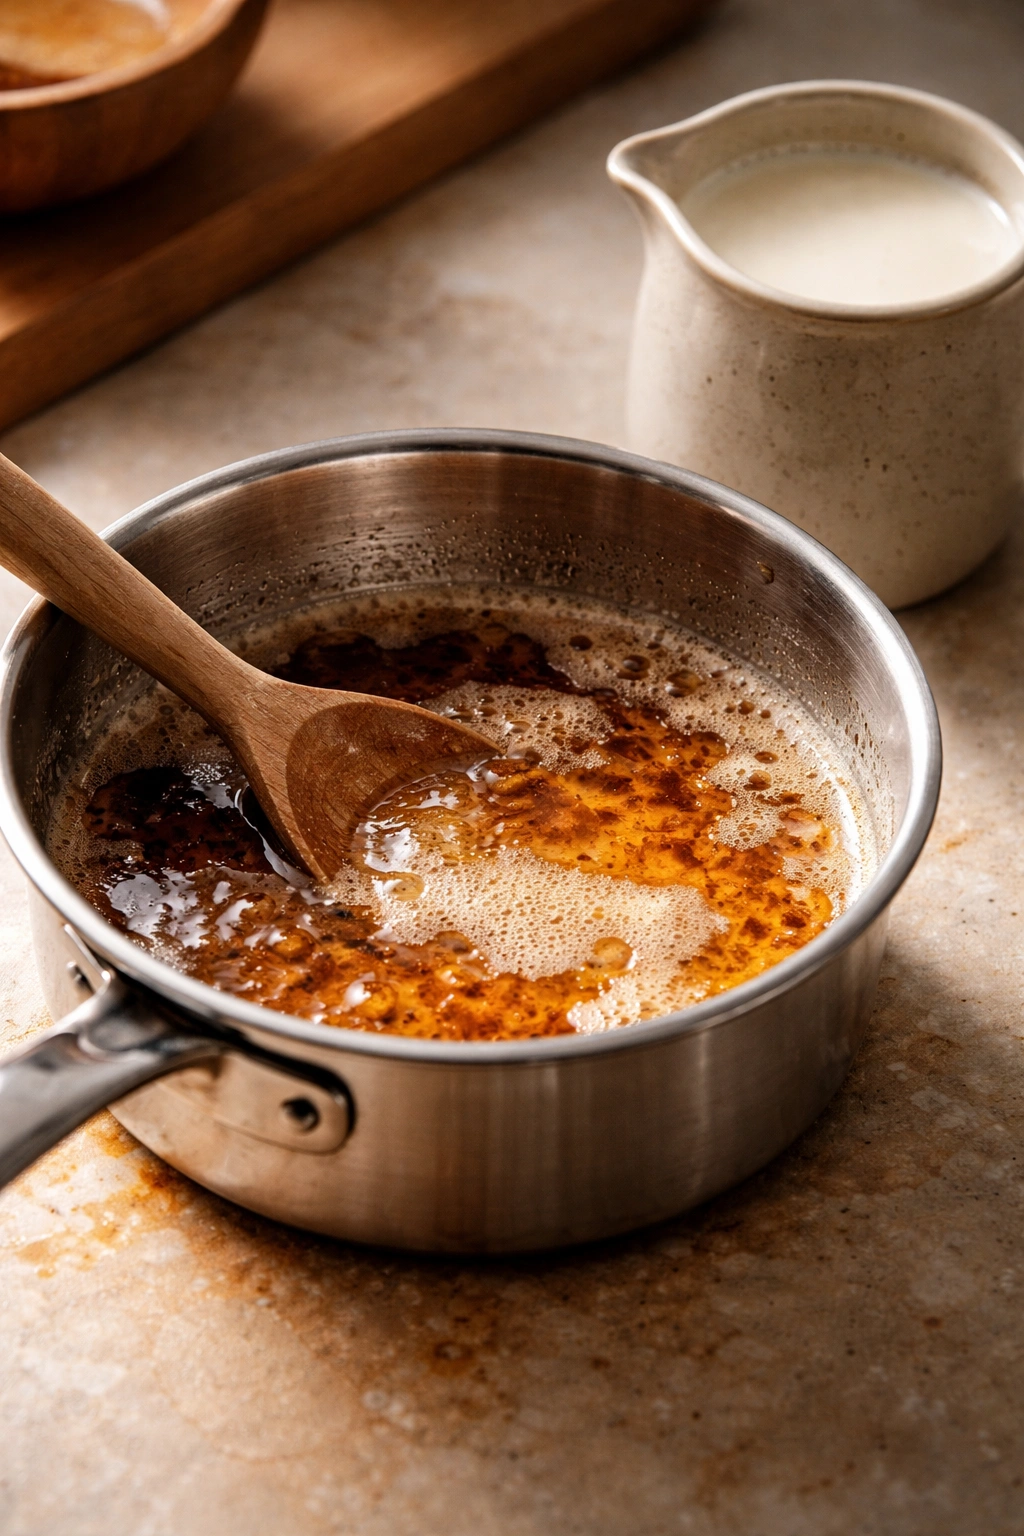
While your potatoes are finishing up, heat about 6 tablespoons of butter in a small saucepan over medium heat. Don’t stir it constantly—let it sit for a minute or two after it melts. You’ll hear it start to crackle and foam. Keep watching. The milk solids in the butter will separate and begin to sink to the bottom, where they’ll gradually turn from white to golden to deeply brown. This takes about 8-10 minutes total. You’re looking for a rich, nutty aroma and a caramel color in the solids at the bottom of the pan.
The moment the color is right (a deep golden brown, but not burned), pour the brown butter into a separate bowl, being careful to include those deeply colored, flavorful solids at the bottom. Set it aside to cool for a few minutes. If the brown butter is too hot, it can break apart when you add the cold cream, and you’ll lose that silky emulsion you’re after.
Warm your heavy cream separately in another small saucepan (about 1 cup to start). You want it hot but not boiling—around 160-170°F if you have a thermometer, or just steaming and too hot to touch. The warm cream incorporates into the potatoes more smoothly than cold cream, and it helps everything stay at a good serving temperature longer.
Getting the Texture Just Right
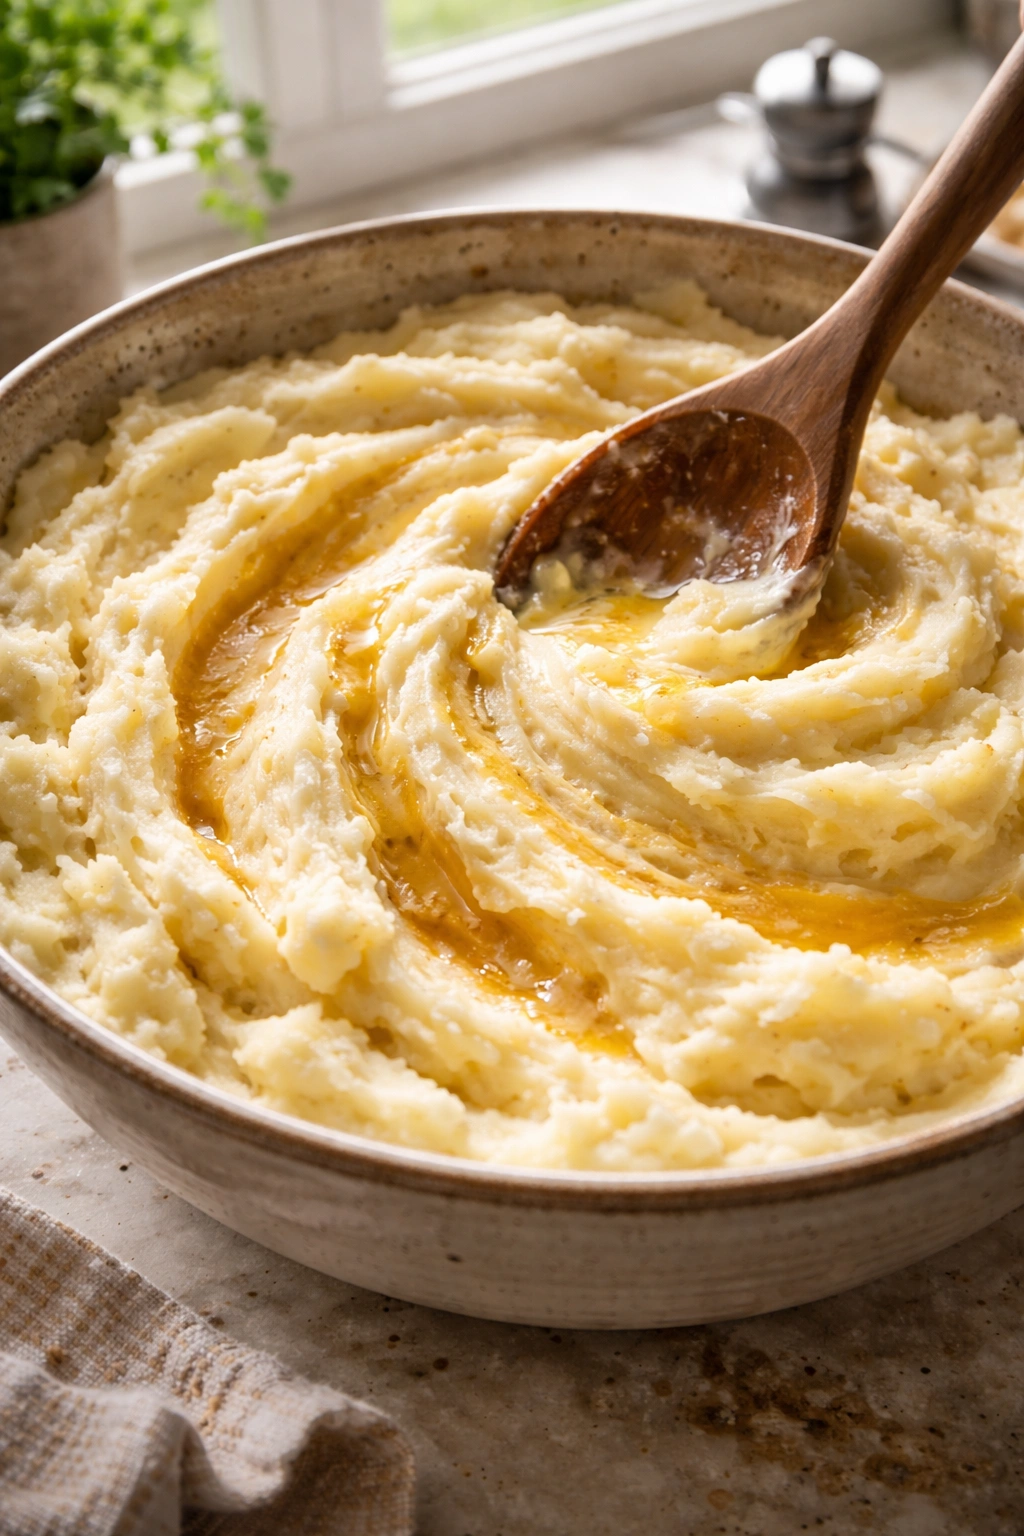
Once your riced potatoes are in the bowl, you’re going to fold in the cream and brown butter in stages. Add about half the warm cream first, folding gently with a wooden spoon or spatula. Don’t beat or stir vigorously—you’re folding. Watch how the potatoes take it in. Add half the brown butter, folding again. Taste it. At this point, it should taste buttery and creamy. Add salt—probably about 1½ to 2 teaspoons of kosher salt, but taste as you go because salt levels vary based on how much you salted the cooking water.
Add the remaining cream slowly, folding between each addition. You’re looking for a texture that’s silky and light but still holds its shape on a spoon. It should never be soupy or runny. Some people like their smashed potatoes a bit thicker (almost holding their shape completely), while others prefer them a touch more luxurious and loose. There’s no wrong answer—it’s about what appeals to you. Add the final brown butter and fold again.
Taste once more for seasoning. The potatoes might need a crack of black pepper, or maybe just a whisper of nutmeg (about ⅛ teaspoon) if you want a subtle background note. Garlic powder isn’t traditional in this version, but if you want that flavor, ¼ teaspoon folded in at this stage adds richness without overpower.
Serving and Timing Information
Yield: Serves 6 to 8 as a side dish
Prep Time: 15 minutes
Cook Time: 40 minutes (including roasting and the final pan-sear)
Total Time: 55 minutes
Difficulty: Intermediate — the technique requires attention to detail and understanding when potatoes are properly dried, but no special skills are needed. Everything happens in straightforward steps.
Complete Ingredient List
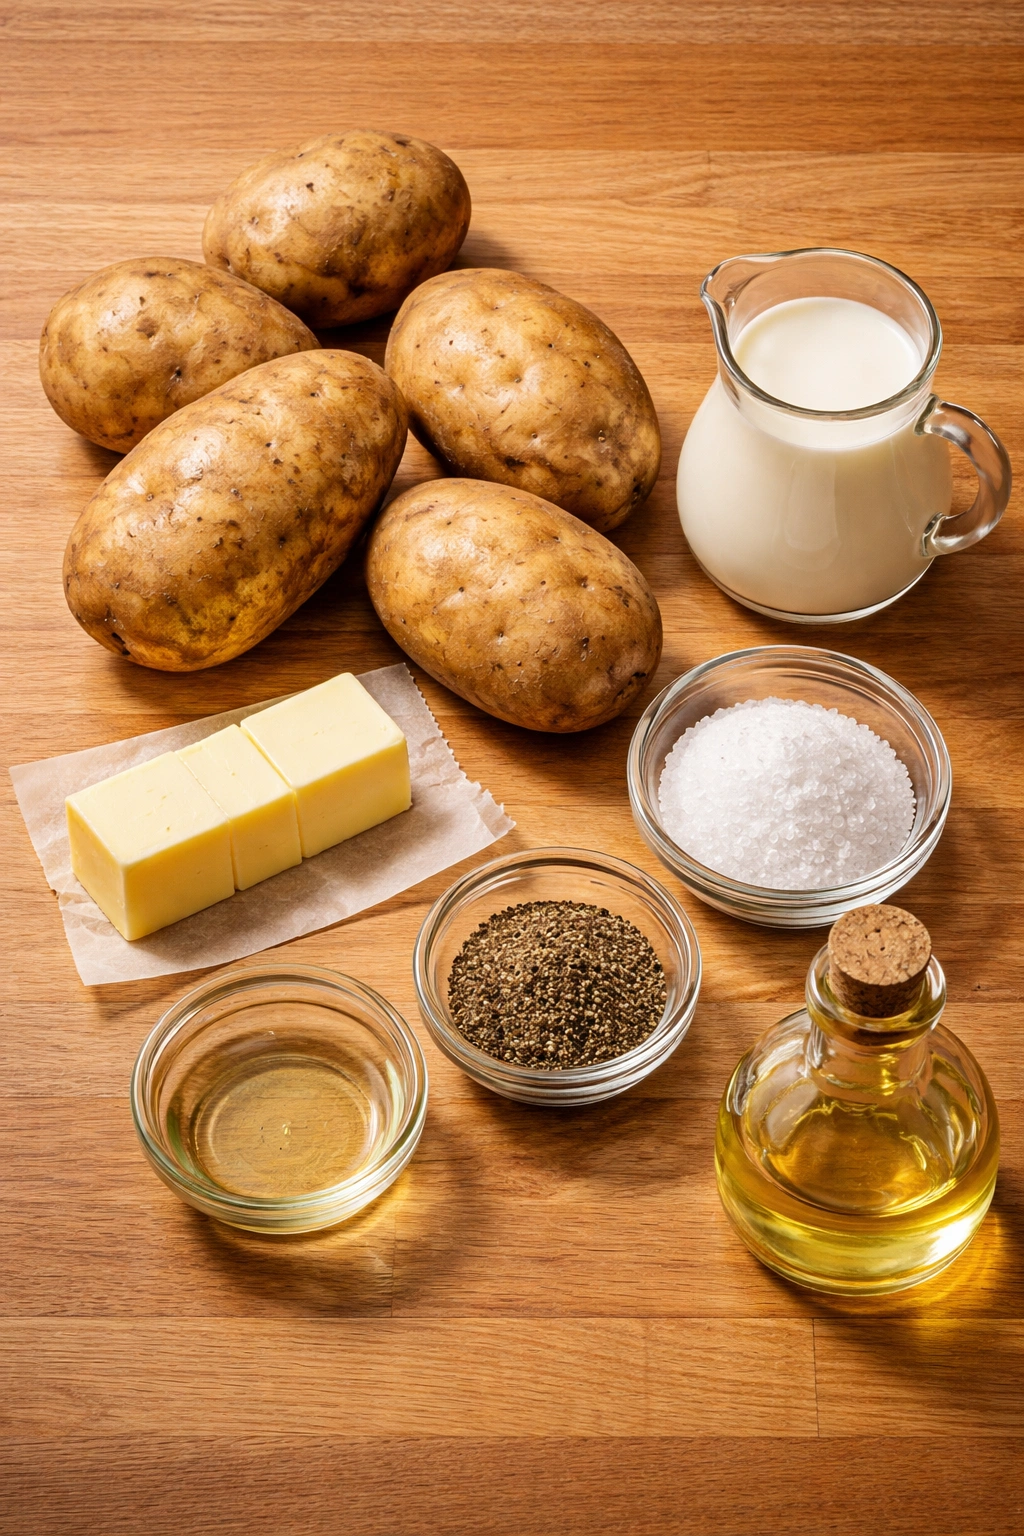
For the Base:
- 2½ pounds russet potatoes (about 5 medium ones)
- Kosher salt for cooking water and seasoning
- ½ teaspoon black pepper, freshly ground
- 1 teaspoon neutral oil (vegetable, canola, or light olive oil)
For the Brown Butter and Cream:
- 6 tablespoons unsalted butter
- 1 cup heavy cream, full-fat
- 1½ teaspoons additional butter for the final pan-sear (or 1 tablespoon for extra crispiness if you prefer more crust)
Optional Finishing Flavors:
- ⅛ teaspoon freshly grated nutmeg (optional but worth it)
- 2 cloves garlic, minced very fine (if you want a subtle garlic note, fold in after everything else)
- 2 tablespoons fresh chives, chopped fine (for garnish)
Detailed Step-by-Step Instructions
Prepare and Cook the Potatoes:
-
Scrub the potatoes under cold running water to remove soil. Cut each potato into roughly even halves or quarters—aim for pieces about 3 inches across so they cook evenly in 20-25 minutes.
-
Place the cut potatoes in a large pot and cover with cold, salted water (use about 1 tablespoon of salt per gallon). Bring to a boil over high heat, then reduce to a gentle, rolling boil.
-
Cook for 20 to 25 minutes, until a fork pierces the largest piece with no resistance and the potato is completely soft throughout. Do not overcook—mushy potatoes won’t mash properly and will become gluey.
-
Drain the potatoes in a colander and spread them out on a clean kitchen towel. Let them sit for 3 to 4 minutes to release residual moisture. This step is critical for crispiness later.
Dry the Potatoes in the Oven:
-
While the potatoes are cooking, preheat the oven to 350°F and position the rack in the center.
-
Spread the drained potatoes on a baking sheet in a single layer. Drizzle lightly with 1 teaspoon of neutral oil and sprinkle with about ¼ teaspoon of salt. Toss gently to coat.
Advertisements -
Roast for 12 to 15 minutes, until you can see faint steam rising from the potatoes and the edges begin to look slightly opaque. You’re removing internal moisture, not browning them. This roasting step is what creates potatoes dry enough to get crispy later.
-
Remove from the oven and let cool for 3 to 4 minutes until safe to handle.
Make the Brown Butter:
-
While potatoes are roasting, melt 6 tablespoons of butter in a small saucepan over medium heat. Let it sit without stirring for 1 to 2 minutes after melting, then watch carefully.
-
The butter will foam and crackle as water evaporates. The milk solids will gradually sink to the bottom and turn from white to light golden to deep brown. This takes 6 to 8 minutes total.
-
When the solids are a rich, nutty golden-brown color and smell deeply caramelized (but not burned), pour the entire contents into a small bowl, including all the brown solids at the bottom. Set aside to cool for 2 to 3 minutes. Watch carefully—brown butter goes from perfect to burned very quickly.
Warm the Cream:
- Pour 1 cup of heavy cream into another small saucepan and heat over medium heat until steaming—about 160 to 170°F if you have a thermometer, or too hot to touch. Do not boil.
Mash and Combine:
-
Once the roasted potatoes have cooled slightly, press them through a ricer into a large bowl, working quickly while they’re still warm. If you don’t have a ricer, use a box grater on the finest setting, pressing gently.
-
Add about half of the warm cream to the riced potatoes. Using a wooden spoon, fold gently—do not beat or stir vigorously. Overworking the potatoes develops gluten in the starch and creates a gluey, stiff texture instead of light and fluffy.
Advertisements -
Fold in about half of the cooled brown butter. Taste and season with salt (probably 1½ to 2 teaspoons of kosher salt) and black pepper.
-
Continue folding in the remaining cream in small additions, tasting between each addition. Stop when you reach your preferred texture—silky and creamy but still holding its shape on a spoon. Fold in the remaining brown butter.
-
Taste once more and adjust salt and pepper. If using nutmeg, fold in about ⅛ teaspoon—just enough to taste as a background note.
Create the Crispy Crust:
-
Transfer the mashed potatoes to a serving bowl or divide among individual plates. Let rest for 2 to 3 minutes so the potatoes set slightly.
-
Heat 1 to 1½ tablespoons of butter in a heavy-bottomed skillet (cast iron is ideal) over medium-high heat until foaming and just starting to brown. The butter should be nutty and fragrant, not smoking.
-
If serving family-style, take one large spoon of the mashed potatoes and carefully place it on the hot butter in the skillet. Let it sear for about 1 to 2 minutes without moving it, until the bottom is golden and crispy. Using a spatula, slide it onto the serving bowl and repeat with additional spoonfuls, building a nest of crispy potatoes on top of the creamy base.
-
Alternatively, if plating individually, place the potatoes in serving dishes, then use the hot butter to crisp a spoonful and place it on top of each serving just before serving.
-
Garnish with fresh chives if desired. Serve immediately while the crispy portions are still hot and crunchy.
Common Mistakes That Ruin the Texture
The number one mistake is skipping the roasting step or rushing it. You need those potatoes genuinely dry, or they’ll steam in the pan instead of crisping. If your finished potatoes refuse to crisp no matter what you do, it’s because residual moisture is preventing browning. The roasting step fixes this entirely—don’t skip it.
The second mistake is overmixing. Mashed potatoes are sturdy vegetables, but if you treat them like you’re making whipped cream, the starch begins to develop gluten, and you end up with a dense, gummy texture instead of light and fluffy. Use a ricer or the gentlest hand-mashing approach. When adding cream and butter, fold rather than stir. One good fold is often enough.
Temperature mistakes affect the final result too. If your cream is too cold when it hits the hot potatoes, it can seize up or not incorporate smoothly. If your butter is too hot, it can break apart. Warming your cream separately and letting your brown butter cool just slightly prevents both problems.
Some people try to use low-fat cream or milk, thinking it’ll still work. It won’t. You need actual heavy cream with enough fat to emulsify properly and coat every potato cell with richness. That’s where the silky texture comes from. Half-and-half and milk are too thin; they’ll make watery, weak potatoes.
Finally, people sometimes salt too aggressively during cooking and then again during mashing, ending up with over-salted potatoes. Season the cooking water generously, then taste after adding cream and brown butter. You’ll probably need a bit more salt at that point, but proceed carefully.
Flavor Variations and Creative Add-Ins
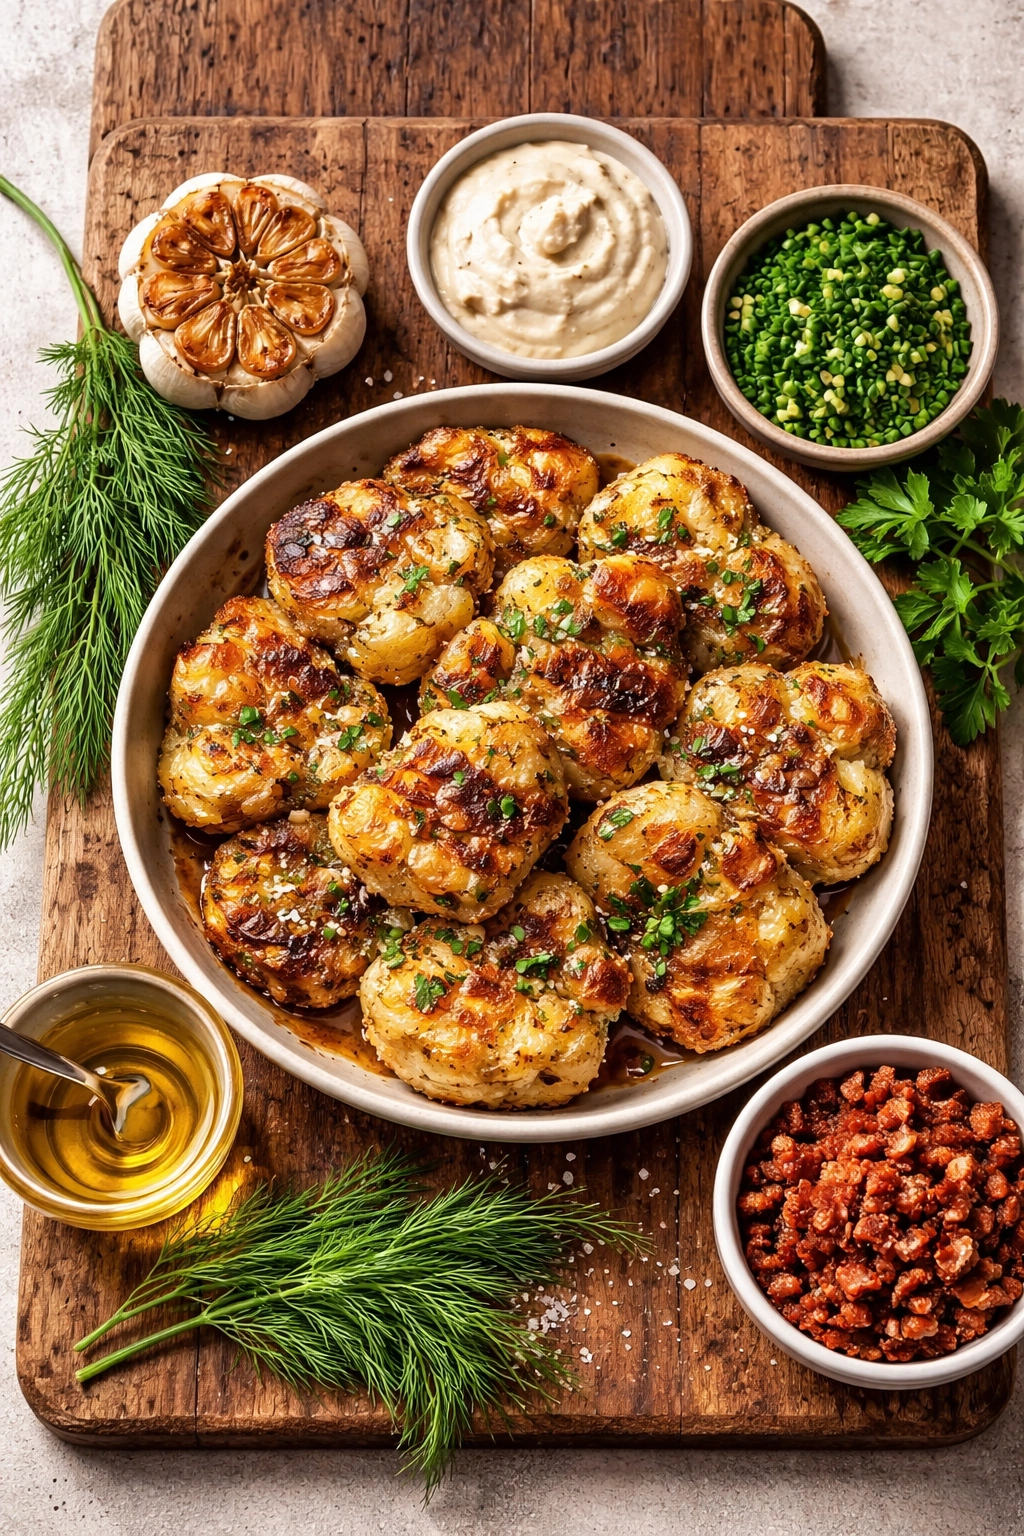
Once you’ve made the basic version a few times, the fun part is making it your own. For a roasted garlic version: Roast 4 to 5 whole garlic cloves alongside the potatoes during the drying step. Once softened, squeeze them out of their skins and fold the pulp into the potatoes before adding cream. The garlic turns sweet and mild, almost nutty.
For a horseradish kick: Fold in 1 to 2 tablespoons of fresh horseradish (finely grated, not the jarred kind) or prepared horseradish after the potatoes are nearly done. This adds brightness and a subtle spice that’s especially good with roasted beef.
For herb-forward potatoes: Fold in a combination of fresh herbs after everything else is combined—about 2 tablespoons total of finely chopped chives, parsley, and tarragon, or whatever fresh herbs you have on hand. Fresh dill is particularly good with these.
For a truffle version: Add just ½ teaspoon of truffle oil (not the cheap stuff) folded in at the very end. Truffle oil is intense, so less is more. You want to taste “buttery with a hint of truffle,” not “truffle oil.”
For loaded-potato style: Fold in crispy bacon bits, sharp cheddar (about ⅓ cup grated and stirred in after everything else), sour cream (about 2 tablespoons for tanginess), and fresh chives. This turns a side dish into something that could be a main course on its own.
For a thyme and gruyère version: Fold in 1 tablespoon of fresh thyme (or 1 teaspoon dried), ⅓ cup of grated gruyère cheese, and a pinch of cayenne. The gruyère gets even more complex with the brown butter.
The key with any variation is to fold it in after the base is complete, tasting as you go. You don’t want to overwhelm the potatoes—their flavor is the foundation.
Make-Ahead and Storage Strategies
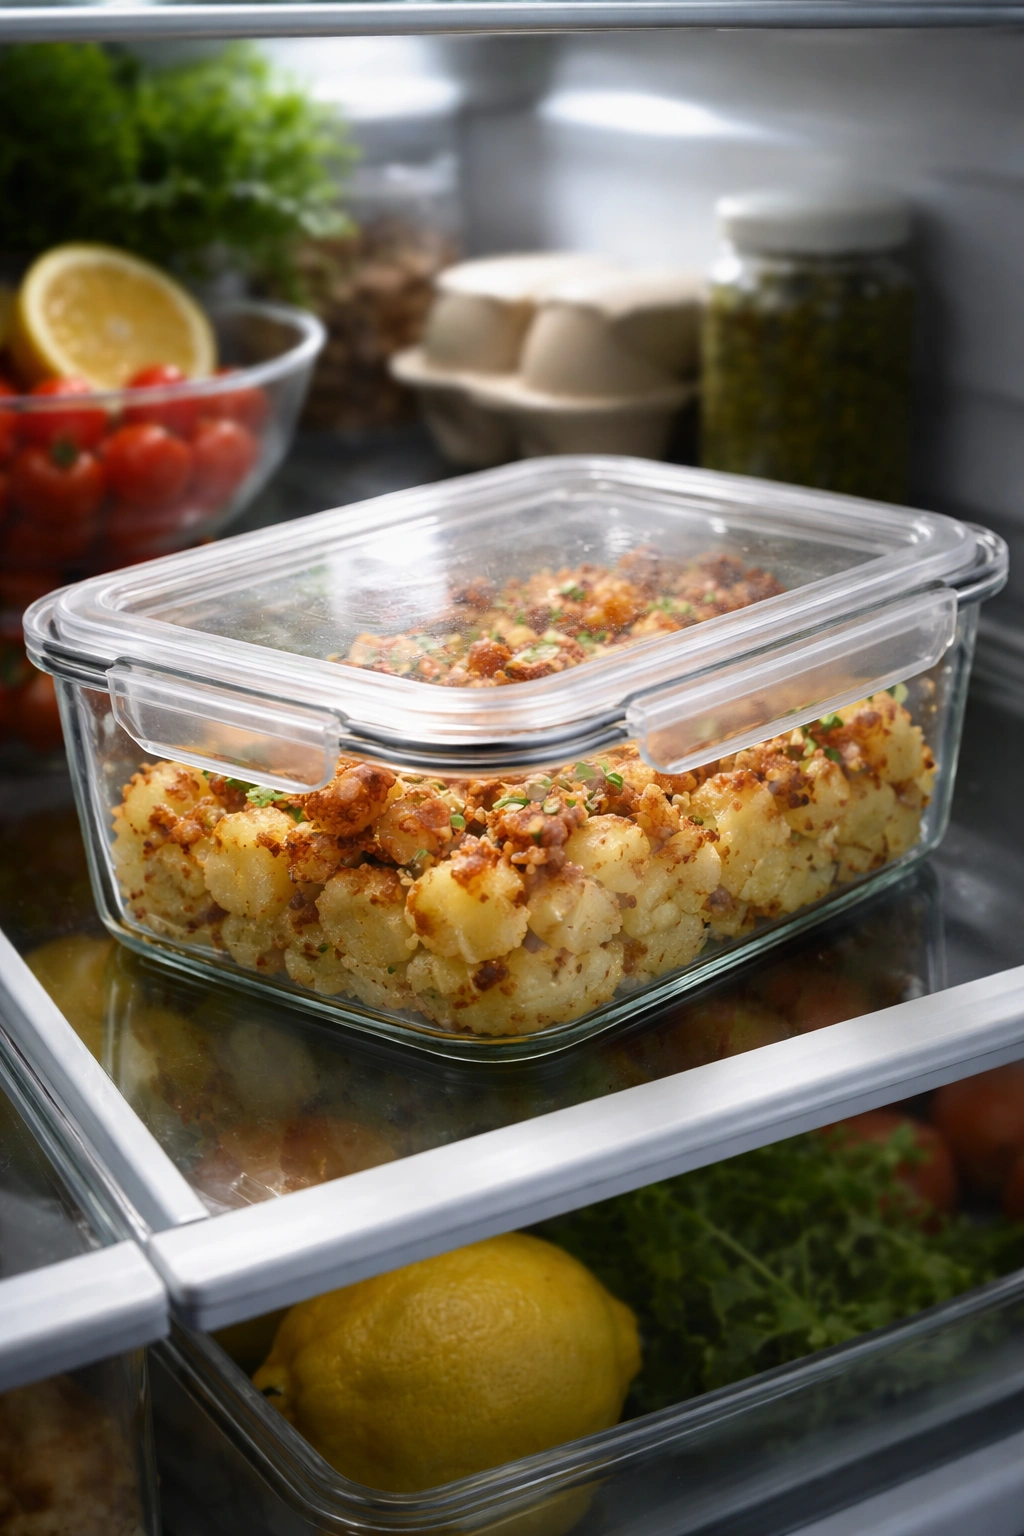
These potatoes taste best served immediately, particularly because the crispy crust on top is part of the whole appeal. However, they do reheat reasonably well if you need to plan ahead.
Make-ahead approach: You can prepare the potatoes completely up to 4 hours ahead, then refrigerate them in a covered container. When you’re ready to serve, reheat gently. Place them in a saucepan over low heat, stirring occasionally and adding a splash of warm cream if they’ve thickened too much. Once they’re heated through and creamy again, finish them with the crispy crust step. The texture won’t be quite as light as freshly made—the starch settles and compacts as it cools—but they’ll still taste great.
For overnight storage: Cover the leftover potatoes and refrigerate them. They’ll keep for 3 to 4 days. To reheat, place them in a saucepan over low heat, stirring occasionally and adding cream or butter to loosen them back to creamy consistency. You can crisp a portion in the skillet if you want, but honestly, cold mashed potatoes are better suited to other applications like hash browns (crisp them in a skillet with more butter until golden on both sides) or potato cakes (shape into patties and pan-fry).
Freezing: These aren’t ideal candidates for freezing because the cream-based mixture can separate when thawed. If you must freeze them, do so in an airtight container for up to 2 months. Thaw overnight in the refrigerator, then reheat gently with extra cream stirred in to restore the texture.
Best served: Immediately after making, while the crispy exterior is still crunchy and the interior is warm and creamy. If you’re cooking for a crowd and timing is tricky, you can make them up to an hour ahead and reheat gently just before serving, then add the crispy crust finish right before plating.
Pairing Suggestions and Serving Ideas
These aren’t delicate, refined potatoes that need to hide next to a subtle dish. They’re bold and buttery, and they stand up beautifully to rich meats and deeply flavored foods. Roasted beef is the classic pairing—especially a prime rib or ribeye where you want something luxurious and confident on the plate. The brown butter echoes the caramelization on the meat.
Duck pairs wonderfully too. The fattiness of duck matches the richness of these potatoes, and together they feel indulgent in the best way. Roasted chicken works too, particularly a bird you’ve finished with a final blast in a hot oven to crisp the skin.
Short ribs in red wine sauce or braised pork chops are perfect partners. Any braise or slow-cooked meat with a rich, savory sauce will be elevated by these potatoes underneath.
If you’re serving them at a holiday table, they pair beautifully with roasted turkey, particularly if you’re drizzling turkey pan gravy over them. Ham with a glaze is another excellent choice. They’re fancy enough for a dinner party but homey enough for a casual family Sunday dinner.
For non-meat occasions, consider them alongside roasted vegetables—Brussels sprouts, root vegetables, or roasted cauliflower. Fish can work too, but stick to richer, more flavorful varieties like salmon or halibut. A delicate white fish might get overwhelmed.
As a plating suggestion: place the mashed potatoes as the base of the plate, lean the protein against the potatoes or on top of them, and drizzle any pan sauce or gravy around everything. The buttery richness of the potatoes makes them excellent for soaking up sauces and gravies, so don’t be shy about pouring them on.
Final Thoughts
The effort you invest in these potatoes—the careful drying, the separate browning of butter, the gentle folding, the final pan-sear for crispiness—it all pays off in a side dish that tastes honestly better than the standard version. You’re not adding weird ingredients or using complicated techniques. You’re simply treating potatoes with respect and using heat strategically to create texture and concentrate flavor.
The best part is that once you’ve made them once and understand the process, they become less “special occasion” and more “whenever you actually want really good potatoes.” They’re the kind of dish that makes you feel like a confident cook, because you know exactly what you’re doing and why, and the results prove it.
Start with the basic version a few times until you own the technique completely. The moment you understand how the roasting creates dryness, how brown butter adds complexity, and why gentle folding matters, you’ll find yourself making your own variations. You might add herbs from your garden, or a cheese you’ve been curious about, or whatever feels right in the moment. That’s when you know you’ve really learned the recipe—when you can make it your own with confidence.