Banana pudding has this magical quality—it shows up at potlucks and suddenly becomes the dish everyone’s talking about, even when the table is loaded with casseroles and salads. There’s something about the combination of creamy custard, soft bananas, and those irresistible wafer cookies that just works, and the best part? You don’t need culinary school credentials to pull it off. The easiest versions still taste like you spent hours in the kitchen, which is exactly what makes this dessert a potluck hero.
The secret to an impressive banana pudding that won’t stress you out is understanding that this dessert actually wants to be simple. Unlike finicky desserts that demand precision and temperamental ingredients, a good banana pudding thrives on straightforward technique and quality basics. Whether you’re dealing with a crowded kitchen at the last minute or you want to prep something the day before, there’s an approach that’ll work for your situation. The recipes that look the most effortless are usually the ones built on solid fundamentals—not shortcuts, but the kind of smart technique that actually saves you time without compromising flavor.
What makes potluck banana pudding different from a fancy plated dessert is that it needs to travel well, hold up through setup and transport, and taste just as good at room temperature as it does fresh. That’s not a limitation—it’s actually freeing, because it means you’re working with a dessert that’s naturally forgiving. You’re not chasing perfection; you’re chasing satisfaction, and this dessert delivers that reliably every single time.
Why Banana Pudding Works as the Ultimate Potluck Dessert
Banana pudding earns its place at the center of dessert tables because it hits multiple marks at once. It’s familiar enough that everyone recognizes it, but interesting enough that people actively seek it out. More importantly, it’s genuinely hard to mess up—the structure of layered pudding, fruit, and cookies is inherently stable, which means it doesn’t collapse if it sits for a couple of hours or if someone jostles it during transport.
The pudding base itself acts as a binding agent that holds everything together literally and figuratively. Unlike cakes that dry out or fruit pies that get soggy, banana pudding actually improves as it sits. The flavors deepen, the textures meld slightly, and the whole thing becomes more cohesive. This means you can make it hours ahead without any real risk—and honestly, many people prefer it that way.
There’s also an element of pure comfort that transcends ingredient lists. Banana pudding tastes like home, like generosity, like someone took the time to make something good for the gathering. It’s not pretentious, which means nobody feels awkward eating seconds (or thirds). It’s indulgent without being heavy, which means even after a full meal, people still have room for it.
How This Version Stays Simple Without Sacrificing Flavor
This recipe cuts through unnecessary steps while keeping every element that makes banana pudding delicious. The pudding itself comes together in about 10 minutes—you’re not making custard from scratch with tempering eggs and constant whisking. You’re using instant vanilla pudding mix, which sounds like a shortcut but actually delivers better results for a crowded dessert table because it’s foolproof and tastes genuinely good.
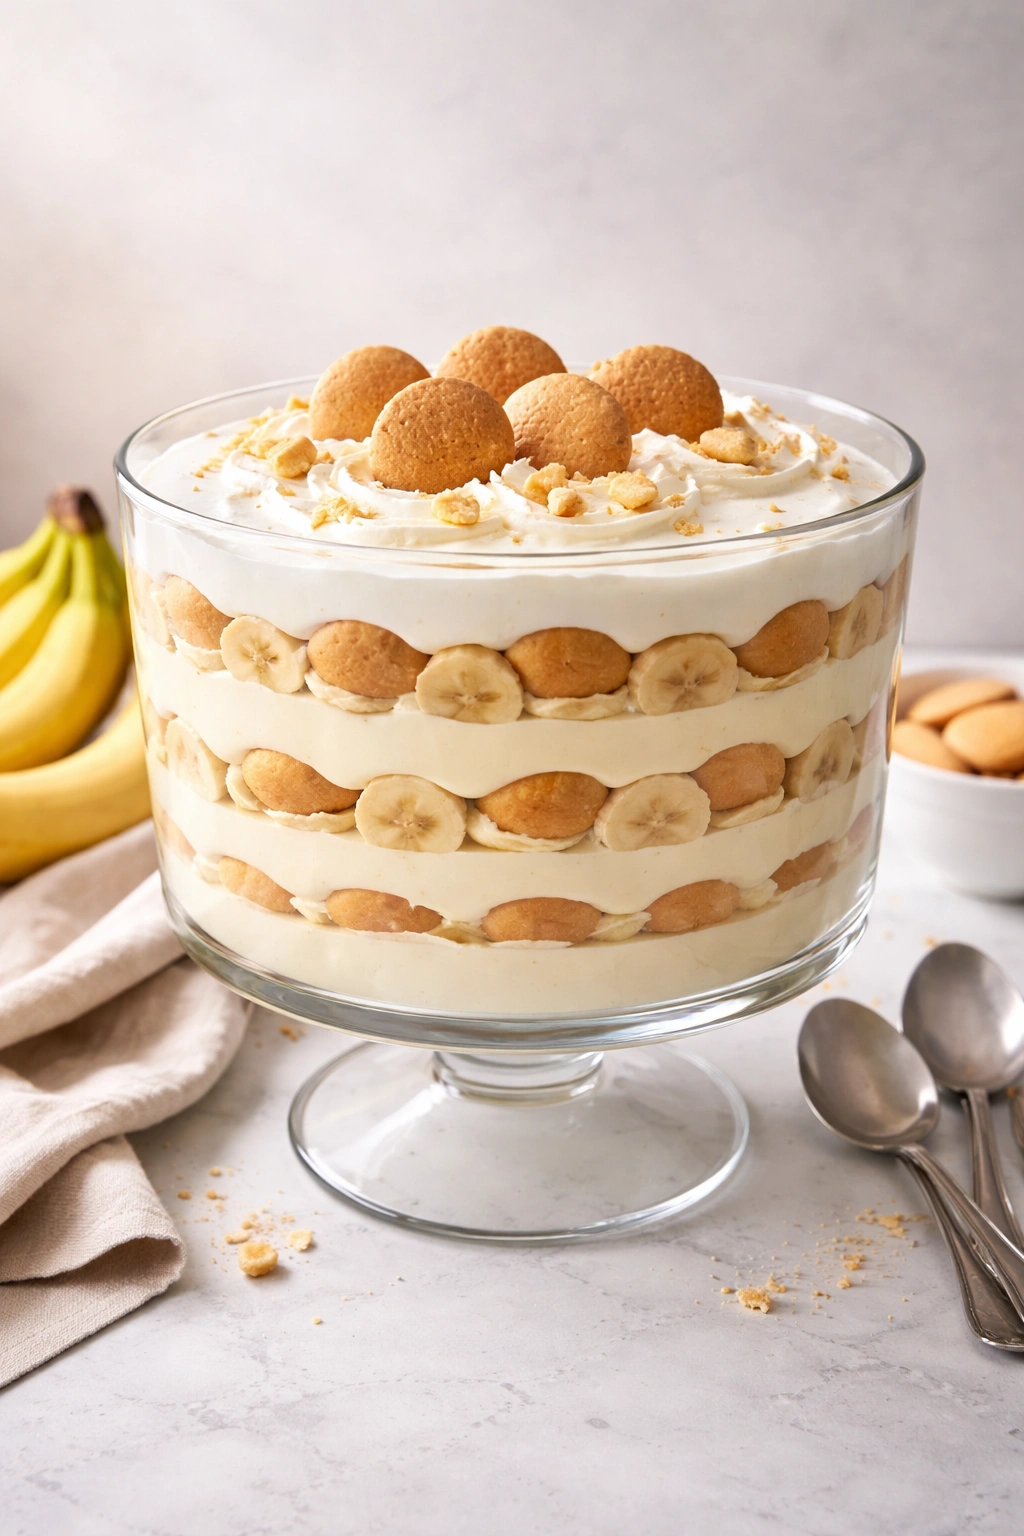
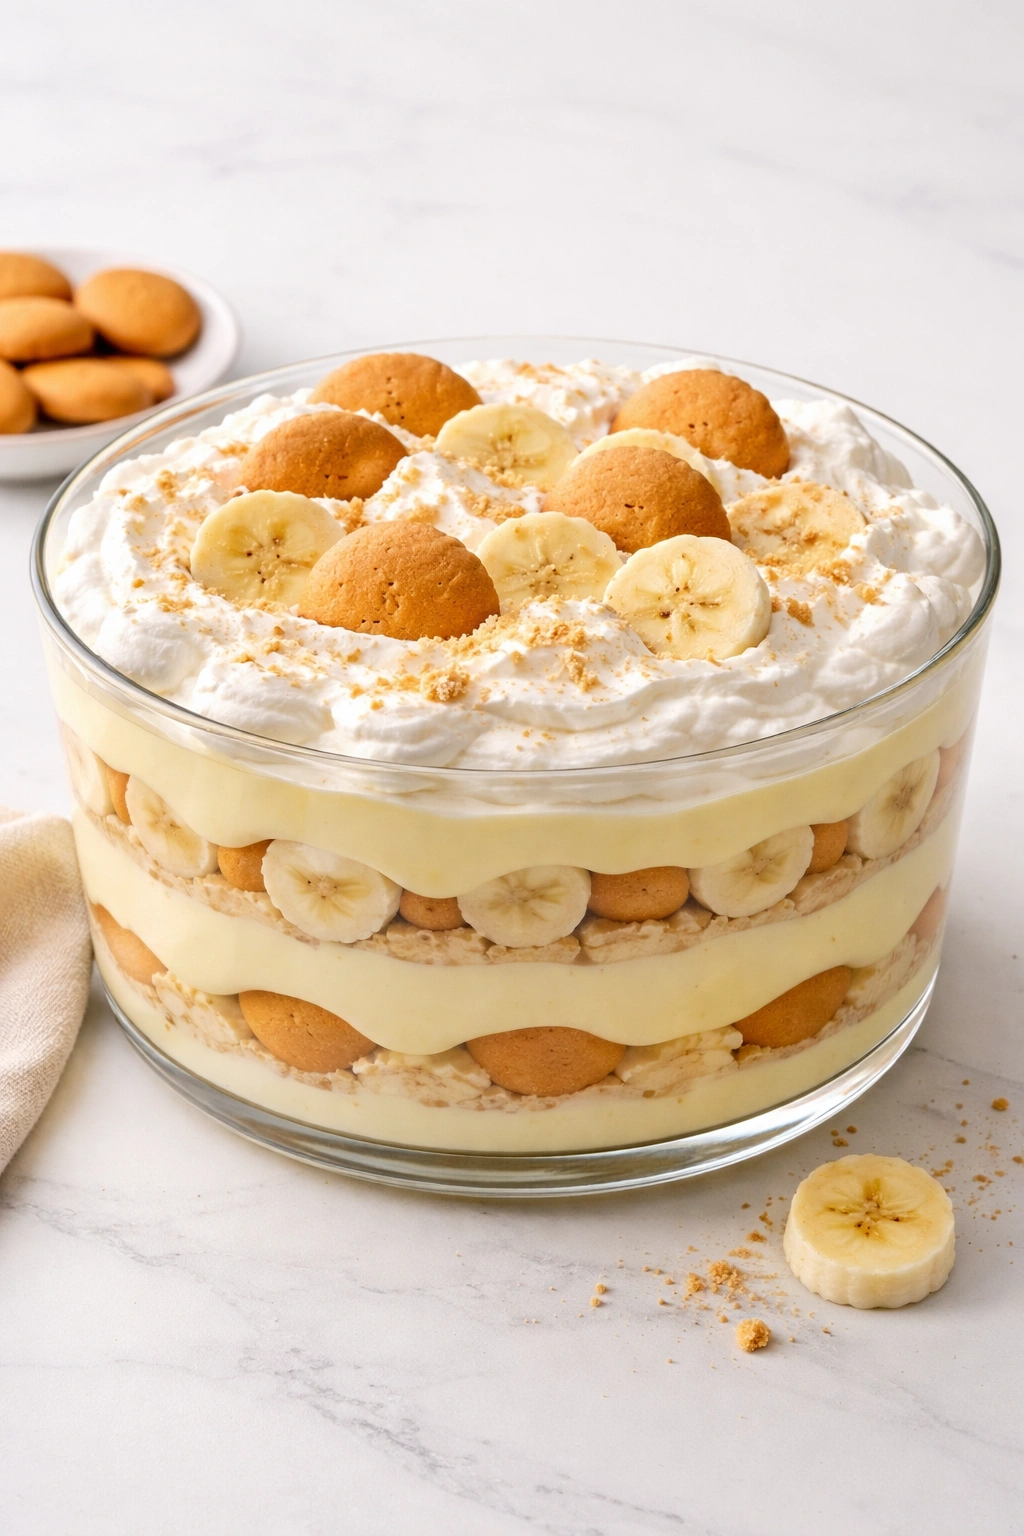
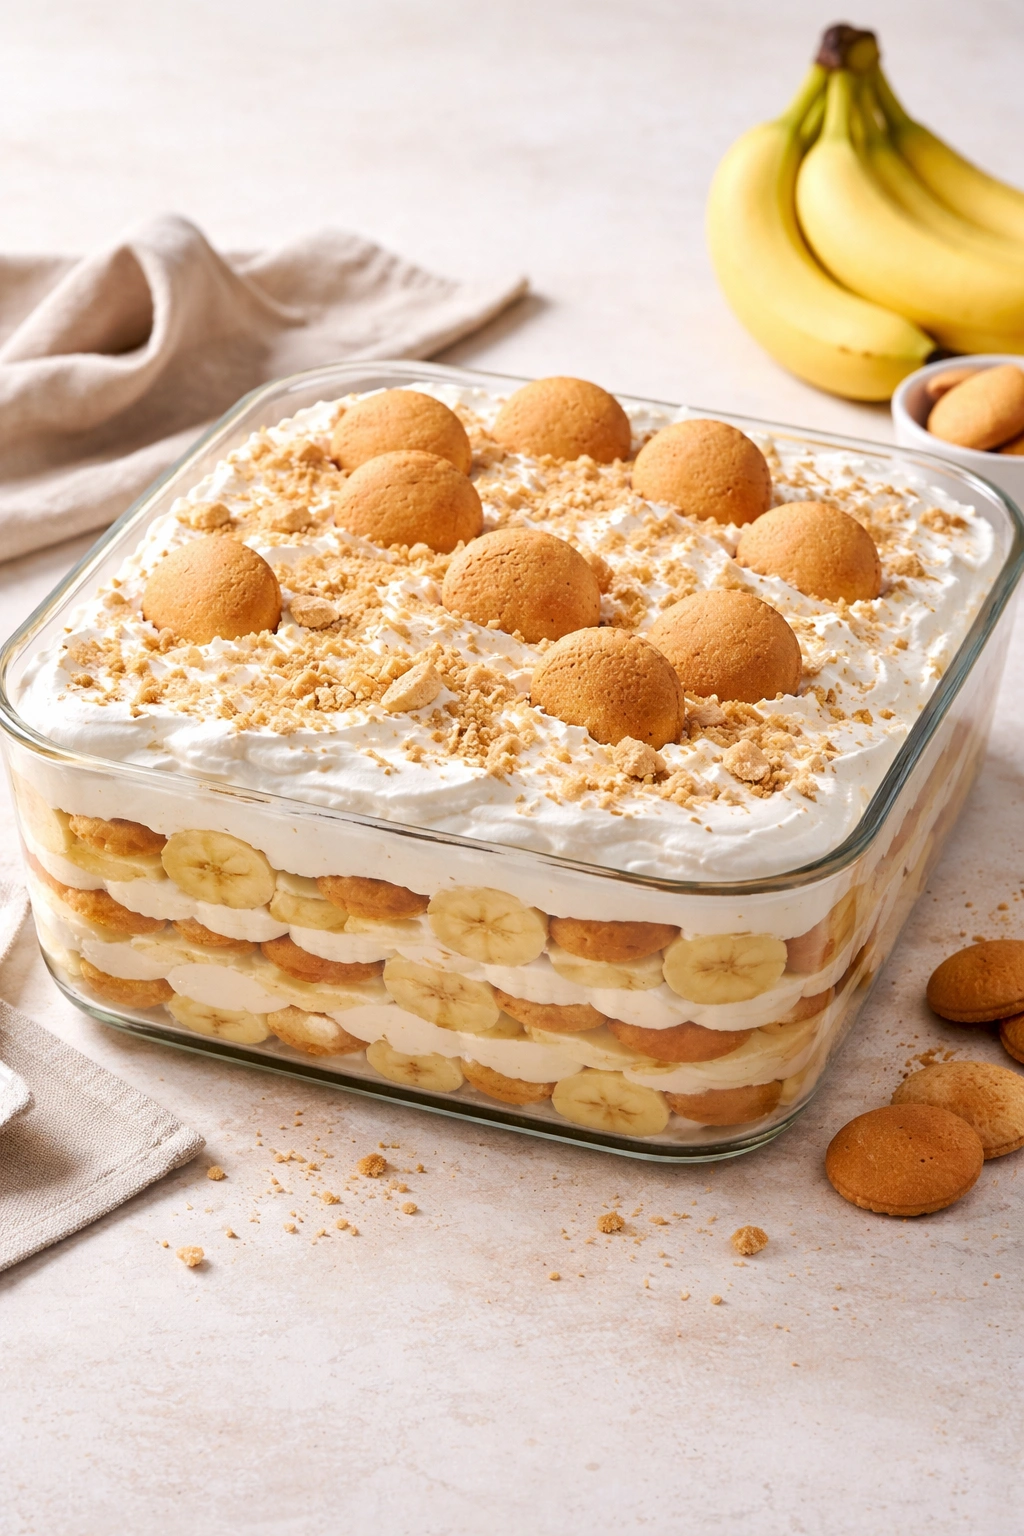
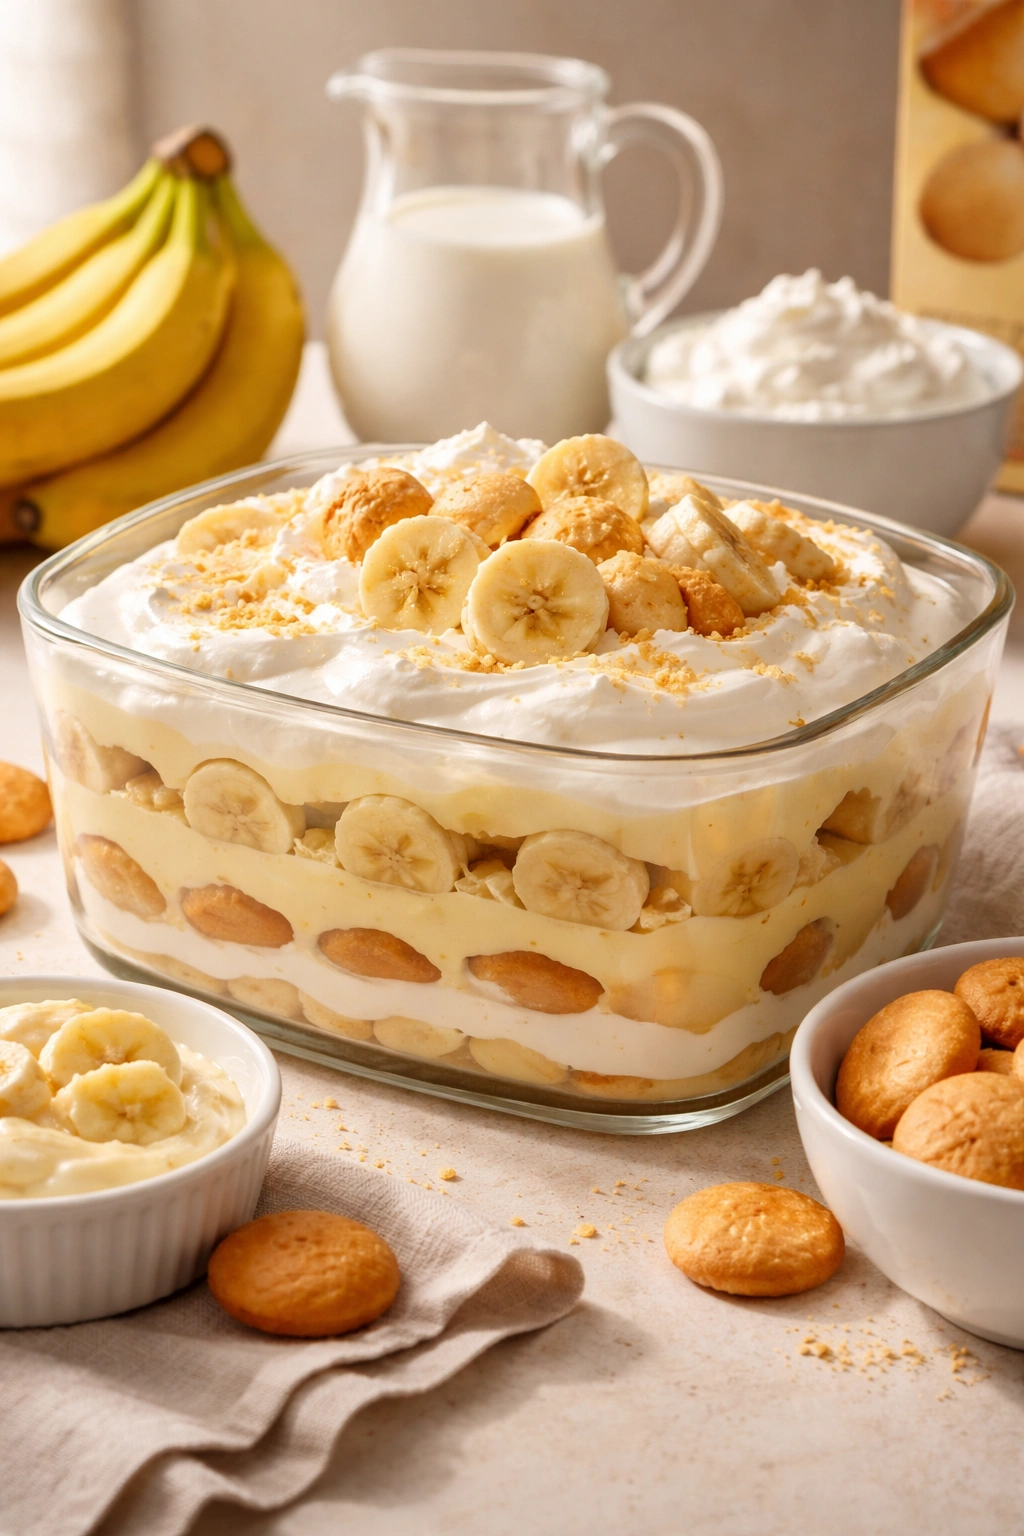
The genius move is in the layering. Instead of assembling individual portions, you’re building one magnificent dish that feeds a crowd. Bananas go in raw—no cooking, no oxidation worries if you time it right. The wafers soften naturally as they absorb moisture from the pudding, reaching that perfect texture that’s soft enough to cut with a spoon but still present enough to give you something to bite.
Real whipped cream makes a massive difference here, both in flavor and in the visual appeal of the final dish. Store-bought whipped cream works in a pinch, but taking two minutes to whip heavy cream with a little sugar and vanilla creates something noticeably richer and more delicious. It also holds up better during transport than the aerosol versions.
Banana Pudding for Potlucks: What You Need to Know
Yield: Serves 12 to 14 people | Makes one 9×13-inch dish
Prep Time: 20 minutes (hands-on active time)
Cook Time: 10 minutes (chilling time only, no baking)
Total Time: 30 minutes active + 2 hours chilling (or overnight for best results)
Difficulty: Beginner — no baking involved, no special equipment required, and the steps are straightforward even for someone making this for the first time. The recipe relies on assembly and timing more than technique.
Make-Ahead Option: This dessert actually improves if made up to 24 hours ahead. Cover it well and refrigerate. Transport in its baking dish wrapped in foil for easy serving at the venue.
What You’ll Need for the Perfect Banana Pudding
For the Pudding Base:
- 2 (5.1-ounce) boxes instant vanilla pudding mix
- 3 cups whole milk (cold)
- 1 teaspoon pure vanilla extract
- ¼ teaspoon fine sea salt
For the Assembly:
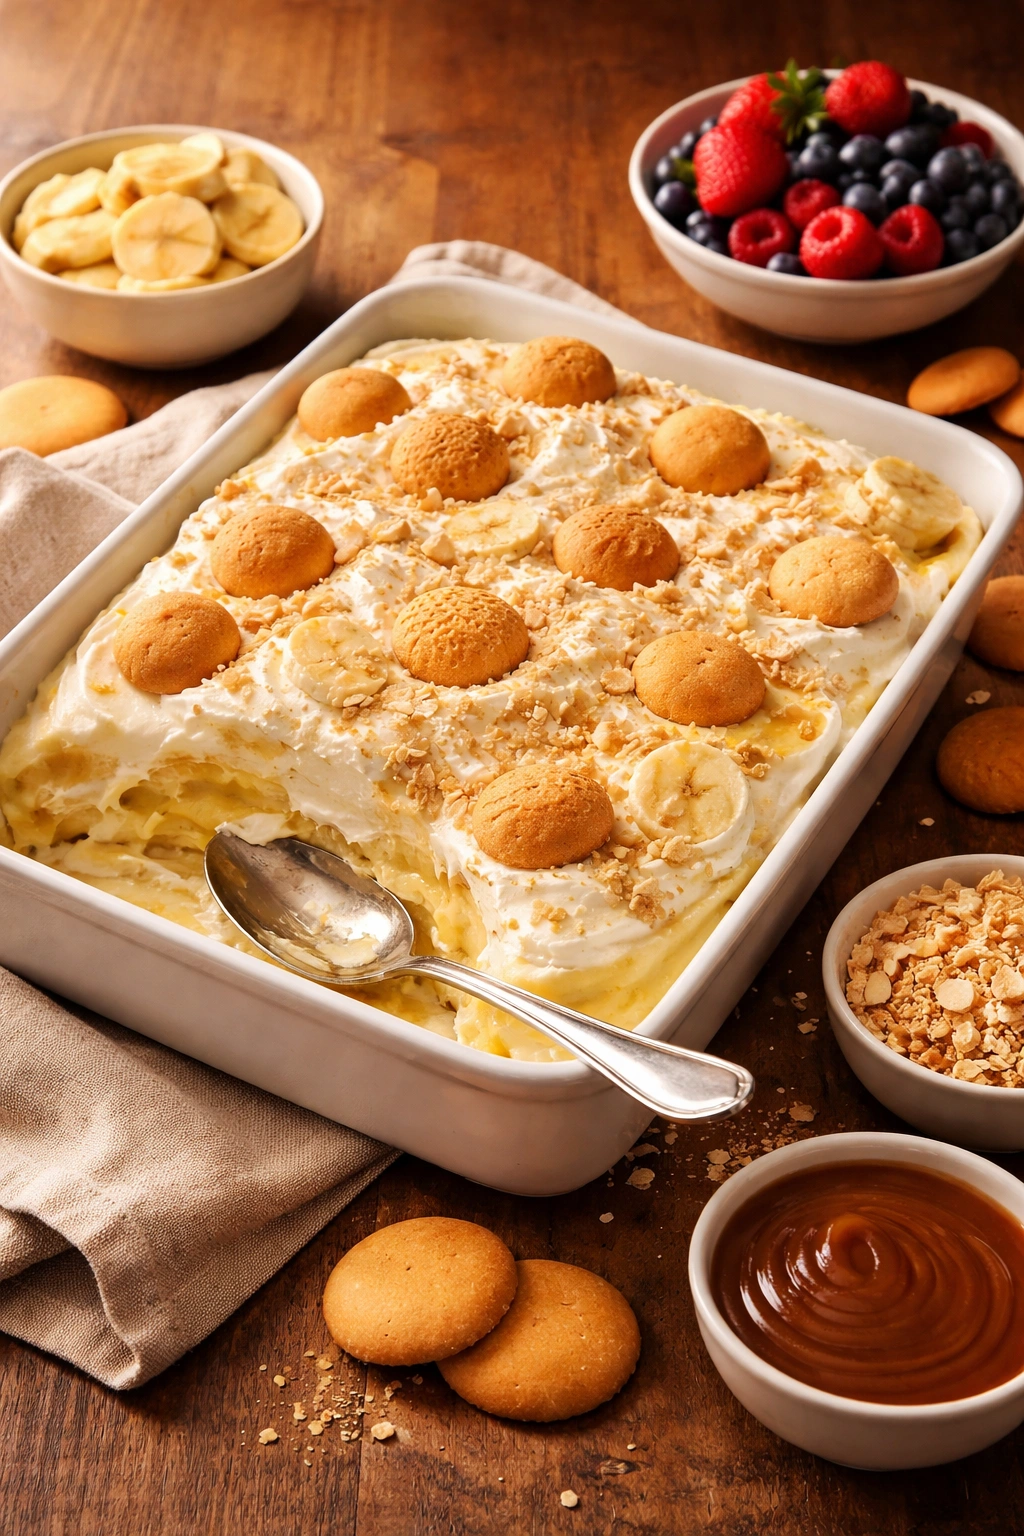
- 1 (12-ounce) box vanilla wafer cookies (about 48 cookies)
- 5 to 6 medium bananas, ripe but still firm (not soft or heavily spotted)
- 2 cups heavy whipping cream (cold)
- 3 tablespoons granulated sugar
- ½ teaspoon pure vanilla extract
- Pinch of fine sea salt
- 2 tablespoons powdered sugar (for garnish, optional)
Optional Garnish:
- Handful of extra vanilla wafers, crushed lightly
- Extra banana slices for the top
- Extra whipped cream piped around the edges
Step-by-Step Instructions for Perfect Assembly
Prepare the Pudding:
-
Pour the cold milk into a large mixing bowl. Add both boxes of instant pudding mix and whisk vigorously for exactly 2 minutes, until the mixture is smooth and has thickened slightly — you want to see no visible lumps of dry pudding powder. The mixture will continue to thicken as it sits.
Advertisements -
Whisk in the vanilla extract and salt to complete the pudding base. Taste a tiny spoonful (before adding bananas) to check the sweetness — it should taste pleasantly sweet and vanilla-forward. Set the pudding aside while you prepare the other components.
Make the Whipped Cream:
-
Pour the cold heavy cream into a clean mixing bowl. Using an electric mixer (hand mixer or stand mixer), beat on medium speed until soft peaks begin to form — this takes about 1 to 1½ minutes. You’ll see the cream go from liquid to fluffy, and when you lift the beaters, the cream should curl over softly at the tips without holding stiff peaks yet.
-
Add the sugar, vanilla extract, and salt. Continue beating on medium speed for another 30 to 45 seconds, until stiff peaks form — when you lift the beaters now, the cream should stand up straight without drooping. Do not overbeat, or you’ll end up with sweet butter. Stop as soon as the peaks stand firm.
-
Set the whipped cream aside in the refrigerator while you assemble the pudding layers.
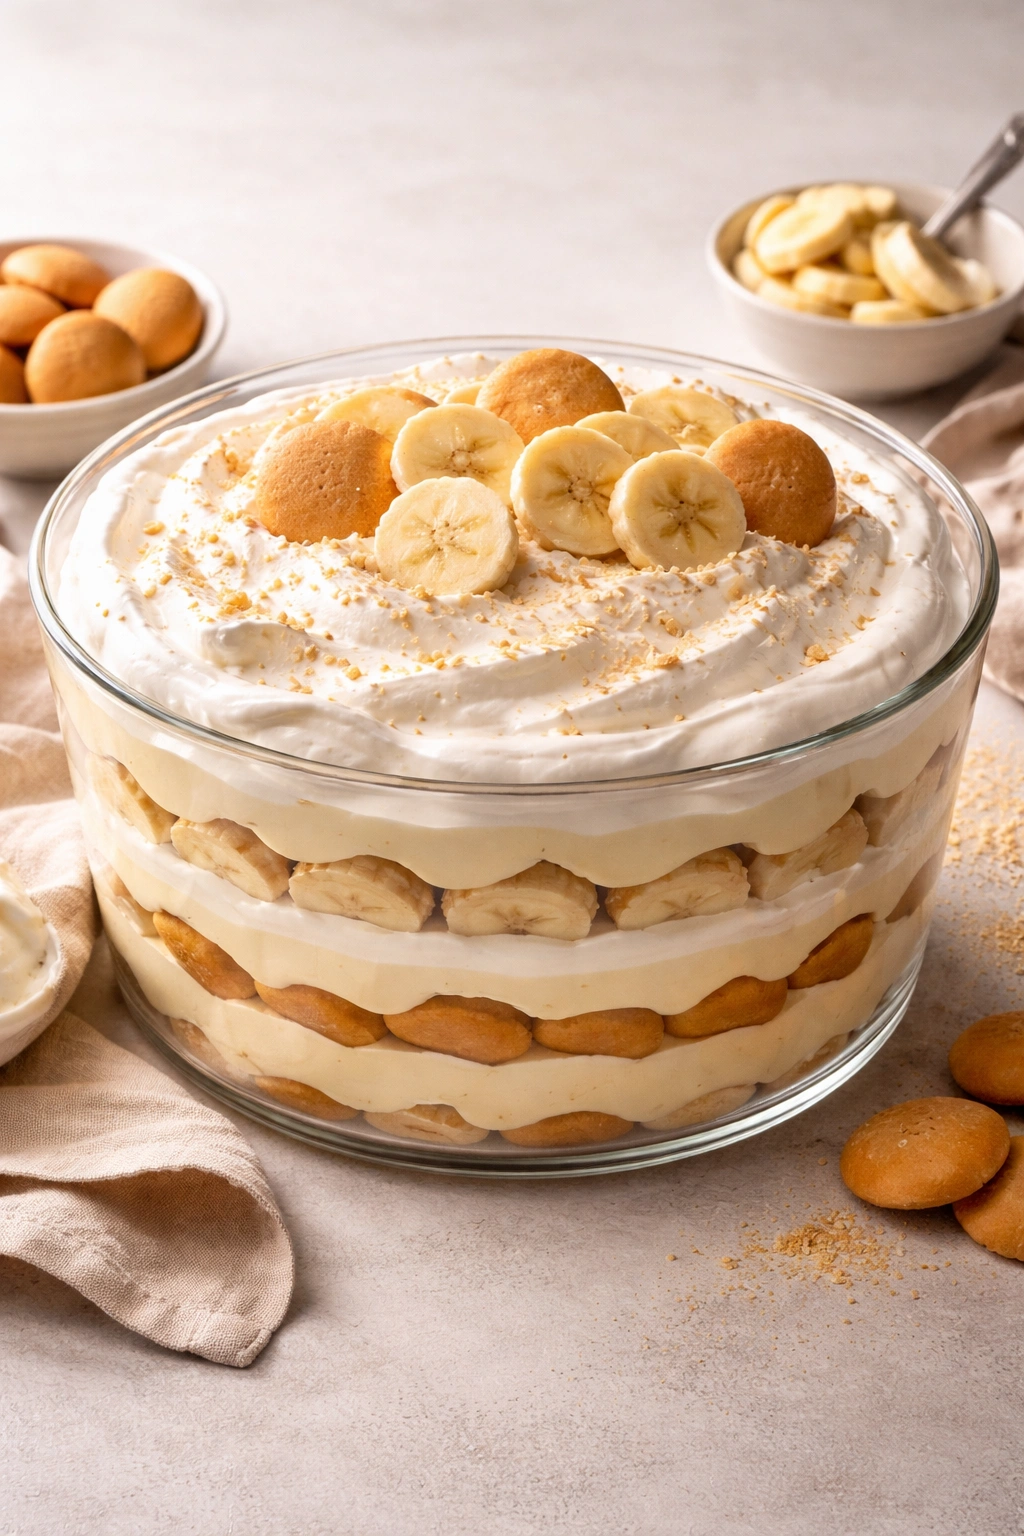
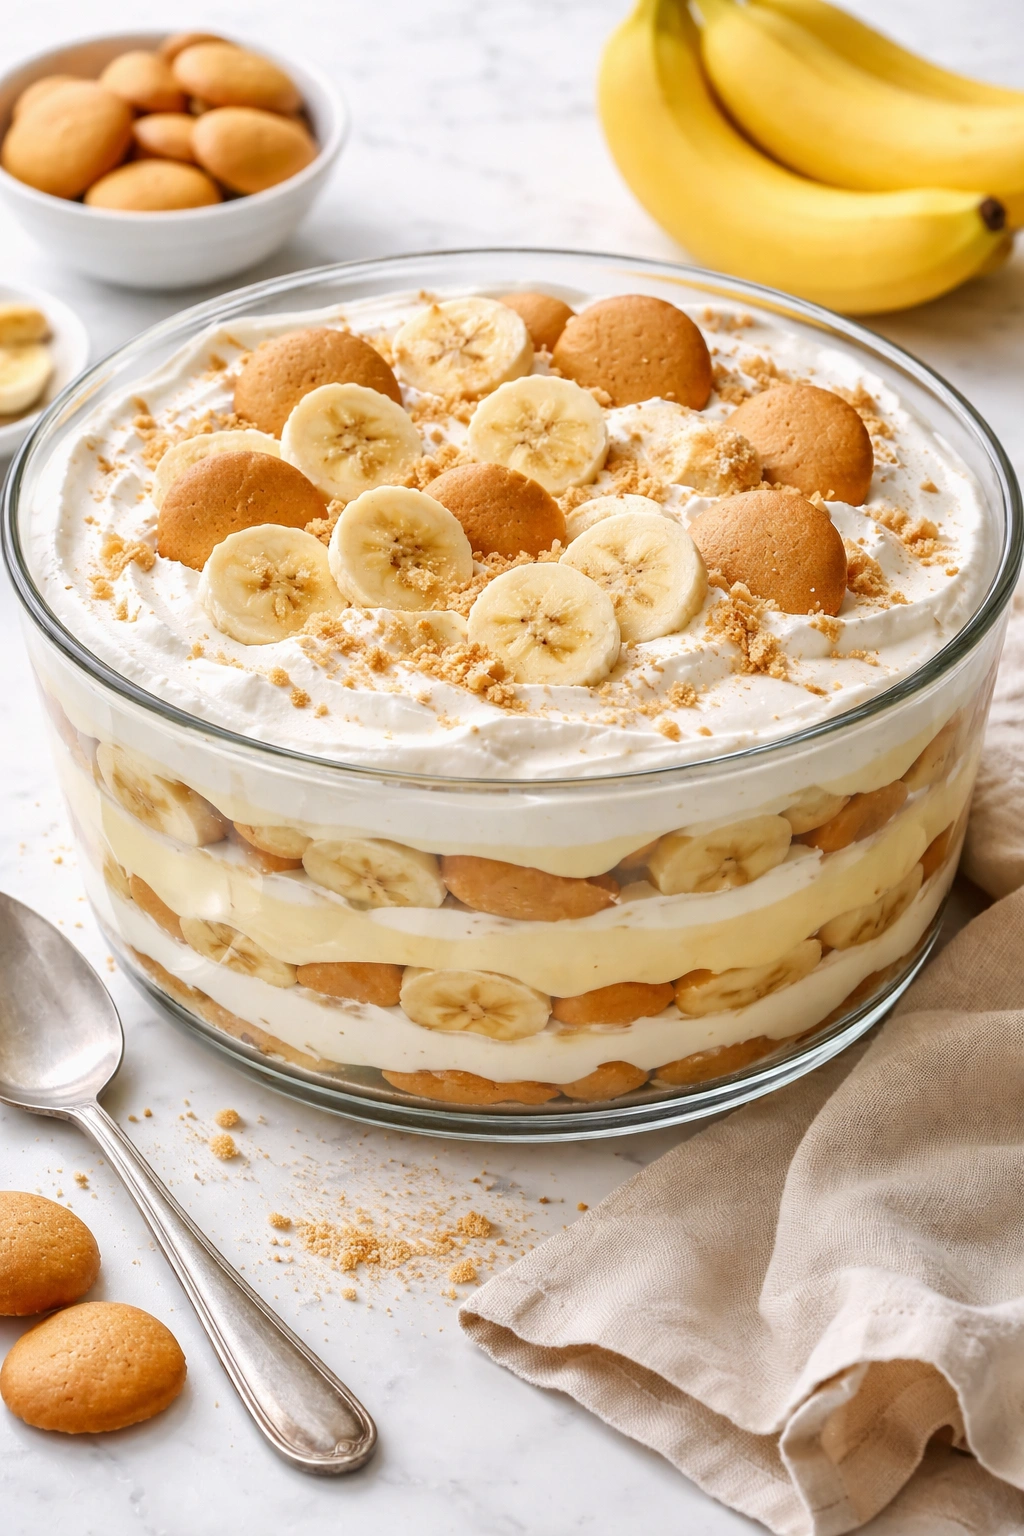
Assemble the Pudding Dish:
-
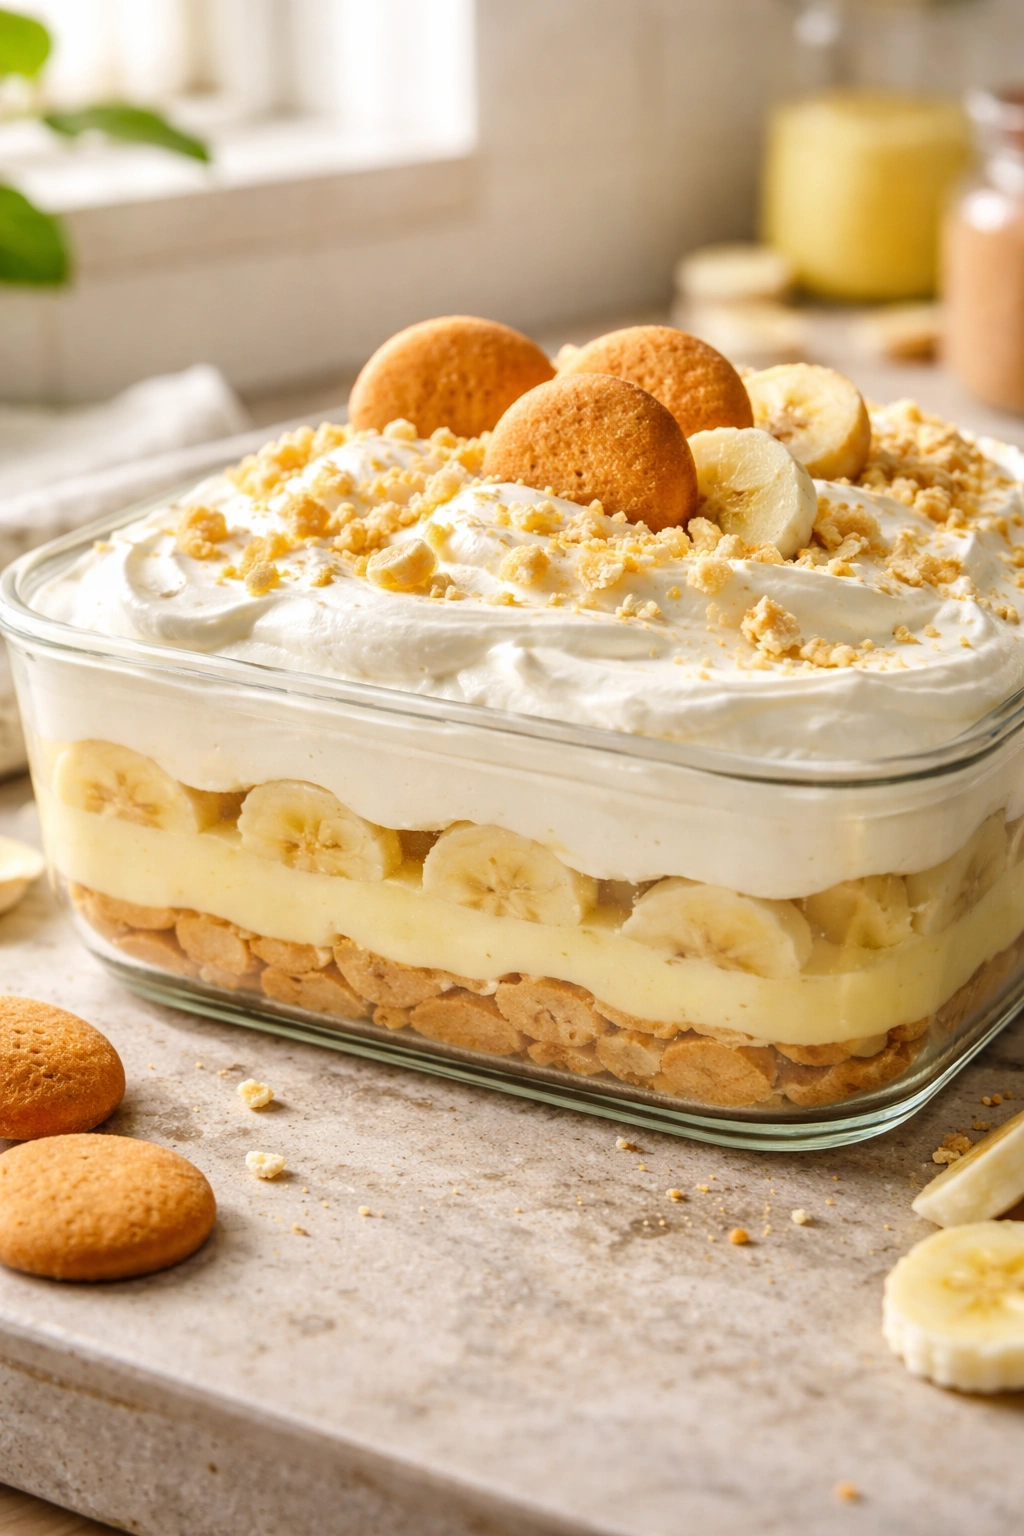
Pour about 1 cup of the pudding into the bottom of a 9×13-inch baking dish, spreading it in an even layer with a spatula. This creates the foundation that anchors all the layers above.
-
Arrange a layer of vanilla wafers directly over the pudding, breaking them as needed to fit tightly. You’re aiming for complete coverage but not overlapping the cookies too much — think of it like creating a tile pattern rather than shingling them. You’ll use roughly 16 to 18 cookies for this first layer.
-
Slice 2 to 3 of the medium bananas into ¼-inch-thick rounds. Arrange the banana slices in a single layer over the wafer cookies, covering as much of the surface as possible without pressing down. These bananas will release juice that softens the cookies below, creating the signature pudding texture.
-
Spread another cup of pudding over the banana layer, smoothing it gently with a spatula so the pudding fills in around the bananas and wafers. Work slowly to avoid pushing the wafers out of place or mashing the banana slices.
Advertisements -
Repeat the layering sequence: another layer of wafers (16 to 18 cookies), then banana slices from 2 to 3 more bananas, then another cup of the remaining pudding. You should have enough ingredients for exactly three distinct layers, which creates the ideal balance of flavors and textures.
-
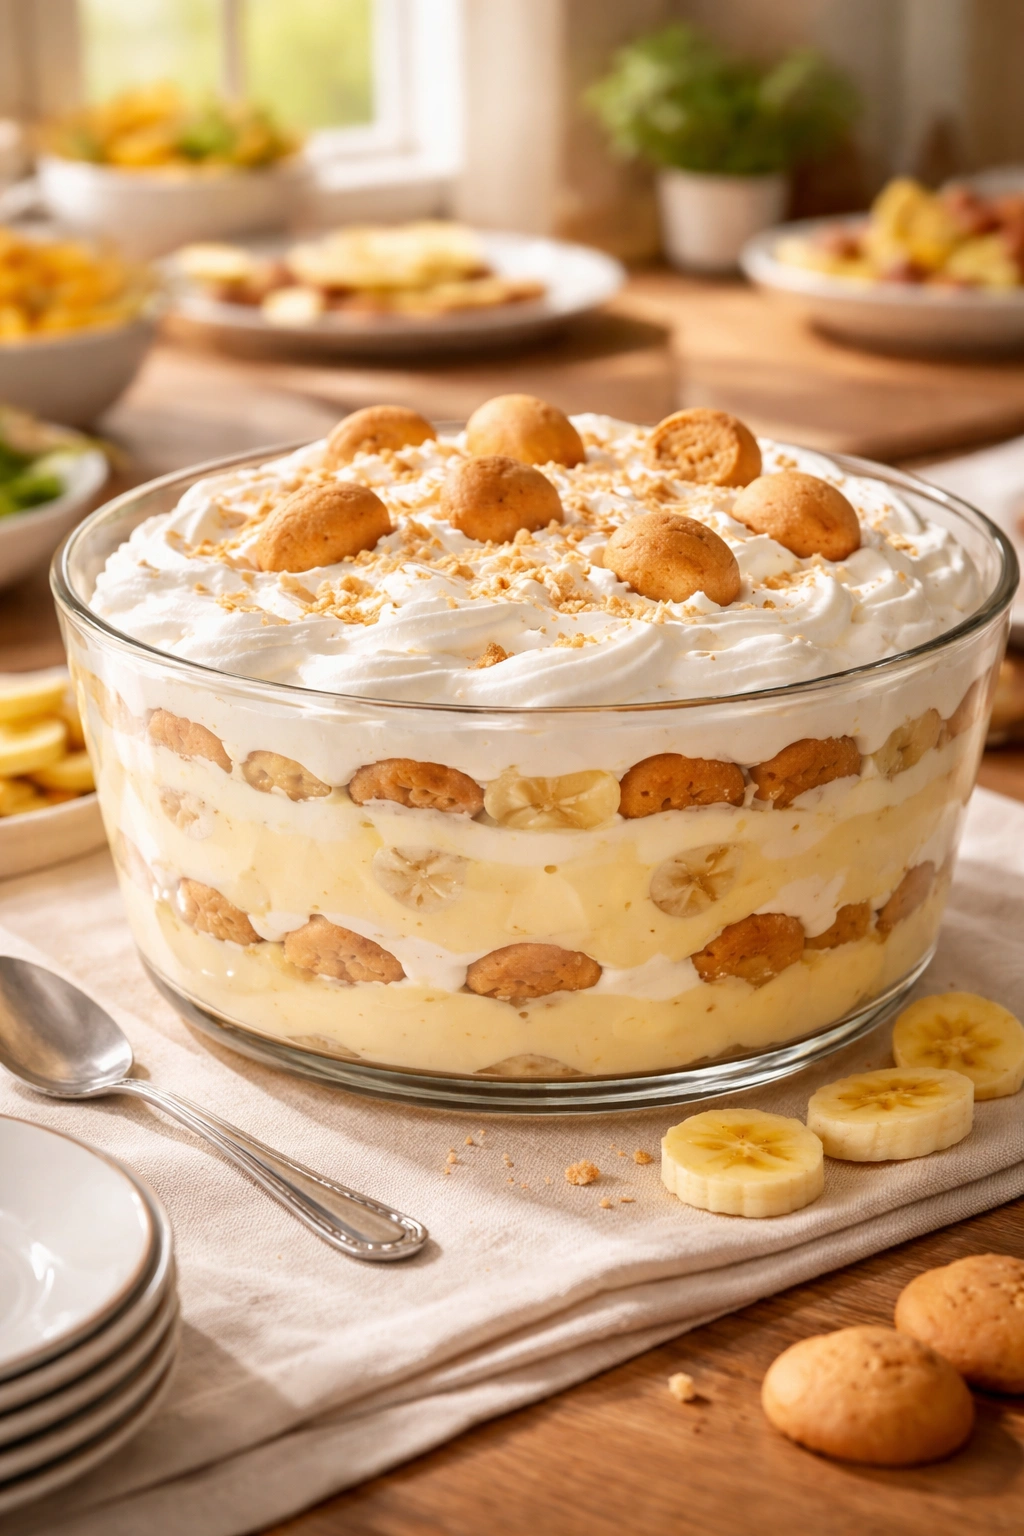
Spread the whipped cream in a smooth, even layer over the very top of the pudding, making sure to seal in all of the pudding and banana layers beneath. This creates both a flavor layer and a moisture barrier that helps everything hold together beautifully.
Finish and Chill:
-
If using optional garnishes, crush a handful of extra vanilla wafers into roughly pea-sized pieces and scatter them over the top of the whipped cream. Arrange thin banana slices over the whipped cream if desired, though this is purely decorative since these bananas are for looks, not structure — they’ll soften as the pudding sits.
-
Cover the baking dish tightly with plastic wrap and refrigerate for at least 2 hours before serving. Ideally, make this the night before your potluck, which gives all the layers time to meld beautifully and the wafers to soften to their perfect, slightly yielding texture.
The Secrets to Potluck-Perfect Banana Pudding
Timing your banana slicing is the single biggest factor in preventing browning and keeping the pudding looking fresh when you arrive at the potluck. Slice your bananas no more than 30 minutes before assembling the pudding—they’ll brown quickly once exposed to air. If you’re making this the night before and browning concerns you, slice the bananas just before assembling the top layer, letting the ones inside the pudding stay protected.
The temperature of your ingredients matters more than you’d think. Cold milk helps the pudding set faster and more reliably, and cold heavy cream whips up faster and holds its structure better than room-temperature cream. Pull your milk and cream from the fridge right before you start assembling—don’t let them sit out while you’re preparing other components.
Cookie choice impacts texture profoundly. Vanilla wafers are the traditional choice for good reason—they soften to a tender, cake-like texture without dissolving completely. Nilla wafers specifically work beautifully because they have just enough structure to hold up during transport but soften reliably in the pudding. If you prefer a firmer texture, use the cookies straight from the box. If you like them softer and more integrated, crush some slightly before layering them in.
The pudding-to-cookie ratio determines whether your final dessert is creamy or dry. Too little pudding and you get a crumbly, unpleasant texture. Too much and it becomes more of a soup. This recipe hits the balance perfectly—three layers of pudding with two complete layers of cookies and bananas means every bite includes all the elements in ideal proportion.
Bananas release juice as they sit, and that juice is actually your friend. It combines with the pudding to create a silky texture and adds subtle banana flavor throughout the dish. This is why making it ahead works so well—the flavors marry, and the texture becomes more cohesive than if you served it immediately.
Adapting This Recipe for Your Specific Situation

If you prefer a richer pudding: Substitute half the milk with heavy cream. This creates a denser, more luxurious texture that feels less like a summer dessert and more like an indulgent, decadent treat. The pudding will set slightly thicker, so whisk it thoroughly to prevent lumps.
If you need to transport it: Keep the pudding in its baking dish, cover it tightly with foil, and place it on a flat surface in your car. It travels beautifully and is easy to serve directly from the dish—no separate serving dishes needed. Place a damp kitchen towel underneath the baking dish on the serving table to keep it stable.
For a chocolate version: Swap the vanilla pudding for chocolate pudding (you’ll still use 2 boxes), and increase the vanilla extract to 1½ teaspoons to balance the chocolate. Everything else stays identical. Some people add a sprinkle of cocoa powder over the whipped cream at the end for visual appeal, though it’s purely decorative.
For smaller batches: This recipe halves beautifully—use one box of pudding, 1½ cups milk, and proportionally reduce everything else. Assemble it in an 8×8-inch dish or a 9-inch pie dish instead of the full 9×13-inch pan. The layering technique stays the same; you’ll simply have fewer layers overall.
For a no-dairy version: Use coconut milk (full-fat canned or the refrigerated carton) instead of regular milk for the pudding. Make whipped coconut cream by chilling a can of full-fat coconut milk overnight, scooping out the thick cream that settles on top, and whipping it with a tiny bit of powdered sugar and vanilla. The texture and flavor are slightly different but genuinely delicious—coconut and banana are a natural pairing.
For a gluten-free gathering: Replace vanilla wafers with gluten-free vanilla cookies. Most grocery stores carry certified gluten-free versions that work perfectly in this recipe. The wafers soften the same way and taste virtually identical to traditional versions. Check that your pudding mix is also certified gluten-free if that’s necessary for your gathering.
To make it more banana-forward: Add ¼ to ½ teaspoon of banana extract to the pudding base, stirring it in with the vanilla. This intensifies the banana flavor without adding actual fruit (which would add unwanted moisture). Alternatively, use one fewer layer of wafers and add an extra layer of sliced bananas, though this does increase the browning risk slightly.
Transportation and Setup Tips That Actually Work
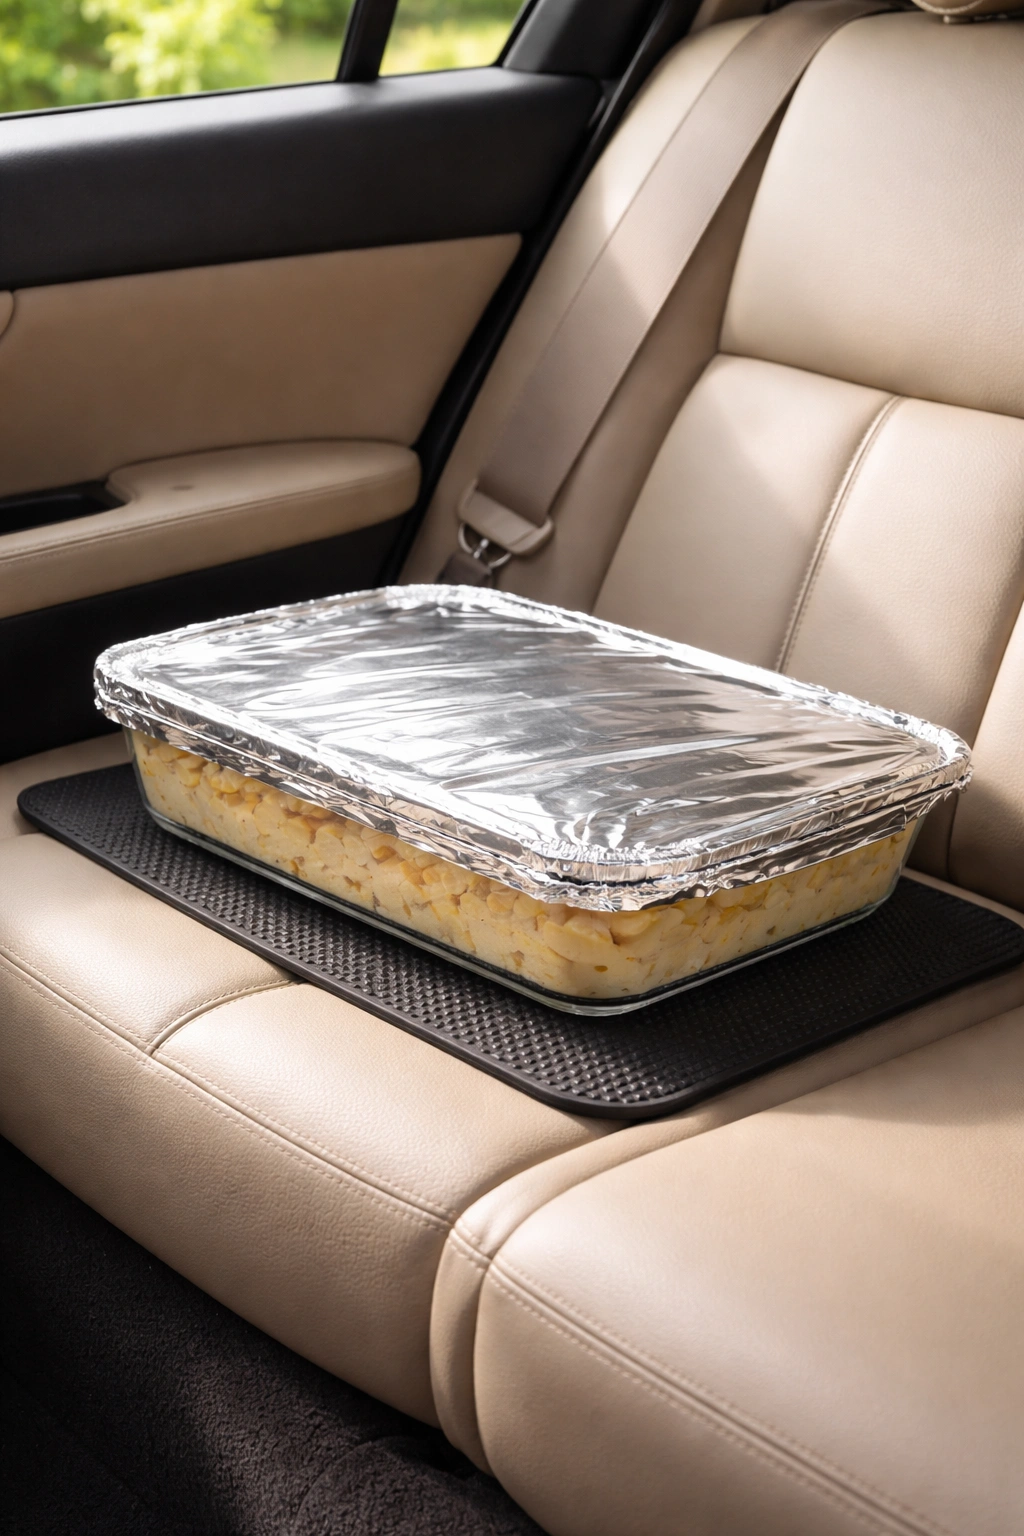
The key to arriving at your potluck with a gorgeous banana pudding is thinking about the journey before you pack it up. A 9×13-inch baking dish is sturdy enough to handle normal transport, but it’s not designed to be jostled around. Place the covered dish on a flat surface in your vehicle—the back seat or trunk works fine, but avoid the front passenger seat where it might slide around during braking.
If you’re concerned about the whipped cream topping, you have two options. One: make the pudding layers the night before, refrigerate them, and add the whipped cream topping just before you leave for the potluck—it’ll stay fresh and lovely for up to 4 hours. Two: transport the pudding without the final whipped cream layer, bring a container of whipped cream in a cooler, and spread it on top once you’ve set the dish on the serving table. This second approach adds 2 minutes of setup but guarantees pristine presentation.
Most potluck gatherings provide space in shared coolers or fridges. Let the host know you’ll need refrigerator space and mention approximate dimensions so they can plan accordingly—a 9×13-inch dish is substantial and needs a dedicated spot. If there’s no refrigeration available at your venue, keep the pudding in a cooler with ice packs until right before serving, then bring it out to the table.
How to Store Leftovers and Make-Ahead Plans
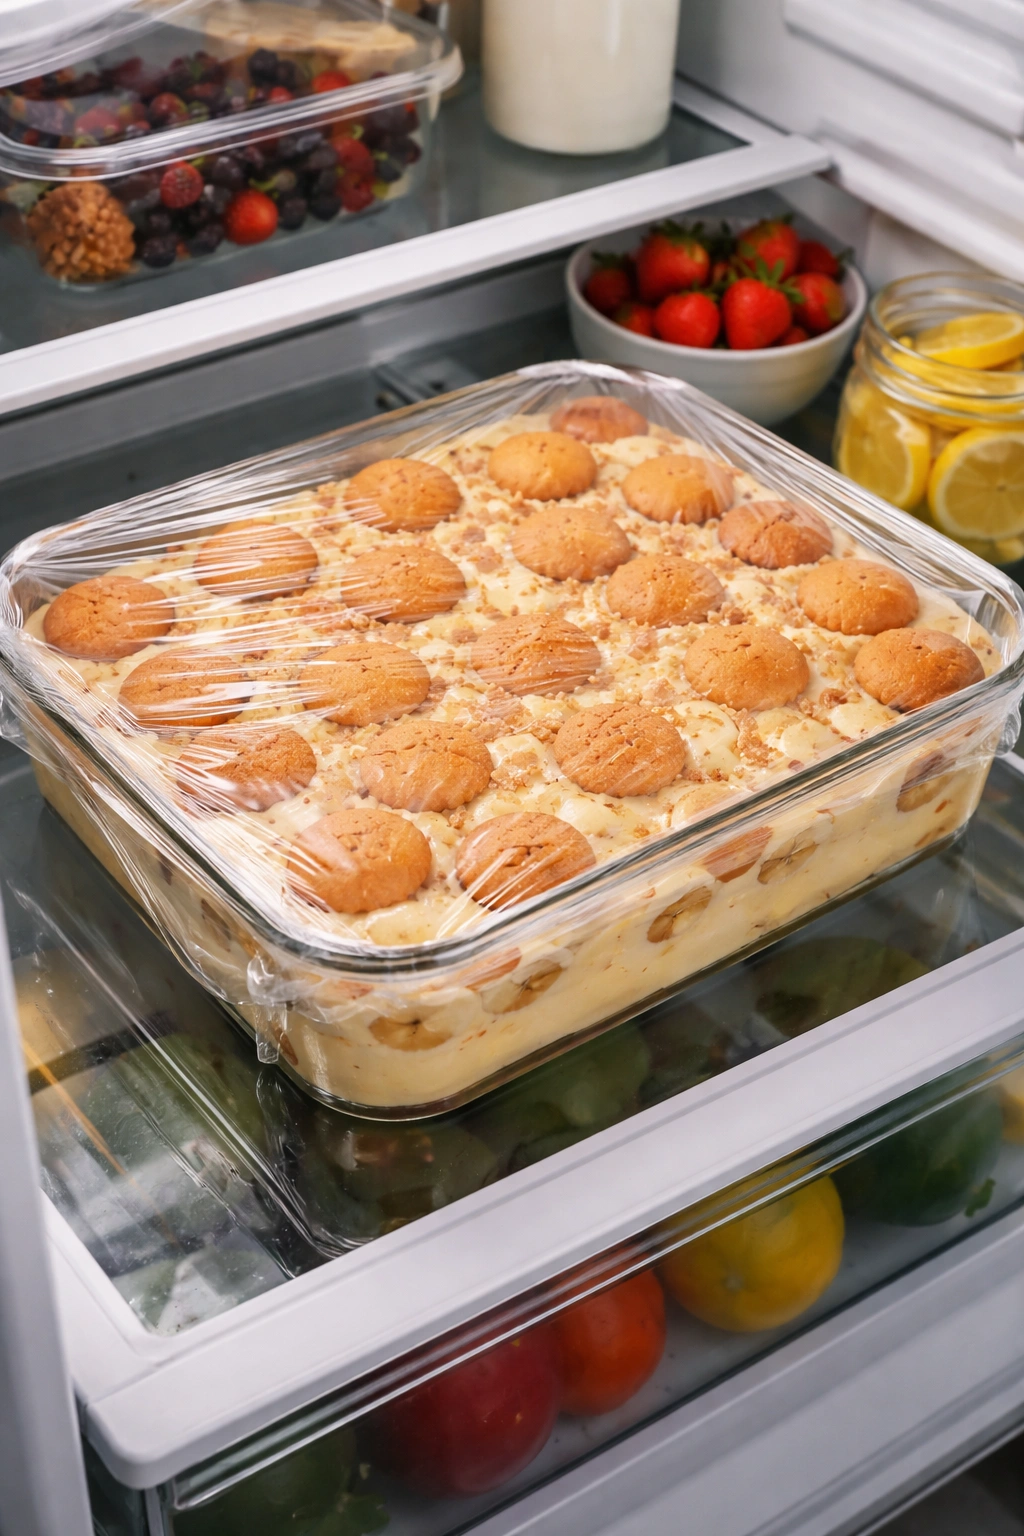
Banana pudding keeps beautifully in the refrigerator for up to 3 days, covered tightly with plastic wrap. The flavor actually deepens slightly on the second day as all the layers continue to marry and soften. Simply leave the dish in its baking pan, cover it well to prevent it from absorbing odors from your fridge, and scoop out what you need.
If you’re making this 24 hours ahead (which is ideal), assemble the complete pudding minus the whipped cream topping. Prepare the pudding layers, cover with plastic wrap, and refrigerate overnight. Make the whipped cream topping the morning of your potluck—it takes less than 5 minutes and tastes noticeably fresher than whipped cream that’s been sitting for hours. Spread it on top right before you leave home or right before serving.
Banana pudding doesn’t freeze particularly well because the wafer cookies develop an odd texture during thawing. The pudding itself would freeze fine, but you’d lose the distinctive texture that makes this dessert special. It’s best enjoyed fresh or within a few days of making it, which is rarely a problem since it tends to disappear quickly.
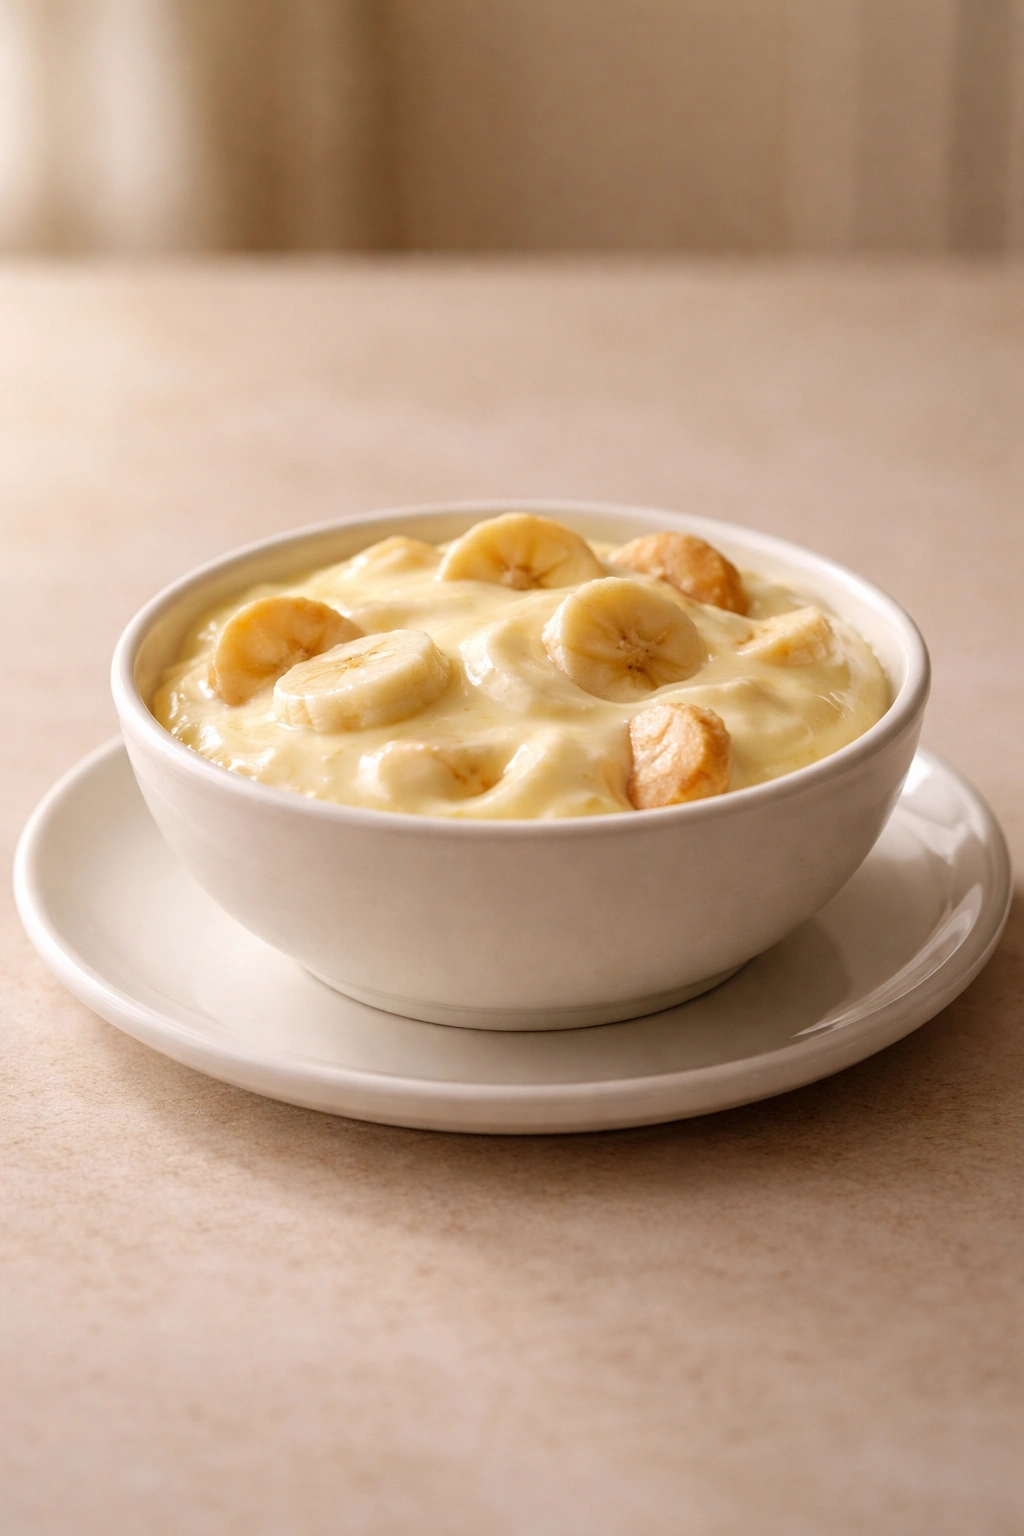
Individual scoops work well for the next day—use an ice cream scoop to portion banana pudding into bowls and cover them individually with plastic wrap. They taste great cold straight from the fridge, and they look intentional and polished when you pull them out, which is a nice surprise for an easy dessert.
Serving Suggestions and Flavor Pairings
Banana pudding sits in an interesting place—it’s substantial enough to serve as a standalone dessert but light enough that it pairs well with almost any meal. At potlucks, it typically shines when served after savory dishes because the creamy sweetness provides a pleasant contrast. If you’re eating it at home after a heavy meal, smaller portions feel just right.
Vanilla wafer cookies create a slightly buttery, neutral base that lets the banana and vanilla flavors shine without competing notes. This is why variations with stronger flavors (chocolate, caramel, bourbon) actually need slightly less pudding than this classic version—you’re introducing more flavor intensity, so the balance shifts slightly.
Some people like to serve banana pudding with a side of shortbread cookies, vanilla cake slices, or pound cake. Others prefer it completely standalone. The whipped cream topping means it doesn’t need ice cream alongside it, though nobody’s going to turn down a small scoop if offered.
For presentation at a potluck, leave the pudding in its baking dish and provide a sturdy serving spoon. People can serve themselves in bowls, or use small dessert plates if the gathering is more formal. The dish itself usually becomes a centerpiece—people tend to hover around it—so place it somewhere prominent where it’s easily accessible but not blocking traffic patterns.
Common Mistakes to Avoid on Your First Try
Skipping the chilling time is the quickest way to end up with a soupy, uninviting pudding. The two-hour minimum allows the layers to set properly and the wafer cookies to absorb just enough moisture without dissolving. Overnight chilling produces noticeably better texture because everything has time to fully meld.
Using pudding that’s too thin happens when people rush the whisking or don’t use enough pudding mix. Whisk vigorously for a full two minutes—it should noticeably thicken as you whisk. If it still seems watery after two minutes, let it sit for another minute; sometimes it needs that extra time. If you’ve already assembled it and it’s too thin, pop the whole thing back in the fridge for an hour and it’ll improve.
Layering wafers on top of each other creates a dense, cookie-heavy texture. Break them as needed and fit them snugly in a single layer. You’re creating a platform for the bananas and pudding, not stacking cookies on top of each other.
Slicing bananas too far in advance means they’ll brown significantly by the time you assemble the pudding. Do this 30 minutes before assembly at most. If you’re making the pudding the night before, slice the final layer of bananas just before assembling the very top.
Overbeating the whipped cream transforms it into sweet butter. Stop beating as soon as stiff peaks form. This takes about 1½ to 2 minutes total—it happens faster than you’d think, especially with a stand mixer.
Forgetting to cover it tightly allows the pudding to absorb odors from your fridge. Use plastic wrap pressed directly onto the surface, then cover the entire dish with foil for extra protection if it’s sitting overnight.
Why This Recipe Consistently Wins Potluck Compliments
There’s something about this approach to banana pudding that makes people assume you spent more effort than you actually did. The secret isn’t elaborate technique—it’s understanding what makes the dessert work and committing to those fundamentals. The pudding is silky and genuinely flavorful because there’s enough of it and it’s properly whisked. The wafers are perfectly tender because they have time to soften in the pudding. The whipped cream is lush because it’s actually whipped, not sprayed from a can.
People also respond to generosity in portion size. This recipe makes one large dish that feeds 12 to 14 people, which means everyone gets a substantial serving. There’s nothing stingy about it, and that abundance translates to the eating experience. A dessert that doesn’t skimp on ingredients or whipped cream topping just tastes better.
The final reason this recipe works is reliability. You’re not waiting for something to bake, you’re not relying on temperamental ingredients to cooperate, and you’re not hoping the texture turns out right. You follow the steps, you chill it, and it comes out exactly as expected every single time. That consistency, combined with genuinely delicious flavor and beautiful presentation, makes this the recipe people ask for after they taste it.
Final Thoughts
Banana pudding remains a potluck legend because it’s fundamentally generous—rich enough to feel indulgent, but light enough that nobody feels sluggish after eating it. This easy version respects that tradition while stripping away any unnecessary steps. You’re making something that looks and tastes like it required real effort, accomplished in less than an hour of actual hands-on time, and improved by sitting overnight.
The beauty of this recipe is that it works for experienced cooks looking for something foolproof and for people trying desserts for the first time and wanting guaranteed success. The ingredients are accessible, the technique is forgiving, and the final result is delicious whether you’re serving it at a casual neighborhood gathering or a more formal occasion.
Make this pudding once, and you’ll notice people genuinely excited to see it at the dessert table. Make it a second time, and you’ll find people specifically requesting it. The comfort, the flavor, the generous portions—it hits all the marks. Next time you need a potluck contribution, this banana pudding will be the dessert that gets completely finished and earns genuine compliments. And honestly, that’s the whole goal.