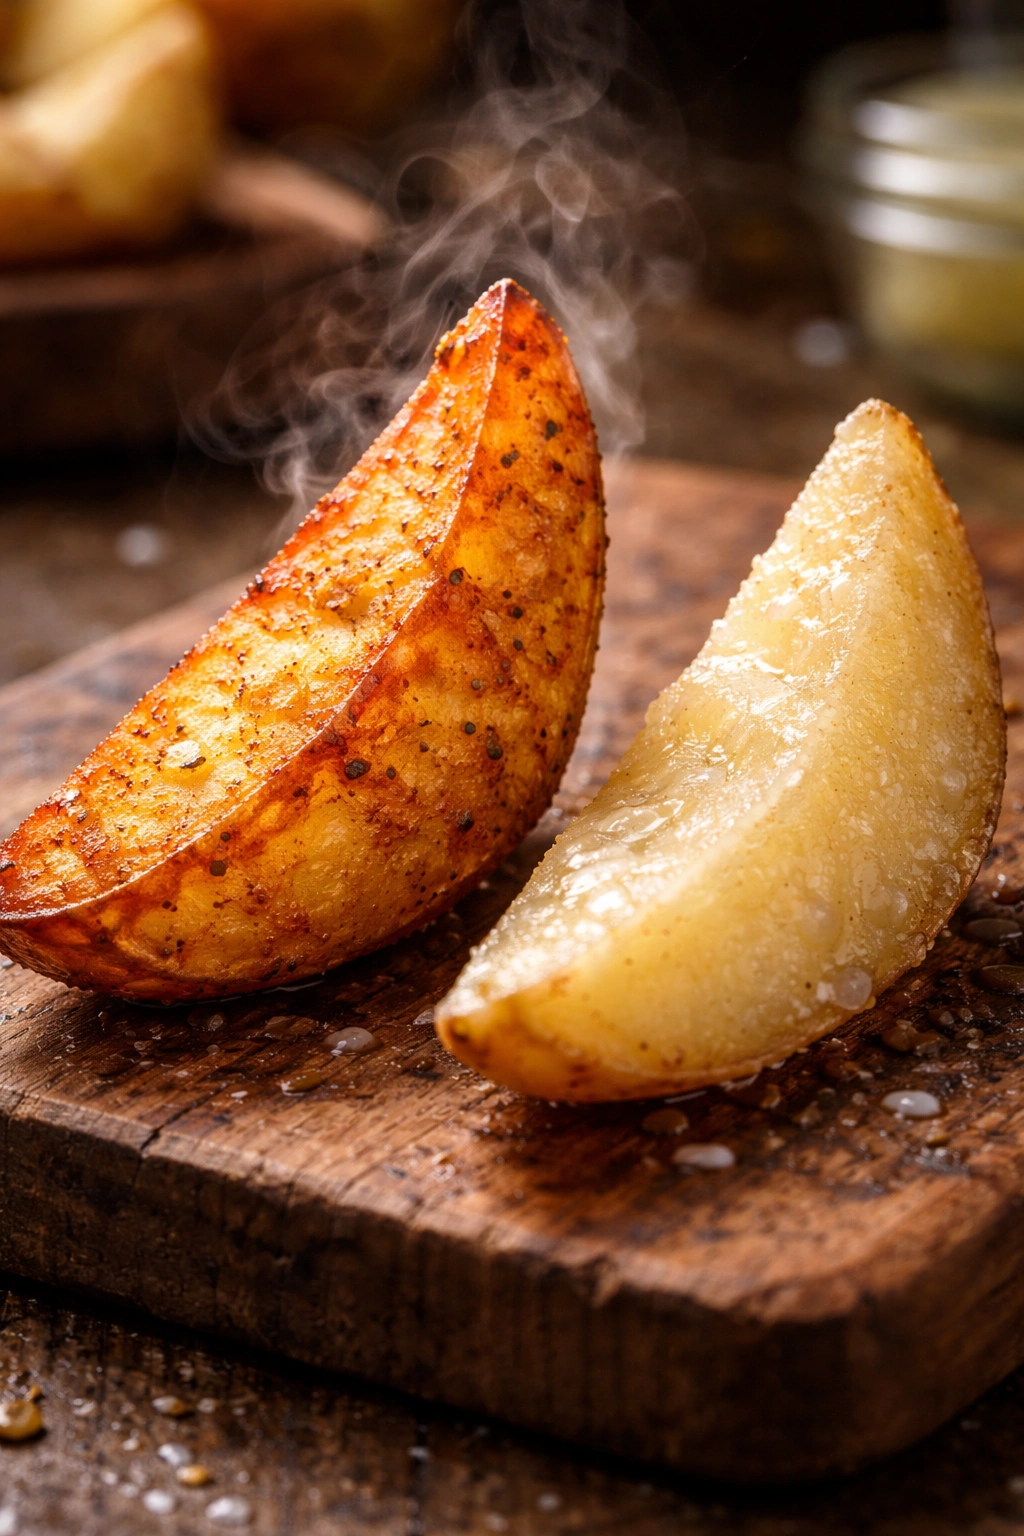
There’s nothing quite like biting into a homemade potato wedge that’s golden and crunchy on the outside while remaining fluffy and tender within. The contrast between the crispy exterior and the pillowy interior is something frozen wedges can never quite achieve, no matter how many “natural ingredients” they claim on the box. When you make them entirely from scratch, you control every variable — the potato variety, the cut thickness, the oil temperature, the seasoning balance — and the results are incomparable to anything you can buy.
The beauty of making potato wedges at home is that it’s genuinely simple. This isn’t a complicated recipe that requires special skills or obscure equipment. What it does require is understanding the why behind each step — why you parboil the potatoes before frying, why you cut them a certain way, why temperature control matters more than anything else. Once you understand those principles, you can make these wedges with perfect results every single time, whether you’re cooking for yourself on a weeknight or preparing a batch for a crowd.
What makes homemade wedges so satisfying is the customization. You can adjust the seasoning to match whatever you’re serving them with, make them spicier or milder, coat them with herbs you actually love rather than stale paprika from a commercial mix. You can make them thicker or thinner depending on your mood, parboil them longer or shorter depending on how crispy versus fluffy you want the final result. That level of control transforms potato wedges from a side dish into something genuinely special.
Why Homemade Potato Wedges Beat the Frozen Version
Frozen potato wedges sit in grocery store freezers for months before they reach your kitchen, which means they’ve been sitting in their own moisture the entire time. Once you fry them, that trapped moisture creates steam instead of crispness, and you end up with soggy wedges that never quite achieve that satisfying crunch you’re after.
When you make wedges from fresh potatoes, they start with a much lower water content than their frozen counterparts. More importantly, you control exactly how much moisture is in the potato before it hits the hot oil. The parboiling step removes some surface moisture while partially cooking the interior, which means the wedges fry faster and crisp up more effectively.
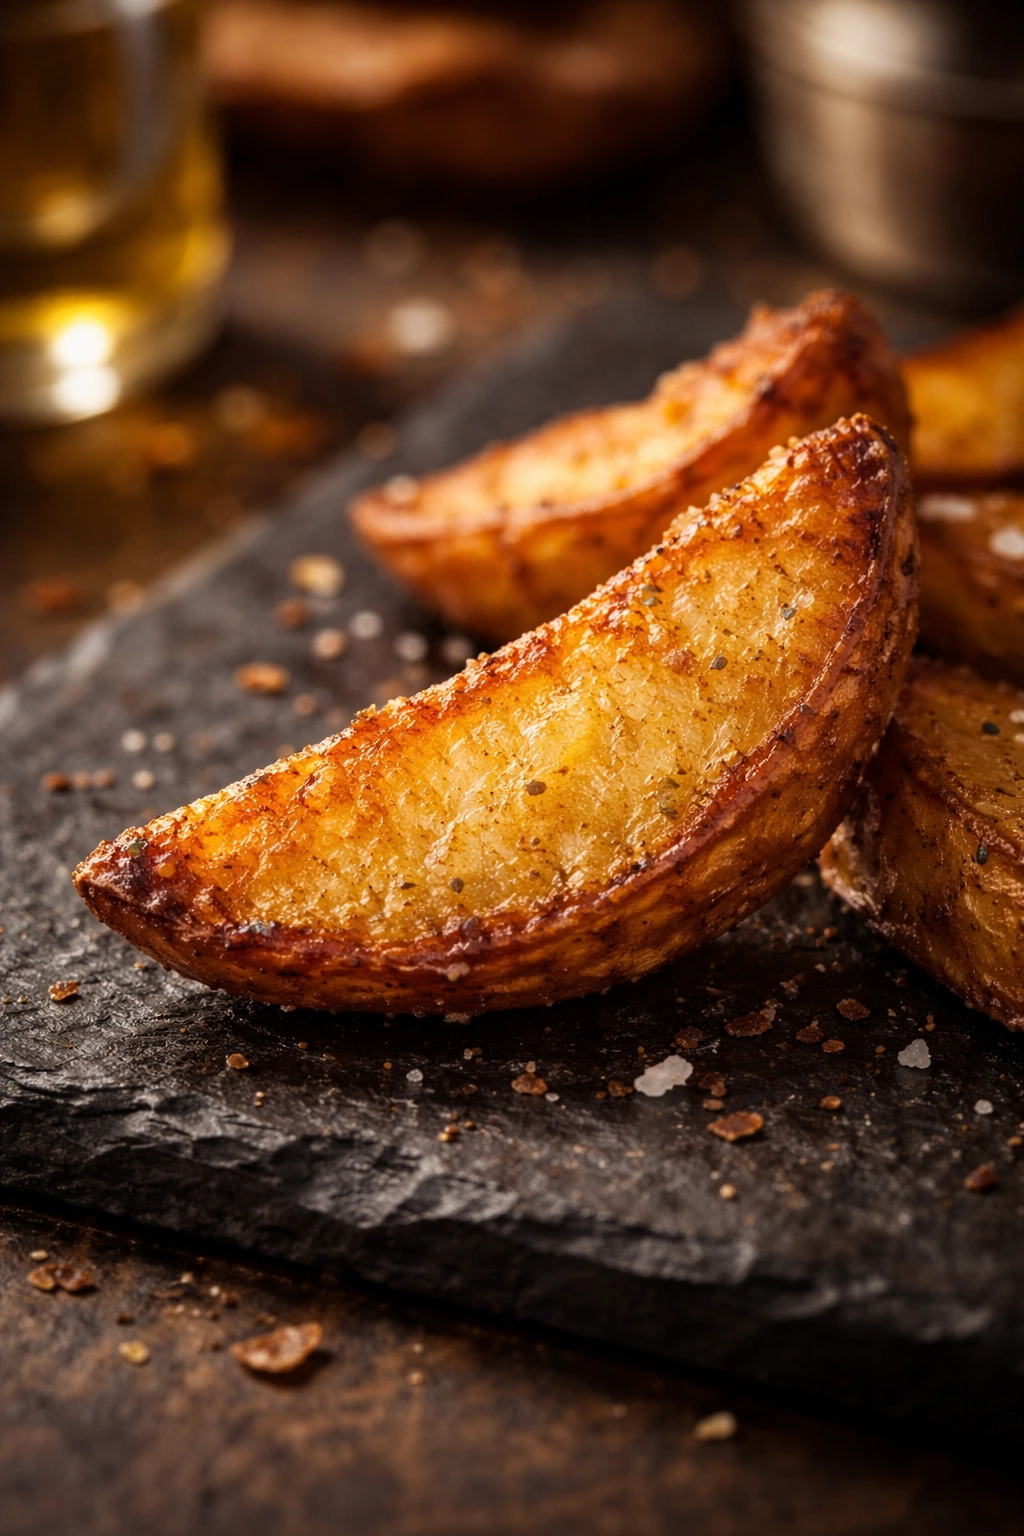
Homemade wedges also develop a different kind of crust. Commercial operations use additives and preservatives to help frozen wedges brown, but those chemicals create a crispy exterior that tastes slightly artificial. When you fry wedges made from fresh potatoes, the potato starch itself caramelizes and browns, creating a crust that tastes like what it actually is — caramelized potato. That’s a subtle but noticeable difference that makes every single wedge taste better.
The Taste and Texture Difference
Fresh potatoes have a natural potato flavor that frozen wedges simply cannot match, even ones made from “100% real potatoes.” Once potatoes are blanched, frozen, and stored, their flavor compounds change. You don’t taste the same earthy, slightly sweet potato flavor that a just-cooked wedge delivers.
The texture difference is equally dramatic. A homemade wedge has a naturally crispy exterior that shatters between your teeth, then gives way to a fluffy, creamy interior. You get the contrast you actually want in a potato wedge — not the dense, slightly rubbery texture that frozen wedges develop even after cooking.
Choosing Your Potatoes: What Works Best
Not all potatoes are created equal when it comes to wedges. The variety you choose affects how crispy the exterior becomes and how fluffy the interior stays, so this choice genuinely matters.
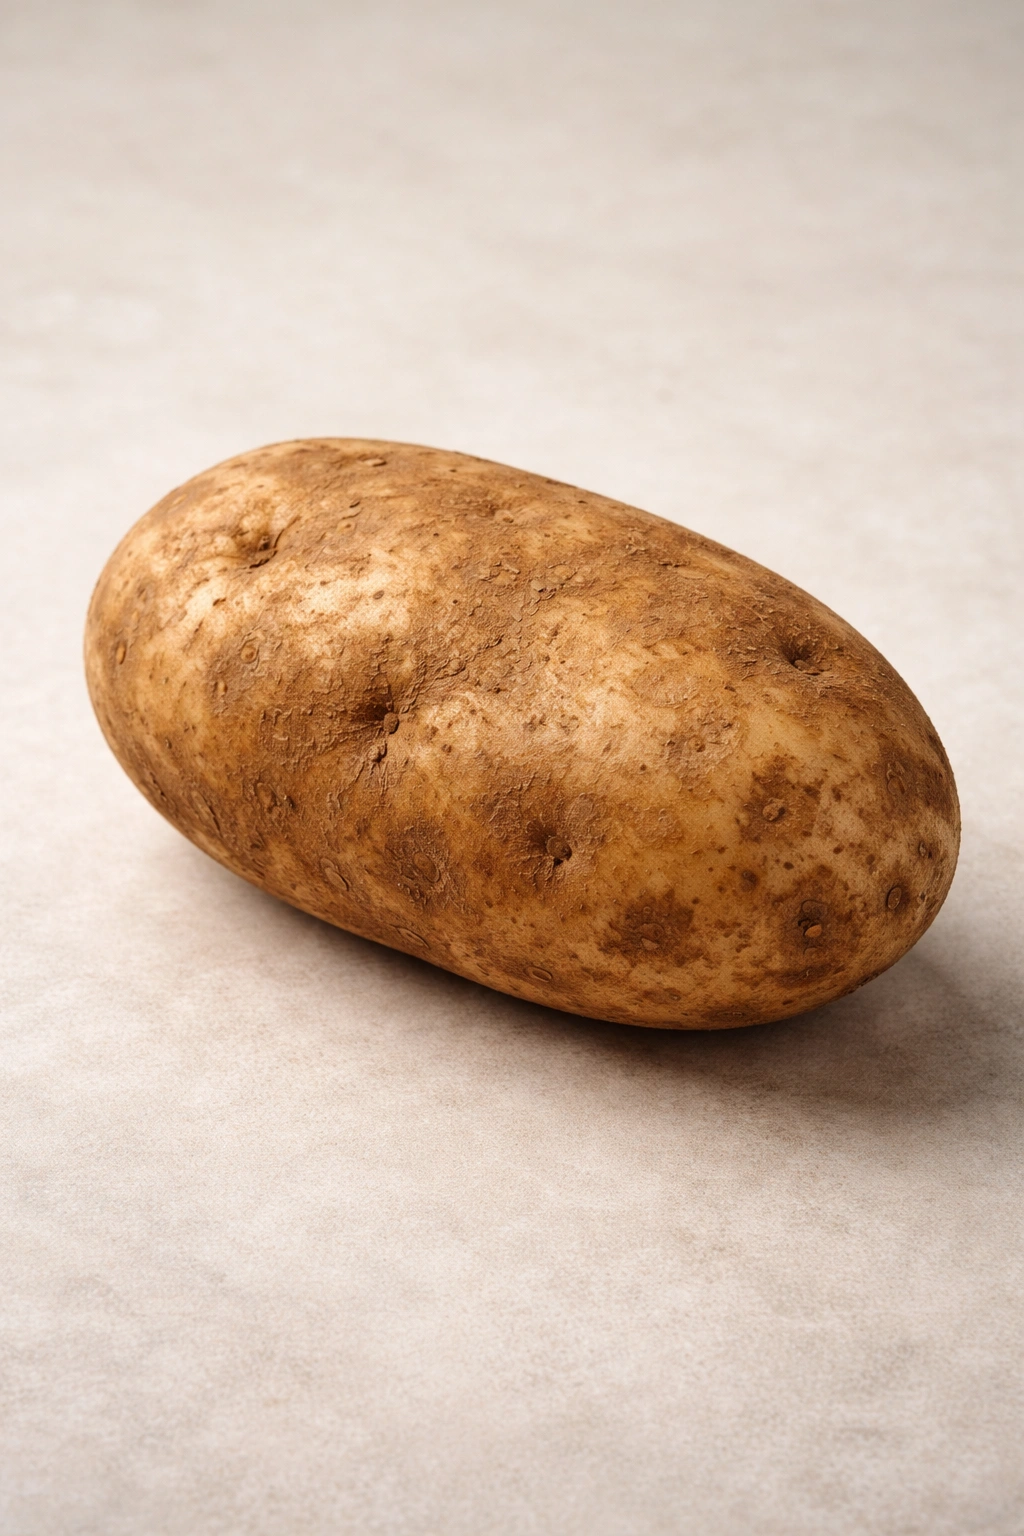
Russet potatoes are the gold standard for wedges. They have a higher starch content than other varieties, which means the exterior caramelizes beautifully and crisps up faster. The interior has enough starch to be fluffy but enough moisture to stay creamy — it’s the perfect balance. Red potatoes, by contrast, are waxy and stay moist even after frying, which means they won’t crisp up as much. Yukon golds are a decent middle ground but won’t crisp quite as well as russets.
Size matters too. You want medium to large russet potatoes — roughly 8 to 10 ounces each. Smaller potatoes mean thinner wedges that burn too easily, while very large potatoes result in wedges with a disproportionate ratio of crunchy exterior to fluffy interior. Medium-sized potatoes give you the sweet spot where the exterior has time to crisp thoroughly while the interior cooks through evenly.
Freshness and Storage
Buy potatoes that are firm to the touch with no soft spots or sprouting eyes. You want them as fresh as possible since older potatoes have lost some of their moisture and develop a slightly mealy texture. Keep them in a cool, dark place until you’re ready to use them — ideally within a week of purchase.
Never use potatoes that have started to turn green. The green color indicates solanine, a compound that tastes bitter and can be harmful in large quantities. If you see any green, cut it off before cooking, but honestly it’s easier to just choose different potatoes.
Essential Equipment and Prep Work
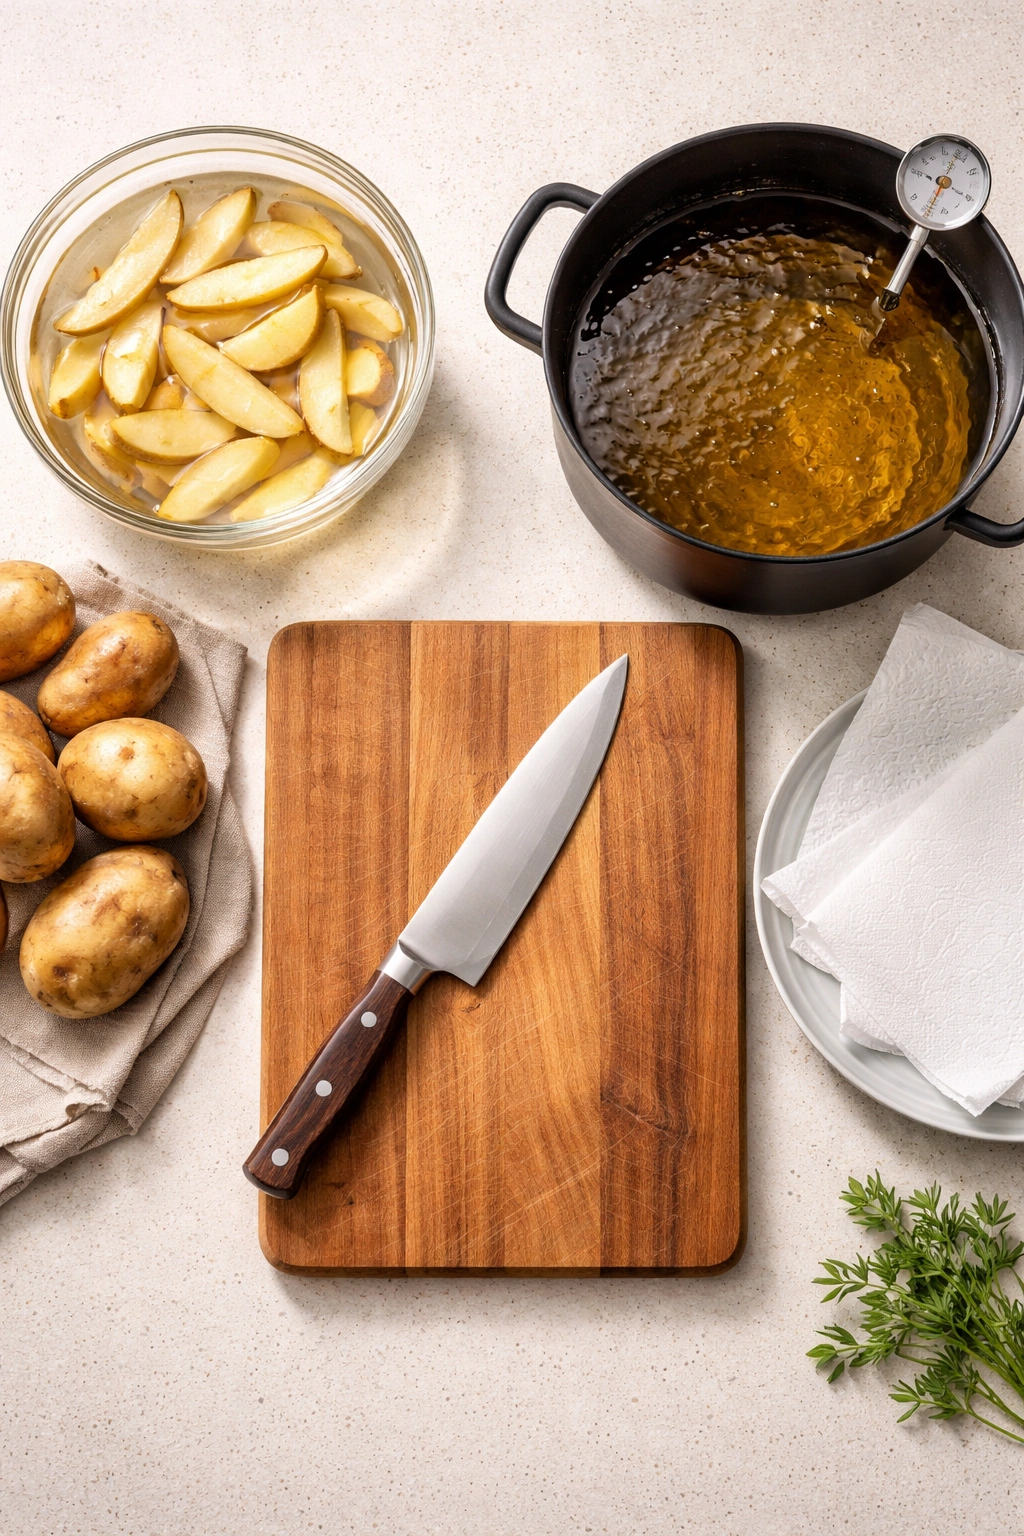
You need three basic tools to make excellent potato wedges from scratch: a sharp chef’s knife, a cutting board, and a deep pot or Dutch oven for frying. A thermometer — either a clip-on candy thermometer or an instant-read digital one — is essential because the oil temperature is the single most important variable for achieving consistent results.
A large bowl for soaking the potatoes and paper towels for drying them thoroughly are also important. Moisture is the enemy of crispiness, so you need to dry the parboiled potatoes as completely as possible before they hit the oil. Some people use a salad spinner, which works beautifully if you have one, but paper towels alone are perfectly adequate.
Why Prep Work Matters
Proper prep work determines whether your wedges will be crispy or soggy. This is where many home cooks cut corners, and it’s where the results suffer most. Spend the extra five minutes to cut your potatoes properly, parboil them thoroughly, and dry them completely, and you’ll have wedges that rival anything from a restaurant fryer.
Cutting Techniques for Perfect Wedge Shape
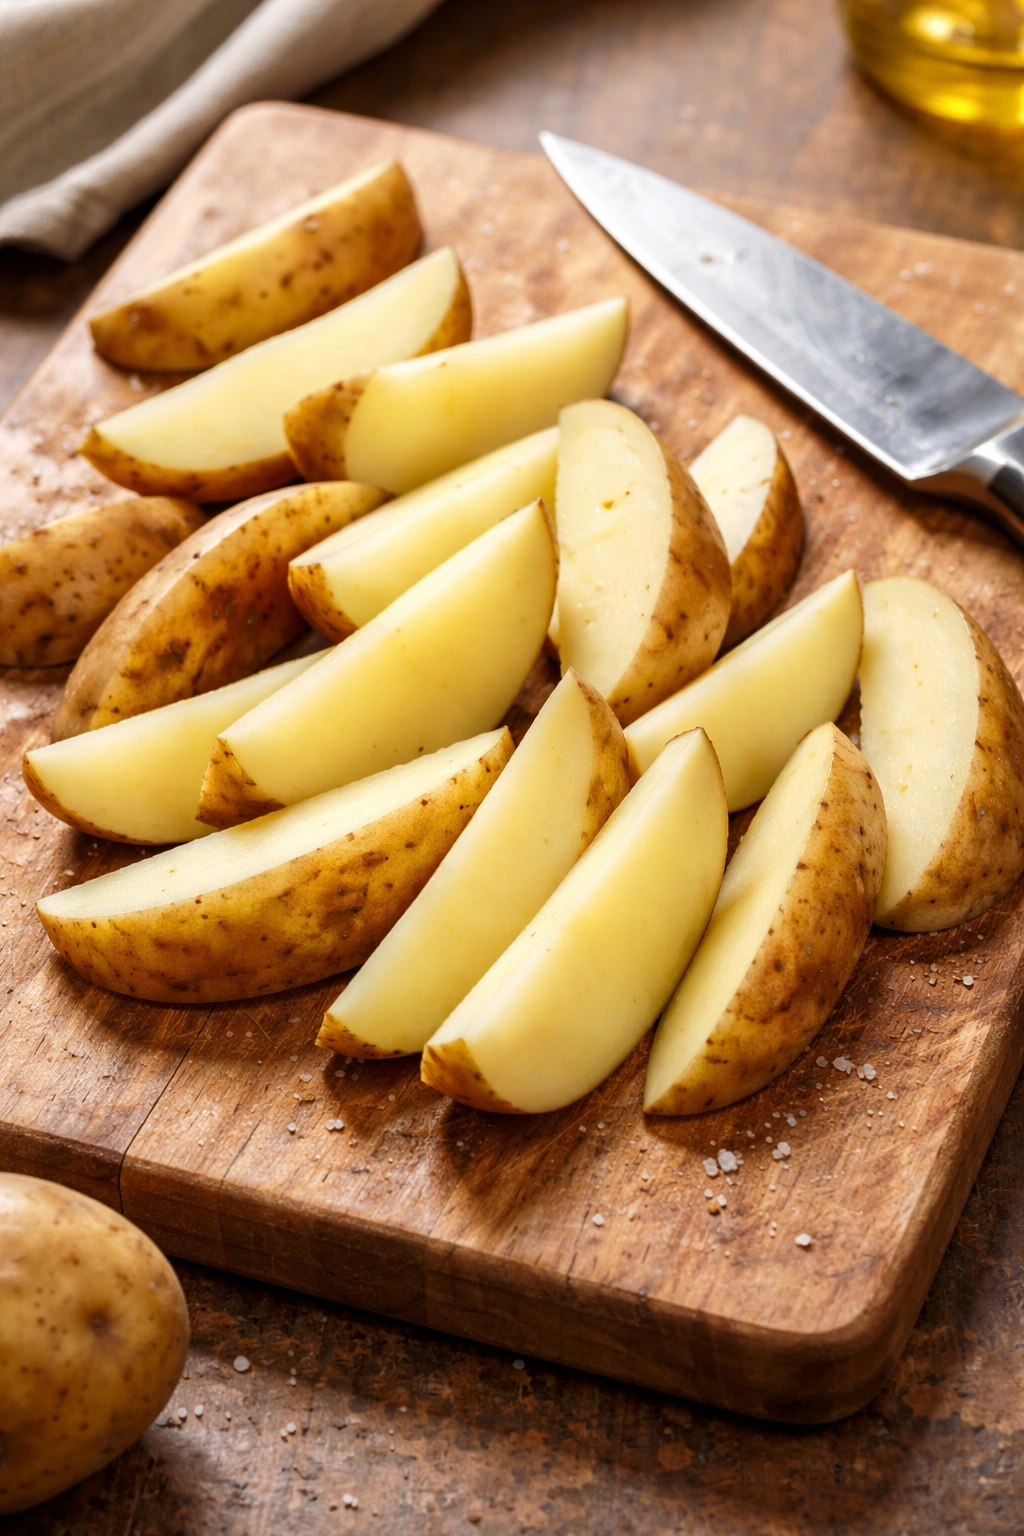
A proper wedge isn’t a fry and it isn’t a chip — it’s a thick, angular cut that’s roughly the shape of a door wedge. The best way to achieve this is to cut your potato lengthwise into quarters, then cut each quarter into pieces about three-quarters of an inch thick.
Start by cutting the potato in half lengthwise. Place the cut side down on your cutting board for stability, then cut each half in half lengthwise again, creating four long quarters. Now, working with each quarter cut-side down, slice across to create wedges about three-quarters of an inch thick. This gives you wedges that are roughly 1.5 to 2 inches long and about three-quarters of an inch thick at the widest point.
Consistency in size matters because thinner wedges cook faster than thick ones. If you cut some wedges half as thick as others, the thin ones will be burnt to a crisp while the thick ones are still pale. Aim for relatively uniform thickness, even if the pieces aren’t perfectly identical — your eye is good enough for this.
Why Shape Matters for Cooking
The wedge shape gives you the best surface-area-to-interior ratio. More surface area means more opportunity for the exterior to crisp, while the thicker interior stays creamy rather than turning into a crunchy chip. The angles on a wedge also help oil flow around the potato efficiently, which promotes even browning.
The Seasoning Strategy That Makes Them Crunchy
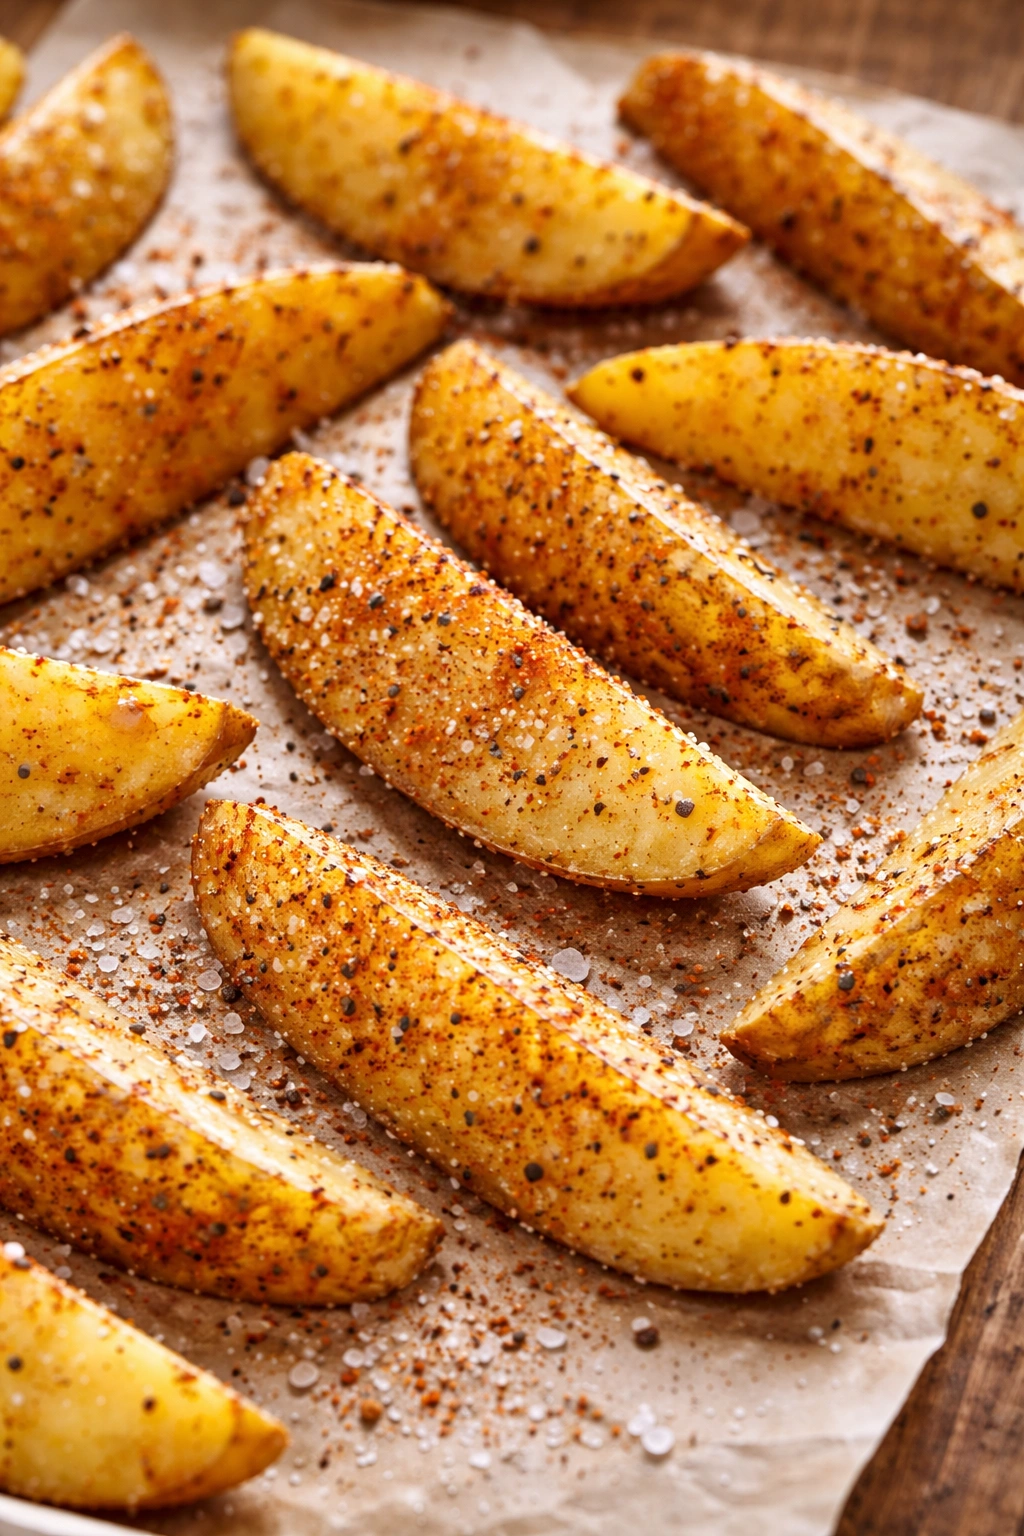
Many home cooks season their potato wedges after frying, but the best approach is to season them twice — once before frying and once right after. The pre-frying seasoning gets trapped against the potato surface during cooking and becomes part of the wedge itself. The post-frying seasoning lands on the hot, crispy exterior and adheres beautifully.
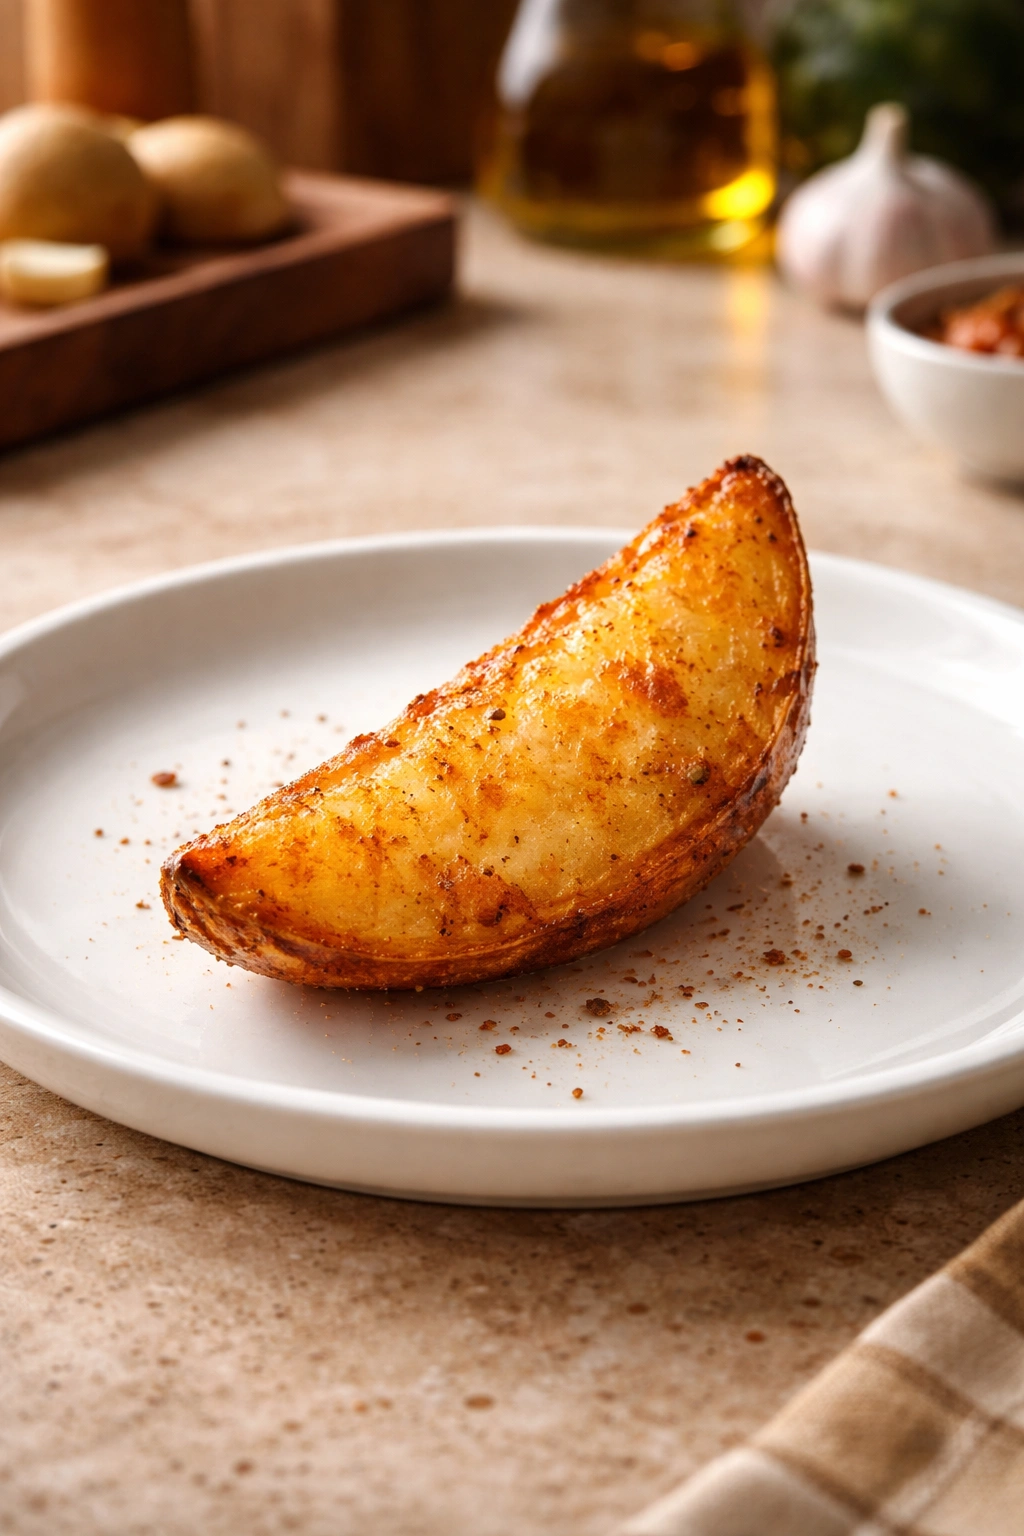
Keep the pre-frying seasoning simple: fine salt, a small amount of freshly ground black pepper, and a touch of garlic powder or paprika if you like. These seasonings won’t burn during frying because you’re using relatively high heat for a short period. Avoid anything with sugar before frying — brown sugar, honey, or barbecue seasoning will burn and taste bitter. Save the sweeter or more complex seasonings for after the wedges come out of the oil.
The Salt Science
Salt on the exterior of the potato actually helps promote crispiness rather than preventing it. The salt draws out a tiny bit of moisture from the surface of the potato, which creates an even crispier crust. This is counterintuitive to many cooks, but it’s why deeply seasoned fried foods become crispier, not less crispy.
Fine salt works better than kosher salt for pre-frying seasoning because the smaller crystals adhere better to the damp surface of the parboiled potatoes. You want them distributed evenly, not in large clumps. Kosher salt is great for the final seasoning right out of the oil, though, because the larger crystals create a pleasant textural contrast.
Complete Recipe: Crispy Potato Wedges From Scratch
Yield: Serves 4 to 6 as a side dish | Makes about 24 wedges
Prep Time: 25 minutes (includes soaking and parboiling)
Cook Time: 12 to 15 minutes
Total Time: 40 minutes active time + cooling
Difficulty: Beginner — The technique is straightforward, the equipment is basic, and there are no tricky timing issues to manage. Even a first-time fryer will succeed with careful attention to oil temperature.
Ingredients for the Wedges
- 4 medium russet potatoes (about 2 pounds total), skin on
- Vegetable oil for deep frying (about 2 quarts), such as canola, peanut, or sunflower oil
- 1 teaspoon fine sea salt
- ½ teaspoon freshly ground black pepper
- ¼ teaspoon garlic powder
- ¼ teaspoon smoked paprika (optional but recommended)
- Additional fine sea salt and kosher salt for finishing
- Fresh herbs for serving, such as fresh parsley, fresh chives, or fresh rosemary (optional)
Step-by-Step Instructions
Prepare the Potatoes:
-
Scrub the potatoes under cold running water with a stiff brush to remove any dirt, then pat them completely dry with paper towels. Leaving them damp will cause the oil to splatter dangerously.
-
Cut each potato in half lengthwise, then cut each half in half lengthwise again, creating four long quarters. Place each quarter cut-side down on your cutting board.
-
Slice across each quarter to create wedges approximately three-quarters of an inch thick at the widest point. You should end up with roughly 24 wedges total. Set them on a plate and cover them loosely with a damp paper towel to prevent browning while you prepare the remaining potatoes.
Parboil the Wedges:
-
Fill a large pot with water and bring it to a boil over high heat. Once it’s rolling, carefully add all the potato wedges in batches — you want them to go into truly boiling water. Do not skip the boiling water step; starting in cold water results in wedges that fall apart during frying.
-
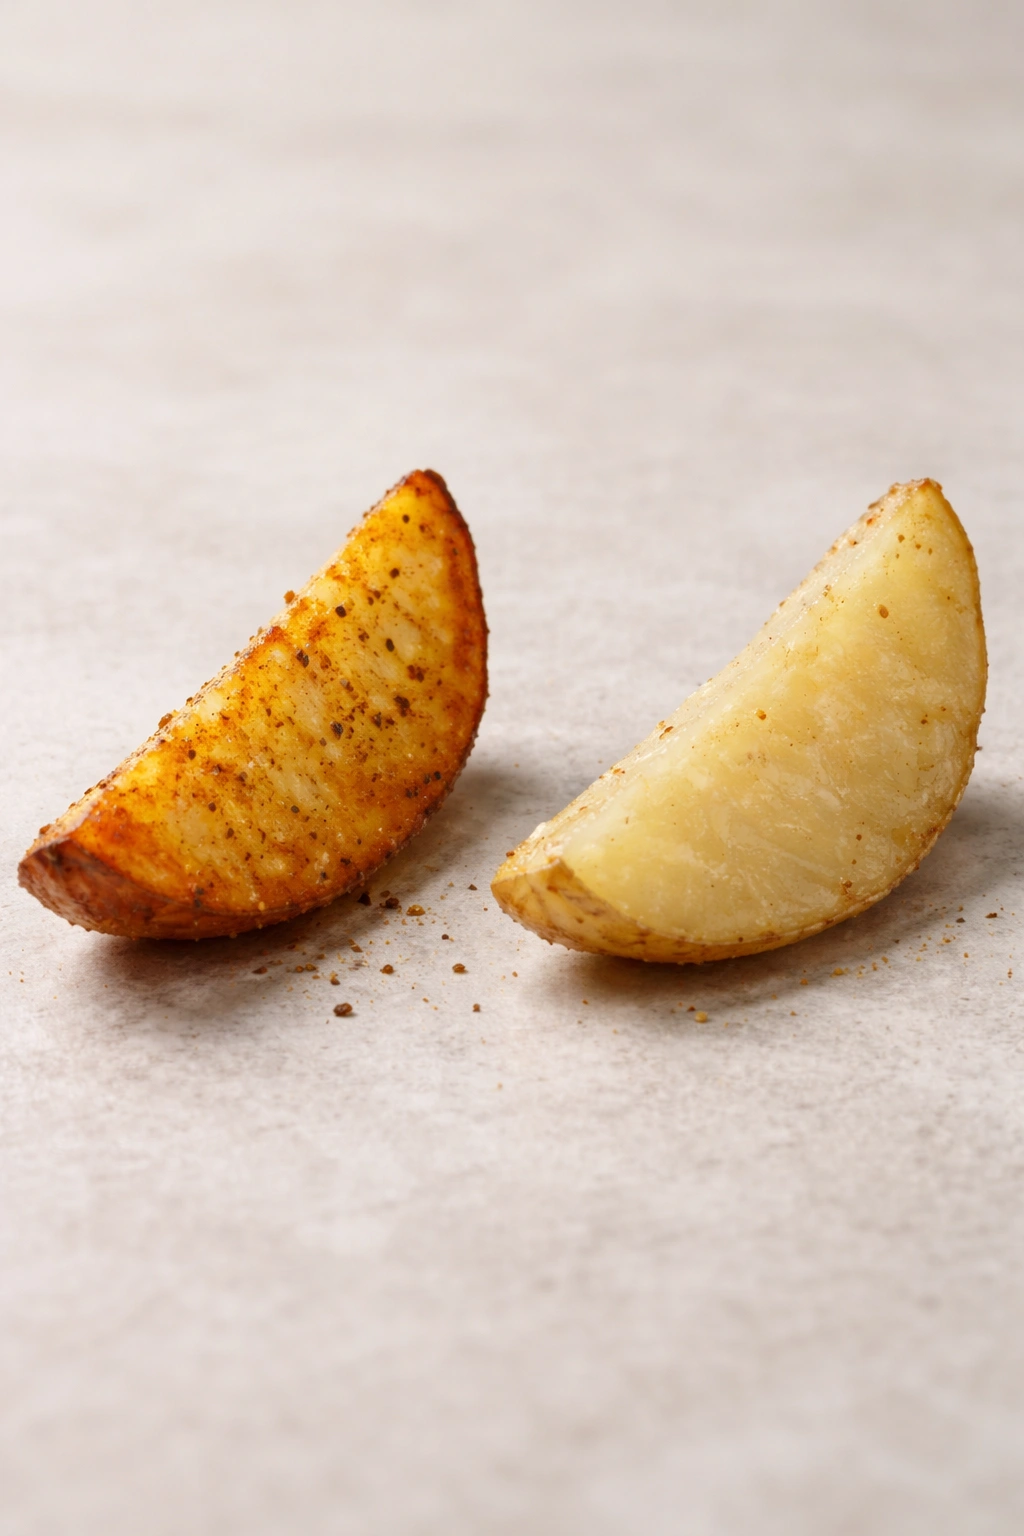
Let the wedges simmer for exactly 5 to 6 minutes. They should be partially cooked but still slightly firm — when you pierce one with a fork, it should offer just a bit of resistance. They’re done when they can be pierced with a fork but aren’t soft all the way through. Set a timer so you don’t overcook them.
-
Carefully drain the wedges in a colander and immediately spread them on paper towels or a clean kitchen towel in a single layer. Let them sit undisturbed for 10 to 15 minutes, patting them gently with additional paper towels if any moisture pools on the surface. This drying step is crucial — any moisture on the potato surface will cause the oil to splatter and will prevent crispiness. The drier they are, the crispier the final wedge.
Prepare the Seasoning and Oil:
-
In a small bowl, whisk together the fine sea salt, black pepper, garlic powder, and smoked paprika. Set this aside.
-
Pour the oil into your deep pot or Dutch oven — it should be about 3 inches deep. Clip a thermometer to the side of the pot so the bulb is submerged in the oil but not touching the bottom. Turn the heat to medium-high and begin heating the oil. This will take 10 to 15 minutes depending on your pot size and stove.
Advertisements
Heat the Oil to the Perfect Temperature:
- Once the oil reaches 325°F (163°C), you’re ready to fry. The oil temperature is the single most important variable — if it’s too cool, the wedges will absorb oil and become greasy; if it’s too hot, the exterior will burn before the interior cooks through. Watch the thermometer carefully as you add the first batch.
Fry the First Batch:
-
Carefully place 8 to 10 wedges into the hot oil — only about one-third of your total wedges at a time. The oil will bubble vigorously; this is normal. The temperature will drop several degrees when you add the cold potatoes. Stir the wedges gently with a spider strainer or slotted spoon to prevent them from sticking together.
-
Fry for 4 to 5 minutes, stirring occasionally, until the wedges are golden brown and crispy on the edges. The exterior should be deep golden, and the cut edges should look crunchy. If the wedges are pale after 5 minutes, your oil isn’t hot enough; remove them and let the oil come back to 325°F before trying again.
-
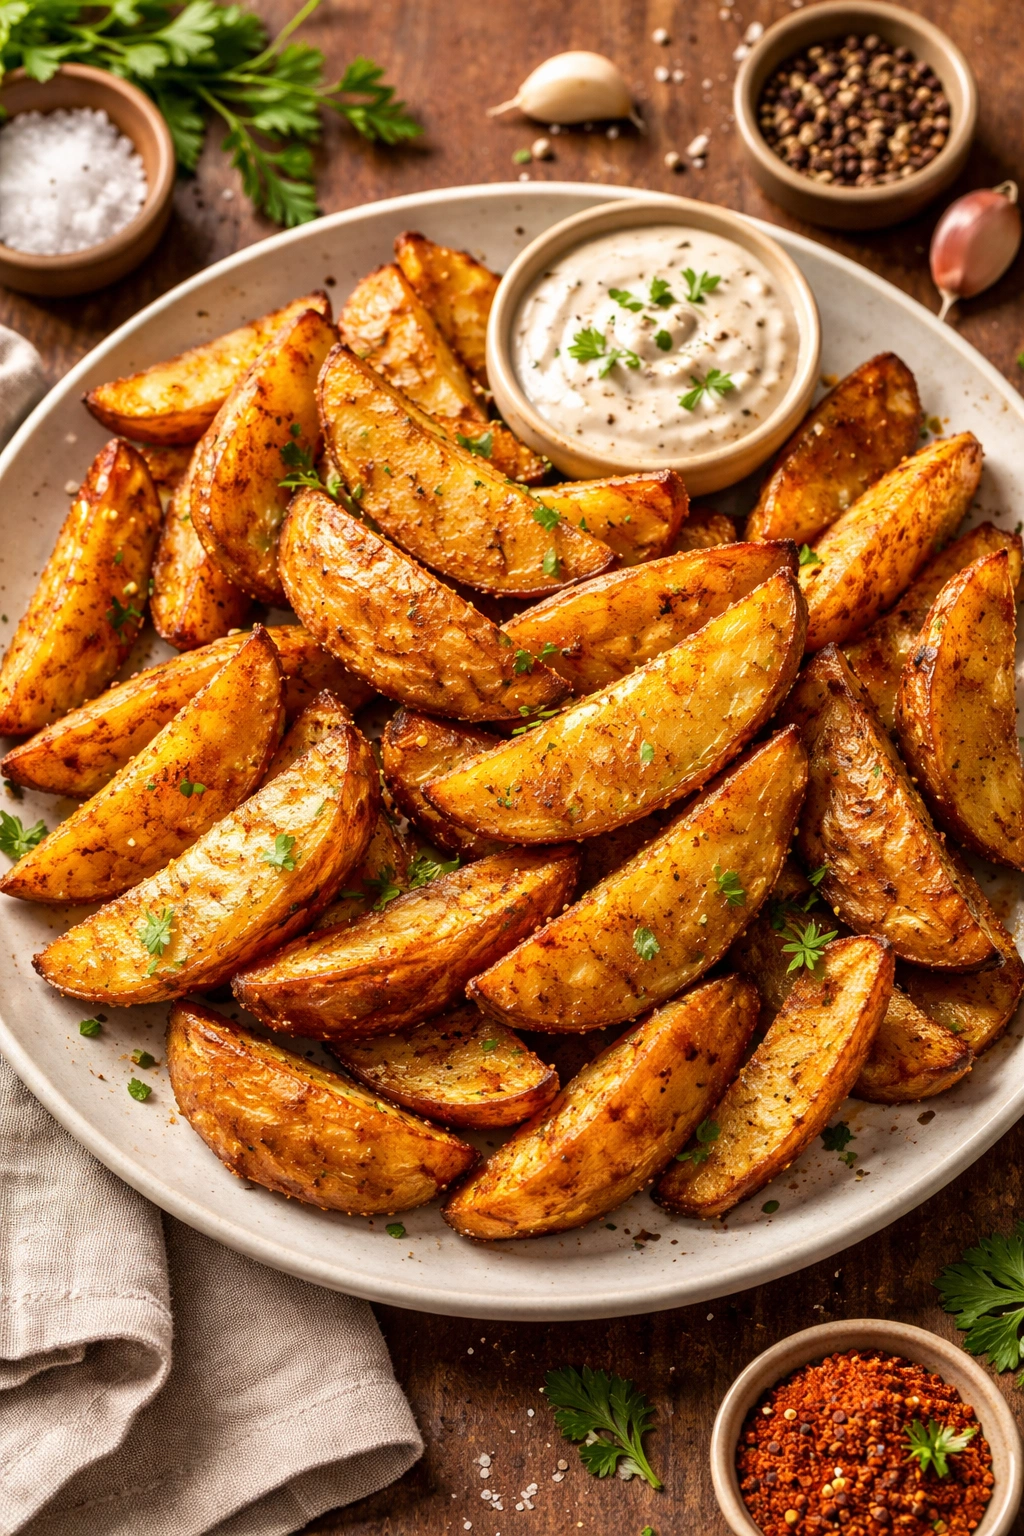
Using a spider strainer or slotted spoon, carefully lift the wedges from the oil and place them on a plate lined with paper towels. Immediately sprinkle them with some of the seasoning mixture while they’re still hot — the seasoning will stick much better to the hot surface.
Fry the Remaining Batches:
-
Let the oil come back to 325°F before adding the next batch. This takes a few minutes. Repeat the frying process with the remaining wedges in two more batches, always waiting for the oil to return to temperature before adding the next batch.
-
As each batch comes out, place it on fresh paper towels and season immediately with the remaining seasoning mixture. Give each wedge a light sprinkle of fleur de sel or finishing kosher salt for extra flavor and crunch.
Rest and Serve:
- Let the wedges rest for 3 to 5 minutes before serving. This allows the exterior to set completely and become even crispier. Serve while they’re still hot, ideally within 10 minutes of removing the last batch from the oil.
Pro Tips for Maximum Crispiness
The parboiling step is what separates mediocre homemade wedges from genuinely excellent ones. Many recipes skip it or do it too briefly, which results in wedges that either absorb too much oil or have a raw, starchy taste in the center. Five to six minutes of simmering is the sweet spot — long enough to partially cook the interior and remove excess moisture from the surface, but not so long that the wedges become soft and break apart during frying.
Your oil temperature matters far more than any other variable. A thermometer isn’t optional — it’s essential. If you try to estimate by watching the oil bubble or holding your hand over it, you’ll get inconsistent results. The wedges are done when they’re golden brown on the outside, which takes 4 to 5 minutes at 325°F. At a higher temperature, they’ll brown faster but won’t cook through; at a lower temperature, they’ll cook through but won’t crisp up.
Use fresh oil if possible. Oil that’s been used multiple times breaks down and creates a darker, less pleasant crust. You can reuse frying oil once or twice if you strain out the potato bits, but it degrades with each use. If your oil starts to smoke before reaching 325°F, or if it’s dark and murky looking, replace it.
Temperature Tricks
Some cooks use a two-temperature frying method: first frying at 300°F until the wedge is cooked through, then quickly frying at 350°F to crisp up the exterior. This works beautifully but requires two temperature adjustments. For simplicity, sticking with 325°F throughout gives you excellent results — golden, crispy wedges with a fully cooked interior.
Common Mistakes and How to Avoid Them
The most common mistake is skipping the parboiling step or not drying the potatoes thoroughly afterward. Raw potatoes frying directly in oil will taste starchy and won’t crisp up properly. Wet potatoes will create dangerous oil splatters and develop soggy spots instead of an even crust. These two prep steps take only about 20 minutes total and they’re what transform ordinary potato wedges into excellent ones.
Overcrowding the oil is the second most common mistake. When you add too many wedges at once, the temperature drops drastically, and the wedges steam in the oil rather than crisp. You’ll end up with greasy, soggy results instead of crispy ones. Fry in three separate batches — your patience here will be rewarded with vastly superior results.
Overseasoning before frying can result in unpleasant burnt-tasting bits. Use a light hand with any seasoning that goes on before frying — save the generous seasoning for after they come out of the oil.
Temperature Drop Issues
The oil temperature will always drop when you add cold potatoes. This is expected and normal. What matters is that you wait for the oil to come back to 325°F before adding the next batch. If you keep adding cold potatoes to oil that’s not hot enough, the temperature drops further with each addition, and you end up with all greasy wedges. Patience between batches is what creates consistent results.
Variations and Creative Twists
Once you’ve mastered the basic technique, you can take these wedges in many directions. The parboiling and frying process stays exactly the same — the customization happens in the seasoning.
Loaded Wedges Style: After frying and seasoning, top the hot wedges with shredded cheddar cheese, crispy bacon bits, sour cream, and fresh chives. The hot wedges will melt the cheese beautifully.
Cajun-Spiced: Add cayenne pepper, dried thyme, dried oregano, and a touch of onion powder to your seasoning mixture. Finish with fleur de sel and a tiny pinch of cayenne mixed with fleur de sel while they’re still hot.
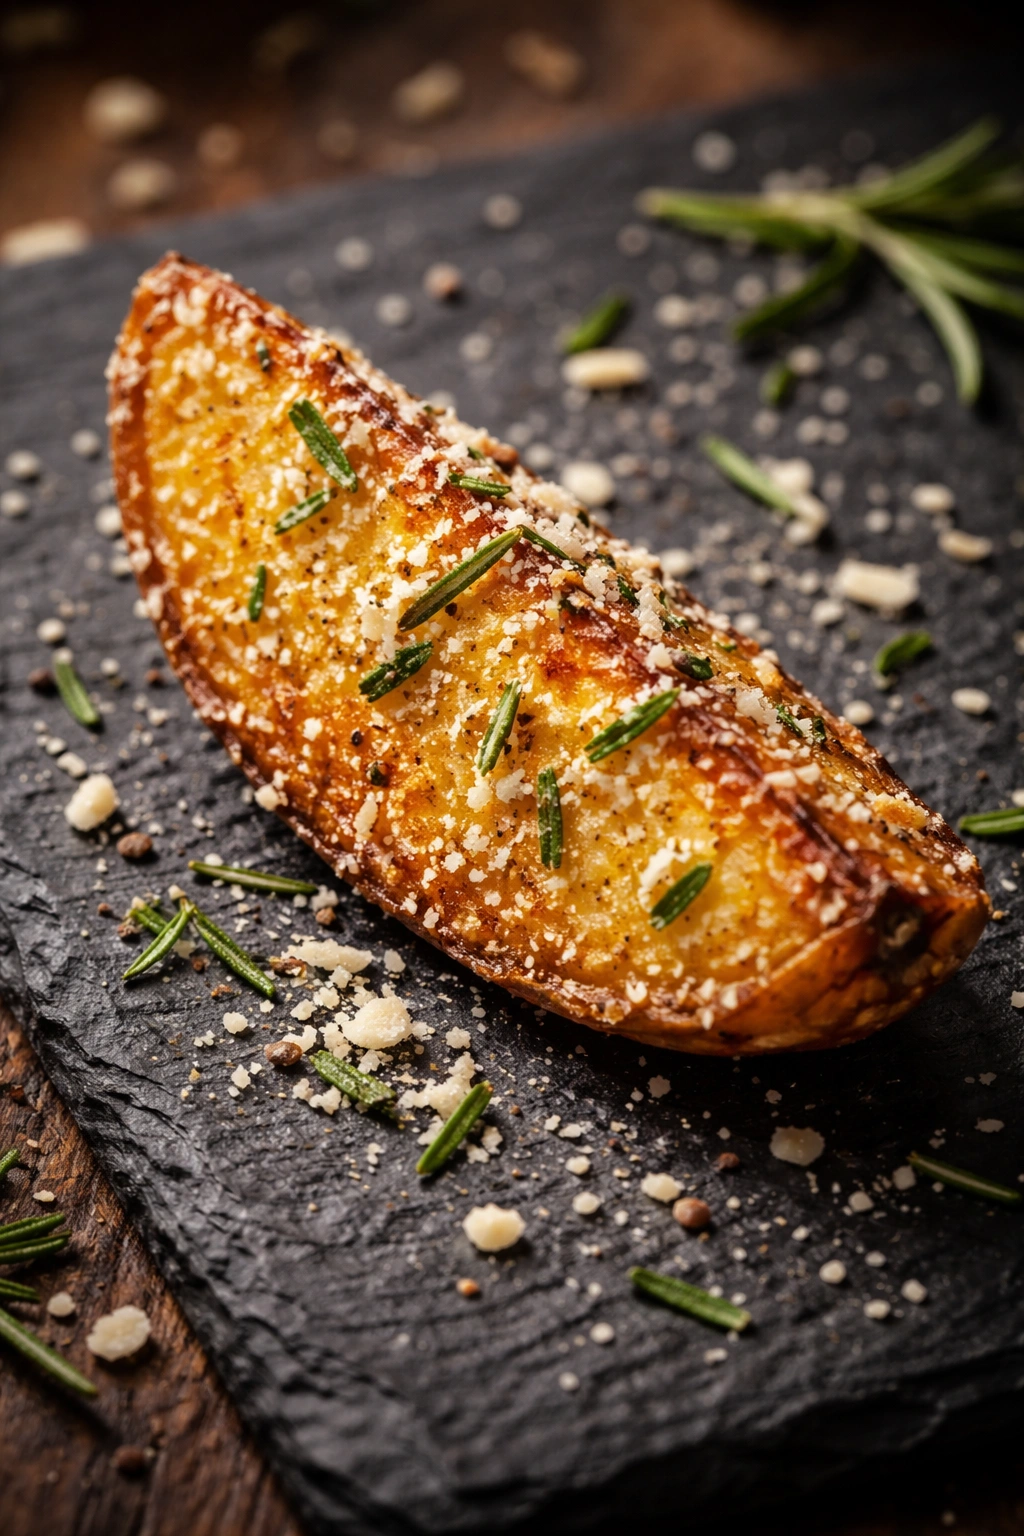
Parmesan and Rosemary: Before seasoning with salt and pepper, toss the hot wedges with grated Parmesan cheese and finely minced fresh rosemary. The cheese will clump slightly, which creates crispy, savory bits.
Garlic Parmesan: This version uses garlic-infused oil brushed on after frying, then generously topped with grated Parmigiano-Reggiano and fresh parsley.
Curry-Spiced: Mix curry powder, turmeric, a pinch of cumin, and salt into your pre-frying seasoning. Finish with a sprinkle of chaat masala if you can find it — it adds a tangy, complex flavor.
Honey Sriracha: Keep the basic seasoning minimal, then drizzle the hot wedges with a mixture of honey, sriracha, and a tiny bit of lime juice. Finish with sesame seeds and sliced green onions.
Dietary Adaptations
These wedges are naturally gluten-free and vegan — as long as you’re using vegetable oil, not animal fat for frying. You can make them dairy-free by simply avoiding any cheese or sour cream toppings.
For lower-fat versions, you can bake the parboiled wedges instead of frying them. Toss them with a light coating of olive oil and your seasonings, then roast at 425°F until golden, about 20 to 25 minutes, stirring halfway through. They won’t be quite as crispy as fried wedges, but they’ll still taste delicious.
Storage and Reheating Methods
Crispy potato wedges are best served immediately, but you can store leftovers in an airtight container in the refrigerator for up to three days. They’ll lose some crispiness as they cool, but they’re still entirely edible.
To reheat, place them on a baking sheet and pop them into a 375°F (190°C) oven for 8 to 10 minutes, until they’re heated through and regain some crispiness. The oven is far superior to the microwave for reheating because it restores the crispy exterior rather than making them steamy.
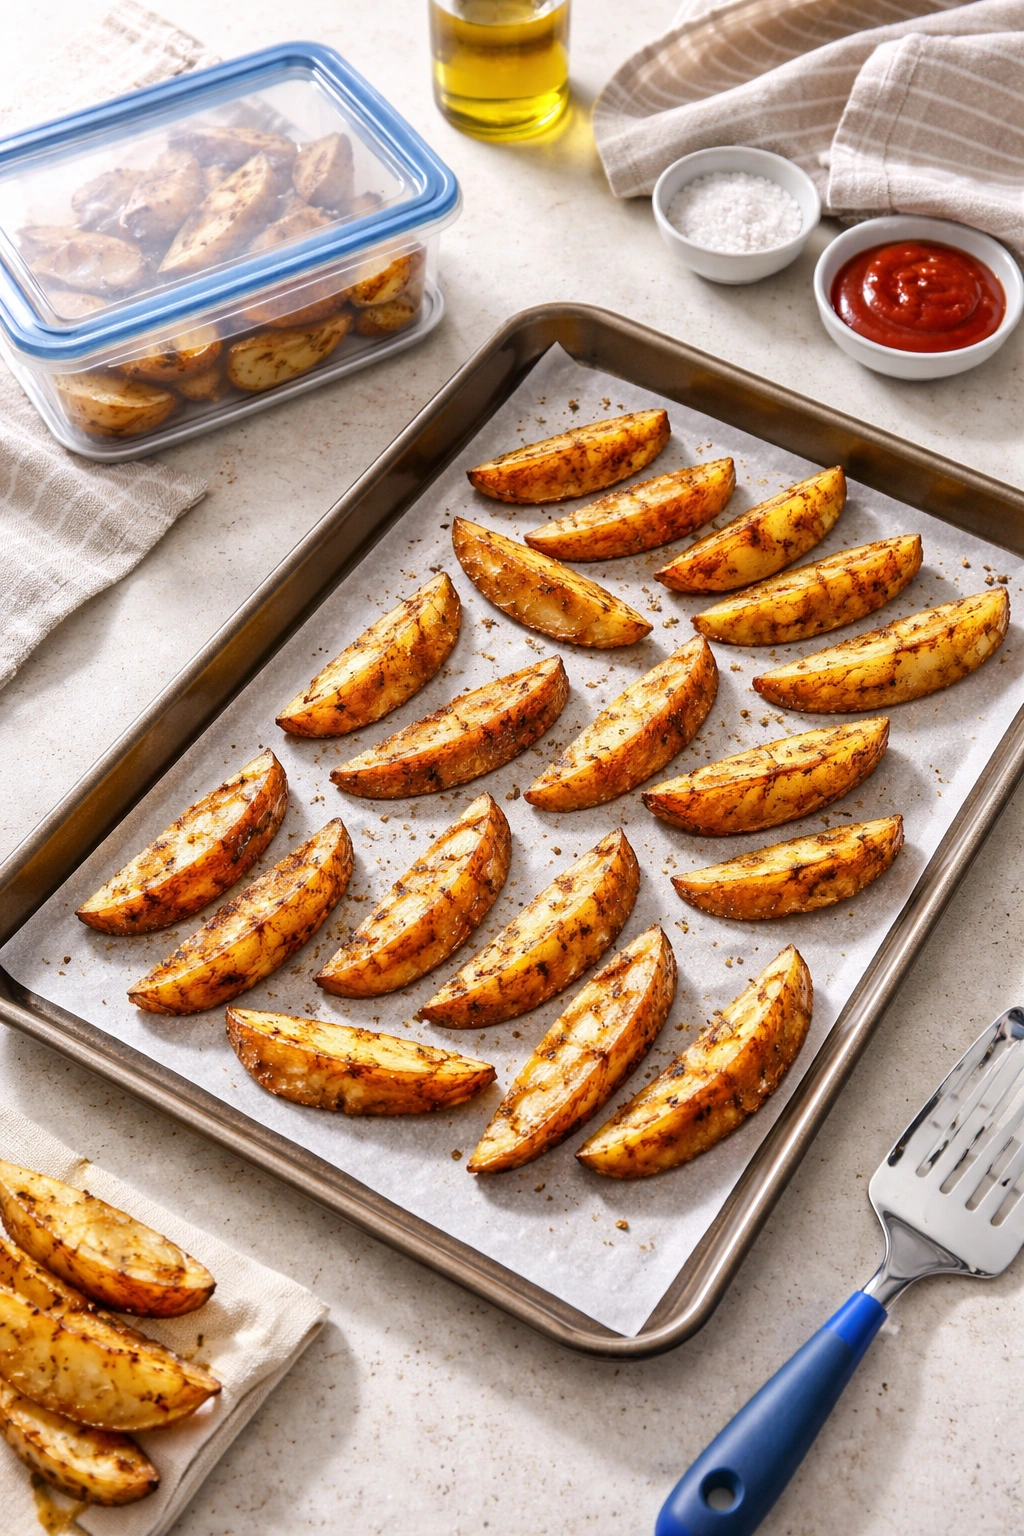
You can also make the wedges partially through ahead of time. Parboil them several hours in advance and store them on paper towels in the refrigerator. When you’re ready to serve, bring the oil to 325°F and fry them — they’ll come out just as crispy as if you’d parboiled them immediately before frying.
Freezing Cooked Wedges
Cooked wedges can be frozen in an airtight container for up to three weeks. Reheat them in a 375°F oven for 12 to 15 minutes, and they’ll be nearly as crispy as fresh. They won’t be quite as perfect as fresh wedges, but they’re excellent for meals when you want crispy potato wedges without the full from-scratch process.
Serving Suggestions and Perfect Pairings
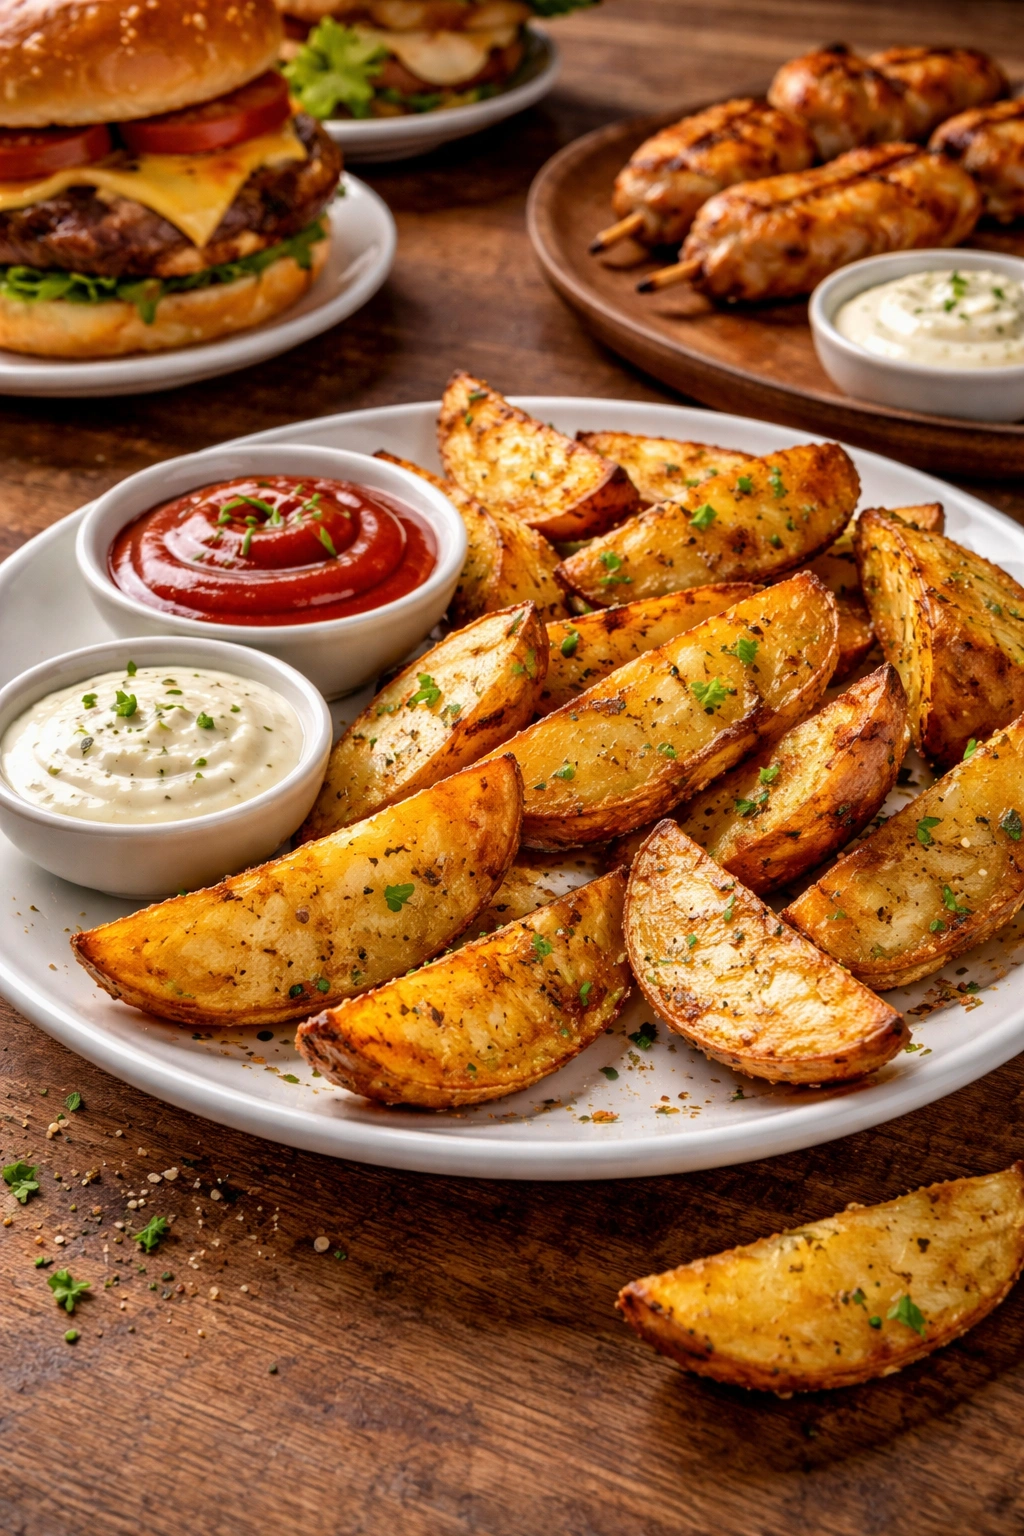
Crispy potato wedges pair beautifully with virtually any dipping sauce you can imagine. A classic combination is simple ketchup and mayonnaise, but consider branching out. Garlic aioli, curry mayo, sriracha mayo, ranch dressing, and chipotle sour cream all pair wonderfully. A simple combination of mayo, sour cream, and fresh dill creates a tangy, creamy dip that lets the potato flavor shine.
These wedges are the ideal side dish for burgers, grilled fish, chicken sandwiches, or any casual meal where you want something crispy and satisfying. They’re hearty enough to feel like the main attraction but simple enough that they don’t compete with more delicate main dishes.
Occasion Ideas
Serve them at casual gatherings with a variety of dipping sauces in small bowls — let guests choose their own. They’re substantial enough that you don’t need as many traditional sides. Pair them with grilled chicken and a fresh salad for a balanced meal, or serve them alongside grilled vegetables and a simple protein for a lighter approach.
For a more indulgent meal, serve them with pulled pork or brisket, creamy coleslaw, and fresh lemonade. The contrast between the crispy wedges and soft coleslaw, and the way the warm wedges complement smoky meat, creates a genuinely satisfying combination.
Final Thoughts
Homemade crispy potato wedges are one of those dishes that seems intimidating until you’ve made them once, after which you realize how simple and reliable they actually are. The technique is straightforward, the ingredients are basic, and the results are dramatically better than anything you can buy frozen or pre-made.
The key is understanding that the parboiling and thorough drying steps are where the magic happens. Those 20 minutes of prep work determine whether your wedges will be crispy or soggy, fluffy or dense. The actual frying is just the final step that brings all that preparation together. Invest in a thermometer so you can monitor the oil temperature, be patient between batches so the oil stays at the right temperature, and you’ll have crispy golden wedges that rival anything from a restaurant kitchen.
Once you’ve made them a few times, this becomes the kind of side dish you make automatically — not for special occasions, but for regular weeknight meals when you want something satisfying and genuinely delicious. The fact that they’re made entirely from scratch with ingredients you can see and taste is simply the bonus.