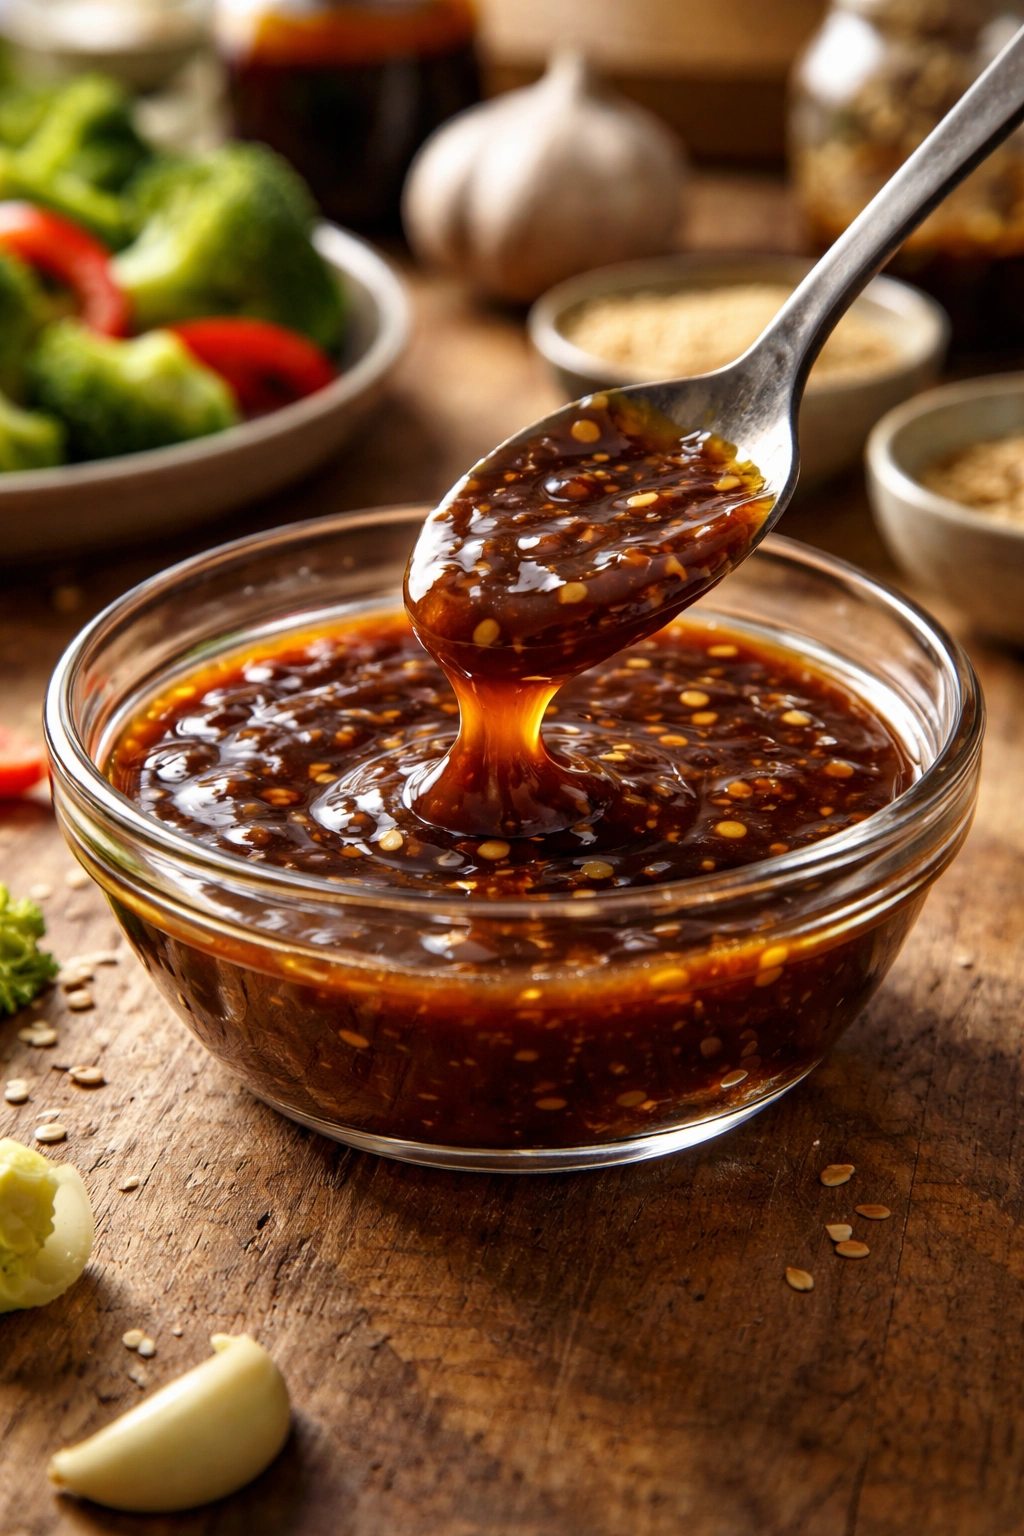
A jar of store-bought stir-fry sauce sits in your pantry with a mystery ingredient list, a price tag that keeps climbing, and a flavor that somehow never tastes quite right in your pan. Meanwhile, a genuinely excellent stir-fry sauce—the kind with deep, balanced flavor that clings perfectly to vegetables and protein—takes about five minutes to whisk together in a bowl. It’s one of those kitchen revelations that completely changes how you cook.
Homemade stir-fry sauce isn’t a culinary secret or a complicated process. It’s simply a matter of understanding which flavors matter most and how to balance them in roughly equal proportions. Once you nail that ratio, you’ll find yourself making stir-fries multiple nights a week because suddenly it’s faster, cheaper, and infinitely more delicious than any other quick dinner option. You’ll also discover that this sauce becomes the foundation for dozens of other dishes—glazed salmon, roasted broccoli, fried rice, chicken wings, and grilled vegetables all benefit from a good stir-fry sauce.
The beauty of making your own is the control. You decide the sweetness level. You choose whether it’s more ginger-forward or garlic-forward. You can make it thick enough to coat or thin enough to pool on the plate. You can whip up a batch in the time it takes to dice your vegetables, and it costs a fraction of what you’d pay for a bottled version. Once you taste the difference a homemade sauce makes, store-bought becomes a backup option, not your default.
Why Homemade Stir-Fry Sauce Changes Everything
The difference between a bottle and a bowl comes down to freshness and intentionality. Commercial stir-fry sauces are engineered to sit on shelves for months, which means they contain preservatives, thickeners that don’t actually add flavor, and often far too much sugar to cover up flat, tired taste.
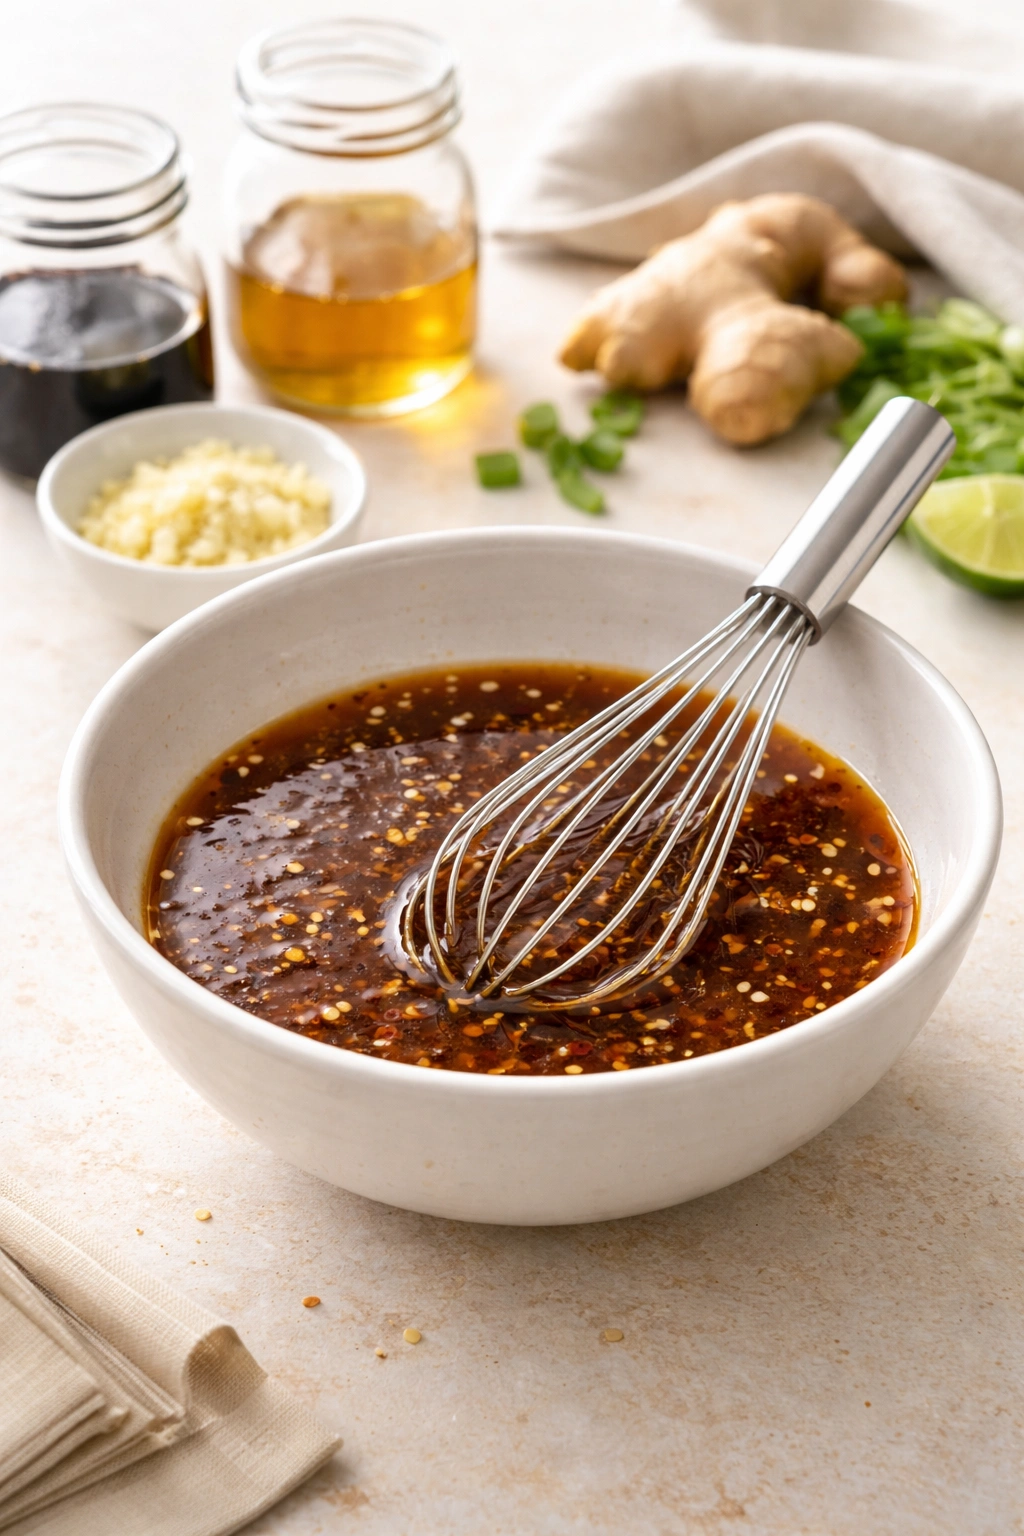
Your homemade version uses only ingredients you actually want to eat—soy sauce, sesame oil, rice vinegar, garlic, ginger, maybe a little honey or brown sugar, and a starch to thicken it gently as it simmers. That’s it. Four minutes of cooking and you’ve got something that tastes alive and vibrant, not one-note sweet or heavily salted.
The texture matters too. A freshly made sauce has a silky, glossy quality that clings beautifully to stir-fried vegetables and protein without being gloppy or gelatinous. The flavors stay distinct enough that you can taste the sesame oil, the ginger bite, the subtle sweetness, and the umami depth all at once, rather than one overwhelming flavor drowning out the others.
The confidence you’ll gain is maybe the best part. Once you understand that a stir-fry sauce is just a formula—aromatics, soy, acid, sweetness, thickener, in the right proportions—you can improvise endlessly. Too thin? Add cornstarch. Too sweet? Add vinegar. Want more heat? Add sriracha. You become the person who makes dinner taste restaurant-quality, not someone following a recipe to the letter.
The Essential Flavor Building Blocks
Every stir-fry sauce that works contains the same core architecture: umami depth, salty richness, bright acidity, subtle sweetness, and a thickening agent that gives the sauce structure. Understanding what each element does lets you adjust the formula confidently.
Soy sauce is your umami and salt foundation. It brings a savory depth that makes everything taste more intentional and complete. Don’t skip it or substitute it with something “healthier”—soy sauce is what makes a stir-fry sauce taste like actual stir-fry. Use regular soy sauce, not tamari (which is gluten-free but tastes slightly different) unless you have a dietary need. The fermented, complex flavor is non-negotiable.
Sesame oil adds richness and a distinctive toasted aroma that signals “stir-fry” to your brain instantly. A little goes a long way—too much becomes overwhelming and almost soapy-tasting. This is the ingredient that separates good from mediocre because it’s where the nutty, sophisticated flavor lives.
Rice vinegar brightens everything and keeps the sauce from tasting one-note. The acidity cuts through the richness of the oil and soy sauce, making your palate want another bite. White rice vinegar is mild and clean; black rice vinegar (also called Chinkiang vinegar) adds a slightly smoky, complex depth. Either works beautifully.
Garlic and ginger are the aromatic backbone. Fresh minced garlic and ginger bring heat, bite, and complexity that dried versions can never match. Don’t even consider garlic powder here—this is where you taste the difference between good and lazy.
Sweetness—whether from honey, brown sugar, or a splash of pineapple juice—balances the savory and salty elements and rounds out the flavor profile. It shouldn’t be noticeable as sweetness; it should just make everything taste more harmonious and complete.
Cornstarch or arrowroot thickens the sauce so it coats your vegetables and protein instead of pooling at the bottom of the pan. This is technically optional (you can make a thinner sauce), but a light thickening makes the sauce cling beautifully during cooking.
Yield, Prep Time, and Difficulty
Yield: Makes about ¾ cup of sauce (enough for 4 servings of stir-fry with vegetables and protein)
Prep Time: 10 minutes
Cook Time: 5 minutes
Total Time: 15 minutes
Difficulty: Beginner — This is genuinely one of the easiest sauces you’ll ever make. Everything goes into a bowl, gets whisked together, and then simmers gently for a few minutes. There’s no technique to master, no timing that requires precision. If you can whisk and read a thermometer, you can make this perfectly.
Complete Ingredient List
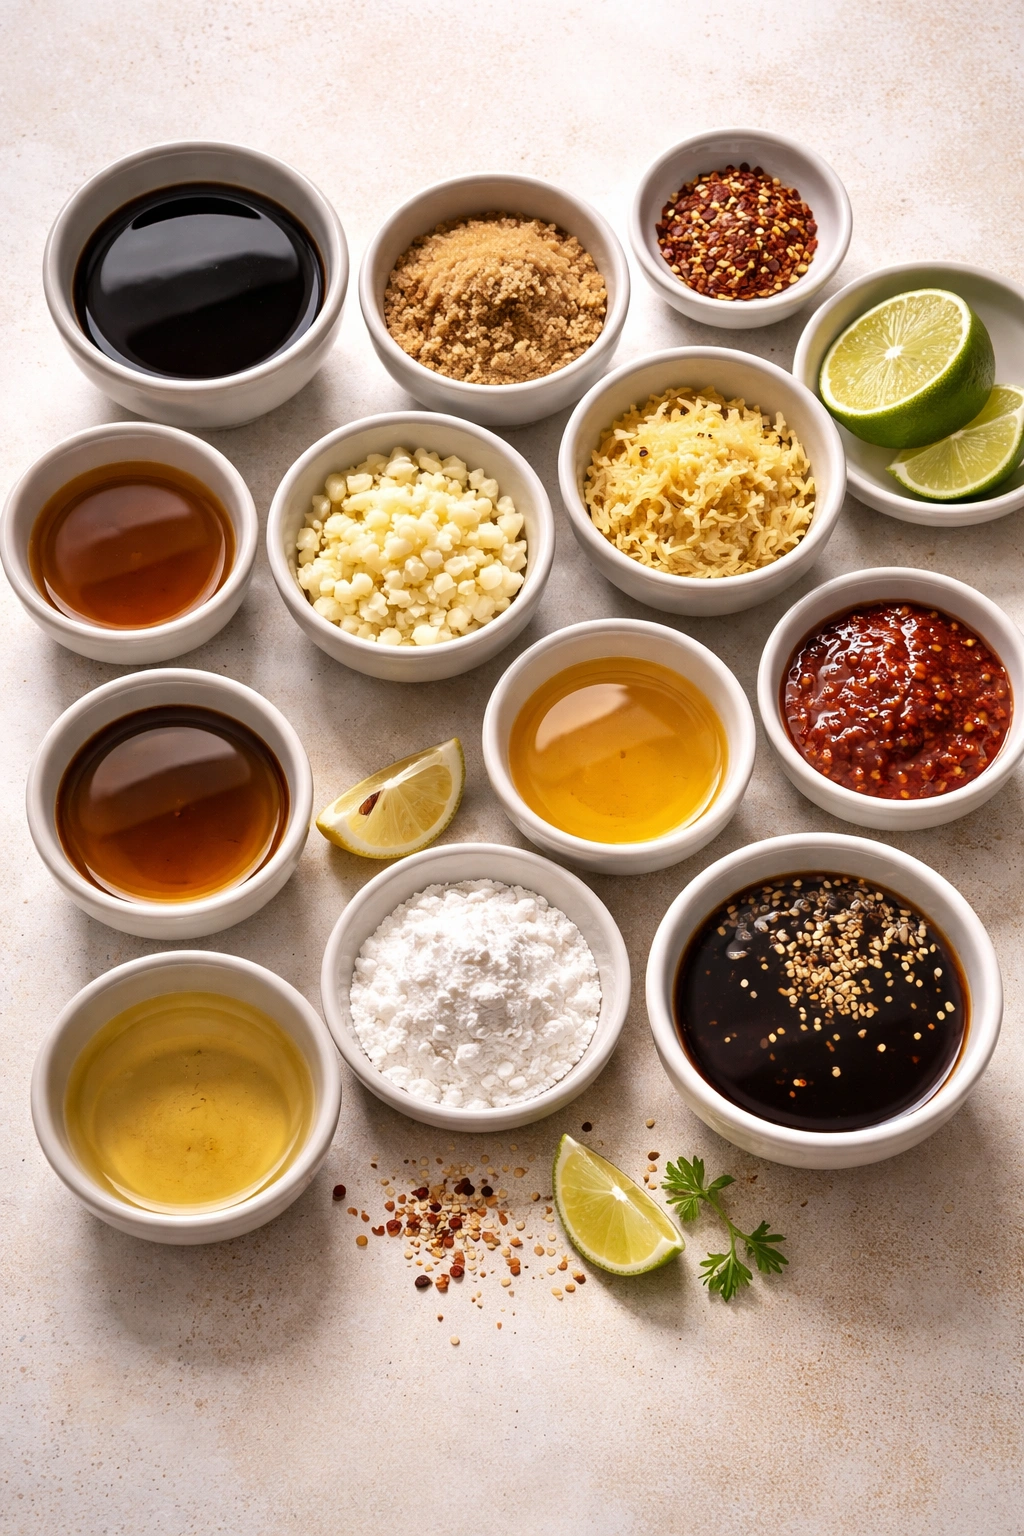
For the Stir-Fry Sauce:
- ¼ cup soy sauce (use regular soy sauce, not low-sodium)
- 2 tablespoons rice vinegar (white or black/Chinkiang vinegar both work beautifully)
- 2 tablespoons honey or light brown sugar
- 1½ tablespoons toasted sesame oil
- 3 cloves garlic, minced very fine (or passed through a garlic press)
- 1 tablespoon fresh ginger, minced very fine (about a 1-inch piece of fresh ginger root)
- ¼ cup water or chicken broth
- 1 tablespoon cornstarch (or arrowroot powder, or tapioca starch for gluten-free)
- ½ teaspoon red pepper flakes (optional, for gentle heat)
- ¼ teaspoon white pepper or black pepper
Optional Add-Ins (Choose None, One, or Two):
- 1 teaspoon miso paste (white or red) — whisked in at the end for deeper umami
- ½ teaspoon five-spice powder — for a more complex, warming spice profile
- 1 tablespoon oyster sauce — adds richness and deeper umami
- 1 teaspoon Sriracha or other hot sauce — for more pronounced heat
- 1 tablespoon pineapple juice — for tropical sweetness and brightness
- 1 teaspoon fish sauce — for umami depth (use sparingly, it’s pungent)
Making the Sauce Step by Step
Prepare the Aromatics:
-
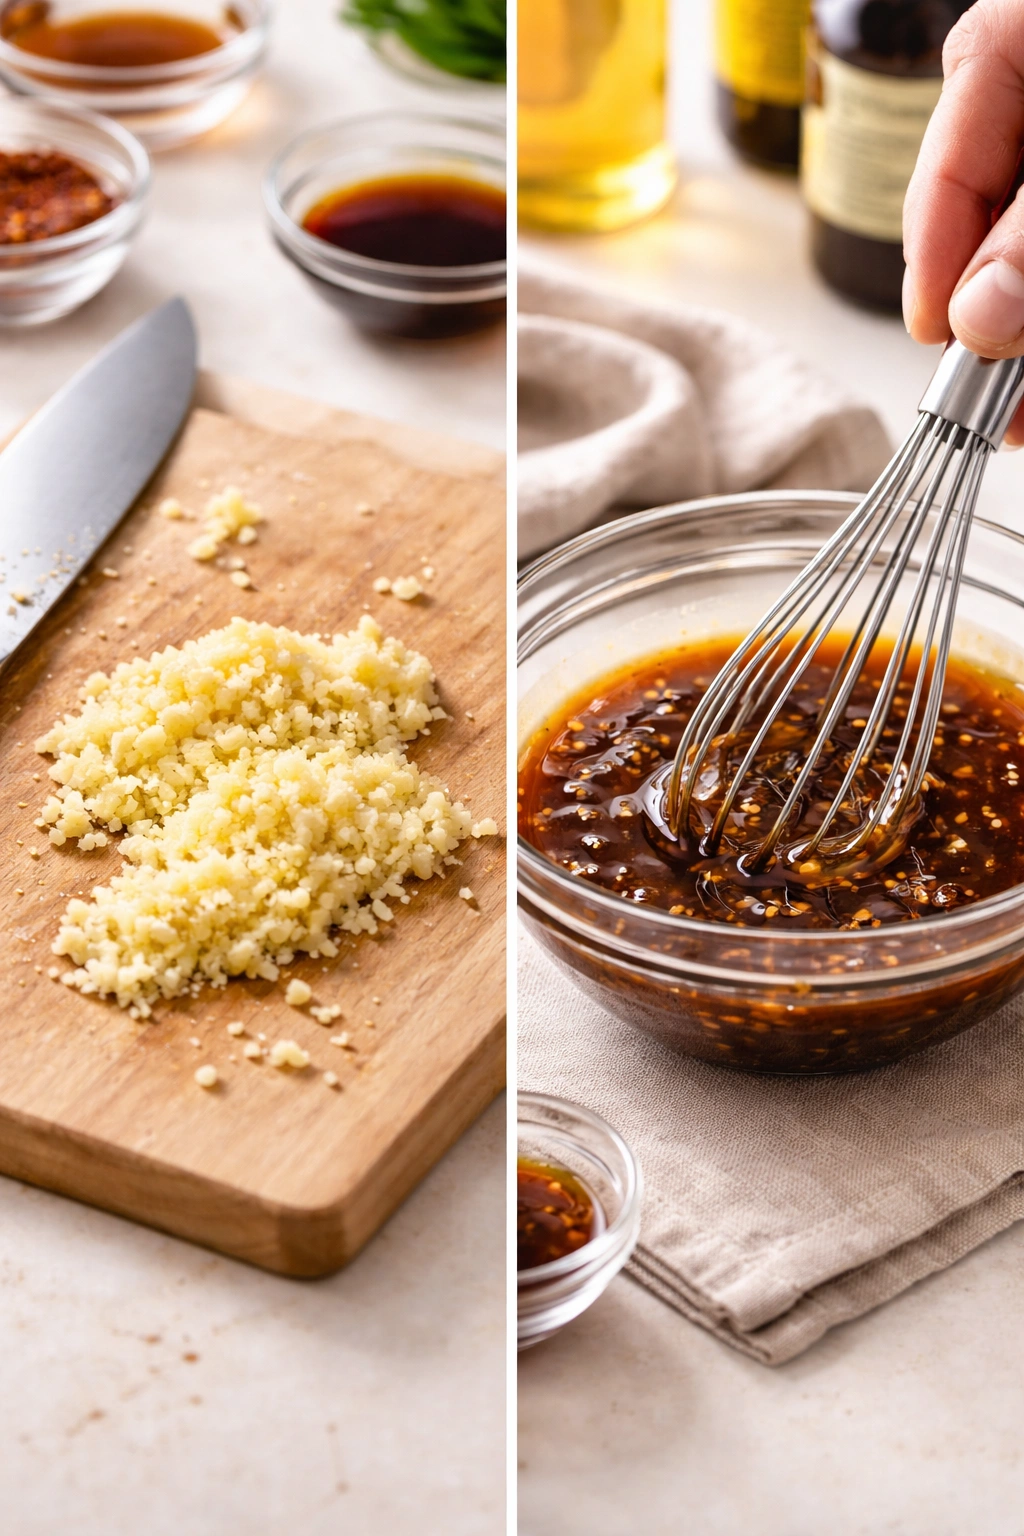
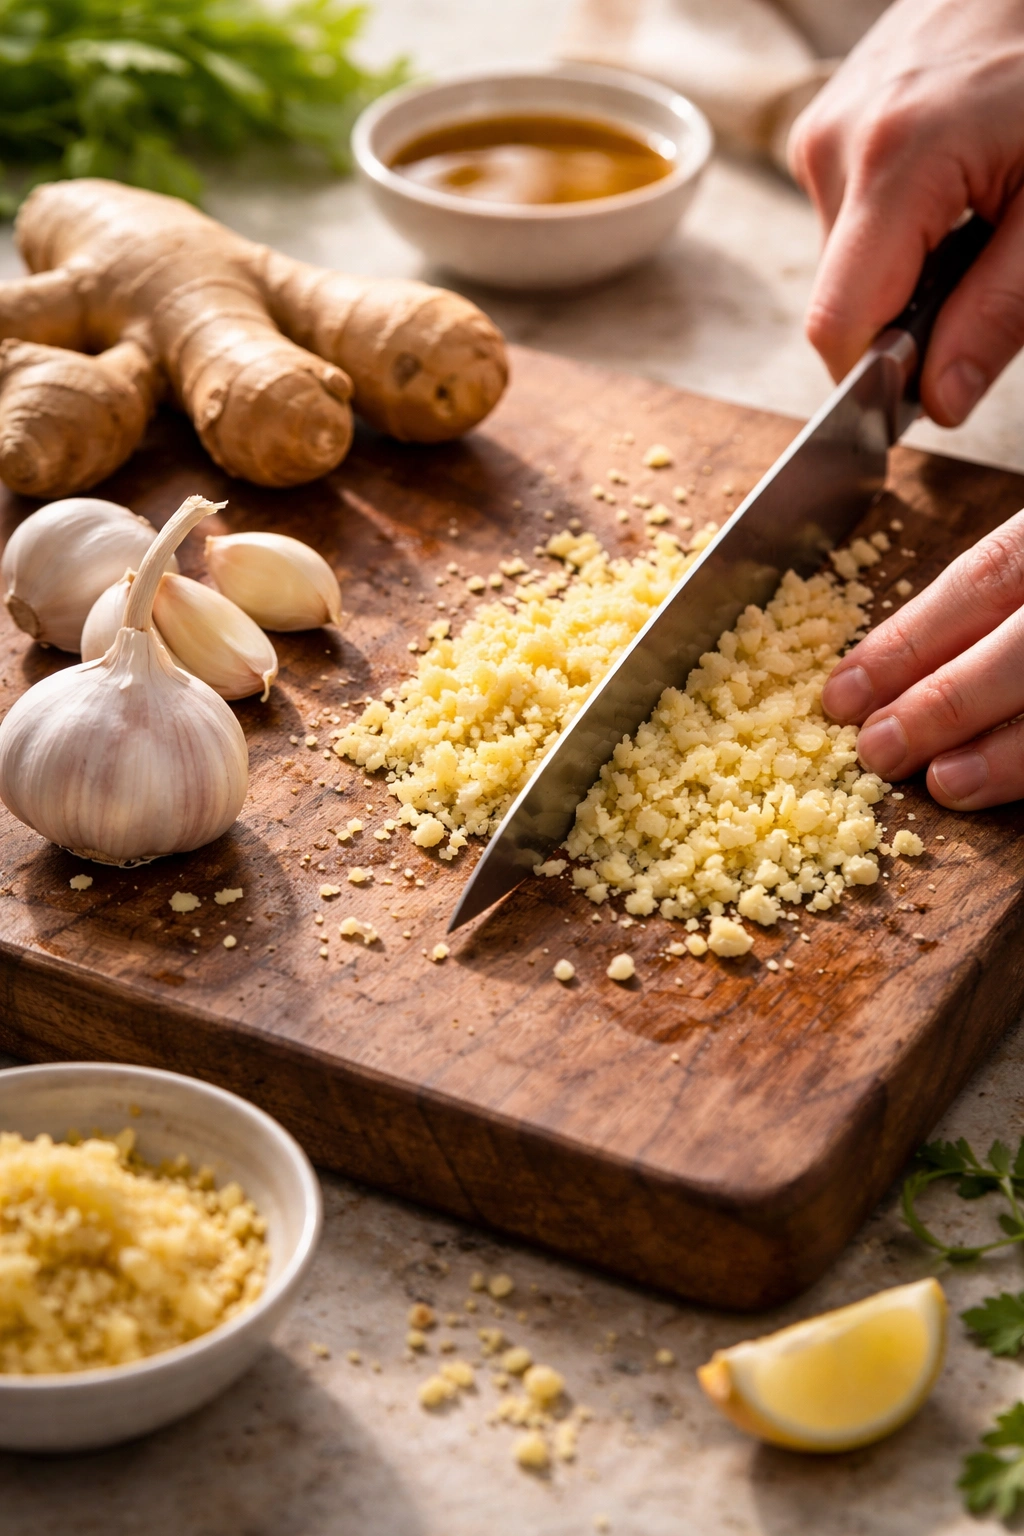
Mince the garlic very finely so it dissolves evenly into the sauce and distributes throughout every spoonful. You can use a microplane, a sharp knife, or a garlic press—any method that creates very small, consistent pieces works. Mincing by hand takes about a minute.
-
Mince the fresh ginger root the same way. Remove the papery skin by scraping it gently with a spoon (you don’t need to peel it completely), then mince the pale flesh as finely as possible. Fresh ginger has a bright, clean bite that dried ginger can’t touch—don’t skip it or substitute.
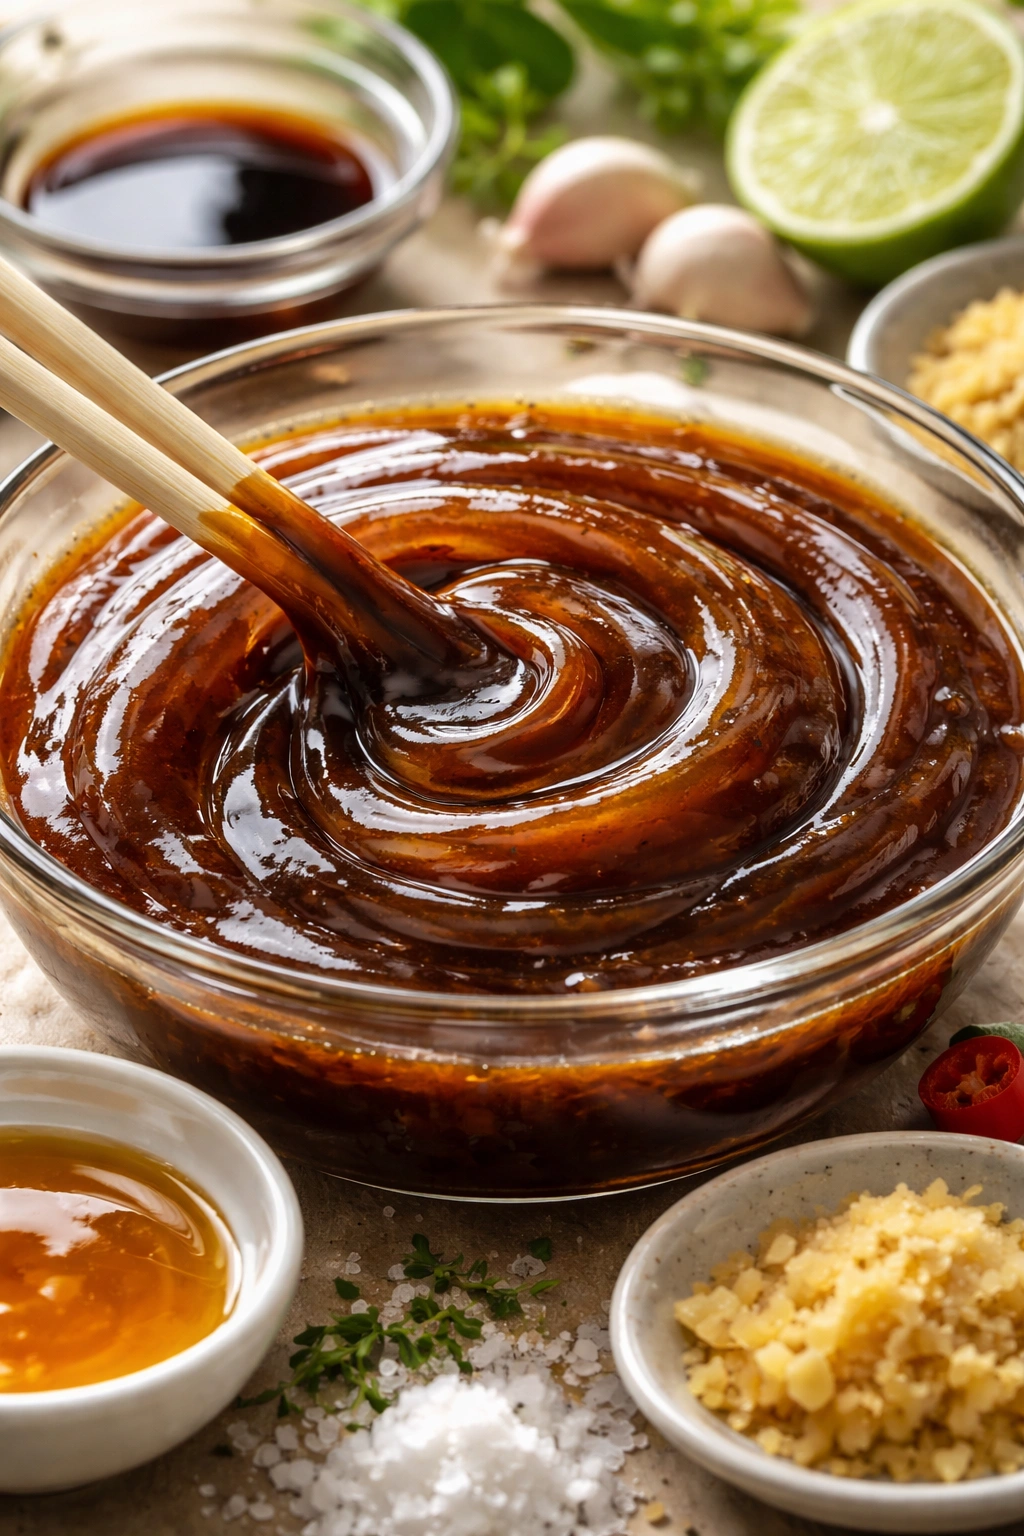
Combine the Sauce:
-
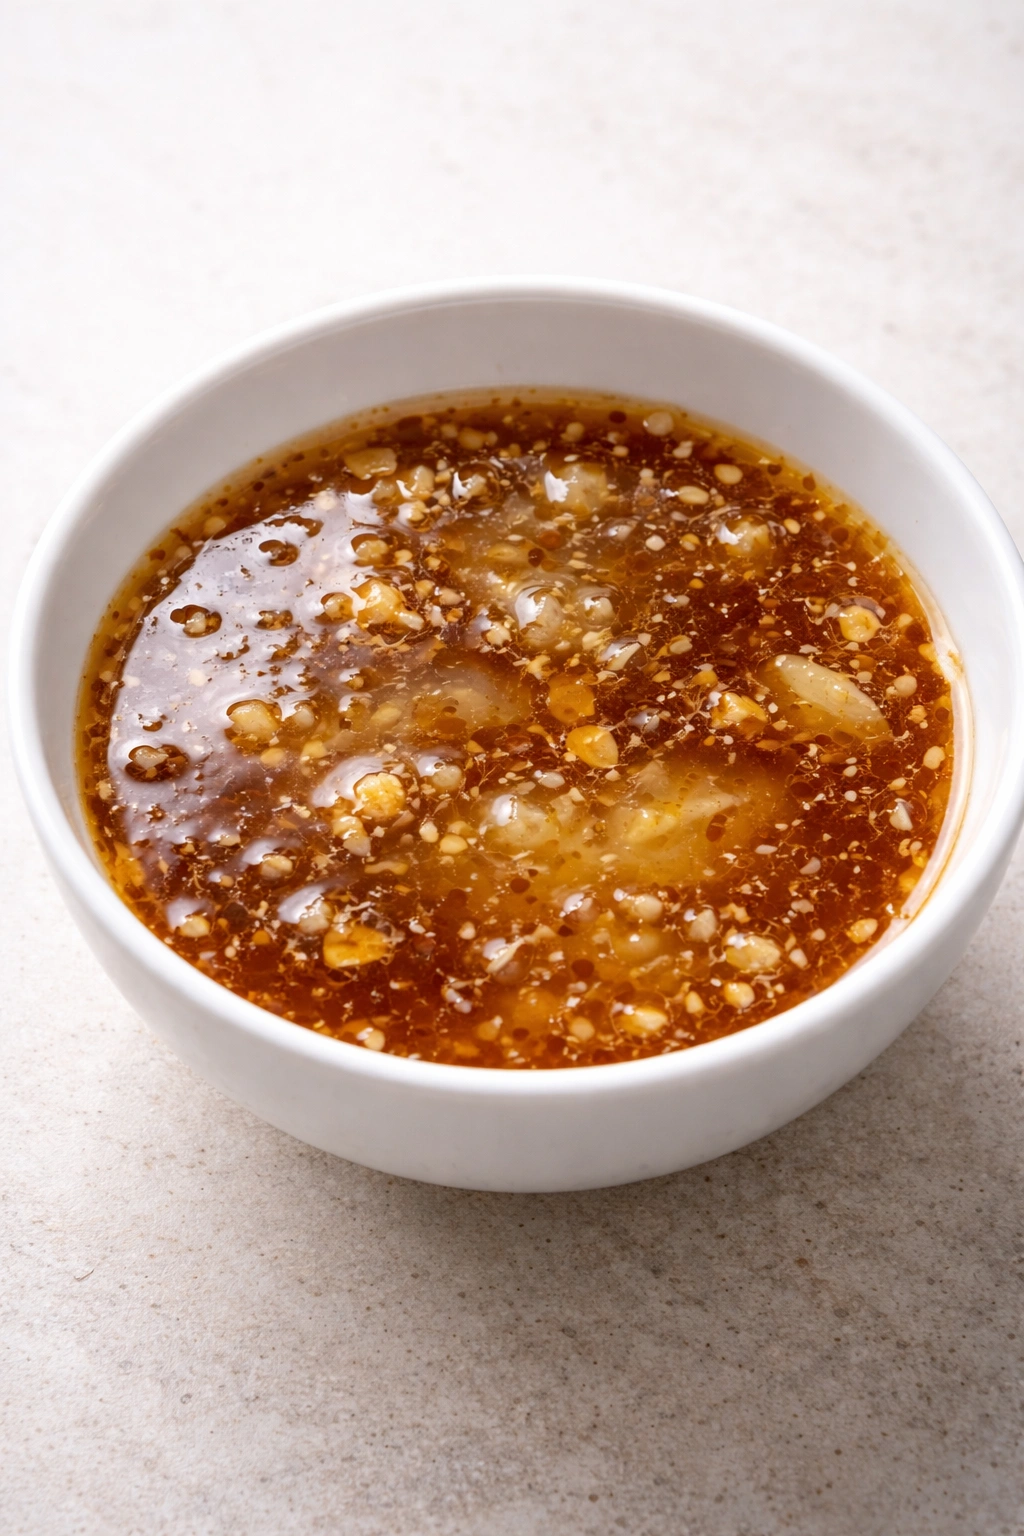
In a small bowl (a 2-cup mixing bowl is perfect), whisk together the soy sauce, rice vinegar, honey or brown sugar, sesame oil, minced garlic, minced ginger, and the optional white or black pepper. Whisk for about 30 seconds until the honey fully dissolves and everything combines smoothly. The mixture should be glossy, aromatic, and deeply flavorful.
-
In a separate small cup or bowl, whisk together the cornstarch and ¼ cup of water or chicken broth until the cornstarch is completely dissolved and the mixture is smooth—no lumps. This mixture is called a slurry, and it’s what thickens the sauce smoothly without creating lumps.
-
Add the cornstarch slurry to the bowl with the other ingredients and whisk gently until completely combined. The mixture will be thin and pourable at this point, which is exactly what you want.
Cook the Sauce:
-
Pour the entire sauce mixture into a small saucepan or skillet over medium heat. Don’t add it to your hot wok or cooking pan yet; it needs a gentle, controlled heat to thicken properly without scorching any of the ingredients.
Advertisements -
Stir constantly as the sauce heats through, about 2 to 3 minutes. You’ll feel a slight resistance building as you stir—this is the cornstarch beginning to gelatinize and thicken the sauce. Watch for the first small bubble to break the surface.
-
Once the sauce reaches a gentle simmer and a few bubbles have broken the surface (about 30 seconds of actual simmering), it’s done. Remove it from the heat immediately. Don’t let it boil hard or cook longer than 1 minute after it simmers—overcooking will make the sauce cloudy instead of clear and glossy, and you’ll lose some of the fresh flavor.
-
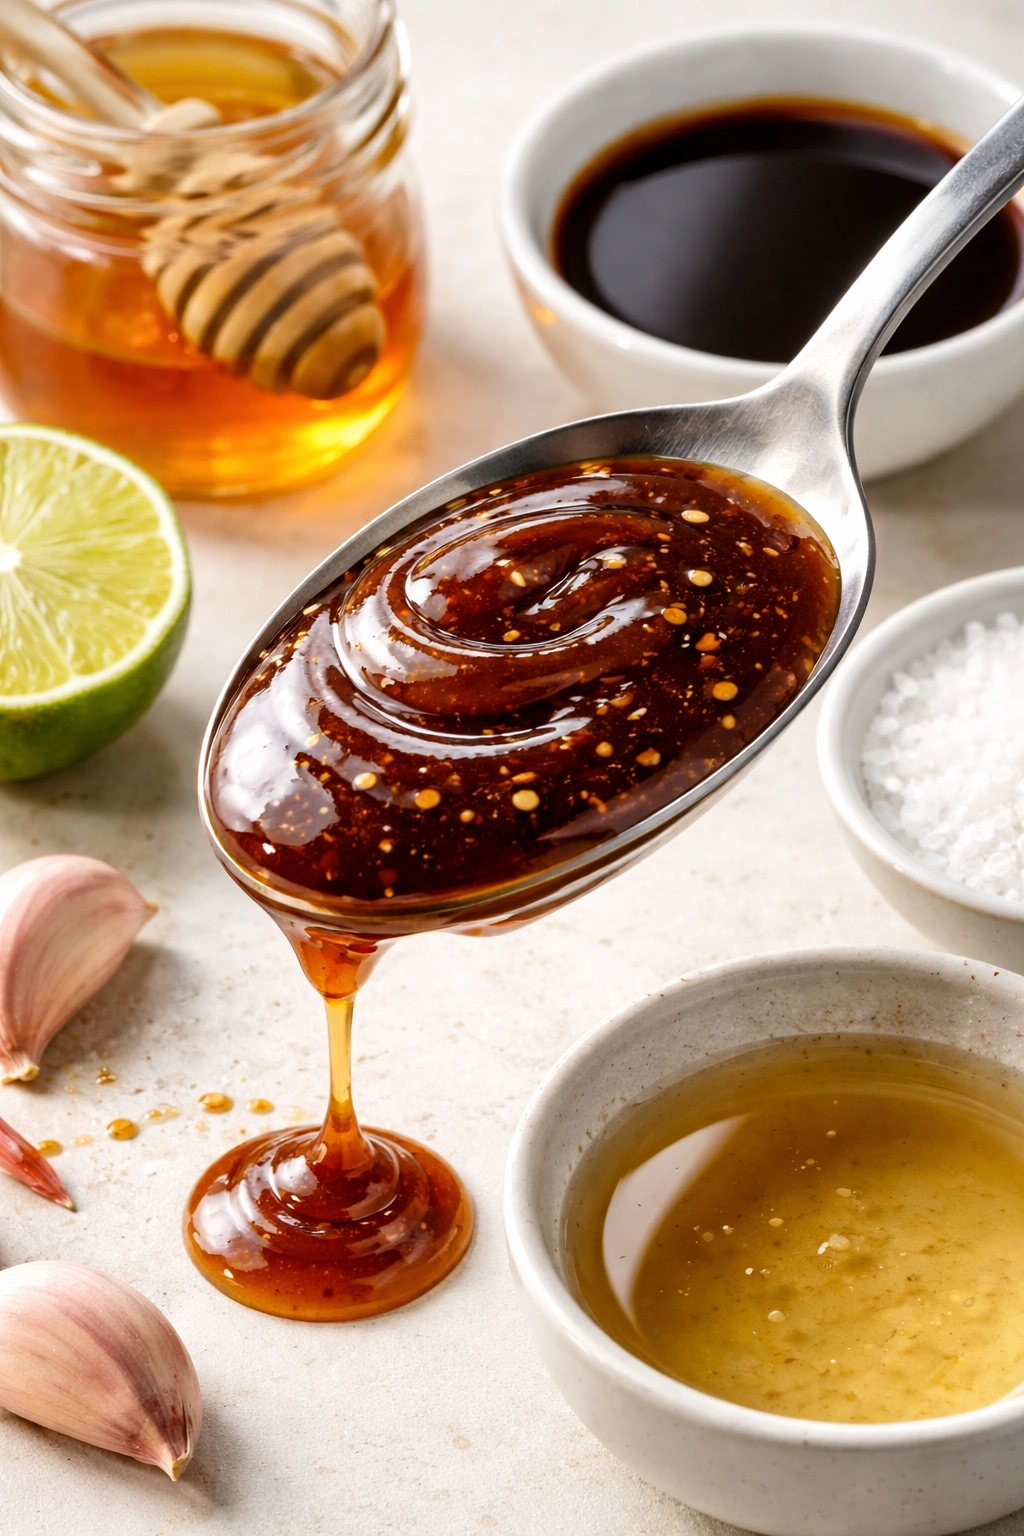
The sauce will continue to thicken slightly as it cools, so it’ll be thicker in your pan after a minute or two than it appeared right off the heat. If you’ve made it and find it’s thicker than you want, whisk in a tablespoon of water to thin it to your preferred consistency.
-
Let the sauce cool to room temperature before using it (about 5 minutes), or use it warm—both work fine. If you’ve added optional ingredients like miso paste that don’t dissolve in the raw sauce, whisk them in right before the sauce comes off the heat, not before.
How to Balance Sweet, Salty, and Umami Perfectly
The magic of a great stir-fry sauce is the balance between its four main flavor pillars, and you can taste when one is out of line. If the sauce tastes too salty, add a touch more vinegar or honey rather than adding water—water dilutes the whole flavor profile. If it tastes too sweet, add a bit more soy sauce or vinegar. This is why tasting and adjusting is so important.
The Sweet-Savory Ratio:
The honey (or brown sugar) shouldn’t taste like sweetness in the final sauce. If you can taste a distinct sweet note, you’ve added too much. The sweetness should be subtle and backing-vocal, not lead. It’s there to make the salty, savory, umami flavors feel complete and less harsh. Start with 2 tablespoons of honey per the recipe, taste it after cooking, and if it seems aggressively sweet, reduce to 1½ tablespoons next time or add a teaspoon more vinegar to balance it.
The Soy Sauce Foundation:
Soy sauce is doing triple duty: adding salt, umami depth, and a fermented complexity. Don’t be tempted to reduce it or use low-sodium soy sauce—the flavor won’t be right. If you’re concerned about sodium overall in your diet, use the regular sauce but simply use less of it when cooking (a tablespoon or two in your pan instead of three). A little goes further than you might expect.
The Umami Depth:
The umami that comes from soy sauce is foundational, but you can deepen it even more by adding a teaspoon of miso paste or oyster sauce. Miso paste is salty and funky-umami, so if you add it, reduce the soy sauce by a tablespoon to compensate. Oyster sauce brings a sweet-savory umami that makes the whole sauce feel richer and more restaurant-quality. Either is optional, but both elevate the sauce considerably.
The Brightness from Vinegar:
The rice vinegar is what stops the sauce from tasting flat and heavy. It adds spark and makes your palate want another bite. If you prefer a slightly brighter, more tangy sauce, use white rice vinegar and add an extra teaspoon. If you like it deeper and more complex, use black rice vinegar (Chinkiang) or add a small splash of Sherry vinegar. The vinegar percentage relative to soy sauce should stay around a 1:2 ratio, so if you’re adjusting, keep that proportion in mind.
Pro Tips for Restaurant-Quality Results
Use Fresh Ginger and Garlic:
Seriously. This is non-negotiable. Dried garlic powder, garlic salt, and powdered ginger taste flat and one-dimensional by comparison. You’re making the sauce fresh in 5 minutes anyway—spend 90 seconds mincing fresh ginger and garlic. You’ll taste the difference in every bite of your stir-fry.
Don’t Skip the Sesame Oil:
Sesame oil is expensive compared to vegetable oil, but you only use 1½ tablespoons per batch and it lasts months in your pantry. It’s worth every penny. The toasted, nutty aroma is what makes homemade stir-fry sauce taste like stir-fry sauce instead of just a salty sauce. Buy a bottle from the Asian foods section of your grocery store (it’s usually cheaper than the fancy specialty brand at the end cap).
Make It Cool, Use It Warm or Room Temperature:
The sauce thickens perfectly as it cools to room temperature. If you cook it and immediately pour it into a hot wok, it’ll be thinner than it should be (the heat prevents the cornstarch from fully setting), so give it a minute or two to cool before adding your protein and vegetables.
Taste and Adjust Before You Cook:
Dip a clean spoon into the cooled sauce and taste it. This is when you decide if it needs more salt, more sweetness, more tang, or more heat. Once it hits the hot pan with your food, you can’t adjust it easily. A taste test takes 10 seconds and prevents a sauce that’s off-balance from becoming tomorrow’s frustration.
Use a Non-Stick or Well-Seasoned Pan:
If you’re heating the sauce, use a non-stick saucepan or a well-seasoned cast-iron skillet to prevent sticking. A steel pan that’s not non-stick can cause the cornstarch to catch and burn on the bottom, which ruins the silky texture.
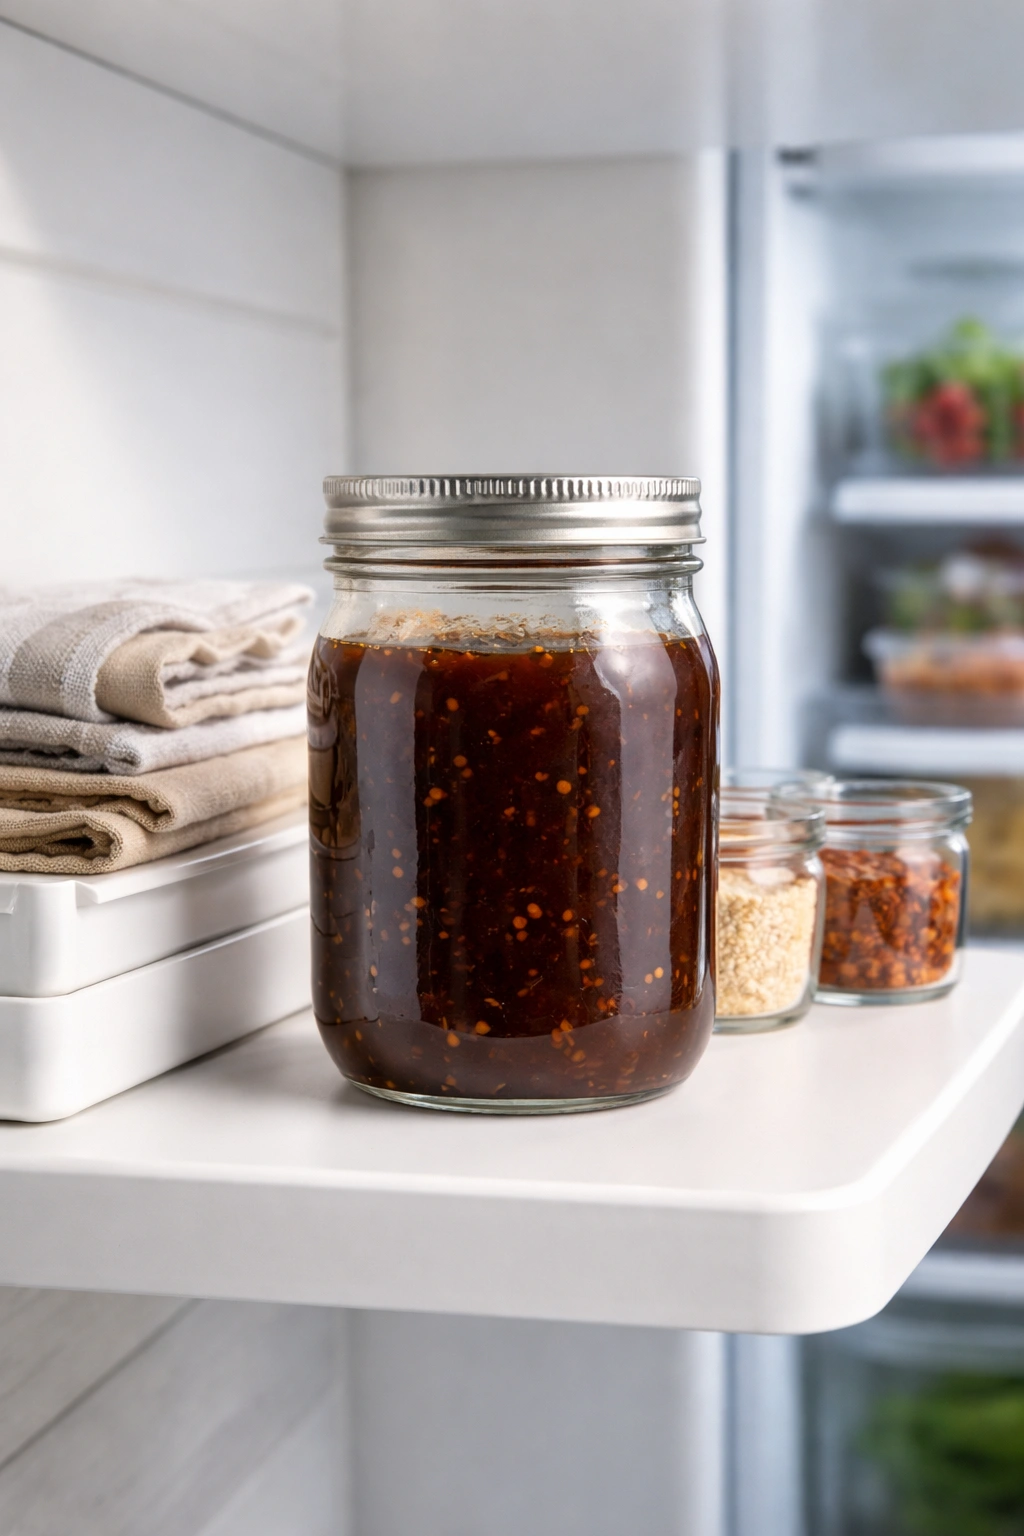
Keep It on Hand in a Jar:
Make a double or triple batch and store it in a clean glass jar in the fridge (see the storage section below). You can grab a spoonful whenever you’re stir-frying, without making it fresh every time. It keeps for weeks and tastes just as good on day 10 as it did on day one.
Common Mistakes That Ruin a Good Sauce
Using Pre-Minced Garlic from a Jar:
Pre-minced garlic is convenient, but it tastes musty, oxidized, and nothing like fresh garlic. The flavor is flat and sometimes almost sulfurous in an unpleasant way. Fresh garlic minced by hand takes 30 seconds and makes an enormous difference. This is worth the extra effort every single time.
Overcooking the Sauce:
The sauce needs only about 1 minute of gentle simmering after the cornstarch thickens it. If you keep cooking it longer, the cornstarch breaks down and the sauce loses its glossy shine, becoming cloudy and separated-looking instead. Off the heat is your friend here—cook until it just simmers, then stop.
Adding the Thickener Directly Without Making a Slurry:
If you dump cornstarch directly into the hot sauce, it clumps. Making a slurry—whisking cornstarch with water until completely smooth before adding it to the sauce—prevents lumps entirely. This step takes 20 seconds and is the difference between silky sauce and grainy, lumpy sauce.
Skipping the Fresh Ginger:
Like the garlic, dried ginger is a completely different flavor profile. Fresh ginger has a bright, almost peppery heat that dried ginger can’t match. The small effort of mincing fresh ginger gives you a sauce that tastes alive instead of tired.
Making the Sauce Too Thick or Too Thin:
If your sauce is too thick, it’s hard to distribute evenly and it can become gelatinous-looking. If it’s too thin, it pools on the plate instead of clinging to the vegetables. The right consistency is somewhere between ketchup and gravy—it should coat a spoon but still flow slowly. If you’ve cooked it and it’s too thick, whisk in a tablespoon of water. Too thin? You’ve either underdone it (cook for a few more seconds) or you need slightly more cornstarch next time.
Using Regular Vinegar Instead of Rice Vinegar:
Regular white vinegar is harsh and one-note sharp. Rice vinegar (white or black) is milder, more complex, and won’t overpower the other flavors. It costs about the same and a bottle lasts months, so there’s no reason not to use the right vinegar.
5 Flavor Variations to Make This Sauce Your Own
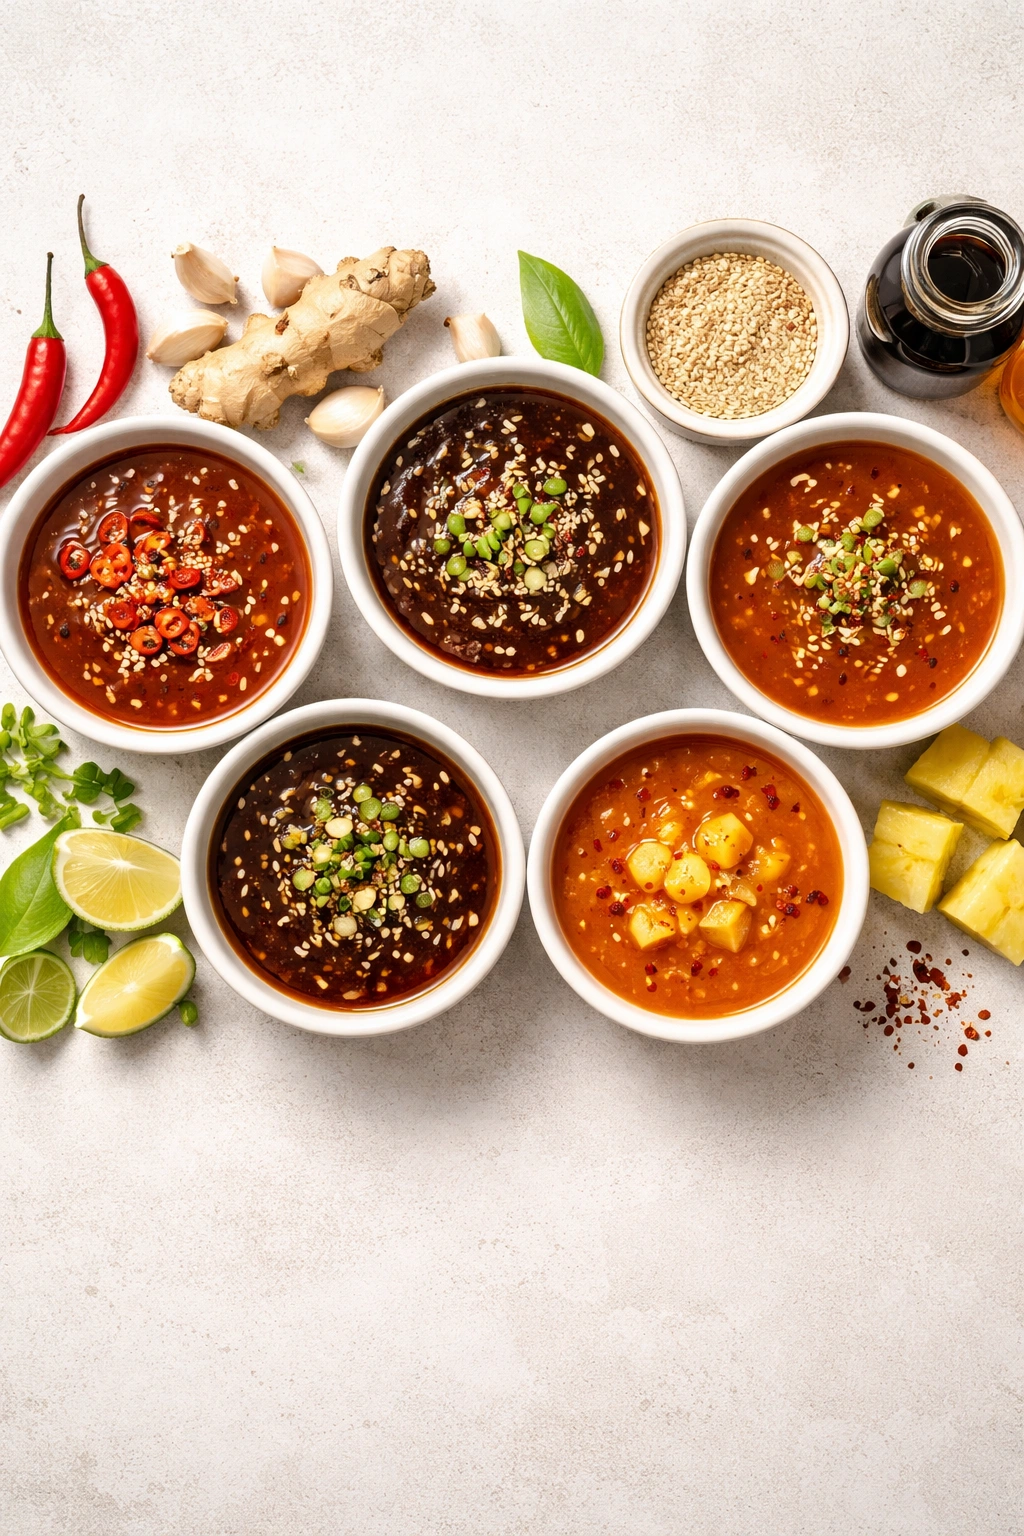
Once you’ve made the basic recipe a few times, play with variations. Each one is still about 5 minutes and completely transforms the final stir-fry. These aren’t just tweaks—they’re entirely different sauces for entirely different moods and proteins.
Variation 1: Spicy Sriracha Sauce
Add ½ to 1 teaspoon of Sriracha (depending on how much heat you want) in the final minute of cooking, after the sauce has thickened. The Sriracha needs to heat through gently so the flavors blend, but you don’t want to cook it so long that the heat becomes sharp and one-dimensional. This version is perfect for a stir-fry with shrimp, broccoli, and snap peas. The heat cuts through the richness of the oil and makes the sauce feel more alive. You can also use any hot sauce you have on hand—gochujang (Korean red chile paste) adds deeper, funkier heat, while a simple hot sauce adds brightness.
Variation 2: Ginger-Forward Sauce
Double the fresh ginger in the recipe (use 2 tablespoons instead of 1) and reduce the honey slightly to 1½ tablespoons. Add an extra splash of rice vinegar (about 3 tablespoons total instead of 2) to keep the sweetness balanced. This version is aggressively ginger-forward and bright, perfect for a stir-fry with lighter proteins like chicken breast or white fish. The bright, peppery heat of the ginger becomes the star. This is the sauce for when you want to taste the ginger in every bite.
Variation 3: Miso-Umami Sauce
Keep the basic recipe but add 1 teaspoon of white or red miso paste in the final minute of cooking (don’t add it at the beginning because it needs to dissolve smoothly into the hot sauce). Reduce the soy sauce by 1 tablespoon since miso is also salty. This version has incredible depth—miso adds a fermented funk and umami that makes the sauce taste like it came from a real restaurant. It’s especially good with beef or mushrooms because the umami flavors complement each other. White miso is milder and slightly sweet; red miso is earthier and more pronounced. Start with white if you’re unsure.
Variation 4: Pineapple-Ginger Sauce
Replace the honey with ¼ cup pineapple juice (bottled or fresh), or add 2 tablespoons of pineapple juice in addition to 1 tablespoon of honey. Keep everything else the same. This version has a tropical sweetness and brightness that’s absolutely magical with shrimp, chicken thighs, or bell peppers. The pineapple juice adds more liquid, so you might need to increase the cornstarch slurry to 1½ tablespoons cornstarch + ¼ cup water instead of 1 tablespoon + ¼ cup. Taste after cooking—you might need to adjust the consistency. This sauce also pairs beautifully with pork, cashews, and broccoli.
Variation 5: Oyster Sauce Version
Add 1 tablespoon of oyster sauce and reduce the soy sauce by 1 tablespoon (since oyster sauce is also salty). Keep everything else the same. Oyster sauce is a thick, deeply savory paste that adds sweetness and depth you can’t get any other way. This version feels richer and more indulgent. It’s incredible with beef, broccoli, and a handful of sesame seeds on top. Oyster sauce is non-vegan, so skip this variation if that’s a concern, but if you eat it, this sauce is close to what you get at really good Chinese takeout restaurants.
Storage, Reheating, and Make-Ahead Guidance
Room Temperature Storage:
The sauce will keep at room temperature in a covered container or jar for up to 2 hours while you’re cooking. This is the ideal scenario—the sauce is already at the right temperature and ready to use whenever you need it. If you’re making the sauce ahead of time and plan to cook a few hours later, store it in the fridge instead.
Refrigerator Storage:
Covered and refrigerated, the sauce keeps for 2 to 3 weeks easily. The flavors stay bright and fresh for the entire time. The sauce may separate slightly as it sits (the oil rises to the top, the watery part sinks)—this is completely normal and not a sign of spoilage. Just whisk or stir it back together before using.
Freezer Storage:
Yes, you can freeze it. Pour the sauce into ice cube trays and freeze until solid (about 4 hours), then pop the cubes out and store them in a freezer bag for up to 3 months. This is genius if you make large batches because you can grab one or two cubes whenever you’re making a quick stir-fry. Thaw the cubes in a small saucepan over low heat for about 2 minutes, stirring occasionally, and it’s ready to use. The texture and flavor stay exactly the same.
Make-Ahead Strategy:
You can make this sauce up to a week in advance. Store it covered in the refrigerator and it’s ready to grab whenever you’re assembling a stir-fry. This is one of my favorite weeknight shortcuts—have the sauce already made, prep your vegetables and protein the morning you want to cook (or the night before), and dinner comes together in 15 minutes flat.
Reheating:
The sauce doesn’t need much reheating. If you’ve made it fresh and it’s still warm, use it as-is. If it’s been refrigerated and is cold, pour it into a small saucepan and heat it gently over low-medium heat for a minute or two, stirring occasionally, until it’s warm. Don’t heat it aggressively—a gentle warm is all you need. The sauce is already cooked, so you’re just taking the chill off.
Using Cold Sauce:
You can also use the sauce straight from the fridge without warming it. It’ll cool the other ingredients slightly, but for a quick stir-fry that’s sometimes nice. The sauce will warm back up once the vegetables are in the hot pan. If you’re worried about the temperature dropping too much, warm the sauce for a minute first.
Serving Suggestions and Pairing Ideas
This sauce is so versatile that you’ll find yourself using it for far more than stir-fries. A good rule: any time you want something savory, ginger-forward, and glossy, this sauce works.
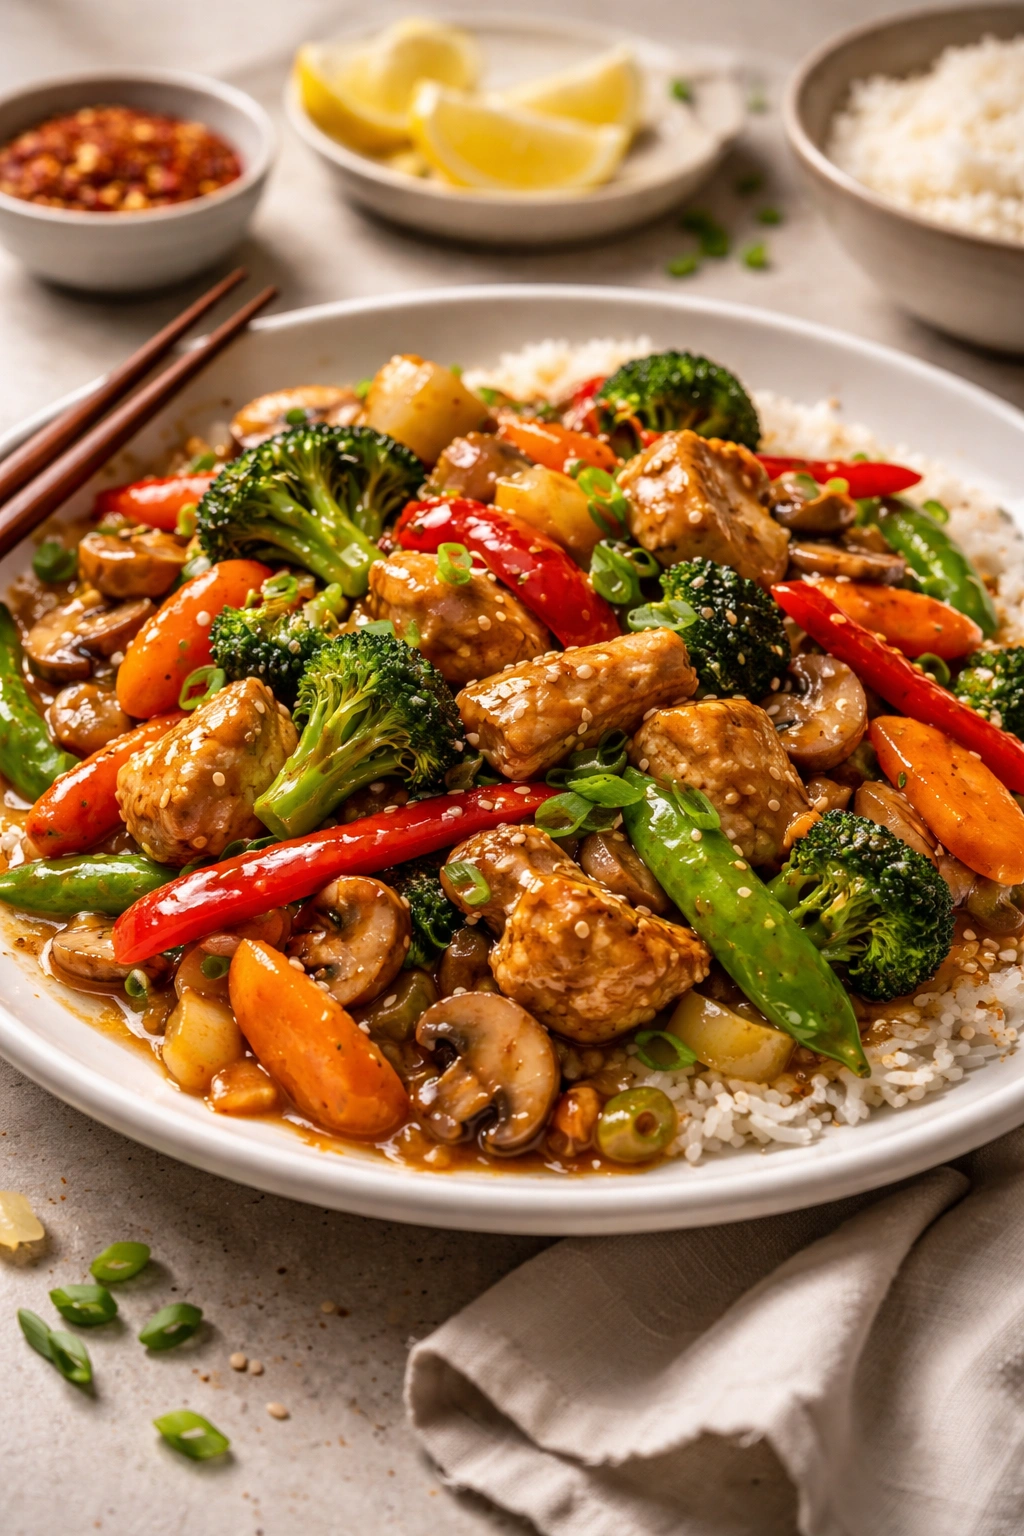
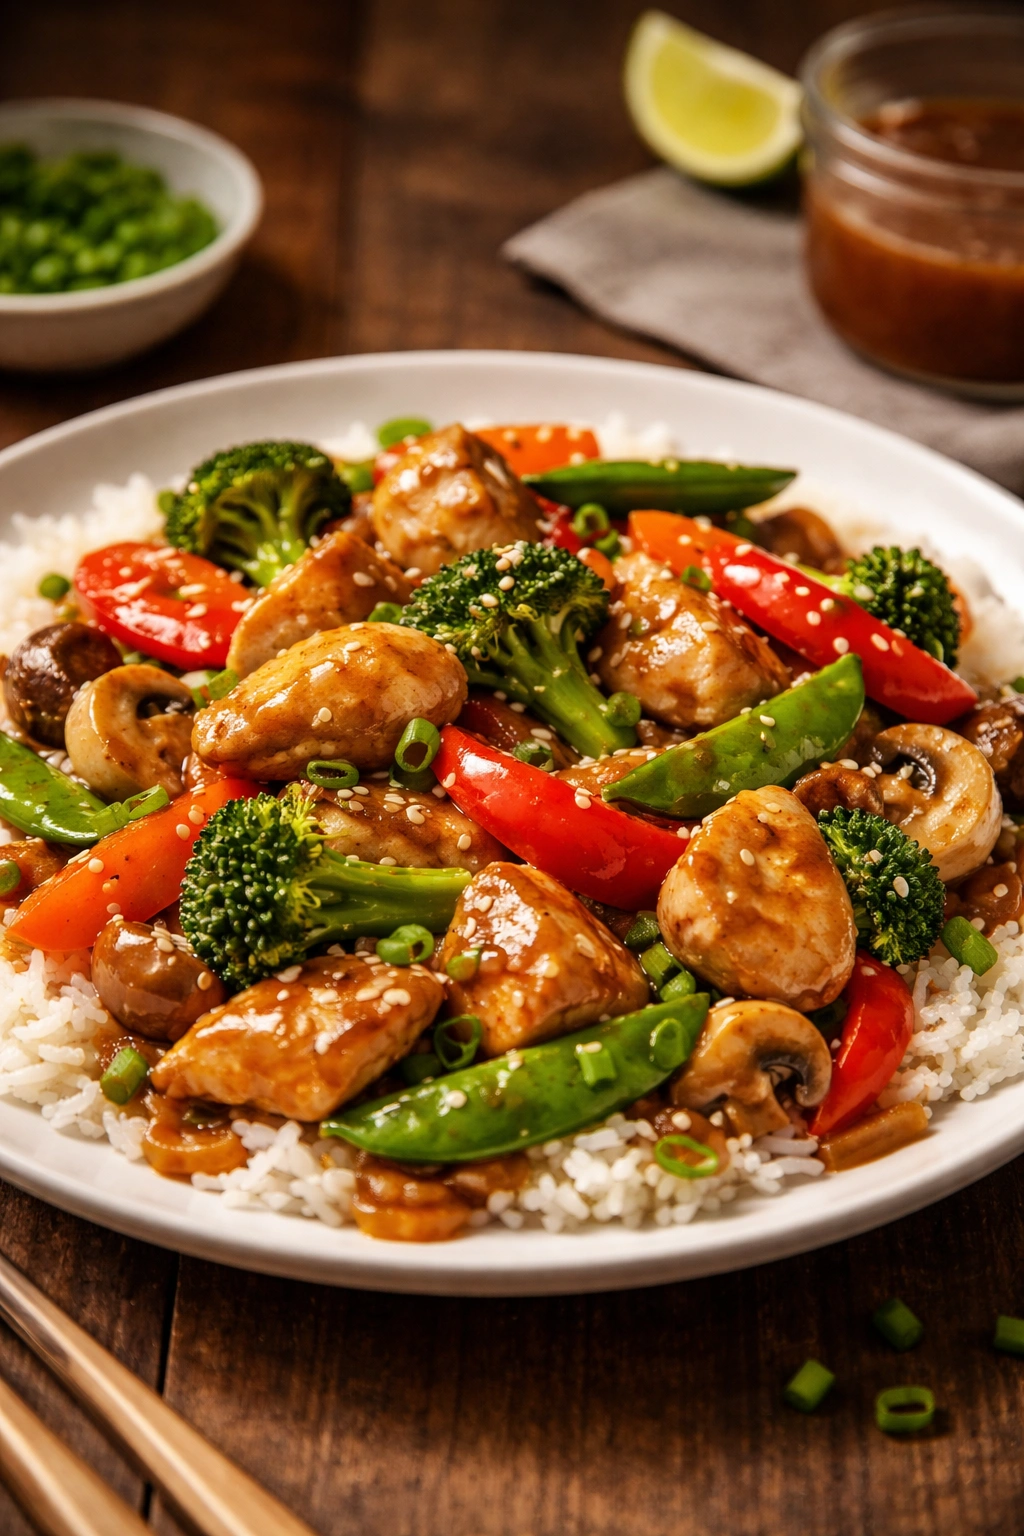
Classic Vegetable Stir-Fries:
Use this sauce with any vegetables you have on hand—broccoli, snap peas, bell peppers, carrots, mushrooms, bok choy, green beans, zucchini, or asparagus. The combination doesn’t matter nearly as much as using plenty of vegetables so each bite has some. Cook the harder vegetables first (carrots, broccoli), then add quicker-cooking ones (snap peas, mushrooms) so everything finishes at the same time. Serve over white rice, brown rice, or noodles.
Protein Pairings:
The sauce works beautifully with chicken breast, chicken thighs, beef (sirloin or flank steak cut thin), shrimp, tofu, firm white fish like cod or halibut, pork tenderloin, or salmon. Cook the protein until almost done, set it aside, stir-fry your vegetables, add the protein back in, and pour the sauce over everything. The sauce coats the protein and vegetables evenly, making every bite delicious.
Glazed Roasted Vegetables:
Toss raw vegetables (broccoli florets, Brussels sprouts halves, carrot sticks, bell pepper chunks) with a little oil, salt, and pepper, spread them on a sheet pan, and roast at 400°F for 20 to 25 minutes until tender and slightly caramelized. In the final 2 minutes of roasting, pour the stir-fry sauce over the vegetables and toss to coat evenly. The sauce becomes sticky and glossy as it heats. This is a killer side dish or a vegetarian main.
Glazed Protein:
Make the sauce, cook a protein (salmon fillets, chicken breasts, pork chops, tofu), and brush or drizzle the sauce over it in the final 2 minutes of cooking. Let it glaze, toss a few times so it coats evenly, and serve. Simple, elegant, and restaurant-quality in about 20 minutes.
Fried Rice:
Use leftover rice (day-old is actually better because it’s drier and won’t get mushy), scramble some eggs, add any vegetables you have, heat everything in a hot wok or large skillet, and drizzle the stir-fry sauce over the top in the final minute of cooking. Toss until every grain is coated. This is how you transform leftover rice into a complete dinner that tastes intentional.
Noodle Dishes:
Cook noodles (ramen, udon, egg noodles, rice noodles), drain them (don’t rinse unless they’re really sticky), and toss them with the sauce in a warm pan along with any vegetables or protein. The sauce clings to the noodles beautifully and makes every noodle delicious. Top with sesame seeds and sliced green onions.
Grain Bowls:
Create a bowl with cooked grain (rice, quinoa, farro), roasted vegetables, a protein, fresh greens, avocado, and a drizzle of the stir-fry sauce. The sauce pulls the whole bowl together and makes you feel like you’re eating something carefully constructed instead of thrown together.
What to Serve Alongside:
Sesame seeds (white or black, or both) sprinkled on top add nuttiness and visual appeal. Sliced green onions add brightness and crunch. A squeeze of fresh lime juice adds final sparkle. Crushed peanuts or cashews add richness and texture. Cilantro adds freshness. Don’t use all of these at once, but pick one or two to make the final dish feel complete.
Final Thoughts
A bottle of stir-fry sauce in your pantry is convenient, but a homemade sauce in a jar in your fridge is life-changing. Once you have it on hand, weeknight dinners shift. You’re no longer choosing between takeout and a 45-minute cooking project. You’re making restaurant-quality stir-fries in 20 minutes or less, spending only dollars instead of $15 to $20 per serving.
The best part? You’ll taste the difference immediately. The first time you make a stir-fry with fresh ginger, toasted sesame oil, and a sauce you made yourself, you’ll understand why homemade beats bottled every single time. The flavors are brighter, the texture is silkier, and the whole thing tastes intentional instead of assembly-line.
Make a batch this week. Keep it in your fridge. Notice how many times you reach for it before the two weeks are up. Try the spicy version, then the miso version. Use it on roasted vegetables, on noodles, on grilled chicken, on tofu. Let it become your secret weapon for turning basic ingredients into something your family will actually want to eat. That’s when you’ll know you’re not just following a recipe anymore—you’re cooking.