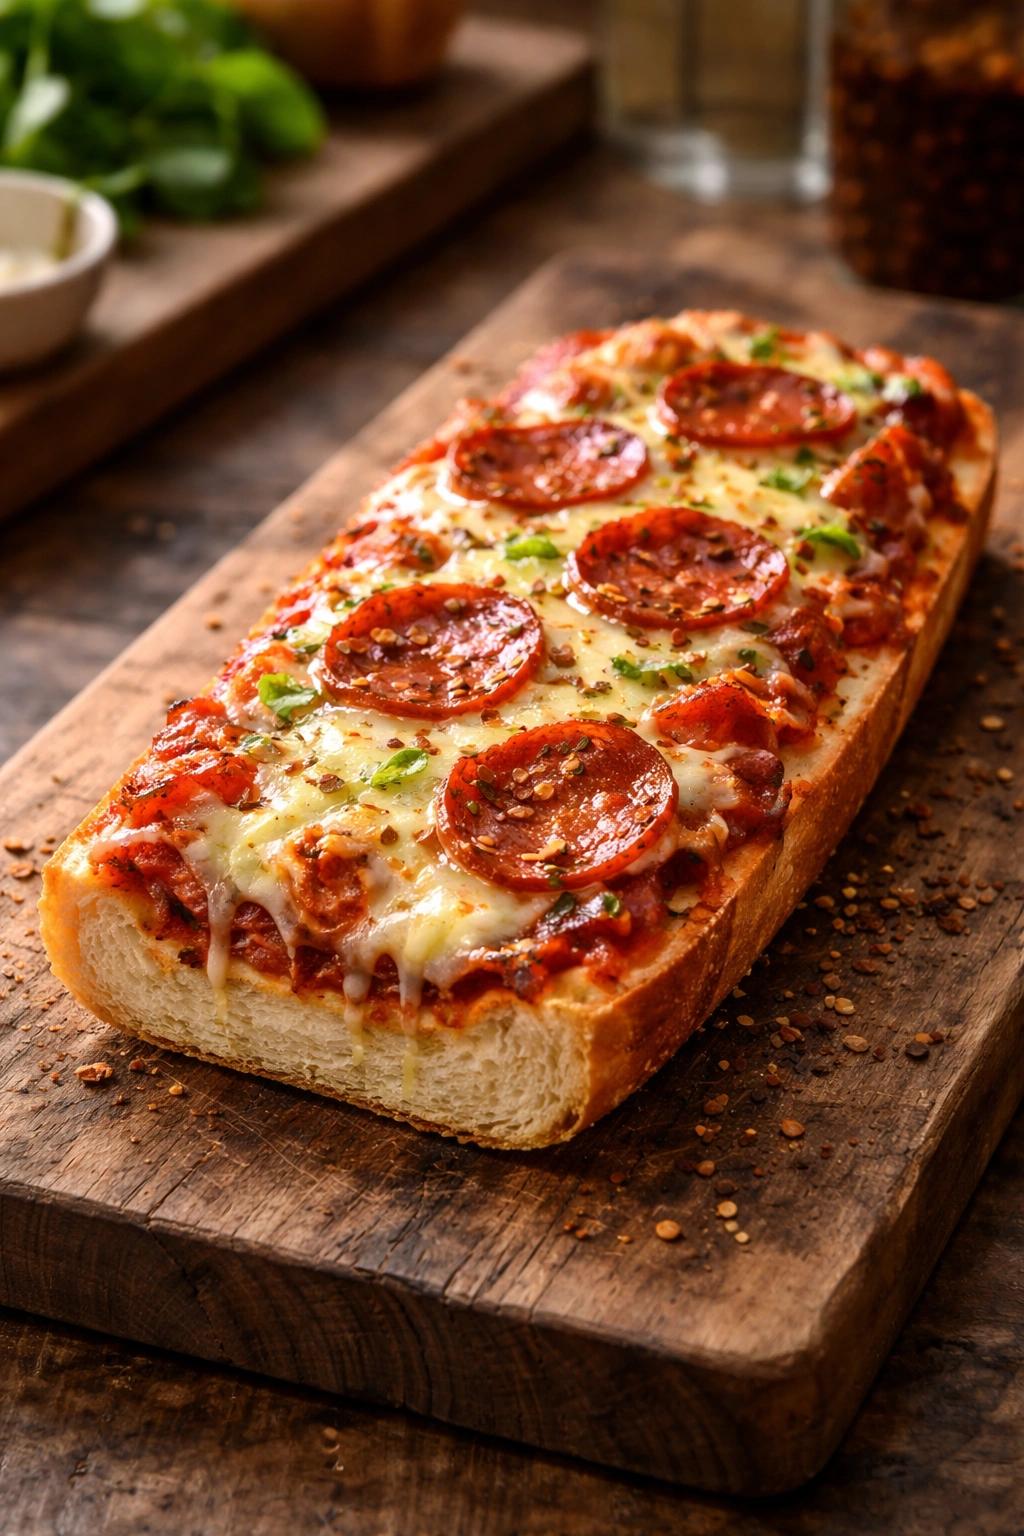
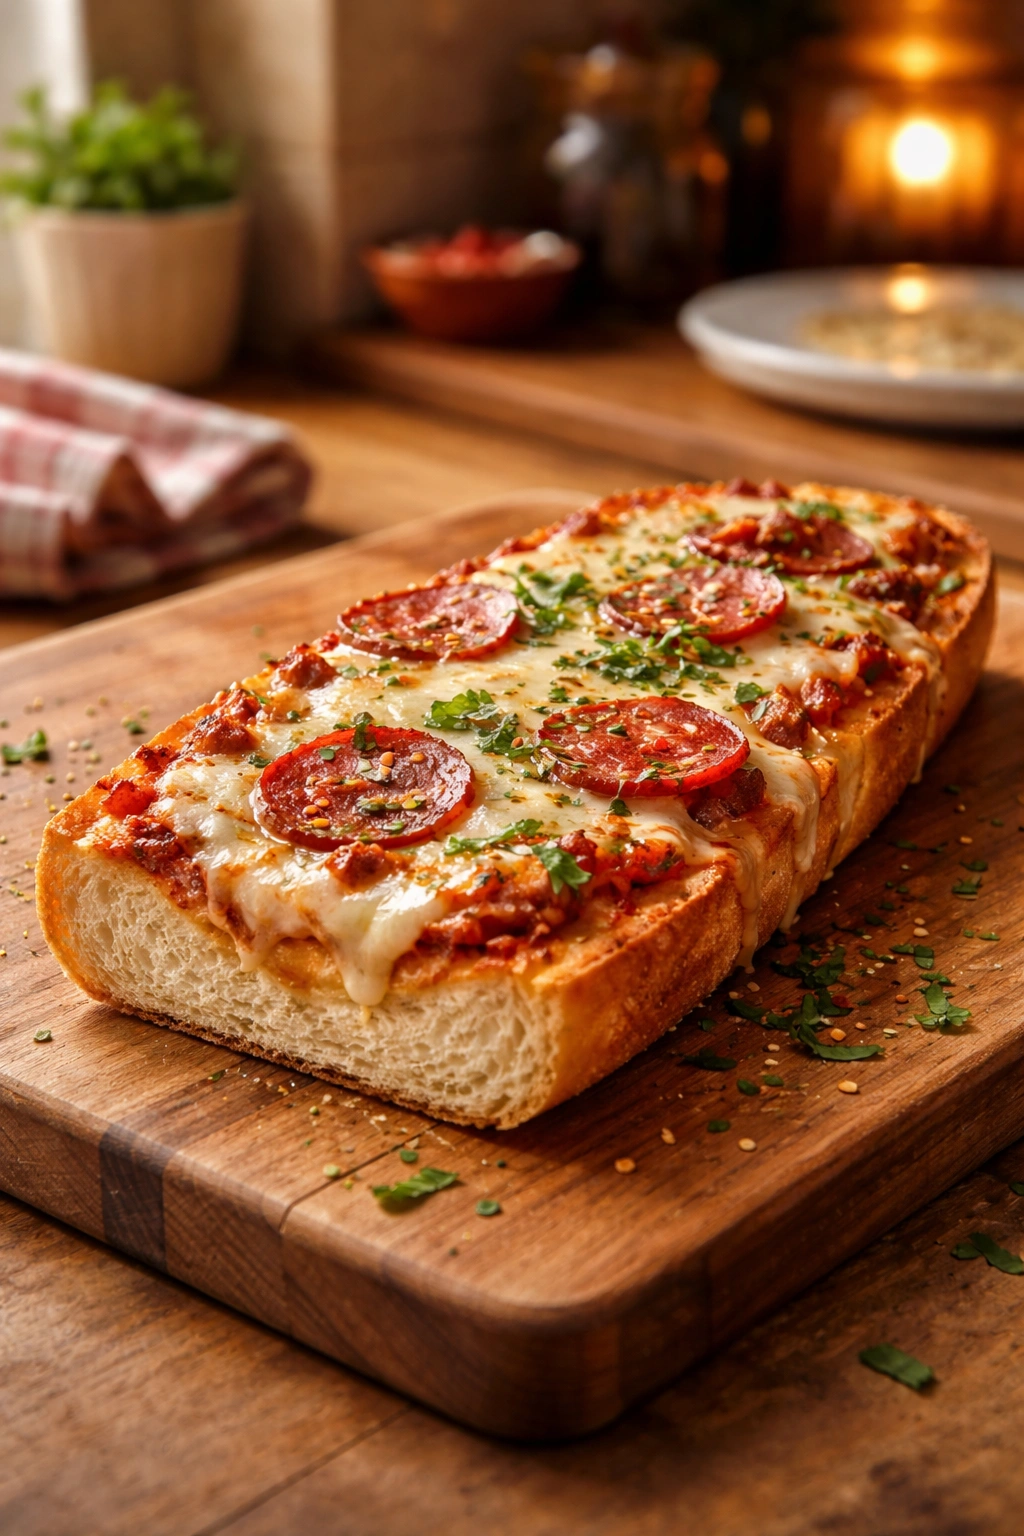
When you’re hungry and don’t want to spend an hour waiting for dough to proof or tinkering with pizza ovens, French bread pizza delivers the goods in less time than it takes to watch a TV show. The magic isn’t complicated—you’re starting with a shortcut ingredient (store-bought French bread) that already has structure and flavor, then topping it strategically and blasting it under a hot broiler until the cheese melts and the edges char. What emerges is a genuinely crispy-outside, slightly chewy-inside pizza that tastes homemade, not like a box-mix disaster.
The real skill here isn’t in the recipe itself—it’s in understanding the physics of what happens when you broil something properly, knowing exactly which toppings work fast and which ones will make your pizza soggy, and timing everything so nothing burns while the cheese finishes melting. I’ve made this enough times to know exactly what goes wrong (overloaded toppings, sauce that’s too wet, broiler set at the wrong height) and how to prevent it every single time. This is the kind of meal that tastes fancy enough to serve guests but easy enough to make on a random Tuesday night when you don’t feel like cooking.
Why French Bread Pizza Is the Perfect Quick Dinner
French bread pizza works because you’re skipping the longest, most tedious part of pizza making—developing the dough. Traditional pizza dough needs time to ferment and build flavor, rise multiple times, and develop gluten structure. With French bread, all that work is already done. You’re working with a foundation that’s already got a sturdy crust, an open crumb structure, and enough flavor to stand up to assertive toppings without tasting like plain bread.
The other advantage is the broiler itself. Most home ovens don’t get hot enough to mimic a proper pizza oven, which means traditional pizza baked in a home oven can turn out with a dense, doughy crust instead of a crispy one. But a broiler—that’s direct, intense heat from above—actually creates the charred, slightly blackened edges you want. It melts cheese fast, browns toppings, and crisps the bottom without drying out the inside. The entire process from prepping to eating takes about 15 minutes of hands-on work plus a few minutes of broiling.
Choosing the Right French Bread
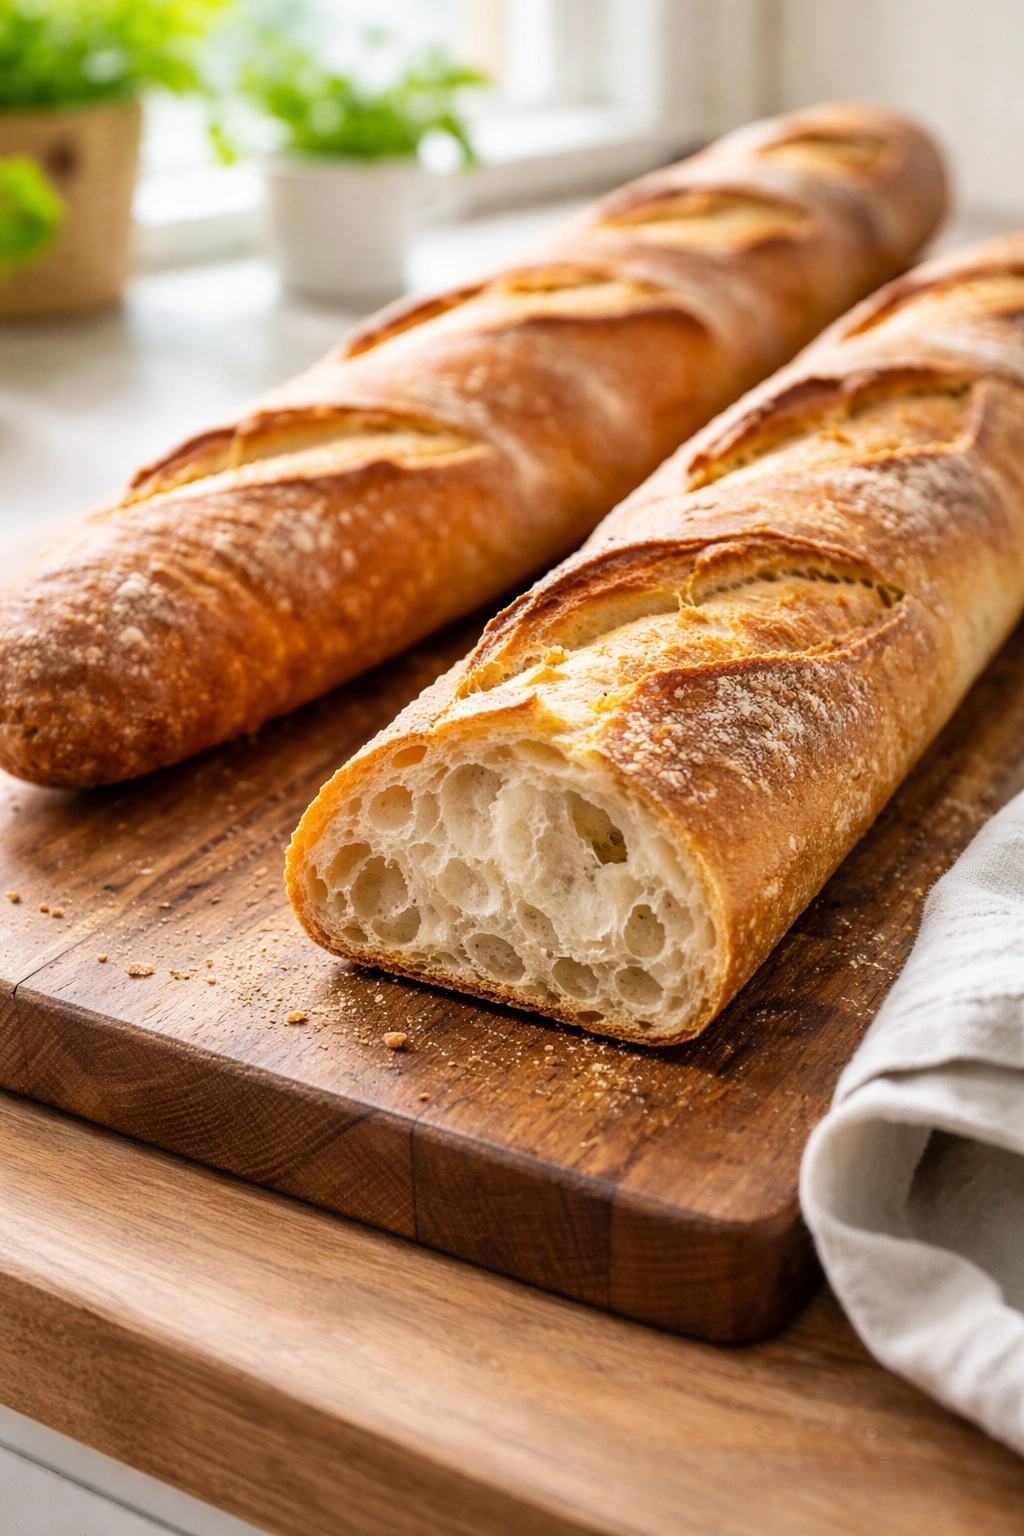
Not all French bread is created equal, and the quality of what you start with determines how much your finished pizza will impress. A truly good French bread has a crispy, crackly crust and an airy, open crumb structure inside—not dense, not gummy, not flavorless. This means you want to buy from a bakery section where the bread is baked in-house or delivered fresh daily, not from a package that’s been sitting on the shelf for three days.
Look for bread that feels substantial when you pick it up—not too light and airy (that means it has too much air and not enough structure), but not heavy either. The crust should have some give when you squeeze it gently, and the inside should have visible holes and an open texture when you slice it. If you’re buying from a grocery store, ask when the bread was baked and pick it up as close to that time as possible. A French bread baked this morning will perform dramatically better than one baked yesterday.
The size matters too. A standard 18-24 inch French baguette will typically feed 2-3 people or make enough pizzas for 3-4 as a starter. Some bakeries sell shorter, stubby French bread loaves that are already closer to what you need. If you can’t find exactly what you want, a sourdough baguette or Italian bread works beautifully as a substitute—the same principles apply.
Building the Perfect Topping Foundation
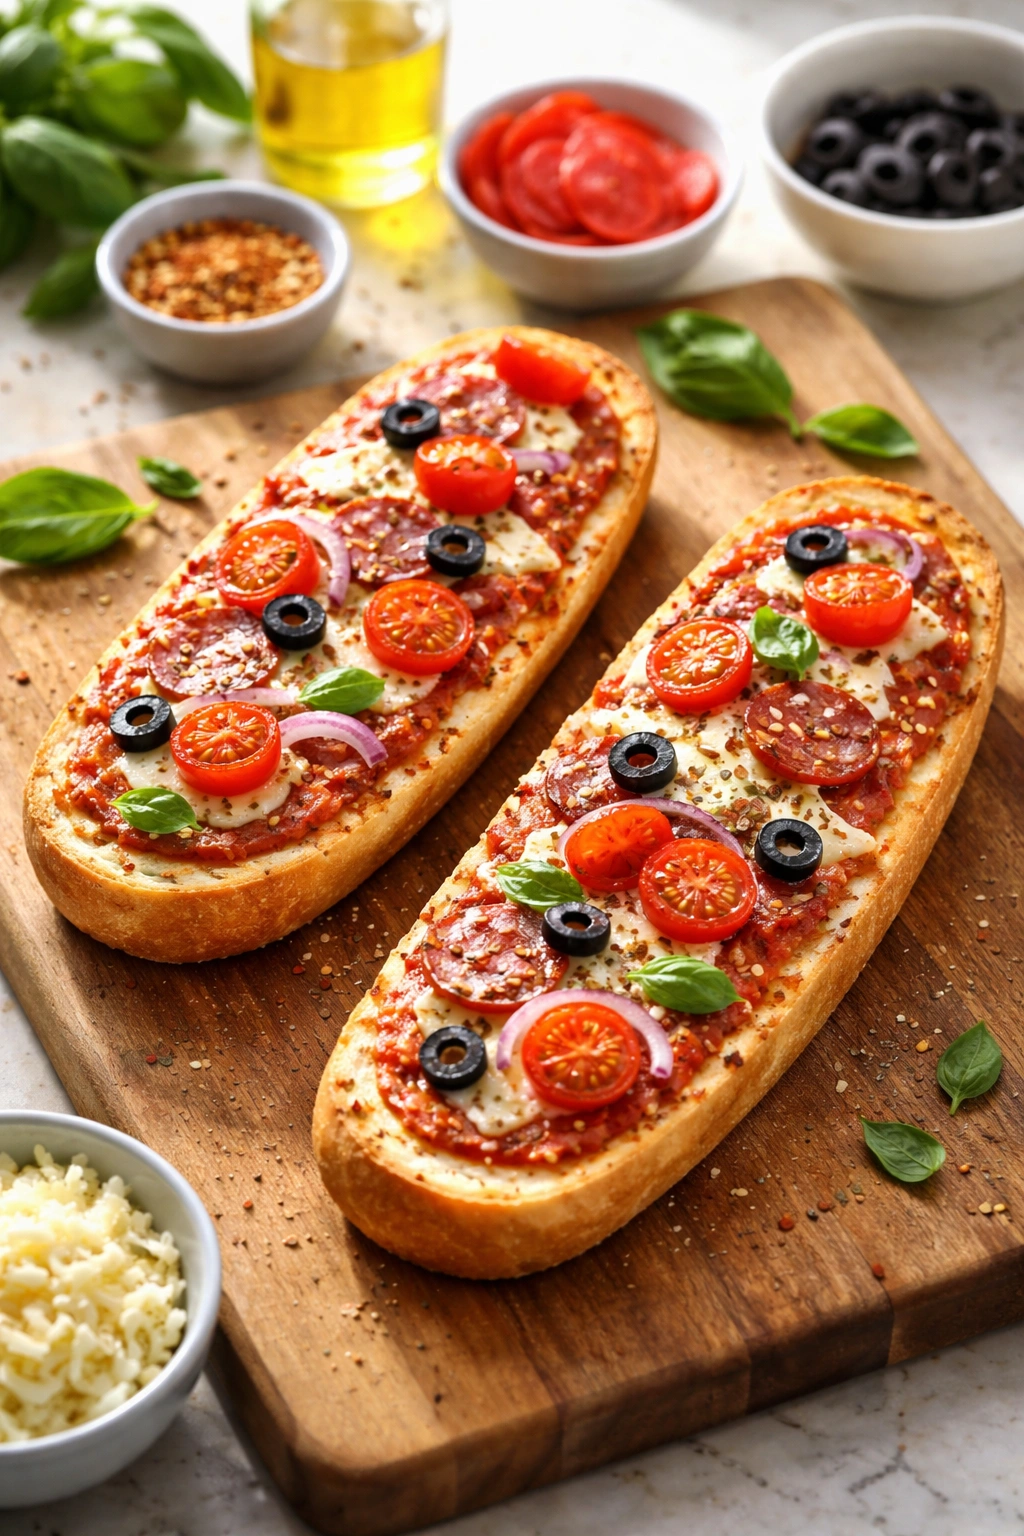
The biggest mistake people make with French bread pizza is treating it like delivery pizza and piling on six different toppings. French bread isn’t as structurally robust as thick pizza dough, and too many toppings—especially wet ones—will make it soggy and droopy by the time the cheese melts. The trick is to be intentional about what goes on and in what order.
Start with a thin layer of sauce—not a thick smear, just enough to flavor and slightly moisten the bread. A thick sauce absorbs into the bread and releases moisture as it heats, which is exactly what makes the bottom soggy. Tomato sauce, pesto, hummus, garlic spread, or even just good olive oil all work as a base. Whatever you choose, keep it to about a tablespoon per half-loaf. Pat it on with the back of a spoon so it distributes evenly without pooling.
Next comes any wet ingredients that need cooking time. If you’re using fresh tomato slices, they should be patted dry with a paper towel—that single step removes surface moisture that would otherwise steam into the bread. Caramelized onions are perfect because they’ve already released their moisture during cooking. Fresh vegetables like bell peppers or mushrooms should be sliced thin so they cook through quickly under the broiler. Raw garlic should be minced fine or sliced paper-thin so it actually cooks instead of tasting sharp and acrid.
The cheese layer comes next, and this is where you can be generous. A mix works better than a single cheese—perhaps half mozzarella (for stretch and melt) and half something with more flavor like sharp cheddar, aged gouda, feta, or fontina. This prevents your pizza from tasting flat. About ¾ to 1 cup of cheese total per half-loaf is the right amount. Shred it fresh rather than using pre-shredded cheese, which contains anti-caking agents that prevent it from melting into a smooth layer.
Top the cheese with any final ingredients that don’t need cooking or that you want to stay slightly raw—fresh basil, arugula, cilantro, fresh mozzarella, hot sauce, crushed red pepper flakes, or drizzled honey. These go on after broiling so they stay vibrant and don’t overcook into nothing.
Setting Up Your Broiler for Success
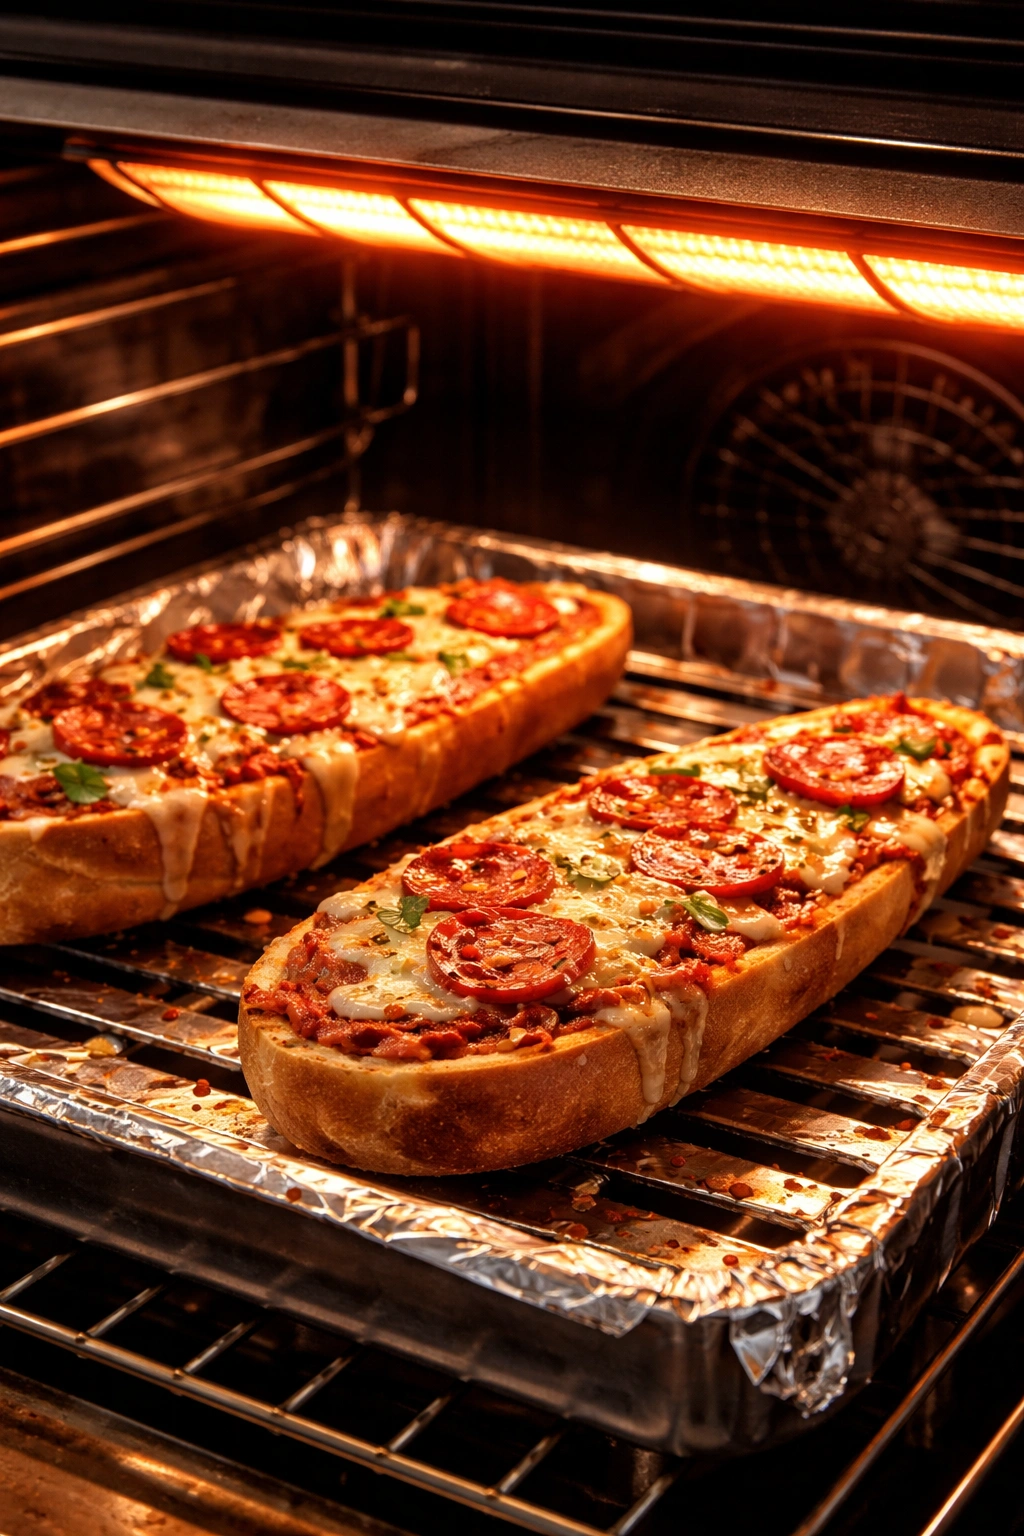
The difference between crispy French bread pizza and burnt, charred disappointment comes down to broiler setup. Most home broilers are either near the top of the oven with the heating element above, or they’re drawer-style broilers at the bottom. Both can work, but they need slightly different strategies.
For a top broiler, position your oven rack about 4-5 inches below the heating element. This distance is close enough that the pizza cooks quickly without being so close that the top burns before the cheese melts and the crust crisps. Preheat the broiler for at least 3-5 minutes so the heating element reaches full temperature. When you place your pizza in, it should sizzle immediately—if it doesn’t, the broiler isn’t hot enough.
For a bottom drawer broiler, follow your oven manual for the exact positioning, but generally you want the bread as close to the heating element as safely possible without touching it. The challenge with bottom broilers is that the bottom cooks much faster than the top, so you might need to slide the rack a bit lower or pull it out a minute or two before you think it’s done to let the cheese finish melting from the residual heat.
Regardless of your setup, line your broiler pan with foil so cleanup is effortless and so you can slide the pizza directly onto the hot foil when you’re ready. Don’t put the bread in before broiling—cold bread going under a hot broiler will take longer and might steam rather than crisp. Have everything prepped and ready to go before you preheat, so you can slide it in the moment the broiler is at full heat.
The Complete Ingredient List
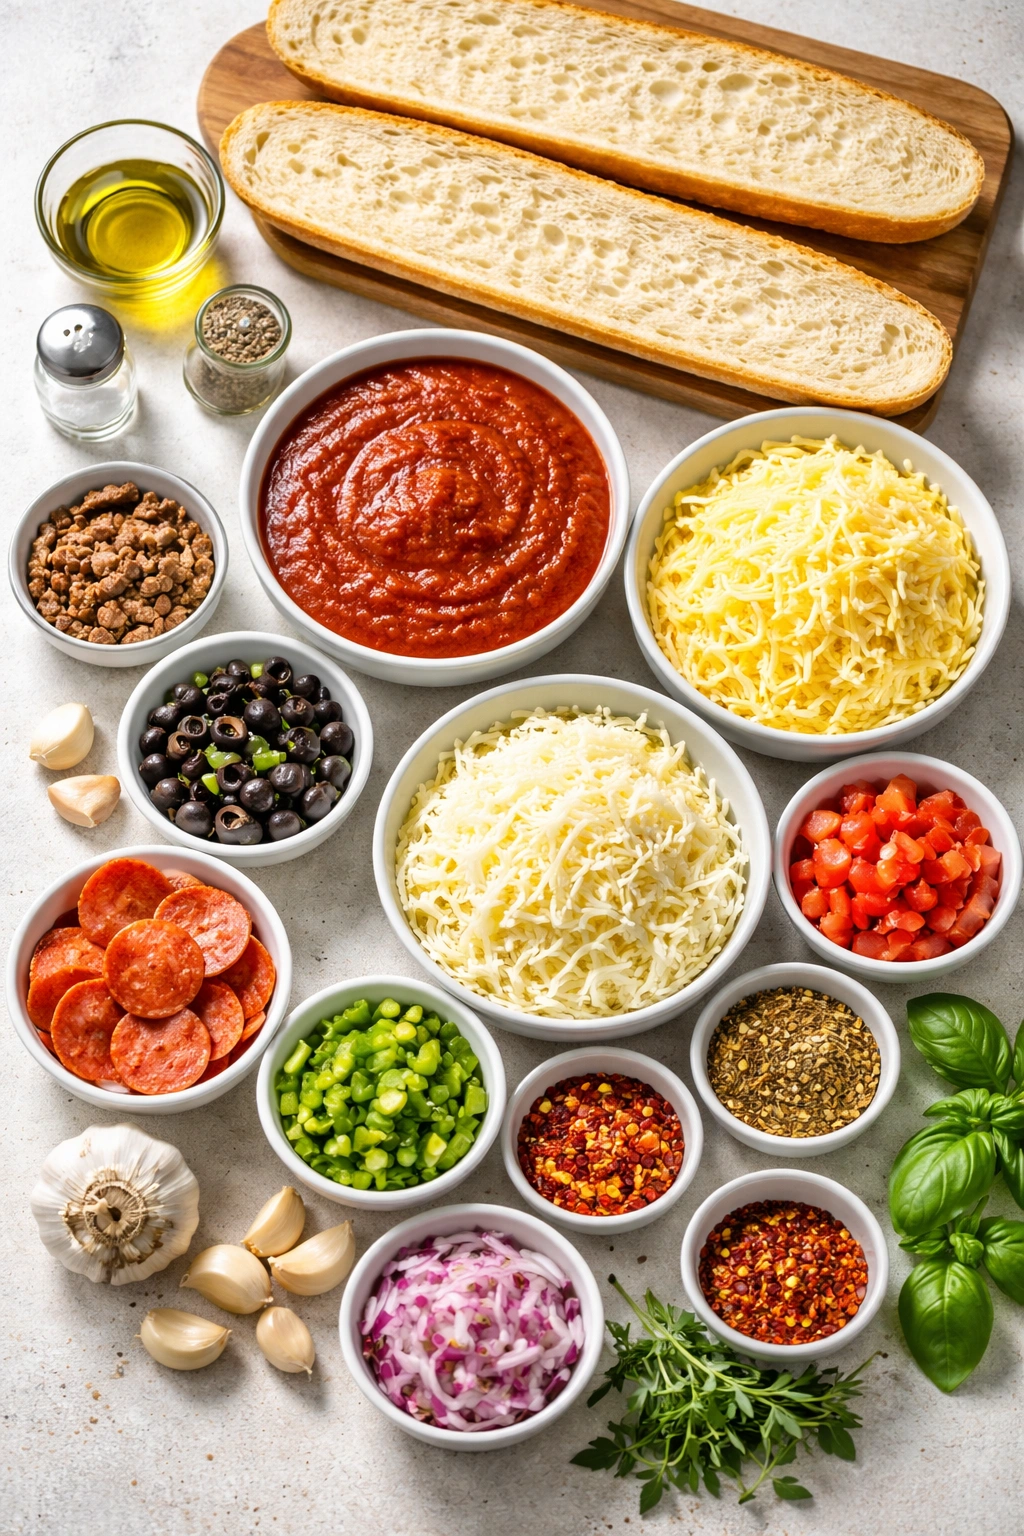
Yield: Serves 2 to 3 | Makes 2 pizzas (4 halves total) Prep Time: 10 minutes Cook Time: 4 to 5 minutes Total Time: 14 to 15 minutes Difficulty: Beginner — No special equipment needed beyond a broiler, and the assembly is straightforward even for someone making pizza for the first time.
For the Pizzas:
- 1 French bread baguette (18-24 inches), halved lengthwise
- 3 tablespoons tomato sauce, pesto, or other base sauce
- 1 cup shredded mozzarella cheese
- ½ cup shredded sharp cheddar or aged gouda (or another flavorful cheese of your choice)
- 2 cloves garlic, minced very fine (or ¼ teaspoon garlic powder, or thinly sliced)
- ½ cup toppings (see variations below for specific ideas: pepperoni, sautéed mushrooms, caramelized onions, diced bell peppers, sun-dried tomatoes, fresh spinach, cooked sausage, sliced olives, or fresh vegetables)
- 1 tablespoon extra-virgin olive oil (for drizzling over finished pizza)
- Salt and freshly ground black pepper to taste
- Optional: fresh basil, arugula, red pepper flakes, or grated Parmesan for topping after broiling
Optional Finishing Touches:
- Fresh basil leaves, torn (add after broiling)
- Handful of arugula (add after broiling)
- Hot sauce or red pepper flakes (sprinkle before or after broiling depending on preference)
- Drizzle of honey (add after broiling for sweet contrast)
- Grated Parmesan or Asiago cheese (add before broiling for extra flavor)
Step-by-Step Instructions
Prepare Your Setup:
-
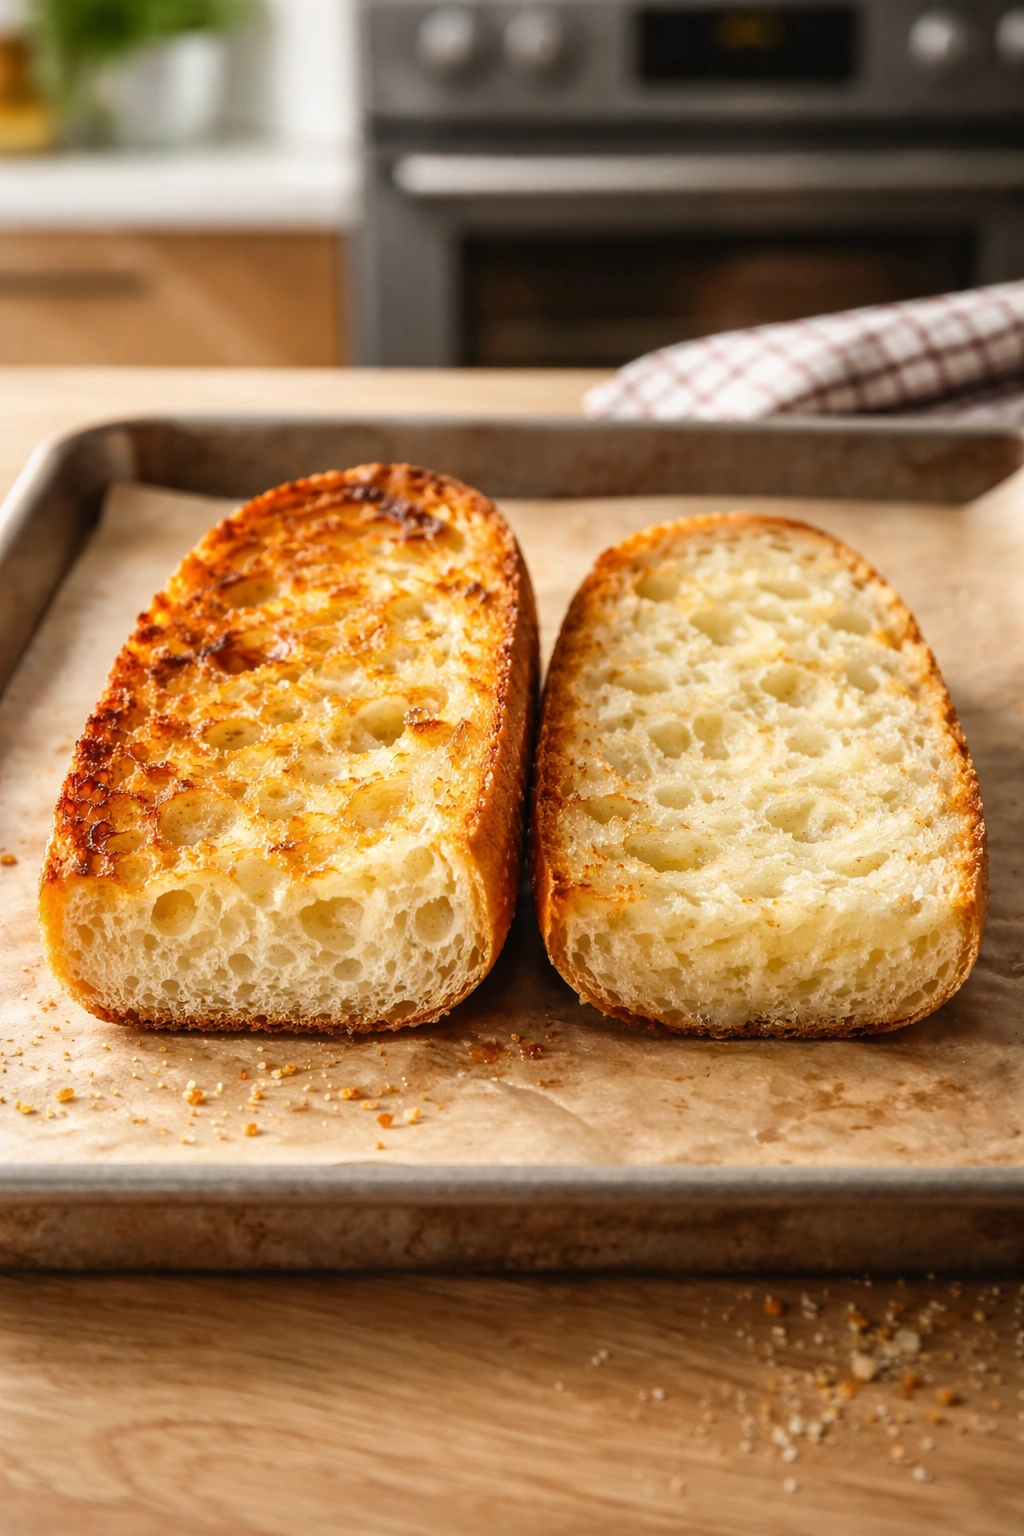
Preheat your broiler for 3-5 minutes until it’s fully heated and the element glows bright orange or red. Position the oven rack 4-5 inches below the heating element (for top broilers) or follow your manual for drawer-style broilers. Line a broiler pan with aluminum foil for easy cleanup.
-
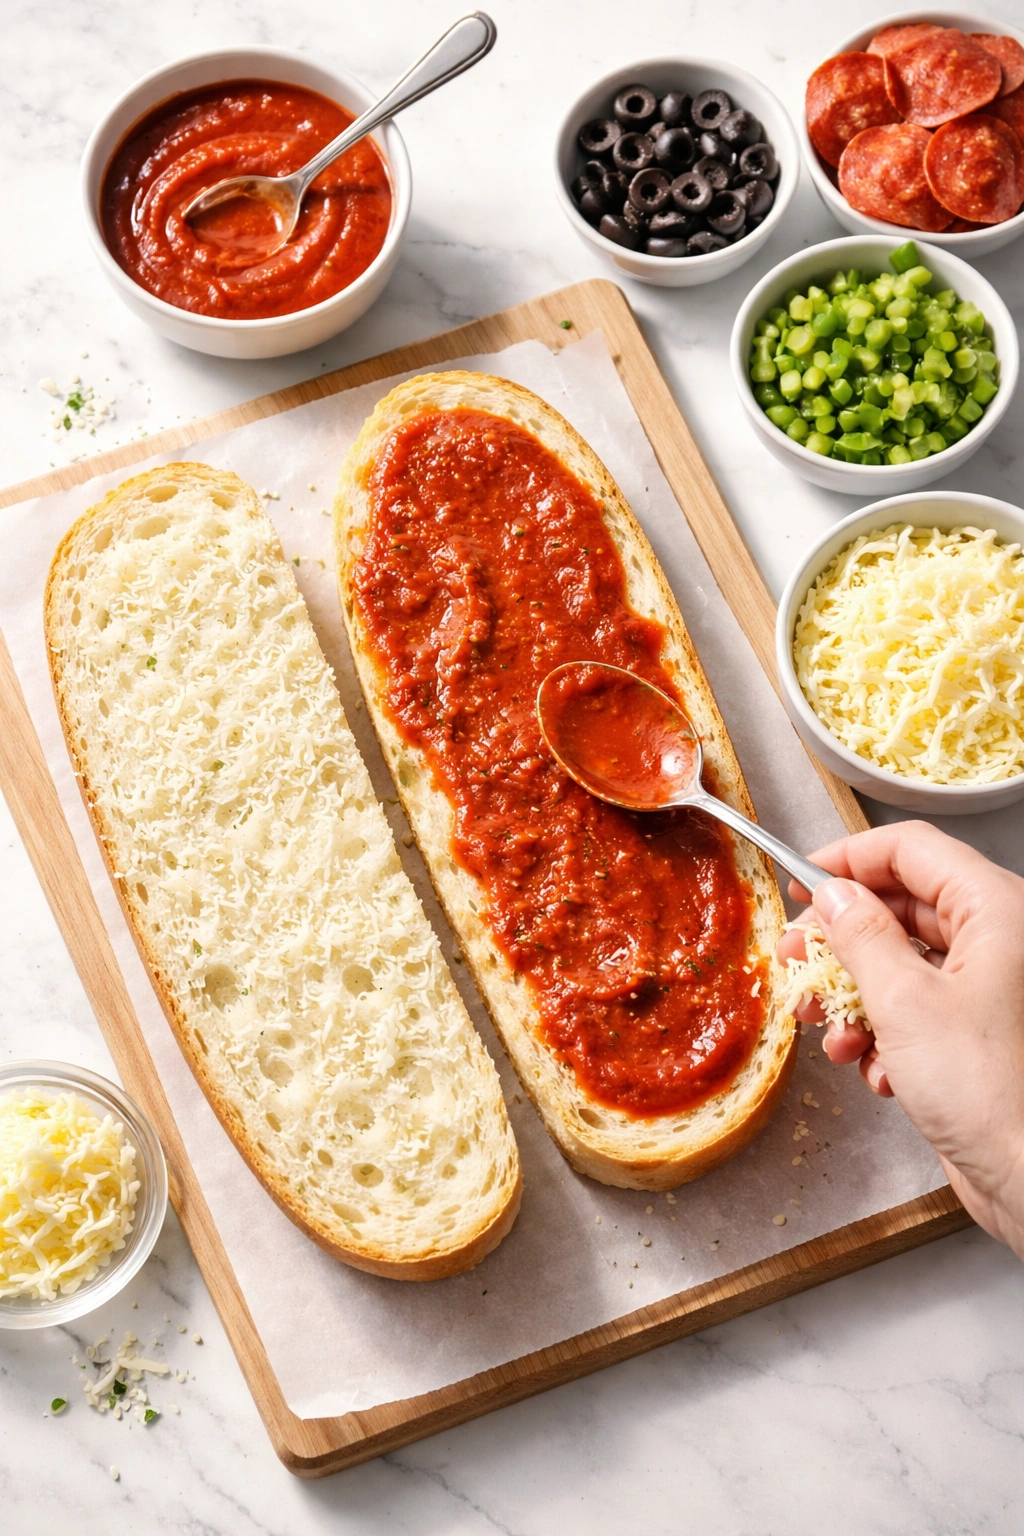
Slice the French bread lengthwise into two long halves — try to keep each half roughly level so the toppings distribute evenly and the pizza cooks evenly. Scoop out a very thin layer of the soft center from each half using a spoon if the interior is very dense, but don’t go overboard — you still want structure. This step helps the bottom stay crispier and prevents excessive sogginess.
Build Your Pizzas:
-
Place both bread halves cut-side up on a cutting board. Pat the cut surfaces gently with a paper towel to remove excess moisture from where you just sliced. This small step prevents steam from making the base soggy.
-
Spread about 1½ tablespoons of tomato sauce, pesto, or other base sauce evenly over the cut surface of each bread half using the back of a spoon. Spread it thin — you want the bread to taste like pizza, not like it was dunked in sauce. The sauce should coat the surface with just a light, even layer.
-
Distribute half of the minced garlic across each bread half. If you prefer a milder garlic flavor, use just a small pinch per half. If you love garlic, sprinkle it more generously. The garlic will cook under the broiler and mellow significantly.
-
If using wet toppings like fresh tomato slices, place them on now and pat them gently dry with a paper towel to remove surface moisture. If using drier toppings like pepperoni, cooked sausage, or olives, distribute them evenly across both halves now.
-
In a small bowl, combine the shredded mozzarella and sharp cheddar (or other cheese of your choice). Divide the cheese mixture evenly between both bread halves, distributing it in an even layer — don’t leave bare spots, but don’t create a thick, chunky pile either. About ¾ inch thickness of cheese is ideal.
-
If using any cheese that benefits from extra flavor (grated Parmesan, Asiago, or other aged hard cheese), sprinkle a light layer on top of the mozzarella mix now. Season lightly with salt and freshly ground black pepper.
Broil to Perfection:
-
Carefully transfer both bread halves to the foil-lined broiler pan, placing them cut-side up with a tiny bit of space between them so heat can circulate. If your pan is small, you may need to broil one half at a time — that’s fine, they cook so fast that the second one will still be warm by the time you eat it.
-
Place the pan under the hot broiler immediately. Watch carefully — don’t walk away. The pizza should begin bubbling and the cheese should start to melt within 30 seconds. The bread edges should begin to brown and crisp.
-
Broil for 4-5 minutes total, rotating the pan halfway through (at the 2-minute mark) so the edges cook evenly. The cheese should be melted and starting to brown in spots, the bread edges should be deeply golden or slightly charred, and the surface should look bubbly and cooked through. If the tops are browning too fast before the cheese melts fully, move the rack down a notch and broil a bit longer from farther away from the heat.
-
Pull the pan out of the broiler — use thick oven mitts because both the pan and the pizza will be extremely hot. Transfer the pizzas to a cutting board or serving plate using a spatula.
Finish and Serve:
-
If you’re adding fresh basil, arugula, hot sauce, honey, or other finishing touches, add them immediately while the pizza is hot. The heat will slightly wilt greens and help ingredients meld together.
-
Let the pizzas cool for 1-2 minutes before cutting and serving. This brief rest allows the cheese to set enough that toppings won’t slide off when you take a bite. Slice each half into 2-3 pieces depending on how large you want each serving to be, and serve immediately while still warm and the crust is at its crispiest.
Practical Tips and Common Mistakes to Avoid
The bread thickness is everything. If you’re using bread that’s too thin and airy, it’ll collapse under the weight of the toppings and turn into something closer to a bread soup than a pizza. If the bread is too dense, it won’t crisp properly and will taste heavy. Aim for bread that’s substantial but still has visible air holes when you slice into it. A bakery-fresh baguette is almost always a better choice than packaged bread sitting on a shelf.
Moisture is your enemy. The number one reason French bread pizza turns out soggy is too much liquid from sauce or fresh vegetables releasing water as they heat. Pat everything dry—the cut surface of the bread, fresh tomato slices, any other watery vegetables. Use minimal sauce. Cook wet vegetables like mushrooms or zucchini in a hot pan until they’ve released their moisture before topping your pizza. This single habit makes a bigger difference than any other adjustment.
Don’t skip preheating the broiler. Some people assume they can just throw the pizza in whenever and it’ll catch up, but a cold broiler means the bottom bread steams instead of crisps. Three to five minutes of full preheating with the element glowing is essential.
Watch it carefully. French bread pizza cooks in such a short window—under five minutes—that you can’t rely on timing alone. Stay nearby and watch for the cheese to bubble, the edges to darken, and the top to look fully cooked. Broilers can vary significantly, so what takes exactly four minutes in one oven might take five in another.
The cheese ratio matters more than you’d expect. Too little cheese and the pizza tastes dry and bread-forward. Too much and it overwhelms the other flavors and doesn’t melt evenly. The sweet spot is about ¾ to 1 cup total for one whole loaf (two halves), which is less than you might intuitively think.
Don’t assemble more than one pizza at a time unless you have multiple broiler pans. The bread starts absorbing moisture from the sauce the moment you spread it on, so if you assemble both pizzas then wait for one to broil while the other sits, the waiting one will get soggy. Assemble one, broil it, eat it or plate it, then assemble and broil the second one. The whole process still takes under 20 minutes.
Variations and Adaptations
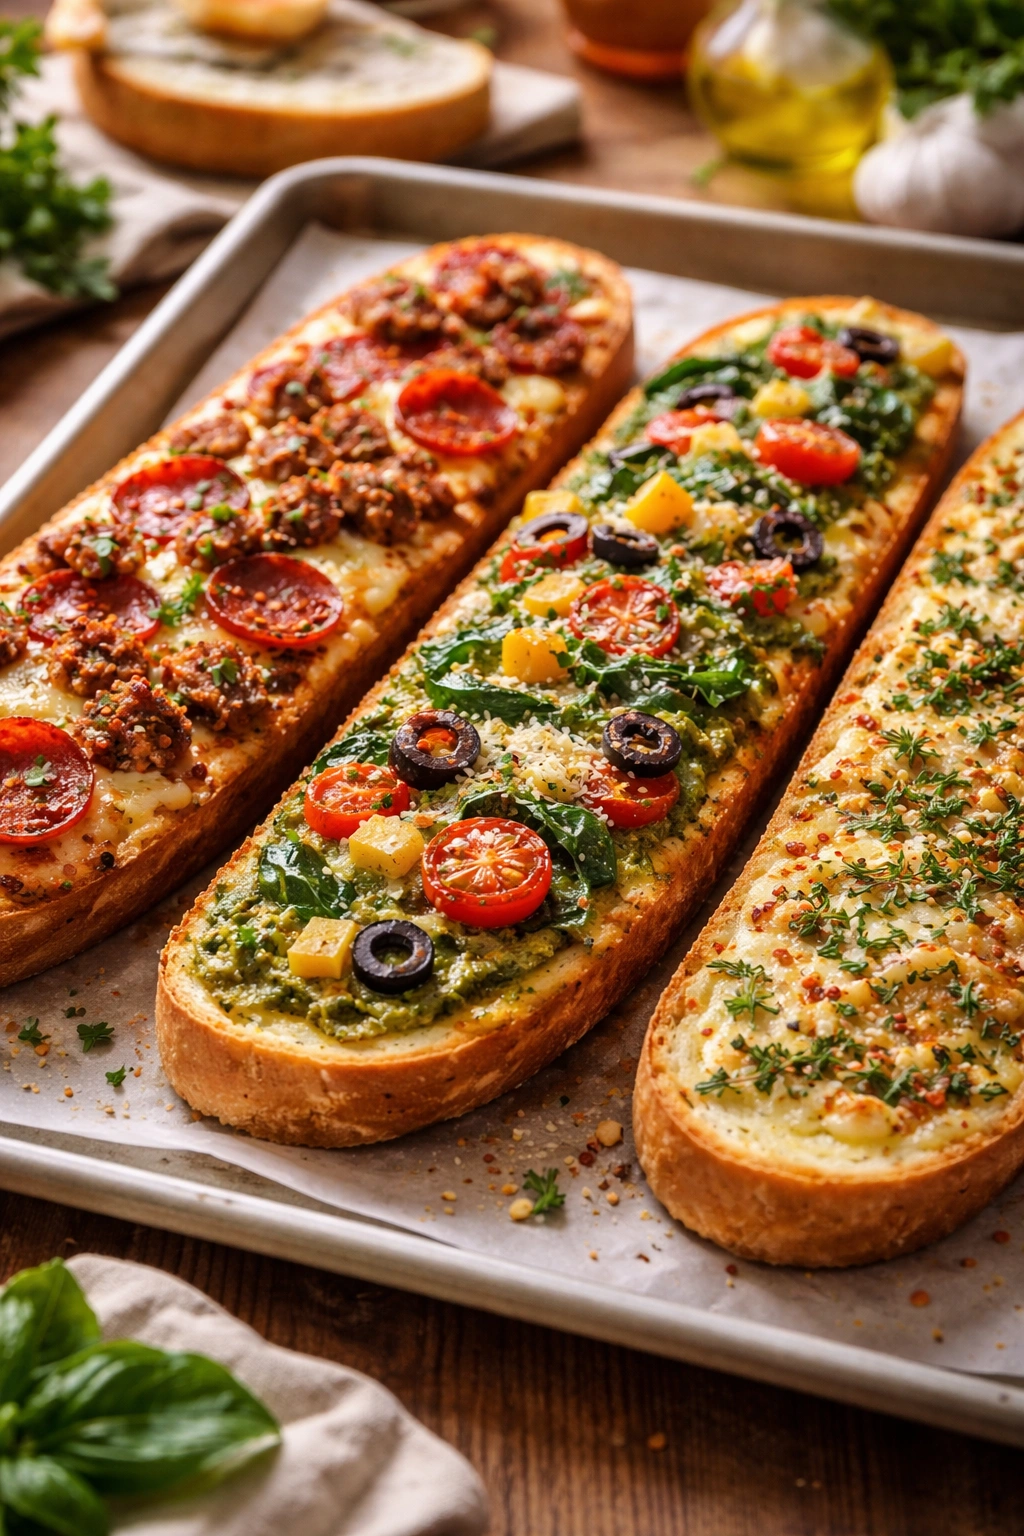
The Classic Meat Lover’s Version: Lay down thin slices of pepperoni across the sauce before adding cheese, then add crumbled cooked sausage, crispy bacon pieces, or diced ham. The meat should be thin or already cooked so it heats through quickly without overdrying. This is the crowd-pleaser that works for nearly everyone.
The Veggie-Forward Green Pizza: Start with pesto instead of tomato sauce, add a thin layer of ricotta or creamy goat cheese before the mozzarella, then top with sautéed spinach, roasted red peppers, sliced zucchini, and a handful of pine nuts. Finish with fresh basil after broiling. This version feels elegant enough for a casual dinner party.
The Garlic and Herb Focaccia Style: Use garlic-infused olive oil as your base instead of sauce, skip the tomato entirely, add fresh rosemary or thyme mixed with sea salt, use a blend of mozzarella and fontina, and finish with a generous drizzle of really good olive oil and flaky salt after broiling. This tastes almost like a gourmet focaccia.
The Breakfast Pizza: Use a light spread of cream cheese as the base instead of tomato sauce, top with crumbled cooked sausage or bacon, a sprinkle of sharp cheddar, then crack a raw egg into a small indent in the center of each half. Broil carefully until the cheese melts and the egg white sets but the yolk is still runny—this takes an extra minute or two. Finish with fresh chives or green onion. Serve with hot sauce on the side.
The BBQ Chicken Version: Spread a thin layer of barbecue sauce over the bread, top with shredded cooked chicken (rotisserie chicken is perfect), diced red onion, and a mix of cheddar and smoked gouda cheese. Finish with fresh cilantro and a drizzle of ranch dressing after broiling.
For a Gluten-Free Approach: Use a good-quality gluten-free bread or even thick slices of sturdy gluten-free bread instead of French bread. The broiler method works exactly the same way—just watch it carefully because gluten-free bread can brown faster and sometimes doesn’t crisp up identically. You may need to adjust the broiling time slightly.
For a Dairy-Free or Vegan Version: Use nutritional yeast mixed with finely grated dairy-free cheese (cashew-based or almond-based cheeses work better than soy under a broiler), skip the dairy cheese entirely, and load up on flavorful toppings like roasted vegetables, caramelized onions, olives, sun-dried tomatoes, and fresh basil. A thin drizzle of truffle oil or toasted sesame oil at the end adds richness you’d normally get from cheese.
Storage, Reheating, and Make-Ahead Tips
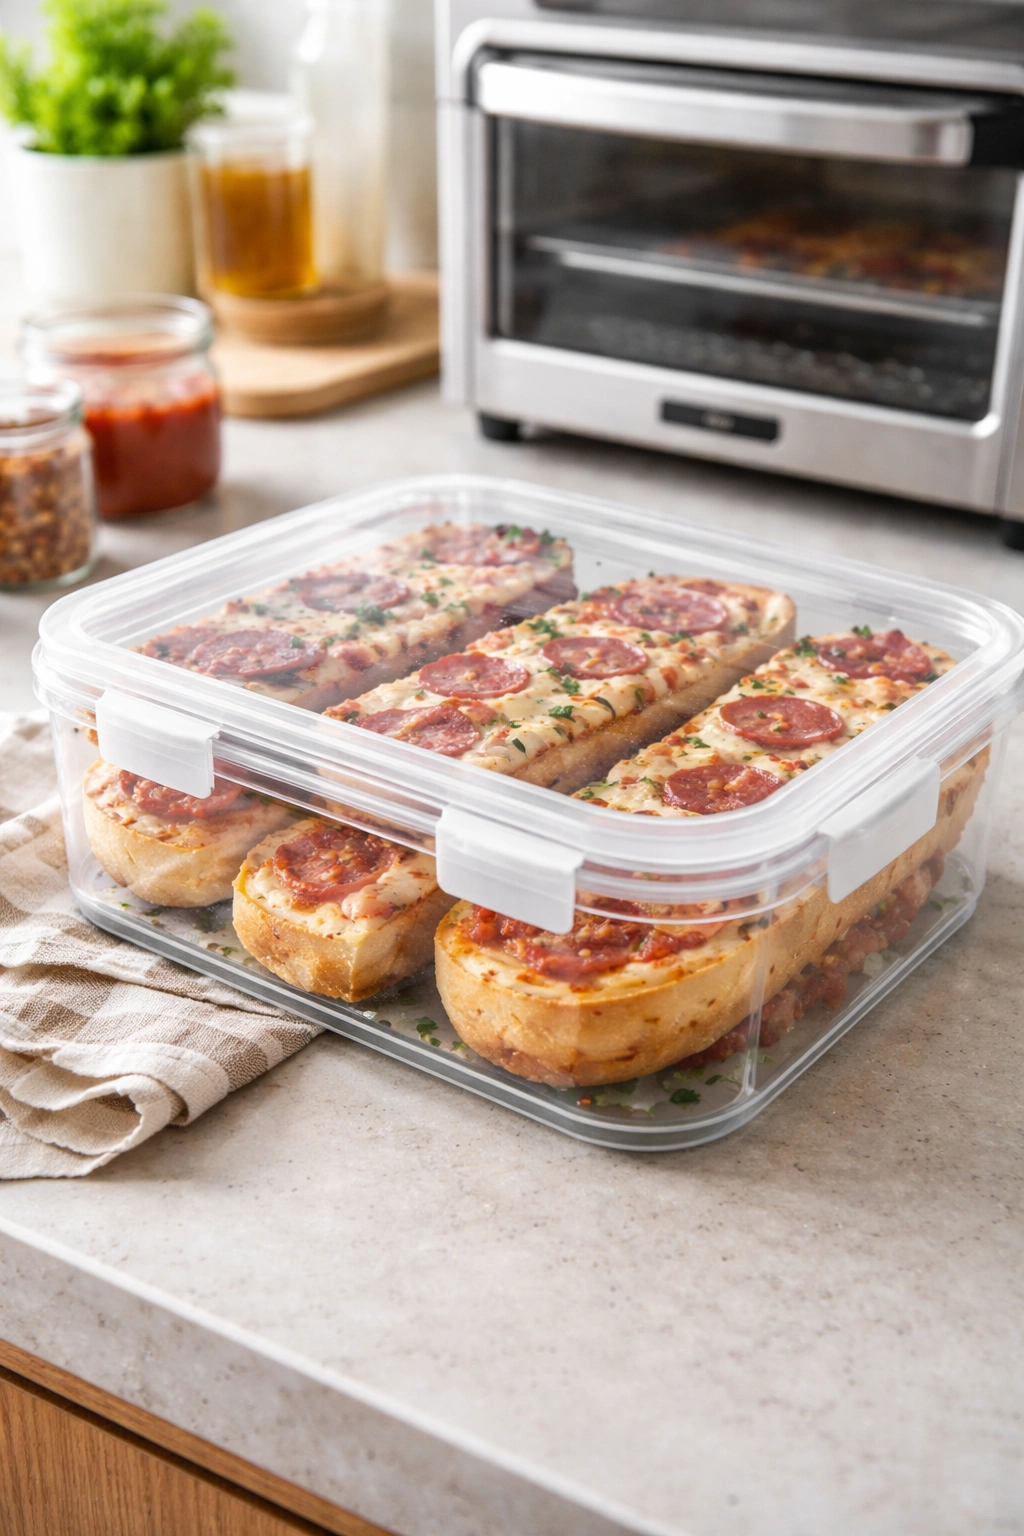
French bread pizza is best eaten immediately while the crust is still crispy and the cheese is gooey. But if you end up with leftovers, they’ll keep refrigerated for up to two days in an airtight container or wrapped tightly in aluminum foil.
To reheat leftovers, use your toaster oven or a regular oven at 375°F for about 5-7 minutes—just long enough for the cheese to melt again and the bottom to crisp slightly. Don’t use a microwave, which will turn the crust soggy and chewy. The toaster oven approach takes a few minutes longer but preserves the texture you worked for during the initial broil.
You can make the components ahead to save time on busy weeknights. Slice the bread and spread the sauce up to 6 hours in advance, then cover the prepared halves loosely with plastic wrap and refrigerate. When you’re ready to eat, let them sit at room temperature for a few minutes while you preheat the broiler, then add the toppings and cheese and broil as directed. The broiling time won’t change.
You can also cook and prep your toppings ahead—caramelize your onions, slice your vegetables, cook your sausage, shred your cheese, and mince your garlic all earlier in the day. Everything keeps covered in the fridge, so when hunger strikes, you just need to assemble and broil. This is the ultimate shortcut if you’re aiming for an even faster dinner.
Fully cooked French bread pizzas can be frozen for up to one month. Let them cool completely first, wrap each half individually in plastic wrap and then foil, and freeze. To reheat from frozen, thaw them in the refrigerator overnight, then warm them in a toaster oven at 375°F for 8-10 minutes until the cheese is melted and the crust has recovered its crispness. Microwave reheating of frozen pizza will result in a rubbery, unpleasant texture, so avoid it.
Serving Suggestions and Perfect Pairings
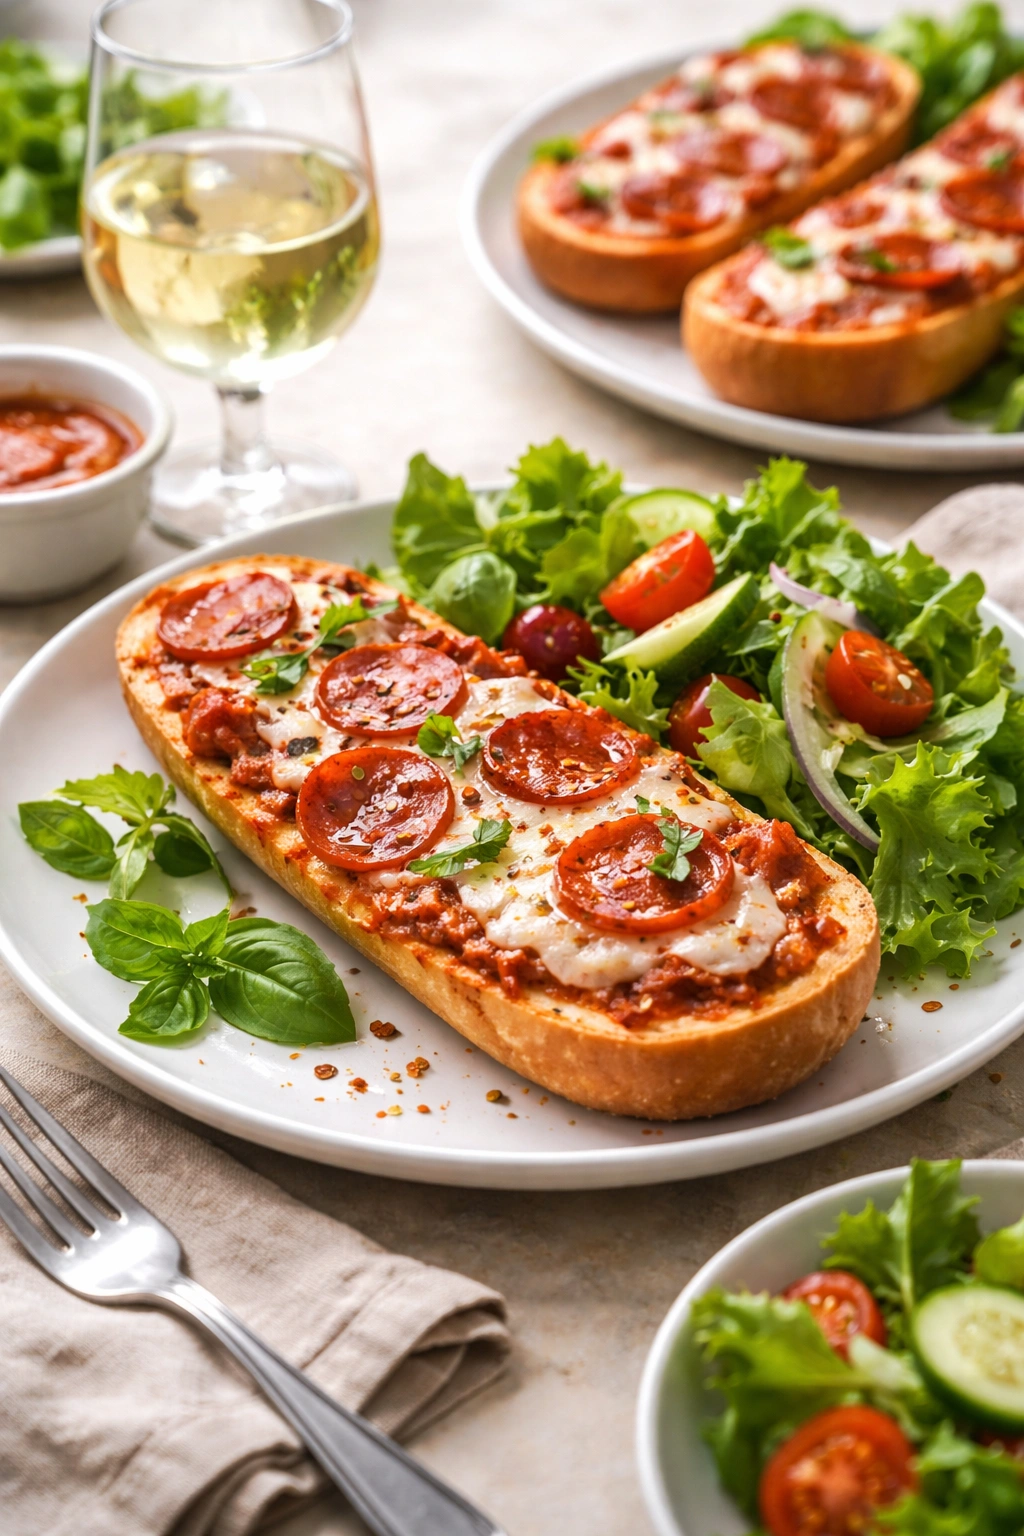
French bread pizza is satisfying enough on its own, but pairing it thoughtfully turns it into a real meal. A crisp, acidic salad cuts through the richness of the cheese and meat—think arugula with lemon vinaigrette, a simple mixed green salad with sharp vinaigrette, or even coleslaw if you’re going for a casual vibe.
A chilled beverage matters too. Sparkling water with a squeeze of fresh lemon is refreshing and won’t compete with the pizza. A cold beer—particularly a light lager, pale ale, or pilsner—pairs beautifully with the savory, cheesy qualities. If you want wine, a slightly chilled rosé or a crisp white like pinot grigio complements without overpowering.
For a more substantial meal, serve it alongside a simple pasta—nothing heavy, just a light olive oil and garlic pasta or a cold pasta salad. Garlic bread might feel redundant since the pizza is already bread-based, but if you’re serving a group and want more carbs, roasted vegetables on the side (zucchini, bell peppers, cherry tomatoes tossed with olive oil and herbs) add color, nutrition, and bulk without making anyone feel overstuffed.
For a lighter, quicker meal, pair it with a bright soup. Tomato soup (homemade or canned, elevated with fresh basil and cream) is the classic pairing. Minestrone or roasted vegetable soup also work beautifully. The warmth and slight acidity of soup against the crispy, cheesy pizza feels balanced and complete.
If you’re making this for lunch or a casual weekday dinner, it goes well with simple sides like chips, pickles, or olives. If you’re making it for a slightly fancier occasion, a composed salad on the side and a nice wine elevate the whole experience.
Leftovers also make fantastic cold pizza the next day if you’re not reheating. The crust will be chewier but still good, and cold cheese pizza tastes nothing like delivery pizza—it has actual flavor and texture.
Final Thoughts
French bread pizza sits in that perfect sweet spot between completely homemade and total convenience. You’re using quality ingredients and doing real cooking—assembling toppings thoughtfully, understanding how your broiler works, timing the heat correctly—but you’re also not spending an evening in the kitchen. It’s the kind of meal that impresses people by tasting way better than it has any right to given how fast it comes together.
The magic really does come down to a few simple rules: keep the toppings intentional instead of piling everything on, pay attention to moisture, choose bread that’s actually worth eating, and stay present while it broils. Once you’ve made it once and understand the rhythm, you can build variations infinitely. Every time someone has a different craving, you can adapt it—it works for meat lovers and vegetarians, it can be adapted for dietary restrictions, and it tastes totally different depending on whether you’re in the mood for something herbaceous or something rich and savory.
This is dinnertime food that actually tastes like you care about it, made fast enough that you can feed people on a Tuesday. That’s the whole appeal right there.