Dried beans have a reputation for being either perfectly tender or stubbornly hard, and most people have experienced at least one batch that turned into mush or refused to soften altogether. The difference between a beautiful bowl of creamy, intact beans and a disappointing pot of either crunchy outliers or broken-down mush comes down to a few critical steps that most home cooks overlook. Once you understand how beans actually cook, why soaking matters (or sometimes doesn’t), and how to read the subtle signals of doneness, you’ll nail perfect beans every single time.
The stakes are higher than they seem. Beans are an inexpensive, protein-packed staple that can anchor weeknight dinners, weekend meal prep, hearty soups, and creamy dips—but only if they’re cooked properly. A pot of improperly cooked beans will ruin the entire dish, no matter how good everything else tastes. The good news is that cooking dried beans perfectly isn’t complicated. It requires no special equipment and no advanced techniques, just an understanding of what’s actually happening to the beans as they soften, some basic timing awareness, and a willingness to follow through to the end.
This guide walks you through every method, every variable, and every decision point you’ll face when cooking dried beans from start to finish. Whether you prefer the overnight-soak approach, want to save time with a quick soak, or need beans ready in 30 minutes flat, you’ll find a tested method here that fits your schedule and always delivers perfect results.
Understanding the Different Types of Dried Beans
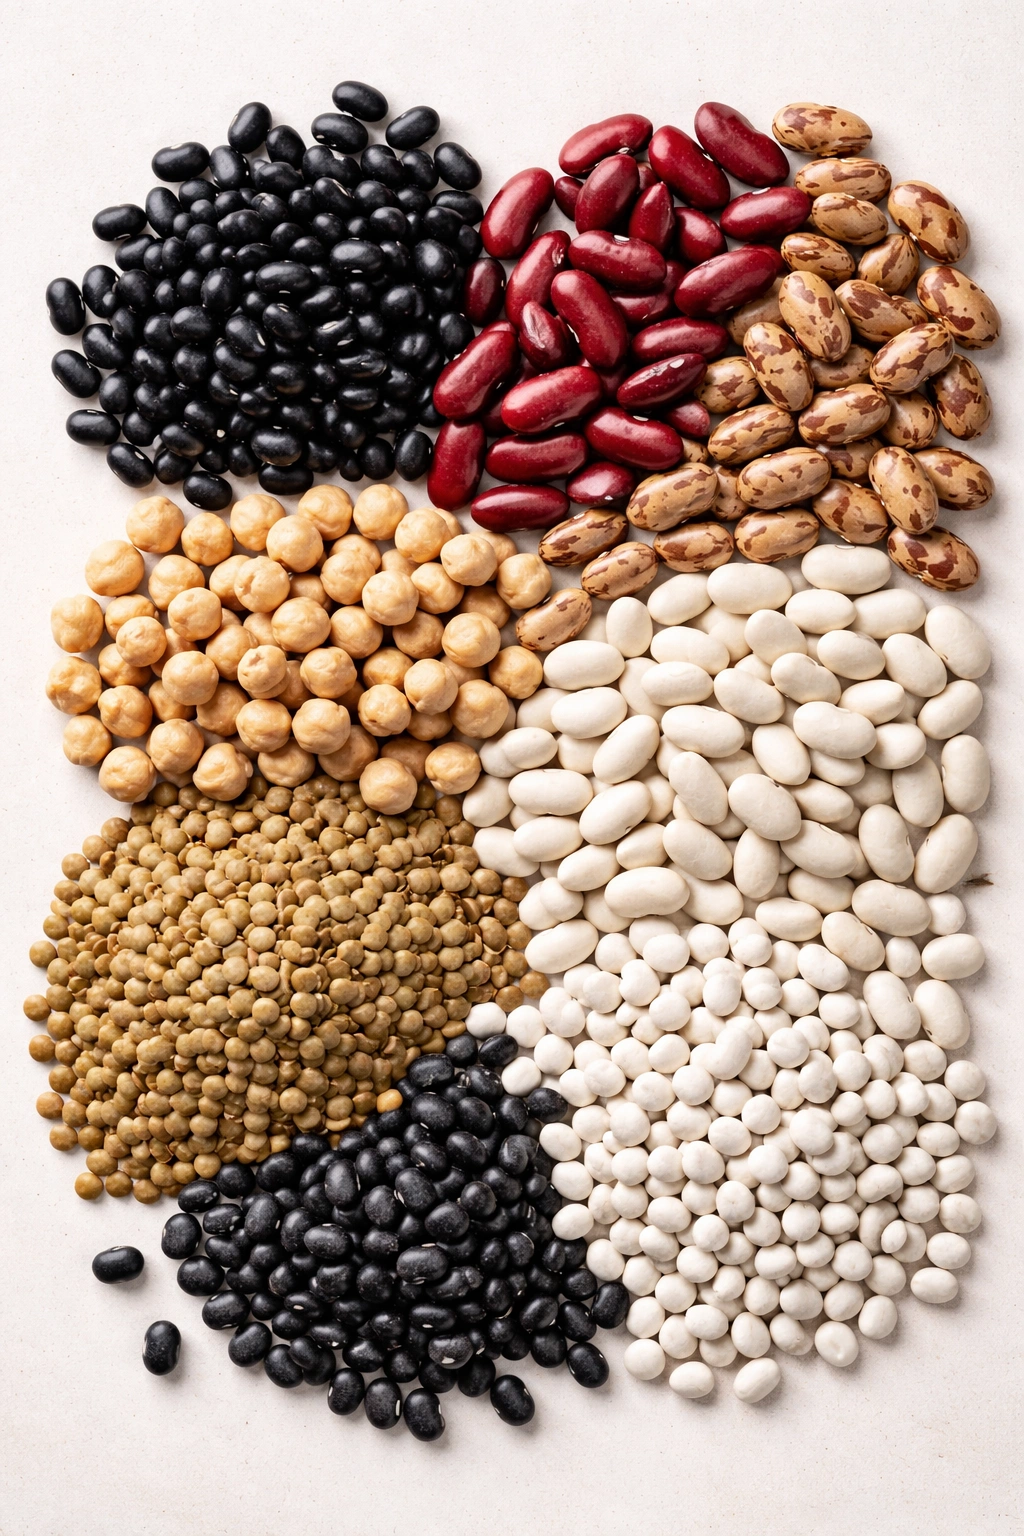
Dried beans aren’t all the same—they vary significantly in size, cooking time, starch content, and flavor profile. Black beans, kidney beans, pinto beans, chickpeas (garbanzo beans), cannellini beans, navy beans, and lentils each cook at slightly different rates and deliver different textures when done. Knowing which bean you’re working with helps you set realistic timing expectations and choose the cooking method that works best.
Black beans are medium-sized and cook relatively quickly, usually reaching perfect tenderness in 45 minutes to an hour after soaking. They have a dense, earthy flavor and stay intact beautifully during cooking, making them ideal for hearty soups, refried bean preparations, and grain-and-bean bowls. Pintos are slightly larger, cook in roughly the same timeframe, and break down a bit more readily than black beans—they’re perfect for refried beans because that softer texture actually works in your favor.
Chickpeas are substantially larger and sturdier than most other beans, requiring 1.5 to 2 hours of cooking time after soaking. They hold their shape exceptionally well and have a buttery, slightly sweet flavor that works equally well in curries, salads, or roasted until crispy. Kidney beans and white beans (cannellini and navy beans) fall somewhere in the middle texture-wise, cooking in about 1 to 1.5 hours and creating a creamy sauce around themselves as they cook.
Pro tip: Size matters more than the specific type when it comes to cooking time. If you’re combining multiple bean varieties in one pot, match beans by size rather than by type, or add them to the water at staggered intervals so they finish at roughly the same moment.
Sorting and Inspecting Dried Beans Before Cooking
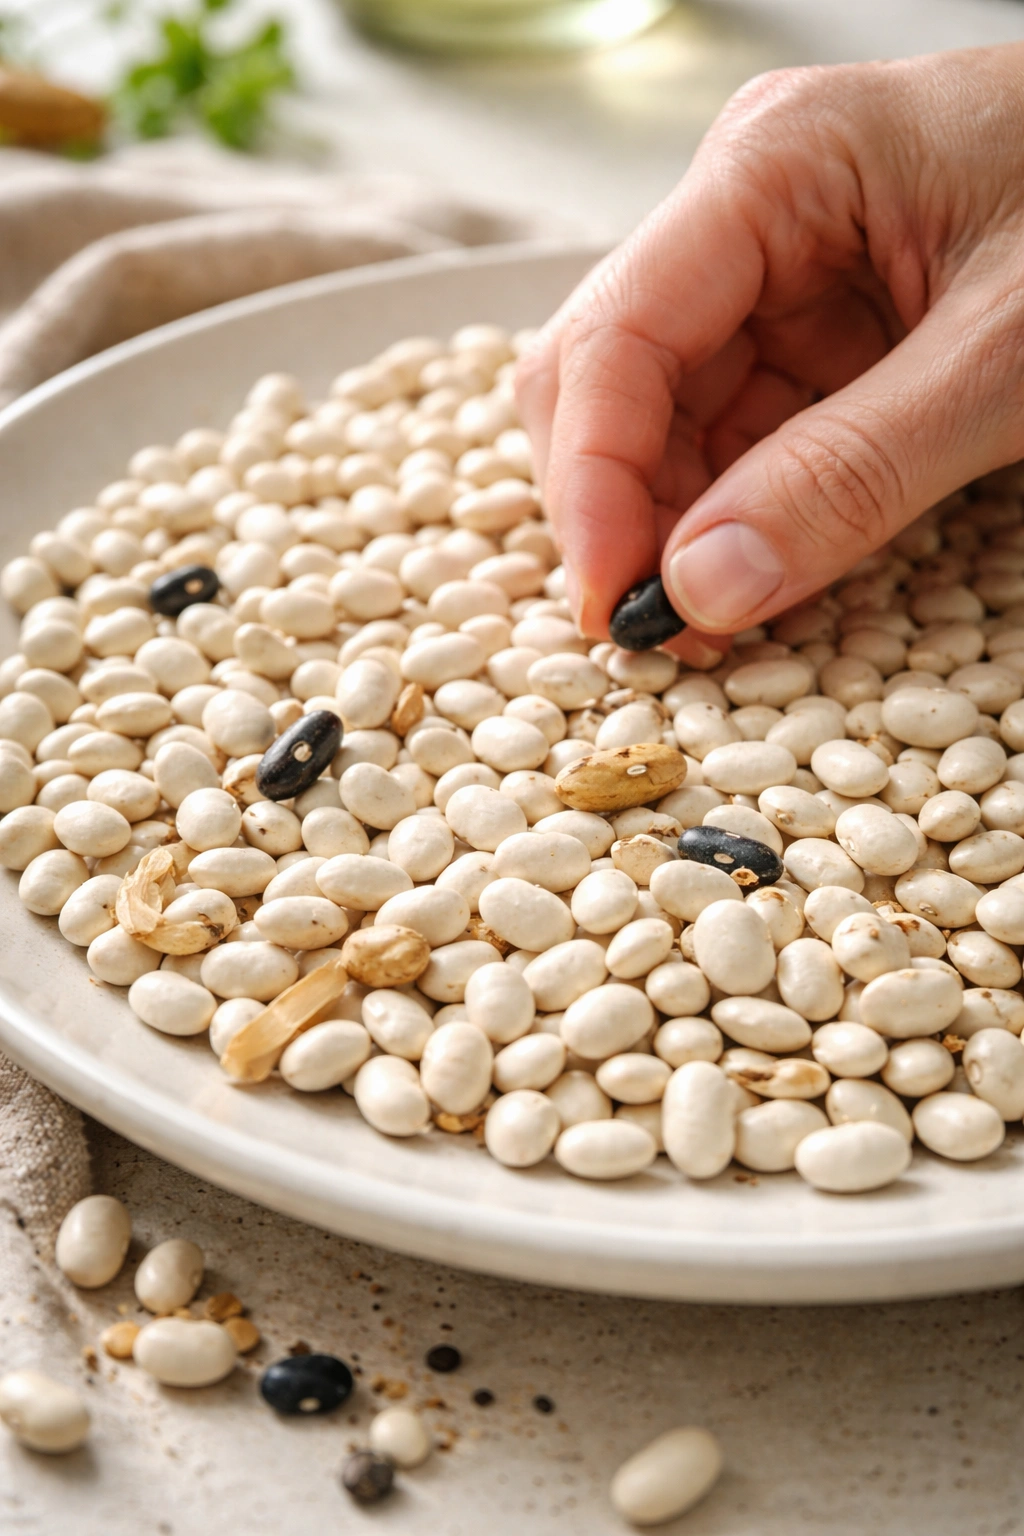
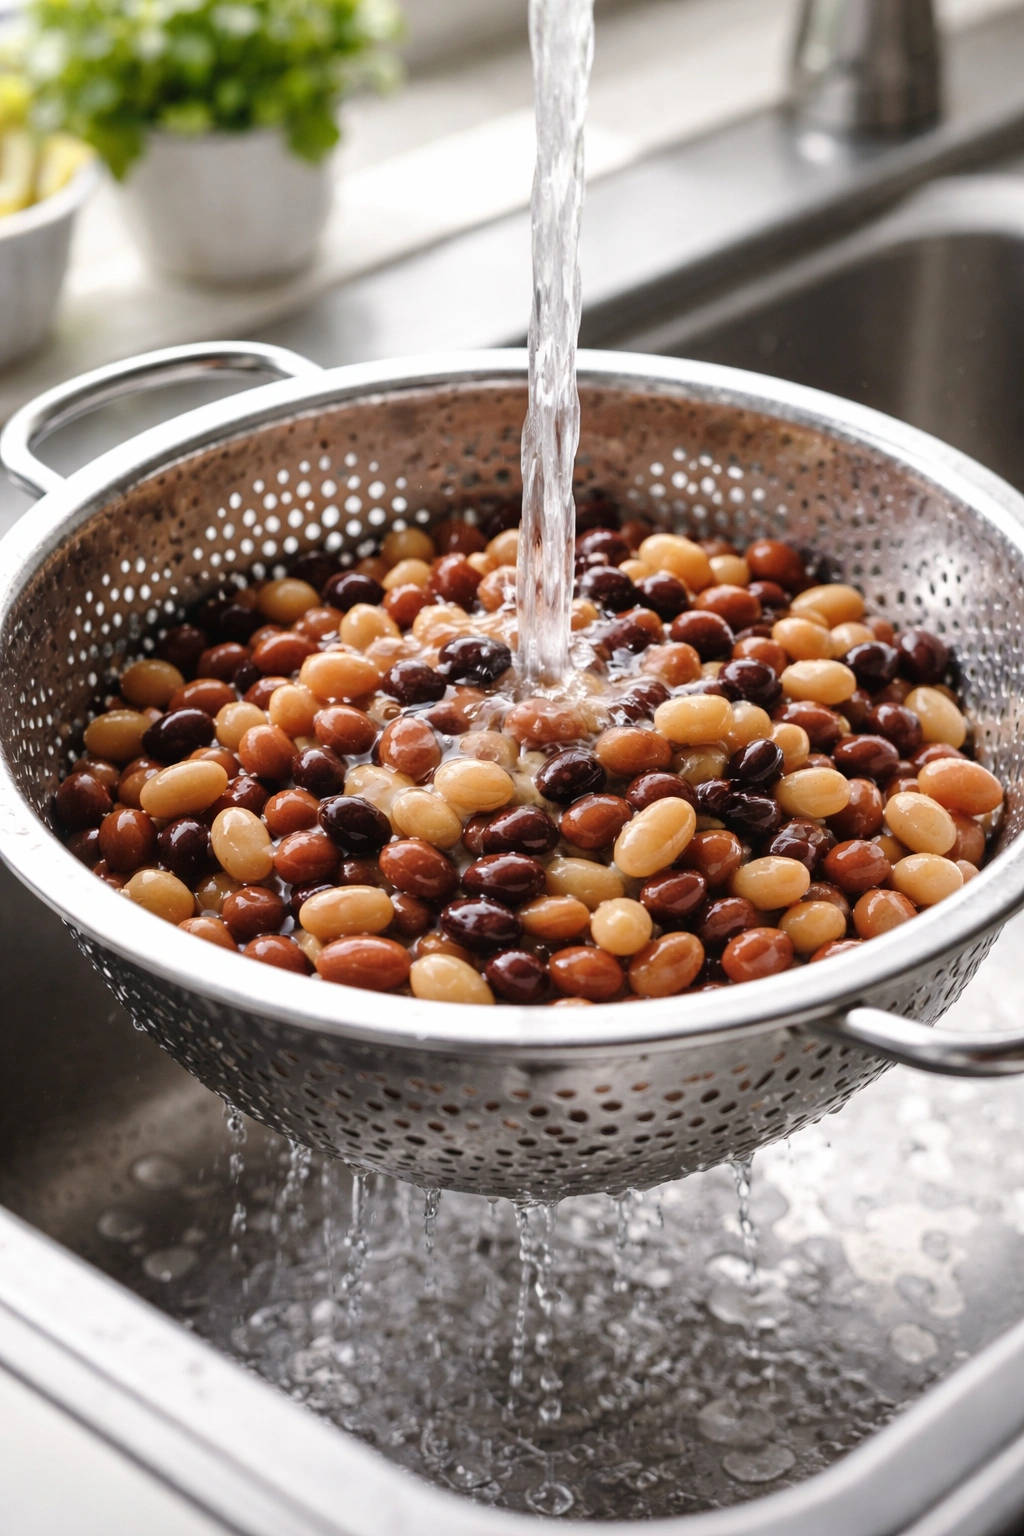
Before a single bean goes into water, you need to sort through them and remove debris. Dried beans are often packed with tiny stones, broken bean pieces, and shriveled duds that absolutely shouldn’t make it into your pot—a stone against your tooth mid-meal is a genuinely miserable experience, and shriveled beans won’t soften properly no matter how long you cook them.
Spread your dried beans on a large, light-colored plate or cutting board in a thin layer. Go through them slowly, scanning for anything that looks discolored, cracked, severely shriveled, or not obviously a bean. Pick out debris and set it aside. This takes 5 to 10 minutes depending on the quantity, but it’s non-negotiable. Rinse the sorted beans in a fine-mesh strainer under cool running water, stirring them gently with your fingers. The rinsing removes surface dust and some of the starches that can contribute to foam or cloudiness during cooking.
Pay special attention to this step if you’re cooking larger beans like chickpeas or kidney beans, since a stone hidden among them is more likely to pass through your fingers unnoticed. If you’re cooking beans you’ve stored for a while, do an extra-careful inspection—very old dried beans sometimes develop a grayish cast or begin to look papery, and these often won’t hydrate and soften properly.
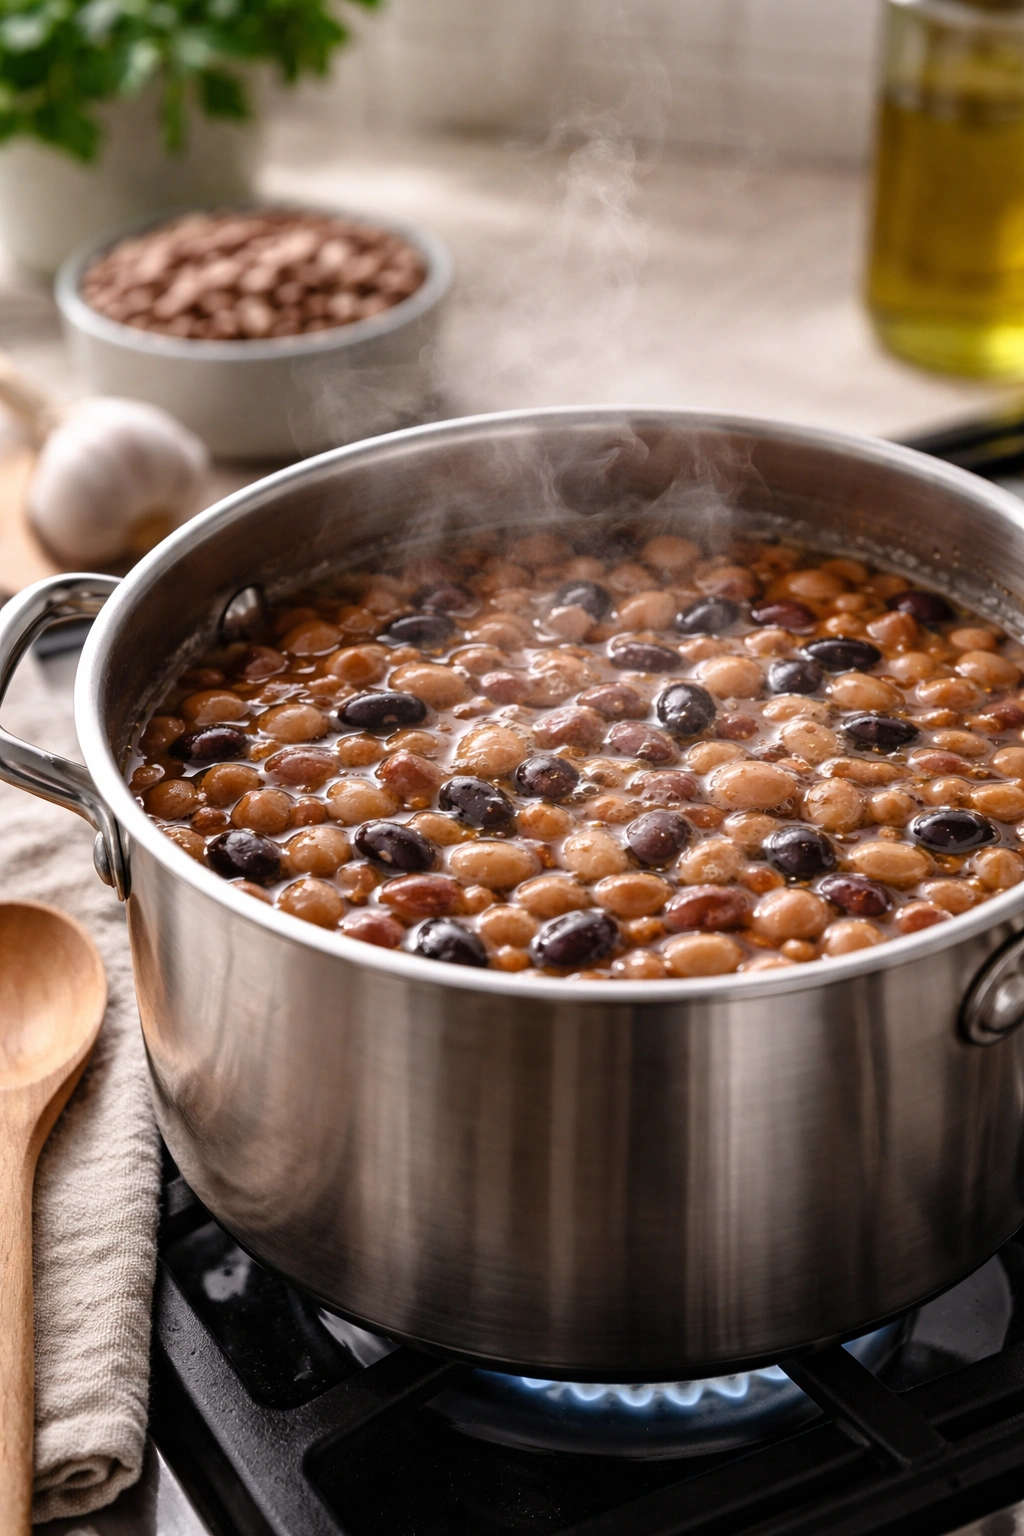
The Long-Soak Method: Overnight Soaking for Maximum Tenderness
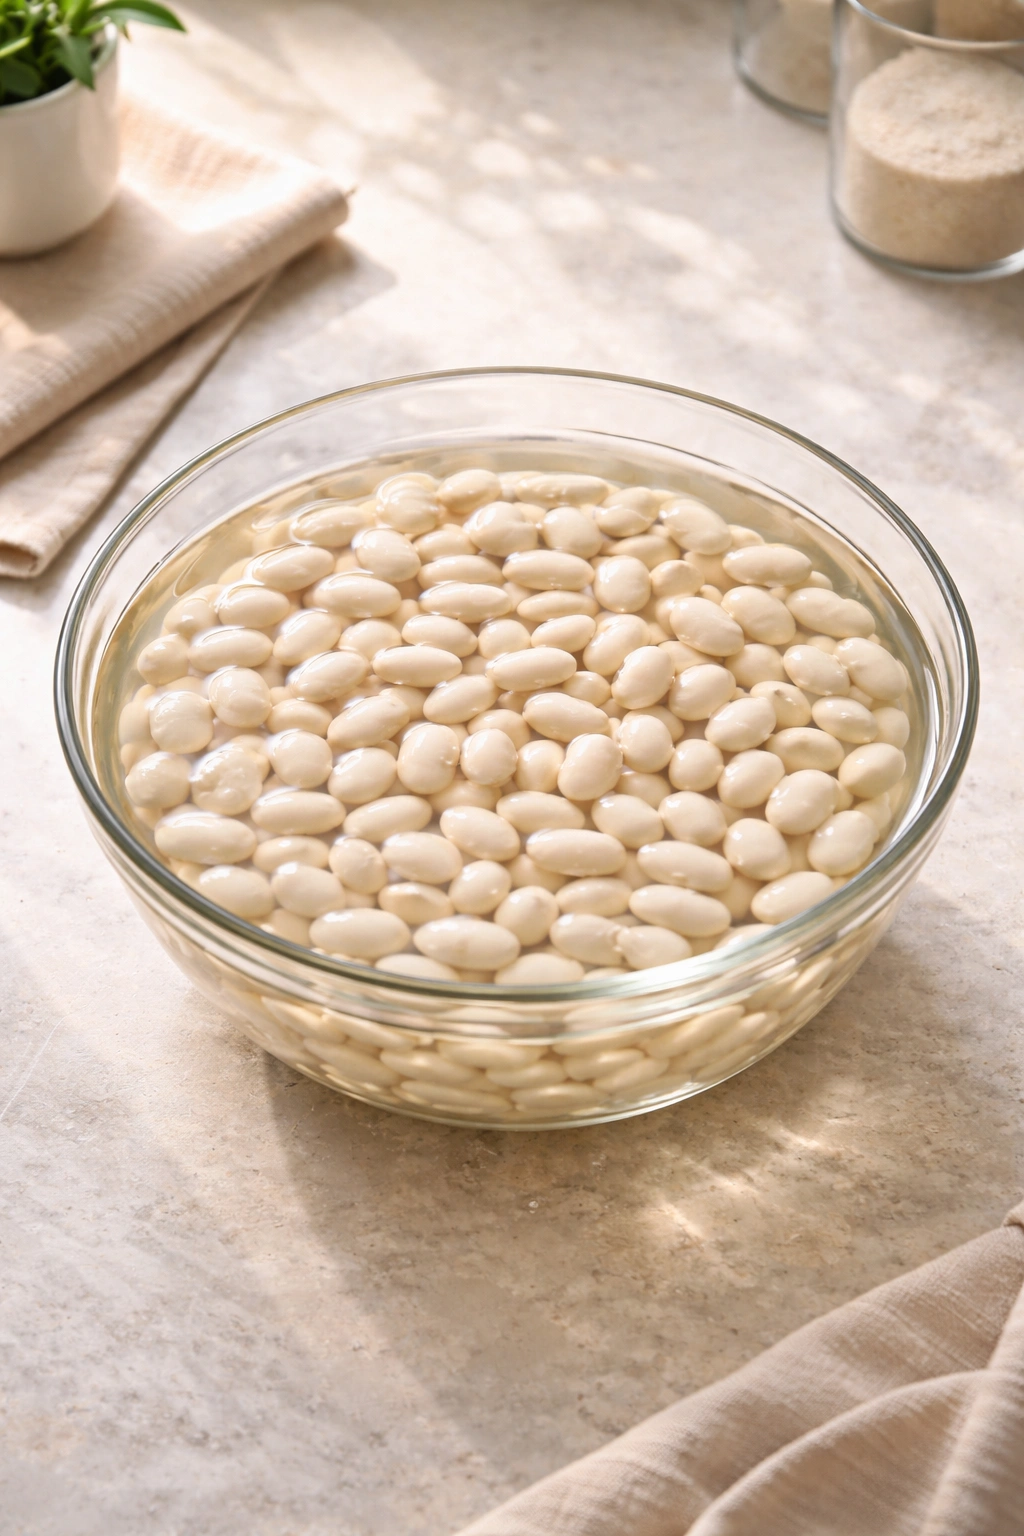
Soaking dried beans overnight is the most traditional method and remains the gold standard for reliably tender results. The soaking process rehydrates the beans gradually, activating enzymes that soften the seed coat and begin to break down some of the complex carbohydrates responsible for gas and digestive discomfort. A long soak also removes a substantial portion of the oligosaccharides—the compounds that cause the bloating many people associate with eating beans.
Place your sorted and rinsed beans in a large pot or bowl and cover them with at least 3 inches of cool water. The beans will roughly double in size as they soak, and you need plenty of water to accommodate that expansion without the beans drying out or running out of room. Cover the pot loosely (beans do absorb a tiny bit of air during soaking, though this is more relevant for pressure cooking) and let them sit for 8 to 12 hours at room temperature. Overnight soaking is convenient because you can prepare them before bed and they’re ready to cook the next morning.
After soaking, drain the beans in a colander and discard the soaking liquid. Rinse them thoroughly under cool running water, stirring gently—this removes even more of the starches and compounds that cause digestive upset. Transfer the drained beans to a large pot and cover with fresh water, using roughly 3 parts water to 1 part beans (a 3-to-1 ratio). The exact amount varies slightly depending on which bean you’re cooking and whether you want a thicker, starchier cooking liquid or a thinner one, but starting with a 3-to-1 ratio gives you a good baseline.
Bring the water to a simmer over medium-high heat. Once it reaches a gentle, steady simmer, reduce the heat to low and cook uncovered, stirring occasionally, until the beans are completely tender and easily smashed between two fingers. This typically takes 45 minutes to 2 hours depending on the bean variety, the freshness of the beans, and the exact temperature of your simmer. Older beans always take longer—beans that have been dried and stored for over a year sometimes take substantially longer than newer harvest beans.
The Quick-Soak Method: Fast Rehydration for Impatient Cooks

If you don’t have time to plan ahead, the quick-soak method rehydrates beans in about an hour and delivers results virtually identical to overnight soaking. Place your sorted and rinsed beans in a large pot and cover them with 3 inches of water. Bring the water to a boil over high heat and let it boil hard for 2 minutes. Remove the pot from heat, cover it, and let the beans sit undisturbed for 1 hour. The residual heat continues the soaking process, and the rapid heating can actually soften the seed coat faster than a cold soak.
After the 1-hour rest, drain the beans and rinse them thoroughly. Proceed with cooking exactly as you would with an overnight-soaked batch—cover with fresh water at a 3-to-1 ratio and simmer gently until tender. The quick-soak method does produce results that are sometimes fractionally less consistent than overnight soaking (occasionally a few beans remain slightly firmer than others), but the difference is subtle and most people won’t detect it.
Worth knowing: The quick-soak method and overnight soak produce nearly identical final textures, so choosing between them is purely a matter of timing. Quick-soak saves you 7 hours of waiting, while the overnight method requires just 5 minutes of active work before you go to bed.
The No-Soak Method: Cooking Beans Straight From Dry
If you forget to soak or simply don’t want to wait, beans can absolutely be cooked without soaking—you’ll just need extra cooking time and slightly more patience. Rinse your sorted, dry beans and place them directly in a pot with 4 parts water to 1 part beans (using more water than the soaked method because unsoked beans absorb more liquid). Bring to a boil, then reduce heat to low and simmer gently, stirring occasionally, for 2 to 3 hours depending on the bean type and age.
The no-soak method takes longer but isn’t actually more complicated—it just requires a longer simmering time. The result is nearly identical to soaked beans in terms of final texture and tenderness. You’ll also get a slightly creamier cooking liquid from the extra starch released during the longer cooking time, which is actually advantageous if you’re planning to use that liquid in a soup or braise.
Some people claim unsoked beans cause more digestive distress, while others say the extended cooking time breaks down even more of the problematic compounds, making no-soak beans actually easier to digest. The evidence is mixed, so this is truly a “do whatever fits your life” situation. Just set your timer, check periodically, and add more water if the beans look dry before they’re done cooking.
Pressure Cooking: From Dry Beans to Ready in 30 Minutes

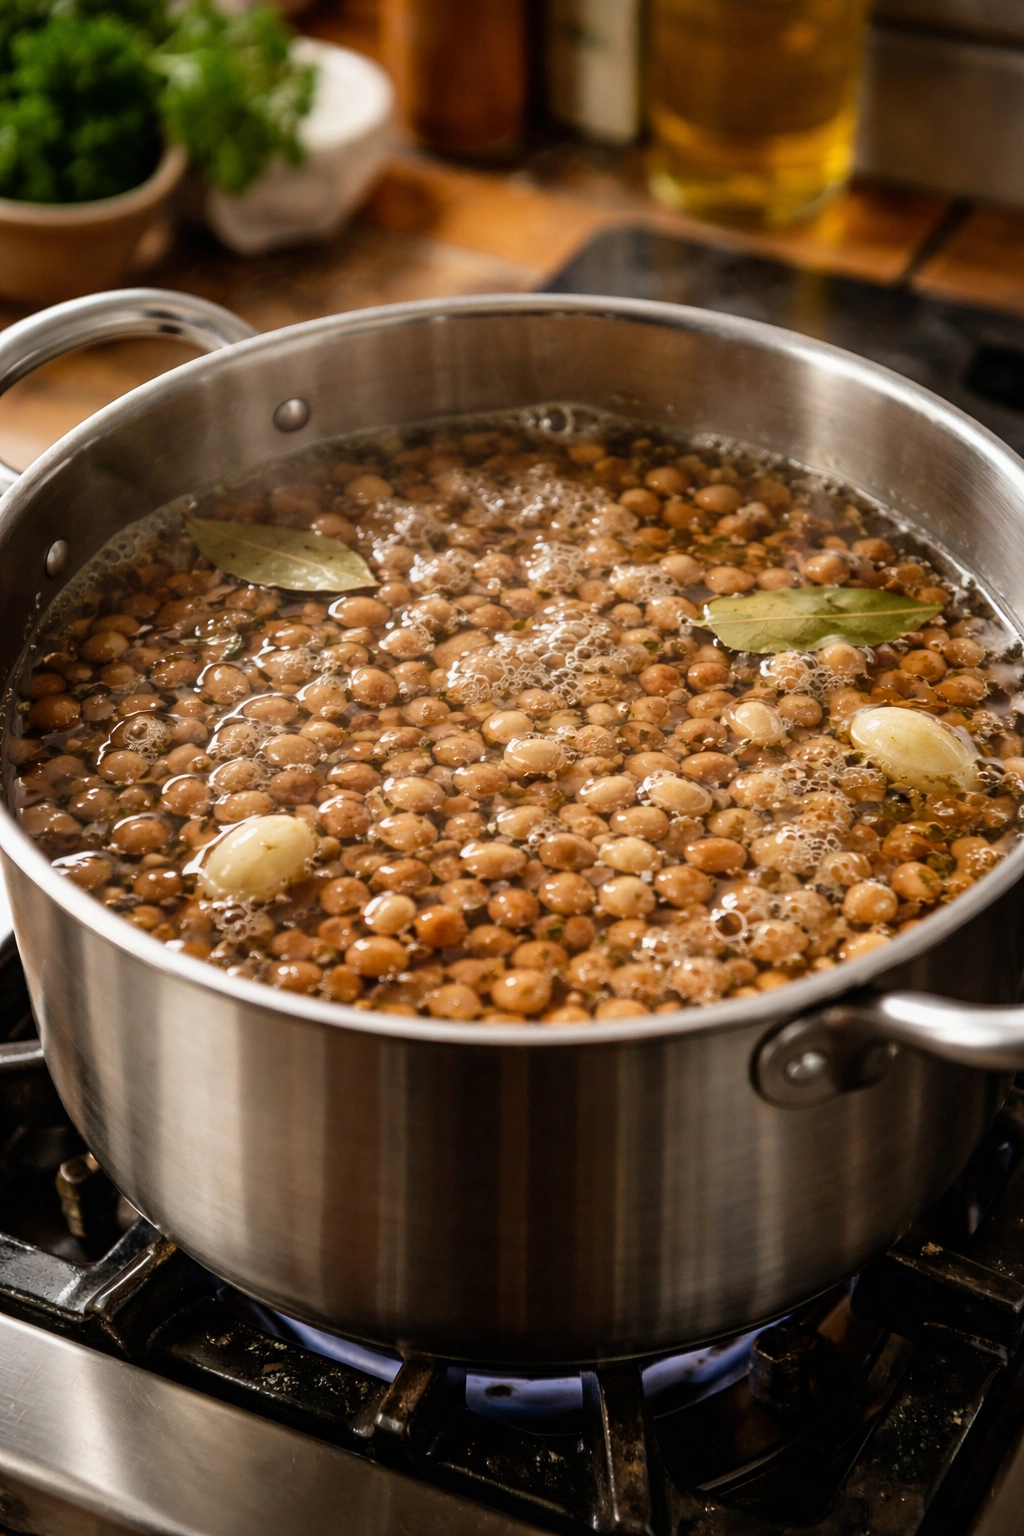
An Instant Pot or other electric pressure cooker produces perfectly tender beans in roughly 30 to 40 minutes from dried, even without soaking. Place your sorted, unsoaked beans in the pressure cooker pot and add liquid at a 2-to-1 ratio (2 parts water to 1 part beans). Don’t soak—the pressure cooker doesn’t need it and will cook the beans thoroughly regardless.
Close the lid, set the valve to sealing, and cook under high pressure for 25 minutes for black beans and pintos, or 30 to 35 minutes for larger beans like chickpeas and kidney beans. Allow the pressure to release naturally for 10 minutes after the cooking time finishes—this is important because forcing the pressure to release suddenly can cause the hot liquid to splash and can sometimes leave beans slightly underdone. After the natural release period, you can carefully open the valve to release any remaining pressure.
The pressure cooker method delivers remarkably consistent results because the high pressure penetrates the beans uniformly, softening them evenly throughout. The drawback is that you can’t easily check whether they’re done mid-cooking (opening a pressure cooker interrupts the process), so you’re trusting the timer. If your beans are older than a year or seem particularly hard, add 5 minutes to the cooking time.
Pro tip: The pressure cooker cooking liquid becomes extremely starchy and viscous—it’s perfect for thickening soups or using as a binder in recipes, but if you prefer a thinner cooking liquid, drain the beans and discard about half of it, then rinse them quickly before using.
Slow Cooker Method: Hands-Off Cooking All Day
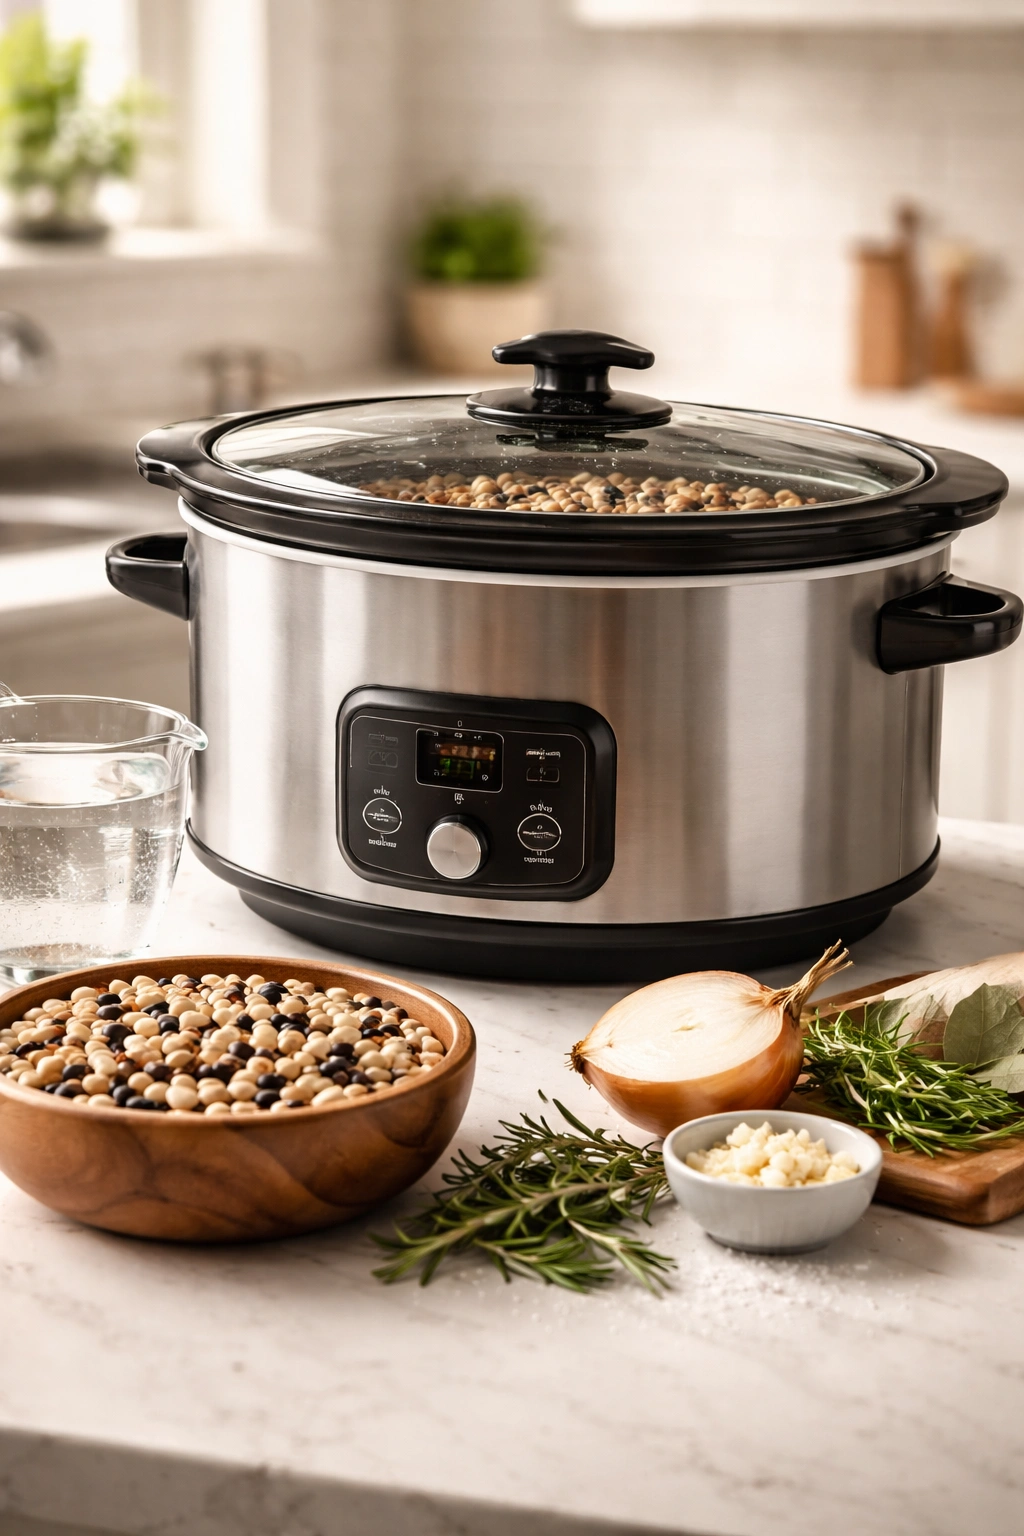
If you own a slow cooker (or Crock-Pot), it’s an excellent vessel for cooking dried beans with virtually zero monitoring required. Soak your beans overnight using the long-soak method, drain them, and add them to the slow cooker with fresh water at a 3-to-1 ratio. Cook on low for 6 to 8 hours, stirring occasionally if you’re home (but this isn’t required—slow cookers do the work regardless).
The slow cooker is ideal if you want to start beans in the morning and have them ready by dinner, or if you’re cooking a very large batch. The gentle, steady heat produces reliably tender beans, and the longer cooking time means even old beans usually soften completely. You can also add aromatics like bay leaves, garlic cloves, or a quartered onion to the slow cooker at the beginning, and they’ll infuse the beans gently over hours without overwhelming them.
The only real drawback to the slow cooker method is the time commitment—you need to plan 6 to 8 hours ahead. But if you set beans to cook while you sleep or while you’re at work, this method requires almost no active effort.
Adding Salt and Seasonings During Cooking
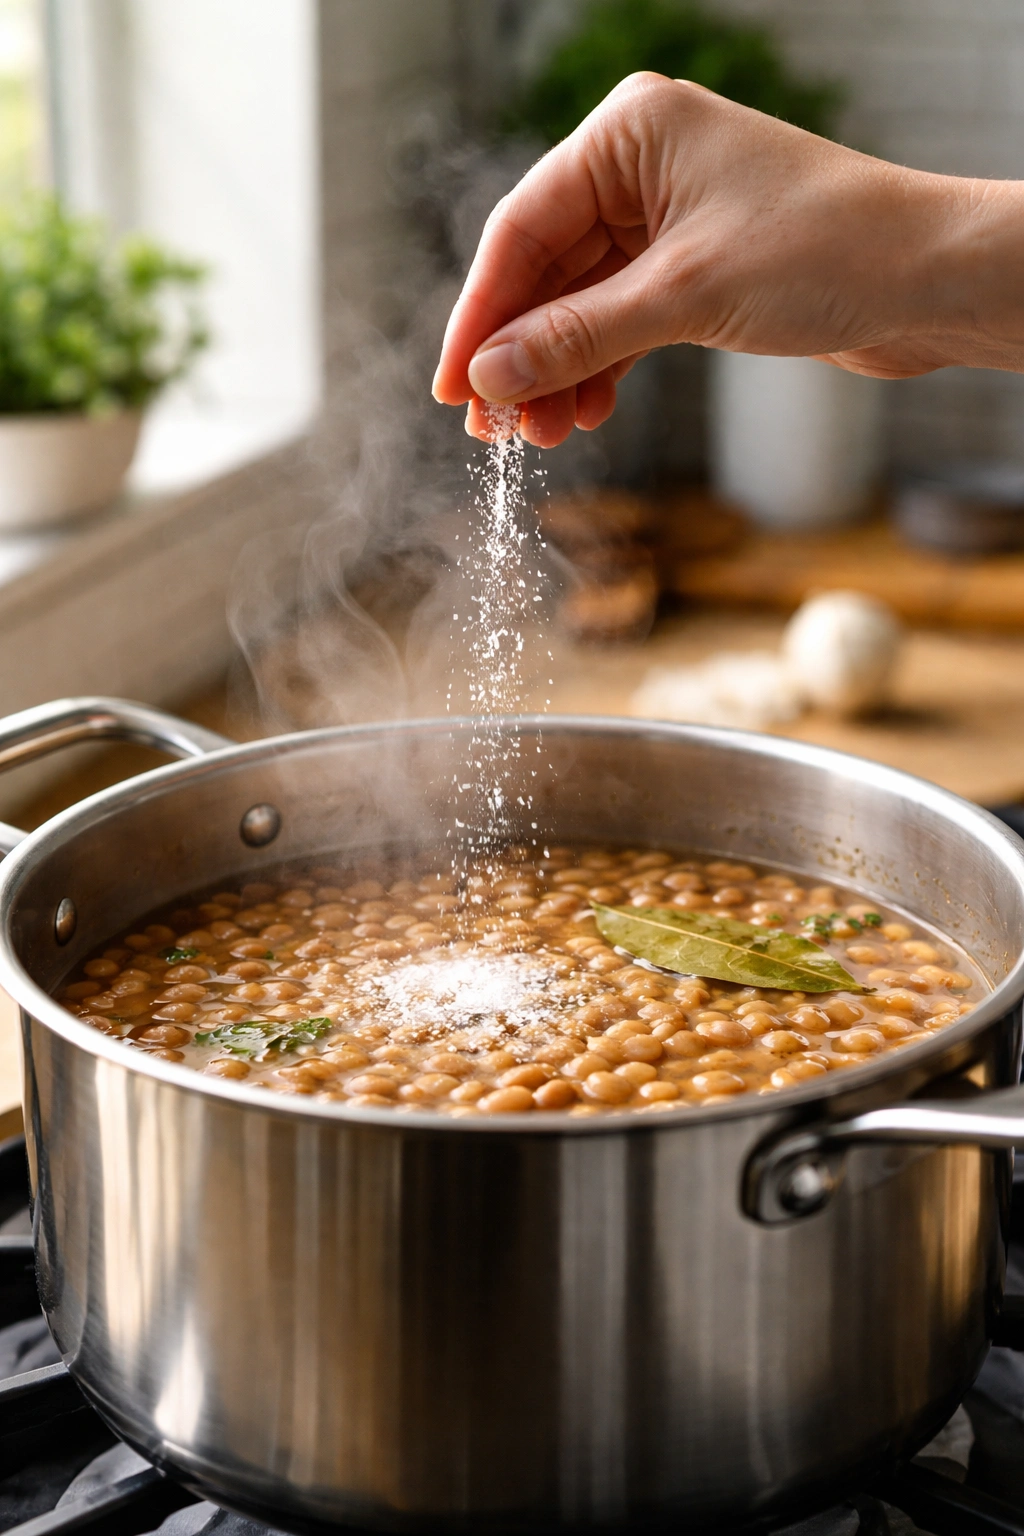
The timing of when to add salt is one of the most debated topics in bean cooking, with some old-school advice claiming salt added early will prevent beans from softening. This is a myth with zero scientific basis. Salt actually helps beans soften by interfering with the cell structure in a way that makes them absorb water more easily. However, the practical truth is more nuanced.
Adding salt at the very beginning of cooking can sometimes cause the water to evaporate slightly faster, which occasionally means you’ll need to add more water partway through. To avoid this, most home cooks prefer to add salt halfway through cooking or even at the very end. This doesn’t change the final texture at all—it’s purely a convenience choice. Add about 1 teaspoon of salt per pound of dried beans (or about ½ teaspoon per cup of sorted beans), tasting as you go.
Beyond salt, you can add flavor directly to the cooking liquid. A bay leaf, a smashed garlic clove, a small dried chili pepper, a piece of kombu (seaweed, which contains natural enzymes that soften beans and reduce gas), a halved onion, or a sprig of fresh thyme all dissolve into the cooking liquid and subtly season the beans. Add these at the beginning of cooking and remove them before using the beans. If you’re making beans to freeze or store, hold back on heavy seasonings and season them when you use them—this keeps your cooked beans more versatile for different dishes.
Testing for Doneness: The Feel and the Taste
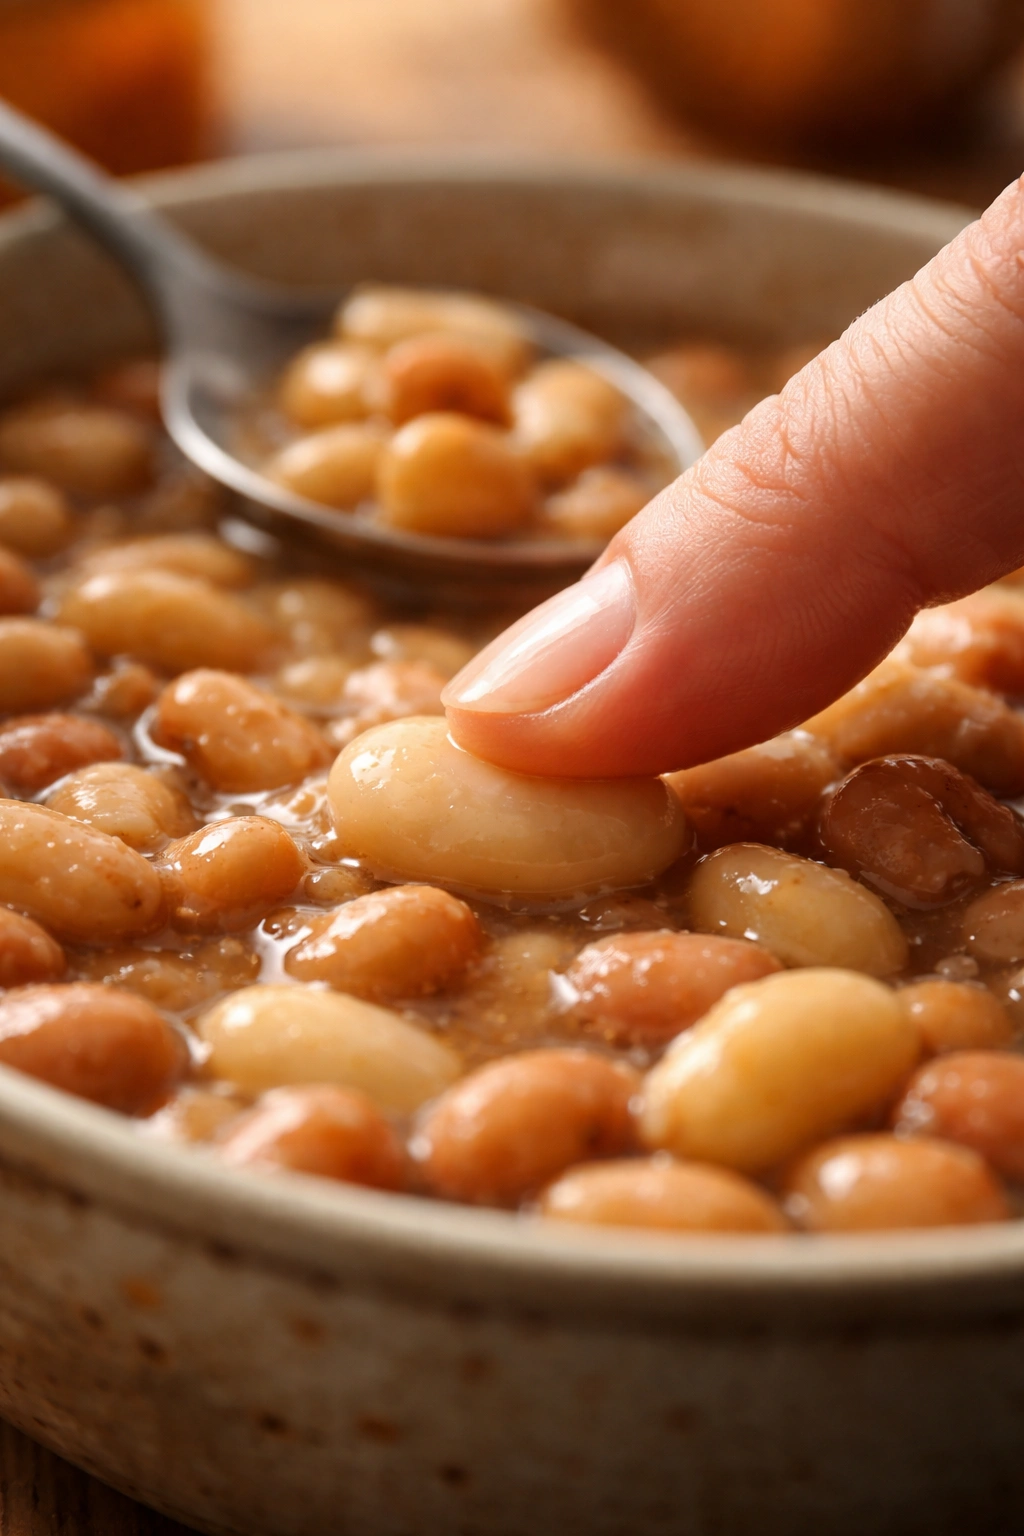
The only reliable way to know when beans are done is to actually taste them and feel them. There’s no timer that works universally because so many variables affect cooking time—the variety of bean, the freshness of the dried beans, the altitude where you’re cooking, the exact temperature of your simmer, and the amount of mineral content in your water all matter. Start checking beans at the minimum time I’ve suggested (45 minutes for fast-cooking varieties, 1.5 hours for large beans), and then check every 10 to 15 minutes after that.
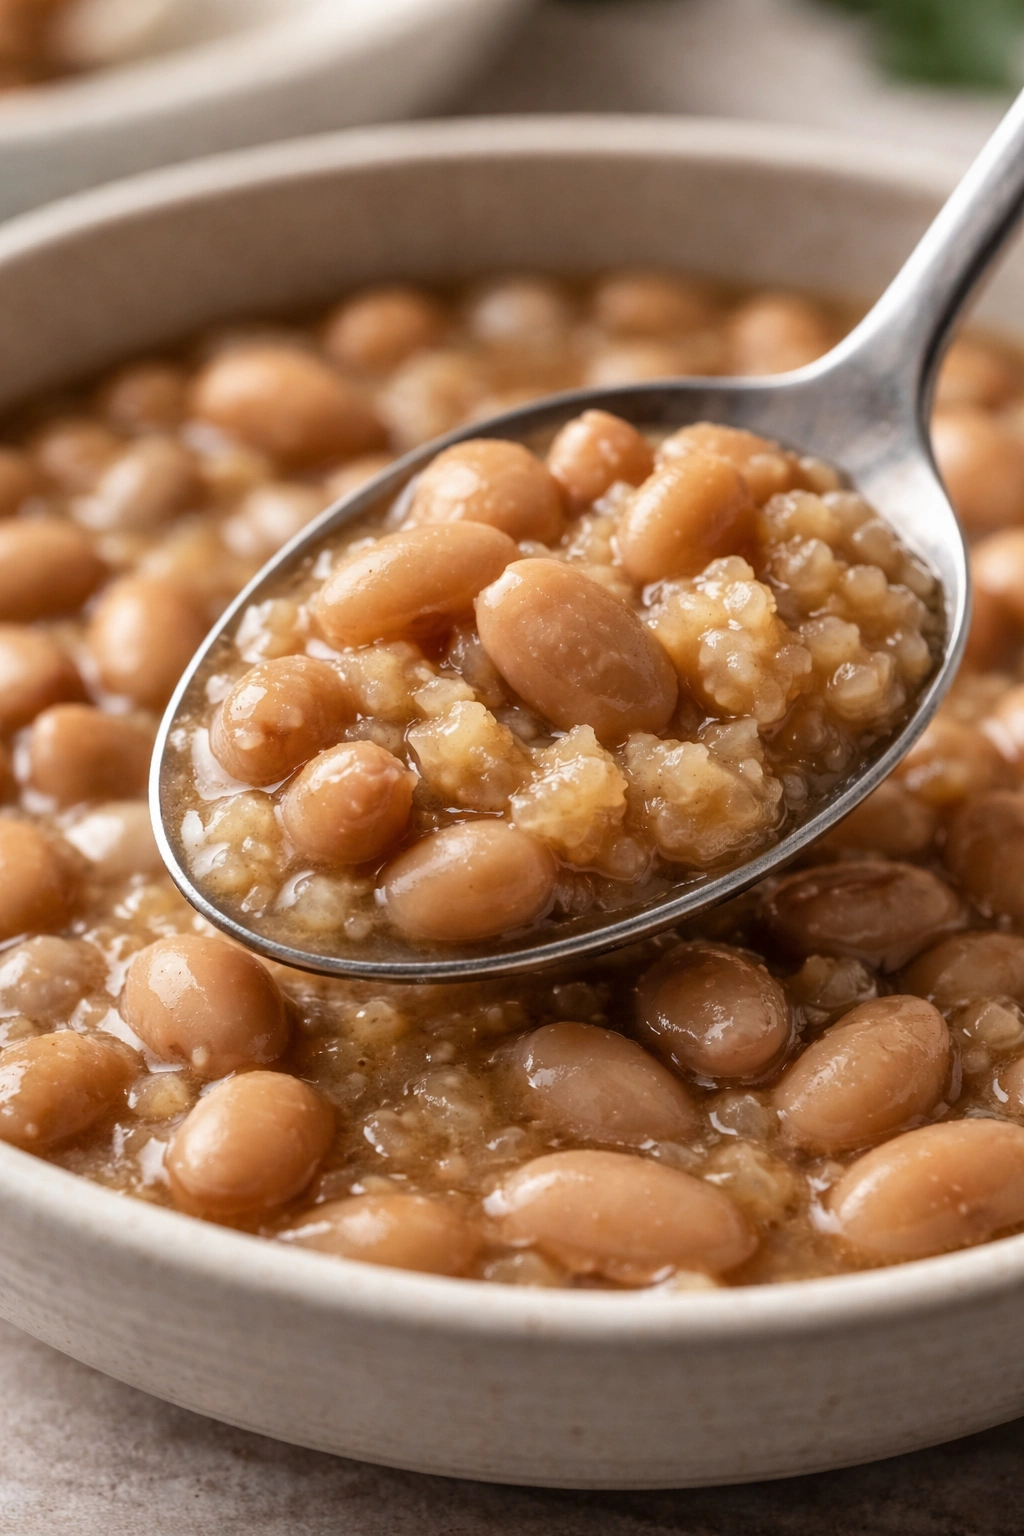
Grab a spoon, fish out a single bean, let it cool for a few seconds, and taste it. Done beans should have zero grittiness or crunch—they should break easily between your tongue and the roof of your mouth, releasing a creamy texture inside. The outside of the bean should be completely soft with no resistance. If they still have any bit of crunch or require vigorous chewing, they’re not done yet. Keep cooking and check again in 15 minutes.
Critical distinction: Mushy and done are different things. Done beans break easily but still hold their shape. Mushy beans fall apart or become grainy. If you’re cooking beans for a salad where you want them to stay intact, remove them from heat at the very first moment they’re completely tender—don’t let them keep cooking a minute longer. If you’re making refried beans or adding them to a soup where texture matters less, you can go a bit longer, but most beans reach peak texture right at the moment they stop being crunchy.
Never add acidic ingredients (like tomatoes, vinegar, wine, or citrus juice) while beans are still cooking—acid hardens the seed coat and prevents further softening. Always wait until beans are completely tender before adding anything acidic.
Preventing Common Cooking Problems
The two most common bean cooking failures are beans that refuse to soften and beans that turn mushy and break apart. Both are preventable once you understand what causes them.
Beans that won’t soften are usually caused by old beans (dried beans older than a year or two cook slower and less reliably), hard water (mineral-heavy water can prevent beans from absorbing water properly), or a temperature that’s too hot (a rolling boil actually prevents beans from softening evenly—you need a gentle simmer). If your beans reach the 2-hour mark and still aren’t tender, check that you’re genuinely simmering, not boiling. Reduce heat further and let them continue cooking. If you have very hard water and consistently struggle with beans, add a tiny pinch of baking soda to the cooking water—about ¼ teaspoon per pound of beans—which raises the pH and helps them soften.
Mushy beans or beans that split open happen when heat is too high (a vigorous boil breaks down the seed coat too quickly), when cooking time is too long (especially obvious if you walked away and forgot about them), or when you’re stirring them too much (constant stirring breaks the fragile exterior of nearly-done beans). Maintain a gentle, steady simmer, stir only occasionally, and check doneness frequently in the last 30 minutes of cooking so you can catch them at peak tenderness.
Beans that have a few split ones mixed in with perfectly intact ones usually means the batch was uneven to begin with—some beans were old and soft, while others were fresher and harder. Sorting more carefully and removing the smallest or shriveled beans before cooking helps prevent this.
Draining and Rinsing Cooked Beans: To Rinse or Not
Once beans are completely tender, drain them in a colander. The decision of whether to rinse them with cool water depends on what you’re using them for and personal preference. Rinsing removes excess starch and some of the compounds that cause gas, and it cools the beans quickly so they’re easier to handle. However, rinsing also removes some flavor and starch that helps thicken soups or dressings.
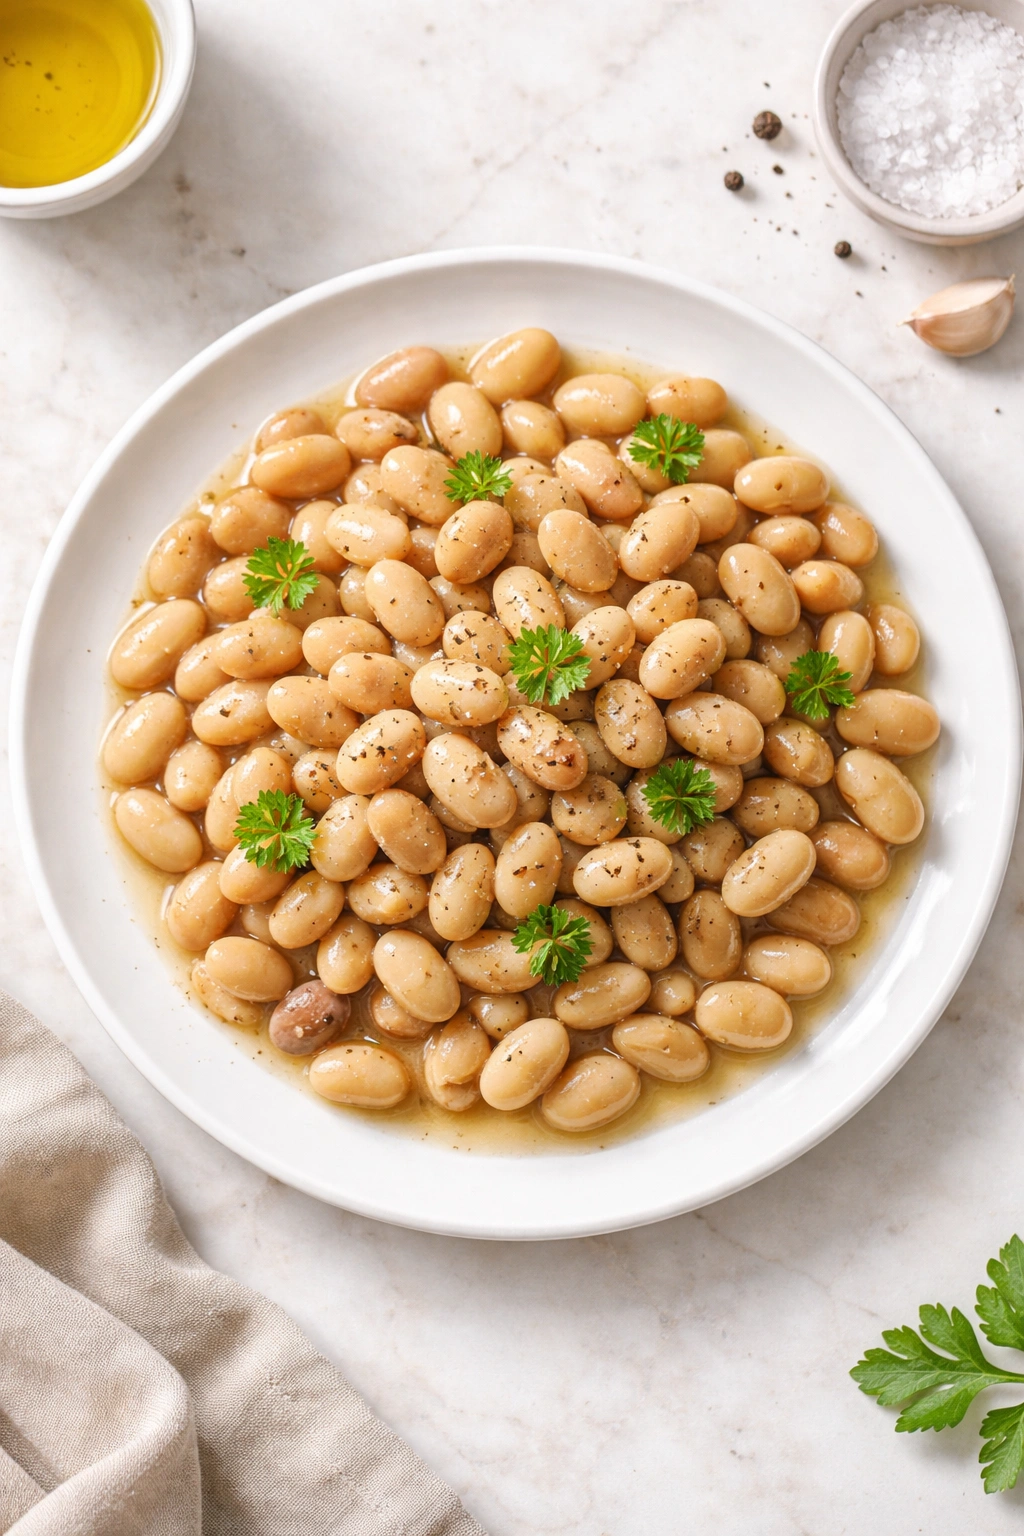
For bean salads, cold preparations, and dishes where you want beans to taste clearly like beans, skip the rinse. For soups where you want a creamy broth, don’t rinse. For refried beans or bean dips where a thick consistency is ideal, don’t rinse. For any application where you’ve highly seasoned your cooking liquid and want that flavor to stick to the beans, don’t rinse. Otherwise, a quick rinse under cool water is fine and leaves you with cleaner, less-starchy beans.
Storing Cooked Beans for Later Use
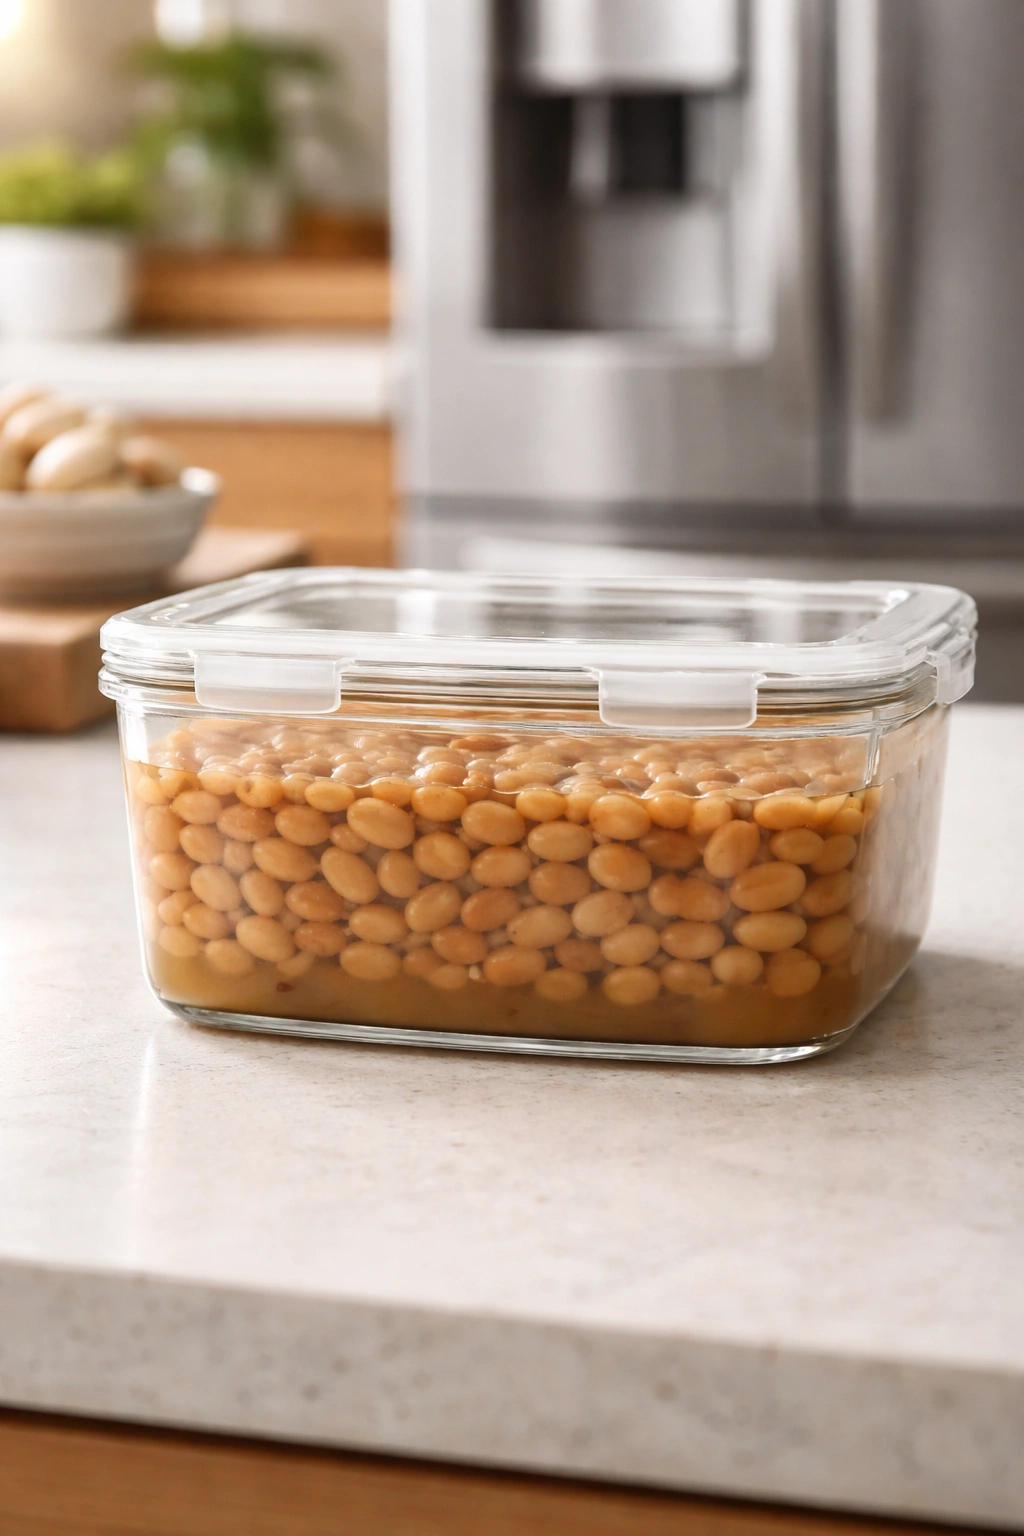
Properly stored cooked beans will keep in the refrigerator for 3 to 5 days, making them convenient to have on hand for quick meals. Store them in a sealed container with some of their cooking liquid to keep them moist—the beans will actually absorb a bit more of that liquid as they sit, flavoring themselves further. Don’t drain all the liquid away or the beans will dry out.
For longer storage, freeze cooked beans in portions. Spread cooled beans on a sheet pan and freeze them uncovered until solid (about 2 hours), then transfer them to a freezer bag or airtight container. They’ll keep for up to 3 months. Alternatively, freeze them in their cooking liquid in ice cube trays or small containers, which makes portioning easy and prevents freezer burn. Thaw frozen beans in the refrigerator overnight before using, or add them directly to hot soups and stews where they’ll thaw and heat through within minutes.
Creating Flavor-Infused Beans for Different Cuisines
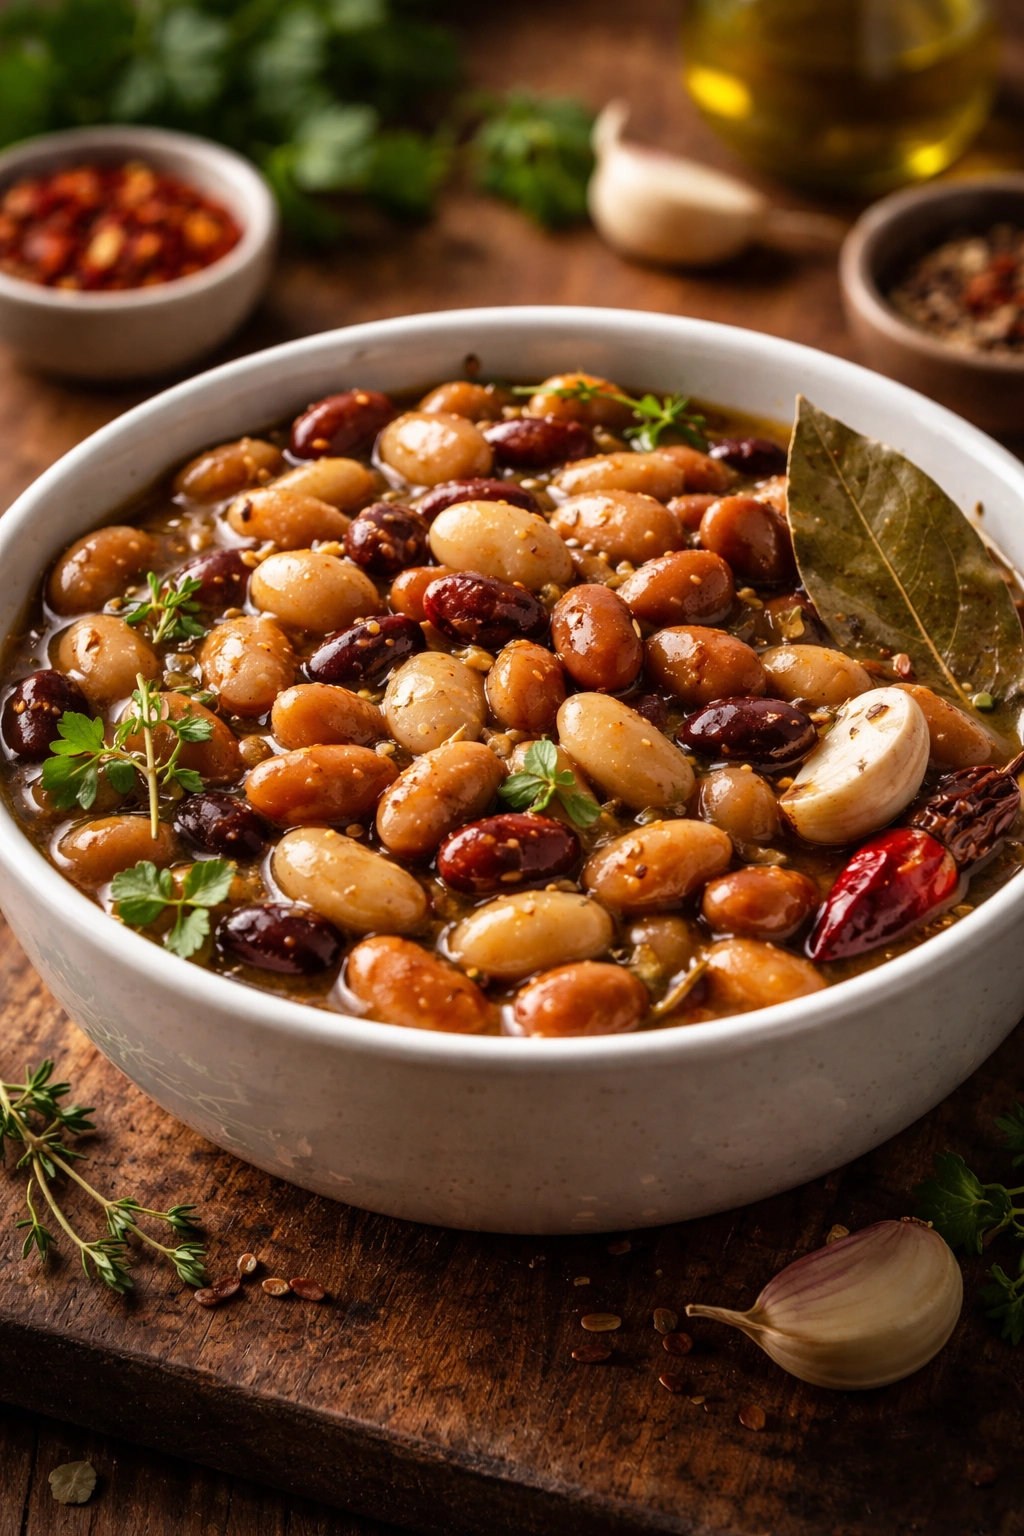
Plain cooked beans are versatile, but beans infused with flavors during cooking are even better. For Mexican-style beans, simmer beans with a dried ancho or guajillo chili, a bay leaf, cumin seeds, and garlic. For Indian-spiced beans, add cumin seeds, coriander seeds, a piece of ginger, and fresh cilantro to the cooking liquid. For Italian-style beans, use bay leaves, rosemary, garlic, and finish with good-quality olive oil.
For Caribbean-style beans (like rice and beans), cook beans with scallions, garlic, fresh thyme, and a dried Scotch bonnet chili for heat and flavor. For Mediterranean preparations, use bay leaves, oregano, lemon zest, and a few whole garlic cloves. The beauty of cooking flavor directly into beans is that every single bean absorbs that taste evenly, rather than just the ones sitting at the bottom of a serving bowl getting seasoned.
Add aromatics at the beginning of cooking and either remove them before serving or leave them in if they’re small enough to eat. Dried chili peppers can stay in the whole pot and diners can fish them out, or you can wrap them loosely in cheesecloth so they’re easy to remove. This approach transforms basic beans into a full-bodied ingredient that barely needs any other seasoning.
Making the Most of the Cooking Liquid
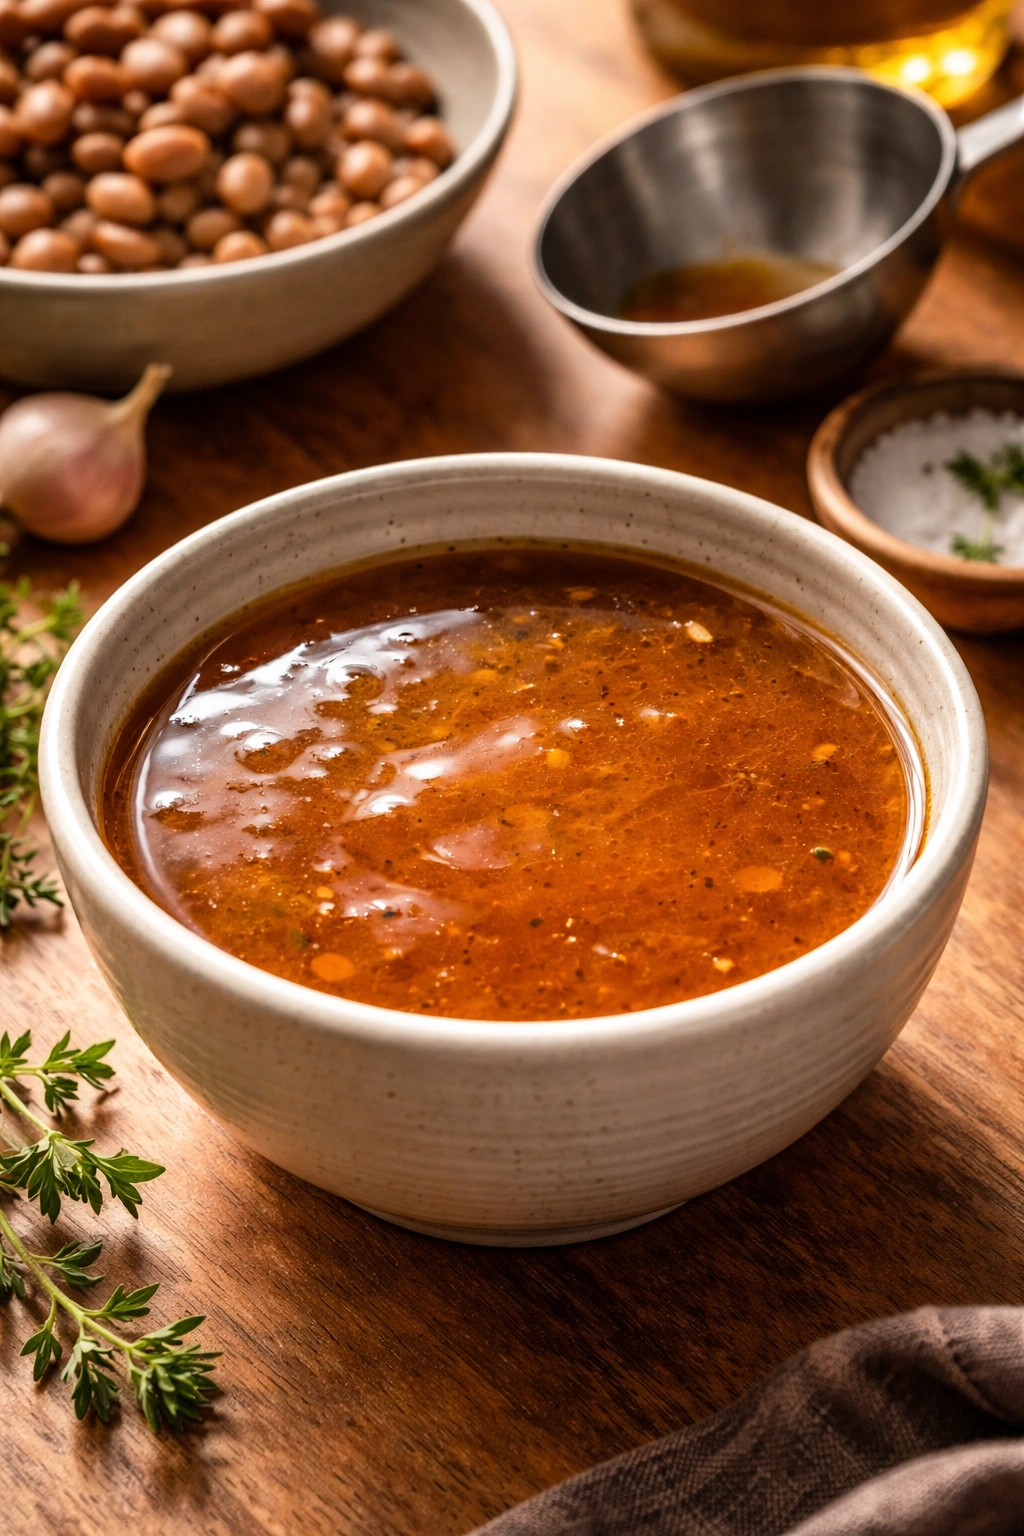
The liquid left behind after cooking beans is liquid gold—it’s thickened and enriched by the starches released from the beans, and it’s deeply flavorful from hours of gentle cooking. Never discard this liquid without considering its uses.
Bean broth (also called aquafaba when made from chickpeas) is perfect for thinning soups, cooking grains, making gravies, or even using as a binder in vegetarian cooking. A cup or two of bean-cooking liquid can turn a thin soup into something with body and richness. Strain it through a fine-mesh sieve if you want a clearer liquid, or use it as-is if cloudiness doesn’t bother you.
Keep the cooking liquid with your stored beans if you’re using them within a few days. If you’re freezing cooked beans, you can freeze the liquid separately and use it later, or incorporate some of it into the frozen beans (freezing liquid slightly increases the volume, so don’t fill containers all the way). Smaller portions of bean liquid can be frozen in ice cube trays for easy individual use in recipes.
Texture Troubleshooting: Getting Beans Exactly How You Want Them
Different dishes call for different textures, and you can adjust your cooking approach slightly depending on the final use. For bean salads, you want beans that are completely tender but still hold their shape perfectly—remove them from heat the moment they reach this stage and cool them immediately in a colander. For soups, you might want some beans to break apart and thicken the broth, so cooking them a few minutes longer is fine.
For hummus or bean dips, slightly overcooking beans (letting them go soft enough to easily break apart) is actually beneficial because they blend into a smoother purée with less effort. For refried beans, you’re actively trying to break down the beans, so cooking until some of them are falling apart is exactly right. The same batch of beans cooked to the same point can be used for multiple purposes—it’s just the handling and processing afterward that determines the final texture in each application.
Key Takeaways
Perfectly cooked beans are entirely within reach once you understand that the process is forgiving and flexible—there are multiple legitimate methods, each with different timing but similar results. Soaking (either overnight or with a quick-boil method) dramatically reduces cooking time and helps make beans more digestible, but it’s optional if you’re willing to cook longer. The absolute key is maintaining a gentle simmer throughout, checking doneness frequently in the final stages of cooking, and removing beans from heat the moment they’re completely tender rather than waiting for a preset timer.
Store cooked beans with their cooking liquid for maximum flavor and texture, and don’t waste that starchy, flavorful liquid—use it in soups, stews, and grain dishes. Season generously and taste frequently as beans cook, adding salt once they’ve begun to soften, and hold off on acidic ingredients until after they’re completely done. With these simple practices in place, you’ll never serve a pot of undercooked, overcooked, or mushy beans again.