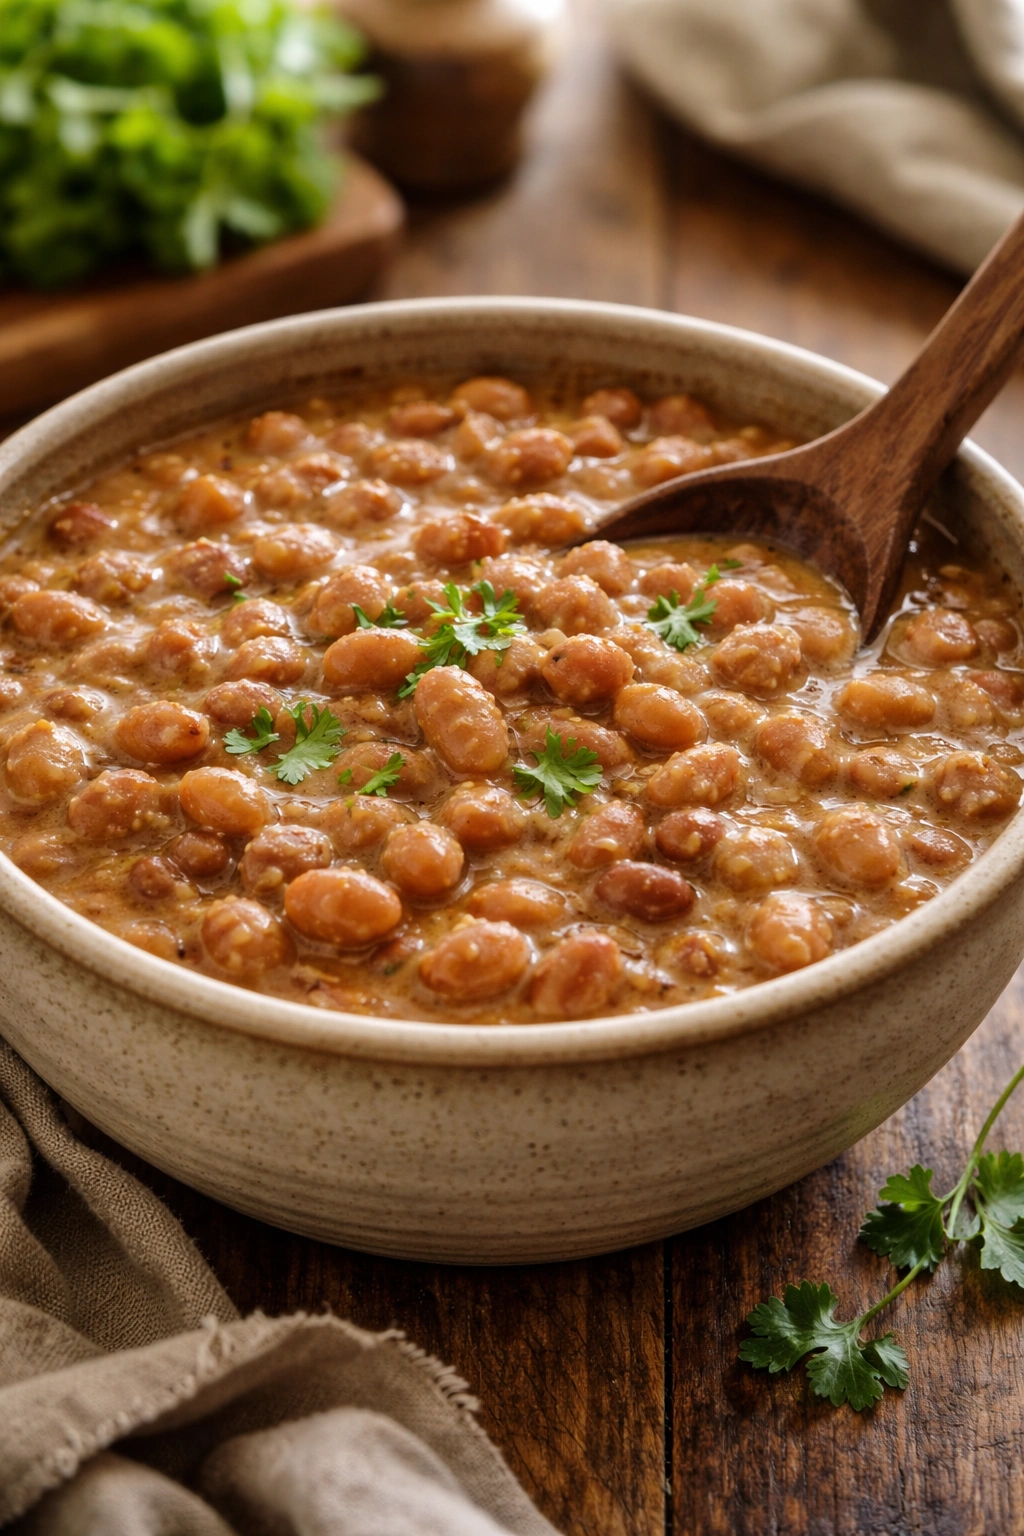
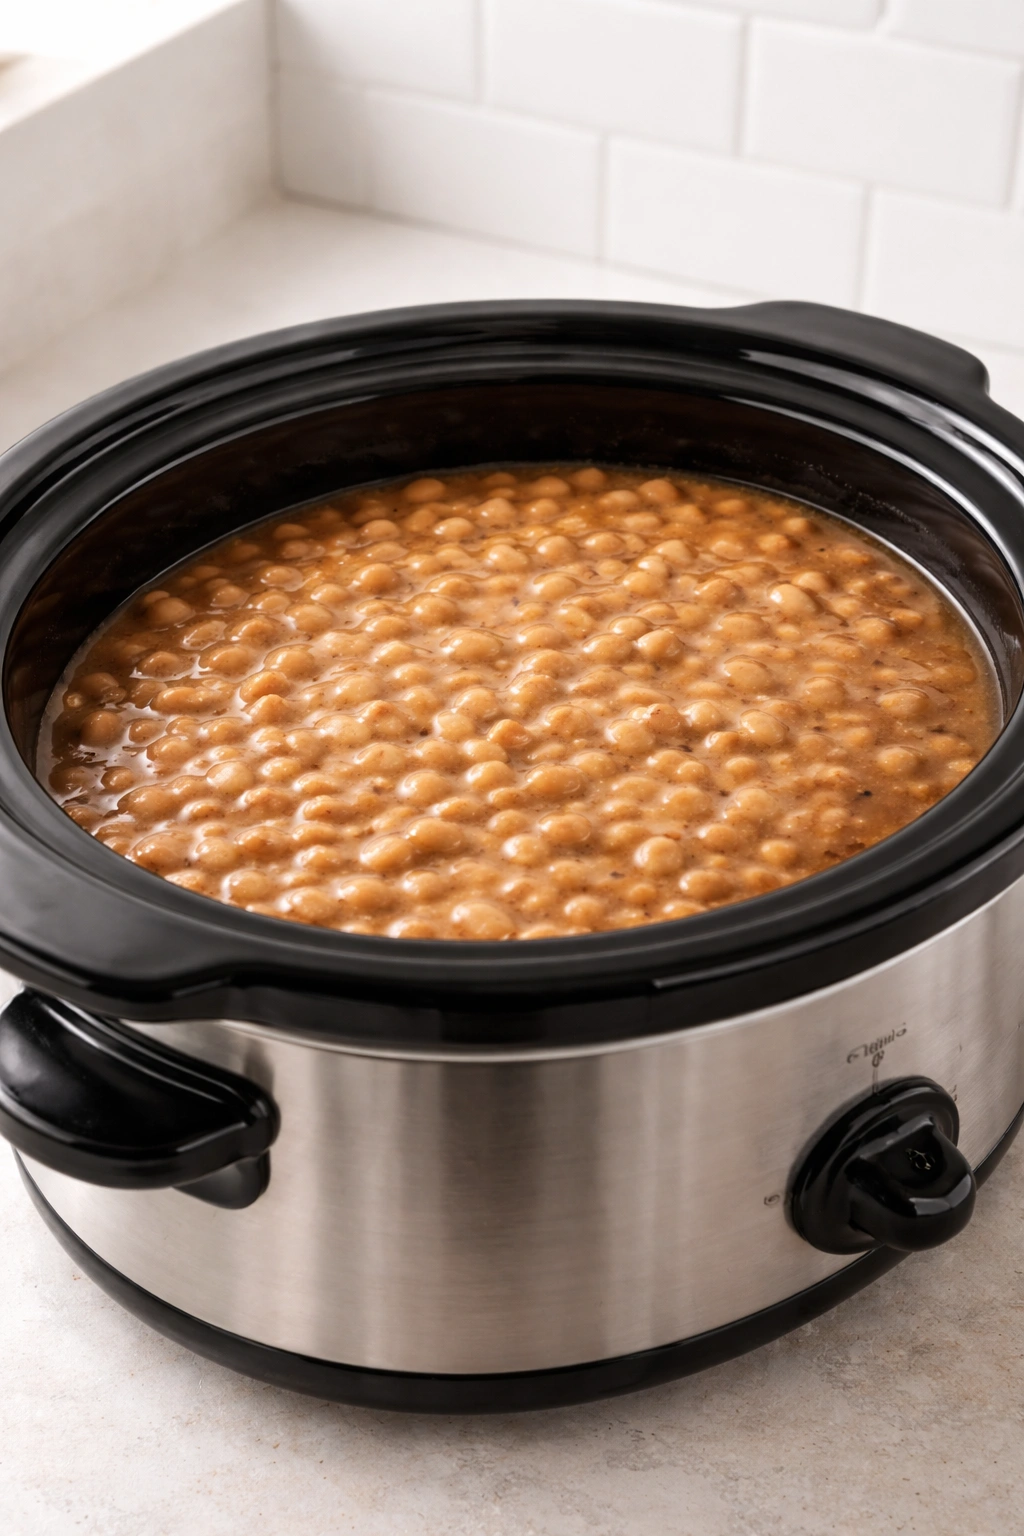
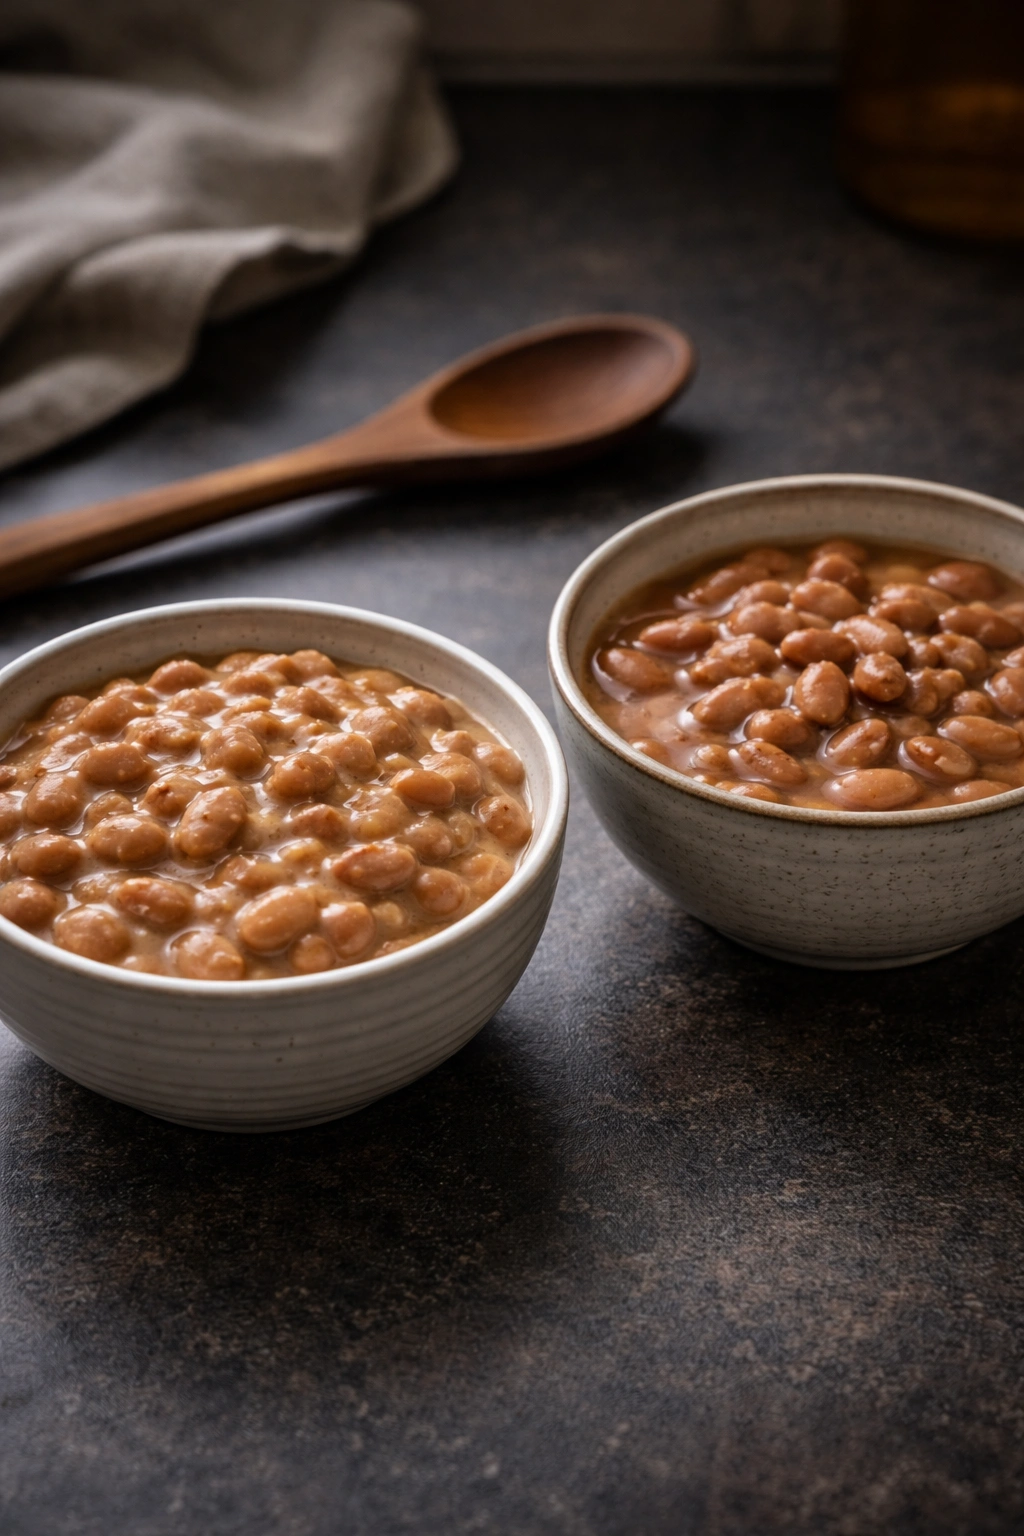
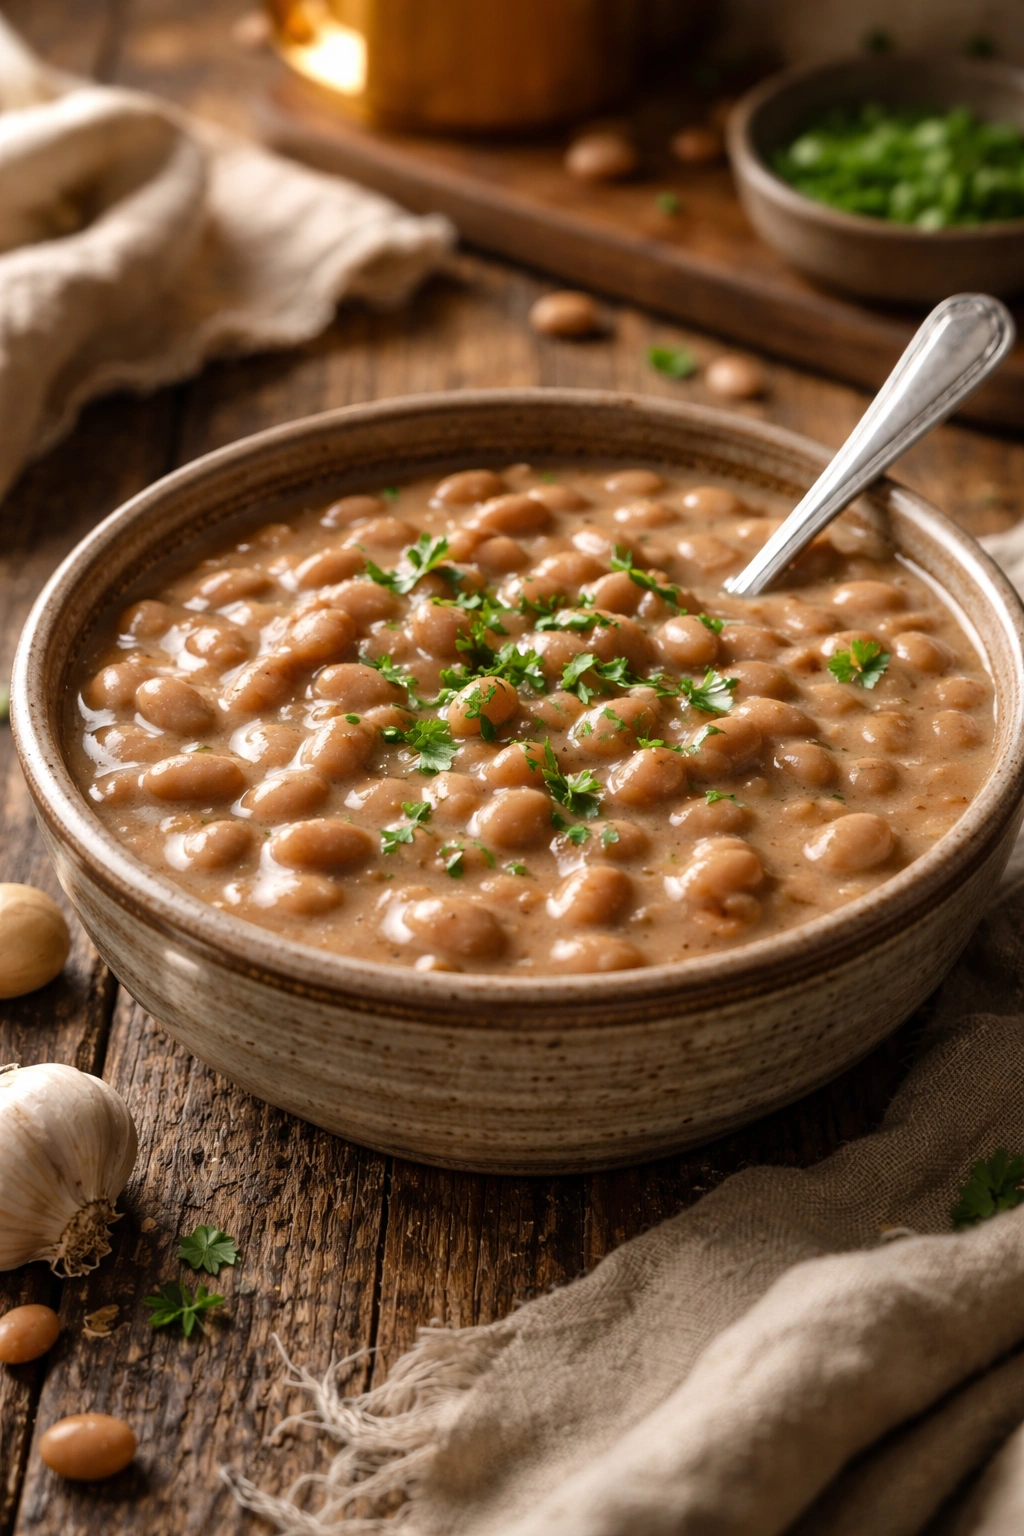
Creamy pinto beans emerge from the slow cooker with a velvety texture that belies their humble origins, transforming simple dried legumes into comfort food that tastes like it took hours of active effort—even though you spent most of that time doing absolutely nothing. The key isn’t complicated technique or exotic ingredients; it’s understanding how time and gentle, consistent heat work together to break down the bean’s structure in exactly the right way, releasing starch that thickens the cooking liquid into something rich and luxurious while the beans themselves become so tender they practically dissolve on your tongue.
This approach to cooking pinto beans sits somewhere between the quick-soak-and-boil method and traditional bean cookery, borrowing the best element from each: the hands-off convenience that makes slow cooking so appealing, combined with the deep flavor development that happens when legumes cook low and slow. The result is beans that taste nothing like canned versions—which, let’s be honest, have a faintly metallic edge and a grainy texture—and everything like the kind your grandmother might have made if she had access to modern conveniences.
Whether you’re building a meal around beans as the star (think a bowl topped with a fried egg, fresh salsa, and crispy tortilla chips) or treating them as the foundation for other dishes (enchilada filling, taco meat replacement, soup base, or just something hearty to serve alongside rice), creamy slow-cooked pinto beans deliver the kind of satisfaction that keeps you coming back. The best part: the method is genuinely foolproof once you understand the handful of variables that actually matter.
Why Slow-Cooked Pinto Beans Are Worth the Wait
Pinto beans occupy an interesting place in the home cook’s pantry. They’re affordable, shelf-stable, packed with protein and fiber, and versatile enough to work in nearly any cuisine, yet many people relegate them to “I’ll just use canned” status because the cooking process feels intimidating or takes too long. The slow cooker flips this equation entirely.
Slow cooking pinto beans isn’t faster than some methods—a pressure cooker will get you to tender beans in about 45 minutes—but it’s more convenient because you literally forget about them once you turn on the machine. More importantly, the low, steady heat creates a fundamentally different texture and flavor profile than boiling. The beans absorb liquid gradually, becoming genuinely creamy rather than mushy, and the cooking liquid transforms into a silky sauce rather than staying thin and watery.
The flavor difference is equally significant. As beans cook slowly in the same liquid, they infuse that liquid with their own subtle earthiness and starch, while any aromatics, spices, or broth you’ve added have hours to meld with the beans themselves. By the time they’re done, you don’t have separate components—you have an integrated whole where the beans have absorbed the flavors and created something greater than the sum of its parts.
This method also gives you flexibility that quick cooking doesn’t allow. If beans finish cooking and you’re not ready to serve them, they’ll sit happily in the slow cooker on the warm setting for hours without falling apart or becoming overcooked. That buffer is invaluable on busy days when timing is messy.
Yield: Serves 6 to 8 | Makes about 6 cups cooked beans with liquid
Prep Time: 15 minutes (or 10 minutes if skipping the soak)
Cook Time: 6 to 8 hours on low, or 4 to 5 hours on high
Total Time: 6.5 to 8.5 hours total, mostly hands-off
Difficulty: Beginner — no special skills required, just basic prep and attention to liquid levels. This recipe is specifically designed for first-time bean cookers who want foolproof results.
Soaking Time (optional): 8 hours to overnight (speeds cooking by 1-2 hours and can reduce gas-causing compounds)
Best Served: Warm from the slow cooker, or refrigerate and reheat gently the next day when flavors have deepened
Ingredients
For the Beans:
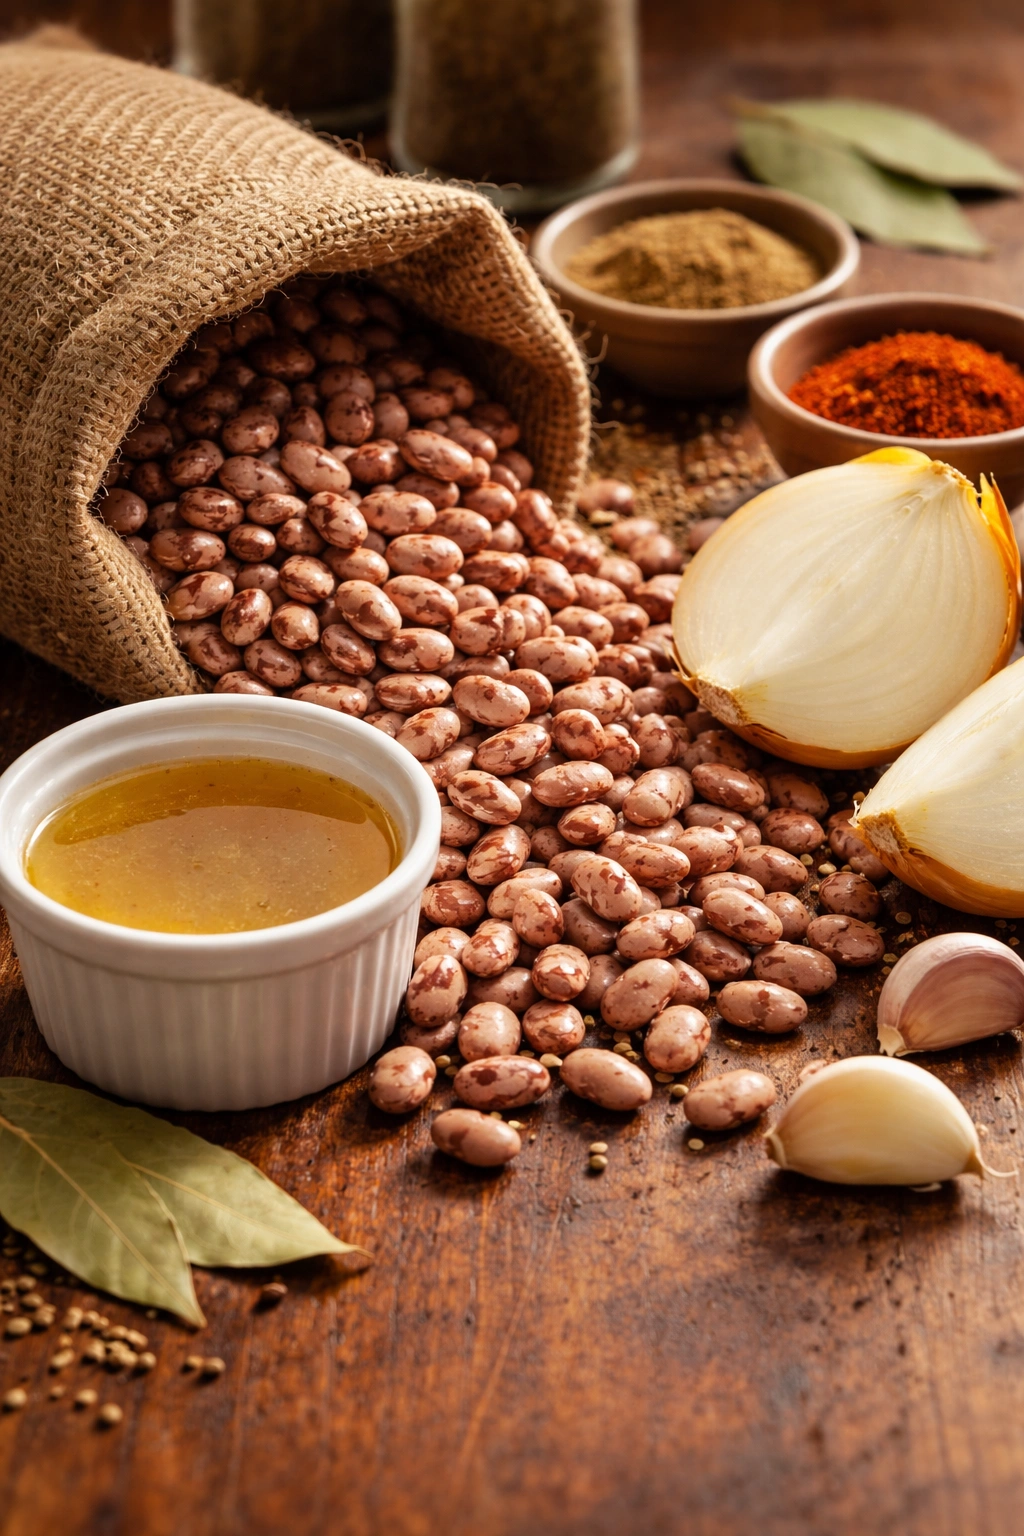
- 1 pound dried pinto beans (about 2 cups), sorted and rinsed
- 6 cups low-sodium vegetable or chicken broth (or water if you prefer a more neutral base)
- 1 medium yellow onion, quartered
- 4 cloves garlic, smashed but left whole
- 1 bay leaf
- 1 teaspoon dried oregano
- ½ teaspoon ground cumin
- 1 teaspoon fine sea salt (add this after the beans are tender, not before)
- 2 tablespoons fresh lard, bacon fat, or olive oil (optional but adds richness)
- ½ teaspoon black pepper, freshly ground
- 1 dried chile de árbol or chipotle pepper (optional—adds subtle heat and smokiness)
For Serving and Finishing (Optional):
- 2 tablespoons fresh cilantro, roughly chopped
- 1 tablespoon lime juice, freshly squeezed
- Thinly sliced jalapeño (for fresh heat)
- Diced fresh tomato
- Finely diced white onion
- Cotija cheese or crumbly queso fresco
- Tortilla chips or crispy fried tortillas
Instructions
Prepare the Beans:
-
Spread the dried pinto beans on a baking sheet and pick through them carefully, removing any small stones, debris, or shriveled beans that won’t cook properly. This step prevents an unpleasant crunch in your finished dish.
-
Rinse the sorted beans thoroughly under cool running water in a fine-mesh strainer, agitating them gently with your hand as you rinse. Continue until the water running through runs clear, usually 3 to 4 rinses. This removes surface dust and some of the compounds that can cause digestive discomfort.
Soak (Optional but Recommended):
- If soaking: Place the rinsed beans in a large pot or bowl and cover with 8 cups of cool water. Let them soak for at least 8 hours, or overnight at room temperature. The beans will absorb water and swell noticeably—this is exactly what you want. When ready to cook, drain the soaking liquid and discard it. If skipping this step, proceed directly to the slow cooker (unsoaked beans will simply need 1-2 hours of additional cooking time).
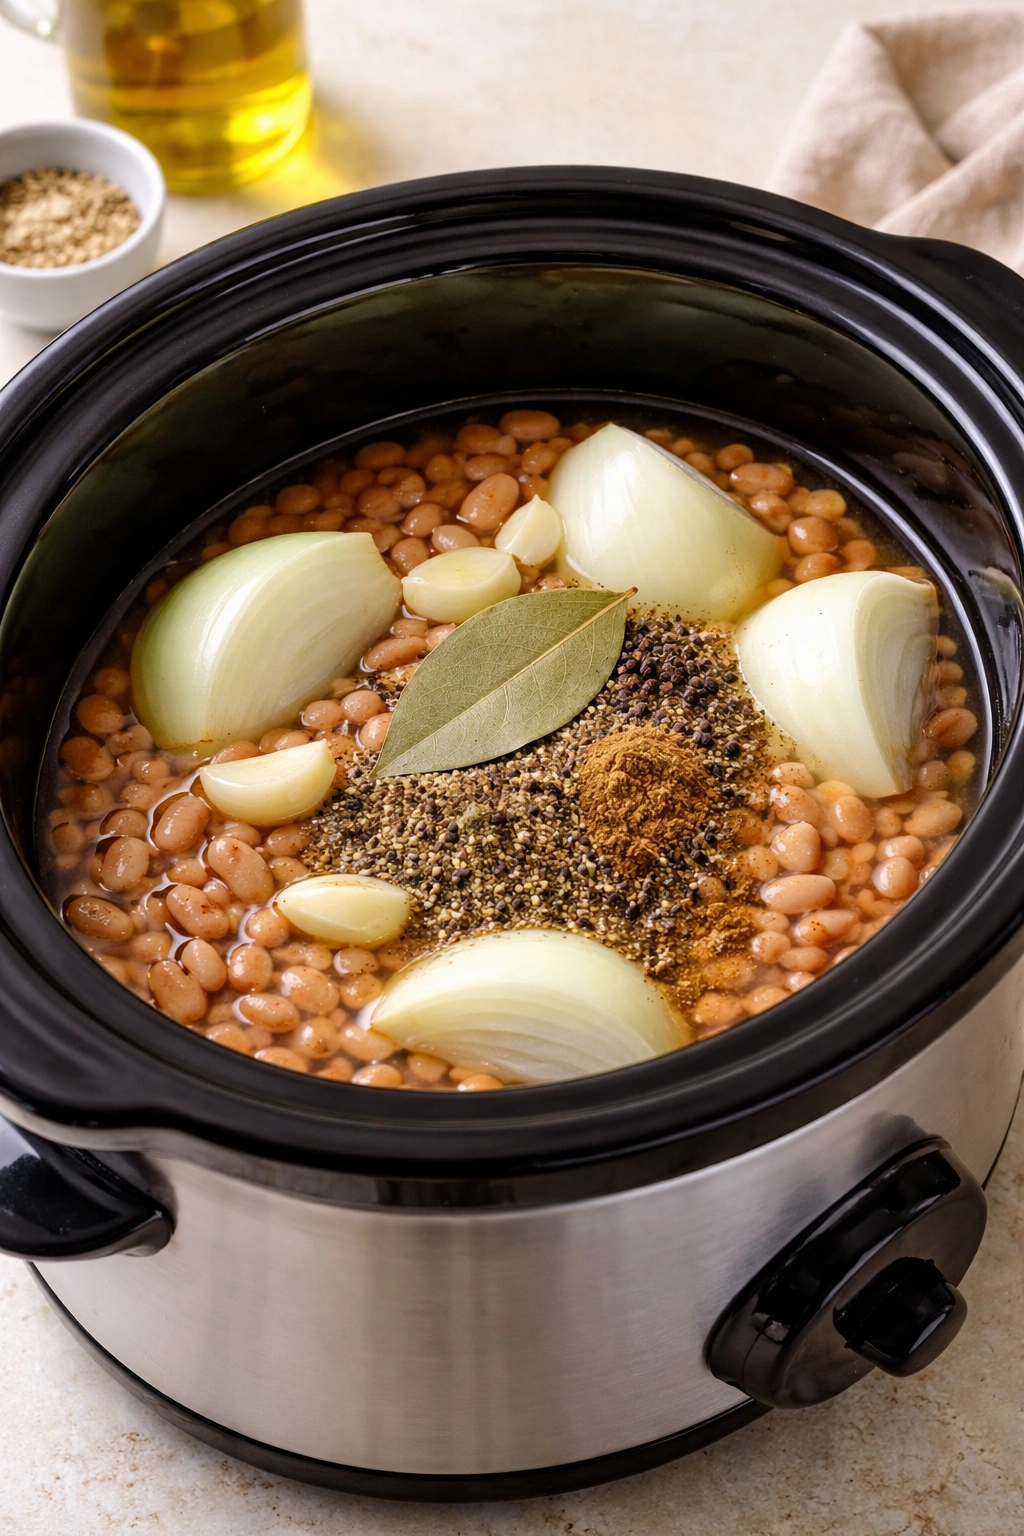
Build the Slow Cooker:
-
Add the drained beans to a 6-quart slow cooker along with the broth, quartered onion, smashed garlic cloves, bay leaf, oregano, cumin, black pepper, and the lard or oil if using. Stir gently to distribute the seasonings evenly.
-
If adding a dried chile for smokiness, break it in half and toss it in now. Do not add salt yet—salt can interfere with the beans’ ability to absorb liquid and soften properly when added at the beginning of cooking.
-
Cover the slow cooker and set it to low heat. Plan for 6 to 8 hours of cooking time. If you’re pressed for time, you can cook on high, but the beans benefit from the gentler, longer cooking—aim for 4 to 5 hours on high, though results may be slightly less creamy.
Monitor During Cooking:
-
About halfway through cooking (around hour 3 on low), carefully lift the lid and stir the beans gently, scraping the bottom to prevent sticking. Check the liquid level—the beans should be mostly submerged or just barely covered. If the liquid level has dropped significantly and the beans are exposed, add ½ to 1 cup of warm broth or water. The exact amount depends on your slow cooker model (some run hotter and evaporate more liquid). The goal is for the beans to cook in liquid, not dry out.
-
Around hour 5 on low (or hour 3 on high), begin testing beans for tenderness. Scoop out a few beans with a spoon and let them cool for a moment, then taste and feel the texture. They should be completely soft, with no chalky or firm center when you bite them. The exterior should yield easily to gentle pressure. If there’s any resistance, cover and check again in 30 minutes.
Final Seasoning:
-
Once the beans are completely tender (no firmness whatsoever), add the salt and stir gently. Taste the broth and add more salt if needed—remember that the beans will absorb some salt over the next few minutes, so slightly under-seasoning is better than over-seasoning.
-
If you prefer a thicker, creamier consistency (which is the whole point of slow-cooking), use the back of a wooden spoon to gently mash about 1 cup of cooked beans against the side of the slow cooker. This releases starch from the beans and thickens the liquid without breaking down the remaining whole beans. Stir gently and let sit for a few minutes to thicken.
Advertisements -
Remove and discard the bay leaf and the largest pieces of cooked onion and garlic (any that didn’t fall apart on their own). Taste again and adjust salt and pepper as needed.
-
Let the beans sit in the slow cooker on warm for at least 30 minutes before serving—this resting period allows the flavors to settle and deepens the taste noticeably.
How to Achieve That Perfect Creamy Texture
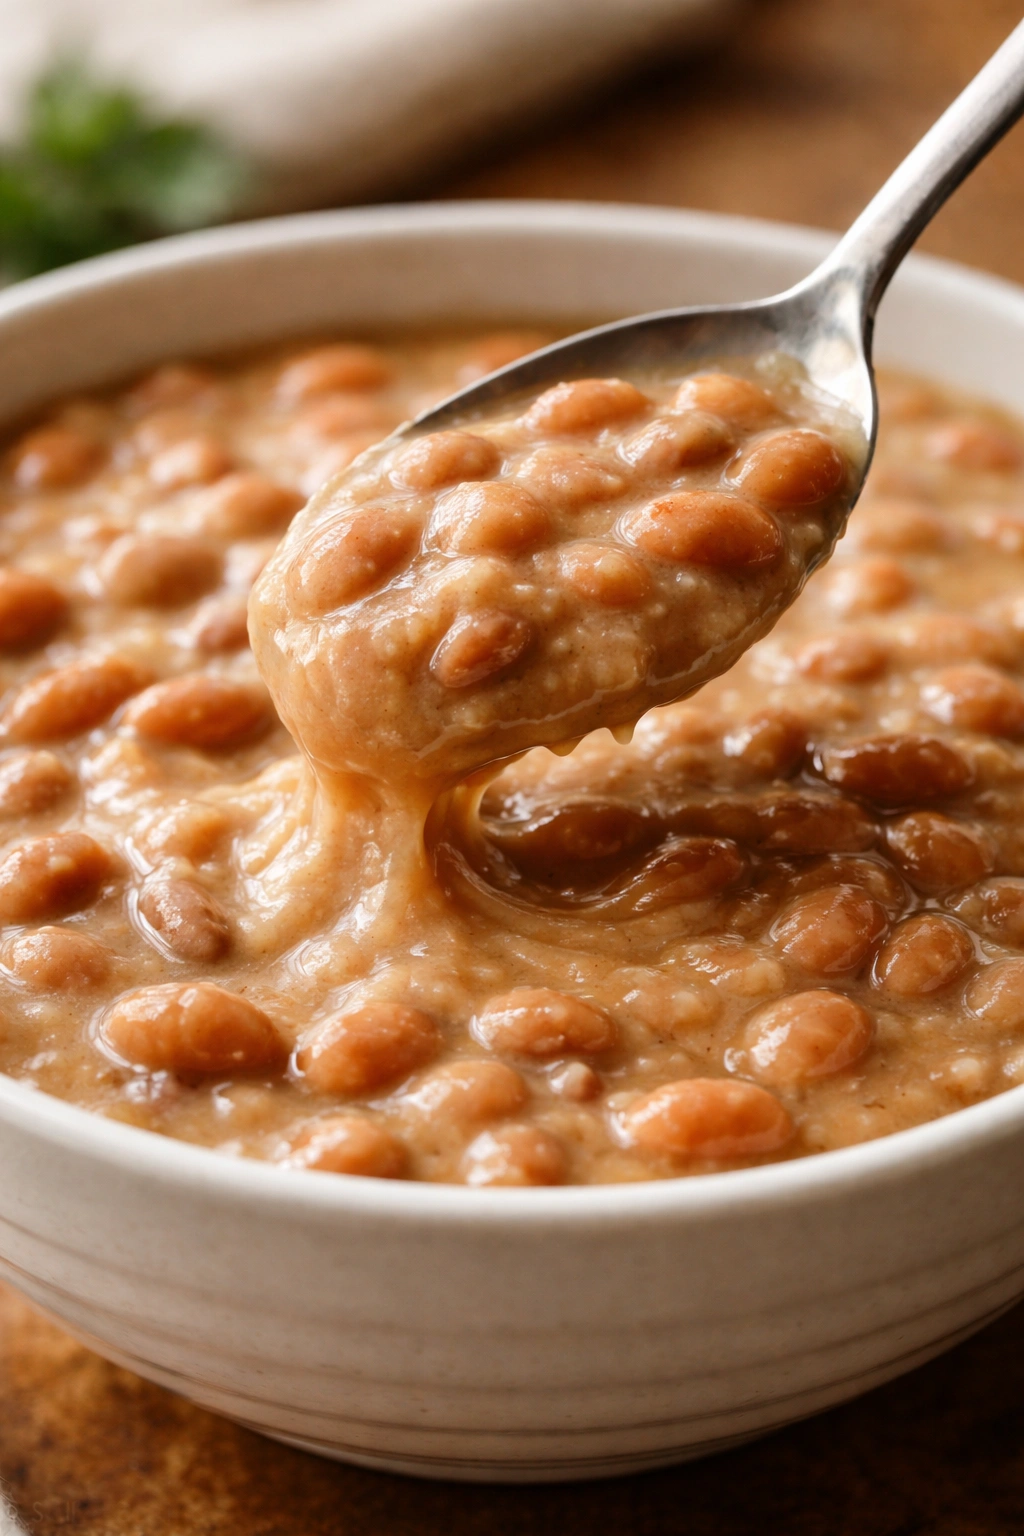
The creamy texture everyone craves from slow-cooked beans doesn’t come from adding cream or butter; it emerges naturally when beans release their starch into the cooking liquid over hours of gentle heat. Understanding this process helps you troubleshoot when something feels off.
As beans cook, their cell walls gradually break down, and starch molecules migrate out into the surrounding liquid. This starch acts as a natural thickener, transforming thin broth into something silky and luxurious. The longer the beans cook at a low temperature, the more starch releases, and the thicker the liquid becomes. If your beans finish cooking and the liquid still feels thin and watery, it means either the beans haven’t cooked long enough yet, or you’ve used too much liquid.
The ratio of beans to liquid matters significantly. Using too much broth results in soup-like results; too little means the beans cook unevenly and may scorch on the sides of the slow cooker. The sweet spot is when the liquid just covers the beans at the start of cooking, then reduces slightly as the slow cooker cooks, leaving you with beans suspended in a creamy sauce by the end.
Mashing a portion of the cooked beans is the most effective way to achieve creaminess on demand. When you crush beans against the side of the slow cooker, you’re physically breaking their structure and releasing concentrated starch directly into the liquid. This works beautifully because the remaining beans stay whole and intact while the liquid thickens noticeably. Start with mashing just ½ cup of beans; if you want it even creamier, mash more. You can always thicken further, but you can’t un-thicken if you go too far.
Never skip the soaking step if creaminess is your goal. Soaked beans cook more evenly and release starch more uniformly than unsoaked beans, resulting in a more naturally creamy finished product without any aggressive mashing.
Common Mistakes and How to Avoid Them
The most frequent mistake happens before the beans even reach the slow cooker: adding salt too early. Salt firms up legume skins and makes them take longer to soften, so waiting until the beans are completely tender before seasoning is non-negotiable. The beans won’t taste bland in the meantime—they’re cooking in flavorful broth infused with aromatics—and they’ll be noticeably creamier when salt goes in only at the end.
Overcrowding the slow cooker matters more than you’d expect. If you double the recipe and cram too many beans into a 6-quart cooker, they won’t have room to move and cook unevenly. Stick with approximately 1 pound of dried beans per 6-quart cooker. If you need more beans, cook multiple batches or use a larger cooker.
Running the slow cooker on high temperature produces a different result than cooking on low, even if the total time adjusts accordingly. High heat can cause the beans to split or develop uneven texture, with some completely tender while others stay slightly firm. Low heat for 6-8 hours creates more uniform, creamier results. If you’re in a hurry, a pressure cooker truly is faster and also produces excellent results—but a slow cooker cooking on high feels like it’s rushing and often shows it in the final texture.
Forgetting to check the liquid level during cooking is the second most common mistake. Every slow cooker model has slightly different hot spots and evaporation rates. If yours runs hot, liquid will disappear faster than expected, and you may end up with undercooked beans that start to scorch on the sides of the cooker. Setting a phone reminder to check at the halfway point takes 30 seconds and prevents disaster.
Using very old dried beans—ones that have been in your pantry for years—can result in beans that simply won’t soften no matter how long you cook them. Dried beans gradually lose moisture and age over time, and ancient beans may never fully hydrate and cook tender. Buy from a source with good turnover (grocery stores, not dusty storage), and aim to use beans within 1-2 years of purchase.
Soaking vs. No-Soak Methods Explained
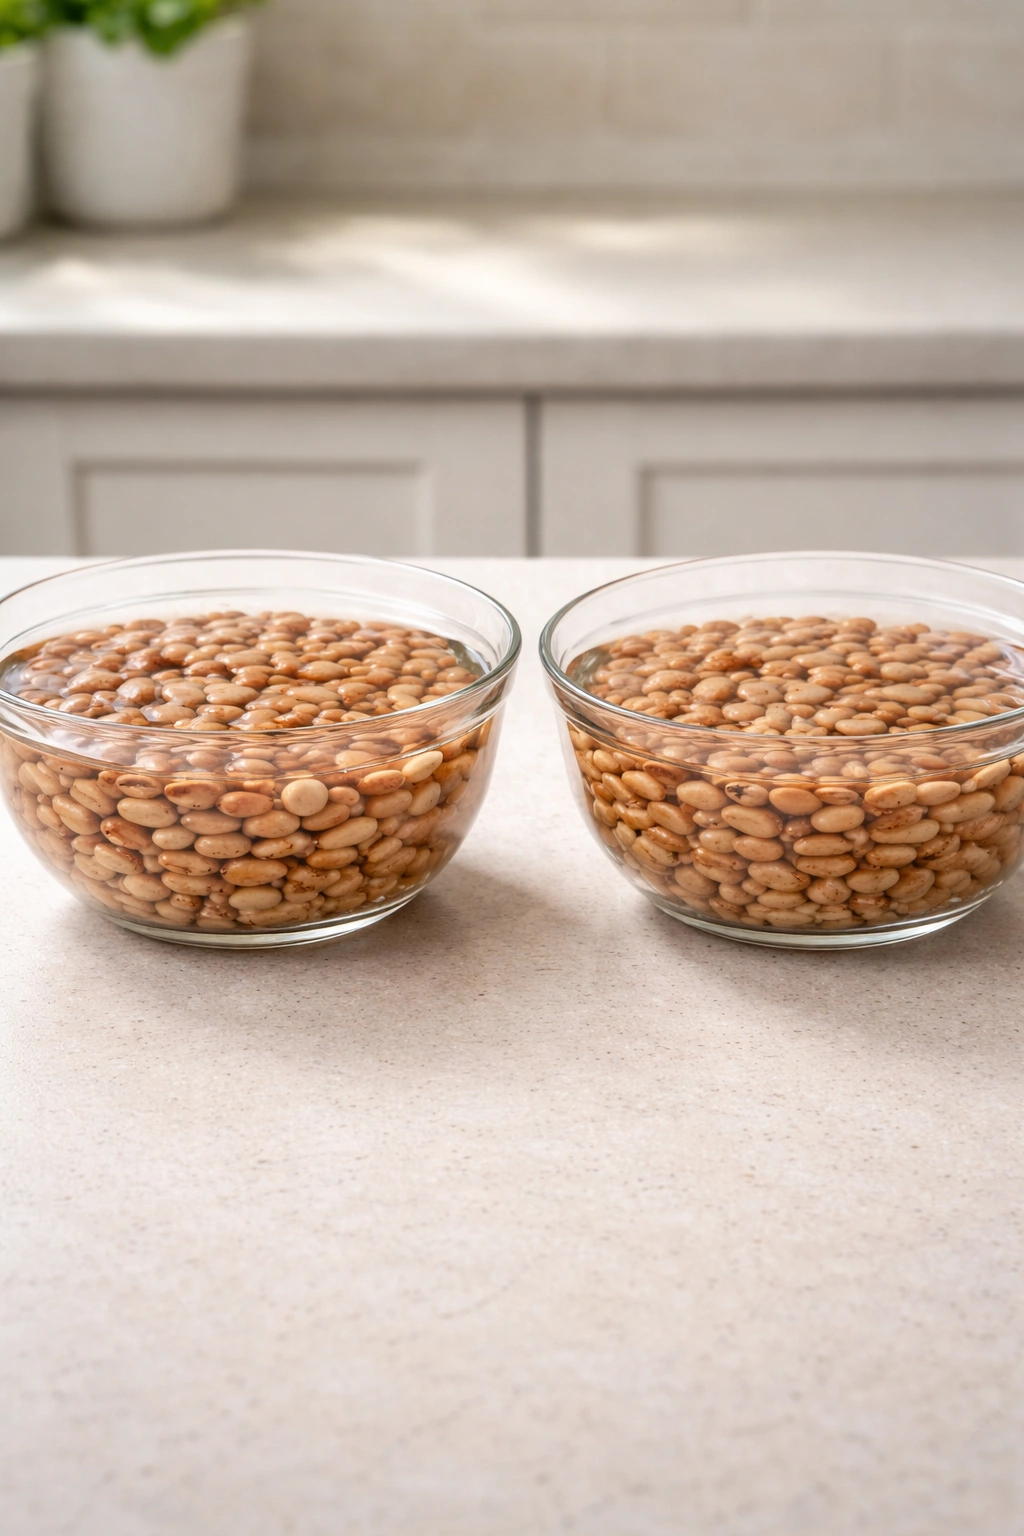
Soaking overnight before cooking is optional, but it shifts the cooking variables in your favor—and it’s worth understanding exactly why before deciding whether to do it.
Soaked beans cook faster because they’ve already absorbed water and swollen before heat is applied. This shaves 1-2 hours off the total cooking time. More importantly, soaking removes compounds from the bean’s surface that some people find harder to digest, which is why the traditional advice says to discard the soaking water. Whether this actually reduces gas production is debatable—research on this is mixed—but discarding soaking water can’t hurt, and many people report better digestive outcomes when they do.
Soaked beans also cook more evenly. When beans go directly from a dry state to heat and liquid, they can develop an uneven interior texture with some parts cooking faster than others. Soaking allows them to hydrate uniformly first, so the subsequent cooking happens more consistently throughout each bean.
The no-soak method trades convenience for time—you simply sort and rinse the beans, then cook them directly in the slow cooker. This works perfectly fine if you have the time. Plan for about 8-10 hours of cooking time on low, rather than 6-8 with soaked beans. The results will be equally creamy and delicious; it just requires more patience.
A middle ground exists if you’re in a moderate time crunch: quick soak. Bring beans and water to a boil in a pot for 2 minutes, then remove from heat and let them soak for 1-2 hours at room temperature. Drain and proceed with the slow cooker recipe. This gives you most of the cooking-time benefit of overnight soaking without requiring advance planning.
Flavor Boosters That Transform the Beans

The basic recipe creates creamy, delicious beans, but several additions elevate them from good to memorable without adding complexity or exotic ingredients.
Bacon or pancetta is the most transformative addition—2-3 slices chopped fine and stirred in with the other ingredients creates a subtle smokiness and depth that reads as “I cooked all day” even though you did no such thing. The fat also contributes to the creamy texture. If you’re vegetarian, bacon fat left in the slow cooker from a previous meal creates the same effect without any meat.
A pinch of smoked paprika—just ¼ teaspoon—creates a charred, slightly smoky undertone without making the beans taste spicy. It mimics the flavor of beans cooked over a wood fire, which is part of where their appeal comes from in traditional preparations.
A few dried chiles added to the slow cooker (just the whole pepper, not chopped) infuse the beans with subtle heat and smokiness as they cook. Common choices include guajillo chiles (milder, fruity), ancho chiles (smoky, slightly sweet), or a single chipotles in adobo. Add conservatively—you can always add more depth later, but you can’t remove it if you overdo it. One dried chile feeds 6 people; two feeds 8-10 generously.
Cumin and oregano are the foundation of Mexican-style beans and work beautifully in the slow cooker, but other spice profiles work equally well. For a more Italian direction, swap the cumin for fennel seed and the oregano for Italian herbs and add a splash of red wine. For an Indian-influenced version, use ginger, turmeric, and garam masala instead of the cubes and oregano.
Fresh cilantro and lime juice stirred in just before serving brighten the beans dramatically. These additions happen at the last moment because heat destroys cilantro’s freshness and lime juice’s acidity. A squeeze of lime and a handful of roughly chopped cilantro make the beans feel more lively and restaurant-quality, even though you’re adding them in seconds.
Seasonal and Dietary Variations
The creamy pinto bean base adapts beautifully to different dietary needs and ingredient availability. None of these swaps require changing cooking method or time; only the ingredient list shifts.
For a vegan version, swap the optional bacon fat or lard for olive oil (keep the amount the same) and use vegetable broth instead of chicken broth. The beans will still be creamy and delicious. Add nutritional yeast or a pinch of miso paste if you want umami depth that usually comes from meat-based broths.
A vegetarian version simply removes any meat ingredients but keeps animal-based broths, dairy, and eggs in play for serving. This is straightforward—just omit any bacon or meat-based fats and use vegetable broth.
For low-sodium diets, use no-salt-added broth and reduce the added salt at the end, relying instead on the beans and aromatics for flavor. The beans will be slightly less seasoned but still delicious, and you maintain complete control over total sodium content.
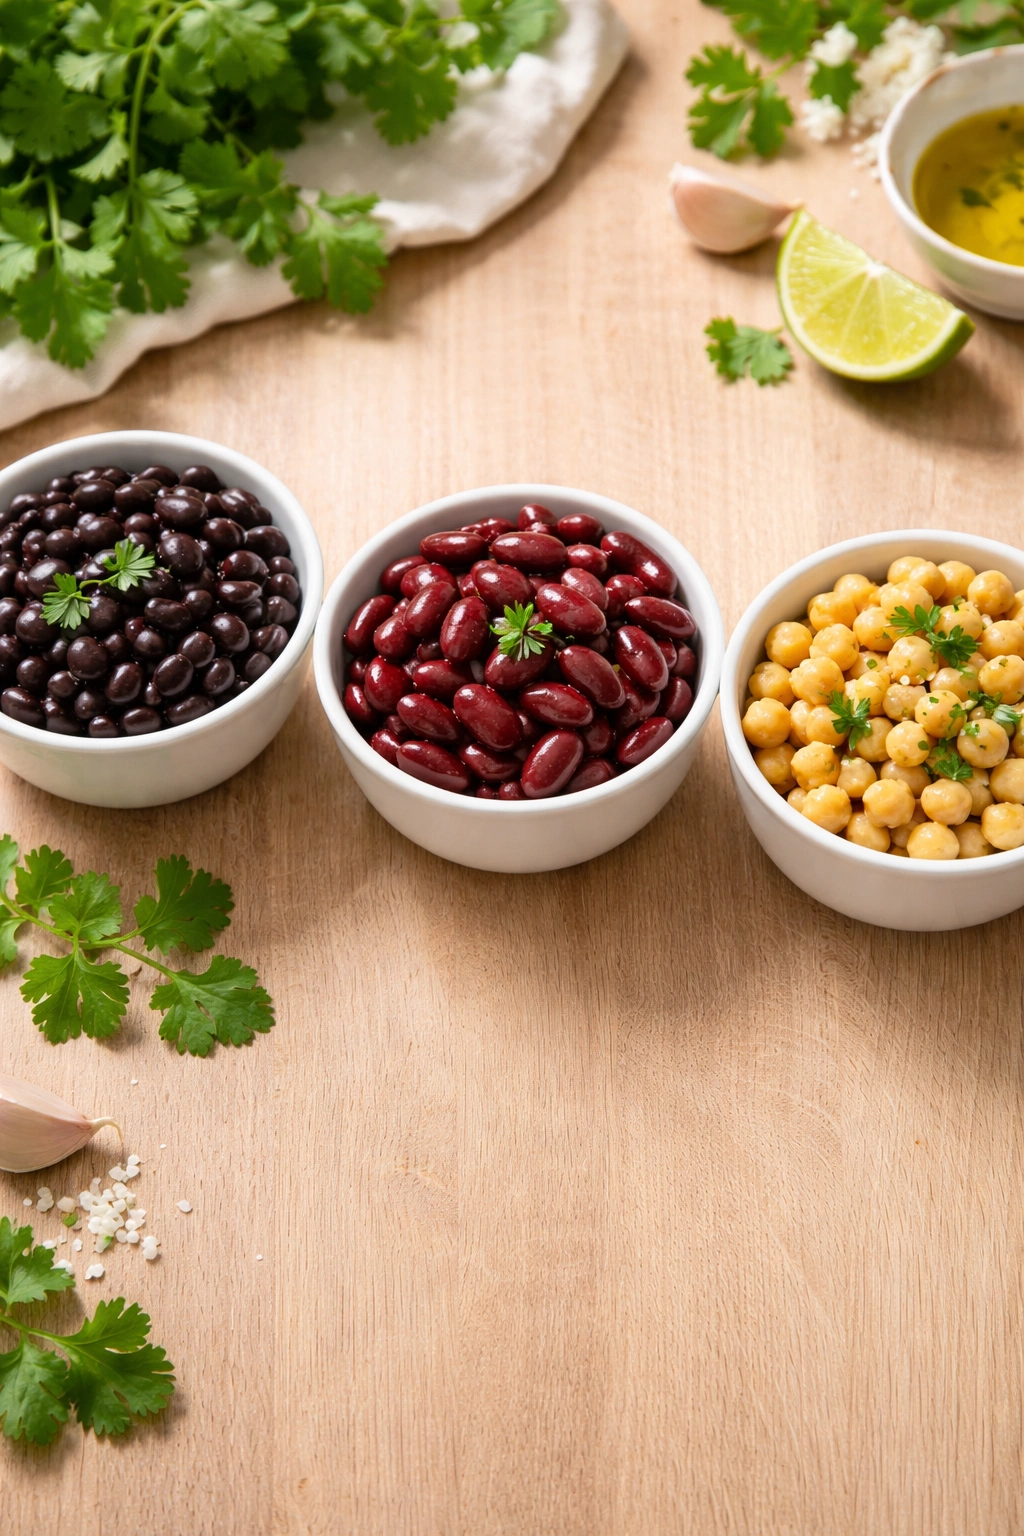
Swapping bean varieties is entirely possible—black beans, kidney beans, or chickpeas all work in the slow cooker with the same cooking time and liquid ratio. Just note that smaller beans like black beans or lentils may cook faster and turn into mush if you’re not careful. Check them a bit earlier than the bean recipe indicates.
Adding other vegetables mid-cook works well if you’re serving the beans as a stew-like side. Diced carrots, potatoes, or zucchini added in the last hour of cooking will soften without falling apart. Tomatoes can be added earlier (they break down and contribute liquid), while delicate greens like spinach should be stirred in at the very end, off heat, so they stay bright and don’t wilt into oblivion.
Make-Ahead and Storage Strategies
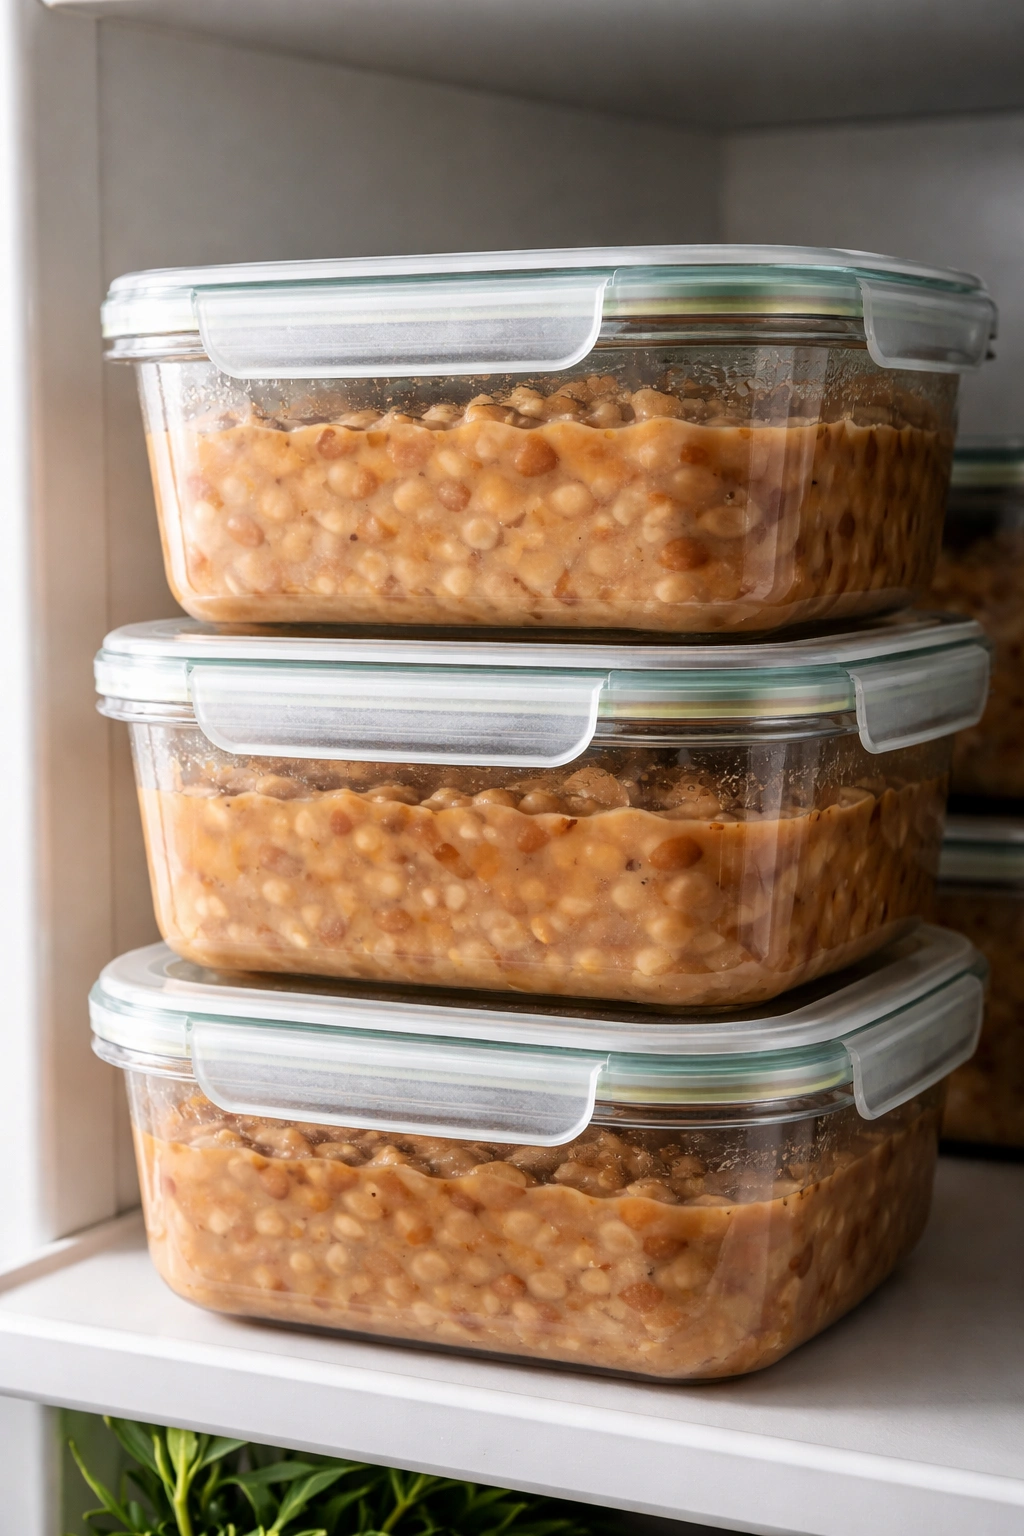
Creamy slow-cooked beans taste even better the next day—the flavors deepen as they sit together, and the liquid thickens further as it cools and the starch molecules set up. This makes beans perfect for advance cooking.
Store cooked beans in an airtight container in the refrigerator for up to 5 days. The liquid will thicken noticeably as they cool, creating a glossy coating over the beans. If you want them thinner when you reheat, stir in a splash of broth or water. If you like them thicker still, simmer them gently in a pot without a lid for a few minutes to reduce the liquid.
To reheat, transfer beans to a pot and warm them gently over medium-low heat, stirring occasionally and adding broth or water if they’ve thickened more than you like. Microwaving works but can create hot spots; stovetop heating is slower but more even. Never boil them aggressively when reheating, or they may burst and lose that creamy texture.
Freezing is where beans really shine. Let the cooked beans cool completely, then transfer them to freezer-safe containers or bags, leaving about an inch of headspace for expansion. Frozen beans keep for up to 3 months. Thaw them overnight in the refrigerator, then reheat gently on the stovetop. You’ll lose a bit of texture—beans soften slightly more upon freezing—but they remain delicious and the flavor is barely different.
Portioning before freezing makes life easier. Transfer cooked beans to an ice cube tray to freeze in 2-tablespoon portions, then pop the frozen cubes into a freezer bag once solid. This way you can thaw exactly as much as you need for a recipe without opening a large container.
Uncooked soaked beans can also be frozen for up to 1 month. If you like to soak beans on a weekend for midweek cooking, go ahead and soak a double or triple batch, drain them, and freeze them in portions. Pull them directly from the freezer into the slow cooker when you’re ready to cook—no thawing needed, just add about 1-2 hours to the cooking time.
Serving Ideas and Flavor Pairings
Creamy pinto beans work as a main course, a side dish, or a supporting ingredient in dozens of preparations, and they pair beautifully with both simple and complex flavors.
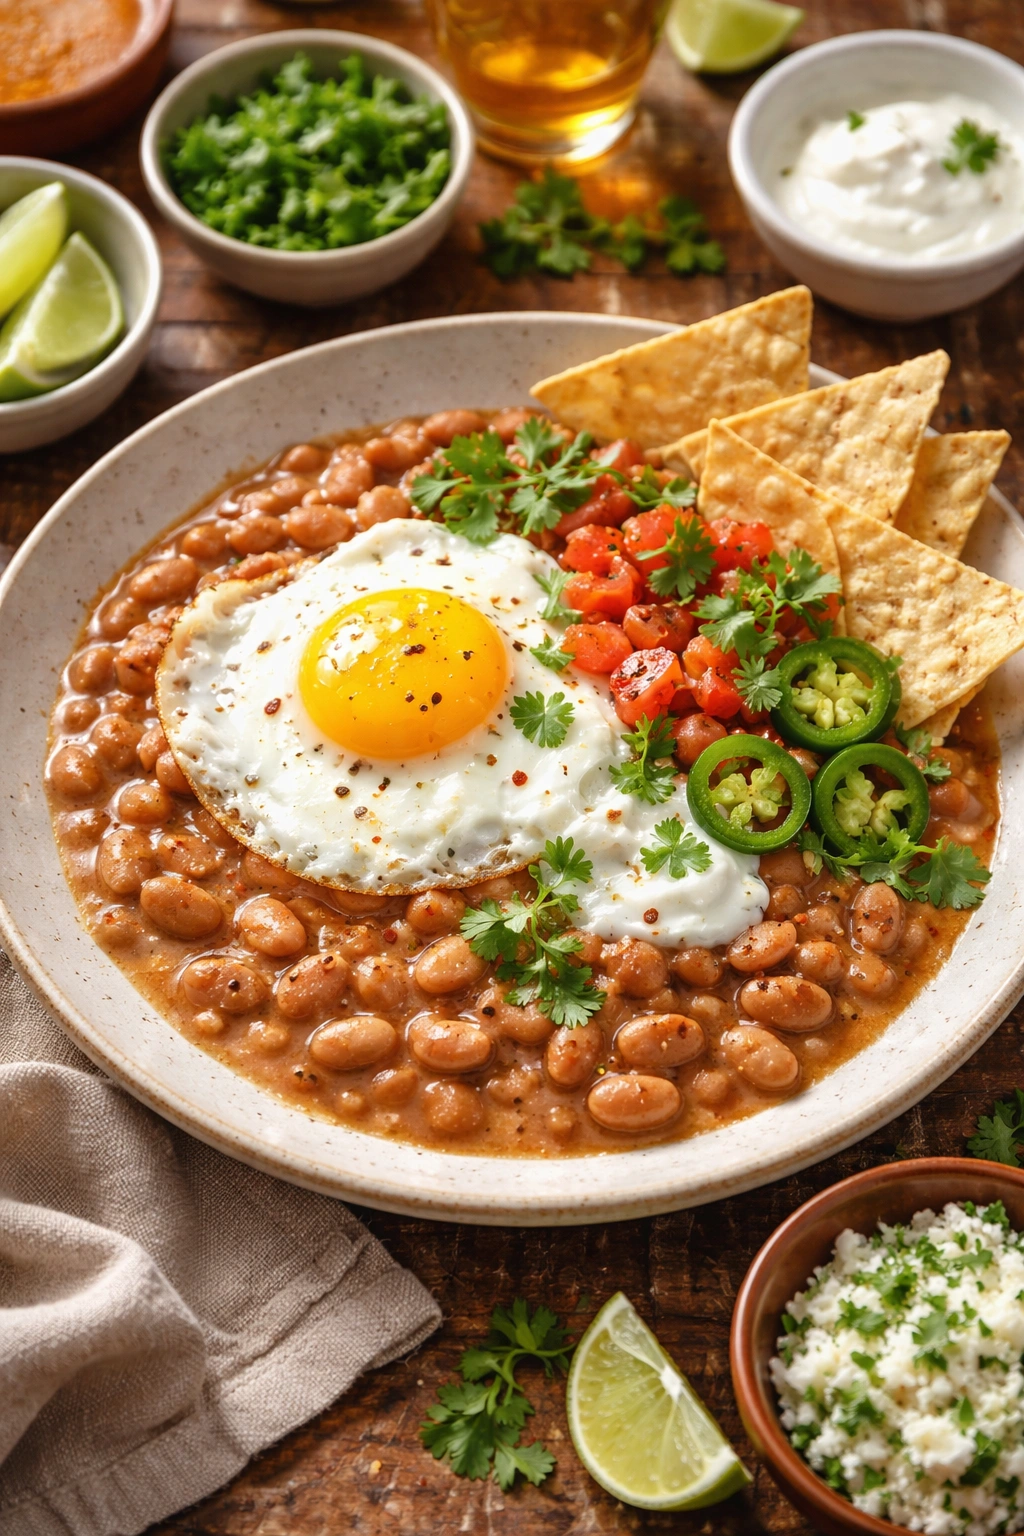
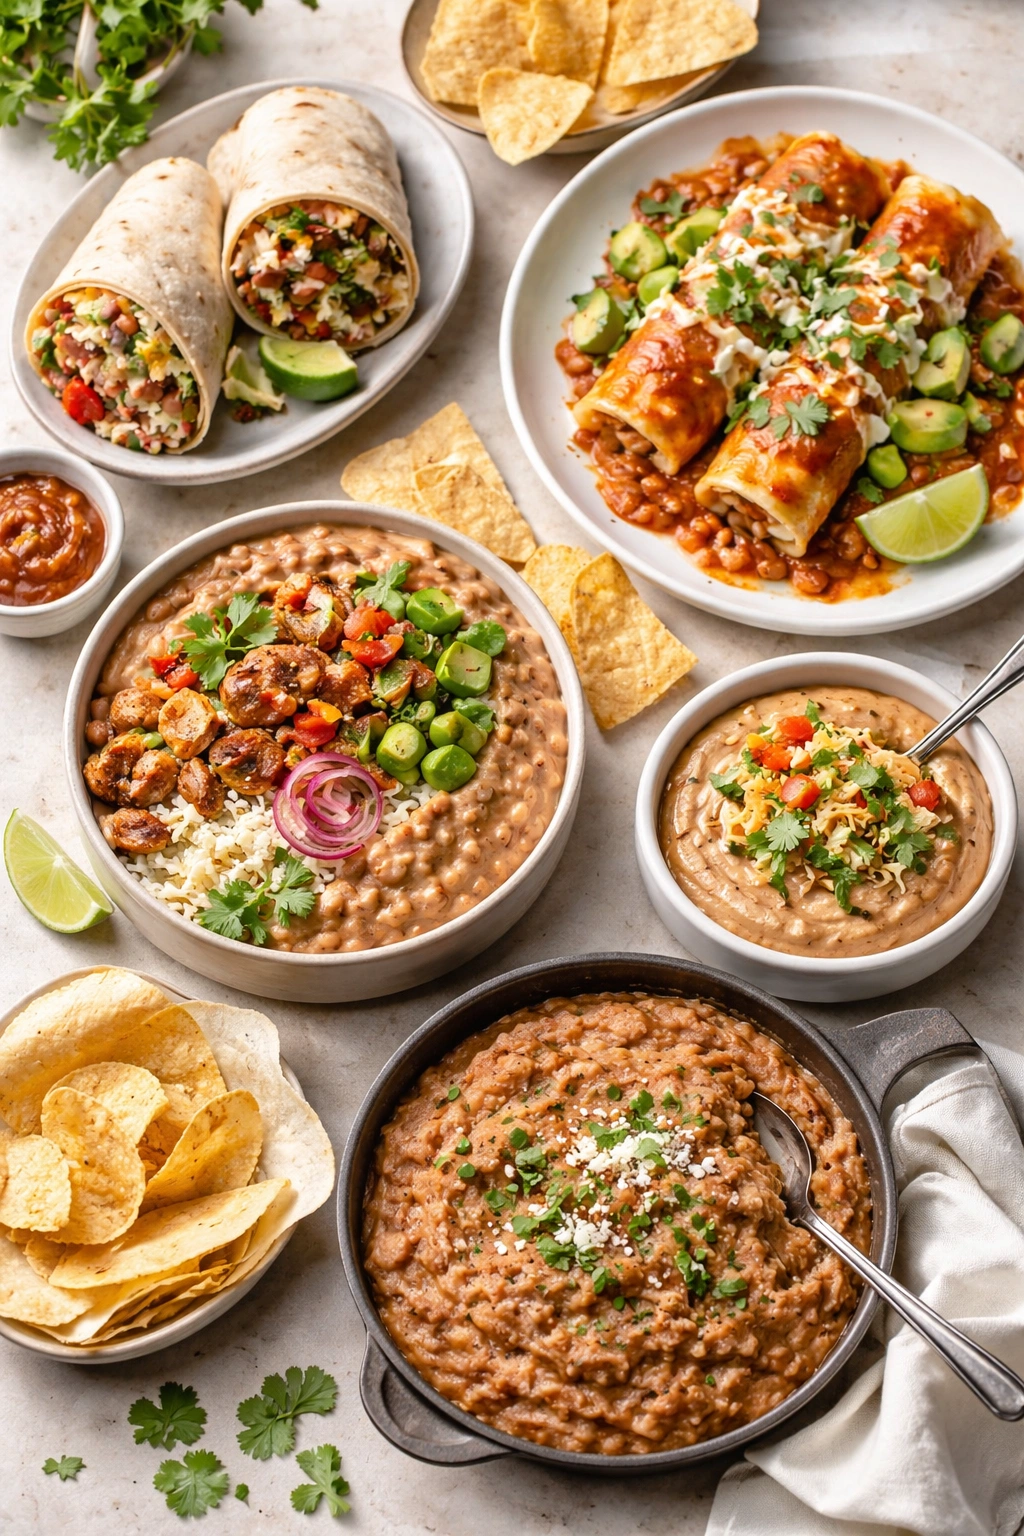
Serve them as the star of a bowl: ladle warm beans and their creamy liquid into a wide, shallow bowl and top with a fried egg (yolk still runny), crispy tortilla chips, diced fresh tomato, sliced jalapeño, a dollop of sour cream or crema, and a handful of fresh cilantro. A squeeze of lime juice and some cotija cheese transform this simple assembly into something luxurious.
Rice and beans is a classic pairing—serve the beans alongside white or brown rice with lime juice, fresh cilantro, and a bit of sautéed garlic. They balance each other’s texture, and the creamy bean liquid soaks beautifully into the rice grains.
Use them as an enchilada filling mixed with cheese, wrapped in tortillas, and baked with sauce and more cheese on top. The creaminess of the beans means you need less sauce to keep everything moist, and they create an incredibly satisfying filling.
Transform them into refried beans by mashing the cooked beans with some of their cooking liquid and a bit of fat (lard, bacon fat, or oil) in a skillet over medium heat, stirring constantly, until you reach your preferred thickness. This is actually simpler than making refried beans from scratch because your slow-cooker beans are already partially mashed and infused with flavor.
Blend some of the cooked beans with their liquid to create a creamy bean dip, mixing in sautéed garlic, cumin, lime juice, and a pinch of cayenne. Serve with tortilla chips or fresh vegetables.
Layer them into nachos: spread tortilla chips on a baking sheet, top with shredded cheese, baked beans, more cheese, and bake at 400°F for about 5 minutes until the cheese melts. Top with jalapeños, sour cream, fresh cilantro, and salsa.
Beans and greens is a Portuguese-inspired combination: warm cooked beans with their liquid in a pot, stir in roughly chopped kale or other sturdy greens with some minced garlic, add a splash of vinegar, and serve alongside crusty bread and olive oil for drizzling.
Stretching a Single Batch Into Multiple Meals
One slow-cooker batch of beans easily feeds 6-8 people in a single meal, but you can also portion it across several meals by transforming the same beans into different dishes through the week.
Night one: serve them as the main-event bowl with toppings, as described above.
Night two: use them as enchilada filling, wrapped and baked with sauce and cheese.
Night three: blend a portion into a creamy dip, serve the remainder as a side alongside roasted chicken or fish.
Night four: combine them with rice, wrap in tortillas with cheese and sauce for burrito burritos, and bake or pan-fry until the exterior is crispy.
Night five: make refried beans by mashing and pan-frying a portion, serve with eggs for breakfast or alongside grilled steak for dinner.
The flexibility means you’re not eating the exact same dish repeatedly, even though you only cooked once. This is where slow-cooker cooking really earns its place in busy kitchens.
Troubleshooting When Things Don’t Go Right
If your finished beans are mushy instead of creamy: the beans cooked too long or the liquid reduced too much. Mushiness is actually flavor-packed beans; you can still use them for refried beans or mashing into a dip, but for a main course presentation, they won’t look as appealing. Next time, check doneness a bit earlier and monitor liquid level more frequently.
If the beans are still firm or chalky after 8 hours on low: either your beans were very old, or your slow cooker doesn’t run hot enough. Continue cooking and check every 30 minutes until they’re tender—this may take 10-12 hours total. Or transfer to a pot, bring to a gentle simmer on the stovetop, and finish cooking there (usually 30-60 more minutes). Use this batch for next time’s reference; note when they finish so you know what to expect.
If the liquid is too thin: this usually means either you used too much liquid at the start, or the beans haven’t released enough starch yet. Mash some beans as described above to thicken, or transfer the beans to a pot and simmer uncovered for 15-20 minutes to reduce the liquid slightly.
If the beans taste bland: add salt gradually, tasting as you go. You likely under-salted—start with another ¼ teaspoon and increase from there. Also consider adding a squeeze of fresh lime juice and fresh cilantro, which brighten and enliven beans noticeably.
If there’s a gritty or sandy texture: you didn’t rinse thoroughly after sorting. Unfortunately, this batch is compromised. Next time, rinse three to four times, really agitating the beans, until the rinsing water runs completely clear.
Final Thoughts
Creamy slow-cooked pinto beans represent comfort food at its most genuine—inexpensive, nourishing, and deeply satisfying in a way that takes you back to eating well without effort or pretension. The method sounds simpler than it probably should work (roughly dump things in a pot and wait), but that simplicity is exactly why it works so reliably. You’re not fighting against the cooking process; you’re working with it, giving time and gentle heat the space they need to transform humble dried beans into something that tastes like it came from a kitchen with generations of knowledge behind it.
The beauty of this approach lives in its flexibility. The base recipe creates something delicious as-is, but every single ingredient can shift based on your preferences, what’s in your pantry, or how you want to serve the beans that night. Spices, add-ins, and finishing touches are entirely under your control, meaning you can make these beans in a hundred different ways and they’ll be right every time.
Once you’ve made this recipe even once, you’ll understand why so many cuisines around the world have legume-centric cooking traditions. Beans are patient, forgiving, and rewarding. They taste better when you cook them yourself than anything from a can. They’re cheaper than nearly any other protein. And they prove that simple food, given enough time and the right conditions, becomes something genuinely remarkable.