How To Grow Pawpaw From Seed: Step-By-Step Guide
Pawpaw is an exotic tropical fruit that you can easily grow in your backyard or balcony. But, do you know how to grow pawpaw from seed? If the answer is no, then here’s a detailed guide on growing pawpaw from seed.
Growing pawpaw from seed might be intimating at first, but with the right step-by-step procedure, it really isn’t so daunting. This guide covers every single thing you need to know about growing your own juicy pawpaws from home. After reading this article, you’ll know exactly what to do in order to establish a lush and healthy tree of mouthwatering pawpaws that will bear yearly harvests.
Table of Contents
- The Best Climate for Growing Pawpaw
- How To Grow Pawpaw From Seed
- Step 1 – Collect fresh pawpaw seeds from ripe fruit
- Step 2 – Clean the seeds by removing any flesh or debris
- Step 3 – Soak the seeds in water for 24 hours to soften the seed coat.
- Step 4 – Scarify the seeds by lightly sanding the seed coat with fine sandpaper
- Step 5 – Stratify the seeds by placing them in a plastic bag with moistened peat moss or sand and refrigerating for 60-90 days.
- Step 6 – Fill pots or trays with seed compost and sow the seeds on the surface.
- Step 7 – Cover the seeds with a thin layer of compost or vermiculite.
- Step 8 – Keep the soil moist and in a warm place, around 25-30°C.
- Step 9 – Germination should take place within 2-3 weeks.
- Step 10 – Once the seedlings are big enough to handle, transplant them into individual pots and grow them on in a greenhouse or cold frame before planting them out in their permanent position.
- Tips for Caring for Your Pawpaw Tree
- Harvesting & Storing Pawpaw Fruit
- Enjoying the Fruits of Your Labor: Eating Pawpaws
- FAQ
- How long does it take to grow a pawpaw from seed?
- What is the fastest way to germinate pawpaw seeds?
- Should you soak pawpaw seeds?
- Do pawpaw seeds need to be dried before planting?
- Can I plant papaya seeds straight from the fruit?
- How can you tell if a papaya seed is male or female?
- Do you soak papaya seeds before planting?
- Can female papaya produce fruit without male?
- Is it possible to change male papaya to female?
The Best Climate for Growing Pawpaw
Pawpaw trees grow best in warm temperate to subtropical climates with moderate humidity and rainfall. The tree prefers full sun to partial shade and well-draining soils. It is hardy in USDA zones 5-8, which means it can tolerate temperatures as low as -25°F, making it suitable for growing in many parts of the United States, Canada, and Australia. If you live outside of its natural range, pawpaw can be grown in a greenhouse or container garden.
How To Grow Pawpaw From Seed
Step 1 – Collect fresh pawpaw seeds from ripe fruit
Step 1 in growing pawpaw from seed is to collect fresh seeds from ripe fruit. Pawpaw fruit is usually ripe during the late summer or early fall, and the seeds are located inside the fleshy interior.
It is important to only collect seeds from fully ripe fruit, as unripe fruit may contain seeds that will not germinate. Handle the seeds gently, as they are delicate and can easily be damaged. Once collected, clean and prepare the seeds immediately for planting to maximize the chances of successful germination.
Step 2 – Clean the seeds by removing any flesh or debris
It is critical to clean pawpaw seeds before planting to get rid of any flesh or debris that may contain bacteria, fungus, or other pathogens that can impede seed germination.
To clean the seeds, rinse them under running water and use a soft brush to remove any remaining flesh or debris.
Make sure that the seeds are completely dry before planting; moisture can cause mold or rot on the seeds. Once they have been cleaned and dried, the seeds are ready for prepping and planting.
Step 3 – Soak the seeds in water for 24 hours to soften the seed coat.
After cleaning the pawpaw seeds, the next step is to soak them in water for 24 hours. This process, called imbibition, helps soften the seed coat and make it easier for water and oxygen to penetrate – essential components for germination.
In addition, soaking the seeds helps to remove any remaining debris or flesh that was missed during the cleaning process. It’s important to remember to change the water every 6-8 hours to keep it fresh throughout the soaking period. After 24 hours, drain the water from the seeds and they will be ready for their next step.
Step 4 – Scarify the seeds by lightly sanding the seed coat with fine sandpaper
Scarifying seeds is the next step after soaking them in water. This process involves abrading or scratching the seed coat in order to let in more oxygen and water.
Scarification can be done by lightly sanding the seed coat with fine sandpaper or by gently rubbing the seeds between two pieces of sandpaper. This helps to break down the hard seed coat, which can increase germination success. However, it is important not to scarify too much because this can damage the seeds and reduce their chances of germination.
Step 5 – Stratify the seeds by placing them in a plastic bag with moistened peat moss or sand and refrigerating for 60-90 days.
After scarifying the seeds, the next step is to stratify them. Stratification exposes the seeds to cold temperatures for a period of time; this helps to break dormancy and prepare the seeds for germination.
To stratify your seeds, place them in a plastic bag with moistened peat moss or sand and refrigerate them for 60-90 days.
Make sure that the peat moss or sand is kept evenly moist (not wet) and check on your seeds regularly to make sure they’re not molding or rotting. Once stratified, your seeds will then be ready for germination and growing.
Step 6 – Fill pots or trays with seed compost and sow the seeds on the surface.
Once the stratification period is complete, the seeds are ready to be sown. Fill pots or trays with seed compost and evenly spread the seeds on the surface.
Seed compost is a specific soil mix that is designed for fostering seed germination, as it has the right balance of nutrients, moisture, and air necessary to support healthy seed growth.
When sowing your seeds, make sure they are placed in a warm spot that gets plenty of light but not direct sunlight.
Step 7 – Cover the seeds with a thin layer of compost or vermiculite.
After sowing the seeds, cover them with a thin layer of compost or vermiculite. This helps to keep the seeds moist and also to protect them from drying out or being washed away by heavy watering. It also helps to keep the temperature and humidity stable, which is essential for germination.
Step 8 – Keep the soil moist and in a warm place, around 25-30°C.
When growing from seed, it’s important to keep the soil moist but not overly wet. Waterlogging can cause mold or rot, so ensure that the soil has adequate drainage.
It should also be kept relatively warm, at a temperature of around 25-30°C. To achieve this, place the pots or trays in a propagator or cover them with a plastic bag.
Step 9 – Germination should take place within 2-3 weeks.
Pawpaw seeds typically germinate within 2-3 weeks, but this can vary depending on temperature, moisture, and seed quality. To ensure the successful germination of pawpaw seeds, check them regularly for signs of mold or rot, and remove any that show these signs.
Proper conditions and care are key to ensuring successful germination, so make sure the environment is kept sufficiently moist and warm enough for the seeds to grow.
Step 10 – Once the seedlings are big enough to handle, transplant them into individual pots and grow them on in a greenhouse or cold frame before planting them out in their permanent position.
Once the seedlings are big enough to handle, they should be transplanted into individual pots and grown in a greenhouse or cold frame.
Growing them in a greenhouse or cold frame will protect them from frost and wind until they are large enough to be planted out permanently.
To ensure the transplanted seedlings acclimatize effectively, it is important to harden them off before planting by gradually exposing them to outdoor conditions.
Tips for Caring for Your Pawpaw Tree
Here are some tips for caring for your pawpaw tree:
- Provide the tree with well-drained soil and full sun to partial shade.
- Water the tree regularly, especially during dry periods.
- Fertilize the tree with a balanced fertilizer in the spring, before the tree starts to leaf out.
- Prune the tree regularly to remove any dead or diseased branches.
- Protect the tree from frost, especially when young.
- Keep an eye out for pests and diseases aphids, and fungal diseases like powdery mildew, and take appropriate action if necessary.
- Keep the tree mulched to help retain moisture and suppress weeds.
- Consider companion planting with other plants that can help deter pests and improve soil health.
- Pawpaw trees are dioecious (having separate sexes), so make sure you plant at least one male and one female tree to ensure fruit production.
- Be patient, as pawpaw trees can take several years to begin producing fruit.
It’s also important to note that pawpaw trees can be propagated by both seeds and grafting. Grafting is a process in which a shoot or scion is taken from a mature tree and joined to the rootstock of a young tree. This can help to speed up the fruiting process, but it can be difficult to find a healthy scion.
Harvesting & Storing Pawpaw Fruit
Pawpaw fruit are typically harvested in late summer or early fall, when they have reached peak ripeness. The skin should be a slightly yellow color, and the flesh should give slightly to pressure when ripe. Carefully twist the fruit off the tree to harvest it; taking care not to damage the delicate flesh.
It is best to use or store pawpaw fruit soon after harvesting as they have a short shelf life. They can be kept in the refrigerator for several days before spoiling. For longer-term storage, you can freeze them by cutting them in half, removing the seeds, and placing them in an airtight container or bag. This way, they will last for up to several months when frozen.
Enjoying the Fruits of Your Labor: Eating Pawpaws
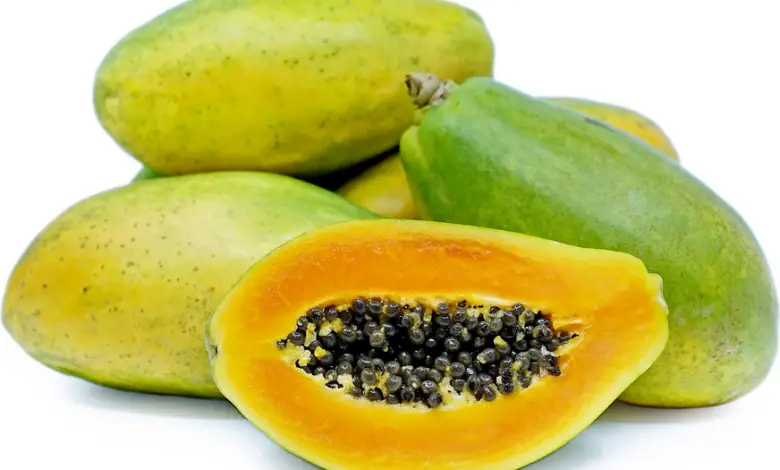
Eating pawpaws is a unique experience, as the fruit has a unique flavor that is often described as a combination of banana, mango, and pineapple. The texture is creamy and custard-like, with large, black seeds that are inedible.
The most common way to eat pawpaws is to cut the fruit in half and scoop out the flesh with a spoon, discarding the seeds. The flesh can be eaten as is or used in a variety of recipes. Some popular ways to enjoy pawpaws include:
- Eating the Fruit Fresh: Cut the pawpaw in half, scoop out the flesh with a spoon, and discard the seeds. The sweet and delicious flesh can be eaten as is or used in recipes.
- Make a Smoothie: Blend together pawpaw flesh, yogurt, honey, and ice for a flavorful smoothie.
- Bake a Pawpaw Pie or Bread: Replace other tropical fruits such as banana or mango with pawpaw in baking recipes like pie or bread.
- Make Preserves and Jams: Cook pawpaw fruit with sugar and other fruits like apples or peaches to make jam and preserves.
- Add to Salads: Mix in pawpaw for a unique flavor boost to salads.
- Add to Savory Dishes: Include pawpaw when preparing meat stews, curries or other savory dishes for sweetness and added uniqueness of flavor.
- Try Pawpaw Beer: An interesting way to enjoy pawpaws is through beer brewing! This provides an additional depth of flavor.
It’s important to note that the flavor of pawpaws can vary depending on the variety and ripeness of the fruit. Some varieties have a stronger, more intense flavor, while others are milder and sweeter. It’s worth experimenting with different varieties and ripeness levels to find your ideal pawpaw flavor.
FAQ
How long does it take to grow a pawpaw from seed?
It takes about 2-3 weeks for pawpaw seeds to germinate and several years for a tree to start producing fruit.
What is the fastest way to germinate pawpaw seeds?
Stratifying the seeds by refrigeration for a period of time before planting is the fastest way to germinate pawpaw seeds.
Should you soak pawpaw seeds?
Soaking pawpaw seeds in water overnight before planting can help to soften the seed coat and improve germination rates.
Do pawpaw seeds need to be dried before planting?
Pawpaw seeds do not need to be dried before planting, but they should be cleaned of any flesh or debris before planting.
Can I plant papaya seeds straight from the fruit?
Papaya seeds can be planted straight from the fruit, but they will have a higher germination rate if they are cleaned and stratified first.
How can you tell if a papaya seed is male or female?
Papaya seeds cannot be visually differentiated between male and female. Male and female plants can only be determined by observing their flowers when they start to bloom.
Do you soak papaya seeds before planting?
Soaking papaya seeds overnight before planting can help to soften the seed coat and improve germination rates.
Can female papaya produce fruit without male?
No, female papaya plants cannot produce fruit without the presence of a male plant for pollination.
Is it possible to change male papaya to female?
No, it is not possible to change a male papaya plant to a female plant. Papaya plants are dioecious, meaning they have separate sexes and cannot change from one to the other.

