How To Grow Plumeria Seeds: Step-By-Step Guide
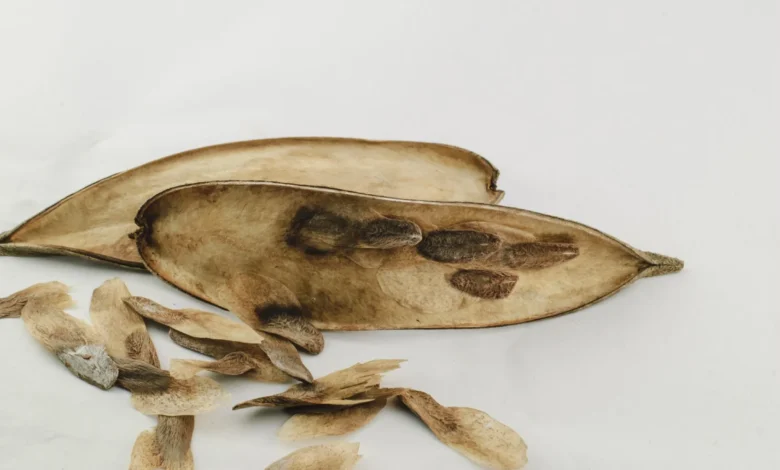
Do you dream of having beautiful plumeria flowers right in your garden? You can make it happen! Planting plumeria seeds is a fun and simple process. We’ll show you every step you need to take for your seeds to grow into lovely plants.
Plumeria, also known as frangipani, is a tropical plant from Central America. Its stunning flowers can bloom in your garden if you plant seeds the right way. In just a few months, you could see the first blooms if you start now.
In this post, we’re excited to share a step-by-step guide to help you grow plumeria seeds from the very beginning until they flower and beyond.
Table of Contents
- Planting Plumeria Seeds: Your Step-by-Step Guide
- Step 1 – Get fresh plumeria seeds
- Step 2 – Prepare the seeds
- Step 3 – Plant the seeds in moist mix and bag them
- Step 4 – Keep the bag warm and moist
- Step 5 – Water regularly and watch for growth
- Step 6 – Time for pots with good soil
- Step 7 – Find a sunny spot and water wisely
- Step 8 – Feed your plants every 2-3 weeks
- Step 9 – Time for the big move
- Step 10 – Take good care of your plants
- How to Grow Plumeria Better
- Frequently Asked Questions
- How long does it take to grow plumeria from seed?
- Should you soak plumeria seeds before planting?
- How and when to plant plumeria seeds?
- How do you get plumeria seeds?
- Is it hard to grow plumeria from seed?
- Is plumeria easy to grow?
- How can I make plumeria grow faster?
- Where does plumeria grow best?
- Do plumeria grow well in pots?
Planting Plumeria Seeds: Your Step-by-Step Guide
Step 1 – Get fresh plumeria seeds
Fresh seeds are key for healthy plumeria plants. Wait for plumeria flowers to bloom and dry out, then gather seeds by shaking the pods or cutting them open. Remember, not all flowers produce seeds, so be patient as you collect.
Step 2 – Prepare the seeds
Once you have your seeds, make sure they’re clean by removing bits of flower or pod. Lay them on paper in a warm spot to dry for a few days, turning them occasionally. Be careful not to dry them too much, or they won’t sprout.
Different plumeria types take different times to start growing, from weeks to a few months. Take care to clean and dry the seeds well, and then be patient as they begin to grow.
Step 3 – Plant the seeds in moist mix and bag them
Plumeria seeds need moisture to grow. Use a good seed-starting mix that has peat moss, vermiculite, and perlite. Spread out the clean, dry seeds on the mix, then cover lightly with more mix. Dampen the mix – not too wet – to avoid seed rot.
Put the seeds and mix into a plastic bag. Close it up and keep it warm, between 80-90°F. This is the perfect temperature for plumeria to start growing. Leave the bag alone and watch for growth after 4 to 6 weeks.
Step 4 – Keep the bag warm and moist
With the seeds in the bag, find a warm place for them to stay cozy. Check the bag daily, making sure the seeds stay moist. Spray them with water whenever needed.
In a few weeks, depending on your plumeria type, small plants should start to appear. When you see them, it’s time to move each seedling into its own pot filled with soil that drains well to continue growing.
Step 5 – Water regularly and watch for growth
After the seeds are in a warm place, they need regular misting to stay moist. Look out for sprouts, which will happen in a couple of weeks. Keep the soil damp for healthy seedling growth, but be careful not to overwater and cause mold or fungus.
Step 6 – Time for pots with good soil
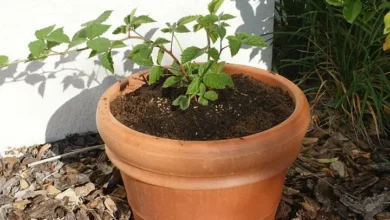
Once your seedlings pop out, gently move them to pots with well-draining soil. Plant them at the same depth they were before. Good drainage is important to keep the roots from rotting. Keep the pots in a spot that gets plenty of sunlight and keep the soil moist.
Step 7 – Find a sunny spot and water wisely
Your new plumeria plants need sunshine to thrive. Place the potted seedlings somewhere bright. Keep the soil moist, but be careful not to give them too much water. Watch for bugs or sickness and deal with problems quickly.
Step 8 – Feed your plants every 2-3 weeks
Healthy plants need food! Give your seedlings a balanced water-soluble fertilizer every 2-3 weeks. Follow the instructions for mixing it with water, then put it in the soil around the plants. Seedling-friendly fertilizer will give the right boost for strong growth.
Step 9 – Time for the big move
When
When you are moving seedlings into a new spot in your garden or into bigger pots, make a hole that’s big enough for the seedling’s roots. This gives them plenty of room to grow. Be gentle when you move them and water them right after you put them in the new spot. This helps them settle in. But remember, don’t water too much because that could cause the roots to rot.
Step 10 – Take good care of your plants
If you want your baby plumeria plants to grow up big and strong, you need to look after them well. That means watering them the right amount, feeding them, keeping bugs and sickness away, cutting them back when needed, training them to grow the right way, and always checking to see if they are healthy.
By giving your plumeria seedlings all the love they need, they are more likely to grow into healthy plants that will make you happy for many years.
How to Grow Plumeria Better
Here’s some advice on how to grow plumeria seeds the right way:
- Get new seeds: Fresh seeds are more likely to sprout. Seeds that are old or not stored well might not grow at all.
- Use a good seed mix: A mix with peat moss, vermiculite, and perlite will help the seeds get just the right amount of water and air.
- Keep them warm: Plumeria seeds need warmth to grow. Keep them in a place that’s about 80-90°F, like on a heating mat or a sunny windowsill.
- Watch the water: Keep the seed mix damp but not too wet to stop the seeds from rotting.
- Light up their life: Once they’ve popped out of the soil, they need lots of light but not direct sunlight. A grow light or a windowsill that doesn’t get direct sun is perfect.
- Patience is key: It can take a while for the seeds to open up and start growing, so don’t rush them.
- Be careful when moving: When it’s time to put them in bigger pots, be gentle with their roots and use a potting mix that drains well.
- Regular food and water: Your little plumeria needs regular watering and a monthly feed to get all the nutrients it needs.
- Plenty of sun: To do their best, they need about six hours of sunlight every day. A sunny spot outside where they can get morning light is great.

