- Pick ripe pineapples: Pineapples should feel a little soft when you push on them if they’re ready to eat.
- Blend well: Make sure to blend the puree until there are no lumps for the smoothest texture.
- Adjust as needed: If the puree is too thick, add water. If it’s too thin, just let it sit and any extra liquid will drain off.
- Add sweetness to your taste: Sometimes a little extra sweetener like sugar or honey can make it just right.
- Store it properly: Keep it in the fridge in a container that seals up tight for one week, or you can freeze it and it will be good for a few months.
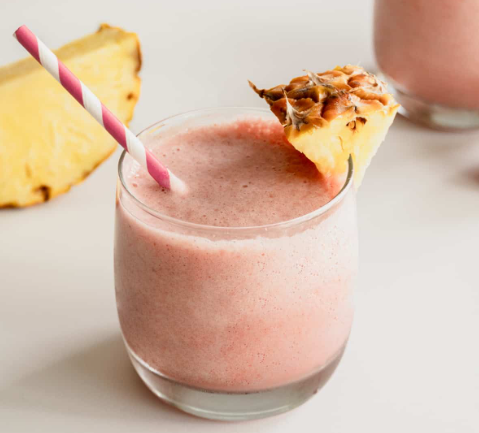
Do you love the tropical taste of pineapple? Making pineapple puree at home is a breeze and it’s super delicious. It’s perfect for adding to your favorite smoothies, drinks, and desserts. This guide will show you how to create this yummy puree step by step.
Want to know how to make pineapple puree from scratch? This blog post will guide you through making your very own puree. It’s time to move on from store-bought puree and enjoy the tastiness of homemade goodness.
What’s Pineapple Puree?
Pineapple puree is just pineapple that’s been mashed into a smooth mix. You can use it in many kitchen recipes, like for drinks, baking, or sauces. You can make it yourself or get it in a can, and sometimes people add sugar to make it sweeter.
Why Make Pineapple Puree at Home?
Creating pineapple puree at your house has lots of benefits:
- Always fresh: You know it’s made from fresh fruits and without any fake stuff or preservatives.
- Save money: It’s cheaper to make your puree from fresh pineapples than to buy it at the store.
- Create your way: You can decide how sweet or smooth you want it and throw in other ingredients too.
- Good for you: Pineapples have lots of vitamins, minerals, and things that are healthy for you.
- Use it in many recipes: Great for smoothies, drinks, and other recipes, plus you can freeze it for later use, so it’s super useful to have around.
In summary, making your own puree is simple, saves you money, and is versatile—a burst of flavor for any recipe.
What You’ll Need to Make Pineapple Puree
Here’s what you need to get started:
- A fresh pineapple
- Water (if you want it thinner)
- Sugar or honey (if you like it sweeter)
Begin by cutting your pineapple into chunks, taking off the skin and the hard center. Put the chunks into a blender and whip it up until it’s totally smooth. You can mix in a little water if it’s too thick. Add some sweetness with sugar or honey if you like it that way. Then, your puree is ready for all your tasty recipes.
Directions for Homemade Pineapple Puree
Step 1: Clean and Chop the Pineapple
Wash the pineapple well to get rid of dirt. Dry it with a cloth or paper towels. Slice off the top and bottom and peel off the skin. Get rid of the eyes and any tough bits. Then, cut the pineapple into smaller chunks for blending.
Step 2: Get Rid of the Skin and Hard Middle
When the pineapple is chopped up, it’s time to take out the hard center. Cut the chunks again lengthwise and remove the center. This part isn’t as yummy as the rest and can make your puree not as smooth.
Step 3: Blend the Chunks into Puree
Pop the cut-up pineapple into the blender or food processor and mix until it becomes a smooth puree. If it needs help, stop and scrape the sides to get everything blended right.
Step 4: Thin it If Needed
If the pineapple puree is really thick, add water, just a bit at a time, until it’s the way you like it. But don’t pour in too much water, or it won’t taste as flavorful.
Step 5: Sweeten if Wanted
Normally pineapples are sweet enough, but if you want more, add some sugar or honey. Put a little in at first, mix it up, and taste it. Then you can decide if it needs any more.
Step 6: Keep the Puree in the Fridge or Freezer
When the pineapple puree is done, keep it in a tight-sealing container. It can stay in the fridge for about one week or in the freezer for six months. It’s a great thing to have ready for your cooking.
Pro Tips for Amazing Pineapple Puree
Here are some extra tips for making really nice puree:
- Pick ripe pineapples: Pineapples should feel a little soft when you push on them if they’re ready to eat.
- Blend well: Make sure to blend the puree until there are no lumps for the smoothest texture.
- Adjust as needed: If the puree is too thick, add water. If it’s too thin, just let it sit and any extra liquid will drain off.
- Add sweetness to your taste: Sometimes a little extra sweetener like sugar or honey can make it just right.
- Store it properly: Keep it in the fridge in a container that seals up tight for one week, or you can freeze it and it will be good for a few months.
If you want to make perfect guava puree, just follow these simple instructions! Guava puree is great for many things. It has a special tropical taste that’s great for mixed drinks, fruit smoothies, and all sorts of baked treats. Make your own guava puree today and see how tasty it is!
Frequently Asked Questions
Is pineapple puree healthy?
Yes, pineapple puree is very healthy. It’s full of important things like vitamins, minerals, and fiber. It has lots of vitamin C to help your immune system stay strong and manganese which is good for your bones. Pineapple puree doesn’t have much fat or calories, so it’s great for keeping a healthy weight. When you eat pineapple puree, you can get a lot of health benefits that last for a long time. Try to add it to your meals as much as you can.How long does pureed pineapple last?
When you put pureed pineapple in a container that’s airtight and put it in the fridge, it will stay good for about a week. If you freeze it, it can last for a few months.Is pineapple puree good for babies?
Babies can really benefit from pineapple puree because it’s full of good vitamins and minerals, like vitamin C and manganese. If you want to give pineapple puree to your baby, start with a little bit to see how they react, then you can give them more if they like it and don’t have any problems.
Advertisements
