There’s something almost magical about showing up to a potluck with a beautiful layered salad. Everyone gravitates toward it first—not because they necessarily plan to eat salad, but because it looks like you put thought and care into what you brought. The truth? A layered salad is actually one of the easiest crowd-pleasing dishes to make, and it stays fresh, beautiful, and delicious for hours longer than a tossed salad would.
The real genius of a layered salad isn’t just the eye appeal (though that’s definitely part of the appeal). It’s the engineering. When vegetables, greens, and dressing are strategically layered in the right order, something remarkable happens: the crisp vegetables stay crisp, the lettuce doesn’t wilt into a sad puddle, and every fork-full tastes balanced and intentional. You can make it hours in advance, transport it without worry, and serve it directly from the same dish it traveled in.
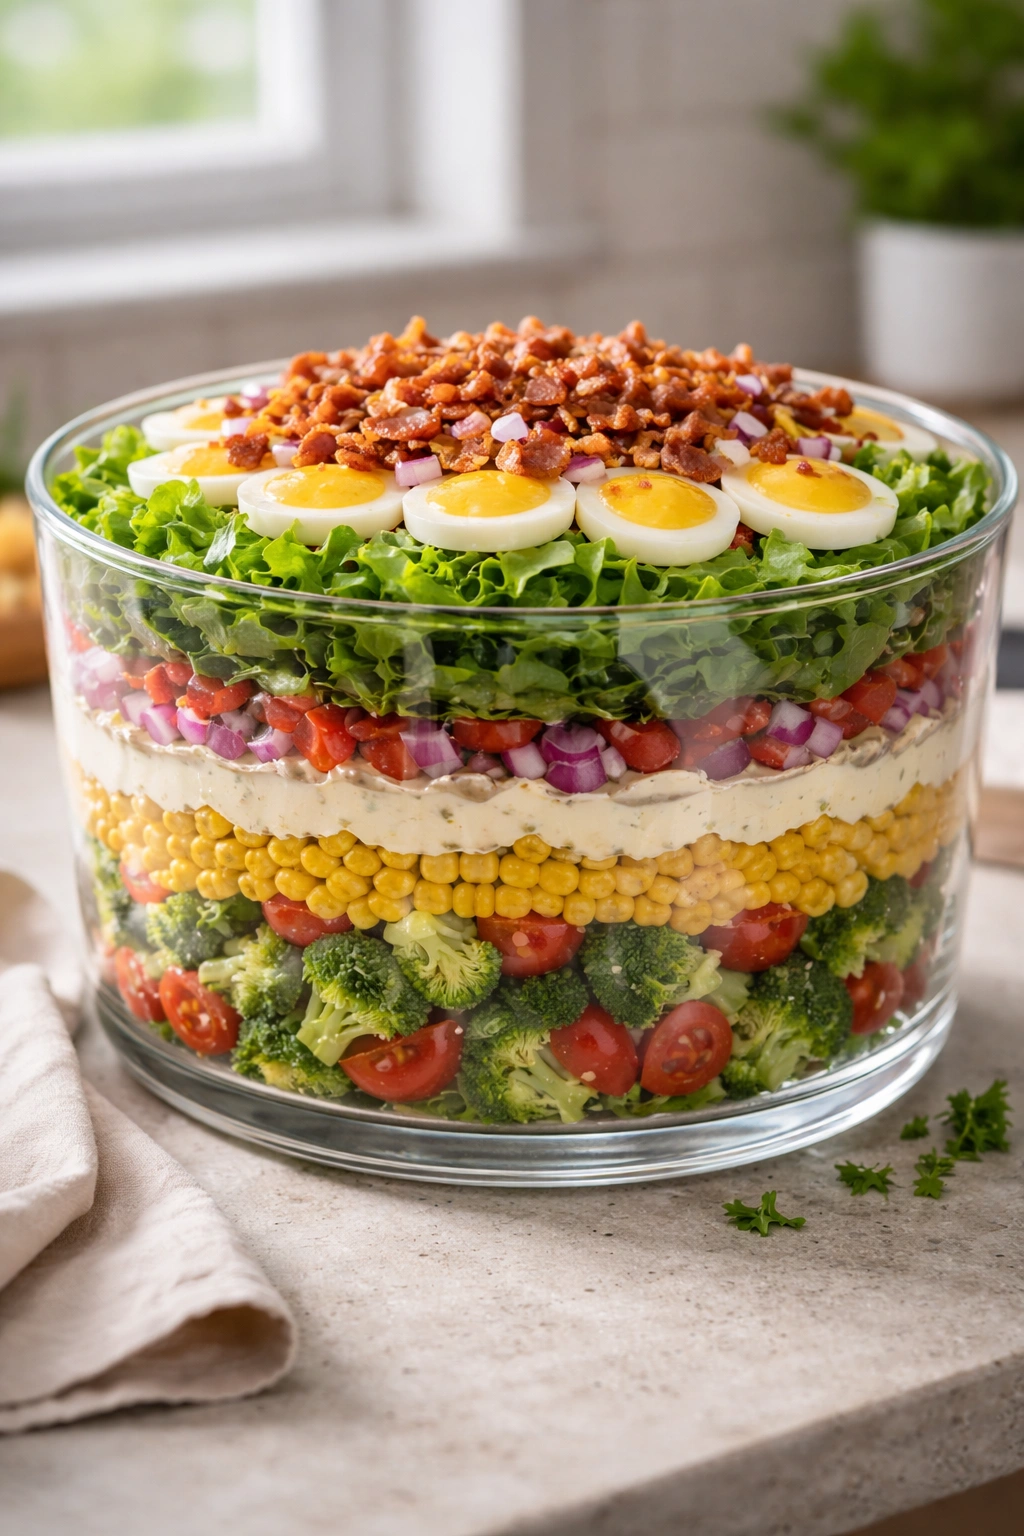
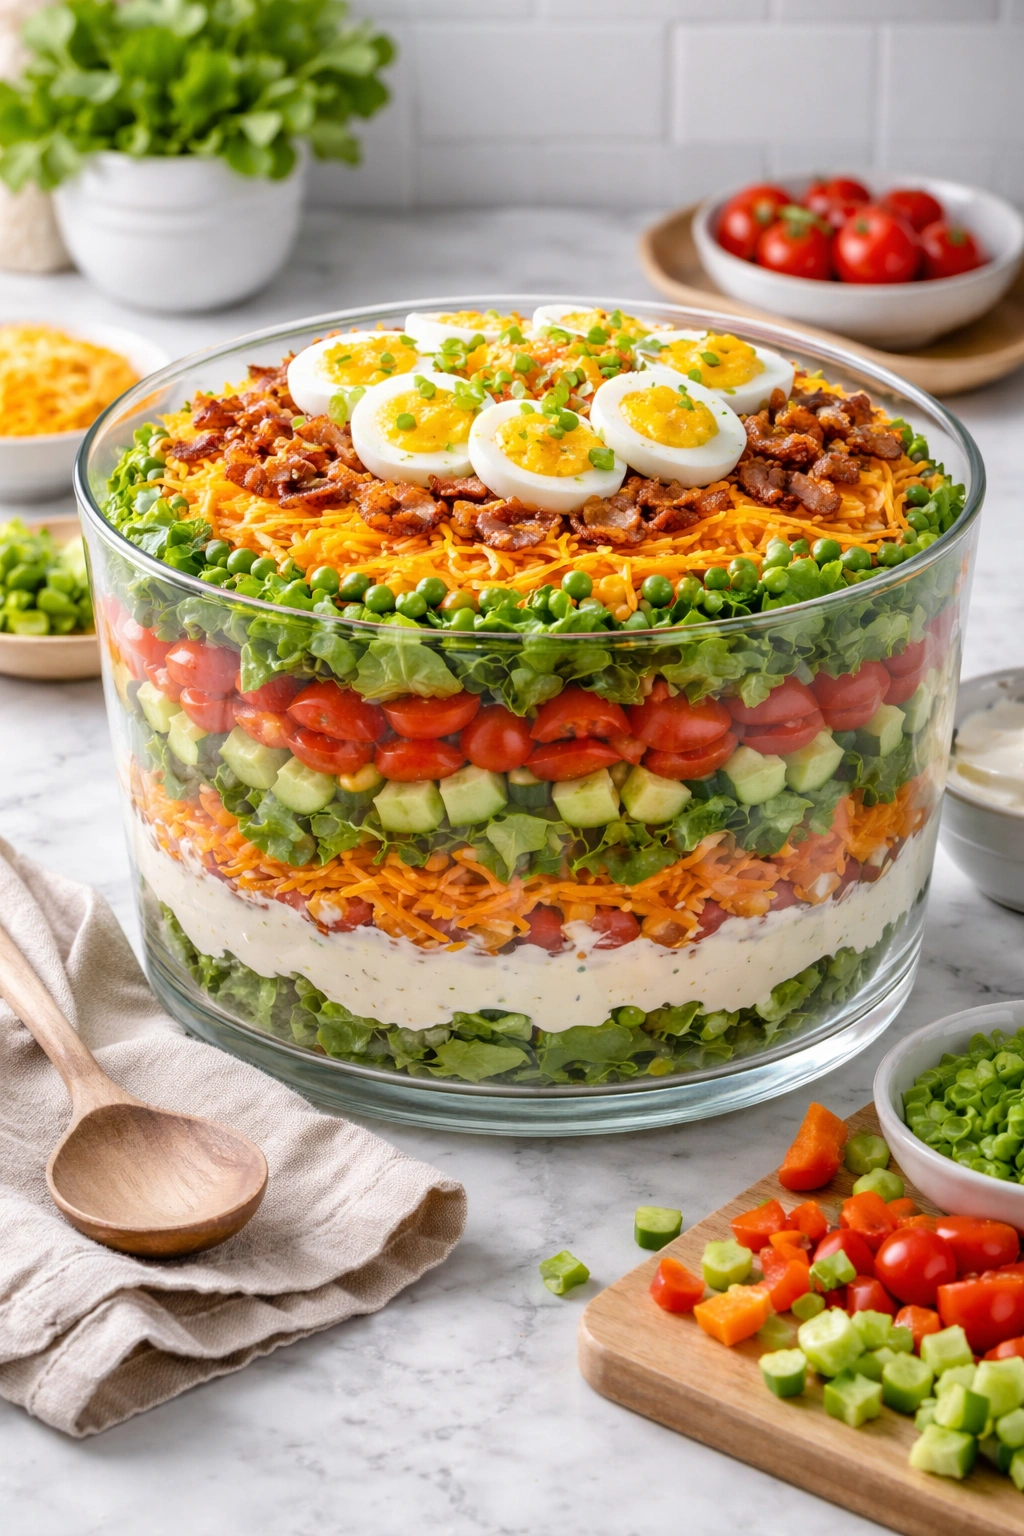
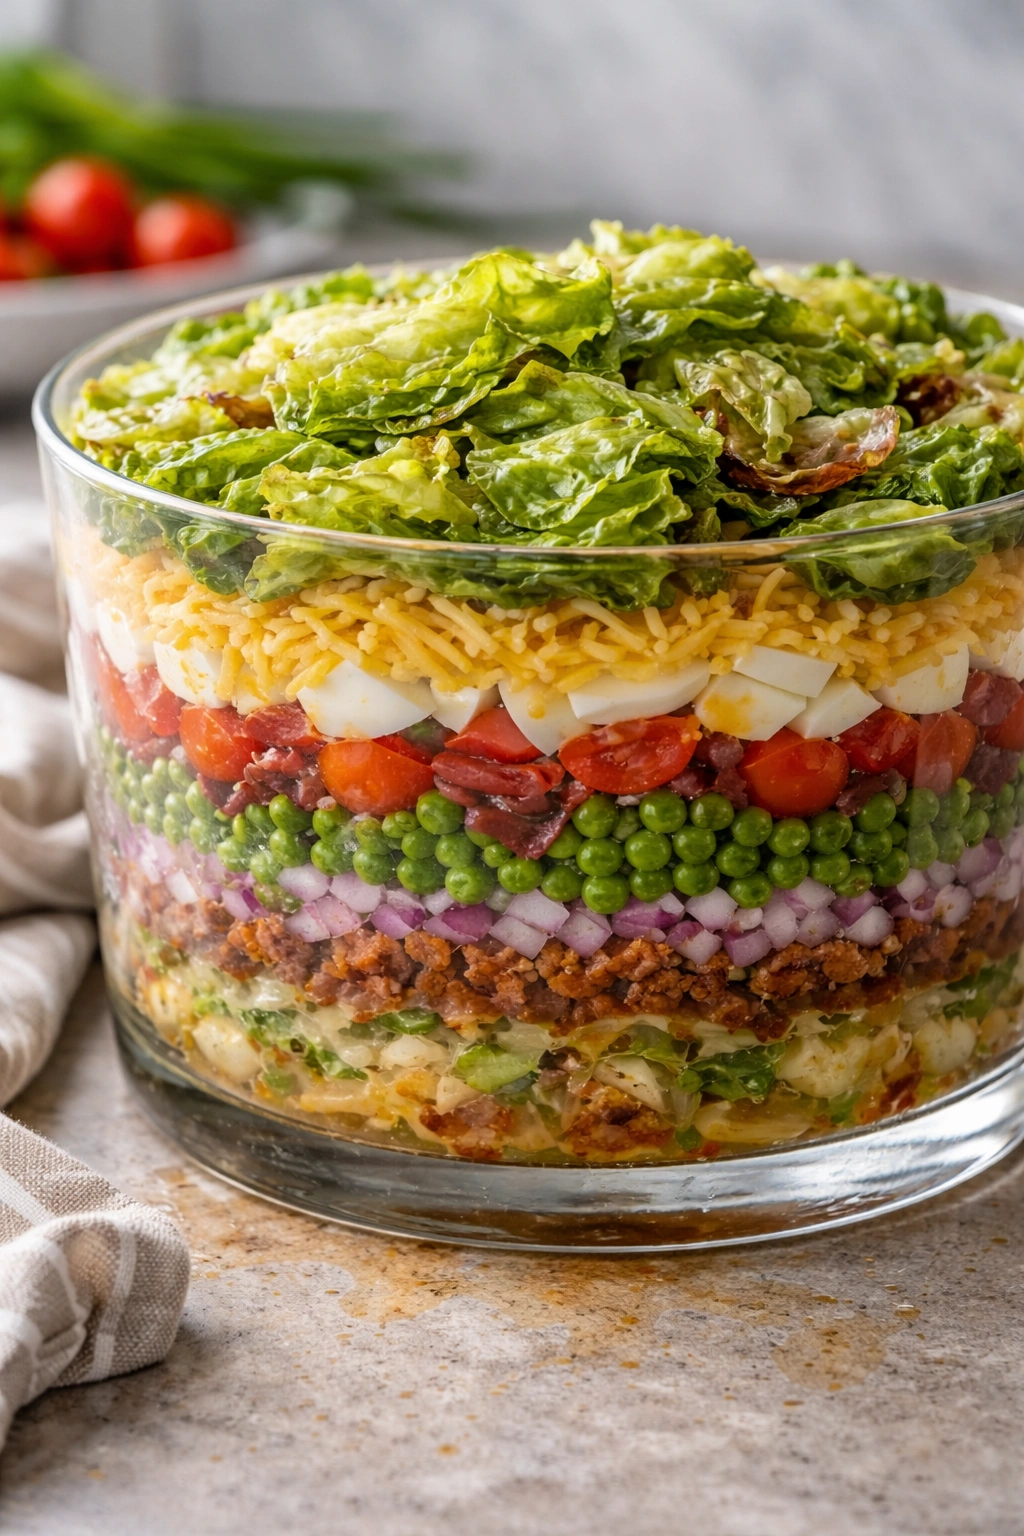
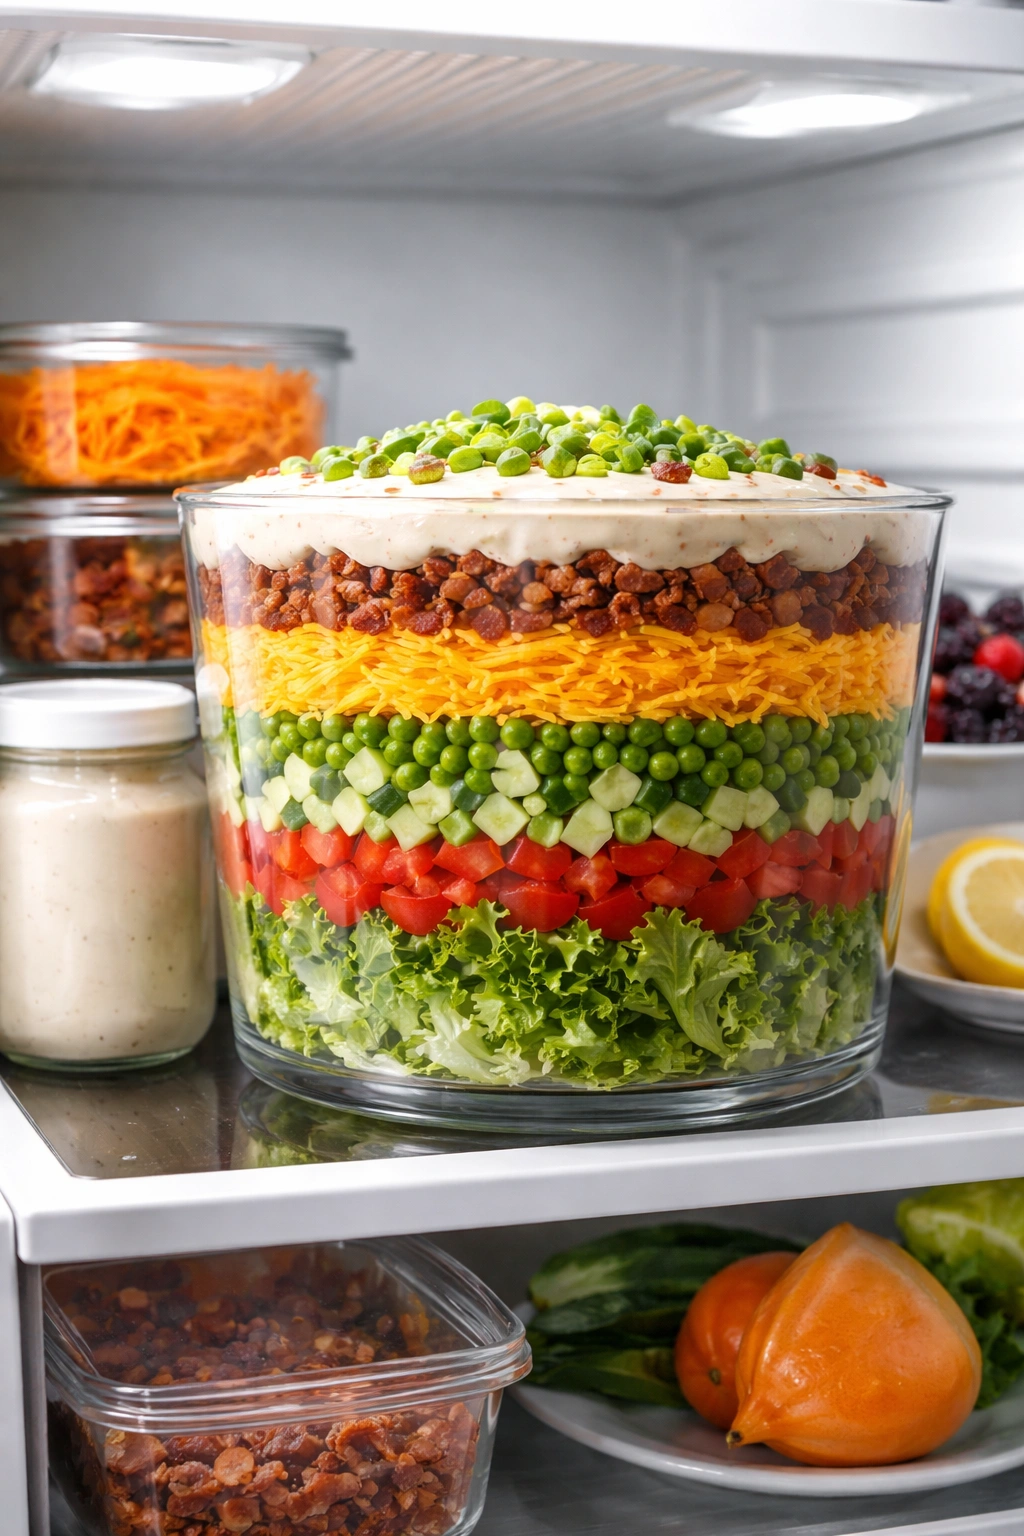
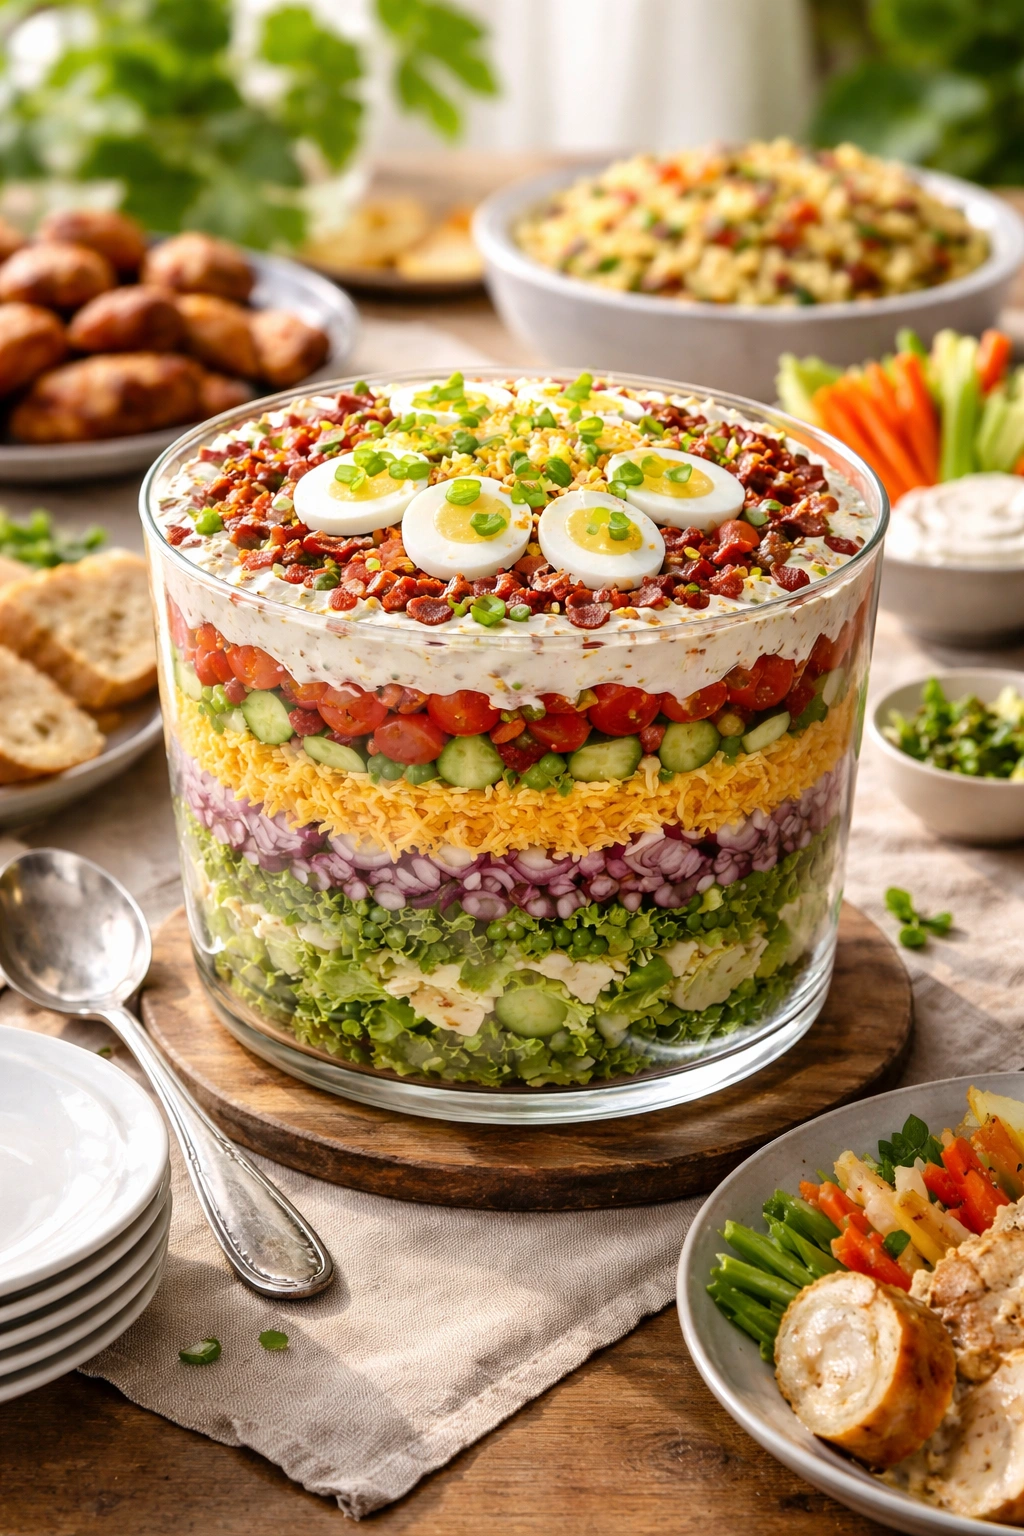
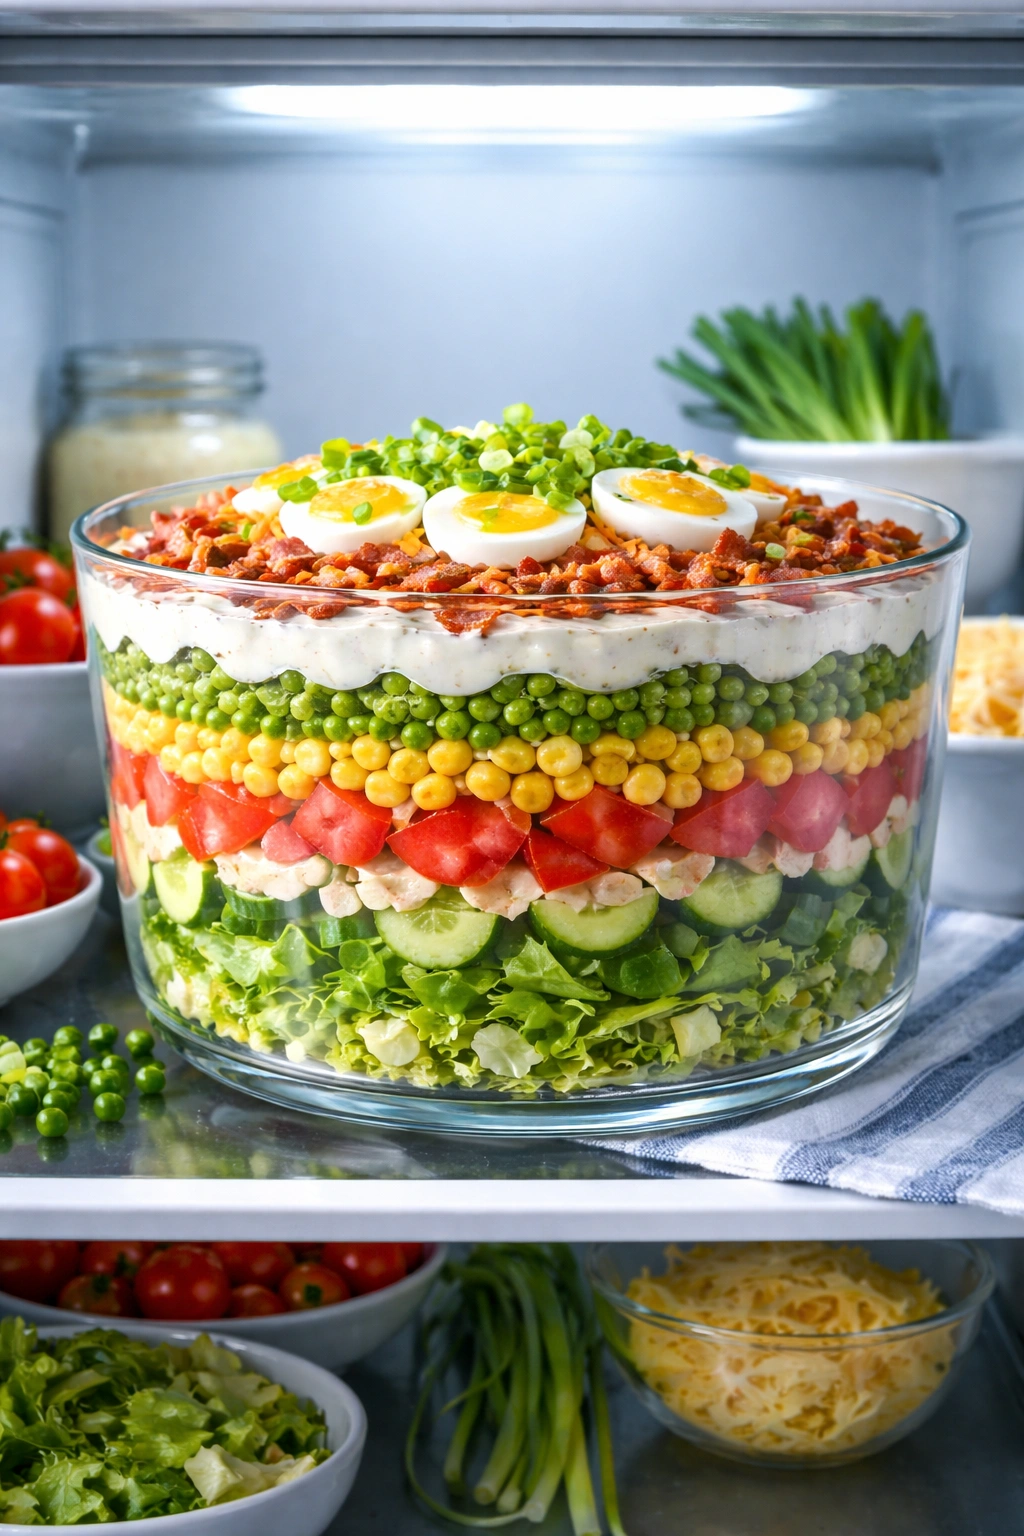
A proper layered salad is mayonnaise-based, built in clear glass so the layers show, and packed with a surprising variety of textures and flavors. It’s the kind of dish that makes people ask for the recipe—even people who normally wouldn’t touch a salad with a ten-foot fork. Whether you’re bringing it to a church potluck, a backyard barbecue, a holiday gathering, or just want to master the technique for your own table, this is the layered salad method that never disappoints.
Why Layered Salads Dominate the Potluck Table

A layered salad has the rare quality of being simultaneously impressive and reliable. Unlike a delicate tossed salad that needs to be served immediately or it turns into a watery, wilted mess, a layered salad actually improves over a few hours as the flavors meld and marry together. The mayonnaise-based dressing acts as a protective barrier, keeping the vegetables crisp and the greens from oxidizing.
This is why restaurants and caterers have loved layered salads for decades—they make sense logistically. You can assemble it the morning of an event, refrigerate it, and it’ll look just as beautiful and taste just as fresh at dinner time. For potlucks specifically, this means you’re not scrambling at the last minute, and you’re not stressed about the window of time to serve it.
The structure also means every bite has balance. A properly layered salad ensures that someone gets a bit of everything in each forkful—lettuce, vegetables, protein, nuts, cheese, and creamy dressing—rather than the fork landing on just lettuce one time and just tomatoes the next. It’s the difference between a salad that feels accidental and one that feels deliberately composed.
The Magic of Strategic Layering
Understanding why you layer things in a specific order is what separates a mediocre layered salad from an exceptional one. The bottom layer should be heartier vegetables that can handle some moisture and time—chopped bell peppers, shredded carrots, or sliced cucumbers. These sit directly on the dressing and actually benefit from absorbing some of those flavors.
The middle layers are where the tender stuff goes. Shredded lettuce should be in the upper half of the salad, where it won’t be crushed by the weight of ingredients above it and where it’s less likely to come into direct contact with the dressing for extended periods. Leafy greens sitting in mayo for six hours will eventually start to soften, but if they’re protected by a layer of harder vegetables above them, they stay fresher.
The very top layer is usually something that stays crunchy no matter what—toasted nuts, crispy bacon bits, or crunchy chow mein noodles. This top layer is both functional and visual: it’s the last thing to touch the dressing, so it stays textured, and it’s the most visible part, so it makes the whole salad look intentional and finished.
Understanding the Core Ingredient Groups
Every successful layered salad relies on a few essential component categories, and understanding what role each plays helps you build variations with confidence.
The creamy base is typically a mixture of mayonnaise, sour cream, and a bit of vinegar or sugar. This creates the dressing and the moisture barrier that protects the vegetables. Some people use ranch-based versions, while others prefer a sweet-and-tangy approach. The ratio matters—too little dressing and the salad feels dry, too much and it becomes heavy and mayo-forward.
The vegetable structure is what gives the salad its substance and visual interest. You need a mix of textures—some soft (tomatoes, cucumbers), some crisp and sturdy (celery, bell peppers), and some flavorful (red onions, radishes). The vegetables should be cut into consistent, bite-sized pieces so the salad eats well.
The lettuce or greens are the bulk and the base that makes this feel like an actual salad rather than just a vegetable casserole. Iceberg lettuce is traditional because of how sturdy and light it is, but you can use other hearty lettuces like romaine. Avoid delicate lettuces that wilt quickly; you need something with structural integrity.
The protein element adds substance and makes the salad feel complete as a main-course contribution. This might be crispy bacon, hard-boiled eggs, diced ham, cooked chicken, or chickpeas for a vegetarian option. It doesn’t have to be meat—it just needs to be something substantial.
The crunchy topper adds textural contrast and visual finish. Toasted nuts, crispy chow mein noodles, croutons, or sunflower seeds all work beautifully. This layer stays on top until serving, so it maintains its crunch even if the salad has been sitting for a while.
The cheese element adds richness and another layer of flavor. Sharp cheddar, crispy bacon and cheddar, or a mix of cheeses all work well.
The Classic Layered Salad Recipe
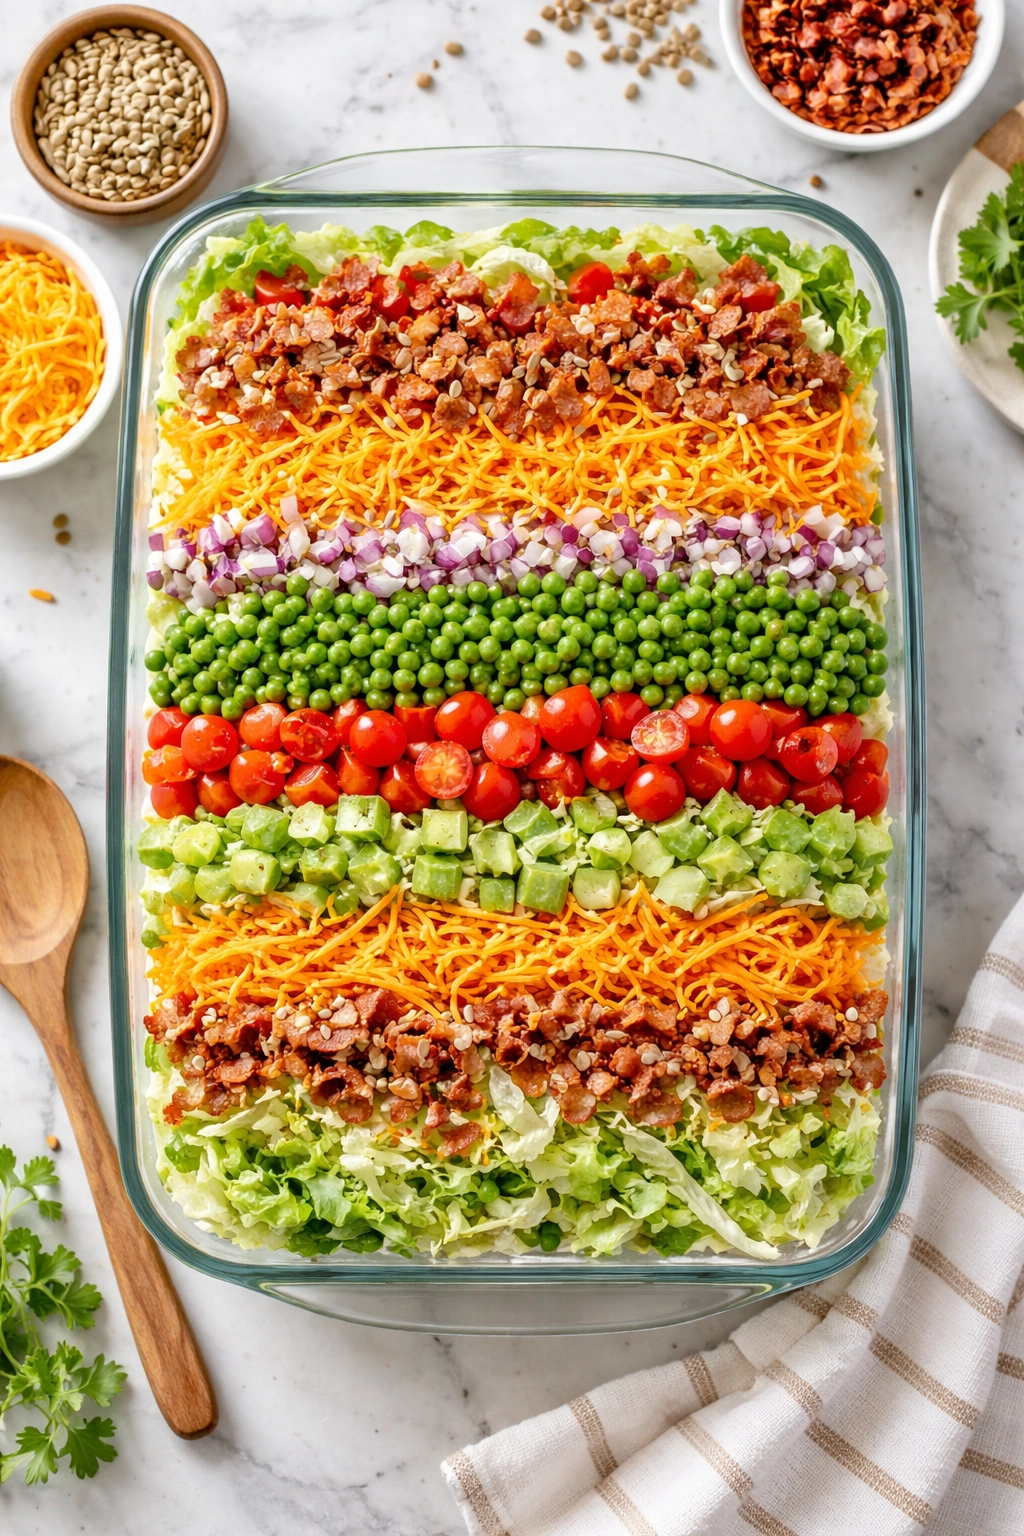
Yield: Serves 10 to 12 | Makes one 9×13-inch salad
Prep Time: 30 minutes
Cook Time: 15 minutes (for bacon; salad requires no cooking)
Total Time: 45 minutes, plus 2 hours refrigeration before serving
Difficulty: Beginner — No special skills required; it’s all chopping, layering, and mixing. Perfect for a first-time cook.
For the Creamy Dressing:
- 1½ cups mayonnaise
- ½ cup sour cream
- 2 tablespoons white vinegar
- 1 tablespoon granulated sugar
- ½ teaspoon kosher salt
- ¼ teaspoon black pepper
- ½ teaspoon garlic powder
For the Salad Layers:
- 1 head iceberg lettuce, shredded into bite-sized pieces (about 8 cups loosely packed)
- 1 cup diced bell pepper (any color, or a mix for visual interest)
- 1 cup diced celery (about 3 large stalks)
- 1 cup seeded and diced fresh tomatoes, or 1 cup grape tomatoes halved
- ¾ cup shredded carrots (about 2 medium carrots)
- 1 medium red onion, thinly sliced (about ¾ cup)
- 1 cup frozen peas, thawed and drained (or fresh English peas if available)
- 8 strips bacon, cooked until crispy and crumbled (about ¾ cup)
- 1½ cups shredded sharp cheddar cheese
- 1 cup roasted and salted sunflower seeds, or ¾ cup chopped toasted pecans (or toasted chow mein noodles for a different texture)
- 2 hard-boiled eggs, chopped (optional but recommended)
Substitution Notes:
- Mayonnaise alternative: Use half mayo and half Greek yogurt for a lighter version, though the dressing will be thinner and slightly tangier.
- Sour cream alternative: Use plain yogurt in a 1:1 ratio, or omit it entirely and increase mayo to 2 cups for a richer dressing.
- Vegetable swaps: Use diced cucumbers instead of celery, shredded zucchini instead of carrots, green bell peppers instead of red, or add diced avocado (do this just before serving so it doesn’t brown).
- Protein options: Use diced ham, cooked shredded chicken, or omit the bacon and add more hard-boiled eggs for vegetarian option.
- Nut alternatives: Pine nuts, toasted almonds, or crispy fried onions all work beautifully.
- Lettuce swap: Use shredded romaine lettuce for a slightly more robust texture, or a mixture of iceberg and romaine.
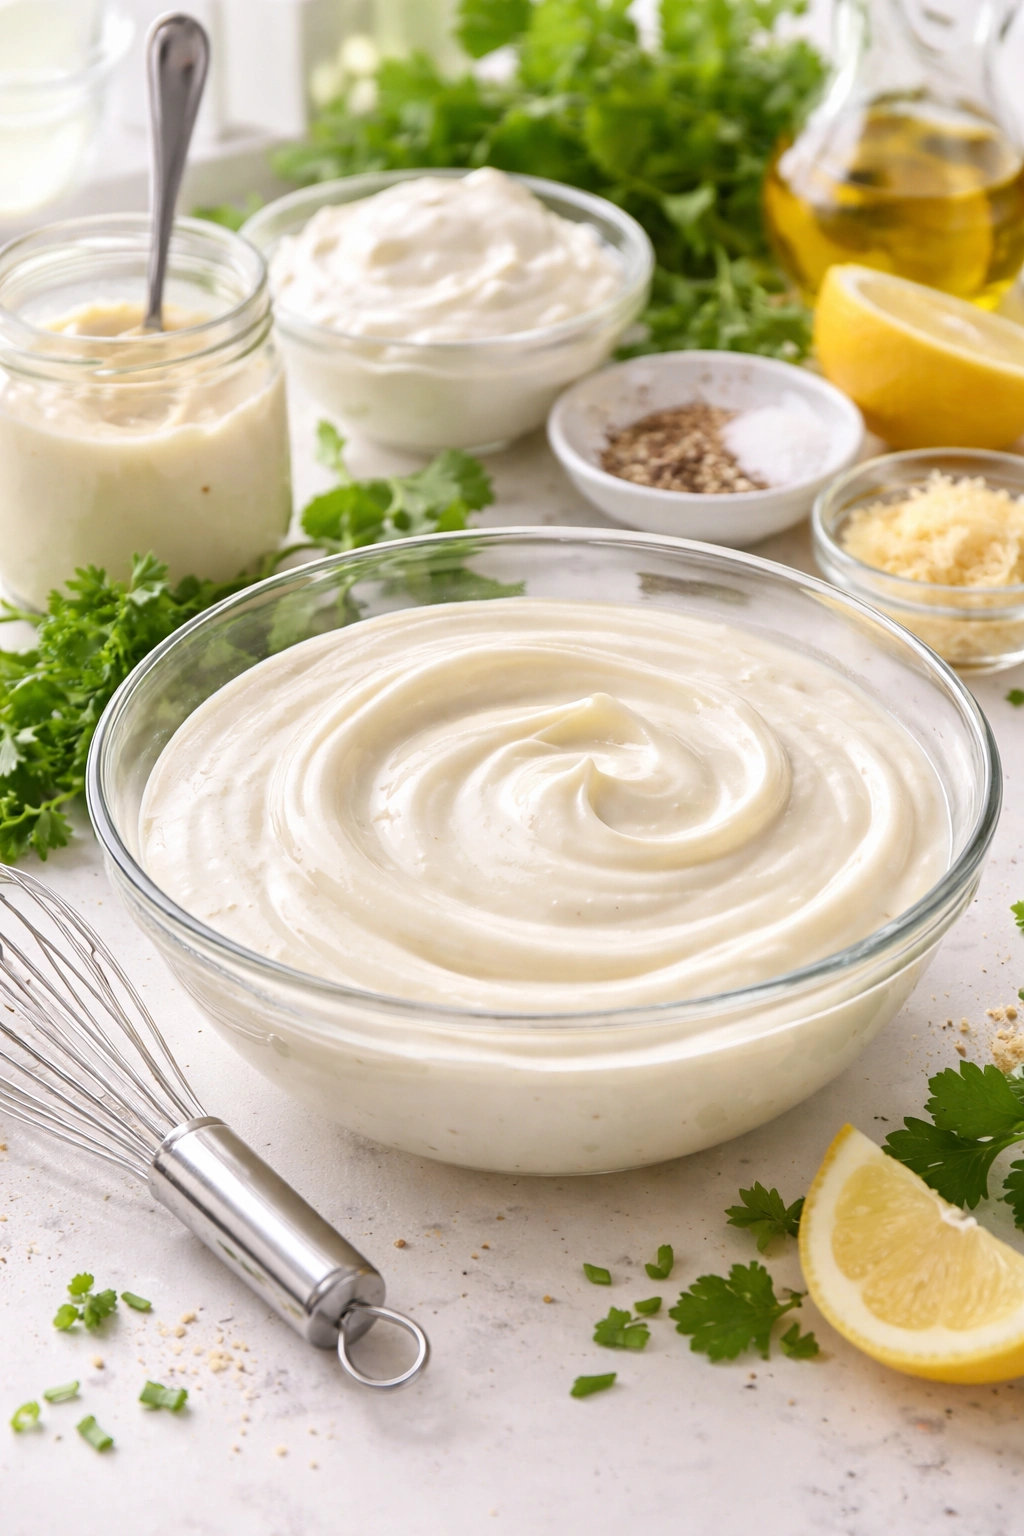
Prepare the Dressing:
- In a small bowl, whisk together the mayonnaise, sour cream, white vinegar, sugar, salt, pepper, and garlic powder until completely smooth and combined. Taste the dressing and adjust the seasoning—it should taste creamy, slightly tangy, and lightly sweet. The dressing can be made up to 2 days in advance and stored in an airtight container in the refrigerator.
Prepare the Vegetables:
-
Wash the iceberg lettuce, pat it dry thoroughly, and shred it into bite-sized pieces. Excess moisture on the lettuce will water down the dressing, so don’t skip the drying step.
-
Dice the bell pepper into ½-inch pieces, removing the seeds and white pith first. Dice the celery into ½-inch pieces as well. Shred the carrots using a box grater or vegetable peeler. Slice the red onion as thinly as you can manage—a mandoline makes this easier but a sharp knife works fine. Dice the tomatoes into ½-inch pieces and drain them in a colander for a few minutes to remove excess liquid.
-
If using fresh peas, blanch them in boiling salted water for 2 minutes, drain, and cool immediately in ice water. If using frozen peas, simply thaw them in a colander under cool running water and drain well.
-
Cook the bacon in a skillet over medium-high heat until it’s crispy and golden, about 8 to 10 minutes. Transfer it to a plate lined with paper towels to cool, then crumble it into bite-sized pieces. You can do this up to 2 days in advance and store it in an airtight container in the refrigerator.
-
Hard-boil the eggs by placing them in a pot of cold water, bringing the water to a boil, removing from heat, covering, and letting them sit for 12 minutes. Transfer them to an ice bath, peel when cool, and chop into small pieces. These can be made up to 2 days in advance.
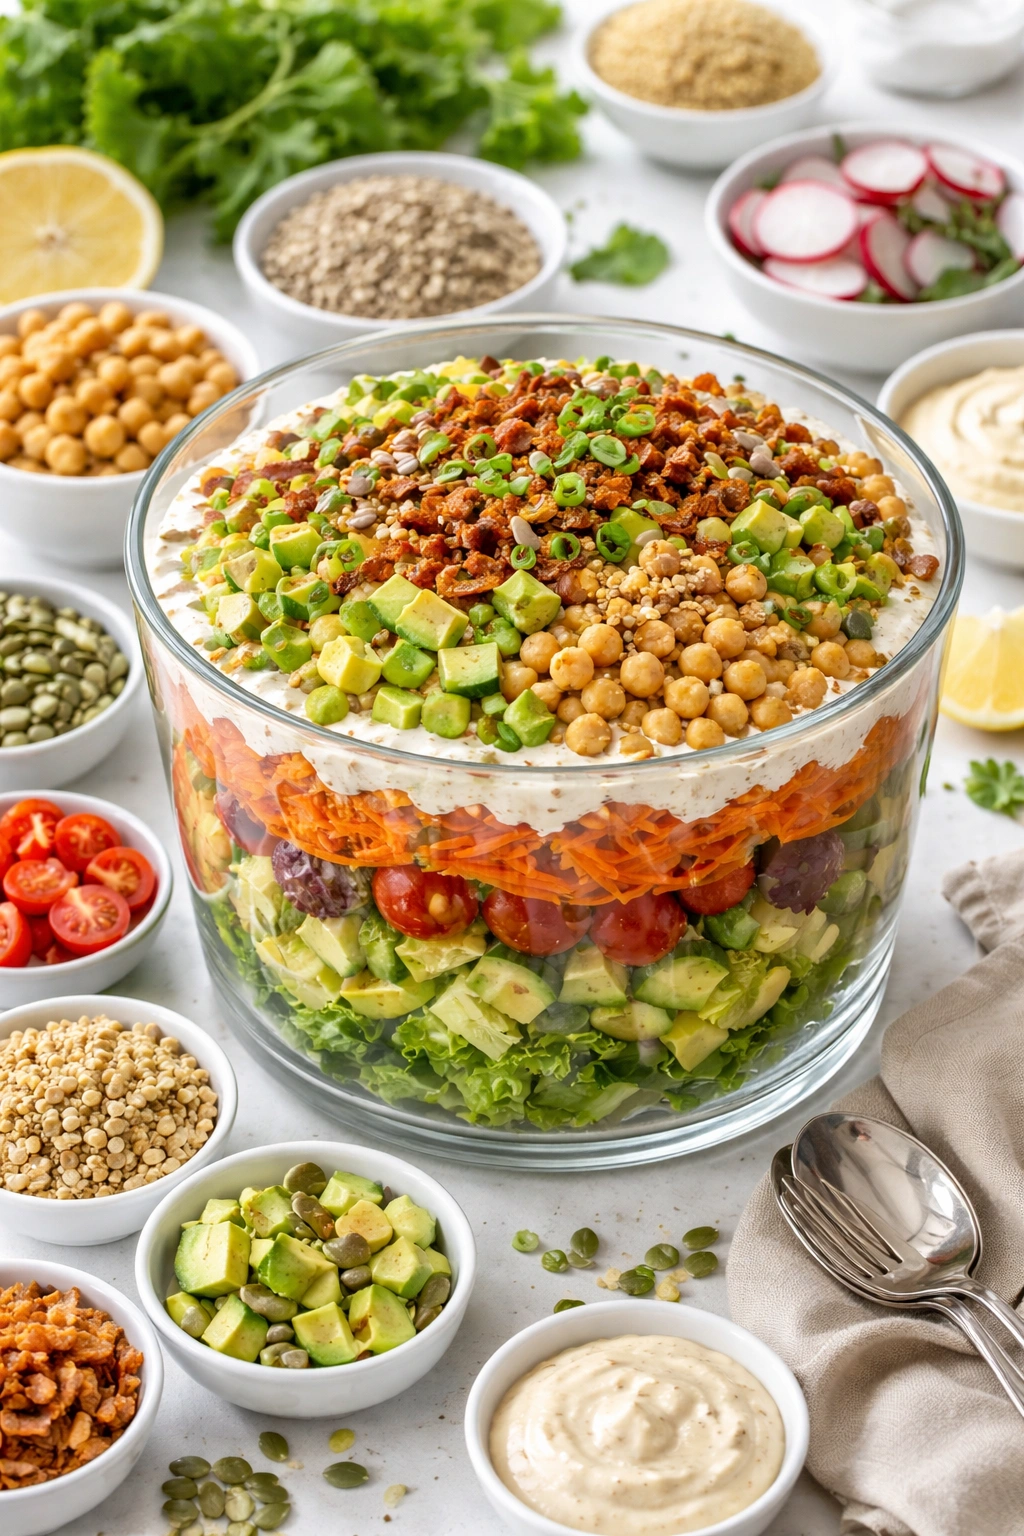
Assemble the Salad:
-
Choose a clear glass 9×13-inch baking dish or similar-sized clear container—the glass is important so the beautiful layers show. Spread the dressing evenly across the bottom of the dish in a thin, even layer, about ⅛ inch thick. This creates a moisture barrier and helps the bottom layer of vegetables stay crisp.
-
Layer the shredded lettuce evenly over the dressing, pressing it down gently to create a compact layer about 1 inch thick. The lettuce is the bulk of the salad, so use all 8 cups.
-
Next, layer the diced bell pepper in an even layer over the lettuce. Then add the diced celery in a single even layer. Then the shredded carrots. Then the sliced red onion, spreading it out so it’s distributed evenly rather than clustered. Then the diced tomatoes. Then the thawed peas.
-
Spread another thin layer of dressing (about 2 to 3 tablespoons) over the peas to create moisture separation between layers. This step prevents the greens below from getting too wet while adding flavor throughout.
-
Now add the crumbled bacon, sprinkle the shredded cheddar cheese evenly over it, and top with the chopped hard-boiled eggs (if using).
Advertisements -
Finally, top the entire salad with the sunflower seeds or nuts, distributing them evenly. This top layer will stay crunchy because it’s not in direct contact with the dressing below.
-
Cover the salad loosely with plastic wrap (the cover keeps it fresh without crushing the top layer) and refrigerate for at least 2 hours, and up to 24 hours, before serving. The salad will actually taste better after a few hours as the flavors meld.
Serving:
- Remove the plastic wrap and bring the salad to the table directly in the glass dish—the layers are part of the appeal, and this eliminates extra dishes. Toss it gently with two large spoons just before serving, combining all the layers so each spoonful has a bit of everything. If you’re transporting it to a potluck, bring it in the covered glass dish and toss it just before serving (or have someone at the event toss it for you).
Common Mistakes That Ruin a Layered Salad
The most frequent mistake people make is using soft, delicate lettuce. Butter lettuce, spring greens, and spinach are wonderful in many salads, but they wilt almost immediately when they come into contact with the creamy dressing and the weight of vegetables above them. By the time the salad is served, you’ve got a mushy pile rather than distinct layers. Stick with sturdy iceberg or romaine lettuce, and your salad will maintain its structure.
Another common error is not draining vegetables thoroughly. Tomatoes especially release water as they sit, and excess moisture dilutes the dressing and makes the bottom layers soggy. If you’re using tomatoes, seed them (cut them in half and squeeze out the seeds and extra juice) and let the diced pieces sit in a colander for a few minutes before layering them.
Skipping the bottom layer of dressing is a mistake that leads to a dry salad. That first thin layer of dressing creates a protective barrier between the glass and the vegetables, keeping the bottom layers crisp and flavorful. It’s not wasted—it’s essential.
Some people make their dressing too thin or too thick. Too-thin dressing won’t coat and protect vegetables; too-thick dressing makes the salad feel heavy and mayo-forward. The dressing should be pourable but still have enough body to coat a spoon. If it’s too thick, whisk in a tablespoon or two of milk or a bit more vinegar until it’s the consistency of soft-serve ice cream.
Layering ingredients unevenly means some bites will have all lettuce while others are all peppers. Take the time to distribute each ingredient in an even layer—you don’t need perfectly uniform thickness, but aim for consistency. Rough, chunky vegetables also eat poorly; aim for consistent, bite-sized pieces.
Finally, not refrigerating long enough means the flavors haven’t melded and the salad tastes more like individual ingredients than a cohesive dish. Give it at least 2 hours—overnight is actually ideal. The flavors develop and deepen considerably overnight.
Storage and Make-Ahead Strategies
A layered salad is one of the most forgiving make-ahead dishes you can prepare. The dressing actually protects the vegetables from oxidizing, so the salad gets better, not worse, with time.
Prepare it up to 24 hours in advance. Assemble the entire salad (including the top layer of nuts or croutons), cover it loosely with plastic wrap, and refrigerate. The vegetables will absorb the dressing flavors and become more cohesive as they sit. The only component that might lose crunch if exposed to the dressing for 24 hours is bacon bits or delicate crackers, so keep those separate and sprinkle them on just before serving if you’re worried.
Store it in the refrigerator for up to 2 days after assembly. It’ll taste fine on the second day, though the lettuce may be slightly softer. If you’ve used especially fragile lettuces, consume it within 24 hours for optimal texture.
Individual components can be prepped in advance. Make the dressing up to 3 days ahead. Cook and crumble the bacon up to 2 days ahead. Chop and store vegetables in airtight containers for up to 1 day (they’ll start to release moisture and soften after that). Hard-boil the eggs up to 2 days ahead. This means you can do most of the work the day before and simply assemble the salad in 15 minutes on the day you need it.
Transport to a potluck easily. Pack the uncovered salad in its glass dish, place it on a flat surface in your car so it doesn’t tip, and you’re done. It doesn’t need to stay cold during transport if you’re traveling less than an hour. If you’re going longer, pack a small cooler with a few ice packs around the glass dish. The salad is sturdy enough to handle being jostled and doesn’t require keeping it at a precise temperature.
For leftover salad, store it covered in the refrigerator for up to 2 days. By the second day, it’ll be noticeably softer and more blended, which some people actually prefer—it’s almost like a salad more classic side dish at that point. If you want to perk up the texture on day two, add fresh nuts or crispy chow mein noodles and a dollop of fresh dressing on top right before serving.
Delicious Variations Worth Trying
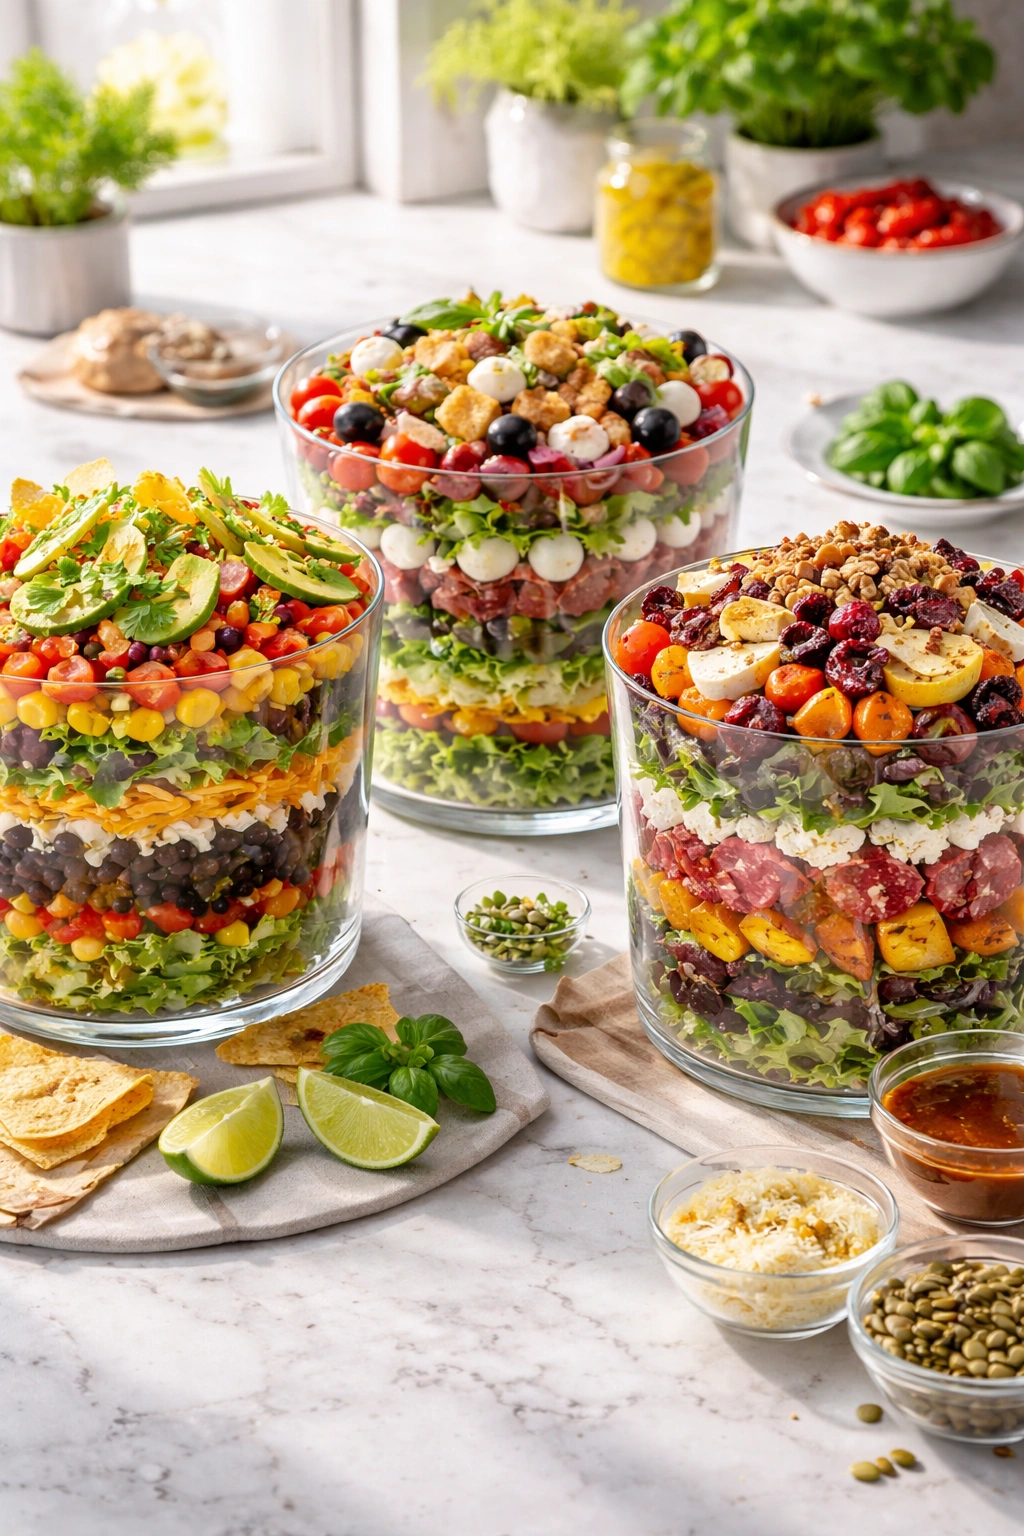
The basic formula is incredibly flexible, and you can adapt it to match the season, the occasion, or ingredients you have on hand.
The Southwestern Layered Salad swaps out some vegetables for black beans, corn, cherry tomatoes, diced red bell pepper, diced red onion, and shredded Monterey Jack cheese. Make the dressing with half mayo and half sour cream, mix in a tablespoon of lime juice instead of vinegar, add cumin and chili powder, and top with crispy tortilla strips and fresh cilantro. This version pairs beautifully with taco night or any Mexican-themed gathering.
The Italian Garden Salad uses grape tomatoes, diced zucchini, sliced red onion, diced bell peppers, fresh mozzarella balls (add just before serving so they don’t get soggy), crispy pancetta instead of bacon, and basil. Make the dressing with equal parts mayo and sour cream, substitute balsamic vinegar for white vinegar, and add Italian seasoning and a touch of garlic. Top with toasted pine nuts or breadcrumbs fried in olive oil.
The Harvest Salad incorporates dried cranberries, diced apple (toss it with a bit of lemon juice to prevent browning), shredded purple cabbage, diced red beets (use canned beets to avoid staining everything), pecans, and crumbled goat cheese. The dressing is the same mayo-sour cream base but with apple cider vinegar instead of white vinegar and a touch of Dijon mustard for complexity.
The Greek Salad Version uses diced cucumbers, diced tomatoes, thinly sliced red onion, diced red and yellow bell peppers, Kalamata olives, chickpeas, feta cheese, and fresh dill. The dressing combines mayo and Greek yogurt, swaps white vinegar for red wine vinegar, and adds oregano and lemon juice instead of sugar. Top with crispy chickpeas or toasted pita chips.
The Creamy Dill Pickle Version (yes, really) uses shredded lettuce, diced cucumbers, diced dill pickles, shredded cheddar, crumbled bacon, hard-boiled eggs, and chopped fresh dill. The dressing is mostly mayo with sour cream, a bit of the pickle juice for tang, no vinegar, and a touch of sugar. Top with crispy chow mein noodles. This is weirdly addictive for people who love pickle flavor.
The Protein-Packed Version adds a full cup of diced cooked chicken or shredded turkey, making it substantial enough to be a lunch on its own rather than a side. Add all the standard vegetables but increase the cheese and nuts slightly to balance the extra protein.
Dietary Adaptations for Every Guest
Making this salad accessible to people with different dietary needs is straightforward, and you don’t need multiple versions.
For a vegetarian version, simply omit the bacon and add an extra ½ cup of chopped hard-boiled eggs, or use crispy fried chickpeas as your protein element. The salad is already mostly vegetables, so this is easy.
For a vegan adaptation, replace the sour cream with coconut cream or cashew cream, use vegan mayo, skip the eggs and cheese, and top with roasted chickpeas, toasted sunflower seeds, and nutritional yeast for a savory note. The salad will taste entirely different, but it’ll be delicious.
For a dairy-free version, use vegan mayo and dairy-free sour cream (or skip the sour cream and use all mayo), skip the cheese, and use a non-dairy-based protein like beans or tofu. Toasted sunflower seeds and nuts provide richness.
For a gluten-free version, skip the bacon if it contains gluten (check the label), avoid crispy chow mein noodles (unless they’re labeled gluten-free), and use gluten-free nuts or seeds for the top. Everything else in the salad is naturally gluten-free. If you’re bringing this to a gathering where gluten-free guests will be present, use a clearly labeled serving spoon.
For a lower-carb or keto-friendly version, keep all the vegetables, protein, cheese, and nuts, but reduce the amount of peas (which are higher carb) or omit them entirely, and use a smaller amount of any sweet-tasting dressing. The rest of the salad is already low in carbs.
The Science Behind Why Layering Actually Works

There’s a practical reason why layered salads have been popular for so long: the structure genuinely preserves freshness better than a tossed salad.
When vegetables are cut and mixed with dressing immediately, the cut surfaces are exposed to oxygen, which begins the oxidation process that causes browning and nutrient loss. The acid in the dressing (vinegar) and the oil (mayonnaise) also begin to penetrate the vegetable cells immediately, softening them. A tossed salad made hours ahead will inevitably be sad and wilted.
A layered salad solves this by creating barriers. The bottom layer of dressing acts as an anaerobic seal, protecting vegetables from oxygen. The lettuce layer insulates the more delicate vegetables from direct contact with moisture. The solid vegetables (carrots, celery, peppers) that sit closest to the dressing are sturdy enough to absorb moisture without becoming mushy, so they essentially sacrifice themselves to protect the more tender lettuce above them.
The mayonnaise is crucial to this system. Unlike a vinaigrette, which is just oil and acid, mayonnaise is an emulsion—oil dispersed in egg yolk—and it clings to vegetable surfaces, creating a moisture barrier. This is why an oil-and-vinegar salad dressing would fail spectacularly as a layered salad dressing: it would separate and slide off the vegetables, leaving them exposed to air and each other.
The sugar in the dressing also serves a purpose. Beyond adding flavor, sugar draws moisture out of the vegetables gradually through osmosis, preventing the vegetables from releasing excess water into the bottom of the salad bowl all at once. This keeps the consistency balanced over hours.
Dressing Your Layered Salad: Ratios and Flavor Balancing
The dressing is what transforms a layered salad from a collection of vegetables into a cohesive dish, so getting it right matters.
The basic ratio is 3 parts mayo to 1 part sour cream. This creates a creamy, slightly tangy dressing that’s not too heavy. If you prefer more tang and a lighter mouthfeel, use equal parts mayo and sour cream, or even 1 part mayo to 1 part Greek yogurt (the yogurt thins it out and adds brightness).
The acid is crucial—typically white vinegar or apple cider vinegar, about 2 tablespoons per 1½ cups of mayo-sour cream base. This prevents the dressing from tasting flat and one-dimensional. Some people use lemon juice instead of vinegar; this works but tastes less pickle-like and more bright and fresh.
The sugar (about 1 tablespoon per batch) balances the tang and adds a subtle sweetness that enhances vegetables. Don’t skip this; it’s not meant to make the dressing sweet but rather to round out the flavors.
Salt and pepper are essential for bringing all the flavors forward. Taste as you go and add more than you think you need—dressing always tastes under-seasoned until you hit the right threshold.
Garlic powder or fresh minced garlic adds savory depth. Fresh garlic is more pungent; garlic powder is subtler and more stable over time. For a potluck salad that’ll sit for hours, garlic powder is your friend because it won’t become sharp or harsh as the dressing sits.
Some people add a touch of sugar and vinegar together, creating almost a sweet-and-sour angle that’s particularly good with lighter vegetables like cucumbers and radishes. Others add a dash of Dijon mustard or dry mustard powder for sharpness. Experiment within the framework and find what you love.
Common Pairing and Serving Strategies
A layered salad is substantial enough to work as a main course contribution at a potluck, but it also works beautifully alongside other dishes.
It pairs exceptionally well with grilled meats—the creamy, cool salad is a perfect counterpoint to smoky, charred flavors. Bring it to a barbecue where grilled chicken, burgers, or ribs are the main event.
It works as a classic potluck side alongside roasted vegetables, baked beans, or mac and cheese. The crisp, fresh elements balance heavier sides.
For a lunch or picnic, it’s sturdy enough to eat straight from the serving dish with a fork, and it doesn’t require keeping hot. Bring it, transport it, and serve it as-is.
It’s excellent at holiday gatherings where it can sit on a buffet table for hours without deteriorating. Thanksgiving, Christmas, Easter, graduation parties—it works for all of them.
For a casual weeknight dinner, you can scale the recipe in half and make it in a smaller bowl, serving it fresh from your fridge. It’s a complete meal if you include the protein element.
Some people serve individual portions—instead of bringing a full 9×13-inch salad, you could assemble it in mason jars or small glasses, with the dressing on the bottom and layers building up to the nuts on top. You can give one to each person, and they shake it in the jar to combine everything. This is a fun variation for meal prep or individual portions.
Final Thoughts
A layered salad is the kind of dish that looks far more complicated and impressive than it actually is. There’s no special technique, no fancy equipment, and no culinary training required. What makes it exceptional is understanding the why behind each layer and being intentional about assembly.
The magic isn’t in any single ingredient—it’s in respecting the engineering of the structure. Sturdy vegetables on the bottom, gentle greens in the middle, crunchy texture on top. A protective layer of dressing at the base. Even distribution so every bite has balance. Enough time in the refrigerator for flavors to develop and marry.
Bring this to your next gathering and watch it disappear. People will ask for the recipe not because the ingredients are exotic or expensive—they’re not—but because you’ve managed to make something both beautiful and genuinely delicious. That’s the kind of contribution that people remember, and the kind of dish you’ll find yourself making again and again.