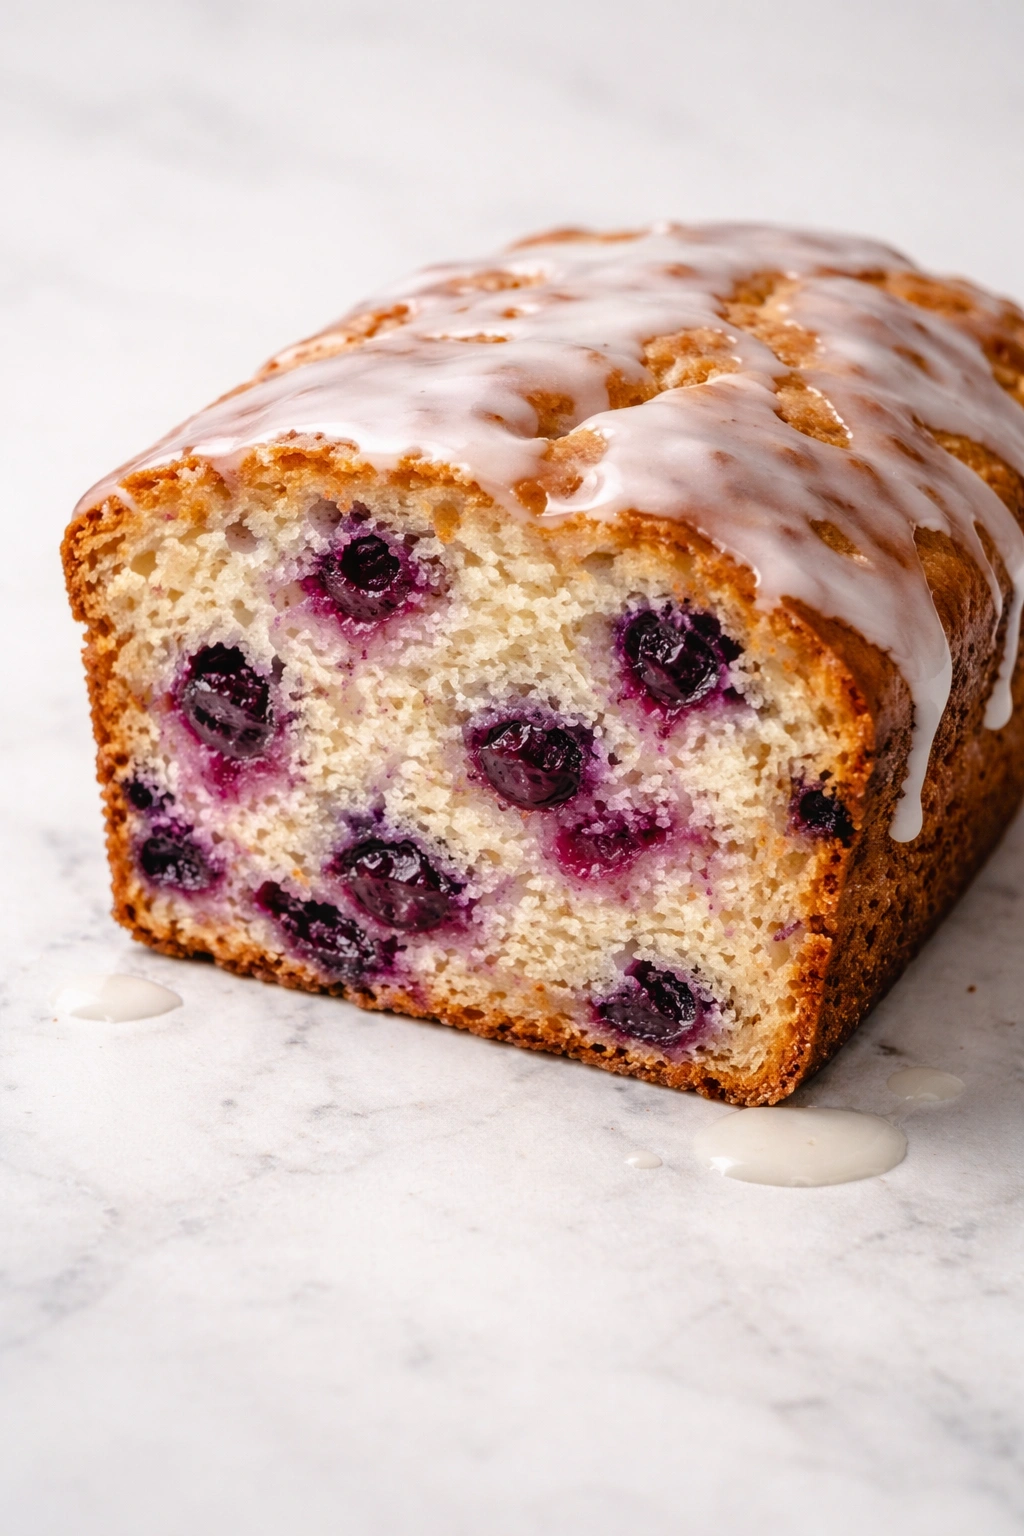
There’s something genuinely comforting about slicing into warm blueberry bread and discovering pockets of jammy berries throughout the tender crumb. The way those burst and stain the bread with deep purple juice, the slight tang of fresh fruit against the sweet, buttery structure—it’s the kind of simple pleasure that tastes like someone took real care. And when you top it with a silky sweet glaze that sets into a delicate shell and then softens ever so slightly into the warm bread, you’ve moved past “nice breakfast” into something people will actually ask you to make again.
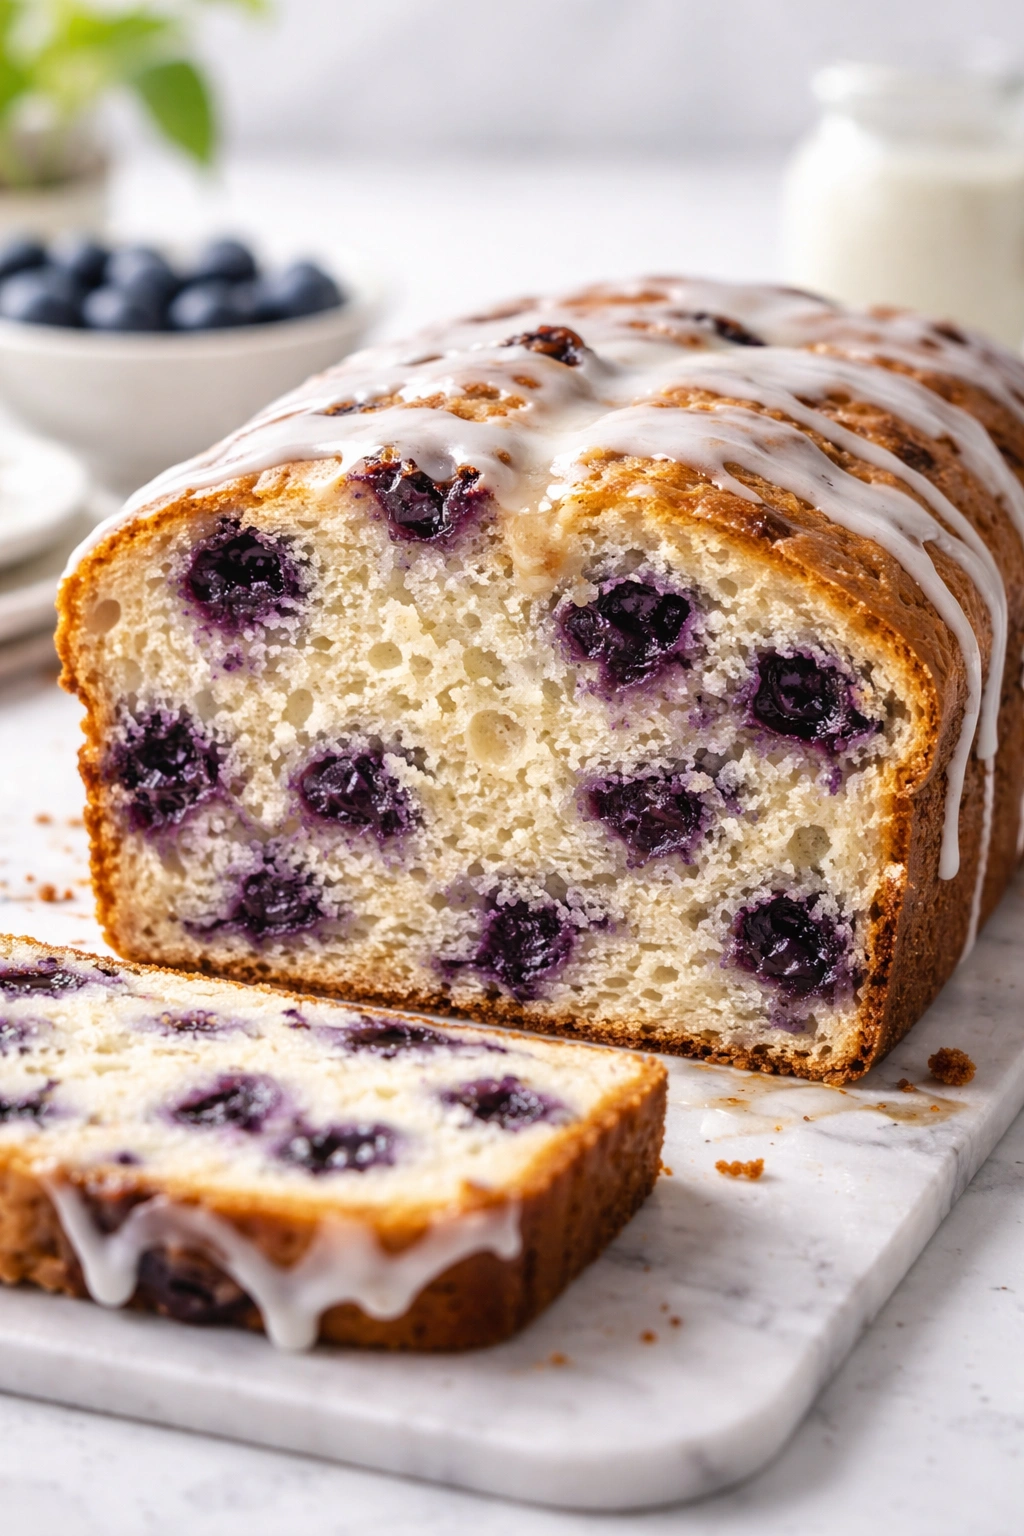
This isn’t one of those blueberry muffin recipes dressed up as bread. Real blueberry bread has a denser, more substantial crumb than a muffin, closer to a pound cake with personality. It should hold up to slicing, layer into toast without crumbling apart, and taste even better the next day when the flavors meld and the texture settles. The glaze isn’t an afterthought either—it’s the polished finish that makes this look bakery-quality and tastes bright enough to cut through the bread’s richness without overwhelming it.
What makes this particular version work is a combination of technique choices that most home bakers overlook. You’re going to use both butter and a touch of neutral oil to keep the crumb tender and prevent drying. You’ll coat your blueberries in a bit of flour before folding them in, which keeps them suspended throughout the bread instead of sinking to the bottom. And you’ll nail the glaze texture—not too thick, not too thin—so it clings beautifully and firms up just enough without becoming crunchy or hard.
Let me walk you through exactly how to make blueberry bread that tastes like the bakery version, but better because you made it yourself.
Why Blueberry Bread With Glaze Stands Out
Blueberry bread occupies a special place in the quick-bread universe. Unlike muffins, which are meant to be casual and portable, good blueberry bread has an elegant structure you can serve at a brunch table. Unlike traditional pound cakes, it’s lighter and more approachable. The glaze adds a visual polish and a sweet-tart contrast that makes every slice feel intentional and finished.
The magic is partly in the fruit itself. Fresh blueberries release their juice during baking, which adds moisture and subtle flavor to the entire loaf. Some of the berries burst completely and stain the crumb with their color and tartness. Others stay mostly intact and provide little bursts of intense blueberry flavor when you bite into them. That combination of distributed flavor and texture pockets is what keeps people coming back for another slice.
A good glaze here serves multiple purposes. It provides sweetness that balances the tartness of the berries, creates a beautiful finished appearance, and seals the top of the bread to keep it fresher longer. The best glazes are thin enough to drip slightly down the sides (which looks professional and feels indulgent) but thick enough that they don’t pool around the base like a puddle.
This bread also improves over time, which is a huge advantage. Fresh out of the oven, it’s warm and slightly tender. By the next day, the flavors have settled and deepened, the texture firms up slightly (in a good way), and it toasts beautifully. It’s perfect for breakfast, a mid-afternoon snack, or even a light dessert. Wrapped properly, it stays fresh and moist for several days.
The Science Behind Tender, Fluffy Blueberry Bread
The structure of blueberry bread depends on understanding how fat, moisture, and gluten development work together. Too much gluten development makes bread tough and dense. Too little leaves you with a crumbly, weak structure that falls apart when you slice it. The goal is a balanced crumb that’s moist and tender but holds together with structure.
Fat plays the biggest role here. Butter provides flavor and richness. Oil—a neutral one like canola or vegetable oil—adds moisture and keeps the crumb tender even after the bread cools and sets. Eggs bind everything together and add structure, but they also contribute moisture and richness. That combination of fat and eggs is what gives really good quick bread its almost cake-like texture.
The leavening is straightforward but critical. You’re using baking soda and baking powder—both chemical leaveners that produce carbon dioxide gas during mixing and baking. That gas is what creates the light, airy crumb. Baking soda needs acid to activate (which you get from buttermilk and lemon juice), while baking powder activates with moisture and heat. Using both gives you reliable, even rise without any metallic aftertaste.
Blueberries themselves add moisture to the batter. As they bake, they release juice that gets absorbed into the surrounding crumb. Some of this juice adds flavor and color. Some of it adds moisture, which you need to account for by not making the batter too wet to begin with. That’s also why coating the berries in flour helps—it creates a tiny barrier that slows down juice release and helps keep berries suspended.
Choosing the Best Blueberries for Your Bread
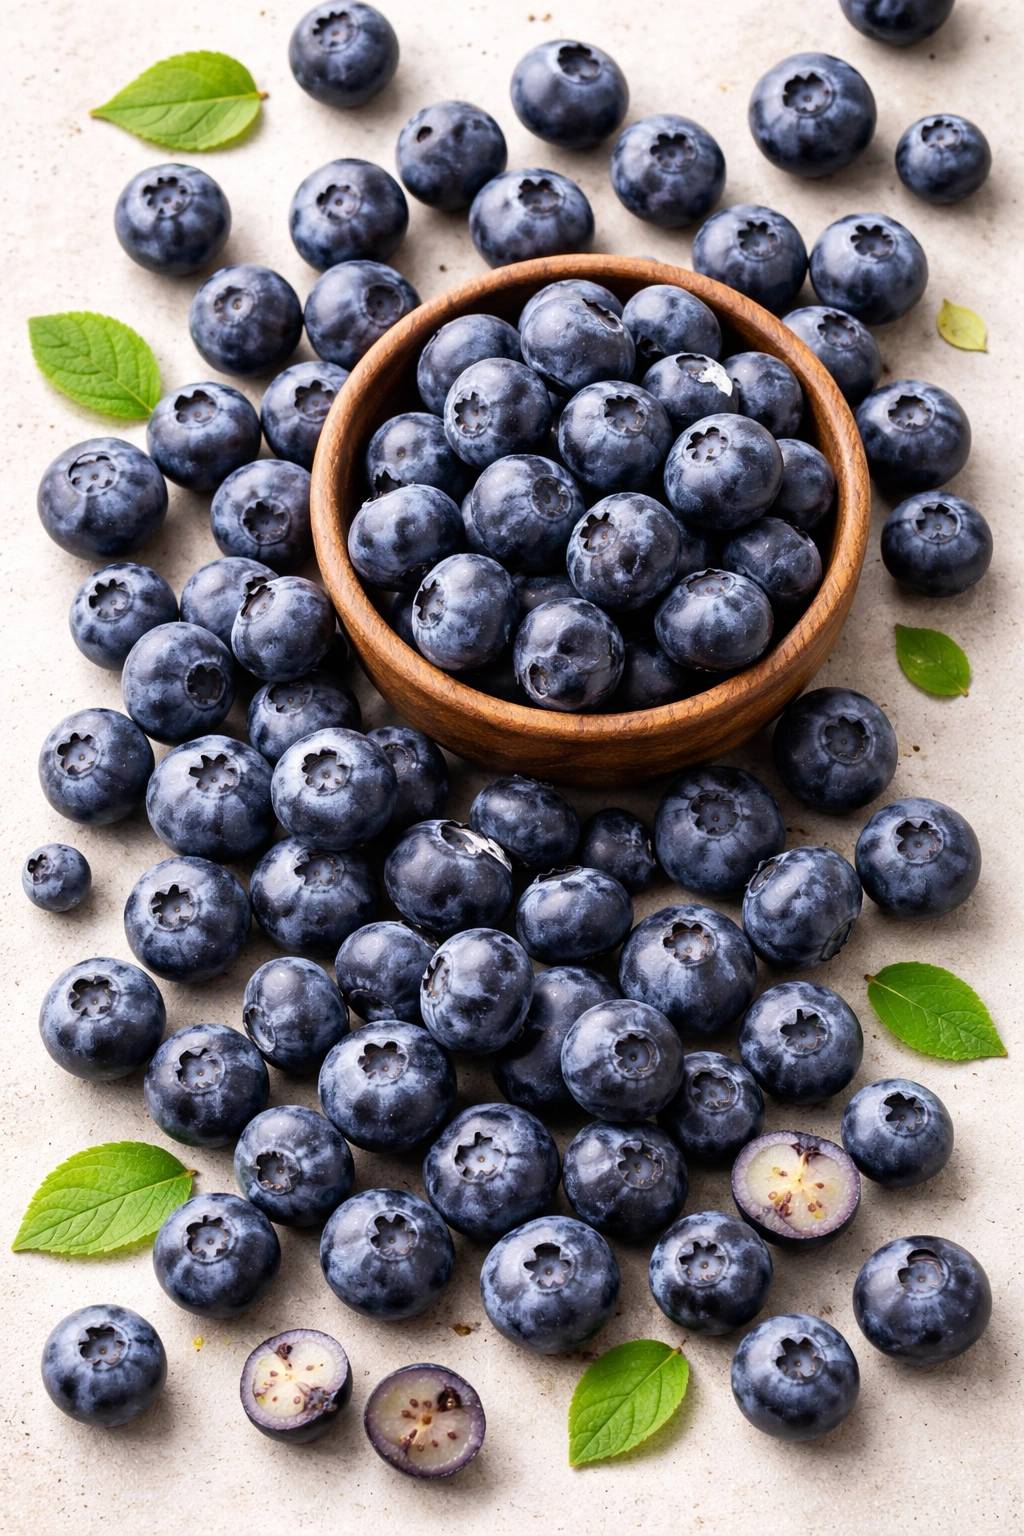
Fresh blueberries are always the first choice, but the reality is that they vary wildly in quality depending on where and when you buy them. Look for berries that are firm, deeply colored, and uniform in size. If they’re mushy or leaking juice in the container, they’re past their peak. If they’re pale or inconsistent in color, they probably don’t have enough flavor yet.
Local blueberries, when you can get them, are typically superior to imported berries that have traveled long distances. They’ve usually been picked riper and haven’t spent days in transit. If you’re buying from a farmers market, ask the grower when they were picked. Same-day or next-day berries will have better flavor and texture than berries that have been in the store for a week.
Size matters too. Smaller berries tend to have more intense flavor than huge, watery ones. They also distribute more evenly through the bread since you’re getting more individual berries for your portion. If the blueberries you find are enormous, they’ll still work fine, but you might want to cut some of them in half so you get more pockets of berry throughout the loaf.
Frozen blueberries are a legitimate alternative when fresh ones aren’t good. In fact, frozen berries sometimes work better in baked goods because they contain less water than some of the oversized fresh berries sold in winter. Don’t thaw them before adding to the batter—toss them directly into the dry ingredients while still frozen. They’ll stay more intact during baking if they go straight from cold to heat, and you’ll avoid juice leaking into the batter, which can make it too wet.
Avoid pre-made blueberry jam or filling for this recipe. You want the bright, fresh flavor of actual berries, and jam can make your bread overly sweet and mushy. This is a recipe where starting with quality fruit makes an immediate, noticeable difference.
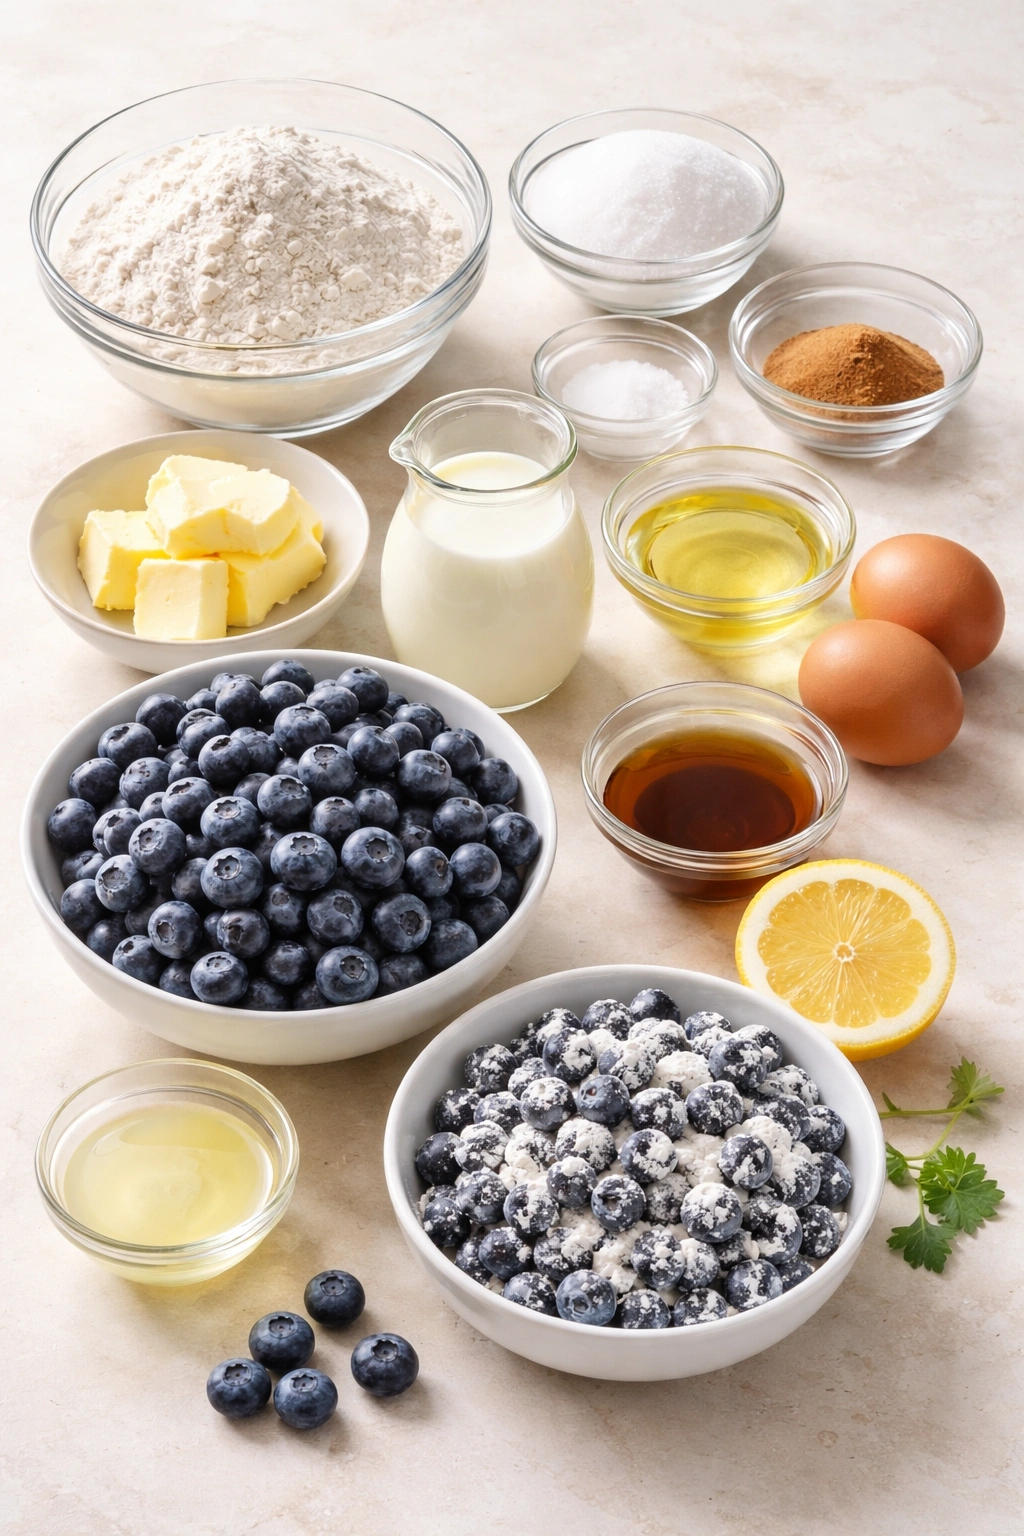
What You’ll Need: Complete Ingredient List
Yield: One 9×5-inch loaf (12-14 slices)
Prep Time: 15 minutes
Cook Time: 55-65 minutes
Total Time: 1 hour 20 minutes (plus cooling)
Difficulty: Beginner — The technique is straightforward, no special equipment required, and the steps are easy to follow even on your first attempt.
For the Bread:
- 2 cups all-purpose flour
- 1½ teaspoons baking powder
- ½ teaspoon baking soda
- ½ teaspoon fine sea salt
- ¼ teaspoon ground cinnamon (optional but recommended)
- 6 tablespoons (¾ stick) unsalted butter, softened to room temperature
- 3 tablespoons neutral oil (canola or vegetable oil)
- ¾ cup granulated sugar
- 2 large eggs, room temperature
- ½ cup buttermilk (or whole milk with 1½ teaspoons white vinegar stirred in and left to sit 5 minutes)
- 2 tablespoons fresh lemon juice
- 1 teaspoon pure vanilla extract
- 1½ cups fresh or frozen blueberries (do not thaw if frozen)
- 1 tablespoon all-purpose flour (for coating berries)
For the Sweet Glaze:
- 1½ cups powdered sugar, sifted
- 3 tablespoons whole milk or heavy cream
- 1½ teaspoons fresh lemon juice
- ½ teaspoon pure vanilla extract
- Pinch of fine sea salt
Step-by-Step Baking Instructions
Prepare Your Pan and Preheat:
-
Preheat the oven to 375°F (190°C) and position the rack in the center of the oven. This middle position ensures even baking with no burnt bottom or underbaked top.
-
Grease a 9×5-inch loaf pan thoroughly with softened butter or nonstick spray, making sure to coat the bottom, sides, and corners. Line the bottom with a strip of parchment paper, leaving about 1 inch of overhang on each of the long sides—this makes lifting the finished bread out effortless and prevents any sticking.
Mix the Dry Ingredients:
- In a medium bowl, whisk together the flour, baking powder, baking soda, salt, and cinnamon (if using) until completely combined. Whisking incorporates air and ensures the leavening is distributed evenly throughout the flour. Set this bowl aside.
Create the Wet Base:
-
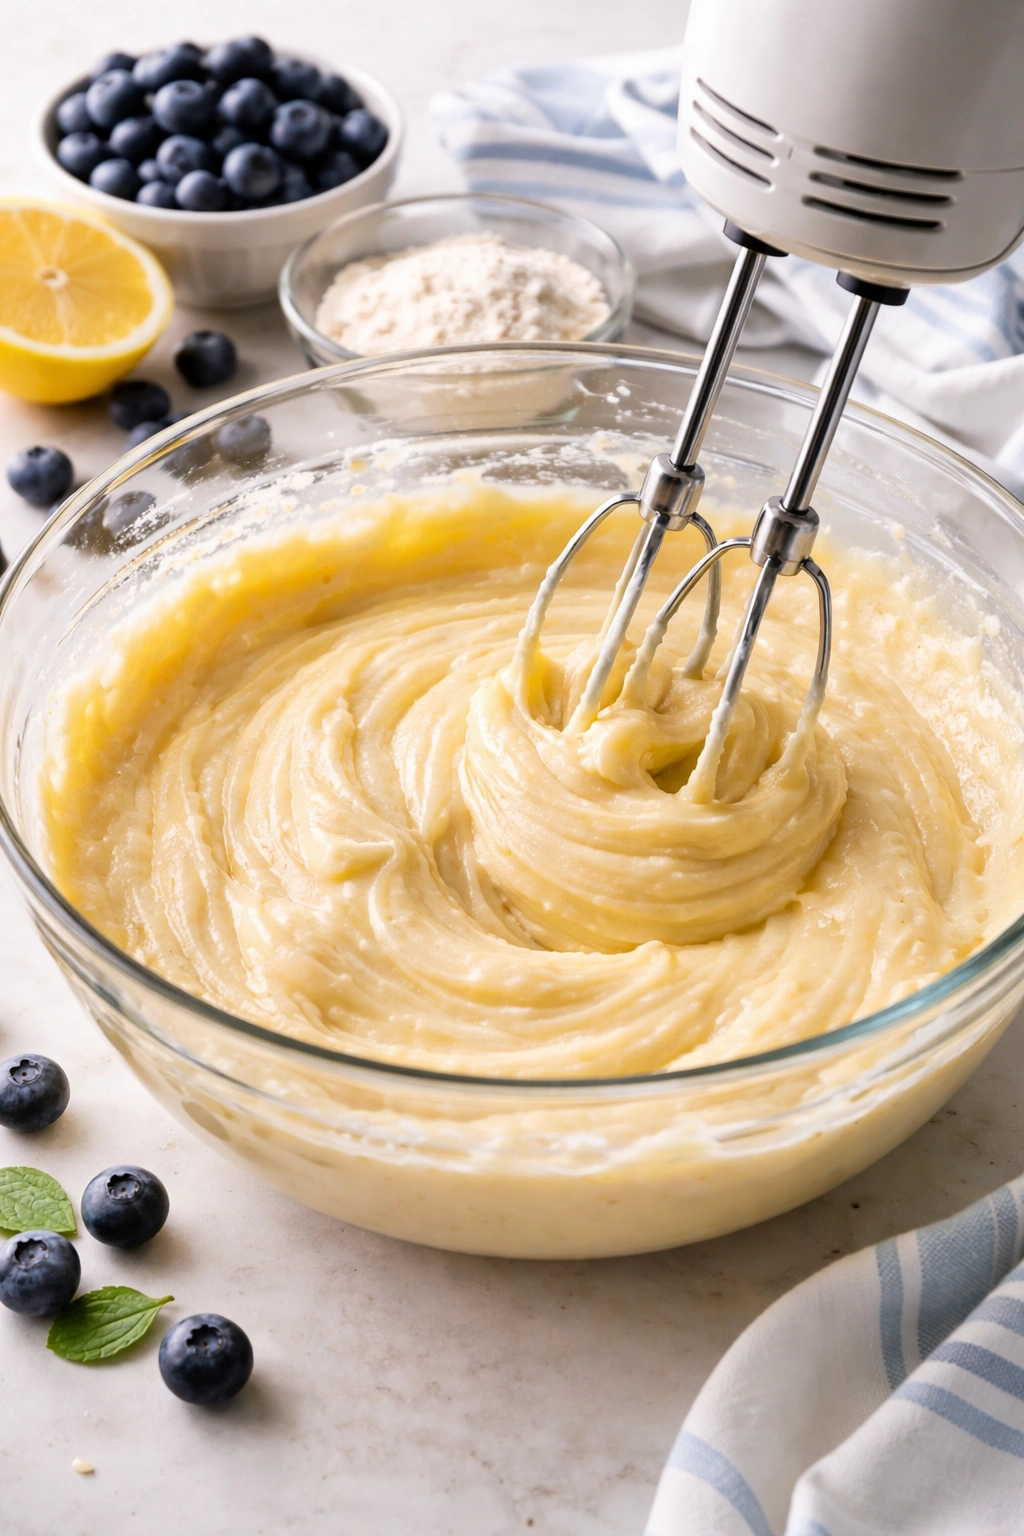
In a large bowl, using a hand mixer on medium speed (or a stand mixer fitted with the paddle attachment), beat the softened butter and oil together for about 1 minute until they’re combined and creamy.
-
Add the sugar to the butter-oil mixture and beat for 2-3 minutes on medium speed. The mixture should become pale, noticeably fluffy, and increased in volume—this is creaming, and it incorporates air that will help your bread rise. Scrape down the sides of the bowl once or twice during this process.
-
Add the eggs one at a time, beating for about 30 seconds after each egg is added. After both eggs are in, the mixture might look slightly curdled or grainy—this is completely normal and will come together as soon as you add the flour. Don’t worry if it doesn’t look perfectly smooth at this stage.
-
Reduce the mixer speed to low. Add the buttermilk, lemon juice, and vanilla extract to the egg mixture and mix just until combined. The batter will look slightly separated, and that’s fine.
Combine Everything Together:
- Add the dry ingredients to the wet mixture in two additions. With the mixer on low speed, add half the flour mixture and mix just until the flour disappears—about 30 seconds. Scrape down the sides of the bowl. Add the remaining flour mixture and mix again just until combined. Do not overmix at this stage. Overmixing develops gluten, which will make your bread tough and dense instead of tender and fluffy. The batter should look smooth but not overworked.
Add the Blueberries:
-
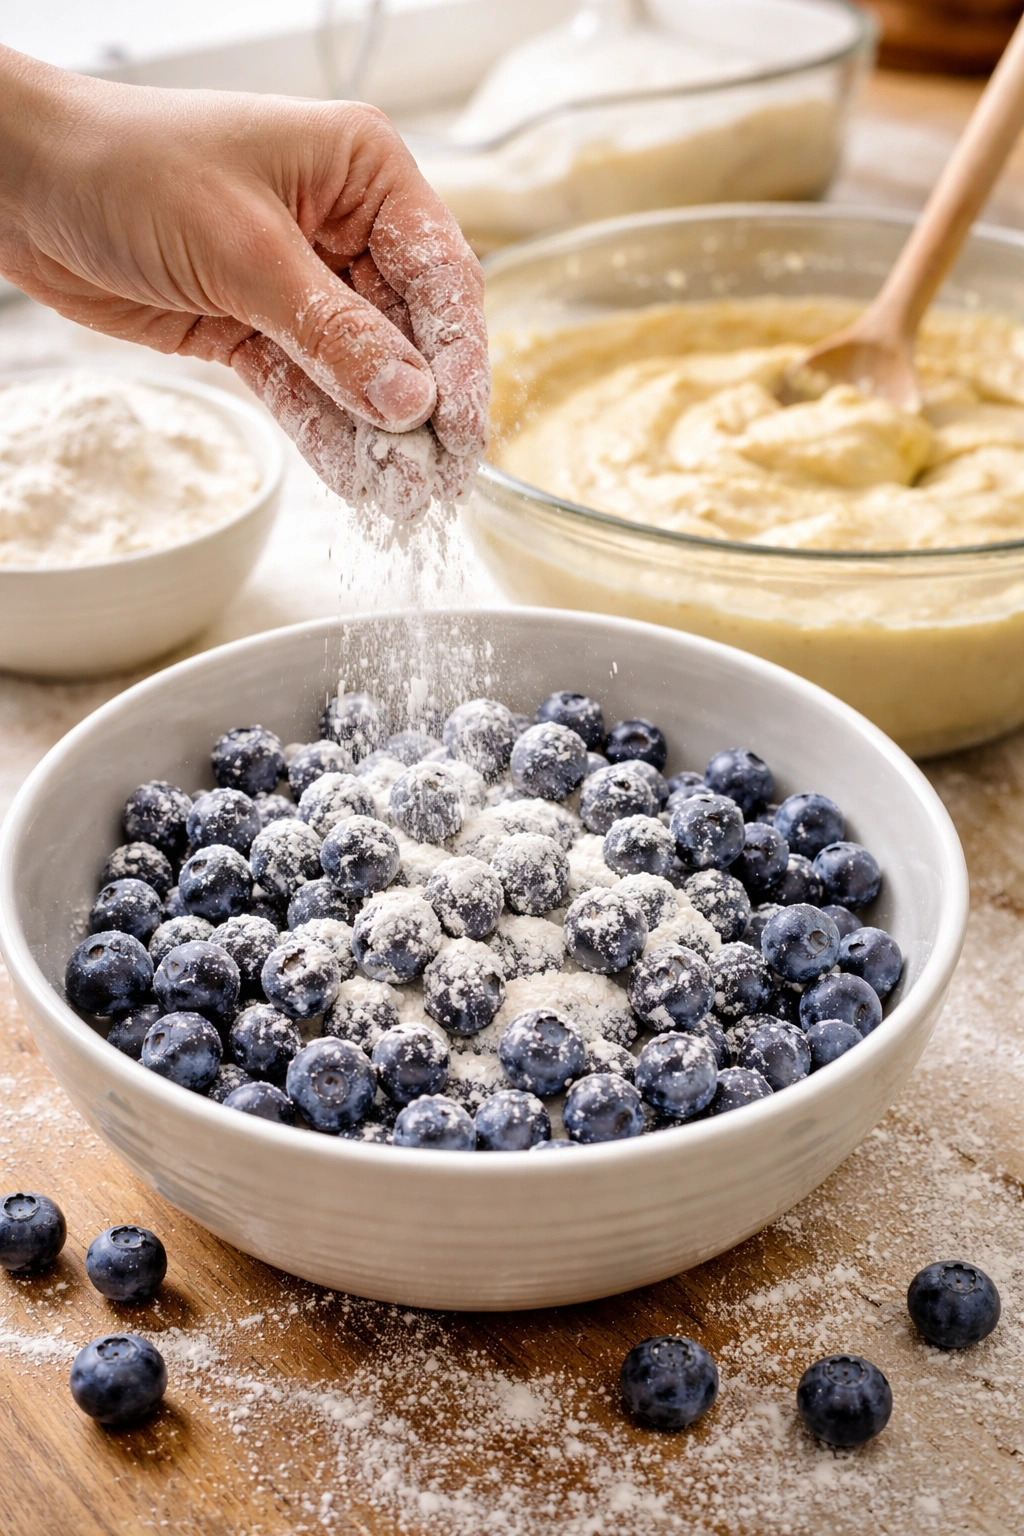
In a small bowl, toss the blueberries with the 1 tablespoon of flour. This light coating helps keep the berries suspended throughout the batter instead of sinking to the bottom. If using frozen berries, do not thaw them—add them directly to the batter while still frozen.
-
Fold the floured blueberries gently into the batter using a rubber spatula or wooden spoon. Use about 10-15 slow, careful strokes—just enough to distribute the berries evenly. Some berries will break and release juice, which is fine and adds flavor.
Bake the Bread:
-
Pour the batter into the prepared loaf pan and smooth the top gently with an offset spatula, making it as level as possible.
-
Place the pan in the preheated oven and bake for 55 to 65 minutes. The bread is done when a toothpick or cake tester inserted into the very center comes out clean or with just a few moist crumbs clinging to it. The top should be deep golden brown. If the top is browning too quickly but the center still feels soft when you gently press it, you can loosely tent the pan with foil for the final 10-15 minutes of baking.
-
Remove the bread from the oven and set the pan on a wire cooling rack. Let the bread cool in the pan for about 15 minutes. This waiting period is crucial—the bread is still setting and will tear if you try to remove it while piping hot.
-
After 15 minutes, gently run a thin knife around the inside edge of the pan to loosen the bread. Using the parchment paper overhang, carefully lift the bread out of the pan and transfer it to the wire rack to cool completely—at least 1 full hour. Never apply glaze to a warm loaf—it will melt and slide right off.
Make the Glaze:
-
While the bread cools, sift the powdered sugar into a medium bowl, breaking up any clumps. Sifting is important because it removes lumps and gives you a smooth glaze.
Advertisements -
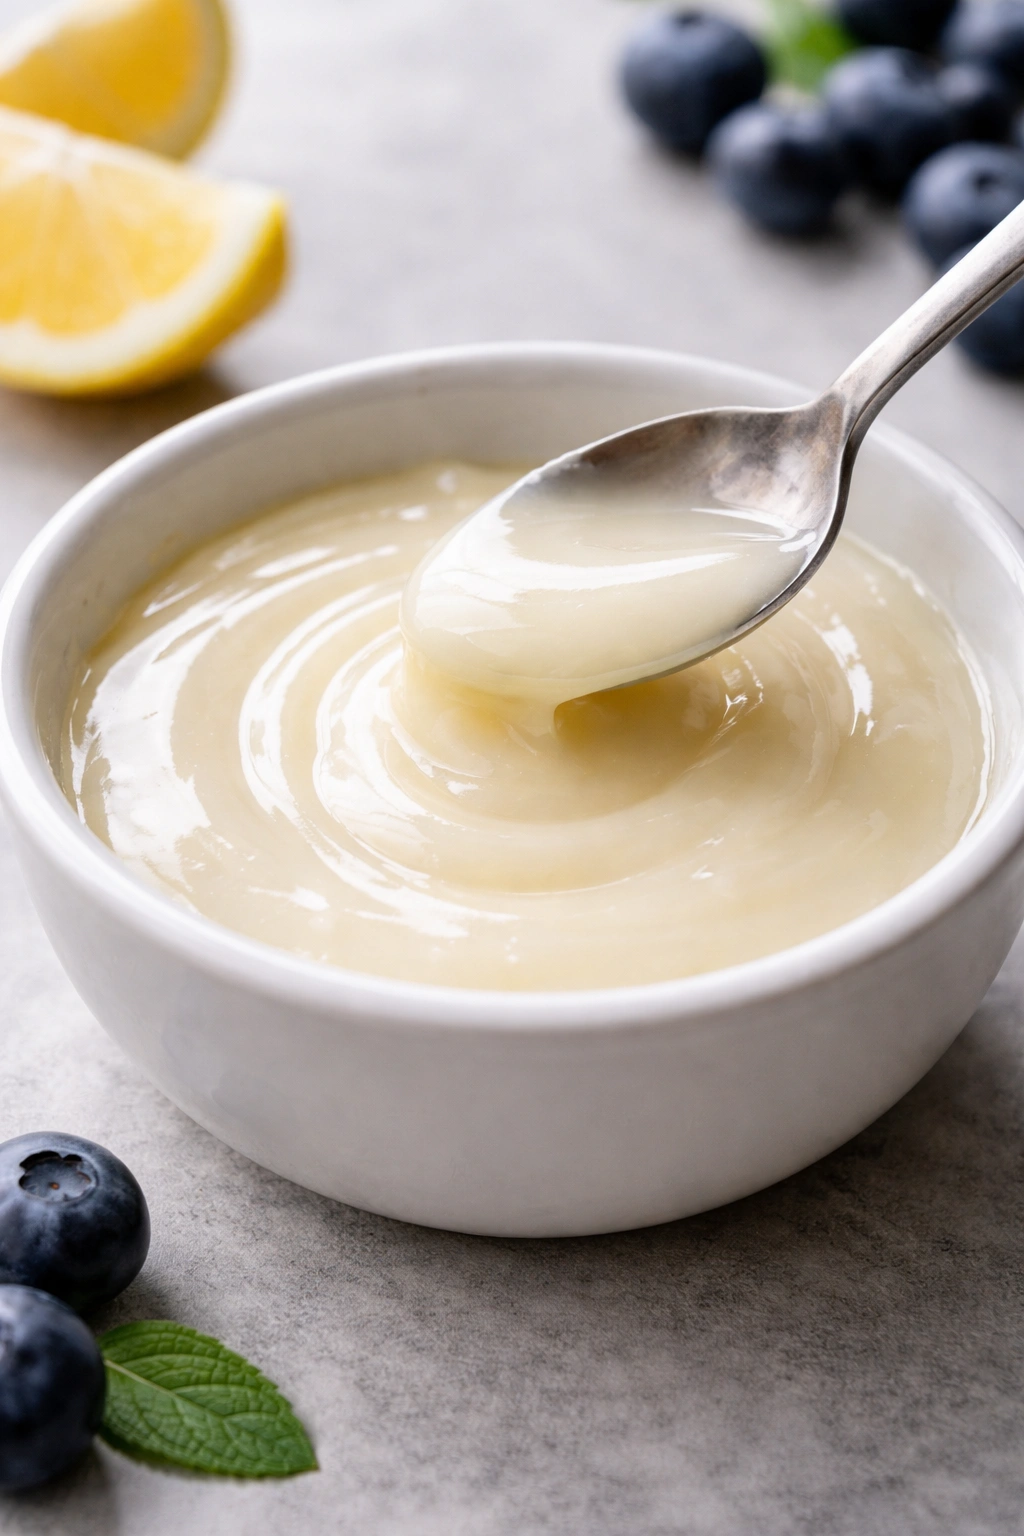
Add the milk, lemon juice, vanilla extract, and salt to the powdered sugar. Whisk until completely smooth, about 1 minute. The glaze should be thin enough to drip slowly off a spoon but thick enough that it doesn’t run off the bread immediately. If it’s too thick, add a small splash more milk (add it 1 teaspoon at a time). If it’s too thin and runny, whisk in a bit more powdered sugar.
Glaze the Bread:
-
Once the bread is completely cool (you should be able to touch it without heat), drizzle the glaze over the top, letting it pool slightly on the surface and drip down the sides. You can use a spoon, a fork, or a small offset spatula to spread it more evenly if you prefer. Work relatively quickly because the glaze will firm up as it sits.
-
Let the glaze set for about 15-20 minutes at room temperature before slicing. This firms up the glaze into a light shell that holds together beautifully.
Pro Tips to Avoid Common Blueberry Bread Mistakes
The number one mistake people make is overmixing the batter after adding the flour. When you mix too vigorously or for too long, you develop gluten strands that make the bread tough and dense instead of tender. Mix only until the dry ingredients disappear into the wet ingredients—it’s okay if there are still a few tiny flour streaks. Stop before it looks perfectly smooth and uniform.
Another common issue is sinking berries. They end up all at the bottom of the loaf, leaving the top dry and boring. Coating the berries in flour before folding them in helps tremendously, but you also need to make sure your batter isn’t too thin or wet. If you accidentally added too much liquid (extra eggs, extra buttermilk, or berries that released tons of juice), the batter is too heavy to suspend the berries. In that case, you can add a tablespoon or two more flour to thicken it slightly.
Blueberries that are still partly frozen when you add them actually help them stay suspended and remain more intact during baking. They have more structure when they go straight from freezer to hot oven. If you thaw them first, they become soft and mushy and are more likely to sink and lose their juice to the batter.
Don’t skip the resting period after baking. Pulling the bread out of the pan while it’s still hot and steaming will cause it to tear and fall apart because the crumb hasn’t set. Those 15 minutes in the pan are when the structure is finishing its setup. The bread will be more forgiving and much easier to handle once it’s had that rest.
The glaze thickness is critical too. If it’s too thick, it sits on top like icing on a cake and doesn’t have that elegant drip down the sides. If it’s too thin, it runs off completely and pools at the base. You want something in between—thick enough to cling but thin enough to have some movement. When you dip a spoon in, it should drip slowly, not immediately and not not at all.
Temperature matters for texture. Room-temperature eggs and softened butter incorporate more air when you cream them, which leads to a lighter, fluffier bread. If you use cold eggs and hard butter straight from the fridge, you’ll have a much denser loaf. Let everything sit on the counter for 30 minutes before you start.
The Perfect Sweet Glaze: Why It Matters
The glaze is what transforms good blueberry bread into something that feels intentional and polished. It’s not just decoration—it serves real purposes. The sweetness balances the tartness of the blueberries and adds another flavor dimension. The slight crispness of the set glaze provides textural contrast to the soft, tender crumb. And visually, it signals that this is something special, not just thrown together.
The lemon juice in the glaze is essential. Without it, the glaze would taste flat and cloying—just pure sugar. Lemon brightens everything, echoes the tartness of the berries, and keeps the whole thing from being one-dimensional. If you don’t like lemon, you could substitute the same amount of fresh orange juice for a different flavor profile, but some kind of acid is necessary for balance.
Powdered sugar is the right choice here instead of granulated. It dissolves instantly when whisked with liquid, creating a smooth, lump-free glaze. It also contains a tiny bit of cornstarch, which helps set the glaze to the perfect consistency—thick enough to cling but not so thick that it becomes crunchy. Granulated sugar would create a grainy, unpleasant texture.
The ratio of sugar to liquid is important. Too much sugar and the glaze becomes stiff and hard to spread. Too much liquid and it slides right off the bread and pools at the base without clinging properly. The sweet spot is when the glaze falls from a spoon in a slow, thick ribbon instead of either dripping quickly or refusing to drip at all. Whisk gradually and taste as you go—you can always add more milk, but you can’t easily remove it once it’s in.
Vanilla extract adds warmth and depth without making the glaze taste like vanilla specifically. The amount is small enough that it’s almost imperceptible, but it rounds out the flavor and makes everything taste more polished. Real vanilla extract is worth using here because imitation vanilla has a harsher taste that becomes noticeable in something as simple as glaze.
Flavor Variations to Try
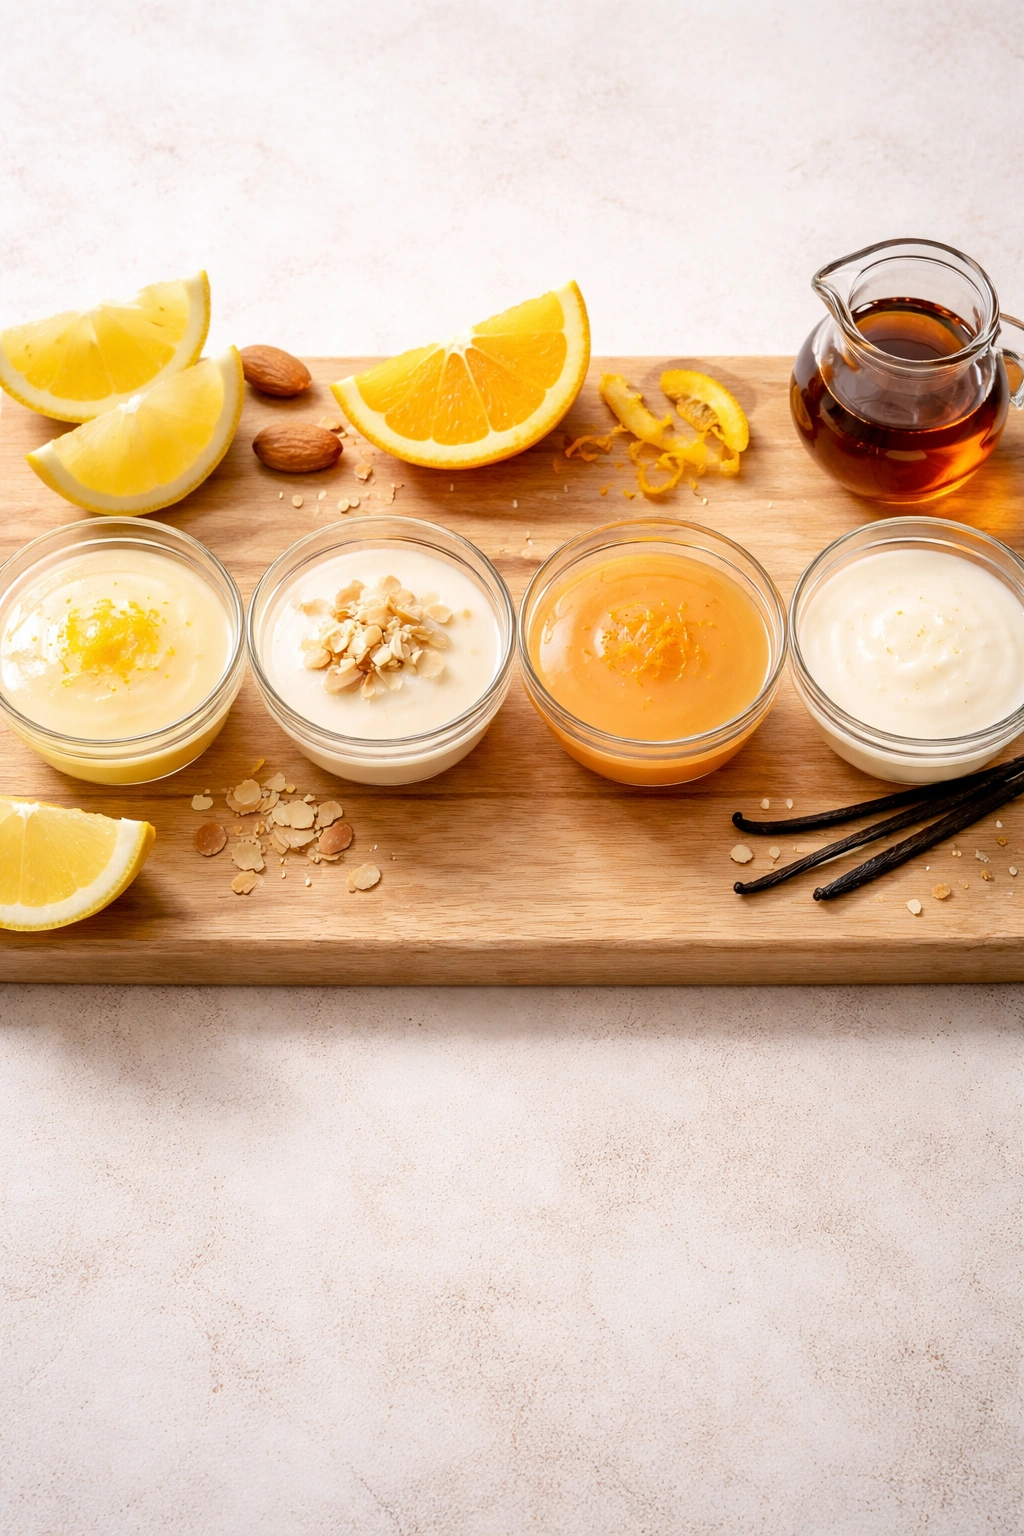
Lemon-Glazed Version: Increase the lemon juice in both the bread and the glaze to 3 tablespoons each. Add ½ teaspoon of lemon zest to the batter for extra brightness. This makes the bread more lemony and tartness-forward, which is gorgeous with blueberries.
Almond Addition: Reduce the all-purpose flour to 1¾ cups and add ¼ cup of finely ground almond flour (or almond meal). Add ½ teaspoon of almond extract to the wet ingredients. This adds a subtle nuttiness and keeps the bread moist and tender.
Streusel Topping: Instead of just glaze, you can top the unbaked batter with a cinnamon streusel. Mix ⅓ cup rolled oats, ¼ cup brown sugar, ¼ cup all-purpose flour, ¼ cup cold butter (cubed), and ½ teaspoon cinnamon until crumbly. Sprinkle over the batter before baking. You can still add glaze after baking if you want both.
Orange Glaze Variation: Substitute fresh orange juice for the lemon juice in the glaze and add ¼ teaspoon of orange zest. Reduce the vanilla to ¼ teaspoon. This gives you a brighter, more citrus-forward finish.
Maple Glaze: Use pure maple syrup instead of milk in the glaze (same amount). Add just ¼ teaspoon vanilla. The maple creates a rich, earthy sweetness that pairs beautifully with blueberries and the bread’s buttery crumb.
Cream Cheese Version: Add 2 ounces of softened cream cheese to the creaming step when mixing the butter and sugar. This adds tang and richness to the bread itself. The glaze stays the same, and the contrast between the tangy bread and sweet glaze is extraordinary.
You can also experiment with the spices. A pinch of nutmeg, cardamom, or ginger adds warmth without overwhelming the blueberries. Start with ⅛ teaspoon of any of these and taste your preference from there.
Storage and Make-Ahead Strategies
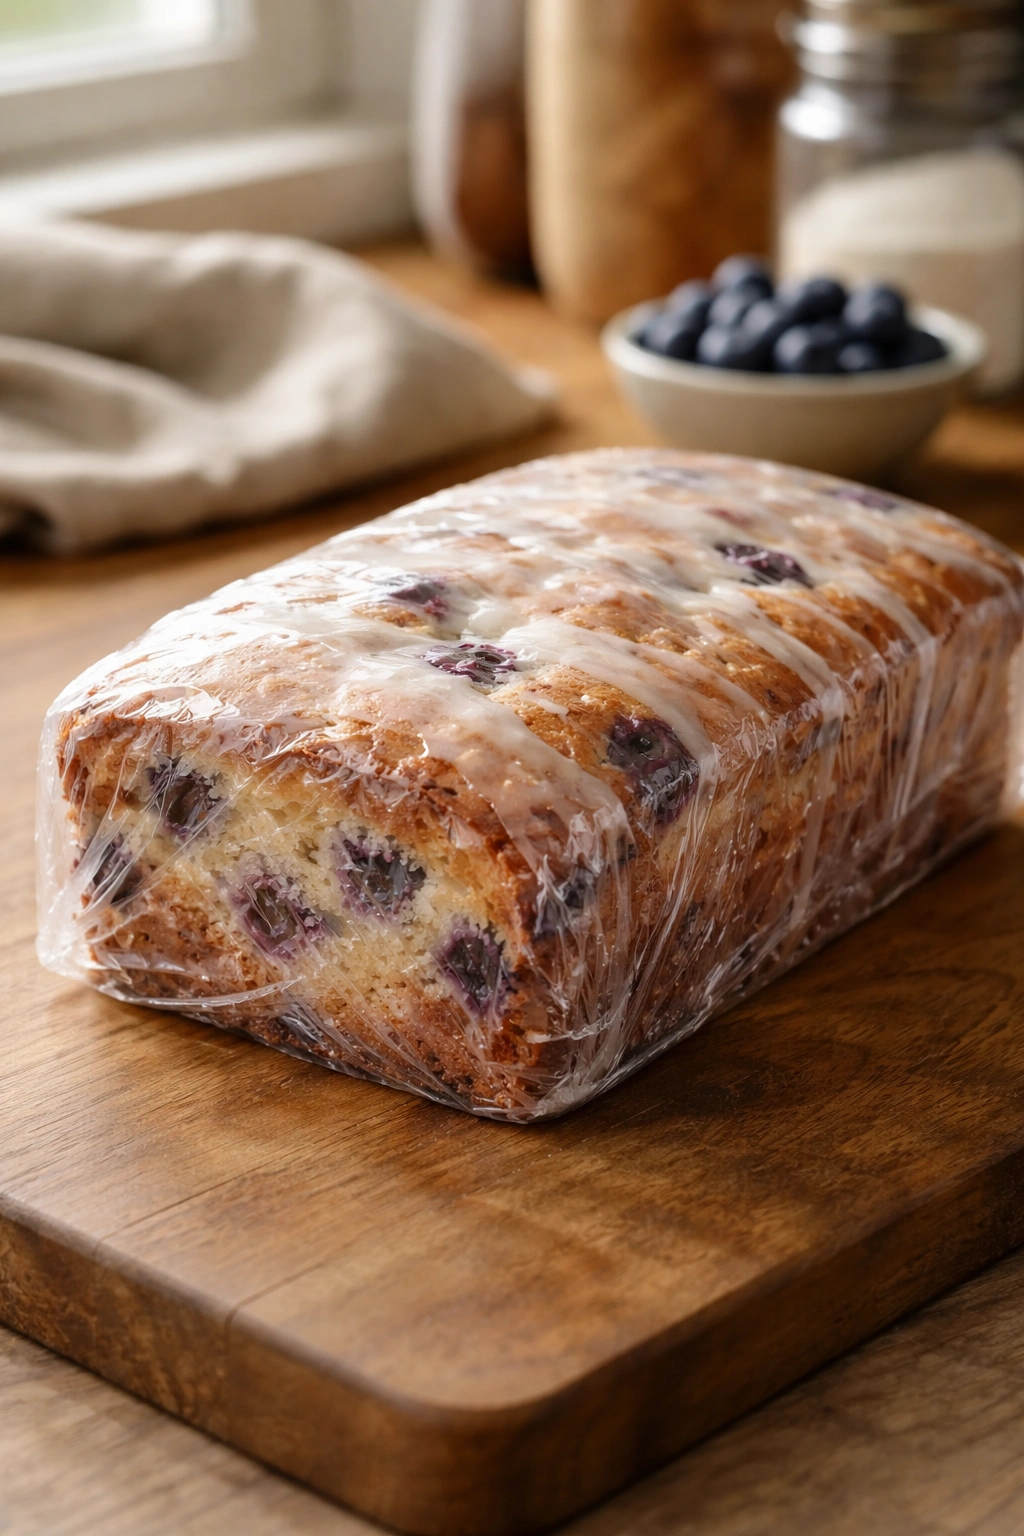
Blueberry bread keeps beautifully for several days at room temperature, which makes it perfect for baking ahead. Once the bread has cooled completely, wrap it tightly in plastic wrap or aluminum foil. Store it at room temperature for up to 3 days. The flavor actually improves on day 2 as the flavors meld and the crumb settles.
For longer storage, this bread freezes exceptionally well. Wrap the completely cooled, unglazed loaf tightly in plastic wrap, then in aluminum foil or a freezer bag. Freeze for up to 3 months. When you’re ready to serve it, thaw at room temperature for about 2 hours (still wrapped so condensation doesn’t accumulate on the surface). Once thawed and cool, apply the glaze.
Alternatively, you can glaze the bread, let the glaze set completely, then wrap and freeze. Thaw wrapped as described above, and the glaze will be set and intact when you unwrap it.
The bread also toasts beautifully, which extends its usefulness. Even after a few days, slices toast up wonderfully with a crispy exterior and warm, tender interior. The glaze caramelizes slightly when toasted, creating an even deeper sweetness.
Don’t refrigerate this bread unless you live somewhere extremely warm and humid. Refrigeration speeds up staling by accelerating moisture loss. Room temperature storage or freezing are both better options.
You can also make the glaze up to 1 day ahead and store it in a covered container at room temperature. Give it a quick whisk before using—it might thicken slightly as it sits. Add a touch of milk to bring it back to the right consistency if needed.
If you want to bake ahead but glaze fresh, you can do that too. The bread tastes just as good unglazed, and you get the pleasure of glazing it fresh before serving. This is actually a great strategy if you’re bringing the bread somewhere—transport it unglazed, then apply the glaze at your destination for maximum visual impact.
Serving Suggestions and Pairings
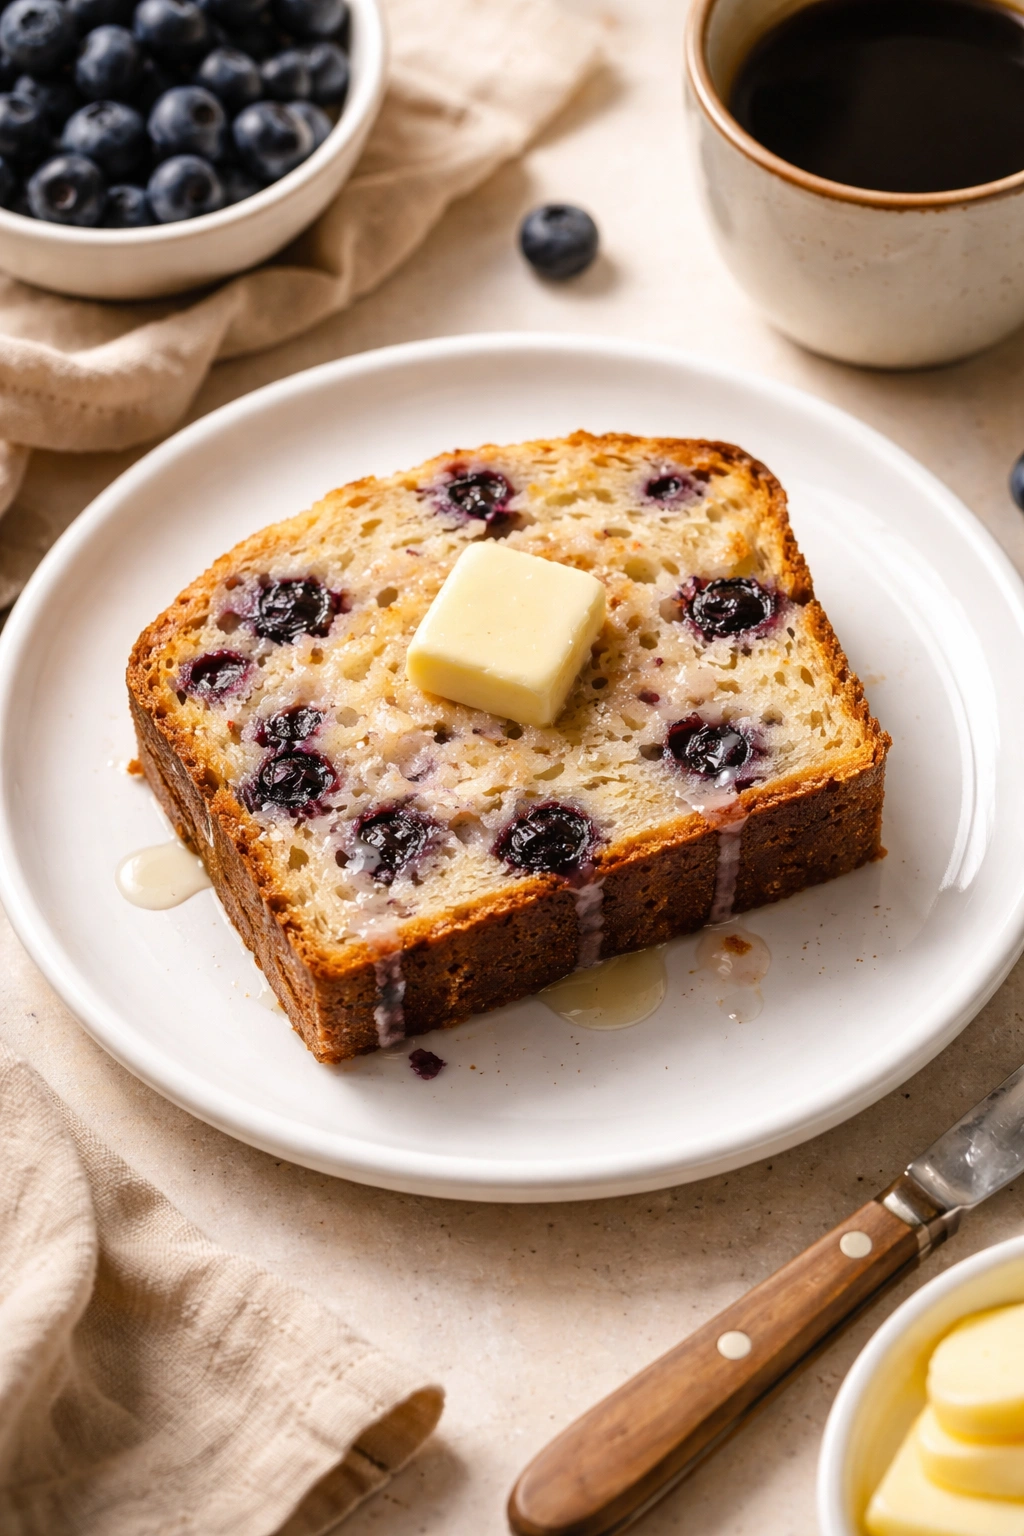
Blueberry bread with glaze is naturally perfect for breakfast or brunch. Serve it warm or at room temperature with good butter and jam, or just on its own so nothing competes with the blueberries and glaze. It pairs beautifully with strong coffee or tea—the slight tartness of the berries echoes the slight bitterness of coffee in a way that feels intentional.
This bread also works as an afternoon snack with tea or as a light dessert after dinner. The richness of the crumb and the sweetness of the glaze make it feel indulgent enough for dessert, but it’s not so heavy that it feels like an actual cake. A slice with a cup of coffee is a perfectly civilized way to end a meal.
For a more elaborate brunch spread, pair slices of this bread with fresh whipped cream and berries on the side. A drizzle of honey or a small scoop of mascarpone on top feels fancy without being fussy.
The bread also makes a thoughtful gift. Bake it a day ahead so the flavors are fully developed, wrap it beautifully in parchment and twine, and you’ve got something homemade that feels genuinely special. Include a note about storage and the best way to serve it—people appreciate that kind of detail.
If you’re serving this at a gathering, slice it before guests arrive so people can grab a piece easily. The glaze looks beautiful and appetizing when you display the bread cut side out, showing off the blueberry-studded crumb. Arrange the slices on a small wooden board with a small plate and butter knife nearby.
Leftover slices (if you somehow have any) are actually better toasted the next day. The toast gives the bread structural integrity while warming it through, and the glaze becomes slightly sticky and caramelized—even more delicious than fresh.
Final Thoughts

Blueberry bread with a sweet glaze isn’t complicated, but it does require attention to a few specific details that separate mediocre bread from the kind people remember and ask you to make again. Coat your berries, don’t overmix your batter, let the bread cool properly before glazing, and get your glaze consistency just right—those four things make all the difference.
The beauty of this recipe is that it’s endlessly adaptable. You can change the glaze flavor, add different spices, experiment with add-ins like nuts or coconut, or use different berries altogether. But the foundation—a tender, moist crumb studded with fruit and topped with a sweet, glossy glaze—is something worth mastering first.
Once you’ve made this bread a couple of times, you’ll develop an intuition for it. You’ll know exactly what the batter should look like, how thick the glaze should be, and how warm the bread can be before it’s safe to remove from the pan. That confidence is what turns a recipe into something you can make without thinking, which is exactly when the best baking happens.