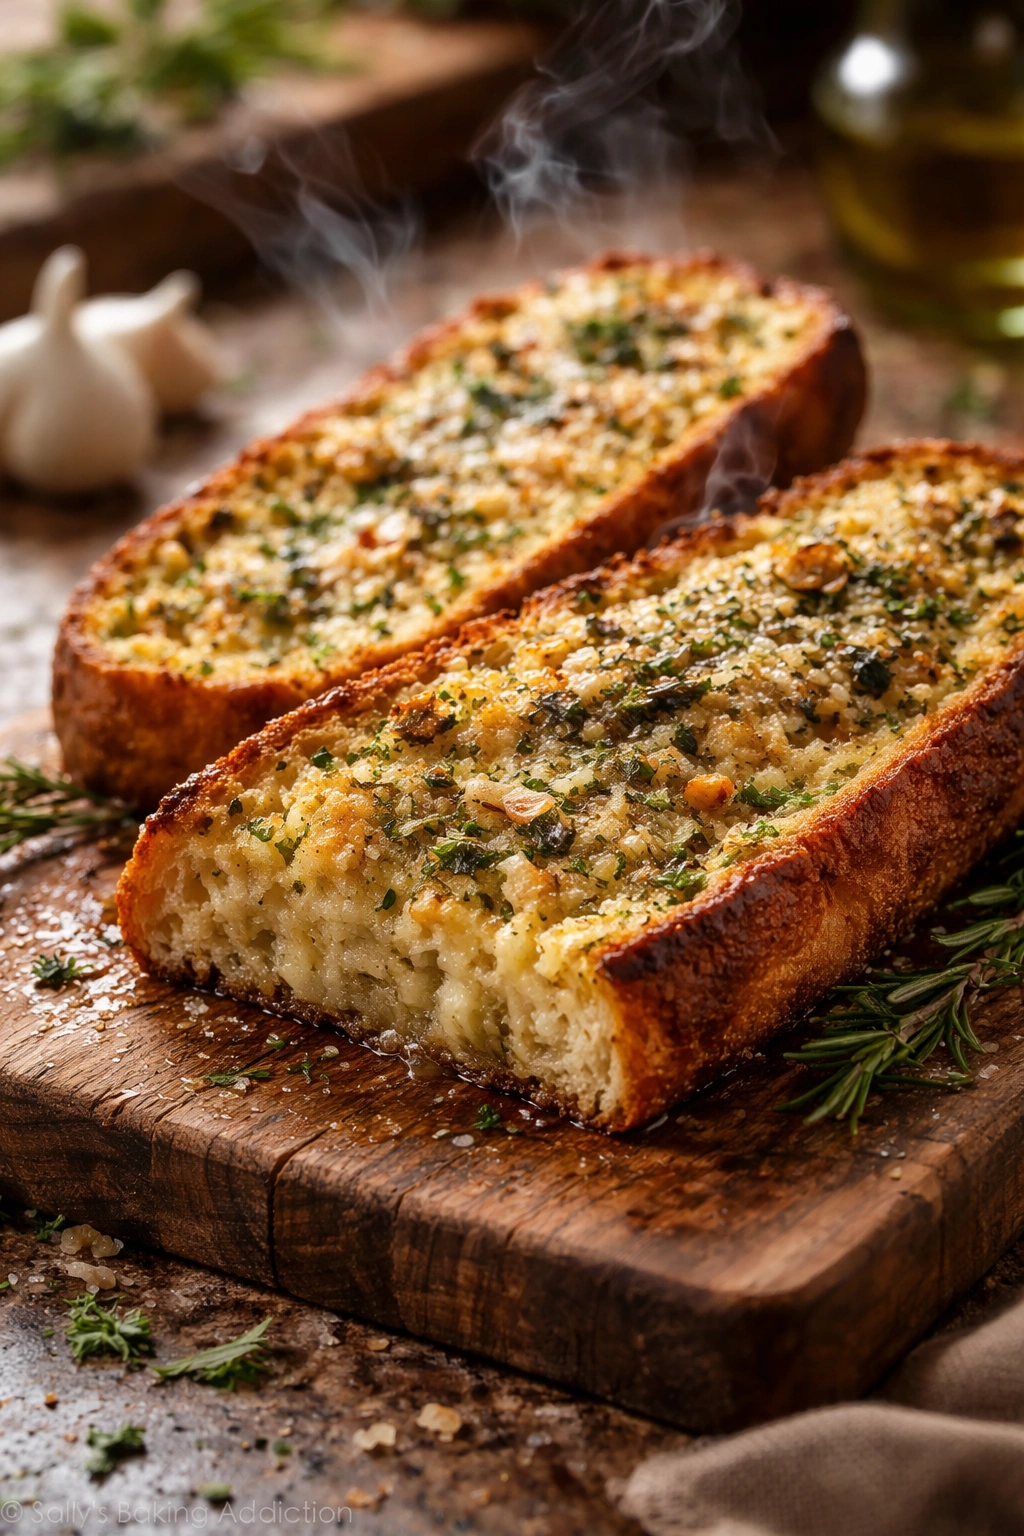
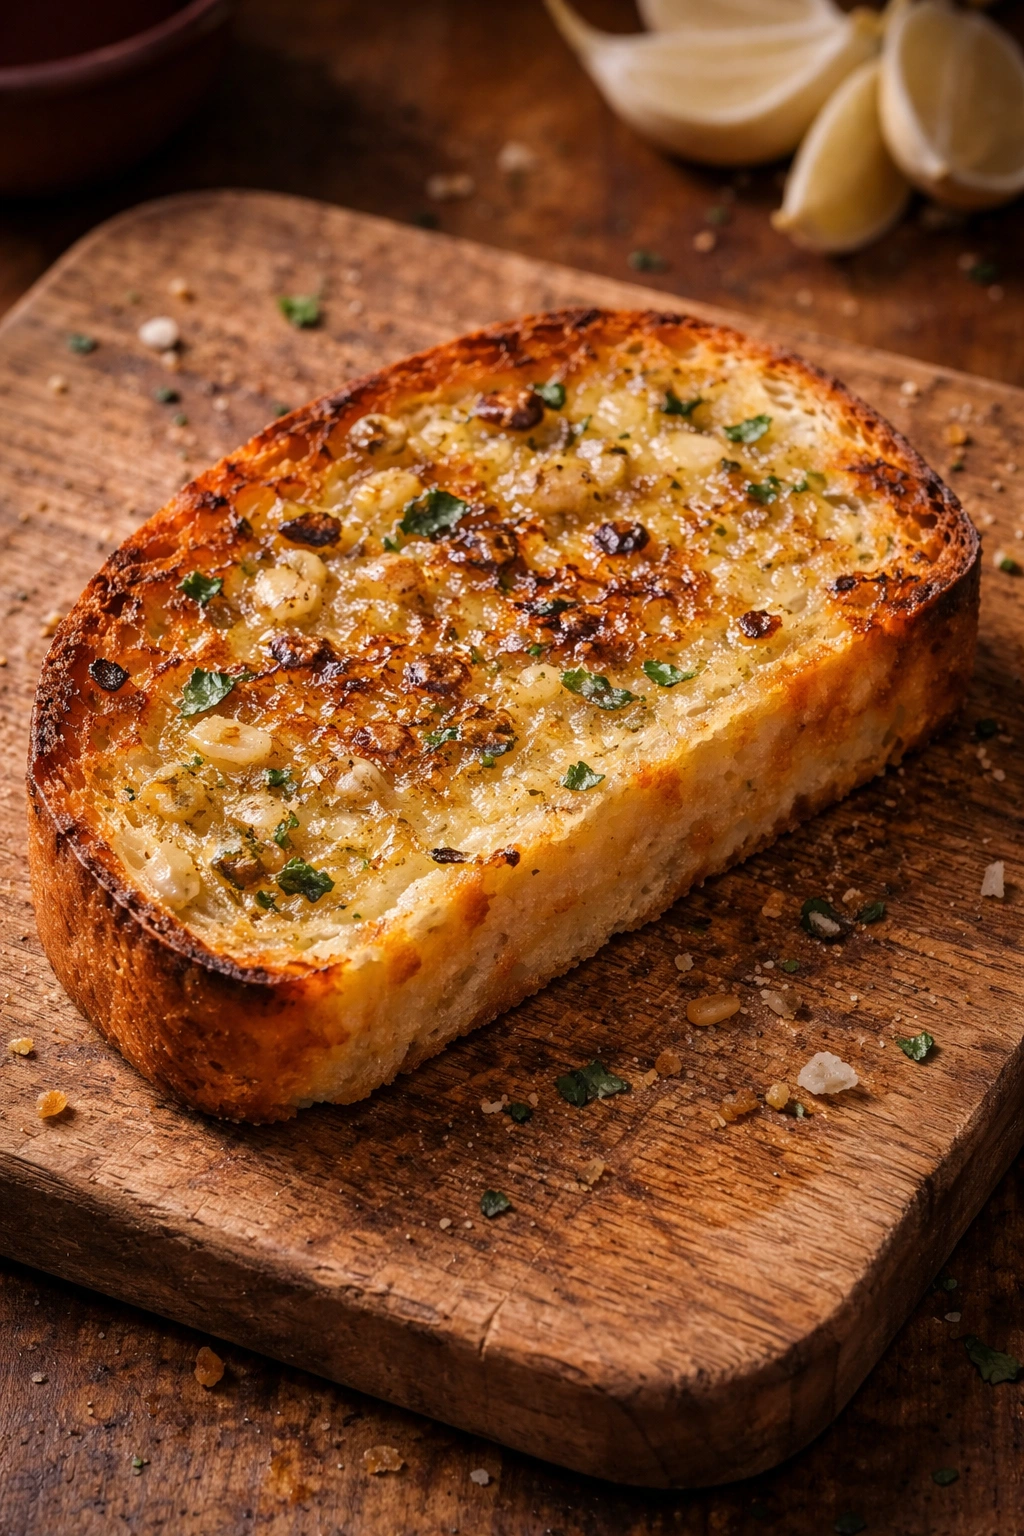
If you’ve ever bitten into that crispy, garlicky, herb-studded slice of bakery garlic bread—the kind where the crust shatters under your teeth and releases aromatic steam, where the butter and roasted garlic are actually visible in their intensity—you’ve probably wondered if you could recreate that magic at home. The truth is, you absolutely can. The difference between forgettable garlic bread and bakery-quality garlic bread isn’t about secret ingredients or expensive equipment. It’s about understanding a few key techniques: how much hydration your dough needs, why you toast the garlic before mixing it into butter, how to build a crust that actually crackles, and when to apply the garlic butter so it caramelizes rather than burns.
Most home bakers struggle with garlic bread because they’re working against themselves—either oversalting the dough, using weak-flavored store-bought bread, skipping the crucial high-heat finishing step, or mixing raw garlic directly into cold butter instead of creating an emulsified, deeply flavored garlic compound. Every one of those choices creates a flatter, less impressive result. What you’re about to learn sidesteps every pitfall. You’ll develop a rich, open crumb that holds up to generous garlic-butter topping without becoming soggy, you’ll build a genuine crust through steam and high heat, and you’ll create a garlic-rosemary butter so aromatic and complex it tastes like it came from a professional kitchen.
This is the kind of bread that makes people ask for your recipe. It’s the kind you’ll want to make at least twice a month, once you understand how straightforward the process really is. The hands-on work spans maybe thirty minutes—the rest is the dough doing its thing while you’re free to do something else.
Why Homemade Garlic Bread Beats Commercial Versions
Bakeries get garlic bread right because they start with bread that’s meant to be garlic bread. They use dough with enough structure and hydration to create an open, irregular crumb—the kind of bread that’s naturally absorbent and forgiving with toppings. They bake with steam, which creates a crust thick enough to stand up to butter and toppings without becoming greasy or collapsing.
Store-bought bread, even “artisanal” versions from grocery bakeries, is often slightly stale when you buy it. The flour quality may be lower, and the fermentation time is usually cut short to save on production costs. When you brush that commercial bread with garlic butter and broil it, you’re essentially reheating an already-oxidized product. The garlic flavor can’t penetrate because the structure is too tight. You end up with a heated crust and a slightly greasy inside.
When you make garlic bread from a fresh dough you’ve developed yourself, you have complete control over every variable. Your bread is actually fresh—baked just hours before you eat it. The dough has been properly fermented, which develops flavor and creates a more open crumb structure. You can adjust the hydration to make the crumb slightly more absorbent. You can use better-quality butter and fresher garlic. You can apply heat in a way that caramelizes the garlic instead of scorching it.
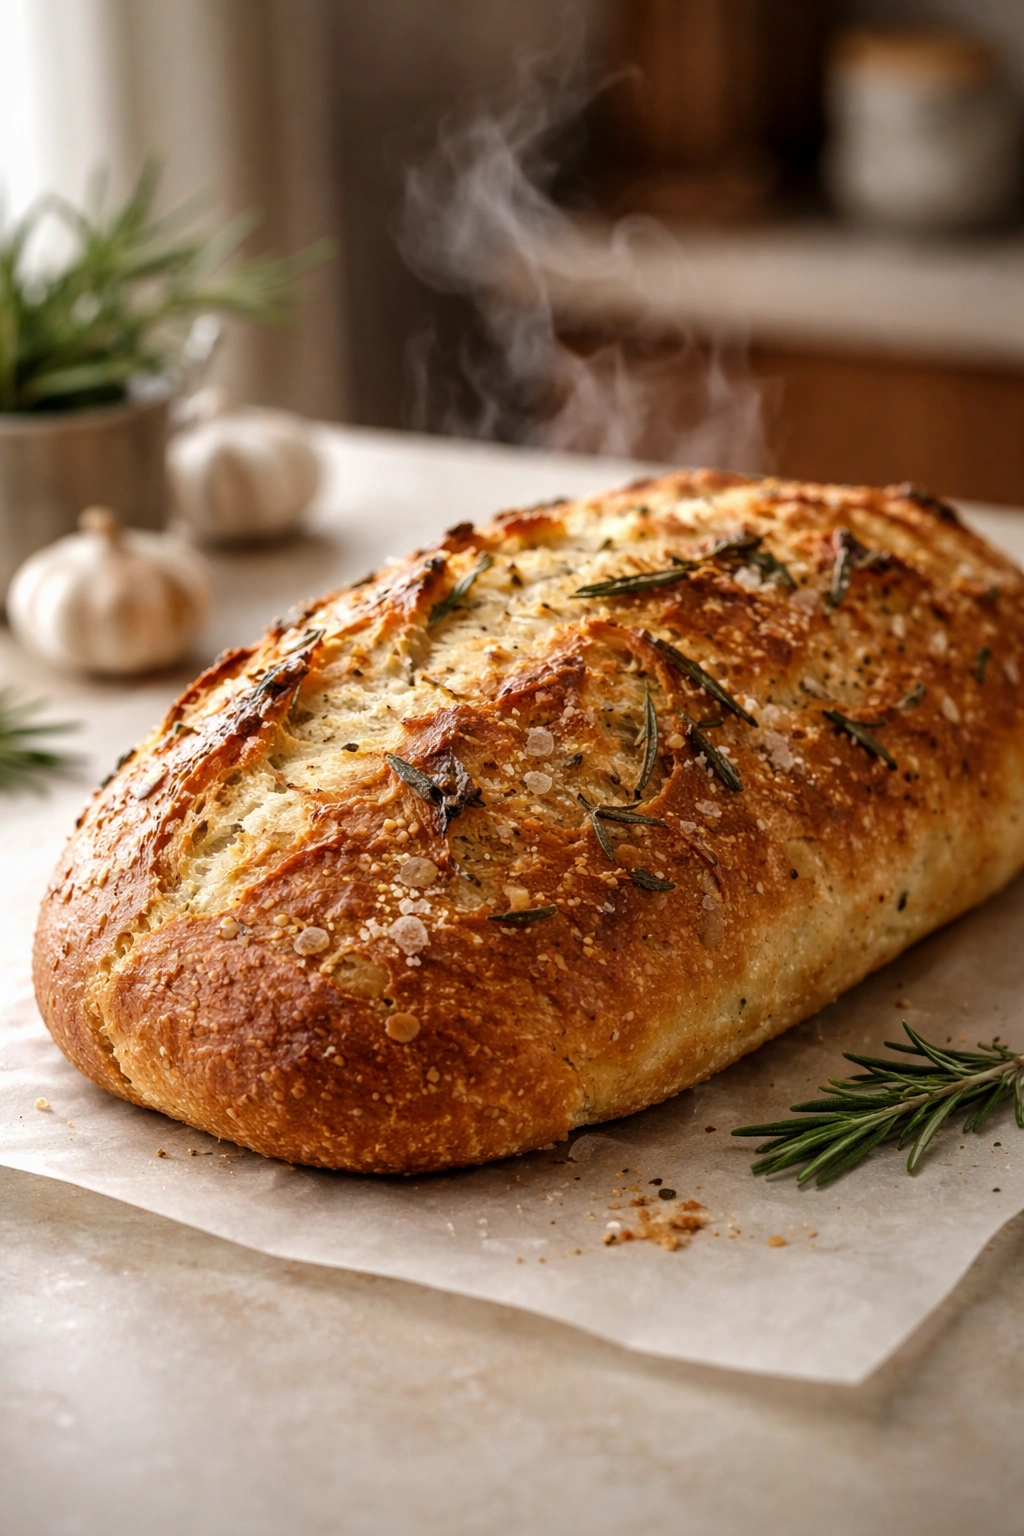
The difference is noticeable immediately. Your garlic bread will smell different—more aromatic, more alive. The crust will crack audibly when you bite into it. The interior will be tender, with actual irregular holes that let butter soak in while still maintaining structure.
Understanding the Science Behind Bakery-Quality Crust
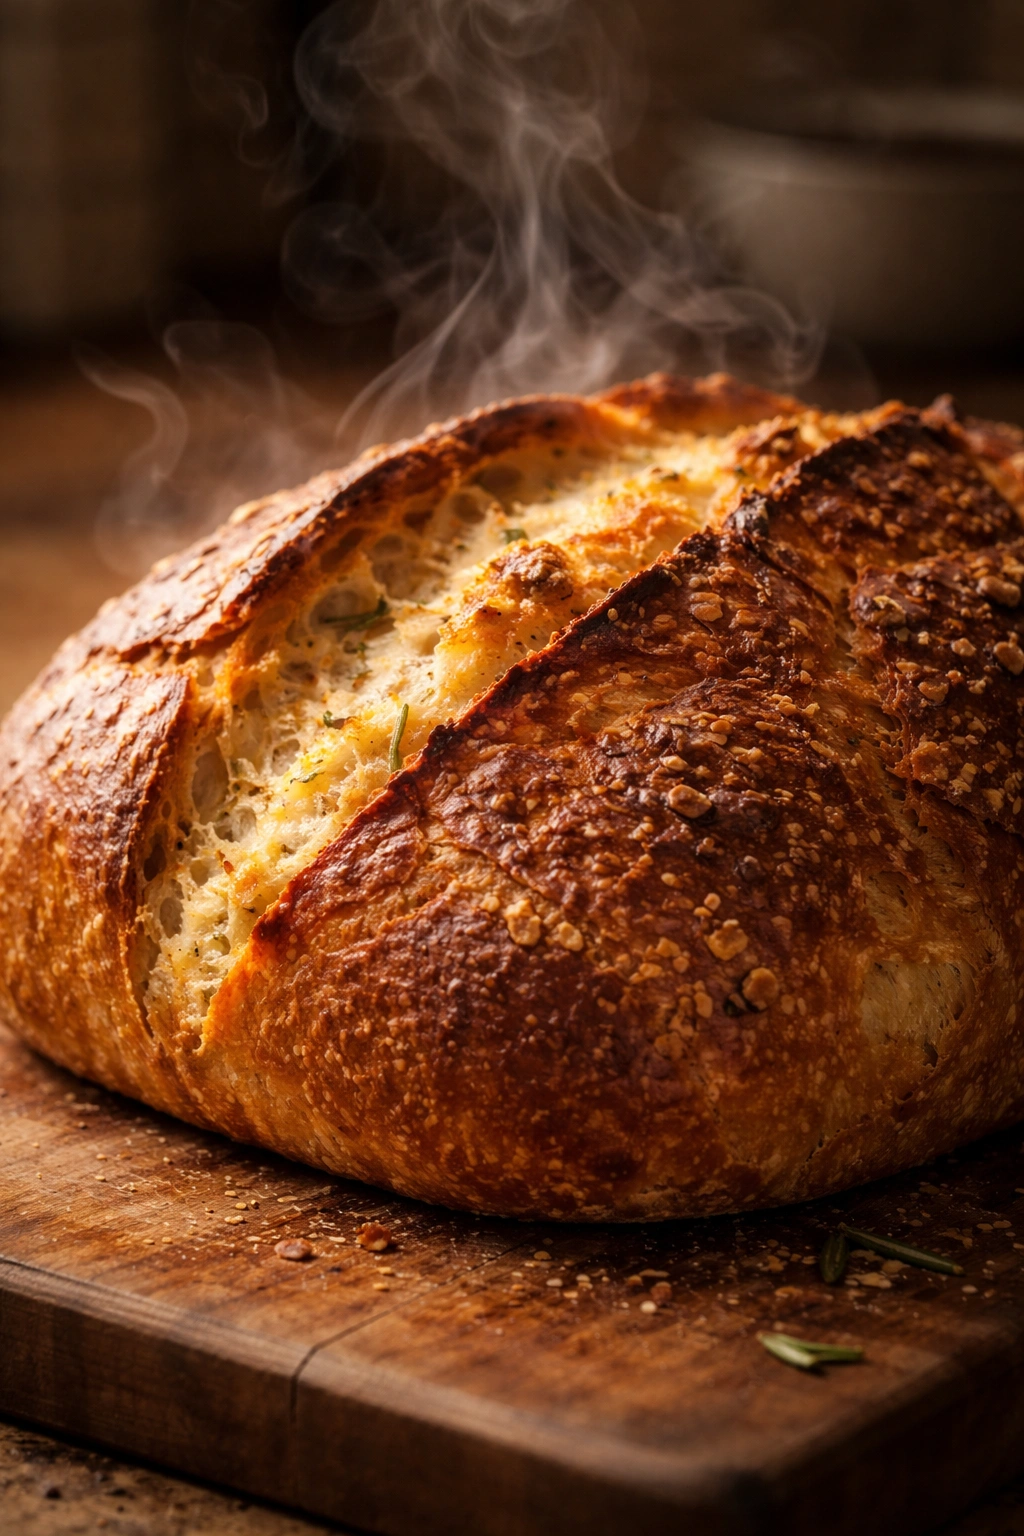
A real crust—the kind that crackles and shatters—requires two things working in concert: steam during the first part of baking, and dry heat toward the end. When dough enters a steamy oven, the exterior surface stays moist and pliable while the interior crumb sets. This allows the dough to rise freely before the crust firms. Once the dough has expanded as much as it’s going to, removing the steam (or finishing the bake without steam) lets the exterior dry out and deepen in color, creating that crispy shell.
For garlic bread specifically, you want this crust to form before you add the garlic butter topping. If you brush the butter on too early, it softens the crust and prevents proper browning. If you add it too late, you’re essentially spreading cold fat onto an already-baked surface, and the bread just feels oily instead of indulgent.
The hydration of your dough also matters profoundly. Dough that’s too dry will bake up dense and tough, with tight crumb and minimal structure to hold garlic butter. Dough that’s properly hydrated—around 65 to 68 percent water—develops better gluten network, rises more dramatically in the oven, and creates that desirable open crumb with irregular holes. Those holes act like little cups for the melted butter and garlic to pool into.
Fermentation time is equally critical. Long, slow fermentation (at least eight hours at room temperature, or overnight in the refrigerator) allows the yeast and bacteria in the dough to create organic acids and break down starches. This develops flavor and creates a more extensible dough that rises higher. Bread made with rushed fermentation tastes bland and flat, even when freshly baked.
Choosing Your Flour and Getting the Right Dough Hydration
All-purpose flour works perfectly for garlic bread, but understanding what “all-purpose” actually means helps you choose the best option for your kitchen. Most American all-purpose flours contain roughly 10 to 12 percent protein. This protein develops into gluten—the network that traps gas and creates rise. Higher protein doesn’t automatically mean better bread; it means stronger dough that rises more aggressively and creates tighter crumb. For garlic bread, you actually want something between tight and open.
The specific brand matters slightly less than consistency. King Arthur Unbleached All-Purpose Flour, Bob’s Red Mill All-Purpose, and store-brand flours all work. What matters more is measuring correctly. Too many home bakers scoop flour directly from the bag, which packs the flour and throws off hydration. You need to spoon flour gently into your measuring cup and level the top—or, better yet, use a kitchen scale. A cup of flour weighs roughly 120 to 125 grams, depending on how tightly it was packed in the bag. When you weigh instead of scoop, you remove variables.
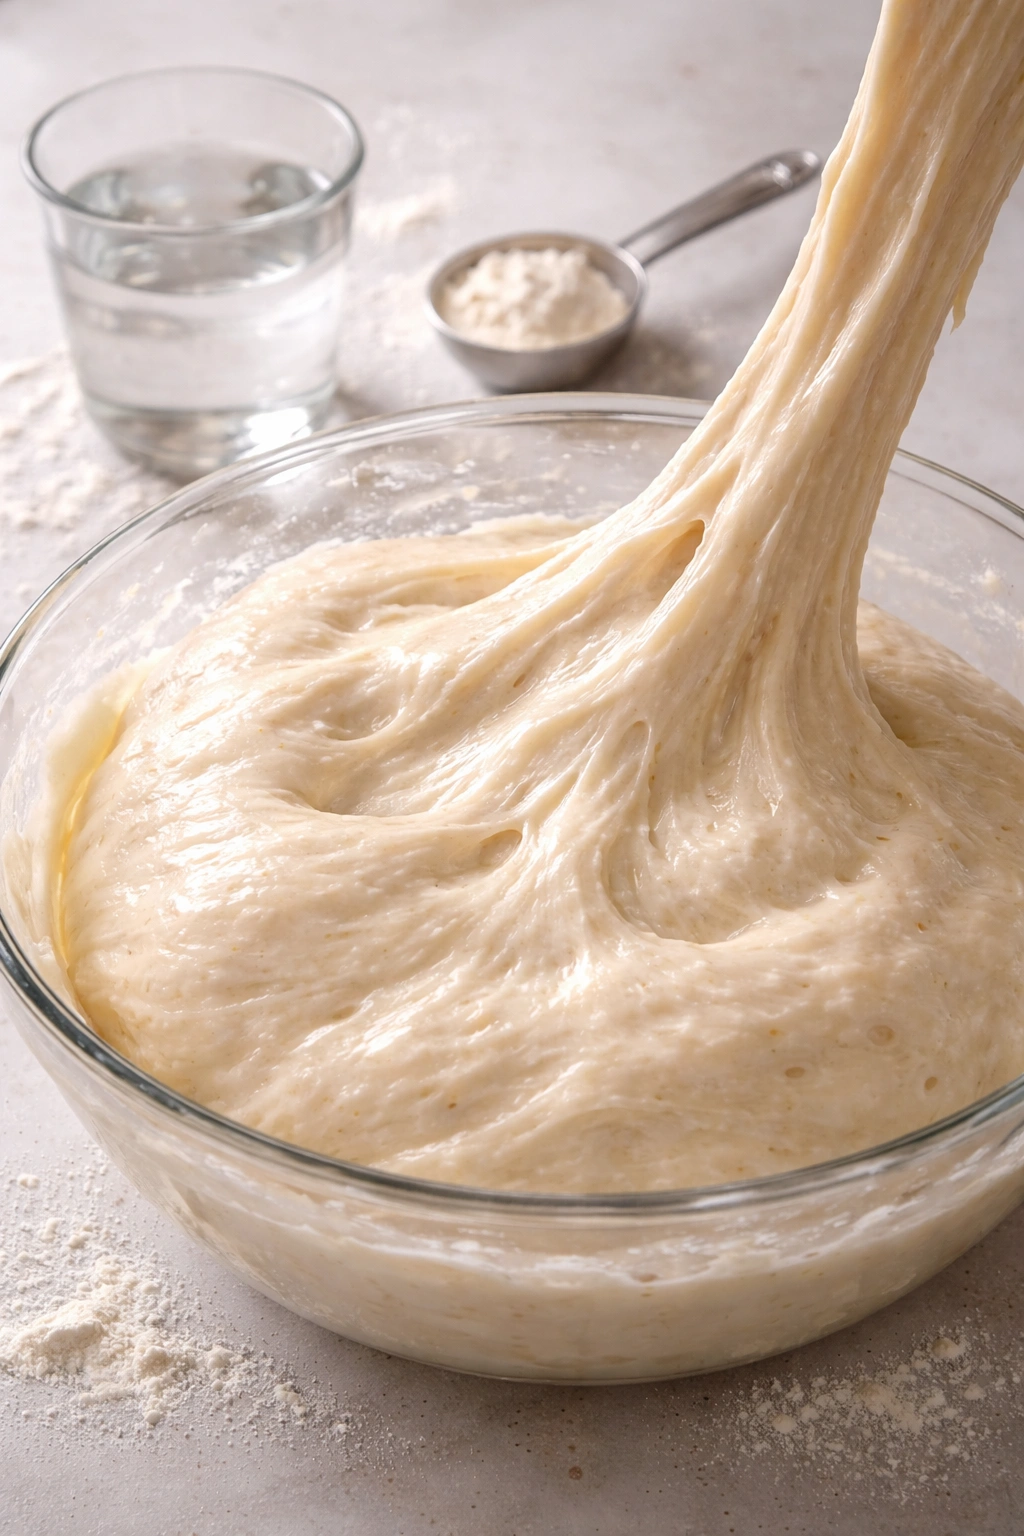
Hydration is the ratio of water to flour, expressed as a percentage. Bakery bread often uses 75 to 80 percent hydration—meaning for every 100 grams of flour, 75 to 80 grams of water. For home bakers just learning the technique, 65 to 68 percent hydration is more forgiving. It gives you a dough that’s soft and extensible but not so wet that it’s sticky and difficult to shape.
Here’s what that looks like in practice: 500 grams of flour plus 330 to 340 grams of water creates a dough that’s noticeably wetter than dense artisan loaves, but substantially drier than a brioche dough or a focaccia dough. When you mix it, the dough will be shaggy and slightly stiff. After a few minutes of hand-kneading or machine mixing, it should come together into a smooth, slightly tacky ball. It shouldn’t stick aggressively to your hands, but you shouldn’t be able to pinch it without some resistance.
The Garlic and Rosemary Blend That Makes All the Difference
Fresh garlic and dried rosemary are the core flavoring pair here, but the technique of preparing them is what separates memorable garlic bread from forgettable versions. Most people buy a jar of minced garlic or, worse, garlic powder. Jarred minced garlic is preserved in a weak acid solution that prevents browning—it never develops that golden, nutty flavor you need. Garlic powder tastes cardboard-like compared to fresh garlic. You need actual fresh garlic cloves, minced or grated just before use.
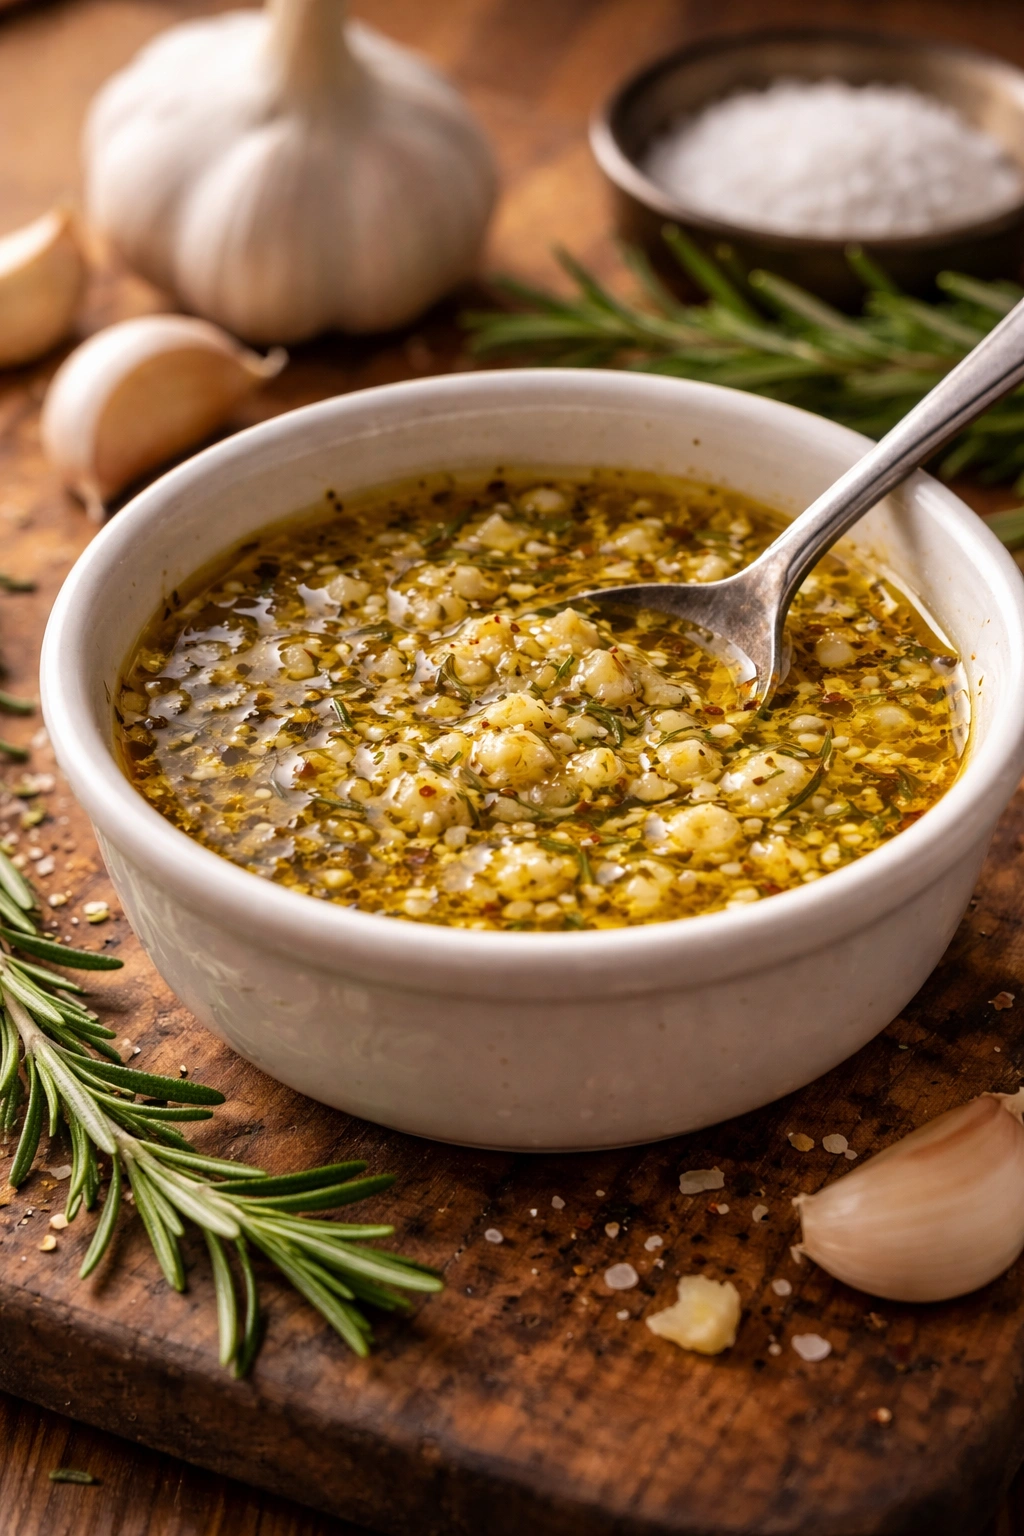
The game-changing technique is toasting the garlic gently in butter before the bread finishes baking, rather than mixing raw garlic into cold butter. When you melt butter over medium-low heat and add minced garlic, the garlic’s compounds begin to dissolve into the fat. Over the course of a few minutes, the raw, harsh bite of fresh garlic mellows into something rich, savory, and almost sweet. You’re not trying to brown the garlic aggressively—that creates a burnt, bitter flavor. You’re creating a gentle, golden infusion where the garlic flavor is distributed throughout the melted butter.
Rosemary has strong, piney, slightly peppery notes. Dried rosemary is actually better than fresh for this application because drying concentrates the flavor. You want about half a teaspoon of dried rosemary for every tablespoon of minced garlic. Fresh rosemary would need to be used at twice the amount to create the same intensity, and the texture of fresh rosemary leaves in the butter is less pleasant than the finely distributed dried herb.
A small pinch of fine sea salt (not table salt—table salt has anti-caking agents that create a grainy texture) and a crack of black pepper round out the flavor. The salt amplifies garlic and helps the rosemary aromatics come forward. You’re not trying to make the butter taste salty; you’re using salt as a flavor amplifier.
Yield, Prep Time, Cook Time, and Difficulty Level
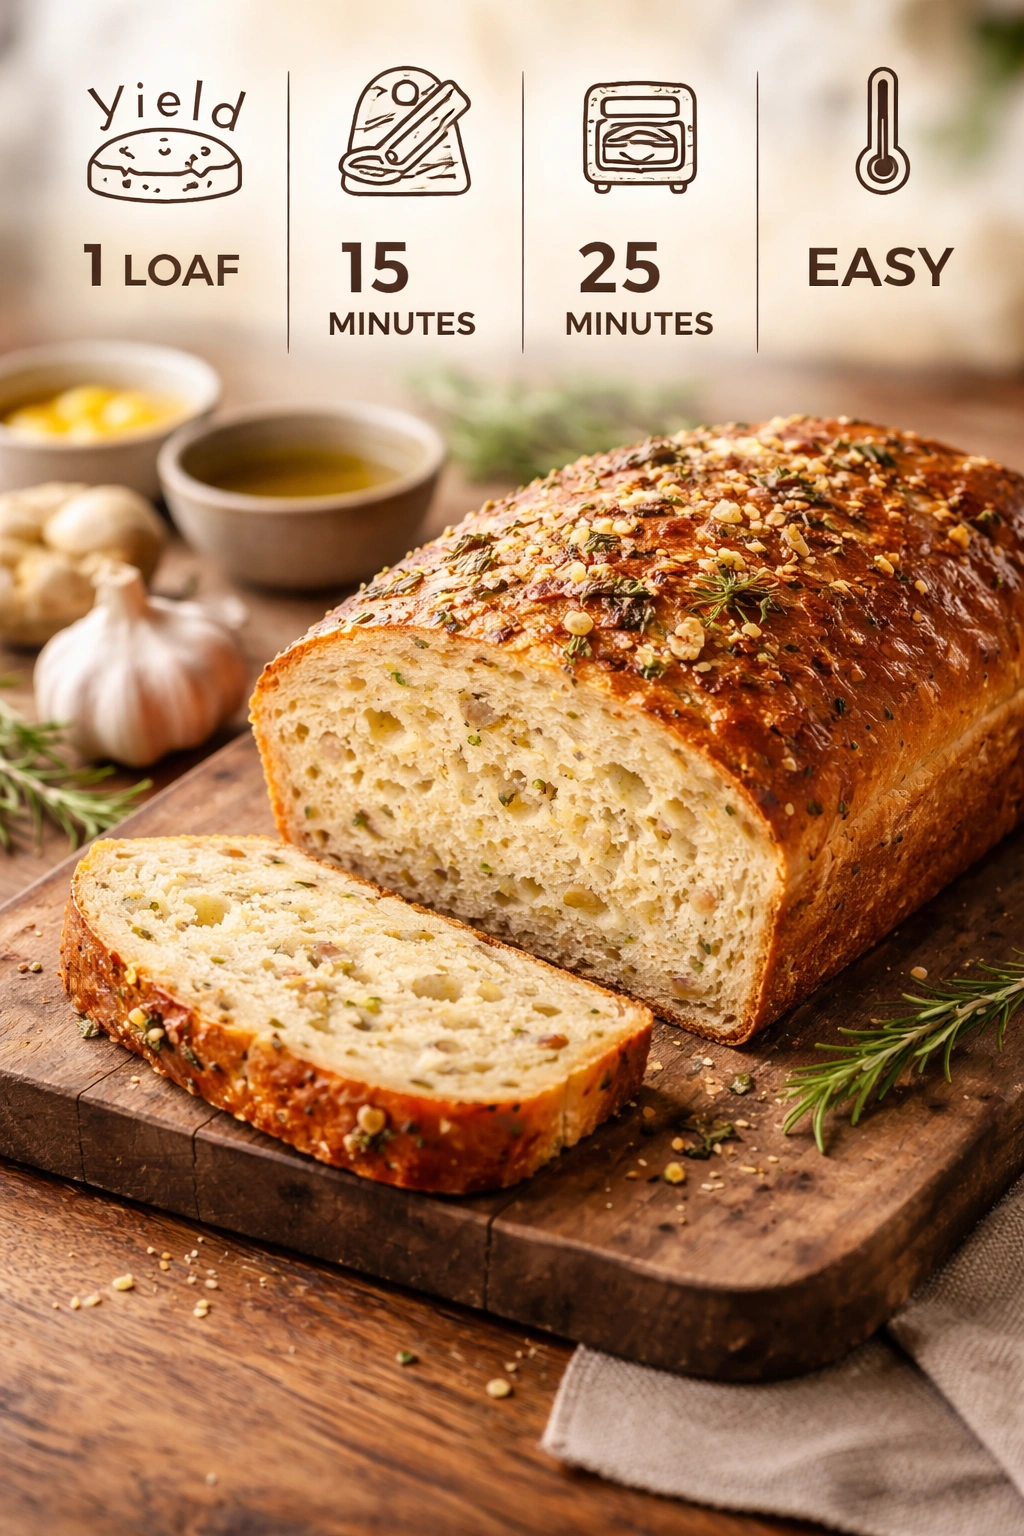
Yield: Makes one beautiful loaf, serves 4 to 6 as a side
Prep Time: 20 minutes (hands-on active prep)
Cook Time: 30 minutes for the dough (with about 8 hours to overnight passive fermentation beforehand)
Total Time: 30 minutes active + overnight for fermentation (or 8 hours minimum). The actual final bake is roughly 20 to 25 minutes.
Difficulty: Intermediate — the concept of fermentation and steam-baking takes practice, but the hands-on steps are straightforward. The first time you make this, things might not be perfect, and that’s completely normal. By the third or fourth loaf, you’ll have developed an intuition for what the dough should look and feel like at each stage.
Best Served: Immediately after the final 2-minute broil step, while the crust is still crackling and the interior is steaming. Serve within 10 minutes of coming out of the oven for maximum crust texture.
Ingredients

For the Dough:
- 500 grams (about 4 cups) all-purpose flour
- 330 grams (about 1⅜ cups) lukewarm water
- 10 grams (about 1½ teaspoons) fine sea salt
- 5 grams (about 1 teaspoon) instant yeast or active dry yeast
- 1 teaspoon olive oil (for oiling the mixing bowl)
For the Garlic-Rosemary Butter:
- 6 tablespoons unsalted butter, divided
- 4 large cloves fresh garlic, minced very finely (or grated on a microplane for maximum surface area)
- ½ teaspoon dried rosemary, crushed between your fingers to release essential oils
- ¼ teaspoon fine sea salt
- 2 to 3 cracks of freshly ground black pepper
- ½ teaspoon fresh lemon juice (optional but highly recommended—it brightens the garlic and cuts richness)
For Shaping and Finishing:
- Extra flour for dusting
- 2 to 3 tablespoons melted butter for brushing the pre-baked loaf (before the garlic butter goes on)
- 1 tablespoon coarse sea salt or fleur de sel (for finishing the crust, optional but encouraged)
- 1 small handful fresh rosemary sprigs (optional, for finishing)
Instructions
Prepare and Mix the Dough:
-
Pour the lukewarm water into a large mixing bowl (or the bowl of a stand mixer). Add the instant yeast and stir with a fork to dissolve completely. Let it sit for about 1 minute—you don’t need to wait for it to get foamy, just let it begin to activate.
Advertisements -
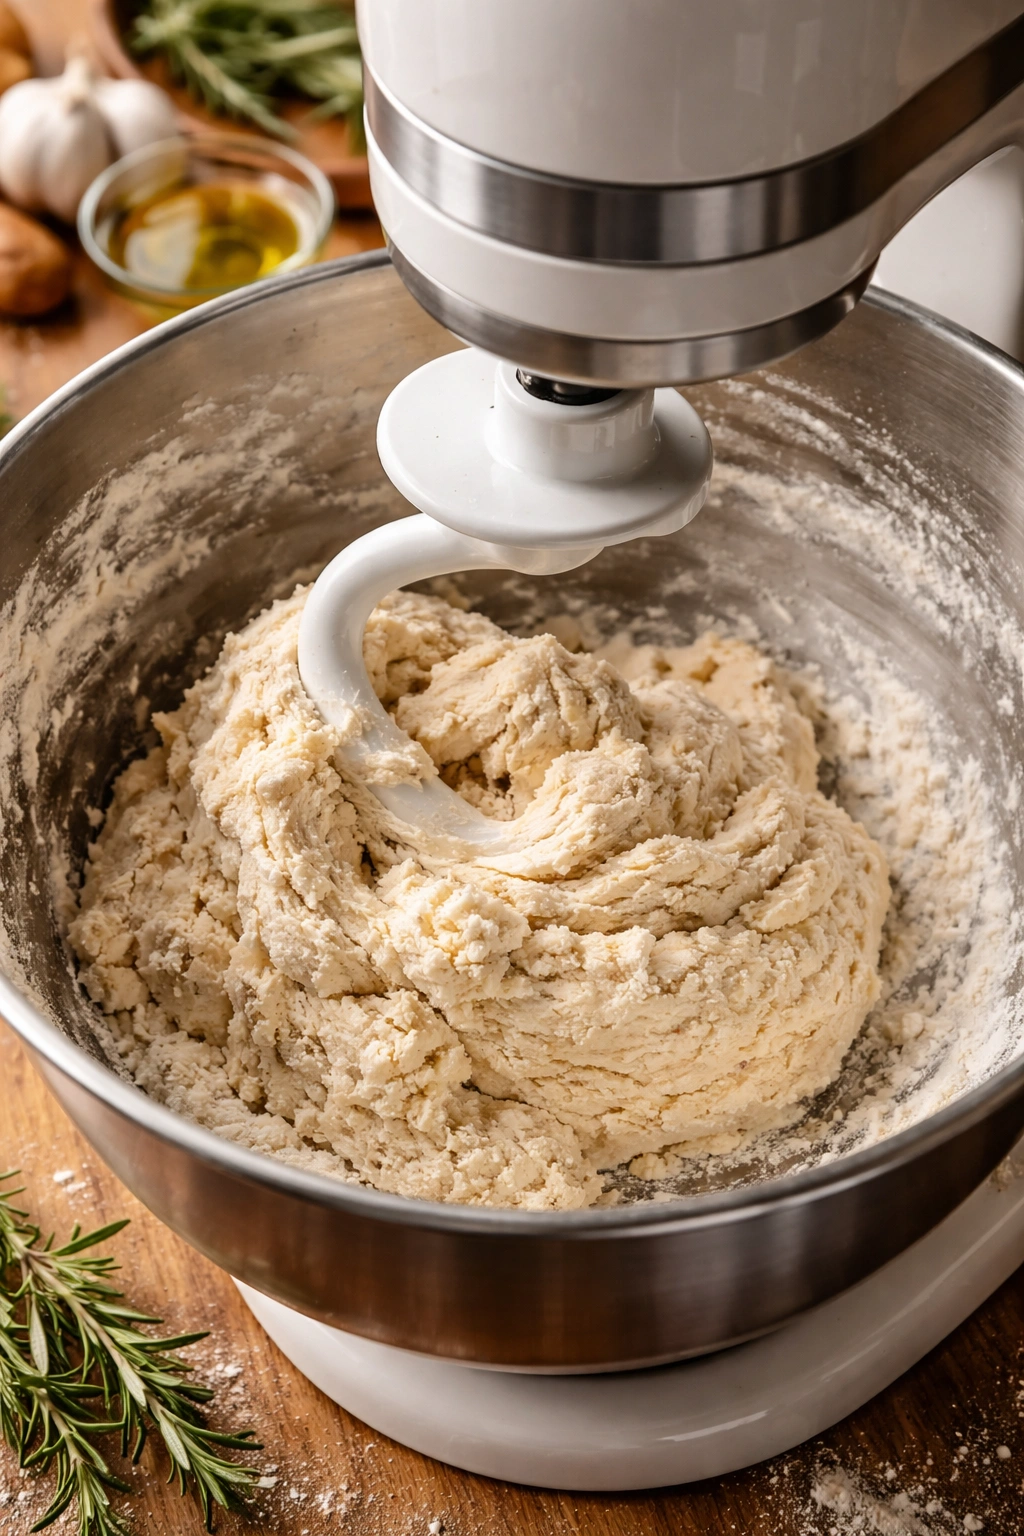
Add the flour and salt to the yeast mixture. If using a stand mixer fitted with a dough hook, mix on low speed for 3 to 4 minutes, until a rough dough forms that pulls away from the sides of the bowl. If mixing by hand, use a sturdy wooden spoon or your hands to fold and turn the dough until you can’t see any dry flour—this takes about 4 to 5 minutes of persistent stirring.
-
Switch to medium speed on the mixer (or continue by hand, turning and folding) for another 4 to 5 minutes. The dough should become noticeably smoother and slightly elastic. It will still feel a bit tacky—that’s correct. Do not add extra flour if the dough feels sticky. Trust the hydration; the dough will become less sticky as it rests and develops gluten.
-
Lightly oil a clean bowl with the olive oil, then transfer your dough to the oiled bowl. Turn the dough once so the top is lightly coated with oil. This prevents the surface from drying out during fermentation.
First Rise and Fermentation:
-
Cover the bowl loosely with a kitchen towel or plastic wrap. Let it rest at room temperature (around 70°F / 21°C) for 8 to 12 hours, or until the dough has risen to roughly 1.5 times its original volume. The dough should feel puffy and soft, with visible bubbles when you peek under the towel. If your kitchen is warmer than 72°F, start checking at 6 hours. If it’s cooler (around 65°F), you may need 12 to 14 hours.
Pro tip: Overnight fermentation in the refrigerator (8 to 16 hours) actually produces better flavor and makes the dough easier to shape because it’s colder and less sticky. If you choose the cold fermentation route, cover the dough and place it directly in the refrigerator after mixing. The next morning, remove it 1 hour before shaping to let it come slightly closer to room temperature.
Shape the Loaf:
-
Lightly dust a clean work surface with flour. Turn the dough out onto the floured surface. Gently shape it into a loose oval or round—don’t compress it aggressively; you want to maintain some of the gas that’s already been developed. The loaf should be roughly 8 to 9 inches long and 5 to 6 inches wide.
-
Place the shaped dough on a piece of parchment paper (this makes transferring to the oven dramatically easier). Cover it loosely with a kitchen towel and let it rest for 45 minutes to 1.5 hours at room temperature. You’re looking for the dough to rise noticeably—it should increase in volume by about 30 to 50 percent. It should feel puffy to the touch, and when you press a fingertip gently into the dough, the indentation should spring back slowly, about halfway. If it springs back completely and immediately, it needs more time. If it doesn’t spring back at all, it’s overproofed and you should bake it immediately anyway—overproofed bread is still edible, just denser.
Prepare for Baking:
-
Position your oven rack to the middle-lower position (not the very bottom) and preheat your oven to 475°F (245°C). If your oven has a convection setting, do NOT use it for this bread—convection circulates air, which dries out the crust before it can develop properly. You want static, humid heat.
-
Prepare a pan of boiling water. You’ll add this to the oven to create steam. A small loaf pan, cake pan, or oven-safe skillet works—you want something that can sit on the bottom rack or a lower shelf and hold boiling water safely without tipping.
Bake with Steam:
-
Carefully place the pan of boiling water on the bottom rack of your preheated oven. The goal is to create a steamy environment for the first part of the bake. This is why you need to be cautious—you don’t want to splash yourself with steam.
-
Using the parchment paper as a handle, transfer your shaped dough to the middle-to-lower rack (above where the water is). Close the oven door quickly to trap the steam.
-
Bake for 15 to 18 minutes. During this time, the dough will rise significantly, the exterior will begin to set, and the steam will keep the crust flexible so it can expand. You’re looking for the crust to turn light golden but not yet deeply browned.
-
Carefully remove the pan of water from the oven. Be extremely cautious—the steam can burn. Slide the pan out with thick oven mitts and set it aside on a heat-safe trivet or the stovetop.
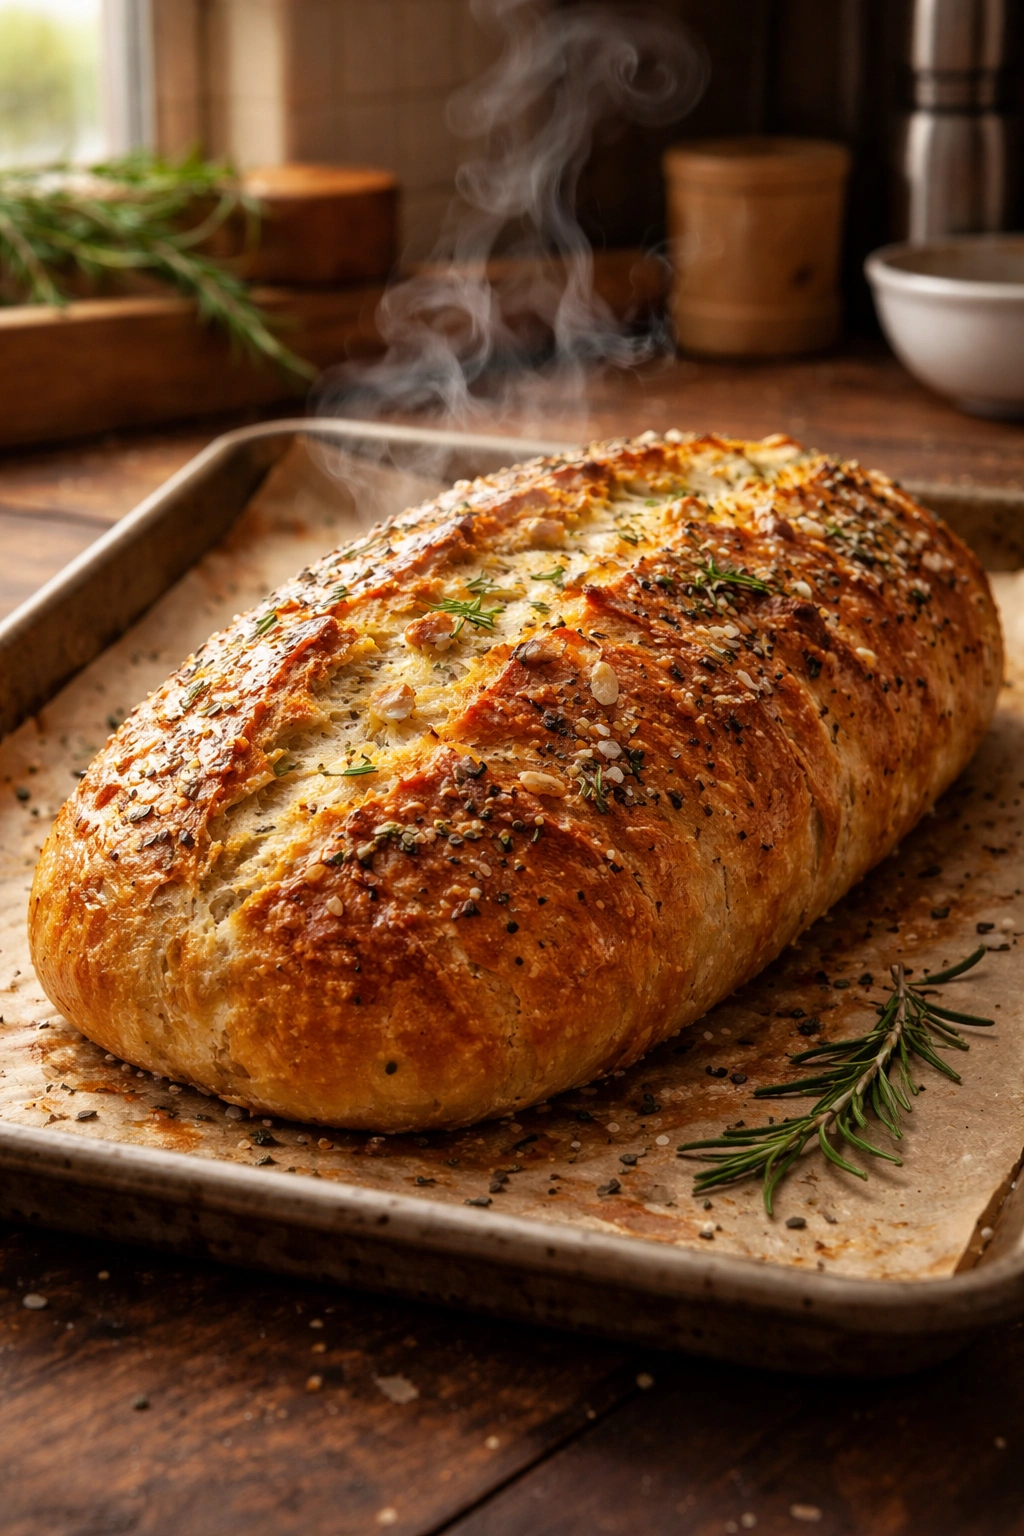
-
Return the loaf to the oven and bake for another 7 to 10 minutes, until the crust is a deep golden-brown color all over. You should be able to tap the bottom of the loaf (use tongs to pick it up safely) and hear a hollow sound. This hollow sound indicates the crumb has set and the loaf is baked through.
Prepare the Garlic-Rosemary Butter:
-
While the bread is baking (around the time you remove the steam pan), begin preparing your garlic butter. Heat 2 tablespoons of the unsalted butter in a small saucepan or skillet over medium-low heat. Once it melts and foams slightly, add the minced garlic. Stir constantly for about 2 minutes. You’re not trying to brown the garlic aggressively; you want it to turn pale golden and very fragrant. This is where the magic happens—the raw bite of garlic softens, and the flavor becomes deep and savory.
Advertisements -
Remove the pan from heat. Add the remaining 4 tablespoons of cold butter, the crushed rosemary, salt, pepper, and lemon juice. Stir until the cold butter is mostly melted and everything is combined into a smooth, fragrant paste. Taste it—it should smell intensely garlicky and herbaceous, not raw or harsh. If it smells raw, you can return it to gentle heat for another 30 seconds, but don’t overdo it.
The Critical Finishing Step:
-
As soon as the loaf comes out of the oven, brush the top and sides with the 2 to 3 tablespoons of plain melted butter. This creates a seal that helps the garlic butter adhere and prevents the crust from drying out too quickly.
-
Using a small spoon or pastry brush, spread the garlic-rosemary butter generously over the entire top and down the sides of the loaf. Don’t hold back—this is where the flavor comes from. Use every drop of the butter mixture.
-
If you’re using the coarse sea salt and fresh rosemary for finishing, scatter them on top now while the butter is still melted and sticky. They’ll adhere beautifully.
The Final Broil (This Is What Creates the Bakery Finish):
-
Turn your oven to the broiler setting (high broil, if your oven has options) and position the rack so the top of the loaf will be about 4 to 6 inches from the heating element. Place the loaf back in the oven immediately.
-
Broil for 2 to 3 minutes, watching it closely. You’re looking for the butter to bubble and the garlic on top to turn light golden-brown. The crust should deepen slightly in color. This happens fast—don’t turn your back. If the loaf starts to look too dark before 2 minutes, your broiler is very hot; pull it out at 1.5 to 2 minutes.
-
Remove the loaf from the oven and let it rest on a cutting board for 3 to 4 minutes. This is crucial—the butter is extremely hot right now and will set as it cools slightly. During these few minutes, the flavors also integrate and mellow just slightly.
The Technique That Creates That Bakery Crust
The difference between garlic bread with a soft, chewy surface and garlic bread with a legitimate crackly crust comes down to three deliberate choices: steam, high heat, and timing of the garlic butter.
Steam during the first part of the bake keeps the exterior surface moist while the interior crumb sets. Without steam, the crust forms too early, preventing the bread from rising fully. The crust becomes dense and tight. With steam, the dough can expand freely, and the crust forms later in the bake, creating a thick, strong shell.
Removing the steam for the final part of the bake allows the exterior surface to dry out. This drying creates the audible crackle when you bite into the crust. The moisture evaporates, and the starches on the surface toast and brown. This is why the bottom of your loaf should also be a deep golden-brown—it’s been sitting on a hot oven rack receiving direct heat from below.
Applying the garlic butter after the loaf is fully baked but before the final broil is the critical timing decision. If you brush it on before baking, it soaks into the dough and creates a greasy, soft surface. If you wait until after the loaf cools, the butter won’t adhere properly. By applying the plain butter first (which creates a seal), then the garlic butter, then broiling immediately, you’re building layers: a baked crust, a layer of melted butter, a layer of garlic-herb butter, and then a final finish of gentle heat that caramelizes the garlic without burning it. The garlic compounds remain on the surface instead of soaking through, creating that concentrated, aromatic layer that tastes like it came from a bakery.
The broil step is what transforms this from good garlic bread to bakery garlic bread. Broiling for those final 2 to 3 minutes creates a thin, crunchy exterior layer while keeping the garlic butter from scorching. The butter bubbles, tiny pieces of garlic turn golden, and the whole thing develops a slight char that adds complexity and depth.
Common Mistakes That Ruin Garlic Bread
Adding too much salt to the dough. Salt is essential—it controls fermentation rate and strengthens gluten. But more than 2 percent salt (by weight of the flour) inhibits yeast and creates dense bread. Your dough should taste slightly salty when you pinch off a small piece and chew it, but not aggressively so. If you’re salting to taste, you’re probably salting too much.
Using jarred minced garlic instead of fresh cloves. Jarred garlic is processed in weak acid, which prevents browning and mellowing. It tastes thin and acidic next to fresh garlic. Spend the extra 30 seconds mincing a few fresh cloves. The difference is enormous.
Skipping the fermentation step. If you rush the dough and try to bake it after just 2 hours at room temperature, you’ll end up with dense, flavorless bread. The fermentation develops flavor and creates rise. There’s no shortcut. If you’re short on time, make the dough one evening and refrigerate it overnight; the cold fermentation actually improves the final loaf.
Applying garlic butter before or too early into the bake. If you brush the raw dough with garlic butter and bake it, the butter soaks in and the bread becomes greasy inside instead of buttery. If you apply it more than a few minutes before the final broil, it hardens as the loaf cools, and you lose the beautiful bubbling, caramelized look you’re trying to achieve.
Using a convection oven for the main bake. Convection fans circulate air, which is great for most baking but terrible for bread. The moving air dries out the crust before it can develop properly. Bake on a regular (non-convection) setting, then use the broiler at the very end.
Not using enough salt or rosemary in the garlic butter. These are flavor amplifiers. A teaspoon of salt and a quarter-teaspoon of rosemary in a full batch of garlic butter seems like nothing, but they make the difference between bread that tastes like buttery toast and bread that tastes like an herb-forward, aromatic bakery item. Taste your butter mixture—it should smell noticeably of garlic and rosemary, not of plain melted butter.
Broiling for too long. Two to three minutes is all you need. Beyond that, the garlic can turn bitter and burnt-tasting, and you lose the subtle caramelization you’re going for. Watch it. The moment you see light golden-brown color on the garlic and butter bubbles, pull it out.
Waiting too long to serve it. The crust is most crackly in those first 10 to 15 minutes after the final broil. After that, it softens as it cools. Serve while it’s still warm, when the butter is melted and the crust still has structural integrity.
Storage and Make-Ahead Tips
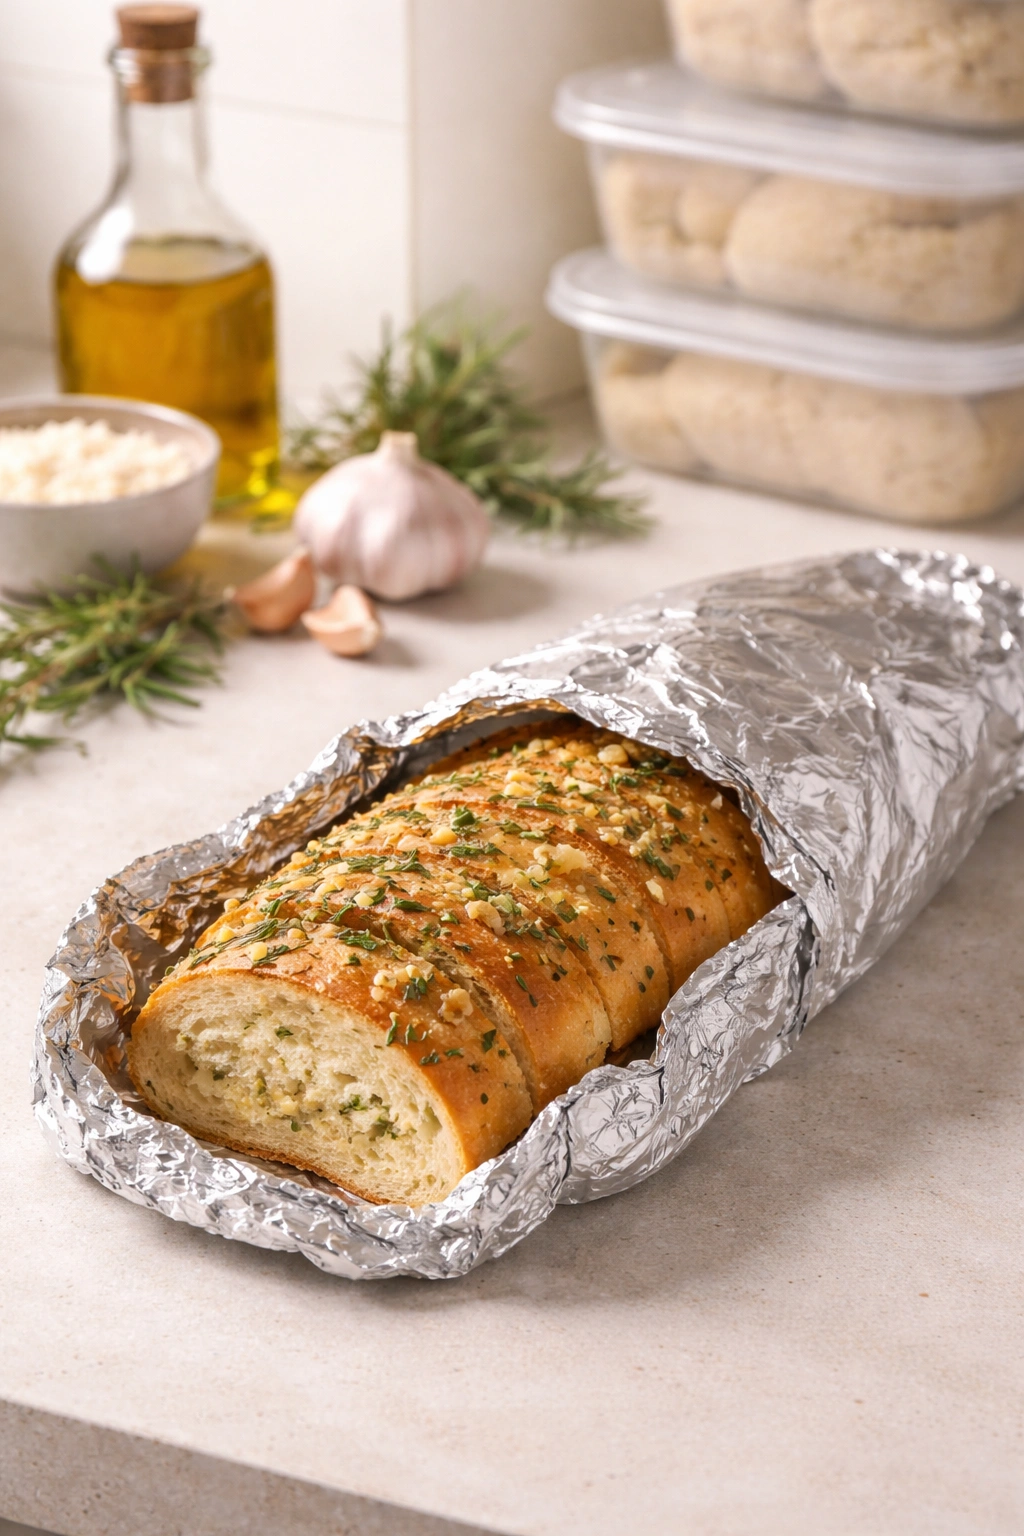
Baked garlic bread keeps at room temperature for about 1 day in an airtight container or wrapped in foil. The crust will gradually soften as it cools, which is why it’s best eaten the day it’s baked. After 24 hours, it becomes noticeably less special.
To reheat baked garlic bread, wrap it loosely in foil (the foil protects the crust from drying out while allowing some steam to escape) and warm it in a 350°F oven for 10 to 12 minutes, until the interior is warm and the crust has regained some crispness. Microwaving makes the crust rubbery—don’t do it.
You can freeze baked garlic bread for up to 2 months. Wrap it tightly in plastic wrap and then foil, removing as much air as possible. Thaw at room temperature for 1 to 2 hours, then reheat in a 350°F oven wrapped loosely in foil for 12 to 15 minutes.
The dough can be made ahead and frozen. After shaping but before the final rise, wrap the shaped dough tightly and freeze it for up to 1 month. To bake, remove it from the freezer and let it thaw at room temperature for 2 to 3 hours (or overnight in the refrigerator). It may need an extra 30 minutes of proofing after thawing because cold fermentation slows yeast activity. Proceed with the steam-bake and garlic butter as written.
You can also prepare the garlic butter ahead. Make it, let it cool to room temperature, then store it in an airtight container in the refrigerator for up to 3 days, or freeze for up to 1 month. Bring it to room temperature before brushing on the baked loaf so it spreads smoothly.
The most efficient make-ahead approach is to make the dough in the evening, refrigerate it overnight (which improves flavor), shape it the next morning, let it do its final rise while you go about your day, then bake and finish it in time for dinner. This gives you freshly baked garlic bread with minimal hands-on effort.
Variations Worth Trying
Garlic Bread with Herbs de Provence: Replace the rosemary with ½ teaspoon of Herbs de Provence (a blend of rosemary, thyme, marjoram, and lavender). This creates a more complex, slightly floral herb profile that feels sophisticated. Add a tiny pinch of garlic powder along with the fresh garlic for extra depth.
Spicy Garlic Bread: Add ⅛ to ¼ teaspoon of red pepper flakes to the garlic butter, depending on how much heat you enjoy. Toast the red pepper flakes briefly in the butter with the garlic so the heat spreads evenly. This version pairs beautifully with Italian pasta dishes or soups.
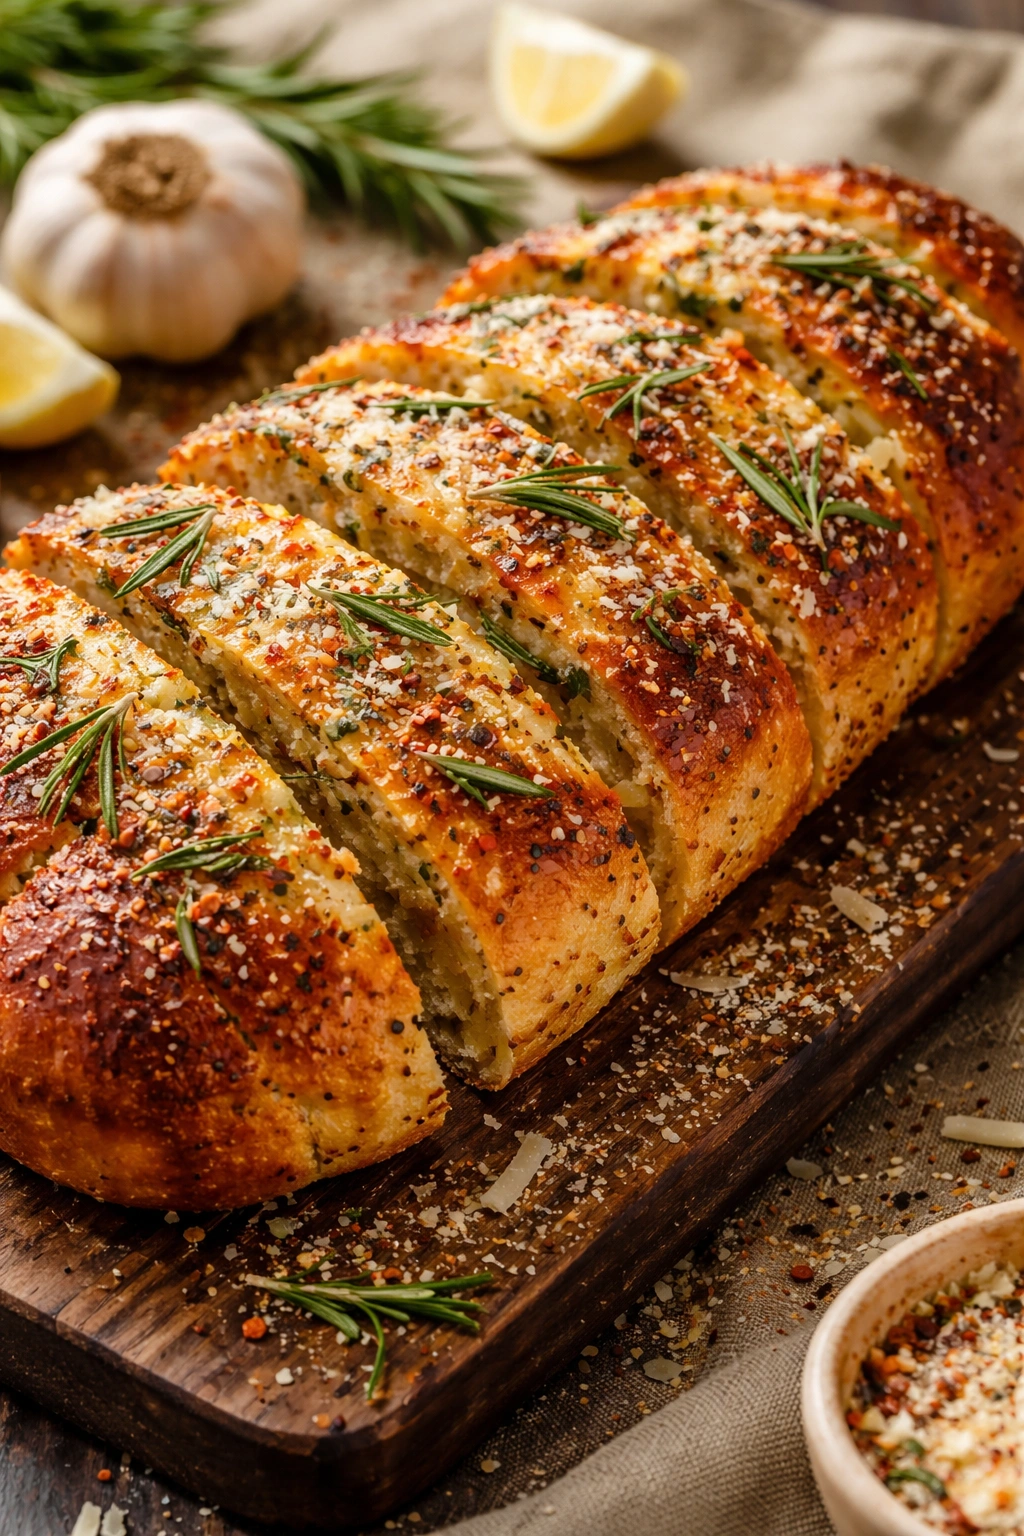
Garlic Bread with Parmesan Crust: After spreading the garlic butter on the pre-broiled loaf, sprinkle about 3 to 4 tablespoons of finely grated Parmigiano-Reggiano or Pecorino Romano over the top. Broil as directed. The cheese will melt and create a crunchy, umami-rich crust that adds savory depth.
Anchovy Garlic Bread (for adventurous eaters): Add 1 to 2 finely minced anchovy fillets to the garlic butter along with the rosemary. The anchovy doesn’t make the bread taste “fishy”—it adds a subtle, salty umami complexity that makes the garlic and rosemary more pronounced. This is genuinely extraordinary with soup.
Whole Wheat or Spelt Version: Replace up to 30 percent of the all-purpose flour with whole wheat or spelt flour. These flours absorb more water, so reduce the water slightly (start with 320 grams instead of 330 grams and adjust as needed). The whole grain adds subtle nutty flavor that complements garlic and rosemary beautifully. The crust may be slightly less crispy and more substantial, which many people prefer.
Garlic Bread with Thyme and Lemon Zest: Replace the rosemary with 1 teaspoon of fresh thyme leaves (or ½ teaspoon of dried thyme). Add the zest of one lemon to the garlic butter. The lemon brightens everything and creates a lighter, fresher interpretation that’s excellent with seafood or lighter soups.
Make It a Cheesy Version: Scatter 1 cup of shredded mozzarella or a combination of mozzarella and gruyere over the garlic butter before broiling. Broil until the cheese is melted and lightly golden. This transforms garlic bread into something closer to focaccia—more indulgent and filling.
Garlic and Black Garlic Variation: Once you’ve mastered the basic version with fresh garlic, try blending fresh minced garlic with 1 teaspoon of finely minced black garlic (which has a funky, umami-rich sweetness). The combination is complex and sophisticated, with a depth that pure fresh garlic alone can’t achieve.
Serving Suggestions and Ideal Pairings
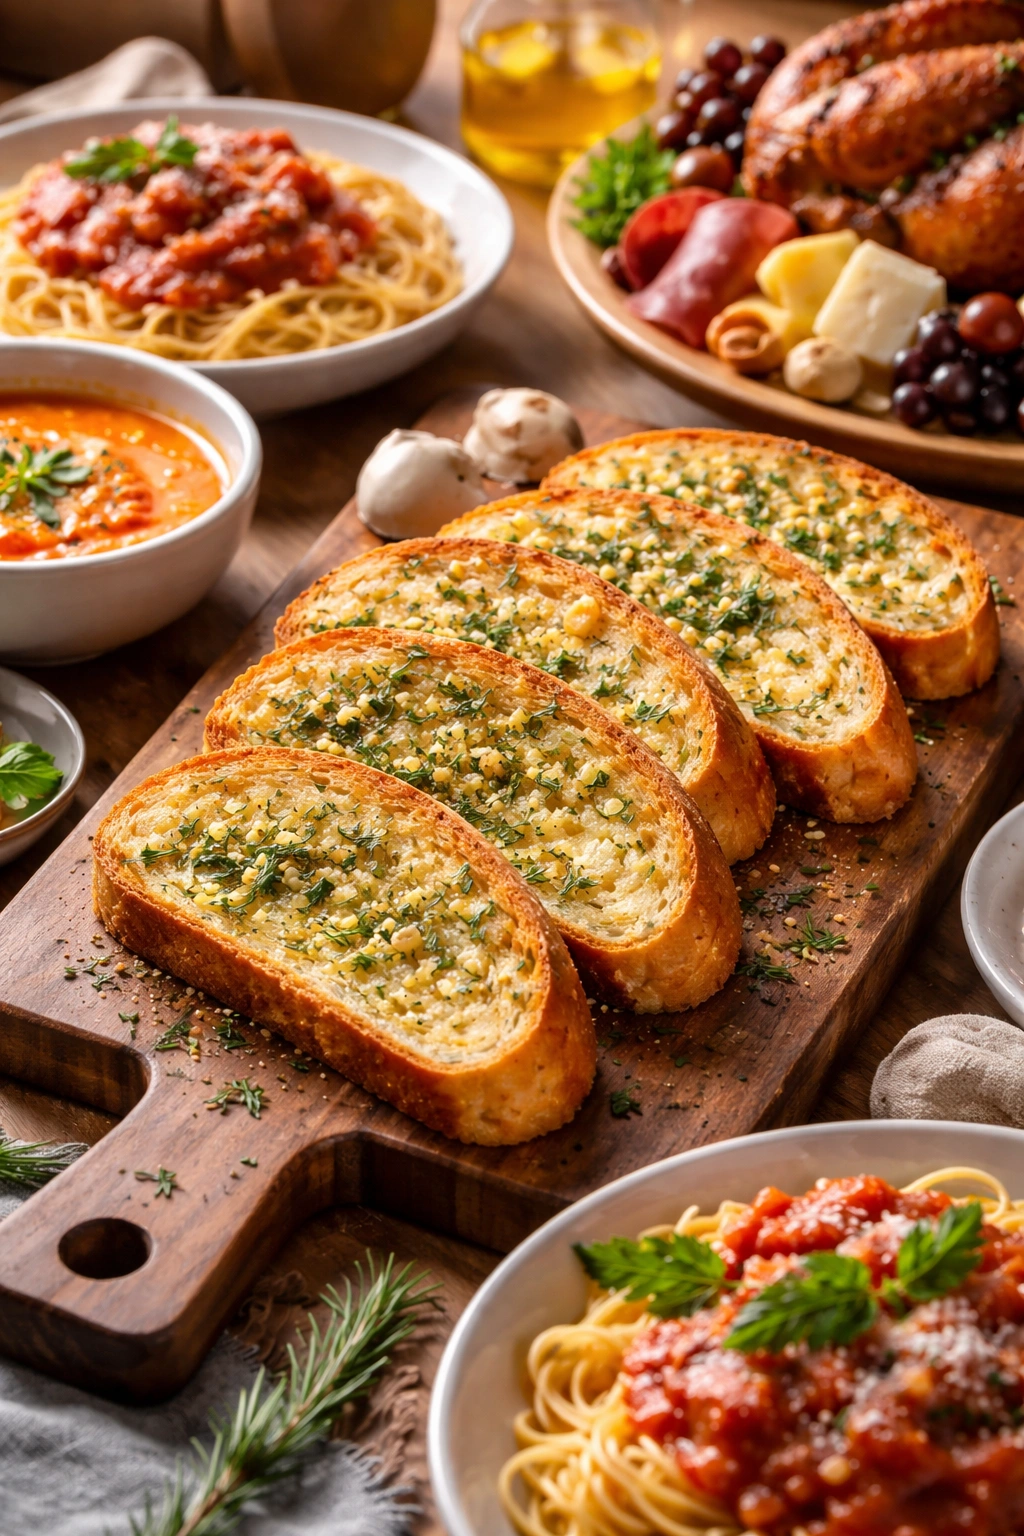
Garlic bread of this quality deserves intentional serving. Slice it on the diagonal with a serrated knife for rustic, beautiful pieces. Arrange the slices in a basket lined with cloth napkins or on a wooden board. Serve it warm so the butter is still melted and the crust still has crunch.
With Italian pasta dishes, garlic bread is the obvious pairing. It soaks up sauce, complements rich pasta, and serves the same function as bread at an Italian dinner table. Make it alongside lasagna, baked ziti, or any saucy pasta.
With soups, particularly creamy or broth-based soups, garlic bread becomes essential. Try it with minestrone, Italian wedding soup, tomato soup, or any soup with depth. The garlic and herb notes complement nearly any savory soup.
With cheese and charcuterie boards, thick slices of garlic bread transform the spread. Serve it alongside cured meats, aged cheeses, olives, and pickled vegetables for a casual but impressive spread.
As a side for roasted meats, especially lamb, chicken, or beef, garlic bread bridges the gap between starch and flavor. It’s less heavy than potatoes but more interesting than plain bread.
As an appetizer at dinner parties, cut the loaf into smaller pieces, arrange on a board, and serve warm while your main course finishes cooking. Guests often eat more of this than anything else.
Toasted the next day (if you happen to have leftovers), sliced garlic bread becomes a foundation for open-faced sandwiches, bruschetta-style appetizers, or a side for eggs and salad at lunch.
With wine pairings, the garlic, herbs, and toasted crust pair beautifully with crisp white wines like Pinot Grigio or Sauvignon Blanc, or with light to medium red wines like Barbera or Sangiovese. The richness of the butter also works with fuller-bodied whites.
Final Thoughts
The garlic bread that tastes bakery-fresh isn’t mysterious or difficult to achieve. It’s the result of respecting three core principles: proper fermentation that develops flavor and creates the right crumb structure, steam-baking that creates a real crust with crackle and crunch, and precise timing of the garlic butter so it finishes the bread without drowning it.
The first time you make this, one or two things might not be perfect. Maybe your crust isn’t quite as crackly as you hoped, or maybe you broiled for 30 seconds too long. That’s completely normal. By your second or third loaf, you’ll have developed an intuition for what the dough should look like at each stage, how long the steam-bake should last in your specific oven, and exactly how dark you want the garlic butter to get under the broiler.
After that, you’ll find yourself making this regularly. It becomes the bread you bring to dinners, the weekend routine that fills your kitchen with an aroma that no store-bought loaf can match, the simple addition that transforms an ordinary meal into something that feels intentional and special. That’s the power of understanding what makes something work—it stops being something you follow a recipe for, and it becomes something you know.