Pinwheels are the ultimate party appetizer—elegant enough for formal gatherings, casual enough for game day, and forgiving enough that even a first-time baker can nail them. They’re built on the simple genius of spreading a flavorful filling onto a tortilla, rolling it tight, slicing it into spirals, and serving them at room temperature. Better yet, you can make them hours ahead, which means less stress when guests arrive and more time to enjoy your own party.
The secret to pinwheels that actually disappear from the platter isn’t fancy technique—it’s choosing fillings that people genuinely crave. That means balancing flavors (creamy meets tangy, rich meets fresh), using quality ingredients that taste like themselves, and understanding how to layer textures so every bite feels intentional. A filling that’s too wet will make your tortilla soggy. One that’s too bland will feel like eating flavored paper. Get the balance right, and pinwheels become one of those recipes people ask for by name.
The recipes below represent six completely different flavor profiles, all of which have proven themselves at countless gatherings. Some are vegetarian, some feature protein, and all of them can be mixed and matched depending on what you have in the fridge. Pick one for next week’s potluck or make three for a game day spread—they all follow the same simple principles, so once you’ve rolled your first batch, the rest become intuitive.
1. Spinach & Feta Cream Cheese Pinwheels
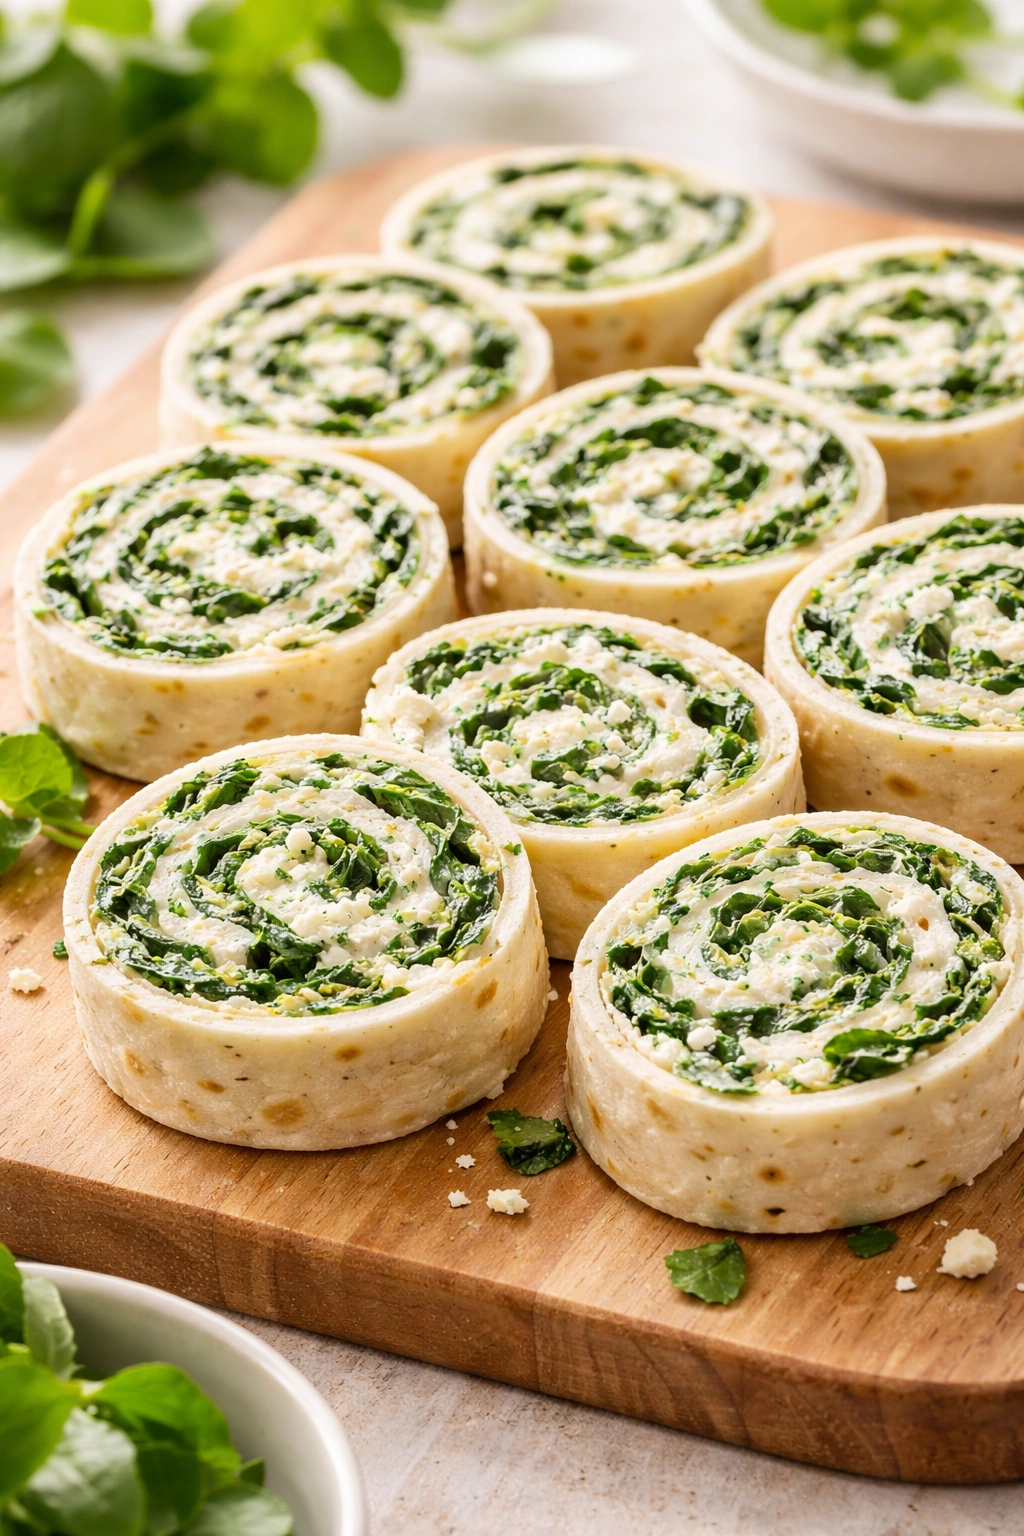
This is the classic for a reason. Spinach brings earthiness and substance, cream cheese creates the structural glue that holds everything together, and feta adds that briny, salty punch that makes people reach for another one. The filling has enough character to feel special but stays subtle enough that it won’t overwhelm anyone with picky taste preferences. This version goes light on the cream cheese and heavy on the fresh spinach, which keeps them tasting vibrant rather than gummy.
Yield: Makes 32 pinwheel slices (about 8 pieces per tortilla, 4 tortillas total) | Prep Time: 25 minutes | Cook Time: None (chilling time: 1 hour minimum) | Total Time: 1 hour 25 minutes | Difficulty: Beginner — no cooking required and the assembly is straightforward. You’re simply mixing, spreading, rolling, and slicing.
For the Filling:
- 1 cup fresh spinach, roughly chopped (or 1/2 cup thawed frozen spinach, excess moisture pressed out)
- 8 ounces (1 package) cream cheese, softened to room temperature
- 1/2 cup crumbled feta cheese
- 2 tablespoons grated Parmesan cheese
- 2 cloves garlic, minced very fine
- 2 tablespoons fresh lemon juice
- 1/4 teaspoon red pepper flakes (optional, for a subtle heat)
- Fine sea salt and freshly cracked black pepper to taste
For Assembly:
- 4 large flour tortillas (10-inch size), room temperature
- 2 tablespoons unsalted butter, melted (optional, for brushing)
- Fresh dill or parsley, finely chopped (optional garnish)
Make the Filling:
-
In a medium bowl, combine the softened cream cheese, crumbled feta, and grated Parmesan. Stir until mostly smooth — a few small feta lumps are fine and actually add character.
-
Add the minced garlic, fresh lemon juice, and red pepper flakes (if using). Stir well to combine.
Advertisements -
Fold in the chopped fresh spinach (or the pressed-out frozen spinach). Stir until the spinach is evenly distributed throughout the cream cheese mixture with no streaky pockets.
-
Taste the filling and adjust seasoning with salt and black pepper. Remember that feta is already quite salty, so start conservatively — you can always add more, but you can’t take it out.
Assemble and Roll:
-
Lay one tortilla flat on a clean work surface. Spread about 1/3 cup of the filling evenly across the tortilla, leaving a 1-inch border on all edges. The border keeps everything contained when you roll and prevents filling from squeezing out. Use an offset spatula or the back of a spoon to spread it thin and even — the filling should be about 1/4 inch thick across the whole tortilla.
-
Starting from one long edge, roll the tortilla tightly toward you, using gentle, even pressure. Don’t roll too fast or the tortilla might tear; don’t roll too loose or the pinwheel will fall apart when you slice it. Once fully rolled, the seam should be on the underside.
-
Repeat with the remaining three tortillas and filling.
-
Wrap each rolled tortilla tightly in plastic wrap and refrigerate for at least 1 hour (overnight is even better — this firms up the filling and makes slicing easier without the tortilla cracking).
Slice and Serve:
-
Working with one chilled roll at a time, use a sharp serrated knife (a bread knife works perfectly). Slice the tortilla into 1/2-inch-thick rounds by gently sawing through rather than pressing down — pressing down crushes the tortilla, while sawing gives you clean edges.
-
Arrange the pinwheel slices on a serving platter with the spiral-side up so people can see the beautiful green-and-white layers. Sprinkle with fresh dill or parsley if you’d like a pop of color.
Advertisements
Tips for Success
Fresh spinach versus frozen spinach makes a real difference here. Fresh spinach stays brighter and tastes more alive, while frozen spinach (which must have excess water pressed out) works fine if that’s what you have on hand. Either way, don’t skip the pressing step with frozen spinach — waterlogged filling breaks down the tortilla.
The cream cheese needs to be softened but not melted or greasy. Leave it on the counter for 30 minutes before using. If it’s still cold and firm, the filling won’t spread smoothly and you’ll overwork the tortilla trying to spread it.
Pro tip: Make the filling up to 2 days ahead and keep it covered in the fridge. Assemble the pinwheels the morning of your event, wrap them, and refrigerate. Slice them no more than 2 hours before serving so they stay fresh.
Storage and Make-Ahead
These keep beautifully in the refrigerator for up to 3 days in an airtight container. Freeze them for up to 1 month — they thaw at room temperature in about 30 minutes and taste as fresh as the day you made them. You can even slice them before freezing if you’d like grab-and-go pinwheels ready to thaw for unexpected guests.
2. Buffalo Chicken & Cream Cheese Pinwheels

If you love buffalo wings but want something you can eat with two hands while mingling, these pinwheels are your answer. Shredded chicken gets tossed in just enough buffalo sauce to flavor it without making the filling wet, then combined with cream cheese for binding and a touch of blue cheese or ranch for cooling creaminess. These are heartier than the spinach version and feel more substantial—they work equally well as a game-day appetizer or a light lunch element.
Yield: Makes 32 pinwheel slices (about 8 pieces per tortilla, 4 tortillas total) | Prep Time: 20 minutes | Cook Time: 25 minutes (for poaching chicken) | Total Time: 45 minutes + 1 hour chilling | Difficulty: Beginner — the only cooking is simmering chicken, which requires no special skill. Everything else is mixing and rolling.
For the Chicken:
- 1 pound boneless, skinless chicken breasts
- 4 cups chicken broth or water
- 1/2 teaspoon salt
- 1/4 teaspoon black pepper
- 1 bay leaf
For the Filling:
- 1 cup shredded cooked chicken (from above)
- 8 ounces cream cheese, softened to room temperature
- 1/3 cup buffalo sauce (Frank’s RedHot or similar, or homemade if you prefer)
- 1/4 cup blue cheese crumbles (or 3 tablespoons ranch dressing)
- 2 tablespoons finely chopped fresh celery or celery leaves
- 2 tablespoons finely chopped fresh parsley (optional)
- Fine sea salt and freshly cracked black pepper to taste
For Assembly:
- 4 large flour tortillas (10-inch size), room temperature
Cook the Chicken:
-
Place the chicken breasts in a medium saucepan or pot. Cover with chicken broth or water by about 1 inch.
-
Add salt, black pepper, and the bay leaf. Bring to a gentle simmer over medium-high heat.
-
Reduce heat to medium and maintain a gentle simmer (not a rolling boil, which toughens the chicken). Cook for 15 to 20 minutes, until the chicken is cooked through — a meat thermometer inserted into the thickest part should read 165°F (74°C), or cut into the largest piece and check that there’s no pink inside.
-
Transfer the chicken to a plate and let it cool slightly. Once cool enough to handle, shred it using two forks or your fingers, pulling the meat into bite-sized strands. Discard any bones or tough bits. You should have about 2 cups of shredded chicken; you’ll use 1 cup for this recipe. (Save any extra for other uses.)
Make the Filling:
-
In a medium bowl, combine the softened cream cheese, buffalo sauce, and blue cheese crumbles (or ranch dressing). Stir until well combined and creamy. The buffalo sauce will thin the cream cheese slightly, which is exactly what you want — the mixture should spread smoothly without being runny.
-
Fold in 1 cup of the shredded chicken, the chopped celery, and parsley (if using). Stir until evenly combined.
-
Taste and adjust seasoning with a pinch of salt and black pepper. Buffalo sauce is already quite salty, so be conservative.
Assemble, Roll, Chill, and Slice:
-
Lay one tortilla flat on your work surface. Spread about 1/3 cup of filling across the tortilla, leaving a 1-inch border on all edges. Spread it thin and even with an offset spatula.
Advertisements -
Starting from one long edge, roll the tortilla tightly away from you, using gentle, even pressure. Once fully rolled, the seam should be on the underside.
-
Repeat with the remaining three tortillas and filling.
-
Wrap each roll tightly in plastic wrap and refrigerate for at least 1 hour.
-
Using a sharp serrated knife, slice each chilled roll into 1/2-inch-thick pieces. Arrange on a platter with the spiral-side up.
Tips for Success
Don’t skip poaching the chicken yourself — rotisserie chicken works in a pinch, but poached chicken shreds more cleanly and stays moister. If you’re short on time, rotisserie chicken is absolutely acceptable.
Buffalo sauce varies wildly in spiciness depending on the brand. If you’re feeding mixed crowds (including people who don’t like heat), use a milder sauce or tone down the amount and balance it with extra ranch dressing or sour cream.
The small amount of fresh celery adds a crucial textural contrast and that classic buffalo-wing flavor echo. Don’t skip it — it transforms these from “just chicken pinwheels” to “oh wow, these taste like wings.”
Pro tip: These are best assembled the morning of and served within a few hours. The cream cheese stays firmer and the tortilla stays more distinct if you don’t let them sit refrigerated for 24+ hours.
Serving Suggestion
Serve these with a small bowl of blue cheese dressing or ranch for dipping, even though the pinwheels are already creamy. Some guests will want to dip anyway, and it’s a nice touch that feels fancy without any additional effort.
3. Mediterranean Hummus & Roasted Red Pepper Pinwheels

These are the vegetarian showstopper that even meat-eaters will demolish. Hummus provides the creamy foundation, roasted red peppers bring sweetness and smokiness, and a combination of olives, sun-dried tomatoes, and crumbled feta creates complexity and texture. The filling stays naturally moist without getting soggy because the vegetables are all pre-prepared rather than fresh and watery. These are also naturally dairy-light compared to the cream-cheese-heavy versions, which makes them feel fresher and more suitable for warmer-weather gatherings.
Yield: Makes 40 pinwheel slices (about 10 pieces per tortilla, 4 tortillas total) | Prep Time: 20 minutes | Cook Time: None | Total Time: 20 minutes + 1 hour chilling | Difficulty: Beginner — no cooking at all. This is simply assembly and rolling.
For the Filling:
- 1 cup hummus (store-bought is perfectly fine)
- 1 cup roasted red peppers (from a jar, drained and finely chopped, or your own roasted and peeled peppers)
- 1/2 cup pitted Kalamata olives, finely chopped
- 1/4 cup sun-dried tomatoes packed in oil, finely chopped (or rehydrated from dry)
- 1/3 cup crumbled feta cheese
- 2 tablespoons fresh lemon juice
- 1 tablespoon fresh oregano, finely chopped (or 1 teaspoon dried oregano)
- 1 tablespoon fresh parsley, finely chopped
- 1 clove garlic, minced very fine
- Fine sea salt and freshly cracked black pepper to taste
- 1/4 teaspoon red pepper flakes (optional, for subtle heat)
For Assembly:
- 4 large whole-wheat or regular flour tortillas (10-inch size), room temperature
- Optional garnish: fresh oregano sprigs, crumbled feta, paprika
Make the Filling:
-
In a medium bowl, combine the hummus and finely chopped roasted red peppers. Stir until evenly combined. The hummus should be a light peachy-pink color throughout.
-
Add the chopped Kalamata olives, sun-dried tomatoes, crumbled feta, lemon juice, oregano, parsley, and minced garlic. Stir gently but thoroughly until everything is distributed evenly.
-
Taste the filling and adjust seasoning with salt, black pepper, and red pepper flakes if using. Remember that olives, sun-dried tomatoes, and feta are all quite salty, so taste before adding additional salt.
Assemble, Roll, Chill, and Slice:
-
Lay one tortilla flat on your work surface. Spread about 1/3 cup of filling evenly across the tortilla, leaving a 1-inch border on all sides. Use an offset spatula or the back of a spoon to spread it thin.
-
Starting from one long edge, roll the tortilla tightly, using even, gentle pressure. The seam should end up on the underside.
Advertisements -
Repeat with the remaining three tortillas and filling.
-
Wrap each roll tightly in plastic wrap and refrigerate for at least 1 hour (or up to 8 hours).
-
Using a sharp serrated knife, slice each chilled roll into 1/2-inch-thick pieces. Arrange on a platter with the spiral-side facing up.
-
If desired, garnish with fresh oregano sprigs, additional crumbled feta, or a light dusting of paprika.
Tips for Success
The key to this filling is making sure everything is finely chopped, not minced to a paste. You want each bite to contain distinct pieces of pepper, olive, tomato, and feta—not a blended mush. Use a sharp knife and chop by hand rather than a food processor.
Roasted red peppers from a jar are the way to go here. Draining them well prevents excess moisture from making the filling too wet. If you’re roasting your own peppers, char them over a gas flame or under the broiler, place them in a plastic bag for 10 minutes to steam, then peel off the charred skin, remove seeds, and chop them.
Sun-dried tomatoes packed in oil are your shortcut to intense tomato flavor without extra moisture. If you only have dry sun-dried tomatoes, rehydrate them in warm water for 10 minutes, squeeze out excess liquid, and chop fine.
Pro tip: Make these the day before if you have time. The flavors meld and deepen overnight, and the filling becomes even more cohesive.
Storage and Serving
These keep for 3 days refrigerated in an airtight container. They can be frozen for up to 1 month and thaw at room temperature in about 30 minutes. Serve them at room temperature or slightly chilled—don’t eat them cold straight from the fridge, as that mutes the flavors.
4. Southwest Turkey & Black Bean Pinwheels

These are the hearty, spiced-up pinwheels that work equally well at a casual get-together or a more formal gathering. Ground turkey gets seasoned with cumin, chili powder, and smoked paprika, then combined with black beans, cream cheese, and just enough sharp cheddar to add richness without overwhelming. Jalapeños and cilantro bring fresh heat and brightness. The filling is protein-packed enough that these work as a light meal component, not just an appetizer.
Yield: Makes 32 pinwheel slices (about 8 pieces per tortilla, 4 tortillas total) | Prep Time: 20 minutes | Cook Time: 12 minutes (for browning ground turkey) | Total Time: 32 minutes + 1 hour chilling | Difficulty: Beginner — just browning ground turkey and mixing filling. No special techniques required.
For the Filling:
- 3/4 pound ground turkey (93/7 lean is fine)
- 1 teaspoon olive oil
- 1/2 teaspoon ground cumin
- 1/2 teaspoon chili powder
- 1/4 teaspoon smoked paprika
- 1/4 teaspoon fine sea salt
- 1/8 teaspoon black pepper
- 6 ounces cream cheese, softened to room temperature
- 1/2 cup cooked black beans (canned and drained is perfectly fine), lightly mashed
- 1/3 cup sharp cheddar cheese, finely shredded
- 1/4 cup corn kernels, fresh or frozen (thawed)
- 2 tablespoons finely diced jalapeño (seeds removed for less heat, seeds included for more heat)
- 2 tablespoons fresh cilantro, finely chopped
- 1 tablespoon fresh lime juice
- Fine sea salt and freshly cracked black pepper to taste
For Assembly:
- 4 large flour tortillas (10-inch size), room temperature
- Optional: lime crema for serving (see Serving Suggestion below)
Brown the Turkey:
-
Heat olive oil in a medium skillet over medium-high heat. Once the oil shimmers, add the ground turkey and break it into small pieces using a wooden spoon or spatula.
-
Cook for 10 to 12 minutes, stirring occasionally, until the turkey is cooked through with no pink remaining. If the mixture throws off excess liquid, drain it off using a fine-mesh strainer.
-
While the turkey is still warm, add the cumin, chili powder, smoked paprika, salt, and black pepper. Stir well to coat all the meat evenly. The spices will bloom from the residual heat and smell incredible. Let cool to room temperature (about 5 minutes).
Make the Filling:
-
In a medium bowl, combine the softened cream cheese, cooked black beans (lightly mashed with a fork so some texture remains), and shredded cheddar cheese. Stir until well combined and creamy.
-
Add the cooled spiced ground turkey, corn kernels, diced jalapeño, fresh cilantro, and lime juice. Fold everything together gently until evenly combined—you’re looking for the turkey to be distributed throughout without overworking the mixture.
Advertisements -
Taste and adjust seasoning with salt and black pepper. The mixture should taste vibrant and balanced between savory, spicy, and fresh.
Assemble, Roll, Chill, and Slice:
-
Lay one tortilla flat on your work surface. Spread about 1/3 cup of filling evenly across the tortilla, leaving a 1-inch border on all edges.
-
Starting from one long edge, roll the tortilla tightly toward you, using gentle, even pressure. The seam should be on the underside.
-
Repeat with the remaining three tortillas and filling.
-
Wrap each roll tightly in plastic wrap and refrigerate for at least 1 hour.
-
Using a sharp serrated knife, slice each chilled roll into 1/2-inch-thick pieces. Arrange on a platter with the spiral-side up.
Tips for Success
Don’t use 99/1 ultra-lean ground turkey for this—it’ll taste dry and stringy. The 93/7 blend has enough fat to stay moist and flavorful while remaining lean enough to feel like a lighter option compared to beef.
Fresh cilantro is non-negotiable here. If you hate cilantro, use fresh parsley instead, but cilantro is what makes this filling taste like southwest cuisine rather than generic turkey filling.
The jalapeños should be finely diced, not minced. You want small pieces throughout the filling so each bite gets a little hit of heat and flavor without overwhelming chunks.
Pro tip: Brown the turkey the day before, cool it completely, and refrigerate it. Then mix the filling the morning of your event. This distributes the workload and keeps everything fresh-tasting.
Serving Suggestion
Serve these with a lime crema on the side: whisk together 1/2 cup sour cream or Greek yogurt, 2 tablespoons fresh lime juice, 1 minced garlic clove, 1/4 teaspoon cumin, salt, and pepper. Drizzle it over the platter or offer it as a dipping sauce.
5. Caprese Pinwheels With Balsamic Glaze
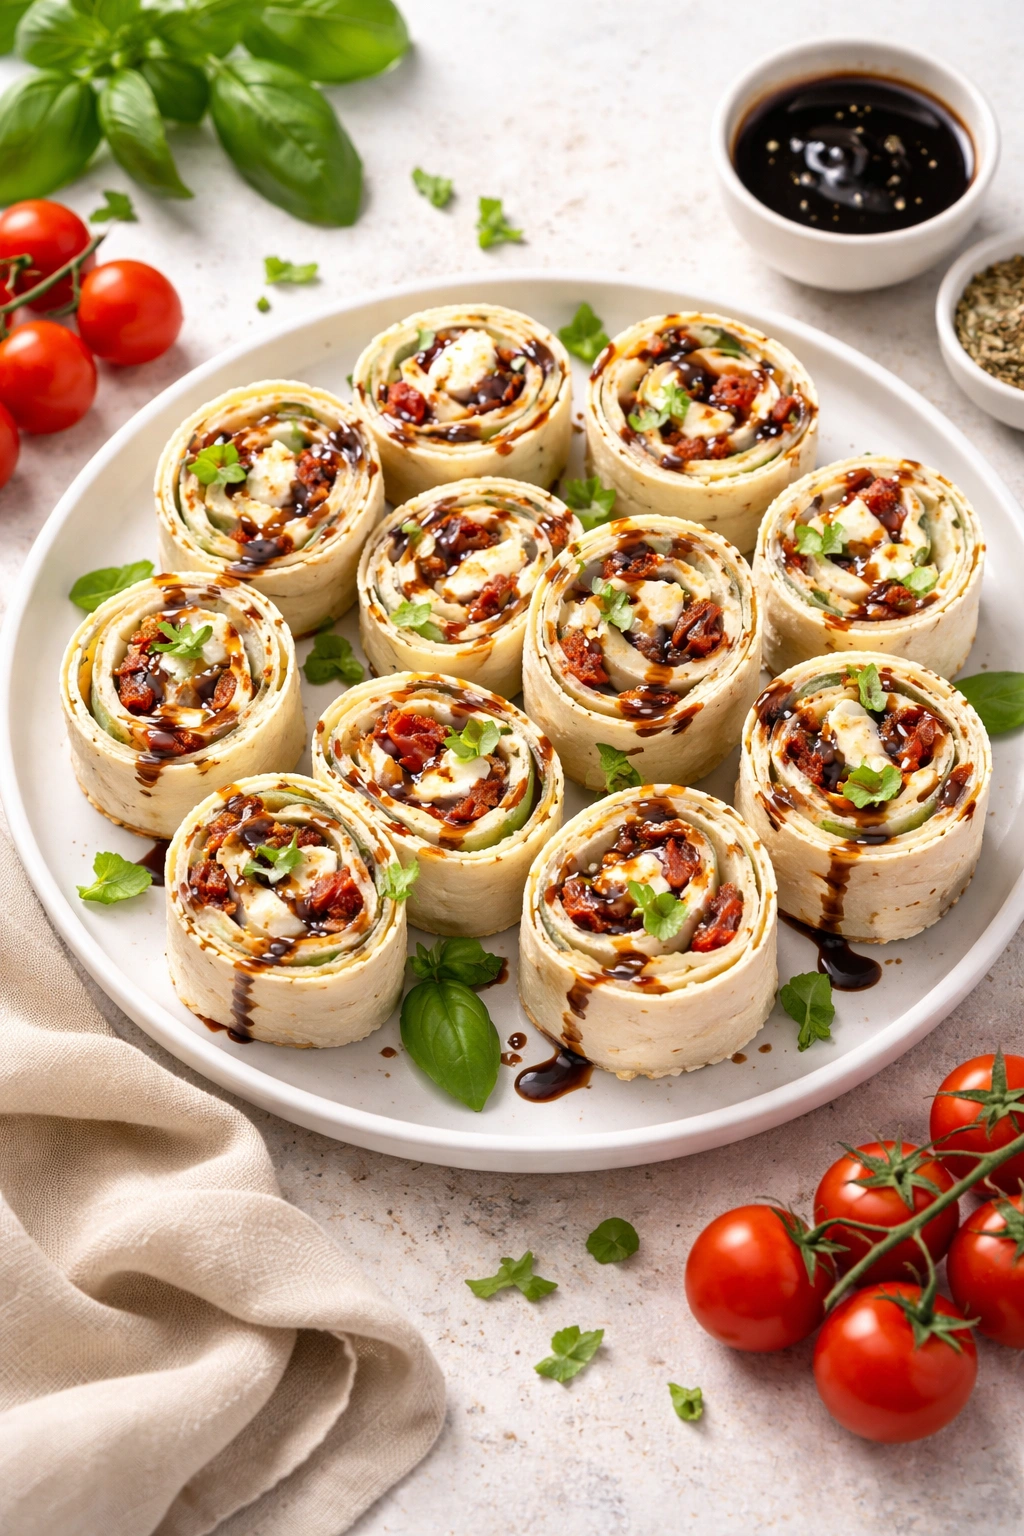
These are the summer pinwheel—fresh, bright, and built on the holy trinity of tomato, mozzarella, and basil. Rather than using fresh tomatoes (which introduce too much moisture), this version uses sun-dried tomatoes for concentrated flavor, fresh mozzarella for creamy richness, and plenty of fresh basil to keep everything tasting alive. A touch of balsamic vinegar and a drizzle of balsamic glaze at the end makes them taste like you spent hours thinking about them when really you just needed 15 minutes.
Yield: Makes 32 pinwheel slices (about 8 pieces per tortilla, 4 tortillas total) | Prep Time: 20 minutes | Cook Time: None | Total Time: 20 minutes + 1 hour chilling | Difficulty: Beginner — no cooking required. This is assembly and rolling.
For the Filling:
- 8 ounces fresh mozzarella, drained well and torn into small bite-sized pieces (about 1 cup)
- 1/2 cup sun-dried tomatoes packed in oil, finely chopped (reserve 1 tablespoon of the oil)
- 3/4 cup fresh basil leaves, roughly torn or chiffonade cut
- 3 tablespoons cream cheese, softened to room temperature (just for structure, not the main protein)
- 2 tablespoons balsamic vinegar
- 1 tablespoon reserved sun-dried tomato oil
- 1 clove garlic, minced very fine
- Fine sea salt and freshly cracked black pepper to taste
- Pinch of red pepper flakes (optional)
For Assembly:
- 4 large flour tortillas (10-inch size), room temperature
- 2 tablespoons balsamic glaze (store-bought, or homemade by reducing balsamic vinegar to a syrup-like consistency)
- Fresh basil leaves for garnish (optional but beautiful)
Make the Filling:
-
Place the torn fresh mozzarella in a medium bowl. Add the finely chopped sun-dried tomatoes, torn fresh basil, and minced garlic.
-
In a small bowl, whisk together the balsamic vinegar and reserved sun-dried tomato oil. Pour this over the mozzarella mixture.
-
Add the softened cream cheese and gently fold everything together. The cream cheese isn’t meant to be the main component—it’s just enough to help hold the filling together and make it spreadable. The basil, tomato, and mozzarella should be the stars.
Advertisements -
Taste and adjust seasoning with salt, black pepper, and red pepper flakes if using. Fresh mozzarella is very mild, so the filling will need salt to bring out flavors.
Assemble, Roll, Chill, and Slice:
-
Lay one tortilla flat on your work surface. Spread about 1/3 cup of filling evenly across the tortilla, leaving a 1-inch border on all edges. Spread gently—fresh mozzarella can be delicate, and you don’t want to break the pieces.
-
Starting from one long edge, roll the tortilla tightly, using even, gentle pressure. The seam should be on the underside.
-
Repeat with the remaining three tortillas and filling.
-
Wrap each roll tightly in plastic wrap and refrigerate for at least 1 hour (but no longer than 4 hours—fresh mozzarella is best when not cold too long).
-
Using a sharp serrated knife, slice each chilled roll into 1/2-inch-thick pieces. Arrange on a platter with the spiral-side up.
-
Drizzle lightly with balsamic glaze and top with a single fresh basil leaf or small basil chiffonade if desired.
Tips for Success
Fresh mozzarella must be drained very well before mixing into the filling. If it’s sitting in liquid, that liquid will eventually weep out and make the tortilla soggy. Pat it dry with paper towels before tearing it.
Sun-dried tomatoes packed in oil are essential here—they provide the tomato flavor without the moisture that fresh tomatoes introduce. Drain them well and chop fine.
The balsamic vinegar is your secret weapon. Don’t skip it—it adds the acidic brightness that makes every component taste more vivid. If you don’t have balsamic vinegar, use red wine vinegar, but the flavor will be different.
Pro tip: These are best assembled close to serving time (within 3-4 hours). Unlike heartier pinwheels that improve with time, these are best eaten fresh while the basil is still bright and the mozzarella is at its creamiest.
Serving Suggestion
Arrange them on a white plate or platter for maximum visual impact—the red, white, and green spirals are naturally beautiful. A small bowl of extra balsamic glaze on the side looks impressive and gives guests the option to dip or drizzle more.
6. Pepperoni & Provolone Italian Pinwheels

These are the most indulgent pinwheel in the lineup—a celebration of Italian charcuterie and cheese that reads like an upscale antipasto platter. Cream cheese mixed with an Italian herb blend creates the base, then thin slices of provolone, pepperoni, and Italian salami get layered in. Fresh parsley and a touch of garlic transform it from “just a sandwich rolled up” into something with real flavor depth. These are perfect for carb-loving crowds and feel appropriately special for a fancier event.
Yield: Makes 32 pinwheel slices (about 8 pieces per tortilla, 4 tortillas total) | Prep Time: 15 minutes | Cook Time: None | Total Time: 15 minutes + 1 hour chilling | Difficulty: Beginner — no cooking at all. This is just spreading, layering, rolling, and slicing.
For the Filling:
- 8 ounces cream cheese, softened to room temperature
- 1/3 cup grated Parmesan cheese
- 2 tablespoons fresh parsley, finely chopped
- 1 tablespoon Italian seasoning (or 1 teaspoon dried oregano + 1 teaspoon dried basil + 1/2 teaspoon dried thyme)
- 1 clove garlic, minced very fine
- 1/4 teaspoon red pepper flakes
- Fine sea salt and freshly cracked black pepper to taste
- 1 teaspoon olive oil (optional, to thin cream cheese if needed)
For Assembly and Layers:
- 4 large flour tortillas (10-inch size), room temperature
- 8 ounces thinly sliced provolone cheese (about 16 slices, or 4 slices per tortilla)
- 6 ounces sliced pepperoni (about 24 slices total, or 6 slices per tortilla)
- 4 ounces thinly sliced Italian salami or capicola (about 16 slices, or 4 slices per tortilla)
- Fresh basil or parsley for garnish (optional)
Make the Herb-Cream Cheese Base:
-
In a medium bowl, combine the softened cream cheese, grated Parmesan, finely chopped parsley, Italian seasoning, minced garlic, and red pepper flakes.
-
Stir until well combined and smooth. If the cream cheese is very thick, add 1 teaspoon of olive oil to make it easier to spread. The mixture should be creamy and easily spreadable without being gloppy.
Advertisements -
Taste and adjust seasoning with salt and black pepper. The Parmesan and pepperoni will add saltiness, so be conservative.
Assemble, Layer, Roll, Chill, and Slice:
-
Lay one tortilla flat on your work surface. Spread about 2 tablespoons of the herb cream cheese mixture evenly across the tortilla, leaving a 1-inch border on all sides.
-
Layer 4 slices of provolone cheese across the tortilla (they don’t need to completely cover it—slight overlaps are fine).
-
Layer 6 slices of pepperoni on top of the provolone.
-
Layer 4 slices of Italian salami or capicola on top.
-
Starting from one long edge, roll the tortilla tightly toward you, using gentle, even pressure. The seam should be on the underside.
-
Repeat with the remaining three tortillas, cream cheese base, and meat and cheese layers.
-
Wrap each roll tightly in plastic wrap and refrigerate for at least 1 hour.
-
Using a sharp serrated knife, slice each chilled roll into 1/2-inch-thick pieces, gently sawing rather than pressing. Arrange on a platter with the spiral-side up.
Advertisements -
Garnish with fresh basil or parsley if desired.
Tips for Success
Don’t use sliced deli meat—use actual packaged sliced pepperoni and salami. The thickness and texture matter. Deli-sliced meat tends to be too thick and changes the ratio of layers.
The cream cheese base should be thin—just enough to hold the layers together and add flavor. If you use too much, the pinwheels become gummy. Two tablespoons spread across a whole tortilla is plenty.
Layer the meats with slight overlaps rather than trying to cover the entire tortilla completely. This keeps the pinwheel from becoming a dense, overwhelming meat log.
Pro tip: Keep the packaged pepperoni and salami in the fridge until just before assembling. Cold meat is easier to work with and less likely to stick together.
Storage and Serving Note
These are incredibly versatile. Serve them at room temperature for the best flavor (cold mutes the seasoning), or refrigerate them and serve chilled if you prefer. They keep for 3 days refrigerated and can be frozen for up to 1 month. A small bowl of whole-grain mustard or marinara sauce on the side makes them feel even more special.
Final Thoughts

The beauty of pinwheels is that once you’ve rolled your first batch, every other variation becomes intuitive. The mechanics are always the same—spread, layer, roll, chill, slice—but the filling is where you get creative. These six recipes represent completely different flavor families, so you can build a pinwheel spread that feels intentional and varied rather than repetitive.
The best part about making pinwheels ahead is that they actually improve as they sit. The flavors marry, the tortilla softens and becomes more pliable, and the filling firms up just enough to make them stable to eat. You can assemble an entire lineup hours before your event and barely think about them again until it’s time to arrange them on a platter.
Start with whichever filling sounds most appealing for your crowd, follow the basic method, and trust the process. Once you’ve made one or two batches, you’ll start seeing other fillings you want to try. Roasted garlic and herb cream cheese with sun-dried tomatoes. Buffalo shrimp with blue cheese. Curried turkey and mango. Pinwheels are the canvas—the filling is where your imagination takes over. You’ve got this.