Cooking sausage doesn’t require fancy techniques or complicated equipment — but knowing the right method makes all the difference between something that’s merely edible and something that’s genuinely delicious. The goal is simple: get the inside cooked through and tender while developing a flavorful, lightly browned exterior that doesn’t burst open and lose all those juices you’re after.
Most home cooks stick with one method out of habit, usually whatever they learned first, but different sausage types and different occasions call for different approaches. A spicy Italian sausage for pasta benefits from one technique, while a delicate chicken sausage needs gentler handling. Breakfast links have different goals than beer-and-brats-night bratwurst. Once you understand the core principles behind each method, you’ll instinctively know which approach will deliver the best results for whatever you’re cooking.
The good news? You probably already have everything you need in your kitchen. No special sausage cookers, no gadgets, no subscriptions. Just solid technique applied with intention — and that’s exactly what separates confident cooks from people who wing it and hope for the best.
1. Pan-Searing Sausage on the Stovetop
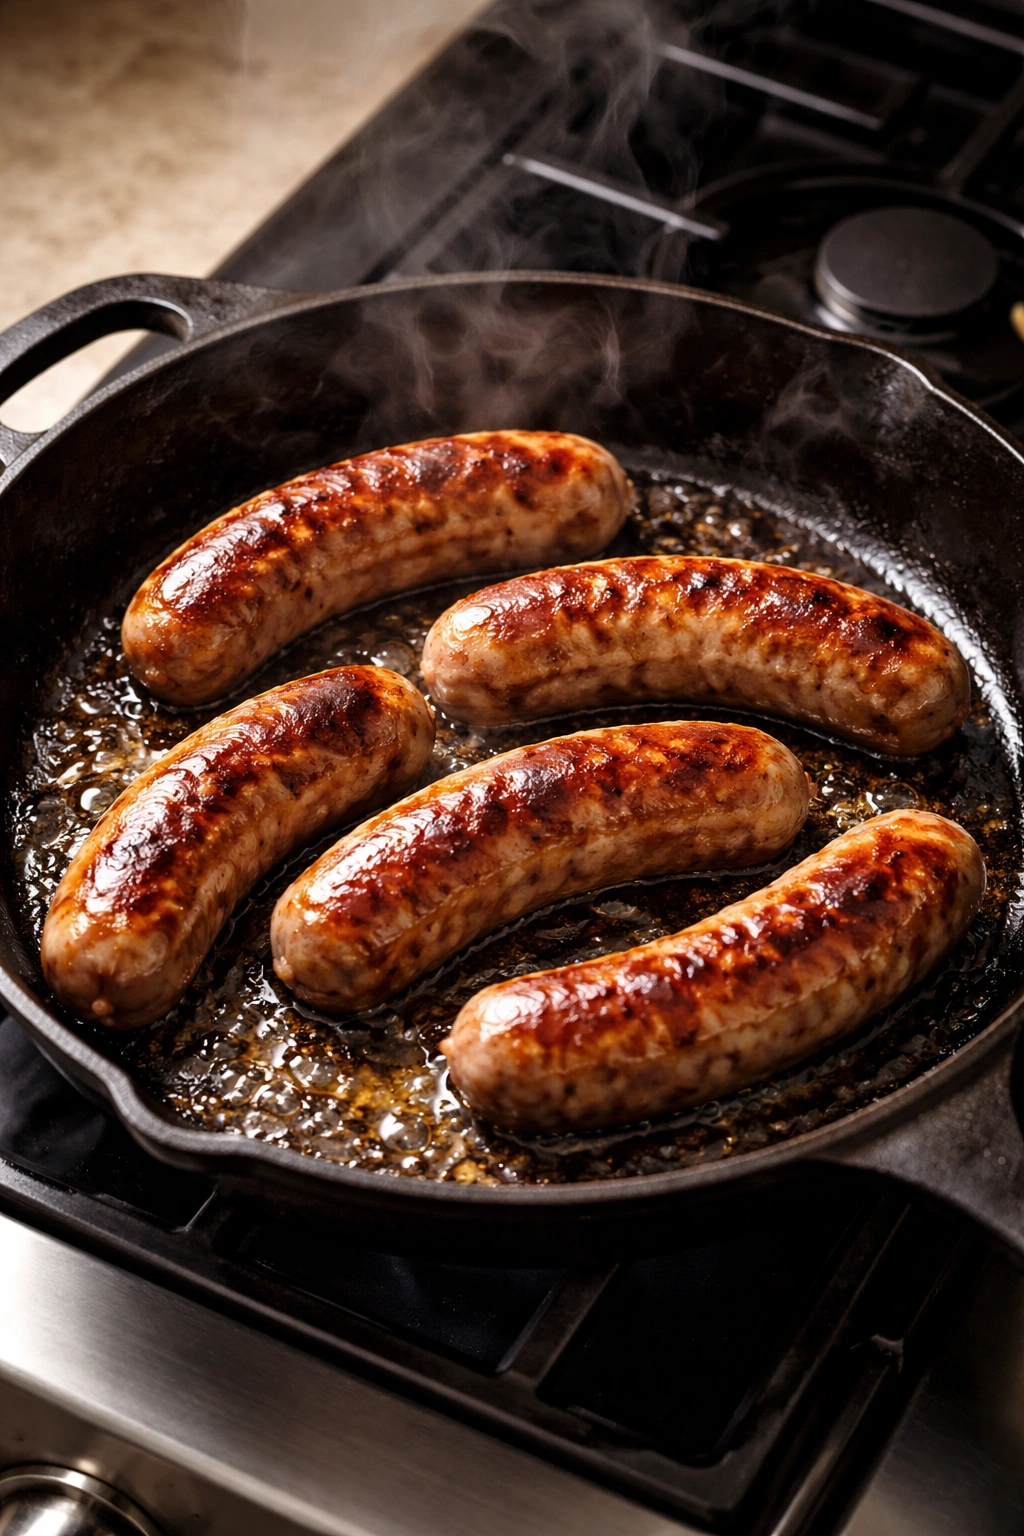
Pan-searing is the fastest, most straightforward method and the one that gives you the most control. You’re cooking sausage directly in a skillet or frying pan over moderate heat, which allows you to monitor doneness closely and adjust temperature on the fly. The sausage develops a golden-brown crust through direct contact with the hot pan while the interior cooks gently in its own rendered fat — no extra oil needed, though a small splash of water helps finish cooking without burning the exterior.
Start with a cold, dry skillet and arrange your sausages in a single layer without crowding. Cold-start cooking is key because it allows the sausage casing to contract gradually instead of bursting from thermal shock. Set the heat to medium or medium-low — never high, even though you might be tempted to rush. High heat will brown the outside before the inside is done, leaving you with a burnt crust and a cold, undercooked center.
Let the sausages sit undisturbed for 3-4 minutes, then turn them once and cook for another 3-4 minutes until they achieve a deep golden color on most sides. This isn’t a stir-and-flip constantly situation — you want that color to develop, which means contact time with the pan. Once they’re browning nicely, reduce heat to medium-low and add about ¼ cup of water to the pan, then cover it with a lid or even just foil. This creates gentle steam that finishes the interior cooking without drying things out or burning the exterior.
Cook covered for another 6-8 minutes depending on sausage thickness, then uncover, let any remaining liquid evaporate, and finish with a final minute or two of dry heat to re-crisp the exterior. The whole process from cold pan to perfectly cooked sausage takes about 15 minutes, start to finish.
Why This Method Works So Well
Pan-searing gives you the best of both worlds — a flavorful crust and a juicy, tender interior. The rendered fat from the sausage becomes a self-basting mechanism, keeping everything moist while the direct heat browns the casing. You can hear and smell what’s happening, so you adjust instantly if something’s cooking too fast. It’s also the method that uses the least energy and creates the least cleanup, which matters when you’re cooking a weeknight dinner.
When to Use This Technique
This is your go-to method for thin sausages like breakfast links, Italian sausage, chicken sausage, or any time you’re cooking sausage as a component of another dish (like for pasta sauce or in a sheet pan dinner). It’s also perfect when you’re only cooking a few sausages and don’t want to heat up a whole oven.
2. Oven-Roasting Sausage for Hands-Off Cooking

Oven-roasting is the method to use when you’re cooking a large batch, cooking thick sausages, or simply want something that doesn’t require hovering over the stove. Line a sheet pan with foil, arrange your sausages in a single layer (they can touch slightly but shouldn’t be piled on top of each other), and slide the whole thing into a preheated 400°F (200°C) oven.
The even, dry heat of the oven cooks sausage gently from all sides, and there’s almost zero hands-on time. You can walk away and do something else for 20-30 minutes depending on sausage size and thickness. The sausages won’t brown as dramatically as pan-searing, but they’ll cook evenly and stay incredibly juicy because the moisture stays trapped in the oven environment.
For extra flavor and browning, you can arrange sausages on a preheated sheet pan that you’ve already oiled lightly and maybe finished with a thin coat of tomato sauce, beer, or broth. The surrounding liquid keeps the sausages from drying out while adding flavor. Just check them after 15 minutes, and if they’re browning too fast, tent the pan loosely with foil and reduce heat slightly.
Oven-roasting is also brilliant for cooking sausage alongside other vegetables. Toss hearty vegetables like bell peppers, onions, zucchini, or potatoes with a little oil and seasoning, arrange them on the pan with the sausages, and everything cooks together in about 25 minutes. This is actual cooking efficiency — one pan, one cleanup, one dinner.
The Temperature Range That Works
400°F (200°C) is the sweet spot for even cooking without excessive browning. If your oven runs hot, you can drop to 375°F (190°C). If you want deeper browning and don’t mind slightly longer cook times, you can bump up to 425°F (220°C), but watch carefully after 15 minutes so the casings don’t split. Internal temperature should hit 160°F (71°C) for pork sausage or 165°F (74°C) for poultry sausage before you pull them from the oven.
Best for Batch Cooking
This method shines when you’re feeding a crowd, prepping sausages for multiple dishes, or want to cook sausage ahead and reheat it later. It’s also the most forgiving method — it’s harder to overcook sausage in the oven than on the stovetop because the heat is gentler and more consistent.
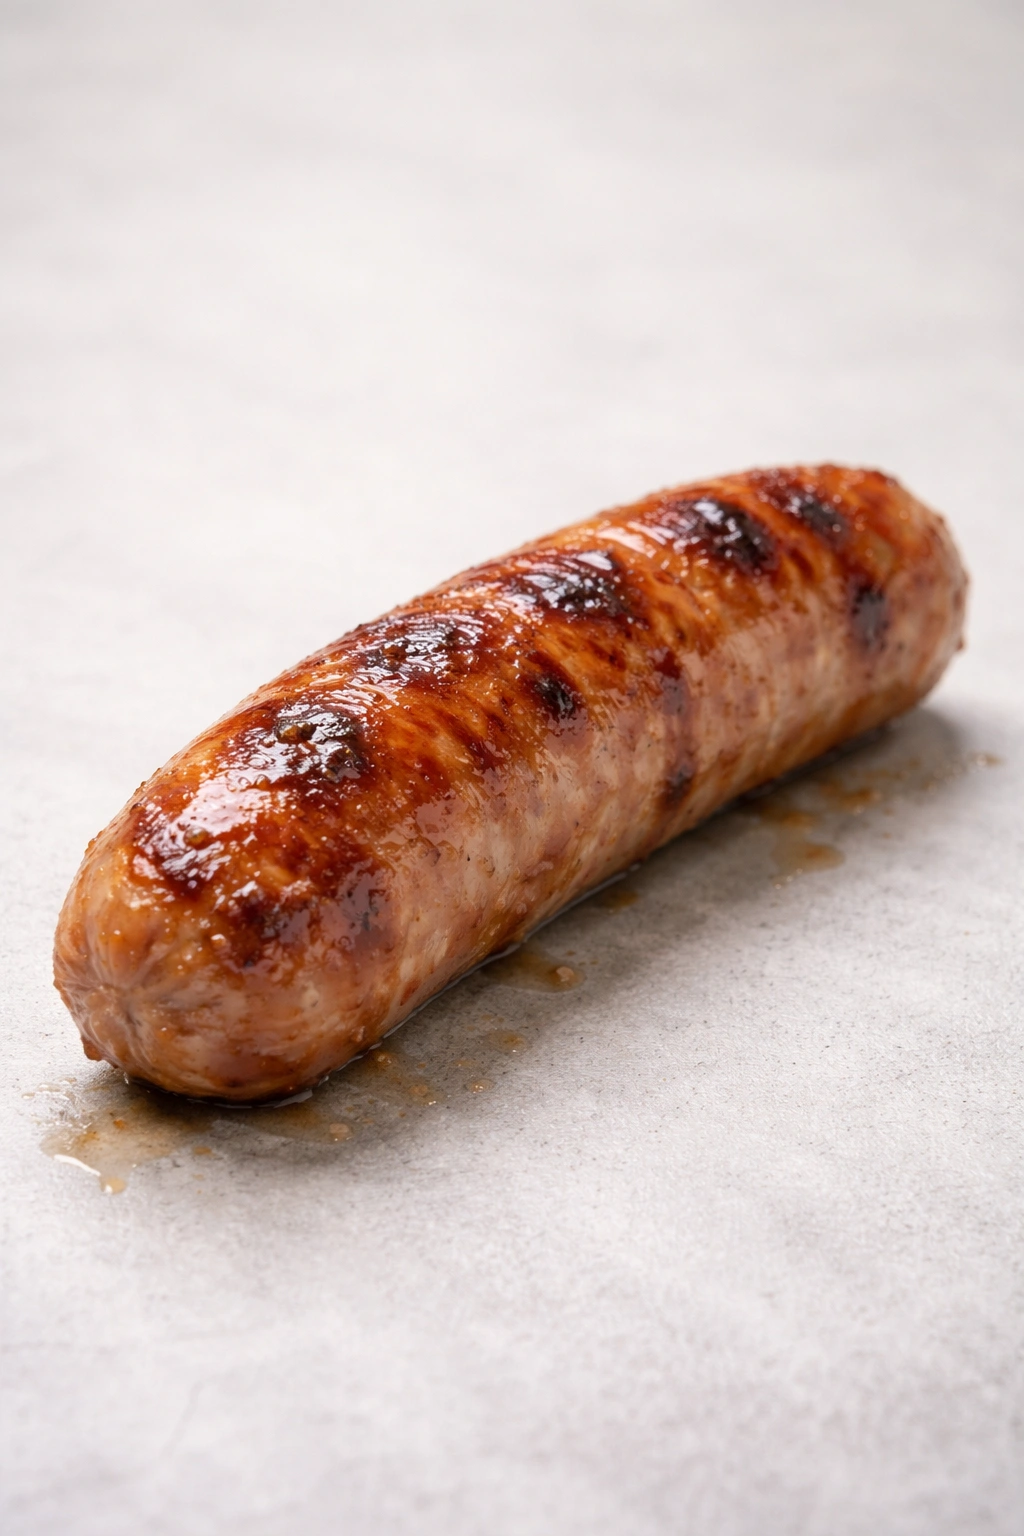
3. Grilling Sausage Over Direct Heat

Grilling sausage creates incredible flavor and those beautiful caramelized exterior stripes that signal you know what you’re doing. The catch is that sausage has a tendency to split open on the grill if you’re not careful, spilling precious juices and fat that you actually want to keep inside.
Start by preheating your grill to medium heat (not high — this is crucial). Medium-heat sausage grilling means direct heat around 350-400°F (175-200°C). If your grill has multiple zones, set it up for indirect grilling on one side so you can move sausages if they’re browning too fast. Oil the grates well to prevent sticking, then lay sausages perpendicular to the grates so they won’t roll into the fire.
Leave them alone for 4-5 minutes — again, don’t constantly fidget with them. Let those grates mark the casing and start rendering the fat inside. Turn once and cook another 4-5 minutes. If the exterior is browning nicely but you’re worried the interior isn’t done, slide sausages to the cooler side of the grill, lower the lid, and finish cooking indirectly for another 5-8 minutes.
The whole point of grilling is flavor, so don’t miss the chance to add wood smoke if you have it. A small amount of soaked wood chips or chunks in a foil packet creates incredible depth without overpowering the sausage itself. Cherry, apple, or mild oak work beautifully with almost any sausage.
Preventing the Split
The most important thing is managing temperature. Sausages split when the casing contracts faster than the interior cooks, causing pressure buildup. Slow, moderate heat prevents this. If you’re grilling thick sausages or heavily seasoned varieties, score the casing lightly with a sharp knife before grilling — just shallow cuts that help pressure release gradually instead of building up dangerously.
Creating the Perfect Grill Marks
For those restaurant-quality diagonal grates across your sausages, rotate them 45 degrees after about 3 minutes on the first side (before flipping), which creates a crosshatch pattern. This is purely aesthetic — it doesn’t affect flavor — but it’s a nice touch that signals you grilled these with intention.
4. Boiling and Pan-Finishing for Even Results

This method gets unfairly dismissed as boring, but it’s actually genius for certain situations, especially if you’re new to cooking sausage or you’re dealing with particularly thick or temperamental casings. The boiling step ensures the interior is cooked through safely and evenly, and the pan-finishing adds browning and flavor at the end.
Bring a pot of water (or beer, or broth if you’re feeling fancy) to a gentle simmer and add your sausages. The liquid should cover them completely. Simmer gently for 10-15 minutes depending on thickness — the sausages should reach 160°F (71°C) internal temperature before you pull them out. This isn’t a full rolling boil situation. Gentle simmering prevents the casings from splitting and keeps the texture tender rather than rubbery.
Remove the sausages with a slotted spoon and set them on a clean towel to cool slightly and dry out. Once they’re cool enough to handle, slice them lengthwise (optional) or keep them whole, then finish them in a hot, dry skillet for 2-3 minutes per side. This final pan step creates that golden crust and caramelization that makes sausage taste delicious. The interior is already perfectly cooked and safe, so now you’re just building flavor on the surface.
The simmering liquid becomes a bonus — you can use it as the base for a pan sauce, pour it into soups, or use it to cook other ingredients. If you simmered in beer or broth, don’t waste it.
When Boiling Makes Sense
This method is perfect for large sausages like bratwurst or kielbasa that might otherwise burst or cook unevenly. It’s also ideal for sausages you’re planning to use in another dish where the browning matters less and even cooking matters more — like slicing into pasta or adding to a beans-and-sausage braise. New cooks often find this method less intimidating because the boiling step feels like a safety net.
The Finishing Pan Makes All the Difference
The pan-finishing step is non-negotiable here. Sausage that’s only boiled tastes pale and mushy. Those 2-3 minutes in the hot skillet create the browning and crust that actually makes you excited to eat it. Use a little butter or oil, and don’t skip this step no matter how tempting it is.
Choosing the Right Sausage for Your Cooking Method
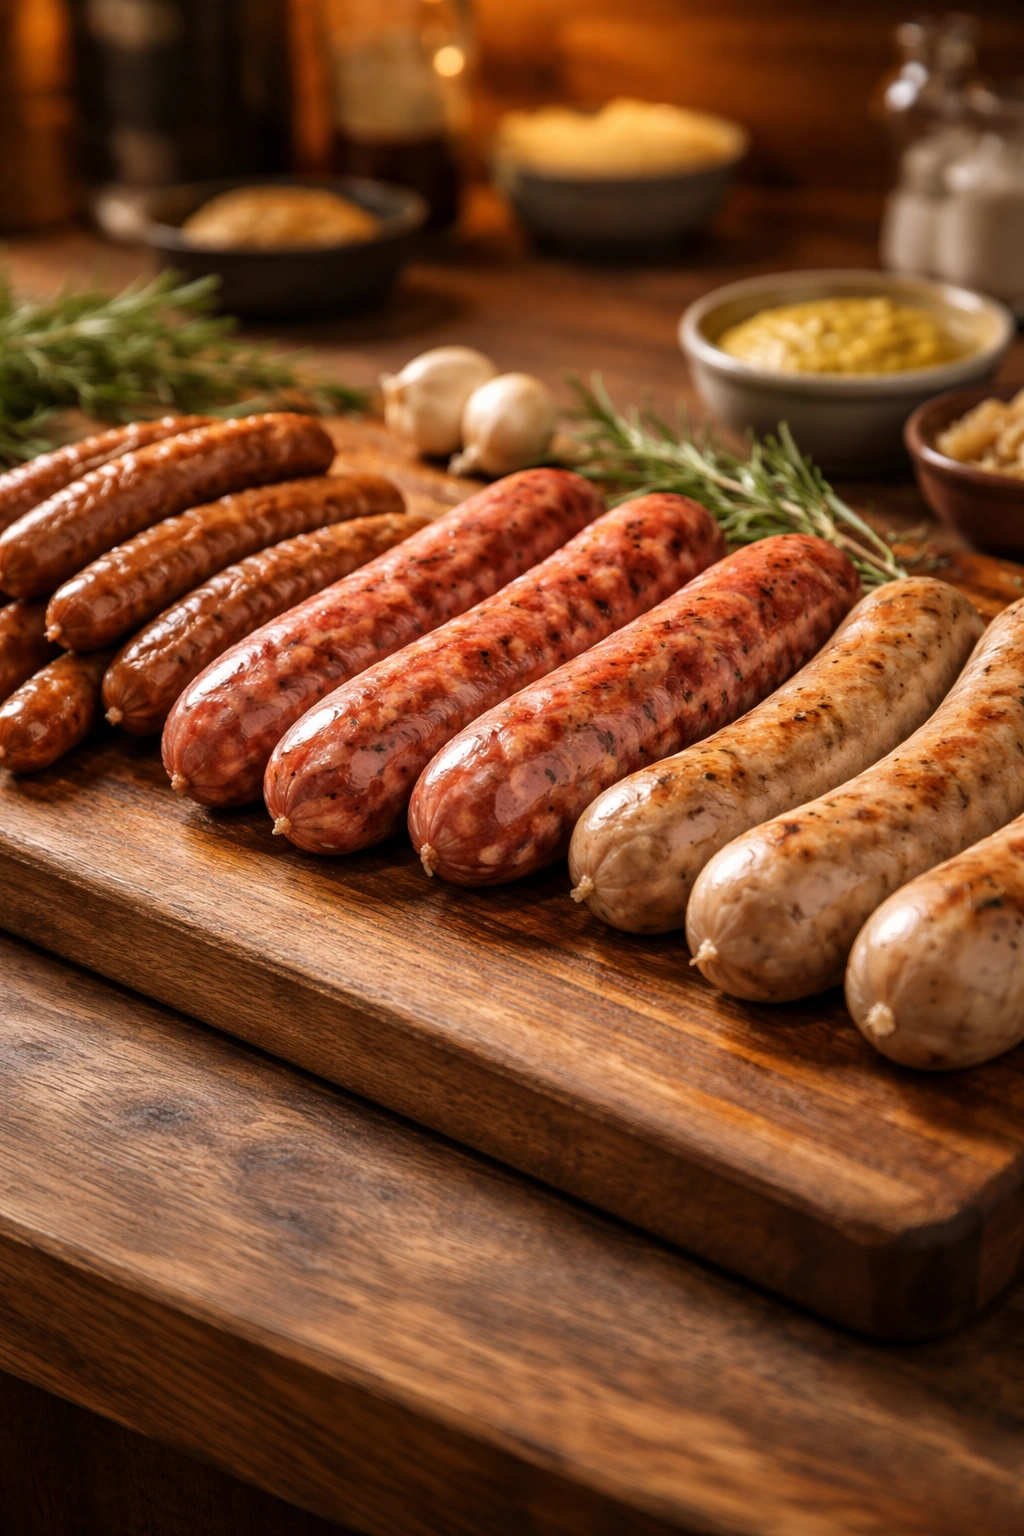
Different sausage styles work best with different methods, though most can handle any technique if done correctly. Thin breakfast sausages (links or patties) are perfect for pan-searing because they cook quickly and brown beautifully in about 12-15 minutes total. They’re also manageable on the grill, though you need to be careful they don’t fall through the grates — skewering them or using a grill basket helps.
Italian sausage, whether loose ground sausage or link form, works wonderfully with pan-searing for weeknight cooking or in the oven if you’re making a big batch for sauce. The moderate fat content means it can handle all methods without drying out. Sweet Italian sausage tends to brown nicely because of the higher sugar content in the seasoning, while hot Italian sausage benefits from the moisture control you get with either oven roasting or the boiling-and-finishing method.
Bratwurst and other large, coarse-textured sausages are actually where boiling-and-finishing really shines. These hefty sausages can be hard to cook through without burning the exterior on the grill or stovetop, so the boiling step ensures even cooking before you add the final browning. That said, if you love grilling bratwurst, medium heat and patience will get you there — it just takes 15-20 minutes instead of 10.
Chicken sausage and turkey sausage are leaner and more fragile, so they benefit from either oven-roasting (where you can’t accidentally split them) or the boiling method before finishing. Pan-searing works fine too, but you need to use slightly lower heat and add that water-steaming step to prevent drying. These leaner sausages don’t have as much fat to keep them moist, so steam and gentle heat are your friends.
The Equipment You’ll Need for Perfect Sausage Every Time
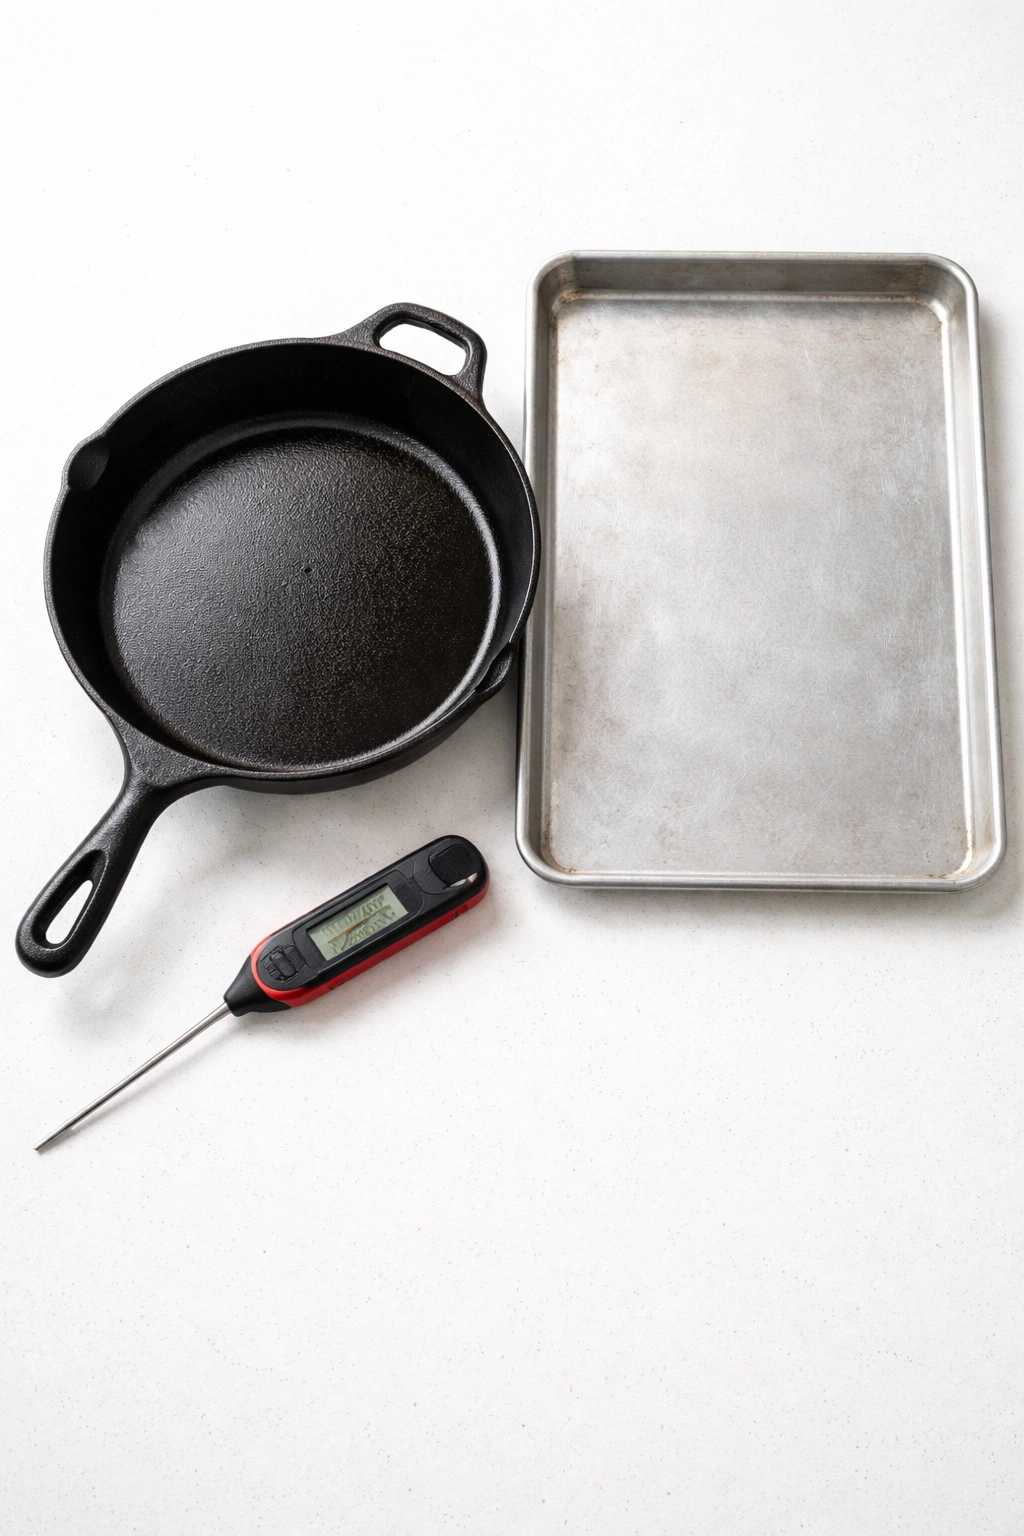
You don’t need specialty equipment, but having the right basic tools makes cooking sausage significantly easier and more reliable. A meat thermometer is genuinely invaluable — poke it into the thickest part of the sausage and you’ll know instantly whether it’s done. The safe internal temperature is 160°F (71°C) for pork sausage or 165°F (74°C) for poultry-based varieties. You can cook by time and visual cues, but a thermometer removes all guessing.
A good, heavy skillet is essential for pan-searing — cast iron is ideal because it holds heat evenly and can handle high temperatures, but stainless steel or heavy nonstick works fine. The pan should be thick enough that it doesn’t have hot spots where sausages brown unevenly. A 10-12 inch skillet works best so sausages can sit in a single layer without crowding.
For oven roasting, you need a sheet pan — doesn’t have to be fancy, just sturdy enough that it doesn’t warp at 400°F (200°C). Line it with foil for easy cleanup, which is honestly the best part of this method. A meat thermometer becomes even more important in the oven because sausages cook gently and evenly, so visual doneness cues are harder to read from across the kitchen.
For grilling, an oil-soaked paper towel held with long tongs will help you oil the grates more effectively than spraying oil (which can flare up). If you do grill often, invest in a perforated grilling basket or grill topper — these prevent sausages from sticking and rolling, and they’re brilliant for cooking sausages alongside other ingredients.
A simple lid (even a baking sheet or piece of foil) is useful for trapping steam while cooking on the stovetop. A slotted spoon becomes essential if you’re boiling sausages. Otherwise, this is honestly about as uncomplicated as cooking gets.
Common Mistakes When Cooking Sausage (and How to Fix Them)
The number-one mistake is cooking at too-high heat, which creates a burnt exterior before the interior is done. Sausage has a casing and a fat content that needs gentle heat to render properly. If you’re seeing black spots or the casing is splitting, lower your heat immediately. Medium and medium-low are your friends — patience matters more than speed.
Another common error is crowding the pan or grill. Sausages need space so they can brown properly. When you pack them in, they steam in their own moisture instead of developing that golden crust you’re after. Work in batches if necessary — it takes an extra few minutes, but the results are dramatically better.
Leaving sausages completely untouched is actually a mistake too, even though I’ve been saying not to fuss with them. You should turn them at least once during cooking so both sides make contact with the heat source. Once is usually enough for pan-seared or grilled sausages, though a quarter-turn in between (if you’re going for fancy grill marks) is optional.
Overcooking is also possible, especially in the oven where sausages can keep cooking after they’ve reached temperature. Chicken and turkey sausages are particularly prone to becoming dry and crumbly if overcooked. Pull them when they hit 160-165°F (71-74°C) internal temperature, not 170°F (77°C), which will make them tough.
Forgetting to rest your sausages briefly after cooking is worth mentioning too. Let them sit for 2-3 minutes before eating or slicing — this allows the juices to redistribute inside the casing rather than spilling out when you cut into them. It’s a small step that prevents losing all those flavorful juices you worked to keep inside.
How to Tell When Sausage Is Perfectly Cooked

The most reliable indicator is internal temperature: 160°F (71°C) for pork sausage and 165°F (74°C) for poultry sausage. Use a meat thermometer inserted into the thickest part of the sausage (usually near the middle), making sure you’re measuring from the interior, not touching the casing. This removes all doubt and works across all cooking methods.
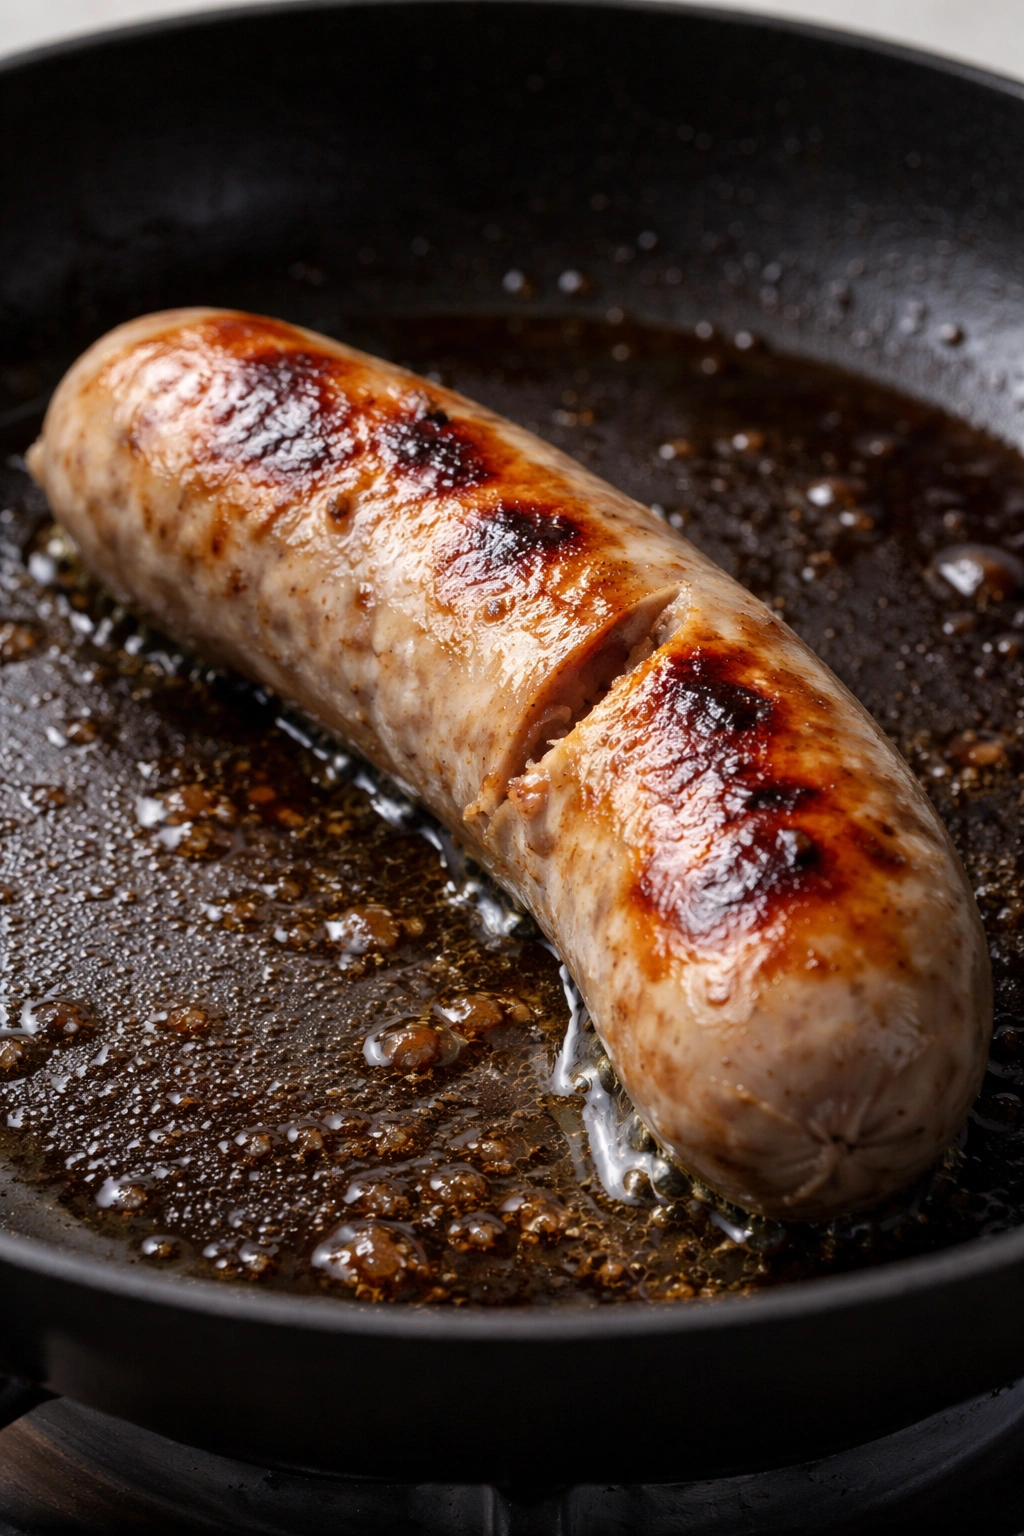
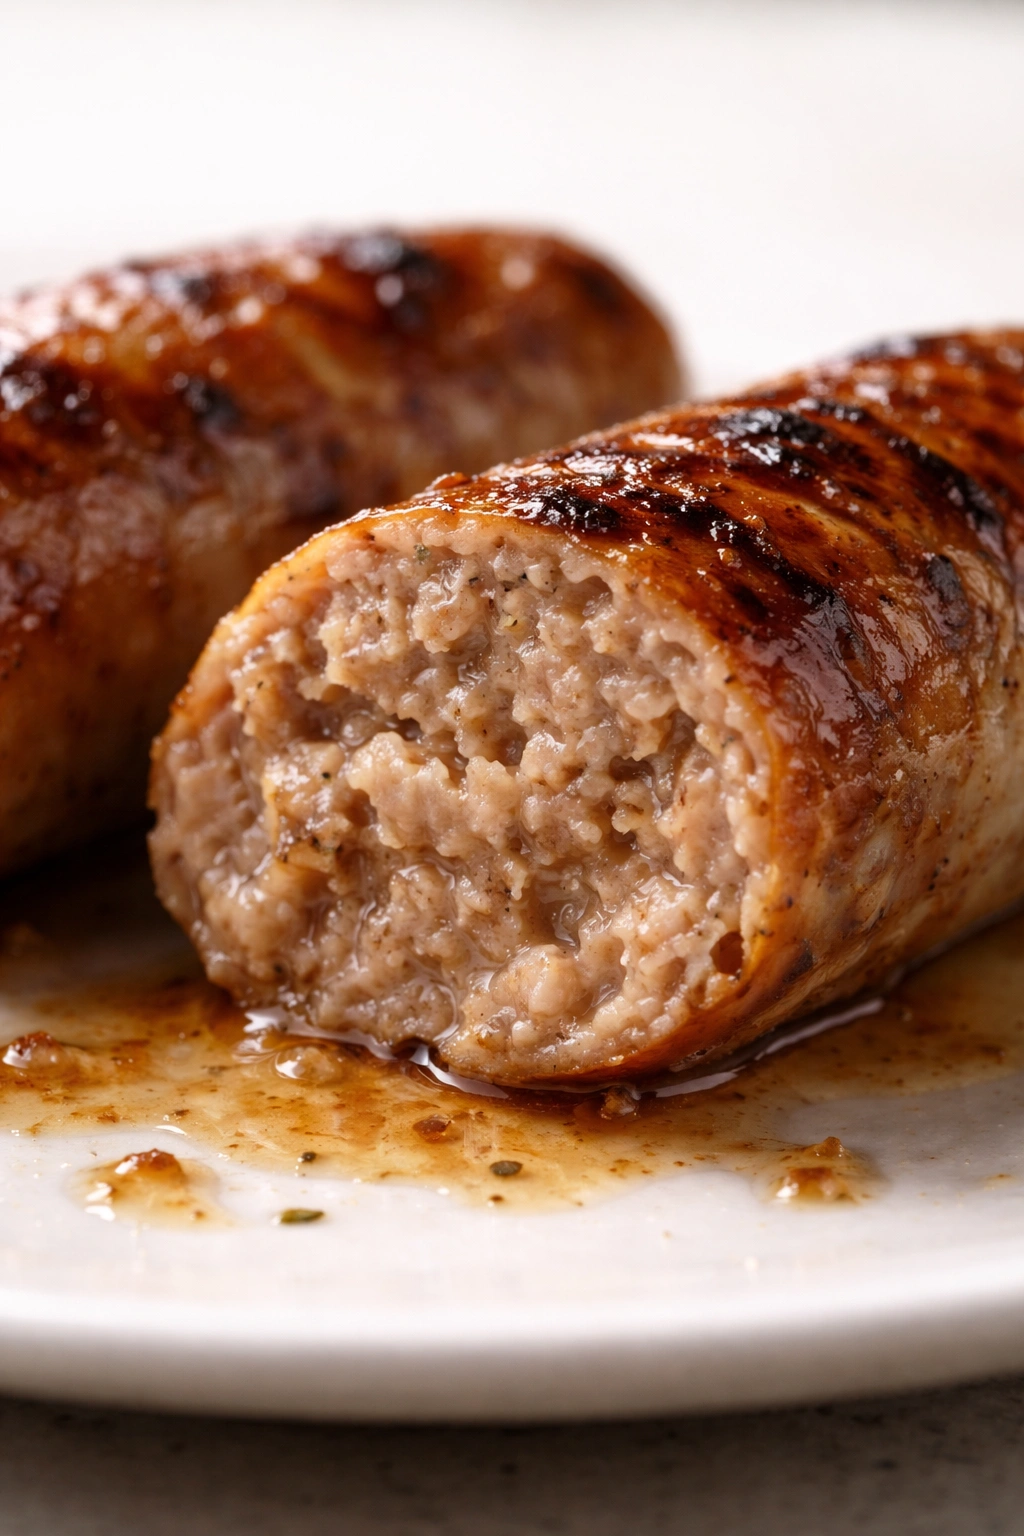
If you’re without a thermometer, visual and tactile cues come second. Cooked sausage will feel firm when pressed gently with a fork — not hard or rubbery, but definitely not soft or squishy. An undercooked sausage feels almost like raw meat: yielding and soft. A properly cooked one resists but still gives slightly. The casing should be a medium to dark golden brown, and if you have any concerns about doneness, you can slice into the thickest part and check the interior color — it should be no longer pink (though some residual light pink around the casing is normal in pork sausage due to meat chemistry).
For boiled sausages, they’ll float slightly when they’re done, though this isn’t a perfect indicator on its own. The floating happens because the interior cooks and shrinks slightly, creating air space inside. Pair this with checking firmness or using a thermometer to be sure.
Sausages that have been simmering too long will split and leak, and the casing might even separate from the meat inside. This usually signals overcooking and excessive heat rather than unsafe sausages, but once the casing splits badly, you’ve lost texture and the sausage will be tough.
Serving Ideas and Perfect Pairings for Cooked Sausage

Sausage is wonderfully versatile — it plays well with nearly any cuisine and flavor profile. For breakfast or brunch, slice cooked sausage and serve alongside scrambled eggs, toast, and roasted potatoes or potatoes hash. The richness of the sausage complements the mild eggs perfectly, and crispy potatoes add textural contrast.
In a pasta dinner, crumbled cooked Italian sausage becomes a meat sauce that outperforms ground beef in both flavor and texture. Cook the sausage using any method, slice or crumble it, then simmer it in tomato sauce for 10-15 minutes so the flavors meld. Serve over any pasta shape and finish with fresh basil and grated cheese.
For casual entertaining, slice grilled or pan-seared sausage and pile it onto crusty bread with sautéed peppers and onions, topped with fresh-grated cheese or a favorite sauce. This is the street vendor move — simple, satisfying, and impressive-looking without much effort. Add a squeeze of spicy mustard or a dollop of aioli if you like.
Sausage belongs in sheet pan dinners with roasted vegetables, which is one of my favorite ways to cook dinner for a crowd. Arrange sausages, sliced potatoes, halved tomatoes, bell peppers, and onions on a sheet pan, drizzle with olive oil, season generously, and roast everything at 400°F (200°C) for 25-30 minutes. One pan, completely minimal cleanup, and everyone gets a complete meal.
Use sausage in soups and braises where it adds deep, savory flavor — white bean and sausage soup, sausage and lentil braise, or sausage in tomato-based minestrone all benefit tremendously from quality sausage. The long, slow cooking lets flavors develop and meld.
For a quick appetizer, slice cooked sausage into rounds, pick through with toothpicks, and serve with your favorite dipping sauce or mustard. It’s unfussy but always a crowd-pleaser at casual gatherings.
Storing and Reheating Leftover Cooked Sausage
Cooked sausage keeps perfectly well in the refrigerator for 3-4 days when stored in an airtight container or wrapped tightly in foil. This makes it great for batch cooking — make extra on the weekend and you’ll have convenient protein ready for quick meals throughout the week.
For freezing, cooked sausage will keep for 2-3 months. Cool the sausages completely before freezing to prevent condensation that can create ice crystals and damage texture. Freeze them in a single layer on a sheet pan first, then transfer to a freezer bag or airtight container once solid. This prevents them from sticking together in a clump.
Reheating is straightforward — you have a few options depending on time and what you’re making. The fastest method is the oven: arrange sausages on a baking sheet and warm them at 350°F (175°C) for about 10 minutes. They’ll warm through without drying out, and this works whether the sausages were cooked or frozen.
Stovetop reheating works perfectly too. Add a splash of water or broth to a skillet, arrange sausages in the liquid, and warm over medium-low heat covered for about 5 minutes, until heated through. This gentle steam-heating method preserves juiciness and texture beautifully.
If you’re reheating frozen sausages, you can actually skip the thawing step entirely — just add a bit of extra cooking time. Add 3-5 minutes to any reheating method if cooking from frozen, or use a meat thermometer to verify they’ve reached 165°F (74°C) internal temperature.
Avoid the microwave if possible — while it’s fast, it tends to create uneven heating and can make sausage casings rubbery. The oven or stovetop methods preserve the quality you worked to achieve during the initial cooking.
Final Thoughts
Cooking sausage confidently is about understanding the core principles — gentle heat, avoiding crowding, respecting the casing, and knowing your target temperature — rather than memorizing rigid recipes. Once you internalize these basics, you’ll instinctively know whether a particular sausage needs the grill, the oven, the skillet, or the boiling pot, and you’ll be able to adjust based on what you have available and what you’re trying to achieve.
The beautiful part is that sausage is incredibly forgiving. Unlike delicate fish or lean cuts that dry out instantly, sausage is meant to have fat content and flavor — it’s almost impossible to truly ruin it. The worst-case scenario is slightly overcooked sausage that’s still perfectly edible. The best-case scenario, with just a little attention and care, is restaurant-quality sausage that tastes like you’ve been cooking this your whole life.
Start with whichever method feels most comfortable, master it, then branch out. Before long, you’ll be the person who can cook sausage perfectly no matter the scenario, and that’s a genuinely useful skill in the kitchen.