Making butter at home is one of the most satisfying kitchen projects you can undertake, and it requires surprisingly little effort. The magic happens when you take a single ingredient—heavy cream—and transform it through a simple mechanical process into creamy, rich butter that tastes noticeably better than what you’ll find in most grocery stores. If you’ve never made butter before, you’re about to discover that it’s not some mysterious culinary feat reserved for professionals or the past; it’s something you can accomplish right now in your own kitchen, using equipment you likely already own.
The reason homemade butter tastes so much better comes down to freshness and control. When cream goes from the dairy to your jar, the fat globules haven’t been sitting in storage for weeks. You’re also working with whole, unadulterated cream rather than the commercial product that may contain additives or stabilizers. Beyond flavor, there’s a genuine thrill in watching cream transform into butter before your eyes—the same cream you can buy at any supermarket becomes something unmistakably handmade and full of character. Once you understand the basic process and learn the small tweaks that guarantee success, you’ll find yourself making butter regularly, experimenting with flavors, and maybe even skipping the store-bought version altogether.
Why Making Butter at Home Is Easier Than You Think
The barrier to entry for butter-making is remarkably low. You don’t need special equipment, rare ingredients, or culinary training. The single most important factor is understanding that butter-making relies on one straightforward principle: agitation separates the fat from the liquid in cream. When you shake, churn, or blend cream with enough force and for long enough, the fat globules bump into each other, their protective coating breaks down, and they clump together into butter. The liquid left behind is buttermilk—a different substance entirely from the cultured buttermilk you buy at the store, though equally useful in cooking.
What makes home butter-making genuinely accessible is that you have multiple options for providing that agitation. A mason jar and arm strength will absolutely work; a food processor will cut your active work time to minutes; a blender accomplishes the task efficiently; even a stand mixer fitted with the whisk attachment can do it. There’s no single “right” way—only the way that fits your kitchen setup and physical preferences. Most people find that a food processor or stand mixer becomes their go-to method after the first time, simply because it requires almost no physical effort and produces butter consistently.
The two-ingredient version (if you count salt) has been made in kitchens across the world for centuries using nothing more than a churn and patience. The fact that you can achieve identical results with modern kitchen tools makes homemade butter genuinely foolproof if you understand the one technique that actually matters: knowing when to stop. Butter-making isn’t something that fails; it’s something that ends when you decide it does. The biggest “mistake” most people make is actually continuing the process too long after the butter has formed, which breaks it down and creates an oily mess. Understanding that sweet spot is the only real skill involved.
The Science Behind How Cream Becomes Butter
Heavy cream is an emulsion—a suspension of tiny fat globules, each coated with a natural protective layer of proteins and phospholipids, all floating in water and milk solids. The reason cream pours smoothly and feels luxurious is because those billions of tiny fat droplets are held in perfect suspension, not touching each other. When you agitate cream with sufficient force, you’re physically breaking those protective coatings and forcing the fat globules to bump into and stick to each other. What starts as millions of isolated droplets becomes larger and larger clumps, eventually forming visible grains of butter.
The agitation also generates heat, and this heat matters more than many home butter-makers realize. Warmer cream separates faster than cold cream because the fat is more fluid and the protective coatings are more fragile. This is why some people chill their cream before starting and others don’t—both approaches work, but they change the timing. Cold cream takes longer to churn, sometimes significantly longer, but the resulting butter has a slightly firmer texture. Room-temperature cream churns quickly, sometimes in as little as five minutes with mechanical agitation, but you must watch it carefully because the transition from cream to butter happens fast.
The buttermilk left behind after butter separates is not the same substance as cultured buttermilk, even though they share a name. Homemade butter-making produces what’s technically called sweet buttermilk—a thin, slightly cloudy liquid containing water, milk proteins, and milk sugars. It’s perfectly safe to drink, and some cultures have consumed it as a beverage for generations. In cooking and baking, it behaves somewhat differently from cultured buttermilk because it lacks lactic acid and the beneficial bacteria cultures, but it remains useful for making quick breads, pancakes, and any recipe where you need liquid to hydrate flour.
Choosing the Right Cream for Best Results
The quality of your butter depends almost entirely on the quality of your starting cream. This is where the real decision-making happens. Heavy cream labeled as having 36% butterfat is the standard choice and will produce reliable results every time. Some sources suggest using cream with higher fat percentages if you can find them—heavy whipping cream labeled at 40% or even 48% butterfat—because higher fat content means more butter and less buttermilk waste. If your local dairy produces cream with the fat percentage clearly labeled, choosing the highest percentage available is a small edge that pays off.
The freshness of the cream matters significantly. Cream that’s been open in your refrigerator for two weeks will still make butter, but the flavor will be duller than cream that’s freshly purchased. If possible, buy cream no more than two to three days before you plan to make butter. Check the printed date, but also use your nose—fresh cream has a mild, slightly sweet dairy smell. Any sour, sharp, or off odor means the cream has begun to culture or spoil, and while it might still technically separate into butter, the flavor will suffer and you’ll have unpredictable results.
Pasteurized cream is the standard and works perfectly. Ultra-pasteurized cream, heated to higher temperatures for extended shelf life, can be more finicky because the heat damages the fat structure slightly, but it will still separate into butter with a bit of patience—expect the churning time to stretch to seven to twelve minutes instead of five to eight. Ultra-high-temperature (UHT) cream sometimes refuses to separate properly at all, though this is rare. If you’re buying cream without knowing whether it’s regular pasteurized or ultra-pasteurized, check the label; regular pasteurized cream is always the safer choice for butter-making.
Organic versus conventional cream makes virtually no difference in the butter-making process itself, though many people prefer organic for reasons of taste preference and farming practices. The final butter will taste like what the cow ate, so grass-fed dairy cream produces a noticeably more golden butter with a richer flavor profile than grain-fed dairy cream. If you have access to cream from a local dairy or farmers market, especially from grass-fed operations, that’s worth trying at least once to experience the flavor difference. The butter-making process is identical; only your taste experience will shift.
Equipment You’ll Need (Simple and Minimal)
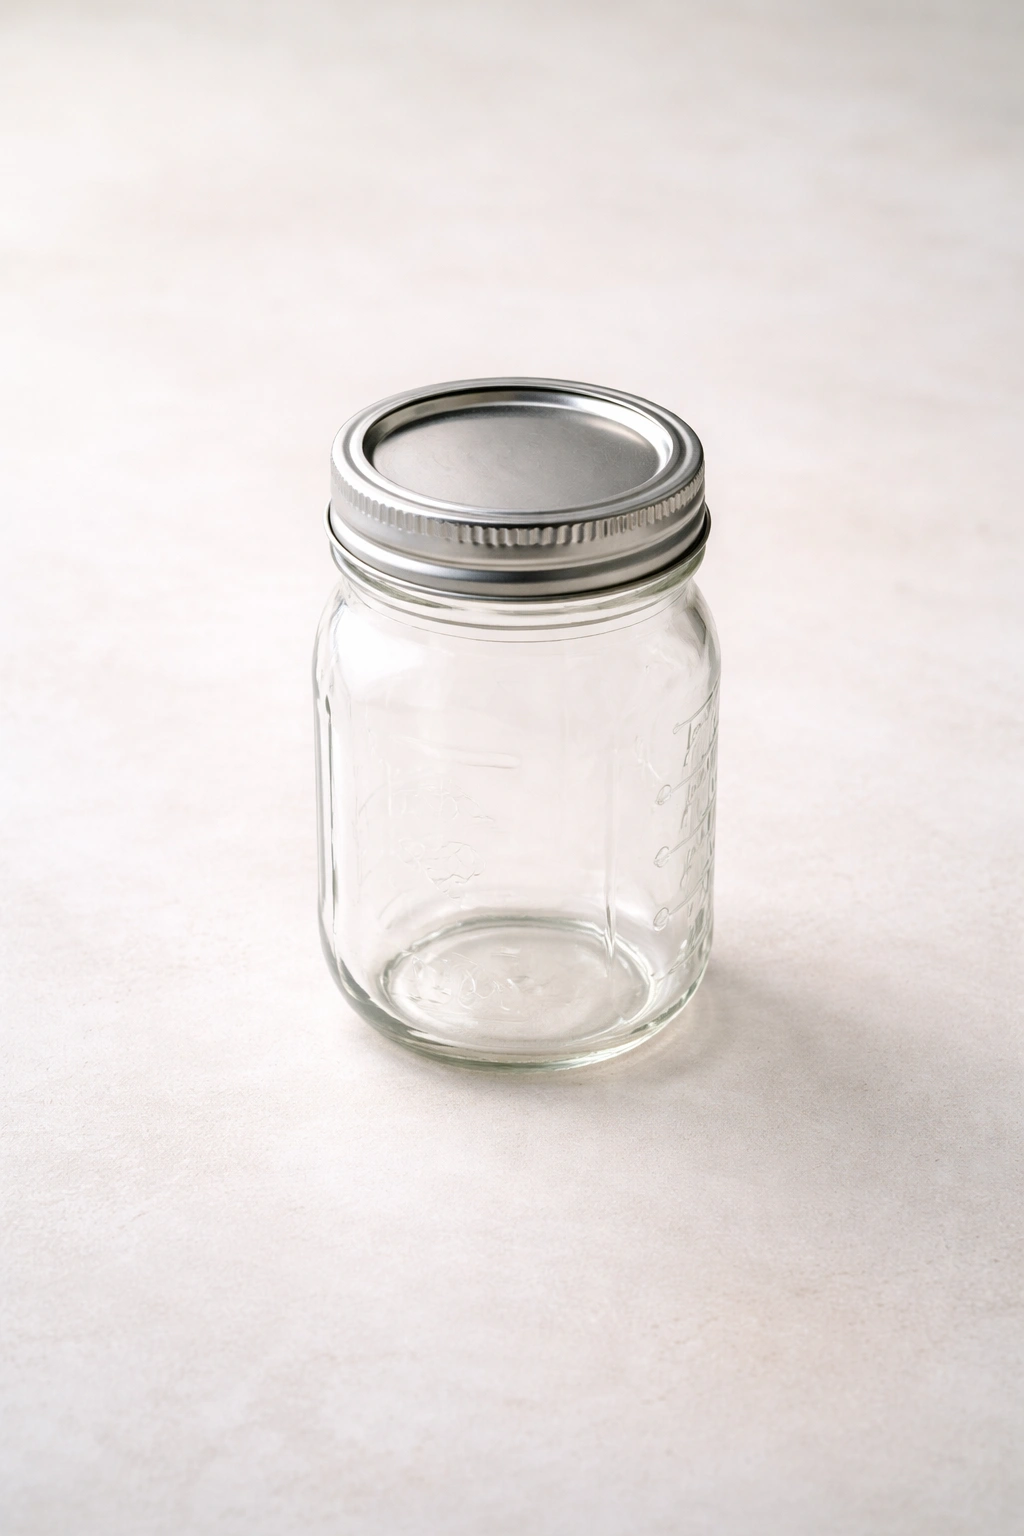
The beauty of butter-making is that your options range from nearly free to moderately priced, and they all work. A glass jar with a tight-fitting lid is the most basic tool—any mason jar from pint size to quart size will work depending on how much cream you’re starting with. Fill the jar half to two-thirds full with cream, seal the lid tightly, and shake vigorously for ten to twenty minutes. This method requires no electricity and engages physical effort, which some people enjoy as a meditative practice. Younger family members often find the shaking method entertaining, turning butter-making into a kitchen activity rather than a chore.
A food processor is the next step up in efficiency and convenience. This is likely the most popular method among home cooks because it’s fast, requires minimal physical effort, and you probably own one already. Pour your cream into the food processor fitted with the steel blade, secure the lid, and pulse repeatedly. You’ll watch the transformation happen in real time through the lid’s window. The churning typically takes four to eight minutes of pulsing, depending on cream temperature and the processor’s power. The trade-off is noise—a food processor running for several minutes is loud—and the need to monitor it so you don’t over-process into separated, greasy butter.
A stand mixer fitted with the whisk attachment is another solid option. Pour cream into the bowl, attach the whisk, and run on medium-high speed. The mixer handles everything mechanically, so you can set it running and work on something else, checking back every minute or so to watch the progression. This method is quiet relative to a food processor, generates less splashing, and feels less hands-on while still providing the satisfaction of watching butter form. The time required sits in the middle—usually six to ten minutes depending on cream temperature and mixer power.
A regular blender works but is less ideal than the above options because you’re working in a smaller space and the blender’s power can sometimes churn butter too aggressively, potentially over-processing. That said, a blender absolutely accomplishes the task. The hand-shake method in a jar is excellent for small batches or for understanding the fundamental process. A traditional butter churn is the romantic option if you have one, and it produces wonderful results while connecting you to the historical kitchen practice. Whichever method you choose, have a fine-mesh strainer, cheesecloth, and a spoon or butter paddle ready before you start—you’ll need these for the finishing steps.
The Butter-Making Process: Step by Step
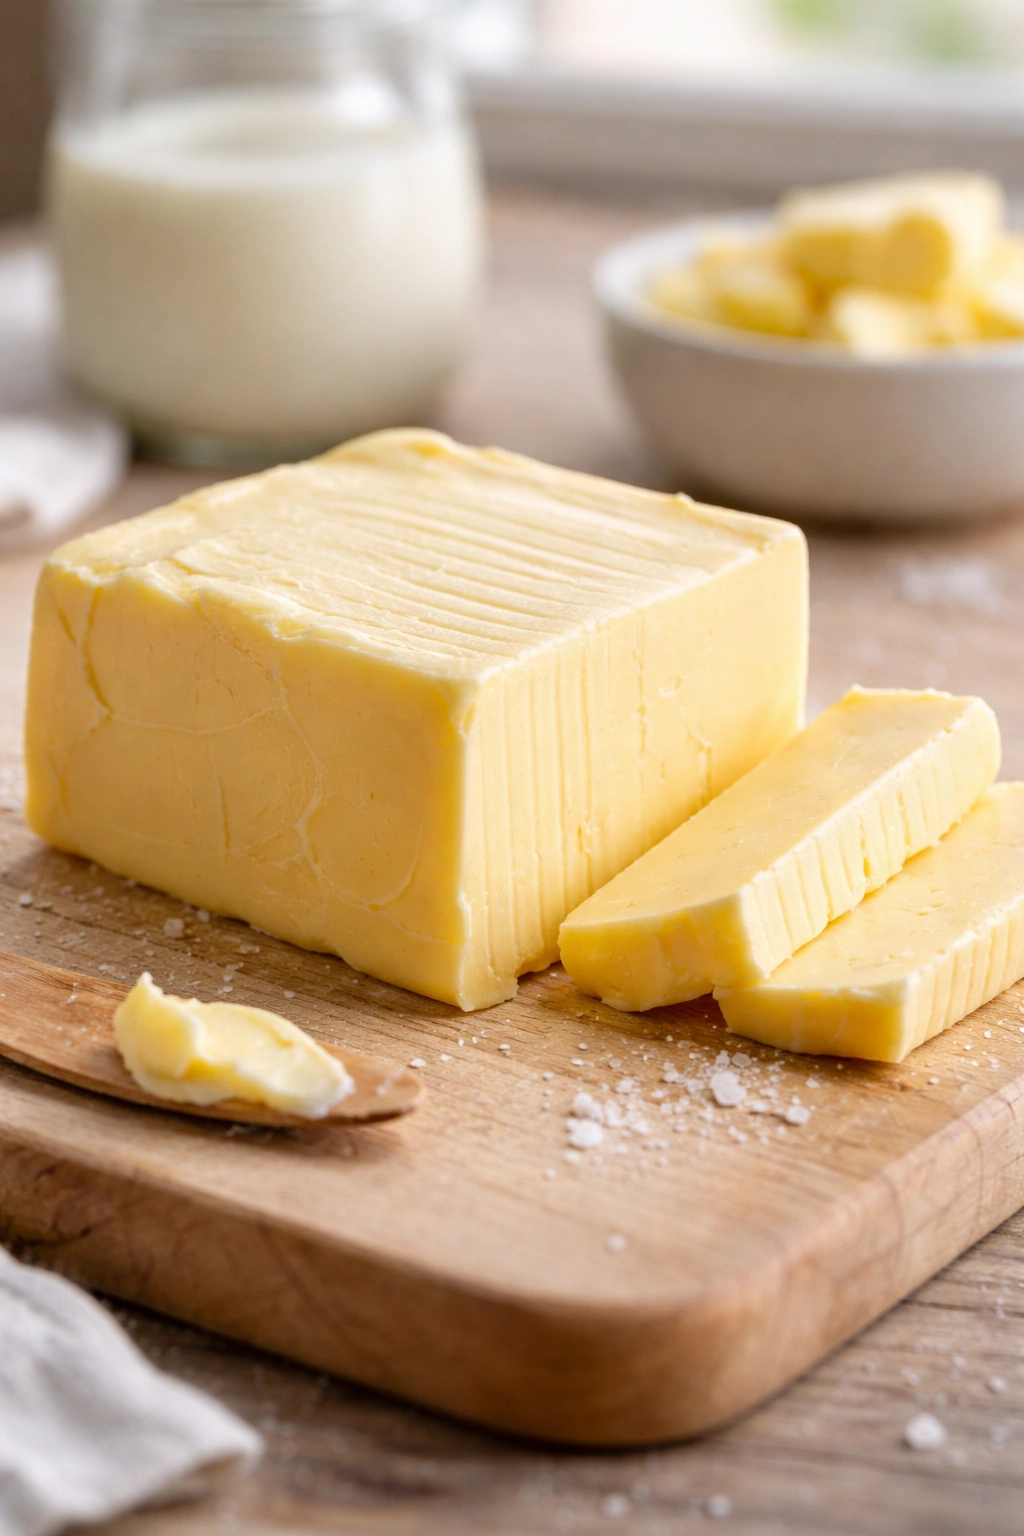
The process itself is straightforward, though paying attention to a few details ensures excellent results every time. Start by measuring out your cream. One pint of heavy cream yields approximately one quarter-pound (one stick) of butter, plus about half a cup of buttermilk. If you’re making butter for the first time, starting with one pint is plenty—enough to see clear results without a huge commitment.
Preparing and Chilling:
-
Pour the cream into your chosen vessel—whether that’s a food processor bowl, stand mixer bowl, or mason jar. If using a food processor or blender, fill only halfway to allow room for splashing and agitation.
-
If you want to speed up the process, you can leave the cream on the counter for thirty minutes to reach room temperature, or you can use it cold directly from the refrigerator. Cold cream takes longer to churn but produces butter with a firmer texture and slightly cooler handling. Room-temperature cream churns faster but requires more careful watching.
Advertisements -
If you’re using the hand-shake method in a jar, seal the jar very tightly—you need an airtight seal or cream will escape around the lid. If using a food processor or mixer, you don’t need a seal since the lid closes once the cream is inside.
The Churning Phase:
-
Begin agitating the cream. If using a food processor, pulse in short bursts every two to three seconds rather than running continuously—this gives the mixture time to settle between pulses and helps you see the progression more clearly. If using a stand mixer, run on medium-high speed. If using a jar, shake vigorously with both hands.
-
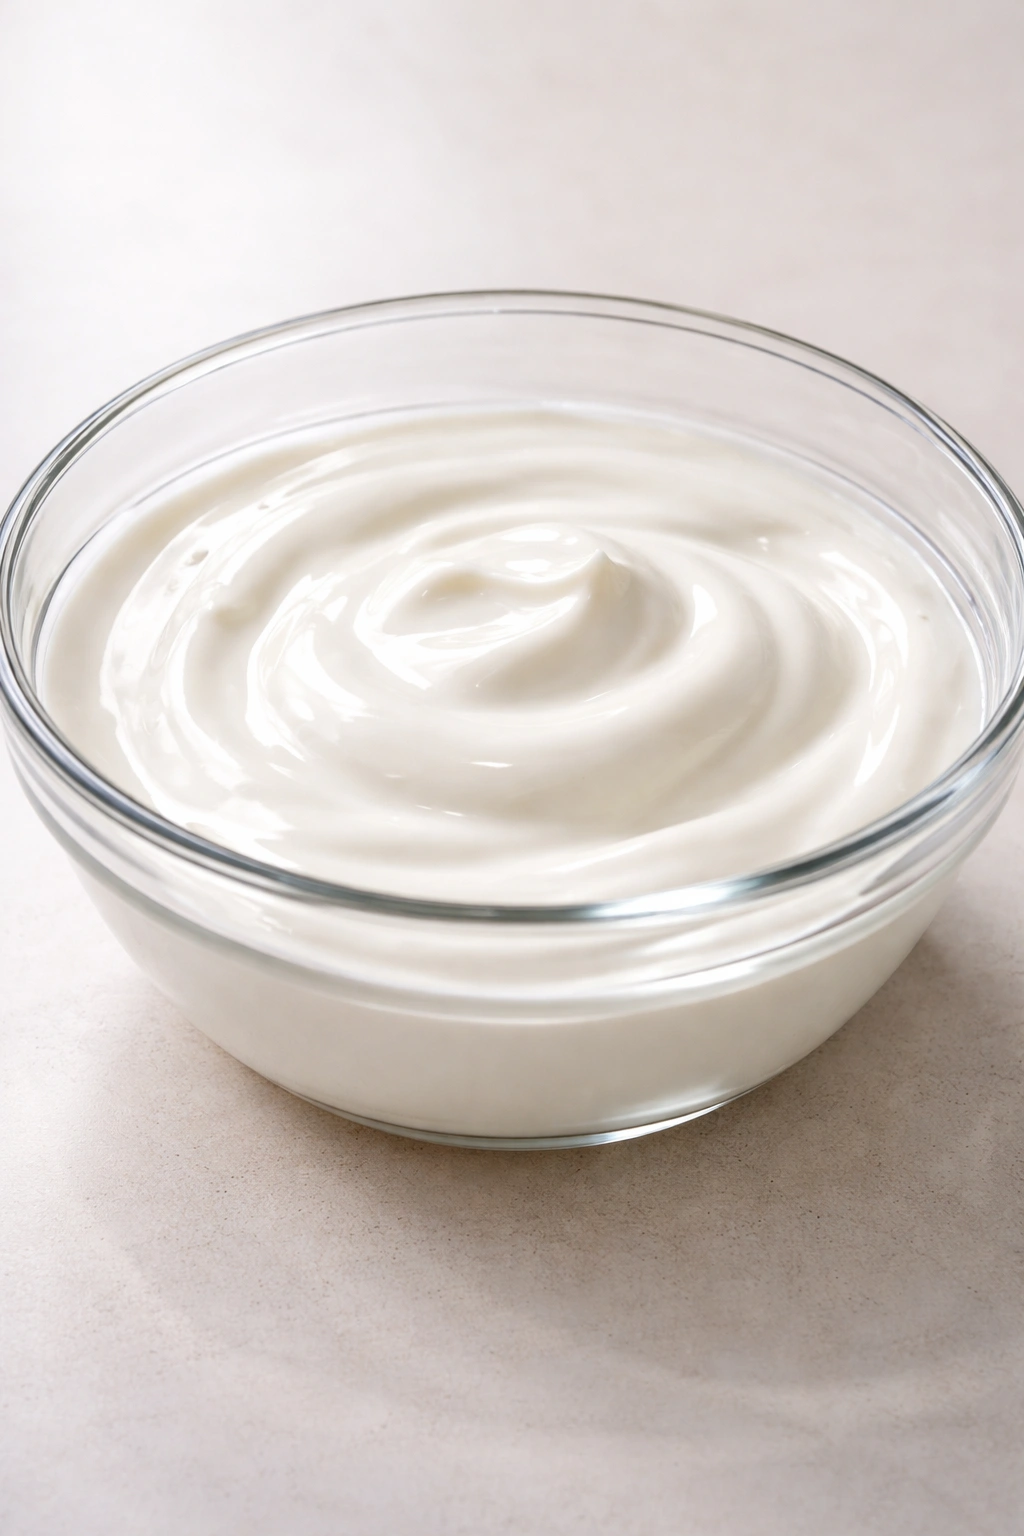
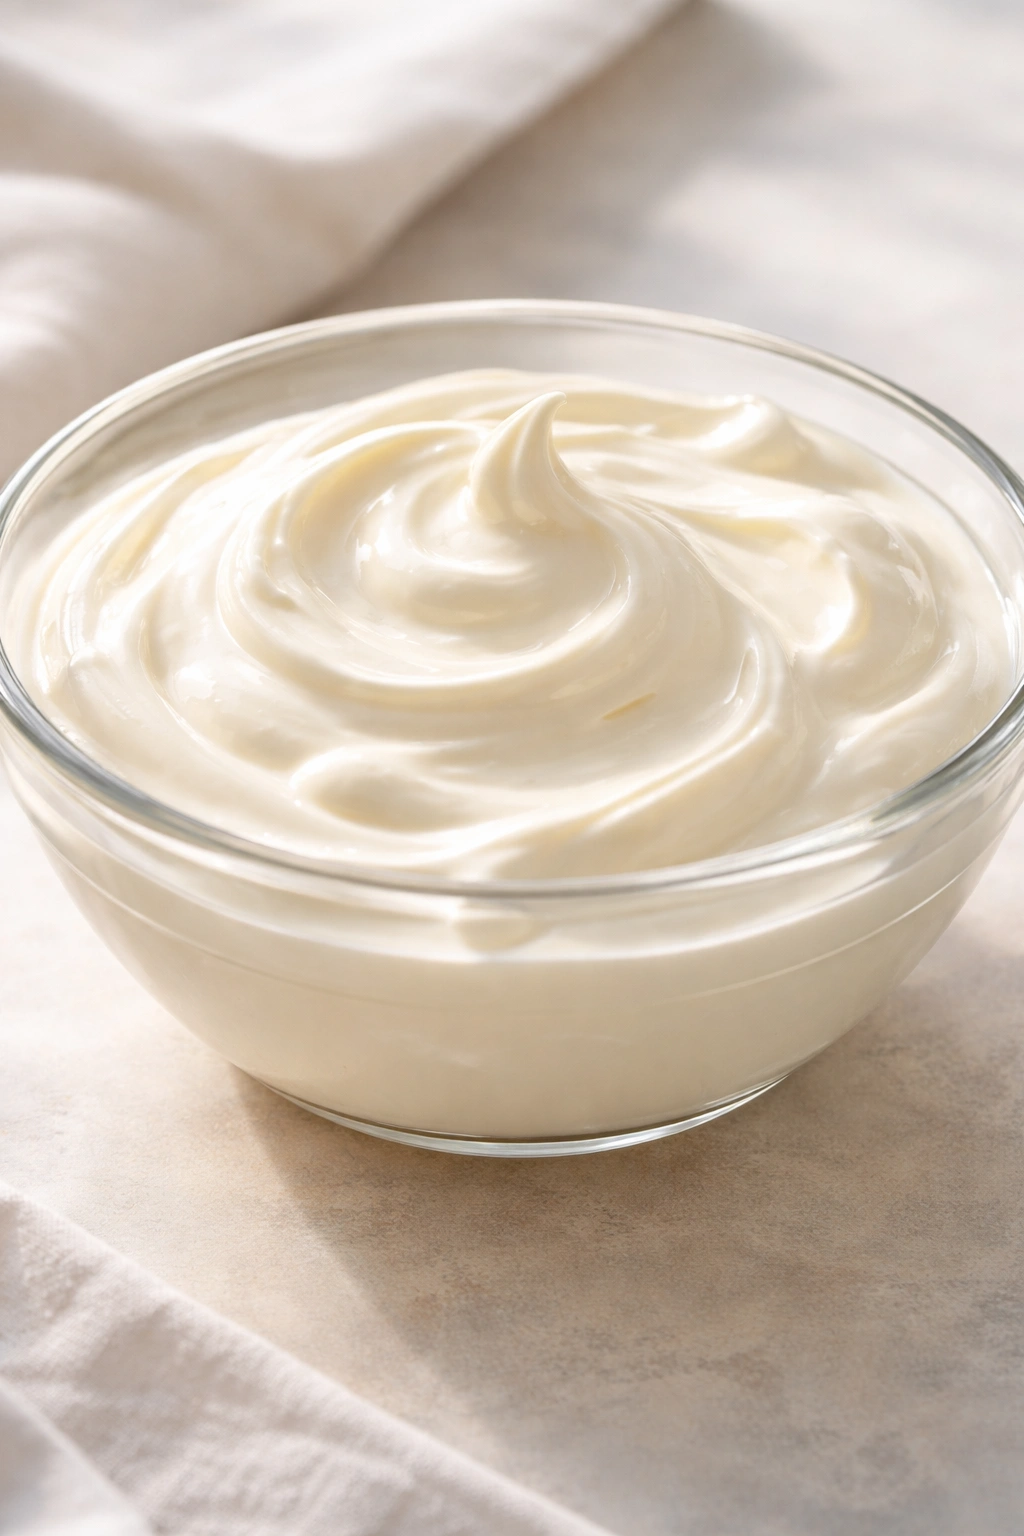
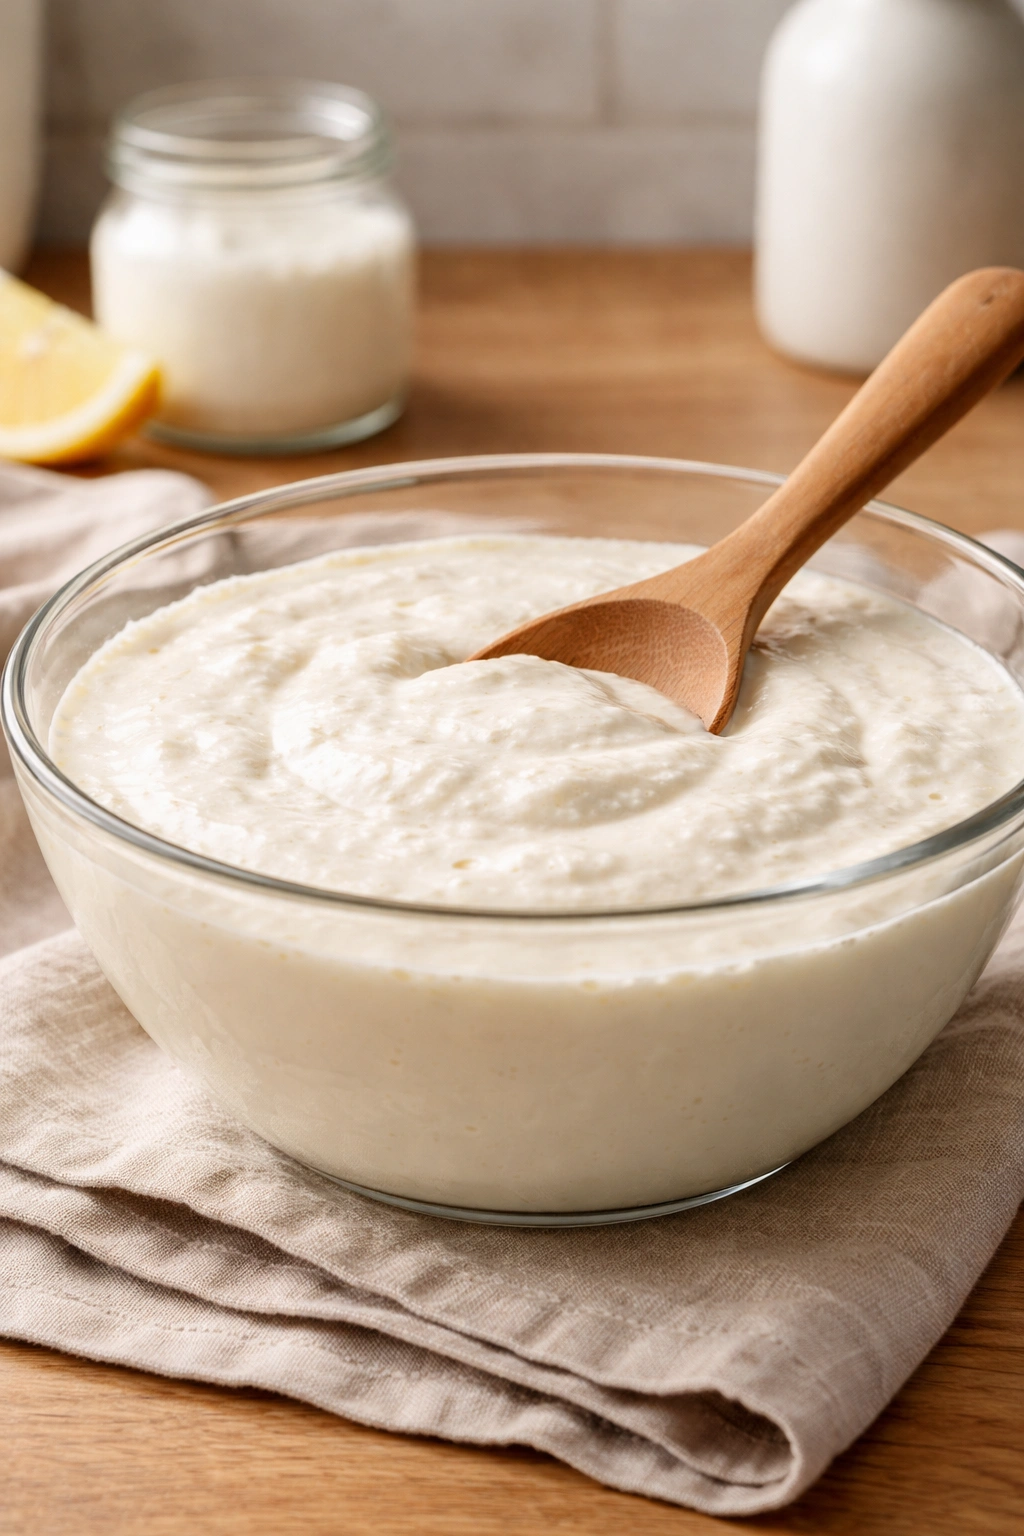
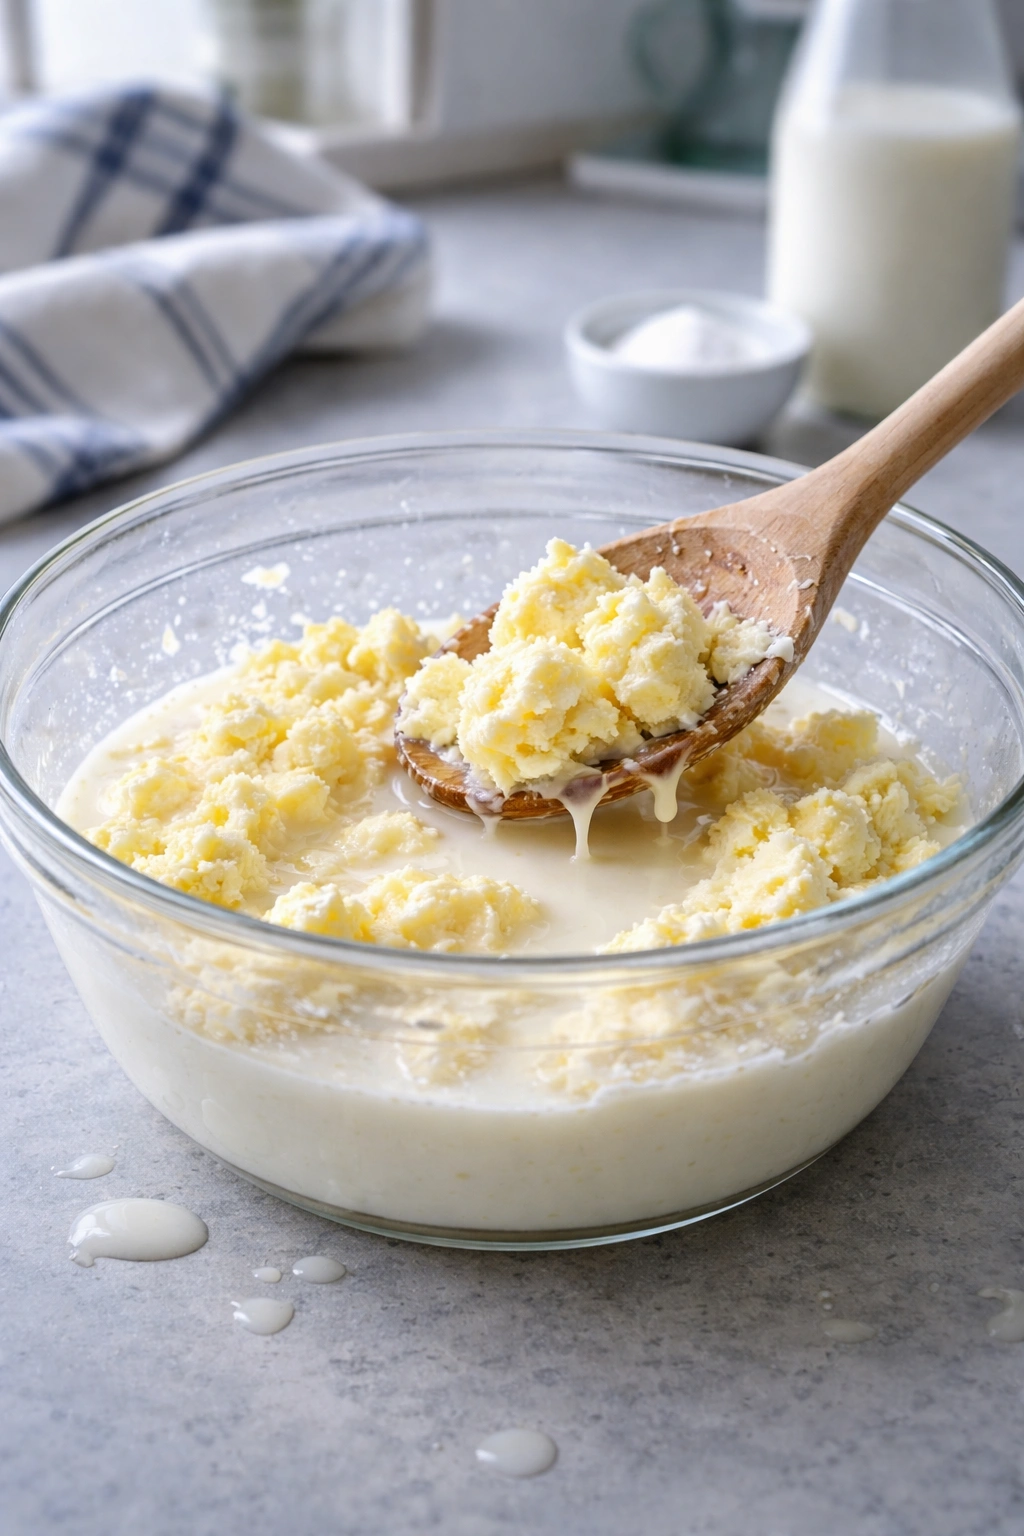
After one to two minutes, the cream will thicken considerably and transform into whipped cream—this is not butter yet, only partially whipped cream. Most people see this stage and wonder if something has gone wrong. It hasn’t. Continue agitating.
-
Keep going. After another two to three minutes of continued agitation, the whipped cream will begin to break down. It will look curdled and grainy, and you may notice liquid starting to separate. This is the moment you’re waiting for.
-
Continue the agitation for another one to three minutes. The transformation now accelerates rapidly. A clear separation point arrives when the butter solids abruptly clump together, leaving a liquid (buttermilk) behind. The entire contents of your vessel will shift visibly—solids on one side or clumped together, with thin, grayish liquid surrounding them. This entire process, from starting to reach this point, typically takes five to twelve minutes depending on cream temperature and agitation method.
Draining and Rinsing:
-
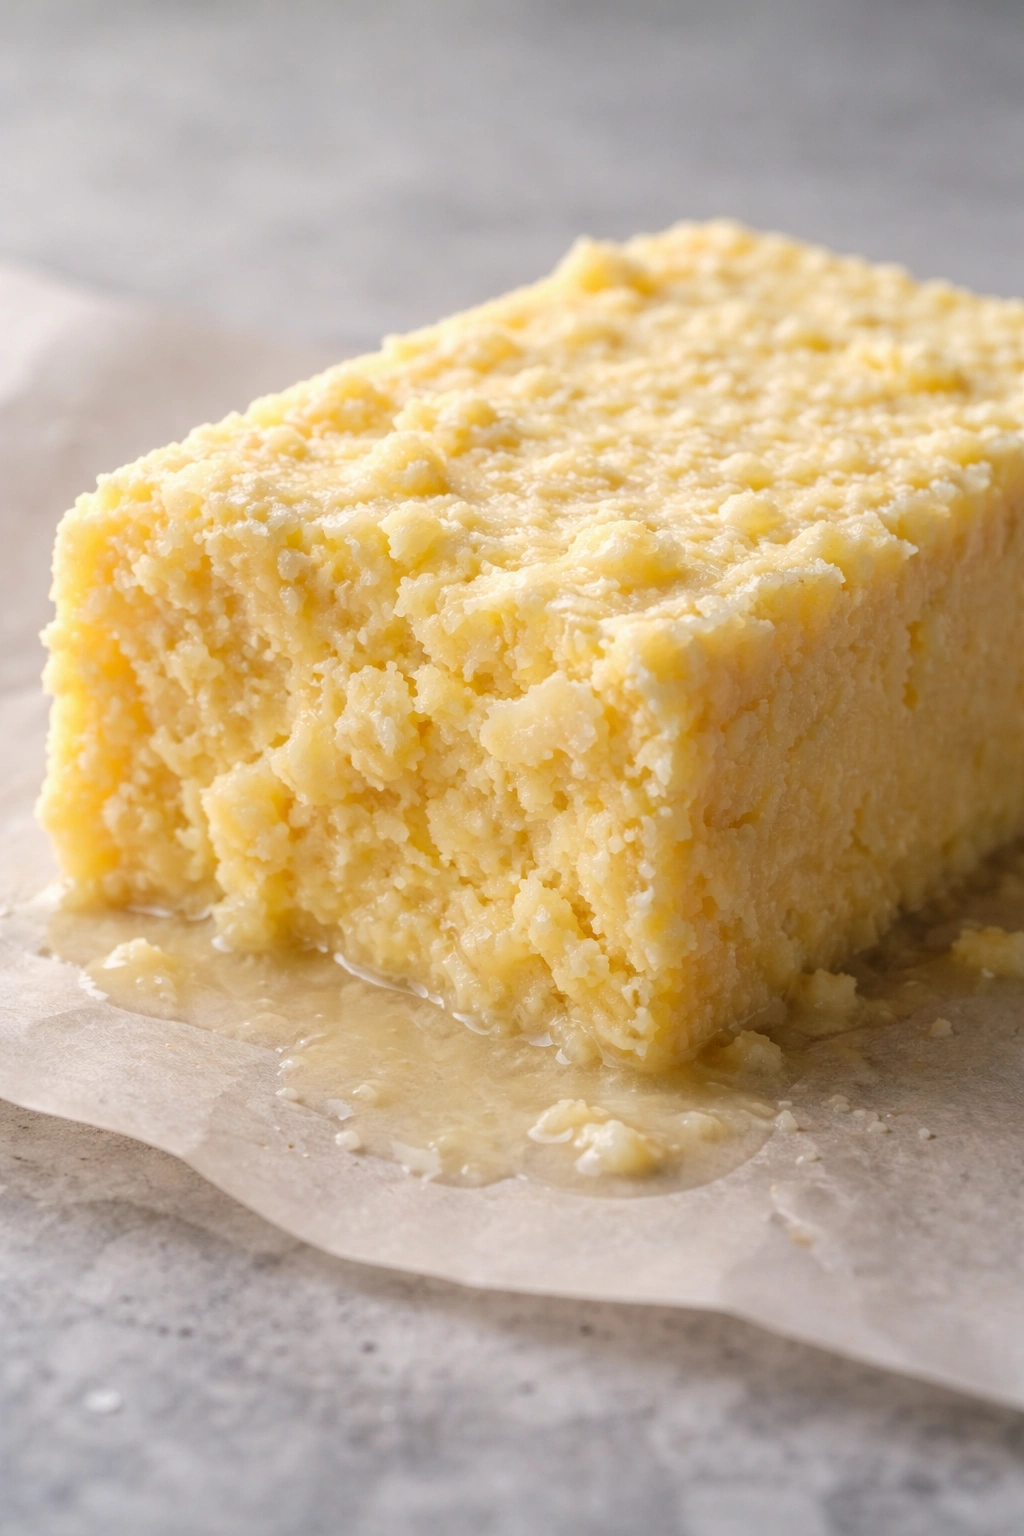
Immediately pour the contents through a fine-mesh strainer set over a bowl. The buttermilk will drain through; the butter solids will remain in the strainer.
-
If you’re planning to use the buttermilk in cooking, save it. Otherwise, discard it. The butter at this point is loose and wet, and it needs to be rinsed and pressed to remove excess moisture.
-
Run cold water over the butter solids in the strainer while using a spoon to press gently against the butter, working it slightly as water flows through. This removes the remaining buttermilk, which would otherwise sour the butter and reduce its shelf life. Continue rinsing and pressing until the water runs relatively clear—two to three rinses are usually sufficient.
Advertisements -
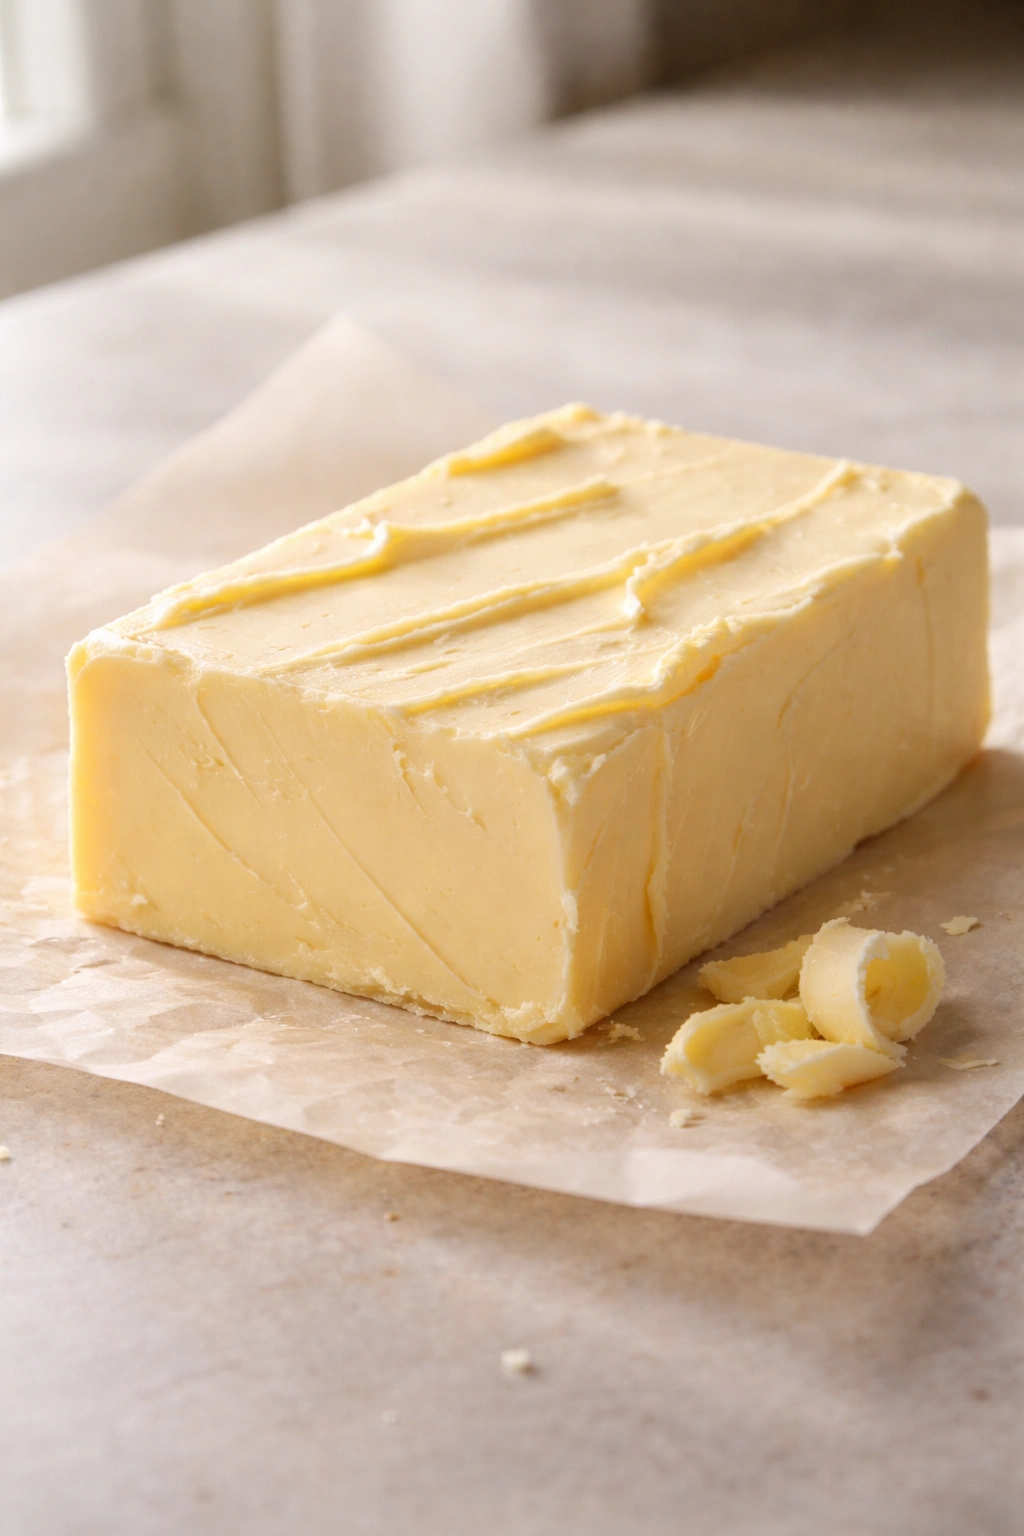
You now have fresh butter. It will be slightly soft and pliable. If you made it from room-temperature cream, it might be quite soft; if from cold cream, it should be noticeably firmer.
Finishing Touches:
-
Transfer the butter to a clean bowl or butter mold if you have one. If you want to add salt, do it now while the butter is still soft. For unsalted butter, you’re done. For salted butter, add fine sea salt at a ratio of approximately one-quarter teaspoon per quarter-pound of butter, then work it in gently with a spoon until evenly distributed.
-
If you’d like the butter to be firmer, refrigerate it for at least one hour. Homemade butter typically has a slightly softer texture than commercial butter because it contains a bit more water and lacks the emulsifiers used in commercial production. This is completely normal and doesn’t affect usability.
Troubleshooting Your Butter If Something Goes Wrong
Occasionally, something in the butter-making process produces unexpected results. The good news is that understanding what went wrong helps you adjust for next time, and most “failures” are actually variations rather than true failures.
The cream isn’t separating even after ten minutes. This almost always points to ultra-pasteurized cream, which has undergone heat treatment that damages the fat structure slightly. Ultra-pasteurized cream takes longer to separate—sometimes fifteen to twenty minutes—but it will eventually separate if you persist. Warming the cream slightly (by running warm water on the outside of your processor bowl or jar) can speed this up. Future batches: choose regular pasteurized cream if you can find it, which separates much more predictably.
The butter is forming but it looks grainier than expected. This is temperature-related. Warmer cream creates finer grain butter. If the grain bothers you, it’s purely aesthetic—the butter works fine. If you want smoother texture next time, start with slightly cooler cream or reduce agitation speed slightly.
You’ve churned for twenty minutes and you have whipped cream, but no clear separation yet. The cream might be too cold, or you’re not agitating with enough force. If using a food processor, switch from pulsing to continuous running for thirty seconds. If using a jar, shake harder and longer. If using a stand mixer, increase the speed. The agitation intensity matters more than you might expect.
Butter has formed but looks darker or discolored than expected. If it’s very pale yellow, the dairy cream came from grain-fed cattle (completely normal and will lighten slightly after refrigeration). If it’s darker than expected, you may have over-processed it slightly, or the cream had a higher fat percentage. This doesn’t affect the taste or safety.
The finished butter is extremely soft even after refrigeration. This happens when cream with a lower fat percentage (below 36%) is used, or when the final rinse isn’t thorough enough and excess water remains. The next batch will improve with colder starting cream and more thorough water rinsing.
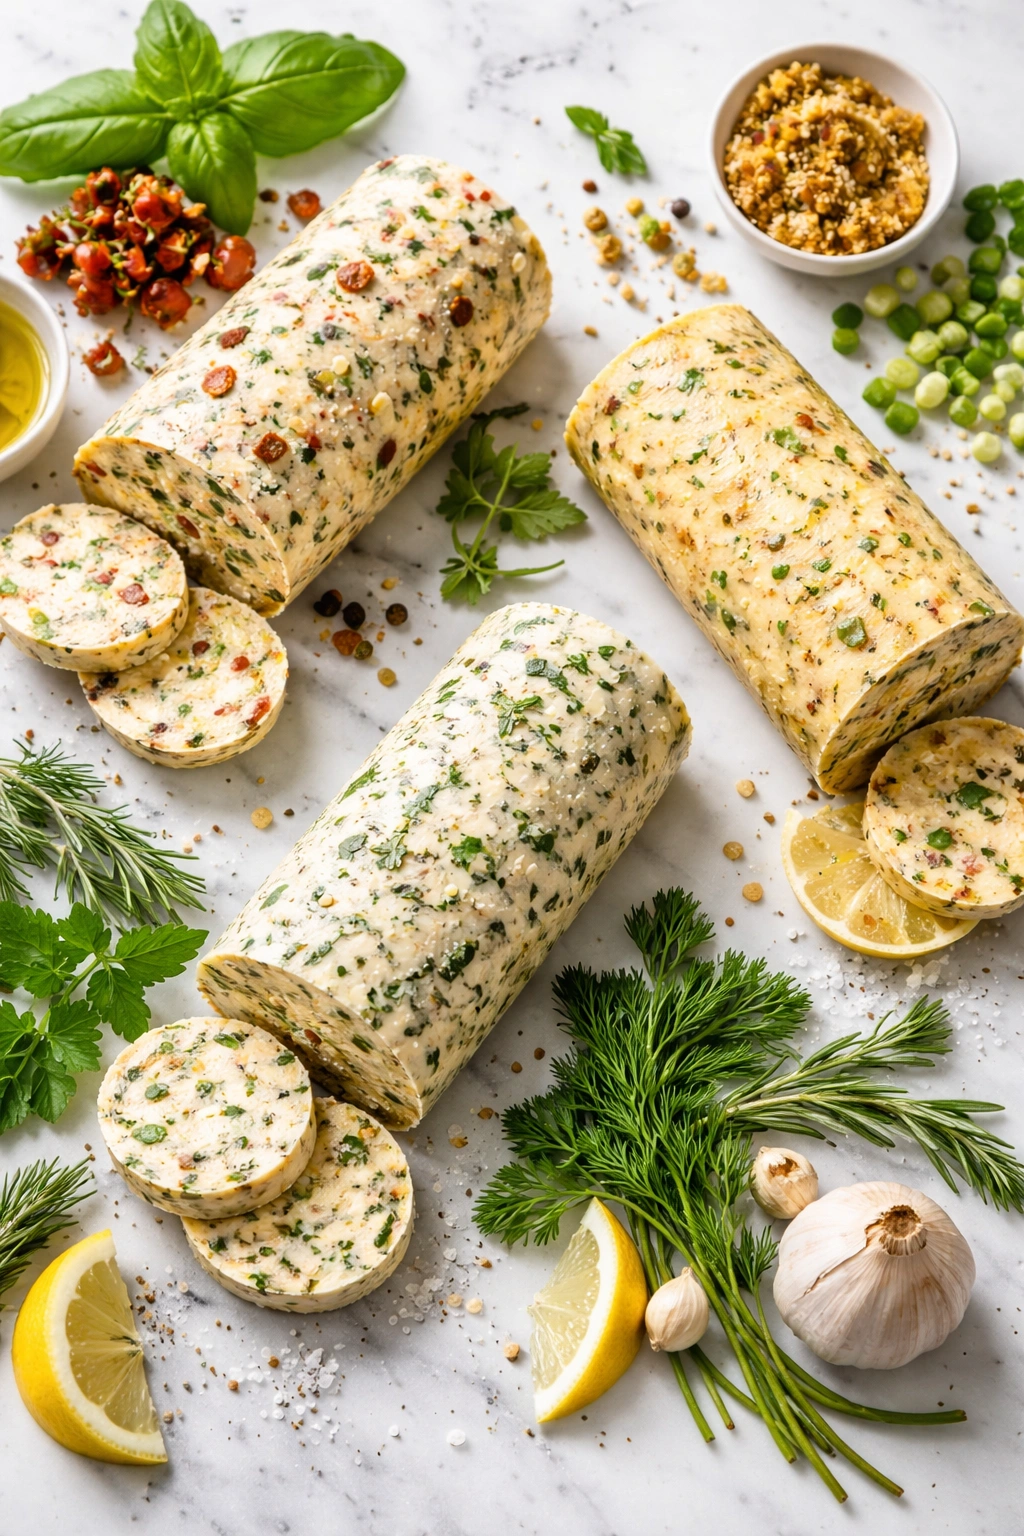
Flavoring Your Homemade Butter
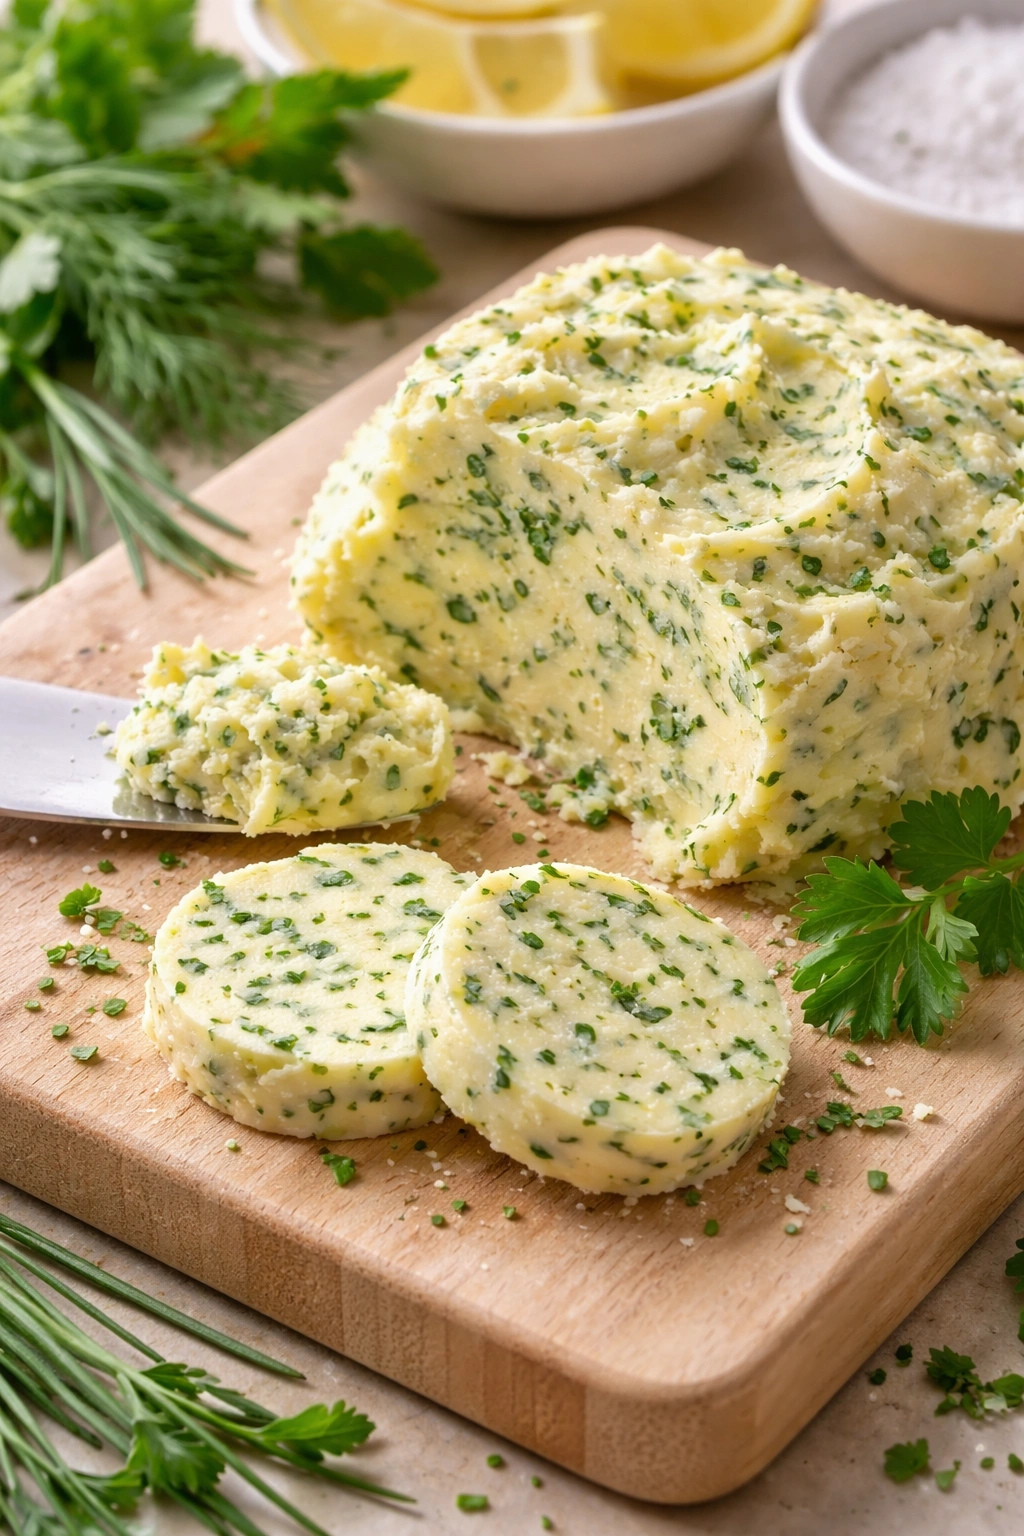
Plain butter is wonderful, but flavored butter opens up new possibilities. The key is adding flavorings while the butter is still soft, immediately after the final rinse, before refrigeration. This lets you distribute flavors evenly throughout the butter.
Herb butter begins with soft butter and fresh herbs minced extremely fine. Garlic, chives, parsley, dill, tarragon, or basil all work beautifully. For every quarter-pound of butter, use about one-quarter cup of finely minced fresh herbs mixed with one clove of minced garlic. Work these in gently with a spoon until evenly distributed, then refrigerate. Herb butter is perfect for finishing grilled meats, topping steamed vegetables, or spreading on bread. The butter’s pale color mixed with bright green herbs is visually appealing, and the flavor is incomparably fresher than store-bought herb butter.
Honey butter combines soft butter with liquid honey at a ratio of about two tablespoons honey per quarter-pound of butter. Work the honey in gently until marbled throughout. This butter is slightly sticky and doesn’t firm up as much as plain butter, which makes it perfect for toast, fresh bread, or pastries. If you prefer the honey more fully incorporated, use honey that’s been warmed and cooled to room temperature before mixing.
Spiced butter starts with soft butter and adds ground spices: cinnamon, cardamom, nutmeg, or clove work beautifully. Use a light hand—start with one-eighth teaspoon of spice per quarter-pound of butter, taste, and add more if you want stronger flavor. Spiced butter is lovely on breakfast toast, oatmeal, or pastries.
Citrus butter incorporates zest and sometimes a tiny bit of juice. Finely zest a lemon, lime, or orange and fold this into soft butter, using about one tablespoon zest per quarter-pound of butter. If you want to add juice as well, add only one-quarter teaspoon at a time, being careful not to add too much liquid—excess liquid can affect the butter’s texture. Citrus butter brightens grilled fish, steamed vegetables, or warm bread.
Making Cultured Butter for Extra Flavor
Cultured butter, common in European traditions, offers deeper flavor through fermentation. If you want to move beyond plain butter and explore more complex tastes, cultured butter is worth trying.
The cultured method requires an extra ingredient: a small amount of buttermilk culture or plain yogurt containing live cultures. The butter-making process is identical, but you begin by mixing one-quarter cup of buttermilk culture with one pint of room-temperature cream and letting it sit at room temperature for eight to twelve hours, or even overnight. During this time, the cultures ferment the cream, creating lactic acid and complex flavors. You’ll notice the cream becoming slightly thicker and developing a subtle tang—this is exactly what you want.
After the culturing time, churn the cream exactly as you would plain cream. The process works identically, and the timeline is the same. The result is butter with a noticeably richer, slightly tangy flavor profile more complex than butter made from plain cream. The buttermilk byproduct from cultured butter will also be thinner and slightly tangy. Many people find cultured butter more flavorful for eating plain or on fresh bread, though for cooking applications, the difference is less pronounced.
Finding buttermilk culture requires slightly more effort than buying plain cream. Some specialty cheese-making supply shops sell dried buttermilk cultures, or you can use fresh cultured buttermilk from the grocery store if it contains live cultures (most do, but check the label). If you can’t find cultures, using one-quarter cup of plain Greek yogurt or regular yogurt containing live cultures works as a substitute, though the flavor won’t be as developed because yogurt cultures are different from traditional buttermilk cultures.
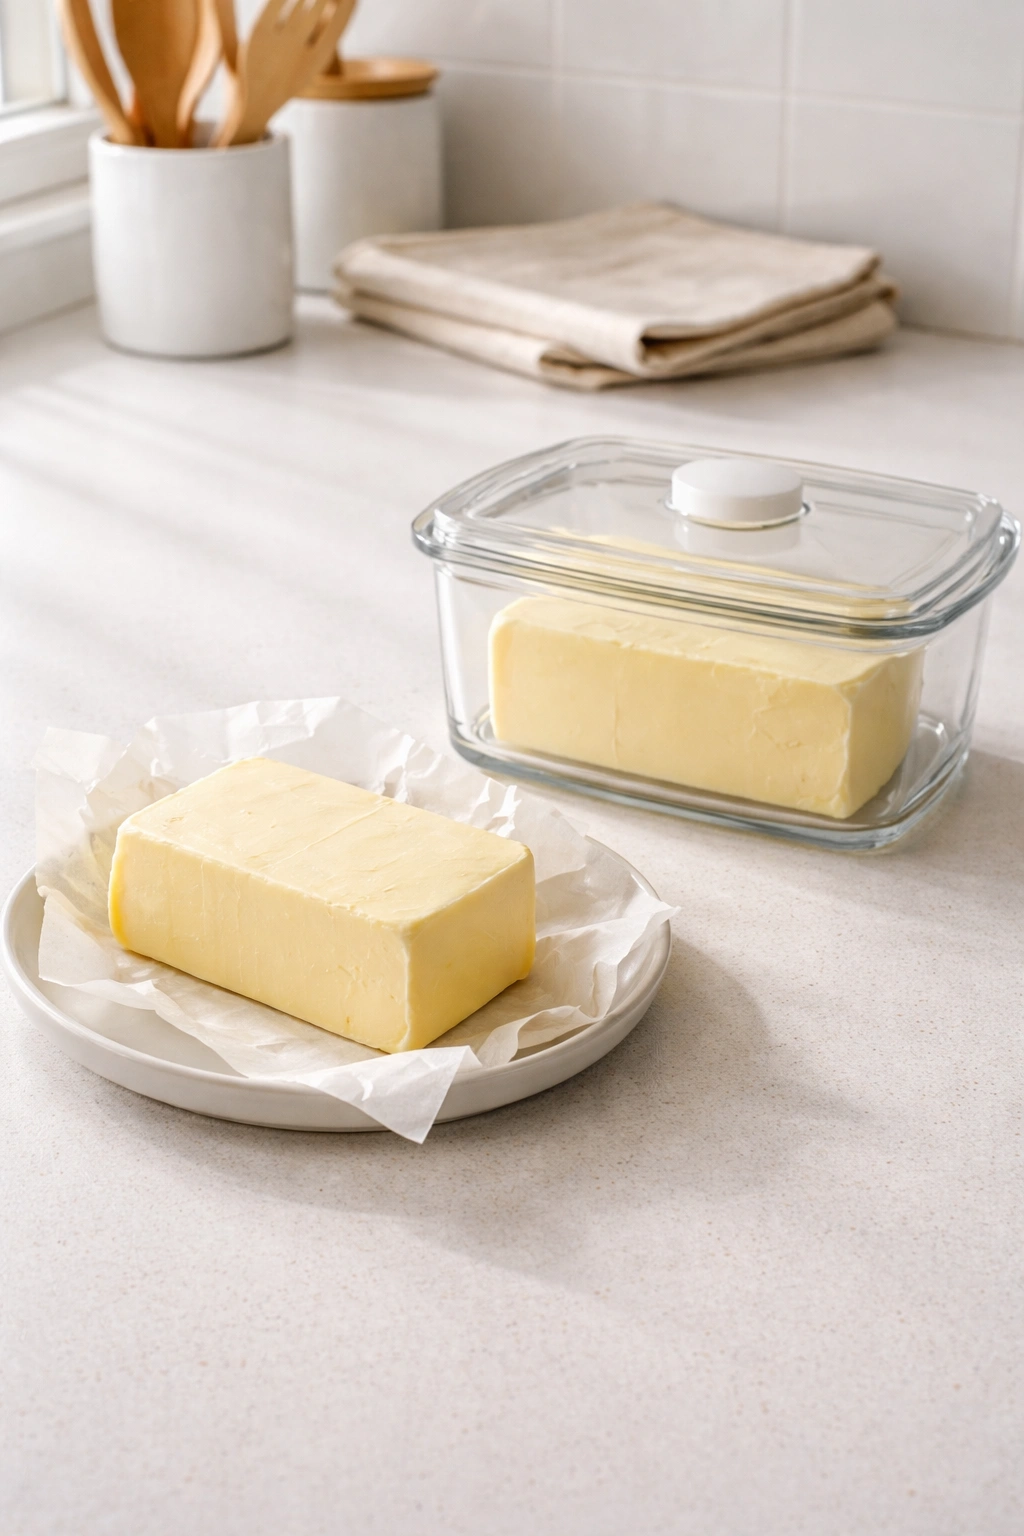
Storing Your Butter to Keep It Fresh
Fresh homemade butter, covered and refrigerated, keeps for two to three weeks before any degradation in flavor. This is longer than many people expect, and it’s significantly longer than the shelf life most worry about.
Refrigerator storage is the primary method. Wrap your finished butter in parchment paper or store it in a covered container, keeping it away from strong-smelling foods (butter absorbs odors easily). The colder your refrigerator, the longer the butter keeps. At standard refrigerator temperature (around 35-40°F), two to three weeks is reliable.
Freezer storage extends the life substantially. Wrap the butter tightly in parchment paper, then place it in a freezer bag with all air pressed out, and freeze. Frozen butter keeps for six months to a year. The flavor remains excellent when thawed, and the texture returns to normal once it reaches room temperature or spends time in the refrigerator. Thaw frozen butter in the refrigerator overnight rather than at room temperature, which helps maintain texture.
Cultured butter keeps longer than plain butter in both refrigerator and freezer because the fermentation creates acidity that naturally preserves the butter. Expect cultured butter to keep for three to four weeks refrigerated, and up to one year frozen.
A water bath method extended butter preservation in pre-refrigeration times. This involves covering the butter with cold water, which creates a barrier preventing oxidation. While this isn’t necessary in modern refrigeration, some people enjoy the method for aesthetic or historical reasons. Change the water daily or every other day. Butter stored this way keeps for about four weeks, but the water needs careful attention.
Room-temperature storage is feasible only in cool climates or during cold seasons. Historically, families kept crocks of butter in cool cellars or springhouses. Modern kitchen counters are typically too warm. If you want to keep butter accessible at room temperature for daily use, make small amounts and plan to use them within one to two weeks, keeping the butter covered.
Common Mistakes That Prevent Butter From Setting
Not every attempt at butter-making ends in obvious failure, but subtle mistakes can produce disappointing results. Recognizing these pitfalls helps you course-correct.
Over-processing the butter is the most common mistake. Once the butter has separated clearly from the buttermilk, stop immediately. If you continue agitating, the butter will break down further, the fat globules will rupture, and you’ll end up with something closer to clarified fat than butter—it’ll be greasy, slick, and lack the proper texture. When you see clear separation, stop. This is the whole game. Food processors make this mistake likely because you can easily get caught up watching the transformation. Set a timer once you see the buttermilk starting to separate, then check every thirty seconds.
Starting with cream that’s too cold extends the process unnecessarily. If your cream comes straight from refrigeration at 35°F, plan for a twenty-minute churn time. This isn’t wrong, only slower. Letting cream sit on the counter for thirty minutes before churning brings it to around 55-60°F and cuts churning time nearly in half.
Inadequate rinsing leaves buttermilk residue in the finished butter, which shortens its shelf life and can affect flavor. After the initial drain, run cold water over the butter solids while pressing gently until the water runs clear. Most home butter-makers skip this step or do it insufficiently because they’re excited to finish. The final rinse is crucial for shelf life.
Not drying the butter properly creates a wetter final product that doesn’t firm up well when refrigerated. After the final rinse, press the butter gently against the side of the strainer to remove excess water. You’re not trying to squeeze liquid out—you’re just helping it drain. A dry butter looks shinier and firms up more completely.
Using cream with an off smell or flavor creates butter that reflects those qualities. Always smell your cream before starting. Fresh cream has a mild, sweet dairy aroma. Any sour, sharp, or unusual smell means that batch of cream isn’t ideal for butter-making.
Going Beyond Plain Butter: Infusions and Variations
Once you’ve made plain butter comfortably, the variations expand your possibilities.
Compound butters combine soft butter with mix-ins that distribute throughout. Beyond herbs, honey, and spices already covered, consider sun-dried tomato butter (mix finely minced sun-dried tomatoes with fresh basil), olive tapenade butter (combine softened butter with finely minced black olive tapenade), or miso butter (add a tablespoon of white miso paste to butter and whisk until smooth). Each variation brings distinctive flavor and works beautifully on bread, vegetables, or finished dishes.
Browned butter begins with butter you’ve already made, then takes it further. Melt the butter in a light-colored saucepan over medium heat and watch it carefully. The milk solids will first foam, then gradually brown. The moment they reach golden-brown color (but before they become dark and burnt), pour the butter through a fine-mesh strainer lined with cheesecloth into a bowl. The browned solids stay in the strainer; the clarified, deeply flavored brown butter goes into the bowl. Browned butter has a nutty, rich flavor impossible to achieve any other way, and it’s exceptional in baking, on vegetables, or in pasta.
Clarified butter (also called ghee when made from butter with an Indian technique) is pure butterfat with water and milk solids removed. Melt your made butter slowly over low heat, then carefully pour the clear golden liquid into a jar, leaving the white solids at the bottom behind. Clarified butter keeps for months at room temperature and has a high smoke point suitable for high-heat cooking. The milk solids that remain can be saved and added to baked goods or used in cooking.
Making Ghee From Your Homemade Butter

Ghee takes clarified butter further. The process is slow and intentional, creating butter that’s been reduced to pure butterfat through patient cooking.
The ghee-making process starts with one pound of your homemade butter placed in a heavy-bottomed saucepan over the lowest possible heat. The butter will melt slowly, and you’ll see it separate into clear golden liquid on top and white milk solids on the bottom. As the milk solids cook at low temperature for thirty to forty minutes, they’ll gradually brown and sink further. Do not rush this process with higher heat. Low heat is essential—you want to evaporate water and brown the solids gently, not cook them quickly.
Once the solids are deep golden-brown and the liquid is clear golden, pour the butter through cheesecloth into a jar, leaving all the solids behind. The resulting ghee is shelf-stable (no refrigeration needed), tastes richer and more complex than clarified butter, and has a high smoke point suitable for all cooking methods. Ghee is prized in Indian and South Asian cooking and increasingly popular in many other cuisines for its flavor and stability.
Storing ghee is easier than storing butter. Covered at room temperature, ghee keeps for months. Some people store it in the refrigerator for longer shelf life, though room-temperature storage is traditional and reliable.
Using the Buttermilk Byproduct
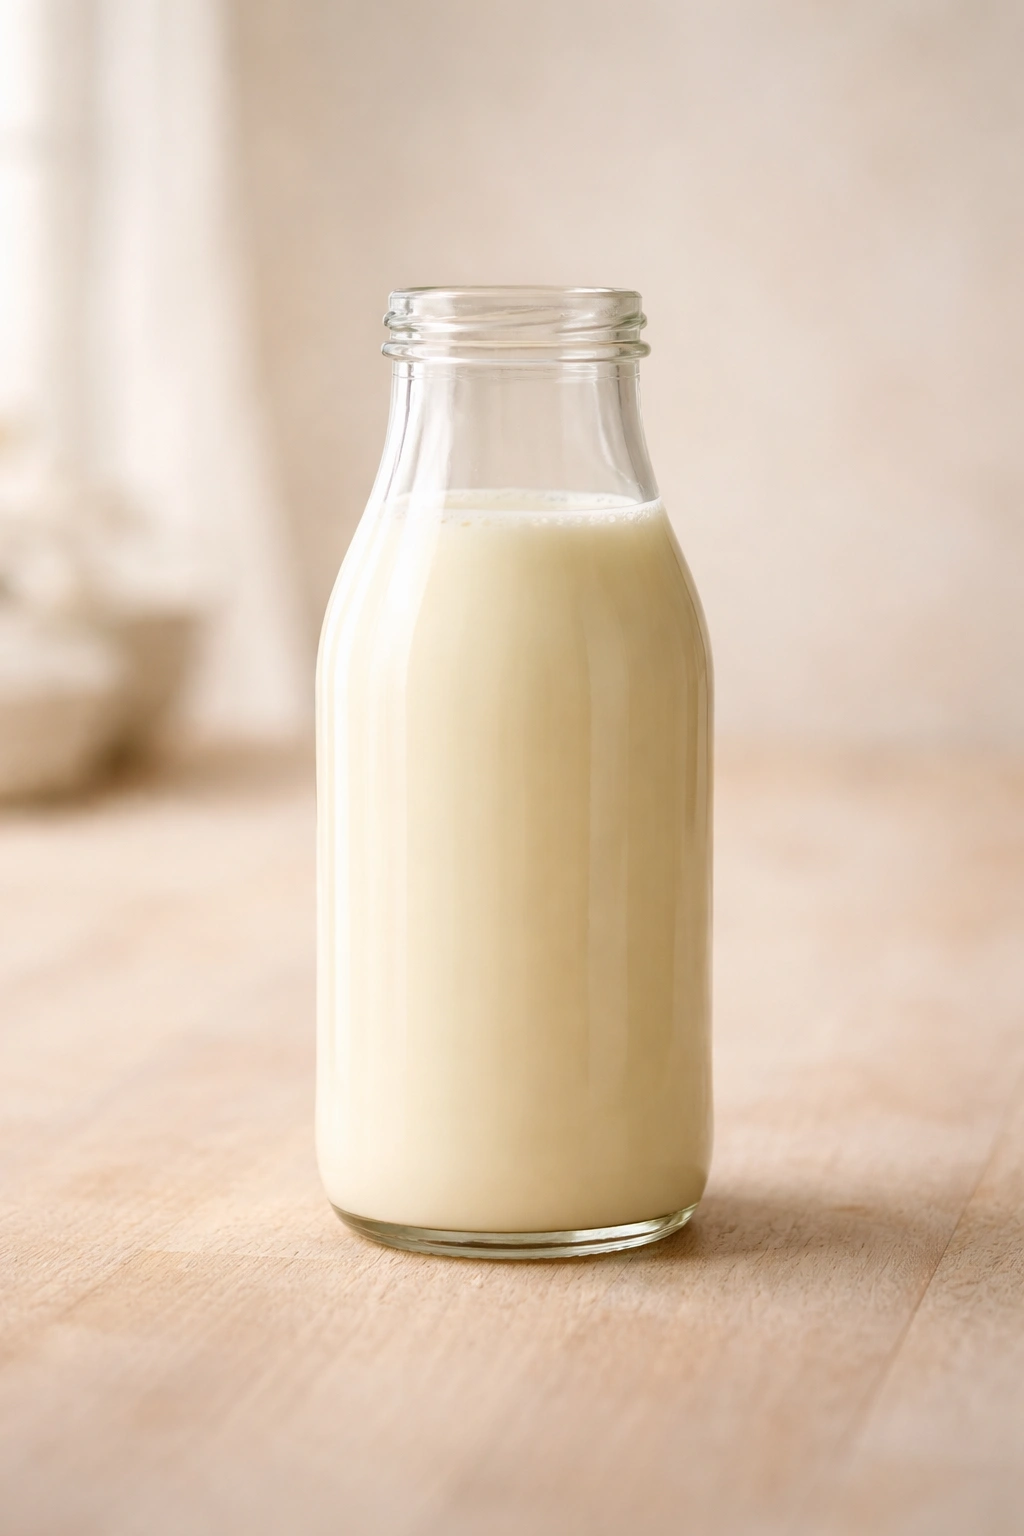
The thin liquid left after butter separates is sweet buttermilk—a different product from cultured buttermilk, but equally useful in cooking.
Pancakes and waffles made with sweet buttermilk are tender and flavorful. Use buttermilk at a one-to-one ratio substitution for regular milk in any pancake or waffle recipe. The slight tang contributes to the browning and creates a subtly more complex flavor.
Quick breads like biscuits and scones become lighter when made with buttermilk. Again, substitute buttermilk for regular milk and reduce the baking powder or baking soda slightly if the recipe calls for it, since buttermilk reacts differently with leavening agents than plain milk does.
Salad dressings benefit from buttermilk’s creamy texture and slight tang. Blend buttermilk with fresh herbs and garlic for a lighter version of ranch dressing that still feels indulgent.
Soups can be enriched with buttermilk added at the end of cooking. Never boil buttermilk once added, or it may curdle. Stir it in gently and warm through, using it instead of heavy cream in lighter applications.
Drinking buttermilk straight is not uncommon in cultures where dairy is prized. If you’ve never tried fresh, warm sweet buttermilk, it’s worth tasting. Some people find it pleasant; others find it too thin compared to cultured buttermilk from the store. Either way, it’s absolutely food-safe and nutritious.
Final Thoughts

Making butter at home transforms a simple ingredient into something distinctly personal. The first time you see cream separate into butter before your eyes, you’ll understand why people have made butter for thousands of years despite the effort involved. There’s genuine satisfaction in taking something that started as animal feed converted through a cow into dairy cream, and converting that cream through your own labor into rich, delicious butter.
Once you’ve made butter once, you’ll realize that the process is not only simple but genuinely difficult to mess up. The only real requirement is patience and attention during that final stage when separation becomes obvious. After that, the rest is finishing—rinsing, pressing, storing. The variables that might stretch one batch’s timeline or slightly alter texture become less mysterious once you’ve seen the process in action.
Your next batch will be faster, more confident, and probably more flavorful because you’ll understand exactly what’s happening at each stage. You might try cultured butter next, or explore herb infusions, or make ghee. You might start saving the buttermilk byproduct for baking. You might gift a jar to someone who’s never experienced truly fresh butter. Or you might simply make it regularly for yourself, enjoying the knowledge that what you’re spreading on your toast or cooking with was made in your own kitchen just days earlier. That’s the real magic of homemade butter—not the process or the ingredients, but the direct connection between your hands and what you eat.