When you’re craving something satisfying, nourishing, and ready on the table within 30 minutes, Indian lentil recipes deliver every time. These humble legumes transform into complex, deeply flavorful dishes that taste like they’ve been simmering for hours, yet come together quickly whether you’re cooking on the stovetop or using a pressure cooker. There’s a reason lentils sit at the heart of Indian cuisine—they’re affordable, versatile, protein-packed, and remarkably adaptable to whatever spices and vegetables you have on hand.
If you’ve written off lentils as bland or boring, these recipes will change your mind completely. The magic isn’t just in the lentils themselves; it’s in how they absorb aromatics, soak up spice-infused oils, and create a naturally creamy texture that rivals dishes made with cream or butter. Whether you prefer a silky dal, a hearty curry thick enough to scoop onto rice, or something with unexpected ingredients like butternut squash and mushrooms, you’ll find tested, foolproof recipes that work for weeknight dinners and special occasions alike.
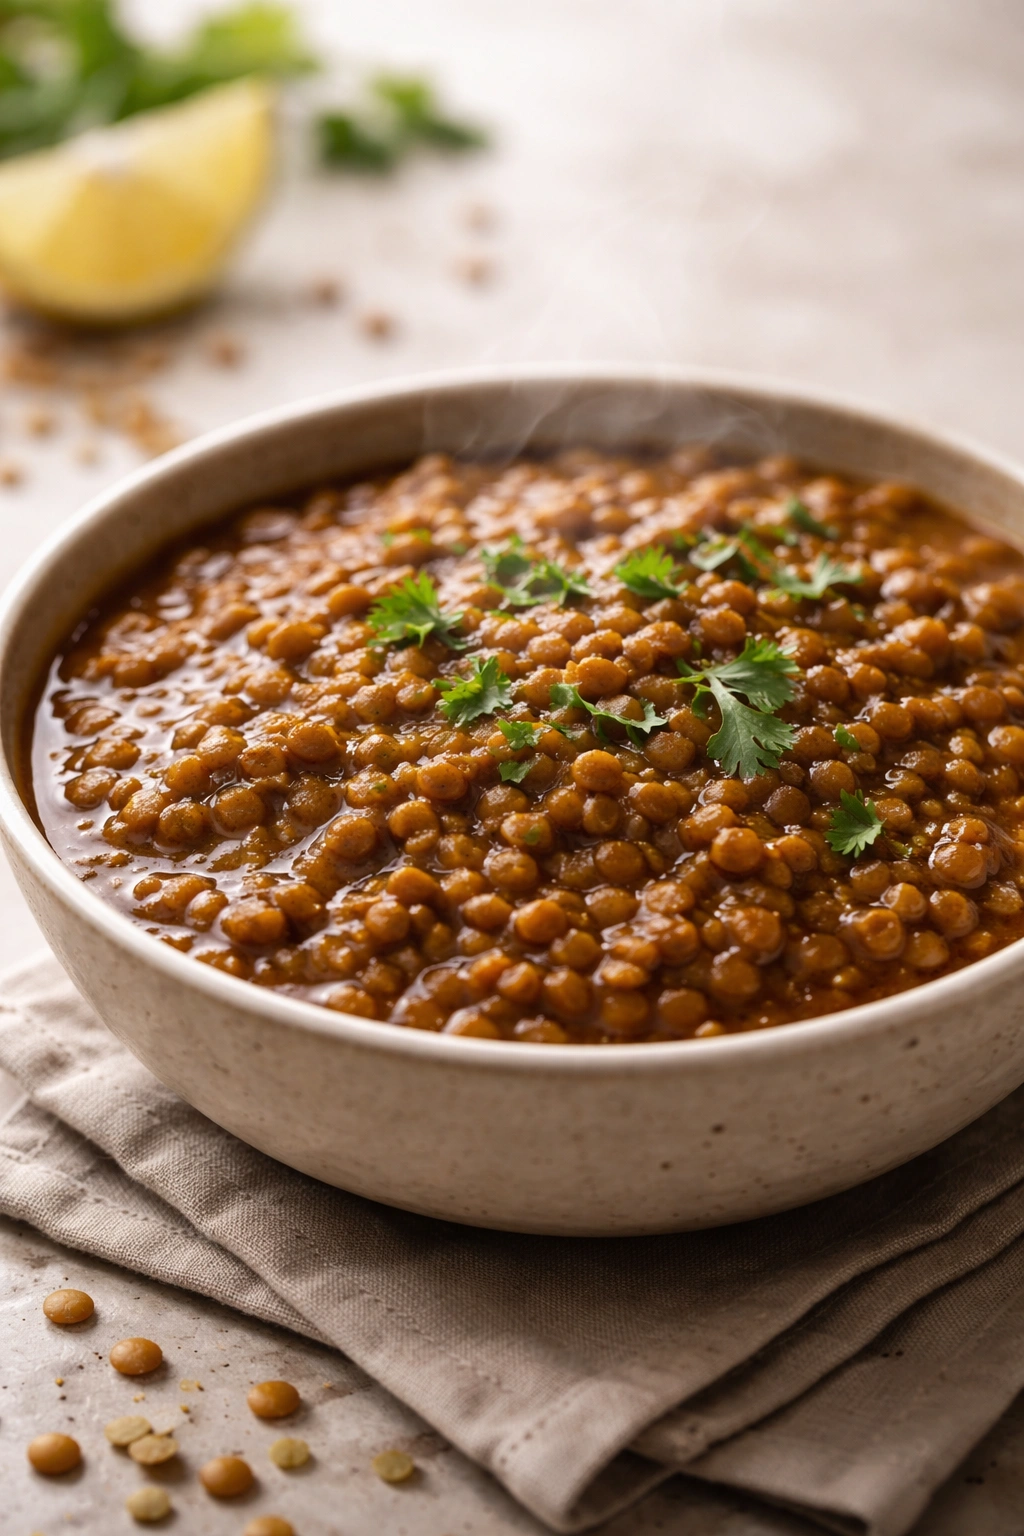
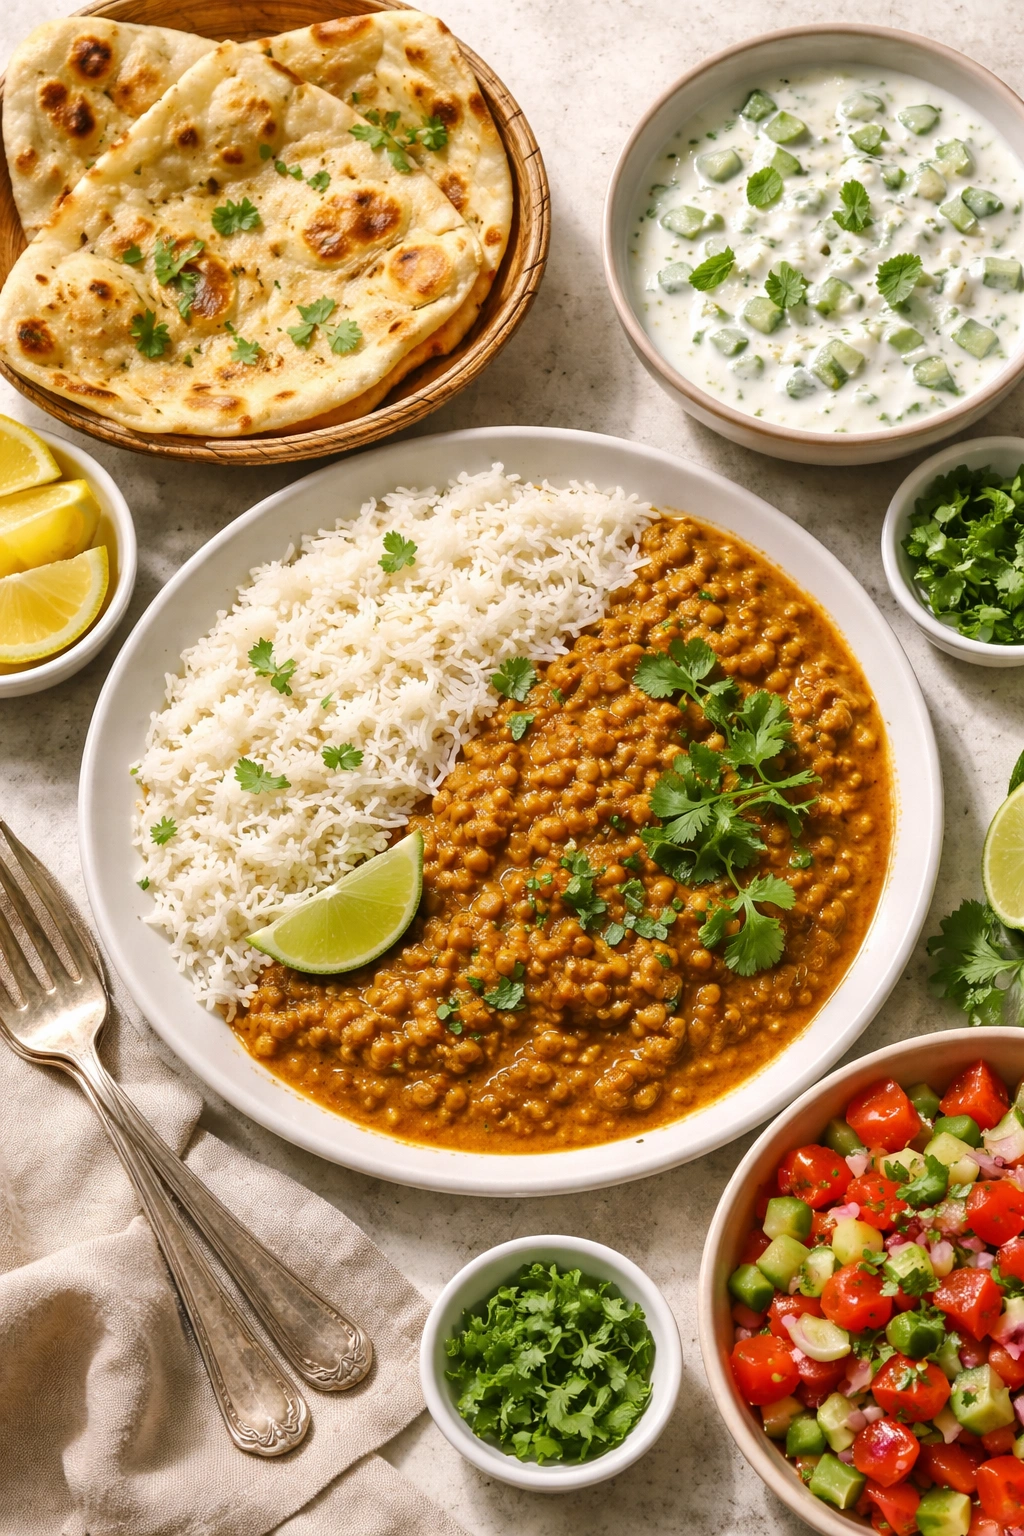
1. Classic Red Lentil Curry with Coconut Milk
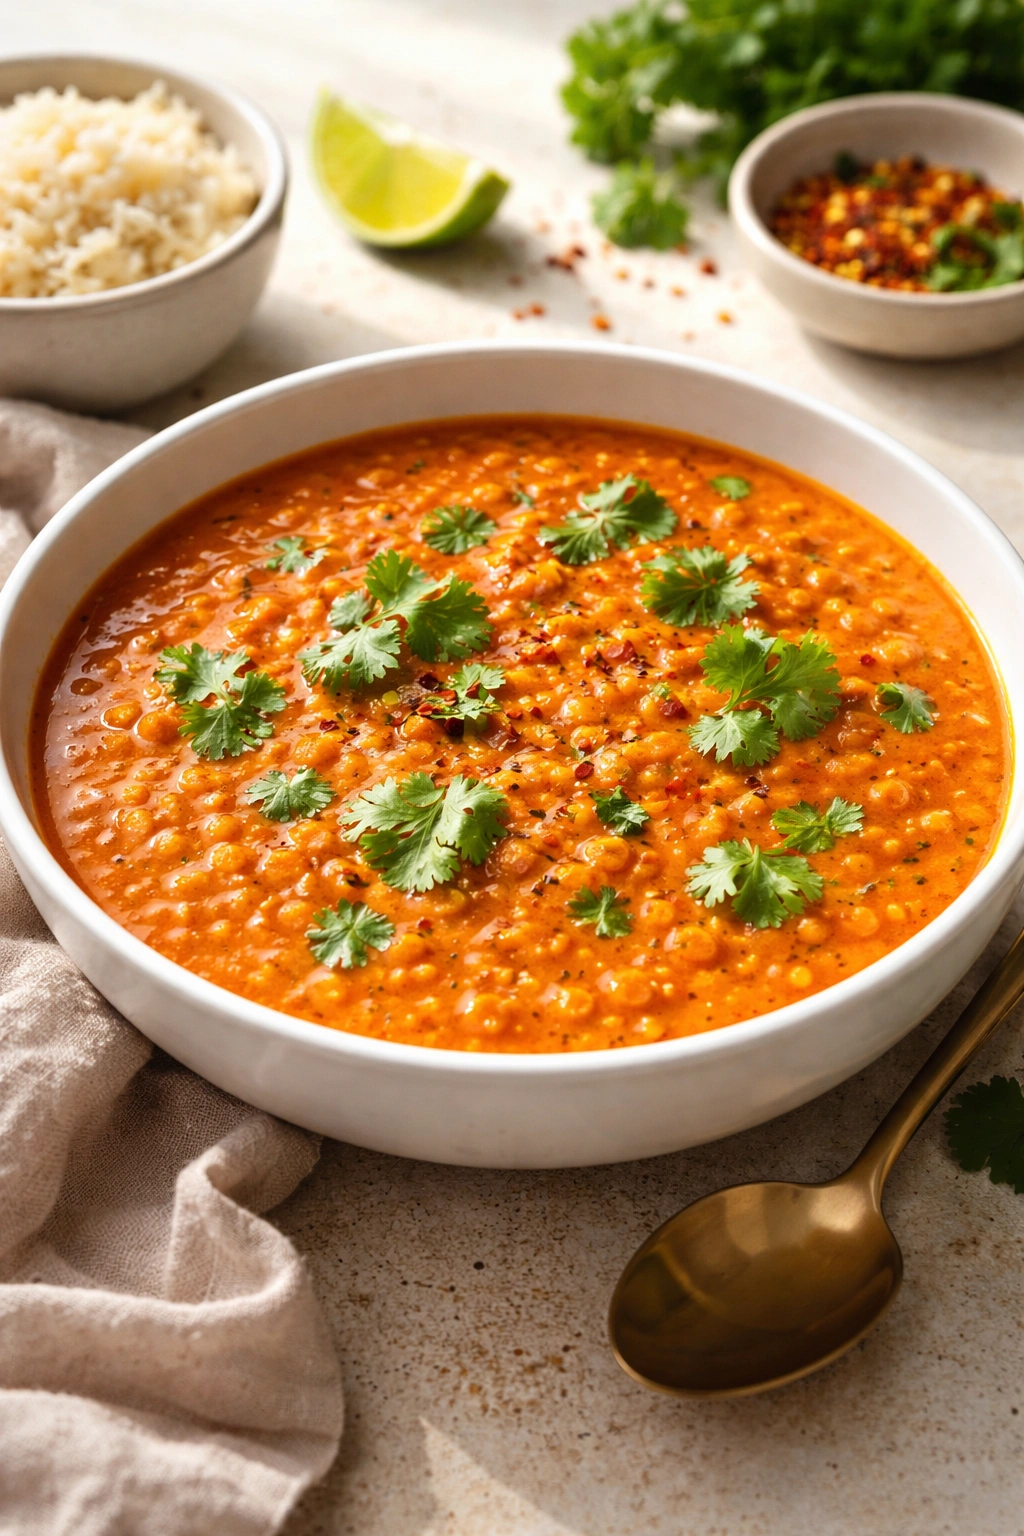
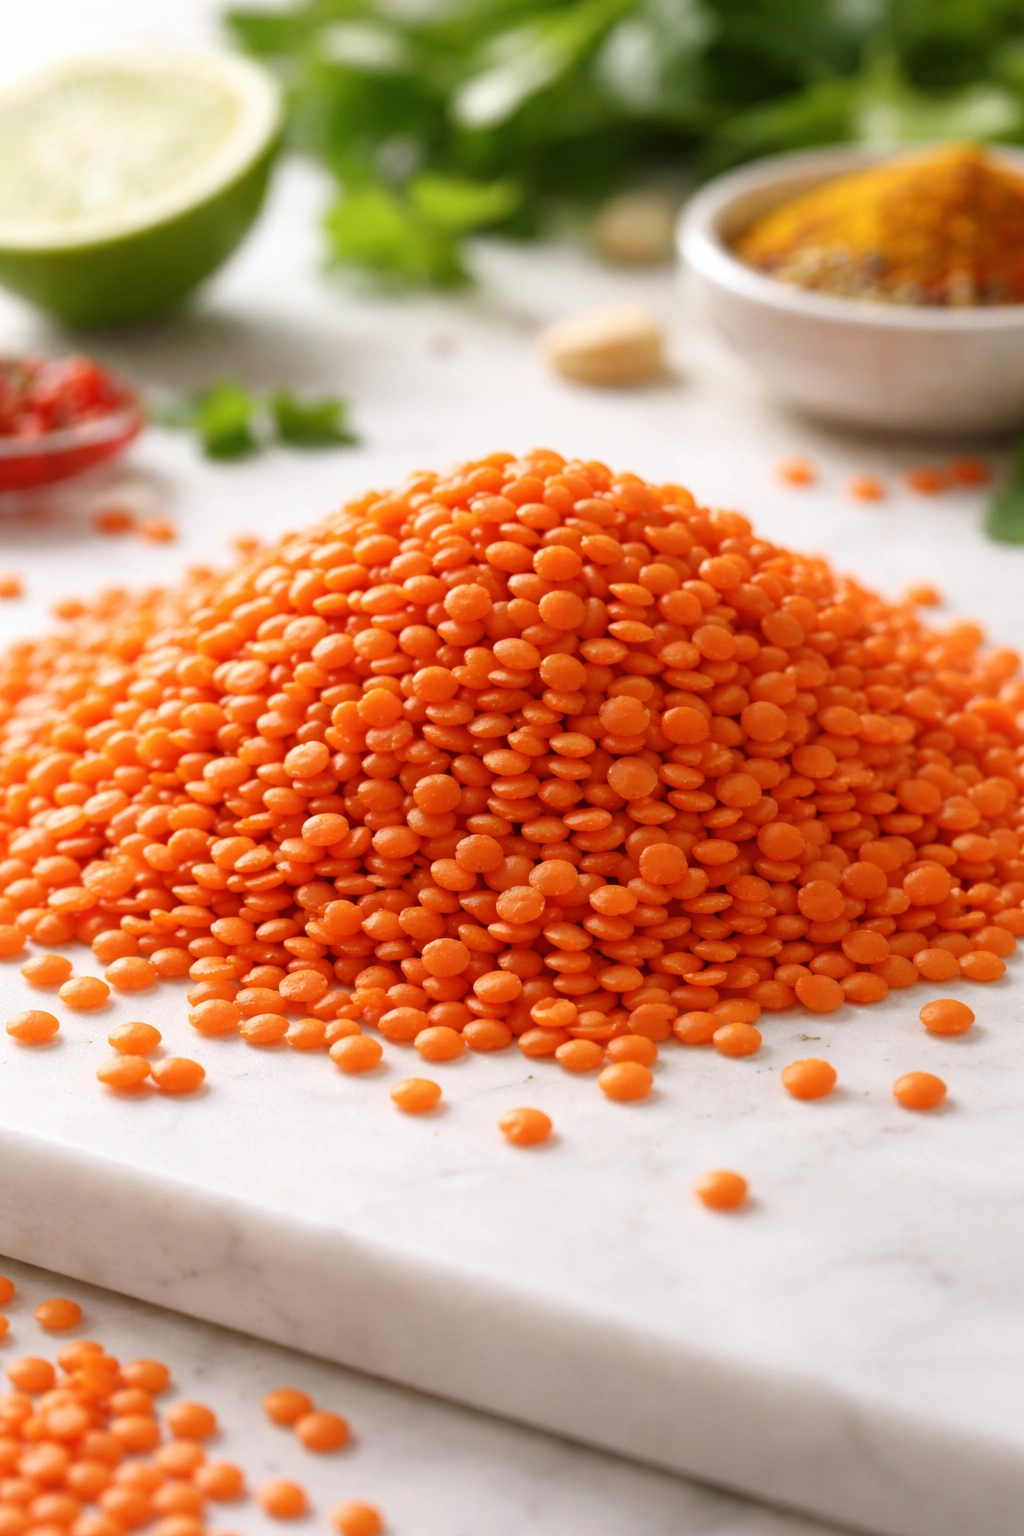
Red lentils are the secret ingredient for creating restaurant-quality curries at home. Unlike other lentil varieties, red lentils break down as they cook, naturally thickening the sauce into something silky and luxurious without any cream or added thickeners. This means you get a deeply comforting dish that’s packed with fiber and protein but feels indulgent with every spoonful.
Yield: Serves 4 | Prep Time: 10 minutes | Cook Time: 25 minutes | Total Time: 35 minutes | Difficulty: Beginner — The ingredient list is short and the steps are straightforward, making this an excellent recipe for anyone new to Indian cooking.
For the Curry:
- 1½ tablespoons coconut oil or olive oil
- 1 medium onion, diced
- 2 garlic cloves, minced
- 1 tablespoon fresh ginger, minced (about 1 inch piece)
- 1 teaspoon curry powder
- 1 teaspoon ground turmeric
- 1 teaspoon ground cumin
- ¼ teaspoon red pepper flakes (or more if you like heat)
- 2 cups vegetable broth
- 1 can (15 ounces) crushed tomatoes
- 1 cup split red lentils, rinsed
- ½ cup coconut milk (full-fat works best)
- 1 teaspoon salt, plus more to taste
- ⅛ teaspoon black pepper
- Fresh cilantro and a squeeze of lemon juice for serving
To Prepare:
Heat the coconut oil in a large pot over medium heat. When it’s shimmering, add the diced onion and sauté for 3-4 minutes, stirring occasionally, until the edges begin to soften and turn translucent. The onion should smell sweet and fragrant by this point.
Add the minced garlic and ginger, then sprinkle in the curry powder, turmeric, cumin, and red pepper flakes. Stir constantly for about 1 minute—this step is crucial because it blooms the spices in the hot oil, releasing their essential oils and intensifying the flavors. You’ll notice the kitchen fill with a warm, aromatic smell.
Pour in the vegetable broth and crushed tomatoes, stirring to combine everything. Rinse the red lentils under cold water in a fine-mesh strainer, then add them to the pot along with the salt. Stir once more to distribute the lentils evenly throughout the liquid.
Increase the heat slightly and bring the mixture to a boil—this should take about 3-4 minutes. Once you see bubbles breaking the surface consistently, reduce the heat to medium-low and let it simmer gently, uncovered, for about 15-18 minutes. The lentils will break down and the sauce will thicken dramatically; this is exactly what you want. Stir every 3-4 minutes to prevent sticking and ensure even cooking.
Check the lentils at the 15-minute mark by tasting one. They should be completely soft and almost creamy, with no firm centers remaining. When they’re done, stir in the coconut milk and simmer for another 2 minutes to heat through. Taste and adjust salt and pepper as needed—you might want a bit more salt than you’d expect because the broth and coconut milk dilute the seasoning.
Why This Works
The combination of turmeric, cumin, and a touch of curry powder creates a warm, earthy base that’s authentic without being intimidating if you’re sensitive to spice. The red lentils dissolve partially, creating a naturally thick sauce that clings beautifully to rice grains. Coconut milk rounds out the flavors with subtle sweetness and richness that balances the tomato’s slight acidity.
Serving and Variations
Serve this curry over steamed basmati rice, brown rice, or even with warm naan bread if you have it. A spoonful of plain yogurt stirred in just before serving adds a cooling element and brightens the flavors. Variations: Add a handful of fresh spinach or diced bell peppers in the last 2 minutes of cooking—they’ll wilt perfectly into the sauce. For creamier texture, use full-fat coconut milk or add a splash of heavy cream at the end. To make it vegetable-forward, add diced sweet potato, cauliflower florets, or diced zucchini along with the broth and cook until tender.
Storage and Make-Ahead Tips
This curry tastes even better the next day once the flavors meld, so don’t hesitate to make a double batch. Store leftovers in an airtight container in the refrigerator for up to 4 days, or freeze for up to 3 months. To reheat, simply warm gently on the stovetop over medium-low heat, adding a splash of water or broth if it’s thickened too much during storage.
2. Creamy Butternut Squash Lentil Curry with Herbs
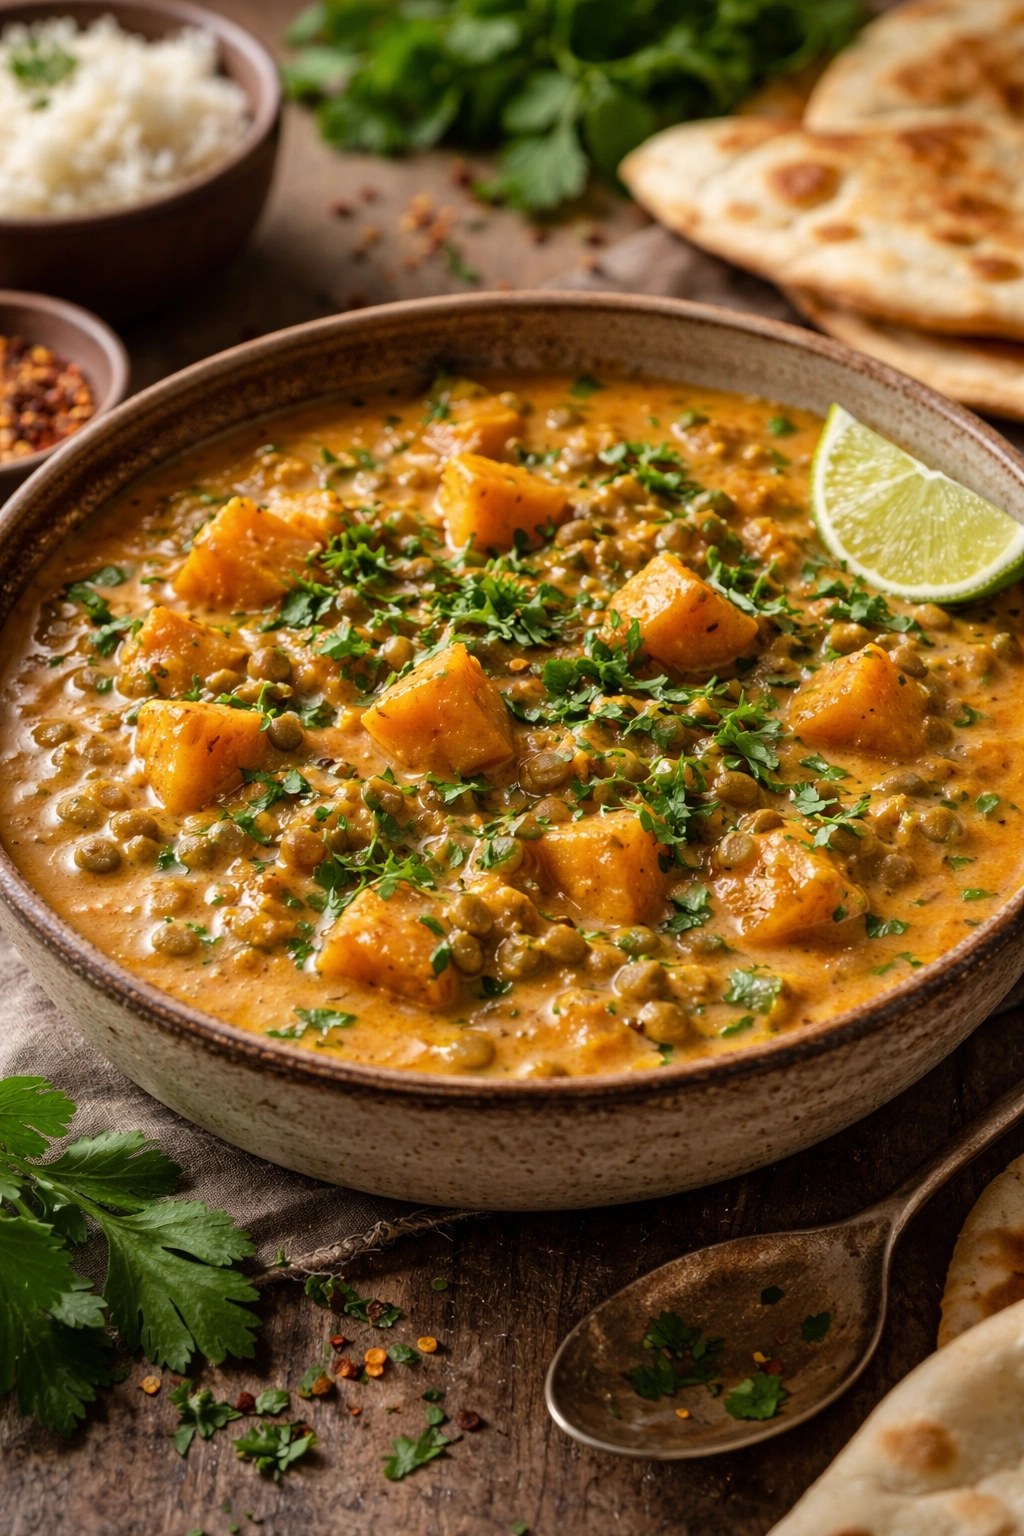
Butternut squash transforms lentil curry into something elegant enough for a dinner party, yet simple enough for a Tuesday night. The squash adds natural sweetness and a velvety texture that makes this dish feel luxurious without requiring cream or butter. This recipe works beautifully for meal prep since the flavors deepen as it sits.
Yield: Serves 4-5 | Prep Time: 15 minutes | Cook Time: 30 minutes | Total Time: 45 minutes | Difficulty: Intermediate — Requires basic knife skills for dicing the squash, but the cooking technique is straightforward.
For the Curry:
- 2 tablespoons olive oil
- 1 medium onion, diced
- 3 garlic cloves, minced
- 1 tablespoon fresh ginger, minced
- 1 teaspoon ground cumin
- 1 teaspoon ground coriander
- ½ teaspoon ground turmeric
- ¼ teaspoon cayenne pepper (optional, for heat)
- 3 cups fresh or frozen butternut squash, cut into ½-inch cubes (about 1 pound)
- 1 cup brown or green lentils, rinsed
- 2½ cups vegetable broth
- 1 can (14 ounces) coconut milk
- 1 bay leaf
- 1 teaspoon salt, plus more to taste
- 2 tablespoons fresh basil or parsley, chopped
- 1 tablespoon lime juice
- Toasted pumpkin seeds for garnish (optional)
To Prepare:
Heat the olive oil in a large, heavy-bottomed pot over medium-high heat. Add the diced onion and cook for 4-5 minutes, stirring occasionally, until the edges turn golden-brown and the onion becomes fragrant. Don’t just soften the onion—brown it slightly. This extra step builds deeper flavor that carries through the entire dish.
Reduce the heat to medium and add the garlic, ginger, cumin, coriander, turmeric, and cayenne. Stir constantly for about 1 minute, watching as the spices release their aroma and begin to coat the onions. Add 2-3 tablespoons of water if the pot looks too dry—this prevents the spices from burning while they toast.
Add the butternut squash cubes and stir to coat them with the spiced oil. Let them cook for about 2 minutes, stirring occasionally. This light sauté brings out the squash’s natural sweetness and creates caramelized edges.
Pour in the vegetable broth, add the rinsed lentils, and drop in the bay leaf. Stir everything together and bring the mixture to a gentle boil. Once boiling, reduce the heat to medium-low, cover the pot partially (leave a crack for steam to escape), and simmer for about 20 minutes until the lentils are mostly tender but not falling apart.
Stir in the coconut milk and cook uncovered for another 5-8 minutes. The squash should be completely fork-tender and starting to break down slightly, while the lentils should be soft but still intact. The sauce will be thick and creamy from the squash and coconut milk combined. Add more broth if you prefer a looser consistency.
Stir in the fresh basil and lime juice just before serving. Taste and adjust salt as needed. The lime juice brightens the rich, sweet flavors and prevents the dish from tasting one-dimensional.
Why This Works
Butternut squash naturally breaks down as it cooks, creating creaminess without any dairy. The squash’s subtle sweetness plays beautifully against earthy cumin and warm turmeric, while fresh herbs and lime juice add brightness that cuts through the richness. Brown or green lentils hold their shape during cooking, providing textural contrast to the soft squash.
Serving and Variations
Serve this curry over jasmine rice, quinoa, or alongside warm flatbread. A spoonful of Greek yogurt or coconut yogurt stirred in adds tanginess. Variations: Add sautéed kale or spinach in the last 2 minutes for added nutrition. Stir in a tablespoon of tahini or almond butter at the end for even creamier texture. For a mushroom version, replace half the butternut squash with diced cremini or oyster mushrooms for deeper umami flavor. Add diced bell peppers with the squash for color and crunch.
Storage Tips
This curry freezes exceptionally well because the squash maintains its texture. Store in the refrigerator for up to 5 days, or freeze in individual portions for quick future dinners. Thaw in the refrigerator overnight before reheating gently on the stovetop.
3. Indian Lentil and Rice One-Pot (Khichdi-Style)
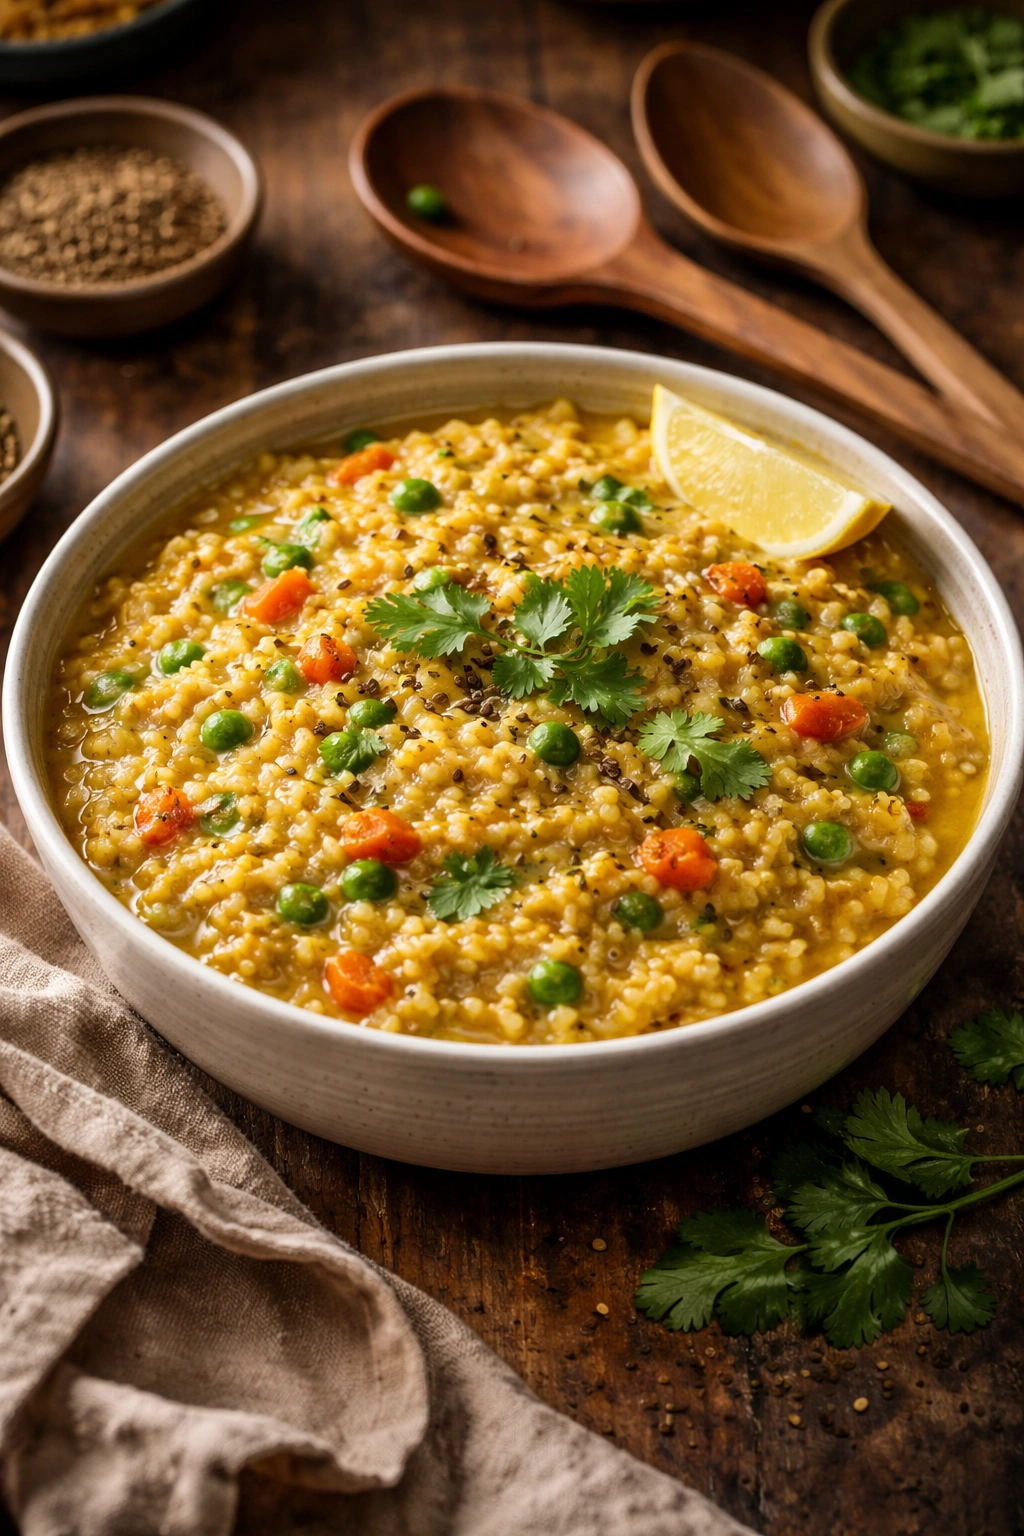
Khichdi sits at the intersection of comfort food and nourishment in Indian cuisine. This one-pot meal combines lentils and rice cooked together with fragrant spices, creating a dish that’s light enough for when you’re not feeling well but satisfying enough for a full dinner. The beauty of this recipe is its flexibility—the spice level and vegetable additions are entirely up to you.
Yield: Serves 4 | Prep Time: 5 minutes | Cook Time: 25 minutes | Total Time: 30 minutes | Difficulty: Beginner — Minimal prep work and straightforward one-pot cooking method.
For the Khichdi:
- 2 tablespoons ghee or coconut oil
- 1 medium onion, diced
- 1 teaspoon cumin seeds
- ½ teaspoon mustard seeds
- 4-5 fresh curry leaves (or ½ teaspoon dried)
- 1 inch fresh ginger, minced
- 2 garlic cloves, minced
- ½ teaspoon ground turmeric
- ¼ teaspoon red pepper flakes (optional)
- ½ cup brown or green lentils, rinsed
- ¾ cup long-grain white or brown rice, rinsed
- 3 cups vegetable broth
- 1 teaspoon salt, plus more to taste
- 1 tablespoon lime juice
- 2 tablespoons fresh cilantro, chopped
- 1 teaspoon ghee for finishing (optional, for richness)
To Prepare:
Heat the ghee in a large pot over medium-high heat. Once it’s shimmering and fragrant, add the cumin seeds and mustard seeds. Listen and watch carefully—within 30-45 seconds, the seeds will begin to pop and smell incredibly aromatic. This tempering step is essential; it’s where the flavor foundation for the entire dish comes from.
Add the diced onion and cook for 3-4 minutes, stirring occasionally, until it’s soft and translucent. The curry leaves and spices will release more aroma as the onion cooks.
Stir in the minced ginger and garlic, then add the turmeric and red pepper flakes. Cook for 1 minute, stirring constantly, until the spices are fragrant and well combined with the oil.
Add the rinsed lentils and rice directly to the pot, stirring to coat them evenly with the spiced ghee. Let them toast for about 2 minutes—this dries out the grains slightly and allows them to cook in distinct pieces rather than clumping together. You might hear a light crackling sound, which is exactly right.
Pour in the vegetable broth and add 1 teaspoon of salt. Stir well, then increase the heat slightly to bring the mixture to a boil. Once you see a rolling boil, reduce the heat to low, cover the pot tightly, and cook for about 15-18 minutes without lifting the lid. Lifting the lid releases steam and disrupts the cooking process.
When the time is up, remove from heat and let the pot sit, covered, for about 5 minutes. This resting period allows any remaining liquid to absorb into the grains and lentils. Fluff with a fork, breaking up any clumps that formed.
Stir in the lime juice, fresh cilantro, and the final teaspoon of ghee if you like extra richness. Taste and adjust salt as needed. The khichdi should have a loose, slightly moist consistency rather than being completely dry.
Why This Works
Cooking lentils and rice together ensures they finish at roughly the same time, creating a unified dish rather than separate components. The initial tempering of seeds and spices in ghee creates an aromatic base that flavors every grain and lentil. The one-pot method means minimal cleanup and better flavor integration as the rice absorbs the lentil-infused broth.
Serving and Variations
Khichdi is traditionally served simply—with plain yogurt on the side, a squeeze of lime, and perhaps some pickled vegetables for contrast. Variations: Add diced vegetables like carrots, celery, or peas along with the lentils and rice for added nutrition. Try different spice combinations—fennel seeds, ajwain seeds, or a teaspoon of garam masala all work beautifully. Make it creamier by stirring in a splash of coconut milk at the end. For a richer version, add diced cauliflower or zucchini.
Make-Ahead and Storage
Khichdi actually improves slightly as it sits—the flavors meld and mellow. Store leftovers in the refrigerator for up to 4 days, and it reheats beautifully with just a splash of water added to restore moisture. You can also freeze portions for future quick dinners.
4. Restaurant-Style Lentil Dhal with Tadka (Tempering Oil)
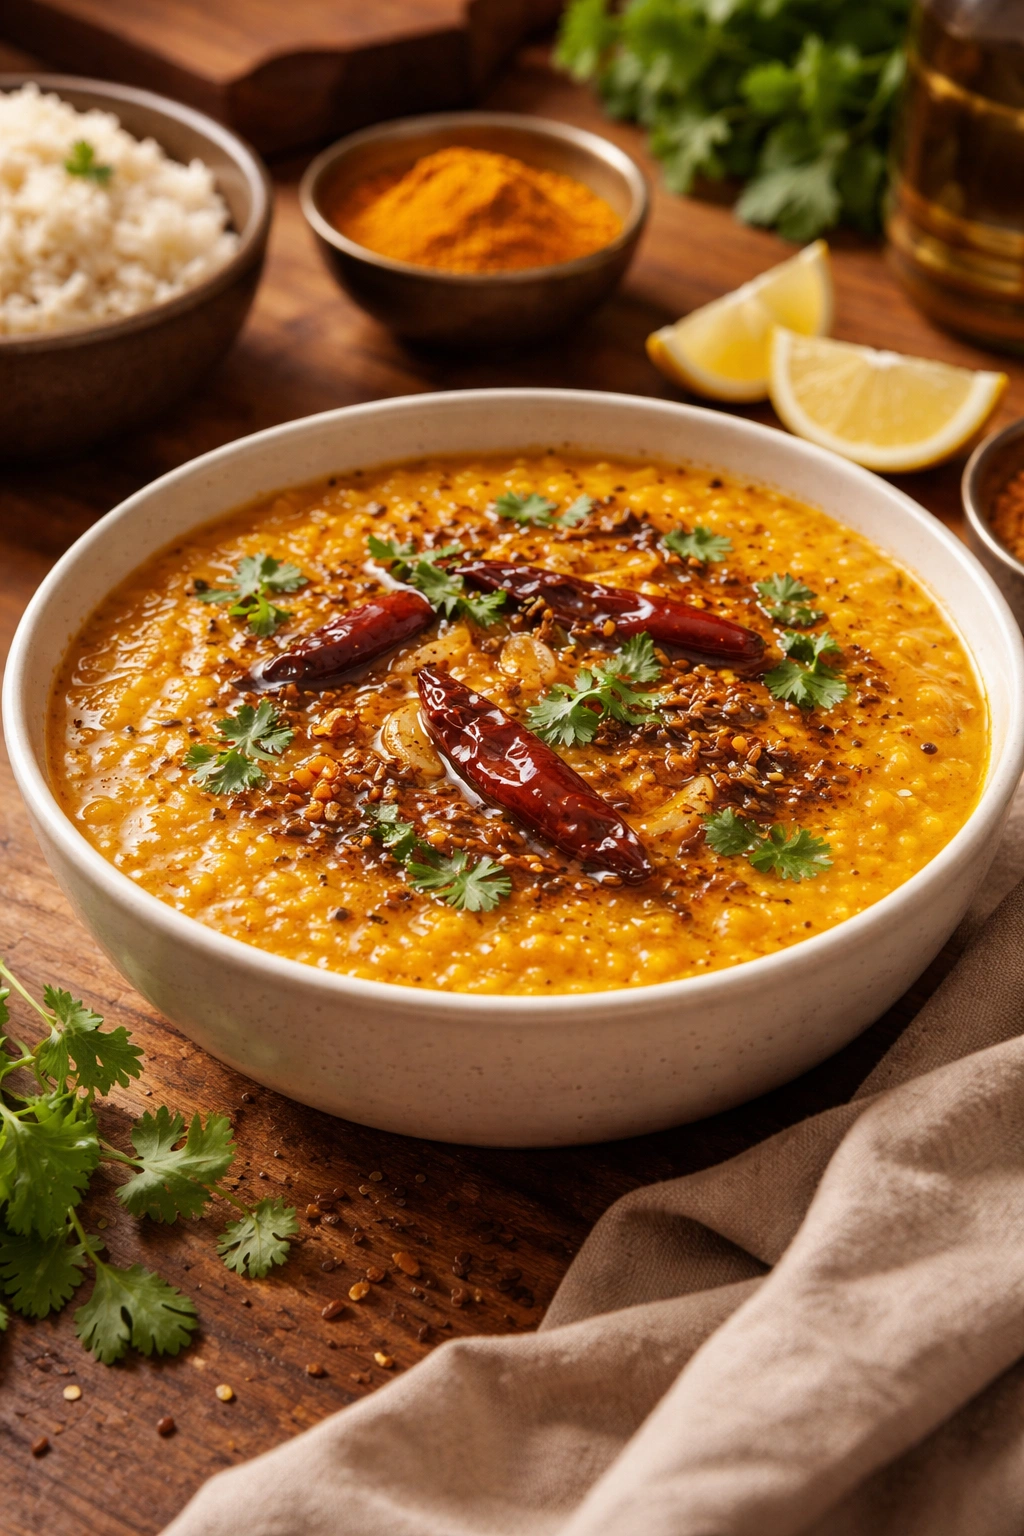
Dhal tadka is what you get when you’ve mastered the technique of balancing lentils, spices, and the dramatic final step of pouring hot spiced oil directly over the finished dish. That sizzling moment when the oil hits the dhal is when flavors transform—the heat intensifies the spices and creates an irresistible nutty aroma that fills the entire kitchen. This is the dhal served in Indian restaurants, and you can absolutely recreate it at home.
Yield: Serves 3-4 | Prep Time: 10 minutes | Soak Time: 1 hour (optional but recommended) | Cook Time: 1 hour 30 minutes | Total Time: 2 hours 40 minutes (or 35 minutes if skipping soak) | Difficulty: Intermediate — The technique is straightforward, but the recipe involves more steps and longer cooking time.
For the Dhal:
- 1 cup dried chana dal or yellow split peas, rinsed
- ½ teaspoon ground cumin
- ½ teaspoon garam masala
- ¼ teaspoon ground turmeric
- 1 pinch cayenne pepper (optional)
- 3¾ cups vegetable broth or water
- ¾ teaspoon salt, plus more to taste
- 2 tablespoons ghee or oil
- 1 medium onion, finely diced
- 4 garlic cloves, minced
- 1 tablespoon fresh ginger, minced
- 6-8 fresh curry leaves, or 1 teaspoon dried
- ½ teaspoon ground cumin (second addition)
- 1 medium tomato, chopped
For the Tadka (Tempering Oil):
- 2 tablespoons ghee or neutral oil
- 1 small shallot or ¼ onion, thinly sliced
- 1 teaspoon cumin seeds
- ½ teaspoon black mustard seeds (optional but recommended)
- 3 dried red chilies, broken in half with seeds removed
- 2-3 curry leaves (optional)
To Prepare the Dhal:
If you have time, rinse the chana dal and soak it in plenty of water for 1 hour. This reduces cooking time and makes the dal more digestible. Drain well before cooking. If you’re short on time, skip soaking and just add about 5 extra minutes to the cooking time.
Heat 2 tablespoons of ghee in a heavy-bottomed pot over medium-high heat. Add the diced onion and cook for 5-6 minutes, stirring occasionally, until the edges are golden-brown and the onion becomes translucent. Brown the onion properly—this creates the flavor foundation for the entire dish.
Reduce heat to medium and add the minced garlic, ginger, curry leaves, and the ½ teaspoon of cumin. Cook for 1-2 minutes until the garlic turns light golden and becomes fragrant. Stir in the chopped tomato and cook until it begins to break down and thicken into a paste, about 2 minutes.
Add the drained chana dal, broth, turmeric, cayenne, and ¾ teaspoon of salt. Stir well, then increase heat to bring the mixture to a boil. Once boiling, reduce heat to low, partially cover the pot, and simmer gently for about 1 hour to 1 hour 15 minutes. Stir every 15-20 minutes to prevent sticking and ensure even cooking.
The dal is ready when it has the consistency of thick porridge—some dal should be completely soft and broken down, while others retain their shape. You should be able to easily mash some of the dal against the side of the pot with a spoon. If it looks too thick, add more broth. If it’s too thin, leave it uncovered and simmer longer.
Stir in the garam masala and additional cumin just before adding the tadka. Taste and adjust salt as needed.
Making the Tadka
While the dal is in its final minutes, prepare the tadka. Heat 2 tablespoons of ghee in a small pan over medium heat until hot but not smoking. Add the cumin seeds and listen—within 30 seconds to 1 minute, they’ll begin to pop and release their aroma. Add the mustard seeds if using (they pop and jump, so don’t be startled), and cook for another 20-30 seconds.
Quickly add the sliced shallot and dried chilies. Cook for about 1-2 minutes until the shallot turns golden and the oil is deeply aromatic. Be very careful not to let the spices burn—if the pan is smoking or you smell burning, remove it from the heat immediately.
Pour the entire contents of the tadka pan directly over the finished dal—this is the dramatic, essential step. The oil will sizzle and hiss as it hits the dal, releasing incredible aromas and intensifying all the flavors. Stir well to incorporate.
Why This Works
The long cooking time allows the dal to develop complex flavors that can’t be rushed. Chana dal’s naturally earthy taste is enhanced by the browned onion and tomato base. The tadka’s final addition transforms the dish from good to extraordinary—the heat jolts the cumin seeds and mustard seeds into full flavor release, and the fried shallot adds textural interest and sweet nuttiness.
Serving and Variations
Serve dhal tadka over steamed basmati rice with warm naan on the side. Some people enjoy eating it more like a soup by adding extra broth, while others prefer it thick enough to scoop. Variations: Add a handful of fresh spinach at the end for color and nutrition. Stir in a splash of coconut milk for creaminess. Make it with different dal types—toor dal, moong dal, or red lentils all work beautifully (adjust cooking times accordingly). Add diced vegetables like carrots or celery along with the tomato.
Storage and Reheating
Dhal keeps beautifully for up to 5 days in the refrigerator. It actually tastes better the next day once flavors meld. When reheating, add water or broth to restore the consistency, as dal thickens during storage. You can make the tadka fresh each time you reheat, or prepare it the first time and refrigerate separately, adding it back before serving.
5. Spiced Lentil Tacos with Indian-Inspired Filling

Indian spices meet taco night in this unexpected fusion dish that works for casual weeknight dinners or crowd-pleasing gatherings. Lentils seasoned with warming Indian spices create a filling that’s hearty enough to stand alone but works beautifully in tortillas with fresh toppings. The lentil texture is crucial here—you want them cooked until tender but not falling apart, so they stay substantial when shredded with spices.
Yield: Makes 8-10 tacos (serves 4) | Prep Time: 10 minutes | Cook Time: 25 minutes | Total Time: 35 minutes | Difficulty: Beginner — Straightforward ingredient list and simple cooking technique.
For the Lentil Filling:
- 1½ tablespoons olive oil or coconut oil
- 1 medium onion, diced
- 3 garlic cloves, minced
- 1 tablespoon tomato paste
- 1 teaspoon ground cumin
- ½ teaspoon ground coriander
- ½ teaspoon ground turmeric
- ¼ teaspoon red pepper flakes
- ¼ teaspoon ground cinnamon (optional but adds warmth)
- 1 cup cooked brown or green lentils (canned is fine; drain and rinse well)
- ¼ cup vegetable broth or water
- 1 tablespoon lime juice
- ½ teaspoon salt, plus more to taste
- 2 tablespoons fresh cilantro, chopped
For Serving:
- 8-10 small tortillas (corn, flour, or grain-free wraps)
- Shredded lettuce or arugula
- Diced tomatoes or salsa
- Sliced avocado or guacamole
- Thinly sliced red onion
- Greek yogurt or vegan sour cream
- Lime wedges
To Prepare:
Heat the oil in a large skillet over medium-high heat. Add the diced onion and cook for 3-4 minutes, stirring occasionally, until it’s soft and beginning to brown at the edges. The onion should smell sweet and fragrant.
Add the minced garlic and tomato paste, stirring constantly for about 1 minute. The tomato paste adds depth and umami that makes the lentil filling taste rich and complex. You’ll notice the mixture darken slightly and concentrate.
Sprinkle in the cumin, coriander, turmeric, red pepper flakes, and cinnamon. Stir constantly for about 30 seconds to bloom the spices in the hot oil. The entire skillet will smell incredible at this point.
Add the cooked lentils and vegetable broth, stirring well to combine. Simmer over medium heat for about 5-7 minutes, stirring occasionally, until the lentils are hot and most of the liquid has absorbed. The filling should be moist but not soupy—it needs to stay put in the taco rather than running everywhere.
Remove from heat and stir in the lime juice, salt, and fresh cilantro. Taste and adjust seasonings as needed. You might want a bit more lime juice or salt than you’d expect, as the acidity and salt help the spices sing.
Why This Works
Brown or green lentils maintain their shape during cooking, creating a substantial filling that behaves similarly to seasoned ground meat. The spice combination—warm cumin and coriander with bright red pepper flakes—tastes Indian but isn’t so intense that it clashes with traditional taco accompaniments. Tomato paste and lime juice build depth and brightness.
Serving Ideas and Variations
These tacos are endlessly customizable. Build them with your favorite toppings—crispy roasted chickpeas add extra texture and protein, while a drizzle of cilantro-lime yogurt sauce brings everything together. Variations: Stir in diced roasted sweet potato or bell pepper for added vegetables. Add a pinch of garam masala for more authentic Indian flavor. Make it raw-forward by serving the warm lentil filling on a bed of fresh greens with raw vegetables and yogurt sauce rather than in tortillas. Add sautéed mushrooms or caramelized onions to make it even heartier.
Storing Leftovers
The lentil filling keeps for up to 4 days in the refrigerator and freezes beautifully. Store it separately from toppings, and reheat gently on the stovetop with a splash of water if needed. You can also prepare the lentil filling hours ahead and assemble tacos right before serving.
6. Lentil-Stuffed Butternut Squash with Tahini Sauce

This showstopping dish combines lentils, herbs, wine, and spices stuffed into roasted butternut squash halves and finished with a silky tahini sauce. It’s elegant enough to serve guests but simple enough to make for yourself—and it yields an amazing two-for-one bonus: the scooped squash flesh becomes the base for the tahini sauce, eliminating waste and creating natural harmony between components.
Yield: Serves 4 | Prep Time: 20 minutes | Cook Time: 1 hour 15 minutes | Total Time: 1 hour 35 minutes | Difficulty: Intermediate — Requires roasting vegetables and managing multiple components, but each technique is straightforward.
For the Squash and Filling:
- 2-3 medium butternut squash (halved, seeded; about 3 pounds total)
- 3 tablespoons olive oil (divided: 2 for squash, 1 for filling)
- Salt and freshly ground black pepper to taste
- 2 large yellow onions, diced
- 6 garlic cloves, minced
- 1 tablespoon fresh sage, chopped
- 2 teaspoons fresh rosemary, chopped
- 2 tablespoons tomato paste
- ⅓ cup dry red wine (Pinot Noir, Malbec, or Shiraz work well)
- 1 cup brown or green lentils, rinsed
- 2⅔ cups vegetable broth
- 1 bay leaf
- 1 teaspoon smoked or sweet paprika
- 2½ tablespoons tahini
- 2 teaspoons white miso paste (adds umami depth)
- 2-3 teaspoons balsamic vinegar
For the Tahini Sauce:
- 1 cup roasted butternut squash (scooped from the halves)
- 2 tablespoons tahini
- 1 tablespoon extra virgin olive oil
- 3-6 tablespoons water or vegetable broth (as needed to thin)
- Salt and pepper to taste
- Chopped Italian parsley for garnish
To Prepare:
Preheat your oven to 425°F (220°C). Slice each butternut squash in half lengthwise and use a sturdy spoon to scoop out the seeds and stringy bits. Save those seeds if you like—roasted with oil and salt, they’re delicious. Place each squash half cut-side up on a large baking sheet. Rub the exposed flesh with about 2 tablespoons of olive oil and season generously with salt and pepper. Roast for 45-50 minutes until the flesh is completely fork-tender and the exposed surface is lightly browned at the edges.
While the squash roasts, prepare the lentil filling. Heat 1 tablespoon of olive oil in a large frying pan over medium-high heat. Add the diced onions and season with a pinch of salt. Cook for 8-9 minutes, stirring occasionally but not constantly—you want the onions to brown, not just soften. Don’t stir too frequently or they’ll steam rather than caramelize. The onions should be mostly browned and deeply fragrant when done.
Reduce heat to medium and add the minced garlic, fresh sage, and rosemary. Cook for about 2 minutes, stirring frequently, until fragrant and the garlic just begins to turn golden.
Stir in the tomato paste, coating all the onions and herbs evenly. Cook for 2-3 minutes, allowing the paste to caramelize slightly.
Pour in the red wine and deglaze the pan, scraping up any browned bits stuck to the bottom—these are flavor gold. Let the wine simmer until the liquid has evaporated and the smell of raw alcohol has completely dissipated, about 2-3 minutes. This step mellows the wine and concentrates its flavor.
Add the vegetable broth, rinsed lentils, bay leaf, and paprika. Stir to combine and increase heat to bring the mixture to a boil. Once boiling, reduce heat to medium-low and maintain a gentle simmer. Cook for about 30 minutes, stirring occasionally, until the lentils are just tender and most of the liquid has been absorbed.
Reduce heat to low and stir in the tahini, miso paste, and balsamic vinegar. Mix until everything is well incorporated and the sauce looks creamy and richly colored. Miso paste dissolves best if you stir it in gradually rather than adding it all at once. Taste and adjust seasonings—you might want another ½ teaspoon of salt and freshly cracked pepper.
Assembling the Squash
When the roasted squash is cool enough to handle, use a sturdy spoon to carefully scoop out the flesh from each half, leaving a ½ to ¾-inch border around the sides and bottom so the squash maintains its shape and doesn’t collapse. Transfer the scooped flesh to a bowl—you’ll need about 1 cup for the tahini sauce, and any extra can be reserved for soup, risotto, smoothies, or another use.
Reduce oven temperature to 350°F (175°C). Spoon the lentil filling evenly into each squash cavity, pressing gently so it distributes throughout the hollow. Place the stuffed squash halves back on the baking sheet and bake for 15 minutes until everything is heated through.
While the squash bakes, make the tahini sauce. Transfer 1 cup of the roasted squash flesh to a food processor along with 2 tablespoons tahini, 1 tablespoon extra virgin olive oil, salt, and pepper to taste. Blend until completely smooth. Slowly stream in water or vegetable broth (3-6 tablespoons, depending on how thick you want the sauce) while blending, scraping down the sides as needed. The sauce should be pourable but with enough body to coat the squash well. Taste and adjust salt and pepper.
Finishing
To serve, drizzle the butternut tahini sauce generously over each stuffed squash half. Garnish with fresh chopped parsley and perhaps a light sprinkle of flaky sea salt if you like. Serve warm or at room temperature.
Why This Works
Using the scooped squash as the sauce base creates perfect flavor integration—nothing tastes out of place because all components share the same star ingredient. The lentil filling gains depth from wine, herbs, and miso paste, while tahini adds richness and creaminess. The dish is substantial enough to serve as a main course for vegetarians and omnivores alike.
Make-Ahead and Variations
This dish can be prepared several hours ahead up until the final roasting. Store the stuffed squash covered in the refrigerator, then bake as directed when ready to serve. The tahini sauce keeps for 3 days in the refrigerator and actually tastes better when flavors have time to meld. Variations: Add sautéed mushrooms, kale, or spinach to the lentil filling. Use different herbs—thyme, oregano, and parsley all work beautifully. Substitute walnut pieces for a portion of the lentils for added texture and earthiness. For a lighter version, use vegetable broth instead of red wine.
Understanding the Nutritional Power of Lentils
Lentils deserve their place at the center of Indian cuisine because they’re nutritional powerhouses that happen to taste incredible. A single cup of cooked lentils provides about 18 grams of protein and over 15 grams of fiber, making them exceptionally satiating and blood-sugar-stabilizing. That combination of protein and fiber means lentil-based meals keep you satisfied for hours without the energy crashes that follow refined carbohydrates.
Beyond protein and fiber, lentils contain significant amounts of iron, folate, and polyphenols—plant compounds with strong antioxidant and anti-inflammatory properties. The iron in lentils is non-heme iron, which isn’t absorbed as readily as heme iron from meat sources, but the vitamin C from tomatoes, lime juice, and other acidic ingredients in these recipes enhances iron absorption dramatically. This is why traditional Indian recipes pair lentils with tomato-based sauces and bright citrus—the combination creates nutritional synergy.
Lentils also contain resistant starch, which acts similarly to soluble fiber and feeds beneficial bacteria in your gut microbiome. This supports digestive health and metabolic function in ways that become more apparent the more regularly you eat them.
Choosing and Preparing Lentils for Best Results
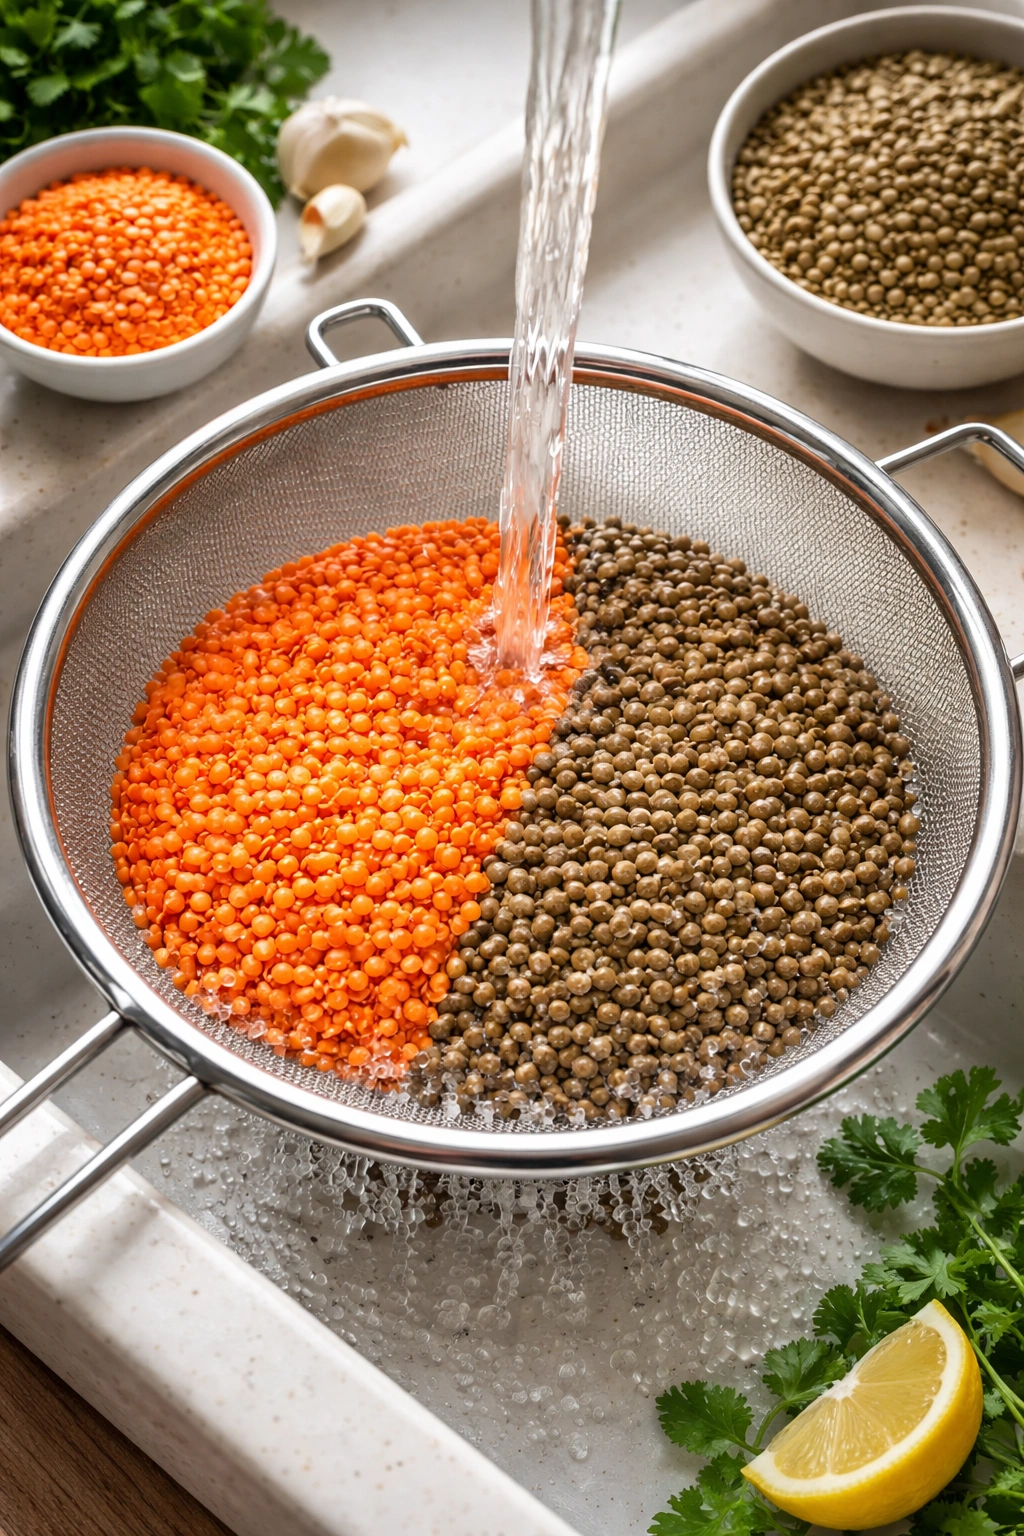
Not all lentils behave the same way, and choosing the right type for your recipe makes a significant difference. Red lentils cook fastest and break down almost completely, making them perfect for curries where you want a thick, creamy sauce. Brown and green lentils hold their shape better and take slightly longer to cook, making them ideal for dishes where you want distinct lentil texture, like tacos or salads. French green (Puy) lentils are considered the fancy option—they stay firm during cooking and have a pleasant, peppery flavor that makes them excellent in dishes where you want the lentils to star visually.
Before cooking any lentils, rinse them under cool running water in a fine-mesh strainer, sorting through them quickly to remove any small pebbles or debris. Dried legume packages often contain small stones that made it through industrial processing, so this step isn’t optional. Most recipes don’t require soaking lentils like you do with dried beans, though soaking for an hour or two can reduce cooking time slightly and make them more digestible.
Store dried lentils in an airtight container in a cool, dark place—they’ll keep for about a year, though they cook faster if used within the first few months of purchase. Cooked lentils freeze beautifully for up to three months, making it worthwhile to cook a large batch when you have time and freeze portions for quick future meals.
Balancing Spices: Creating Authentic Flavor Without Overwhelming Heat
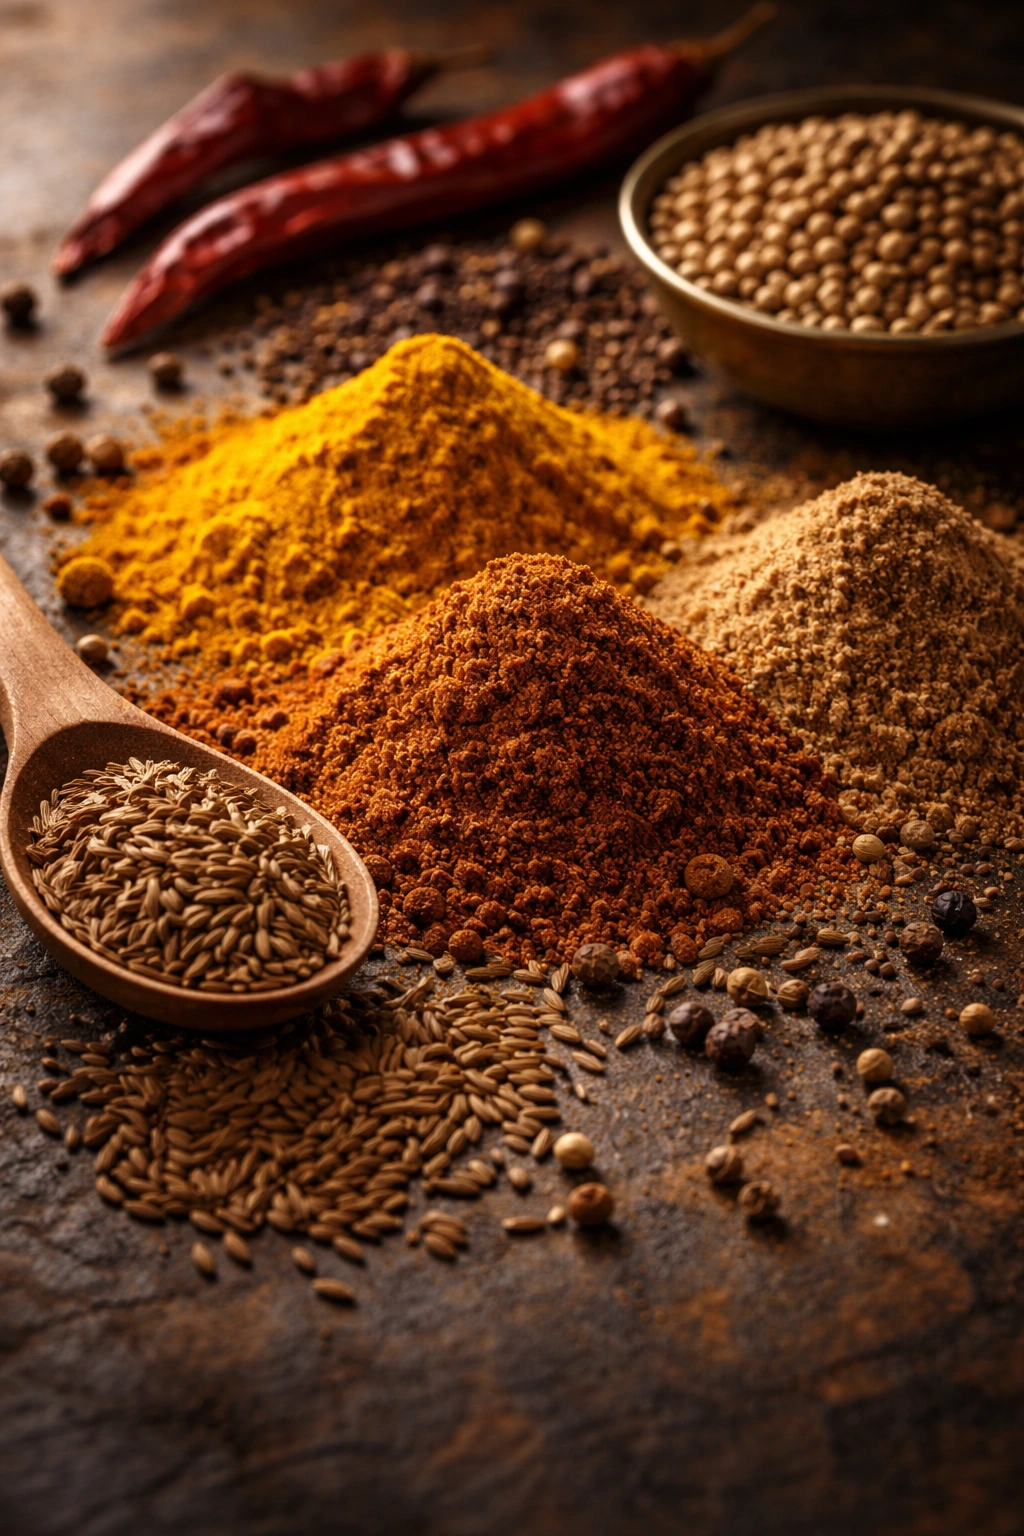
The beauty of Indian cooking is that you can create incredibly flavorful dishes that aren’t spicy or hot. Heat comes specifically from peppers and spices like cayenne—not from the warm, earthy spices like turmeric, cumin, and coriander that form the backbone of these recipes. If you’re sensitive to spice or cooking for people who are, simply reduce or omit the red pepper flakes and cayenne while keeping all the other seasonings at full strength.
Blooming spices—cooking them briefly in hot oil before adding other ingredients—is a non-negotiable technique that appears in all these recipes for a reason. This step toasts the spices, bringing out their essential oils and deepening their flavors significantly. You’ll notice the difference immediately—the kitchen fills with aroma, and the finished dish tastes exponentially more developed than it would if spices were simply stirred in at the end.
Salt timing also matters. Adding salt early in cooking (usually when sautéing onions) seasons them gradually and helps them brown better. But always taste at the end and add more if needed—spices and cooking methods vary, and recipes can’t account for every variable.
Pressure Cooker and Instant Pot Modifications
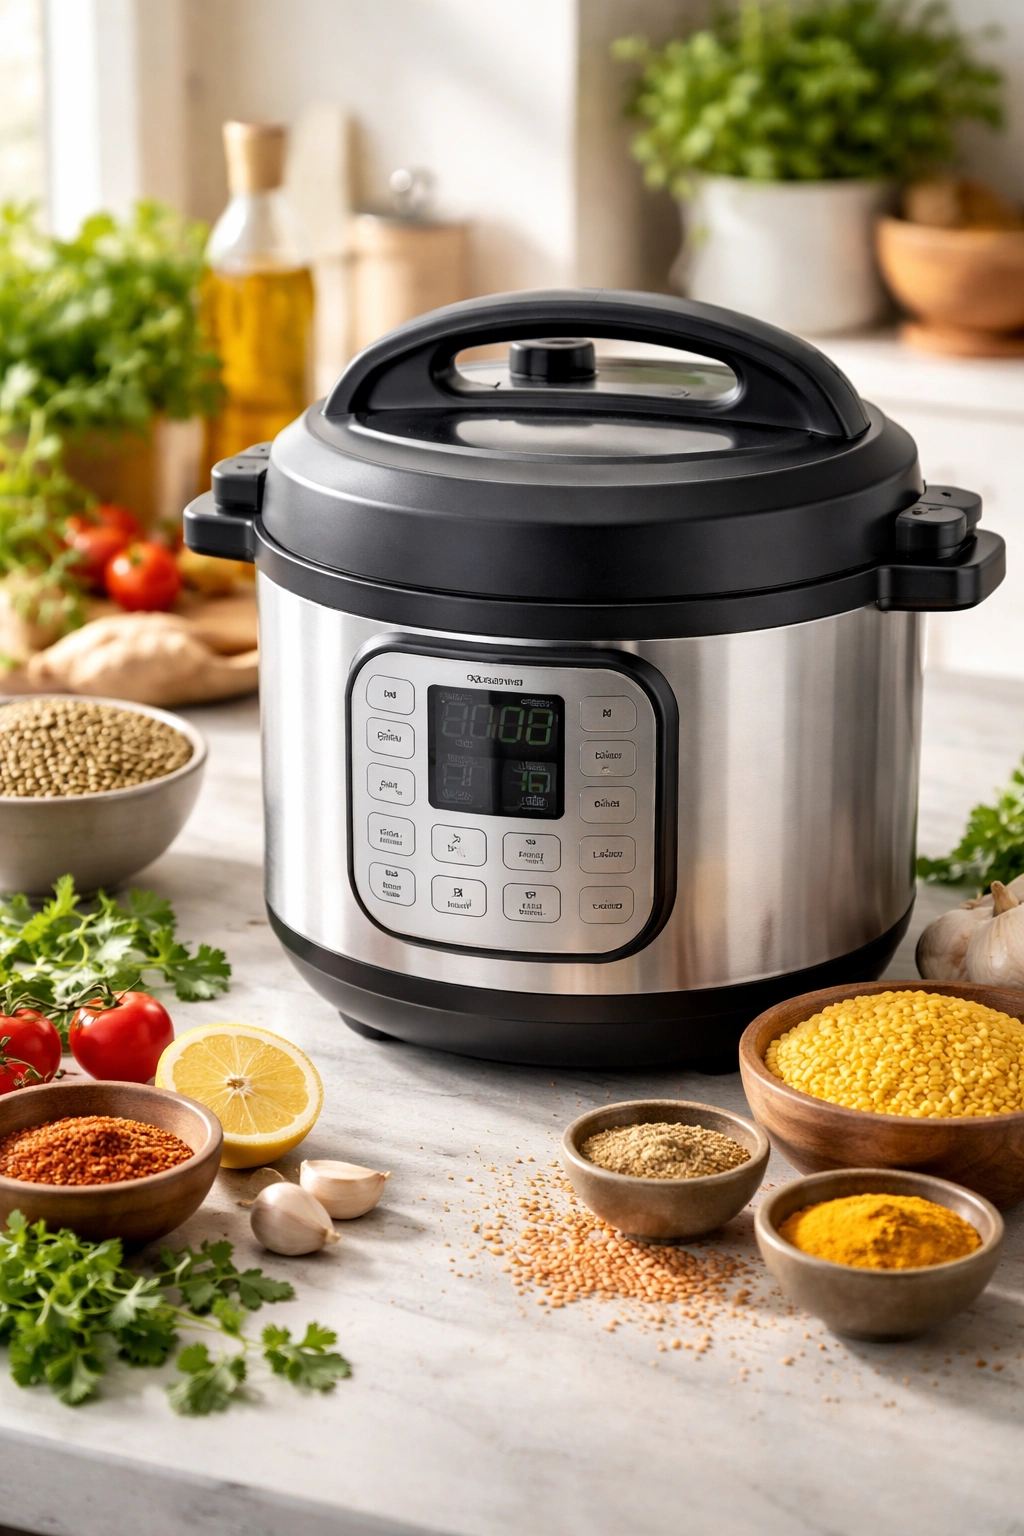
If you own a pressure cooker or Instant Pot, most of these lentil recipes can be completed in a fraction of the time. The general rule is that pressure cooking reduces cooking time to about ⅓ or ¼ of the stovetop time, though you need to add time for the pressure to build and release.
For red lentil curry, instead of simmering for 25 minutes, sauté the aromatics and spices in the Instant Pot using the sauté function (about 5 minutes), then add broth, tomatoes, and lentils. Close the lid, bring to high pressure, and cook for just 4-5 minutes. Allow pressure to release naturally for 10 minutes, then quick-release any remaining pressure.
For recipes using brown or green lentils, sauté aromatics as directed, then add lentils and liquid, close the lid, and pressure cook on high for 8-10 minutes. Again, allow natural pressure release before opening.
The main advantage beyond speed is that pressure cooking actually brings out flavors more effectively than long, slow simmering because compounds are extracted faster under pressure. The main disadvantage is that vegetables can become mushy if cooked too long, so add delicate vegetables like spinach or soft squash after pressure cooking rather than before.
Serving Suggestions and Complementary Sides
Indian lentil dishes are endlessly flexible in how you serve them. Steamed rice is the obvious choice, but don’t stop there. Warm naan bread soaks up creamy curries beautifully. Flatbreads, whether traditional or grain-free, work wonderfully. Some people enjoy these dishes more like soups by adding extra broth and eating them in bowls with a spoon.
Fresh vegetable accompaniments balance the richness of lentil dishes. A simple Indian-style tomato salad (tomatoes, red onion, cilantro, lime juice, and salt) provides textural contrast and brightness. Cucumber raita (grated cucumber mixed with yogurt, cumin, and salt) cools and refreshes your palate between bites. Pickled vegetables add sharp, bracing flavors that cut through richness.
Fresh herbs matter tremendously. A shower of fresh cilantro, chopped mint, or sliced green onions added just before serving brightens every dish. A squeeze of fresh lime or lemon juice at the table allows people to adjust acidity to their preference.
Storing, Freezing, and Reheating Indian Lentil Dishes
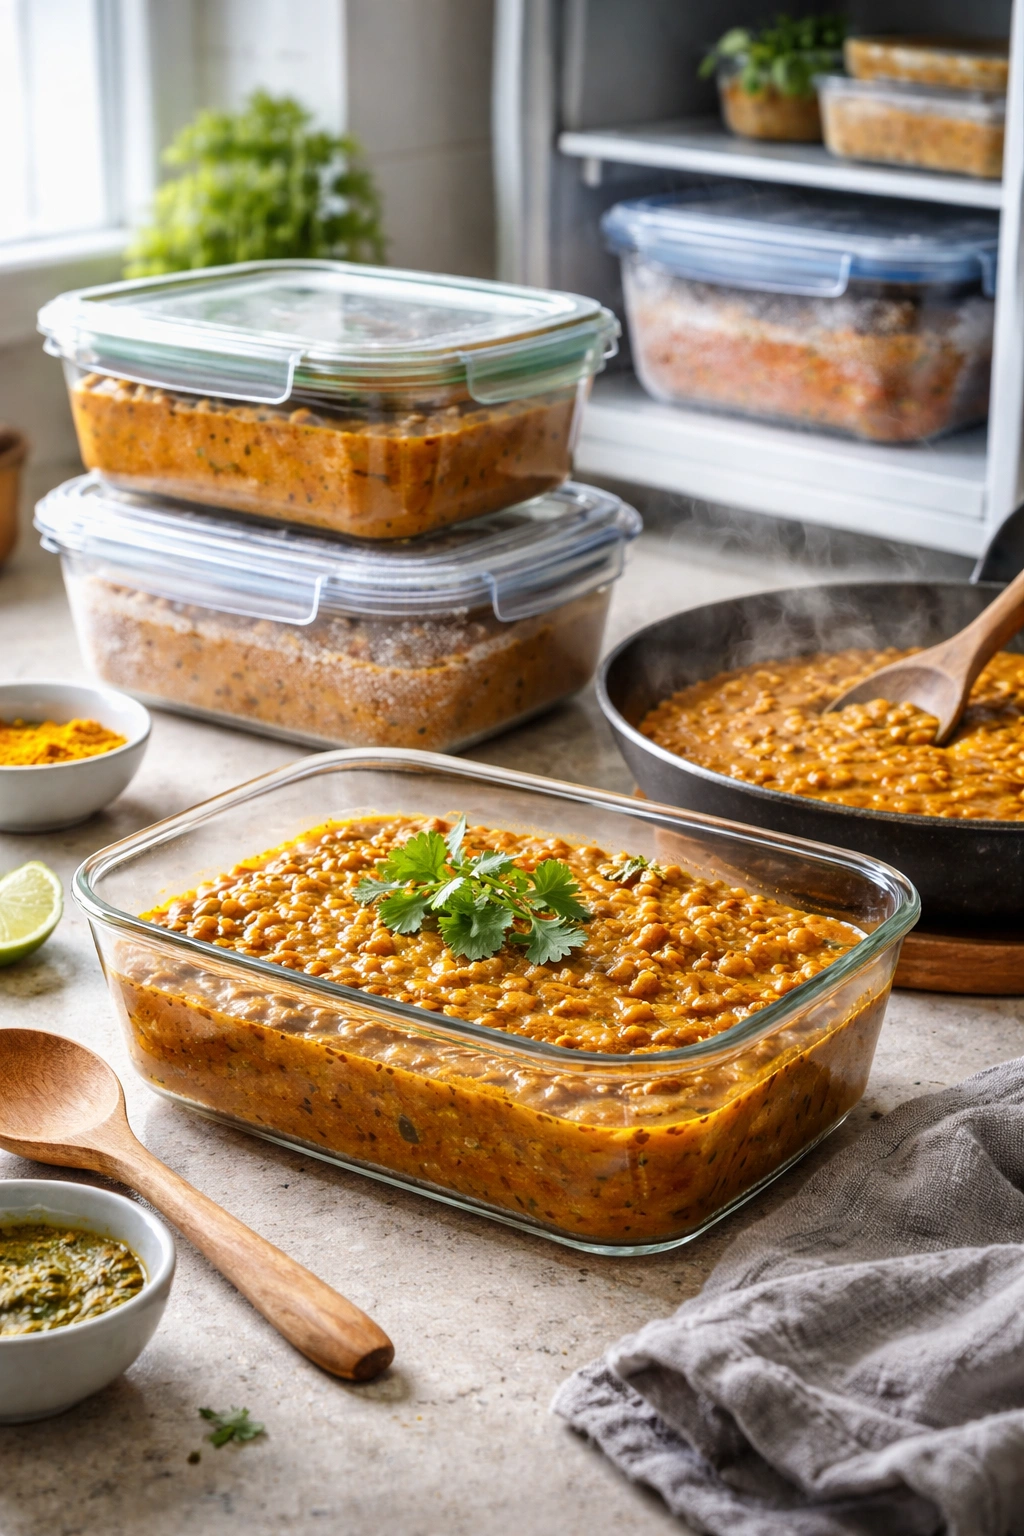
Most of these recipes taste even better the next day, once flavors have time to meld and deepen. Store lentil dishes in airtight containers in the refrigerator for up to 5 days. When reheating, add a splash of water or broth since lentil dishes thicken considerably during storage as they cool.
All of these recipes freeze well for up to 3 months. Pour cooled lentil curry into freezer-safe containers or ice cube trays for convenient portion control. Thaw overnight in the refrigerator before reheating gently on the stovetop. Alternatively, reheat from frozen on the stovetop over medium-low heat, stirring occasionally and adding water as needed until you reach the desired consistency.
Dishes with fresh herbs added at the end (like the tadka in dhal tadka) are best assembled fresh, but the cooked lentil base freezes perfectly. You can prepare the lentil portion days or weeks ahead, then garnish and serve fresh when ready.
Key Takeaways
These six lentil recipes represent different approaches to one of the world’s most satisfying ingredients. Whether you’re drawn to creamy curries, one-pot meals, stuffed vegetable dishes, or fusion tacos, lentils deliver nutrition, flavor, and satisfaction in every version.
The real secret to great Indian lentil cooking isn’t mysterious ingredients or complicated techniques. It’s understanding that blooming spices in hot fat awakens their flavor, that browning onions creates depth, and that a squeeze of lime at the end brightens everything. Master these fundamentals with these recipes, and you’ll find yourself cooking lentil dishes instinctively, adjusting them based on what’s in your kitchen and what your palate craves that day.
Start with whichever recipe calls to you most strongly, whether it’s the quick red lentil curry or the showstopping stuffed squash. Each one builds confidence for the next. Within a few weeks of cooking these recipes regularly, you’ll develop an intuitive feel for how long lentils take in your particular pot, how much liquid you prefer, and what spice combinations speak to your taste. At that point, the recipes become guidelines rather than rules—and that’s when your cooking really comes alive.