There’s a particular moment in parenting when you realize those frozen chicken nuggets from the grocery store might not be the best option anymore. Maybe it’s when your curious toddler asks what’s actually in them, or when you read an ingredient list that includes things you can’t pronounce. That’s when homemade chicken tenders become not just a nice idea—they become a game-changer for busy families who want to know exactly what their kids are eating.
The truth is, making crispy, juicy chicken tenders at home is shockingly easy, and the results are leagues better than anything you’ll find in the freezer section. These aren’t complicated, fussy recipes that demand fancy equipment or professional skills. They’re the kind of meal that comes together in under 30 minutes (including baking time), tastes restaurant-quality, and turns even the pickiest eaters into enthusiastic dinner participants. Your kids will ask for them again and again, and you’ll feel good serving them because every single ingredient is something you recognize and trust.
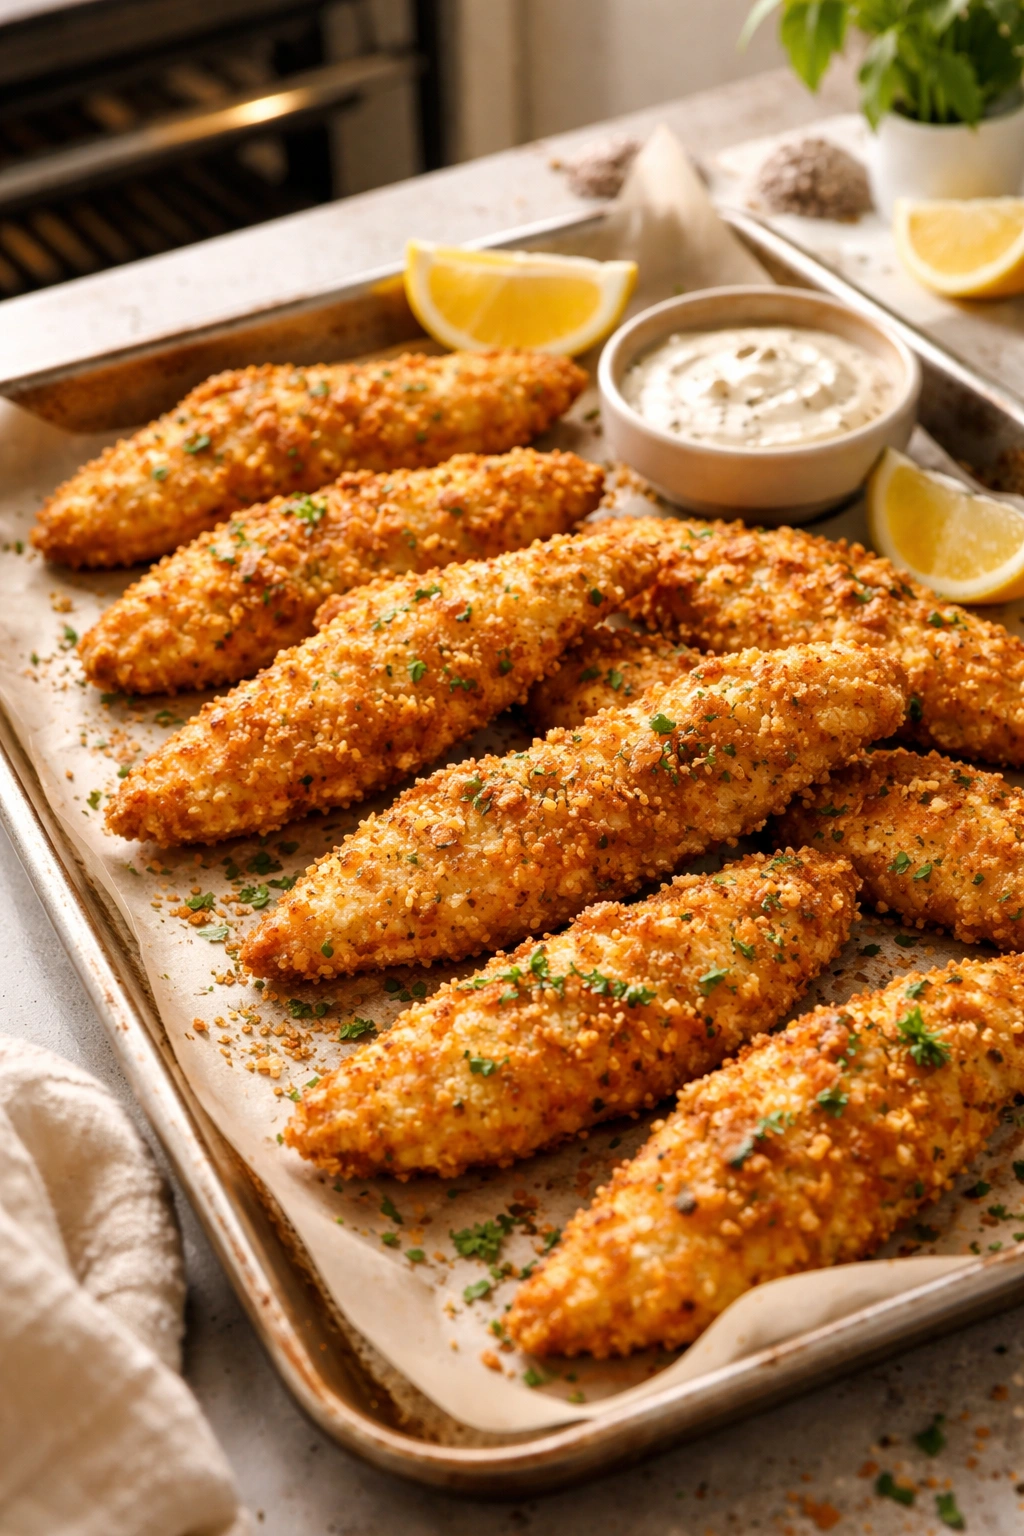
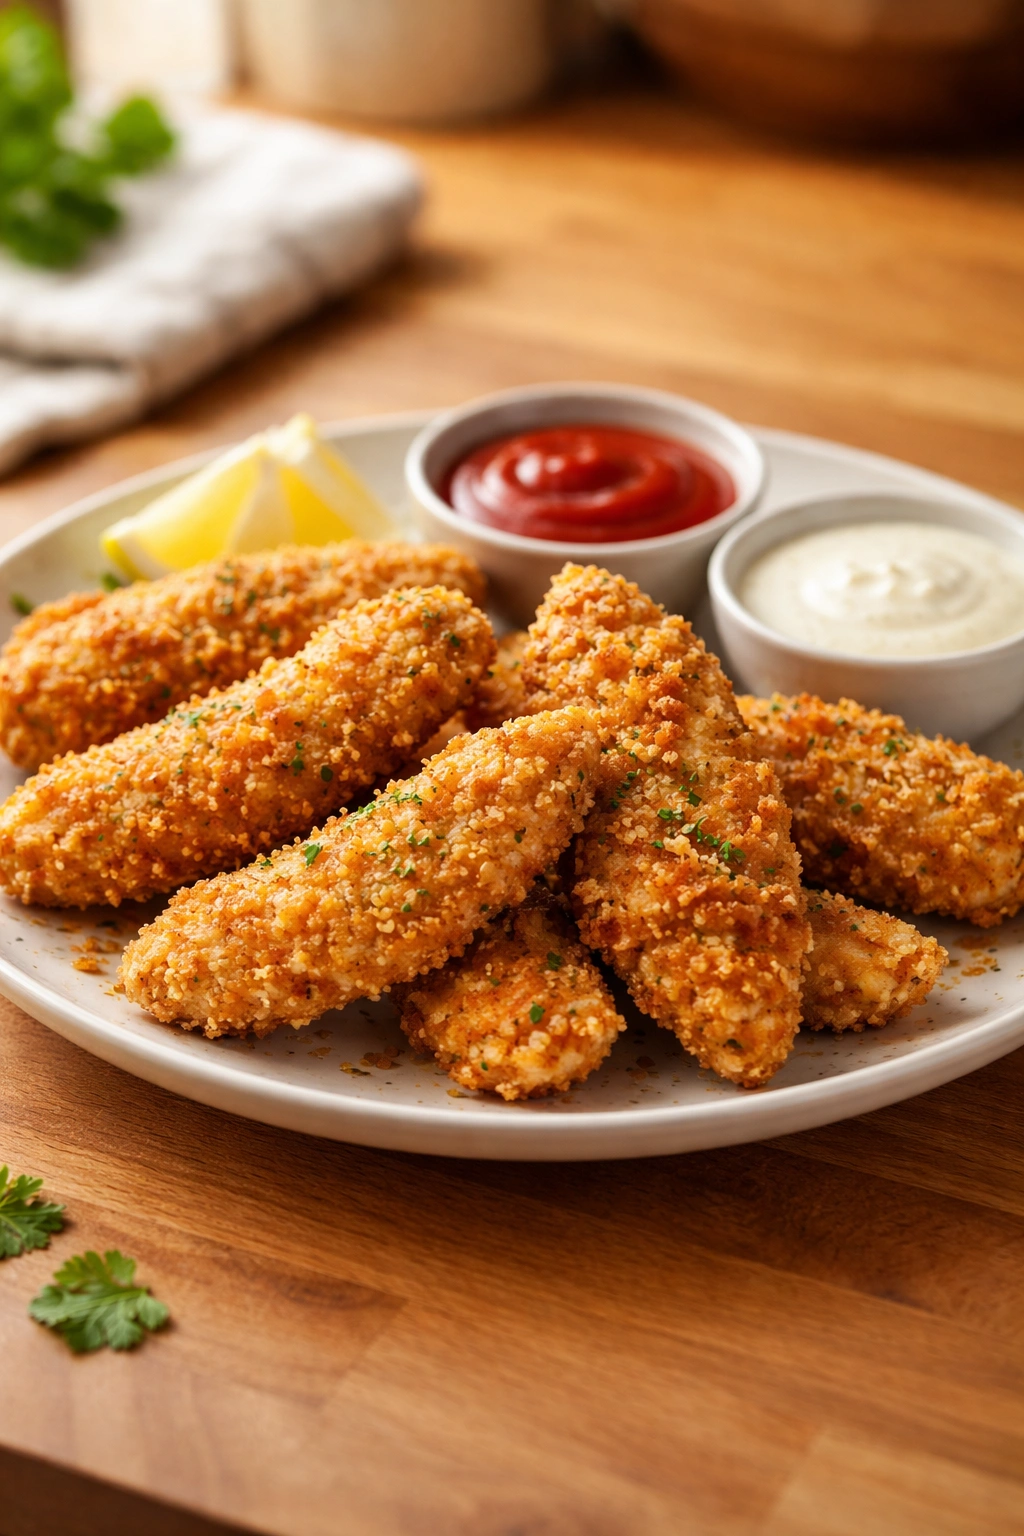
What makes homemade chicken tenders so special isn’t just the flavor—it’s the texture. That contrast between the crispy, golden-brown exterior and the impossibly tender, juicy chicken inside is something the store-bought versions struggle to deliver. It’s the difference between “okay, I’ll eat this” and “Mom, can we have these again tomorrow?” And here’s the beautiful part: once you master this recipe, you’ll have a reliable weeknight dinner weapon that works for breakfast-for-dinner nights, lunch boxes, salads, and even those moments when unexpected guests show up and you need to pull together something impressive.
Why Homemade Chicken Tenders Beat Store-Bought Every Time

When you make chicken tenders at home, you control everything—the quality of the chicken, the seasoning, the breading texture, and the cooking method. Store-bought frozen tenders often contain surprising amounts of filler, preservatives, and sodium, along with ingredient lists that read more like a chemistry experiment than food. Some commercial versions contain as many as 35+ ingredients, including things like sodium tripolyphosphate, silicon dioxide, and artificial flavoring.
Homemade versions use real, whole chicken breast meat with a simple coating of flour, egg, and breadcrumbs—that’s it. The chicken stays moist and flavorful because you’re controlling the cooking process, and there’s no mystery about what’s happening inside those golden strips. Plus, making them yourself often costs significantly less per serving than buying the frozen boxes repeatedly throughout the month.
The flavor difference is undeniable. Homemade tenders taste like actual chicken, with a delicate, tender interior that’s worlds apart from the dense, somewhat rubbery texture of many commercial options. Kids notice the difference immediately, and they respond by actually wanting to eat them, which is half the battle with picky eaters.
Choosing Your Chicken Matters More Than You Think
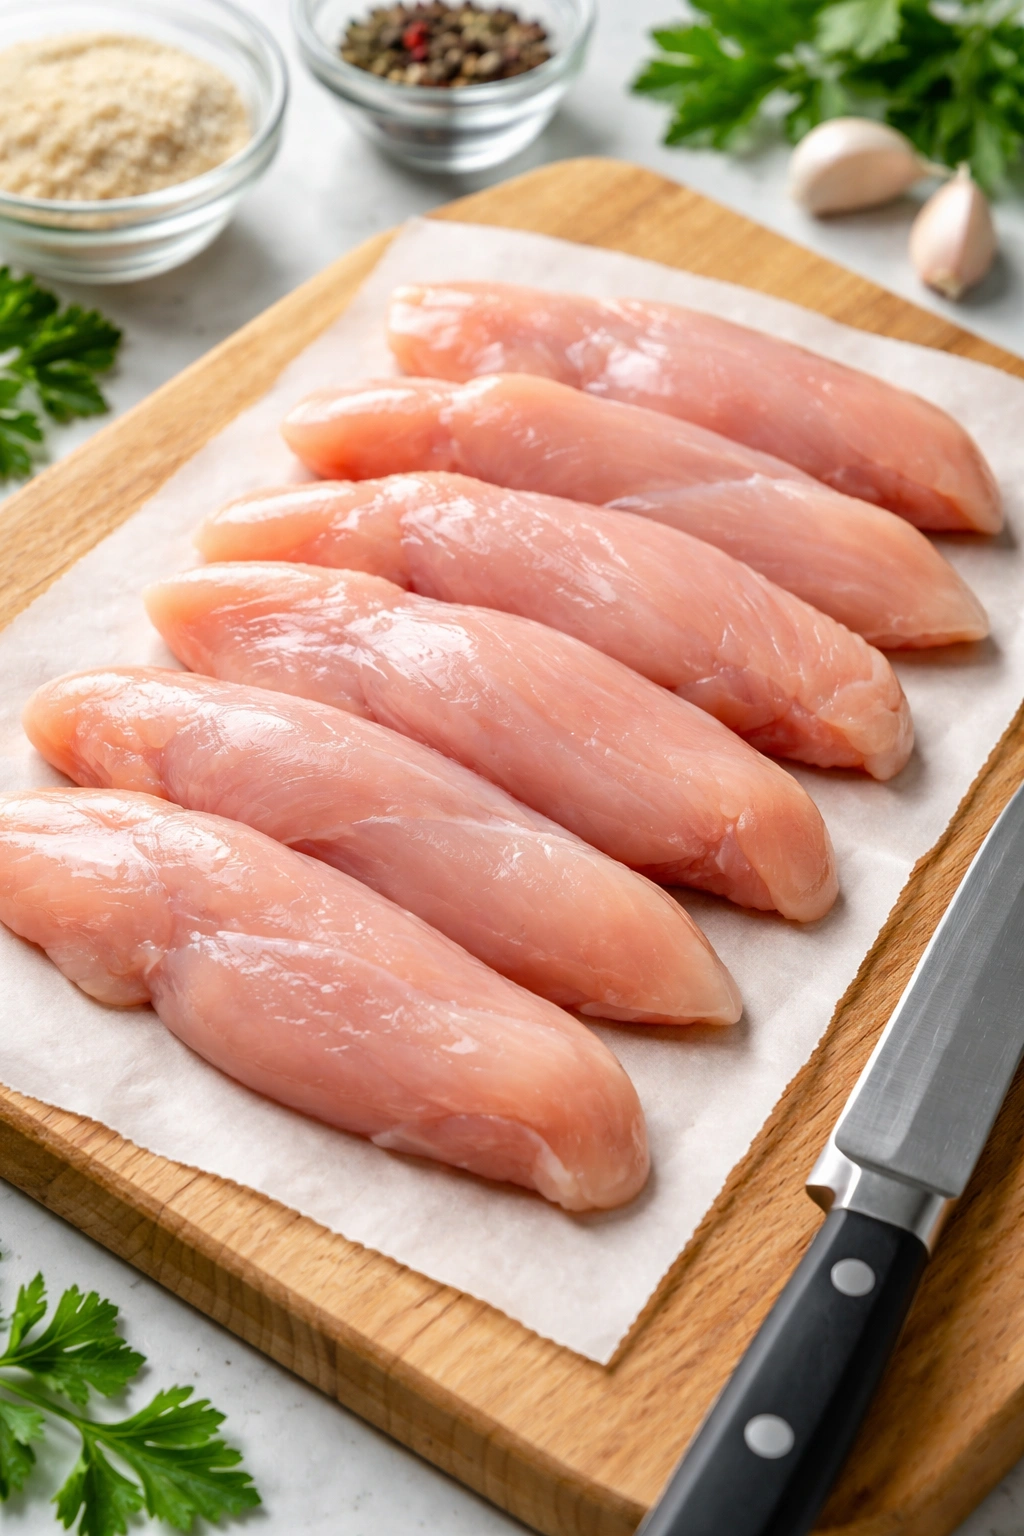
The foundation of great chicken tenders is, obviously, good chicken. You have two main options: purchase pre-cut chicken tenderloins, or buy boneless, skinless chicken breasts and slice them yourself.
Chicken tenderloins are the thin, tender muscle that sits beneath the chicken breast. They’re naturally thin and uniform, which means they cook evenly and stay incredibly juicy. If you find them at the store, they’re often the more convenient choice because there’s minimal prep work involved. Just trim off the white tendon (the stringy bit) if it’s visible, and you’re ready to bread.
Boneless, skinless chicken breasts are usually more affordable and easier to find year-round. Cut them into strips roughly ½ to ¾ inches thick, and you’ve essentially got homemade tenderloins. Thinner strips cook faster, while slightly thicker cuts stay juicier—choose based on your preference and how quickly they’ll cook. Pat the chicken completely dry with paper towels before breading, as any excess moisture will steam the coating instead of letting it crisp up.
For the best results, use room-temperature chicken. Cold chicken straight from the fridge will shock your hot oil or oven, causing uneven cooking. Let it sit out for 10-15 minutes after trimming, and you’ll notice a real difference in how evenly and beautifully they cook.
Setting Up Your Breading Station for Success
The key to perfectly breaded chicken tenders is organization and a three-step breading process. Before you touch a single piece of raw chicken, set up your entire station so you’re not fumbling around mid-preparation.
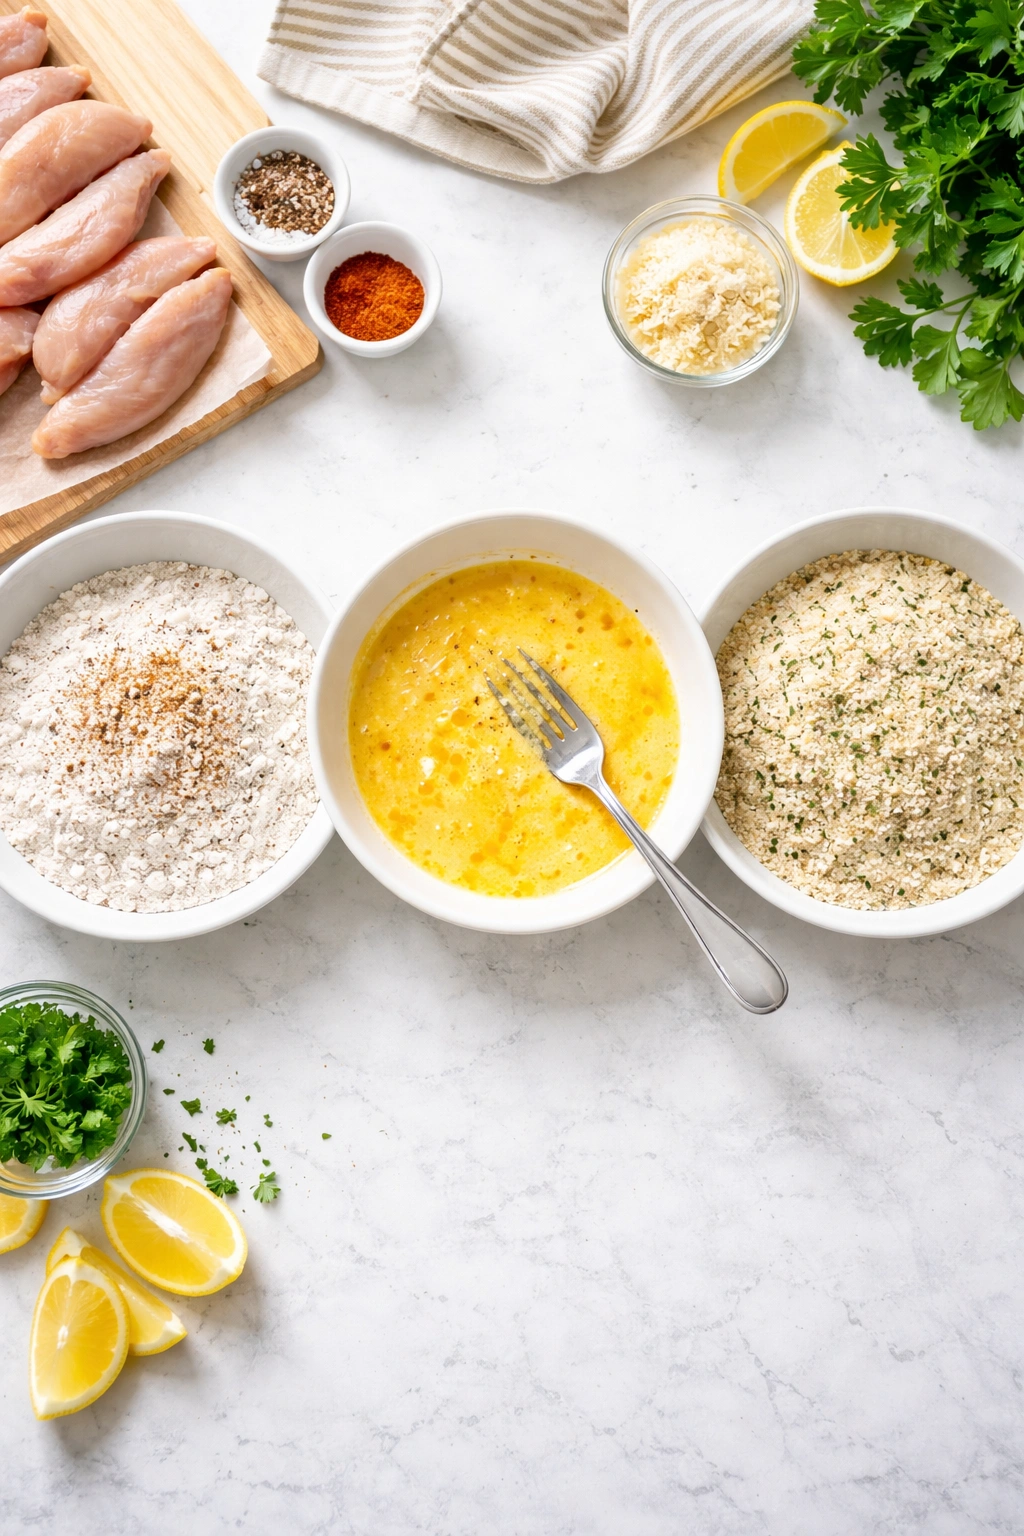
You’ll need three shallow dishes or bowls lined up in a row. The first holds seasoned flour, the second holds beaten egg mixed with water or milk, and the third holds panko breadcrumbs mixed with additional seasoning. Having everything ready before you start means the chicken breads more quickly, the coating adheres better, and you’ll minimize the mess.
Use panko breadcrumbs instead of regular breadcrumbs—this is non-negotiable if crispy texture is your goal. Panko is made from bread without the crusts and is grated into larger, flakier pieces than traditional breadcrumbs. When these larger flakes hit the heat, they create a noticeably crunchier, more delicate crust. Regular breadcrumbs will work, but the texture won’t be as satisfying, and your family will notice the difference.
Season every layer generously. The flour mixture gets salt, pepper, and seasonings. The egg wash gets a pinch of salt too. The breadcrumb mixture gets its own seasoning boost. This layering approach ensures the flavor runs all the way through the tender, not just on the surface.
The Two-Dredge Technique That Guarantees Crispy Coating
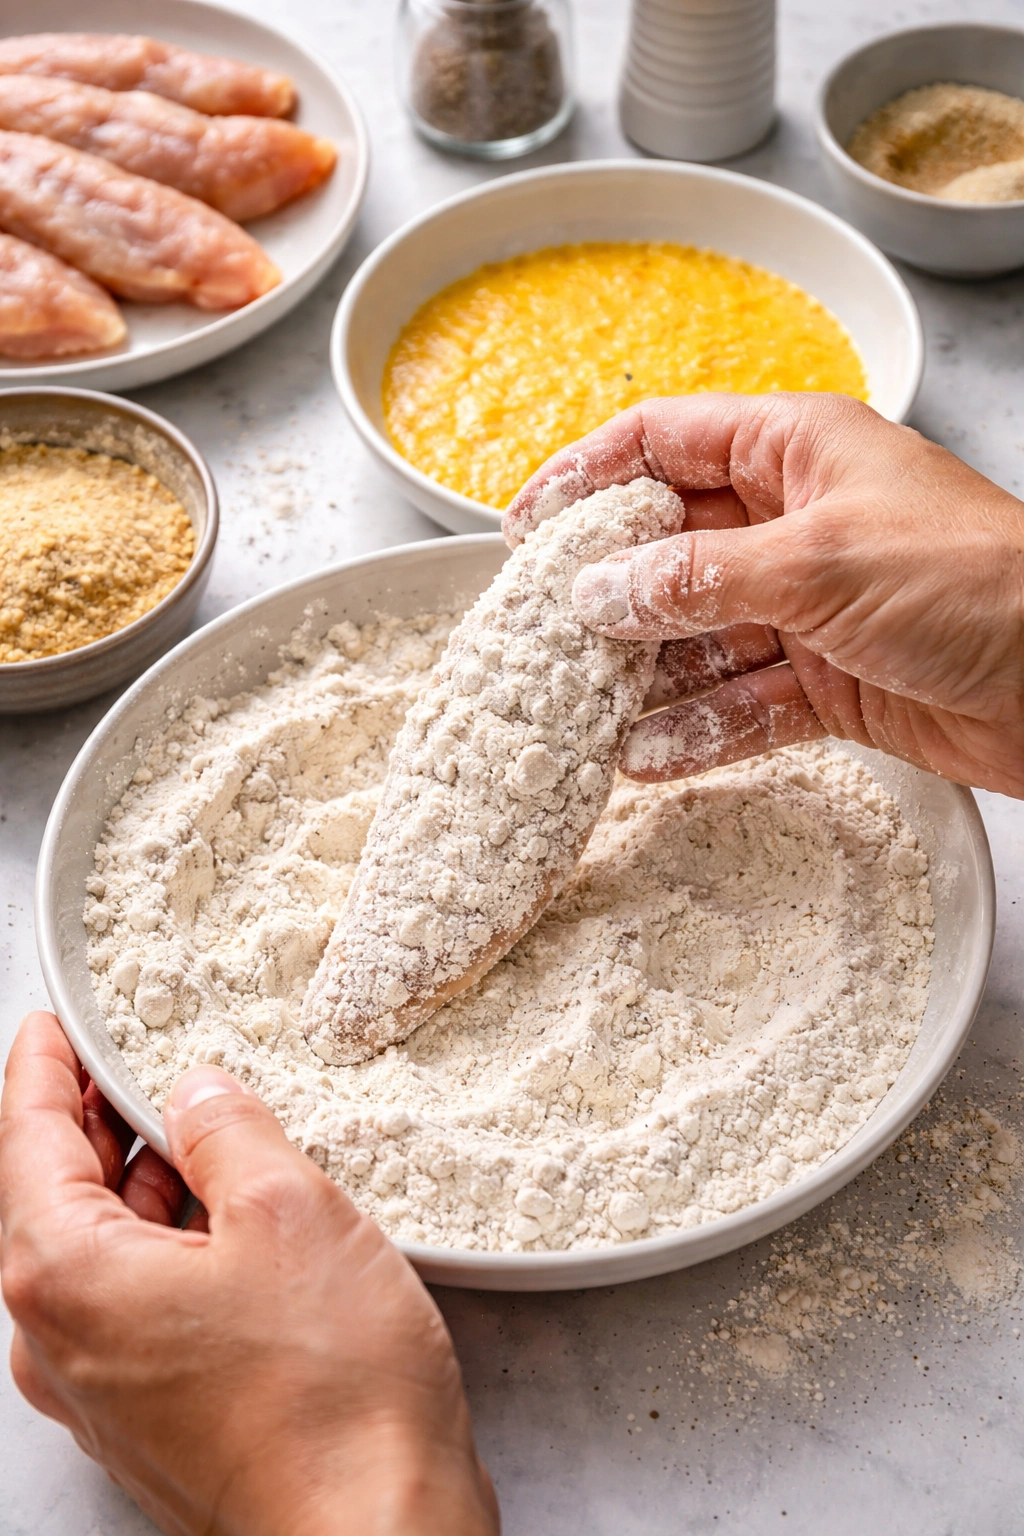
This is the secret that separates restaurant-quality homemade tenders from mediocre ones: the two-dredge method. Most home cooks dip the chicken once in flour, then egg, then breadcrumbs. That works fine. But dipping it twice—flour, egg, flour again, then egg again, then breadcrumbs—creates a thicker, crunchier, more spectacular crust.
Here’s how it works: Start by dredging each chicken piece in the seasoned flour, coating it completely and shaking off excess. Next, dip it into the egg mixture, letting the excess drip back into the bowl. Now comes the second flour dip—place the egg-coated chicken back into the flour mixture and coat it again, pressing gently so the flour adheres to the wet egg. This creates a slightly bumpy, textured surface that loves to crisp up.
Finally, dip the twice-floured chicken into the egg mixture one more time, then roll it in the panko breadcrumbs, pressing firmly to ensure the crumbs stick to every surface. Use your hands for this final step—your fingers are your best tool for pressing the panko into place and creating an even, thick coating.
The double-dredge takes maybe an extra 30 seconds per piece, but the textural payoff is absolutely worth it. You’ll get a noticeably crunchier crust that stays crispy longer, even as the tenders cool.
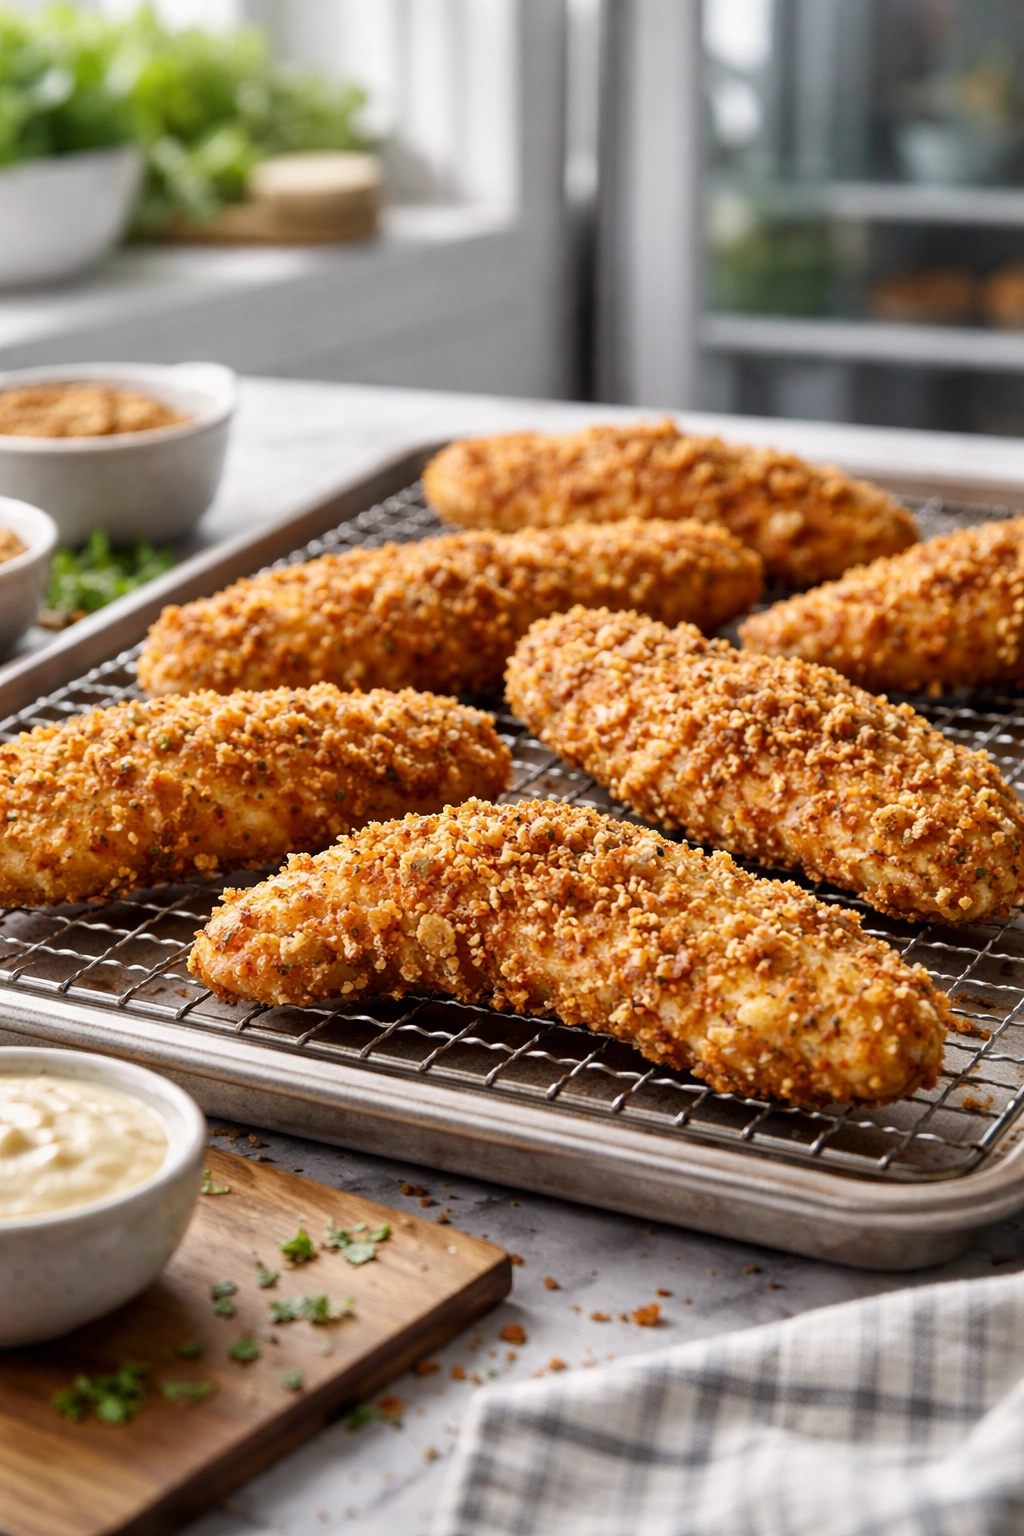
The Wire Rack Secret for Crispiness Everywhere
Here’s a game-changer: bake your chicken tenders on a wire rack placed over a baking sheet, rather than directly on the pan. This simple setup is what separates unevenly cooked tenders (soggy on the bottom, crispy on top) from perfectly crispy tenders on all sides.
The wire rack allows hot air to circulate completely around the chicken, so heat hits the bottom, top, and sides simultaneously. This means you don’t need to flip them halfway through if you’re baking them. The bottom gets just as golden and crispy as the top, without any effort on your part.
If you don’t have a wire rack, you can create a makeshift version by crumpling up some aluminum foil into a rough grid shape and placing it on your baking sheet. It won’t be as effective as an actual rack, but it will lift the chicken up slightly and allow some air circulation underneath.
Spray the rack with nonstick cooking spray before adding the chicken—this prevents sticking and makes cleanup much easier. A light spritz of olive oil or avocado oil spray on the breaded tenders before baking also helps them brown beautifully and stay crispy without adding much fat.
Baking vs. Frying: Which Method Is Right for You
Both methods produce delicious results, but they have different advantages depending on your priorities.
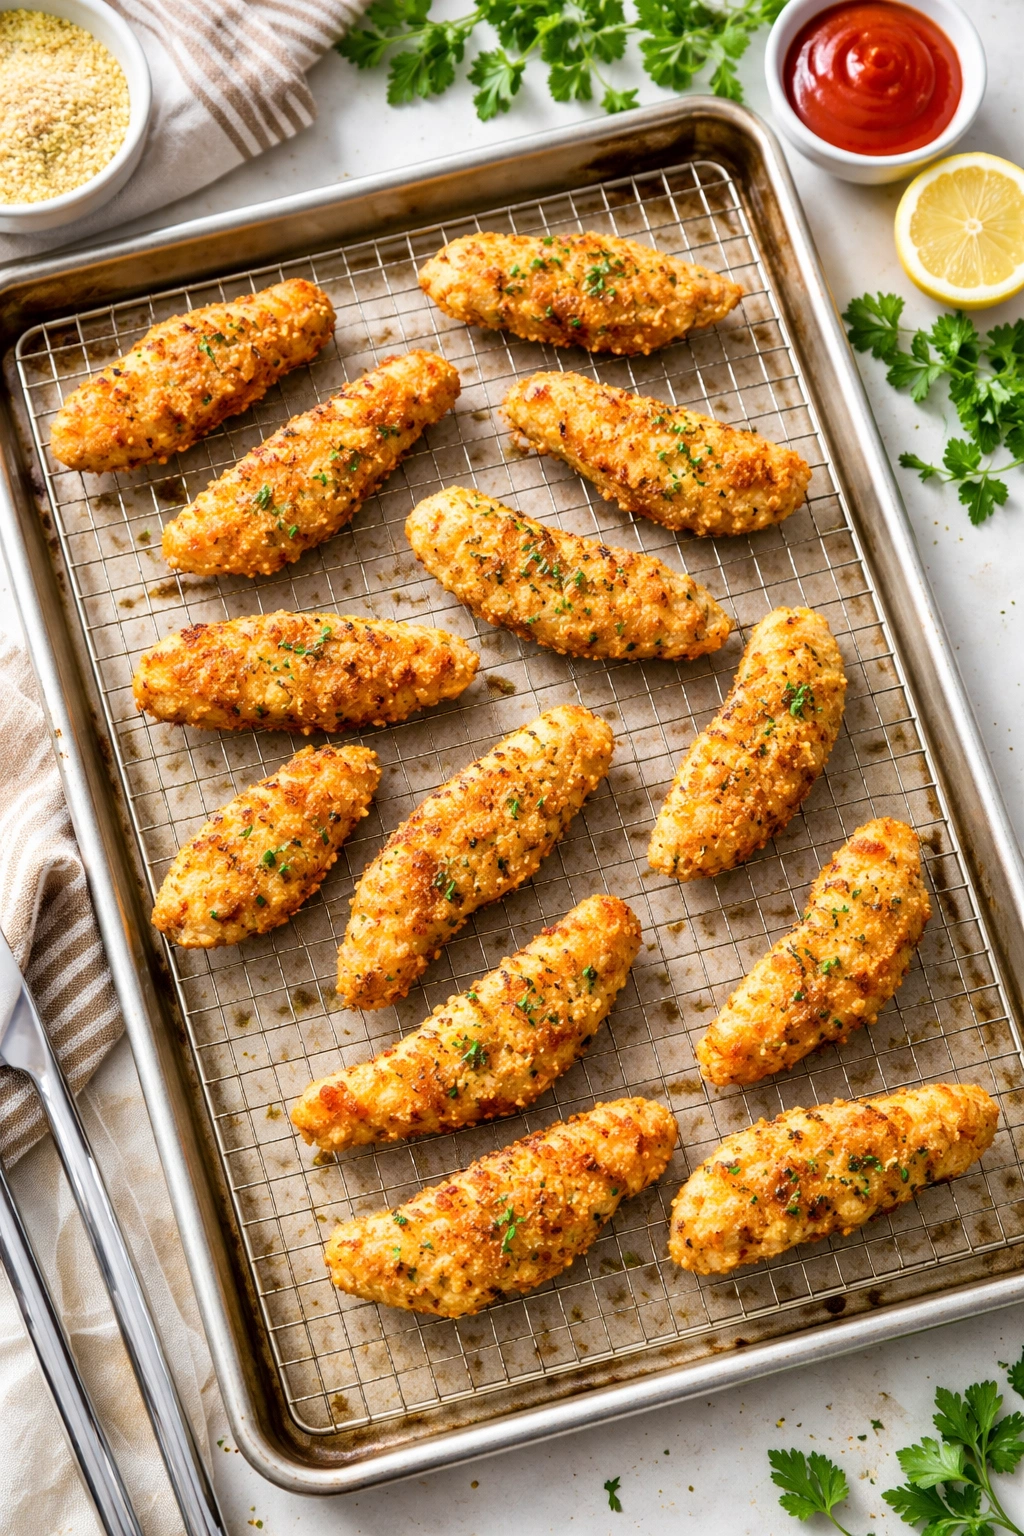
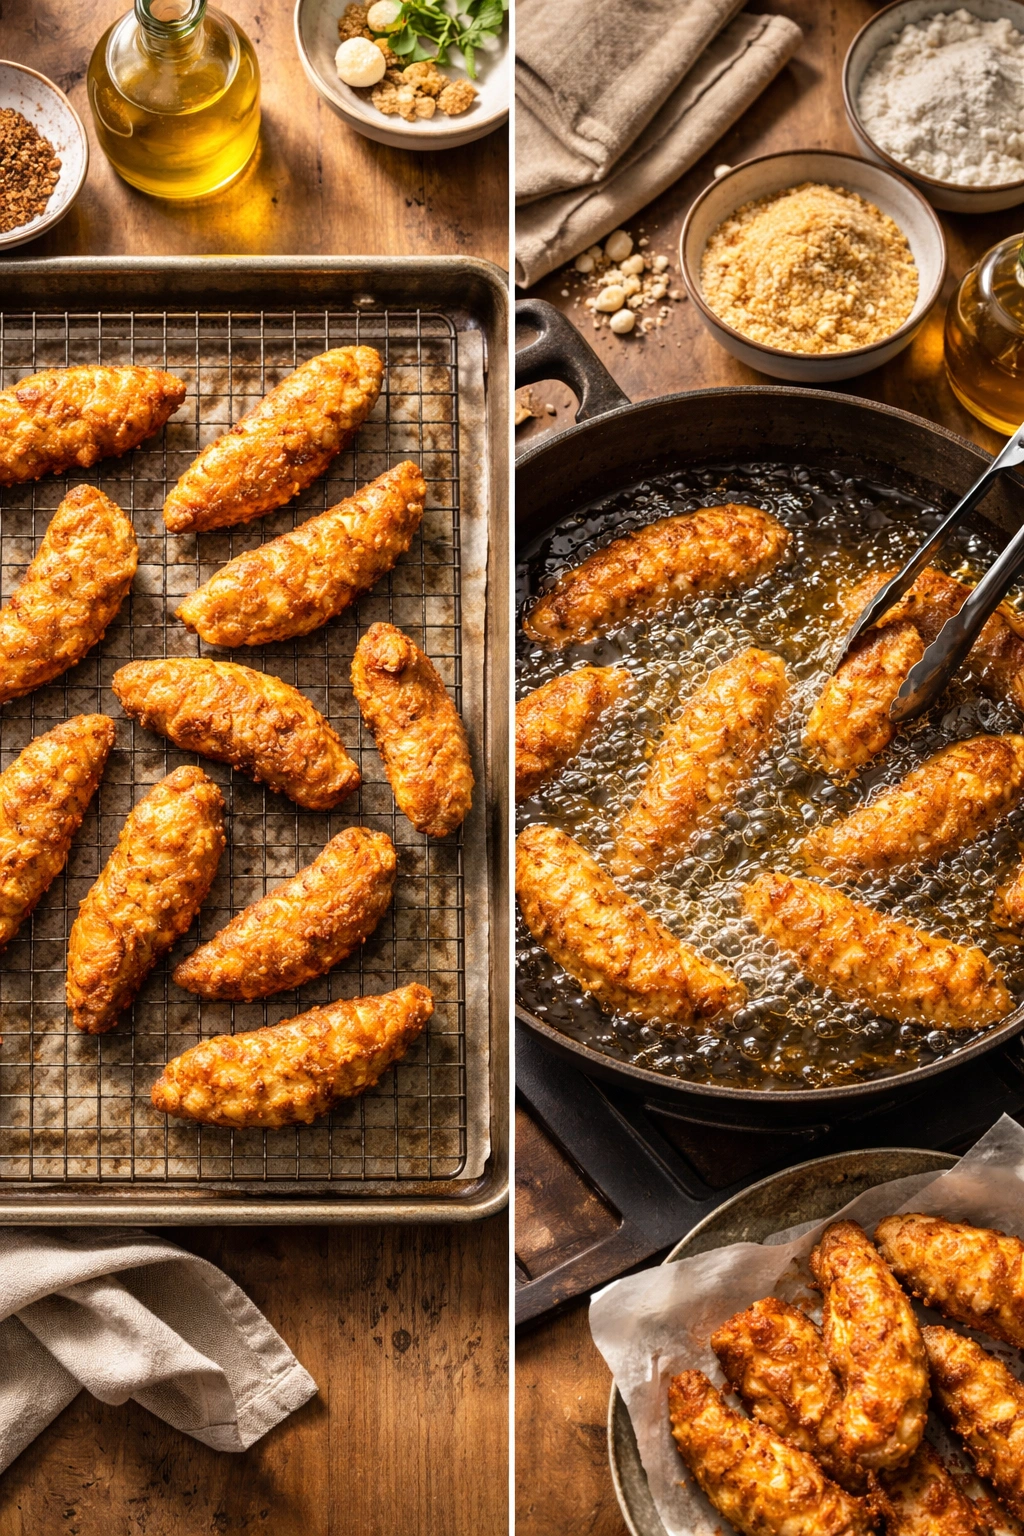
Baked chicken tenders are the busy parent’s best friend. Preheat your oven to 425°F, arrange the breaded tenders on a wire rack, and bake for 12-15 minutes until golden and cooked through (165°F internal temperature). There’s no splattering oil, minimal smell, and cleanup is trivial. The tenders come out beautifully crispy with a light, delicate coating. They’re healthier since you’re using a minimal amount of oil, and you can easily make large batches without working in multiple rounds.
Pan-fried or deep-fried chicken tenders deliver a richer, more decadent crust with deeper color and slightly more pronounced crunch. You’ll heat about ¾ inch of oil in a skillet or pot to 325-350°F, then carefully place the breaded tenders in the hot oil, cooking for 3-5 minutes per side until golden brown. The chicken is done when it reaches an internal temperature of 165°F. You’ll need to work in batches so you don’t overcrowd the pan, and you must monitor the oil temperature carefully to prevent burning.
Most home cooks find baking the simpler, more convenient option for regular weeknight dinners. It’s faster (no oil heating time), safer (no splashing hot oil), and delivers nearly identical results with a fraction of the fuss. Save deep-frying for when you want an extra-indulgent version or when you’re making a large batch for a party and can really embrace the cooking process.
The Recipe: Crispy Baked Chicken Tenders
Yield: Serves 4 to 6 | Makes approximately 16-20 tenders
Prep Time: 15 minutes
Cook Time: 15 minutes
Total Time: 30 minutes
Difficulty: Beginner — This recipe requires no special equipment beyond what most kitchens already have, and the steps are straightforward enough for someone cooking chicken tenders for the first time.
For the Chicken:
- 1½ pounds chicken tenderloins (or boneless, skinless chicken breasts, cut into ¾-inch-thick strips)
For the Breading Station:
- 1 cup all-purpose flour
- 1½ teaspoons seasoned salt (divided into three portions: ½ teaspoon for flour, ½ teaspoon for breadcrumbs, ½ teaspoon reserved)
- ¼ teaspoon black pepper
- 3 large eggs
- ¼ cup water (or whole milk)
- 2 cups panko breadcrumbs
- 2 tablespoons grated Parmesan cheese (optional, but adds lovely flavor and helps browning)
- Cooking spray (olive oil or avocado oil preferred)
Instructions:
Prep and Preheat:
-
Preheat your oven to 425°F and position the rack in the center of the oven.
-
If using chicken breasts, trim any visible fat and cut the breasts lengthwise into strips about ¾ inches thick. If using tenderloins, locate the white tendon (the stringy piece) and trim it flush with the meat—just pinch it with your fingers and carefully slice it away with a sharp knife. Pat all the chicken completely dry with paper towels.
-
Place a wire rack on top of a rimmed baking sheet. Spray the rack lightly with cooking spray and set it aside.
Set Up Your Breading Station:
-
In your first shallow bowl or dish, whisk together the flour, ½ teaspoon seasoned salt, and black pepper until combined. Set aside.
-
In your second shallow bowl, whisk together the eggs with the water (or milk) and ½ teaspoon seasoned salt until completely combined. Set aside.
-
In your third shallow bowl, combine the panko breadcrumbs, Parmesan cheese (if using), and the remaining ½ teaspoon seasoned salt. Mix with a fork until the seasonings are evenly distributed. Set aside.
Bread the Chicken Using the Two-Dredge Method:
-
Working with one chicken piece at a time, place it into the flour mixture and turn it to coat all sides completely, pressing gently so the flour adheres. Shake off any excess flour and set the floured piece aside on a clean plate.
-
Once all pieces are floured, take the first piece and dip it into the egg mixture, turning to coat all sides and letting excess egg drip back into the bowl.
-
Place the egg-coated chicken back into the flour mixture for a second dredging, coating it completely and pressing gently to create a slightly bumpy, textured surface. This double-flour step is what creates the extra-crispy crust.
-
Dip the twice-floured chicken back into the egg mixture one final time, coating all sides and shaking off excess.
-
Now place the chicken into the panko breadcrumb mixture and turn it to coat completely. Use your hands to press the panko gently but firmly onto the chicken, ensuring it adheres on all sides and nothing falls off. Press from all angles—top, bottom, and sides—for an even coating. Place the breaded tender on the prepared wire rack.
-
Repeat steps 8-11 with each remaining chicken piece until all are breaded and arranged on the rack in a single layer, not touching.
Bake for Maximum Crispiness:
-
Lightly spray the surface of all the breaded tenders with cooking spray—just a quick, even mist. This helps them brown beautifully and creates that characteristic golden, crispy exterior.
-
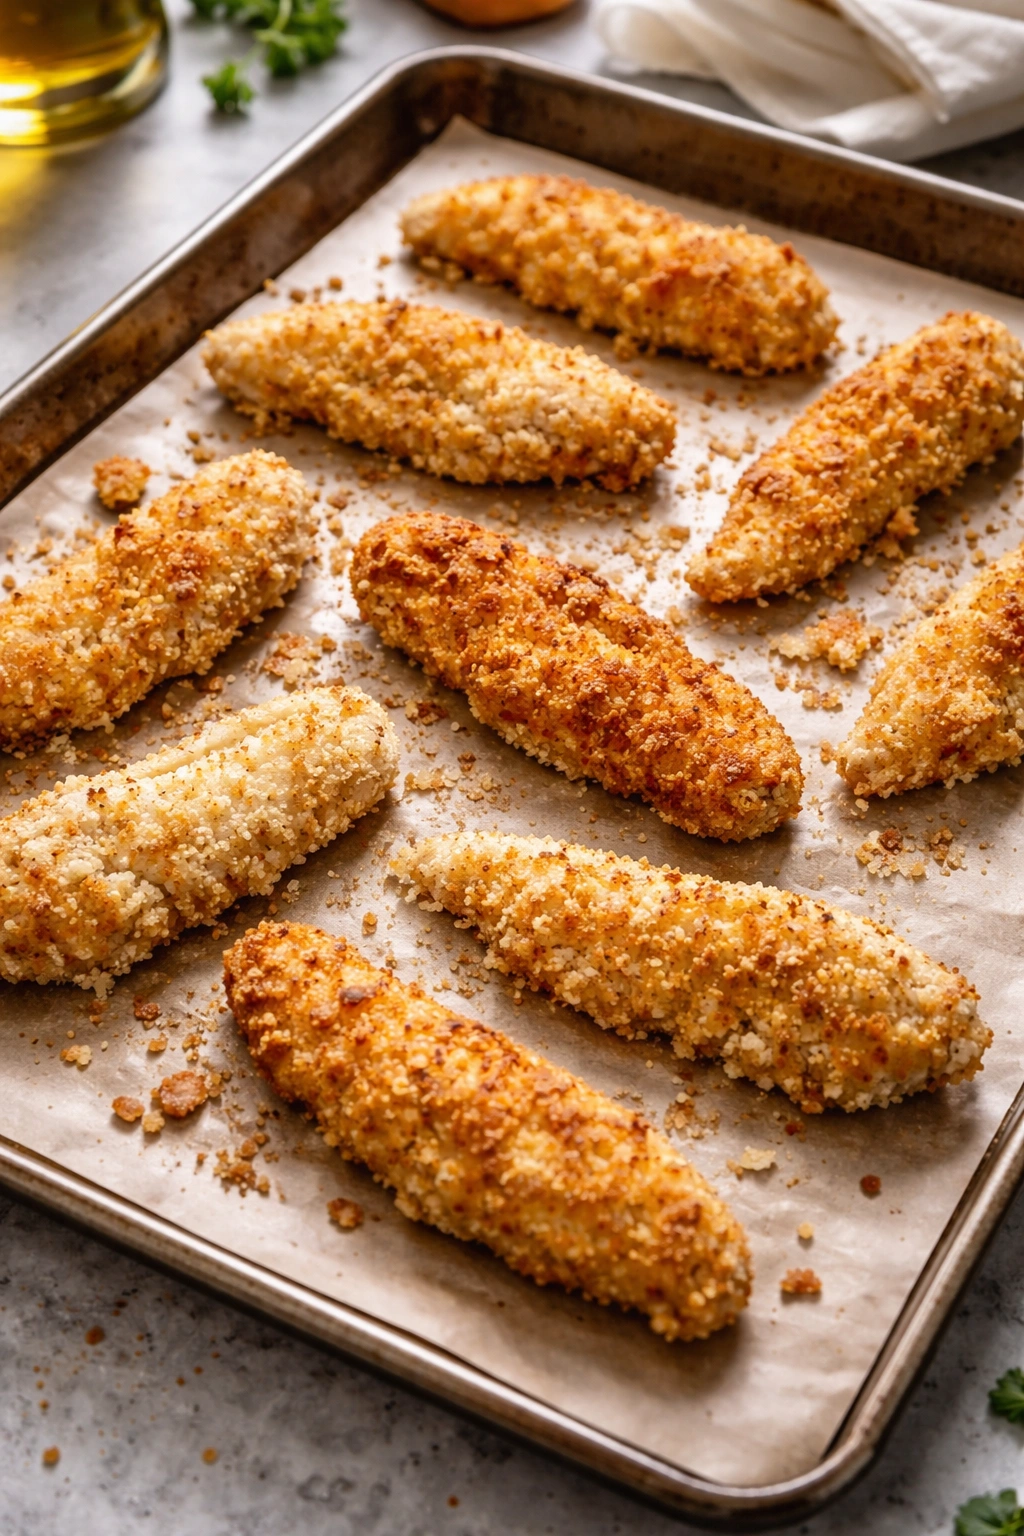
Bake for 12-15 minutes, rotating the baking sheet halfway through cooking if your oven has hot spots, until the tenders are golden brown on all sides and the chicken reaches an internal temperature of 165°F when tested with an instant-read thermometer inserted into the thickest piece.
-
Remove from the oven and let the tenders rest on the rack for 2-3 minutes before serving. They’ll continue to crisp slightly as they cool.
Advertisements
Pro Tips for Restaurant-Quality Results Every Time
Chill the breaded tenders before baking. If you have time, place the breaded chicken on the wire rack, cover it loosely with plastic wrap, and refrigerate for 15-30 minutes before baking. This allows the coating to set firmly and stick to the chicken even better, resulting in a thicker, crunchier crust that’s less likely to fall off during cooking.
Use a combination of regular and panko breadcrumbs if you want something between traditional and extra-crispy. Mix half regular breadcrumbs and half panko for a slightly less overwhelming crunch that some families prefer.
Add extra seasonings to the panko mixture based on your family’s preferences. Try garlic powder, paprika, dried Italian herbs, or a pinch of cayenne pepper for subtle heat. A small amount of smoked paprika adds restaurant-like depth without being noticeable as “smoky” to kids.
Toast the panko beforehand for extra crunch. Spread your panko breadcrumbs on a baking sheet and toast them in a 350°F oven for 3-5 minutes, stirring occasionally, until they’re lightly golden and fragrant. Let them cool completely before using for breading. This creates an incredibly crunchy coating that stays crisp longer.
Don’t skip the Parmesan cheese. Even just 2 tablespoons mixed into the breadcrumb mixture adds savory umami depth that makes people say “these taste amazing” without being able to identify why. It also helps the coating brown beautifully.
Invest in an instant-read thermometer. This takes the guesswork out of doneness. The chicken is safe to eat at 165°F, and using a thermometer means you’ll never have dry, overcooked tenders again. Insert the thermometer into the thickest piece without touching bone—if you have one.
Common Mistakes and How to Avoid Them
Wet chicken makes soggy breading. This is the number-one reason homemade tenders disappoint. Pat your chicken completely dry before breading, and make sure it’s at room temperature. Cold, wet chicken will steam instead of crisp up.
Overstuffed baking sheet prevents browning. Tenders need space around them for air to circulate. If they’re touching or crammed together, they’ll steam and stay pale instead of turning golden. Arrange them in a single layer with at least ½ inch between each piece.
Breading falls off during cooking. This usually means you didn’t press the panko firmly enough into the chicken, or the coating wasn’t given time to set. Use your hands to really press the breadcrumbs in place, and chill the breaded tenders for at least 15 minutes before cooking if possible.
Tenders are crispy outside but raw inside. Your oven temperature is too high, or they’re too thick. Make sure pieces are uniform thickness (around ¾ inches), and verify your oven temperature with an oven thermometer. If your oven runs hot, you may need to lower the temperature to 400°F and add 2-3 minutes to cooking time.
Using regular breadcrumbs instead of panko. Regular breadcrumbs will absolutely work, but they create a denser, less crispy coating. If that’s what you have on hand, they’re fine, but panko is genuinely worth keeping in your pantry for this recipe.
Forgetting to season the breadcrumb mixture. The seasoning needs to be in every layer, not just the flour. If the breadcrumb coating is unseasoned, the tenders will taste bland on the outside even if the chicken inside is flavorful.
Flavor Variations You Can Try
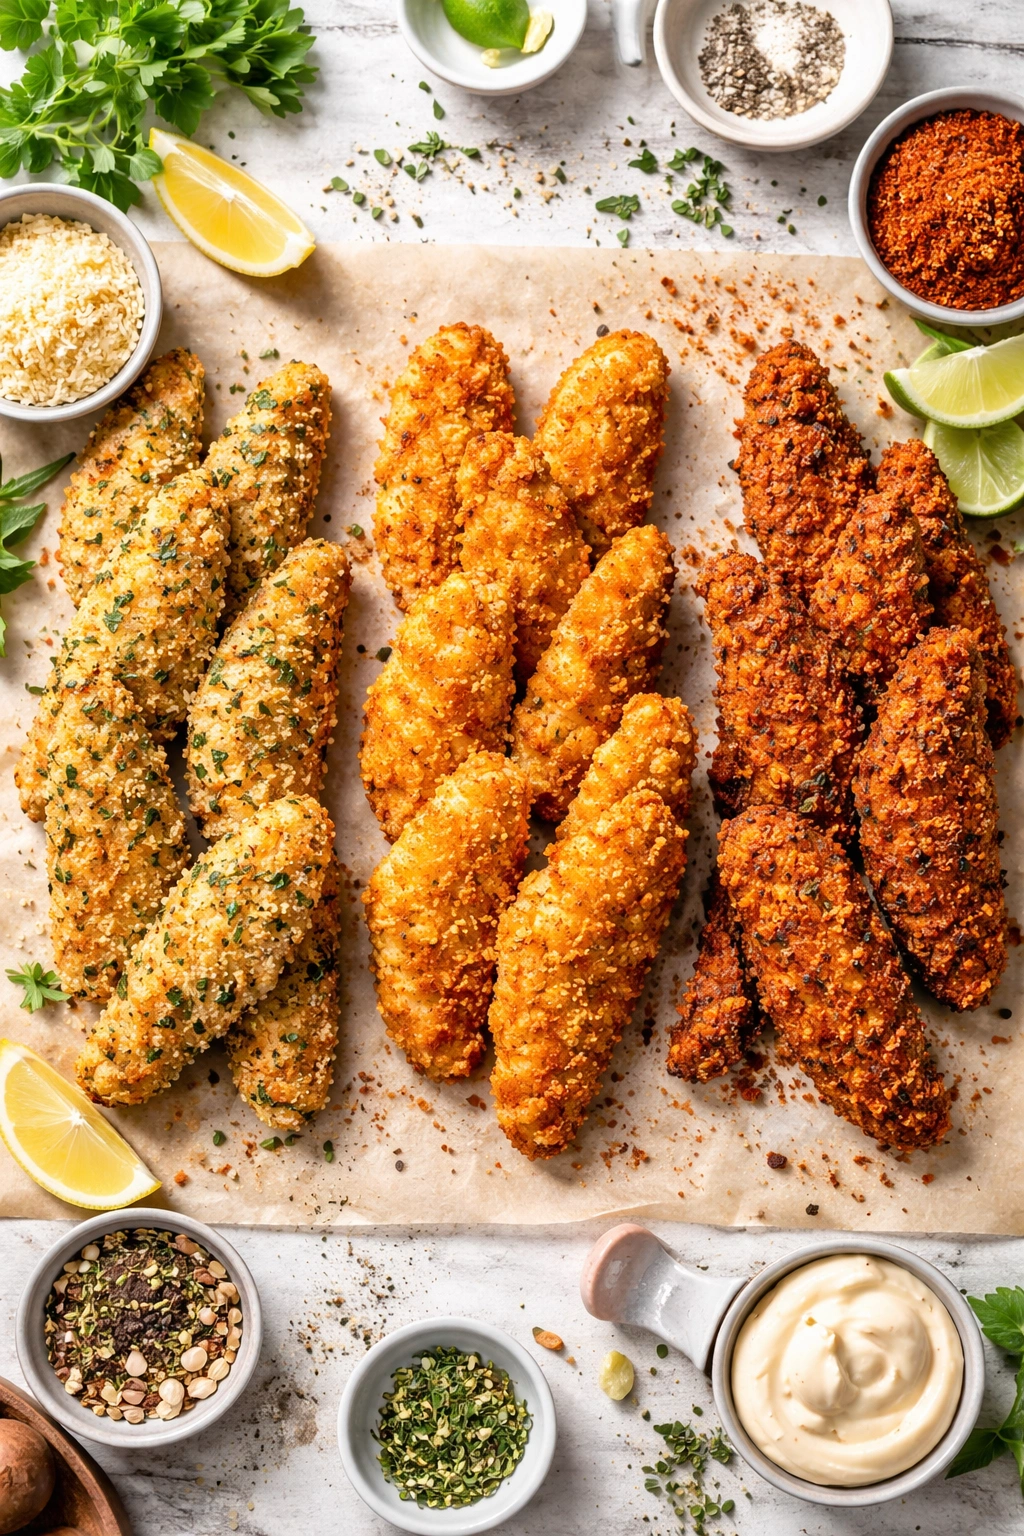
Once you’ve mastered the basic recipe, these variations let you shake things up and keep the dish interesting.
Parmesan and Italian Herb Version: Add 1 teaspoon of dried Italian seasoning (or ½ teaspoon each dried basil and oregano) to the panko mixture along with ¼ cup grated Parmesan. These become crispy, herbaceous, and automatically taste more sophisticated. Serve them with marinara sauce for dipping, or crumble them over a salad.
Honey Mustard Crusted: Mix 2 tablespoons of Dijon mustard into the egg wash before dipping. The mustard adds a subtle tang that complements the chicken beautifully and creates a slightly darker, more interesting crust. Make a simple honey mustard dipping sauce by whisking together ¼ cup Dijon mustard, ¼ cup honey, and 1 tablespoon apple cider vinegar.
Spicy Cajun Tenders: Add ½ teaspoon cayenne pepper, ½ teaspoon smoked paprika, ¼ teaspoon garlic powder, and ¼ teaspoon dried thyme to the panko mixture. These pack enough heat to be interesting for adults without being overwhelming for kids who don’t love spicy food. Serve with a cooling ranch dip to balance the heat.
Crushed Chip Coating: Replace half the panko with crushed tortilla chips, cheese-flavored crackers, or even cornflake cereal. The chips add flavor and a different texture. For tortilla chips, pulse them in a food processor until you have crumb-sized pieces, then mix with the panko.
Gluten-Free Version: Use a 1:1 gluten-free flour blend in place of all-purpose flour, and swap in gluten-free panko breadcrumbs. These work beautifully and deliver virtually identical results. The cooking time and method remain exactly the same.
Dairy-Free and Egg-Free: If your family has allergies, use ⅓ cup of unsweetened almond milk (or any plant-based milk) mixed with 1 tablespoon of cornstarch in place of the eggs. For the flour mixture, you can add a tiny pinch of xanthan gum (if your milk doesn’t contain it) to help the coating stick. The results will be slightly less crispy but still delicious and completely satisfactory.
Storage and Reheating Like a Pro
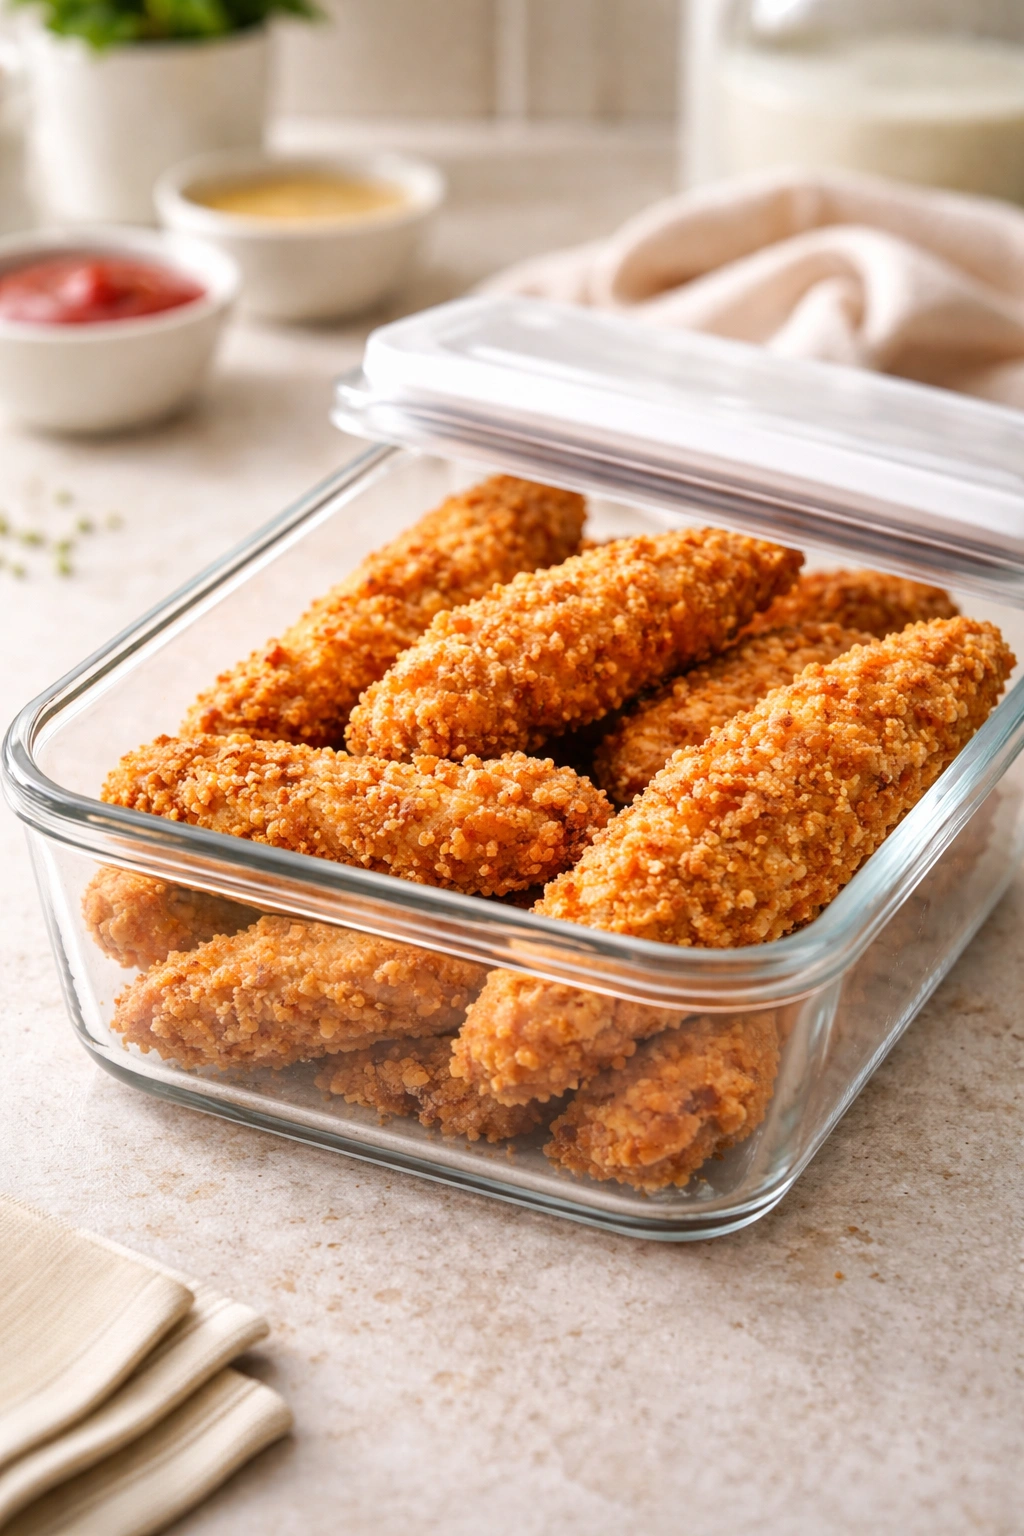
Refrigerator storage: Leftover cooked chicken tenders keep beautifully in an airtight container for up to 4 days. They’ll lose some crispiness, but they’re still delicious eaten cold straight from the container (perfect for lunch boxes), or you can reheat them.
Freezing cooked tenders: Let them cool completely, then arrange them in a single layer on a parchment-lined baking sheet and freeze for 2 hours until solid. Transfer the frozen tenders to a freezer-safe container or bag and store for up to 3 months. This is a game-changer for busy families—you can make a huge batch once and have ready-to-reheat tenders on hand all month.
Freezing uncooked (breaded) tenders: Arrange the breaded, unbaked tenders on a parchment-lined baking sheet in a single layer and freeze for 2 hours. Once solid, transfer them to a freezer-safe bag and store for up to 1 month. You can bake them directly from frozen—just add 3-5 minutes to the baking time and check that they reach 165°F internally.
Reheating for maximum crispiness: This is crucial. Never microwave leftover chicken tenders if you want to maintain that crispy coating. Instead, preheat your oven to 375°F, arrange the tenders on a wire rack over a baking sheet, and bake for 5-7 minutes if refrigerated, or 15-18 minutes if frozen. For extra crispiness, give them a light spray of cooking oil before reheating. Alternatively, use an air fryer at 375°F for 5-6 minutes for refrigerated tenders or 10-12 minutes for frozen.
Make-ahead for parties: You can bread the chicken tenders the morning of a party and keep them covered in the refrigerator until you’re ready to bake. Bake them just before serving so they’re warm and crispy. If you need to make them earlier, bake them and reheat in a 300°F oven for 5-10 minutes just before guests arrive—they’ll be warm and crunchy, not soggy.
Serving Ideas Beyond Ketchup
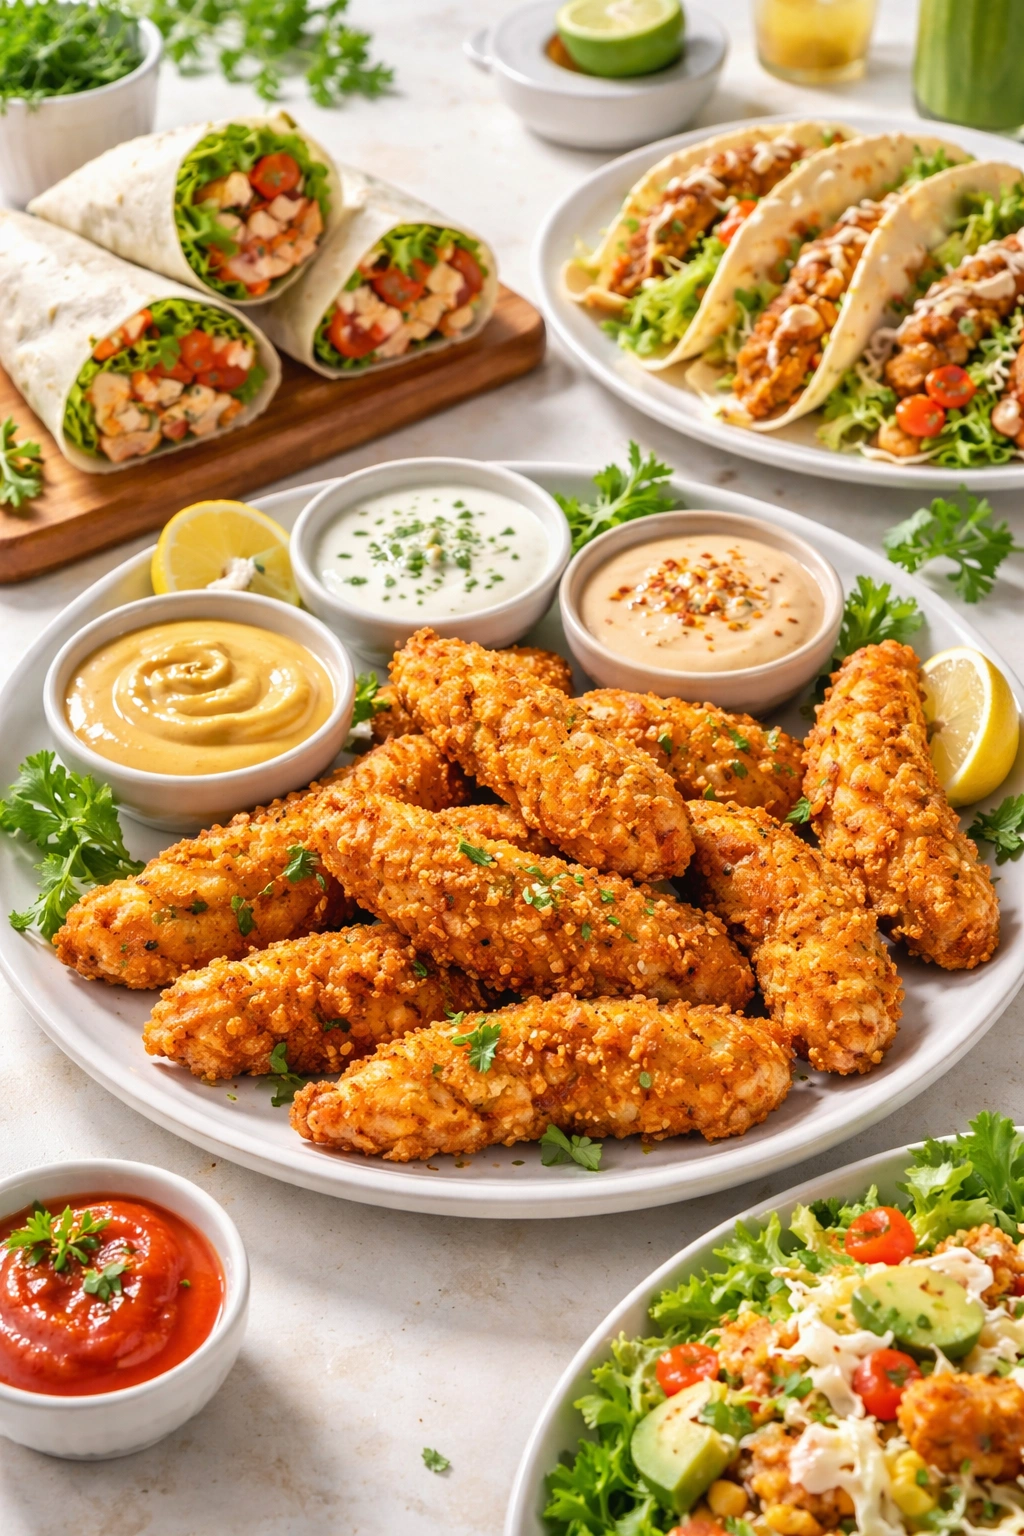
While chicken tenders with ketchup will never go out of style, these crispy strips are incredibly versatile and work beautifully in dozens of different meal configurations.
With classic sides: Serve alongside crispy baked fries (or air-fryer fries), roasted sweet potato wedges, and a simple fruit salad or veggie plate. Add a creamy dip like ranch, honey mustard, or BBQ sauce, and you’ve got a complete meal that feels like a treat.
In tacos and wraps: Chop the cooled tenders and pile them into warm flour or corn tortillas with shredded lettuce, diced tomato, avocado, and a drizzle of crema or sour cream. Sprinkle with fresh cilantro and lime juice for a simple, elegant taco.
Over salads: Chop warm chicken tenders and scatter them over a bed of greens with your favorite salad toppings—cherry tomatoes, cucumber, shredded cheese, crispy bacon bits. The warm chicken wilts the lettuce slightly and turns a side salad into a satisfying main course.
As chicken parmesan: Top each tender with a spoonful of marinara sauce and a sprinkle of mozzarella cheese, then broil for 2-3 minutes until the cheese melts. Serve over pasta or on a crusty roll for an easy, impressive dinner.
In sandwiches: Layer cooled tenders on a soft bun or piece of bread with coleslaw, pickles, and a smear of mayo or honey mustard for a crispy chicken sandwich that rivals any fast-food version—except it’s made at home with real ingredients.
For breakfast-for-dinner: Serve alongside scrambled eggs, toast, and fruit for a protein-packed breakfast meal that kids actually get excited about.
Chopped into pasta: Toss warm chicken tenders (chopped into bite-sized pieces) with buttered pasta, a light sauce, and steamed broccoli. The warm chicken mingles with the pasta and creates something that feels both comforting and fresh.
With dipping sauces: Set up a dipping sauce bar with 3-4 options—honey mustard, ranch, BBQ, sweet and spicy sriracha mayo, or even a simple lemon-herb yogurt sauce. Let everyone choose their favorite, which makes the meal feel special and interactive.
Make-Ahead and Batch-Cooking Strategies for Busy Weeks
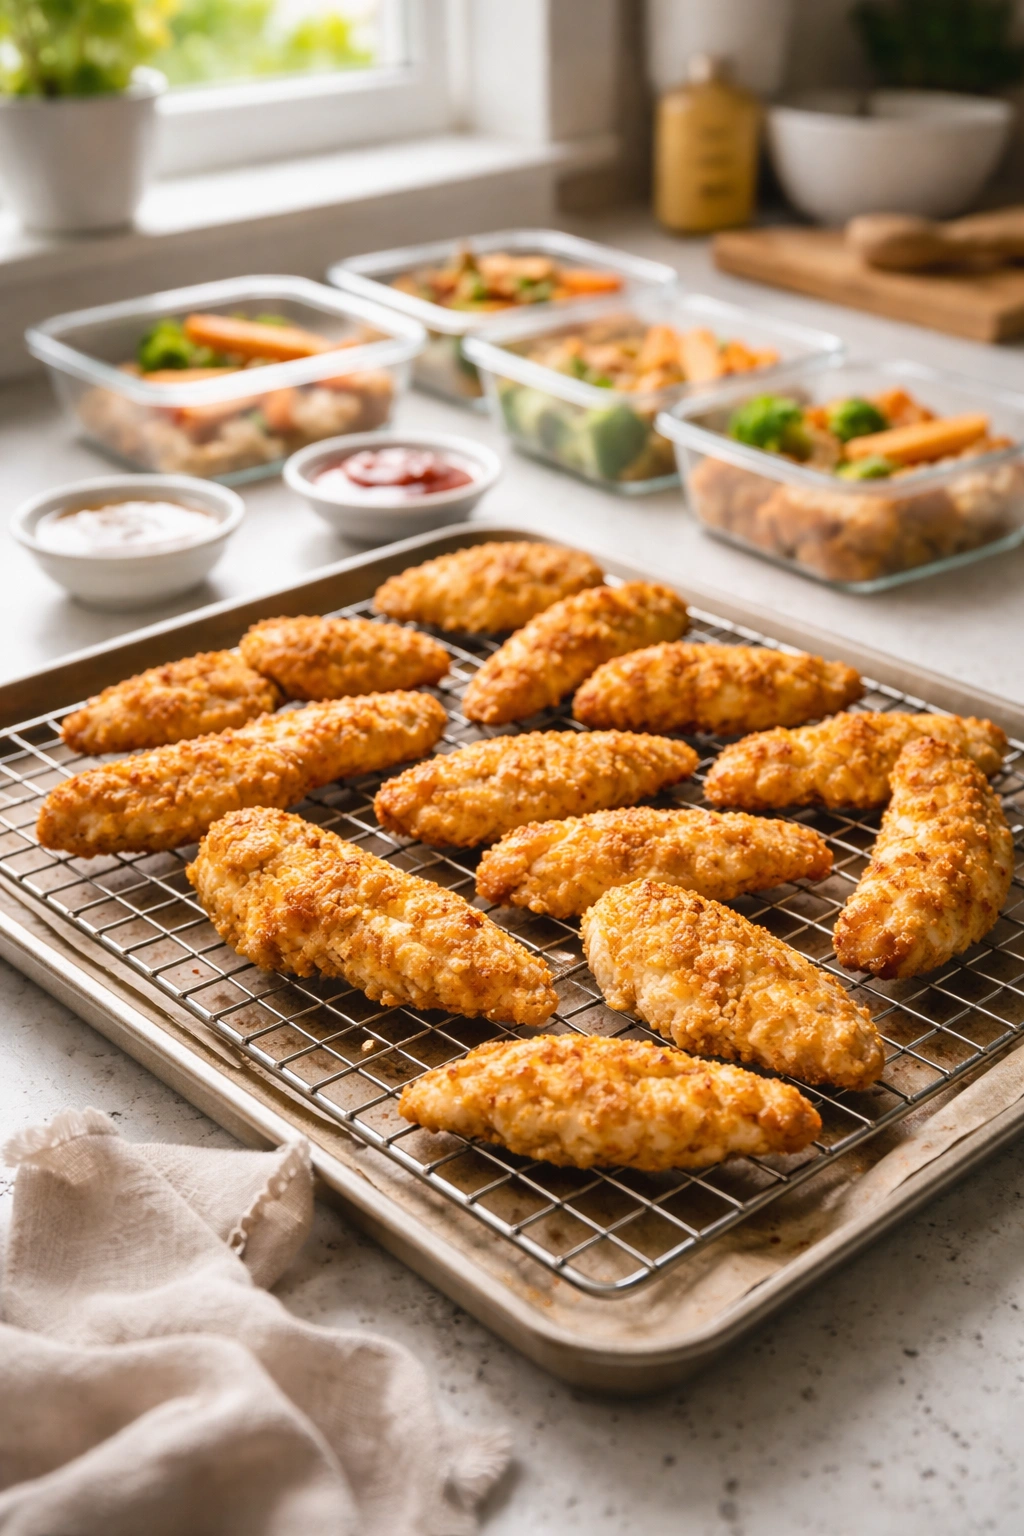
The genius of chicken tenders is that they’re perfect for batch-cooking and meal-prepping. Make a huge batch on a Sunday and you’ve got easy proteins for the entire week.
Make once, eat all week: Cook a double or triple batch when you have time, then portion them into separate containers for different days. Reheat just what you need each evening. This is especially helpful on days when you’re running late and need dinner on the table in 10 minutes.
Mix and match combinations: Make your basic batch one day, then a seasoned Italian version another day, and perhaps a spicy Cajun batch a third day. Your family gets variety without you having to cook from scratch every single time.
Prep the breading station the night before: Measure out all your flour, eggs, water, and breadcrumbs into their respective bowls and cover them with plastic wrap. In the morning, you literally just need to trim the chicken and start breading—it cuts your prep time in half.
Cook for two meals at once: When you’re making chicken tenders for dinner, make extra to pack in lunch boxes the next day. Cooled tenders are just as delicious as hot ones, and kids love having something they actually want to eat in their lunch.
Final Thoughts
Homemade chicken tenders are one of those recipes that actually deserves the reputation it’s earned—easy enough for a beginner, reliable enough that you’ll make them again and again, and universally loved across age groups and palates. They’re the dinner solution when you want something quick but still home-cooked, when you want complete control over ingredients, and when you want your family asking “can we have these again tomorrow?”
The beauty of mastering this recipe is that it becomes a foundation for so many other meals. Those tenders can transform into sandwiches, salads, pasta dishes, tacos, and breakfast-for-dinner plates. They freeze beautifully, they’re perfect for meal prep, and they somehow make even the pickiest eater feel like they’re getting exactly what they want for dinner.
Give yourself permission to stop buying the frozen versions. You’ve got this recipe now, and it honestly takes less time than baking a frozen box while delivering results that are noticeably better. Your kids will taste the difference, your wallet will feel the difference, and you’ll get that quiet satisfaction that comes from feeding your family real food made with your own hands.