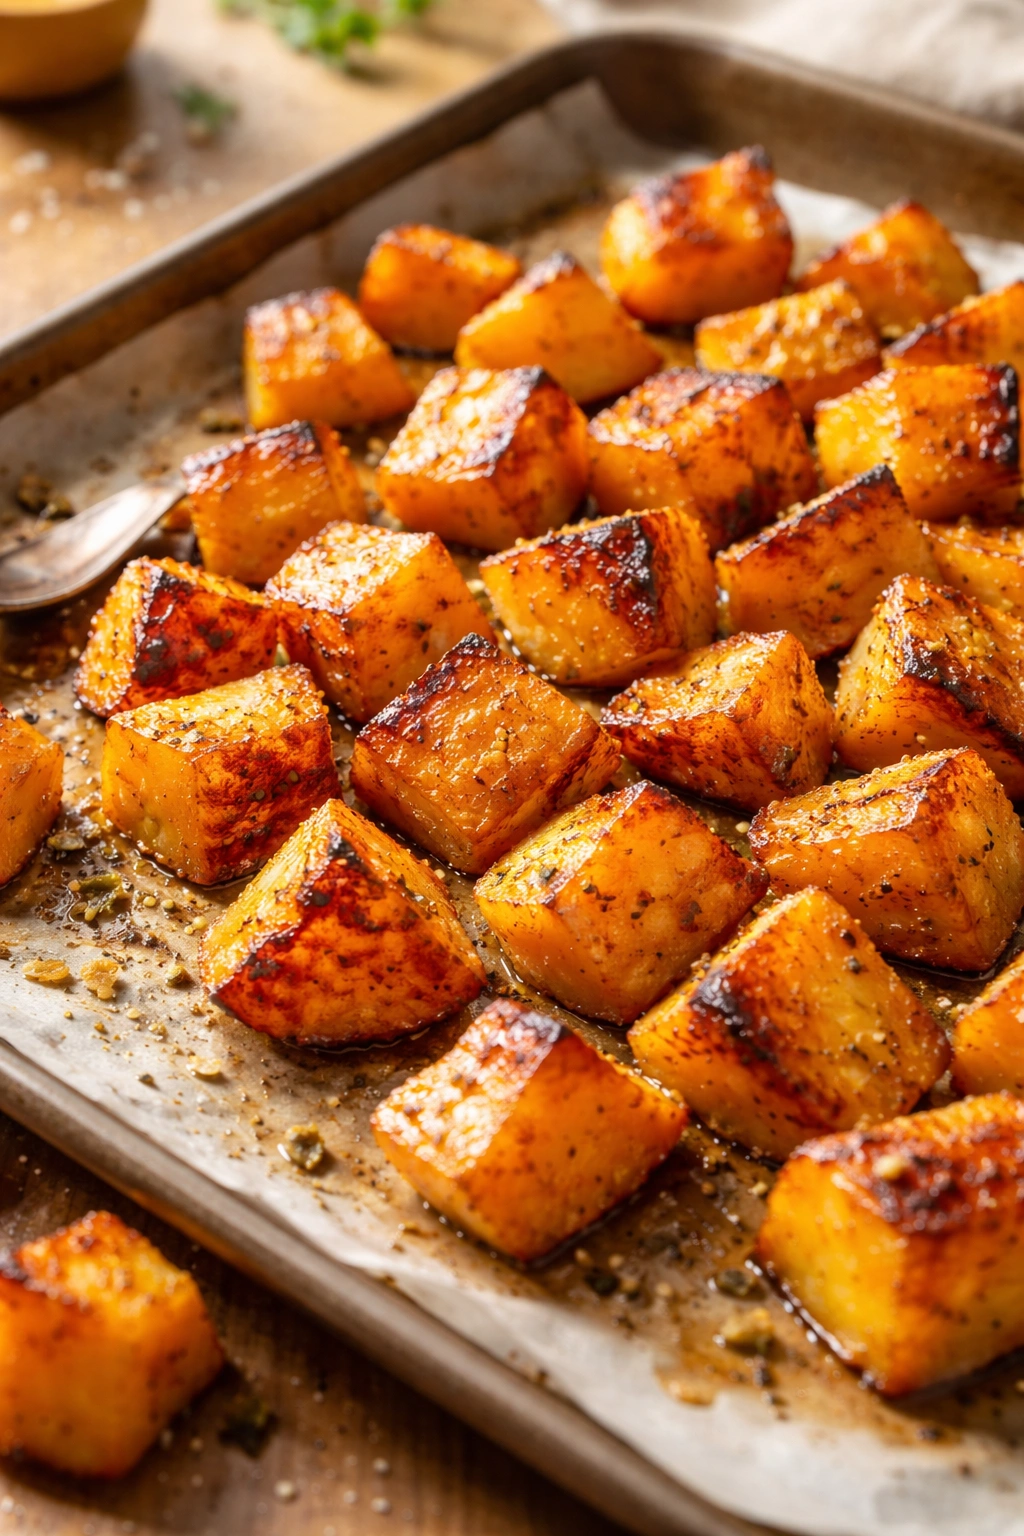
Roasted squash has quietly become the weeknight hero nobody talks about enough. It requires minimal prep, takes care of itself in the oven, and emerges deeply caramelized and naturally sweet — transforming something as humble as a cut-in-half vegetable into the kind of side dish that makes people ask for seconds. The beauty of roasted squash isn’t just in its simplicity, though. It’s in what happens when you stop fighting the vegetable’s natural tendencies and instead lean into them: the high heat coaxes out sugars, the edges crisp while the flesh stays creamy, and you end up with something that tastes far more interesting than the five minutes of active work you put into it.
If you’ve been defaulting to the same roasted broccoli or steamed green beans out of habit, or if you’ve tried roasted squash once and felt uncertain about timing and doneness, this is the section that changes that. Roasted squash deserves a permanent slot in your weeknight rotation — it pairs with almost everything, stores beautifully, and scales effortlessly from cooking for two to feeding a crowd. Whether you’re pairing it with roasted chicken, a simple grain bowl, or grilled fish, this is the technique that unlocks exactly why roasted squash tastes better than you remember.
Why Roasted Squash Is the Perfect Weeknight Side
Weeknight cooking demands efficiency without sacrifice. You need something that doesn’t require you to hover over the stove, doesn’t take an hour to prepare, and doesn’t need a PhD in vegetable science to execute successfully. Roasted squash checks every single one of those boxes, and then some.
The magic begins the moment high heat meets squash flesh. When you roast squash at a sufficiently hot temperature — around 400°F and higher — the natural sugars in the vegetable undergo what chefs call the Maillard reaction. This isn’t just browning; it’s a chemical transformation that creates hundreds of new flavor compounds simultaneously. The result tastes sweeter, deeper, more complex, and infinitely more interesting than steamed or boiled squash ever could.
What makes this approach genuinely weeknight-friendly is the hands-off aspect. You cut your squash, season it, slide it into the oven, and disappear. There’s no stirring required midway, no watchful waiting, no last-minute panic about timing. Depending on the squash variety and how you cut it, roasting typically takes 25 to 40 minutes. That’s enough time to handle other elements of your meal, set the table, make a salad, or genuinely take a breath during a busy evening.
The consistency is another underrated advantage. Unlike pan-searing or sautéing — where you need to monitor heat and movement constantly — roasting delivers reliably tender interiors and caramelized edges almost automatically. Once the roasting sheet goes into a properly preheated oven, the outcome is largely in the oven’s hands, not yours.
Why This Beats Your Usual Vegetable Side
Most weeknight vegetable sides fall into predictable patterns. Steamed asparagus tastes like steamed asparagus. Sautéed spinach can be bitter if you’re not careful. Roasted root vegetables require peeling and cutting into uniform pieces. Roasted squash sidesteps all these friction points.
You’re not peeling anything — the skin becomes edible and tender when roasted properly, or you can easily scoop away the flesh if you prefer. You don’t need perfect uniformity; slight size variation actually creates more textural interest as some edges crisp more aggressively than others. You don’t need constant attention or technique finesse. The oven does the heavy lifting.
What You’ll Need to Know About Squash Types
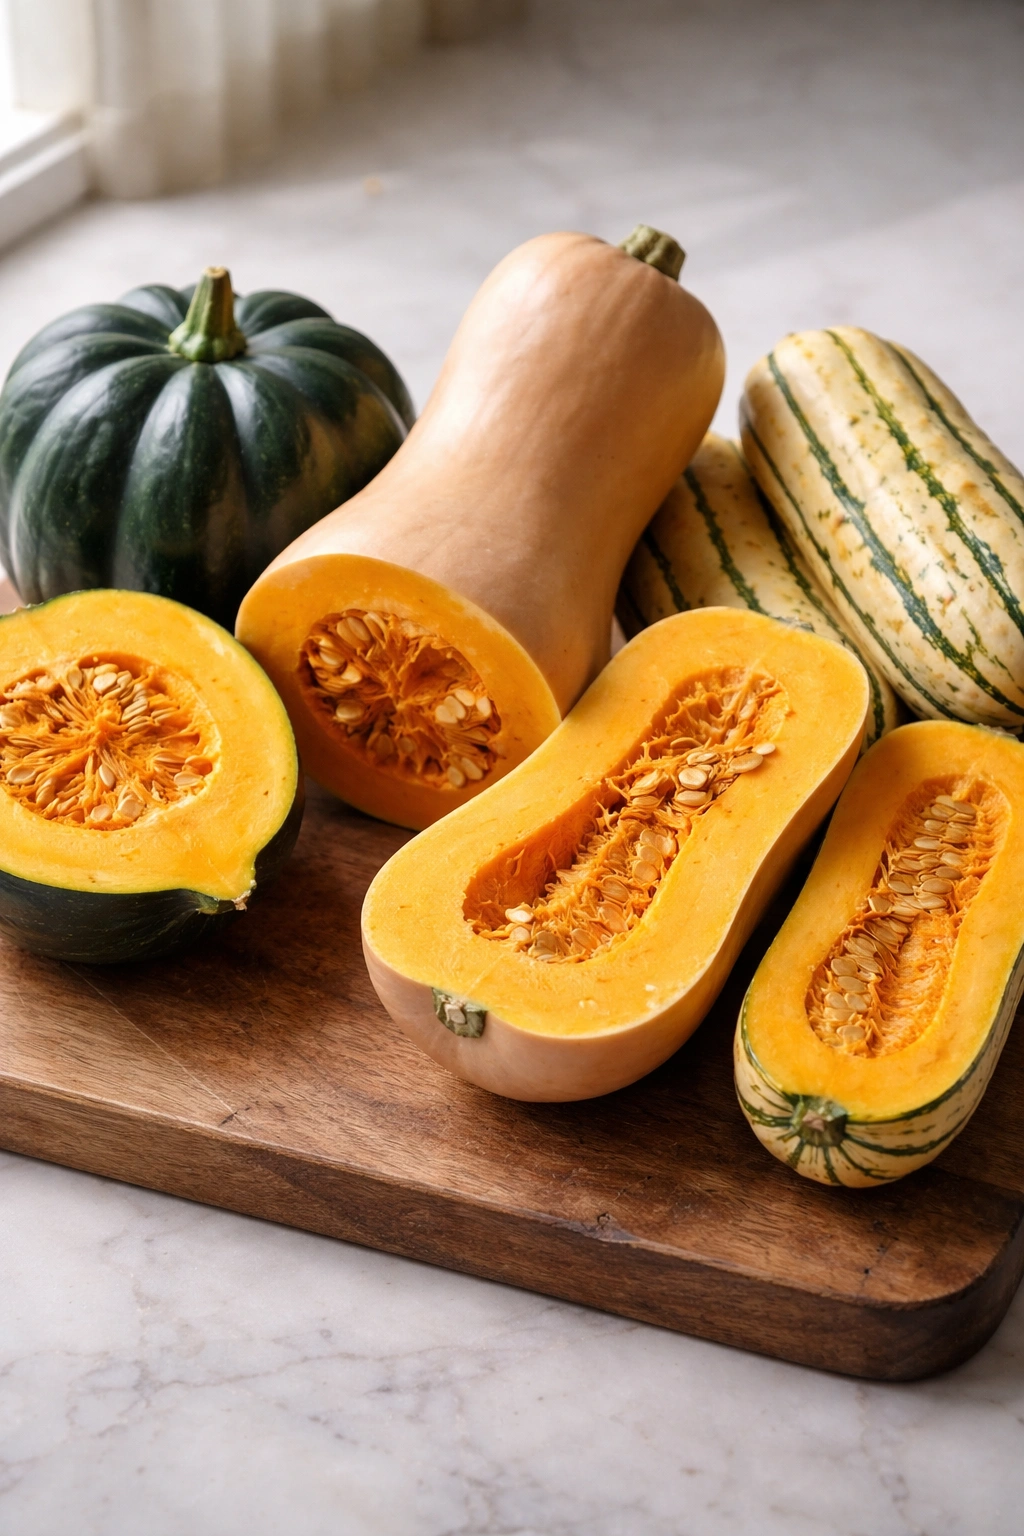
Not all squash are created equal when it comes to roasting, and knowing which varieties work best makes a meaningful difference in your weeknight success rate. Some squash are denser and require longer roasting; others are smaller and cook through quickly. Some have thinner skin that becomes pleasantly tender; others need to be scooped away from tougher outer layers.
Acorn squash is probably the most recognizable for home cooking. It’s modest in size — typically 4 to 6 inches long — which means a single squash can serve one to two people when halved lengthwise. The flesh is creamy and slightly sweet, and when roasted, it develops deeper caramel notes. The skin softens considerably and is entirely edible once cooked, though some people prefer scooping the flesh away. Acorn squash typically roasts in 25 to 35 minutes.
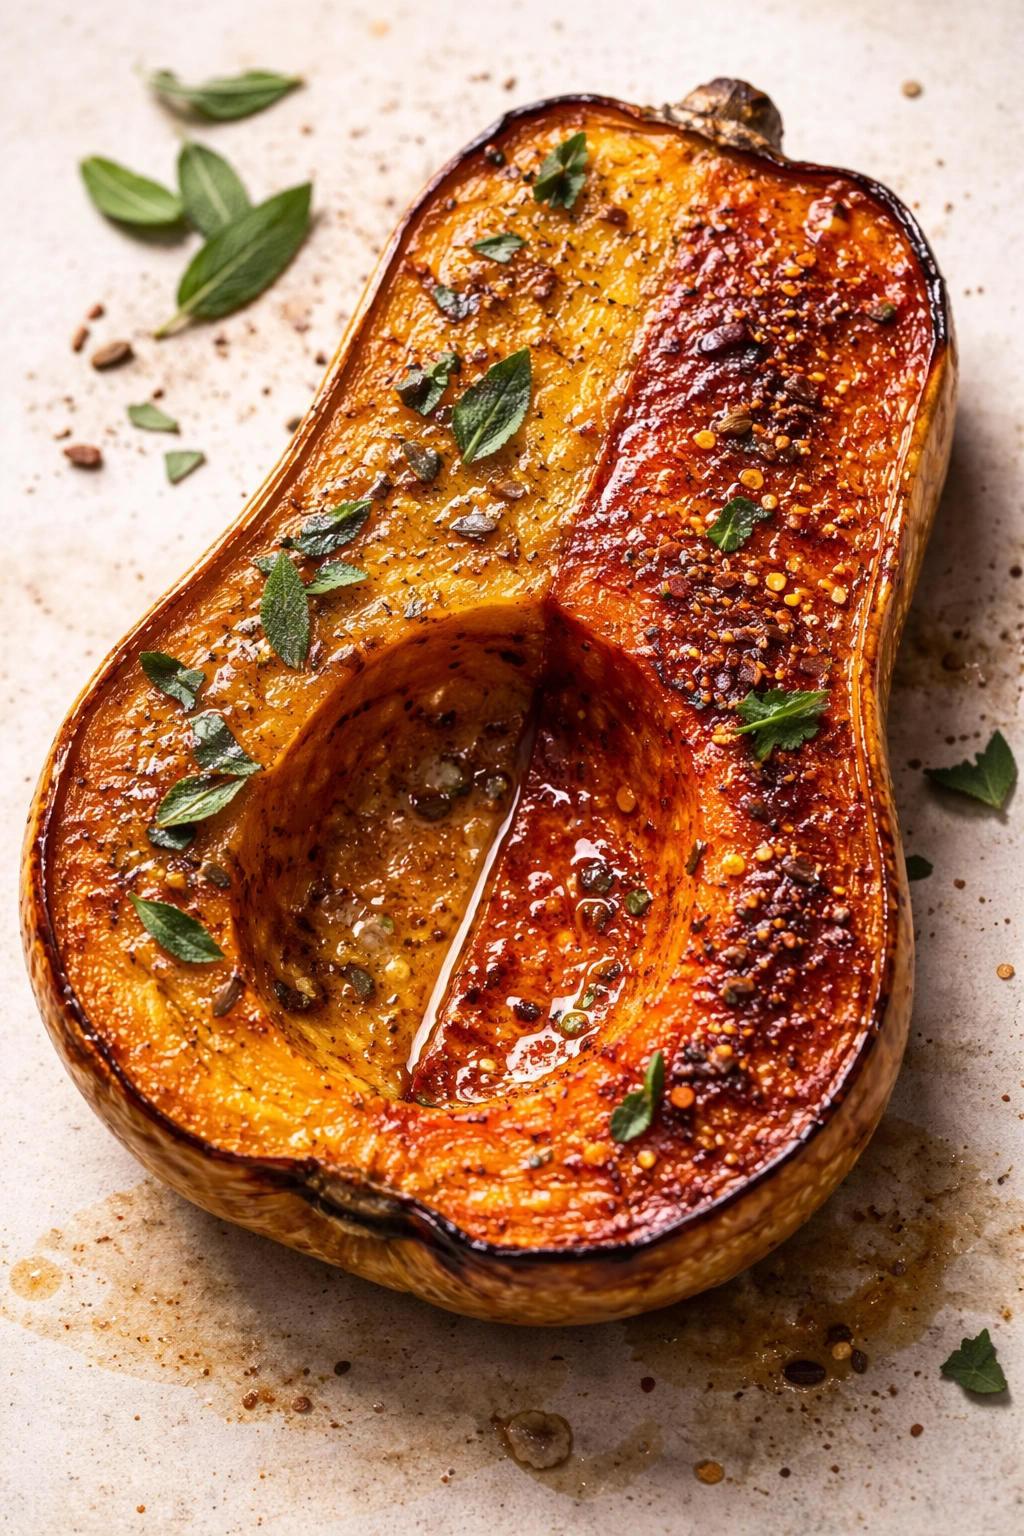
Butternut squash is larger and more oblong, with a longer neck section that’s easier to cut than the bulbous bottom. The flesh is noticeably sweeter and has a finer, less stringy texture than acorn. This sweetness can become even more pronounced during roasting, making butternut excellent if you want that caramelized, candy-like edge. Butternut takes longer — usually 35 to 45 minutes — because of its greater density. It’s perfect if you’re feeding more people or want to cut it into wedges rather than halving it.
Delicata squash is smaller and more delicate, with thin skin that becomes almost completely tender when roasted. The flavor is subtly nutty and refined. Because of its smaller size and thinner walls, delicata roasts quickly — often 20 to 25 minutes. This makes it ideal when you’re genuinely time-pressed on a weeknight.
Kabocha squash is dense and drier than other varieties, with flesh that’s creamy without being fibrous. The skin is tougher and doesn’t soften as much, so most people scoop the flesh away. It roasts longer than acorn but has exceptional flavor — almost chestnut-like.
The bottom line for weeknight cooking: acorn and delicata are your fastest, most forgiving options. Butternut works beautifully if you have 45 minutes and want to feed more people. All of them deliver excellent flavor when roasted properly.
Choosing Your Squash and Prepping the Pan
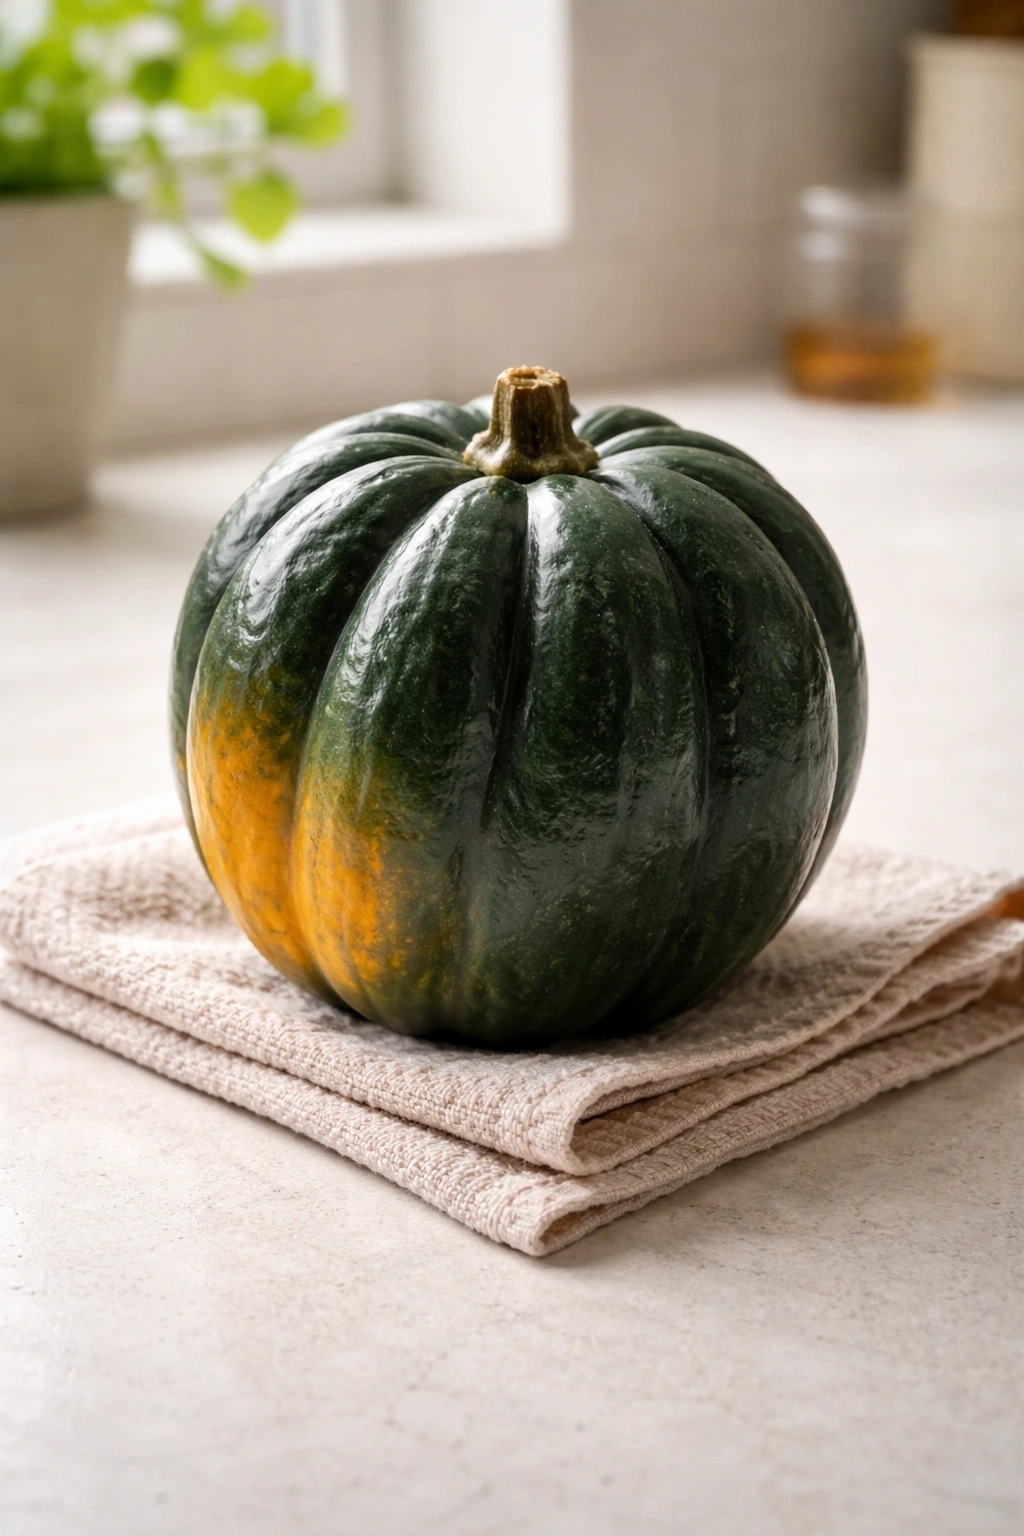
Selecting a good squash matters more than people realize. At the grocery store or farmers market, look for squash that feels heavy for its size — this suggests dense flesh rather than watery chambers. The skin should have no soft spots, blemishes, or dark patches beyond the typical mottling that many varieties display. A squash with a dull, matte finish will roast better than one with a shiny, waxy appearance.
When you get your squash home, you have two prep approaches. The first — and easiest if your knife skills are modest or your squash is particularly hard — is to roast the whole squash first for about 10 minutes at 400°F. This softens the skin just enough to make cutting considerably easier. Then remove it from the oven, let it cool for five minutes, and proceed with halving or cutting. This adds 10 minutes to your total time, but eliminates the frustration of wrestling with a rock-hard squash on a cutting board.
The second approach, if your knife is sharp and your wrist is strong, is to cut it raw. Set your squash on a stable cutting surface — a damp kitchen towel underneath prevents it from rolling. For acorn or other round varieties, cut from the stem end downward in a single clean motion, using the weight of the knife rather than sawing motions. For butternut with its elongated neck, cut off the neck section separately, then halve the bulbous section. Take your time; a slip is no fun.
Once your squash is halved or cut into pieces, you’ll need to scoop out the seeds and fibrous strings. A sturdy spoon does this efficiently. Don’t discard those seeds — toss them with oil and salt, spread on a sheet pan, and roast alongside your squash for the last 15 to 20 minutes. They become crispy and delicious.
For your roasting pan, use a rimmed baking sheet lined with parchment paper or simply well-oiled. Parchment makes cleanup effortless and prevents sticking. If you don’t have parchment, a light brushing of oil works fine. Arrange your squash pieces cut-side down on the prepared sheet.
The Basic Roasted Squash Recipe
This is the foundation. Every variation builds from this simple approach, which is precisely why it’s worth mastering first.
Yield: Serves 4 to 6 as a side dish | Makes approximately 8 cups cooked squash
Prep Time: 15 minutes
Cook Time: 30 minutes (acorn squash; butternut may take 40-45 minutes)
Total Time: 45 minutes
Difficulty: Beginner — no special equipment required, straightforward steps, nearly impossible to get wrong once the squash is cut and seasoned.
Ingredients
For the Roasted Squash:
- 2 medium acorn squash (or one medium butternut, or three small delicata)
- 3 tablespoons extra-virgin olive oil
- 1 teaspoon fine sea salt, plus more to taste
- ½ teaspoon freshly ground black pepper
- ¼ teaspoon garlic powder (optional but recommended)
For Serving:
- Fresh thyme or sage leaves, if desired
- Fleur de sel or flaky finishing salt, optional
- 1 tablespoon unsalted butter, cut into small pieces (optional, for finishing)
Instructions
Prepare the Squash and Oven:
-
Preheat your oven to 400°F (200°C) and position the rack in the center of the oven. While the oven heats, line a rimmed baking sheet with parchment paper.
-
If your squash is difficult to cut, place it whole in the preheated oven for 8 to 10 minutes — this softens the skin just enough to make cutting easier. If your knife is sharp and you’re confident, proceed directly to the next step.
Advertisements -
Carefully cut each squash in half from stem to tip, using a sharp chef’s knife and steady downward pressure rather than a sawing motion. Set the halves flat on your cutting board.
-
Using a sturdy spoon, scoop out the seeds and stringy flesh from the center of each squash half. (Reserve these seeds if you’d like to roast them separately — toss with oil, salt, and spread on a separate sheet pan to roast for the last 15 to 20 minutes.)
Season and Roast:
-
Place all squash halves cut-side up on the prepared baking sheet. Drizzle the flesh evenly with olive oil — about 1.5 teaspoons per half. Season generously with salt, pepper, and garlic powder, distributing the seasonings evenly across the exposed flesh.
-
Flip each piece over so the cut side faces down on the parchment paper. This is critical — the cut side needs direct contact with the hot pan to develop the deep caramelization and crispy edges that make roasted squash special. If it’s cut-side up, the flesh steams rather than roasts.
-
Slide the baking sheet into your preheated oven and roast, undisturbed, for 25 to 30 minutes (for acorn squash — butternut will need 40 to 45 minutes). The squash is ready when a fork pierces the flesh easily and the skin has darkened slightly. The edges, if visible, will show some browning and char.
-
Remove the squash from the oven and carefully flip each piece over using tongs or a spatula — the cut side is now facing up and the skin is down. The flesh should be noticeably caramelized and may show some browning.
-
If desired, dot each squash half with a small piece of butter and sprinkle with fresh thyme or sage leaves. Return to the oven for 2 to 3 minutes to melt the butter slightly — this is optional but adds richness.
-
Remove from the oven and let rest for 3 to 5 minutes before serving. The squash will be extremely hot; give it a moment.
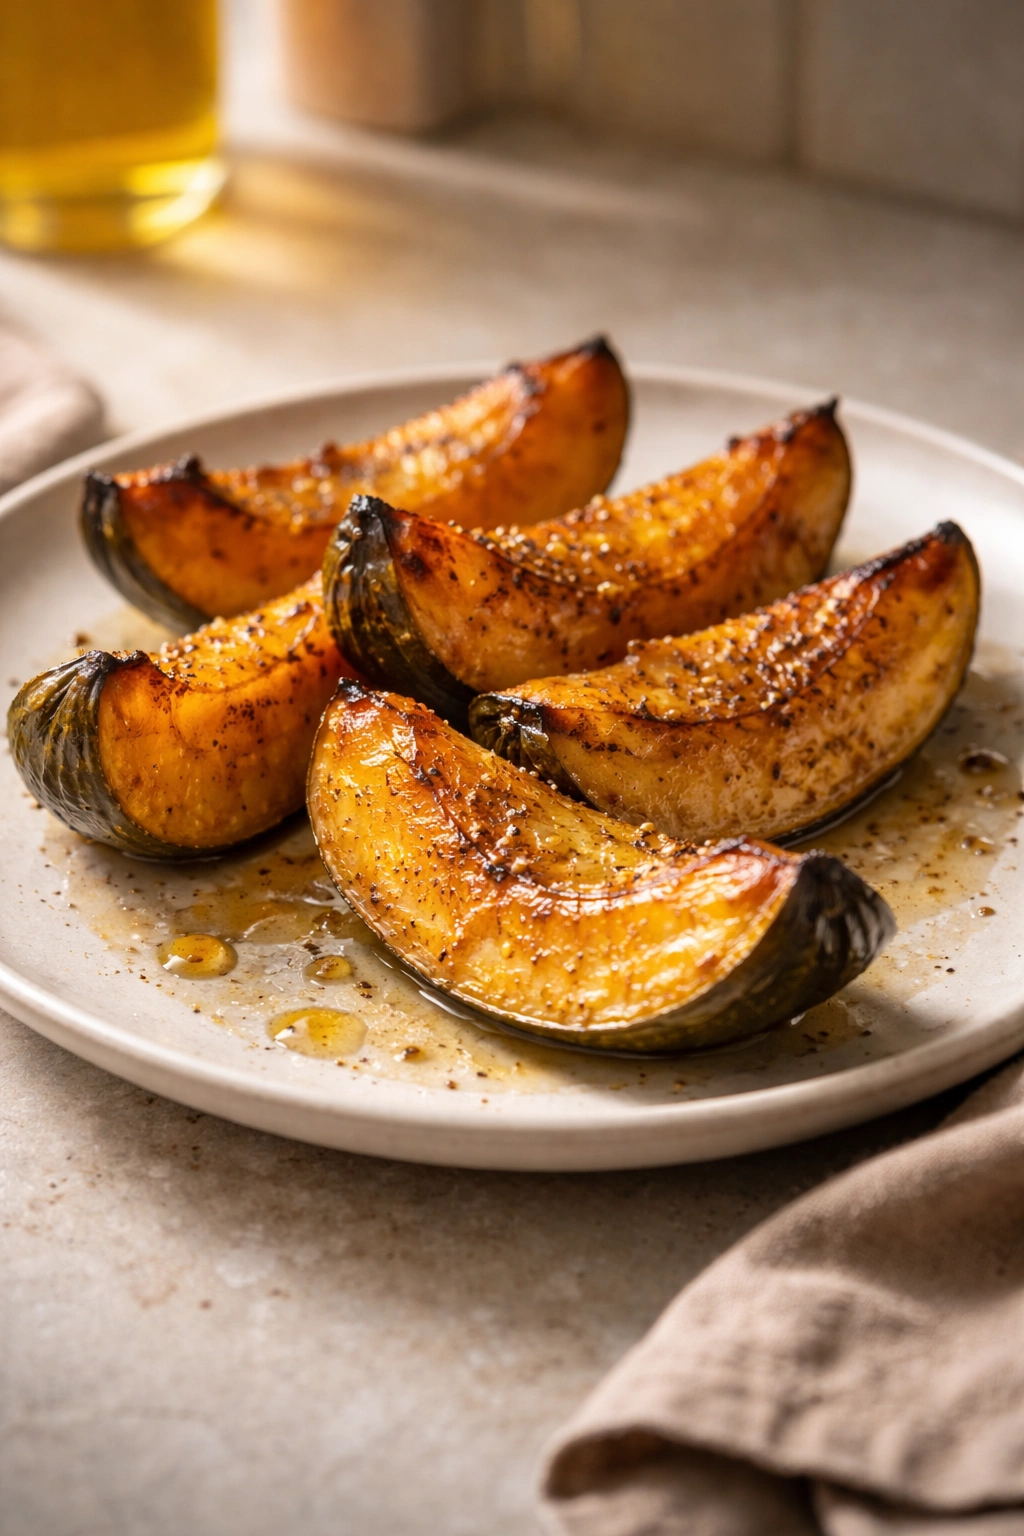
Serving and Finishing:
- Transfer to serving plates or a platter. If using whole halves, you can either eat directly from the skin (spoon the flesh out as you would an avocado) or scoop the flesh into a bowl and drizzle with any pan juices. Finish with a pinch of fleur de sel if you’d like to enhance the sweetness with mineral salt contrast.
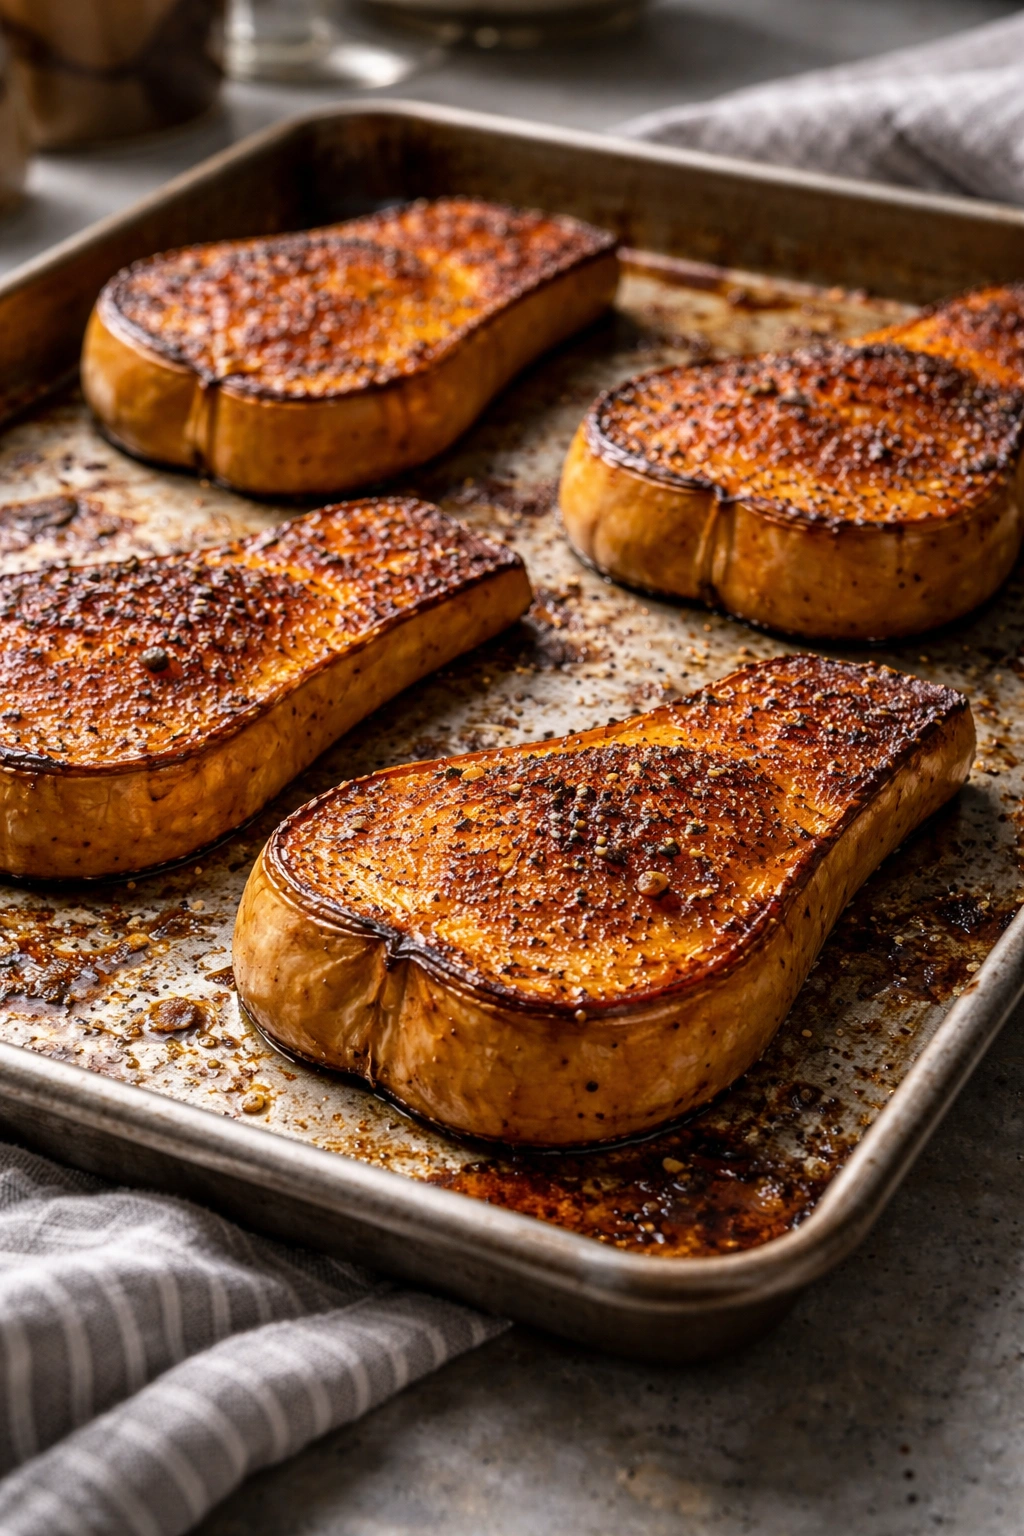
The Secret to Perfect Caramelization
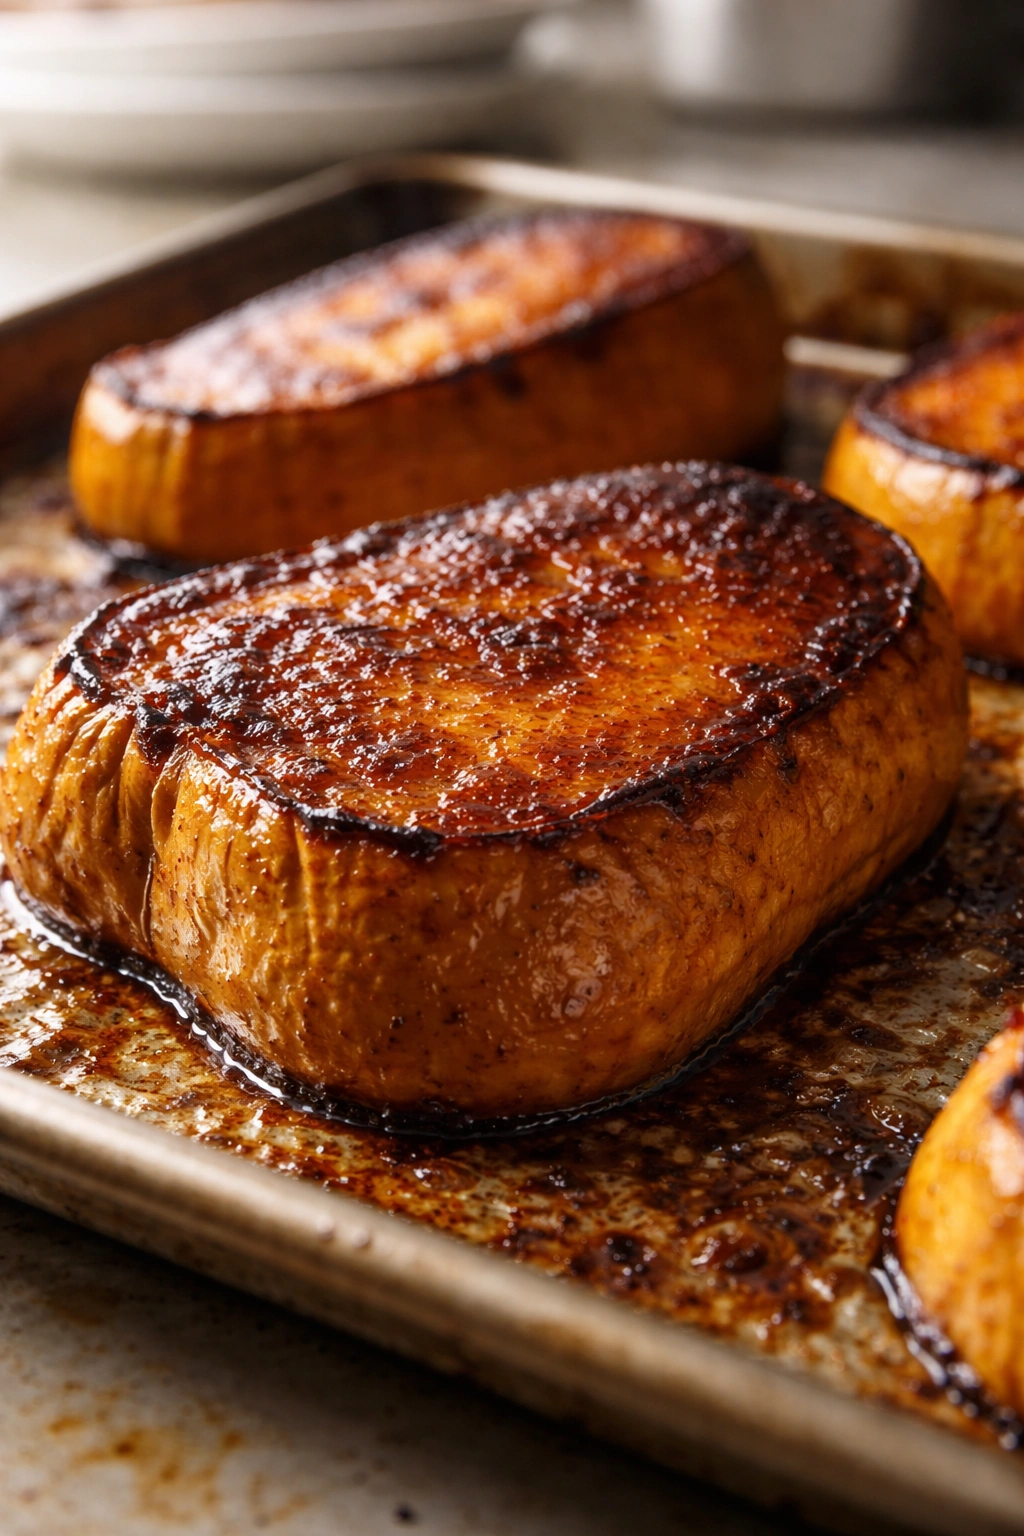
This is the section that separates mediocre roasted squash from the kind that makes people ask for the recipe. Most people roast squash cut-side up, which means the exposed flesh simmers in its own steam rather than making direct contact with the hot pan. You get soft, cooked squash, but you miss the caramelization entirely.
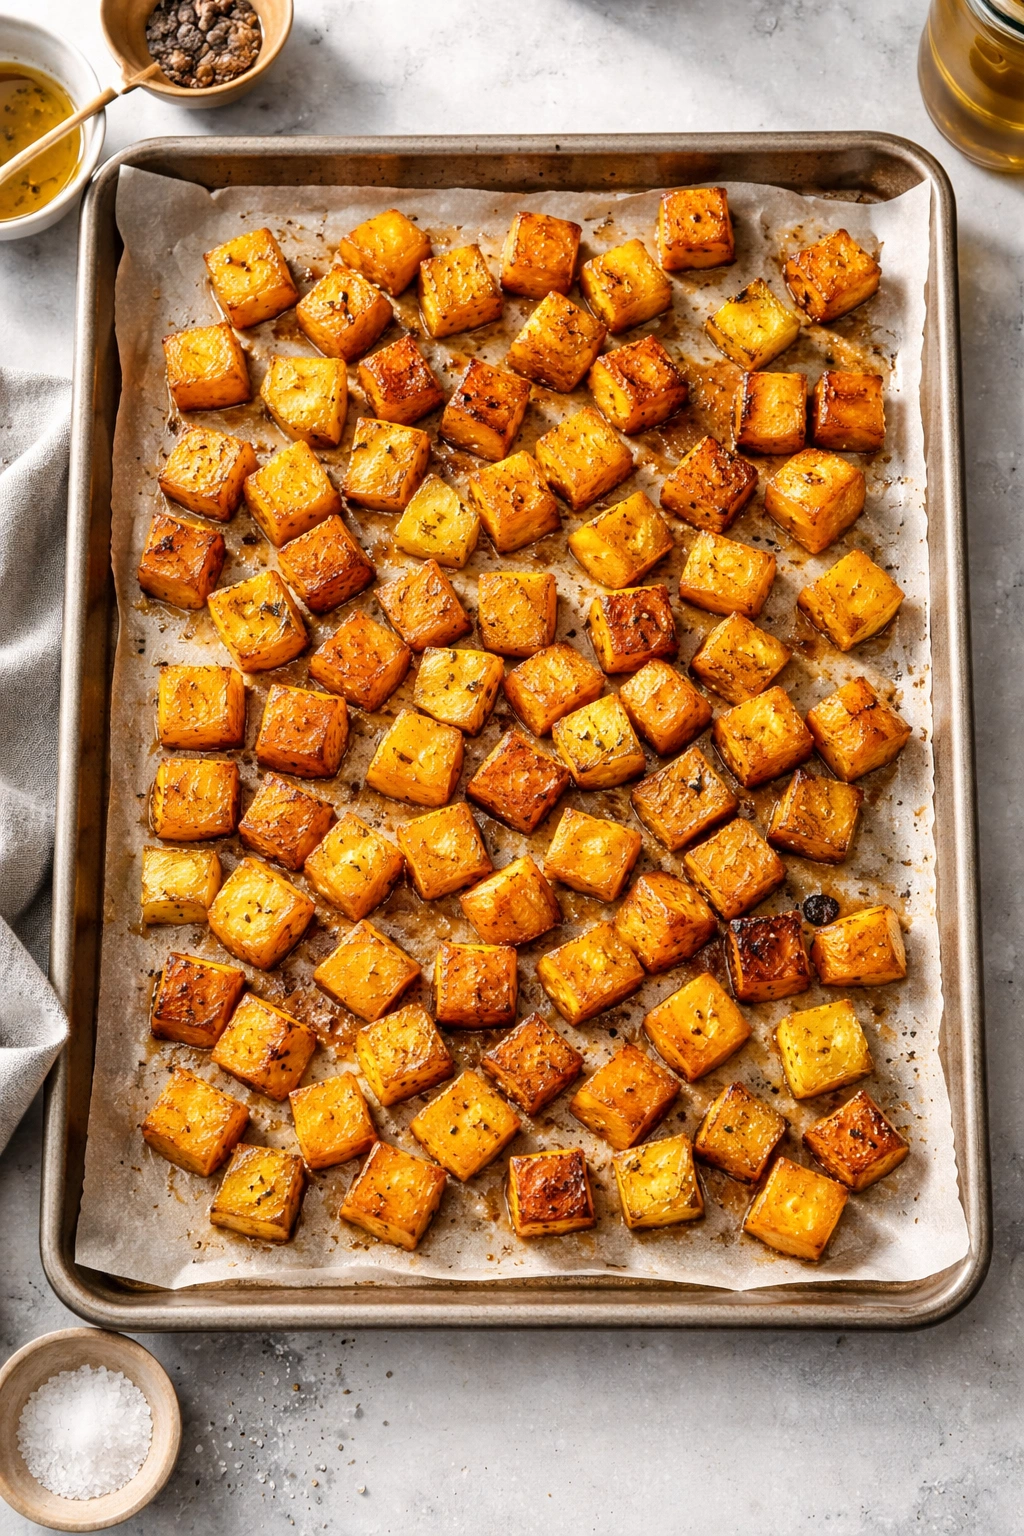
The trick is to roast cut-side down for the majority of the cooking time. The cut surface sits directly on the hot baking sheet, developing a caramelized crust through direct heat transfer. The exterior flesh browns and sweetens. Meanwhile, the heat gradually penetrates the squash from above, cooking the interior gently and evenly. Only in the last few minutes do you flip it over, allowing the now-tender flesh to finish cooking and any seasonings to meld.
This method works because of one simple principle: dry heat plus direct contact equals caramelization. When the cut side is face-down on a hot surface, the moisture in the squash’s cells is forced to evaporate rather than condense as steam. That evaporation creates the conditions for the Maillard reaction — the browning and flavor development you’re after.
The darkness you’re aiming for is a medium-to-dark golden brown, almost the color of butterscotch. This indicates that adequate caramelization has happened without crossing into burnt territory. A little char on the edges is not just okay — it’s actually desirable. That slight bitterness from char balances the squash’s natural sweetness.
Timing varies based on your oven and the size of your squash. A 400°F oven with acorn squash halves typically hits caramelization around 25 to 30 minutes. If you’re roasting at 425°F, it’s closer to 20 to 25 minutes. If your oven runs cool, you may need 35 to 40 minutes. The doneness test is visual — look for browning on the flesh where it touches the pan — combined with the fork test. The flesh should yield immediately to a fork when fully cooked.
Flavor Variations Worth Trying
Once you’ve mastered the basic roasted squash, these variations keep the side dish feeling fresh across multiple weeks of weeknight cooking. The beauty of each variation is that you’re still following the exact same roasting method; you’re only changing the seasonings.
Maple and Sage
This is autumn on a plate. After seasoning with salt and pepper, brush the squash flesh with a mixture of one tablespoon maple syrup dissolved into the olive oil. Sprinkle generously with fresh sage leaves (or a pinch of dried sage if that’s what you have). The maple deepens the squash’s natural sweetness while the sage adds an herbaceous, slightly peppery note that prevents the dish from tasting one-dimensional. This pairing is particularly stunning with roasted pork or duck.
Spiced with Cumin and Chili
This variation brings heat and earthiness. Mix your olive oil with a quarter teaspoon of ground cumin, an eighth teaspoon of smoked paprika, and a tiny pinch of cayenne pepper. Brush this infused oil onto the squash flesh before roasting. The cumin adds warmth, the paprika contributes subtle smokiness, and the cayenne creates a barely-there tingle. Finish with a squeeze of fresh lime juice after roasting. This is excellent alongside slow-cooked chicken or as part of a grain bowl with black beans and cilantro.
Garlic and Rosemary
If you love robust herb flavors, this is your version. Mince two cloves of fresh garlic very finely and mix into your olive oil along with one tablespoon of fresh rosemary leaves (or one teaspoon dried). The garlic caramelizes alongside the squash, becoming sweet and mellow rather than sharp. Rosemary is assertive enough to stand up to the roasted squash without getting lost. This works beautifully with roasted lamb or alongside hearty grain dishes.
Parmesan and Black Pepper
This keeps things simple but elevated. Roast the squash using the basic method with just salt and pepper. In the last minute of roasting, sprinkle freshly grated Parmigiano-Reggiano over the exposed flesh and return to the oven just long enough for the cheese to melt slightly and toast at the edges. A generous crack of black pepper and a tiny drizzle of good olive oil after roasting complete it. This version works as a starter course, alongside simple proteins, or as a vegetarian main when paired with a grain and a green salad.
Honey and Thyme
More refined than maple, honey creates a delicate caramelization. Drizzle each squash half with half a teaspoon of honey mixed into the olive oil, then scatter fresh thyme leaves over the top before roasting. The honey caramelizes slightly alongside the squash’s natural sugars without overpowering them. The thyme stays fresh and bright. Serve this alongside white fish or poached chicken for an elegant, understated flavor profile.
Miso and Ginger
This brings umami and warmth. Mix one tablespoon of white or red miso with your olive oil (thinning it slightly with a teaspoon of water if it’s very thick) and brush onto the squash before roasting. Add a quarter teaspoon of ground ginger to the salt-and-pepper seasoning. The miso deepens during roasting, developing savory complexity; the ginger adds gentle heat. This is stunning with roasted salmon or alongside a stir-fried vegetable medley.
Storage and Make-Ahead Tips
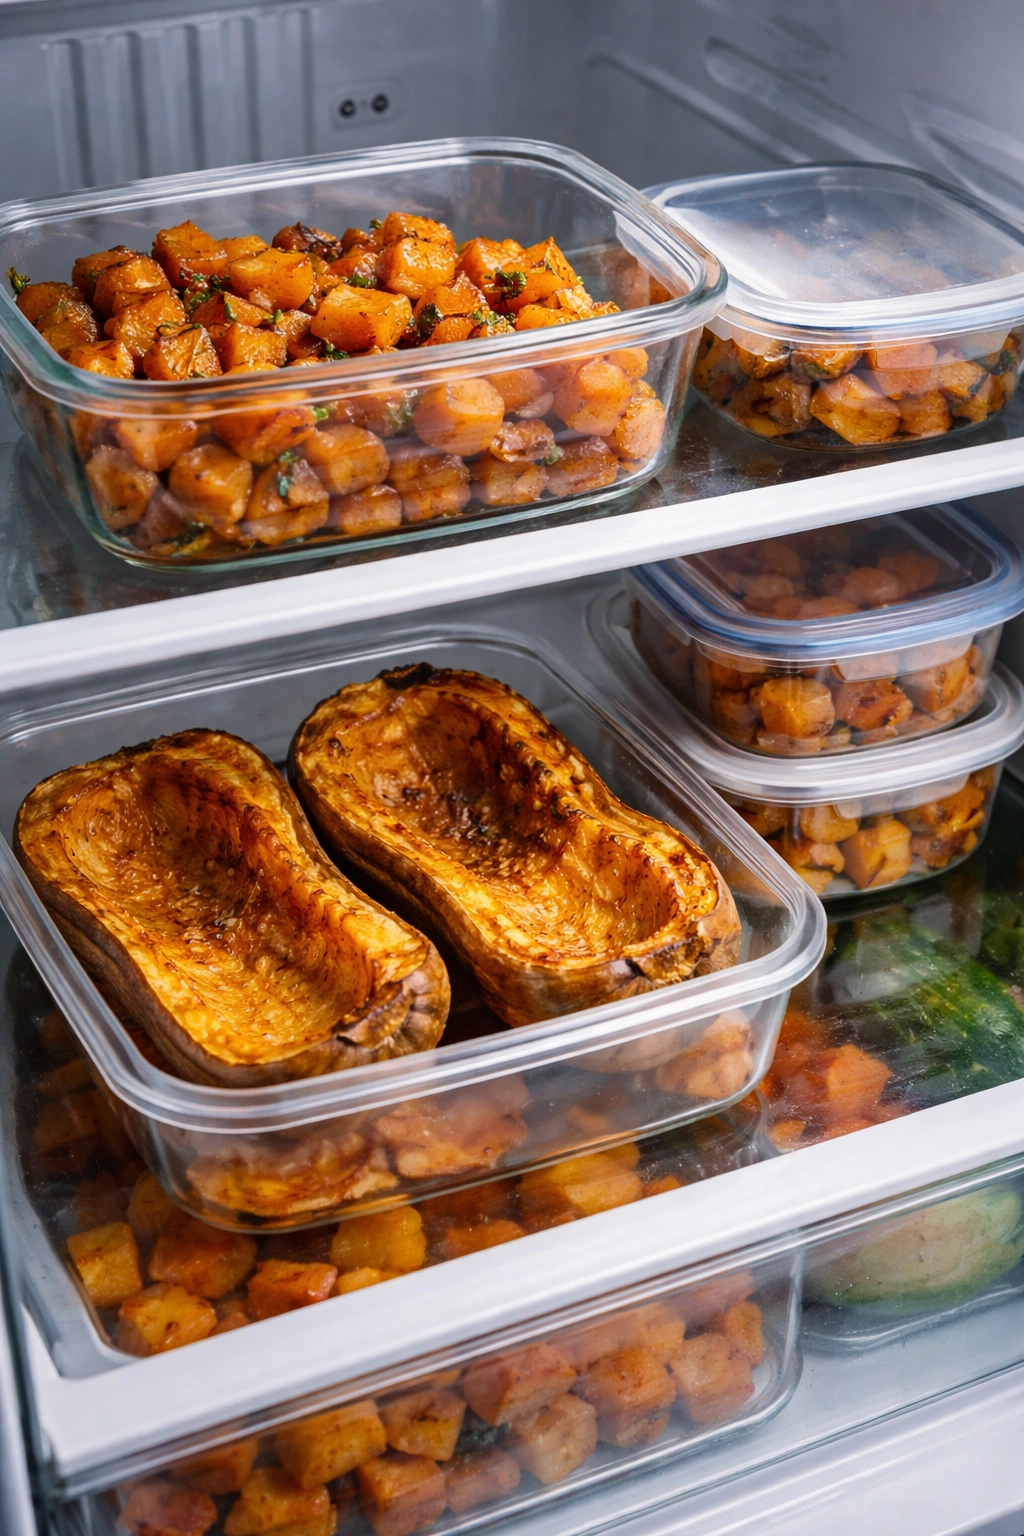
The beauty of roasted squash extends well beyond the initial cooking. It stores beautifully and reheats without texture degradation, which makes it perfect for meal prep or cooking extra portions during a less busy evening to rely on later in the week.
Storing Roasted Squash at Room Temperature: If your kitchen is a typical room temperature (68 to 72°F), roasted squash keeps in an airtight container for up to four hours after cooking. This window is perfect if you’re cooking dinner and need to hold it for a bit before serving.
Refrigerator Storage: Roasted squash keeps in a sealed container in the refrigerator for four to five days. It won’t dry out as much as you might expect because the roasting process concentrates the natural moisture in the flesh. Store it either in halves (covered with plastic wrap) or scooped into a container. If you’ve added butter or cream-based toppings, the window shrinks to three days.
Freezing: Roasted squash freezes beautifully for up to three months. Cool the squash completely, scoop the flesh into freezer-safe containers or bags (removing as much air as possible), and label with the date. When you’re ready to reheat, thaw in the refrigerator overnight and reheat gently in a 350°F oven for about 10 minutes, covered with foil to prevent over-drying. Alternatively, you can reheat from frozen in a microwave at 50% power for 5 to 7 minutes, checking partway through.
Make-Ahead Strategy for Weeknights: If you roast a large batch of squash on a weekend, you’ve essentially created multiple easy weeknight sides without additional effort. Divide the roasted squash into portions, store in your refrigerator, and reheat individual servings as needed throughout the week. You can change the flavor profile on serving by adding different finishing touches — drizzle with hot honey one night, finish with a sprinkle of Parmesan the next, add fresh herbs the night after.
Partially Cooked Squash: If you’re prepping squash in advance but want maximum freshness, you can cut and scoop your squash, season it, arrange it on a baking sheet, wrap tightly, and refrigerate for up to one day. When dinner time arrives, simply pop it into a preheated 400°F oven; it will take about the same amount of time as cooking fresh squash.
Serving Ideas and Perfect Pairings
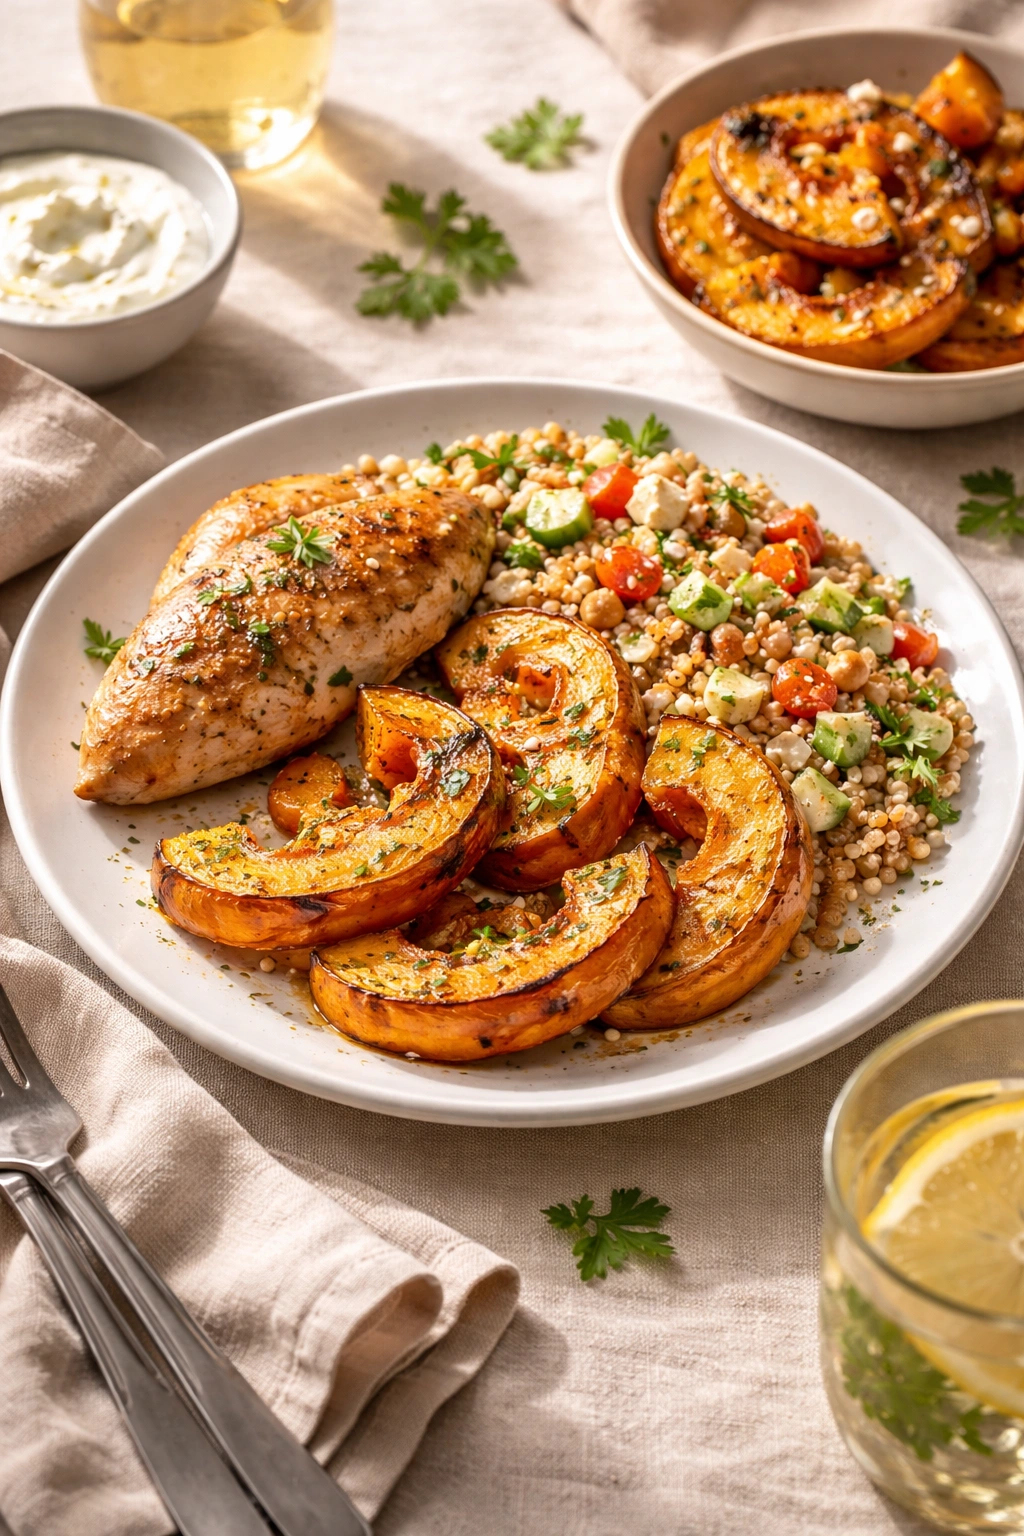
Roasted squash’s mild sweetness and creamy texture make it extraordinarily versatile at the table. It works as well with simple proteins as it does in composed grain bowls or vegetarian meals.
Alongside Roasted Proteins: Roasted squash pairs beautifully with virtually any roasted chicken preparation. The contrast between the savory, browned exterior of roasted chicken and the sweet, buttery flesh of roasted squash creates natural balance on the plate. It’s equally lovely alongside roasted pork, lamb chops, or duck. The key is that both elements can share the same oven space and roasting temperature, making meal planning efficient.
With Grain Bowls: A simple bowl of grain (farro, quinoa, wild rice, or couscous) becomes more interesting with the addition of roasted squash. Add a simple dressed green or raw vegetable, a source of protein (legumes, grilled fish, or a poached egg), and you have a complete meal. The roasted squash adds natural sweetness and textural contrast to bowls that might otherwise feel monotonous.
As Part of a Vegetarian Meal: Roasted squash with crispy chickpeas or roasted tofu and a generous salad of bitter greens creates a filling, nutritionally complete vegetarian dinner. The sweetness of the squash balances the earthiness of legumes and the bitterness of greens like radicchio or mustard greens.
Alongside Simple Fish: White fish — halibut, cod, flounder, or sea bass — benefits from roasted squash’s richness and sweetness. Serve the fish simply sautéed or baked, and let the squash be the vegetable highlight. A squeeze of lemon over both elements ties them together.
With Autumn Soups: Roasted squash works as a component alongside fall soups rather than as the main soup ingredient. Serve a spoonful of butternut squash soup alongside a piece of roasted squash flesh and crispy sage for a sophisticated first course.
As a Snack or Light Lunch: A piece of roasted squash with a small handful of nuts (pecans or walnuts) and some cheese becomes a naturally sweet, satisfying light lunch or snack. The sweetness feels almost dessert-like without actual sugar.
Common Mistakes and How to Avoid Them
Even though roasted squash is genuinely hard to ruin, there are a few missteps that people make repeatedly. Knowing about them in advance prevents disappointment.
Roasting Cut-Side Up Instead of Down: This is the most common mistake and the one that generates most complaints about roasted squash being “mushy” or “not caramelized.” Cut-side down is not intuitive — your brain says “I’m seasoning the flesh, so the flesh should face up.” Resist that instinct. Cut-side down is the rule.
Under-Seasoning at the Raw Stage: Squash is mild, and it needs proper seasoning at the beginning. Don’t be shy with salt. You’re seasoning not just a vegetable side but the entire roasted surface that will develop flavor through browning. Season enough that it might taste slightly over-salted if you were to taste the raw flesh. The roasting process will balance this.
Roasting at Too Low a Temperature: If your oven is set to 350°F, your squash will cook through before it caramelizes. You need 400°F minimum, ideally 425°F, to achieve browning. Hotter ovens are your friend here.
Cutting the Squash Into Pieces That Are Too Small: If you halve your squash into quarter or eighth-inch pieces, the edges will burn before the center is fully cooked. Stick to halves or at most large wedges. The goal is a thick piece that caramelizes on the cut side while cooking through gently.
Checking on It Too Frequently: Resist the urge to open the oven and peek. Every time you do, you release heat and extend cooking time. Commit to a closed oven until your timer indicates it’s time to check.
Forgetting About Your Oven’s Personality: Ovens vary wildly. One person’s 400°F is another person’s 380°F. If your roasted squash consistently finishes before the time guide suggests, your oven runs hot — reduce time accordingly. If it’s still undercooked after the estimated time, your oven runs cool — extend your roasting time or boost temperature by 25°F next time.
Not Letting It Cool Slightly Before Serving: Roasted squash emerges from the oven extremely hot, and its texture is best appreciated when it’s just above room temperature. The flesh is most creamy and pleasant when it’s rested for 5 to 10 minutes. Serving it steaming hot means you’ll burn your mouth and miss some of the subtle flavor development.
Final Thoughts
Roasted squash deserves the permanent, reliable spot in your weeknight cooking that it hasn’t yet earned. It asks for almost nothing — a cut squash, a brush of oil, a handful of salt — and it delivers something that tastes far more complex and cared-for than those minimal inputs suggest.
The secret, of course, is the roasting method itself. That cut-side-down approach that creates caramelization, that high heat that coaxes sweetness from an inexpensive vegetable, that hands-off cooking that lets your oven handle the heavy lifting — these are genuinely valuable techniques that work every single time. Once you’ve made roasted squash this way three times, you won’t need to check a recipe again.
More importantly, once roasted squash becomes a regular part of your rotation, you’ll notice something shift about your weeknight meals. They’ll feel more intentional, more thought-through, less like you defaulted to the easiest side dish available. You’ll have a vegetable side that works alongside anything, that actually tastes better the next day, that feels elegant without requiring any special technique. You’ll have made something worth serving, not just something that happened to be on the plate.
That’s the real power of mastering a simple technique. It doesn’t just add one dish to your repertoire — it changes how you approach the entire meal.