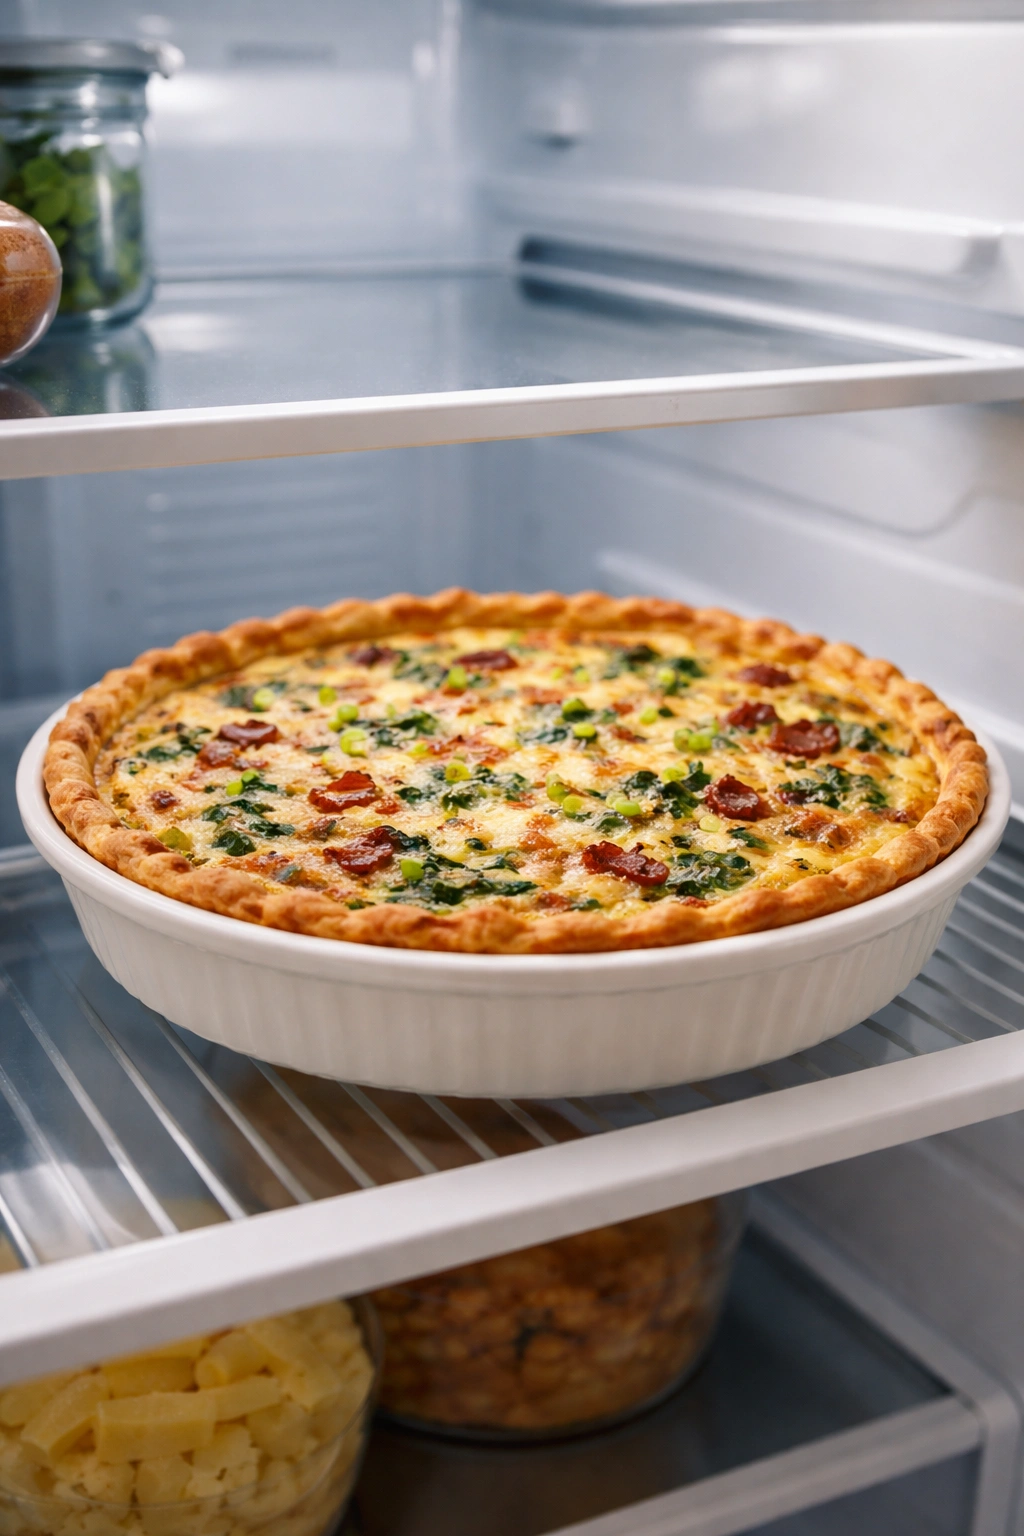
There’s a special kind of magic in waking up knowing breakfast is already done. No scrambling. No cleanup. Just a beautiful, perfectly cooked quiche waiting in your refrigerator—golden, fragrant, and ready to feed your family or yourself with minimal effort. Make-ahead quiche transforms the chaos of busy mornings into something manageable, and honestly, it tastes better than rushed eggs ever could.
The beauty of a quiche designed for make-ahead assembly is that it actually improves when you give it time. The flavors meld together overnight, the filling sets up with a silky texture that’s impossible to rush, and you can bake it straight from the refrigerator without any special adjustment. Whether you’re feeding a crowd before a hectic week, prepping individual portions for grab-and-go breakfasts, or creating something special for a weekend brunch, a prepared quiche eliminates the decision paralysis of breakfast and delivers something genuinely impressive without the stress.
The strategy here isn’t just about convenience—it’s about understanding how quiche works at a technical level. A custard-filled tart benefits from cold time before baking. The egg mixture hydrates and fully incorporates, the flavors develop, and the crust doesn’t get overworked. You’ll actually get better, more tender results by planning ahead than by making your quiche and baking it the same day. This is the rare case where laziness and excellence align perfectly.
Why Make-Ahead Quiche Is the Ultimate Breakfast Solution
Quiche represents the intersection of elegant and effortless, and the make-ahead version tips the scale decisively toward effortless. Once your quiche is assembled and waiting in the fridge, you’ve essentially finished the hardest part of breakfast. In the morning, you simply turn on the oven, let it bake for 35 to 40 minutes, and everything else can wait.
This approach eliminates food decision anxiety during hectic mornings. You can’t oversleep and skip breakfast when it’s already sitting there waiting to be heated. You can’t convince yourself that coffee and a granola bar count as nutrition when you have an entire quiche full of vegetables, protein, and cheese at arm’s reach. The make-ahead quiche becomes a guarantee—a failsafe for mornings when everything else falls apart.
Beyond the morning efficiency, there’s real nutritional advantage here. Quiche by its nature combines eggs (complete protein), dairy (calcium and fat-soluble vitamins), vegetables (fiber and micronutrients), and often meat (additional protein and iron). A single slice provides sustained energy through the morning because it includes all three macronutrient categories. You’re not eating empty carbs or relying on caffeine to power through until lunch—you’re eating actual food that fuels your body properly.
There’s also genuine cost advantage to batch-preparing breakfast this way. A quiche feeds six to eight people with minimal waste, and the per-serving cost of a homemade quiche (even when you include a premium crust and quality fillings) is substantially lower than stopping for a coffee shop breakfast. Make one quiche on Sunday evening, and you’ve essentially solved breakfast for most or all of the following week.
Choosing Your Crust: Homemade vs Prepared
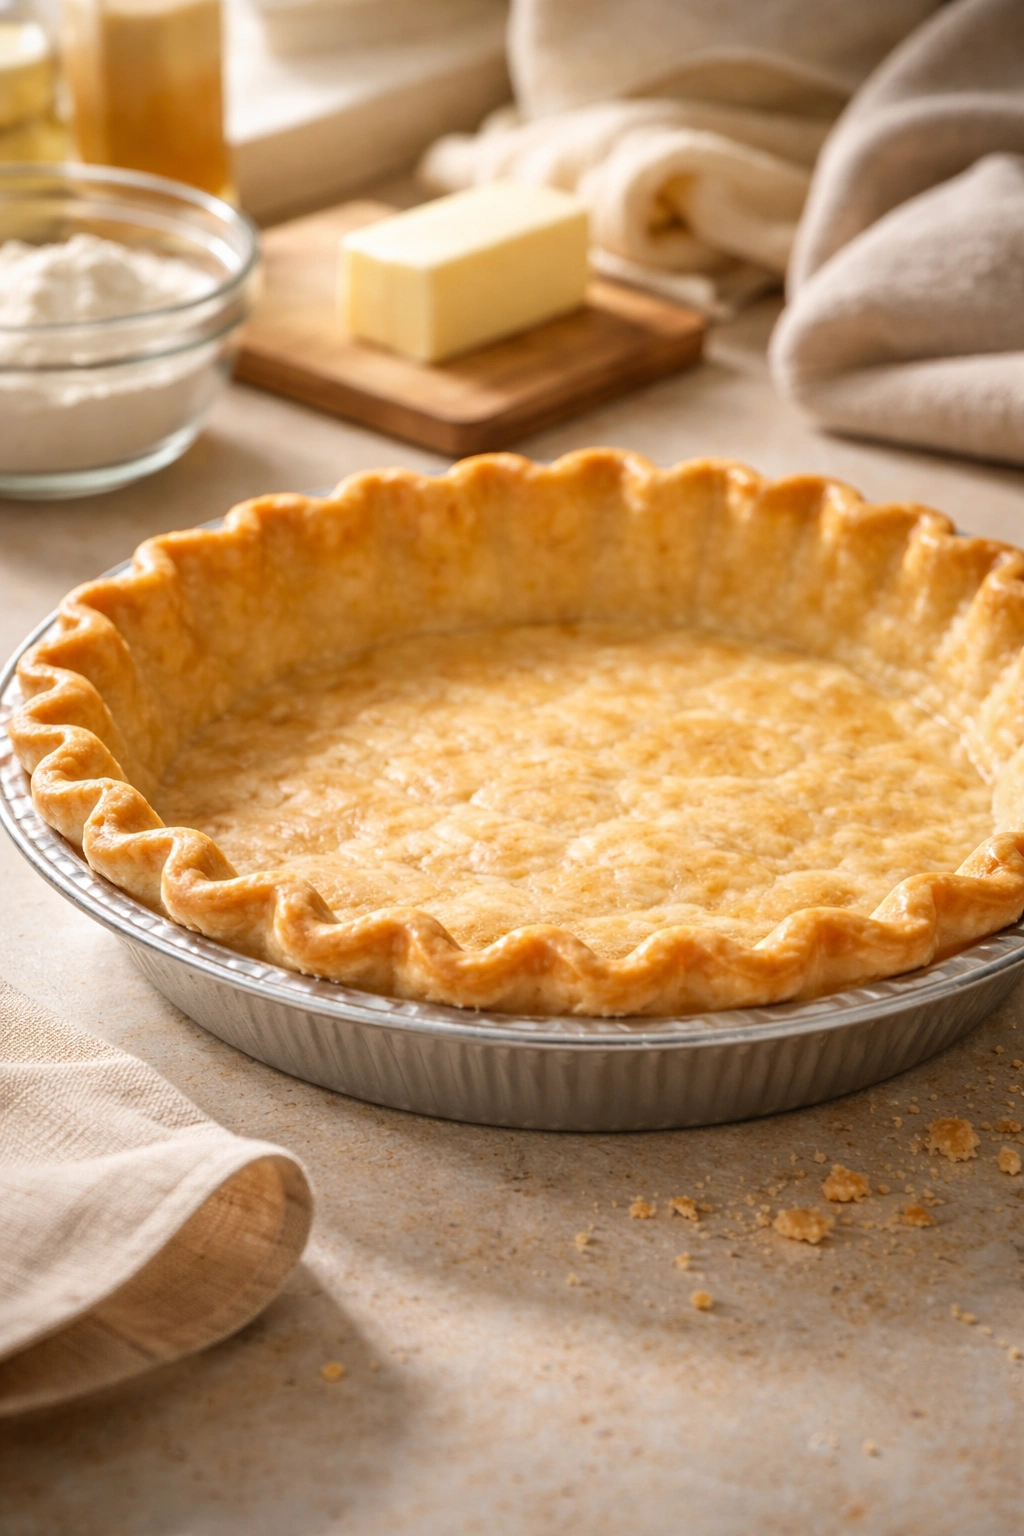
The crust represents your first decision point, and it’s genuinely worth thinking through rather than defaulting automatically to either option. A homemade crust is completely achievable if you have 15 minutes to mix dough and 30 minutes to chill it before assembling your quiche, and it delivers superior flavor and texture—a buttery, flaky baseline that elevates everything that sits on top of it.
A quality store-bought crust is not a compromise; it’s a practical tool. If you’re using your quiche specifically to save time, spending 45 minutes to an hour making pie dough defeats part of the purpose. Frozen pie crusts have improved dramatically over recent years, and the difference between a grocery store crust and a homemade one matters far less than the quality of your fillings and custard. Choose the option that fits your actual schedule and stress level, not the option you think you “should” choose.
The Homemade Crust Advantage
A homemade crust gives you complete control over butter content, salt level, and texture. You can make it with cold butter to create a flakier result, or you can use a hot-water method to create a more tender, shortbread-style crust. You can flavor it with herbs, cheese, or spices tailored to your filling. The crust can be made several days ahead and frozen in the pan, ready for filling when you’re ready to assemble.
The Prepared Crust Advantage
Store-bought frozen crusts come fully fitted to a pie tin, eliminating the fitting step entirely. There’s no blind baking required if you’re using a quality brand. They thaw in the refrigerator while you prep your fillings, and they bake up reliably without the skill required for homemade pastry. For a busy person prioritizing the make-ahead convenience angle, this is the rational choice.
Building Your Perfect Quiche Custard Base
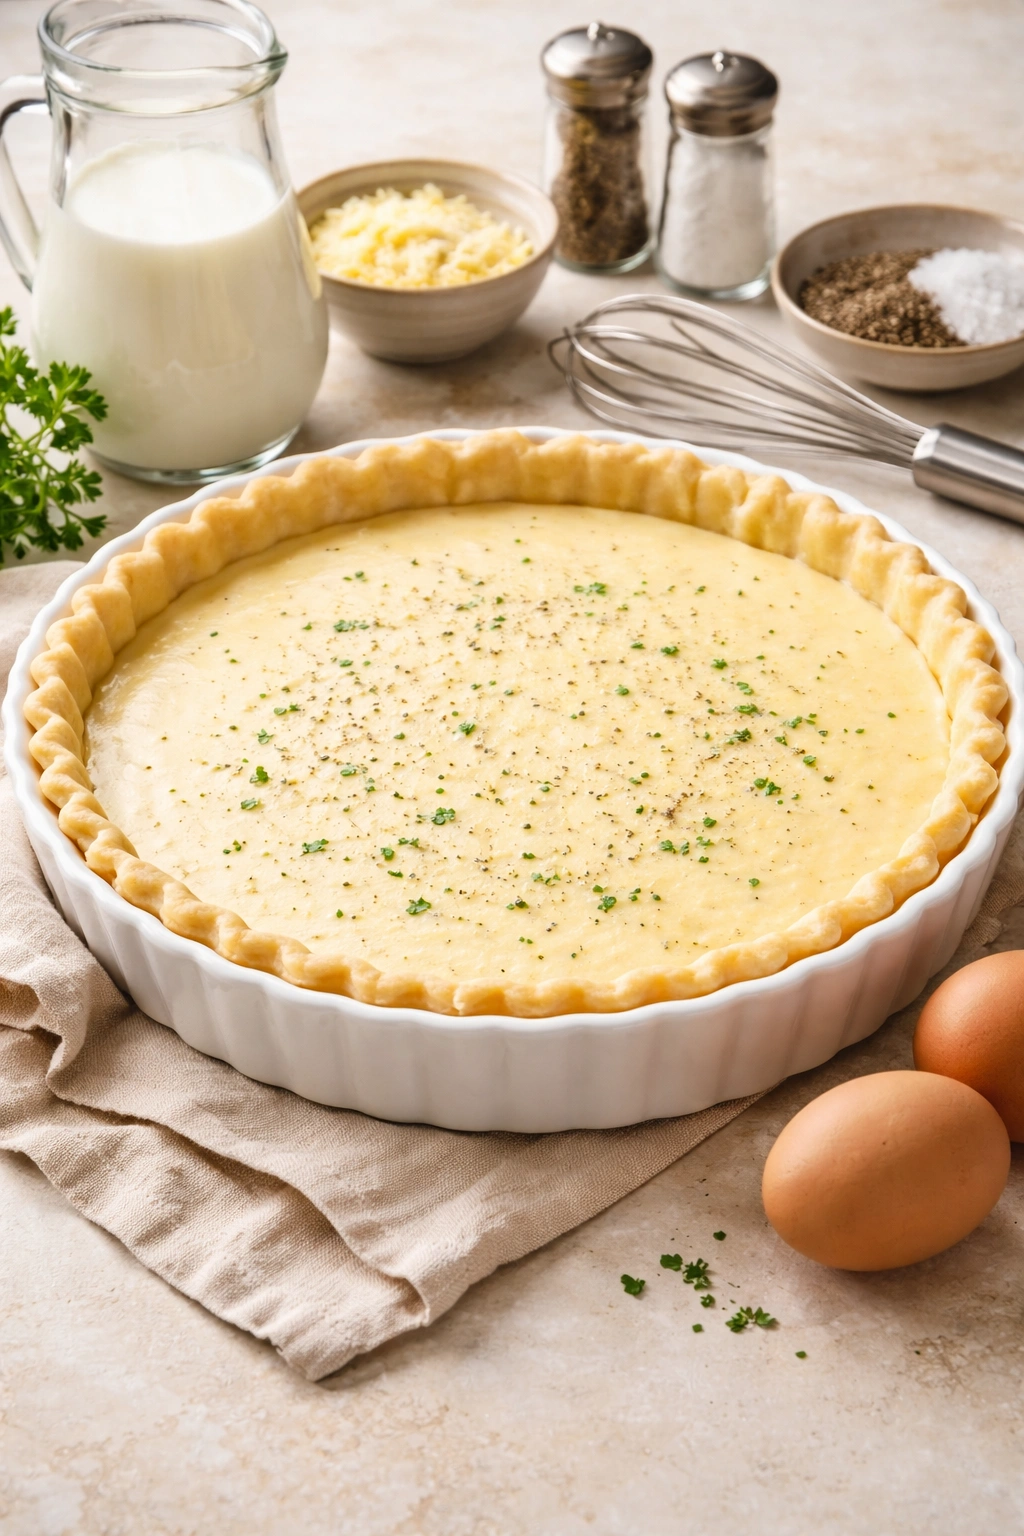
The custard is truly the heart of quiche—it’s what transforms a filling of vegetables and cheese into something creamy, rich, and genuinely craveable. The ratio matters here, and it’s one of those formulas worth memorizing because once you understand it, you can build any quiche variation you want without guessing.
The ideal quiche custard typically uses one large egg per ½ cup of liquid (either cream, milk, or a combination). If you’re making a 9-inch quiche (which is the standard size), you’ll use four to six eggs depending on your other ingredients, plus one cup of cream or milk (or a 50-50 blend of both). Some recipes lean heavily toward cream for richness, while others use mostly milk for a lighter result. The make-ahead angle actually benefits from slightly less cream and slightly more milk, because the mixture hydrates better during the overnight refrigeration and sets up with a more tender texture.
Seasoning your custard might sound optional, but it’s genuinely critical. Salt brings out the flavor of the eggs and vegetables. Nutmeg—just a small pinch, barely perceptible—adds a subtle complexity that people often can’t identify but immediately notice by its absence. White pepper (rather than black) keeps the visual presentation clean without dark specks. Some quiches benefit from a small pinch of cayenne to add depth without heat. These seasonings should be whispered, not shouted; the goal is enhancement of the egg’s natural flavor, not a spiced custard.
The Best Fillings for Make-Ahead Quiche
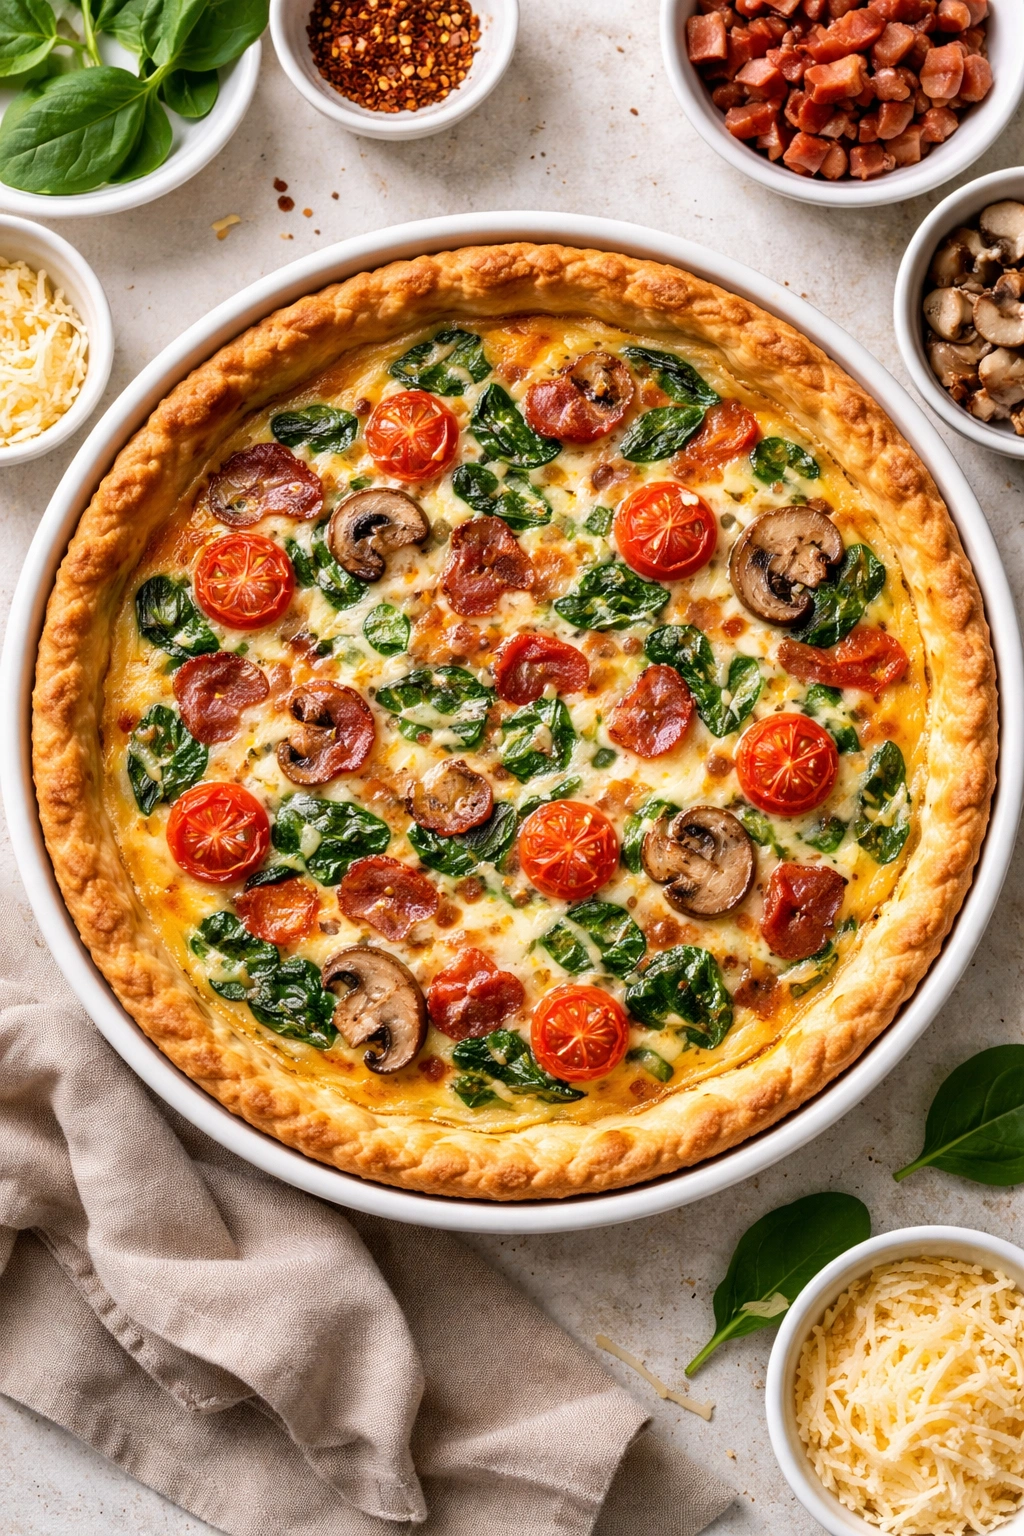
The most successful quiches balance vegetables, protein, and cheese with intention—not just throwing in whatever sounds good. Every ingredient should contribute either flavor, texture, or nutrition (ideally multiple). Your filling should occupy roughly 40 to 50 percent of the pie’s volume, leaving enough room for the custard to set properly. Too much filling and you get a crowded quiche that doesn’t bake through evenly; too little and you have custard with some vegetables scattered in it rather than a truly integrated filling.
Vegetables work best when they’ve been precooked or at minimum partially dried. Raw vegetables release water during baking, which dilutes your custard and prevents it from setting properly. Sauté your vegetables briefly in butter or oil before adding them to your crust, or roast them until they’re slightly caramelized for deeper flavor. Vegetables with high water content—tomatoes, zucchini, mushrooms—should be cooked down until they lose significant moisture before incorporating them.
Proteins should be cooked through and chopped into pieces that distribute evenly throughout the quiche. Bacon is traditional for excellent reason: it cooks crisply, releases fat that flavors the custard, and doesn’t require chopping into tiny pieces. Sausage works beautifully if you crumble it as it browns and drain excess fat. Ham, salmon, or diced chicken all work provided they’re cooked, seasoned, and cut into appropriately sized pieces. The protein shouldn’t dominate the texture of the quiche; you want enough to provide substance and flavor, not so much that you’re essentially eating a meat pie that happens to contain eggs.
Cheese selection influences both flavor and texture. Cheddar, gruyère, and fontina melt into the custard and add richness. Feta and goat cheese maintain their shape somewhat and add tanginess. A combination of cheeses (often a melting cheese plus a more distinctive one) creates greater flavor complexity. The total cheese amount should be roughly one to 1.5 cups for a standard 9-inch quiche—enough to add significant flavor and richness without making the custard grainy from too much fat.
How to Prep and Store Your Quiche Before Baking
This is where the make-ahead magic actually happens. Once your crust is fitted into the pan, your vegetables are prepared, and your custard is mixed, you’re ready for the assembly that sets everything up for success.
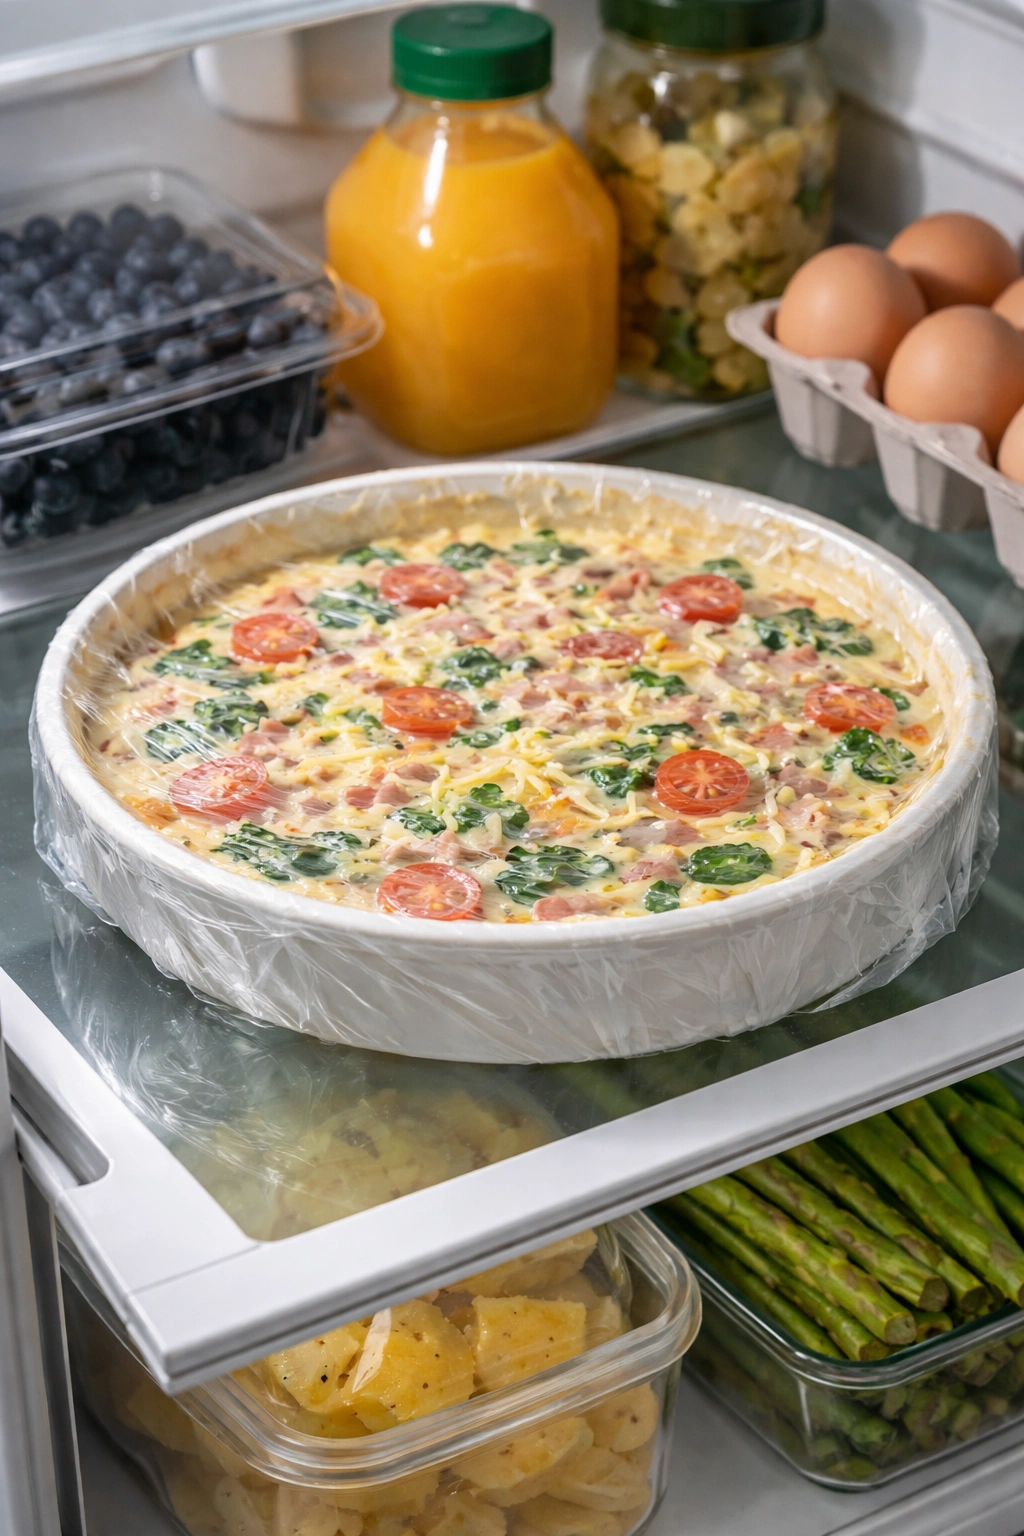
Layer your fillings into the prepared crust strategically. Start with any ingredients that would absorb moisture (mushrooms, zucchini, tomatoes), then add heartier items (broccoli pieces, asparagus), then cheese, then any crisped proteins like bacon. This stratification helps ensure that water from vegetables doesn’t pool at the bottom of your custard. Pour your prepared custard slowly and deliberately over all the fillings, giving everything time to settle and ensuring the custard seeps into gaps. The custard should reach about ¾ inch from the top edge of the crust to prevent overflow during baking.
Once assembled, cover your quiche tightly with plastic wrap and refrigerate for at least 2 hours, but ideally overnight. This refrigeration time is when all the magic happens: the eggs begin to set, the flavors meld, the vegetables continue to release moisture that gets absorbed into the custard, and the filling becomes unified rather than separate components. If you’re making your quiche the night before and baking it the next morning, you can even store it up to 16 hours in the refrigerator without compromising texture or food safety.
The quiche can also be frozen before baking if you want to extend your make-ahead timeline. Assemble the quiche, cover it tightly with plastic wrap, then top with a layer of aluminum foil (this prevents freezer burn and ice crystals that can make the crust soggy). Label it with the date and contents. It will keep frozen for up to one month. When you’re ready to bake, transfer it directly from the freezer to the oven without thawing—simply add 10 to 15 minutes to the baking time and cover the top loosely with foil if it’s browning too quickly.
Baking Your Quiche From Chilled State
This is genuinely important: a chilled quiche bakes differently than a room-temperature one, and that’s entirely to your advantage. The cold filling means the crust will start setting before the custard heats through, which prevents a soggy bottom. The slower heat penetration means the eggs will cook more gradually and set up creamier rather than rubbery.
The Perfect Oven Setup
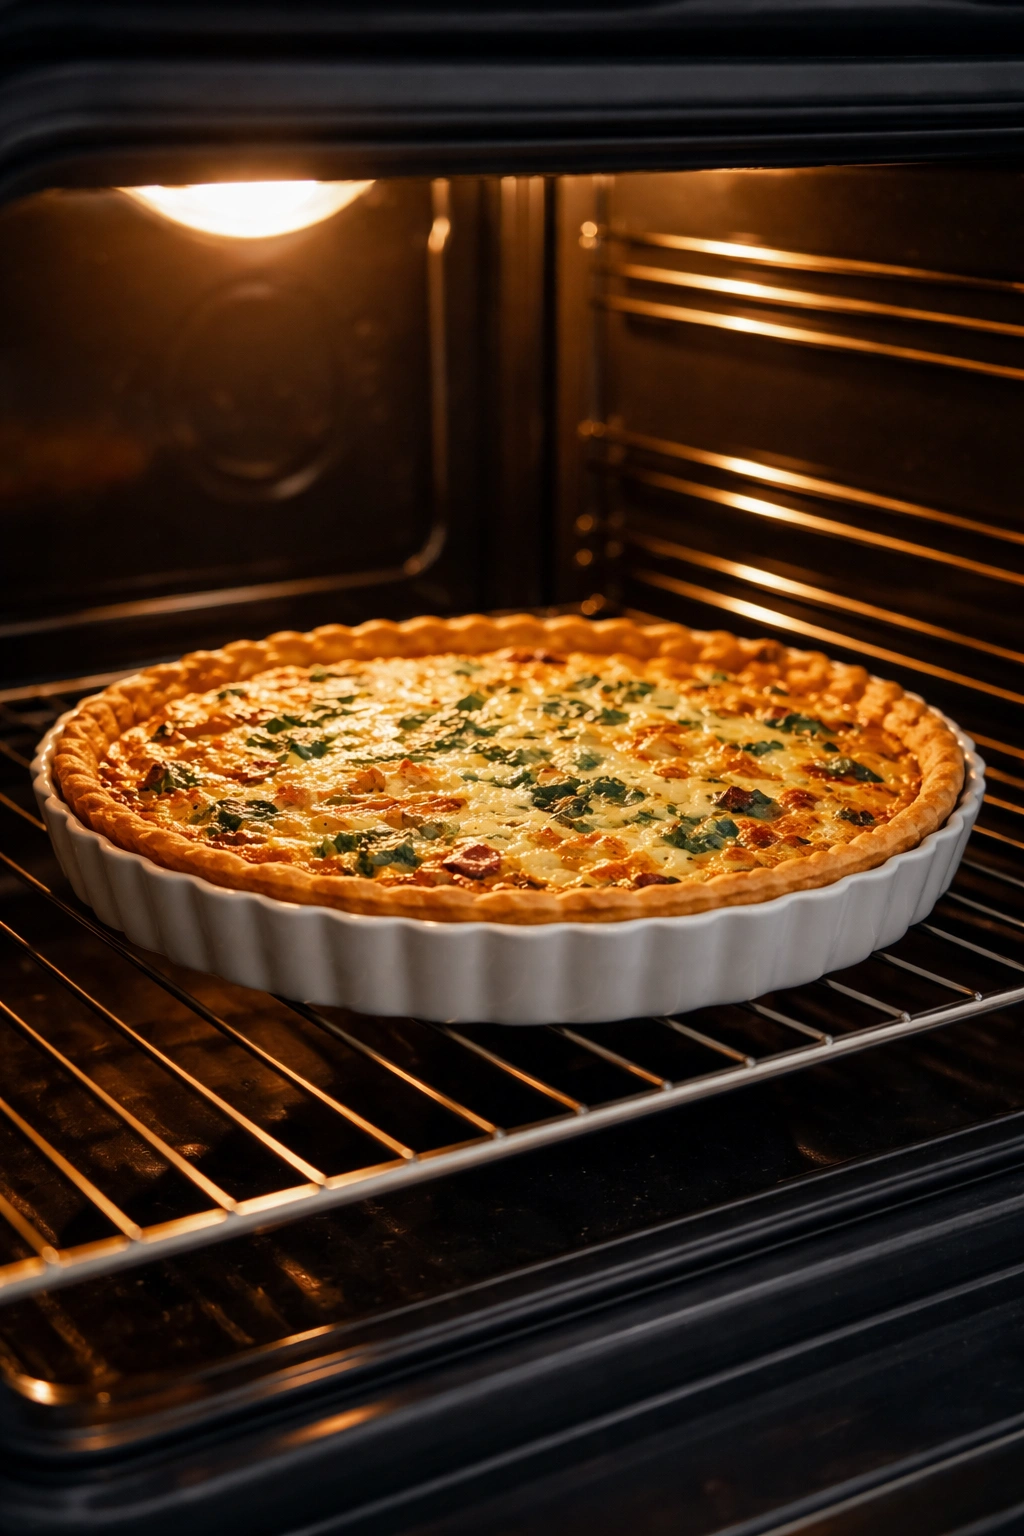
Position your oven rack to the lower third position—this ensures the bottom of your crust receives direct, consistent heat and bakes through completely. Preheat your oven to 375°F (190°C) for a standard refrigerated quiche. If your quiche is frozen, start at 350°F (175°C) to prevent the filling from cooking too fast before the crust is done.
Place your quiche directly on the preheated oven rack (not on a baking sheet, which insulates the bottom) or on a preheated baking sheet if your oven is prone to heat spots or uneven baking. Bake for 35 to 40 minutes for a refrigerated quiche, until the edges are set and lightly golden but the very center still jiggles ever so slightly when you gently shake the pan. It will continue to cook from residual heat after you remove it from the oven, setting up to perfect doneness as it cools.
The visual cue is more reliable than time here. You’re looking for a quiche where most of the filling is visibly set but the center—an area roughly the size of a quarter in the middle of the pie—still has the slightest jiggle. This wiggle indicates the center is just barely set, meaning your slices will be creamy rather than firm throughout. If you bake until the entire quiche is completely still and there’s no jiggle whatsoever, you’ve overcooked it and the eggs will be rubbery.
A Complete Make-Ahead Quiche Recipe
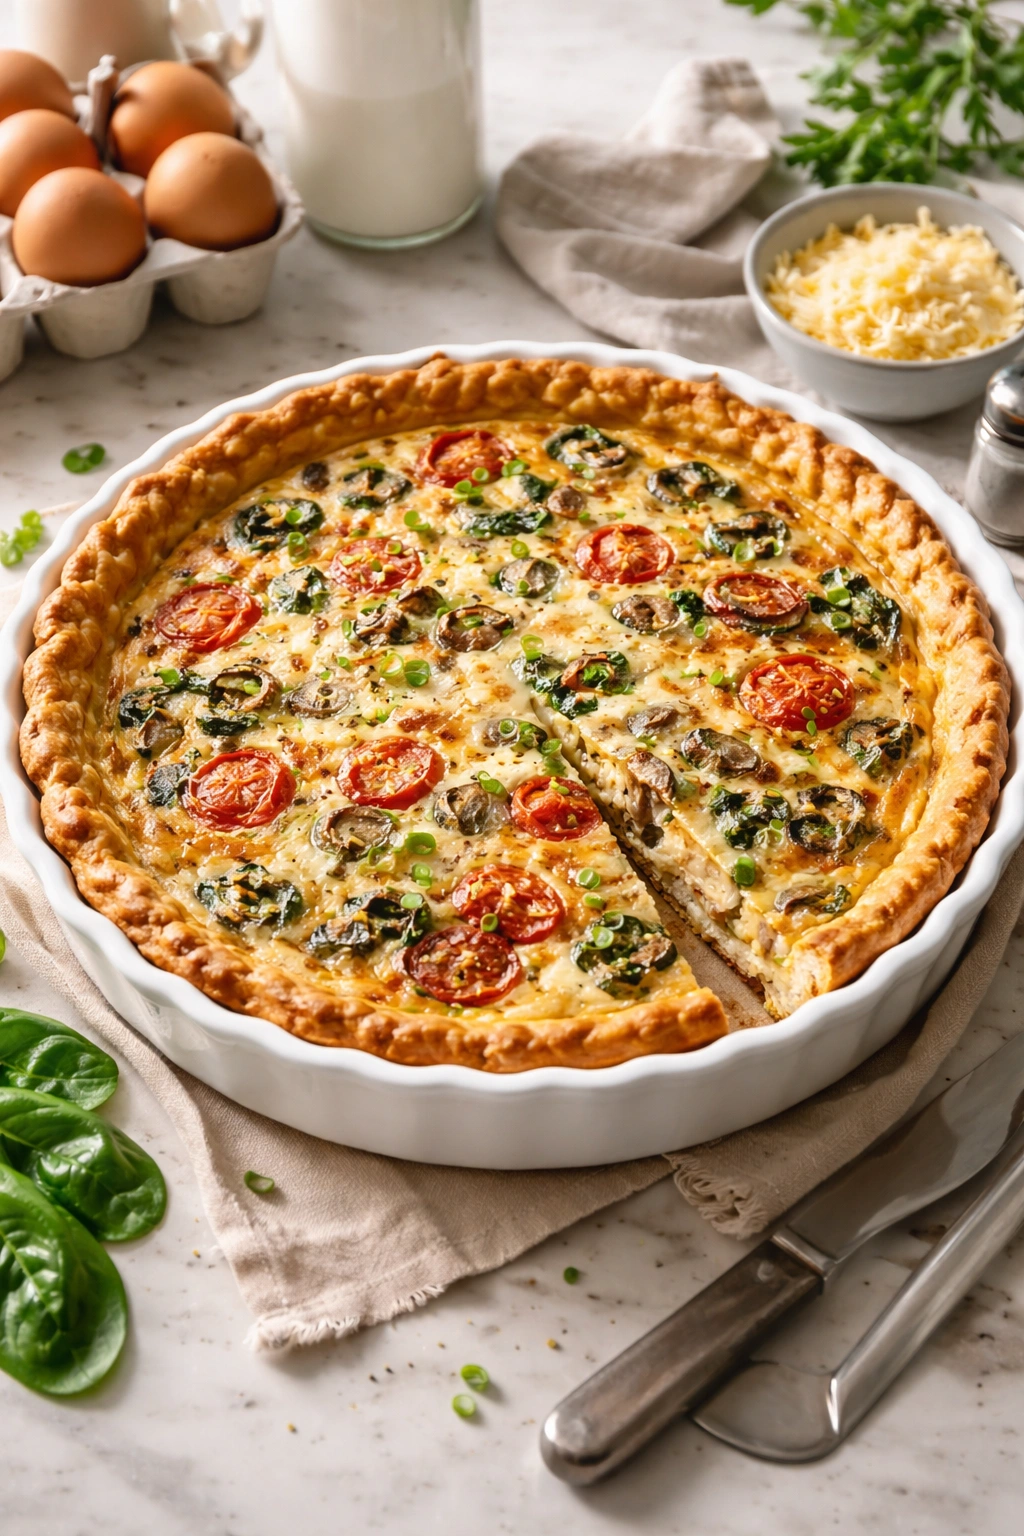
This recipe uses a classic combination of vegetables and cheese that works beautifully for both weekday breakfast and weekend brunch. It’s deliberately designed to assemble the night before and bake in the morning.
Yield: Serves 6 to 8 | Makes one 9-inch quiche
Prep Time: 30 minutes
Cook Time: 40 minutes
Total Time: 1 hour 10 minutes active + overnight refrigeration
Difficulty: Beginner — This requires no special equipment or advanced cooking skills. If you can sauté vegetables and whisk eggs, you can make this quiche perfectly.
Ingredients
For the Crust:
- One 9-inch frozen pie crust (or homemade, if preferred) — thawed in the refrigerator for at least 4 hours before assembling
For the Fillings:
- 2 tablespoons unsalted butter
- 1 medium yellow onion, diced (about 1 cup)
- 8 ounces fresh mushrooms (cremini or baby bella), sliced (about 3 cups)
- 1 red bell pepper, diced (about ¾ cup)
- 8 ounces fresh spinach (about 4 cups loosely packed), roughly chopped
- 1 teaspoon fine sea salt (divided — ½ teaspoon for cooking vegetables, ½ teaspoon for custard)
- ½ teaspoon freshly ground black pepper (divided)
- 1¼ cups whole milk
- ¾ cup heavy cream
- 5 large eggs, room temperature
- 2 tablespoons unsalted butter, melted (for brushing the crust)
- 1 cup sharp cheddar cheese, shredded (about 4 ounces)
- ½ cup gruyère cheese, shredded (about 2 ounces)
- ¼ teaspoon ground nutmeg (freshly grated if possible)
- Pinch of white pepper
Prepare the Pan and Vegetables
This should be done the morning or afternoon before you want to bake:
-
If you’re using a frozen crust, remove it from the freezer and allow it to thaw in the refrigerator for at least 4 hours, ideally overnight. A completely thawed crust is dramatically easier to work with and less likely to crack during assembly.
-
In a large skillet over medium heat, melt 2 tablespoons of unsalted butter. Once the foam subsides, add the diced onion and cook for 3 to 4 minutes, stirring occasionally, until the onion is translucent and beginning to soften at the edges.
-
Add the sliced mushrooms to the pan with the onion and increase the heat slightly to medium-high. Cook for 5 to 6 minutes, stirring every minute or so, until the mushrooms have released their liquid and the liquid has mostly evaporated, leaving the mushrooms lightly golden and tender. This step is critical — it removes moisture that would otherwise weep into your custard during baking.
-
Add the diced red bell pepper to the pan and cook for 2 more minutes, just until it begins to soften.
-
Add the chopped fresh spinach in handfuls, stirring between additions, until it’s all wilted into the pan — this takes about 2 minutes total. Season the vegetable mixture with ½ teaspoon of fine sea salt and ¼ teaspoon of black pepper. Taste and adjust seasoning if needed.
-
Transfer the cooked vegetables to a bowl and spread them on a plate to cool slightly. It’s important that the vegetables cool to room temperature before you combine them with your custard, or the heat will begin cooking the eggs prematurely.
Prepare the Custard
While your vegetables are cooling:
-
In a medium bowl, whisk together the whole milk and heavy cream until combined.
-
Add 5 large room-temperature eggs to the milk mixture and whisk vigorously for 1 to 2 minutes, until the eggs are completely incorporated and the mixture is uniform and pale. The warmth of room-temperature eggs emulsifies more readily with the dairy than cold eggs would.
Advertisements -
Season the custard with the remaining ½ teaspoon of fine sea salt, ¼ teaspoon of black pepper, the ¼ teaspoon of ground nutmeg, and the pinch of white pepper. Whisk everything together thoroughly until all seasonings are evenly distributed. Do not skip the nutmeg — even though you won’t taste it distinctly, it adds a subtle warmth and complexity that significantly elevates the finished quiche.
-
Combine the shredded cheddar and gruyère cheeses in a small bowl.
Assemble the Quiche
Now everything is ready for assembly:
-
If you’re using a frozen crust, place it on a baking sheet. If you made homemade crust, fit it into a 9-inch pie pan. Using a pastry brush, brush the inside of the crust lightly with the 2 tablespoons of melted butter. This creates a protective layer that helps prevent a soggy bottom crust. Allow this to set for 1 minute.
-
Distribute the cooled cooked vegetables evenly across the bottom of the crust, pressing down gently so they form an even layer. Sprinkle the cheese mixture evenly over the vegetables.
-
Pour the prepared custard slowly and deliberately over the vegetables and cheese, starting from the center and working outward, allowing the custard to seep into the gaps between vegetables. The custard should reach approximately ¾ inch below the rim of the crust — this prevents overflow during baking while ensuring enough custard to set properly.
-
Give the filled pie a gentle quarter-turn on the baking sheet to ensure any unsettled ingredients settle evenly.
Refrigerate Before Baking
- Cover the assembled quiche tightly with plastic wrap, pressing it directly against the crust rim to prevent the edges from drying out. Refrigerate overnight, or for at least 2 hours if you’re baking it the same day. This refrigeration time is essential — it allows the eggs to begin setting, the flavors to meld, and the vegetables to soften further as they continue releasing moisture into the custard.
Bake the Quiche
The next morning, or when you’re ready to bake:
-
Position your oven rack to the lower third of the oven and preheat to 375°F (190°C). Allow the oven to come to full temperature for at least 15 minutes.
-
Remove the plastic wrap from your quiche. Place the quiche on the preheated baking sheet directly onto the lower oven rack. Do not use an insulating baking sheet — you want direct, consistent heat on the bottom of the crust.
Advertisements -
Bake for 35 to 40 minutes. The edges of the quiche will puff up and set, turning light golden brown. The center will continue to cook. You’re looking for a quiche where the edges and outer portions are completely set and firm, but the very center — an area roughly 2 inches in diameter in the middle of the pie — still has the slightest barely-perceptible jiggle when you gently shake the pan. This small wobble indicates the center is just set, and the quiche will continue cooking from residual heat after you remove it from the oven, reaching perfect creamy doneness.
-
Remove the quiche from the oven and set it on a wire cooling rack. Allow it to cool at room temperature for at least 10 minutes before slicing. Do not slice into a hot quiche — the filling is still setting and will fall apart on your server. A 10-minute rest allows the center to firm up just enough to slice cleanly.
-
Slice the cooled quiche into wedges and serve immediately, or allow it to cool completely and store for serving later.
Common Mistakes That Prevent Perfect Results

Most quiche failures boil down to a few predictable errors, and understanding them is half the battle in avoiding them. The good news is that once you know what to watch for, they’re entirely preventable.
Soggy bottom crust happens when moisture from the fillings and custard soaks into the pastry before it has a chance to set. The remedy is threefold: cook your vegetable fillings thoroughly to remove moisture, brush the inside of your crust with melted butter as a moisture barrier, and bake your quiche on a lower oven rack where the direct heat sets the bottom quickly. Some bakers also swear by partially baking the crust at 375°F for 5 to 8 minutes before adding fillings, though this step is truly optional if you follow the moisture-removal rules above.
Rubbery, overcooked eggs result from baking the quiche too long or at too high a temperature. The eggs continue cooking after you remove the quiche from the oven, so you want to remove it while the very center still has that barely-perceptible jiggle. If you’ve overbaked it once, you’ll never make the mistake twice—rubbery quiche is genuinely unpleasant. Use the visual cue of that center wiggle rather than trusting time alone, because every oven bakes differently.
Custard that won’t set usually means either your egg-to-liquid ratio is off, you have way too much water-releasing vegetables in there, or you haven’t baked it long enough. Trust the visual cues: a quiche that looks set around the edges but still wobbles in the center is actually set and will continue firming as it cools. Don’t overbake it trying to eliminate that center jiggle.
Filling that separates or slides around happens when you assemble your quiche with cold custard and don’t give it time to settle before baking. The custard hasn’t started setting, so the solid ingredients shift during baking. Overnight refrigeration gives your custard time to begin setting up and anchors the fillings in place.
Crust that cracks or shrinks during baking usually means your crust was too warm when it went into the oven, or you stretched it during fitting and it returned to its original size. Always thaw frozen crusts in the refrigerator, and never stretch or manipulate a homemade crust more than absolutely necessary to fit it into the pan. A crust that feels cold when it goes into the oven will hold its shape through baking.
Storage, Reheating, and Make-Ahead Timing

The beauty of a make-ahead quiche is that it’s genuinely flexible with storage and timing. You can bake it several days ahead, refrigerate the baked quiche, and reheat it for busy mornings—or you can freeze the unbaked assembled quiche and bake it directly from frozen whenever the need arises.
If You’re Baking It the Night Before
Assemble your quiche in the afternoon or evening, cover it tightly with plastic wrap, and refrigerate overnight. In the morning, preheat your oven, remove the plastic wrap, and bake as directed—no special adjustment needed. The quiche will have had 12 to 16 hours of refrigeration, which actually improves the final texture.
If You’re Storing a Baked Quiche
A fully baked, cooled quiche keeps in the refrigerator for 3 to 4 days. Store it covered loosely with plastic wrap or in an airtight container. Do not wrap it so tightly that condensation builds up; this can make the crust soggy. Reheat individual slices by wrapping them loosely in foil and warming them in a 325°F (160°C) oven for 10 to 12 minutes, just until heated through. Alternatively, microwave a slice on 50 percent power for 1 to 2 minutes to prevent the eggs from toughening.
If You’re Freezing the Unbaked Quiche
Assemble the quiche completely, cover it tightly with plastic wrap, then top with a layer of aluminum foil. Label it with the date. Freeze it flat on a shelf for at least 2 hours to set the shape, then you can store it vertically if needed. The unbaked quiche will keep frozen for up to one month. When you’re ready to bake it, transfer it directly from the freezer to the oven without thawing. Bake at 375°F (190°C) for 50 to 55 minutes (adding 10 to 15 minutes to the standard baking time because it’s starting frozen). The top may brown quickly; cover it loosely with foil if it’s darkening before the center is set.
If You’re Freezing a Baked Quiche
A fully baked quiche freezes beautifully. Cool it completely, then wrap it tightly with plastic wrap and then foil. Label it clearly. It will keep frozen for up to 2 months. Thaw overnight in the refrigerator before reheating, or reheat directly from frozen in a 325°F (160°C) oven, tented with foil, for 25 to 30 minutes until heated through.
Variations and Flavor Combinations
Once you understand the basic structure—custard base, sautéed vegetables, cheese, and optional protein—the variations are endless. You can keep your quiche fresh and interesting across multiple weeks of breakfast without repeating the same combination.
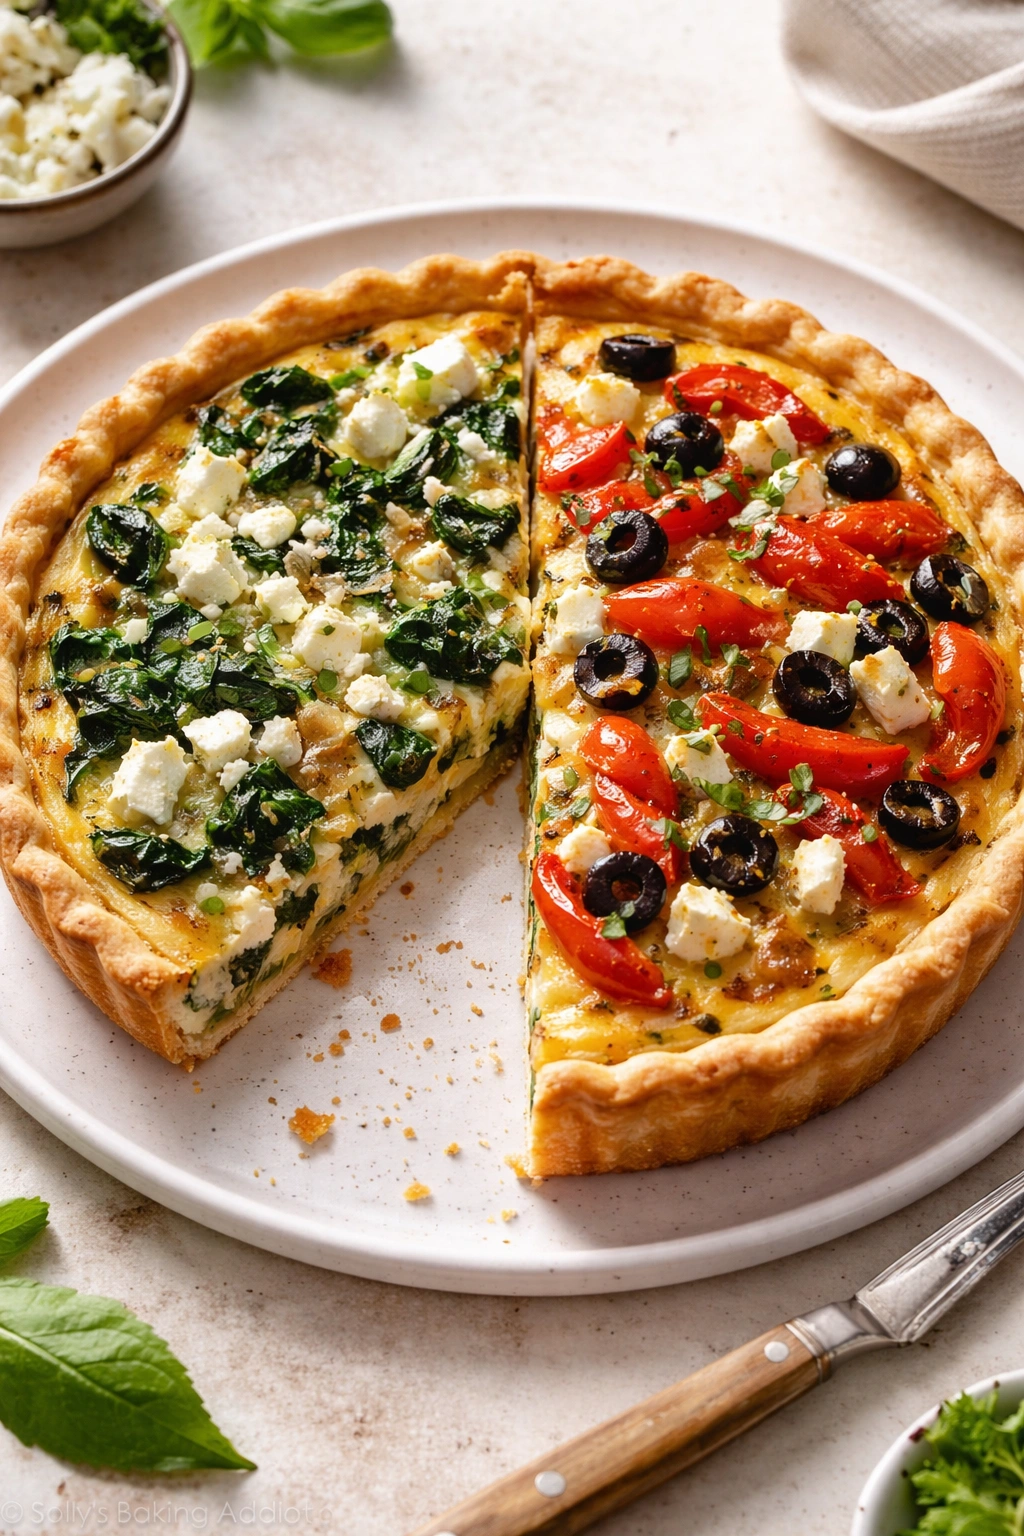
The Mediterranean Version
Replace the mushrooms and spinach with roasted zucchini, sun-dried tomatoes, and fresh basil. Use feta cheese instead of cheddar, and add a handful of kalamata olives. The combination is bright, slightly tangy, and genuinely craveable.
The Breakfast Meat Version
Skip some vegetables and add 8 ounces of cooked crumbled sausage or bacon to your filling. Combine this with sautéed onions and peppers. Use cheddar and a small amount of smoked gouda for a richer, meatier depth.
The Asparagus and Goat Cheese Version
Sauté fresh asparagus cut into 1-inch pieces with shallots and a touch of garlic. Use crumbled goat cheese and a small amount of sharp cheddar. Fresh dill or thyme stirred into the custard complements this combination beautifully.
The Broccoli and Cheddar Version
Roast broccoli florets at 425°F (220°C) until the edges are lightly charred (about 12 minutes) before assembling. This adds a subtle roasted flavor. Use sharp cheddar and a small amount of gruyère. Add a pinch of red pepper flakes to the custard for warmth.
The Caramelized Onion and Brie Version
Make this one truly special by slowly caramelizing 3 or 4 onions in butter over medium-low heat for 30 to 40 minutes until they’re deep golden and sweet. Mix with chopped fresh thyme. Use crumbled brie or camembert along with just a small amount of gruyère. This version feels luxurious and restaurant-quality.
The Vegetable Garden Version
Use whatever seasonal vegetables you have available: fresh corn kernels, zucchini, tomatoes (briefly roasted to remove moisture), carrots, or peas. Sauté everything until any excess water has evaporated. Mix cheeses—cheddar and gruyère work with almost any vegetable combination.
The Smoked Salmon Version
Add 6 ounces of smoked salmon, flaked into pieces, along with sautéed leeks and fresh dill. Use a small amount of gruyère and some crème fraîche mixed into the custard. This creates an elegant brunch-worthy quiche.
The essential rule for any variation: cook vegetables that release moisture (mushrooms, zucchini, tomatoes, leafy greens) until they’ve lost significant water, and balance rich ingredients (cream, cheese, cured meat) with lighter ones (fresh vegetables, herbs) so no single flavor overwhelms the others.
Serving Ideas and Pairing Suggestions

A quiche works beautifully as a standalone breakfast, but it’s genuinely elevated with thoughtful accompaniments. The beauty is that simple pairings actually work best here.
A crisp green salad with a bright vinaigrette cuts through the richness of the eggs and cheese, adding freshness. A simple mixed greens salad with a lemon-based vinaigrette is perfect if you’re eating your quiche for lunch, but for breakfast, a salad might feel like overkill.
Fresh fruit—berries, sliced melon, citrus segments—provides textural contrast and adds vitamins without weighing you down after breakfast. Serve it on the side or as a palate cleanser after your quiche.
Toast or bread is genuinely optional with quiche because it’s quite filling on its own, but some people enjoy a small piece of crusty bread to accompany it, especially if you’re eating it as part of a brunch.
Sparkling water, coffee, or tea pairs naturally with quiche. If you’re making this for brunch, sparkling wine is obviously a wonderful accompaniment.
Bacon or sausage on the side seems redundant if your quiche already contains bacon or sausage, but if you’ve made a vegetable-only quiche, these proteins make the meal more substantial.
A dollop of sour cream or crème fraîche on the side adds richness and tang if you enjoy that. Fresh herbs scattered on top—dill, parsley, chives—add color and a fresh finish.
The beautiful part is that quiche is genuinely satisfying and complete on its own. You don’t need much else to have a nourishing, elegant breakfast or brunch. Serve it warm, at room temperature, or cold directly from the refrigerator (all are delicious), and people will be impressed with how effortless you made it seem.
Final Thoughts
A make-ahead quiche is one of those dishes that pays dividends throughout an entire week. The hour of assembly time on a calm evening translates into calm mornings where breakfast is genuinely solved. You’re not standing in your kitchen at 7 a.m. trying to figure out what to eat; you’re simply slicing something delicious that you prepared when you had time and energy to do it well.
The custard-based structure of quiche means it actually improves when you give it time. The overnight refrigeration isn’t a concession for convenience; it’s actually the better way to make this dish. The eggs set up more gradually, the flavors meld more completely, and you end up with a more tender, creamy result than you would get by baking it the same day. This is one of the rare instances where planning ahead doesn’t just save time—it actually creates a better final product.
Start with the combination of vegetables and cheese in this recipe, which genuinely works beautifully and has been tested countless times. Once you’ve made it a few times and understand how the components work together, branch out into your own variations. Use whatever vegetables are in season, whatever cheese appeals to you that week, whatever protein your family actually enjoys. The framework is flexible enough to absorb endless variations while remaining reliably delicious.
A quiche waiting in your refrigerator is genuinely transformative for busy mornings. It represents nutrition without stress, elegance without effort, and peace of mind before your day even begins.