The beauty of pizza is that it doesn’t need to be complicated—and neither does the dough. For years, home bakers have been intimidated by bread-making because they assumed it required kneading, special equipment, and endless patience. The truth is far simpler: a no-knead pizza dough requires nothing more than flour, water, salt, and time. The magic happens through long fermentation, where beneficial bacteria develop flavor and structure while you’re not even paying attention. This approach produces a dough that’s authentically crispy on the outside, tender and airy on the inside, and bursting with complex, savory notes that store-bought dough simply cannot match.
This particular method comes together in just minutes of hands-on work, yet it delivers pizzeria-quality results that rival the output of ovens that have been seasoning for years. You’re not fighting the dough or forcing it into submission—you’re letting time and chemistry do the heavy lifting. The fermentation process breaks down the gluten naturally, making the dough extensible and easy to stretch without tearing. More importantly, those long hours of rest allow the flour to fully hydrate and the flavors to develop complexity. What started as a humble mixture of basic ingredients transforms into something that tastes like it came from a wood-fired oven in Naples or New York.
The minimal kneading requirement is what makes this method so accessible. You’ll mix the ingredients just enough to combine them into a shaggy mass—less than a minute of work. Then you let time do everything else. No standing mixer, no arm strength, no special technique required. This dough is wonderfully forgiving, impossible to overwork, and completely flexible to your schedule. You can make it the morning before you want pizza, bake it the next evening, or even freeze portions for pizza on your terms, whenever cravings strike.
Why This No-Knead Method Actually Works
The no-knead approach has become a revelation for home cooks precisely because it eliminates the barrier that keeps most people from making dough at home. Traditional pizza recipes demand kneading—either by hand for 10 to 15 minutes or in a stand mixer for 8 to 10 minutes. The physical effort required makes many people decide it’s simply easier to order delivery. With this method, you fold the dough once or twice during its rest period instead of kneading it aggressively upfront, and the result is superior dough with less effort.
The key mechanism at play is called autolyse—the process by which flour gradually absorbs water and gluten develops without mechanical agitation. In traditional kneading, you’re creating gluten structure through repetitive stretching and folding motions. In the no-knead method, you’re achieving the same gluten development through time and hydration. The dough becomes increasingly elastic and extensible as it sits, allowing you to stretch it thinner and wider without tearing. This is why a wet dough that seems impossible to handle on day one becomes supple and cooperative by day two or three.
Long fermentation also develops the flavor profile that separates good pizza dough from exceptional pizza dough. During those hours of rest, wild yeast and naturally occurring bacteria in the flour ferment the small amount of sugars present, creating organic acids that add depth and subtle sourness. These compounds are the same ones that give San Francisco sourdough its distinctive tang and allow Neapolitan pizza to taste complex despite using only four ingredients. You’re essentially creating a slow-rise dough that mimics the fermentation that professional pizzerias achieve with their high-hydration doughs and long proofing times.
The minimal active time makes this method realistic for weeknight cooking. You spend approximately three to five minutes mixing ingredients one day, perhaps another two minutes doing a set of stretches and folds at some point during fermentation, and then about 15 minutes shaping and getting the dough ready to bake. The oven does the final transformation in just 12 to 20 minutes depending on your preferred crust thickness and char level. Compare that to an hour-long kneading and hand-shaping session, and you understand why this method has become so popular.
The Science Behind Long Fermentation Dough
Understanding the fermentation process helps you make better decisions about timing, hydration, and storage. When you mix flour with water, gluten proteins begin to absorb moisture and align with each other, creating a developing network of interconnected strands. This network is what allows dough to stretch and trap gas bubbles from fermentation. In a traditional recipe, kneading accelerates this alignment through mechanical action. In a no-knead dough, the same thing happens naturally over several hours, powered by hydration and time rather than muscle.
The yeast and bacteria in flour and your environment begin metabolizing sugars immediately after the dough is mixed. This produces carbon dioxide, which gets trapped in the gluten network and creates the bubbles that give pizza its characteristic open crumb and airy crust. It also produces organic acids that develop flavor and allow the dough to maintain its structure longer—this is why a four-day-old dough tastes noticeably more complex than a same-day dough.
Temperature plays an enormous role in fermentation speed. A dough left at room temperature (around 70°F) ferments rapidly, potentially becoming overproofed within 12 to 18 hours. A dough kept in the refrigerator (around 40°F) ferments slowly and deliberately, developing flavor over several days without overdoing it. Most home cooks find that refrigerator fermentation offers the best balance—it buys time and flexibility while creating superior flavor. You can make the dough whenever is convenient, let it ferment for 24 to 72 hours, and then bake pizza whenever you want. It’s calendar-friendly baking rather than clock-watching baking.
Hydration level influences how the dough behaves during fermentation and baking. Higher-hydration doughs (those with more water relative to flour) become very sticky and extensible but also develop more open, airy crumbs with larger bubble structure. Lower-hydration doughs are easier to handle but produce denser, less forgiving crusts. This recipe uses a moderate hydration level that’s high enough to create excellent open crumb, but low enough that the dough remains manageable without advanced shaping skills. It strikes a balance between beginner-friendly and bakery-quality results.
Essential Ingredients for Perfect Pizza Dough
Pizza dough lives or dies by ingredient quality because there are so few of them. Each ingredient plays a specific role, and swapping or skimping on any single one noticeably changes the outcome. These are the ingredients you genuinely need—no surprises, no unnecessary additions, just straightforward foundations.
Flour is the structural backbone. All-purpose flour (10 to 12 percent protein) works beautifully for this recipe, creating dough with good extensibility and enough gluten development to trap gas effectively. Bread flour (12 to 14 percent protein) creates a slightly chewier crust with stronger gluten structure—perfect if you like more structure and less delicate open crumb. Don’t use cake flour or pastry flour; they lack the protein content necessary for proper dough development. Measure flour by weight if at all possible (3 cups = approximately 420 grams), but if measuring by volume, spoon flour into your cup and level it off without compacting.
Water is your second-largest ingredient by weight and dramatically influences how dough behaves. Filtered or tap water both work equally well. The water temperature on the day you make dough slightly influences fermentation speed, but it’s not critical to adjust for—room-temperature water is perfectly fine. Never use hot water, which can kill yeast or overstimulate fermentation. If your tap water is particularly hard or heavily chlorinated, letting it sit in an open container for an hour allows some chlorine to dissipate, though this is not essential for this recipe.
Salt seasons the dough and controls fermentation speed by slowing yeast activity (slowing fermentation allows flavors to develop more fully rather than racing through quickly). Use fine sea salt or kosher salt; avoid iodized table salt, which can have a slightly metallic flavor. Salt should always be dissolved in water before adding to flour rather than mixing dry, which ensures even distribution and prevents salt from killing yeast cells it comes into direct contact with. The small amount of salt in this recipe—just three-quarters of a teaspoon per three-cup batch—is essential for flavor and shouldn’t be reduced or eliminated despite pizza’s reputation for being salty.
Yeast drives fermentation and creates the gas bubbles that make the crust rise and develop its characteristic texture. Instant yeast (also called bread yeast or rapid-rise yeast) works perfectly here. A tiny amount—just one-quarter teaspoon—is sufficient because fermentation happens over many hours rather than the quick rise of a traditional recipe. This small quantity produces gentle fermentation that develops flavor without racing toward overproofing. Avoid active dry yeast, which has larger granules and behaves differently than instant yeast in this application. Store yeast in the refrigerator or freezer once opened, where it maintains viability for a year or longer.
Olive oil is optional but genuinely improves dough. A tablespoon per batch adds richness, helps the dough relax during fermentation, and creates a slightly more golden crust. You don’t need extra-virgin oil—a standard olive oil works fine and is more economical.
Serving and Timing Information

Yield: Makes 2 large pizzas (14-inch) or 3 medium pizzas (12-inch)
Prep Time: 5 minutes
Cook Time: 15–20 minutes (baking only)
Total Time: 5 minutes active + 24–72 hours fermentation = 24 hours minimum to 72 hours maximum
Difficulty: Beginner — no special equipment required, hands-on work is minimal, and fermentation happens passively in the refrigerator.
Fermentation Note: This dough requires long, cold fermentation in the refrigerator for best results. Minimum 24 hours; 48–72 hours produces even deeper flavor. Plan accordingly, but there’s no rush—the dough actually improves with age and can ferment for up to 5 days.
Complete Ingredient List
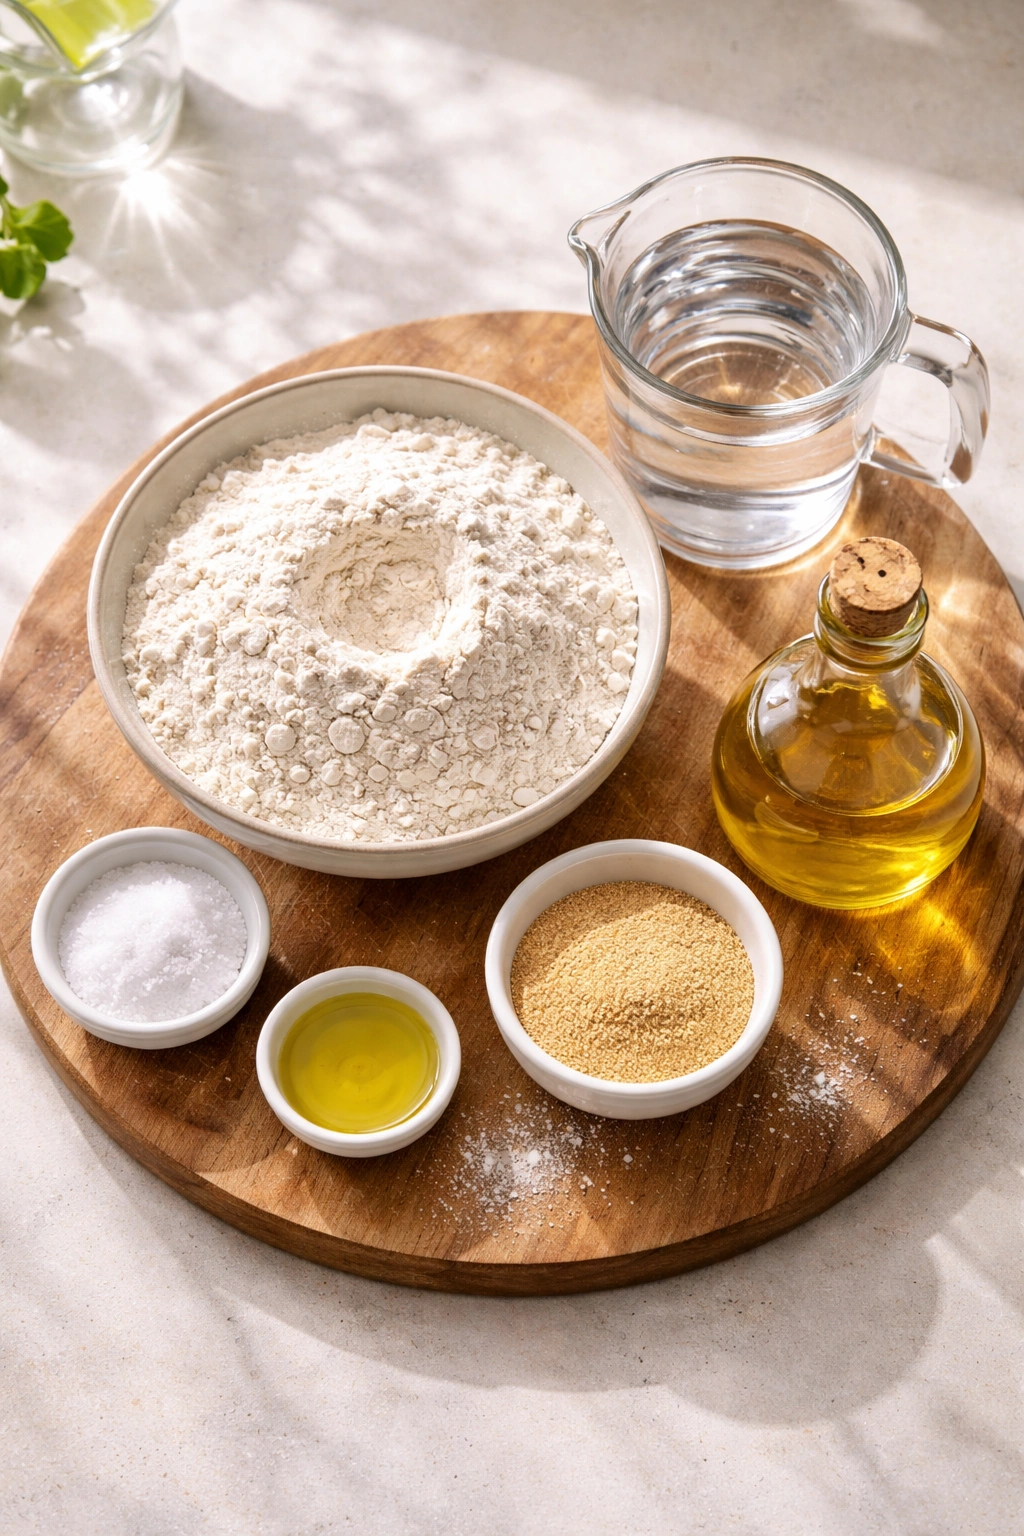
For the No-Knead Pizza Dough (makes two large pizzas):
- 3 cups (420 grams) all-purpose flour or bread flour, spooned and leveled
- 1¼ cups (300 milliliters) room-temperature water
- ¾ teaspoon fine sea salt or kosher salt
- ¼ teaspoon instant yeast (also called bread yeast or rapid-rise yeast)
- 1 tablespoon olive oil (optional but recommended for richer flavor and easier handling)
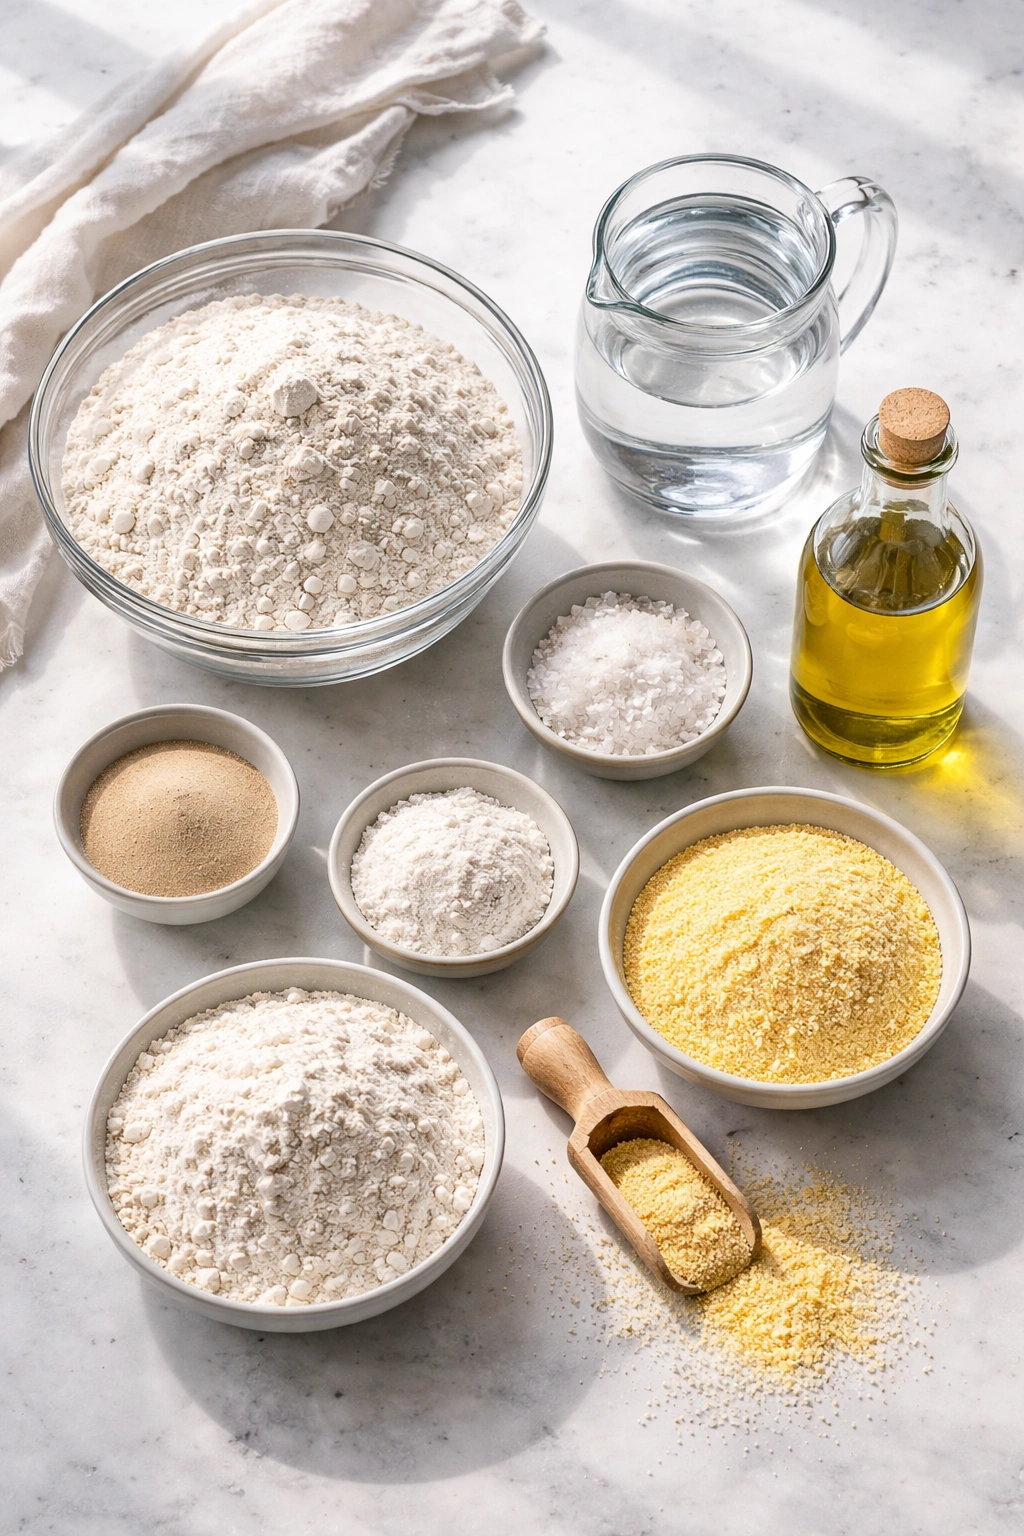
For shaping and baking:
- Extra flour for dusting work surfaces and your hands
- Cornmeal or semolina flour for the pizza pan or baking surface (prevents sticking and adds a subtle texture)
- Toppings of your choice (sauce, cheese, vegetables, meats—whatever suits your preference)
Step-by-Step Instructions for Making and Baking Your Pizza

Day One — Mix and Begin Fermentation:
-
Pour the room-temperature water into a large bowl. Add the salt and stir until mostly dissolved—you’ll see a few salt crystals remaining, which is fine. The salt will continue dissolving as it sits.
-
Sprinkle the instant yeast evenly over the salted water and let it sit for one minute, then stir gently to combine. The yeast will begin activating immediately, though you won’t see obvious bubbling at this stage since the dough is salt-forward and fermentation is gentle.
-
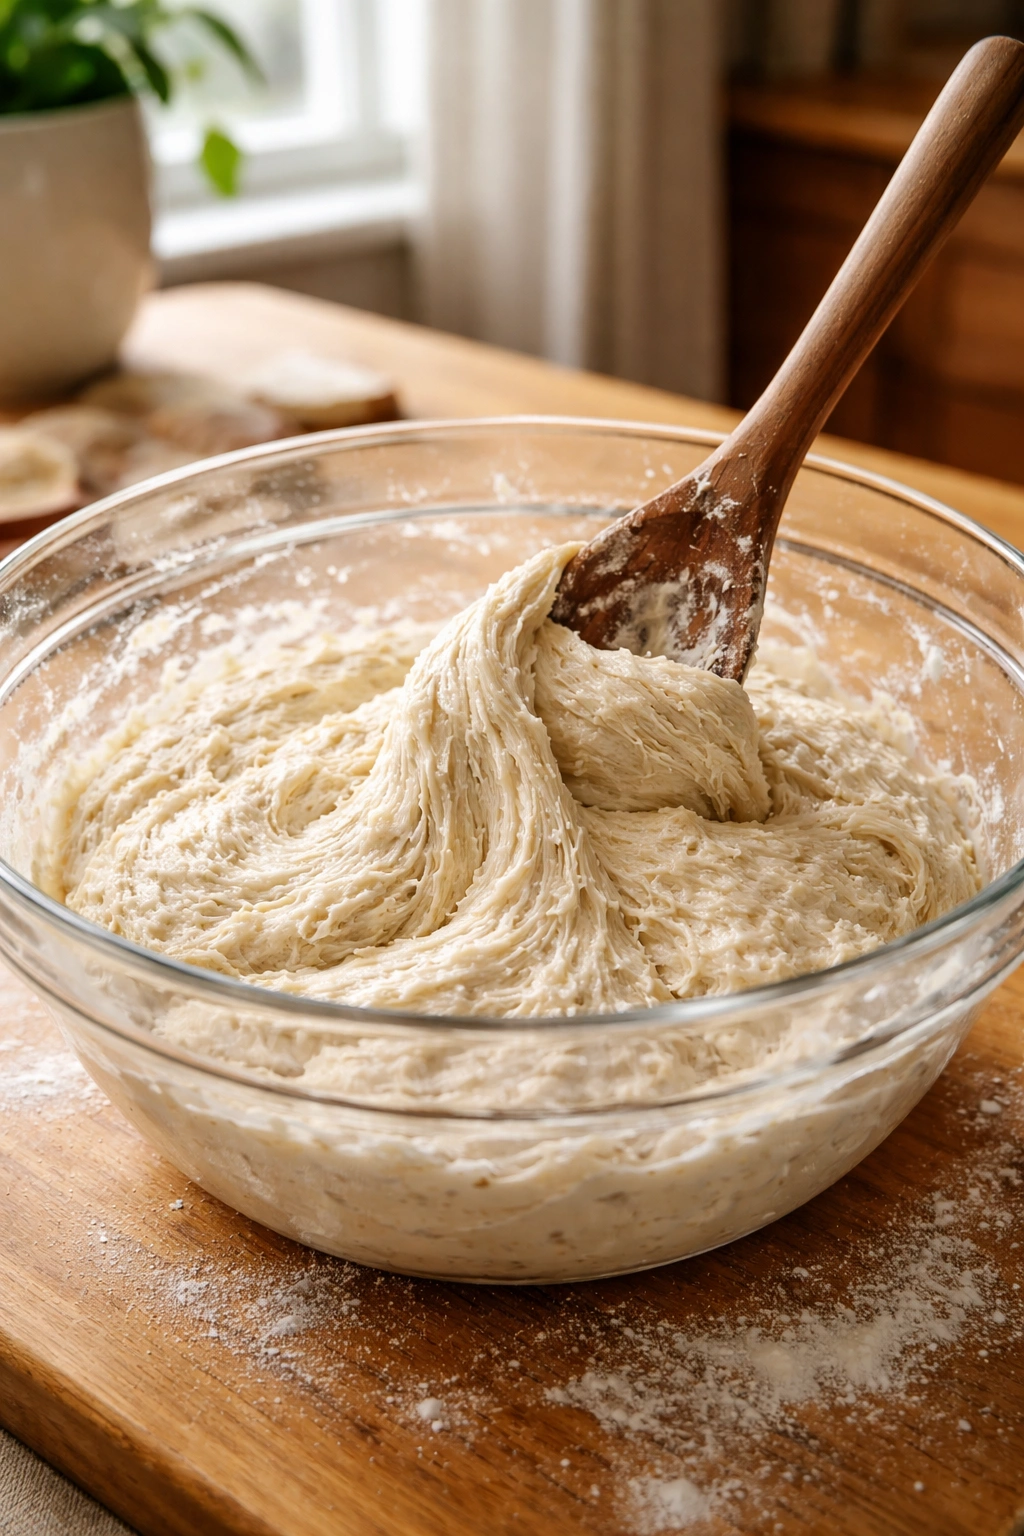
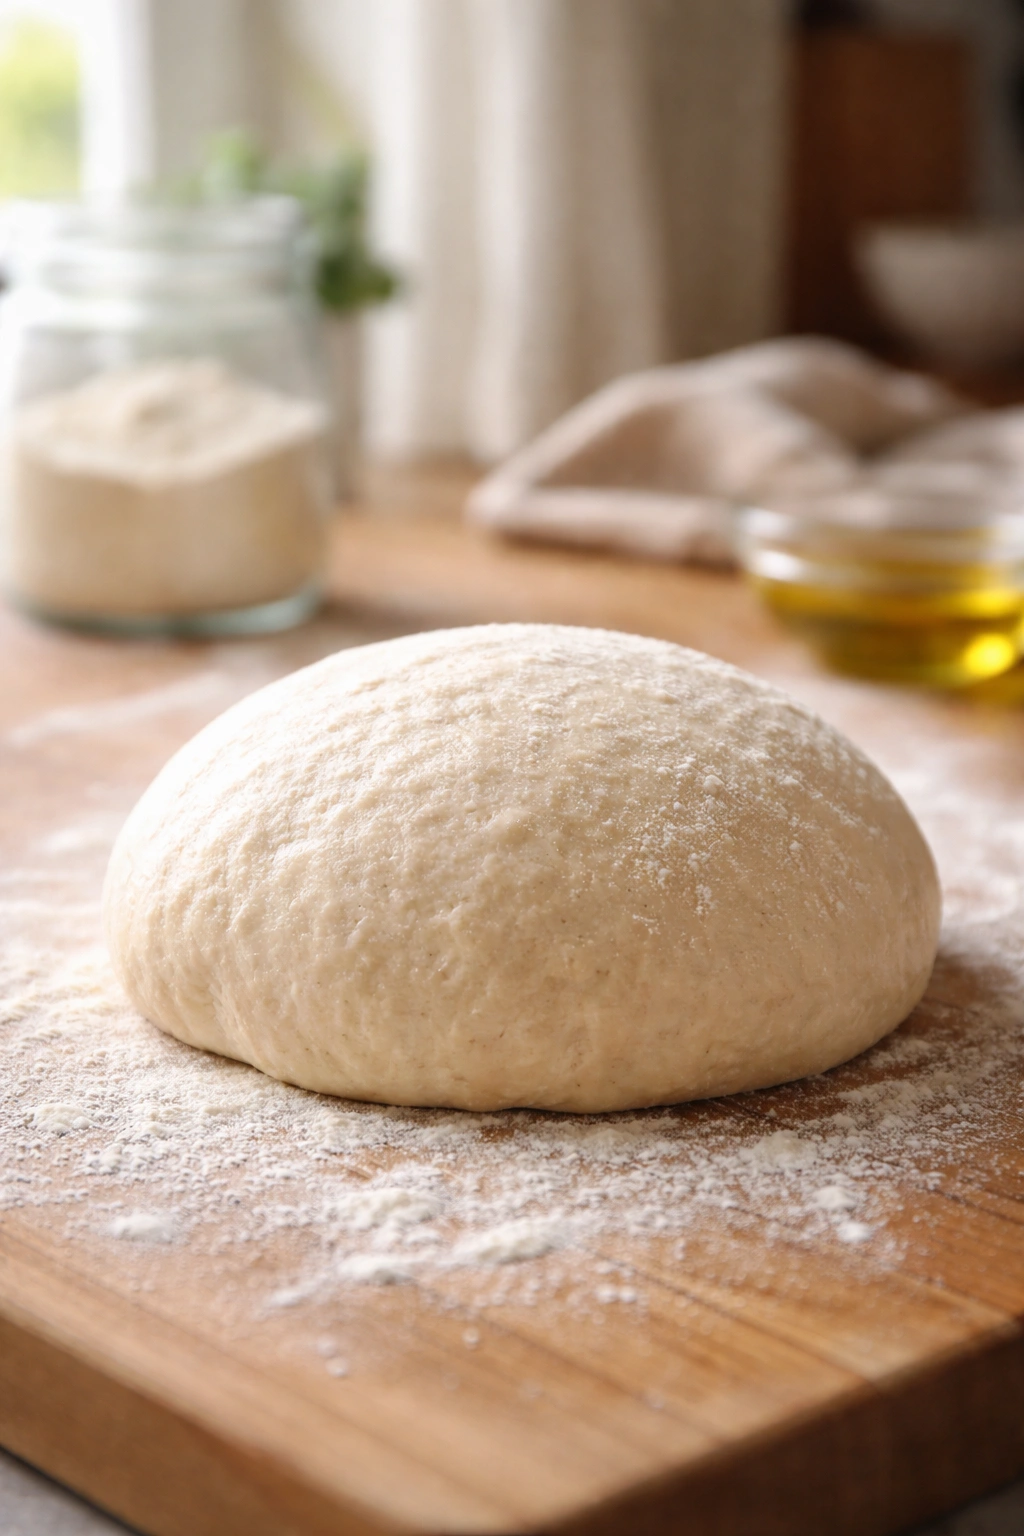
Add the flour to the bowl all at once. Using a sturdy wooden spoon or a rubber spatula, stir the mixture until all the flour is hydrated and you’ve formed a shaggy, wet dough with no dry flour remaining. Do not knead or beat vigorously—stirring until combined takes about 30 to 60 seconds and is all the work this dough needs at this stage. The dough will appear too wet and sticky, almost like a thick batter. This is completely normal and essential to the final texture.
-
If using olive oil, drizzle it over the surface of the dough and stir briefly to distribute it throughout. This step improves flavor and makes the dough slightly less sticky.
Advertisements -
Cover the bowl loosely with a plastic lid, a clean kitchen towel, or plastic wrap. The cover should be loose enough that air can still exchange; you’re not creating an airtight seal. This prevents the dough from drying out while allowing carbon dioxide to release and prevent pressure buildup.
-
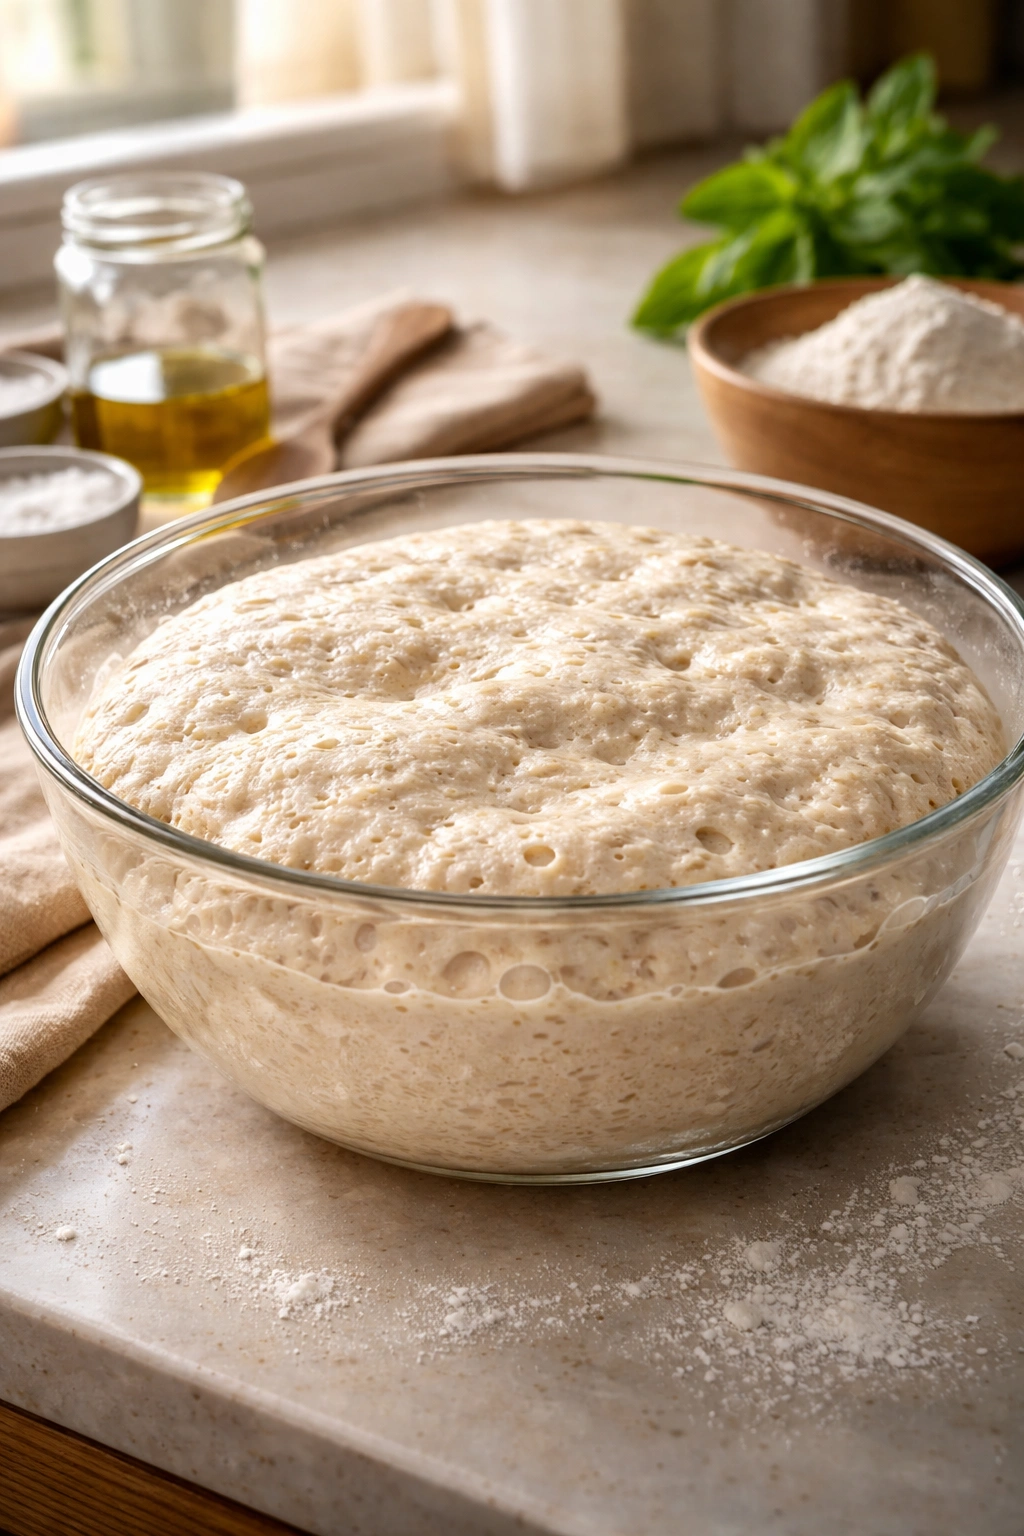
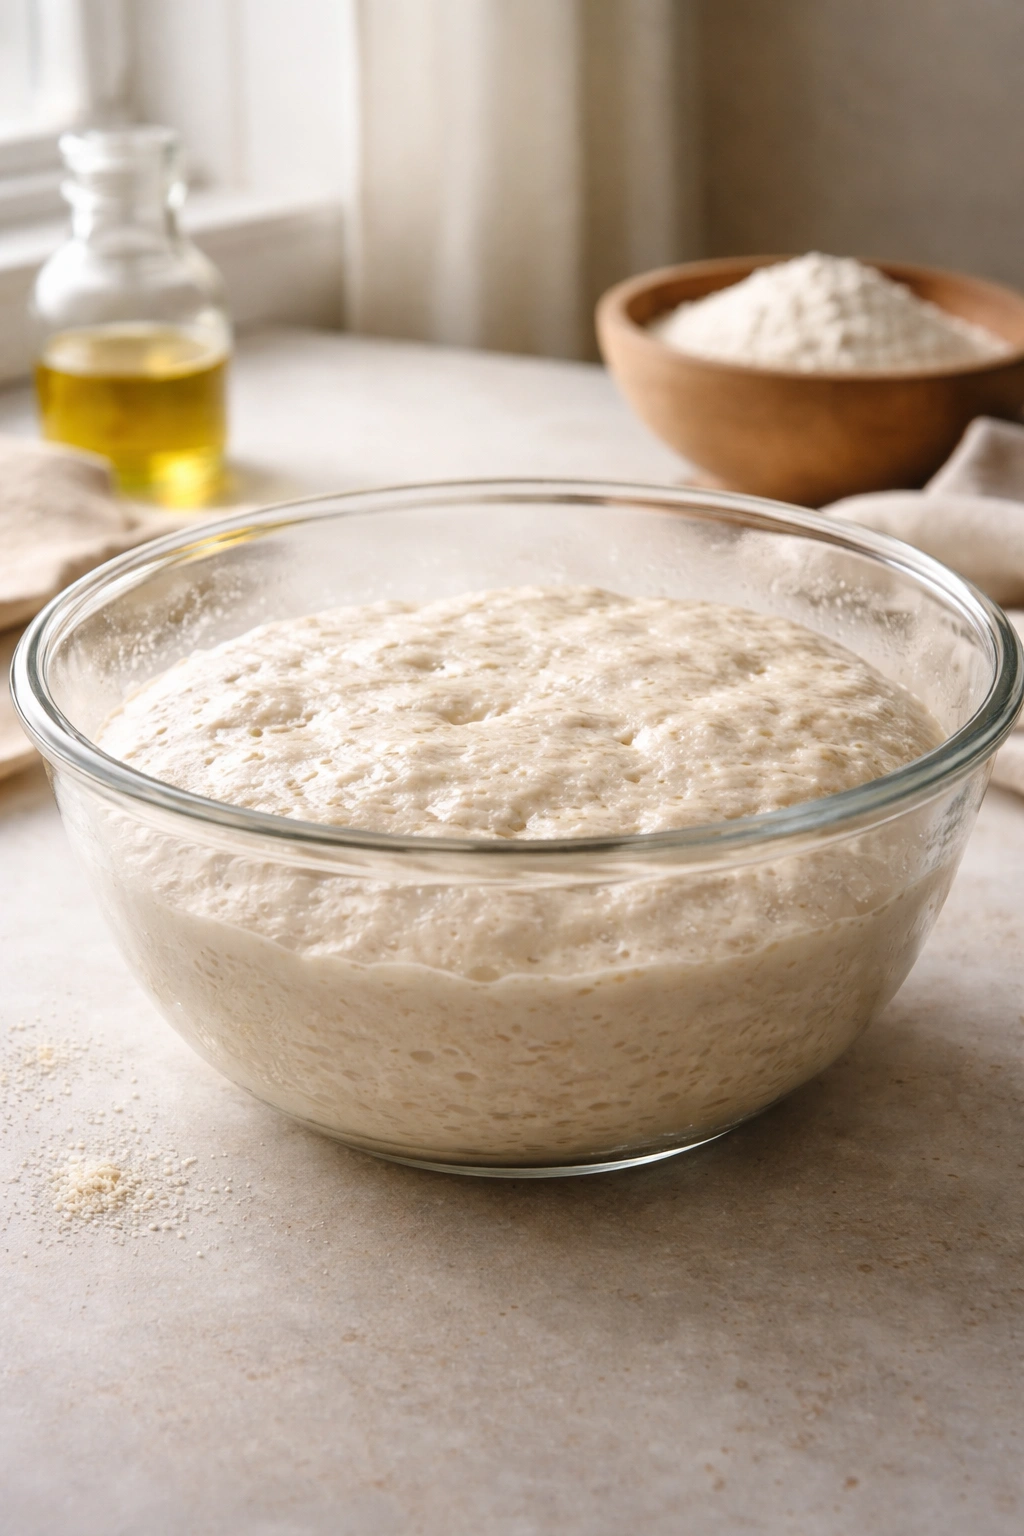
Set the bowl on the counter at room temperature (approximately 68°F to 72°F is ideal) and allow the dough to ferment undisturbed for 12 to 18 hours. During this time, you’ll see the dough slowly rise and develop visible bubbles on the surface. The transformation is remarkable—what started as a shaggy, sticky mass becomes noticeably more structured and even slightly elastic.
Day Two — Fold and Transfer to Refrigerator:
-
After the dough has fermented at room temperature for 12 to 18 hours, it’s time to move it to cold storage. Wet your hand or a damp spoon. Fold the dough onto itself by pulling one edge up and folding it over to the opposite side. Rotate the bowl 90 degrees and repeat, folding the new top edge over to the opposite side. Complete this motion one or two times around the bowl. This folding step takes about 30 seconds and helps redistribute nutrients to remaining yeast, setting up for continued slow fermentation. The dough is still very wet and sticky—you’re not trying to knead it or create a smooth surface, just gently folding.
-
Cover the bowl again and place it in the refrigerator. The dough will ferment slowly in the cold, developing flavor and becoming increasingly easy to work with as the cold temperature causes the gluten network to relax and become more extensible. The cold also slows yeast activity, preventing the dough from overproofing and becoming soupy.
-
Allow the dough to ferment in the refrigerator for at least 24 hours. At the 24-hour mark, it’s ready to shape and bake. However, for deeper, more complex flavor, let it sit for 48 to 72 hours. The dough improves with age and becomes increasingly flavorful and easier to stretch as gluten development continues and the cold fermentation extends. Some pizza makers prefer a 5-day cold fermentation for maximum flavor development.
Day Three (or later) — Shape and Prepare to Bake:
-
When you’re ready to make pizza, remove the dough from the refrigerator and allow it to warm slightly on the counter—about 15 to 20 minutes at room temperature makes it far easier to shape without tearing. A very cold dough is brittle and springs back aggressively; a slightly warmed dough is supple and forgiving.
-
Generously dust a work surface (your countertop or a large baking board) with flour. Dust your hands and a flexible dough scraper with flour as well. Turn the dough out of the bowl onto the floured surface. It will still be quite sticky and may appear somewhat deflated from its refrigerator height—this is normal.
-
Gently stretch the dough into a rough rectangular or circular shape by pulling it with your hands or using your fingertips to gently press outward. Work carefully; this dough is delicate and tears easily if you’re aggressive. If the dough tears, don’t panic—simply pinch the tear closed and continue stretching. A tear of half an inch or less will seal itself as the dough rests and bakes. Let the dough rest for 5 to 10 minutes if it becomes resistant and springs back aggressively—resting relaxes the gluten and makes stretching easier.
Advertisements -
Continue stretching until you’ve achieved your desired pizza size. For a thin crust, stretch as thin as you can get it—about ¼ inch thick. For a thicker, chewier crust, aim for ½ inch thick. For a deep-dish style, press the dough into a greased pan rather than stretching it on a flat surface. The beauty of this dough is its flexibility—it adapts to your preferences and preferred thickness without requiring technique adjustment.
-
Transfer the shaped dough to a pizza pan, a pizza stone (preheated in the oven), or a baking sheet. If using a solid pan, brush it lightly with olive oil or dust it with cornmeal or semolina flour to prevent sticking. If using a preheated pizza stone, have a pizza peel (a flat wooden or metal paddle) ready for transfer.
-
Allow the shaped dough to rest for another 10 to 20 minutes at room temperature before topping and baking. This short rest helps the gluten relax and prevents the dough from shrinking during baking. You’ll see it puff up slightly and become noticeably airier—this is the final rise before baking.
Baking Your Pizza:
-
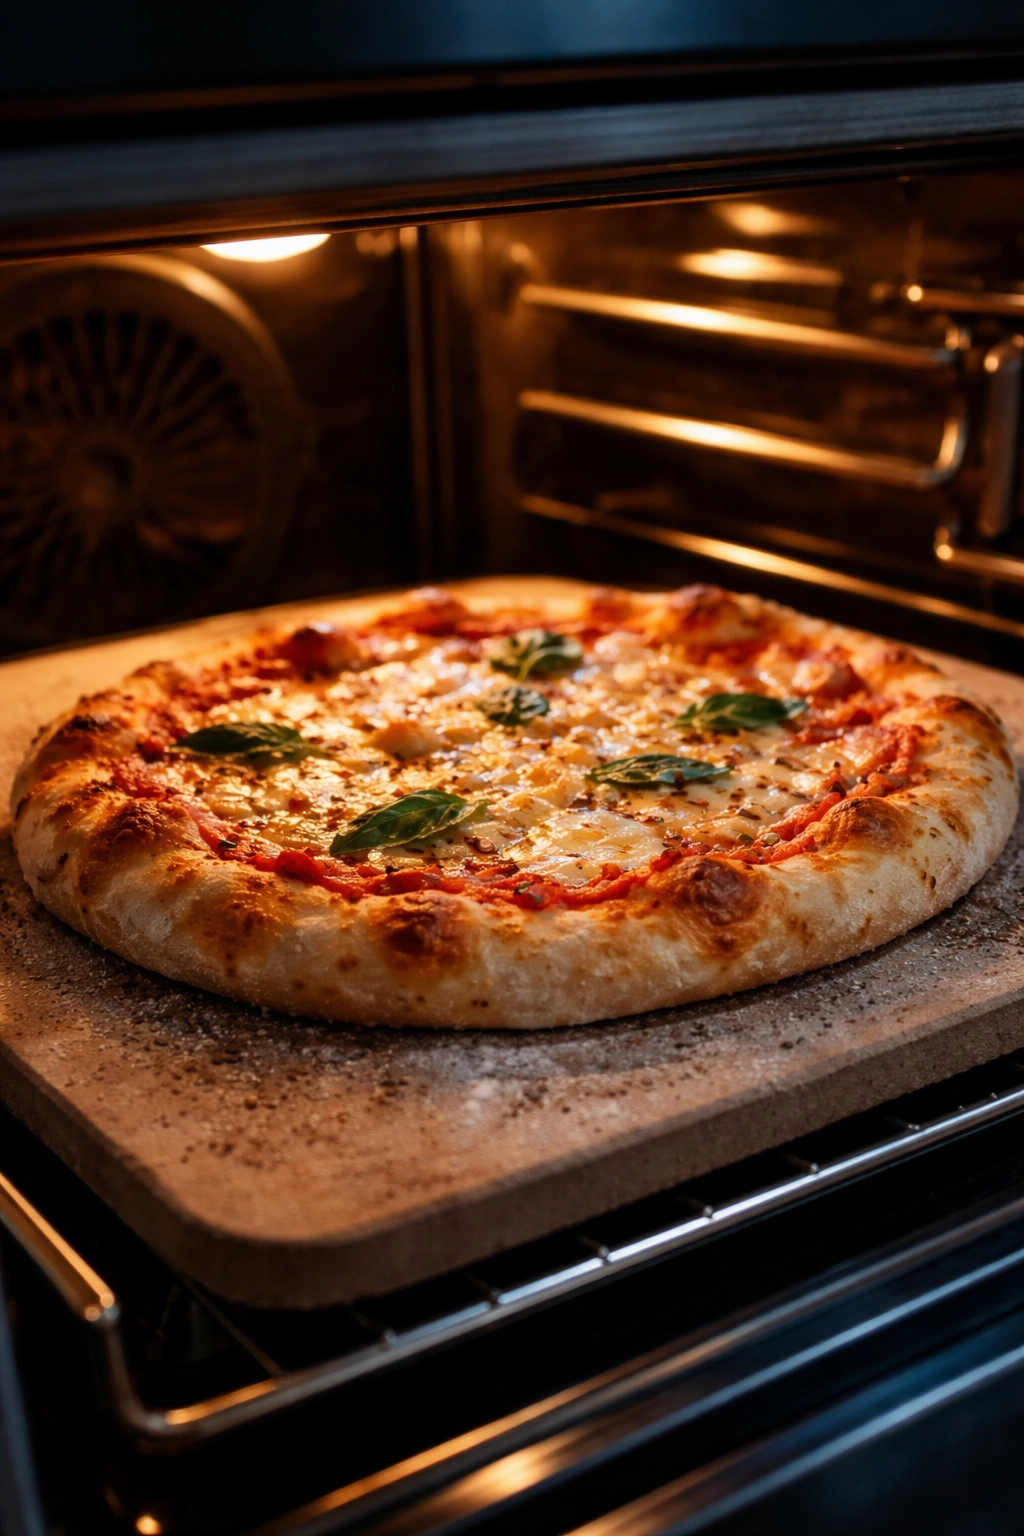
While the shaped dough rests, preheat your oven to 475°F (245°C) for a standard home oven, or as hot as your oven will go. A pizza stone or steel should be placed on the middle rack and preheated for at least 30 minutes to conduct heat effectively. If you don’t have a pizza stone, a heavy baking sheet works perfectly fine.
-
Top your pizza with your choice of toppings—tomato sauce, cheese, vegetables, meats, or whatever appeals to you. Spread sauce thinly; less is more when it comes to pizza. Cheese should be distributed evenly but doesn’t need to cover every millimeter. Heavy toppings can weigh the dough down and prevent the crust from rising properly.
-
Carefully place the topped pizza in the preheated oven. On a standard oven rack, bake for 15 to 20 minutes, rotating the pizza halfway through to ensure even browning. If using a preheated pizza stone, slide the pizza onto the stone using a pizza peel and bake for 12 to 15 minutes (preheated stones cook the bottom crust faster than room-temperature pans). The pizza is done when the crust is golden brown and the cheese (if using it) is melted and bubbling. The bottom should sound hollow when you tap it with a wooden spoon, indicating the interior is fully cooked.
-
Remove the pizza from the oven using a pizza peel or a sturdy spatula. Allow it to cool for 2 to 3 minutes before slicing; this allows the cheese to set slightly and makes cutting and handling much easier. Slice with a pizza wheel, a sharp knife, or kitchen shears. Serve immediately while still hot.
Common Mistakes to Avoid When Making No-Knead Pizza Dough
Understanding where things go wrong is just as valuable as knowing what to do right. These mistakes catch even experienced bakers if they get careless.
Using too much yeast is the most common error. Home bakers often think that more yeast equals faster fermentation and better dough, but the opposite is true in this application. A large amount of yeast causes the dough to ferment so quickly that gluten development can’t keep pace, resulting in dough that overproofs rapidly and collapses when you try to shape it. The tiny quarter-teaspoon in this recipe is precisely calibrated for long, slow fermentation that develops flavor without overshooting. Resist the urge to add more.
Mixing the dough too aggressively seems counterintuitive, but it’s worth mentioning. A brief stir is all this dough needs; extended mixing doesn’t improve anything and actually overdevelops gluten, making the dough stiffer and less extensible than it should be. You’re not making bread dough here—you’re creating a hydrated slurry that will develop structure over days through time rather than minutes through effort.
Not storing in the refrigerator removes the entire benefit of long fermentation. A dough left at room temperature for longer than 18 to 24 hours will overproof, develop an unpleasant sour taste, and become difficult to shape. The refrigerator’s cold temperature slows fermentation dramatically, allowing those beneficial chemical reactions to continue developing flavor without the dough falling apart. Always move the dough to the fridge after its initial 12- to 18-hour room-temperature fermentation.
Skipping the fold means losing out on better developed gluten and a dough with more structure. The single fold at the 12- to 18-hour mark takes literally 30 seconds and noticeably improves how the dough handles. It’s not essential, but it’s such a small investment that skipping it seems illogical.
Shaping the dough straight from the refrigerator without letting it warm causes it to tear easily and spring back aggressively. Those 15 to 20 minutes of room-temperature rest are invaluable—the dough becomes more extensible and forgiving. It seems like an unnecessary delay, but it prevents a frustrating shaping experience.
Using water that’s too warm accelerates fermentation and can even kill yeast if it gets above 120°F. Room-temperature water is perfect; there’s no reason to heat it. If your kitchen is exceptionally cold (below 65°F), you might let water sit in a warm corner for a few minutes, but it shouldn’t feel noticeably warm to your touch.
Topping the pizza too heavily weighs down the dough and prevents it from rising properly in the oven. Use a light touch—a thin layer of sauce, a moderate amount of cheese, and toppings distributed to allow airflow underneath. An overloaded pizza cooks unevenly and produces a doughy, underbaked bottom crust.
Troubleshooting Guide for Pizza Dough Problems
Despite best intentions, things sometimes don’t go as planned. Here’s how to diagnose and correct common problems.
The dough is too sticky to shape. This usually means the dough is too cold or hasn’t rested long enough after coming out of the refrigerator. Leave it on the counter for 20 to 30 minutes at room temperature before attempting to shape, and it will become noticeably more cooperative. Alternatively, the dough may be too wet overall—if this is a recurring problem, reduce the water slightly next time (start with 1 cup instead of 1¼ cups) and observe how it changes.
The dough tears when you try to stretch it. This indicates the gluten network isn’t fully relaxed. Give the dough a 10-minute rest on the counter before resuming stretching. Try a gentler touch—instead of aggressive stretching, use gentle pressing motions with your fingertips and allow gravity to help. A thin dough is delicate; thick, gentle pressure beats aggressive force every time.
The dough springs back and won’t stay stretched. The gluten is too tight from cold storage. Again, allow additional room-temperature rest—up to 30 minutes if necessary. Alternatively, stretch the dough only partway, let it rest, then finish stretching. This two-stage approach allows the gluten to relax gradually without fighting you.
The crust is too dense and doughy, not airy and light. This usually means either the oven temperature was too low (aim for 475°F or hotter), the fermentation time wasn’t sufficient (try 48 to 72 hours instead of 24), or the dough was deflated during shaping (be gentler). It can also indicate that the dough overproofed before baking—if the shaped dough was left to rise for too long at room temperature (more than 40 minutes), it may have expanded all its air before entering the oven.
The bottom crust is burnt but the top isn’t done. Your oven has a hot bottom and cooler top—not uncommon. Use a pizza stone instead of a baking sheet, move the pizza to a lower oven rack, or reduce the oven temperature by 25°F and bake longer. Pizza stones conduct heat more evenly and prevent hot spots from scorching the bottom.
The pizza cooked too quickly and the inside tastes doughy. The oven temperature was too high, causing the outside to char before the inside cooked through. Lower the temperature to 450°F and bake a bit longer. Also ensure you’re rotating the pizza halfway through baking so it cooks evenly.
The dough developed a strong, unpleasant sour smell. This usually means it fermented too long, or the room temperature was too warm during fermentation. The dough is likely still usable—this smell is normal, expected yogurt-like sourness from extended fermentation. Bake it and taste the result; fermentation funk often dissipates during baking. If the smell is genuinely foul (more like rotten than sour), discard it and start fresh.
Different Styles: How to Adapt This Dough Recipe
This dough is incredibly versatile and adapts beautifully to different pizza styles and preferences. Small adjustments transform the same base recipe into completely different final products.
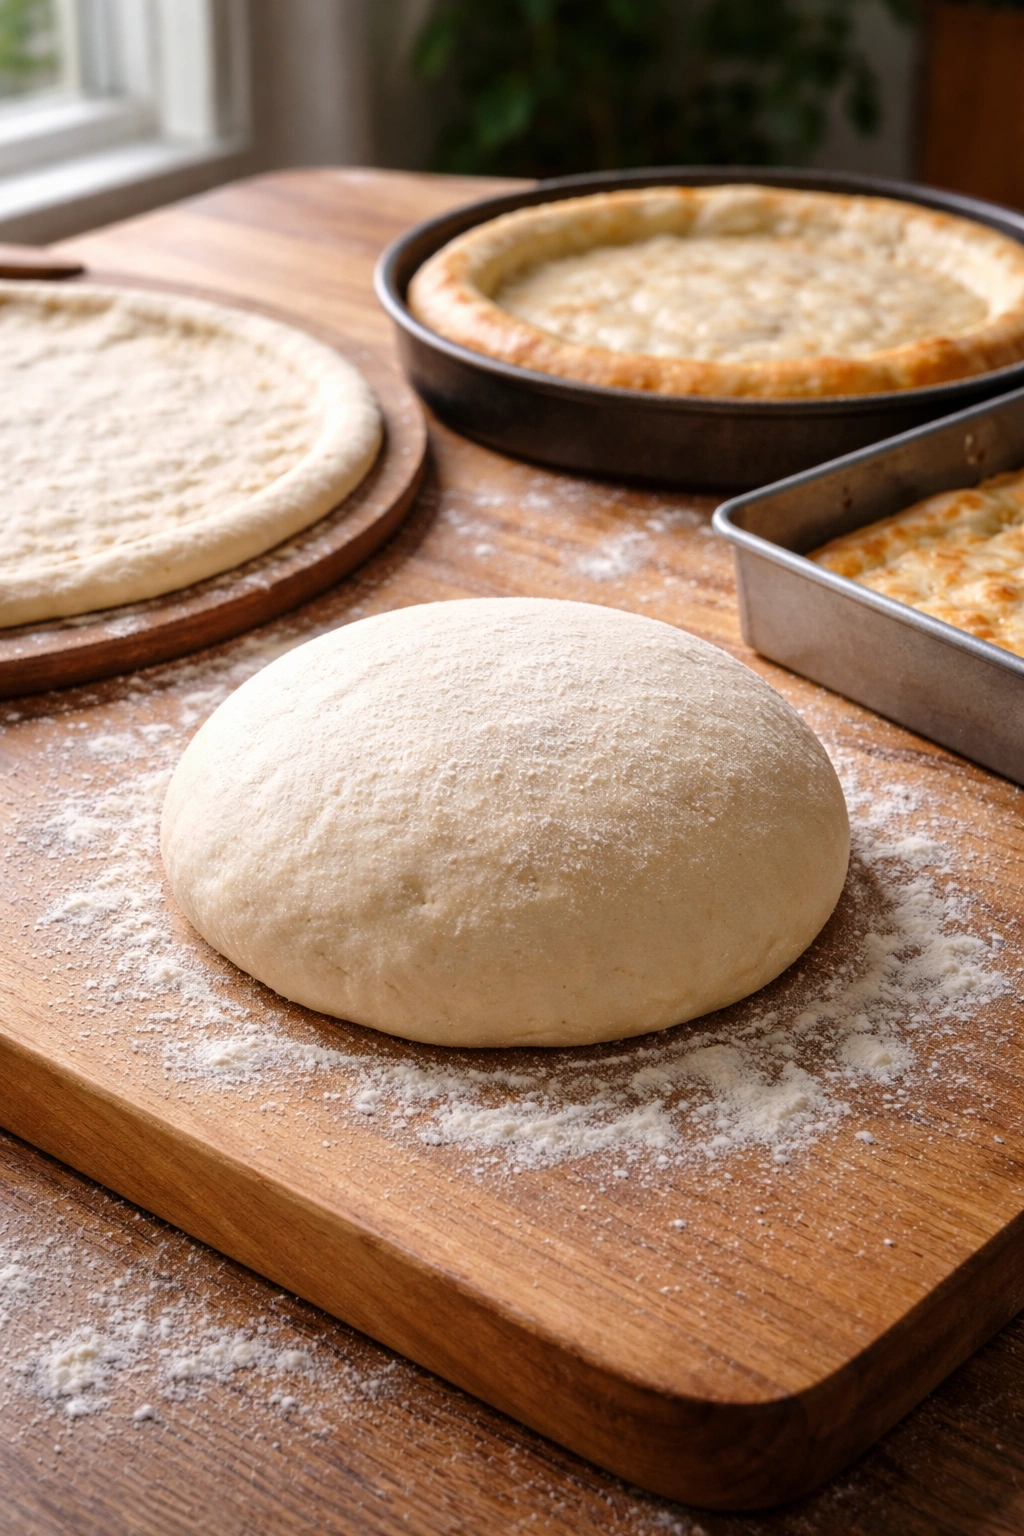
For ultra-thin crust pizza, stretch the dough as thin as you can coax it—nearly transparent, about ⅛ inch thick. Bake on a preheated pizza stone at 500°F for just 8 to 10 minutes. The result is crispy, cracker-like, and lightly charred—perfect for showcasing toppings without being weighed down by bread.
For thick-crust or deep-dish pizza, press the dough into a well-oiled baking pan (9 by 13 inches or round) rather than stretching it thin. Allow it to rise for 20 to 30 minutes before topping, then bake at 450°F for 20 to 25 minutes. The dough will be noticeably chewier and more substantial—almost bread-like in its texture and heft.
For Sicilian or Grandma-style pizza, shape the dough into a rectangle and press it into a 9-by-13-inch rectangular pan. This style prioritizes even thickness throughout and a crispy, golden exterior. Bake at 475°F for 15 to 18 minutes. It’s the Italian grandmother’s answer to thin-crust versus deep-dish—a delicious middle ground.
For Neapolitan-style pizza, use the dough at higher temperature (around 900°F in a wood-fired oven if you have access, or as hot as your home oven allows). Shape it thinner than deep-dish but thicker than cracker-thin—about ¼ inch. The super-high heat causes the exterior to char and bubble dramatically while the interior stays tender. Bake time is minimal, just 60 to 90 seconds in a truly hot oven, or 10 to 12 minutes in a home oven at maximum temperature.
For a calzone or folded pizza, shape the dough into two halves. Fill one half with your desired filling (ricotta, mozzarella, vegetables, meats), then fold the dough in half and seal the edges by pressing them firmly together. Bake at 475°F for 15 to 20 minutes until golden. The dough style remains unchanged; only the shaping and filling method differs.
Flavor Variations and Mix-Ins to Try
The basic dough is wonderfully neutral, but you can inject distinctive flavor by adding ingredients to the base recipe. Make these additions during the initial mixing stage, stirring them in along with the flour.
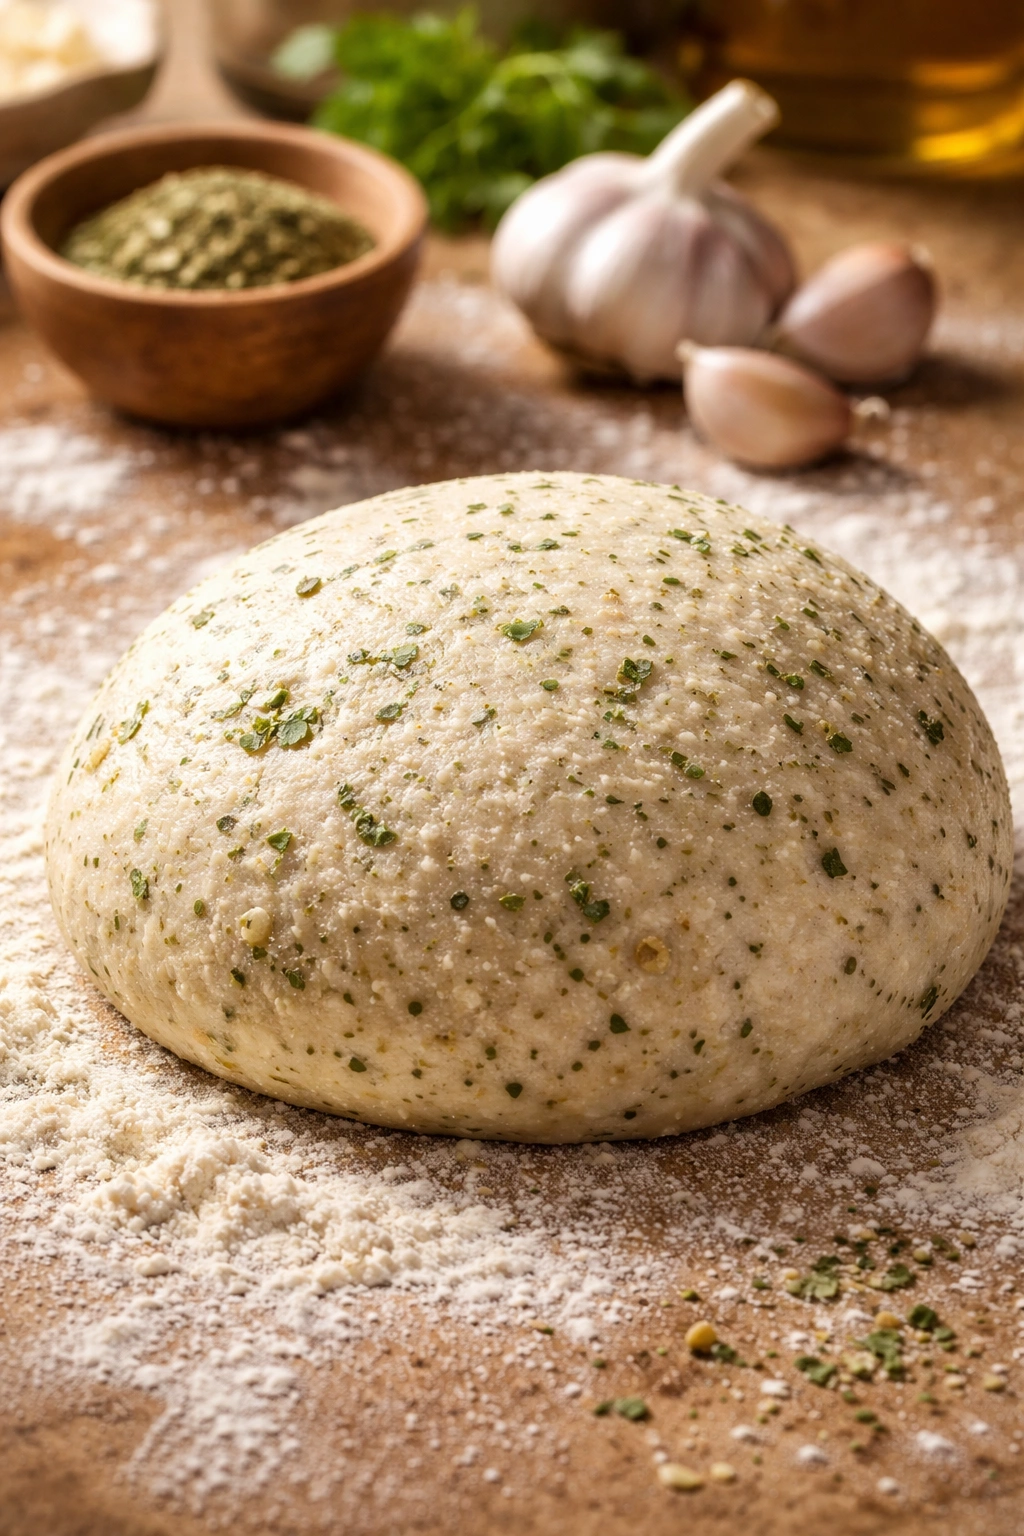
Garlic dough adds 3 to 4 minced garlic cloves to the water before adding flour. The garlic rehydrates during fermentation and creates a subtle, savory backdrop to any toppings. This variation pairs beautifully with white pizzas (ricotta and cheese without tomato sauce) or meat-heavy pizzas.
Herb-infused dough incorporates 1 tablespoon of dried herbs (oregano, Italian seasoning, or a mix) into the flour before adding water. The dried herbs rehydrate and distribute throughout the dough, creating consistent herb flavor in every bite. Fresh herbs are less effective for fermentation recipes because they break down over time; dried herbs hold up better to long fermentation.
Whole wheat dough substitutes up to 25 percent of the all-purpose flour with whole wheat flour (start with ½ cup whole wheat and 2½ cups all-purpose). Whole wheat adds a slight earthiness and nutty flavor, plus additional fiber and nutrition. It does make the dough slightly less extensible, so handle it gently.
Cornmeal or polenta dough adds ½ cup cornmeal to the flour mixture (reducing all-purpose flour to 2½ cups accordingly). Cornmeal creates a subtle sweetness, a slightly grainier crumb, and a gorgeous golden color. It’s particularly delicious on pizzas with corn-based toppings.
Olive oil-enriched dough increases the olive oil to 3 tablespoons instead of 1 tablespoon. This creates a more tender, flaky crust with richer flavor—almost focaccia-like in its texture. The extra oil also extends the dough’s shelf life and keeps it more moist during fermentation.
Spicy dough adds ½ to 1 teaspoon of red pepper flakes, a pinch of cayenne, or a tablespoon of hot sauce mixed into the water before adding flour. This creates a background heat that complements spicy toppings or brings unexpected depth to classic cheese pizzas.
Storage, Make-Ahead, and Freezing Tips
This dough is forgiving about timing, which is perhaps its greatest advantage over doughs with shorter fermentation windows. Understanding how to store and freeze it maximizes flexibility.
At-room-temperature storage is intentional for the first 12 to 18 hours but should not extend beyond that point. After the initial fermentation, the dough moves to the refrigerator, where it keeps beautifully for up to 5 days. The dough actually improves during this time as fermentation continues slowly and flavor develops further. If you won’t be using it within 5 days, transfer it to the freezer instead.
Refrigerated dough can be shaped and baked directly without coming to room temperature first, though it’s easier to shape when slightly warmed. Some bakers prefer to bake the dough straight from the fridge, claiming the cold makes it easier to stretch without tearing. Try both approaches and see which you prefer.
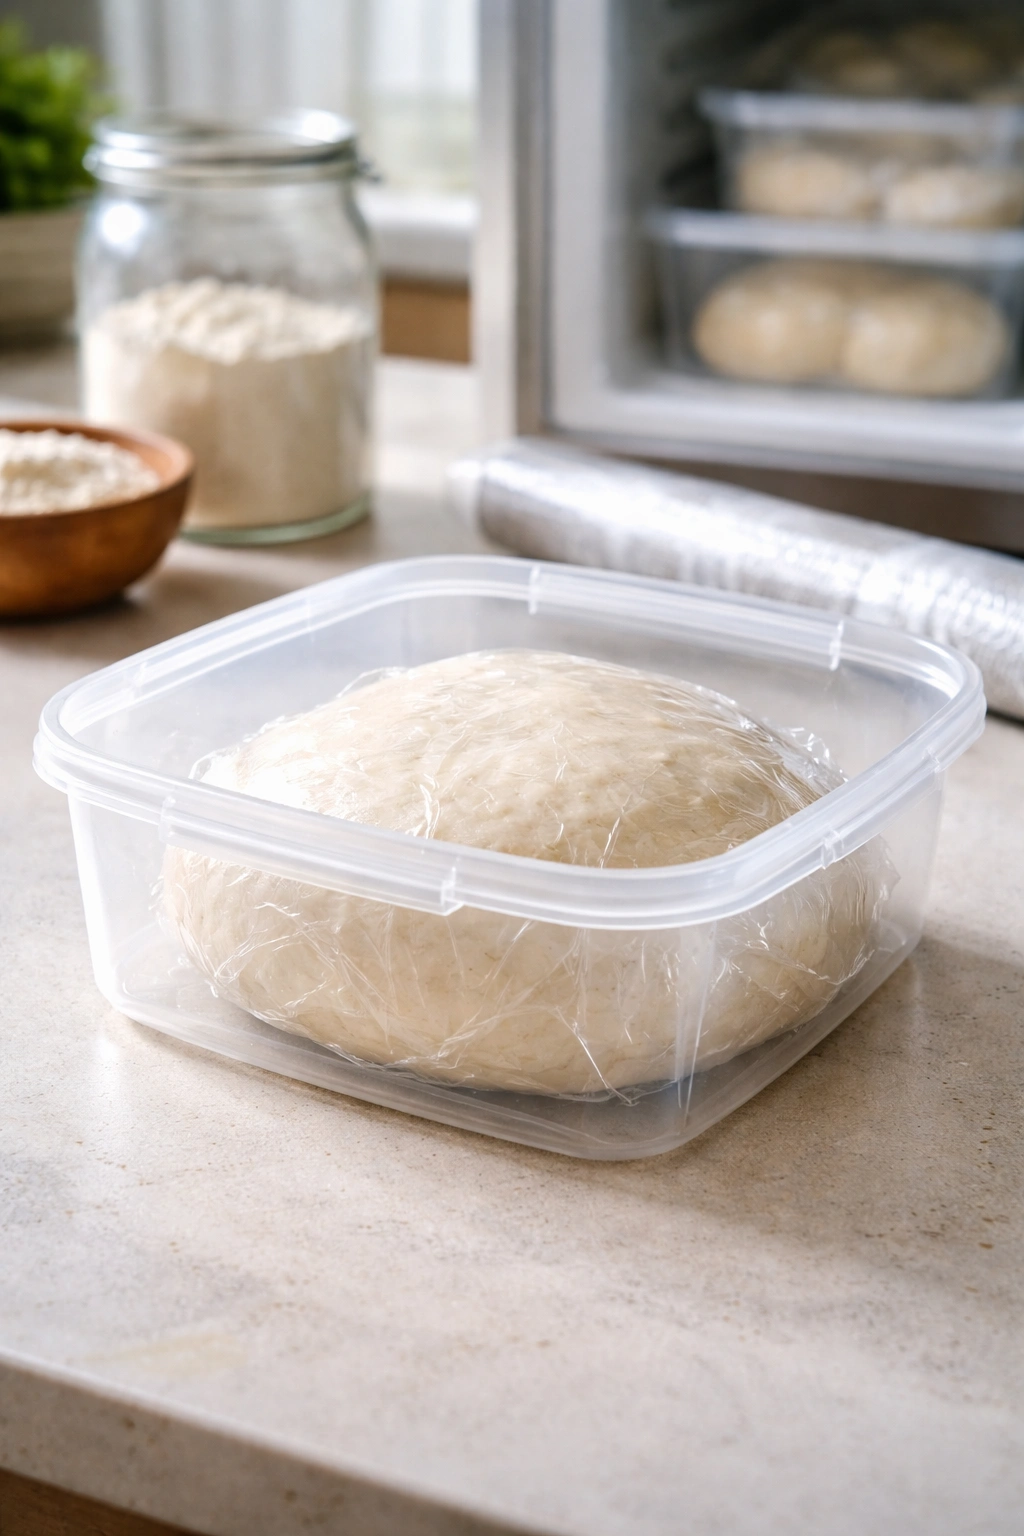
Freezing the bulk dough works perfectly. Once the dough has fermented in the refrigerator for at least 24 hours, divide it into portions (use whatever size makes sense for your household), wrap each portion tightly in plastic wrap, place in a freezer-safe container or bag, and freeze for up to 3 months. The dough will continue fermenting very slowly even in the freezer, developing additional flavor complexity.
Thawing frozen dough takes approximately 4 to 8 hours at room temperature (or overnight in the refrigerator). Once thawed, treat it like fresh dough—allow 15 to 20 minutes of room-temperature rest before shaping, then proceed normally. The dough will be slightly more forgiving when thawed because additional fermentation during freezing has extended gluten development.
Freezing pre-shaped dough is also possible. Shape the dough, place it on a baking sheet, freeze it uncovered for 2 to 3 hours until solid, then wrap tightly in plastic wrap and freeze for up to 1 month. Bake directly from frozen—add 5 to 10 minutes to the baking time and the result will be indistinguishable from fresh-baked dough.
Make-ahead for meal prep is where this dough truly shines. Make a double or triple batch, freeze portions, and you’ll have pizza dough on hand whenever cravings strike. Thaw overnight, allow 20 minutes of room-temperature rest, and dinner is 20 minutes away.
Best Practices for Shaping and Stretching Your Dough

Shaping determines the final pizza’s appearance, crust thickness, and baking behavior. Technique matters, but so does patience and a gentle touch.
The starting stretch begins with flour-dusted hands and a flour-dusted work surface. Turn the dough out of the bowl and gently gather it into a loose ball. Press your hands into the dough center and push outward simultaneously, creating a flat disk. You’re not trying to achieve final thickness on this first stretch—you’re just coaxing the dough into a workable shape.
The edge-to-edge stretch happens next. Lift one edge of the dough and let gravity do half the work while your hands gently pull the opposite edge. Rotate the dough 90 degrees and repeat, working your way around the circumference. This technique uses the dough’s weight to stretch it gradually and gently, minimizing tears. It’s far more effective than aggressively pulling from the center outward.
The rest-and-return approach works beautifully when dough resists stretching. After a few minutes of gentle stretching, set the dough aside on your work surface for 5 to 10 minutes. The gluten will relax, and when you return to stretching, it will be noticeably more cooperative. You can repeat this cycle as many times as necessary—there’s no penalty for patience.
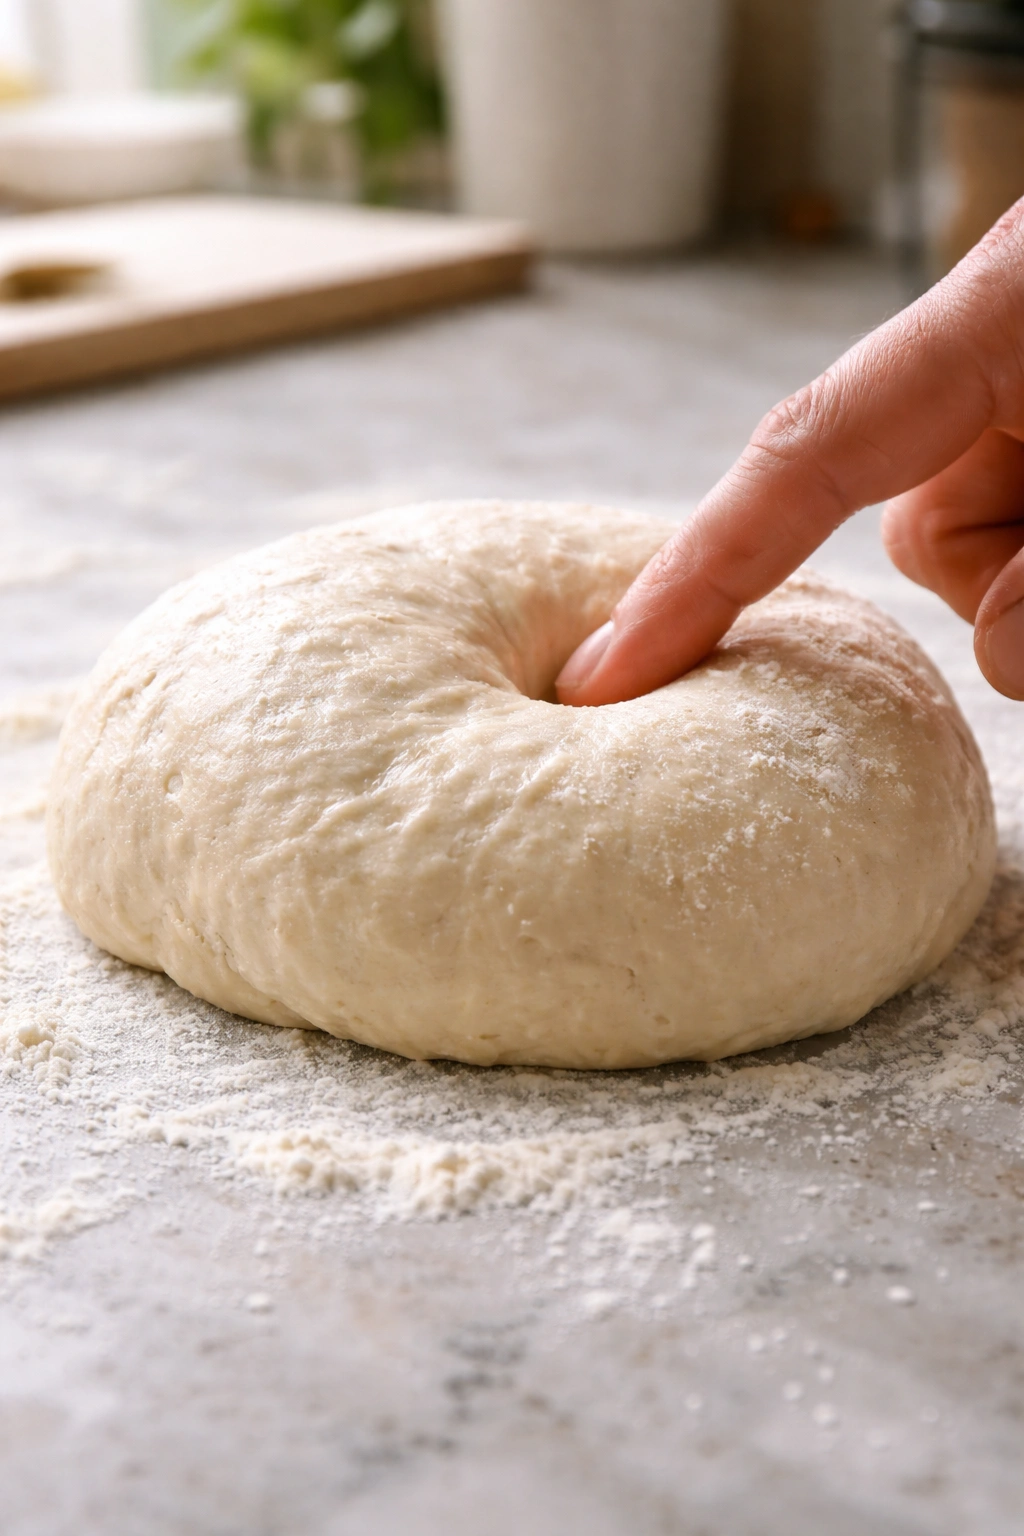
The finger dimple method creates the characteristic doming and dimpling of traditional pizzeria pizza. Once you’ve stretched the dough relatively thin, use your fingertips (dipped in olive oil to prevent sticking) to press gentle indentations all over the surface, creating an uneven texture. This distributes toppings more evenly and creates more surface area for crust browning.
Pinching and sealing edge cracks is simple but important. If a tear develops during stretching, pinch the two sides together firmly and continue working. The gluten network will seal itself; you’re just making sure the edges are in contact so they can bond during baking.
The pizza peel transfer is an optional technique if you’re using a pizza stone or steel. You need a long-handled flat paddle (the peel itself) and a good technique to avoid dough slipping. Dust the peel generously with cornmeal or semolina—this acts as ball bearings, allowing the dough to slide. Place the shaped, topped pizza on the peel, give it a gentle shake to ensure it moves freely, then slide it confidently onto the preheated stone. Practice a few times with an empty peel to build confidence.
Baking Your Pizza: Temperature, Time, and Technique
The oven is where the dough’s long fermentation work gets transformed into a finished pizza. Temperature and timing are critical but also somewhat flexible—oven variation means you’ll need to observe your specific oven rather than follow instructions blindly.
Preheating is non-negotiable. Your oven should reach temperature at least 15 to 20 minutes before the pizza goes in. If using a pizza stone or steel, extend preheating to at least 30 to 45 minutes to allow the stone to fully absorb and conduct heat. A cold stone produces a doughy bottom crust; a properly preheated stone produces a crispy, brown bottom.
Temperature targets depend on oven type and desired crust style. A standard home oven at 475°F to 500°F produces a nicely browned crust in 15 to 20 minutes. A home oven with convection (fan-assisted) at 450°F to 475°F bakes slightly faster because air circulation accelerates browning. A wood-fired oven at 800°F to 900°F cooks in under 2 minutes. Every oven is different—your first pizza is a test run. If the crust browns too quickly, lower the temperature next time. If it takes longer than 22 minutes to cook, raise the temperature.
Oven placement affects how pizza bakes. Most home ovens have a hot bottom and cooler top. If your bottom crust is burning before the top is done, move the pizza to a higher rack. If the top is browning much faster than the bottom, move it lower. Pizza stones conduct heat upward and create more even baking than a baking sheet, which is why many home pizza makers invest in one.
Rotation ensures even browning. Midway through baking (around the 10-minute mark for a 20-minute bake), open the oven and rotate the pizza 180 degrees using a pizza peel or spatula. This compensates for uneven oven heat and ensures the pizza browns evenly around its perimeter.
Doneness cues matter more than watching the clock. The crust should be golden brown, the cheese (if using) should be melted and bubbling, and the bottom should sound hollow when tapped with a wooden spoon. These signals are more reliable than a timer because they account for oven variation.
Resting after baking allows the cheese to set and the interior to finish cooking carryover heat. Two to three minutes of rest makes slicing dramatically easier and ensures the cheese stays in place rather than sliding off with the first slice.
Serving Suggestions and Perfect Pizza Pairings
Pizza stands alone beautifully, but thoughtful accompaniments elevate a meal from good to memorable.
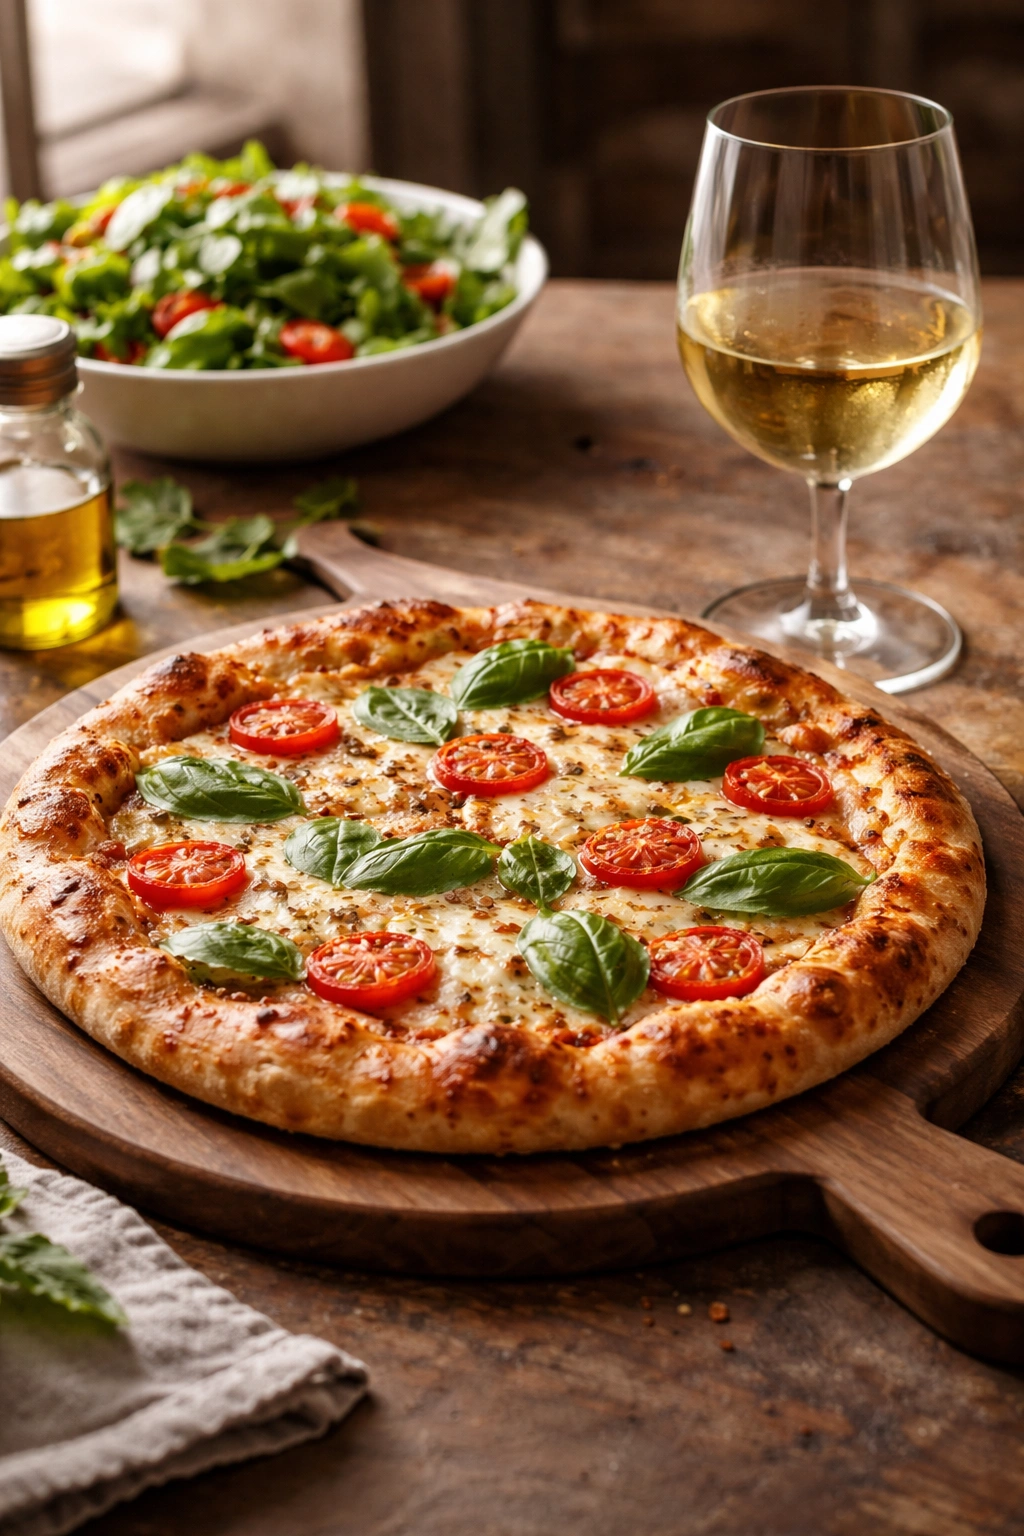
Beverages should complement the pizza’s richness and saltiness. A cold Italian lager or pilsner cuts through the cheese’s heaviness with refreshing bitterness. Dry white wine (Pinot Grigio or Vermentino) provides a crisp, acidic counterpoint. Sparkling water with lemon is an excellent non-alcoholic option that cleanses the palate between bites. Avoid sugary sodas, which become cloying when paired with cheese and bread.
Side dishes should be light and fresh to balance pizza’s richness. A simple green salad with lemon vinaigrette brightens the meal. Roasted vegetables (especially broccoli rabe or Brussels sprouts with garlic) add another dimension. Dipping sauces—marinara, garlic oil, or hot honey—extend the pizza-eating experience.
Finishing touches transform basic pizza into something restaurant-quality. A drizzle of excellent olive oil after baking adds glossy richness. Fresh basil torn by hand (not chopped) and scattered across hot pizza perfumes the dish beautifully. Crushed red pepper flakes provide customizable heat. A squeeze of fresh lemon adds brightness and cuts through the cheese’s weight.
Serving style depends on the occasion. Casual meals call for pizza eaten by hand, standing or sitting informally. Dinner parties benefit from sliced pizza presented on a wooden cutting board at the table, allowing guests to serve themselves and appreciate the crust’s appearance. For cocktail parties, cut the pizza into tiny squares for easy nibbling.
Final Thoughts
No-knead pizza dough revolutionizes home pizza baking because it removes the intimidation factor without sacrificing quality. You’re not fighting the dough or requiring special equipment—you’re simply mixing basic ingredients and letting time and chemistry handle the heavy lifting. The result tastes like it came from a pizzeria that’s been perfecting their craft for decades, yet it required minimal effort from you.
The magic lies in understanding fermentation. Those long hours in the refrigerator transform flour, water, salt, and yeast into something with complexity, structure, and extensibility that mirrors doughs developed through traditional kneading. You’re learning to work with time instead of against it, which is perhaps the most valuable lesson any home baker can internalize.
Start with the basic recipe exactly as written. Once you’ve made a few pizzas and understand how the dough behaves in your specific kitchen and oven, then experiment with variations—different hydration levels, added herbs, alternative toppings, different thickness preferences. You’ll develop intuition about what works and what doesn’t. That intuition is worth far more than following recipes blindly forever.
The beauty of pizza is that it’s both simple and infinitely variable. You can eat it today and feel satisfied, or eat it tomorrow and create a completely different experience through topping variations. Store extra dough in the freezer, and pizza becomes a genuinely convenient weeknight meal—thaw, shape, bake, and dinner is ready faster than it would take to order delivery. Home pizza is genuinely delicious, genuinely convenient, and genuinely within reach for any home baker willing to invest a tiny amount of active time and some patience.