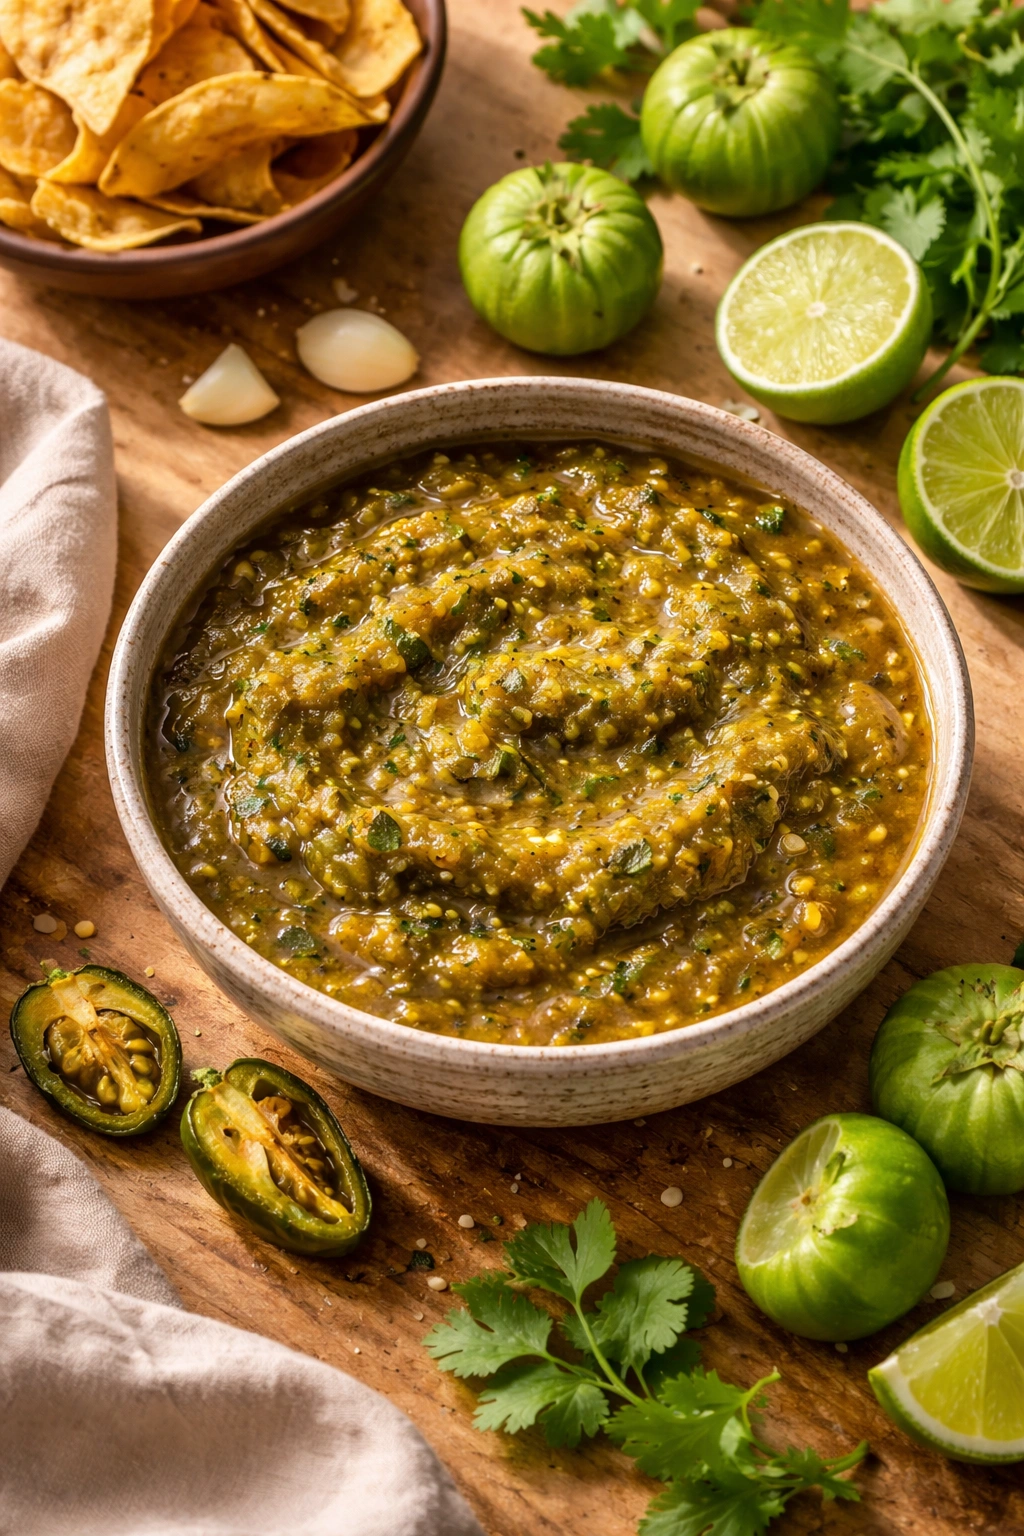
There’s a moment when roasted tomatillo salsa hits your taste buds that makes you understand why people rave about it. It’s not the raw, bright-green punch you might expect from fresh tomatillos — it’s something deeper, more complex, with this subtle caramelization that makes even simple chips taste special. The thing is, roasting feels like a step you might skip on a busy weeknight, but once you taste the difference it makes, you’ll never go back to the raw version again.
Raw tomatillo salsa has its place, sure. But there’s a reason restaurants and home cooks keep coming back to the roasted version: the heat transforms those firm, slightly tart tomatillos into something almost creamy, with a depth that raw versions just can’t match. The char adds a gentle smokiness, the peppers develop sweetness, and the garlic mellows into something almost sweet rather than harsh. It’s the kind of salsa that tastes like someone spent hours on it, when in reality you’ve maybe spent twenty minutes of active work.
What makes this version “easy” is that it respects your time while refusing to compromise on flavor. You’re not babying vegetables at the stove or wrestling with a molcajete if you don’t want to. A sheet pan, a blender or food processor, and about forty minutes from start to finish gets you to something genuinely restaurant-quality. The effort feels earned because the results taste like they should.
Why Roasting Tomatillos Changes Everything
Roasting fundamentally transforms tomatillos in ways that raw preparation simply cannot. When you broil or roast them, the natural sugars caramelize slightly, creating depth and complexity rather than just acidity. The exterior develops small charred spots that add a subtle smokiness, and the flesh becomes soft enough that it naturally releases its juice when blended.
The difference shows up immediately on your palate. Raw tomatillo salsa tastes bright and sharp — it’s that cutting edge that works beautifully with rich foods like carnitas or creamy queso. Roasted tomatillo salsa feels more balanced, almost rounded, because the heat mellows the natural tartness and brings forward flavors that were hiding in the background. That’s why it pairs beautifully with everything from simple chips to complex grilled fish.
The Science Behind the Change
When tomatillos reach temperatures above 300°F, their cell walls begin to break down, releasing and concentrating their natural juices. The sugars undergo Maillard browning — the same chemical reaction that makes bread crust delicious and steak crusty. This isn’t just heating; it’s actual flavor creation happening on the surface of every vegetable.
Garlic and peppers behave similarly under high heat. Garlic’s harsh sulfur compounds transform into sweeter, nuttier compounds. Poblanos and serranos lose their raw bite and develop almost fruity notes. The onion becomes translucent and sweetens noticeably. Everything that seemed one-dimensional raw becomes multi-layered when roasted.
Why This Matters for Your Final Salsa
A roasted salsa will keep for longer because those roasted vegetables have less raw moisture, which means less fermentation and a longer shelf life in your fridge. It freezes better because the roasting process has already broken down cell walls, so thawing and refrosting doesn’t make it mushy. It also blends differently — roasted vegetables create a salsa with better body and consistency, rather than a thin, watery puree that raw versions sometimes produce.
Most importantly, roasted salsa is more forgiving. You can taste it as you go and adjust seasoning more easily because the flavors are more pronounced. With raw salsa, you’re often guessing at salt and lime because the sharpness of the raw vegetables masks your additions until it’s too late.
When to Make This Salsa (And Why You’ll Want Extra)
Roasted tomatillo salsa is one of those preparations that’s easy to justify keeping around. It’s sturdy enough to survive a crowded dinner party where it sits on a table for hours, yet refined enough to impress if you’re plating individual appetizers. Unlike delicate fresh salsas that start looking tired after an hour, this one actually improves slightly as the flavors meld.
The best time to make this is during tomatillo season — late spring through early fall in most growing regions — when tomatillos are abundant and cheap. But honestly, because this salsa freezes beautifully, making a double batch during peak season means you can have restaurant-quality salsa available year-round.
Uses That Go Beyond Chips and Tacos
This salsa works as an actual cooking ingredient, not just a condiment. Spoon it over grilled chicken breast and it becomes a complete, elegant dish. Mix it with sour cream for a taco sauce that elevates ground beef to something special. Swirl it into scrambled eggs or ricotta. Dollop it onto grilled fish where it acts as both sauce and garnish. Use it as a base for enchilada verde sauce — just simmer it with chicken broth and cream and you’ve got something restaurant-quality without the effort.
As a dip, it’s fantastic with everything from tortilla chips to roasted vegetables to even fresh radishes. It’s the kind of salsa that makes people think you spent your afternoon cooking, when really you had the oven do most of the work.
Storage Means Convenience
Because this salsa keeps for up to a week in the refrigerator and freezes for up to three months, making a big batch is actually the smart play. You get fresh salsa for initial use, then you have convenient portions ready to pull from the freezer whenever you need that hit of bright, complex flavor without any actual cooking required.
Choosing and Preparing Your Tomatillos
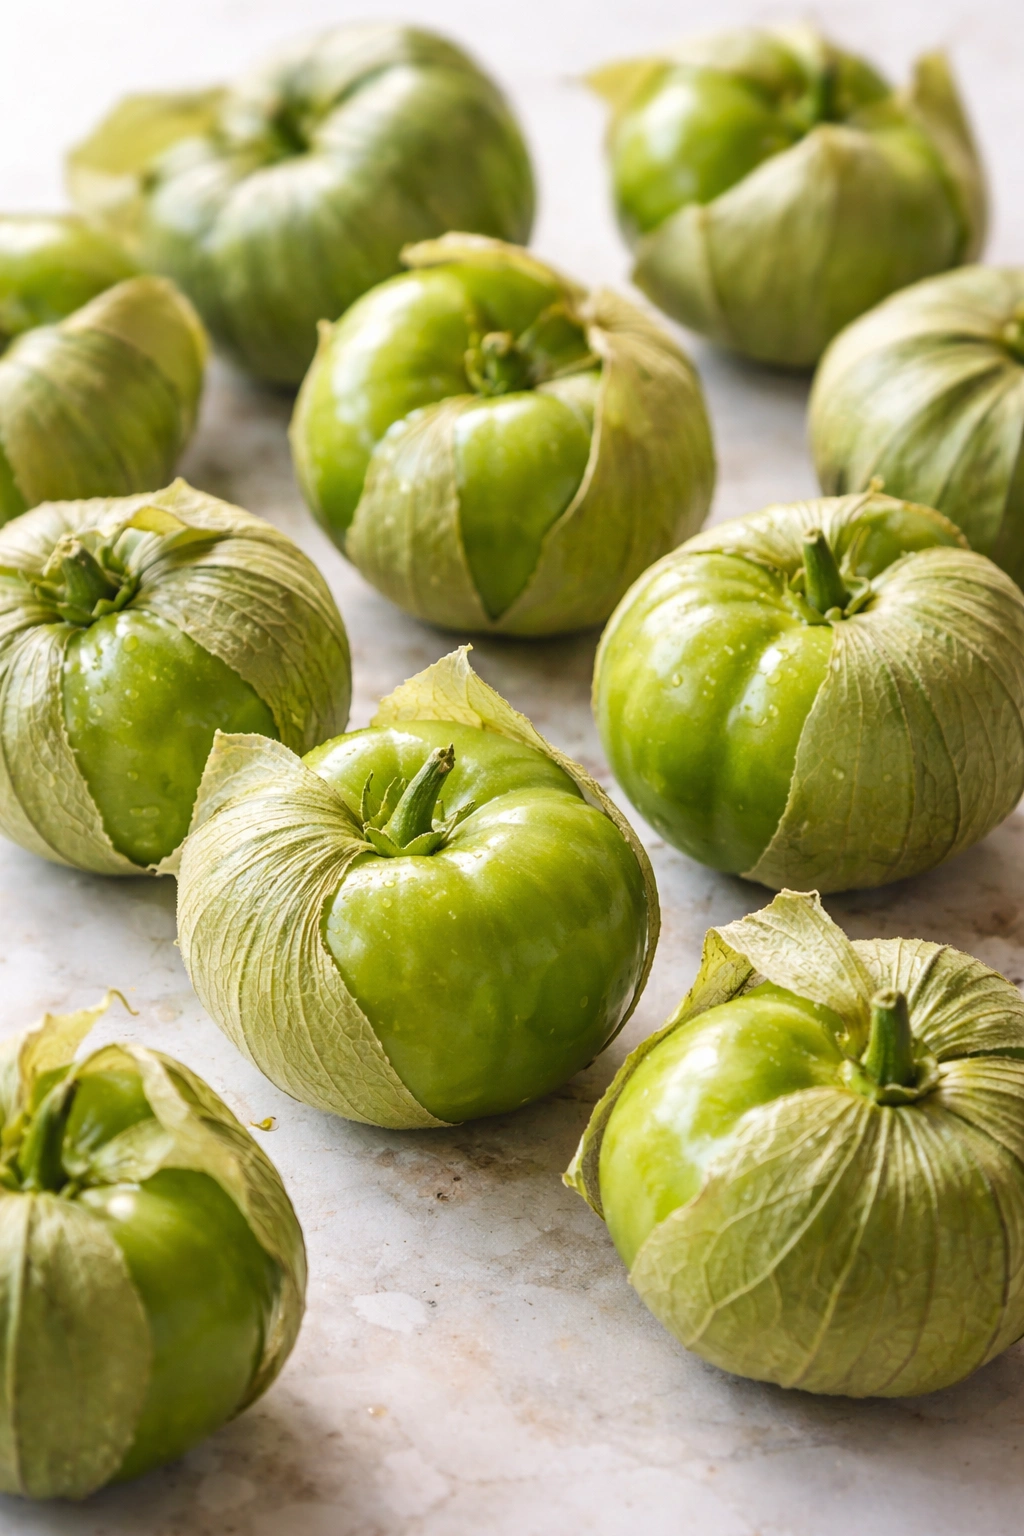
Not all tomatillos are created equal, and choosing the right ones makes a tangible difference in your final salsa. You want tomatillos that are fully mature but still firm — they should be the size of a golf ball or slightly smaller, with the papery husk pulled back enough that you can see the green fruit underneath. The husk should be nearly split open at the stem end.
If the tomatillo feels too soft when you squeeze it gently, it’s overripe and you’ll end up with watery salsa. If it’s hard and the husk is still tightly wrapped, it’s not quite ready — the flesh will be firmer and the flavor more vegetal. You’re looking for that sweet spot where they’re mature enough to have developed their complex flavor but firm enough to hold their shape when roasted.
The Husk Matters
That papery husk might seem like packaging, but it actually protects the fruit during roasting. I keep it on through the entire roasting process because it prevents the tomatillo from drying out too much on the outside. Once everything comes out of the oven, the husks slip right off, and underneath is perfectly roasted fruit with good moisture and flavor. If you remove the husk before roasting, you’ll lose some juice and the tomatillos can dry out on the surface.
Cleaning and Prep
Before roasting, rinse the tomatillos under cool water to remove the sticky residue that clings to the husk — this stuff is harmless but washing it off makes handling easier and helps you see the fruit color better. Pat them dry with a clean kitchen towel. You don’t want water sitting on them when they hit the heat because it causes steaming rather than roasting.
Check each tomatillo as you rinse it. If the husk is damaged or the fruit inside has a soft spot, set it aside — these overripe ones can be saved for a different use (they’re great for cooking into a cooked-down sauce), but for this salsa you want the firm ones that will hold up to the high heat and develop that wonderful char.
Essential Equipment You’ll Actually Need
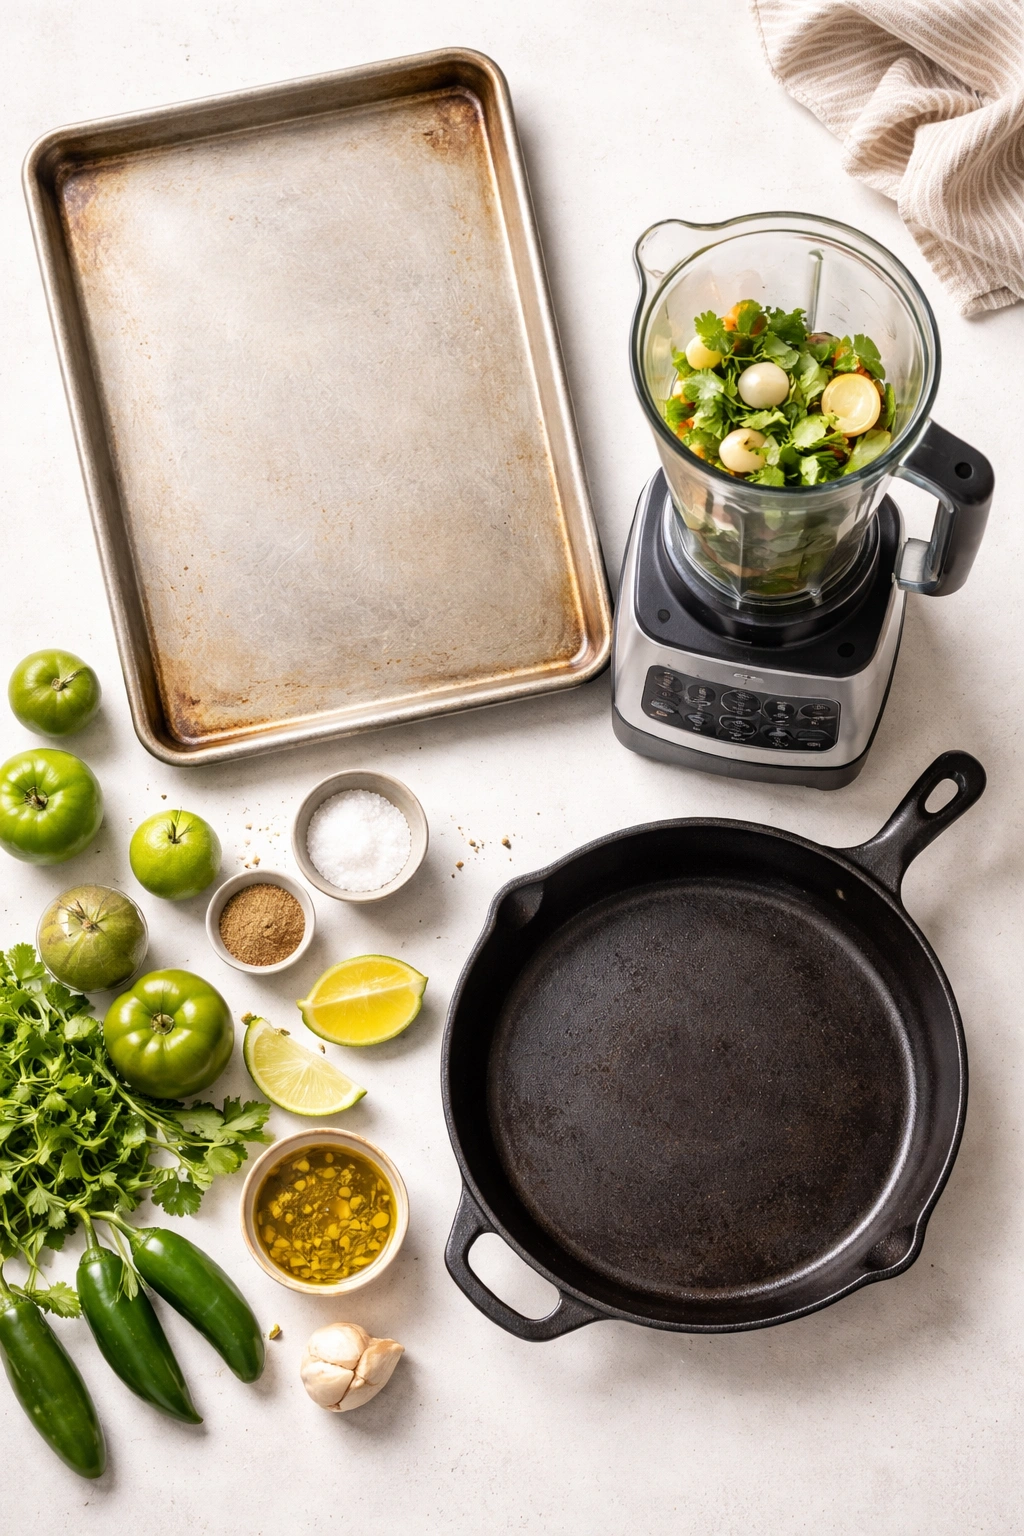
You don’t need fancy equipment for this salsa, but having the right tools makes the job noticeably easier and faster. At minimum, you need a sheet pan large enough that the vegetables sit in a single layer without crowding. Cast iron works beautifully here because it conducts heat so evenly, but a regular rimmed baking sheet is fine too.
For blending, you have two solid options. A blender creates the smoothest texture and is what you’d use if you want restaurant-style salsa — completely smooth or just slightly textured. A food processor gives you more control over texture and works perfectly if you prefer chunkier salsa. Both methods work; it depends on your preference. Some people use an immersion blender and a bowl for small batches, which is fast and creates minimal cleanup.
The Molcajete Question
A molcajete — that traditional lava-stone mortar and pestle — is absolutely not required, despite what some recipes suggest. It creates a more rustic, hand-crushed texture that some people prefer for the authenticity factor. But honestly, it also requires a lot of arm work and doesn’t finish the job faster than electric blending. Use one if you own and love it, but don’t buy one specifically for this salsa.
Other Helpful (But Optional) Items
A chef’s knife for chopping the cilantro and fine-tuning any large chunks that the blender misses. A microplane grater if you want to zest a lime directly over the finished salsa for extra pop. A fine-mesh strainer if you want to remove some of the liquid to create thicker salsa (some of the juice drains off during roasting; you can capture it separately and add back as much or as little as you want). None of these are essential, but they’re all tools that make the job easier.
Complete Ingredients List
Yield: Makes about 3 cups | Serves 8-10 as a side Prep Time: 15 minutes Cook Time: 25 minutes Total Time: 40 minutes Difficulty: Beginner — high heat does the work for you, minimal hands-on skills required
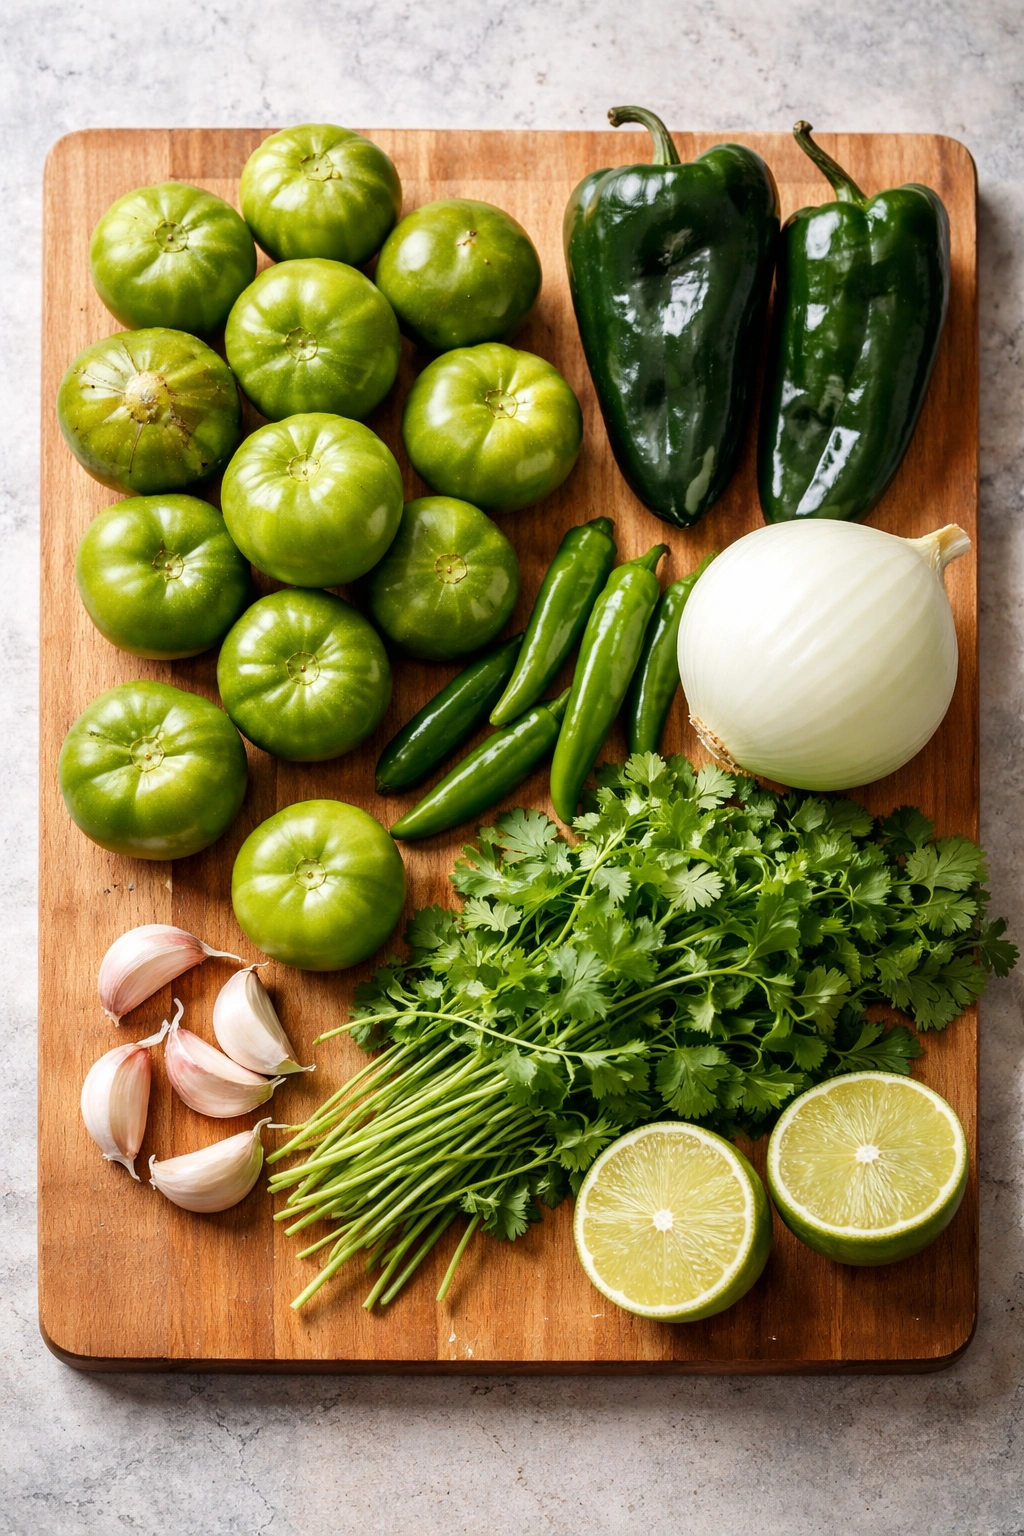
For the Roasted Salsa:
- 2 pounds (about 8-10 medium) tomatillos, husked and rinsed
- 2 poblano peppers (about 8 ounces total)
- 1 to 2 serrano peppers, depending on how much heat you want (start with 1 if you’re sensitive to spice)
- ½ medium white onion, cut into thick slabs
- 4 garlic cloves, unpeeled
- 2 tablespoons fresh cilantro leaves, loosely packed (or 3 if you’re a cilantro devotee)
- Juice of 1 to 2 limes (about 3-4 tablespoons fresh lime juice), divided
- 1 teaspoon fine sea salt (more or less to taste — you can always add more after blending)
- ¼ teaspoon black pepper
- ¼ teaspoon ground cumin (optional but recommended — adds warmth without being obvious)
Optional additions for custom flavors:
- 1 tablespoon fresh epazote leaves or ½ teaspoon dried epazote (if you want an authentic Mexican angle)
- ½ jalapeño pepper in place of 1 serrano (for milder heat with a different flavor profile)
- 1 tablespoon honey or ½ teaspoon sugar (only if your roasted salsa tastes too sharp after blending — taste first before adding)
Serving and Timing Block
Yield: Makes 3 cups of finished salsa | Serves 8-10 as an appetizer or side
Prep Time: 15 minutes (washing, husking, cutting vegetables)
Cook Time: 25 minutes (roasting time only)
Total Time: 40 minutes active + optional 10 minutes resting time before blending
Difficulty: Beginner — no special cooking skills needed. The oven does the work, you just need to be able to safely handle hot vegetables and operate a blender or food processor.
Best Served: Slightly warm or at room temperature with tortilla chips, or as a topping for grilled proteins while still warm
Step-by-Step Roasted Salsa Instructions
Prepare Your Oven and Pan:
-
Preheat your oven to 450°F (230°C) and position one oven rack in the upper third of the oven (closer to the heating element). Line a large rimmed baking sheet with aluminum foil for easy cleanup — this is optional but worth the small effort because tomatillo juice stains like crazy if you don’t.
-
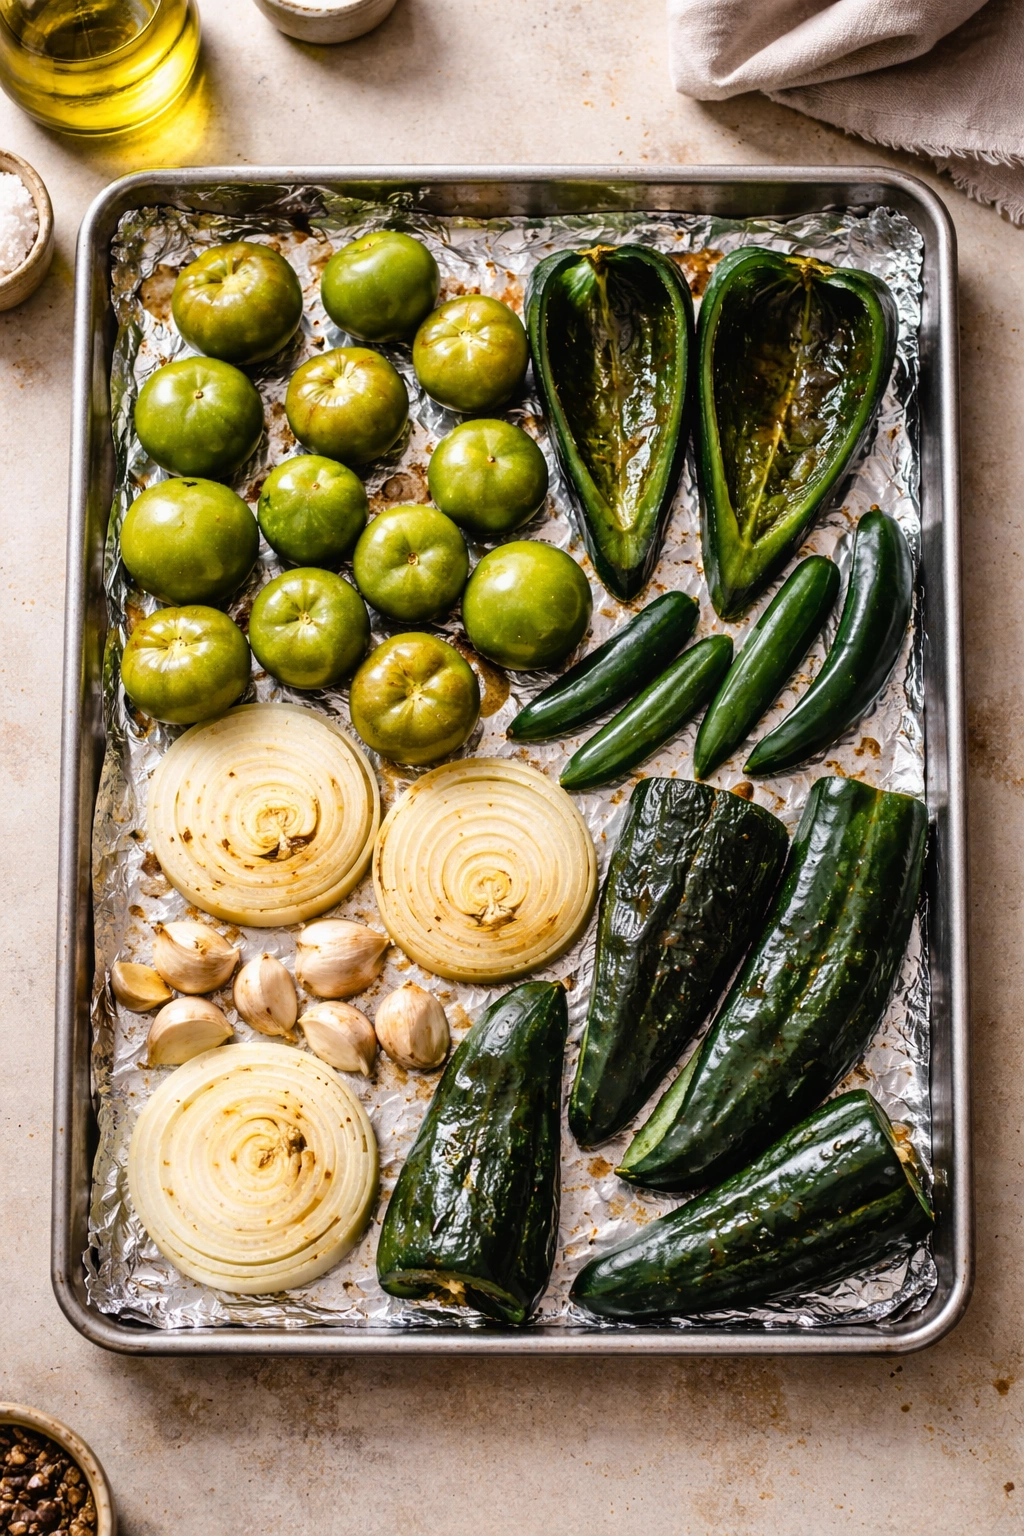
Prepare the vegetables: Husk and rinse the tomatillos, then pat them dry. Cut the poblano peppers in half lengthwise and remove the seeds and ribs — you want the flat surfaces to make good contact with the hot pan for better charring. Keep the serrano peppers whole; their smaller size means they’ll roast through evenly without cutting them.
-
Arrange everything on your prepared sheet pan in a single layer. The tomatillos should be cut-side up if you’ve halved any, though I usually leave them whole. The poblanos should be skin-side up so the skin gets direct heat and chars. Scatter the serrano peppers, onion slabs, and unpeeled garlic cloves around the tray. Don’t crowd the pan — the vegetables need a little space around them so heat can circulate and they roast rather than steam.
The Roasting:
-
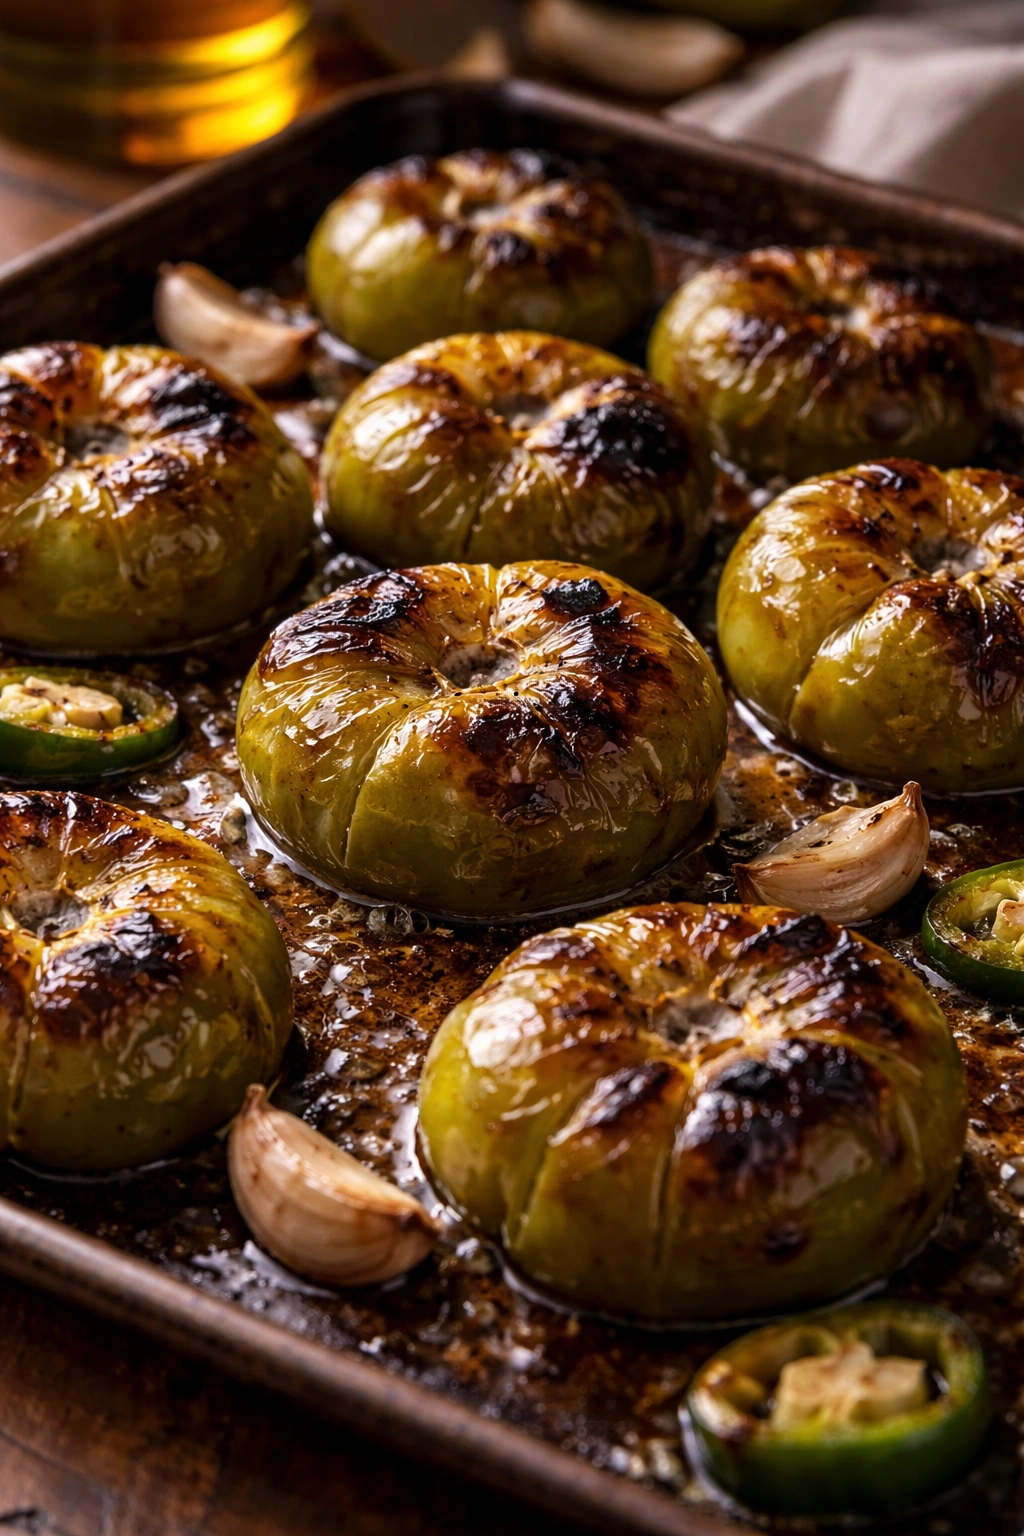
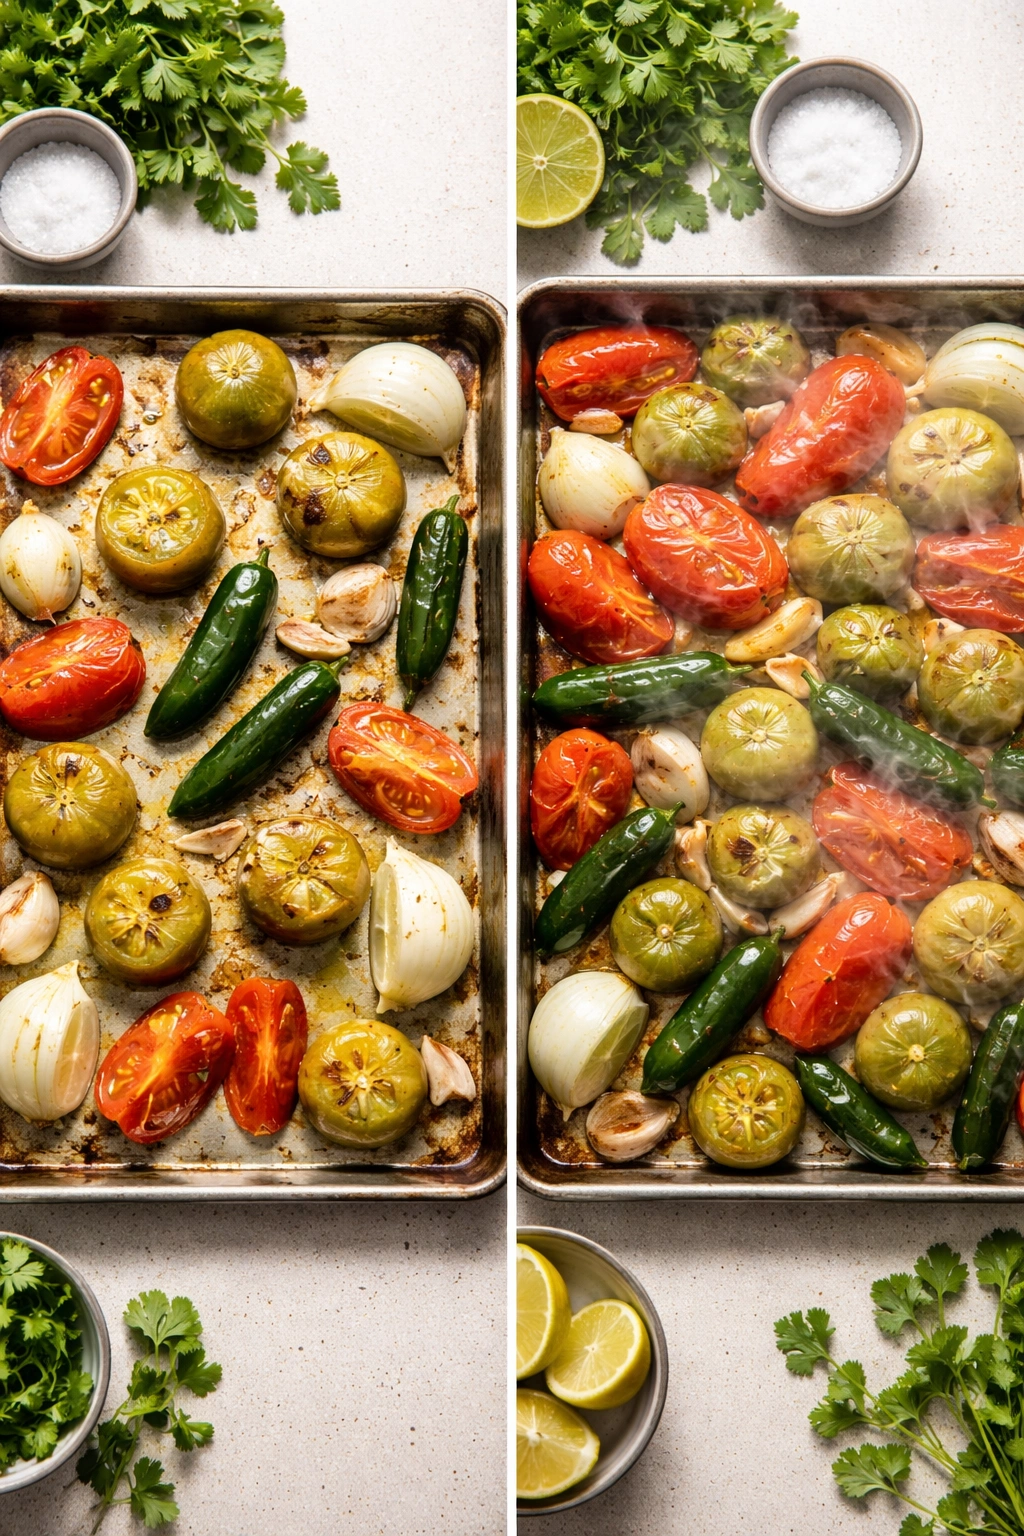
Place the sheet pan in the preheated oven, as close to the heat source as possible. Roast for 8 to 10 minutes until the tomatillo skin starts to split and char in spots, and the flesh begins to turn from bright green to a dull olive green. You should see some blackened spots on the tomatillos — this is exactly what you want.
-
After 10 minutes, remove the pan and check the poblano peppers. They should have a few charred spots on the skin. If they’re not charred yet, flip them skin-side down and return to the oven for another 3 to 5 minutes. The goal is charred skin on the poblanos because that char is flavor.
-
Return the entire pan to the oven for another 10 to 12 minutes until the tomatillos are soft enough that a fork pierces them easily and the juice is pooling on the pan. The poblanos should be mostly charred on the skin, the onion should be caramelized at the edges, and the garlic should be soft and slightly blackened on the outside. This is 20-25 minutes total roasting time, depending on your oven and the exact size of your vegetables.
Advertisements -
Remove the pan from the oven carefully — everything is very hot and that pooled liquid on the bottom is literally boiling. Let the vegetables rest on the pan for about 5 minutes. This makes them easier to handle and allows the residual heat to finish cooking the centers without overcooking the exteriors.
Prep for Blending:
-
Once cool enough to handle, peel the charred skin off the poblano peppers. It should slip off fairly easily once it’s roasted — if it’s not cooperating, don’t force it; a little charred skin actually adds flavor. Discard the skin and any remaining seeds. Leave the serrano peppers whole; their thin skin is edible and adds to the final texture.
-
Squeeze the garlic cloves out of their skins into a small bowl. They should pop right out — they’re completely soft and sweet now. If any garlic is stuck, just squeeze harder or pry it out with the flat side of a knife.
-
Pour off the accumulated liquid from the pan into a separate bowl and set aside. This is essentially roasted tomatillo juice and it’s flavorful gold. You’ll add it back to your salsa as needed to get the consistency you want.
Blend and Season:
-
Transfer the roasted tomatillos, poblanos, serranos, onion, garlic, and cilantro leaves to your blender or food processor. Add the juice of 1 lime and the salt and pepper.
-
Blend on medium speed for about 30 seconds, until you reach your desired texture. If you prefer smooth salsa like you’d get at a restaurant, blend for a full minute until completely smooth. If you like it with some texture, pulse it 8-10 times until the pieces are broken down but still visible. This is entirely your call — either version tastes amazing.
-
Taste the salsa before adding the reserved roasted liquid. It should taste complex and balanced — tomatillo forward with the peppers coming through and the roasted notes obvious. If it tastes too thick, add reserved liquid 2 tablespoons at a time, stirring and tasting, until you reach the consistency you want. Some people like thick salsa; others prefer it pourable. Go with your preference.
-
Add the juice of the second lime — start with the juice from half a lime, taste, and add the rest if needed. The lime brightens everything and should be noticeable but not dominant. Add the cumin if using, and taste again. Add more salt very slowly and in small pinches — it’s easier to add more than to fix oversalted salsa. Start with the 1 teaspoon called for, blend it in, taste, and add ¼ teaspoon at a time if needed.
Advertisements
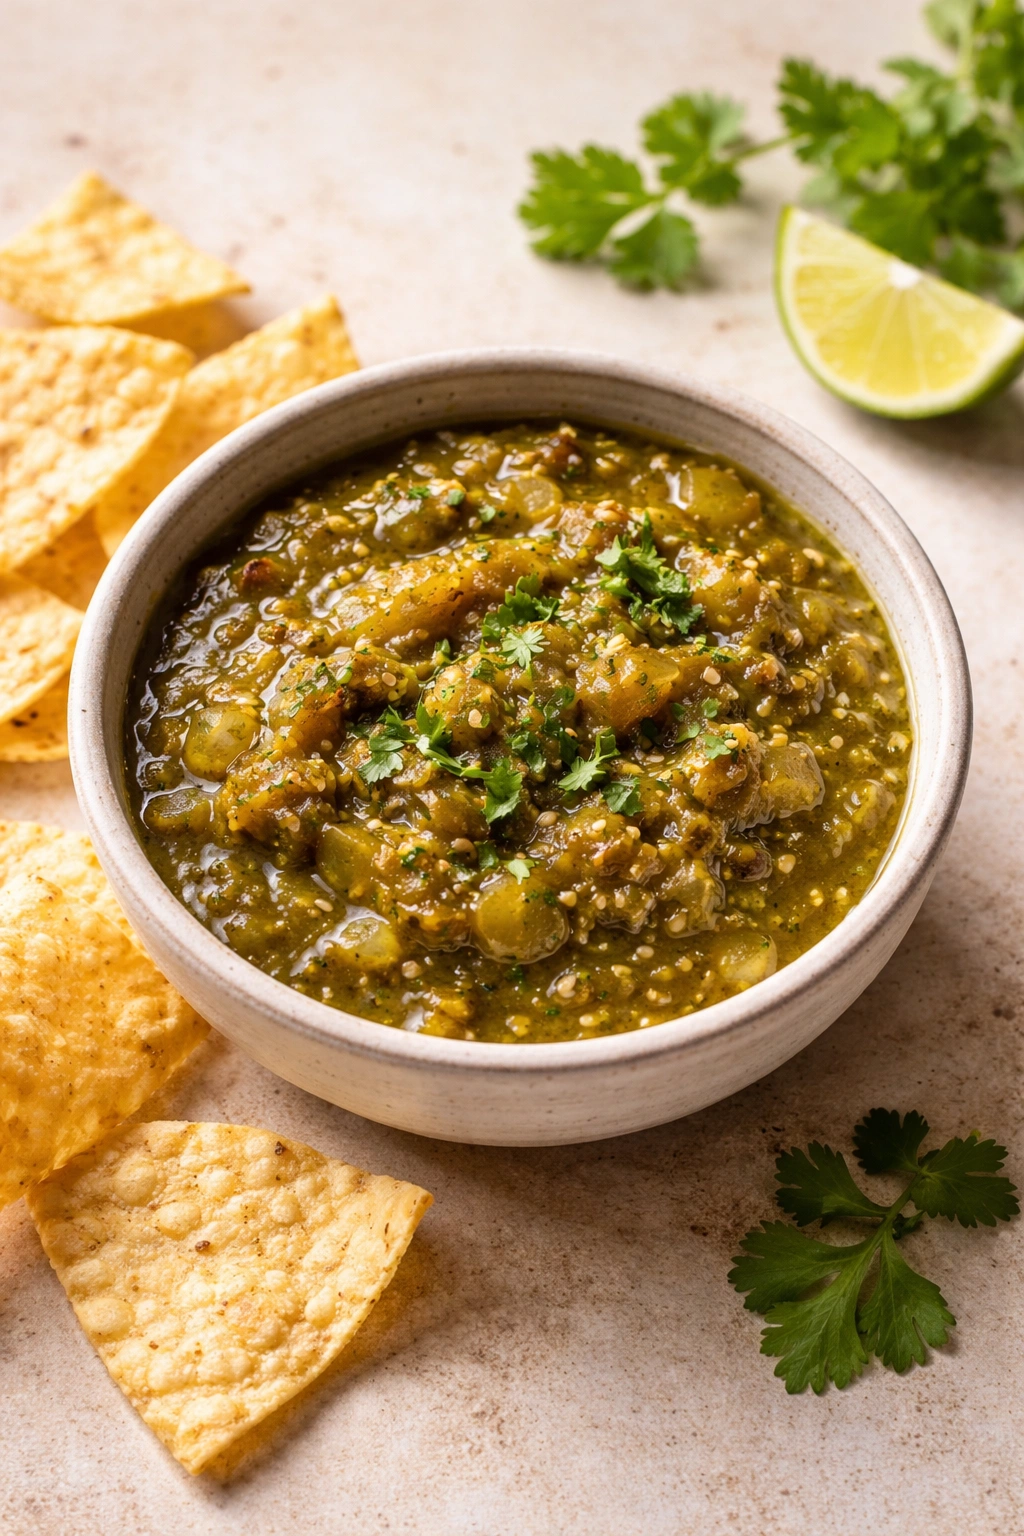
Final Check and Rest:
- Transfer the finished salsa to a serving bowl. Let it rest at room temperature for 5 to 10 minutes before serving — the flavors continue to marry and mellow slightly as it sits. If you’re making this ahead, cover and refrigerate until you’re ready to serve, then bring it back to room temperature for 15 minutes before serving for the best flavor.
Practical Tips and Common Mistakes to Avoid
The most common mistake is not roasting the vegetables hot enough. If your oven runs cool or you don’t roast long enough, the tomatillos won’t develop that complex flavor and your salsa will taste more raw and one-dimensional. The solution is simple: crank the heat to 450°F minimum, and don’t pull the pan out until you see actual char and the tomatillos have softened noticeably.
Another common issue is adding ingredients in the wrong order. Blend the hot vegetables first with just the herbs and lime, then taste before adding extra salt. Tomatillos are naturally acidic and somewhat bitter, and the lime helps balance that. Adding salt before tasting means you might oversalt trying to cut the tartness, when really you just need more lime and time for the flavors to settle.
The Texture Trap
If your finished salsa separates and gets watery, you either overcrowded the pan during roasting (steaming instead of roasting) or you blended it too much. You can fix this by straining off some of the liquid through a fine-mesh sieve, but the better approach is adjusting your method next time. Roast with good spacing between vegetables, and blend just until the texture you want is reached — don’t keep going past that point.
Char Is Good, Burnt Is Bad
There’s a fine line between the beautiful char that adds flavor and actual burnt vegetables that taste acrid. The difference is about 5 minutes, so watch carefully during the last bit of roasting. Vegetables should be soft and mostly translucent when you cut into them, with visible char on the outside but no black-on-black appearance. If the skin looks completely blackened and the flesh inside is mushy, you’ve gone too far and the salsa will taste slightly burnt.
The Garlic Game
Roasted garlic is dramatically different from raw garlic — it’s sweet and mellow. This is good, but sometimes you want a tiny bit of raw garlic bite to cut through. If your finished salsa tastes flat even after lime and salt, mince a tiny bit of fresh raw garlic (I’m talking a quarter clove) into the finished salsa. That little bit of raw intensity wakes everything up without making it harsh.
Cilantro Confidence
If you’re not a cilantro person, this salsa is good with less or without it entirely. Some people find cilantro soapy (it’s actually a genetic thing, not a personal failure), and there’s zero shame in that. Use half the amount or skip it completely. The roasted vegetables are flavorful enough to stand on their own.
Make-Ahead Timing
You can prep all the vegetables and arrange them on the pan up to 4 hours ahead. Cover it loosely with plastic wrap and store in the fridge, then roast when you’re ready. This means you can do all the chopping in the afternoon and have fresh salsa ready the moment guests arrive — just pop it in a preheated oven.
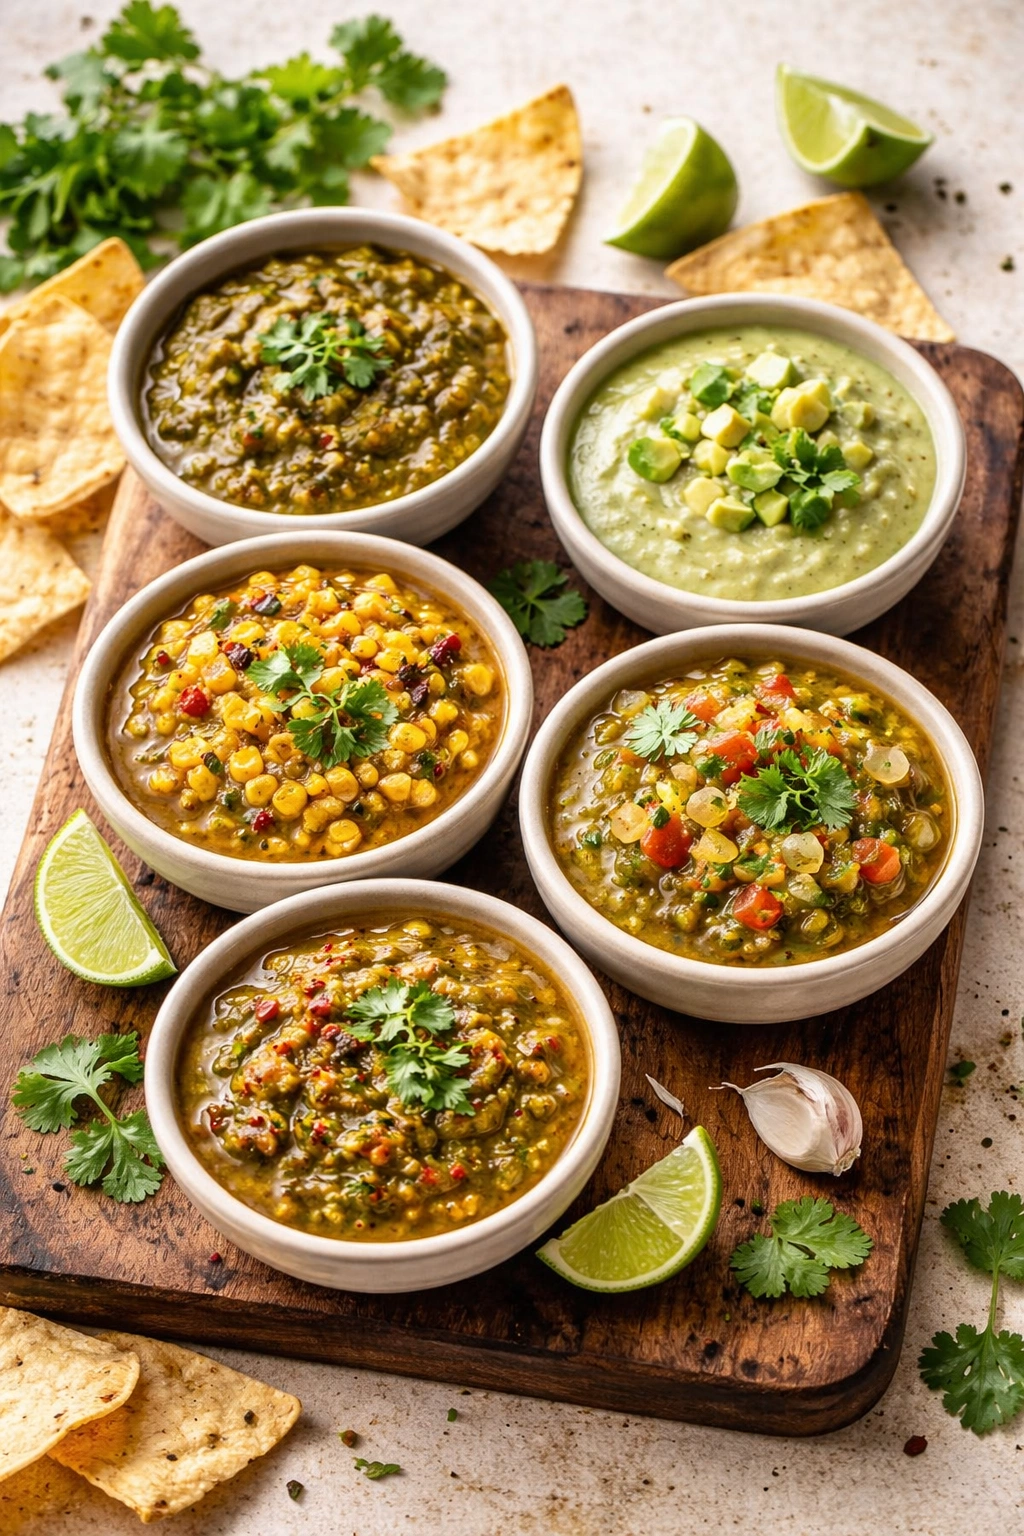
5 Flavor Variations Worth Trying
Smoky Roasted Tomatillo Salsa with Smoked Paprika
After blending, stir in ½ teaspoon of smoked paprika along with the cumin. This adds a deeper, smokier note that makes the salsa taste even more complex and works beautifully with grilled meats. The paprika disappears into the background but elevates the entire dish. Start with ¼ teaspoon if you’re uncertain — paprika has a strong flavor and you can always add more, but you can’t remove it once it’s in.
Creamy Roasted Tomatillo Salsa
Blend the roasted vegetables as directed, then stir in 3 to 4 tablespoons of crema, Mexican crème fraîche, or sour cream thinned slightly with a tablespoon of water. This creates a silky, luxurious salsa that’s absolutely stunning with grilled fish or as a topping for enchiladas verdes. The creaminess mellows the tomatillos’ tartness and creates something that tastes much richer than the ingredient list suggests. Use this version warm, not cold — reheating slightly breaks up the separation that sometimes happens with dairy.
Charred Corn and Roasted Tomatillo Salsa
Roast ¾ cup of fresh corn kernels (or thawed frozen corn) alongside your other vegetables, spreading it in a thin layer on the pan so it chars. Blend it in with everything else, or stir it in whole after blending for a bit of texture. The sweetness of charred corn balances the tomatillos perfectly and creates a summer-focused salsa that’s beautiful at picnics and outdoor dinners. This variation is stunning with grilled chicken or inside tacos with crispy fish.
Chile-Focused Roasted Salsa Verde with More Heat
If you love spice, use three serrano peppers instead of two, or include one or two habaneros roasted alongside the poblanos (be careful with habaneros — they’re significantly hotter and will make this salsa quite spicy). Alternatively, add ¼ to ½ teaspoon of cayenne pepper after blending and taste as you go. This version becomes a condiment that serious spice lovers appreciate, while still maintaining the roasted complexity that makes roasted tomatillo salsa special.
Roasted Tomatillo Salsa with Charred Tomatillos and Fresh Herbs
Skip the blender entirely and roughly chop the roasted vegetables by hand, then stir in extra fresh cilantro (another tablespoon), a tablespoon of finely minced fresh mint or basil, and an extra squeeze of lime juice. This approach keeps more texture and creates a chunky salsa that tastes fresh despite the roasting. It’s more labor-intensive but creates something visually interesting and textually complex. This version is best eaten within a day or two because the fresh herbs deteriorate faster than blended salsa.
Storage, Make-Ahead, and Freezing Guide
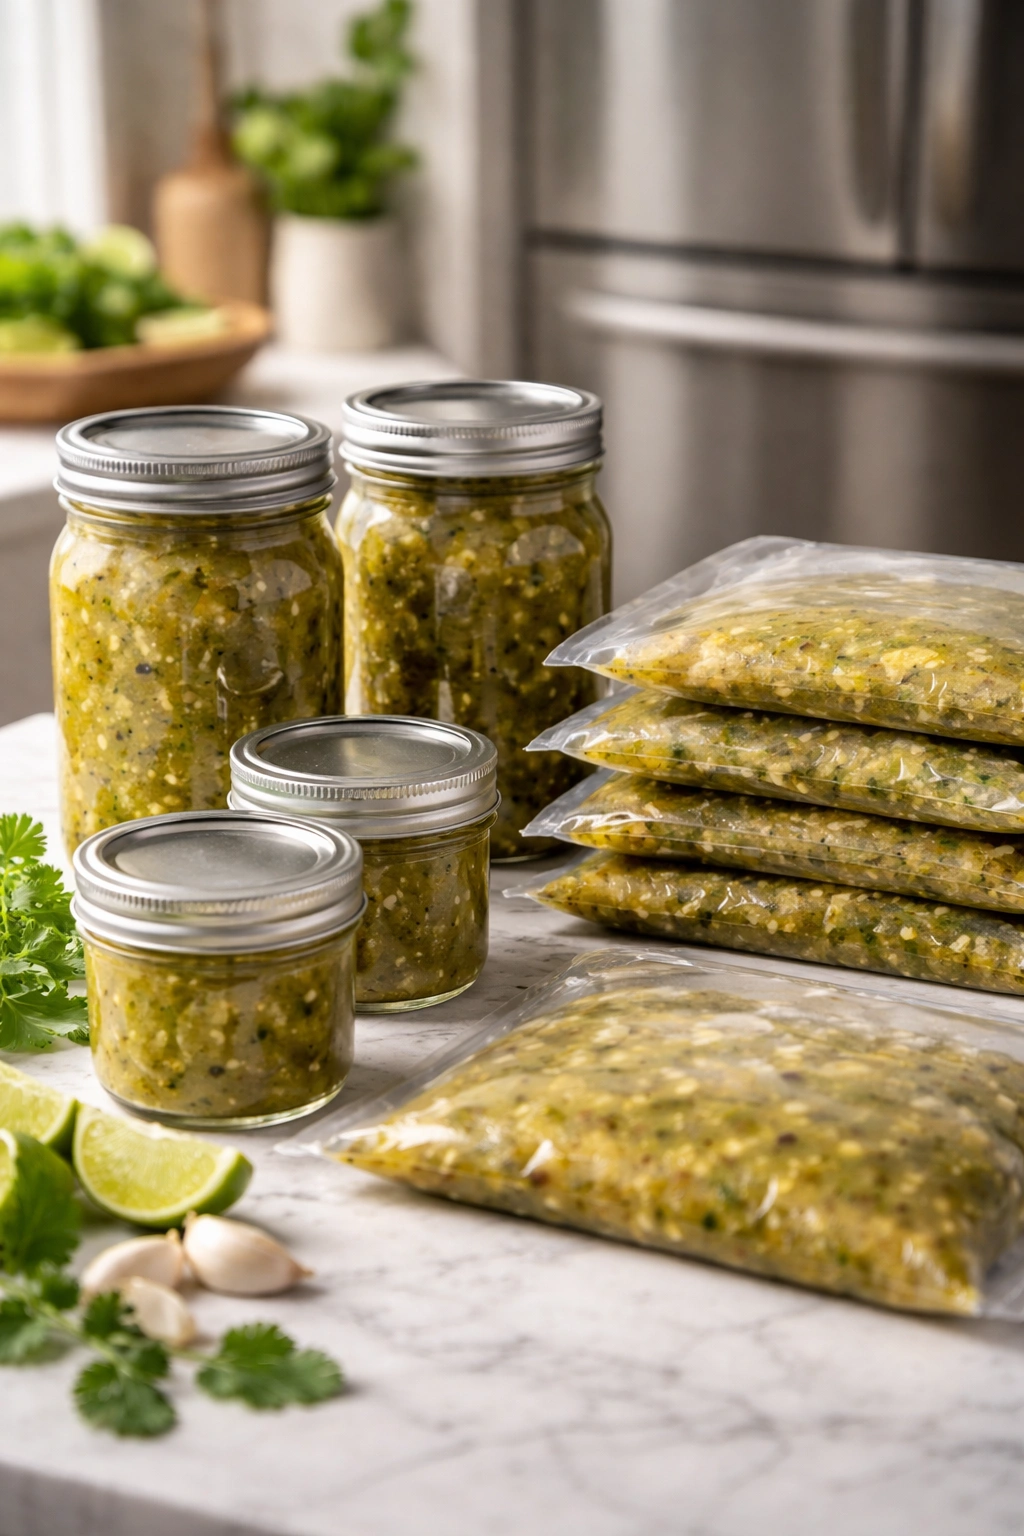
Roasted tomatillo salsa keeps for up to 7 days in the refrigerator in an airtight container. The flavor actually improves after the first day as the roasted notes deepen and the ingredients meld. If you notice any mold or off smell after a few days, discard it — trust your senses.
For the freezer, this salsa is genuinely excellent. It freezes beautifully because the roasting has already broken down cell walls and released the juices. Portion it into ice cube trays (each cube is about 2 tablespoons) and freeze, then pop the cubes into a freezer bag and label them with the date. Frozen salsa keeps for up to 3 months and thaws completely without any texture degradation. This is the smart way to preserve a batch made during peak season for use throughout the year.
Reheating and Thawing
Thaw frozen salsa either by moving it to the refrigerator the night before, or by running the container under cool water and stirring every few minutes until it’s liquid. Don’t microwave it unless you’re in a hurry — gentle thawing preserves the texture better. Once thawed, it tastes just like fresh salsa. If the flavors seem a bit muted after freezing, add a squeeze of fresh lime juice and it snaps right back to life.
If you want to serve it warm, you can gently heat roasted tomatillo salsa in a saucepan over medium-low heat, stirring frequently, for about 5 minutes. This brings out the roasted notes again and is particularly nice if you’re using it as an actual sauce over enchiladas or rice bowls. Never boil it — high heat can make the cilantro taste mushy.
Make-Ahead Strategies
The morning-of approach: Prep and arrange vegetables on the pan early in the day, cover loosely with foil, and refrigerate. When you’re ready to serve, preheat the oven and roast. You’ll have fresh salsa ready in 30 minutes with minimal last-minute stress.
The two-day approach: Make the entire batch two days before serving. The flavor is more integrated and the salsa tastes even better. Keep it covered in the fridge. This works especially well for entertaining because the salsa is ready and you only need to set it out.
The component approach: Roast the vegetables but don’t blend them. Store the roasted vegetables and their liquid separately in the fridge for up to 4 days, then blend and season just before serving. This takes only 5 minutes of blending and you get that “fresh” taste of salsa made the day you serve it.
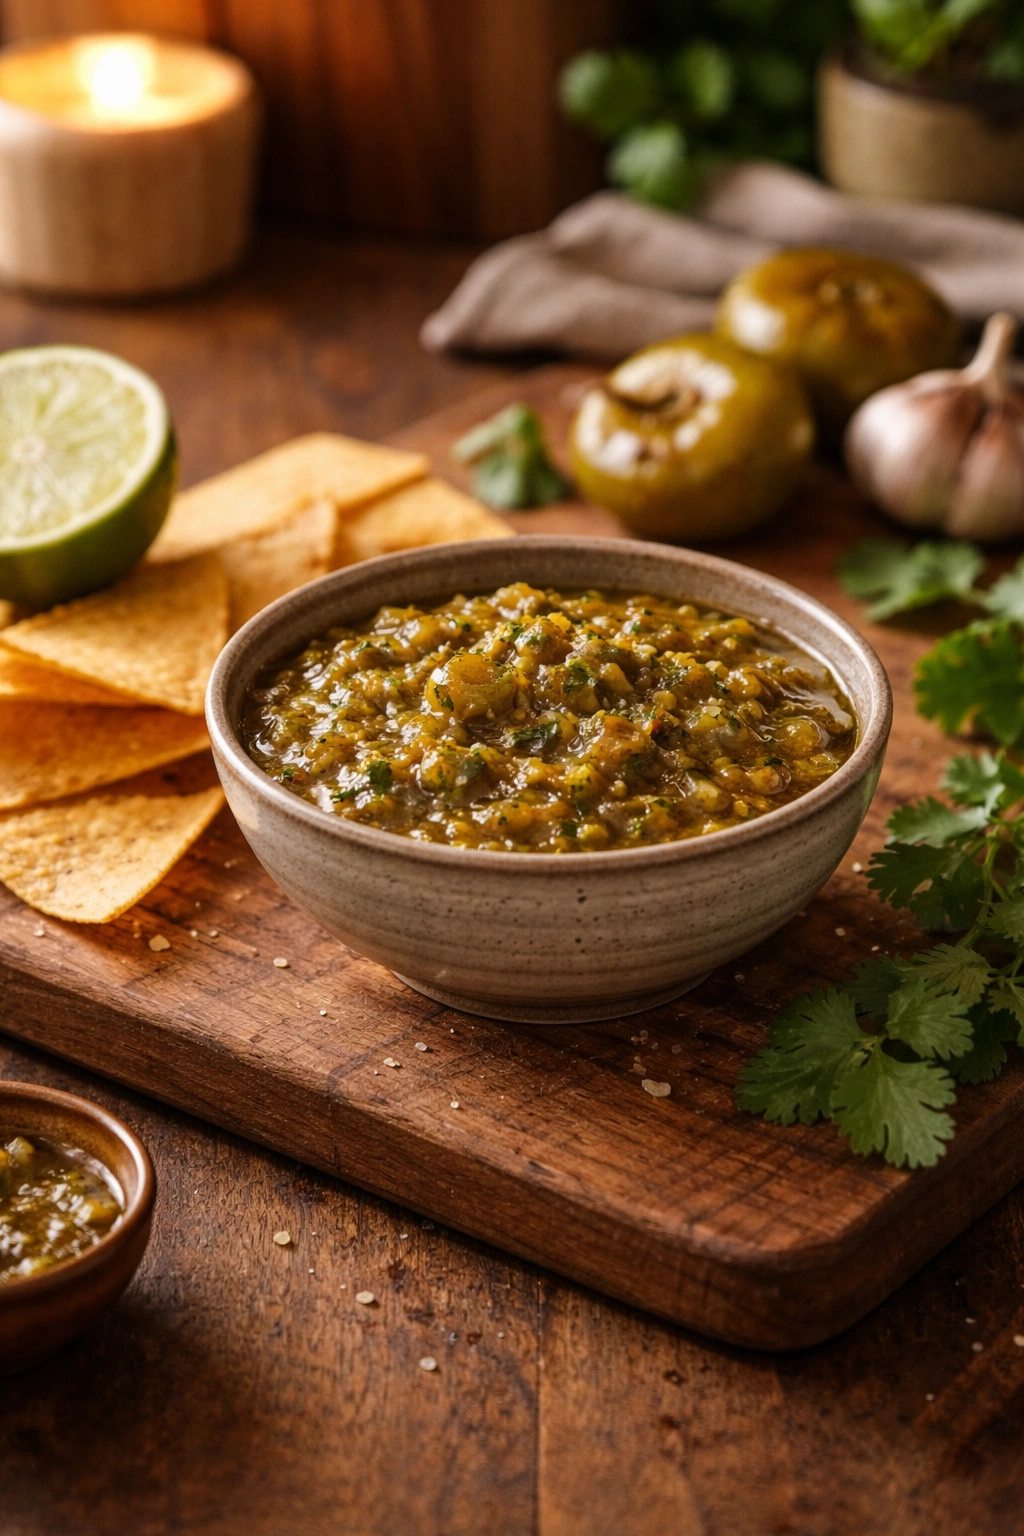
Serving Suggestions and Pairing Ideas
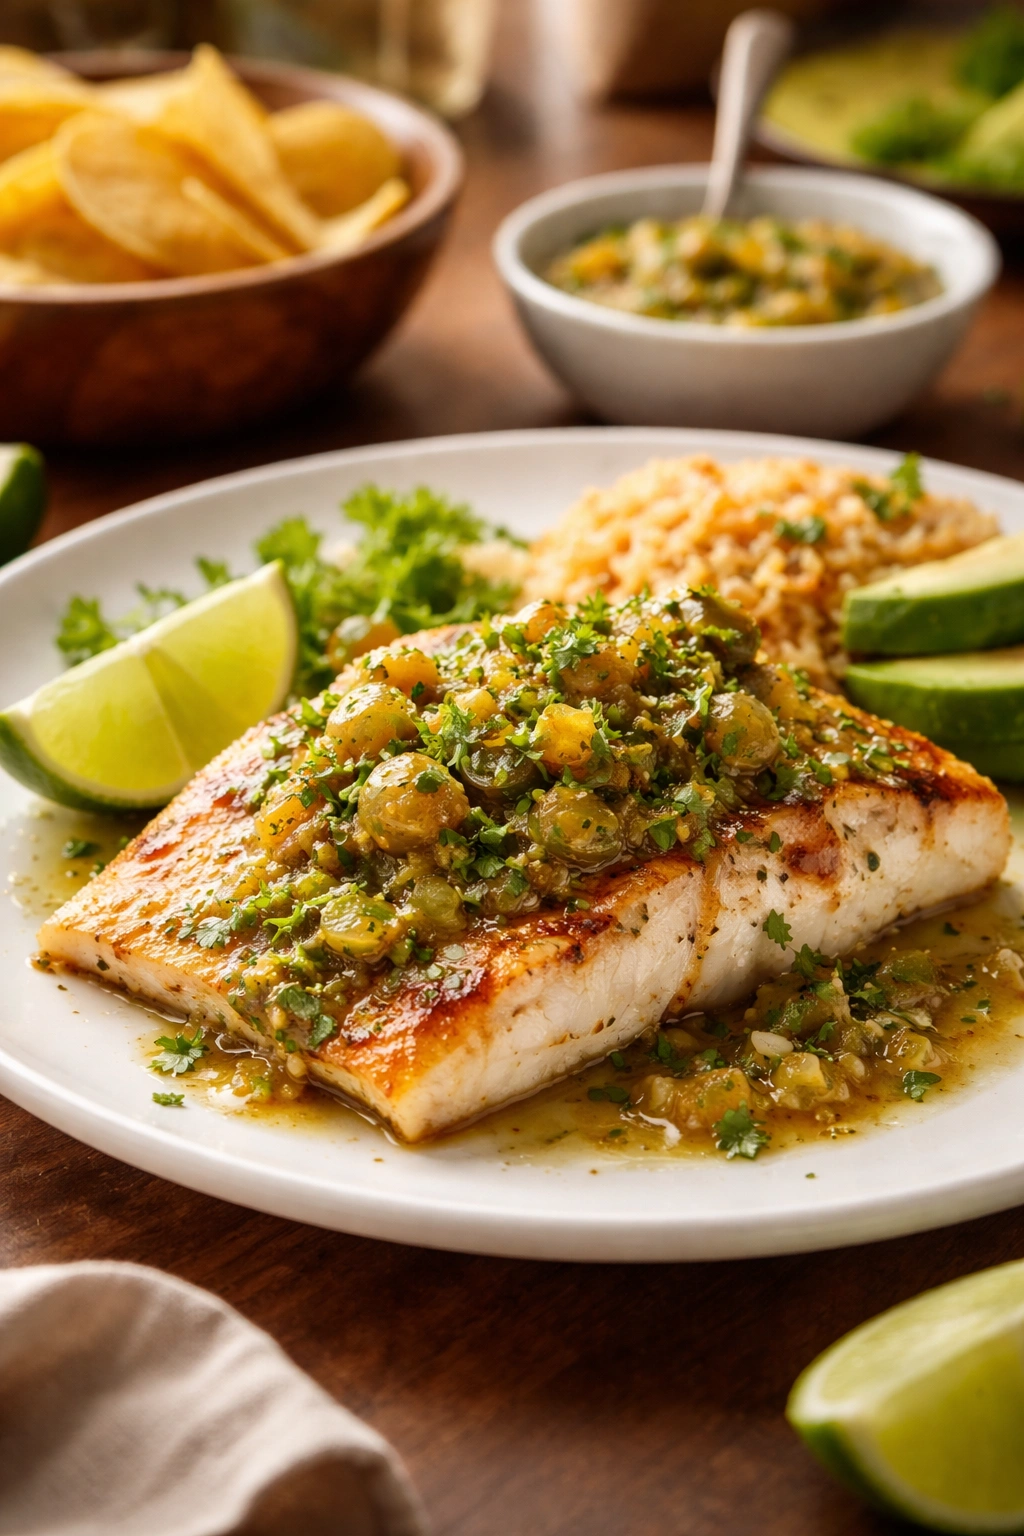
The most obvious pairing is warm tortilla chips, and honestly, this salsa needs nothing else to be a perfect appetizer or snack. But the versatility doesn’t stop there. Spoon it over grilled fish or shrimp where it acts as both sauce and bright accompaniment — the roasted depth pairs beautifully with the char from the grill. Over grilled chicken breast, it transforms something simple into something restaurant-quality.
Use it as the base for enchiladas verdes. Mix it with chicken broth and heavy cream for a proper salsa verde sauce — about 2 cups salsa, 1 cup chicken broth, and ½ cup heavy cream simmered together for 5 minutes creates enough sauce for 12 to 14 enchiladas. Pour it over rolled tortillas filled with shredded chicken and cheese, then bake until bubbly.
Breakfast Applications
Scrambled eggs become something special with a spoonful stirred in just before serving. Breakfast tacos with scrambled eggs, chorizo, and roasted tomatillo salsa are genuinely one of the best breakfasts you can make at home. Chilaquiles — tortilla chips softened in this warm salsa with crema and cheese — are a legitimate dinner option, and the roasted complexity of this salsa makes them taste like something you’d order at a good restaurant.
On Its Own
Serve it alongside elotes (grilled corn with mayo and cotija cheese) as a bright accompaniment. Use it as a condiment for carne asada or carnitas, where its slight tartness cuts through the richness. Mix it with cottage cheese or ricotta for an addictive dip that’s lighter than guacamole but equally satisfying.
Temperature Matters
This salsa is good cold straight from the fridge, excellent at room temperature, and genuinely wonderful served warm — especially if you’re using it with grilled foods or as a sauce over proteins. Room temperature brings out the roasted notes best; this is the ideal serving temperature if you’re serving it as a standalone condiment.
Final Thoughts
Roasted tomatillo salsa is one of those recipes that feels more impressive than it actually is. The oven does the heavy lifting, your hands-on time is minimal, and the results taste like you’ve spent hours developing complex flavors. Once you’ve made this once, you’ll understand why it’s a restaurant staple and why home cooks defend it so fiercely.
The magic isn’t in any fancy technique or hard-to-find ingredient. It’s in trusting that high heat transforms simple vegetables into something more interesting than they start as, and in tasting your work before you’re done so that you can balance it exactly the way you like it. A squeeze of lime, a pinch of salt, a moment of rest — these tiny adjustments between roasting and serving are what separate good salsa from great salsa.
Make it once this way and you’ll have a reference point forever. After that, you can play with variations, adjust the spice level to match your preference, and fold it into other recipes with confidence. But the technique itself — the roasting, the blending, the balance of flavors — becomes something you trust because you’ve done it and tasted how good it is. That’s when cooking stops feeling like following instructions and starts feeling like something you actually know how to do.