Freezer marinades are honestly one of the most underrated time-savers in meal prep. You spend maybe five minutes mixing seasonings and liquid, toss your chicken in a bag, and suddenly dinner is halfway prepared before the week even starts. When life gets hectic—and it always does—pulling a bag of marinated chicken from your freezer and thawing it overnight transforms a stressful evening into a genuinely manageable one. The magic is that as the chicken thaws, it’s simultaneously absorbing all those flavors you built into the marinade, so by the time you’re ready to cook, the seasoning has penetrated deep into the meat.
The real advantage here goes beyond just saving time. Marinades work on chicken at a molecular level, tenderizing the meat through acidic ingredients while infusing flavor that no amount of seasoning at the end can replicate. Freezing chicken in marinade extends that infusion process across days or even weeks, meaning your final cooked chicken is noticeably more flavorful and juicy than chicken you quickly marinated for a couple of hours. You’re basically getting a premium result through smart planning rather than complicated technique.
Why Freezer Marinades Are a Meal Prep Game Changer
The appeal of freezer marinades goes far beyond just convenience, though convenience is certainly nice. What makes them truly transformative is how they eliminate friction from weeknight cooking. When you open your freezer and see a bag of already-seasoned chicken waiting for you, the hardest part of dinner preparation is already done.
Think about a typical weeknight: you come home tired, you’re hungry, and the last thing you want to do is figure out what to cook and how to season it. With a freezer marinade, that decision was made on Sunday. You’re not standing in front of your fridge wondering what to throw together. You’re not scrambling to remember where you put the garlic powder. The chicken is portioned, it’s seasoned, and it’s ready to transform into dinner.
This system also makes it genuinely easy to rotate flavors throughout the week. One marinade gives you Thai-inspired flavors, another brings Mediterranean brightness, a third offers smoky heat. Your family doesn’t get bored eating the same protein over and over because the marinades completely change how the chicken tastes and feels. You’re not actually changing what you’re cooking—you’re just changing how it’s seasoned.
The freezer storage piece is equally important. You’re not limited to marinating chicken the night before you cook it. You can prep multiple marinades on a Sunday when you have mental energy for it, then pull from your freezer reserves whenever you need dinner. Bad week? No problem—reach for a bag. Unexpectedly got home early? Grab a marinade and dinner comes together in the time it takes to cook. This flexibility removes the pressure to meal prep on a specific schedule.
The Science Behind Marinating Chicken
Understanding how marinades actually work helps you appreciate why freezing them is so effective. A marinade is fundamentally a vehicle for flavor and texture transformation, and it works through three main mechanisms: acid, fat, and seasoning working in concert.
Acidic ingredients are the workforce here. Whether you’re using lemon juice, lime juice, vinegar, yogurt, or tomato-based sauces, that acidity begins breaking down the muscle proteins in chicken the moment they make contact. This breakdown does two things simultaneously: it creates tiny pathways that allow seasonings to penetrate deeper into the meat, and it renders the chicken more tender because those broken-down proteins retain moisture better during cooking.
This is where timing becomes critical. A few hours of marinating in your fridge will tenderize the surface and add flavor to the outer layers. But if you freeze the chicken in marinade and let it sit for days or weeks before cooking, something even more interesting happens. The freezing process itself creates ice crystals that slightly break down cell structures. Then, as the chicken thaws—the process taking twelve to twenty-four hours—the marinade gradually penetrates deeper and deeper into the meat, reaching the center in a way that a brief fridge marinating never could.
The fat component does something equally important. Olive oil, sesame oil, or avocado oil acts as a flavor carrier, helping fat-soluble compounds distribute throughout the chicken while also creating a protective barrier that prevents moisture from escaping during cooking. This is why marinades with oil produce juicier chicken than marinades without it. The fat gets into the muscle fibers and insulates them, so even if you slightly overcook the chicken, it still stays tender and moist.
Seasonings and aromatics—garlic, ginger, herbs, spices—are where you build actual flavor complexity. These compounds are released and activated by the liquid and fat around them. In a freezer marinade, they have weeks to slowly infuse into the chicken. You’re not fighting against a tight timeline. The flavors have time to develop and mellow, creating more cohesive, complex results than quick marinades.
How to Mix and Prepare Marinades for Freezing
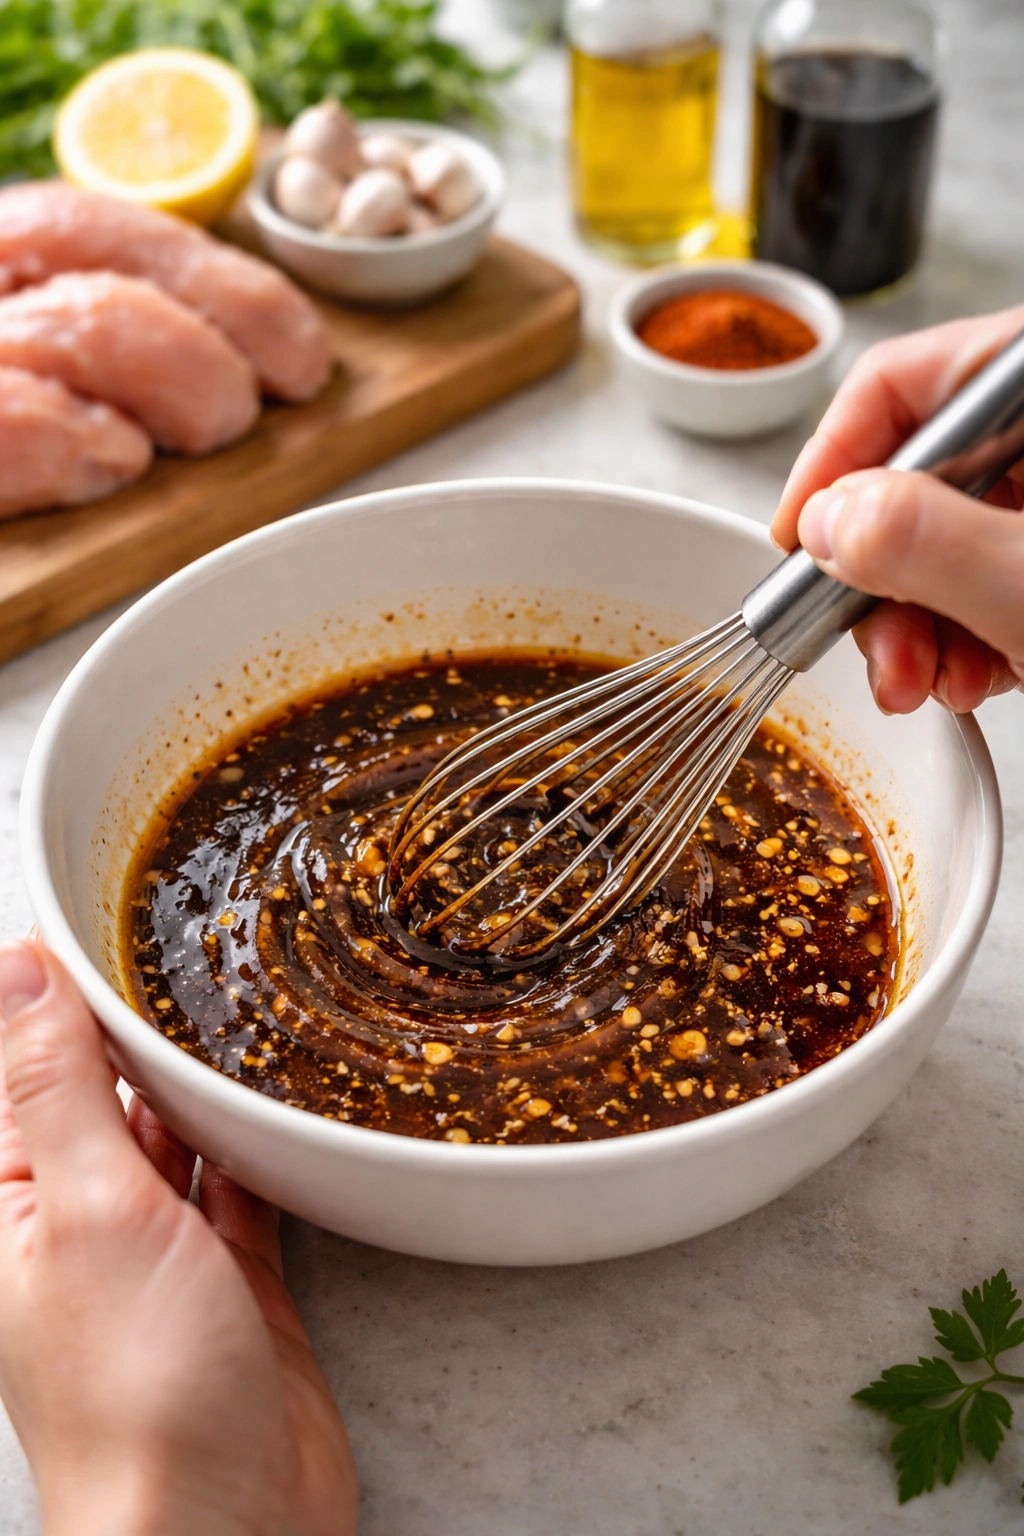
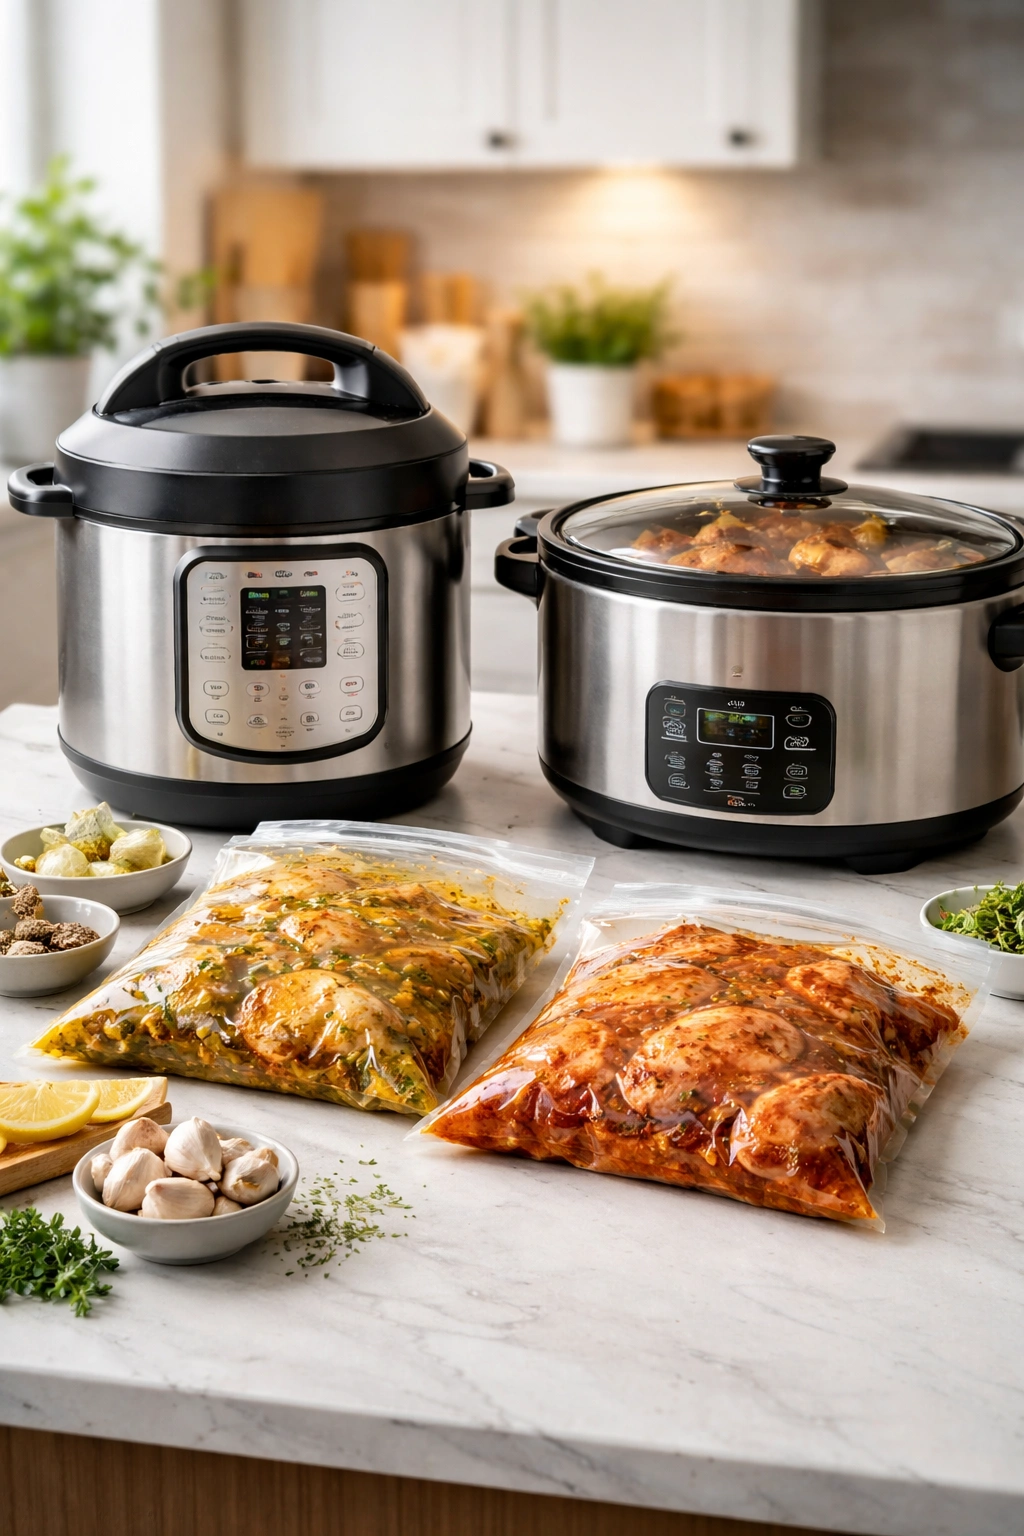
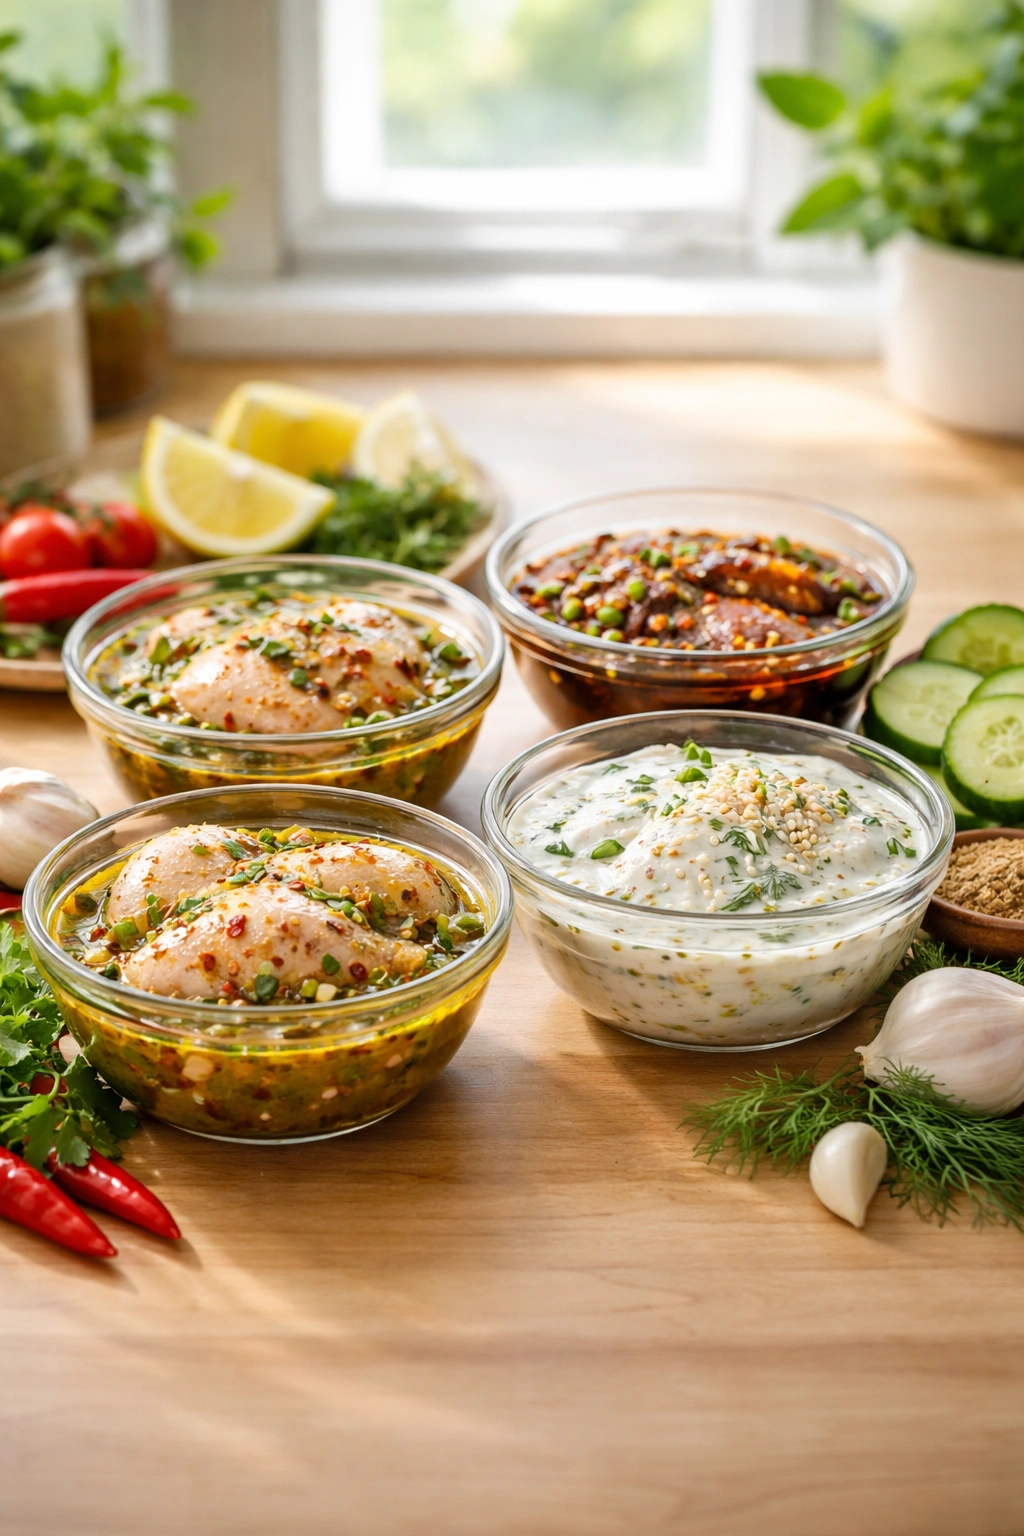
The actual act of preparing a freezer marinade is almost laughably simple, but there are a few details that matter. You want your liquid components to be well combined before adding chicken, because some ingredients—particularly spice pastes, honey, and yogurt-based bases—can clump if they’re not fully incorporated first.
Start by mixing all your liquid and seasoning components in a bowl. If your marinade has honey, brown sugar, or thick pastes like gochujang or adobo, make sure these are fully dissolved or dispersed into the oil and acidic liquid. Give it a good whisk for thirty seconds to a minute. This ensures even distribution when you add the chicken, and it also prevents seasonings from concentrating in one spot while other parts of the chicken stay bland.
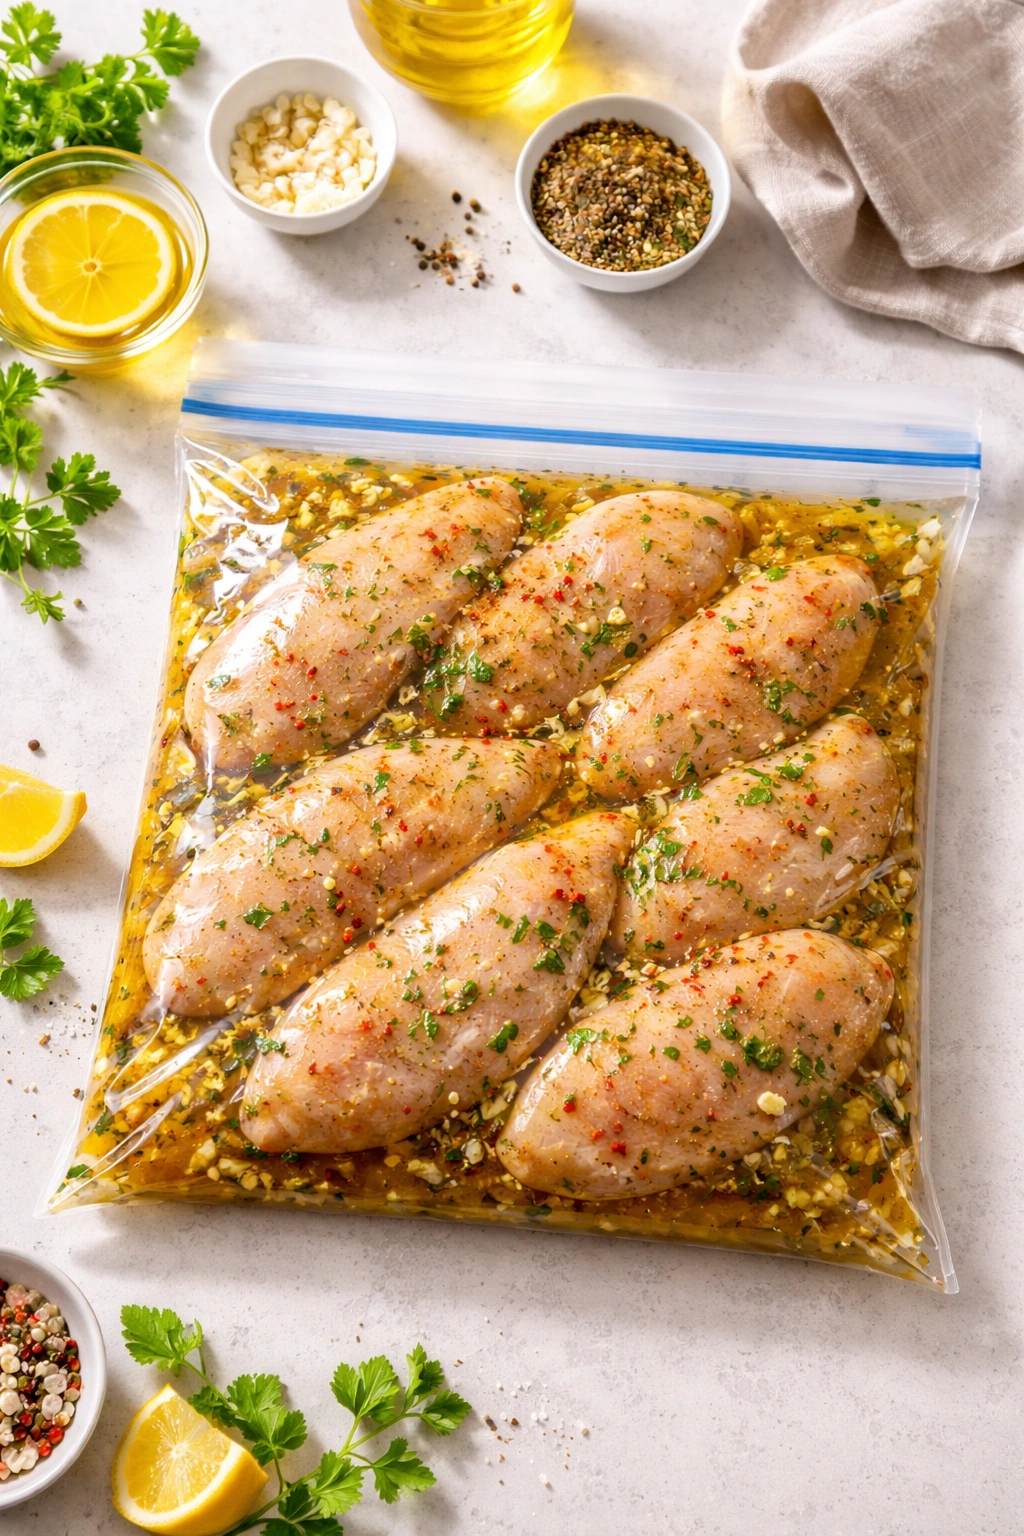
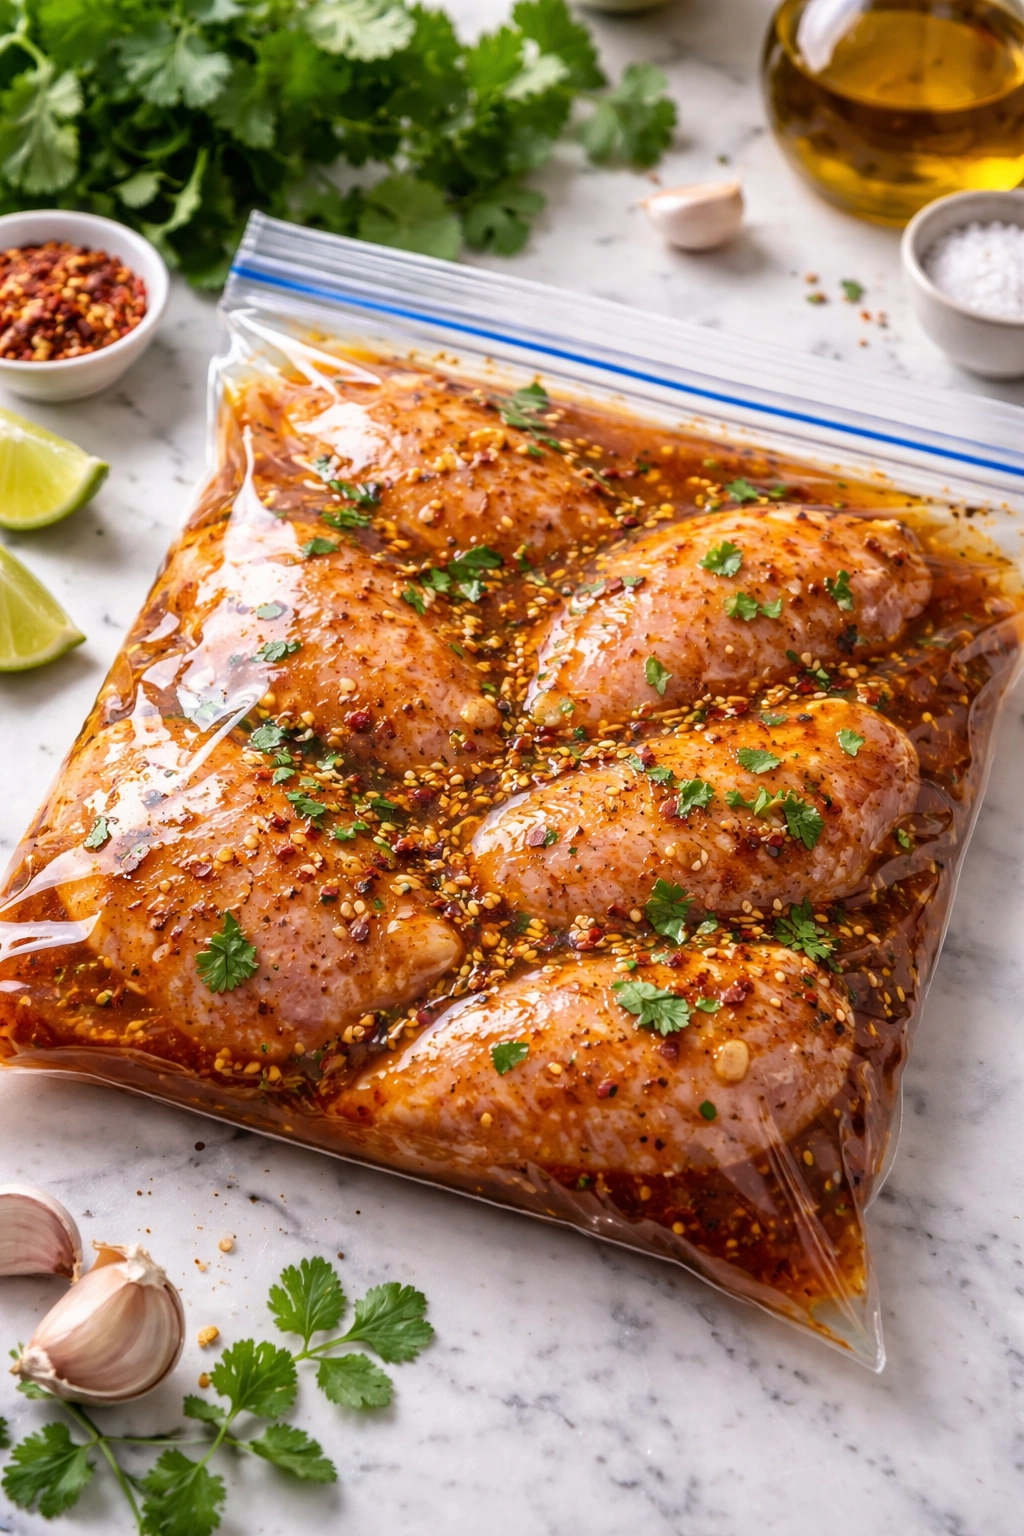
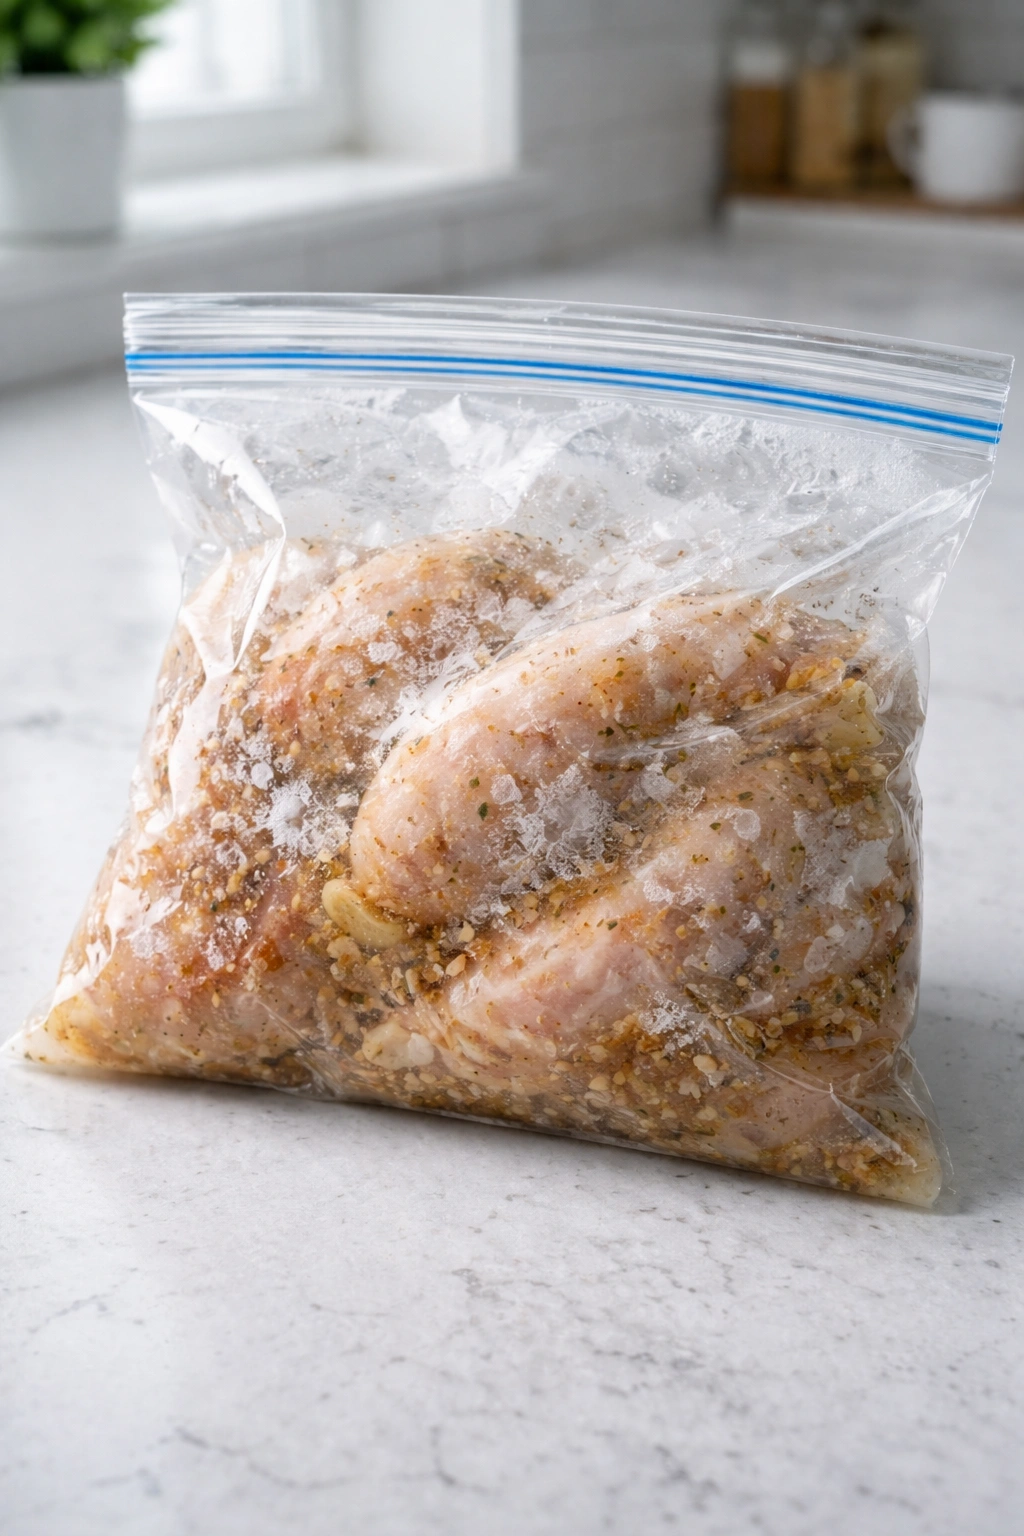
Now add your chicken to the bowl or directly into a freezer bag. If you’re mixing in a bowl, you can transfer to a bag afterward, or you can do the whole thing in a sturdy zip-top freezer bag—just be careful with sharp chicken edges puncturing the bag. Toss the chicken until every piece is coated in marinade. This is where you use your hands or a spoon to make sure nothing is left dry.
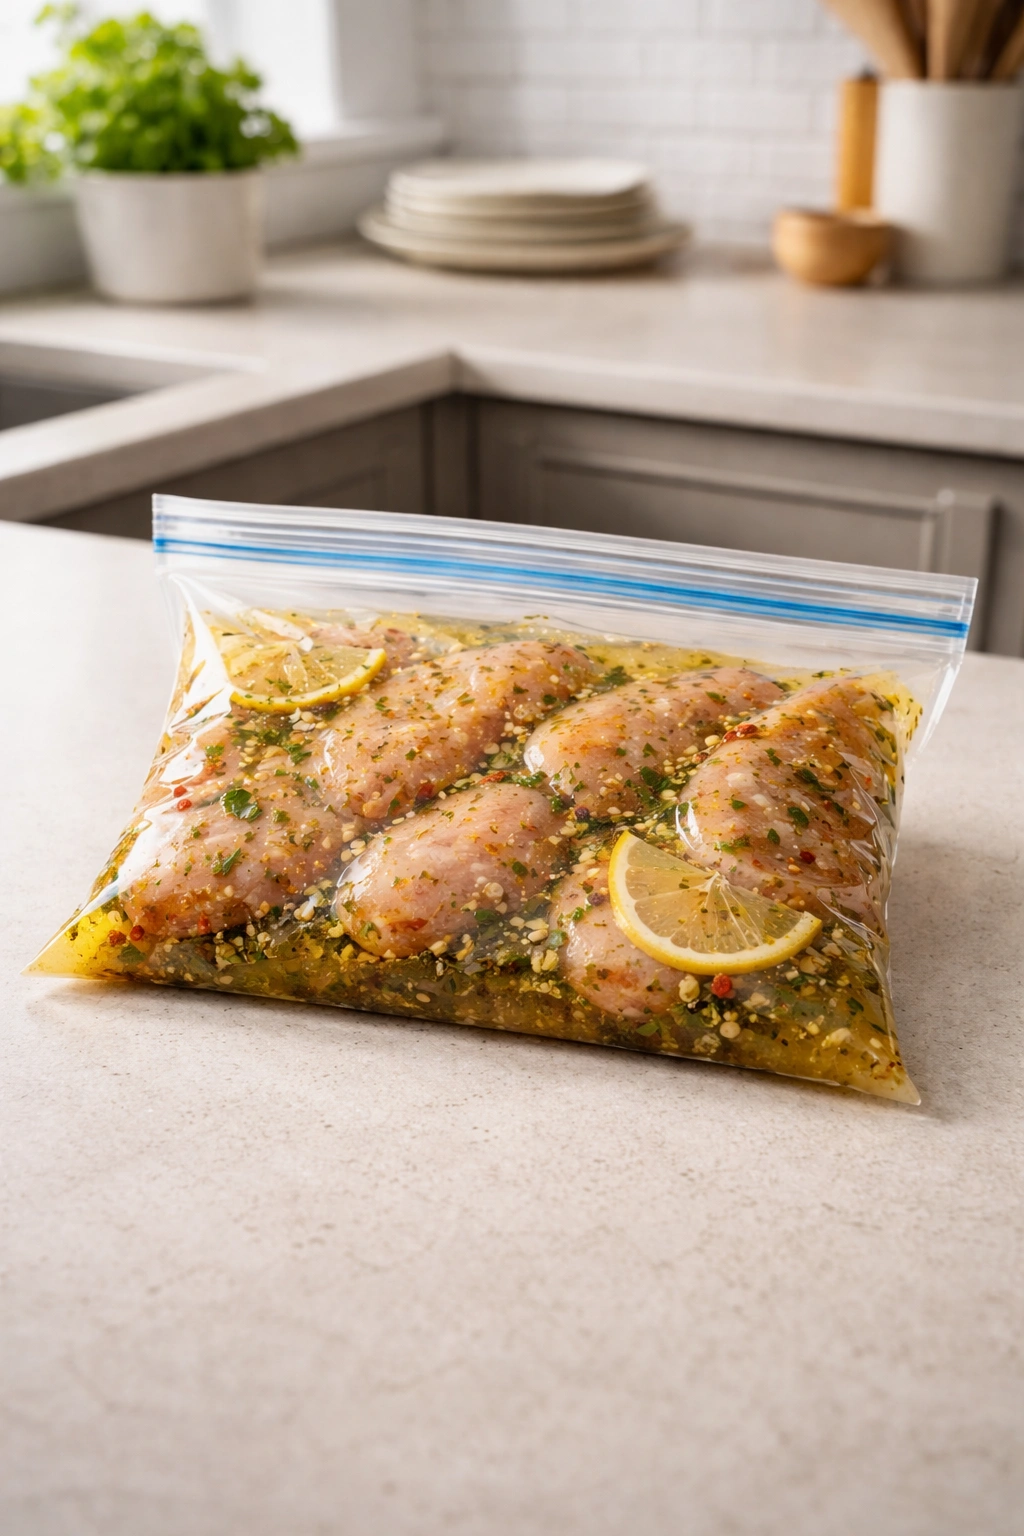
The key detail most people skip: remove as much air as possible from the bag before sealing. Excess air creates ice crystals that can damage the chicken’s texture and also leaves exposed chicken that can experience freezer burn. If you’re using a zip-top bag, fill it, then gently press the chicken down as you slowly seal the bag, letting the air escape as you go. Some people use a straw trick—seal the bag almost all the way, insert a straw in the gap, suck out the remaining air, then quickly seal. Others use a vacuum sealer, which is genuinely worth it if you’re doing this regularly.
Label your bag with permanent marker. Write the marinade type, the amount of chicken, and the date you froze it. This takes thirty seconds but saves you from playing freezer archaeology later, trying to remember what’s in an unlabeled bag. Use a chalk marker if you’re planning to reuse silicone bags, since regular permanent marker is harder to wash off.
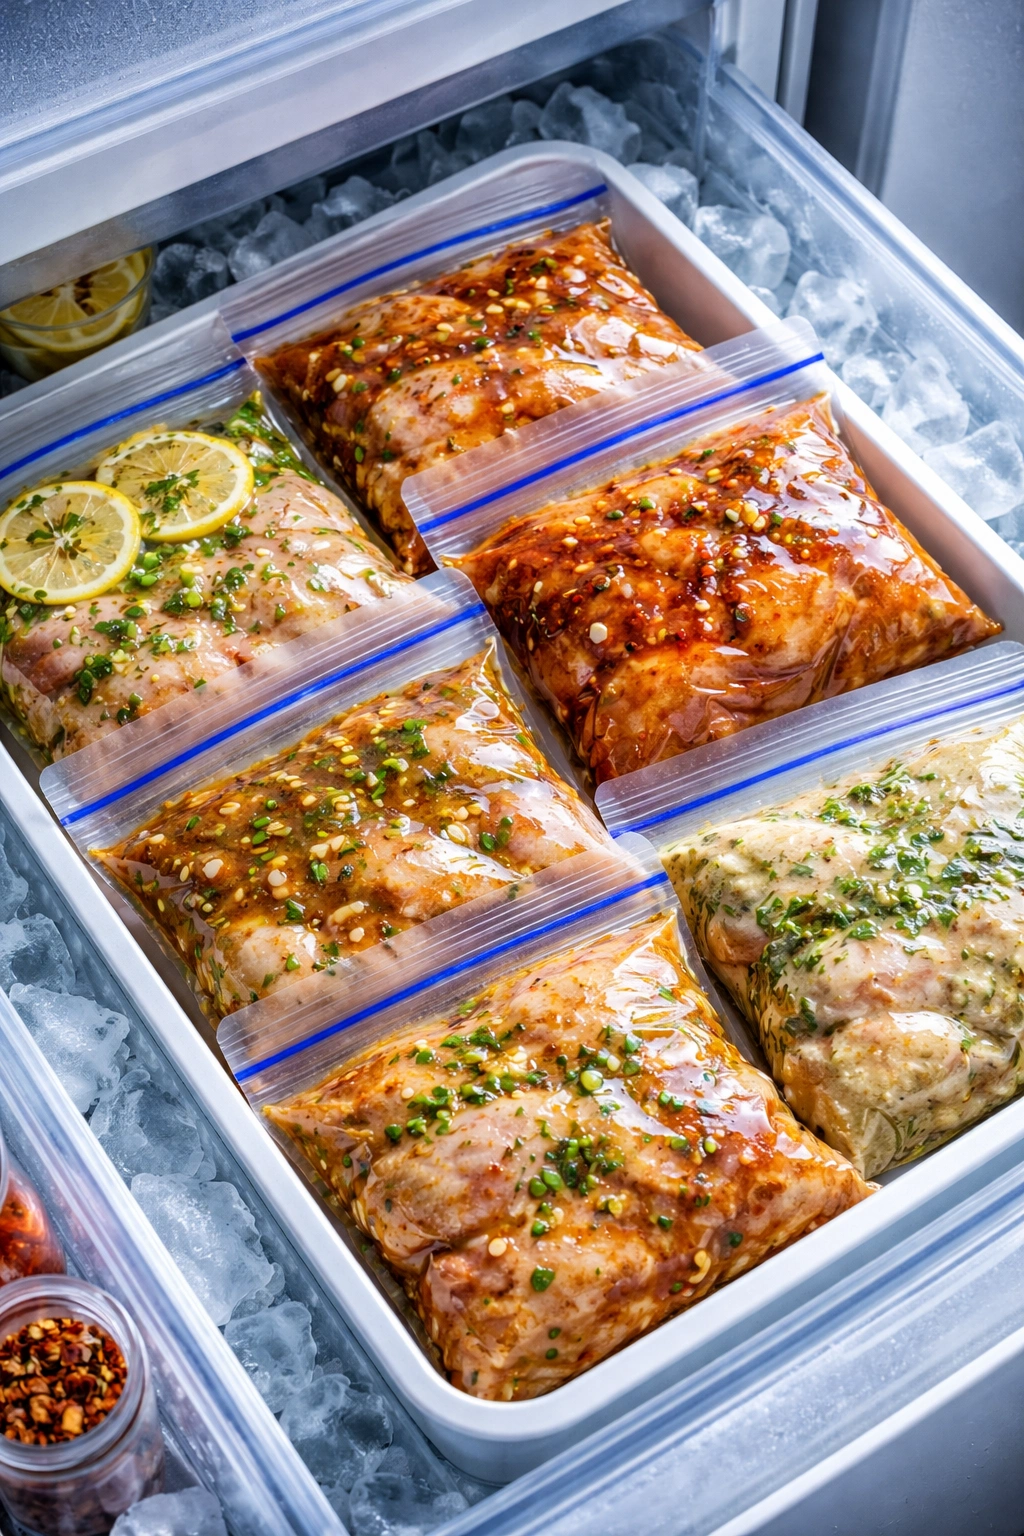
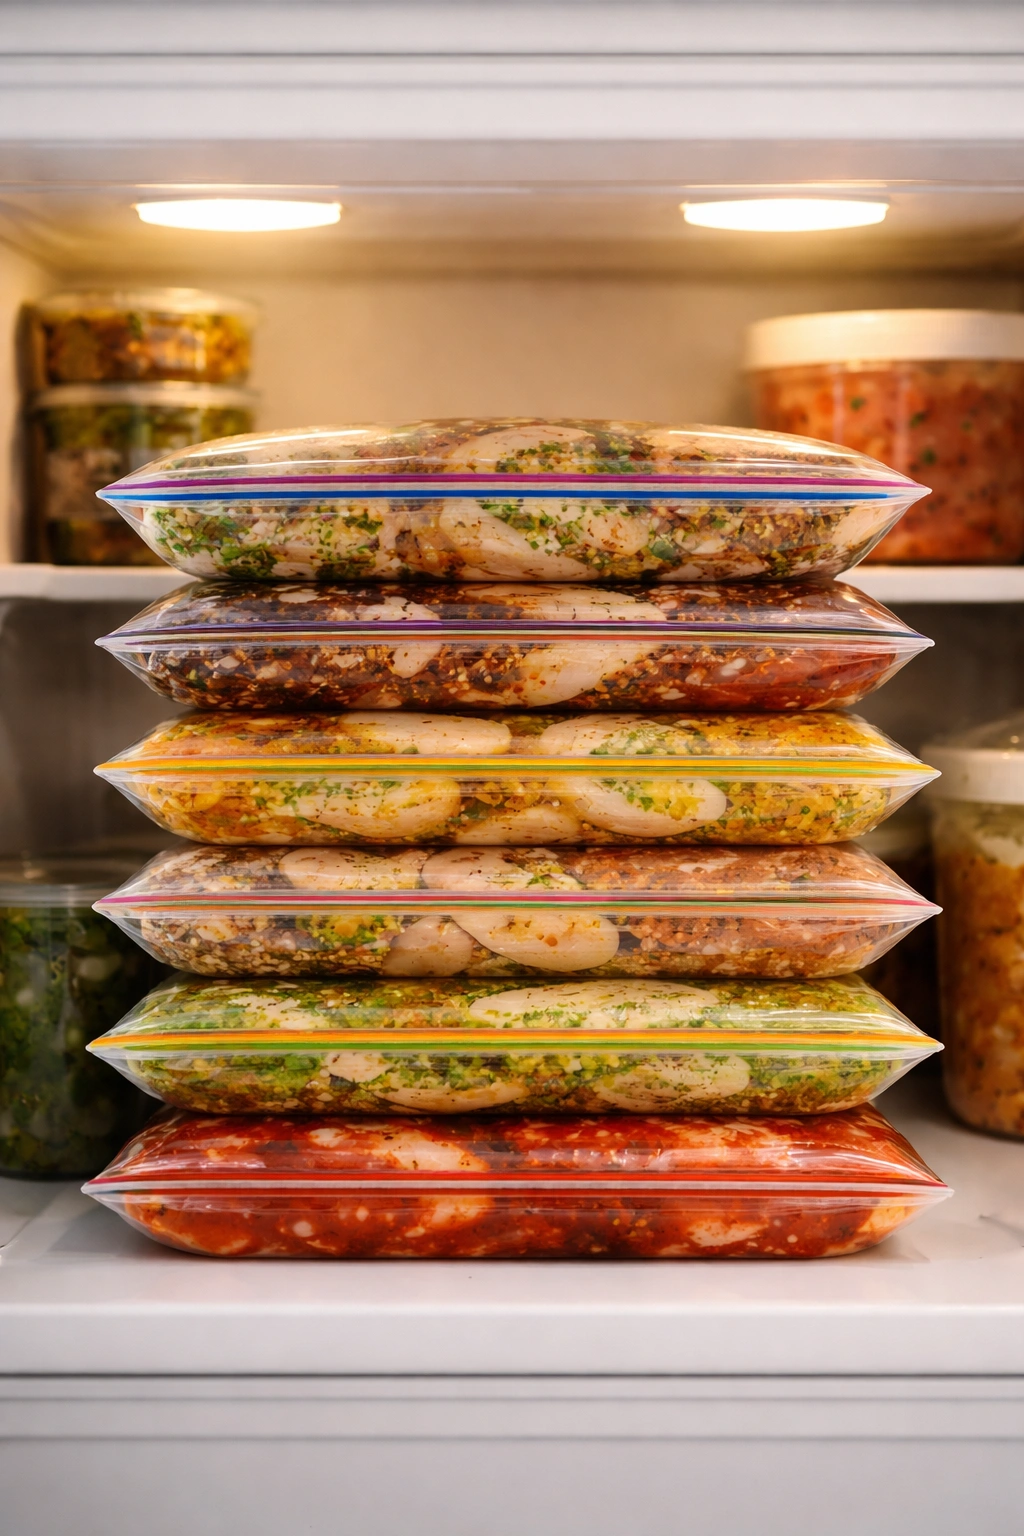
If you’re freezing multiple batches, lay them flat on a baking sheet first, then transfer them to your freezer’s vertical storage once frozen. This saves space and makes it easier to pull out exactly what you need without digging through a pile of bags.
Choosing the Right Containers for Frozen Marinades
While disposable zip-top freezer bags work perfectly fine, the choice of container genuinely affects both your results and your environmental impact. Different containers have different strengths, and your choice might depend on how much you’re prepping and how long you’re storing.
Heavy-duty freezer bags remain the most popular choice, and for good reason. They’re inexpensive, they take up minimal space, and they’re effective. The key word here is “heavy-duty”—flimsy sandwich bags aren’t sturdy enough to reliably hold raw chicken without risking tears. Look for bags labeled specifically as freezer bags, which have thicker plastic that resists cracking in cold temperatures. A box of quality freezer bags costs just a few dollars and makes your whole operation feel more intentional than just tossing raw chicken in random plastic.
Reusable silicone bags have become increasingly popular and for good reason. Brands like Stasher bags are genuinely durable and can last hundreds of uses. They take up a bit more space than flat zip-top bags, but they’re washable, they don’t tear, and they’re kinder to the environment if you’re doing this regularly. If you’re prepping freezer marinades every single week, reusable bags pay for themselves quickly and feel like you’re doing something meaningful for the planet.
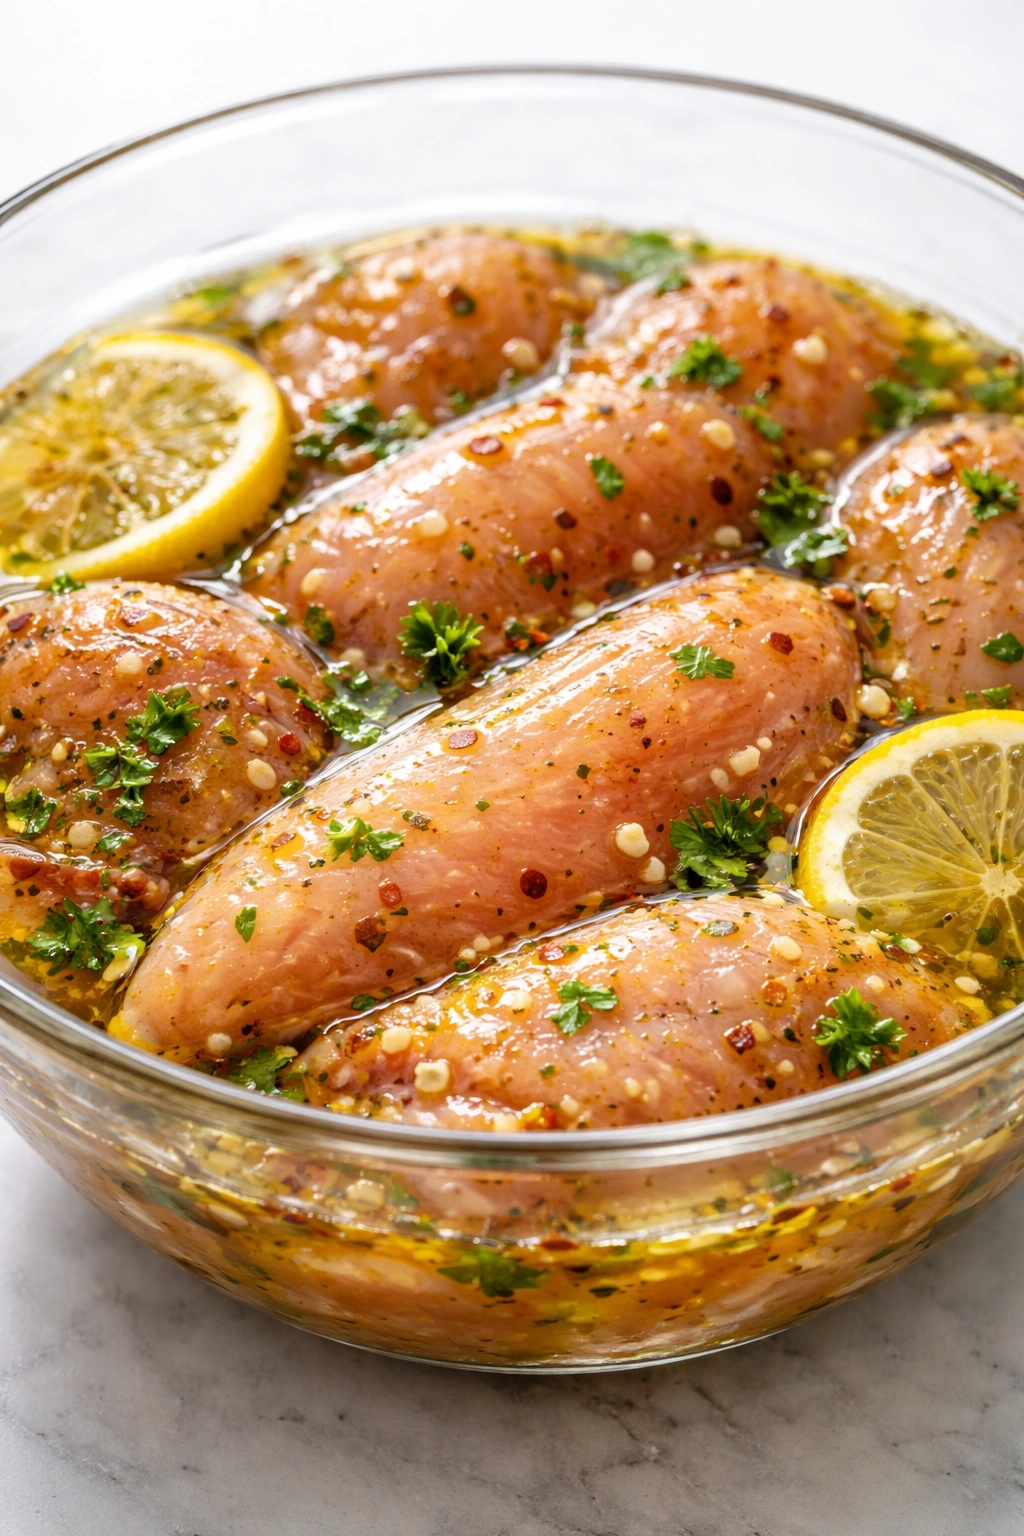
Glass containers with lids work fine if you have the freezer space and don’t mind the weight. The advantage of glass is that it’s completely inert—no questions about plastic leaching into your food—and it’s beautiful enough to look intentional rather than makeshift. The disadvantages are that glass takes up way more room and can develop frost on the interior over time. Glass also takes longer to thaw since cold penetrates more slowly through thick walls.
Plastic storage containers are another option, especially if they’re designed for freezer use. These work well for smaller batches or for storing multiple portions of the same marinade in one container. The main limitation is that they take up significantly more freezer space than bags, which matters if you’re trying to prep several different marinades at once.
Whatever container you choose, the principle remains the same: you want minimal air contact, clear labeling, and a system you’ll actually use consistently. The best container is the one you’ll reach for every time you’re prepping meals.
Seasoning Combinations That Freeze Beautifully
Not all marinades freeze equally well, and understanding which flavor profiles thrive in the freezer helps you build a rotation that actually tastes good weeks later. Some marinades develop deeper, more complex flavors during the freeze-thaw cycle, while others can become muddy or lose their brightness.
Asian-inspired marinades with soy sauce, ginger, and garlic are naturals for freezing. Soy sauce acts as a preservative while also adding umami depth that actually improves as it sits. Ginger and garlic mellow slightly during freezing, which means they blend more smoothly into the chicken rather than tasting sharp or overwhelming. A basic combination of soy sauce, rice vinegar, brown sugar, minced garlic, minced ginger, and sesame oil creates a marinade that genuinely tastes better after a week in the freezer than it does after two hours in the fridge.
Mediterranean marinades built on olive oil, lemon, and herbs freeze well with one caveat: fresh herbs like cilantro, parsley, and dill do get softer after thawing, which doesn’t affect flavor but changes texture slightly. You can work around this by using dried herbs instead, or by adding fresh herbs only when you cook. A frozen marinade of olive oil, lemon juice, dried oregano, dried thyme, minced garlic, salt, and pepper will still taste bright and herbaceous after weeks of freezing.
Yogurt-based marinades like tandoori or Greek styles freeze beautifully. The yogurt acts as a tenderizer while also creating a creamy base that distributes spices evenly. Some people worry that yogurt will separate or break when frozen, and it can develop a slightly grainy texture, but it still tastes delicious and the texture difference is unnoticeable once you cook the chicken. These marinades often improve with time in the freezer because the spices have longer to infuse.
Honey and brown sugar-based marinades can thicken significantly when frozen. This isn’t a problem—it just means when you thaw the bag, the marinade might be thicker than when you froze it. It still clings to the chicken beautifully and cooks into a lovely glaze. Sweet and tangy marinades with honey mustard, brown sugar, and vinegar are actually ideal for freezing because the sweetness mellows slightly, creating better balance.
Avoid marinades that are too heavily dependent on fresh citrus juice alone. While lemon and lime juice don’t spoil in the freezer, marinades made with just citrus, oil, and maybe garlic can taste a bit flat after prolonged freezing. Citrus brightness actually does fade slightly over time. You’ll get better results if you pair citrus with other elements—yogurt, ginger, soy sauce—that add depth.
Spice pastes like chipotle adobo, gochujang, and curry paste are perfect for freezing. These are already concentrated, stable ingredients that actually benefit from the long infusion period. A chipotle marinade with adobo paste, garlic, paprika, and olive oil will taste more integrated and delicious after weeks of freezing than it will after an hour of marinating.
The general principle: marinades with multiple flavor layers, some acid component, and substantial seasoning freeze better than simple, delicate marinades. You want marinades bold enough to stay interesting after a long freeze, not delicate enough to fade.
The Critical Step: Thawing Frozen Marinated Chicken Properly
Here’s where many people accidentally ruin an otherwise perfect meal prep: they thaw the chicken wrong. The method you choose affects both food safety and how well the marinade actually penetrates the meat.
The safest and best method is thawing overnight in your refrigerator. Transfer the frozen bag from freezer to fridge in the morning or the night before you plan to cook, and by evening or the next morning, the chicken is completely thawed. During this slow thaw, the chicken gradually softens while continuing to absorb the marinade. The texture stays pristine because there’s no temperature shock. All the muscle fibers have time to relax and accept the marinade’s liquid without getting damaged. Yes, it requires planning ahead, but it’s worth it.
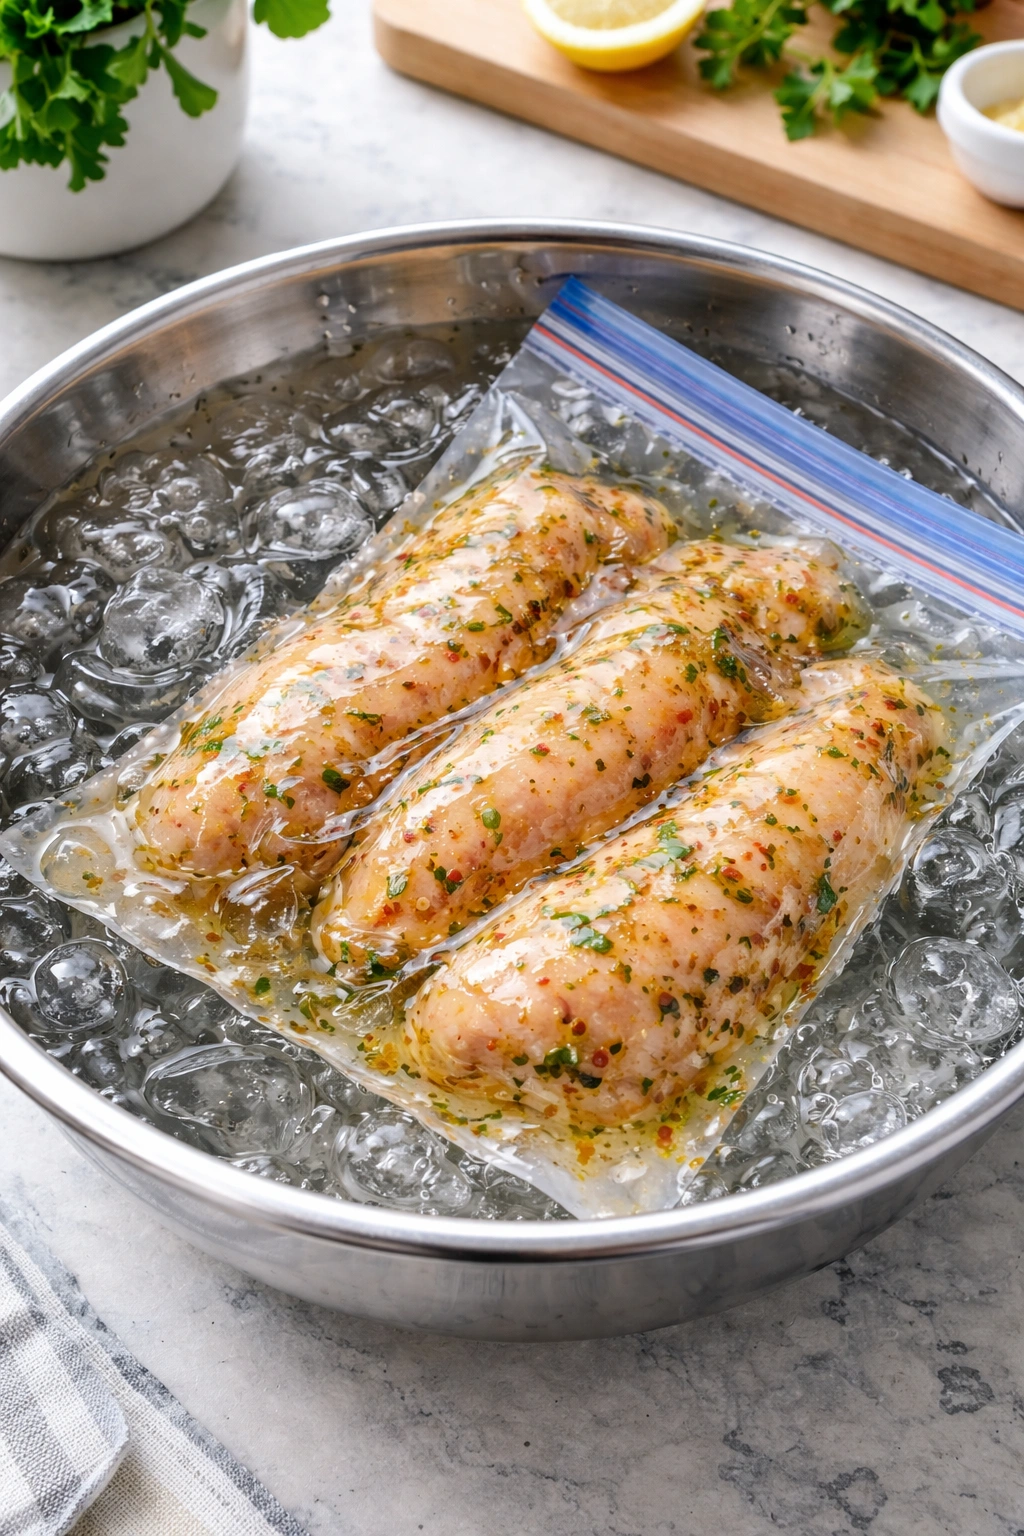
If you’re short on time, the cold-water method works in a pinch. Place your sealed bag in a bowl of cold water and leave it on the counter. Change the water every thirty minutes or so—each fresh water exchange is slightly warmer than ice-cold, so it gradually brings the temperature up. This method takes about two to three hours depending on the size of the chicken package. It’s genuinely safe if you keep the bag sealed and the water cold, and it’s much faster than fridge thawing. The main advantage over using hot water is that the chicken texture stays better and there’s less risk of the marinade separating.
Never use hot or warm water to thaw. This seems like the logical shortcut, but it’s a terrible idea. Hot water creates temperature shock that damages the chicken’s protein structure and can actually cause the marinade to separate or the texture to become mushy. Plus, there’s a genuine food safety concern: the outside of the chicken will reach the danger zone temperature (40°F to 140°F) where bacteria multiply, while the inside is still frozen. Stick with cold water if you’re in a hurry.
The microwave is not a good option either, despite being fast. Microwave thawing is inherently uneven—some parts of the chicken start cooking while others are still frozen. The exterior becomes rubbery, and the texture is compromised. For a freezer marinade method where texture and tenderness matter, the microwave defeats the whole purpose.
One less common but legitimate option: start cooking from frozen in an Instant Pot. Some people skip the thawing step entirely and put the frozen bag directly into their Instant Pot with additional liquid. This works because the Instant Pot’s pressure and moisture environment cooks the chicken evenly without the freezer marinade texture issues you’d have in a conventional oven. If you do this, add about one-third cup of additional broth or water to ensure there’s enough liquid for the pot’s pressure system to work properly.
The bottom line: plan ahead and thaw in the fridge overnight when possible. This gives you the best flavor penetration, the best texture, and zero food safety concerns. It’s not faster, but it’s smarter.
Oven-Baking Marinated Chicken for Tender Results
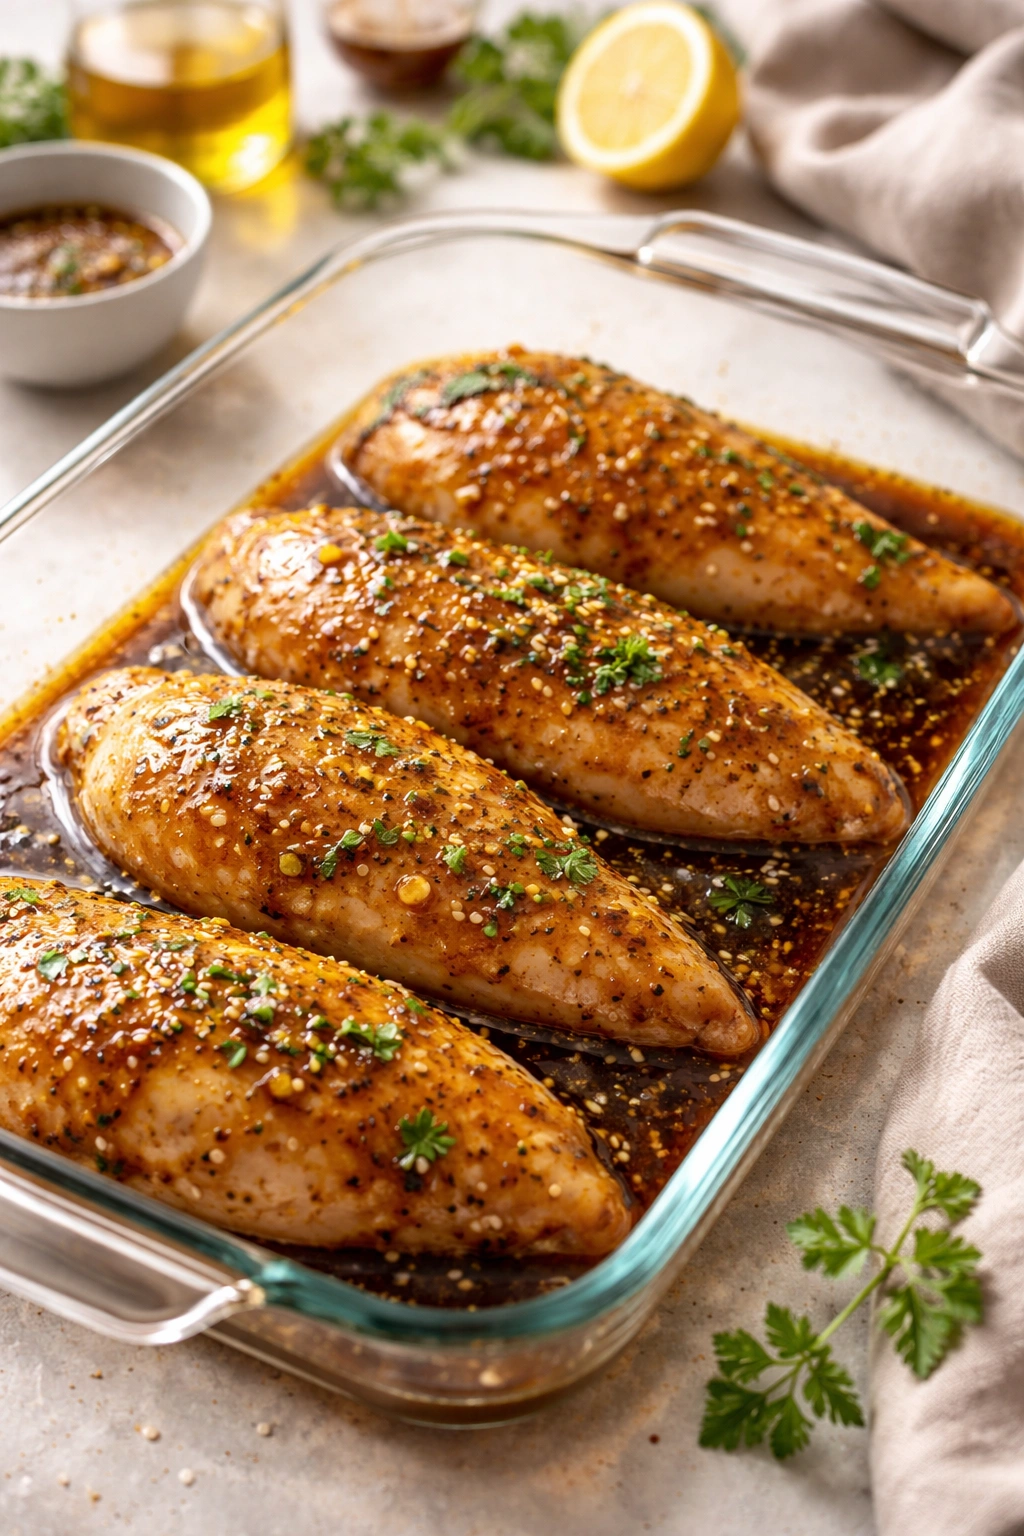
Baking is probably the most straightforward way to cook thawed marinated chicken, and it consistently produces tender, juicy results. The oven’s dry heat cooks the chicken gently and evenly, and the marinade essentially bastes the meat as it cooks.
Preheat your oven to 400°F to 425°F. This temperature range is hot enough to cook the chicken through without overcooking the exterior. At 400°F, you’re looking at about twenty to twenty-five minutes for standard-sized boneless chicken breasts. At 425°F, you’ll hit that sweet spot slightly faster, around twenty to twenty-three minutes. The exact timing depends on how thick your chicken pieces are—a breast pounded to even thickness might take only eighteen minutes, while a thicker, unpounded breast might need thirty.
Pour the thawed chicken and its marinade into a baking dish or cast-iron skillet. Using a shallow dish rather than a deep casserole helps the marinade reduce slightly, concentrating the flavors even more. Cast iron is genuinely ideal because it browns the exterior beautifully and conducts heat evenly. A glass baking dish works perfectly fine too. Some people use a rimmed baking sheet lined with parchment paper, which works well if you want quick cleanup.
The flip is important. At the halfway point—about twelve to thirteen minutes in—use tongs to flip each piece of chicken so the other side gets exposure to both the heat and the pooled marinade. This ensures even cooking and even browning. Don’t be tempted to skip the flip; it genuinely matters.
Know your done temperature: 165°F internal temperature. Use an instant-read thermometer inserted into the thickest part of the chicken without touching bone. This is non-negotiable for food safety, but it’s also the difference between perfectly juicy chicken and dry, overcooked chicken. The moment it hits 165°F, pull it out. It’ll continue cooking slightly from residual heat—called carryover cooking—so actually pulling it out at 163°F or 164°F gives you the juiciest result.
Let it rest for five minutes after cooking. This is the step people skip when they’re hungry, but resting allows the muscle fibers to relax and reabsorb their juices. If you slice into chicken immediately after cooking, all those flavorful juices run out onto the plate. A five-minute rest keeps them in the chicken where they belong.
Some people reduce the marinade on the stovetop after removing the chicken, creating a concentrated sauce to drizzle over everything. Pour the remaining pan liquid into a saucepan, bring it to a rolling boil for at least one minute (this kills any raw chicken bacteria that might be in there), then pour it over the cooked chicken. This turns a simple baked dish into something restaurant-quality.
Grilling Thawed Marinated Chicken to Perfection
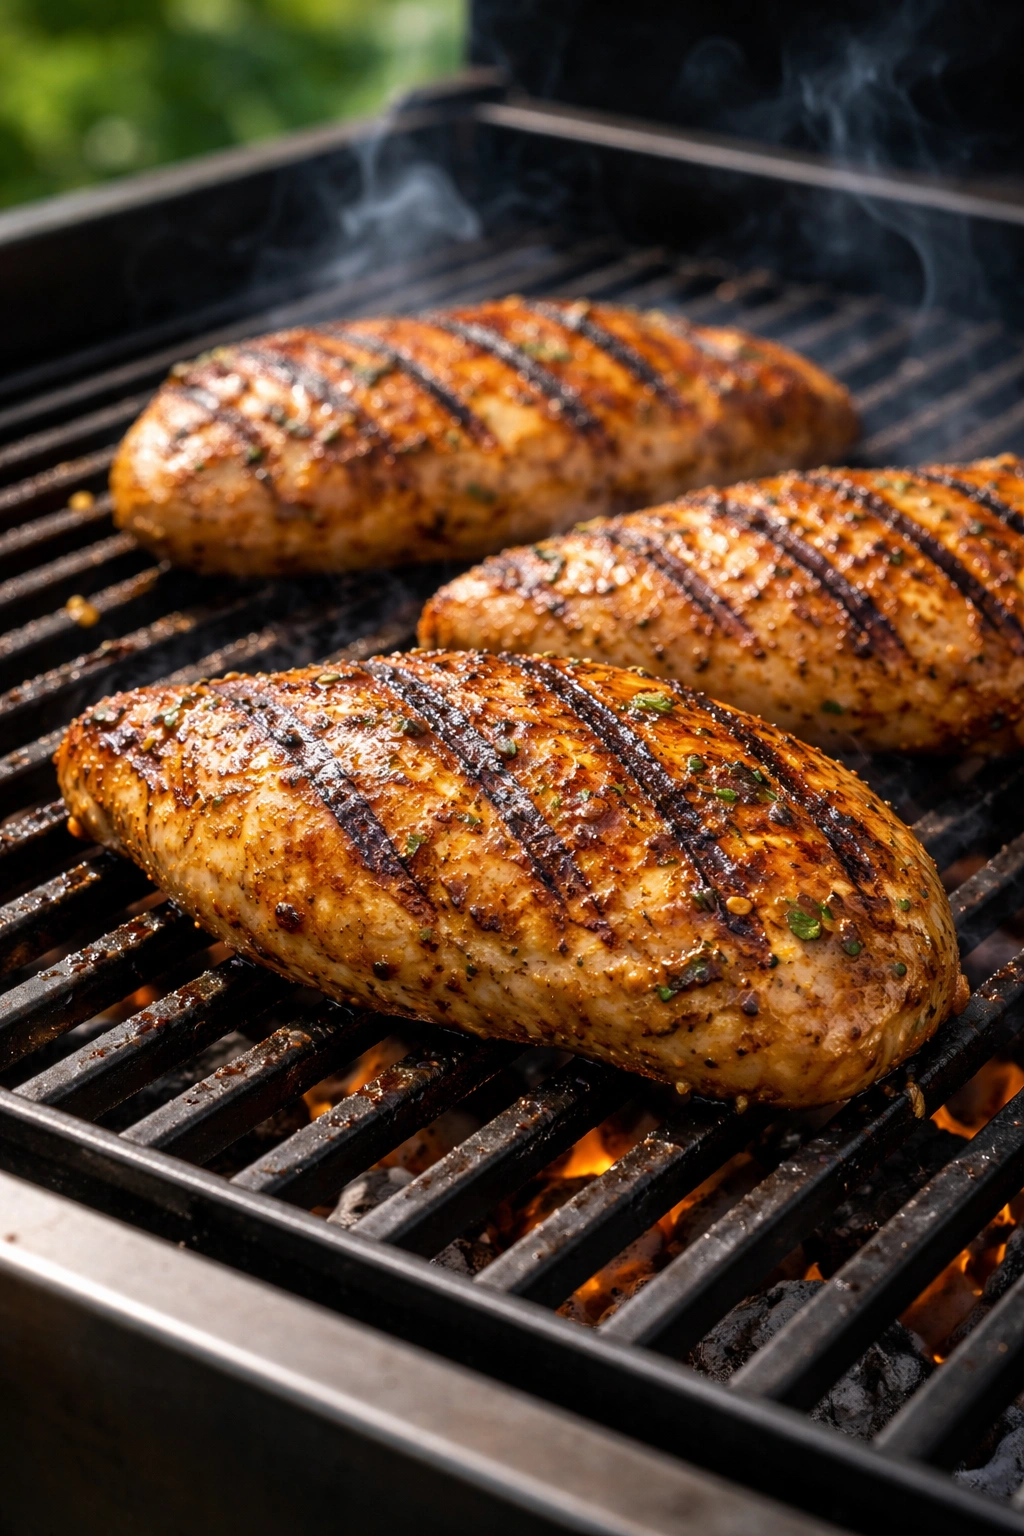
Grilling marinated chicken produces that caramelized exterior and subtle smoky flavor that’s nearly impossible to replicate in an oven. The high, direct heat creates complexity in the marinade’s sugars and spices, turning them into something deeper and more interesting.
Clean and oil your grill grates thoroughly. This prevents sticking, which would tear the meat and pull off all your lovely marinade crust. Heat your grill to medium-high (around 400°F to 450°F) and while it’s preheating, use a grill brush to scrub the grates, then use a paper towel dipped in oil to wipe them down. Some people use a grill stone or those grill cleaning blocks, which work well too.
Pat the chicken mostly dry before grilling. It doesn’t have to be completely dry—a little surface moisture is fine—but excessive marinade pooling on the surface will cause steam rather than sear. You want the dry heat to make contact with the chicken. Shake off excess marinade or lightly pat with a paper towel.
Place the chicken over direct heat and don’t move it. The first few minutes are critical. Let the chicken sit for four to five minutes without poking it, moving it, or flipping. This allows the Maillard reaction (the chemical reaction that creates browning and crust) to happen. If you flip too early, you interrupt this process and end up with pale, stuck-on chicken instead of a beautiful crust.
Flip once, then adjust heat or position as needed. After that first four to five minutes, flip the chicken and cook for another four to five minutes on the second side. Chicken pieces vary in thickness, so use your thermometer to check. The thickest part should be approaching 155°F to 160°F. At 155°F, pull the chicken from the grill and let it rest—the carryover cooking will bring it to the final 165°F.
Watch for flare-ups. Sometimes sugar-heavy marinades cause small flames when they drip onto the coals or burner. This is fine in moderation—a little char is what you’re after. But if flames are licking the chicken excessively, move the chicken to a cooler part of the grill (indirect heat) to finish cooking without charring excessively.
Thinner chicken pieces grill better than thick ones. If your chicken breasts are massive, consider pounding them to about three-quarters of an inch thick, or even slicing them in half horizontally to create two thinner pieces. This creates faster, more even cooking, and it allows more surface area to develop that caramelized crust.
Grilled marinated chicken is particularly excellent shredded or sliced and served over rice, in wraps, on salads, or alongside grilled vegetables. The marinade has created such deep flavor that minimal additional seasoning is needed.
Instant Pot and Slow Cooker Methods for Marinated Chicken
Both of these methods are fantastic for busy days when you can’t stand over a stove or oven, and both produce incredibly tender chicken. The methods are different enough that they deserve individual attention.
For the Instant Pot, add the thawed chicken, its marinade, and approximately one-third to one-half cup of additional liquid (chicken broth, water, or even wine). The additional liquid is essential because the Instant Pot needs minimum liquid to build pressure. Without it, you’ll get a “burn” error message.
Set the Instant Pot to high pressure for seven to eight minutes if you’re using individual chicken breasts, or eight to ten minutes if you’re using chicken thighs or larger pieces. Most Instant Pots take an additional ten to fifteen minutes just to come to pressure, so total time is more like twenty-five minutes, not eight. Once the timer sounds, use quick release to release the pressure immediately. Check that the chicken has reached 165°F—it should be very tender and pull apart easily.
The advantage of the Instant Pot method is speed and the fact that the chicken comes out incredibly tender and moist. The pressure environment doesn’t allow any drying out. The slight disadvantage is that you don’t get the browning or caramelization that makes cooked chicken visually appealing, though the flavor is still excellent.
For the slow cooker, place the thawed marinated chicken directly into your slow cooker. Don’t add additional liquid—the chicken itself releases moisture. Set it to low for three to four hours, or high for one and a half to two hours. The slow cooker method requires the least active work of any method. You put the chicken in before leaving for work and it’s ready when you get home.
One consideration: slow cooker chicken tends to be quite soft and pull-apart tender, which is fantastic if you’re going to shred it for salads, tacos, or bowls. It’s less ideal if you want recognizable chicken breasts. Also, because the chicken sits in pooling liquid, it steams rather than develops any browning. Some people finish slow cooker chicken under the broiler for two to three minutes to add color and slight crust.
Both methods work beautifully with freezer marinades. You’re going to get tender, flavorful chicken regardless. The choice is really about how much time you have and what texture you’re after.
Pan-Searing and Air Frying Your Thawed Chicken
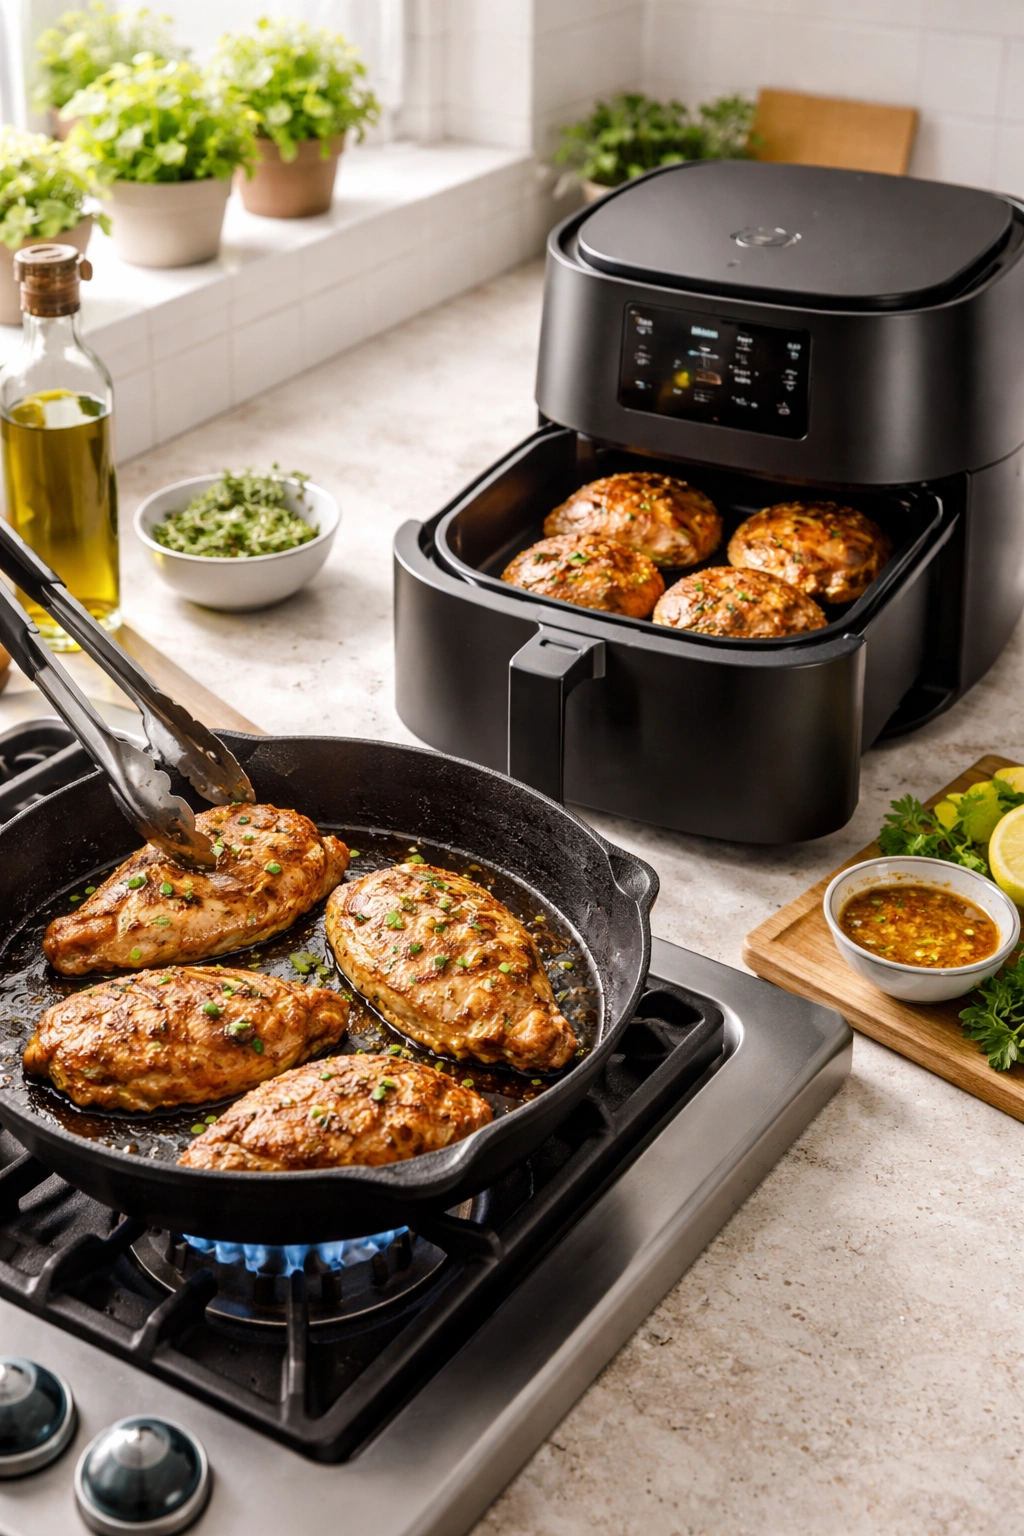
These methods create the most flavorful crust and the crispiest exterior of any cooking method, but they require slightly more attention and technique.
For pan-searing, heat a heavy skillet (cast iron is ideal) over medium-high heat. Pat your thawed marinated chicken dry, then add it to the hot pan. If the pan is properly hot, the chicken should sizzle immediately—this is the sound of the exterior beginning to caramelize. Don’t touch it for four to five minutes. Let that crust develop undisturbed.
Flip the chicken and cook the other side for another four to five minutes. At this point, check your temperature. If the chicken is approaching 160°F, move the pan off the direct heat or reduce heat to medium and continue cooking gently. If it’s still around 150°F or lower, keep the heat at medium-high for another minute or two.
The advantage of pan-searing is that you develop an incredible crust and you can watch the cooking process happen in real time. You’re in control. The disadvantage is that it requires active attention and slightly more skill to get consistent results.
For air frying, preheat your air fryer to 400°F. Arrange the thawed, patted-dry chicken in the basket in a single layer—don’t overlap pieces. Cook for ten to twelve minutes for regular-sized chicken breasts, checking at the ten-minute mark. The air fryer works through intense circulating heat, so it’s fast. It also creates a surprisingly crispy exterior despite the lack of oil on the cooking surface.
Air frying is genuinely convenient and foolproof. The results are consistently good. The slight downside is that you don’t get the same caramelized crust you’d get from pan-searing or grilling—the exterior is more crispy than caramelized. But for pure convenience and tender, cooked chicken, it’s hard to beat.
Both of these methods are excellent for when you want chicken that’s visually interesting and has developed flavor complexity through browning. They’re faster than oven baking but require more active engagement than slow cooker or Instant Pot methods.
Converting Leftover Marinade Into a Safe Sauce
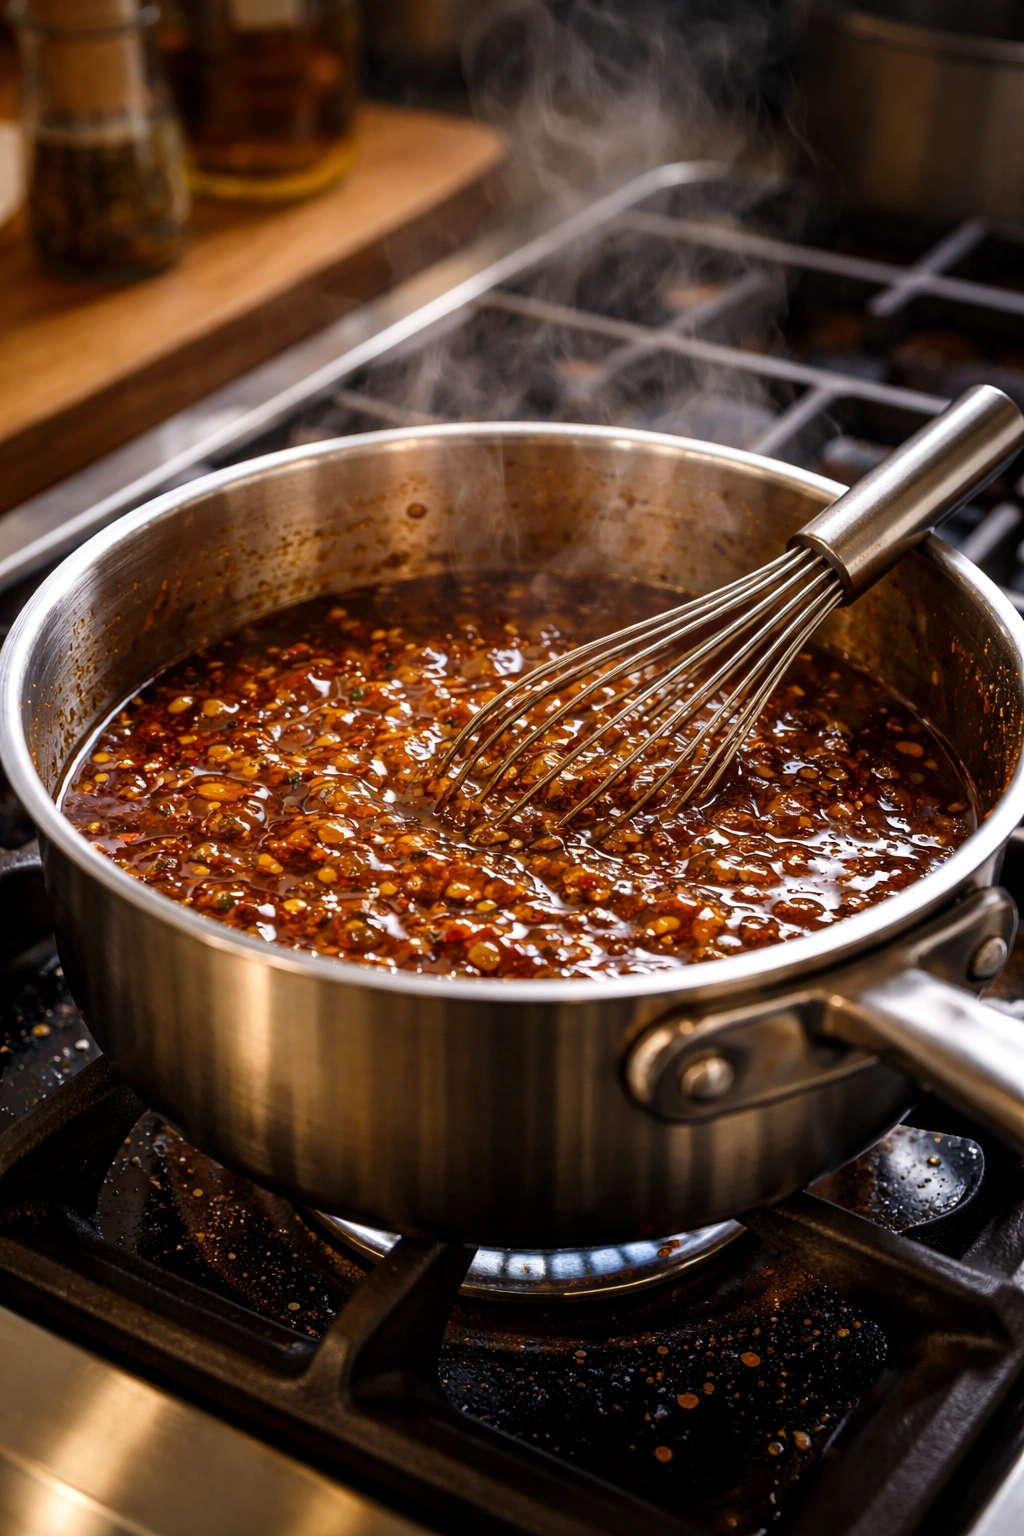
One of the most frustrating aspects of cooking with marinades is that you can’t reuse the liquid that raw chicken sat in—it’s unsafe to use without proper treatment. But you can absolutely transform it into a delicious sauce. The process is simple: heat it enough to kill any bacterial contamination.
Pour the leftover marinade into a saucepan and bring it to a rolling boil. Keep it at a rolling boil for at least one full minute. The CDC recommends this process for rendering questionable water safe to drink, and the same principle applies here. One minute of rolling boil eliminates any pathogens that might be present in the raw chicken juices mixed into the marinade.
Strain the marinade after boiling to remove any chunks of chicken or large herb pieces. A fine-mesh strainer works perfectly. This gives you a clear sauce to drizzle over your finished chicken.
Taste it and adjust seasoning if needed. Boiling can concentrate the flavors, so it might be saltier than you’d want. A squeeze of fresh lemon juice, a pinch of honey, or a splash of fresh herbs can brighten it back up. You can also thin it slightly with a bit of water or broth if it’s too intense.
This sauce is genuinely delicious over rice, drizzled over finished chicken, used as a dipping sauce for grilled vegetables, or even tossed with noodles. You’ve taken a “waste” component and turned it into an additional element of your meal. Some marinades, particularly those with honey or sugar, reduce and thicken beautifully into glossy sauces. Others stay thinner and more like a drizzling sauce. Either way, it’s worth the extra five minutes.
Storage Timeline: How Long Marinaded Chicken Lasts
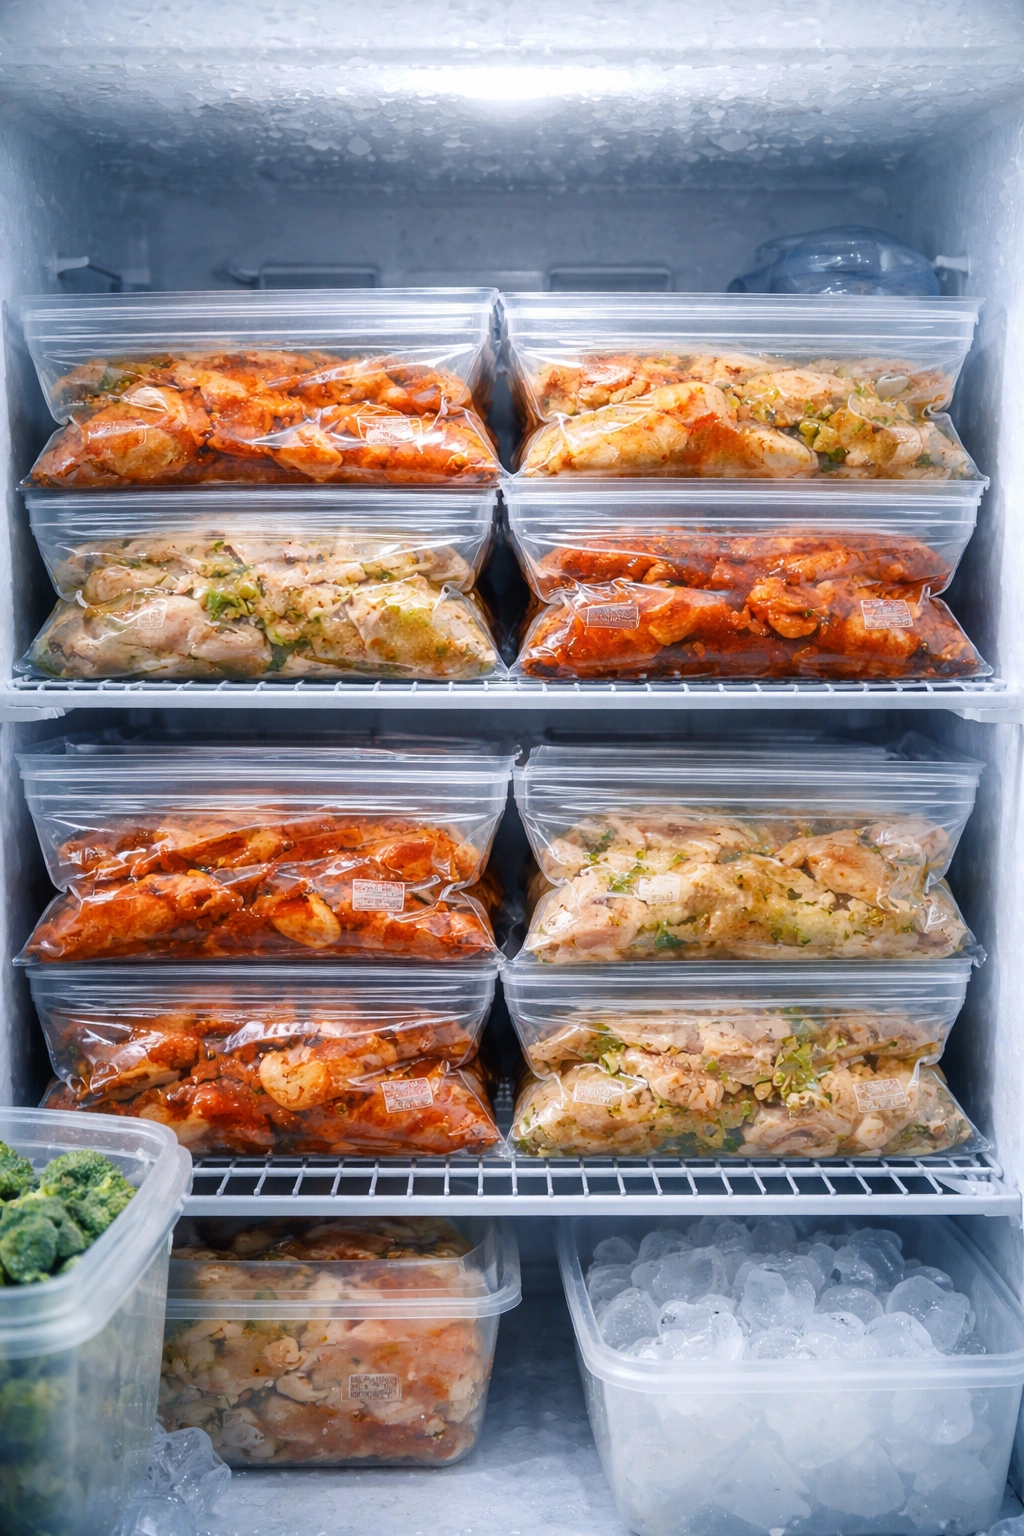
Understanding the timeline of your freezer marinades helps you plan effectively and avoid food waste.
In the refrigerator (if you’re not freezing), marinated chicken should be cooked within twenty-four hours. This is the critical window. The acidic components in marinades will continue to break down the chicken’s muscle proteins over time. After about twenty-four hours, the texture starts to become mushy or mealy instead of tender. You’ll notice the chicken looks slightly gray and doesn’t have the texture you’d want. The food is still safe to eat—acid acts as a preservative—but the quality declines.
In the freezer, marinated chicken keeps safely for up to three to four months if stored properly in airtight containers or bags. The freezing essentially pauses the marinating process. The flavor infusion that would take hours or days in the fridge can happen over weeks in the freezer at no risk to food safety.
After cooking, leftover marinated chicken keeps for three to four days in the refrigerator. Store it in an airtight container, and it’s fine to reheat gently in the oven or microwave. Some people prefer to shred or chop cooked marinated chicken immediately and store it that way, which makes meal assembly even faster later.
The Instant Pot cooking method changes some timeline considerations. Marinated chicken cooked in an Instant Pot creates a moist environment where leftover chicken should probably be consumed within two days rather than four, just to be safe. But honestly, most people eat it much faster anyway.
The key principle: freeze for longer storage, refrigerate only if you’re cooking within twenty-four hours. Planning ahead keeps everything safe and delicious.
Flavor Profiles Worth Freezing (with Examples)
Having a rotation of different flavors keeps meal prep interesting and ensures you’re never bored eating the same protein. Here are flavor profiles that absolutely shine in freezer marinades.
Thai-inspired marinades combining fish sauce (or soy sauce if you skip fish sauce), lime juice, brown sugar, garlic, and red chili flakes create a bright, complex flavor that actually deepens during the freeze. Add some ginger and cilantro and you’ve got something special. This works beautifully over jasmine rice with vegetables.
Mediterranean marinades built on olive oil, lemon juice, dried oregano, dried thyme, and garlic bring gentle brightness that pairs with almost any side. These are foolproof and genuinely versatile. Serve it over Greek salad, alongside roasted vegetables, or in wraps.
Korean-style marinades with gochujang or gochugaru (Korean chili), soy sauce, brown sugar, sesame oil, and ginger create deep umami flavors that improve over time. The sweetness mellows slightly during freezing, creating better balance. This is phenomenal over rice with kimchi and eggs.
Yogurt-based tandoori or Indian-style marinades with yogurt, curry powder, ginger, garlic, and lime create creamy complexity. They’re excellent for both poultry and vegetables. Serve over basmati rice with cilantro and yogurt sauce.
Citrus-forward marinades with fresh orange or grapefruit juice, garlic, cumin, and a pinch of chipotle create something bright and slightly smoky. These are particularly excellent grilled and served in tacos or over a citrus-dressed grain bowl.
Honey mustard marinades with Dijon mustard, apple cider vinegar, honey, and garlic create classic sweet-and-tangy flavors that are hard to mess up. These work with grilled vegetables and simple sides like roasted potatoes.
Soy-and-ginger marinade (essentially a simplified teriyaki) with soy sauce, rice vinegar, brown sugar, garlic, and fresh ginger creates umami depth. The simplicity means the individual components shine rather than competing with each other.
The beauty of all these marinades is that they work with most cooking methods, they freeze beautifully, and they create genuinely different eating experiences depending on what you pair with them. You’re not just cooking different chicken—you’re creating different meals.
Common Mistakes That Ruin Frozen Marinaded Chicken
Even with good intentions, some preventable mistakes can undermine an otherwise perfect freezer marinade setup.
Not removing enough air from the freezer bag is probably the most common problem. This leads to freezer burn, where the chicken’s surface becomes discolored and dry even though the inside is fine. The flavor is usually still decent, but the texture is compromised. This is easily prevented by that thirty seconds of effort to press out as much air as possible.
Trying to marinate and then immediately freeze without any fridge time is worth reconsidering. While it’s technically fine to go straight from mixing the marinade to freezing, you’re losing the initial burst of flavor development that happens in the first hour or two in the fridge. Some people do a quick one-hour fridge marinate before freezing, which jumpstarts the process and gives you noticeably better flavor. It’s a small change with noticeable results.
Using overly acidic marinades without testing them in the fridge first is risky. If your marinade is mostly lemon juice or vinegar with minimal other components, it can over-tenderize the chicken to the point of mushiness during a three-week freeze. Test a new marinade recipe in the fridge for twenty-four hours before committing to a month-long freezer commitment.
Thawing in warm water or at room temperature causes texture damage. The exterior starts cooking while the interior thaws, creating an inconsistent result. Cold water thawing or fridge thawing takes longer but produces genuinely better chicken.
Overcrowding the baking dish when cooking creates steaming instead of browning. If you’re baking multiple chicken breasts and they’re touching or overlapping, they steam in their own moisture and don’t develop any color. Arrange them in a single layer with some space between each piece.
Not patting the chicken dry before pan-searing prevents crust development. If the surface is wet from marinade, it steams rather than sears. This thirty-second step of patting dry makes a noticeable difference in how the final chicken looks and tastes.
Skipping the rest period after cooking is tempting but wrong. Resting for five minutes makes a genuine difference in juiciness. The muscle fibers relax and reabsorb moisture. It’s not optional if you want the best texture.
Reusing raw marinade without boiling is a legitimate food safety risk. Some people get comfortable and decide to pour the raw marinade over the cooked chicken as a sauce without boiling. This is how people get sick. If you want to use the marinade as a sauce, boil it first. No shortcuts.
Most of these mistakes are easy enough to avoid once you know they’re mistakes. A single bad experience usually teaches the lesson faster than any warning.
Make-Ahead Strategies for Busy Weeks
The real power of freezer marinades comes from building them into a strategic meal prep system. Here’s how to make them actually work for your life.
Pick a specific day and time when you’ll do your prep. Most people do this on Sunday, but it could be any day that works for your schedule. The key is picking a dedicated time so it becomes routine rather than something you might forget. Just thirty minutes of focused effort can create five or six days of dinners.
Choose a marinades based on cooking method variety. If you have an oven-baking day, a grilling day, and a slow cooker day coming up, prep marinades that work well with each method. This prevents decision fatigue and ensures you’re actually using the marinades you’ve prepared.
Batch prep multiple marinades at once. If you’re already in prep mode, you might as well mix three or four different marinades while you’re at it. You’ll have momentum, and your future self will be incredibly grateful. Mix all your marinades first, then divide your chicken among the different flavors rather than doing one marinade at a time.
Consider freezing extras of whatever you cook. If you’re cooking a batch of marinated chicken for dinner, cook an extra batch at the same time (it barely adds effort) and freeze the cooked chicken for quick lunches. Cooked marinated chicken is wonderful on salads, in wraps, or reheated with grain bowls.
Create a visual system so you actually use what you’ve prepped. Some people keep a small whiteboard on their freezer listing what marinades are in there. Others take photos of their labeled bags. Whatever system makes you remember that you have marinated chicken waiting is the right system.
Match marinades to your schedule. If you know Wednesday is your busiest night, put a slow cooker or Instant Pot marinade in the fridge on Tuesday night. If you know Friday is when you have time to cook, prep your most favorite marinades for the weekend when you have flexibility.
The system works best when it removes decision-making from your life. Ideally, you come home tired, look at your freezer, grab what’s there, and know exactly how to cook it because you prepped it with intention.
Final Thoughts
Freezer marinades are honestly one of those meal prep techniques that seems small but creates outsized impact on your weeknight sanity. You’re not saving enormous amounts of time—mixing a marinade takes maybe five minutes—but you’re shifting that work to a time when you have mental energy for it. You’re also eliminating the barrier between having ingredients and having dinner on the table.
The real magic is the way flavor develops during the freeze-thaw cycle. You’re getting results that rival restaurant-quality marinating time, but through lazy freezing rather than active preparation. The chicken you cook is more tender, more flavorful, and more interesting than chicken you’ve quickly seasoned on a weeknight.
Start simple: pick one or two marinades you know you like, prep them this weekend, and see how it feels to open your freezer a week later and have dinner already halfway prepared. Once you establish the habit, adding more variety becomes effortless. Your family gets better flavor variety, you get less stress, and your freezer becomes a genuine asset rather than just a storage box.
The investment is minimal—just some good freezer bags and five minutes of prep time. The return is genuine convenience and consistently delicious dinners. That’s genuinely worth your time.