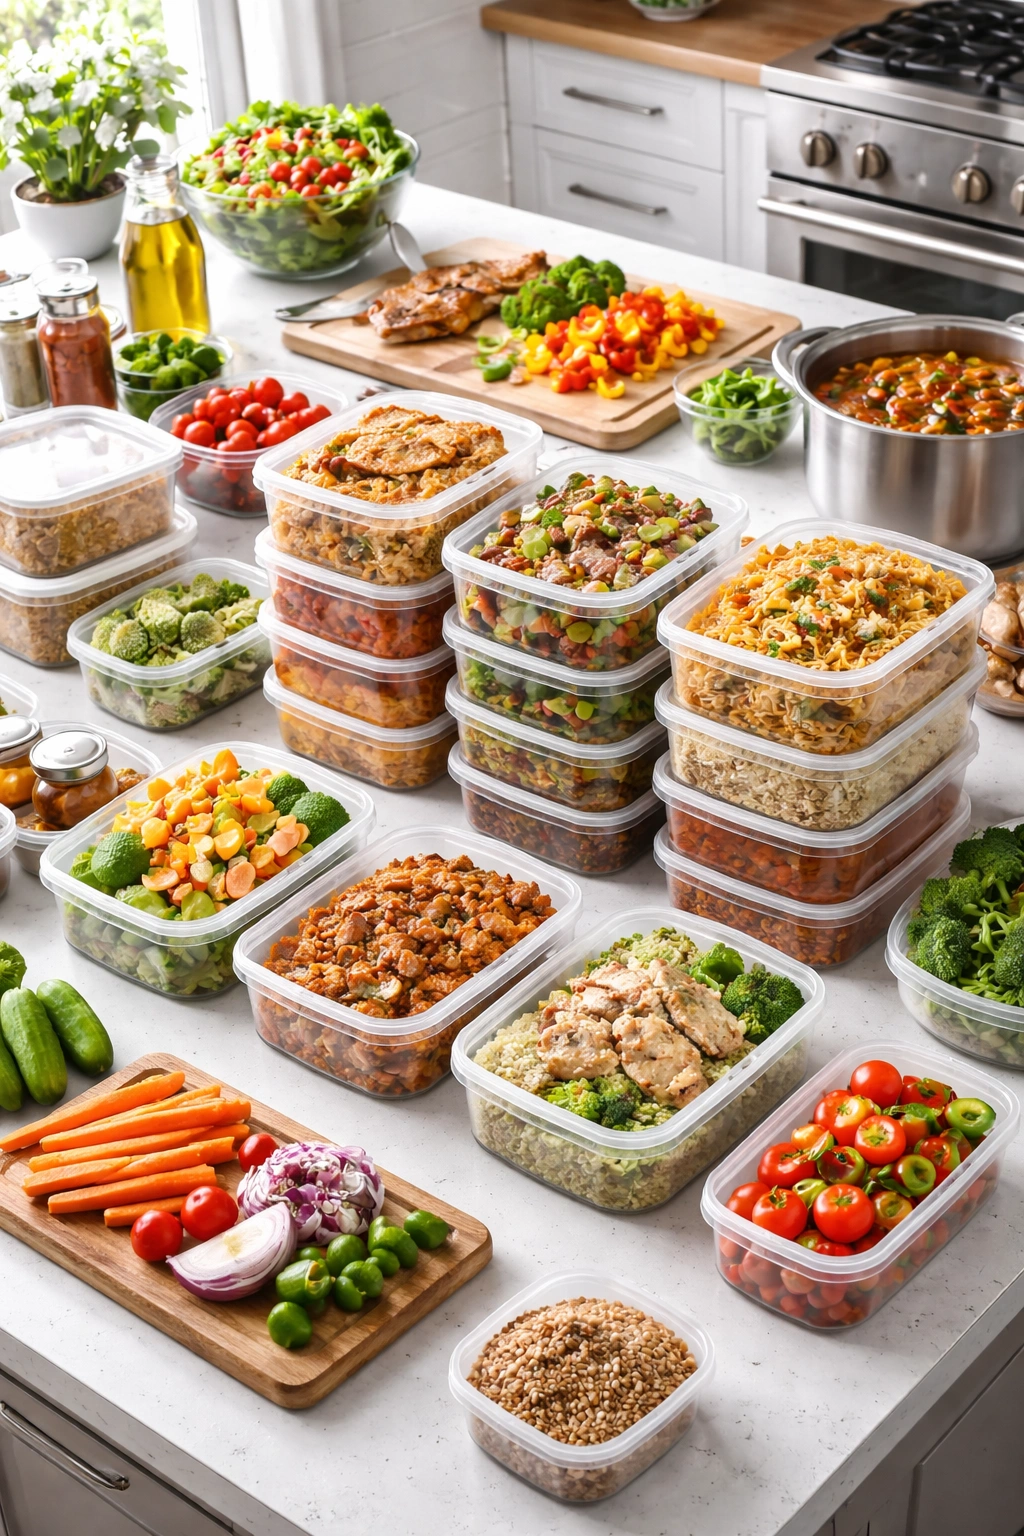
Spending Sunday afternoon at the stove might seem like the opposite of saving time, but batch cooking is actually the secret weapon that transforms your entire week. When you cook once and eat well for days, you’re not scrambling at 5 p.m. to figure out what’s for dinner, you’re not ordering takeout for the third time this week, and you’re not letting expensive ingredients go bad in your fridge. Batch cooking is the bridge between good intentions and actually following through—especially for families juggling work, school, sports schedules, and everything in between.
The magic of batch cooking lies in its simplicity and scalability. You choose recipes that taste even better after a day or two, that freeze beautifully, and that can be portioned into individual meals or family servings depending on your needs. These aren’t complicated restaurant dishes requiring fresh herbs and last-minute assembly—they’re the kind of hearty, satisfying meals that thrive in the slow cooker, on a sheet pan, or in your largest pot. Cook it once on a Sunday or your preferred free afternoon, and you’ve bought yourself the gift of stress-free dinners for days afterward.
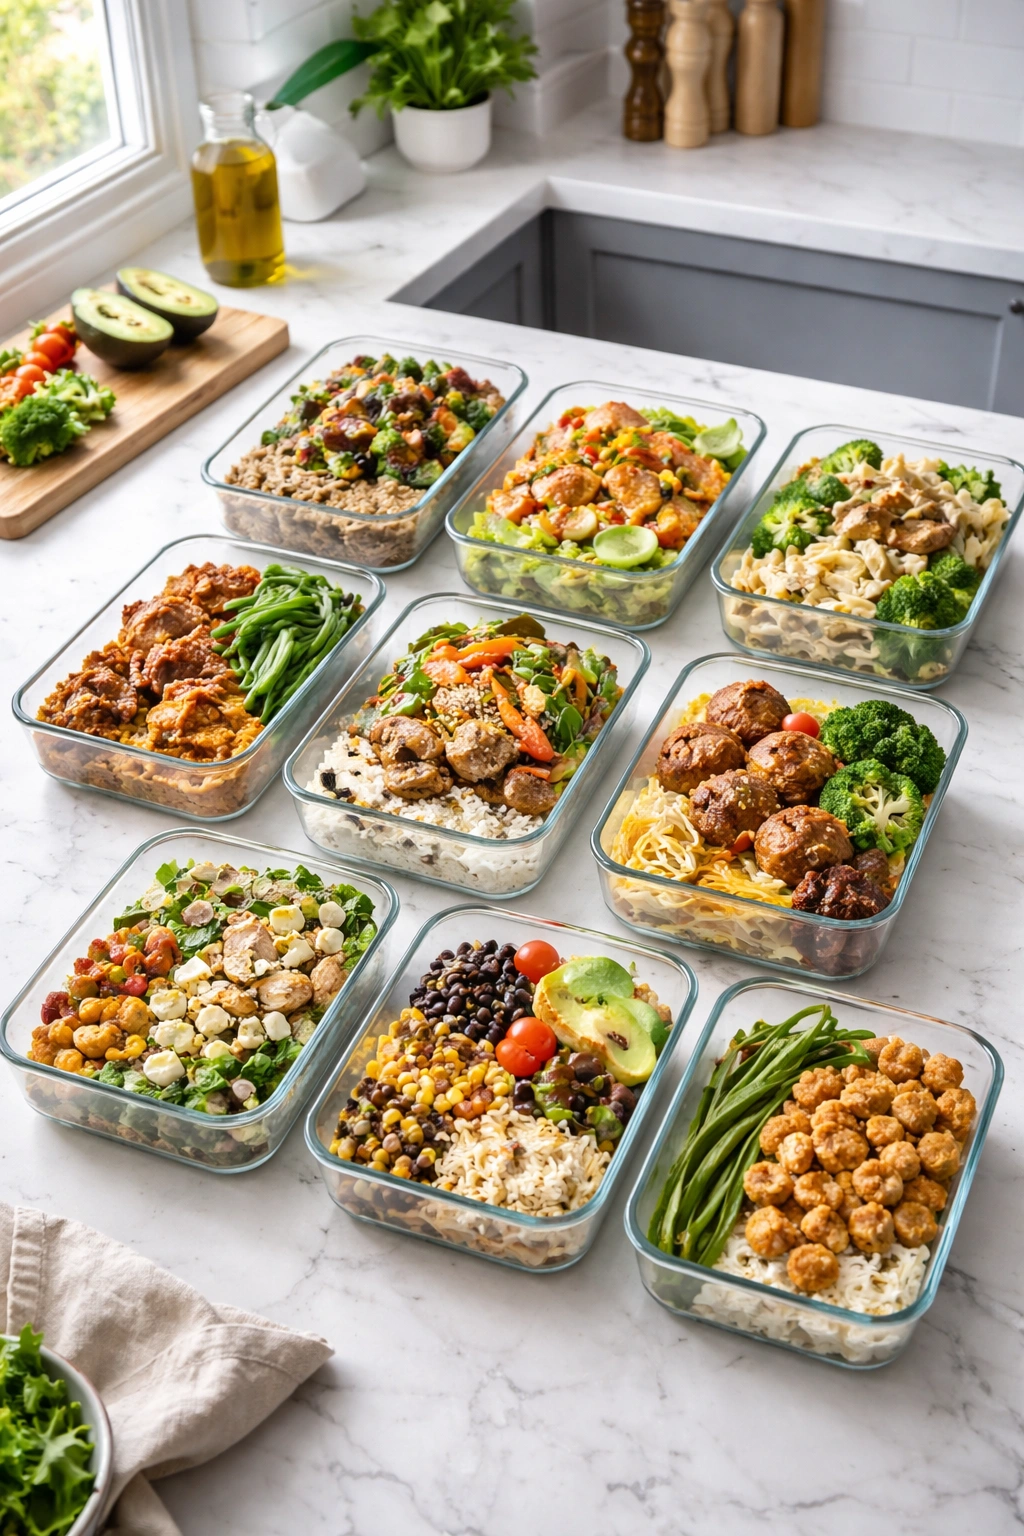
Real families with real schedules rely on batch cooking because it works. Whether you’re feeding picky eaters, managing dietary preferences, handling food allergies, or simply refusing to spend your evenings stressed about dinner, batch cooking recipes give you the foundation to feed your family well without burning yourself out. Here are eight proven recipes that freeze beautifully, reheat perfectly, and will make your busy week infinitely more manageable.
Why Batch Cooking Saves Time and Money
The math is straightforward but worth spelling out: you spend two to three hours cooking on one day instead of spreading that same total time across five or six cooking sessions. That’s not just a time savings—it’s a mental and emotional shift. Instead of the evening cooking crunch when everyone’s hungry and tired, you’ve got prepared meals waiting.
The financial advantage is equally real. Buying ingredients in bulk, cooking with intention, and eliminating last-minute takeout decisions means your grocery dollar goes further. You’re less likely to throw away ingredients that went bad before you got around to using them. You’re buying proteins and vegetables at better prices when you’re cooking for multiple meals at once.
Beyond time and money, batch cooking prevents the decision fatigue that sinks so many families. Once you’ve cooked and portioned your meals for the week, the question “what’s for dinner?” has already been answered. You’re choosing from prepared options rather than starting from zero when you’re tired and hungry. For busy families, that mental simplification is often worth more than the hours saved.
How to Set Up Your Batch Cooking Day
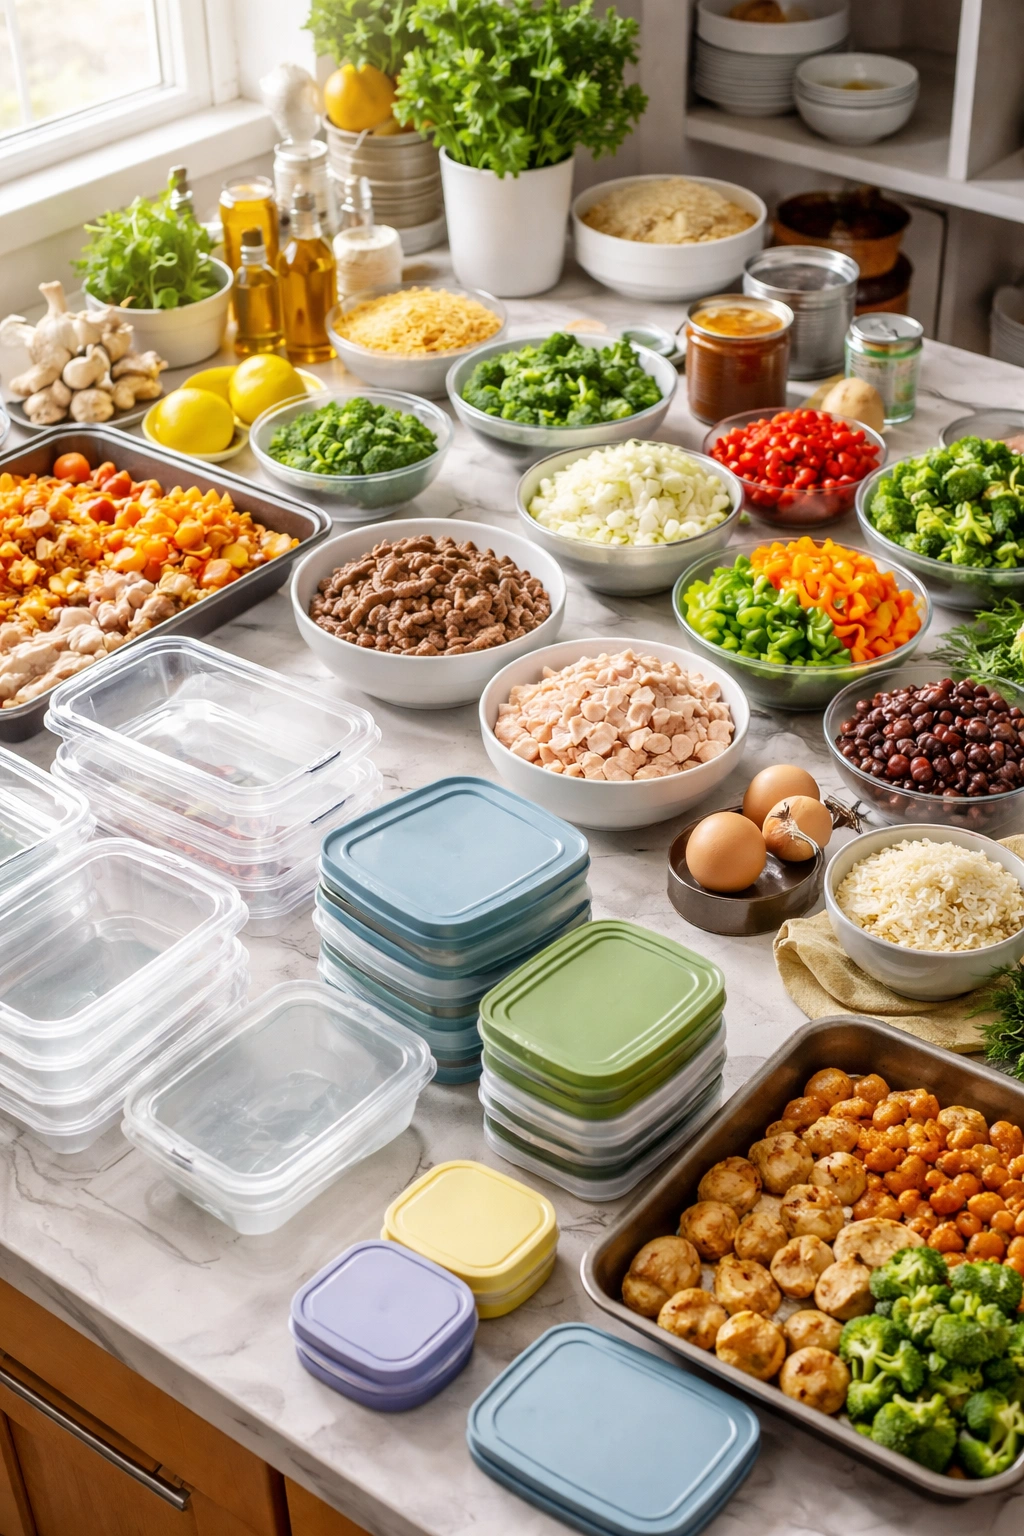
Success starts before you touch a pot. Spend 15 minutes reading through all eight recipes and your chosen dishes, gathering every ingredient you’ll need and laying out your equipment. Check your freezer space—knowing you’ll need room for multiple containers matters before you start cooking.
Choose recipes that work well together logistically. If three of your recipes use the oven, you’ll need to stagger them or use multiple racks and longer total cook time. If two recipes use the same base ingredient, you might prep that component once and divide it among recipes. Smart sequencing means you’re not waiting around for things to finish, and you’re using your equipment efficiently.
Invest in good freezer containers. Flat, stackable containers maximize freezer space. Label everything with the contents and date using a permanent marker on the lid or a piece of tape on top—you’ll thank yourself later. Divide everything into portions that make sense for your family (individual containers, family-sized portions, whatever you’ll actually reheat and eat).
1. Freezer-Friendly Beef Chili
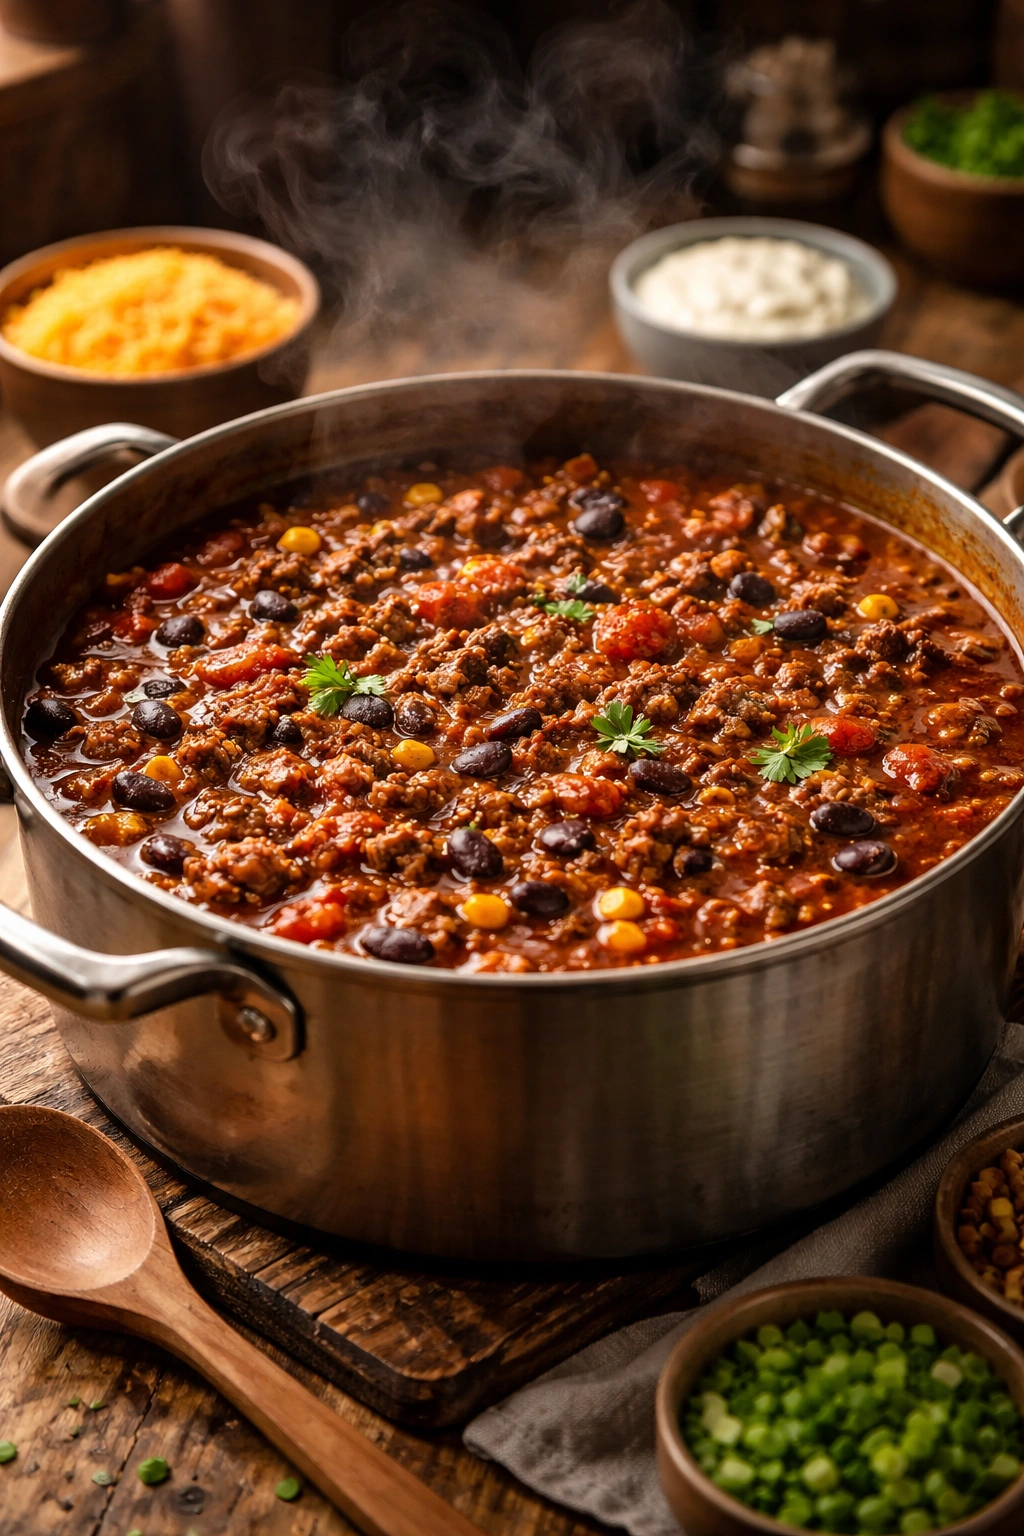
This is the anchor recipe that works equally well for a casual family dinner, as a base for loaded nachos, as a topping for hot dogs, or mixed with pasta for a quick chili mac. The long, slow cooking develops deep, complex flavors that actually improve by the next day as the spices and ingredients continue to meld.
Yield: Makes about 12 servings (three 4-serving containers)
Prep Time: 20 minutes
Cook Time: 2.5 to 3 hours
Total Time: 2 hours 50 minutes to 3 hours 20 minutes
Difficulty: Beginner — the technique is straightforward, and you’re mostly monitoring a pot that simmers gently on its own.
For the Chili:
- 3 pounds ground beef
- 2 large yellow onions, diced small
- 6 cloves garlic, minced
- 3 tablespoons tomato paste
- 3 tablespoons chili powder
- 2 tablespoons ground cumin
- 1 tablespoon smoked paprika
- 2 teaspoons dried oregano
- 1 teaspoon cayenne pepper (adjust to your spice tolerance)
- 2 tablespoons olive oil
- Salt and black pepper to taste
- Two 28-ounce cans crushed tomatoes
- Two 15-ounce cans kidney beans, drained and rinsed
- One 15-ounce can black beans, drained and rinsed
- One 15-ounce can pinto beans, drained and rinsed
- 2 cups low-sodium beef broth
- 2 tablespoons apple cider vinegar or lime juice
Cook the Beef and Build the Base:
-
Heat the olive oil in a large, heavy-bottomed pot over medium-high heat. Add the ground beef in batches (don’t crowd the pan), breaking it into small crumbles as it cooks. Cook until the meat is deeply browned and most liquid has evaporated, about 8 to 10 minutes total. This step is crucial—the browning adds flavor that will carry through the entire pot of chili.
-
Drain any excess grease from the pot if there’s more than a thin layer remaining. Add the diced onions and cook over medium heat, stirring occasionally, until the onions are soft and beginning to brown at the edges, about 5 minutes.
-
Add the minced garlic and cook for just 1 minute until fragrant. Do not let it brown or it will taste bitter.
-
Stir in the tomato paste and cook for 2 minutes, stirring constantly. This deepens the paste’s flavor and removes any raw taste.
-
Add the chili powder, cumin, smoked paprika, oregano, and cayenne pepper. Stir constantly for about 1 minute until the spices are fragrant and have coated all the meat and vegetables.
Simmer and Build the Pot:
-
Pour in the crushed tomatoes (with their juice) and the beef broth, stirring well to combine. Bring to a simmer, then reduce the heat to low. Let the chili simmer gently, partially covered, for about 1.5 hours. This time allows the flavors to develop and the liquid to reduce slightly and concentrate.
Advertisements -
Add all three types of beans and stir well. Continue simmering for another 45 minutes to 1 hour. The chili should be thick enough that a spoon can be dragged through it and it takes a moment to fill back in.
-
Stir in the apple cider vinegar or lime juice. Taste and adjust the seasonings—add more salt, pepper, or spice as needed. The chili should taste bold and well-seasoned, not muted or flat.
Cool, Portion, and Freeze:
- Let the chili cool for 15 minutes at room temperature before portioning. Divide into freezer containers, leaving a half-inch of headspace (the chili will expand slightly as it freezes). Cool completely before sealing the lids and placing in the freezer.
Real-World Tips:
This chili tastes noticeably better the next day as the flavors settle and deepen. If you have time, make it a day ahead, refrigerate it overnight, and then portion and freeze it. Skip this step if you’re working on a tight schedule—it freezes beautifully either way and will still be delicious. When reheating from frozen, thaw overnight in the refrigerator and reheat gently in a pot over medium heat, stirring occasionally, until it reaches a simmer. Add a splash of water if it seems too thick.
For family variety, portion the chili into containers before adding spices that some family members might not enjoy. This gives you the flexibility to customize heat levels for different eaters.
2. Slow Cooker Pulled Pork with Flexible Applications
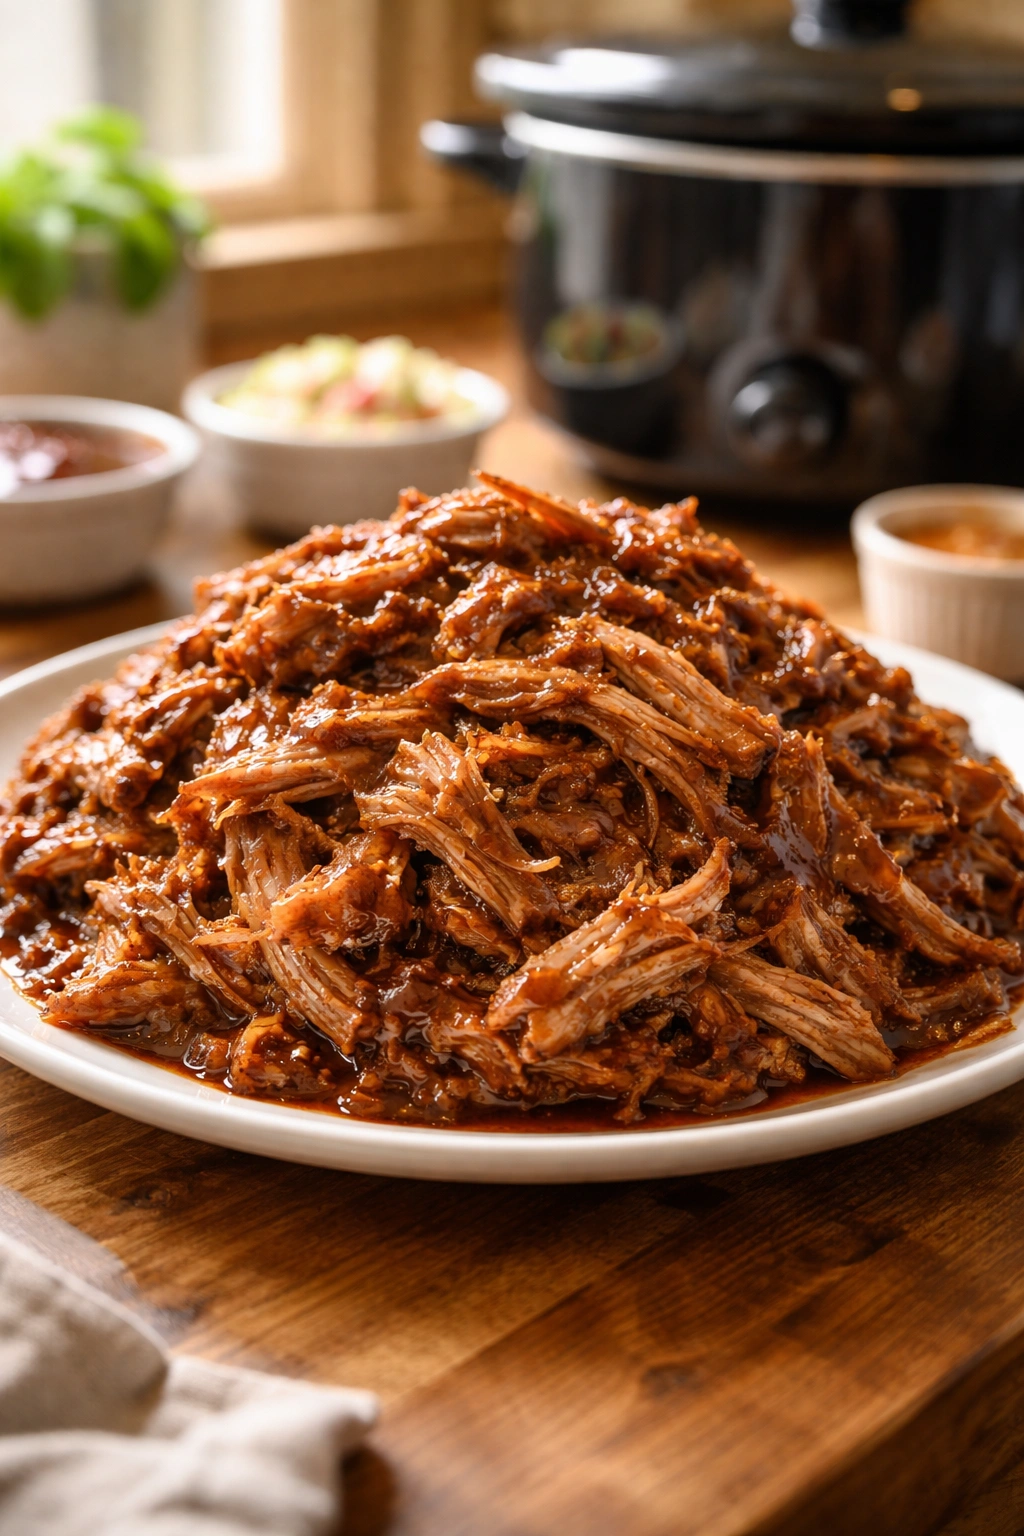
Pulled pork is the MVP of batch cooking because it works as a dinner all by itself, becomes filling for sandwiches, layers into tacos, tops nachos, or gets stirred into barbecue sauce and served as a completely different meal halfway through the week. One slow cooker session yields six to eight meals’ worth of protein, and the cooking method couldn’t be simpler.
Yield: Makes about 10 servings
Prep Time: 15 minutes
Cook Time: 8 to 10 hours on low
Total Time: 8 to 10 hours plus 15 minutes active time
Difficulty: Beginner — the slow cooker does virtually all the work.
For the Pulled Pork:
- One 5 to 6-pound pork shoulder (bone-in or boneless, skin trimmed to ¼-inch thickness)
- 3 tablespoons brown sugar, packed
- 2 tablespoons smoked paprika
- 1 tablespoon garlic powder
- 1 tablespoon onion powder
- 1 tablespoon dry mustard powder
- 2 teaspoons black pepper
- 1.5 teaspoons cayenne pepper
- 2 teaspoons fine sea salt
- 1 cup low-sodium chicken or vegetable broth
- ½ cup apple cider vinegar
- 3 tablespoons Worcestershire sauce
- 1 tablespoon molasses
- Optional: 2 tablespoons liquid smoke for deeper flavor
Prepare and Season the Meat:
-
Pat the pork shoulder completely dry with paper towels. Any surface moisture will prevent proper browning and seasoning adhesion. This is a quick but important step.
-
In a small bowl, combine the brown sugar, smoked paprika, garlic powder, onion powder, dry mustard, black pepper, cayenne, and salt, stirring until the mixture is fully combined and the brown sugar isn’t clumpy.
-
Rub the spice mixture all over the pork shoulder, pressing it firmly into the meat so it adheres well. Don’t be shy—this is your seasoning layer and it should coat the entire surface.
-
Optional but recommended: heat 1 tablespoon of oil in a large skillet over medium-high heat and brown the pork shoulder on all sides, about 2 minutes per side. This step adds flavor through caramelization, but you can skip it if you’re short on time. The pork will cook and soften either way.
Slow Cook:
-
Place the pork in a slow cooker (6-quart capacity is ideal for this size). In a liquid measuring cup, whisk together the broth, apple cider vinegar, Worcestershire sauce, molasses, and optional liquid smoke.
-
Pour the liquid over and around the pork (not over the top where it will wash off the seasoning). Cover and cook on low for 8 to 10 hours. The pork is ready when it shreds easily with two forks—the meat should pull apart almost effortlessly. At 8 hours it may be slightly firm; at 10 hours it will be incredibly tender.
-
Carefully transfer the pork to a cutting board or large bowl. Discard any bones and excess fat (a layer of surface fat is normal and adds flavor, but remove any hard cartilage or overly thick fat that won’t shred). Using two forks or a meat shredder, pull the pork into bite-sized pieces.
-
Strain the cooking liquid through a fine-mesh sieve into a bowl. Skim the fat from the surface if you prefer leaner pork, or leave it for more flavor. Return the shredded pork to the slow cooker and stir in enough of the strained liquid to make the pork moist and flavorful without being soupy (you may not need all of it).
Cool, Portion, and Freeze:
- Let the pork cool for 20 minutes before portioning into containers. Divide into family-sized portions or individual servings depending on how you plan to use it. Leave a half-inch of headspace.
Storage and Reheating:
Pulled pork keeps frozen for up to three months. Thaw overnight in the refrigerator and reheat gently in a pot over medium heat, adding a splash of water or broth if needed, until warmed through. It reheats beautifully and doesn’t dry out when handled gently.
Real-World Application Ideas:
Monday dinner: serve pulled pork on soft buns with coleslaw and pickles. Wednesday: load it into taco shells with black beans and cheese. Friday: reheat and toss with your favorite barbecue sauce for pulled pork nachos.
3. Sheet Pan Meatballs with Multiple Finishing Options
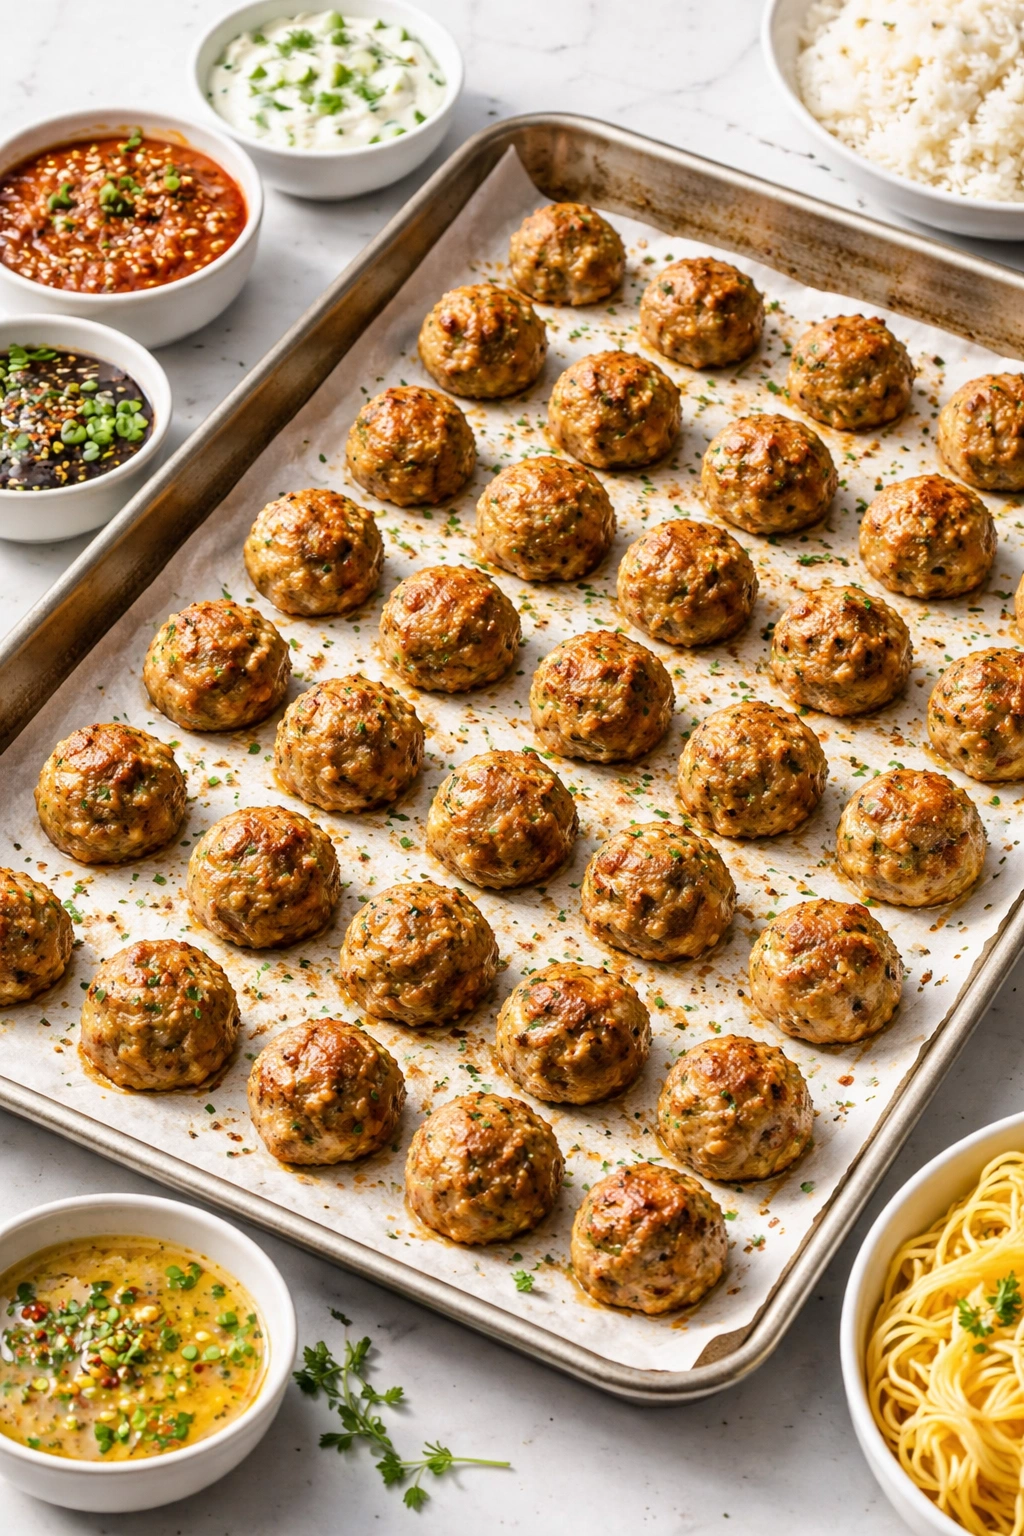
Meatballs are one of the most flexible batch-cooking proteins because they freeze beautifully and work in marinara pasta, Swedish cream sauce, teriyaki glaze, or eaten plain as a quick protein. Cooking them on a sheet pan instead of on the stovetop means less grease spattering, more even cooking, and easier portioning.
Yield: Makes about 48 meatballs (4 servings per 12 meatballs)
Prep Time: 25 minutes
Cook Time: 25 minutes
Total Time: 50 minutes
Difficulty: Beginner — the technique is mixing and baking.
For the Meatballs:
- 2 pounds ground beef (or a mix of ground beef and ground pork)
- 1 cup panko breadcrumbs
- ½ cup whole milk
- 1 small yellow onion, minced very fine (about ½ cup)
- 4 cloves garlic, minced
- ½ cup finely grated Parmesan cheese
- ¼ cup fresh Italian parsley, finely chopped (or 2 tablespoons dried)
- 2 large eggs
- 1.5 teaspoons fine sea salt
- ½ teaspoon black pepper
- ½ teaspoon red pepper flakes
- Nonstick cooking spray or oil for the pan
Prepare and Shape:
-
Preheat the oven to 400°F (205°C) and position the rack in the center. Line two large sheet pans with parchment paper or silicone baking mats.
-
In a small bowl, pour the milk over the panko breadcrumbs and let sit for 2 minutes. Stir gently until the mixture resembles damp sand. This mixture is called a “panade” and it keeps the meatballs moist and tender by adding moisture that the breadcrumbs absorb.
Advertisements -
In a large bowl, combine the ground meat, the panade mixture, minced onion, garlic, Parmesan, fresh parsley, eggs, salt, pepper, and red pepper flakes. Using your hands or a wooden spoon, mix very gently until the ingredients are just combined. Do not overmix. Overworking the mixture develops gluten and makes the meatballs dense and tough. The mixture should look shaggy and come together when squeezed, not look smooth and uniform.
-
Scoop the mixture using a 1.5-ounce cookie scoop (about the size of a golf ball) and roll gently between your palms into round meatballs. Place them about 1 inch apart on the prepared sheet pans. You should have about 24 meatballs per pan.
Bake:
- Lightly spray the meatballs with nonstick cooking spray (this promotes browning and color). Bake for 22 to 25 minutes, rotating the pans halfway through, until the meatballs are deeply browned and a meat thermometer inserted in the largest meatball registers 160°F (71°C).
Cool, Portion, and Freeze:
-
Let the meatballs cool on the sheet pans for 10 minutes. They’ll firm up as they cool and be easier to handle. Transfer to a rimmed baking sheet or freezer-safe container.
-
Freeze the meatballs uncovered (on a sheet tray) for at least 2 hours. Once they’re solid, transfer them to a freezer bag or container for long-term storage.
Reheating and Serving:
These meatballs can go straight from freezer to sauce. If you’re making marinara, heat your sauce in a pot and add the frozen meatballs, letting them simmer for 10 to 12 minutes until warmed through. For other applications, thaw them first (either overnight in the fridge or 10 minutes in the microwave) and finish with your chosen sauce.
Finishing Ideas:
Prepare three different sauces (marinara, Swedish cream, teriyaki) and divide the meatballs among them for variety throughout the week.
4. Vegetable-Forward Curry with Coconut Milk Base
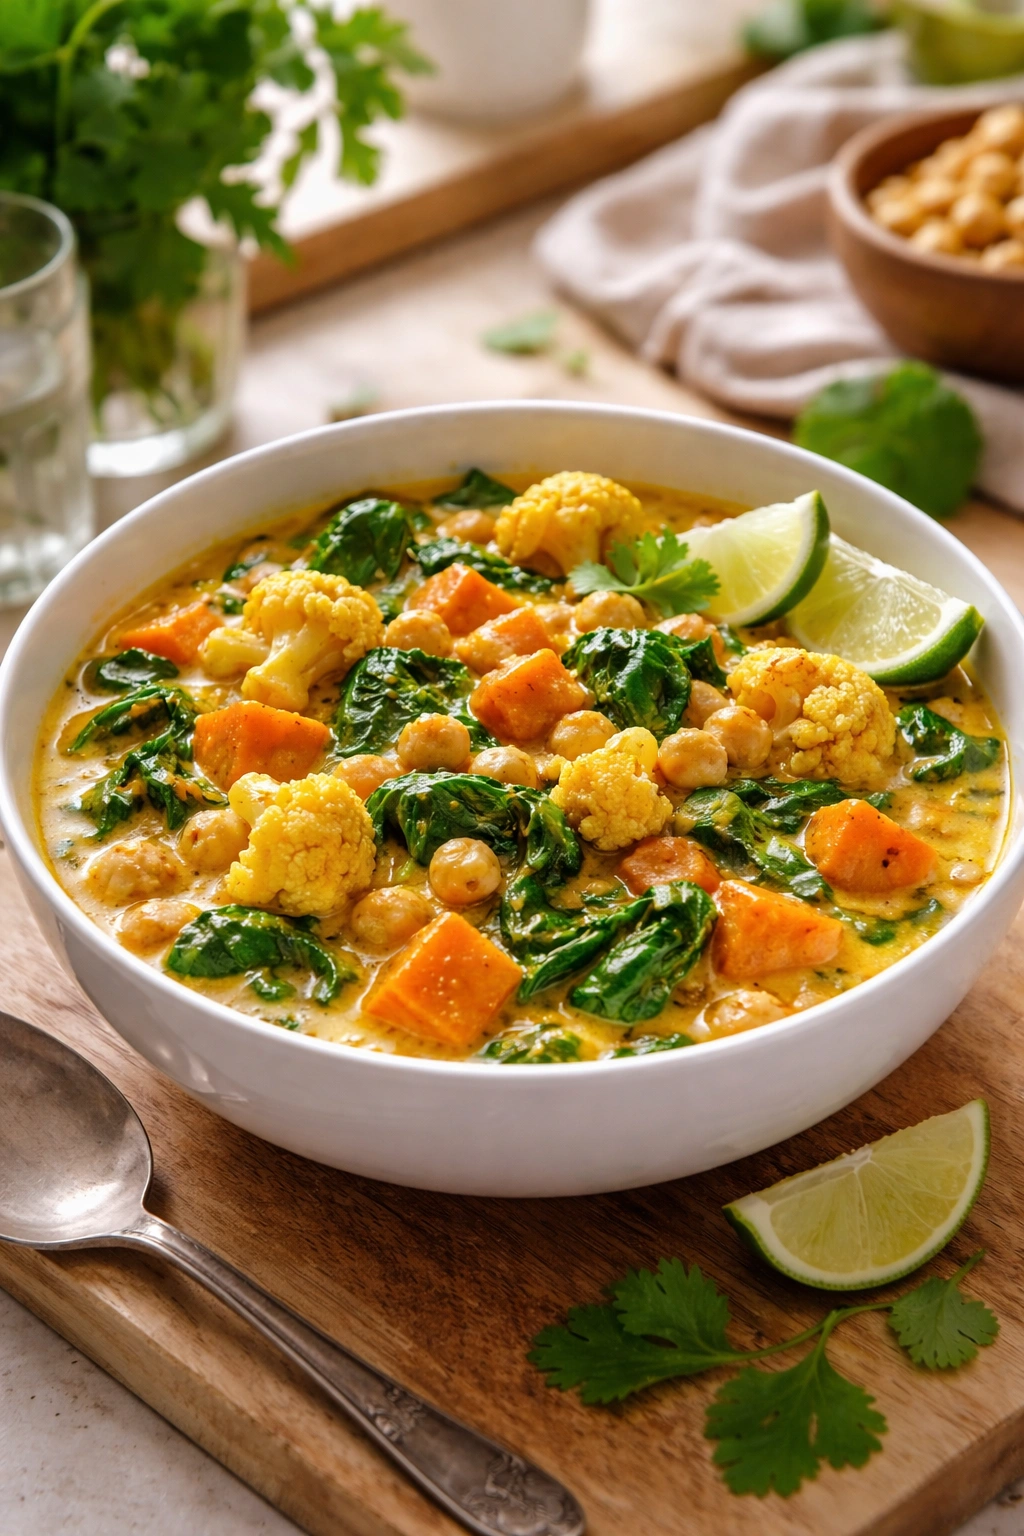
This curry is the recipe that makes vegetable-heavy meals exciting. Chickpeas and hearty vegetables like sweet potato, cauliflower, and spinach soak up the fragrant spices and creamy coconut milk, creating a naturally vegetarian main that doesn’t feel like a compromise. It works for families with dietary variety because vegetarians and meat-eaters can add their own protein (tofu, shrimp, or chickpeas) after reheating.
Yield: Makes 6 to 8 servings
Prep Time: 30 minutes
Cook Time: 35 minutes
Total Time: 65 minutes
Difficulty: Beginner — the only technique is dicing vegetables and simmering.
For the Curry:
- 3 tablespoons coconut oil
- 1 large yellow onion, diced
- 6 cloves garlic, minced
- 1 tablespoon fresh ginger, minced
- 3 tablespoons red curry paste (found in the Asian foods aisle)
- 1 tablespoon ground cumin
- 1 teaspoon ground coriander
- ½ teaspoon turmeric
- 1 teaspoon fine sea salt
- ½ teaspoon black pepper
- One 14-ounce can coconut milk (full-fat for richest flavor)
- 1.5 cups low-sodium vegetable broth
- 2 medium sweet potatoes, peeled and cut into ¾-inch cubes
- 1 head cauliflower, chopped into florets
- One 15-ounce can chickpeas, drained and rinsed
- 2 cups fresh spinach
- 2 tablespoons lime juice
- Optional: ¼ cup fresh cilantro, roughly chopped
Build the Flavor Base:
-
Heat the coconut oil in a large pot or Dutch oven over medium-high heat. Add the diced onion and cook, stirring occasionally, until softened and just beginning to brown at the edges, about 5 minutes.
-
Add the minced garlic and ginger and cook for about 1 minute, stirring constantly, until fragrant. Do not let them brown.
-
Stir in the red curry paste, breaking it up with your spoon as you stir, so it blends evenly into the onion mixture. Cook for 1 minute.
-
Add the cumin, coriander, turmeric, salt, and black pepper. Stir constantly for about 1 minute until the spices are fragrant and well combined with the paste.
Build the Sauce and Add Vegetables:
-
Pour in the coconut milk (stir the can first if the cream and liquid have separated) and the vegetable broth, stirring well to combine everything. Bring to a simmer.
Advertisements -
Add the diced sweet potatoes and cauliflower florets. Stir well, then reduce the heat to medium and let the curry simmer gently, partially covered, for about 20 minutes. The sweet potatoes and cauliflower should be tender but not falling apart.
-
Add the chickpeas and stir. Simmer for another 5 minutes until the chickpeas are warmed through.
-
Remove from heat and stir in the fresh spinach, allowing it to wilt into the curry. Add the lime juice and stir. Taste and adjust seasonings—add more salt, lime juice, or even a touch more curry paste if needed.
-
If using fresh cilantro, stir it in just before serving or portioning.
Cool, Portion, and Freeze:
- Let the curry cool for 15 minutes before portioning into freezer containers. Divide into family-sized portions.
Reheating and Serving:
Thaw overnight in the refrigerator or reheat directly from frozen in a pot over medium heat, stirring occasionally, until warmed through. The curry may be thicker after freezing; thin it with a splash of coconut milk or vegetable broth to reach your preferred consistency. Serve over rice, with naan bread, or over greens for a lighter meal.
5. Bolognese Sauce for Multiple Applications
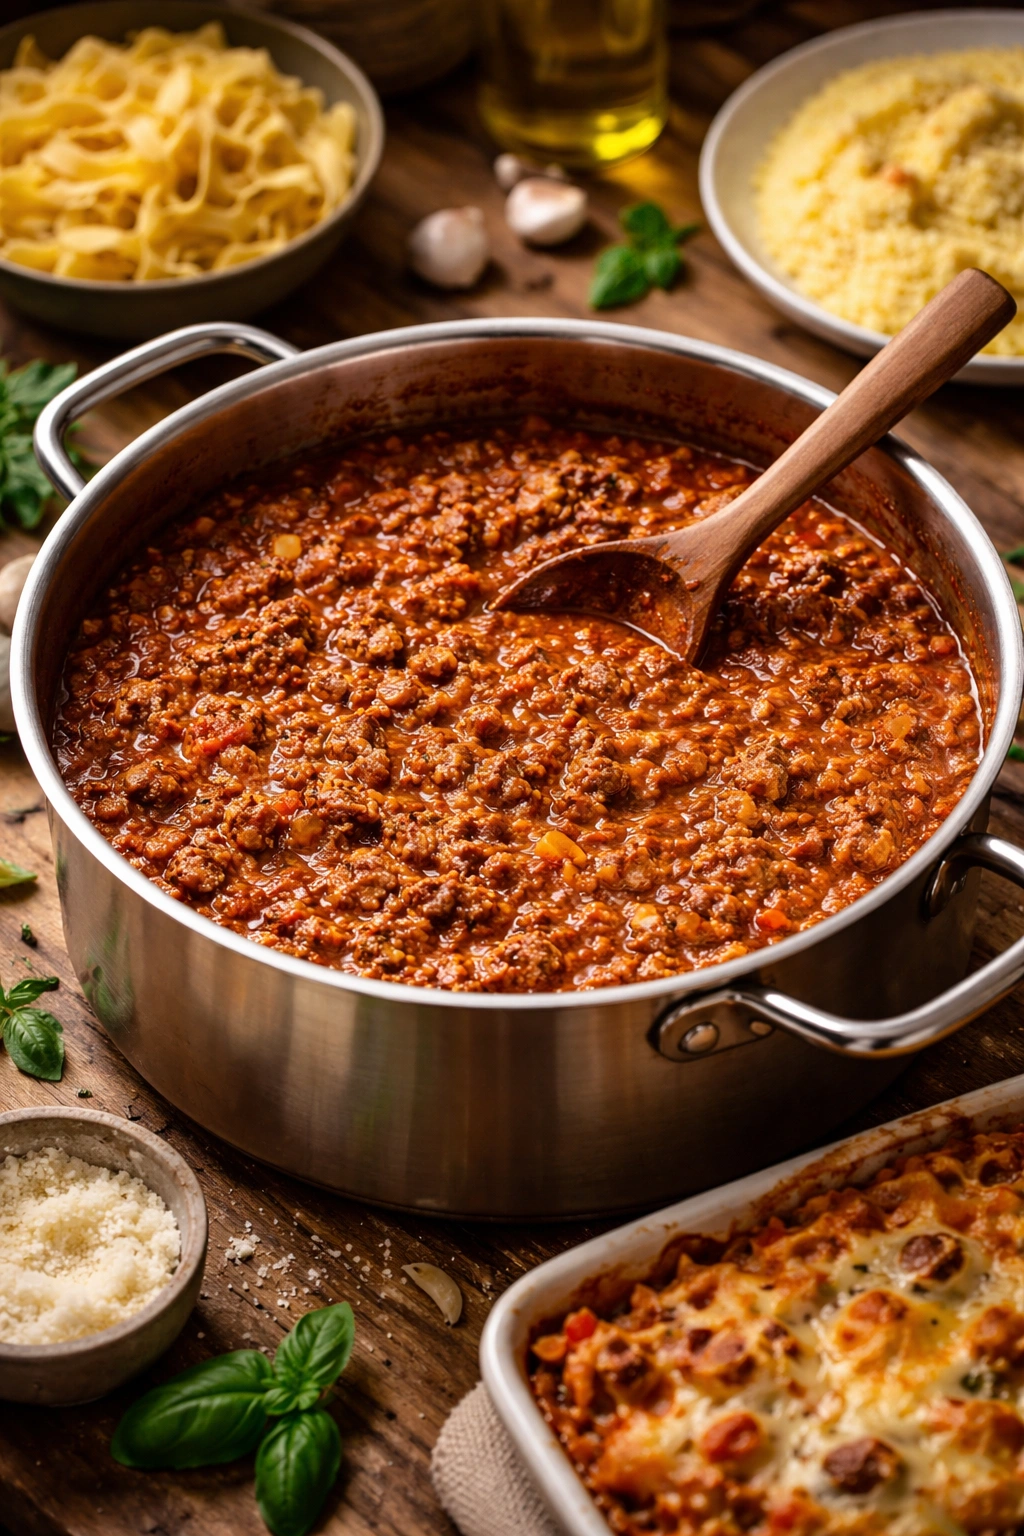
A proper Bolognese is complex, slow-simmered, and absolutely worth making in a big batch. Unlike quick marinara, this meat-and-vegetable sauce develops deeper flavor over hours and freezes beautifully. Use it this week with pasta, next week spooned over polenta, the week after as a filling for baked pasta. It’s the ultimate multi-purpose sauce.
Yield: Makes about 8 cups (8 servings with pasta)
Prep Time: 20 minutes
Cook Time: 2 hours
Total Time: 2 hours 20 minutes
Difficulty: Beginner — mostly hands-off simmering.
For the Bolognese:
- 2 pounds ground beef
- 4 ounces ground pork (adds depth; all beef works too)
- 3 tablespoons olive oil
- 1 medium yellow onion, diced small
- 2 medium carrots, diced small
- 3 celery stalks, diced small
- 6 cloves garlic, minced
- ½ cup whole milk
- ½ cup dry white wine (or additional broth)
- 3 tablespoons tomato paste
- One 28-ounce can crushed tomatoes
- One 15-ounce can tomato sauce
- 1 teaspoon fine sea salt
- ½ teaspoon black pepper
- 1 teaspoon dried oregano
- ½ teaspoon dried basil
- 1 bay leaf
- Pinch of nutmeg
- 1 tablespoon balsamic vinegar
- 2 tablespoons butter (optional but adds richness)
Brown the Meat:
-
Heat 1 tablespoon of the olive oil in a large, heavy-bottomed pot over medium-high heat. Add the ground beef and pork, breaking it apart with a wooden spoon as it cooks. Cook until deeply browned, about 10 minutes, breaking it into small crumbles. Drain off excess grease, leaving about a thin layer.
-
Add the milk and stir, scraping up any browned bits from the bottom of the pot. Cook until the milk is mostly absorbed, about 2 minutes. This is an Italian technique that adds richness and mellows the meat flavor.
Build the Base:
-
Reduce heat to medium and add the remaining 2 tablespoons of olive oil. Add the diced onion, carrots, and celery (this is called a soffritto—the aromatic base) and cook, stirring occasionally, until soft and fragrant, about 8 minutes.
-
Add the minced garlic and cook for 1 minute until fragrant.
-
Stir in the tomato paste and cook for 2 minutes, stirring constantly.
-
Pour in the wine and use a wooden spoon to scrape up any flavorful browned bits stuck to the bottom of the pot. Simmer until the wine is mostly reduced (about 2 minutes).
Simmer Low and Slow:
-
Add the crushed tomatoes, tomato sauce, salt, pepper, oregano, basil, bay leaf, and nutmeg. Stir well. Bring to a gentle simmer, then reduce heat to low. The sauce should barely bubble—this low, slow cooking is what develops the deep, complex flavor.
Advertisements -
Let the Bolognese simmer, partially covered, for 1.5 to 2 hours. Stir occasionally to ensure nothing sticks to the bottom. The sauce should reduce significantly and thicken noticeably. It’s ready when it’s rich, concentrated, and a spoon dragged through it takes a moment to fill back in.
-
Remove from heat and stir in the balsamic vinegar. If using butter, stir it in now for added silkiness. Taste and adjust seasonings—this sauce should taste bold and balanced between savory, umami, and the slight sweetness of the tomatoes.
-
Remove the bay leaf.
Cool, Portion, and Freeze:
- Let cool for 15 minutes before portioning into freezer containers. This sauce freezes beautifully for up to three months.
Reheating and Serving:
Thaw overnight in the refrigerator or reheat gently in a pot over medium heat, stirring occasionally. If it’s too thick after freezing, thin with a splash of pasta water, vegetable broth, or milk. The Bolognese will seem thinner as it heats and will coat the pasta beautifully.
6. Sheet Pan Enchiladas (Assemble Then Freeze)
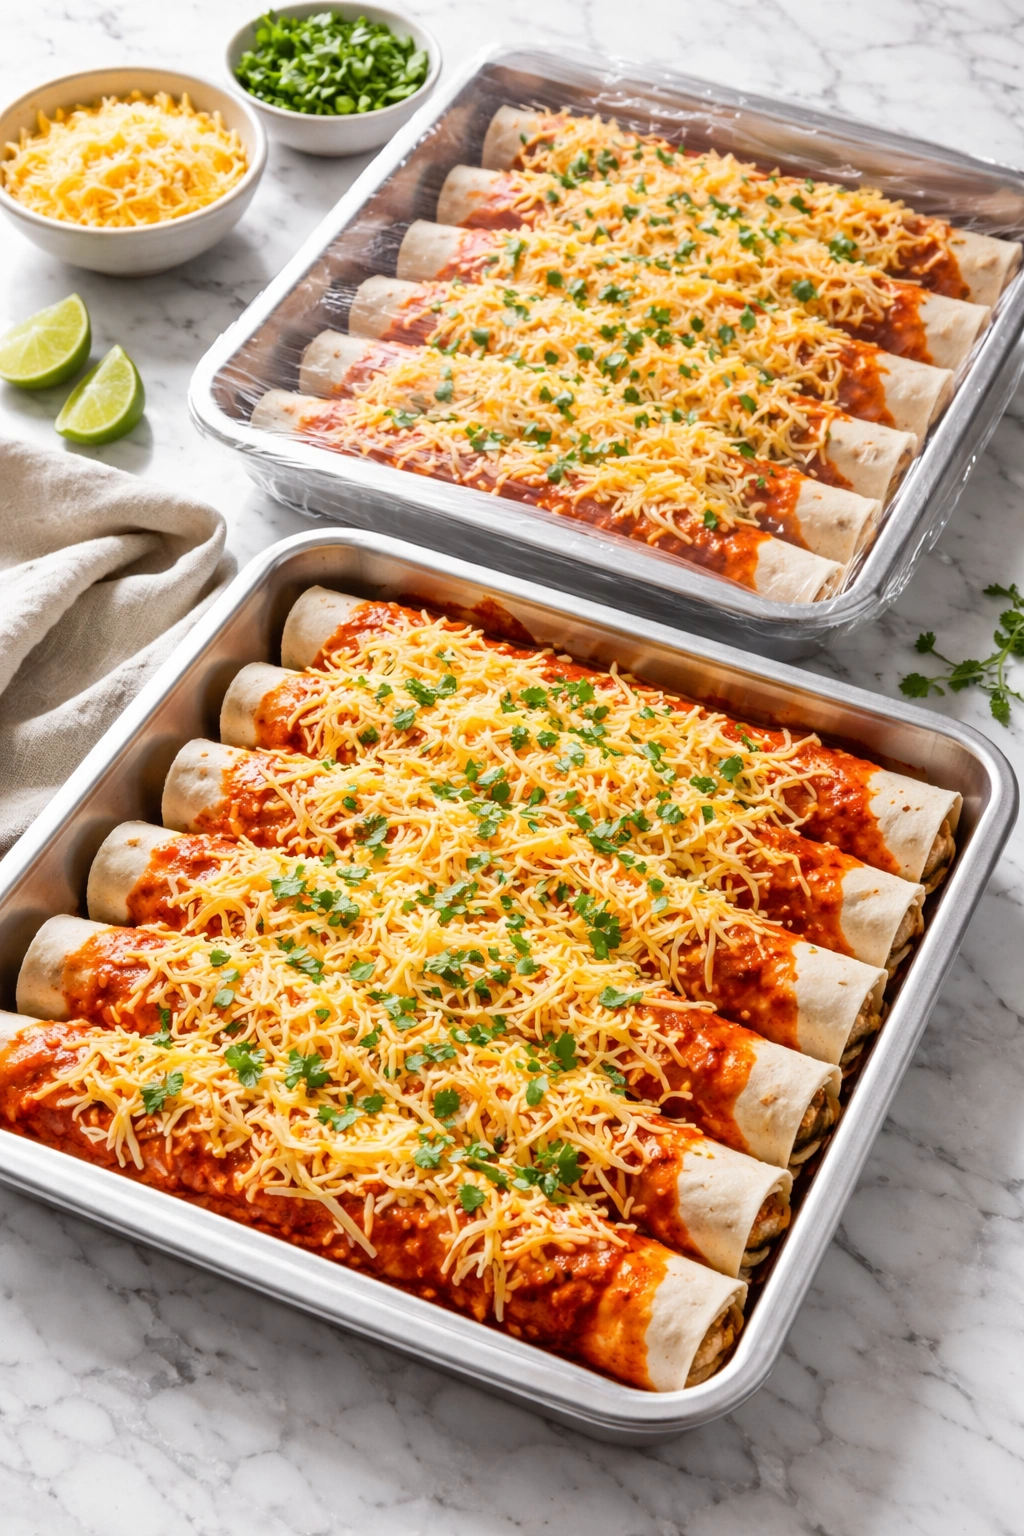
These enchiladas are a game-changer because they assemble once, freeze, and go straight from freezer to oven—no thawing required. Make a big batch on prep day and you have complete meals ready to pull out on hectic nights.
Yield: Makes two 9×13-inch pans (8 enchiladas per pan, 16 total)
Prep Time: 45 minutes
Cook Time: 45 minutes (if baking from frozen, add 10 to 15 minutes)
Total Time: 1 hour 30 minutes
Difficulty: Beginner — straightforward assembly.
For the Enchilada Filling and Sauce:
- 3 tablespoons olive oil
- 1 large yellow onion, diced
- 2 pounds ground beef
- 4 cloves garlic, minced
- 2 teaspoons ground cumin
- 1 teaspoon chili powder
- ½ teaspoon oregano
- Salt and pepper to taste
- 2 cups shredded cheddar or Mexican blend cheese, divided
- One 10-ounce can red enchilada sauce (or 1.5 cups homemade)
- 2 cups low-sodium beef broth
- 16 corn or flour tortillas (6-inch), warmed slightly so they don’t crack
- Optional: ½ cup fresh cilantro, sliced green onions, or sour cream for serving
Prepare the Filling:
-
Heat olive oil in a large skillet over medium-high heat. Add the diced onion and cook until softened, about 3 minutes.
-
Add the ground beef, breaking it into small pieces, and cook until deeply browned, about 8 minutes. Drain excess grease.
-
Add garlic, cumin, chili powder, and oregano, cooking for about 1 minute until fragrant.
-
Remove from heat and stir in 1 cup of the shredded cheese. Season with salt and pepper to taste.
Prepare the Sauce:
- In a medium bowl, whisk together the enchilada sauce and beef broth until well combined. This creates a pourable sauce that will keep the enchiladas moist as they bake.
Assemble:
-
Preheat oven to 350°F (175°C) if baking immediately. Line two 9×13-inch baking dishes with a thin layer of the sauce mixture (about ½ cup per dish).
-
Warm the tortillas (wrap them in damp paper towels and microwave for 30 seconds) so they’re pliable and won’t crack when rolled.
-
Place a tortilla on a flat surface and spoon about 3 tablespoons of the beef filling slightly off-center. Roll tightly and place seam-side down in the baking dish. Repeat with all 16 tortillas, creating two rows of 8 in each pan. Pack them snugly so they hold together.
-
Pour the remaining sauce evenly over the enchiladas (about 1 cup per pan). Sprinkle the remaining 1 cup of cheese over the top, dividing it between the two pans.
Advertisements
Freeze or Bake:
-
If freezing: cover tightly with plastic wrap and then foil (the foil prevents freezer burn). Freeze for up to one month.
-
If baking now: cover with foil and bake for 30 minutes. Remove foil and bake another 10 to 15 minutes until the cheese is bubbly and beginning to brown.
Baking from Frozen:
- Do not thaw. Cover enchiladas tightly with foil and bake at 350°F (175°C) for 50 to 60 minutes. Remove foil and bake another 10 minutes until bubbly and the cheese has started to brown.
Serving:
Serve with fresh cilantro, sliced green onions, sour cream, or avocado slices on the side.
7. Teriyaki Chicken Over Rice
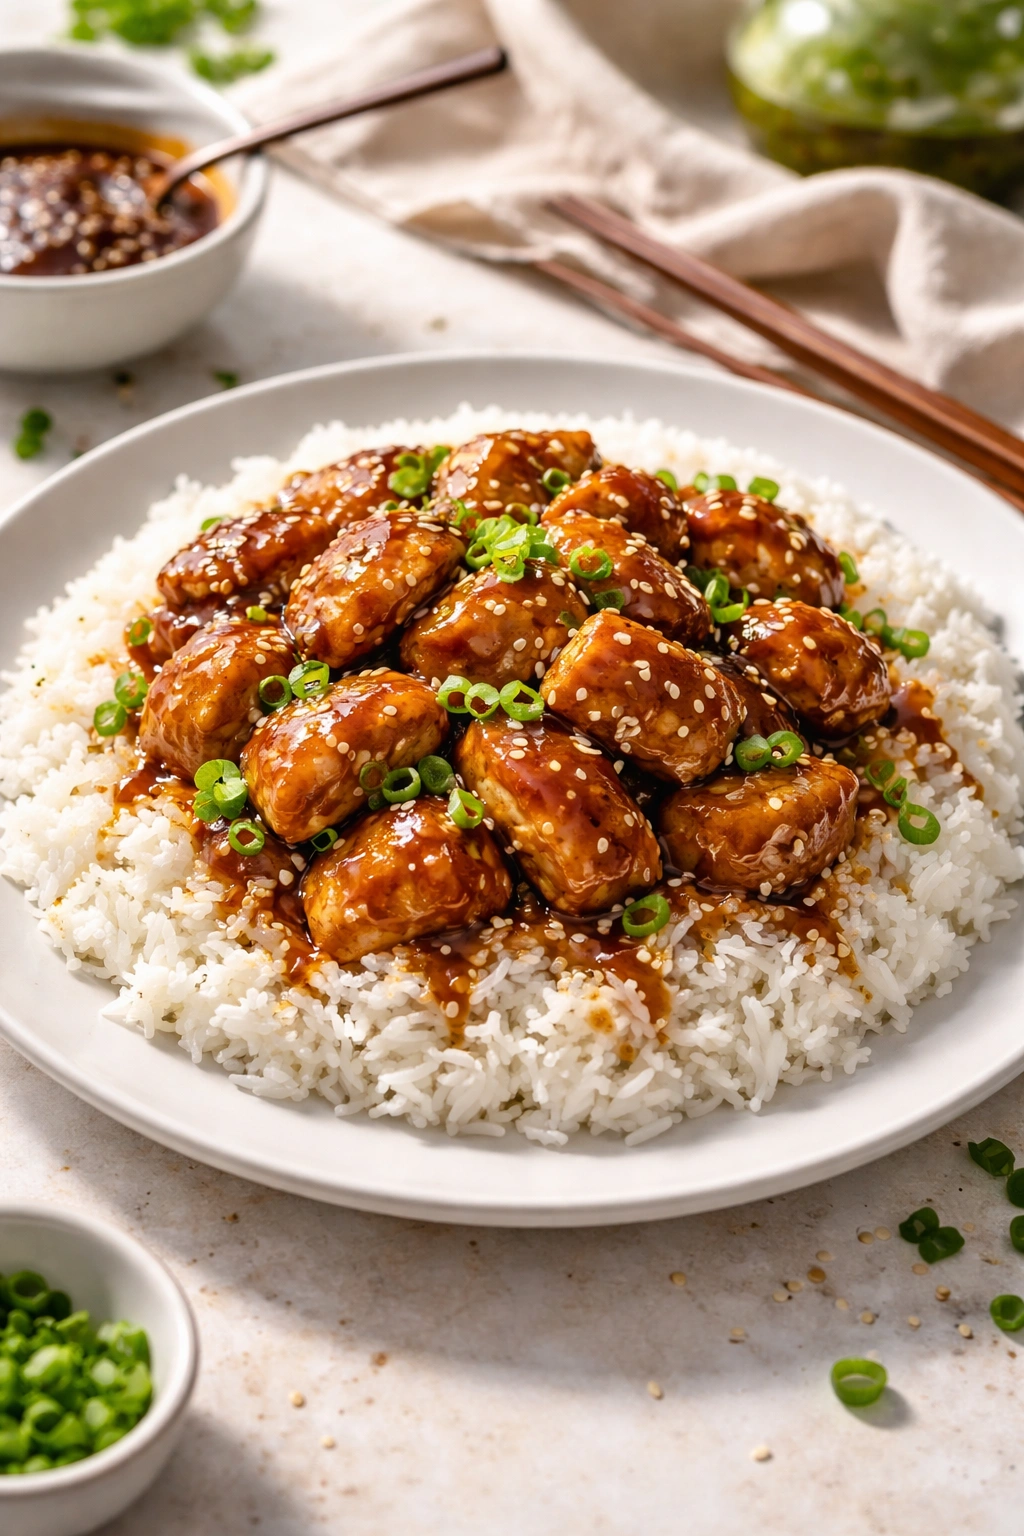
This sweet-savory, glossy chicken is the recipe that makes your family actually excited about leftovers. The sauce caramelizes slightly as it cooks, and the chicken stays moist through reheating. This freezes beautifully and reheats in minutes in either the oven or microwave.
Yield: Makes 4 to 6 servings
Prep Time: 15 minutes
Cook Time: 25 minutes
Total Time: 40 minutes
Difficulty: Beginner — basic pan-cooking technique.
For the Teriyaki Chicken:
- ½ cup low-sodium soy sauce
- ¼ cup mirin (sweet rice wine) or honey
- 2 tablespoons rice vinegar
- 2 tablespoons brown sugar, packed
- 4 cloves garlic, minced
- 1 tablespoon fresh ginger, minced
- 1 teaspoon sesame oil
- 2 pounds boneless, skinless chicken thighs or breasts, cut into 1-inch pieces
- 2 tablespoons neutral oil (vegetable or canola)
- 2 tablespoons cornstarch mixed with 3 tablespoons water (slurry)
- 2 green onions, sliced
- 1 tablespoon sesame seeds
- Optional: red pepper flakes for heat
Prepare the Sauce:
- In a small bowl, whisk together the soy sauce, mirin, rice vinegar, brown sugar, minced garlic, ginger, and sesame oil. Set aside.
Cook the Chicken:
-
Heat the neutral oil in a large skillet over medium-high heat. Pat the chicken pieces dry with paper towels (moisture prevents browning). Add the chicken in a single layer (work in batches if needed) and cook without moving for about 2 minutes until the bottoms are golden. Stir and cook for another 3 to 4 minutes until the chicken is cooked through.
-
Pour the teriyaki sauce over the chicken and stir well. Bring to a simmer and cook for about 2 minutes.
-
Stir the cornstarch slurry to recombine it (the cornstarch will have settled to the bottom). Drizzle the slurry into the simmering sauce while stirring constantly. The sauce will thicken noticeably within 30 seconds.
-
Cook for another 1 to 2 minutes until the sauce is glossy and clings to the chicken.
-
Remove from heat and stir in most of the sliced green onions, reserving some for garnish.
Cool, Portion, and Freeze:
- Let cool for 10 to 15 minutes before portioning. This chicken freezes beautifully.
Reheating:
Thaw overnight in the refrigerator or reheat from frozen in a covered oven-safe dish at 350°F (175°C) for about 20 minutes (or 10 minutes if thawed). The sauce may seem thick when cold—it will loosen up as it warms. Serve over rice with the sesame seeds and reserved green onions on top.
8. Vegetable Minestrone Soup
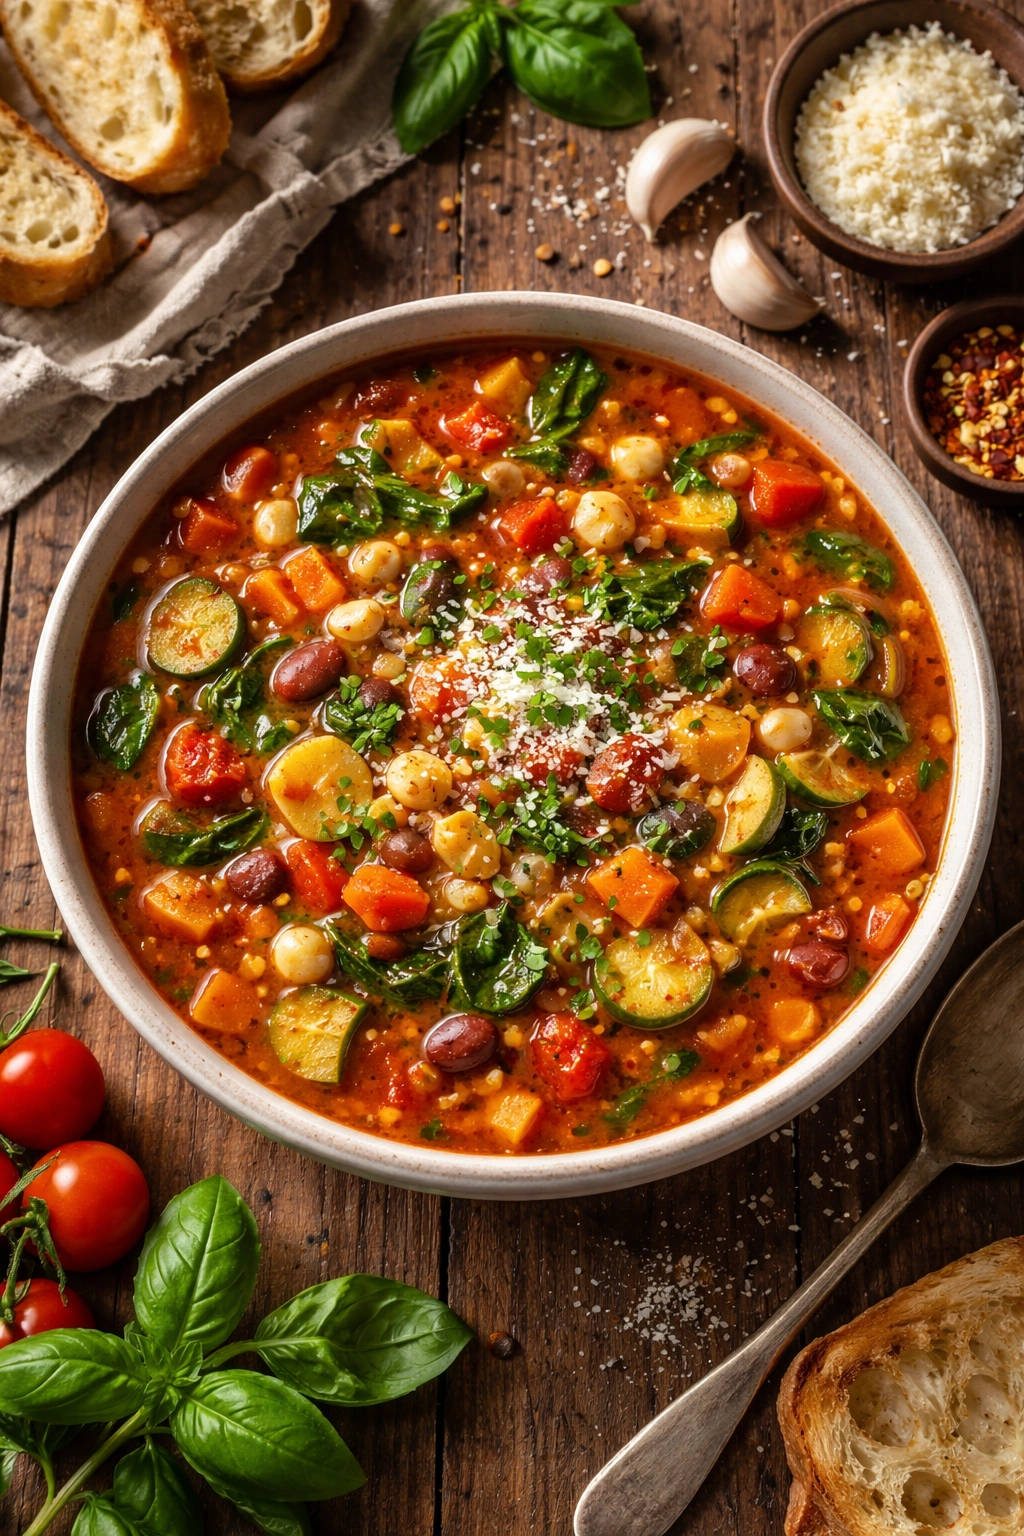
This is the recipe that transforms a pile of seasonal vegetables into complete meals. Minestrone is hearty enough to be a main course, packs in vegetables, beans, and pasta all in one pot, and actually improves in flavor as it sits in the freezer. Unlike cream-based soups, this one freezes beautifully without separating.
Yield: Makes about 12 servings (three 4-serving containers)
Prep Time: 30 minutes
Cook Time: 45 minutes
Total Time: 1 hour 15 minutes
Difficulty: Beginner — mostly chopping and simmering.
For the Minestrone:
- 3 tablespoons olive oil
- 1 large yellow onion, diced
- 4 carrots, diced
- 4 celery stalks, diced
- 6 cloves garlic, minced
- 8 cups low-sodium vegetable or chicken broth
- One 28-ounce can crushed tomatoes
- 2 medium zucchini, diced
- 2 cups diced bell peppers (any color)
- 1 large potato, diced small
- 1 head of kale or 2 cups fresh spinach, roughly chopped
- One 15-ounce can kidney beans, drained and rinsed
- One 15-ounce can cannellini beans, drained and rinsed
- 2 teaspoons dried basil
- 1 teaspoon dried oregano
- 1 bay leaf
- 1 teaspoon fine sea salt
- ½ teaspoon black pepper
- ¾ cup small pasta (ditalini, orzo, or small shells)
- 2 tablespoons balsamic vinegar
- Optional: ¼ cup fresh parsley, chopped
Build the Base:
-
Heat olive oil in a large pot over medium-high heat. Add the diced onion, carrots, and celery and cook, stirring occasionally, until softened, about 8 minutes.
-
Add the minced garlic and cook for about 1 minute until fragrant.
-
Pour in the broth and crushed tomatoes (with their liquid). Add the bay leaf, basil, oregano, salt, and pepper. Bring to a gentle simmer.
Add Vegetables:
-
Add the diced zucchini, bell peppers, and potato. Simmer for about 15 minutes until the potato and other vegetables are tender.
-
Add the kale or spinach and both types of beans. Stir well and simmer for another 5 minutes until the greens are wilted and the beans are heated through.
-
Add the pasta and simmer for about 8 to 10 minutes (check the pasta package for the exact timing) until the pasta is tender but not mushy. The soup will thicken slightly as the pasta absorbs liquid.
Advertisements -
Remove from heat and stir in the balsamic vinegar. Taste and adjust seasonings. Remove the bay leaf.
-
If using fresh parsley, stir it in just before serving or portioning.
Cool, Portion, and Freeze:
- Let cool for 15 minutes before portioning into freezer containers.
Reheating:
Thaw overnight in the refrigerator or reheat directly from frozen in a pot over medium heat, stirring occasionally, until warmed through. The soup may thicken as it sits; thin it with a splash of broth or water if needed. The pasta will have absorbed liquid during freezing, so the soup will be slightly thicker when reheated—this is normal.
Real-World Note:
If you’re in a hurry on prep day, skip the pasta during the cooking process and add it when you reheat the soup from frozen. The pasta will cook perfectly and won’t become mushy from sitting in the frozen soup.
Setting Up Your Freezer for Success
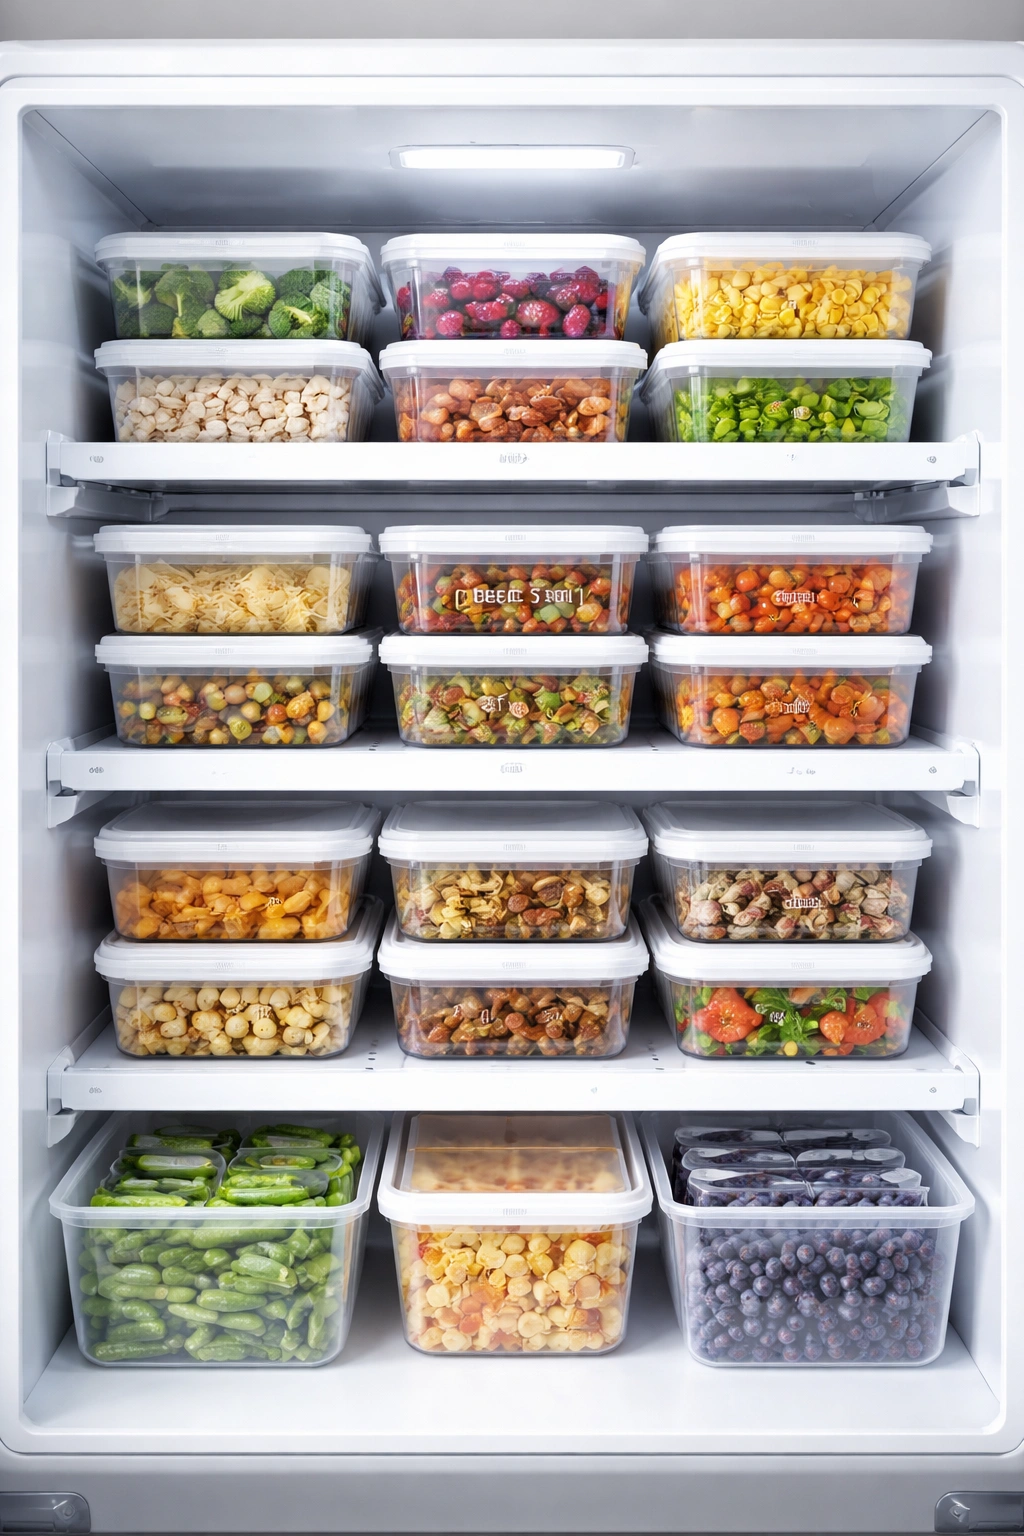
Batch cooking only works if you can actually find and access your food when you need it. The first time you spend 20 minutes searching for something is the last time you’ll think batch cooking is worth it. Organization transforms batch cooking from overwhelming to genuinely helpful.
Use uniform containers whenever possible. Clear freezer containers let you see exactly what you have without opening them. Label everything on top with waterproof tape or a permanent marker—write the dish name and the date. You’ll be surprised how quickly you forget whether that mystery container is chili or Bolognese, and you’ll want to use oldest items first.
Flat containers and bags maximize your freezer space. Freeze cooked dishes in flat zip-lock bags initially, then stack them like files once they’re frozen solid. This uses a fraction of the space that traditional containers would take. Leave a label with the contents and date on each bag.
Keep a freezer inventory list on your refrigerator or phone. As you add items, write them down. As you use them, cross them off. This prevents over-buying ingredients you’ve already cooked and helps you meal plan based on what’s actually available.
Defrosting and Reheating Strategy
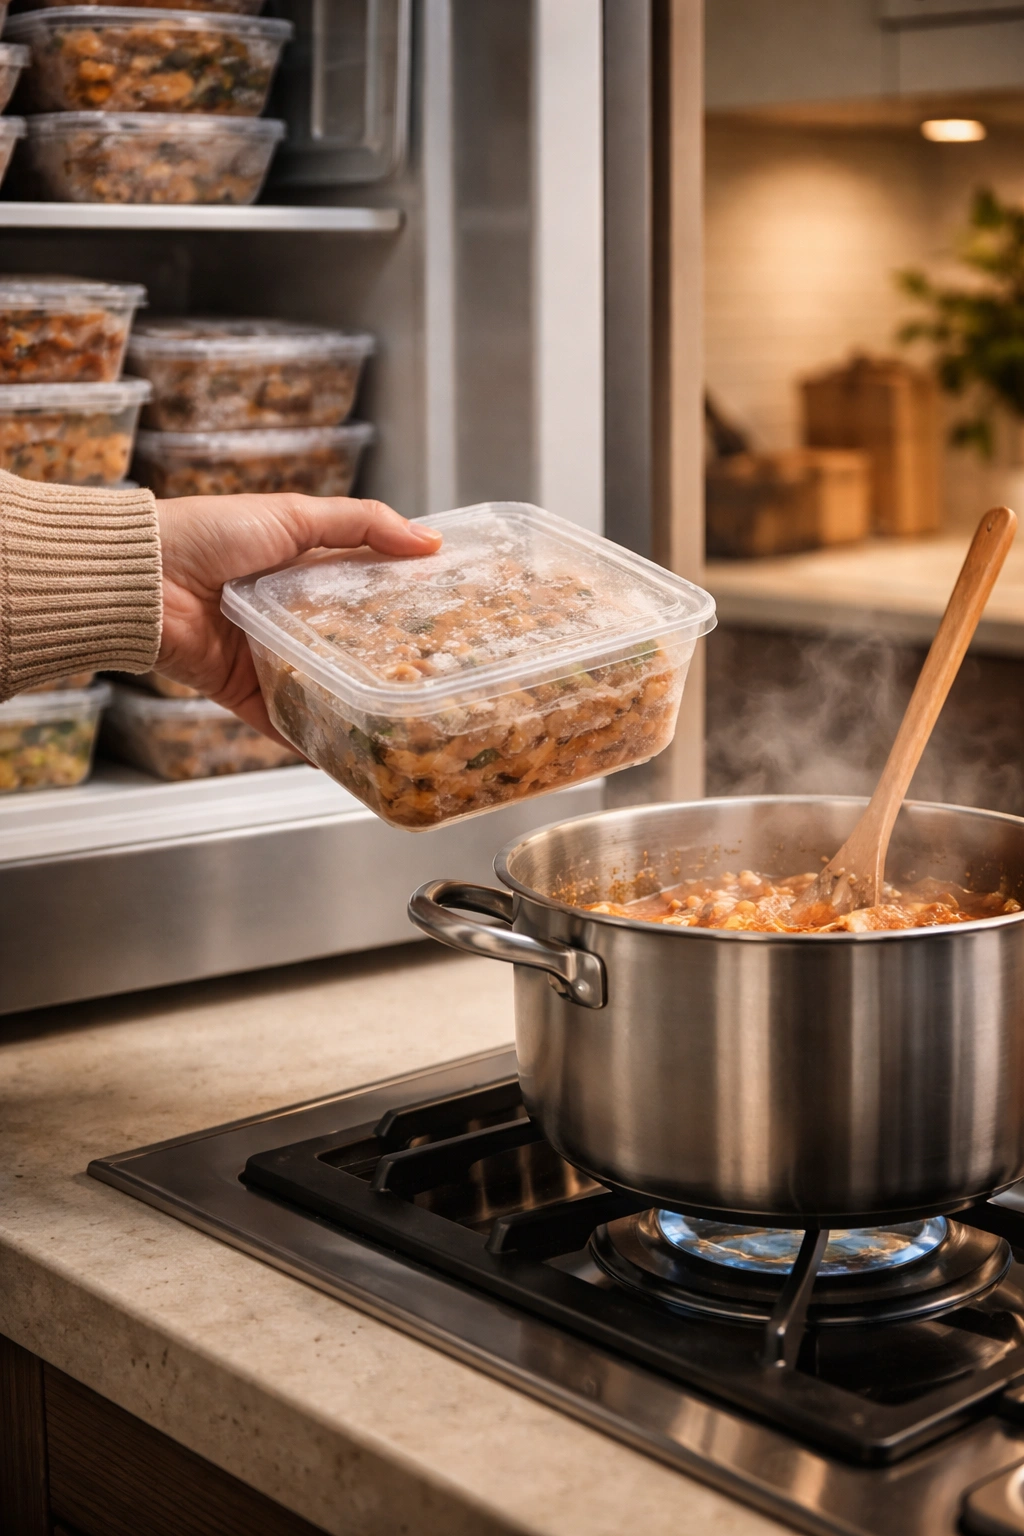
Proper thawing and reheating make the difference between food that tastes fresh and food that tastes like leftovers. The safest method is overnight thawing in the refrigerator. This takes planning but produces the best results and even allows some of the flavors to improve as the dish sits overnight.
For faster reheating, many of these dishes can go straight from freezer to pot or oven. When you have 30 minutes before dinner, reheat on the stovetop over medium heat, stirring occasionally, until warmed through. Soups, chilis, and sauces can be brought to a gentle simmer. Casseroles like enchiladas reheat beautifully covered in the oven, which takes 10 to 15 minutes longer than reheating thawed dishes but produces more even results.
Microwave reheating works for individual portions. Transfer to a microwave-safe container, cover loosely, and heat at 50% power in 2-minute intervals, stirring between intervals. This slower method prevents overcooking edges while cold centers remain.
Meal Planning Around Your Batch Cooking
The point of batch cooking is to remove decision-making from busy weekdays. Once these eight recipes are in your freezer, you’re not asking “what’s for dinner?” every night at 4 p.m.—you’re choosing from prepared options that are actually appealing.
If you’re cooking all eight recipes in a single session, you’ll need to stagger them carefully. Start with anything that takes the longest and can simmer unattended (the chili, Bolognese, or minestrone). While those are cooking, prepare and assemble the sheet pan enchiladas, shape and bake meatballs, and sear the chicken for teriyaki. The slow cooker pulled pork can cook overnight if you’re planning to cook batch recipes over two days.
Some weeks you might choose four to five of these recipes instead of all eight. This is perfectly fine and often works better for smaller families or when you have leftovers from the previous week. Mix and match based on your needs, your family’s preferences, and your freezer space.
Final Thoughts
Batch cooking isn’t about being perfect or following a rigid meal plan. It’s about showing up for yourself on a free afternoon so that your exhausted self on a weeknight has an actual dinner waiting instead of a crisis. Whether you tackle all eight of these recipes at once or rotate through them over several weeks, you’re building a system that handles the chaos of busy family life.
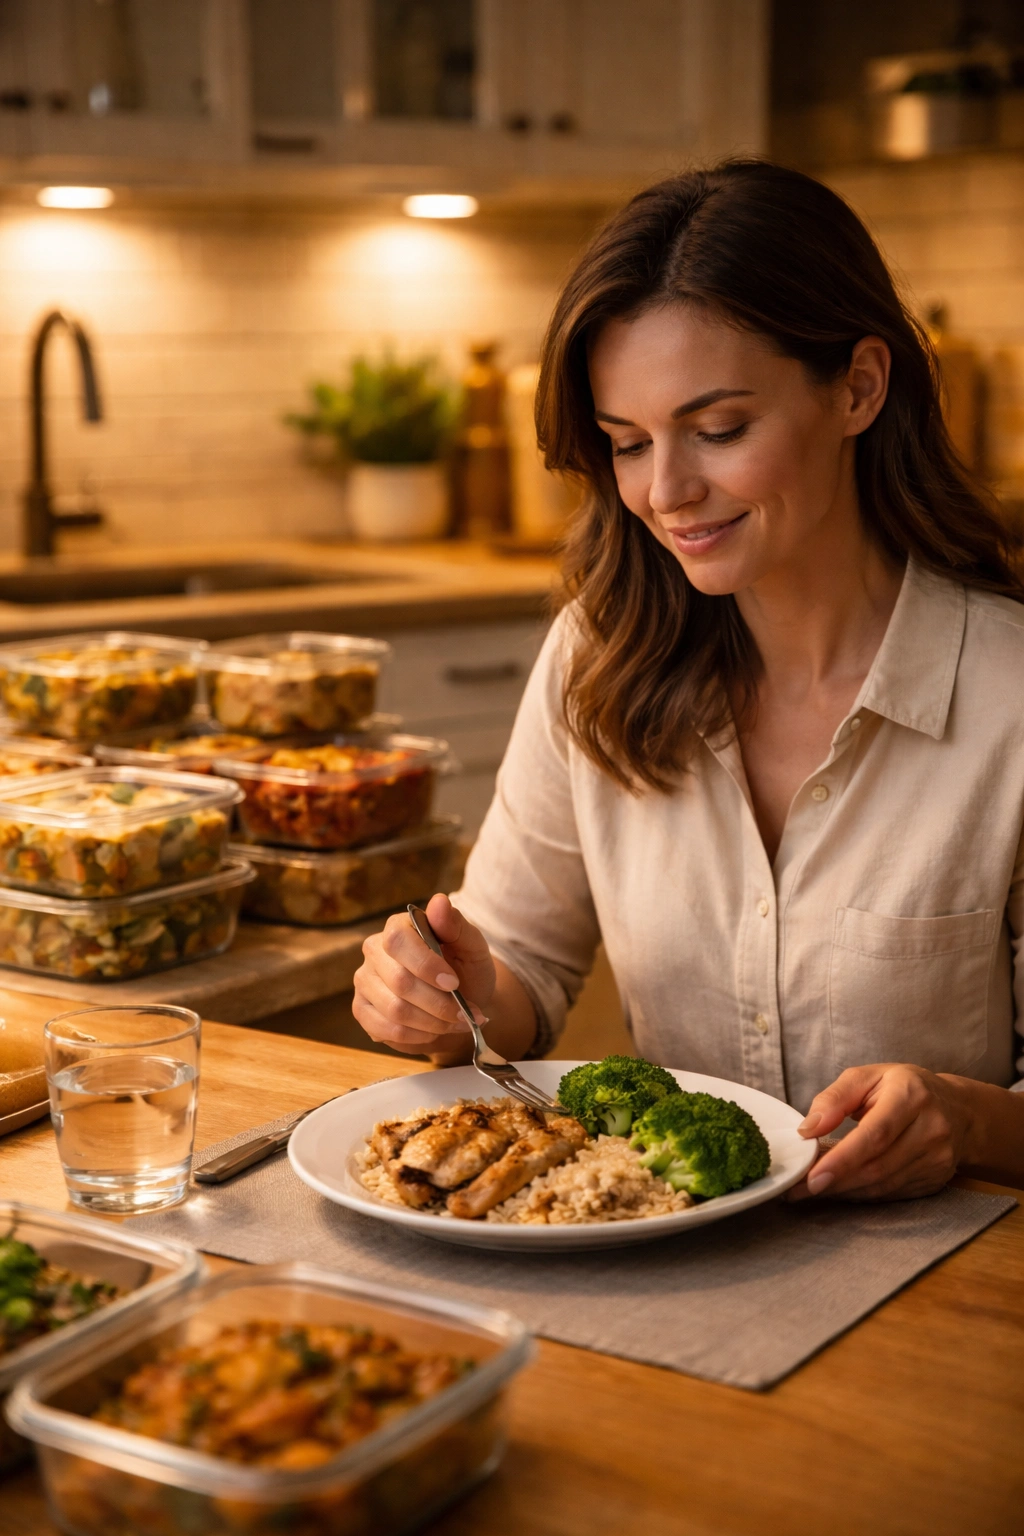
The real magic happens when you sit down to dinner on a Wednesday and realize you’re eating something genuinely delicious that you didn’t have to cook that day. That moment—when the meal is already made, it tastes great, and nobody had to order takeout—is what makes batch cooking worth doing. These eight recipes are your foundation. Once you’ve made them a few times, they become automatic, faster, and you’ll start adapting them to whatever proteins, vegetables, and flavors your family loves most.