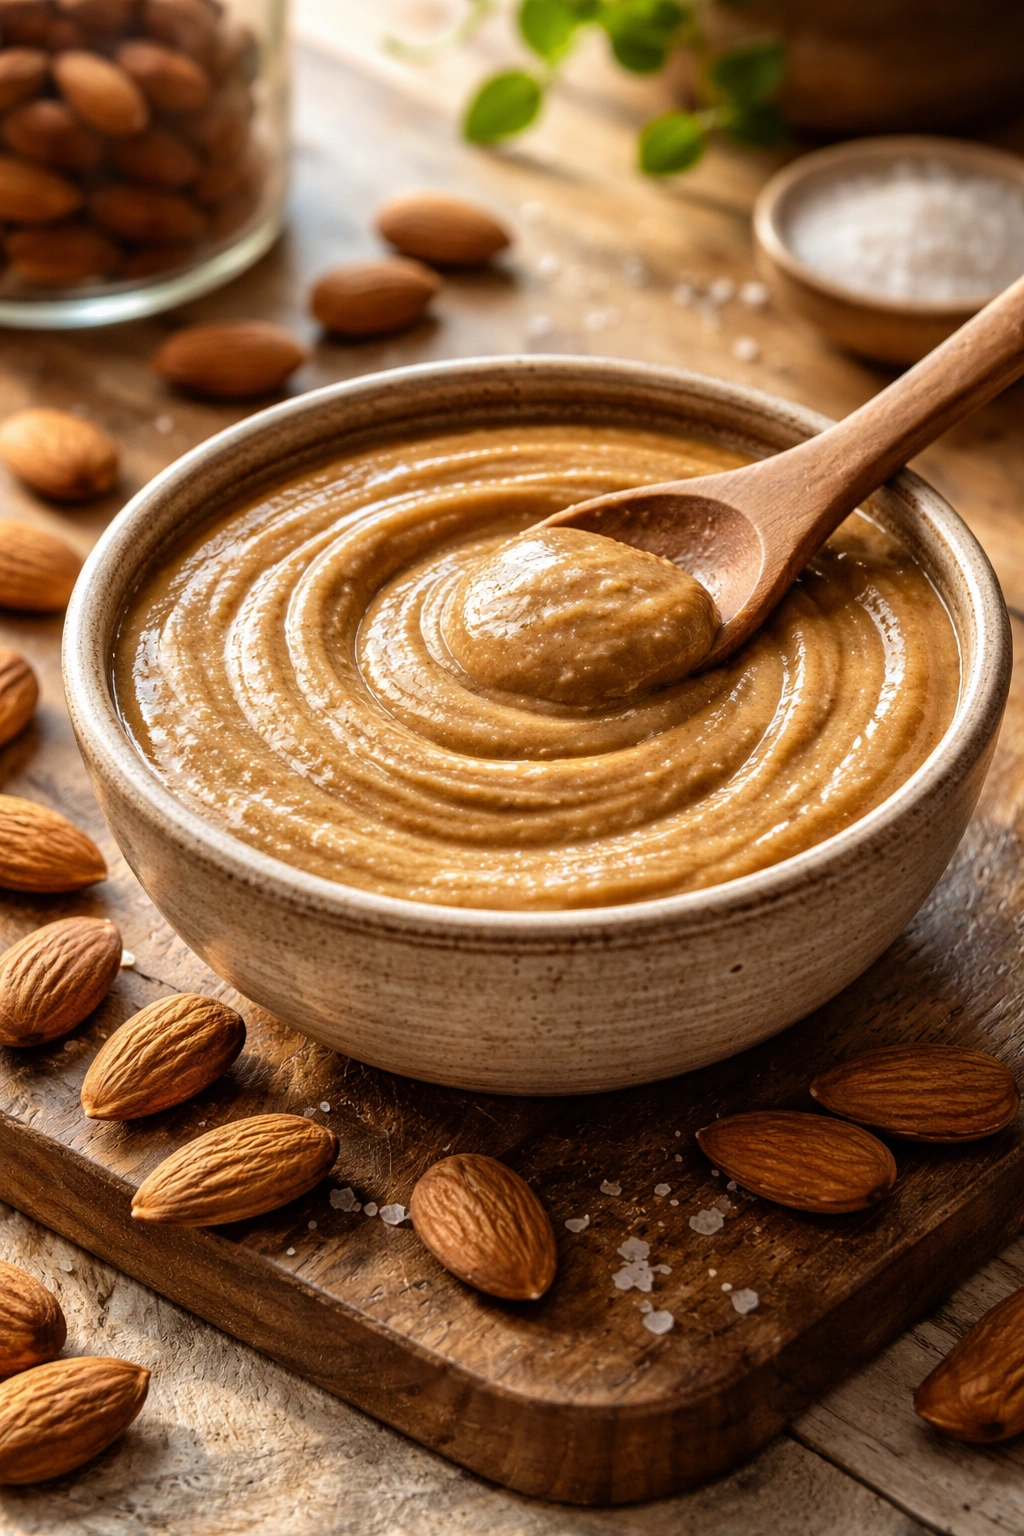
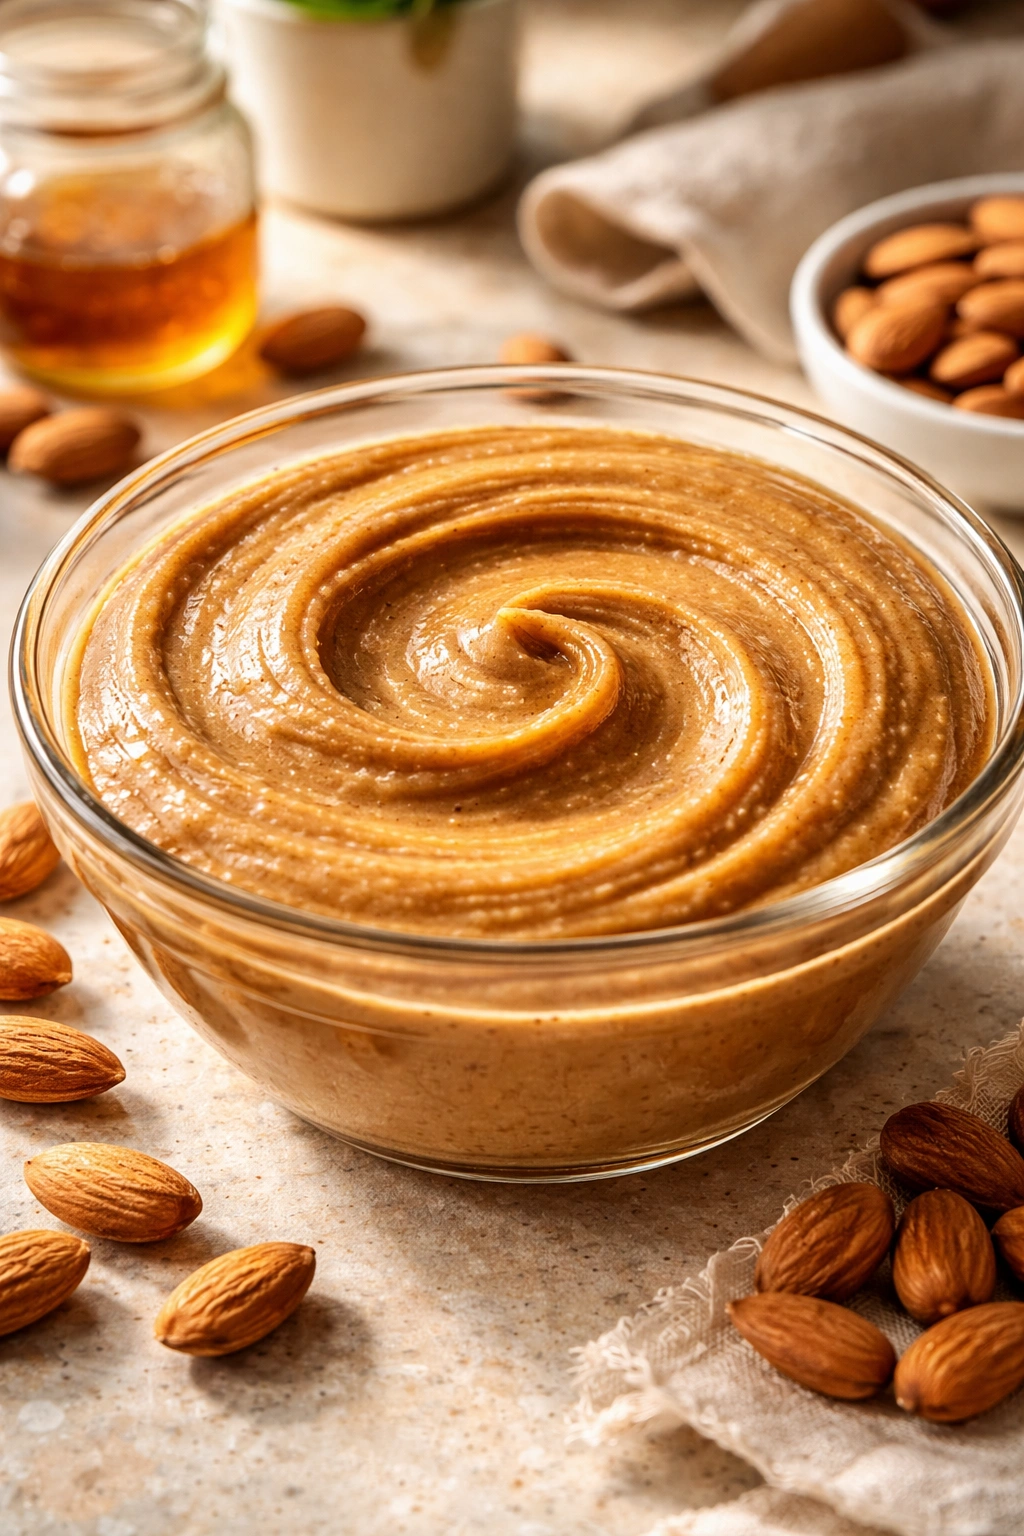
There’s something genuinely magical about watching a handful of whole almonds transform into silky, rich butter in just minutes. The moment your food processor creates that creamy texture is when you realize store-bought almond butter was never really the best version of itself — it was just convenient. Homemade almond butter is incomparably fresher, more flavorful, and costs a fraction of what you’d spend at the grocery store. If you’ve hesitated because you thought the process required special equipment or hours of monitoring, you’re about to discover how wrong that assumption is.
Making almond butter at home is startlingly simple. You need one ingredient, one appliance, and five minutes of patience (though most of that time is hands-off). The process works because almonds contain enough natural oils that, when broken down and agitated, create a smooth, spreadable butter without any additives. No stabilizers, no sugar, no palm oil — just pure almond, exactly as intended. Once you’ve made it fresh just once, you’ll never look at a jar of commercial almond butter the same way again.
The best part? You have complete control over exactly what goes into your butter, which means you can customize it to match your exact preferences. Prefer a nuttier flavor? Go with roasted almonds. Want the fiber and antioxidants in the skin? Keep them unblanched. Craving something sweet or flavored? You can add vanilla, honey, or cinnamon directly to your batch without the weird gums and additives found in flavored commercial versions.
Why Homemade Almond Butter Tastes So Much Better Than Store-Bought
The first time you taste homemade almond butter, the difference is immediately obvious. Store-bought versions often taste stale or slightly rancid because almonds begin oxidizing as soon as they’re processed. Most commercial producers grind almonds weeks or months before they reach store shelves, and even vacuum-sealed jars can’t stop that degradation entirely. Your homemade version will be made fresh, tasting exactly as nutty, sweet, and rich as almonds are meant to taste.
Commercial almond butters contain stabilizers — usually palm oil or hydrogenated vegetable oil — that keep the natural almond oil from separating. This might seem convenient, but it changes both the texture and the nutritional profile. Homemade almond butter will naturally separate slightly as it sits (the oil rises to the top), which is completely normal, healthy, and actually preferable from a nutrition standpoint since you’re getting the whole almond, oil and all.
Cost savings are genuinely substantial. A jar of premium almond butter costs $12 to $16, while a pound of raw almonds (which makes about 1.5 jars of butter) costs $6 to $9. You’re paying more than double for convenience and packaging. Once you make it yourself twice, you’ll recoup your food processor investment.
Most importantly, fresh almond butter has a flavor depth that commercial versions simply can’t match. There’s a sweetness and complexity to almonds that develops fully only in freshly ground form. Within hours, that brightness starts fading.
What Equipment You Actually Need to Make This
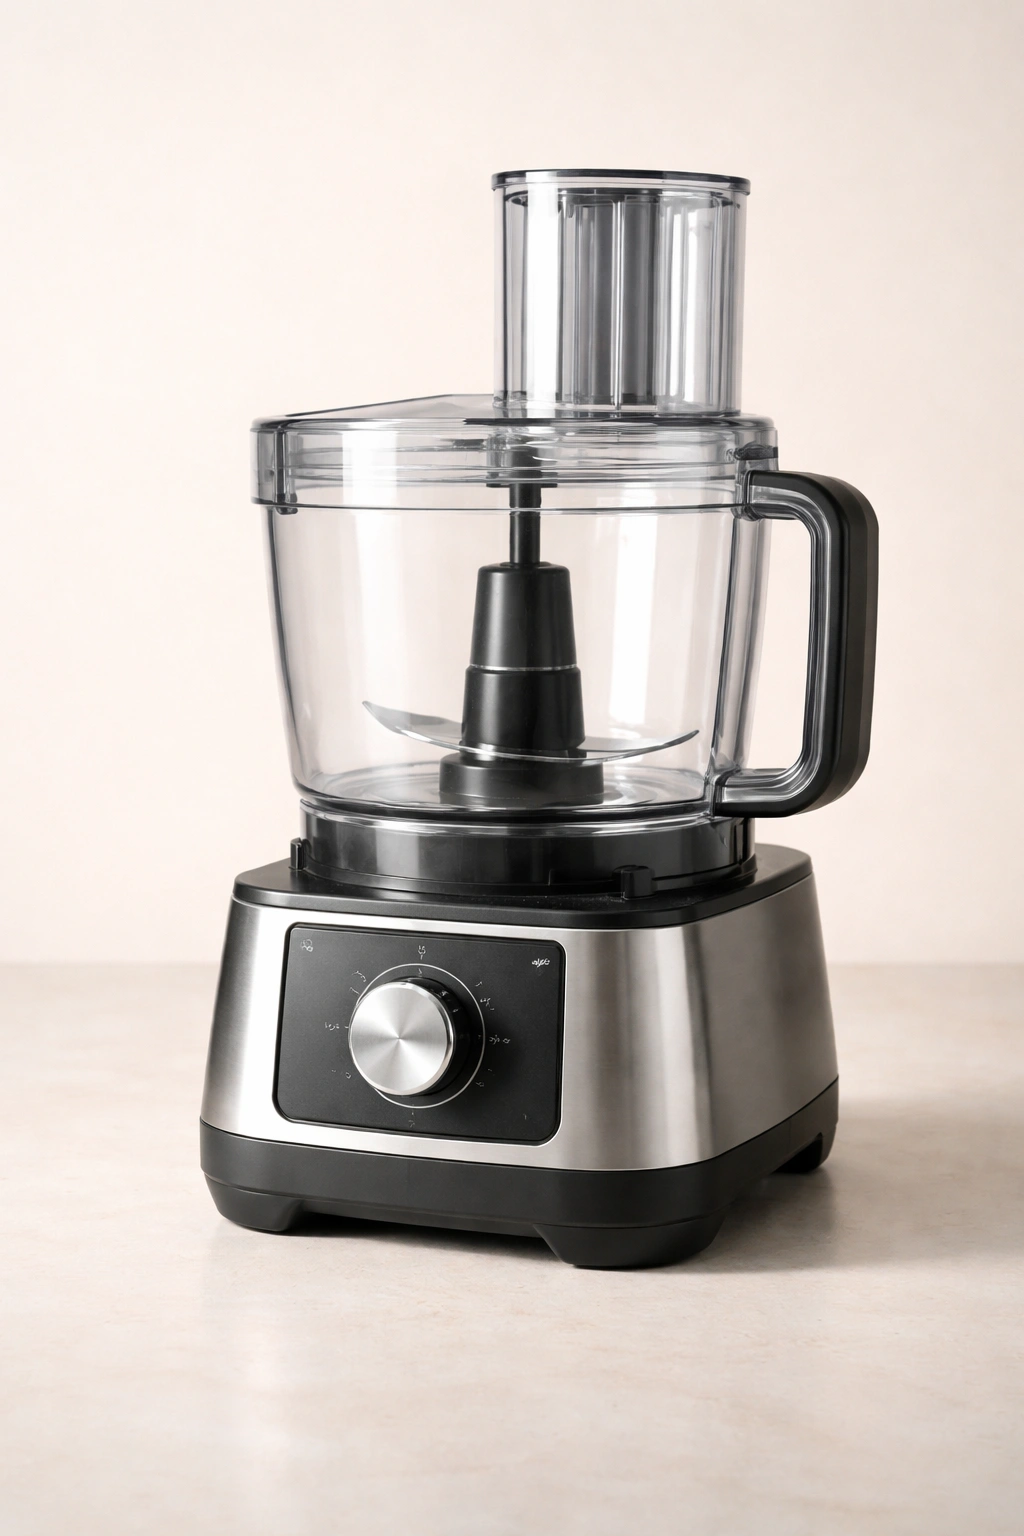
You need a food processor — that’s genuinely the only essential appliance. A high-powered blender like a Vitamix or Ninja can work, though the process takes slightly longer and requires more careful monitoring. A basic food processor costs $30 to $50 new and works beautifully for almond butter. If you make nut butters regularly, this becomes one of your most-used kitchen tools.
The size matters somewhat. A full-sized food processor (10-14 cup capacity) is ideal because it gives the almonds enough room to move and circulate. Trying to make almond butter in a small 4-cup mini processor is technically possible but requires patience and frequent stopping to scrape down sides. A standard 11-cup Cuisinart or similar is perfect.
One optional piece of equipment that makes everything easier: a tamper or wooden spoon for pushing almonds toward the blade. The almond particles will try to climb the sides of the bowl, and having a tool to nudge them back down saves constant stopping and scraping. Some food processors come with a pusher specifically designed for this.
You’ll want a flexible spatula for scraping every last bit of butter from the processor bowl — it’s rich and expensive, so waste nothing. A small mason jar or airtight container is essential for storage. Everything else you probably already have in your kitchen.
Choosing the Right Almonds (Blanched vs Unblanched, Roasted vs Raw)
This choice matters more than you might think because it directly affects the final flavor, texture, and nutritional profile of your butter.
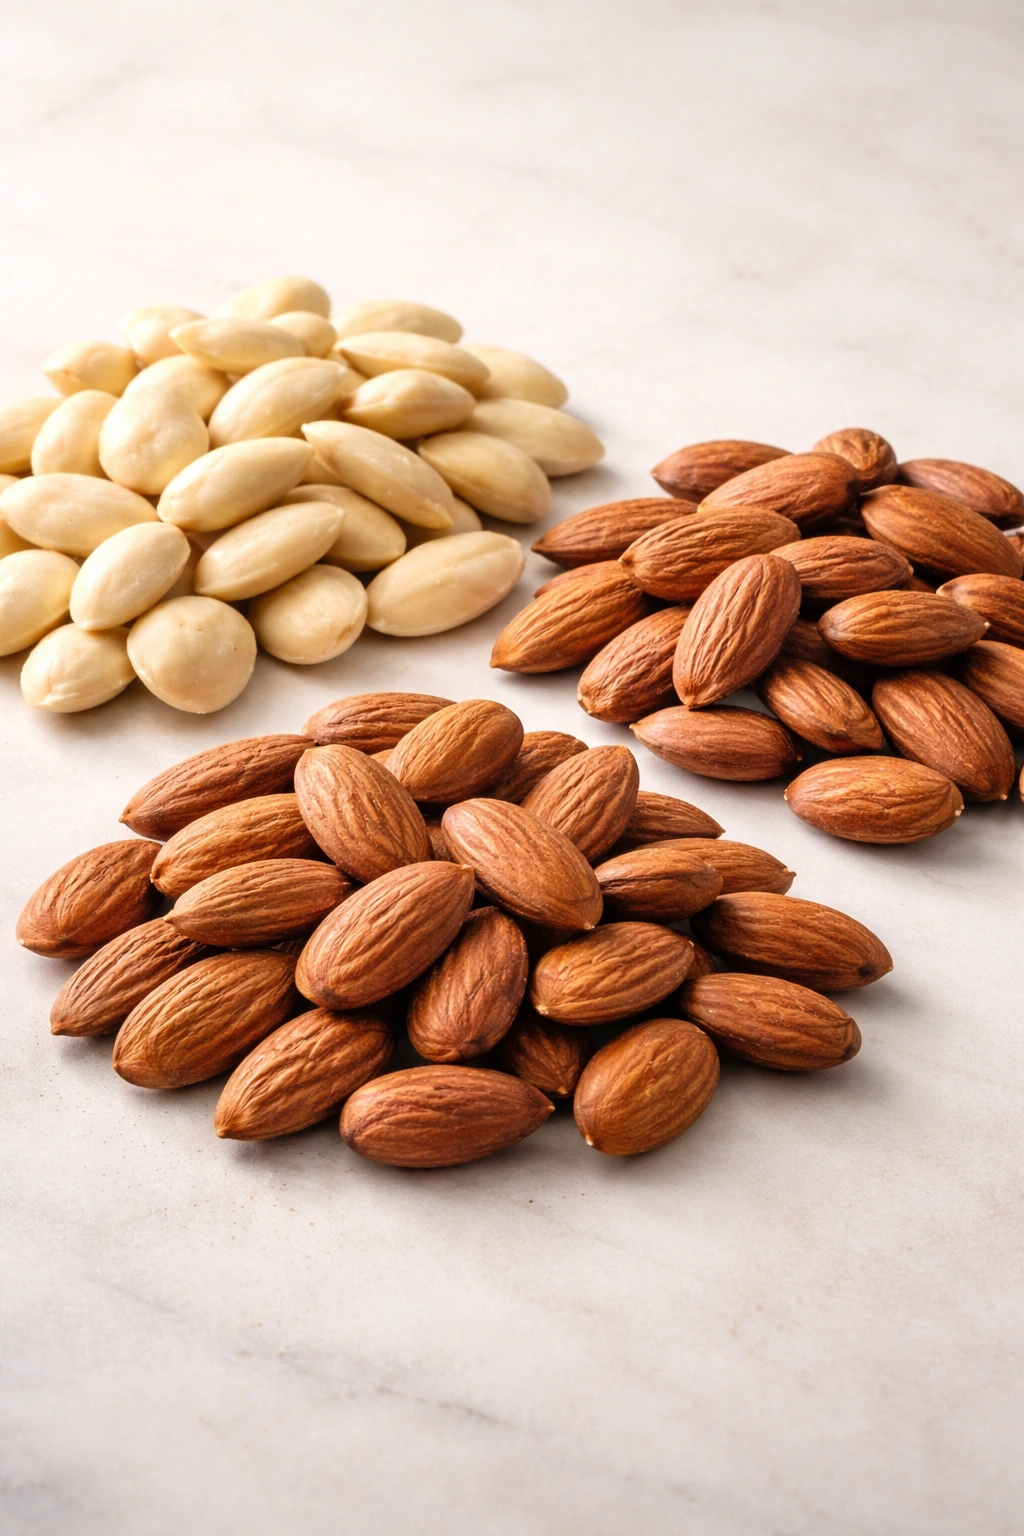
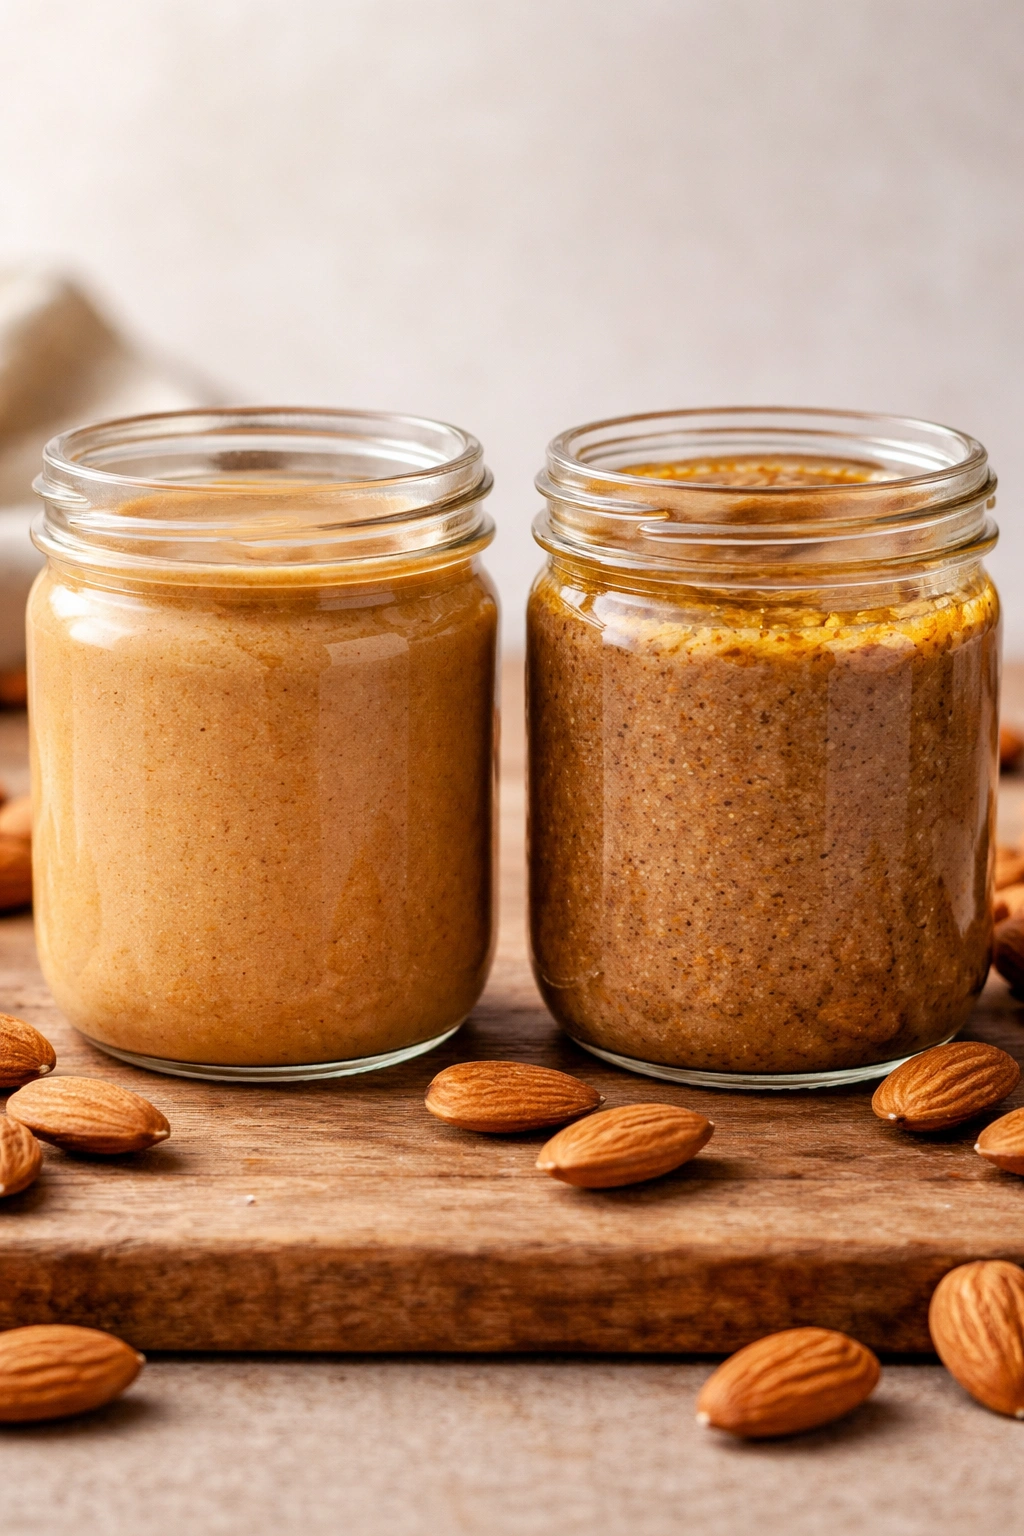
Blanched almonds have the reddish-brown skin removed, leaving pale ivory nuts. Butter made from blanched almonds has a milder, cleaner flavor and creates a noticeably lighter-colored, smoother butter. The trade-off is that you’re removing some fiber and antioxidants that live in the skin. Blanched almond butter tastes slightly sweeter and more refined.
Unblanched almonds retain their brown skin, creating darker, more textured almond butter with a richer, more complex flavor. This butter contains more fiber (roughly double what blanched contains) and more polyphenol antioxidants. If you’re making this for nutritional density, unblanched is the smarter choice. The butter will be slightly grainier, which most people actually prefer because it adds character.
Raw almonds haven’t been heat-treated after processing. They have a fresher, slightly vegetative taste and retain more of the delicate compounds that give almonds their nuanced flavor. Raw almonds make butter that feels lighter and more delicate.
Roasted almonds have been toasted after processing, creating deeper, more caramelized flavors with toastier notes and slightly more concentrated taste. Roasted almond butter tastes richer and more indulgent. The roasting process also makes the almonds slightly less prone to oxidation, so roasted almond butter stays fresher slightly longer.
For a beginner, start with unblanched raw almonds — they’re usually the least expensive, give you the most nutritional benefit, and taste distinctly almondy without being overly toasty. Once you understand the basics, you can experiment with blanched, roasted, or combinations to find your preference.
Buy from sources with high turnover — bulk bins at health food stores, or online retailers that specialize in nuts. Fresher almonds make noticeably better butter. If almonds smell even slightly off or rancid, they’ll make butter that tastes that way.
The Yield, Timing, and Difficulty Breakdown
Yield: Makes approximately 1 cup of almond butter
Prep Time: 2 minutes (measuring and pouring almonds into the processor)
Cook Time: 5 to 8 minutes (processing time only — most of this is hands-off)
Total Time: 7 to 10 minutes active time
Difficulty: Beginner — No special skills required, no chopping or precision needed, impossible to truly mess up. Even if your butter ends up slightly grainier than desired, it’s still delicious and spreadable.
The actual hands-on time is shockingly minimal. You measure almonds, start the processor, then mostly just wait. You’ll pause once or twice to scrape down the sides (takes 30 seconds), but that’s genuinely the only active involvement required.
The total timeline from “I want almond butter” to “I’m spreading it on toast” is about 10 minutes. Compare that to getting dressed, getting in the car, driving to the store, finding the nut butter section, standing in line, and driving home — you’ve saved time and money.
Complete Ingredient List and Substitutions

- 2 cups raw almonds (blanched or unblanched, your choice)
- Optional: ¼ teaspoon fine sea salt (adds depth and balances sweetness)
- Optional: 1 to 2 tablespoons raw honey or pure maple syrup (for sweetness if desired)
- Optional: ½ teaspoon pure vanilla extract (amplifies almond flavor slightly)
- Optional: ¼ teaspoon ground cinnamon (adds warmth without sweetness)
Why these amounts matter: Two cups of almonds fills a standard food processor bowl to a good working level. Less than that, and the blade struggles to catch the pieces efficiently. More than two cups, and the processor strains and the process takes longer.
Salt substitution: Use the tiniest pinch of kosher salt if you don’t have fine sea salt. Regular table salt is three times denser, so use only ⅛ teaspoon if that’s your only option.
Sweetener options: Honey and maple syrup both work identically — choose whichever you have or prefer. Agave nectar works too. Add these slowly because a little goes a long way; you can always add more, but you can’t remove sweetness. Skip the sweetener entirely if you want pure, unsweetened almond butter.
Vanilla option: Almond extract (not vanilla) actually pairs more naturally with almonds, but it’s stronger — use only ¼ teaspoon if using almond extract instead of vanilla.
That’s genuinely it. No emulsifiers, no preservatives, no stabilizers. Just almonds and whatever flavor adjustments appeal to you.
Step-by-Step Instructions for Creamy Homemade Almond Butter
Prep and Processing:
-
Measure 2 cups of almonds and pour them into the food processor bowl fitted with the standard metal blade. Don’t skip measuring — eyeballing it often leads to overstuffing, which makes processing much slower.
-
Cover the processor and turn it on to the highest speed. Do not use a pulse setting; continuous high speed is essential because it allows the almonds to circulate and break down evenly. Pulsing creates uneven texture and takes longer overall.
-
Let the processor run for 2 minutes without stopping. You’ll hear the machine working steadily, and inside the bowl, the almonds are being chopped into smaller and smaller pieces. The sound might be loud — that’s completely normal and necessary.
-
Stop and peek inside. The almonds should look like coarse flour or breadcrumbs at this stage. If they’re still in large chunks, close the lid and process for another minute. If they already look like fine powder, you’re progressing faster than usual (this happens with fresher almonds or some processor models).
-
Continue processing for another 2 to 3 minutes without stopping. Now you’ll hear the sound change slightly — it becomes more of a steady hum. The almond flour is warming from friction and beginning to release its natural oils. You might see a slight steam rising from the bowl, which is normal.
-
Stop and open the processor. At this point, you should see the almond mixture starting to clump together slightly and appear shiny or wet-looking. The texture should resemble wet sand or fine breadcrumbs. If it’s still powdery and dry, close it up and process for another minute. Every food processor is different, and some take a minute longer.
The Creaming Phase:
-
Resume processing for 2 to 4 more minutes continuously. This is the magic phase where the almonds transition from a paste to actual butter. The friction and movement are releasing enough oil that the particles begin bonding together into a smooth, creamy mass. The sound might seem to get slightly quieter as the mixture becomes more cohesive.
-
After 2 minutes of this phase, stop and scrape down the sides with a flexible spatula, pushing any clumps from the corners and sides back toward the center. This ensures everything processes evenly. The middle of the bowl might already look creamy while the edges still look floury.
Advertisements -
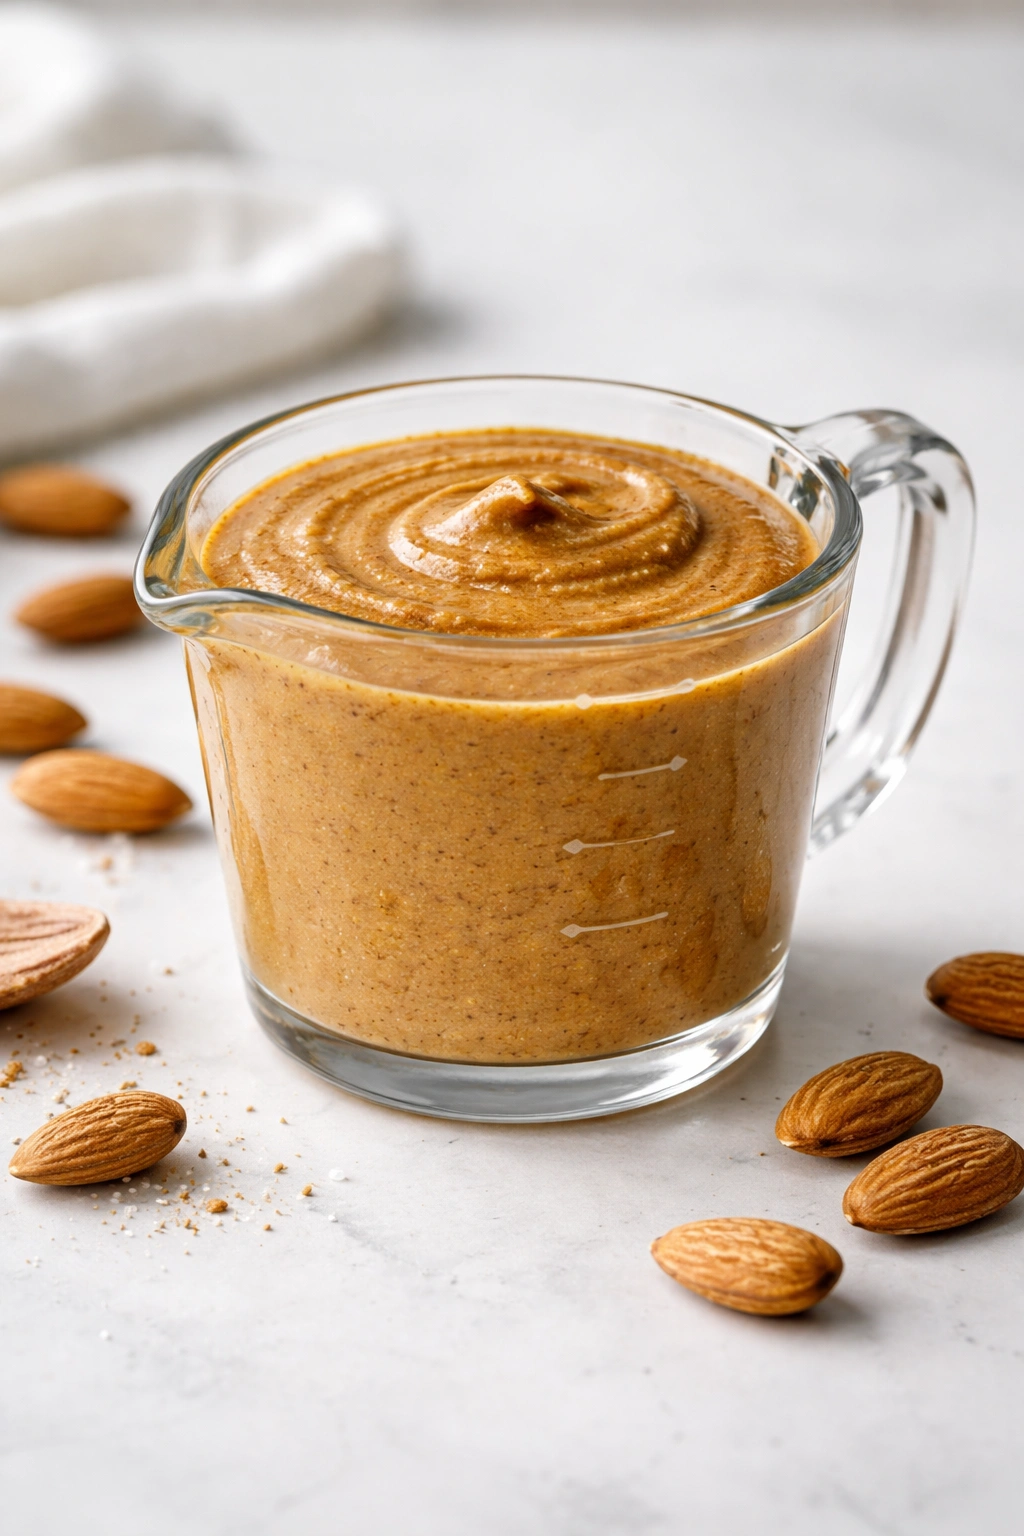
Resume processing for the final 1 to 2 minutes. This is when it all comes together. Watch through the feed tube if your processor has a clear one — you’ll see the moment it transforms from chunky paste into smooth, pourable butter. The entire mixture should move as one cohesive mass, spinning along with the blade.
-
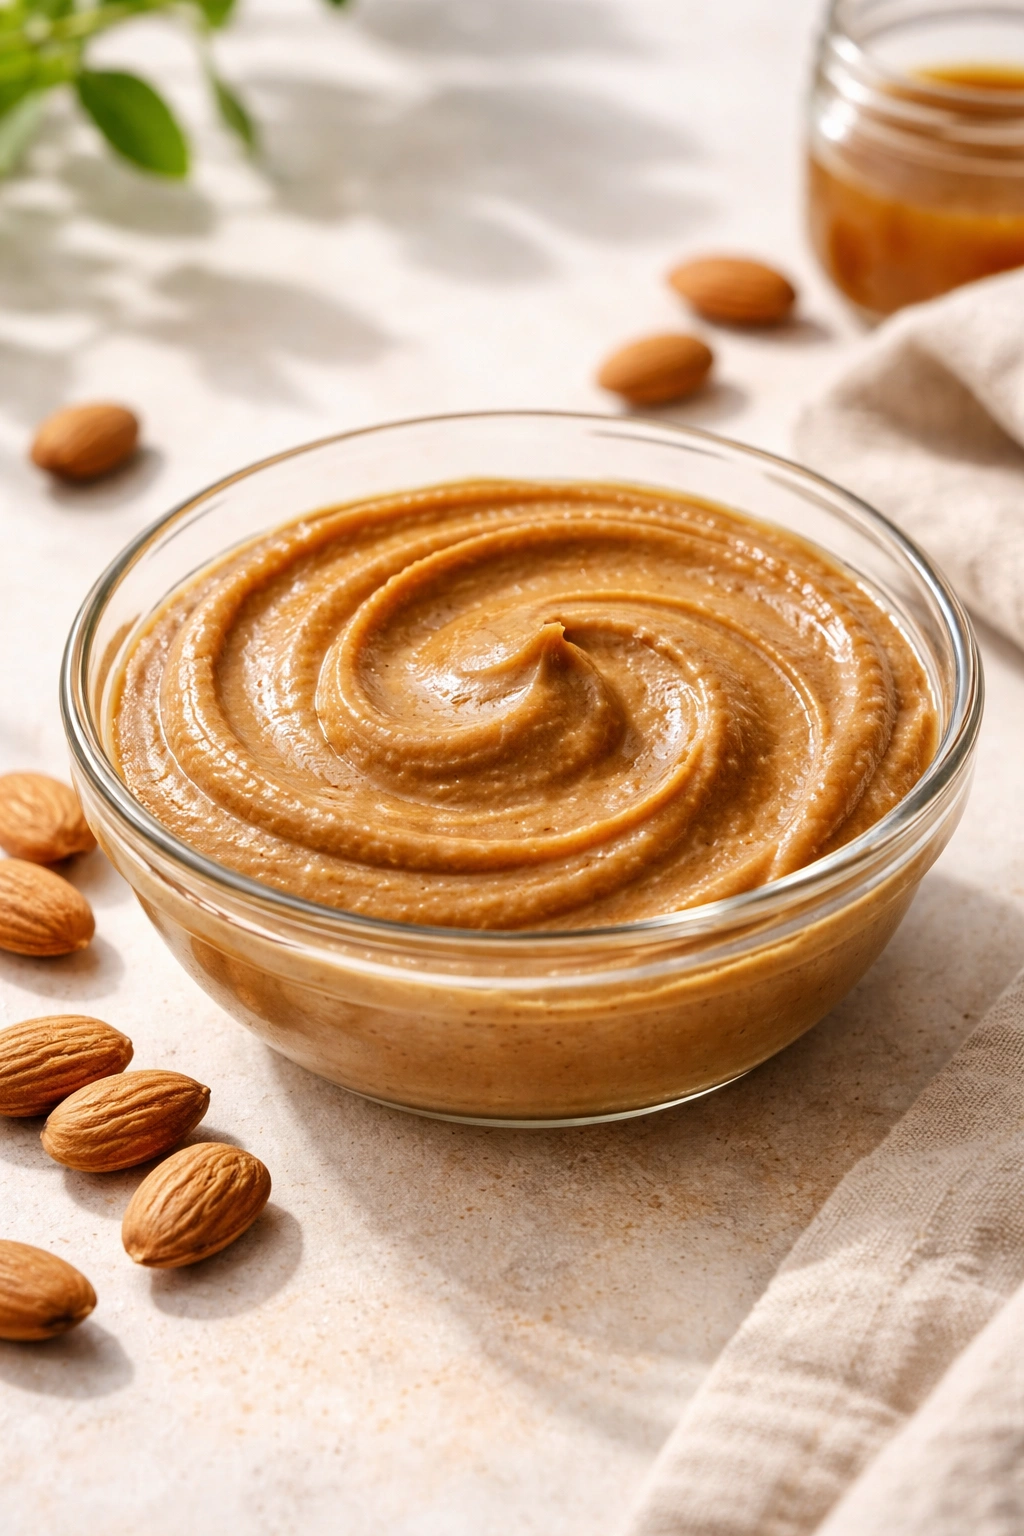
Stop when the almond butter is completely smooth and creamy, with no visible graininess. It should look similar to commercial peanut butter — glossy, smooth, and easily spreadable. If you prefer slightly grainier texture, you can stop about 30 seconds earlier. If you want it almost silky, let it go another 30 seconds (though extended processing does generate more heat).
Flavoring (Optional):
-
If you’re adding salt, honey, vanilla, or cinnamon, add them now while the butter is still warm and the processor is empty. The warmth helps integrate these additions evenly.
-
Process for just 30 seconds to combine. You’ll see the additions distribute throughout the butter.
Final Step:
- Transfer the warm almond butter into a clean jar using a spatula, scraping every bit from the processor bowl. It will be noticeably warm — that’s the friction from processing. Allow it to cool to room temperature before sealing (about 30 minutes). Warm butter will create condensation inside the jar when sealed, which can promote mold growth.
Why Your Almond Butter Isn’t Smooth Yet (And How to Fix It)

If you’ve stopped at the “wet sand” stage and the mixture isn’t turning into butter, it usually means one of three things is happening.
Your almonds are too fresh or stored in overly humid conditions, which means they contain slightly less natural oil than average. The solution is simple: keep processing. It might take an extra 2 to 3 minutes longer than expected, but it will eventually happen. Fresh, premium almonds sometimes take longer because they haven’t had time to dry out slightly (which paradoxically makes the oil more available).
You’re starting with too-cold almonds from the freezer. Cold almonds release their oils much more slowly. If you freeze almonds for storage, pull them out and let them sit at room temperature for 30 minutes before processing. This small step cuts processing time noticeably.
Your food processor isn’t powerful enough or is overheating. Lower-wattage processors sometimes struggle with almond butter. If your machine is getting hot and the almonds are stalling in a chunky paste after 10 minutes of continuous running, stop and let it cool for 15 minutes. You might need to process in batches (1 cup at a time) rather than 2 cups at once.
You’re using old almonds that have lost some oil content over time. Buy fresh almonds with upcoming harvest dates printed on the bag. Old almonds (stored longer than 6 months) take noticeably longer to butter, sometimes not buttering at all.
If your butter ends up slightly grainier than desired, you can run it through the processor again for another minute. It’ll smooth out further, though there’s diminishing returns after a certain point.
Making Flavored Variations Without Extra Effort
The beauty of homemade almond butter is that you can experiment endlessly without the cost or complexity of commercial flavored versions.
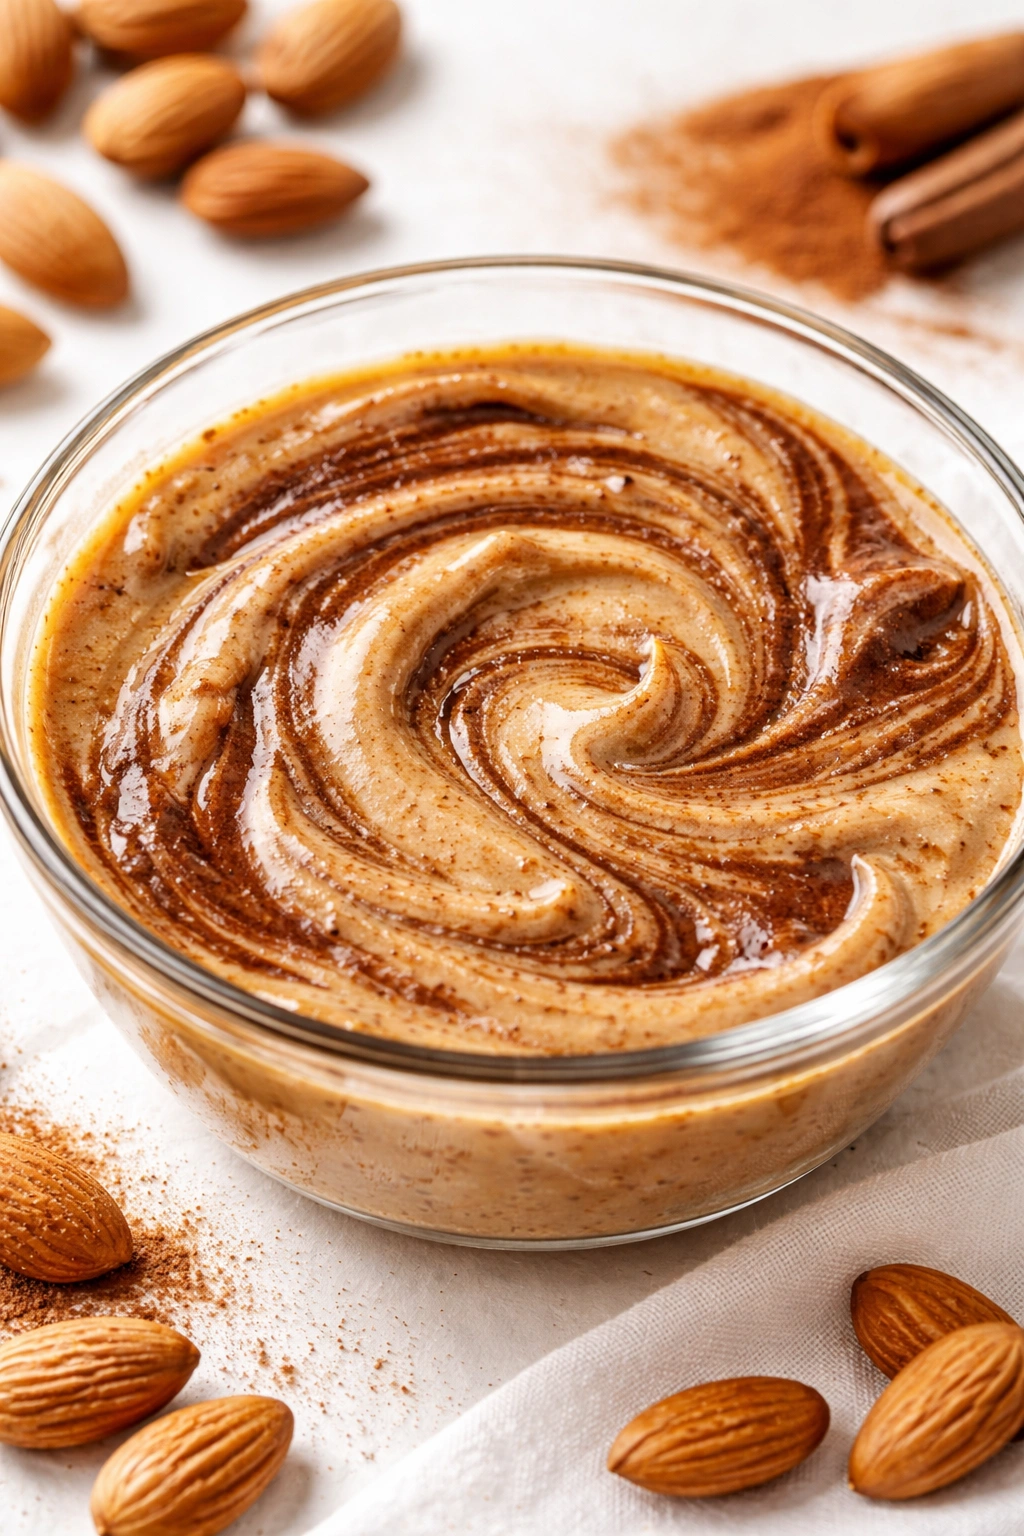
Cinnamon Almond Butter is the easiest variation. Add ¼ to ½ teaspoon ground cinnamon (start with ¼) to the finished butter and process for 30 seconds. The warmth of cinnamon complements almonds perfectly and adds complexity without sweetness.
Honey-Vanilla Almond Butter brings sweetness and depth. Add 1 tablespoon raw honey and ½ teaspoon vanilla extract to finished butter and pulse to combine. This creates a more dessert-like butter that’s heavenly on toast or in smoothies.
Maple Pecan Almond Butter uses almonds as the base but adds a small amount of toasted pecans (¼ cup) and 1 tablespoon pure maple syrup. Process the almonds to butter first, then add the pecans and maple syrup and pulse just until the pecans are broken into small pieces throughout. You’ll get texture variation and a deeper, more complex flavor.
Chocolate Almond Butter (for the indulgent) combines finished almond butter with 2 tablespoons unsweetened cocoa powder and 1 tablespoon honey. Mix by hand with a spatula first, then pulse in the processor for even distribution. This stays completely smooth.
Salted Caramel Almond Butter is surprisingly sophisticated. Add 2 tablespoons pure maple syrup, ¼ teaspoon vanilla, and just a pinch of fine sea salt to finished butter. Process for 30 seconds. The maple syrup adds that caramel-like depth without actual caramel making.
Coconut Almond Butter splits the base: Use 1.5 cups almonds and ½ cup unsweetened shredded coconut. Process together as normal — the coconut will break down into tiny pieces and distribute throughout, adding texture and tropical flavor.
The key rule with all variations: start with less flavoring than you think you need. You can always add more, but you can’t remove it. Add honey or spices incrementally, tasting as you go.
How to Store Homemade Almond Butter for Maximum Freshness
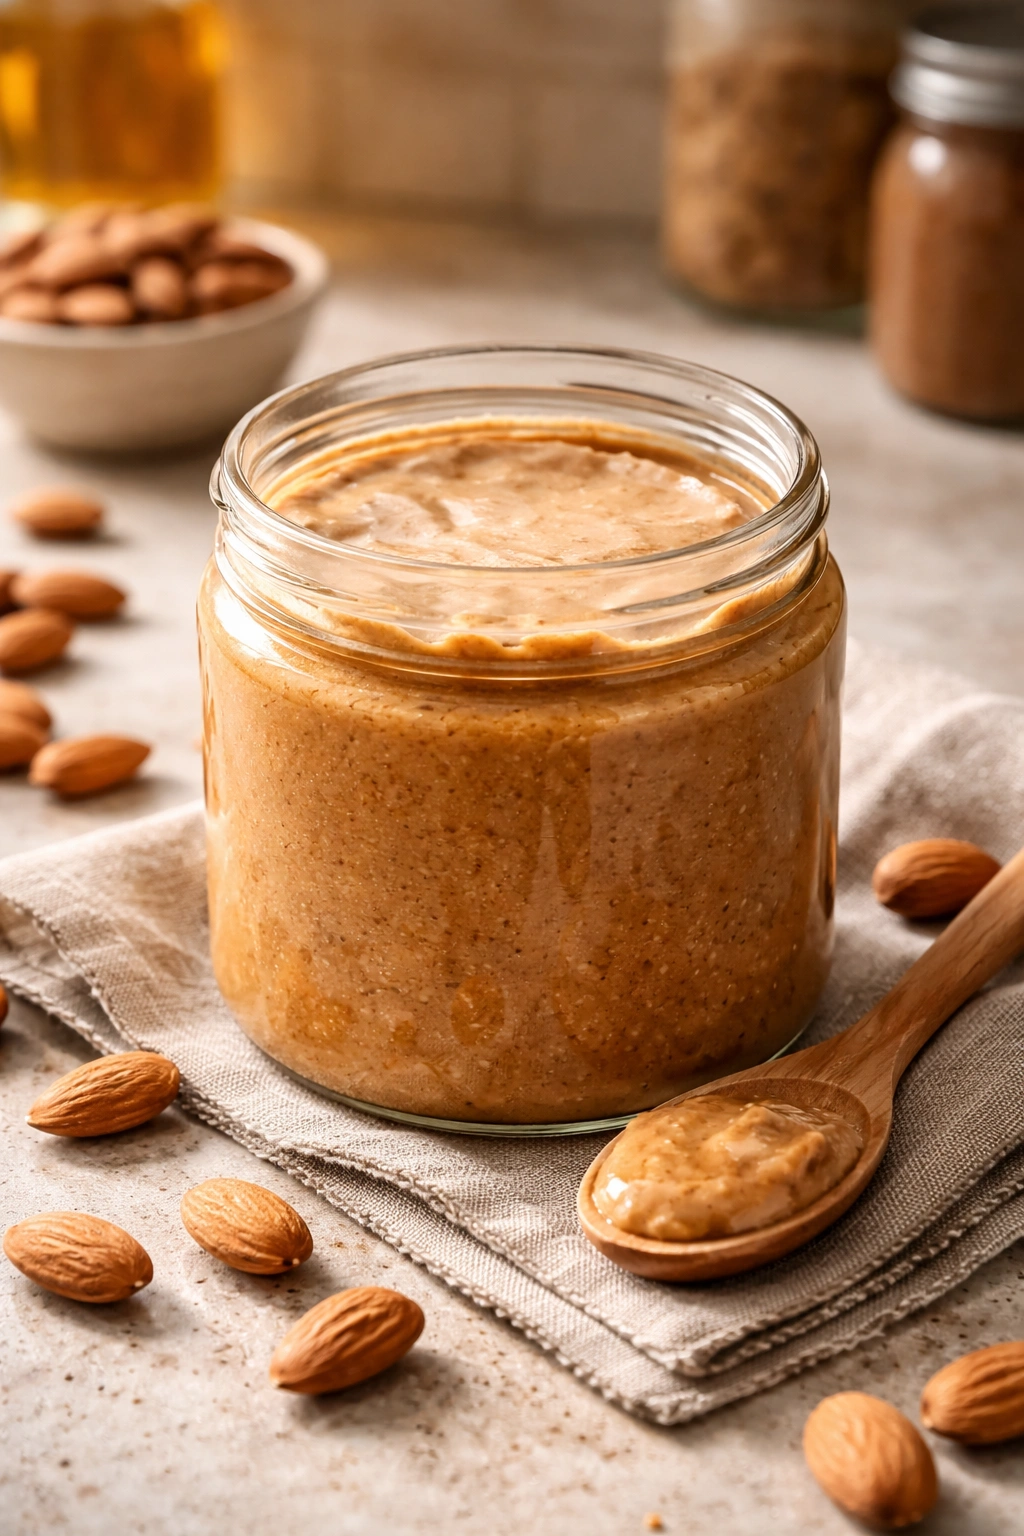
Homemade almond butter will separate naturally as it sits — the almond oil rises to the top and the denser solids settle to the bottom. This is completely normal and actually indicates you’re getting the real, unmixed product. Many people prefer this; some see it as inconvenient. Either way, it’s not spoilage or a problem.
Room temperature storage works well for up to one week if your kitchen is reasonably cool (below 70°F). Keep the jar in a dark cabinet away from direct sunlight, which accelerates rancidity. The almond oil will separate visibly, but simply stir it back in before using. The texture will stay creamy and spreadable at room temperature.
Refrigerated almond butter lasts 2 to 3 weeks and separates much less because the cold slows oil movement. Remove it from the fridge about 10 minutes before using if you want it at spreadable consistency; cold almond butter is quite firm. To prevent the top from drying out in the fridge, press a piece of parchment paper directly onto the surface before sealing the jar. This blocks air exposure and keeps it fresh longer.
Frozen almond butter lasts up to 3 months and maintains quality beautifully. Freeze it in small glass jars with an inch of headspace (almond butter expands slightly when frozen). Thaw overnight in the refrigerator before using. This is the best option if you make large batches and want extended storage.
Signs of rancidity: Almond butter that smells sharp, sour, or chemically off has gone bad. Fresh almond butter smells sweet and nutty, never sour or bitter. If you see visible mold (rare, but possible), discard it immediately.
Prevent rancidity by storing in airtight containers with minimal air exposure. Oxygen is what causes the nuts to go off, so less oxygen means longer freshness. Glass jars with rubber seals work better than plastic containers (which absorb oils and can’t seal as tightly).
Best Ways to Use Your Fresh Almond Butter
Fresh almond butter is incomparably better than store-bought in virtually every application. The pure, clean taste shines through without the stabilizer taste that many commercial versions carry.
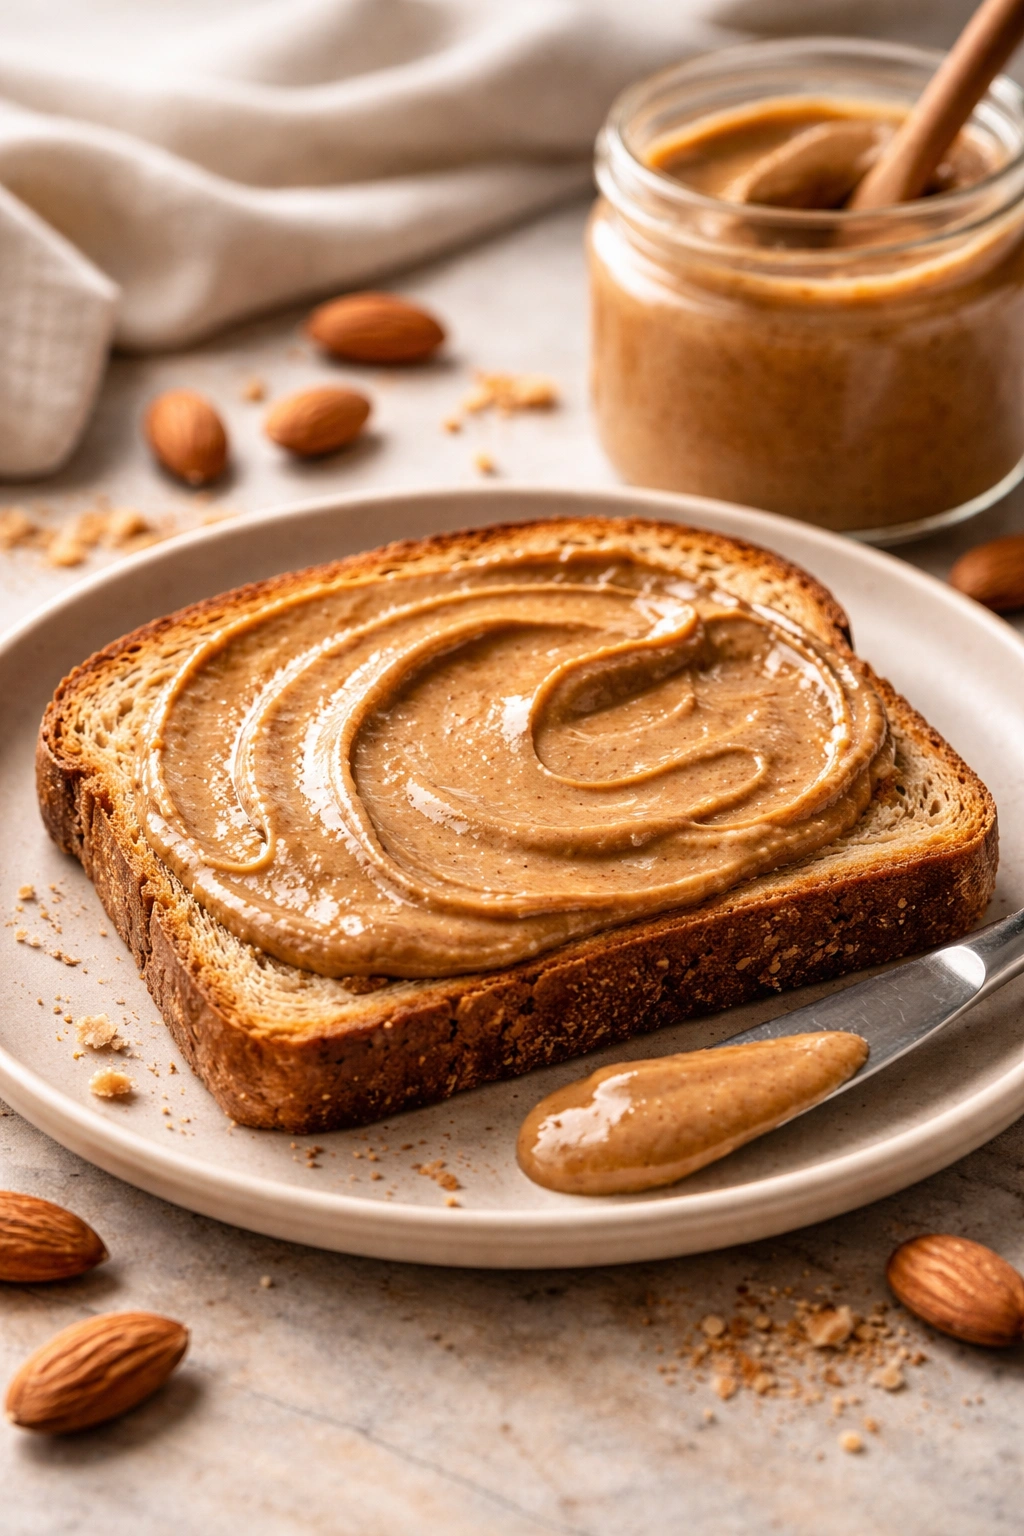
Spread it on warm toast and top with sliced berries, a drizzle of honey, or a pinch of sea salt. The warmth of the toast brings out the almond flavor beautifully. This is genuinely the best way to taste what you’ve made — pure and simple.
Blend it into smoothies for creamy richness and protein without banana (if you’re avoiding bananas). A 2-tablespoon spoonful creates a velvety texture and satisfying depth.
Swirl it into Greek yogurt with a touch of honey for an effortless yogurt bowl that tastes far fresher than pre-made flavored yogurts.
Bake with it. Use it as a one-to-one substitute for peanut butter in cookies, brownies, or energy balls. The more delicate flavor lets other ingredients shine, which is actually preferable in baking compared to heavy commercial peanut butter.
Make a quick sauce for roasted vegetables or grilled chicken: Mix 2 tablespoons almond butter with 1 tablespoon soy sauce, 1 teaspoon rice vinegar, 1 teaspoon maple syrup, and a pinch of garlic powder. Thin with a splash of water to drizzle consistency. This becomes an exceptional sauce that tastes nothing like the commercial stuff.
Use it as a dip for apple slices, pear slices, or celery sticks. The freshness of your homemade version makes these simple combinations taste elevated.
Make almond butter cookies or almond butter cups by combining it with dark chocolate and coconut oil. Homemade almond butter creates superior texture and taste compared to cookies made with commercial versions.
Comparing Homemade vs Store-Bought Almond Butter
Understanding the differences clarifies why homemade is worth the minimal effort and time.
Freshness is the most immediate difference. Store-bought almond butter is processed weeks or months before reaching your kitchen. Homemade is literally made fresh when you want it, tasting brighter and noticeably more almondy.
Oil separation is inevitable in homemade butter without stabilizers, which some see as annoying and others embrace as proof of purity. Commercial brands prevent this with emulsifiers and stabilizers, keeping the texture consistent but creating a less-authentic product.
Ingredient transparency is complete with homemade. You know exactly what’s in it because you added it. Store-bought often contains ingredients you’d never add yourself — palm oil, added sugars, gums, and preservatives that extend shelf life but aren’t necessary for a product you’re consuming relatively quickly.
Cost per ounce strongly favors homemade. Premium store-bought costs roughly $0.80 to $1.00 per ounce. Homemade costs closer to $0.30 to $0.40 per ounce when you factor in bulk almond prices.
Flavor depth is noticeably richer and more complex in homemade versions. The warmth generated during processing brings out natural sweetness and complexity that fades in stored commercial products.
Texture control is completely in your hands with homemade. You can make it smooth and creamy or slightly grainy and textured, whatever you prefer. Commercial brands are one-size-fits-all.
Health perspective is roughly equivalent in terms of nutrition — almond butter is almond butter. The difference is that homemade versions contain no added oils or emulsifiers, which some people prefer for cleaner eating.
Customization is impossible with commercial products. You can make flavored versions instantly and inexpensively at home. Buying a flavored commercial version costs the same as plain, and the flavoring is often overpowered by the taste of stabilizers.
Final Thoughts
Making almond butter at home is genuinely one of the easiest ways to upgrade your kitchen output with minimal effort. Five minutes of processing transforms a few dollars of almonds into something dramatically fresher, better-tasting, and more nutritious than commercial versions costing three times as much.
The process requires no special skill, just almonds and a food processor. Your first batch might take a couple extra minutes if you’re uncertain about when it’s “done,” but by the second or third time, you’ll do it almost thoughtlessly. The real revelation comes when you taste it — that clean, bright almond flavor with no chemical aftertaste — and realize you’ve been settling for inferior products for years.
Once you start making your own, you’ll likely find yourself doing it regularly. Keep a pound of almonds in your pantry and you’re always five minutes away from fresh, creamy, customized almond butter. Whether you prefer it plain, cinnamon-spiced, or honey-sweetened becomes entirely your choice. That control and freshness is worth far more than the minimal time investment required.