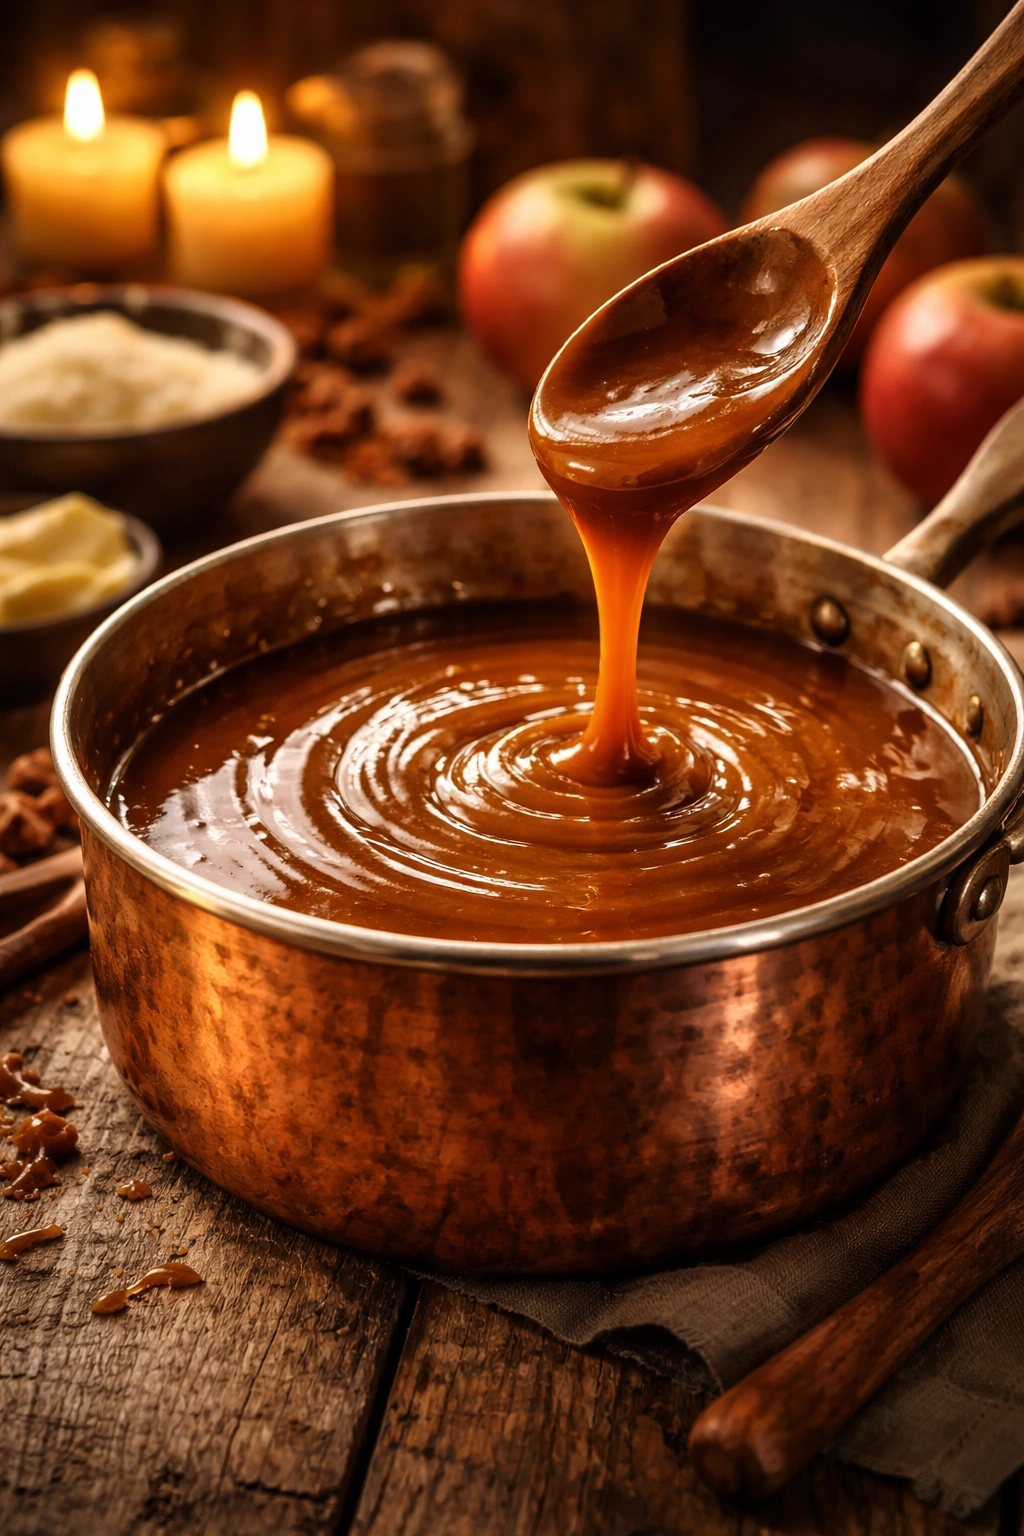
There’s a moment, usually about 5 minutes into making homemade caramel, when the kitchen fills with an aroma so rich and buttery that everything stops. It doesn’t matter what you’re planning to do with that caramel—drizzle it over ice cream, dunk apple slices into it, or swirl it through brownies. That smell alone tells you something genuinely good is about to happen. The best part? You don’t need hours in the kitchen or fancy equipment. A simple stainless steel saucepan, a wooden spoon, and a kitchen timer are all that stand between you and restaurant-quality caramel sauce that tastes infinitely better than anything from a jar.
Most people think homemade caramel is intimidating or time-consuming, so they skip it and settle for store-bought versions filled with corn syrup and additives. But the truth is much simpler: real caramel—just sugar, butter, cream, and salt—takes less time to make than it does to bake a batch of cookies, and the flavor difference is absolutely worth experiencing. Once you’ve made it once, you’ll realize how straightforward the process is, and you’ll never go back to the bottled stuff again.
The 10-minute timeline isn’t marketing hype—it’s genuinely achievable when you understand the process and prep your ingredients beforehand. This article walks you through everything: the science of why caramel works, the exact steps to nail it on your first try, the mistakes that trap most beginners, and creative variations that let you customize it to your taste. By the end, you’ll have a reliable technique you can make from memory, on any evening, whenever the craving hits.
The Magic and History Behind Caramel
Caramel has been captivating people for centuries, but its origins are surprisingly recent compared to other cooking techniques. While burnt sugar has been a byproduct of cooking since humans first started working with sugar—imported to Europe from the Middle East around the 11th century—intentional caramelization became a deliberate art form during the French culinary renaissance of the 17th and 18th centuries.
The appeal was simple: caramel provided an entirely new flavor profile that didn’t exist before. You take plain white sugar and heat it until it breaks down chemically, transforming into something complex, nutty, and deeply savory-sweet. Caramel became a mark of sophistication and skill in French kitchens, something only a trained cook could reliably execute. Back then, it was precious—made in small batches and used sparingly as a luxurious finish or sauce.
What’s remarkable is that the core technique hasn’t changed. The chemistry of caramel—the breakdown of sucrose molecules under heat, the creation of new flavor compounds called caramelization byproducts—is the same now as it was 300 years ago. What has changed is accessibility: modern stoves, reliable thermometers, and the availability of ingredients mean that what once required a culinary apprenticeship is now something you can master in a single afternoon.
The beauty of making it at home is that you’re not paying for packaging, marketing, or shelf space. You’re paying for the raw ingredients themselves—sugar, butter, cream—and your own 10 minutes of attention. For the cost of a single specialty coffee, you can make a batch of caramel that rivals anything you’d find at a fancy dessert shop.
Why Homemade Caramel Tastes So Much Better

Store-bought caramel sauces are formulated to be shelf-stable, pourable at room temperature, and able to withstand months of storage without separation or crystallization. To achieve this, manufacturers add corn syrup, hydrogenated oils, thickening agents, and preservatives. None of these are harmful in small quantities, but they all change the flavor and mouthfeel in subtle ways that add up.
Real caramel—made from just four ingredients—tastes cleaner and more intensely sweet. The butter’s dairy notes shine through without competition from cheap oils. The cream is actually cream, not a mixture of water and stabilizers. The salt, when used in the right amount, doesn’t taste salty at all; instead, it amplifies the sweetness and brings out the subtle complexity of the caramelized sugar.
The texture is noticeably different too. Homemade caramel has a silkier, more luxurious mouthfeel because it contains real fat from real butter and real cream. The viscosity is pure, without gelling agents. It coats your mouth in a way that bottled versions simply can’t replicate—richer, more satisfying, and more memorable.
There’s also the freshness factor. Homemade caramel tastes like it was just made because it was just made. You’re capturing the sauce at its absolute peak, not weeks or months into its shelf life. The flavors are bright and vivid in a way that store-bought caramel—which has been sitting in storage, distribution, and shop shelves—rarely achieves.
The Science of Caramelization in Under 10 Minutes
Caramelization is a chemical transformation, not just cooking. When sugar heats up to about 320°F (160°C), the sucrose molecules start to break apart. This creates hundreds of new flavor compounds—esters, aldehydes, and other organic molecules—that give caramel its signature nutty, complex taste. Different temperatures produce different flavors: lighter caramel (around 300°F) tastes buttery and toffee-like; darker caramel (340-360°F) becomes more bitter and burnt-tasting, with less sweetness and more sophistication.
The 10-minute timeline works because you’re not making caramel from scratch at high heat for the entire time. Instead, you’re using the wet method: you dissolve the sugar in water first, which lowers its boiling point and makes the heating more even. This prevents crystallization and reduces the temperature at which caramelization begins. You’re essentially getting a head start on the cooking process, which is why the actual caramel-making phase takes only a few minutes once the water cooks off.
Butter and cream stop the caramelization process by adding liquid and cooling the sugar slightly. This is actually essential—if you just kept heating pure caramel, it would eventually burn and taste bitter. The cream interrupts that process and stabilizes the mixture into a smooth sauce. The salt’s job is both chemical and flavor-based: it inhibits crystallization (keeping the caramel smooth and glossy) while also making the sweetness feel more rounded and less one-dimensional.
What You’ll Need: Ingredients

For the Caramel Sauce:
- 1 cup (200 grams) granulated white sugar
- ¼ cup (60 milliliters) water
- 6 tablespoons (85 grams) unsalted butter, cut into cubes
- ½ cup (120 milliliters) heavy cream (or whole milk for a thinner sauce), at room temperature
- ½ teaspoon fine sea salt (or ¼ teaspoon if using table salt, which is denser)
- ¼ teaspoon pure vanilla extract (optional but highly recommended)
Yield: Makes about 1 cup of caramel sauce
Prep Time: 5 minutes (measuring ingredients and cutting butter)
Cook Time: 10-12 minutes total
Total Time: 15-17 minutes
Difficulty: Beginner — This recipe requires no special equipment beyond a heavy-bottomed saucepan. The steps are straightforward, and once you understand why each step matters, the technique becomes nearly foolproof. Even first-time caramel makers succeed with this method because the wet-sugar technique is more forgiving than dry-sugar caramelization.
Step-by-Step Instructions for Perfect Caramel
Prepare Your Ingredients and Equipment:
-
Measure out all your ingredients before you start cooking—this is essential because once the sugar reaches temperature, you’ll need your hands free to add butter and cream without fumbling. Cut the butter into small cubes (about ½-inch pieces) and set them on a small plate. Pour the cream into a measuring cup or small bowl (it should be at room temperature, so if it’s been in the cold fridge, let it sit on the counter for 5 minutes first). Measure the salt and vanilla into separate small dishes. This preparation step takes only a few minutes but eliminates stress once the heat is on.
-
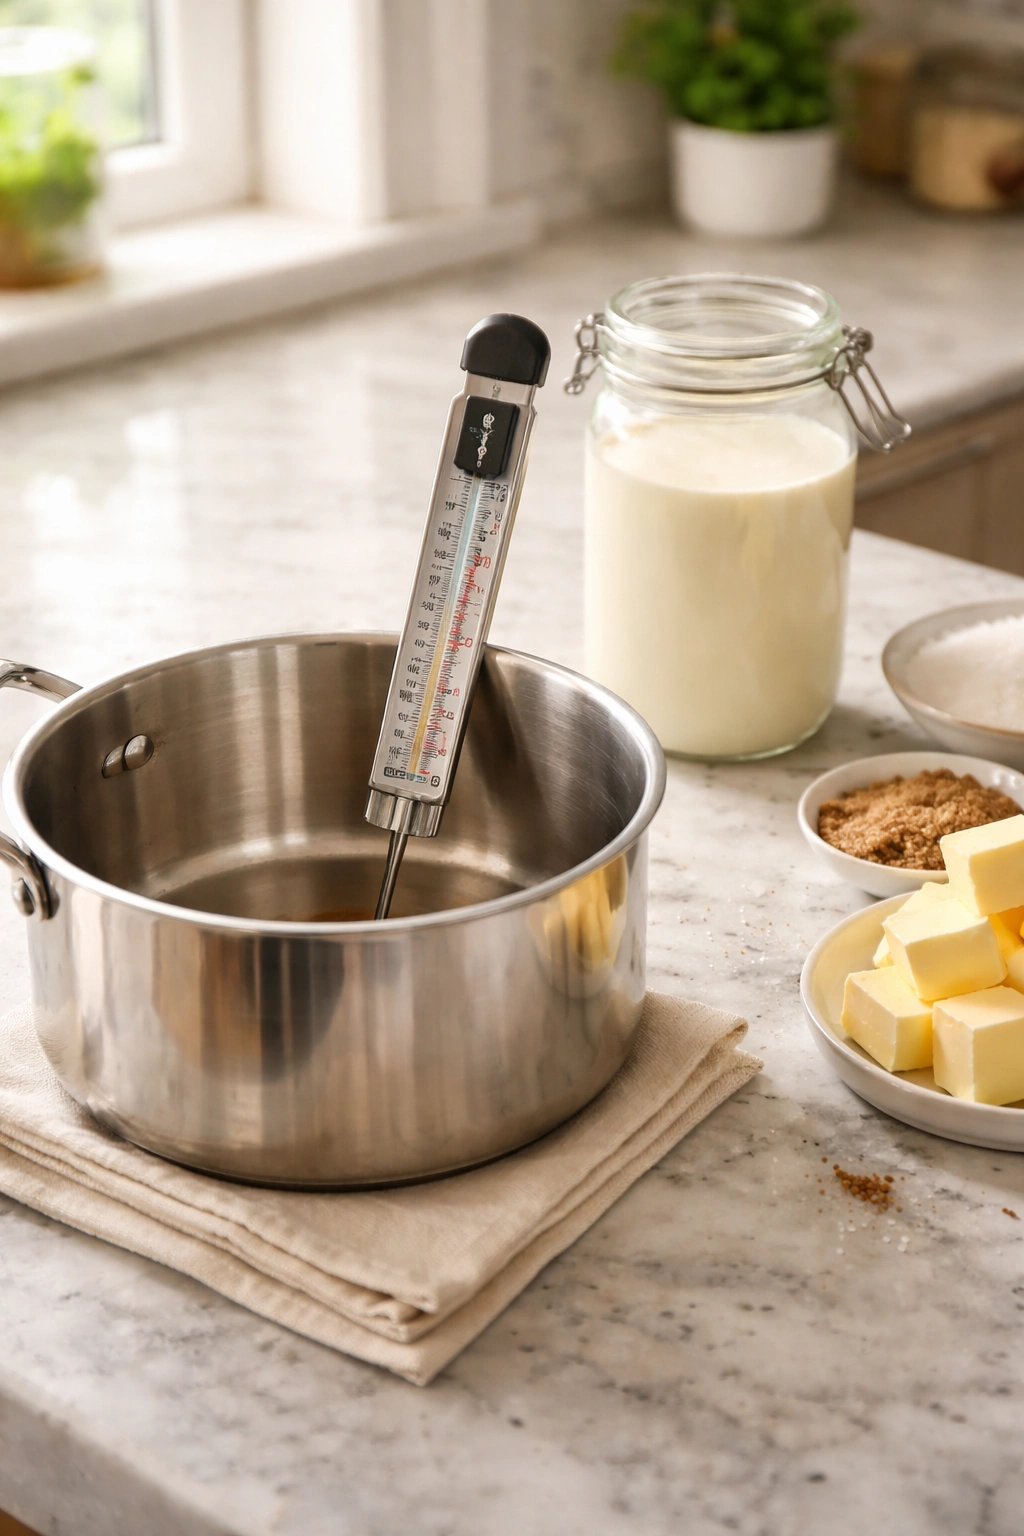
Place a heavy-bottomed stainless steel saucepan on the stovetop. Avoid nonstick pans because you need to be able to see the color change of the sugar clearly, and the dark nonstick surface makes this difficult. If you have a candy thermometer, clip it to the side of the pan now, making sure the bulb doesn’t touch the bottom of the pan (it should sit about ½-inch above the bottom surface, and it should be fully submerged in the syrup once the liquid comes up to that level). Have a wooden spoon ready nearby—ideally one with a long handle so your hand stays away from the heat.
Make the Caramel:
-
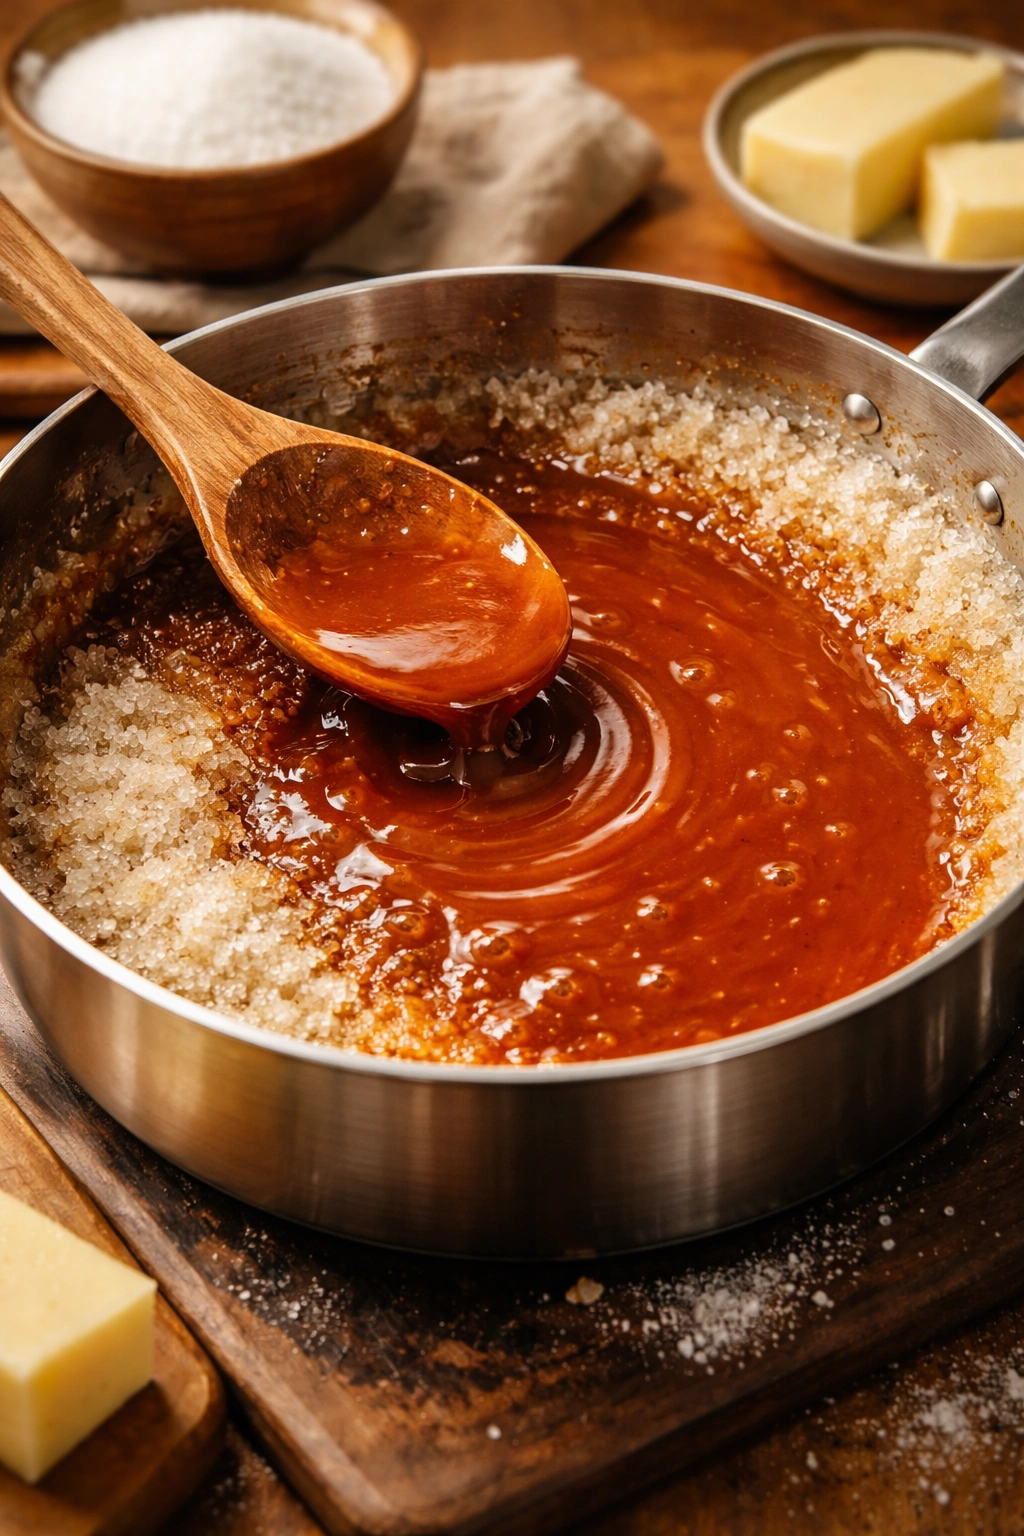
Pour the water into the saucepan, then add the sugar, stirring gently with the wooden spoon until the sugar is completely moistened. The mixture should look like wet sand, not a smooth syrup yet. Turn the heat to medium-high and stop stirring once you turn on the heat—stirring can cause crystallization, which turns your smooth caramel grainy and unpleasant. If sugar crystals stick to the sides of the pan above the waterline, use a pastry brush dipped in water to brush them down into the syrup, but otherwise, leave the mixture alone.
-
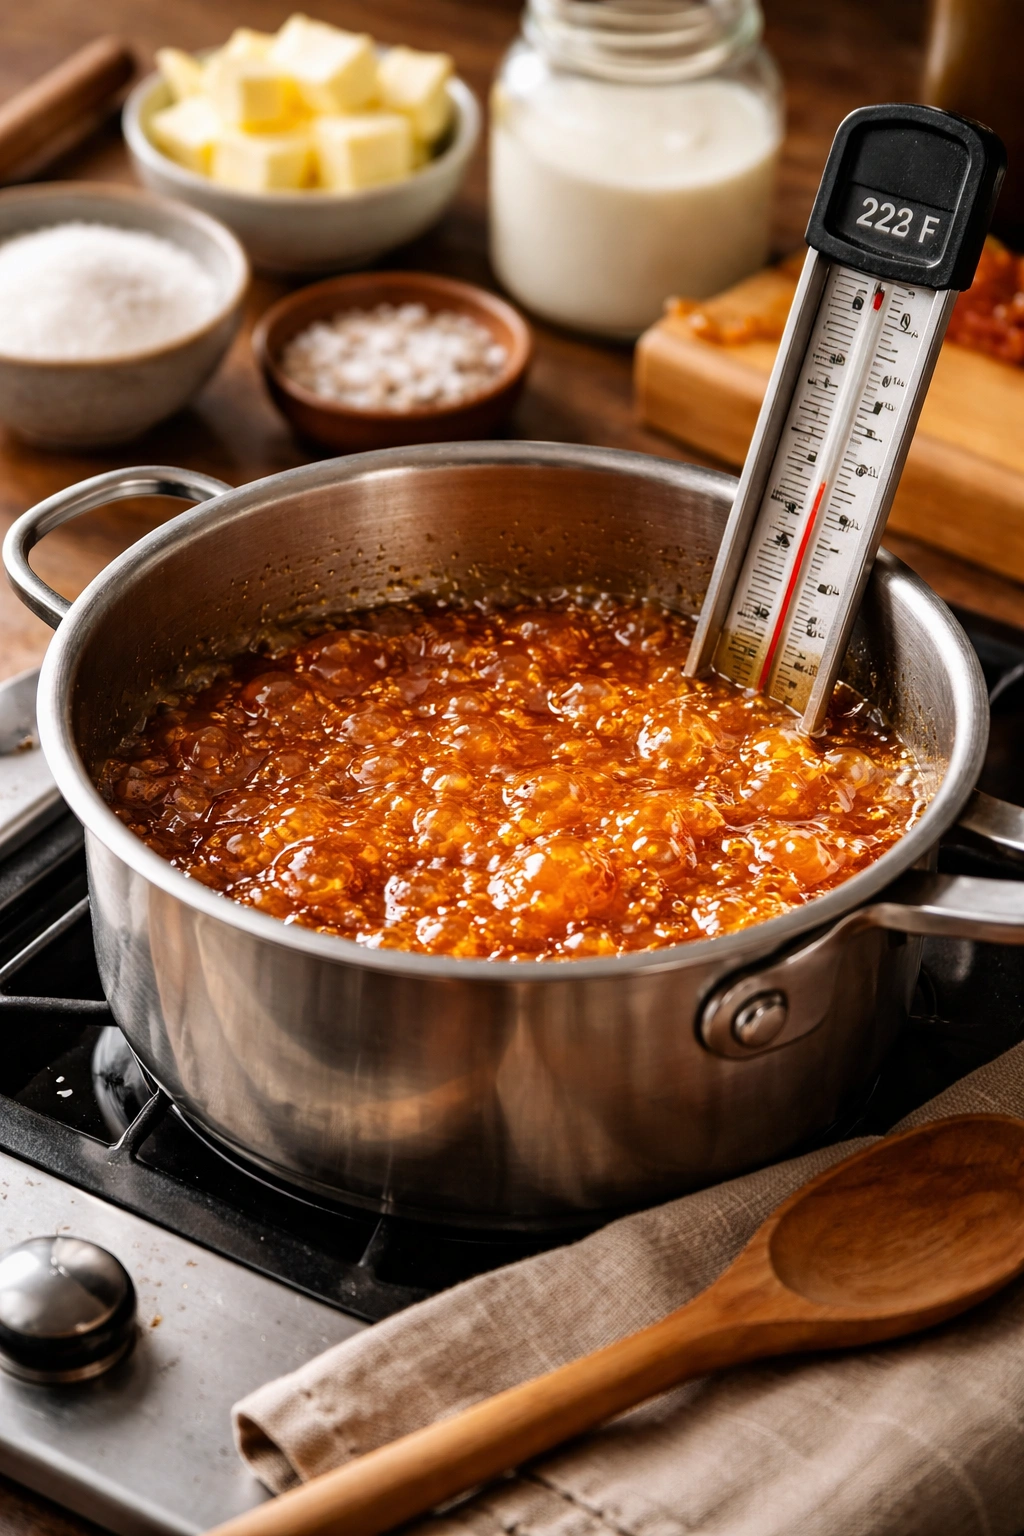
Watch as the water heats and begins to bubble. The mixture will look cloudy at first, then gradually become clear as the water cooks off. You’ll hear a steady, quiet bubble—resist the urge to stir. This stage takes about 4 to 5 minutes, depending on your stove’s heat output. If you have a candy thermometer, it will read around 260°F (127°C) when the water is almost cooked off and the sugar syrup is about to start caramelizing.
-
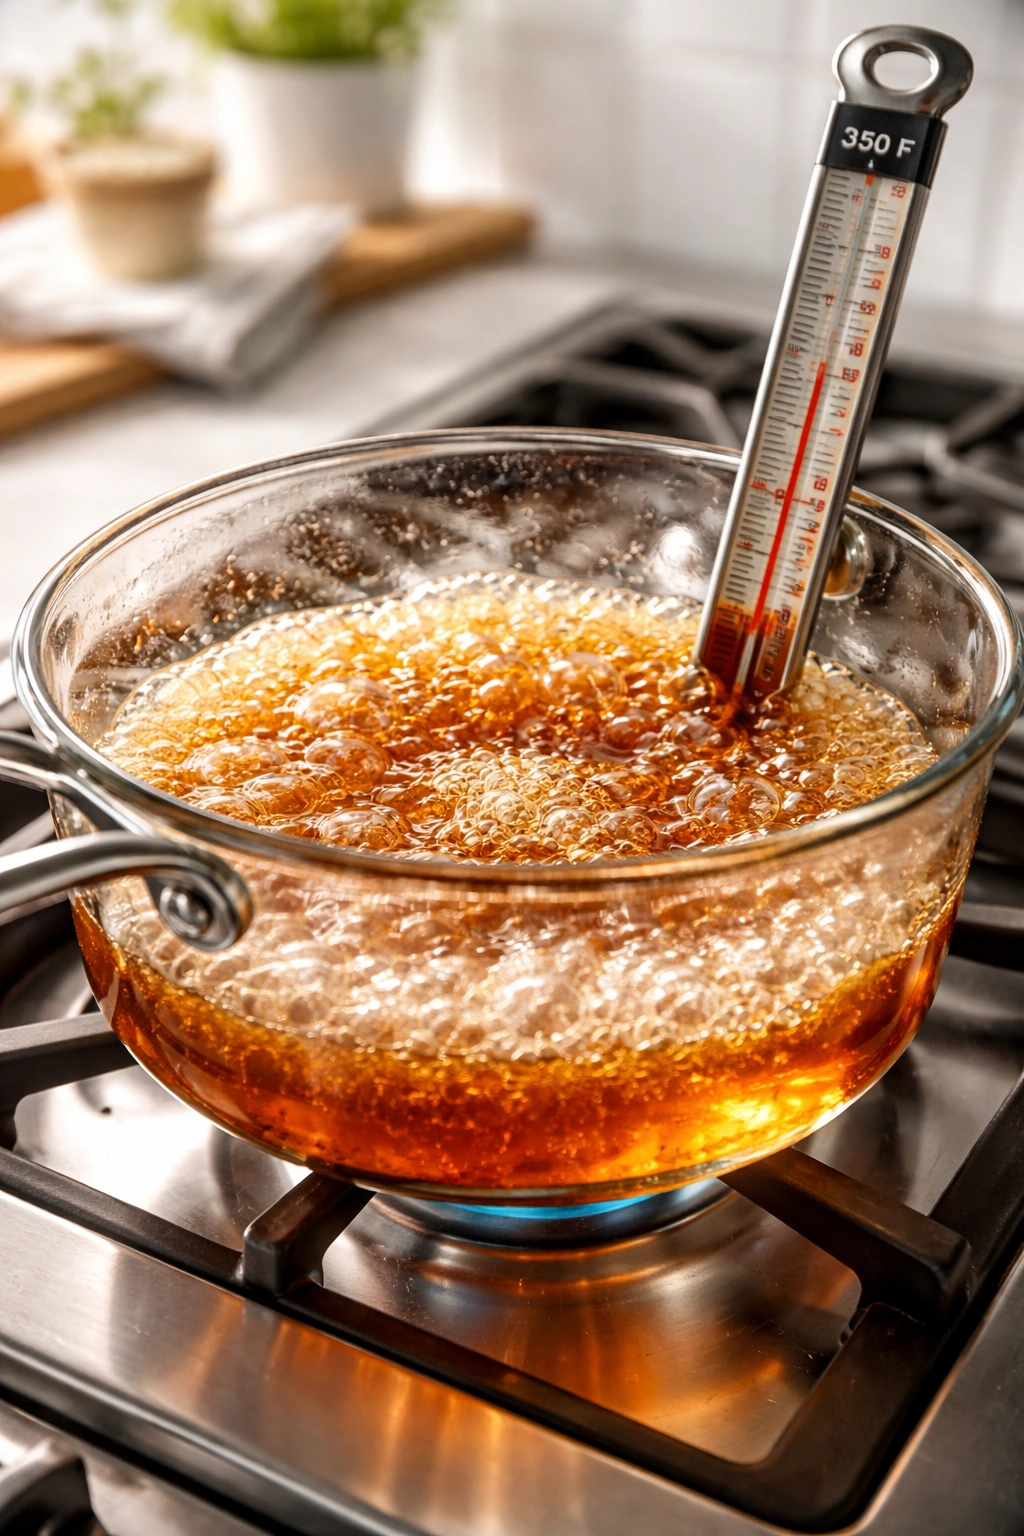
Once the syrup becomes clear and light amber in color (around 300-310°F on a thermometer, or about 8 minutes into cooking), you’ll start to see the magic happen. The edges of the pan will turn amber first—this is caramelization beginning. Swirl the pan gently (don’t stir with a spoon—use a gentle swirling motion by tilting the pan) to distribute the heat evenly and bring the darker edges into the center. Watch carefully from this point forward because the color deepens quickly.
-
Stop heating when the caramel is a deep amber color, somewhere between the shade of iced tea and apple juice—not dark brown. This happens very quickly, usually within 30 seconds to 1 minute of the color change starting. If you have a thermometer, you’re aiming for 330-340°F (165-170°C). If you don’t have a thermometer, use the color as your guide: too light and it’ll taste buttery but not deeply caramel-y; too dark and it’ll taste burnt and bitter. You can always make another batch once you’ve seen what “perfect” looks like, so don’t stress about getting it exactly right the first time.
-
The moment the color looks right, remove the pan from heat immediately. This is crucial—the residual heat will continue to darken the caramel for a few seconds even off the flame, so you want to stop just slightly before it reaches your desired color. Carefully add the cubed butter, stirring gently with the wooden spoon. The mixture will bubble and foam as the cold butter hits the hot sugar—this is completely normal and a sign that everything is working. Keep your face back from the pan during this step because the steam can be very hot.
-
Once the butter is fully melted and incorporated (about 30 seconds of gentle stirring), remove the spoon and slowly pour in the room-temperature cream. Pour slowly—the mixture will bubble enthusiastically as the cold cream hits the hot caramel, and if you pour too fast, it can splash over the sides or boil up dangerously. Keep your hands and face clear of the pan. This bubbling is just water from the cream turning to steam; it’s dramatic but harmless if you’re careful.
Advertisements -
After all the cream is added, the caramel will look separated and slightly curdled. Don’t panic—this is exactly what should happen. Set the pan back on the stove over low heat and stir constantly for about 30 seconds to 1 minute, until the mixture becomes completely smooth and uniform. The residual heat will melt any butter solids that seem separated, and the whole thing will come together into a silky, glossy sauce.
-
Remove from heat and stir in the salt and vanilla extract. Taste a small drop on a spoon (be careful—it’s still very hot) and adjust the salt if needed. The salt should make the sweetness feel more balanced and complex, not salty-tasting. If it tastes too salty, you can add another tablespoon or two of cream to mellow it out.
-
Pour the finished caramel sauce into a heat-safe jar or bowl and let it cool to room temperature. It will thicken noticeably as it cools—this is the butter and cream setting up. Never refrigerate caramel immediately after making it while it’s still hot, as condensation will form inside a sealed jar and make the caramel grainy. Let it cool, then transfer to an airtight jar for storage.
Common Mistakes and How to Avoid Them
The most frequent caramel fail is crystallization—the smooth sauce suddenly turns grainy and sandy halfway through cooking. This happens when sugar crystals form on the side of the pan and then fall back into the syrup, triggering a chain reaction that corrupts the entire batch. You prevent this by not stirring once the heat is on, and by using a pastry brush dipped in water to brush down any crystals that form above the waterline. Once crystallization starts, it’s nearly impossible to fix, so prevention is your only option.
The second common mistake is pouring cold cream into hot caramel too quickly. People do this to save time, but it causes the mixture to boil violently and sometimes boil over the sides of the pan, making a mess and reducing the sauce. The solution is simple: pour slowly and deliberately. Yes, it takes 10 extra seconds, but it’s the difference between a beautiful finish and caramel splattered on your stovetop.
Overcooking the caramel—letting it get too dark before adding butter—is the third major pitfall. The result tastes bitter, with the sweetness masked by burnt notes. This is why using both a thermometer and your eyes is smart. Color is your primary guide; the thermometer is your backup confirmation. If you’re not sure, it’s better to pull it off the heat slightly early and have a lighter, buttery caramel than a dark, burnt one.
Forgetting to cool the caramel before sealing the jar leads to condensation inside the container, which drips into the caramel and causes it to crystallize during storage. Let it cool completely to room temperature, then transfer it to an airtight jar. This takes about 15-20 minutes after cooking.
Some people add the cream while the pan is still on the heat and the caramel is still bubbling. The cream can boil away too quickly, or the mixture can overheat and taste slightly burnt. Always remove the pan from the stove before adding the cream. The residual heat is plenty to melt the butter and warm the cream to the right temperature without further cooking.
Tips for Nailing It Every Time
Use a heavy-bottomed stainless steel saucepan. This distributes heat evenly and prevents hot spots that can cause the sugar to color unevenly. Thin pans lead to brown spots and burnt edges while the center is still light. Stainless steel lets you see the color change clearly, which is essential for knowing when to stop.
Room-temperature cream is non-negotiable. Cold cream fresh from the fridge will shock the hot caramel and potentially cause it to seize or separate. Let it sit on the counter for 5 minutes if it’s been refrigerated. Room temperature means it incorporates smoothly without dropping the temperature of the caramel too dramatically.
A candy thermometer removes the guesswork. While experienced cooks rely on color alone, a thermometer gives you a safety net. Aim for 330-340°F (165-170°C) before adding the butter. The color should match this temperature closely, but the thermometer gives you certainty if your kitchen lighting makes it hard to judge color accurately.
Don’t stir once the heat is on. This is the golden rule of caramel-making. Stirring introduces air bubbles and can trigger crystallization. Instead, gently swirl the pan to distribute heat once the color starts changing. Your hands stay safe, and the caramel stays smooth.
Vanilla extract is optional but recommended. A quarter teaspoon of pure vanilla (not imitation vanilla, which has a chemical aftertaste) adds depth and rounds out the flavor. It’s not strong enough to taste like vanilla—instead, it deepens the caramel notes and adds a subtle warmth. Skip it if you’re using the caramel in a recipe where vanilla might clash with other flavors.
Keep everything measured and ready before you start. Caramel-making is too fast to be fumbling for ingredients or running to find a spoon. The five minutes of prep work—measuring, cutting butter, pouring cream—makes the actual cooking phase smooth and stress-free.
Use fine sea salt, not table salt. Table salt is more densely packed, so its grains are smaller and it measures heavier per teaspoon. Start with ½ teaspoon fine sea salt; if that feels too much (the caramel tastes salty rather than balanced), use ¼ teaspoon table salt next time.
Variations and Flavor Twists
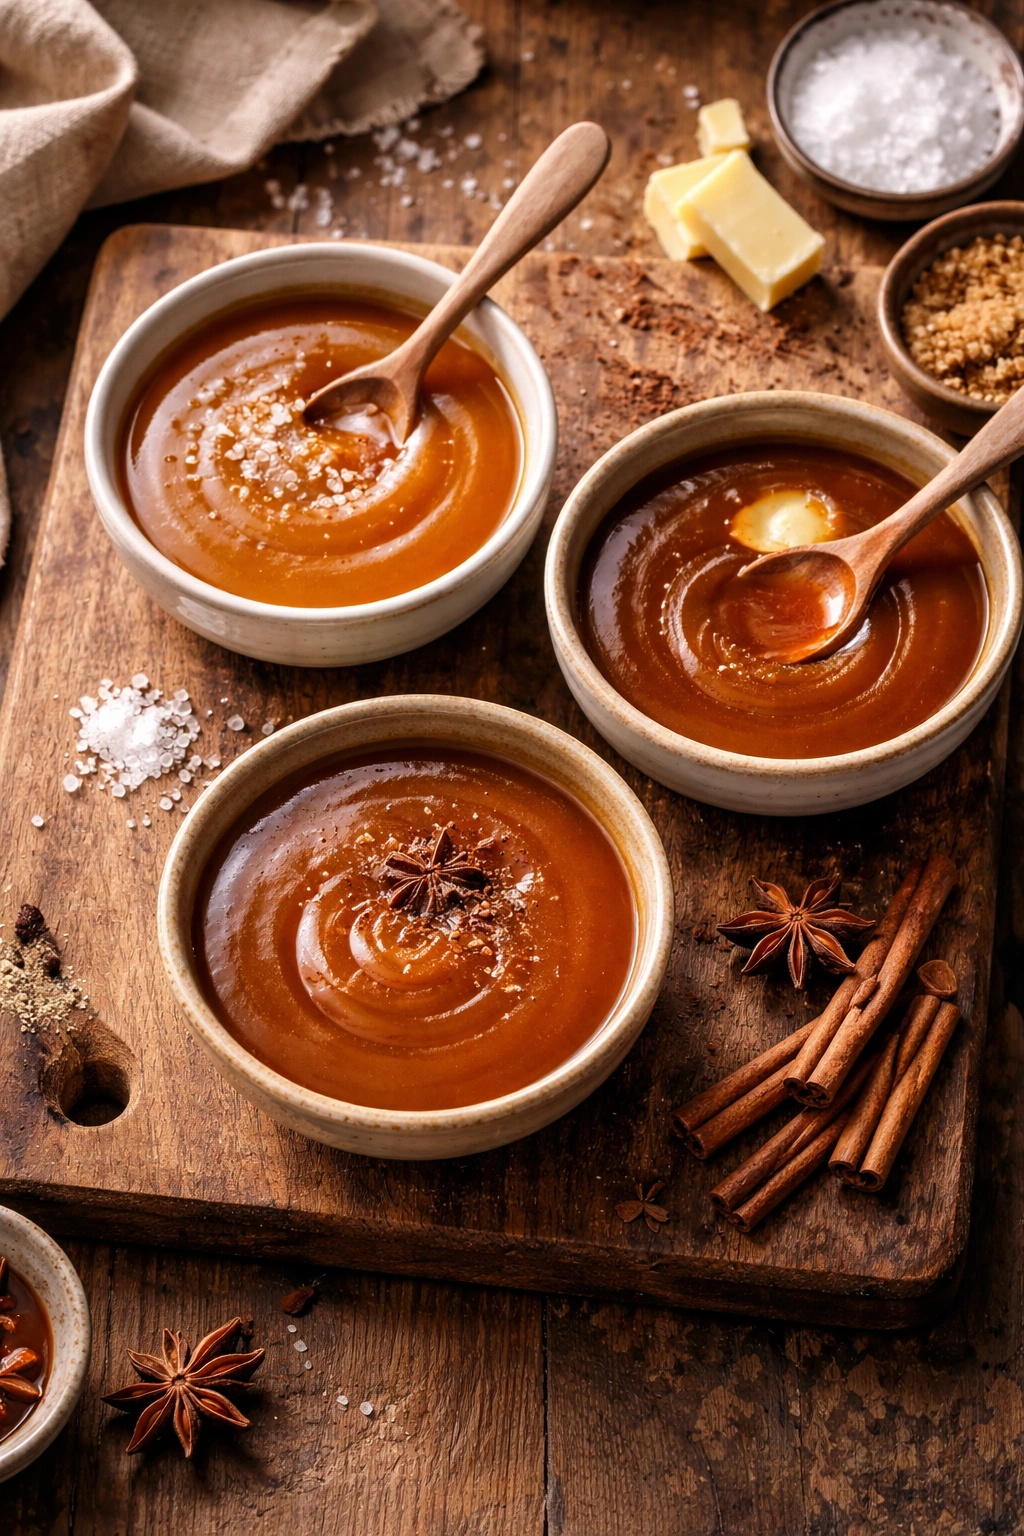
Salted Caramel: Increase the salt to ¾ or even 1 full teaspoon of fine sea salt, or finish the sauce by sprinkling a pinch of fleur de sel on top just before serving. The salt should taste like it balances and highlights the sweetness, not like you’re eating salted caramel popcorn.
Brown Butter Caramel: Before you begin, brown 8 tablespoons of butter in a separate pan over medium heat, watching until the milk solids turn golden-brown and the butter smells nutty (about 5 minutes). Let the browned butter cool slightly, then use it in place of the regular butter in the recipe. The result is a more complex, toasted caramel with deeper flavor.
Spiced Caramel: Once the caramel is finished and cooling, whisk in ¼ teaspoon ground cinnamon, a pinch of ground cardamom, and a tiny pinch of cayenne pepper (just ⅛ teaspoon—it should be barely perceptible, just adding warmth, not heat). The spices play beautifully against the sweetness without dominating the flavor.
Coffee Caramel: After removing the pan from heat and adding the butter, dissolve 1 tablespoon of instant espresso powder in the cream before pouring it into the caramel. The result tastes like salted caramel mocha—sophisticated and deeply rich.
Dark Chocolate Caramel: Chop 3 ounces of dark chocolate (70% cacao or higher) into small pieces. Once the finished caramel is smooth and off heat, stir in the chocolate pieces until completely melted. This creates a sauce that tastes like chocolate-covered caramels.
Whiskey or Rum Caramel: After the caramel cools slightly (when it’s still warm but no longer actively bubbling), stir in 1 tablespoon of whiskey, dark rum, or brandy. The alcohol flavor mellows considerably during the cooling process, leaving just a sophisticated depth. This is lovely poured over ice cream or pound cake.
Coconut Caramel: Replace half of the heavy cream with full-fat coconut cream, or stir ½ teaspoon of coconut extract into the finished sauce. The coconut flavor is subtle but distinctive, especially beautiful with dark chocolate or on vanilla ice cream.
Storage, Make-Ahead, and Reheating
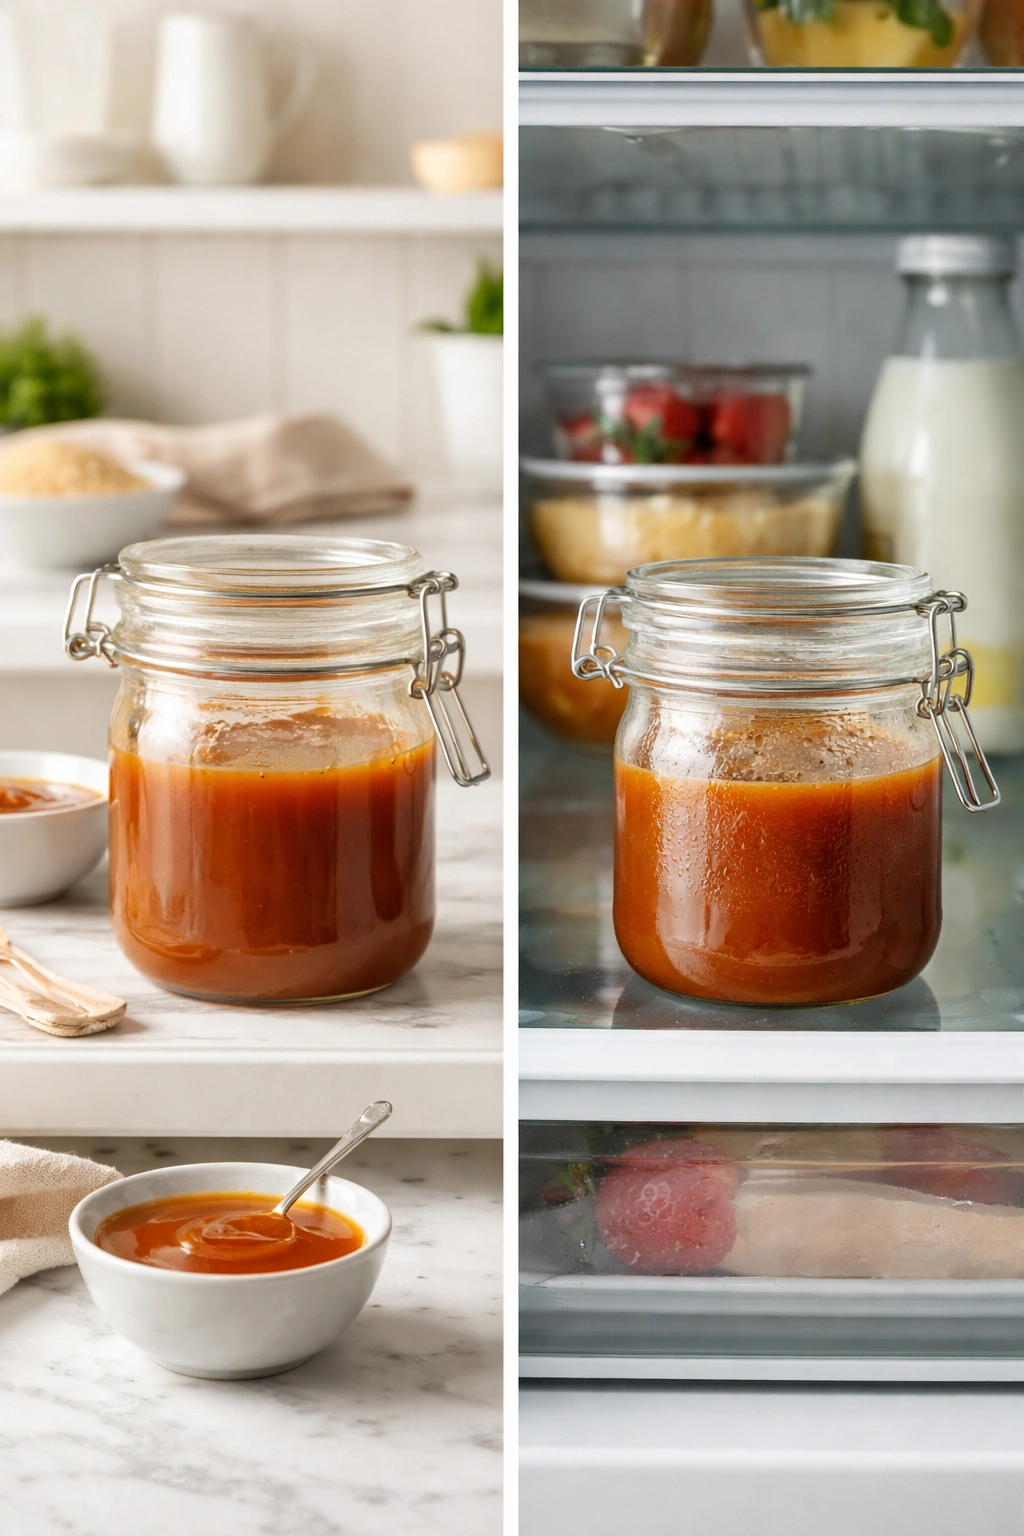
Room Temperature Storage: Homemade caramel sauce keeps in an airtight jar at room temperature for about one week. During this time, it remains pourable and ready to use. Cover it to keep out dust and prevent it from absorbing odors from the kitchen.
Refrigerator Storage: Sealed in an airtight jar, caramel keeps in the refrigerator for up to three weeks. Cold caramel becomes quite thick and stiff—almost fudgy. To use it, you can either warm it gently on the stove over low heat (about 1-2 minutes, stirring occasionally) or microwave it in 10-second bursts, stirring between each burst, until it’s pourable again.
Freezer Storage: You can freeze caramel sauce in an airtight jar or container for up to three months. Thaw it overnight in the refrigerator, then warm it gently before using. Caramel doesn’t freeze solid like water because of its high sugar and fat content; instead, it becomes very stiff but remains somewhat pliable.
Make-Ahead Strategy: Caramel can be made up to one week in advance and stored in the refrigerator. Many home cooks actually prefer to make it a few days ahead because the flavors deepen slightly as it sits. You’ll need to warm it before serving, but this takes just 2-3 minutes on low heat.
Reheating: Never boil caramel or expose it to very high heat when reheating. Use low or medium-low heat on the stove, stirring occasionally, until it reaches a pourable consistency. In the microwave, use 10-second bursts on 50% power, stirring between bursts. The goal is gentle warming, not cooking.
What If It’s Too Thick? Cold caramel can be thinned by gently heating it and stirring in a tablespoon or two of heavy cream or even whole milk. Add slowly and taste as you go. You can also thin it with water, though this slightly dilutes the caramel flavor.
What If It Crystallizes During Storage? This occasionally happens, especially if condensation got into the jar. Place the sealed jar in a warm water bath (not boiling water, just warm tap water) for 5-10 minutes, then stir gently. The crystals usually dissolve as the caramel warms. If they don’t fully dissolve, you can strain the caramel through a fine-mesh sieve into a clean jar.
Best Uses for Your Homemade Caramel
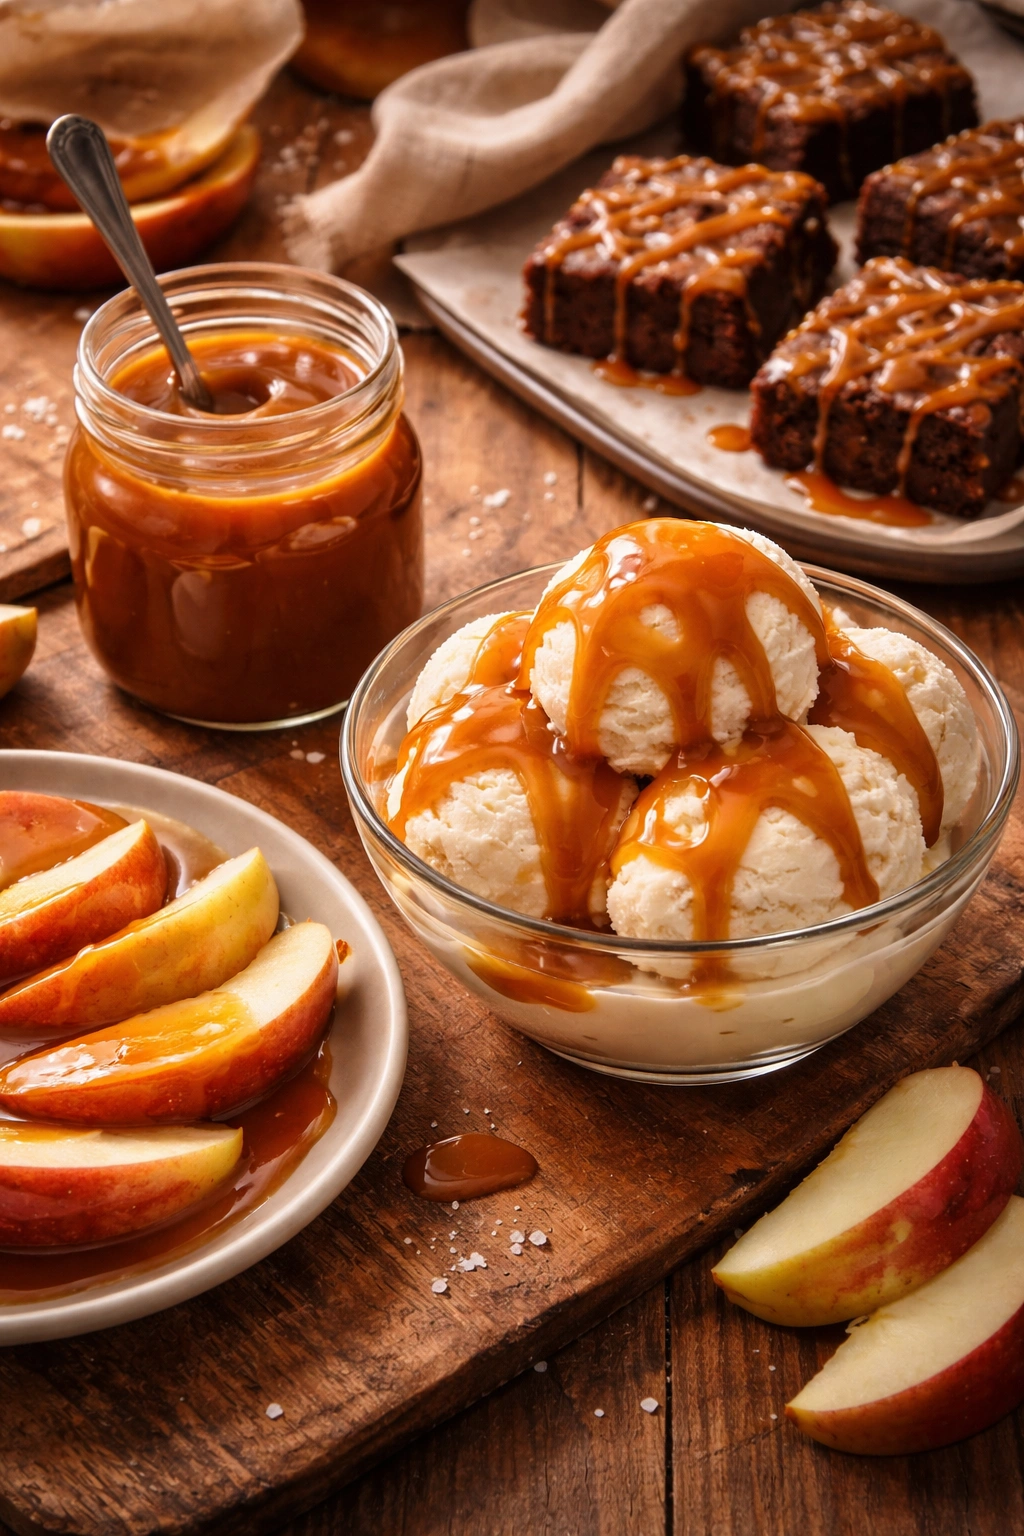
Ice Cream Topping: This is the most obvious application and also the most satisfying. Drizzle warm caramel over vanilla ice cream and watch it firm up slightly against the cold cream. The contrast of temperatures is pure bliss.
Apple Dipping: Slice fresh, crisp apples (Honeycrisp, Fuji, or Granny Smith work beautifully) and warm your caramel sauce in a small bowl. Dipping apple slices into warm, buttery caramel is a simple dessert that feels elegant.
Baked Goods: Swirl caramel into brownie batter before baking, drizzle it over finished cakes or cupcakes, or layer it between layers of cake and frosting. Caramel’s rich, salty-sweet flavor pairs beautifully with chocolate cake, vanilla cake, and even carrot cake.
Caramel Apples: Cook apple slices or whole small apples with caramel sauce for a homemade version of the carnival treat. The apples soften slightly as the caramel coats them.
Cheesecake or Pudding Topping: A drizzle of warm caramel sauce elevates a simple cheesecake or chocolate pudding into something restaurant-quality.
Caramel Popcorn: Toss freshly popped popcorn with warm caramel sauce and sea salt for a homemade version of gourmet caramel corn. Spread it on a baking sheet to cool and firm up slightly.
Coffee Additive: Stir a spoonful of caramel sauce into hot coffee for a homemade caramel latte flavor—richer and more luxurious than syrup-based coffee drinks.
Dessert Sauce for Fruit: Drizzle caramel over roasted pears, grilled peaches, or fresh berries. The warm-sweet sauce amplifies the fruit’s natural flavors.
Troubleshooting Guide

The caramel tastes grainy or sandy. This is crystallization. The good news is it’s not dangerous—it’s just not as pleasant. The bad news is it can’t be fixed once it’s happened. For your next batch, remember not to stir once the heat is on, and use a pastry brush to brush down any sugar crystals that form on the sides of the pan. If crystallization happens early in the cooking process, you can start over with fresh ingredients and be more careful with stirring.
The caramel split or looks curdled after adding the cream. This is likely because the cream was too cold or you added it too fast. The caramel will often come together when you put the pan back over low heat and stir gently for 30 seconds to 1 minute. If it doesn’t fully smooth out, add another tablespoon of cream and stir again. Future batches: use room-temperature cream and pour it slowly.
It tastes burnt or bitter. You cooked it too long. The caramel reached a temperature above 350°F (175°C) or was allowed to darken beyond a deep amber color. This batch won’t improve, but next time, remove the pan from heat as soon as the color reaches “iced tea shade” rather than waiting for “apple juice shade.”
The finished sauce is too thick and won’t pour. This means you used less cream than recommended, or some of the cream may have cooked off during the butter-adding stage. Gently reheat it with an extra tablespoon of cream stirred in, or thin it with a splash of water or milk.
The finished sauce is too thin and runny. This means the butter-to-cream ratio was too cream-heavy, or the caramel wasn’t cooked long enough before adding ingredients. Next time, reduce the cream to ⅜ cup or increase the butter to 7 tablespoons. A thin caramel isn’t a disaster—it’s still delicious; it just won’t coat ice cream as thickly.
There’s condensation in the jar and the caramel is now grainy. This happens when caramel is sealed in a jar while still warm. For next batch, always let caramel cool completely to room temperature before transferring to a sealed container. If this happens now, try the warm water bath method described in the storage section to see if the crystals redissolve.
The vanilla extract makes it taste weird. Use pure vanilla extract, not imitation vanilla, which has a chemical aftertaste that can clash with caramel. Pure vanilla extract costs more but tastes vastly better. Alternatively, you can skip vanilla entirely—the caramel is delicious without it.
Why 10 Minutes Is Actually Realistic

The 10-minute timeline assumes you’ve measured your ingredients ahead of time. This is the key to staying within the timeframe. The actual cooking process—from sugar hitting the pan to finished caramel in a bowl—takes about 12-15 minutes depending on your stove’s power. Adding 5 minutes for prep (measuring sugar, cutting butter, pouring cream) brings you to a realistic 15-20 minutes total from start to finish. The “10 minutes” refers to the stove time, not including prep.
Here’s the actual breakdown: water boiling off takes 4-5 minutes; caramel color developing takes 3-4 minutes; butter and cream adding takes 1 minute; cooling takes 15-20 minutes off the heat. If you’re in a hurry, you can use the caramel while it’s still warm (which is actually ideal for ice cream topping). If you have patience, letting it cool gives you a thicker sauce that clings better to solid foods.
The 10-minute promise is realistic because this wet-sugar method is faster than dry-sugar caramelization, which requires constant vigilance and takes longer because the sugar doesn’t dissolve first. The wet method gets you results with less stress and more forgiveness.
Final Thoughts

Making homemade caramel sauce isn’t a special occasion skill or a hidden culinary secret—it’s just a basic technique that takes less time than most people assume. You’re not defying physics or attempting molecular gastronomy. You’re just heating sugar, adding butter and cream, and letting chemistry do its job. The result tastes so much better than bottled versions that it’s hard to understand why anyone uses them once they’ve tried the real thing.
The beauty of this technique is that it’s completely repeatable. Make it once and you’ll understand the process. Make it three times and you won’t need a recipe. After that, you’ll have it down so well that you can practically make it in your sleep. Caramel becomes part of your kitchen toolkit—something you can produce whenever you want dessert to feel a little more special, a little more intentional, and infinitely more delicious.
Keep a jar in the refrigerator and you’ll find yourself reaching for it constantly: warmed slightly and poured over ice cream, drizzled on toast with sea salt, stirred into coffee, or swirled into brownies just before they finish baking. Once you’ve experienced what real caramel tastes like, you’ll wonder why you ever considered anything else.