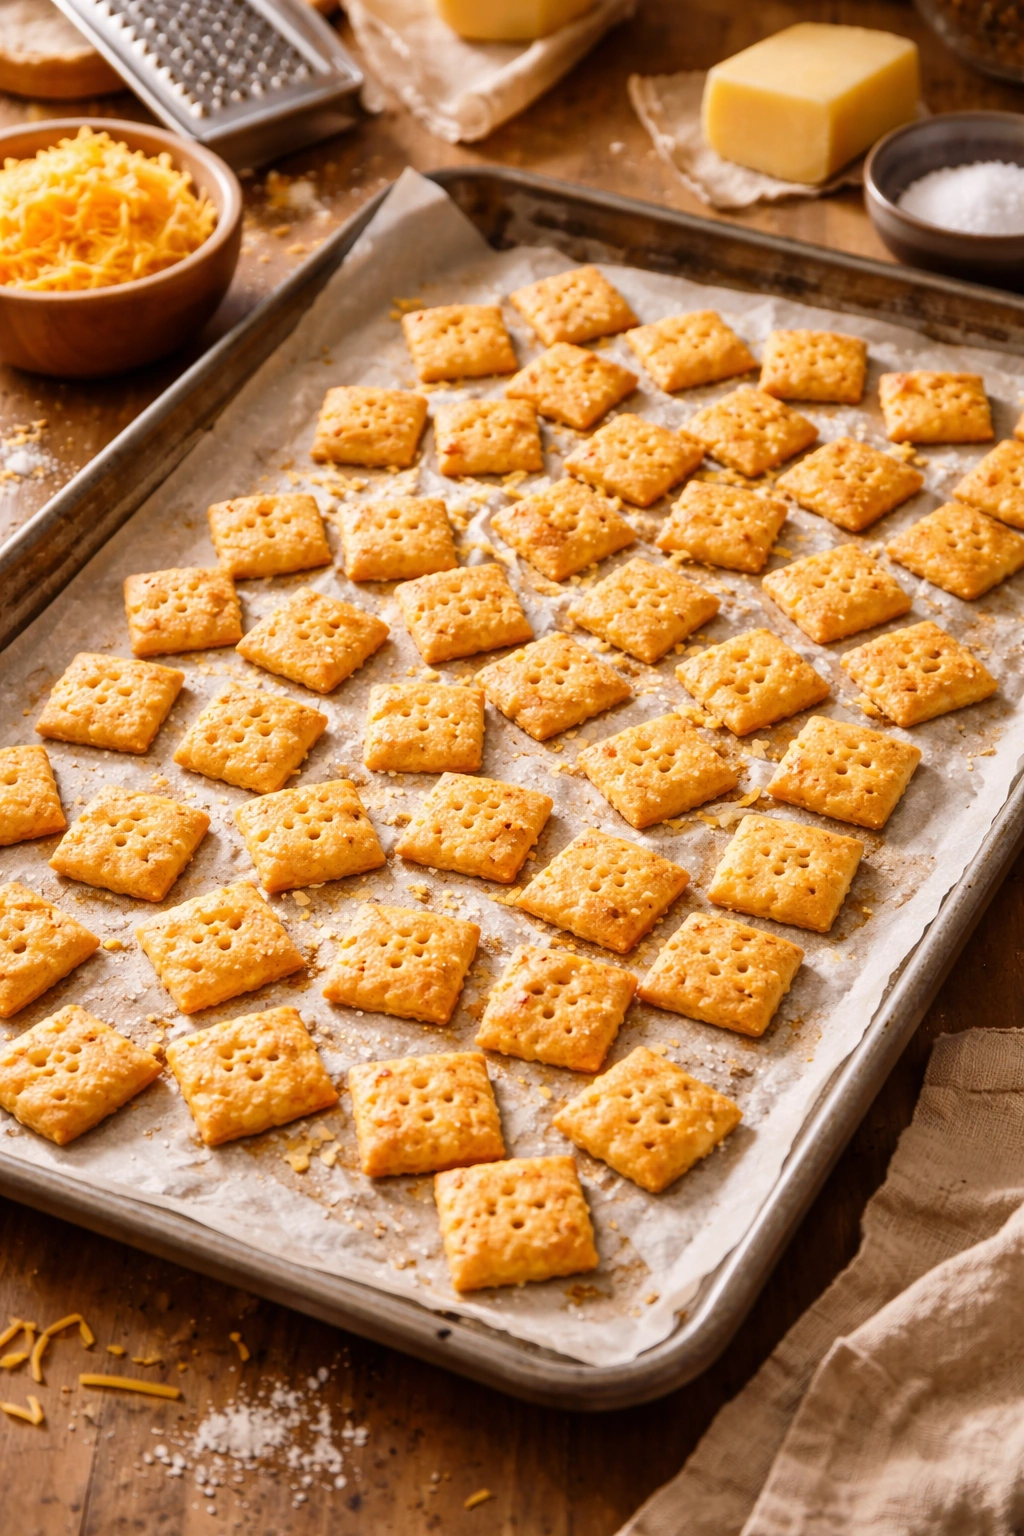
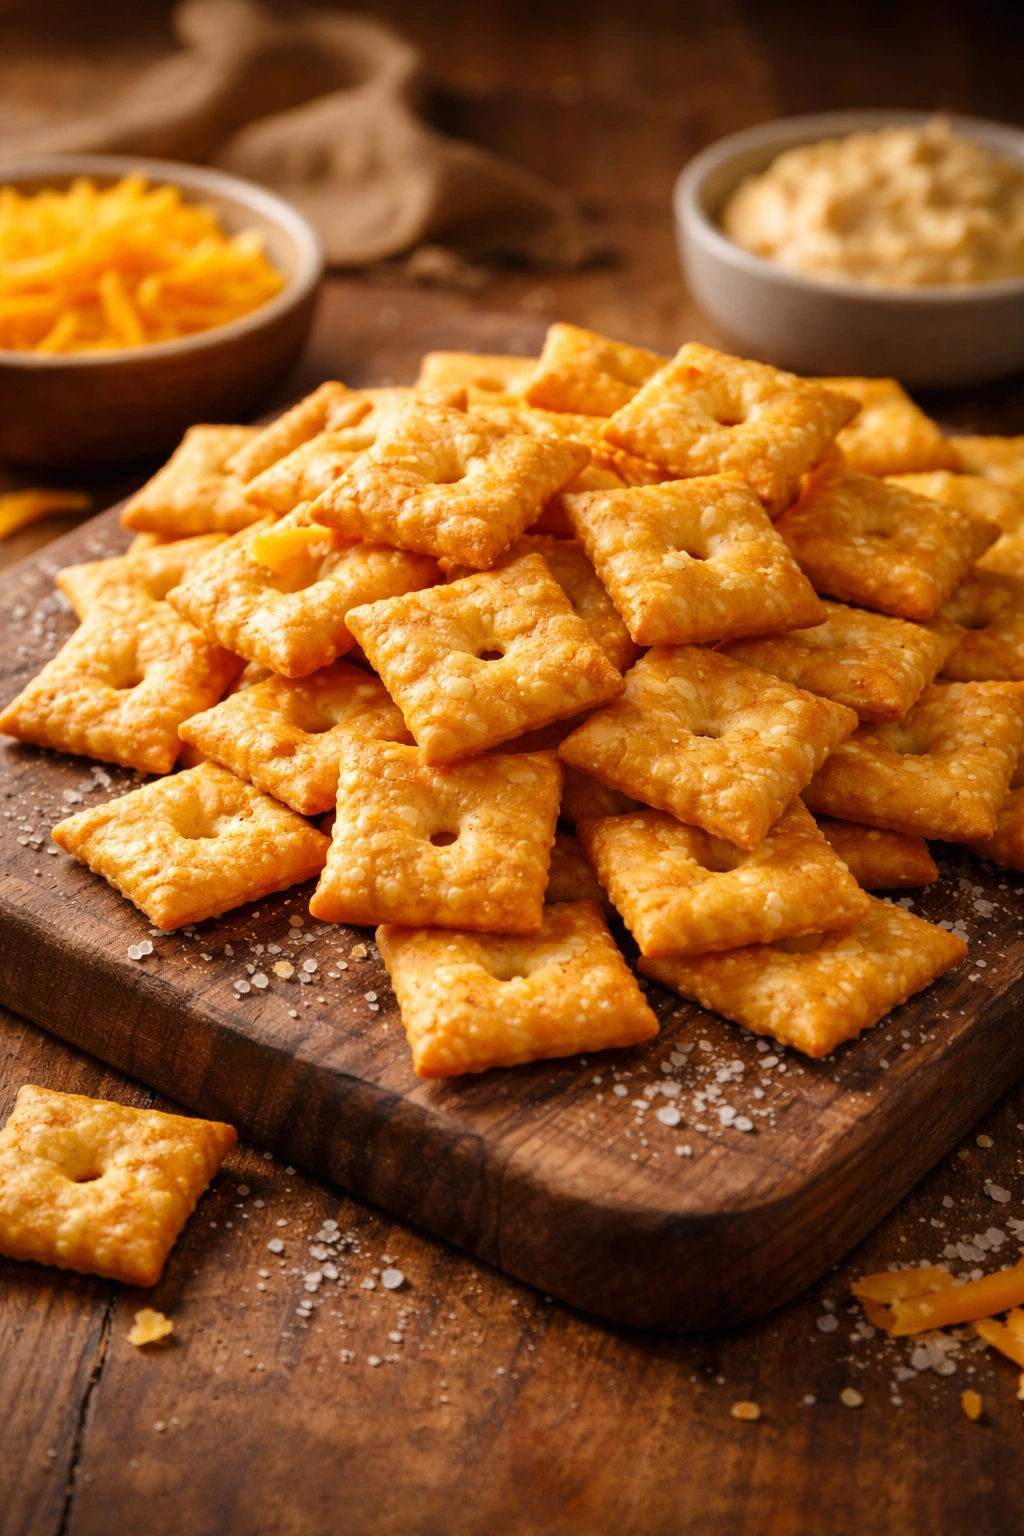
There’s something almost magical about opening a box of Cheez-Its — that distinctive cheddar aroma hits you instantly, and you can’t help but grab a handful before you even realize what you’re doing. But here’s what most people don’t realize: those beloved crackers aren’t some culinary mystery you need commercial equipment to replicate. The homemade version is actually simpler than you’d think, and when you make them yourself, you gain something the store-bought version can never give you — complete control over the cheese quality, the seasoning intensity, and the crispness level. Once you taste a warm batch of homemade cheese crackers fresh from the oven, with a golden color that means they’re perfectly crispy rather than over-baked to a fragile shell, you’ll understand why this recipe becomes an instant favorite in any kitchen.
What really sets homemade crackers apart is the freshness factor. Commercial crackers sit in bags for weeks or months before reaching your pantry; your homemade batch is ready to eat in less than an hour from the moment you decide to make them. The butter is warm, the cheese is at its most aromatic, and the contrast between the buttery exterior and the sharp cheddar bite is something boxed crackers simply can’t match, no matter how many flavor packets they include.
Why Make Your Own Cheese Crackers
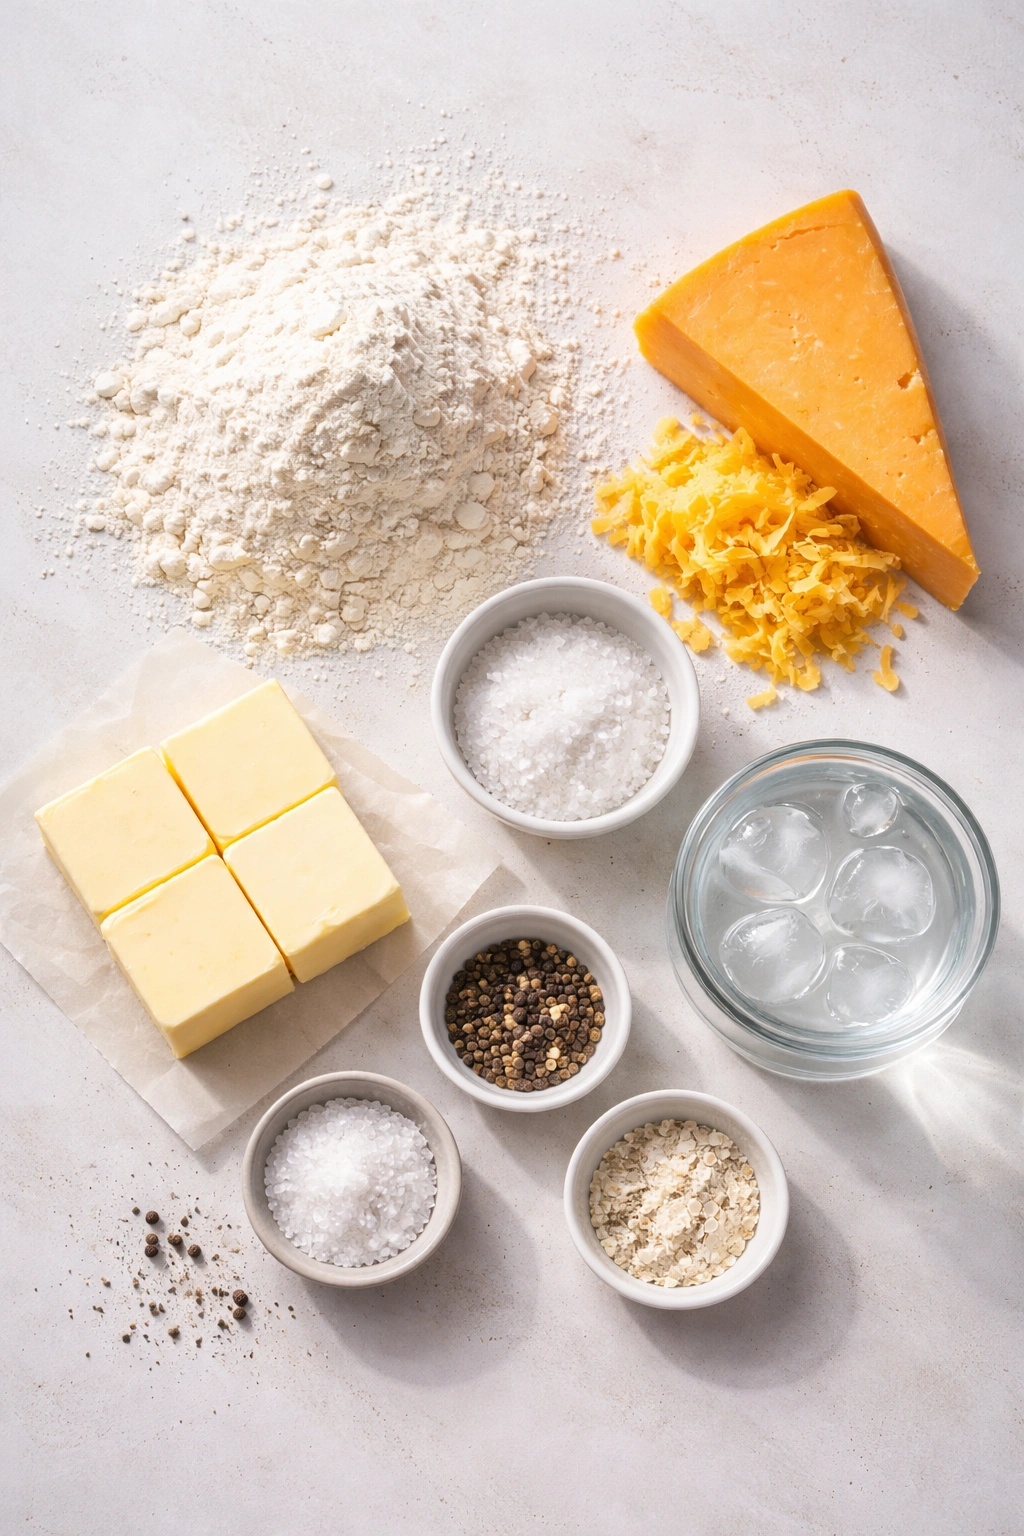
The case for homemade crackers goes beyond nostalgia or the simple pleasure of fresh food. When you make crackers in your own kitchen, you’re starting with exactly four ingredients — flour, butter, sharp cheddar, and salt — and nothing else. Most commercial cheese crackers contain preservatives, vegetable oils that you might want to avoid, artificial flavors, and a list of additives that serve the manufacturer’s need for shelf stability rather than your need for flavor. You’ll notice the difference immediately in both taste and texture.
Homemade cheese crackers also cost significantly less than the premium box-store versions, especially when you buy quality cheddar in bulk. A single batch of homemade crackers — enough to fill a large container — costs roughly what you’d spend on two small boxes from the grocery store, and the flavor is incomparably better. The satisfaction of pulling a sheet of golden, bubbling crackers from your oven and knowing you made them from scratch isn’t something you can put a price on either.
Beyond the practical advantages, there’s a genuine joy in serving homemade crackers to family and friends. People almost always ask for the recipe, and you’ll become known for this one simple thing you do better than anyone else. It’s the kind of skill that feels impressive but actually requires zero special talent — just a basic understanding of how to manage dough and oven timing.
The Secret to Authentic Cheez-It Flavor
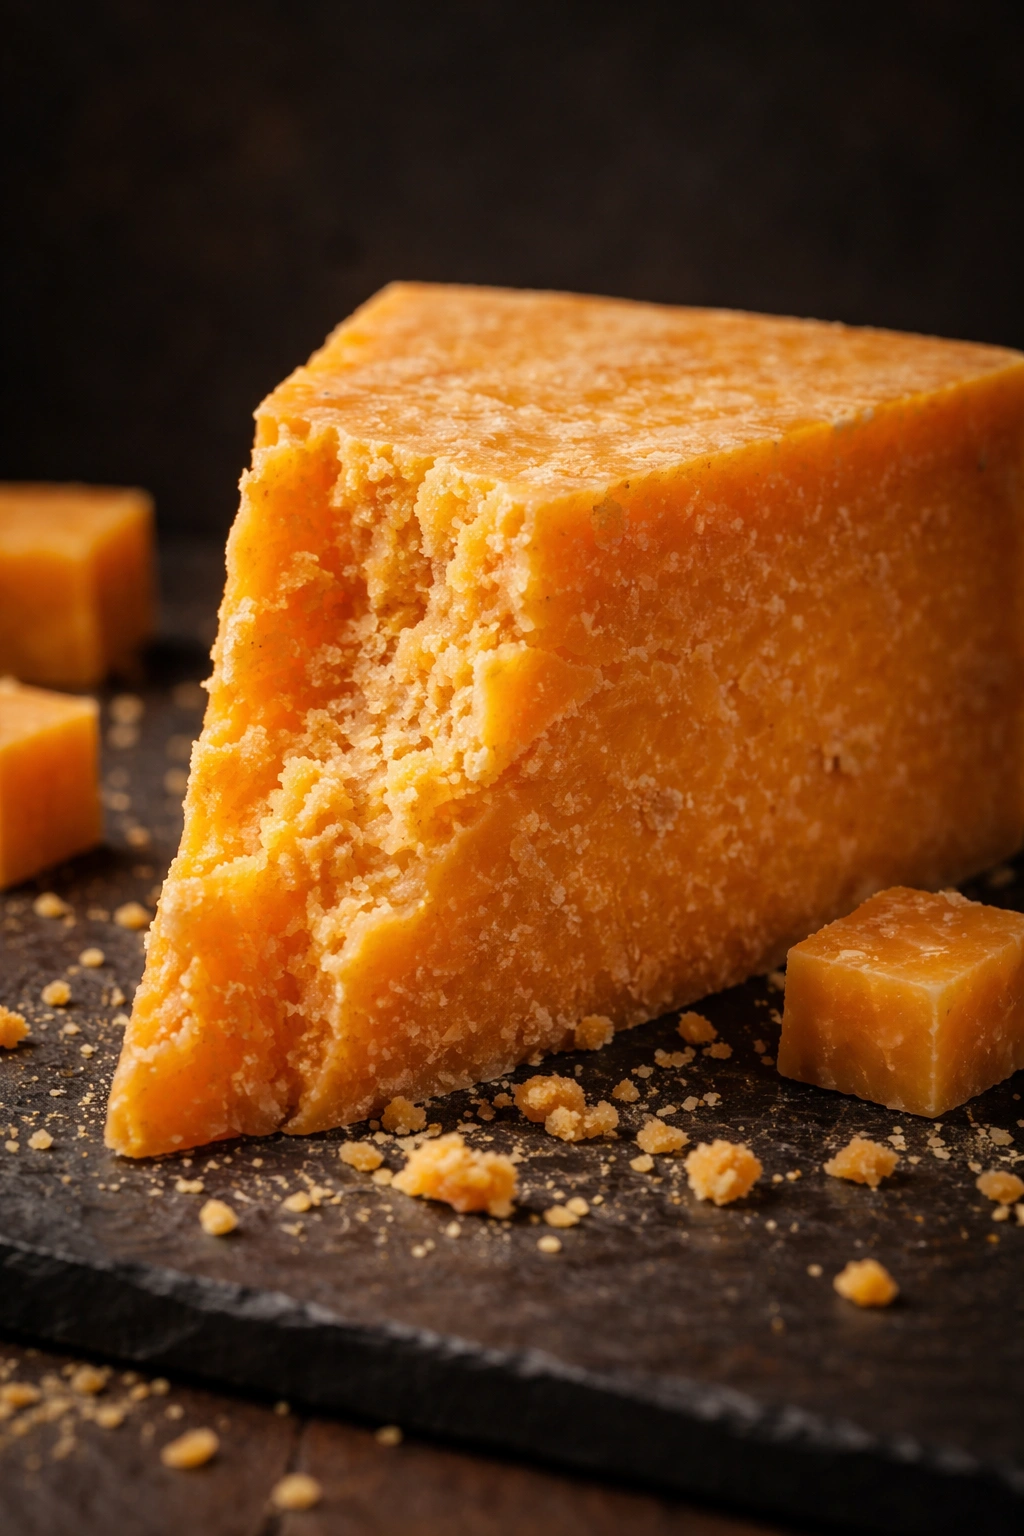
The reason homemade cheese crackers taste so close to the real thing comes down to one crucial ingredient: extra-sharp cheddar cheese. This is non-negotiable. Regular sharp cheddar, or — heaven forbid — mild cheddar, will not deliver the punchy, distinctive flavor that makes Cheez-Its addictive. Extra-sharp cheddar has been aged longer, and that aging process concentrates the flavor compounds that give the crackers that unmistakable bite. You’re looking for a cheddar that’s been aged at least nine months; many shops carry versions aged a full year or longer, and these are absolutely worth seeking out.
The second secret is actually overcooking the crackers just slightly compared to traditional crackers. Where a cookie might bake for 10 minutes and be done, these cheese crackers benefit from an extra minute or two in the oven — enough to drive out virtually all remaining moisture and create that hollow, crispy structure that makes them so satisfying to eat. The crackers will sound hollow when you tap them, and they’ll shatter cleanly when you break them apart rather than bending softly. This texture is what separates the homemade Cheez-It experience from other homemade cracker recipes.
Salt is the third secret, and here’s the counterintuitive part: you need more salt than seems reasonable when you’re mixing the dough. The saltiness gets distributed throughout the batch, so what tastes over-seasoned when you taste a raw piece of dough will be perfectly balanced when the crackers are baked. Start with the amount called for in the recipe, taste a cracker fresh from the oven, and adjust upward next time if you prefer an even more assertive flavor. Some people like to add a light sprinkle of fleur de sel on top before baking for an extra texture dimension.
Essential Ingredients for Perfect Crackers
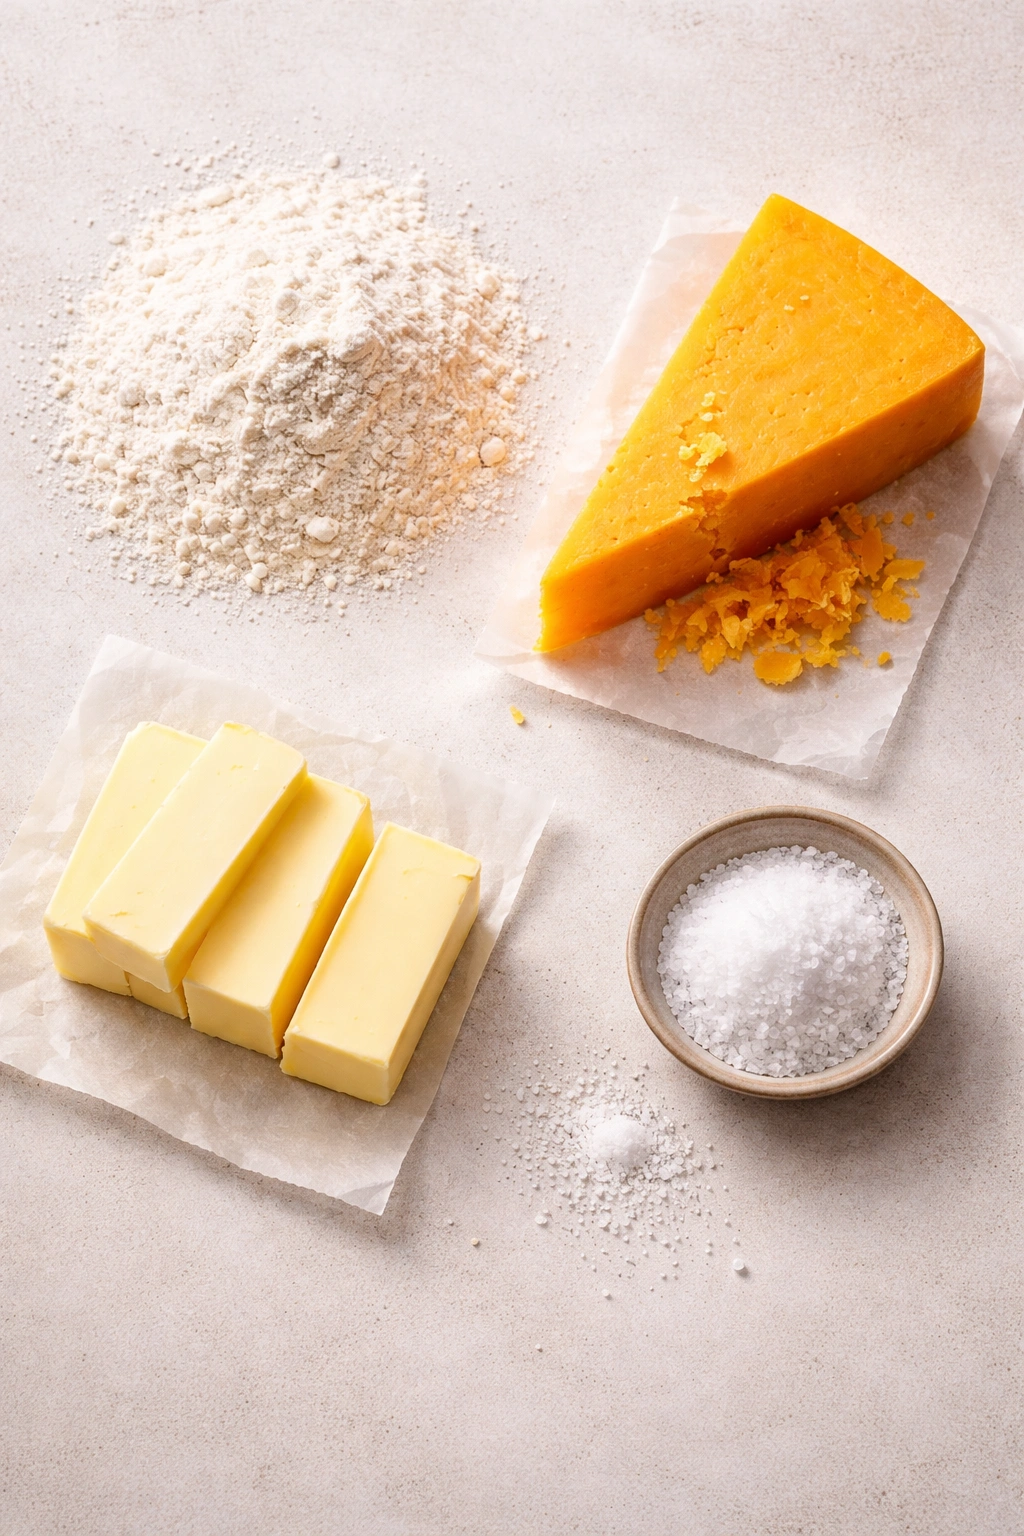
Making these crackers requires just four foundational ingredients, but ingredient quality matters enormously. The flour should be all-purpose flour with a moderate protein content — around 10-12%. This gives you enough gluten development to create structure without making the crackers tough or chewy. Bread flour will make them too dense; cake flour will make them too delicate and fragile. Standard all-purpose is the perfect middle ground.
The butter must be unsalted and should ideally be at room temperature before you begin. Cold butter is harder to work into the flour evenly, and salted butter would throw off your salt balance. Some bakers swear by European-style butter with higher fat content, and if you have access to it and want to splurge, it does create an exceptionally rich flavor and slightly flakier texture.
The cheddar cheese is where your money should go. Buy a block of extra-sharp aged cheddar and grate it yourself rather than using pre-shredded cheese. Pre-shredded cheese contains anti-caking agents that prevent it from melting and blending smoothly into the dough — it’ll give you a speckled, uneven texture instead of the uniform, homogeneous cracker you’re aiming for. A microplane grater creates finer, more evenly-sized shreds than a box grater, which means faster, more complete melting into the dough.
The salt should be fine sea salt or kosher salt, not table salt. Table salt’s finer grains can clump during mixing, and its iodine content can add an off-flavor. Kosher salt or sea salt gives you a cleaner, brighter salt taste. Measure it by weight if possible rather than by volume — salt’s density varies between types, and weight is the only truly accurate measurement.
Equipment and Tools You’ll Need
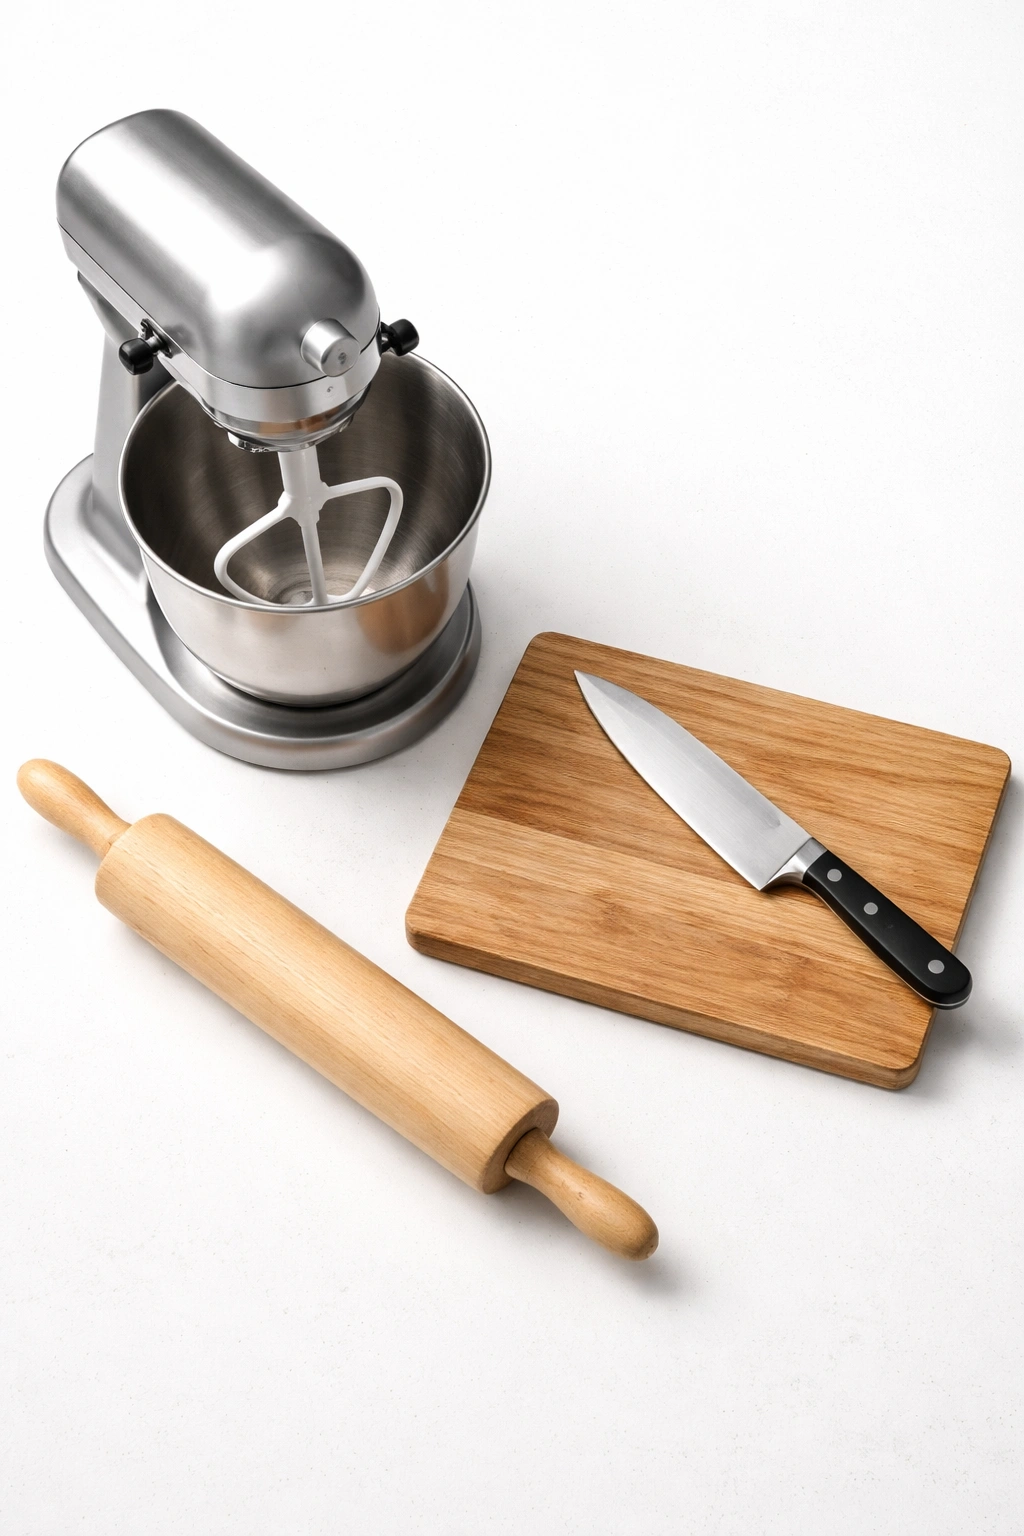
You don’t need much to make cheese crackers successfully, which is part of their appeal. A stand mixer with a paddle attachment makes the job incredibly easy — the paddle mixes the dough in about 3 minutes and distributes the cheese evenly throughout. If you don’t have a stand mixer, a hand mixer works fine, though you’ll need to beat for a bit longer. A simple wooden spoon and your hands can work too, though hand-mixing this dough takes some arm strength and patience.
A food processor is genuinely optional, despite what some recipes might suggest. Many people use a food processor to combine the dough because it’s extremely fast, but it’s just as easy to mix in a stand mixer or by hand, and you’ve got one fewer bowl to wash. If you do use a food processor, use the regular blade attachment and pulse rather than running continuously — you’re looking for dough that comes together, not a ball that’s been overworked.
For rolling and cutting, you’ll need a work surface (a countertop or large cutting board), a rolling pin, and a way to cut the crackers into squares. A sharp knife works fine for freehand cutting into irregular shapes, but many people prefer a cracker cutter — a square cookie cutter works perfectly, or you can buy an actual crackers cutter online that’s designed specifically for this purpose. The more uniform your crackers, the more evenly they’ll bake, so investing in a square cutter is worthwhile if you plan to make these often.
Baking sheets should be sturdy enough that they don’t warp in the oven — thin, flimsy sheets will cause uneven baking and create some crackers that brown too quickly. Professional-grade aluminum or steel baking sheets are ideal. Parchment paper is essential for preventing sticking and simplifying cleanup. A cooling rack helps the crackers stay crispy after baking instead of steaming themselves into softness on the hot pan.
Serving and Timing Info
Yield: Makes approximately 200 small crackers (enough to fill a 1-quart container) | Serves 8-12 as an appetizer or snack
Prep Time: 20 minutes (hands-on active mixing, rolling, and cutting)
Cook Time: 18-22 minutes (baking in two batches)
Total Time: 40-45 minutes active time
Difficulty: Beginner — This recipe requires no special skills or experience. The dough comes together easily, rolling is straightforward, and the only thing requiring attention is watching the oven during baking to catch them at their peak crispness. Even a first-time baker will succeed on the first try.
Best Served: Immediately after cooling completely, while they’re at peak crispness. They remain good for several days in an airtight container but are most delicious within the first 24 hours.
The Ingredient List You’ll Need
For the Crackers:
- 2 cups (240 grams) all-purpose flour
- ¾ teaspoon fine sea salt
- ½ teaspoon freshly ground black pepper (optional, but recommended)
- 8 tablespoons (113 grams) unsalted butter, softened to room temperature
- 2 cups (225 grams) extra-sharp aged cheddar cheese, finely grated from a whole block (not pre-shredded)
- 2 tablespoons ice water (keep additional water nearby in case the dough needs it)
Optional Finishing:
- Fleur de sel or sea salt flakes for sprinkling before baking (about ¼ teaspoon total)
Building the Perfect Dough Step by Step
Prepare Your Station:
-
Gather all your ingredients and let the butter sit on the counter at room temperature for 20-30 minutes until it’s soft enough to indent with your finger but not so warm that it’s greasy or oily. Room-temperature butter is essential — it incorporates evenly into the flour without creating little lumps.
-
Preheat the oven to 375°F (190°C) and position one rack in the upper-middle portion of the oven and another in the lower-middle. Since you’ll be baking two sheets at once, having two racks at similar heights ensures even baking. If your oven has hot spots, you may need to rotate the pans halfway through.
-
Line two baking sheets with parchment paper. This prevents sticking and makes cleanup effortless. Don’t skip the parchment — these crackers, though sturdy, can stick if the pan isn’t properly protected.
Mix the Dough:
-
In the bowl of a stand mixer, combine the flour, salt, and black pepper (if using). Whisk together with a fork or your mixer’s paddle briefly on low speed just to distribute the salt evenly throughout the flour. Evenly distributed salt is crucial — salt pockets create overly salty spots in the finished crackers.
Advertisements -
Add the softened butter to the flour mixture and beat on low speed for about 1 minute, until the butter is broken into pea-sized pieces and distributed throughout the flour. The mixture should look crumbly and loose, not at all like a cohesive dough yet.
-
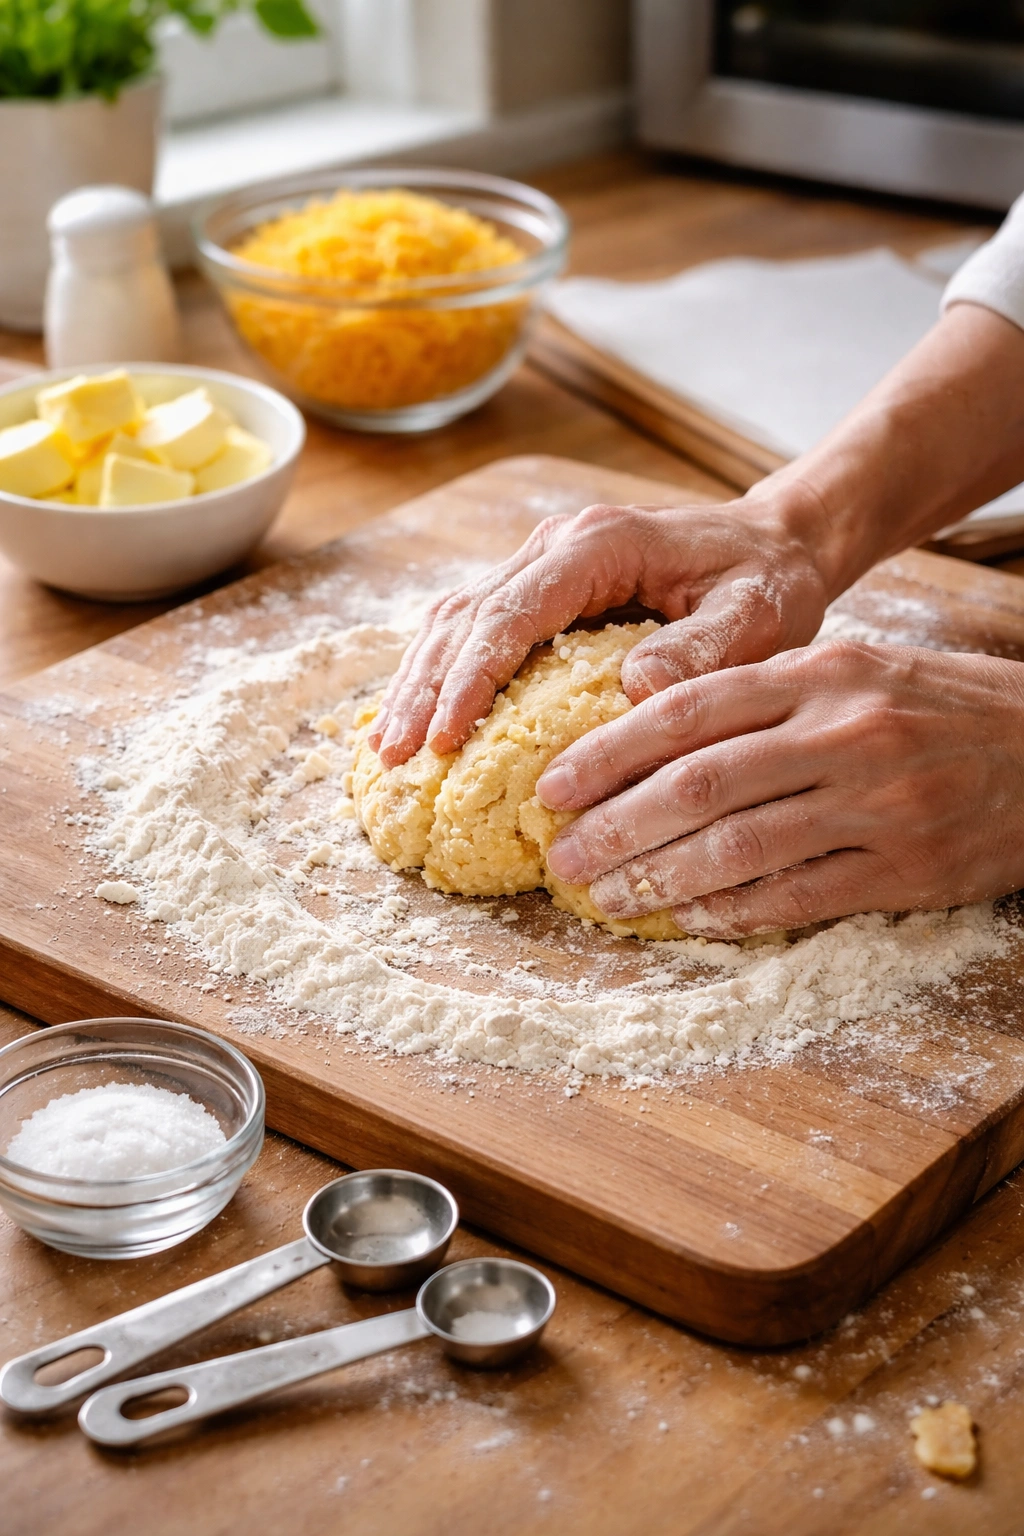
Add the finely grated cheddar cheese to the butter-flour mixture and beat on low speed for 2-3 minutes, increasing to medium speed partway through. This is the crucial step where the cheese distributes evenly throughout the dough and the friction from mixing begins to warm and partially melt the cheese particles into the butter and flour. The dough will look sandy and loose at first, then gradually come together as the cheese and butter bind the flour.
-
Add 1 tablespoon of ice water and beat on low speed for 15-20 seconds, just until you see the dough beginning to come together. The dough should be on the dry side — you want it to hold together when pinched, but it shouldn’t be sticky or wet. If pinching a handful leaves your fingers noticeably wet, you’ve added too much water. If the dough crumbles apart when you pinch it, add the second tablespoon of ice water one teaspoon at a time until the dough just barely holds together. Do not add water all at once; it’s better to add too little and add more than to add too much and have to dry it back out.
-
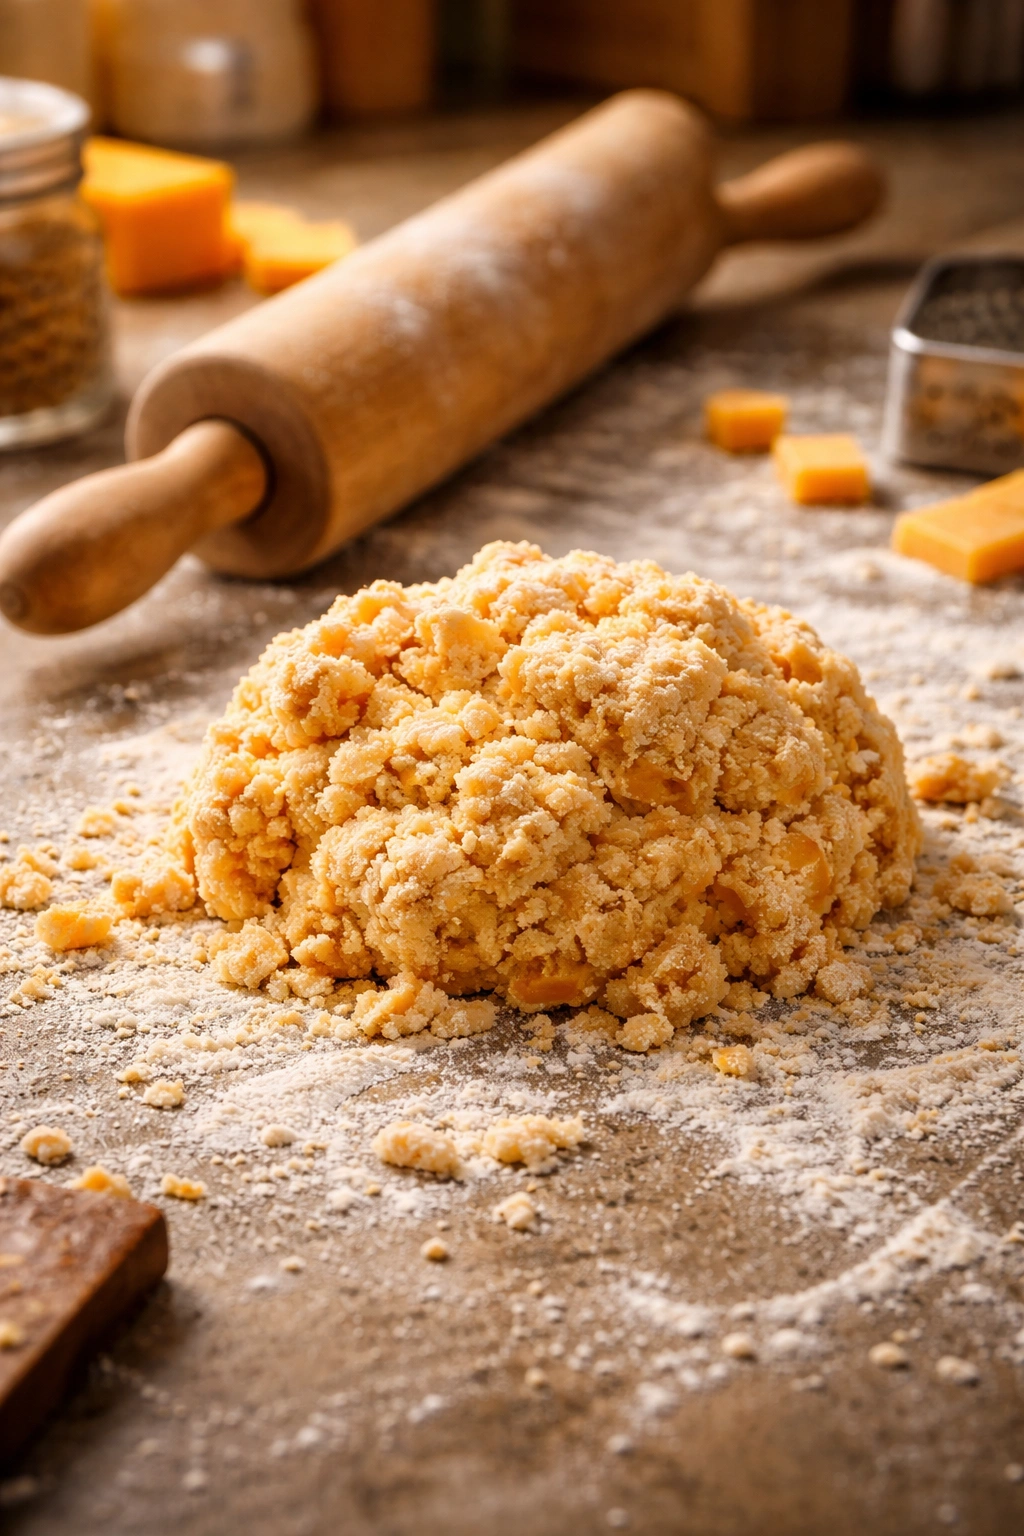
Stop mixing as soon as the dough comes together. Overmixing at this stage develops gluten, which makes crackers tough and chewy instead of crisp and delicate. You’re aiming for a dough that holds together but still feels somewhat loose and crumbly.
Roll and Cut:
-
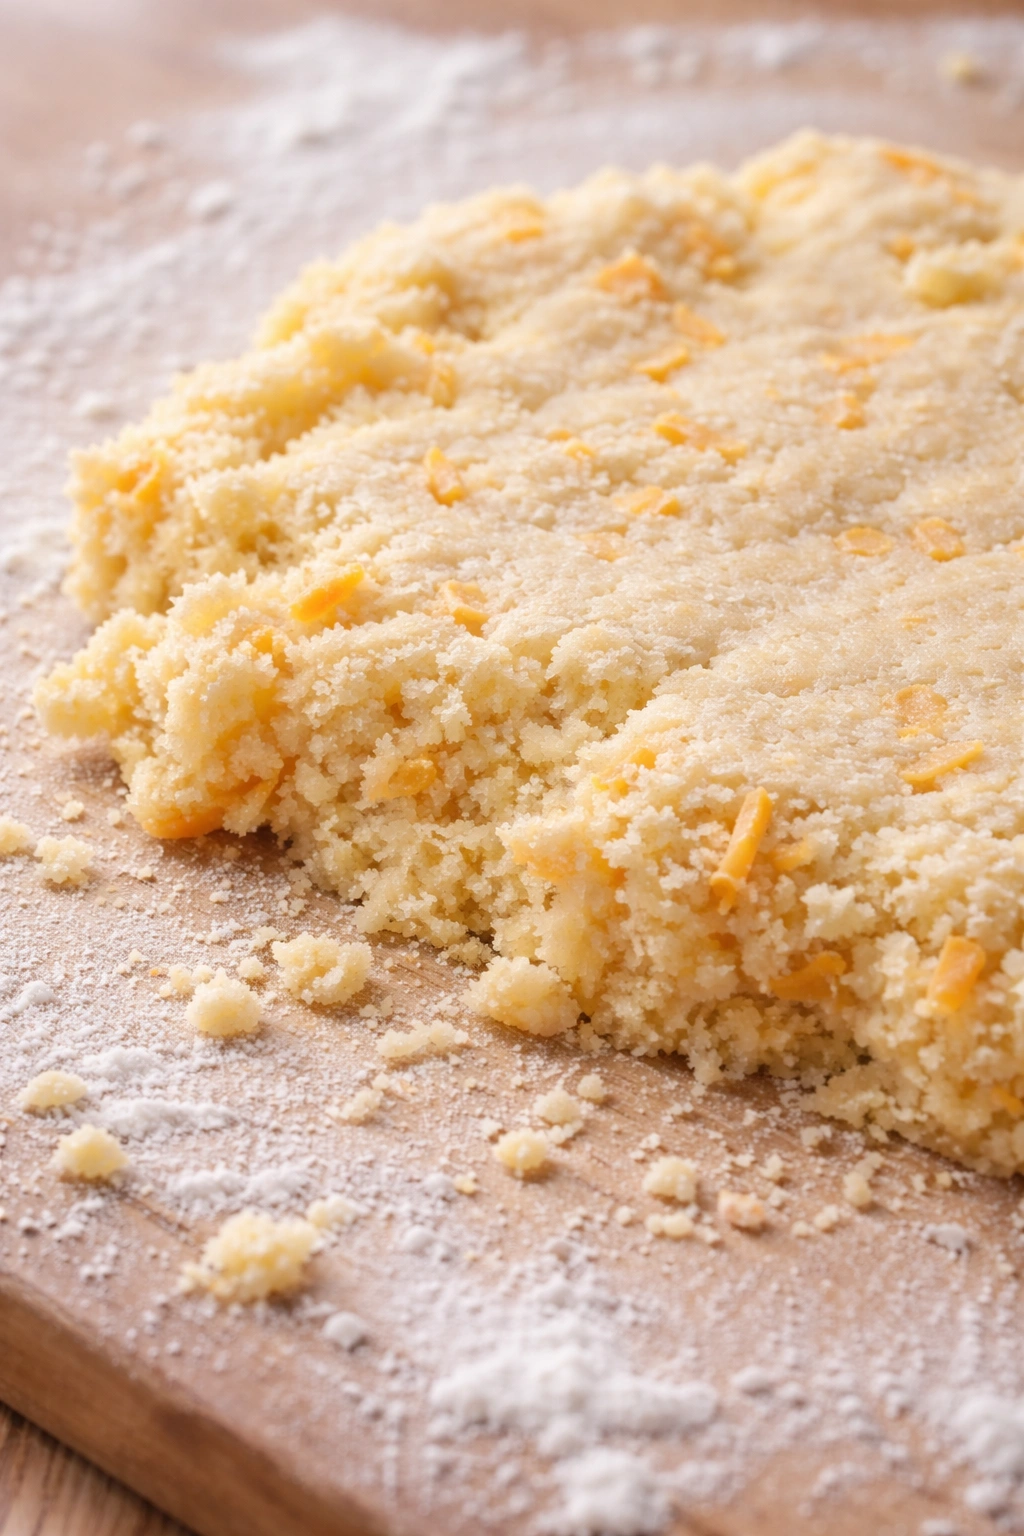
Lightly dust your work surface with flour. Divide the dough in half — you’ll roll one half at a time, which makes handling much easier than wrestling with all the dough at once. Press the first half into a flat disk on the floured surface.
-
Dust the top of the dough with a little more flour, then roll out to a thickness of approximately 1/8 inch (about 3 millimeters). The dough should be thin enough that you can almost see through it in places, but not so thin that it’s transparent. This thickness is crucial — roll it too thick and the crackers will be chewy; roll it too thin and they’ll be fragile. Aim for consistency; if some parts are thicker, gently press them down even.
-
Using a sharp knife or a square cracker cutter, cut the dough into small squares approximately ¾ inch (2 centimeters) on each side. These are bite-sized crackers meant to resemble Cheez-Its, not large crackers. The size is partly about tradition, but it’s also practical — smaller crackers bake more evenly and reach peak crispness faster than oversized pieces.
-
Place the cut crackers on one of the prepared baking sheets, spaced about ½ inch (1 centimeter) apart. They don’t expand much during baking, so they can be relatively close together, but they do need enough space for air to circulate around them for even crisping. If you’re sprinkling with fleur de sel, sprinkle lightly now — a tiny pinch per cracker is plenty; the flavor is concentrated.
-
Repeat the rolling, cutting, and placing process with the second half of the dough on the second baking sheet.
Advertisements
Bake to Perfect Crispness:
-
Place both baking sheets in the oven on the two prepared racks. Set a timer for 12 minutes, then rotate both sheets front to back (and swap racks if one side of your oven runs hotter). This rotation helps them bake evenly.
-
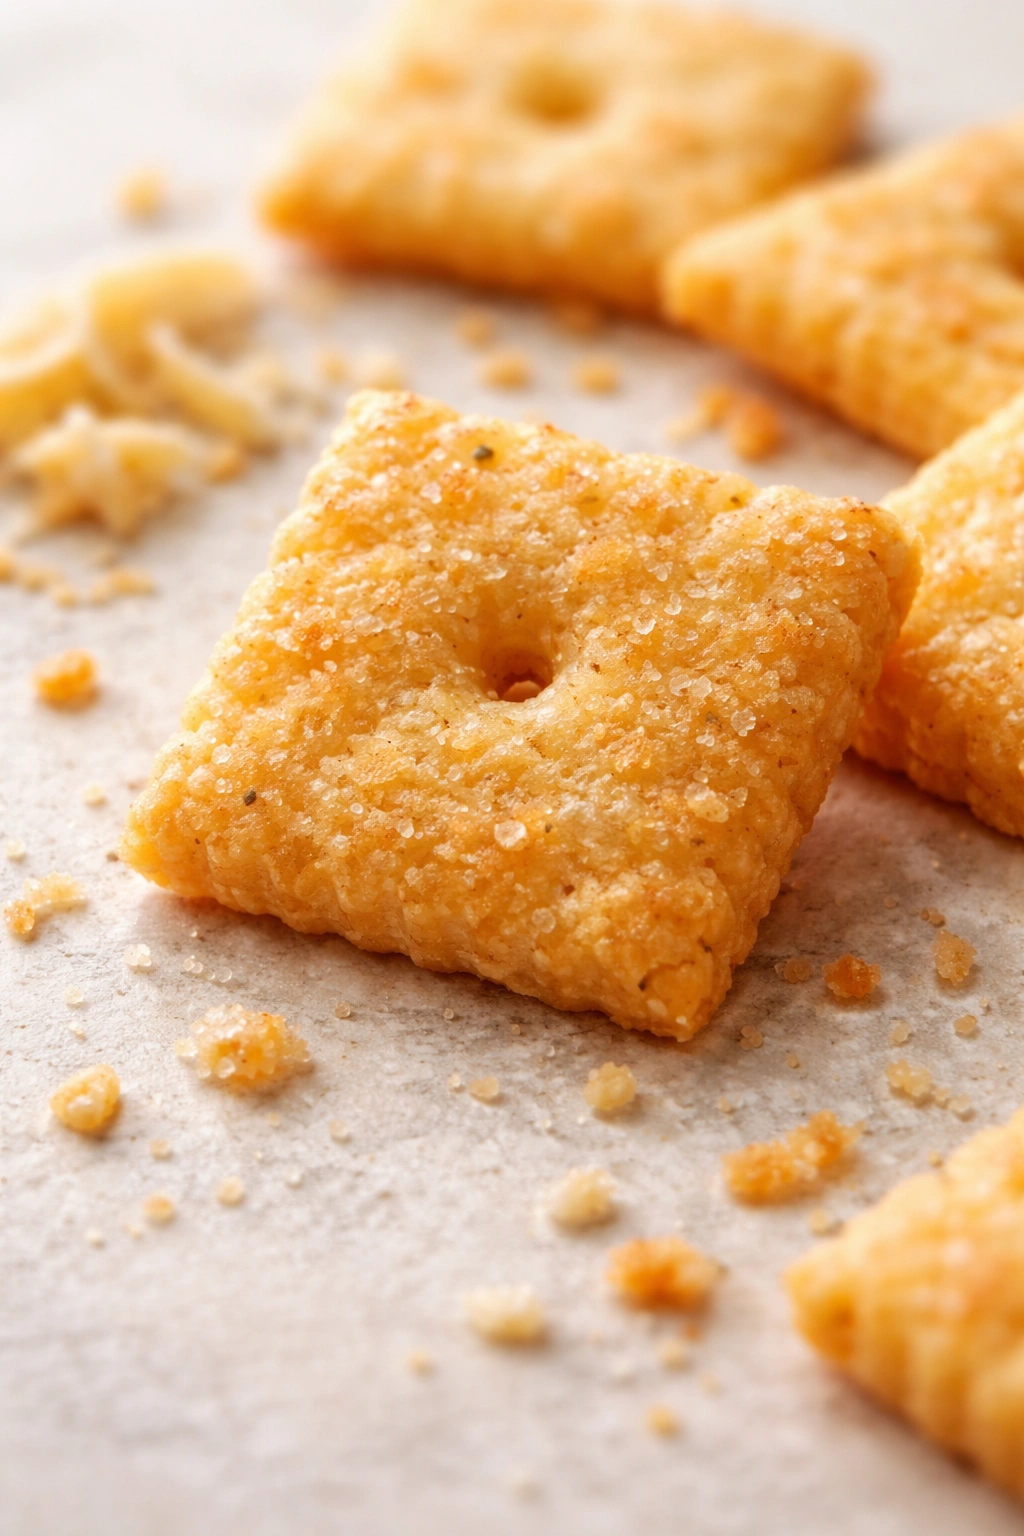
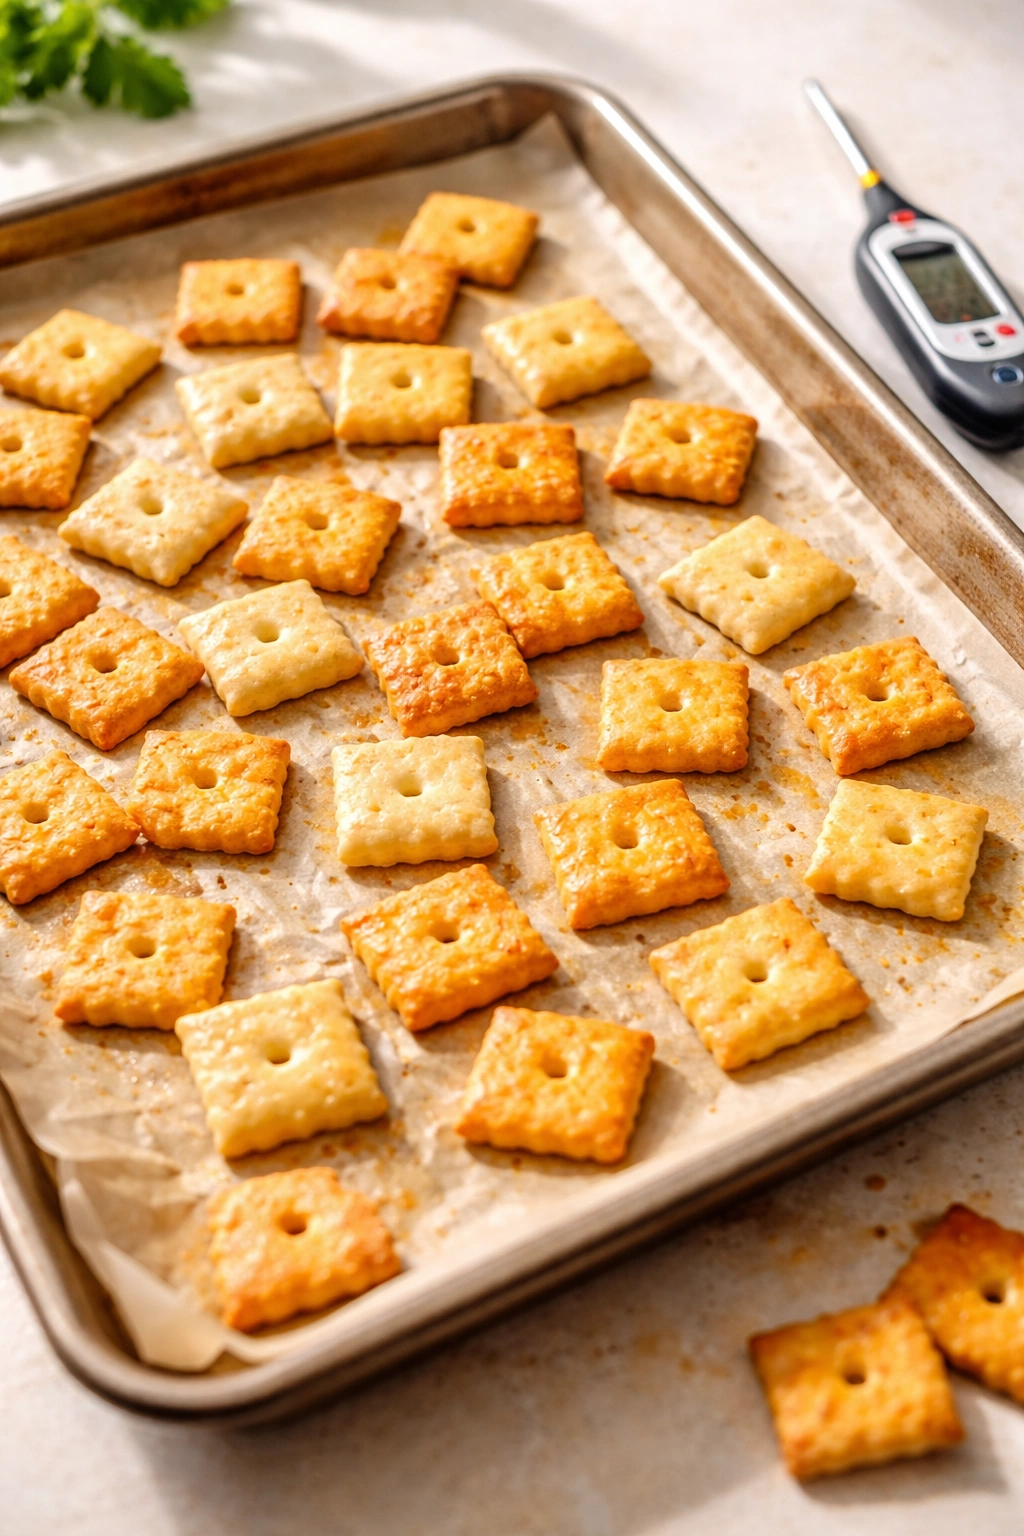
Continue baking for another 6-10 minutes, watching closely as they approach doneness. The crackers are ready when they’re a deep golden color with slightly darker edges — not pale yellow, not brown, but a warm, rich gold. Properly done crackers will sound crispy and hollow when you tap them. The edges should have just the smallest amount of browning for flavor depth. If the edges are deep brown, they’re slightly overdone and may taste slightly bitter; if they’re still pale yellow, they’re underbaked and won’t be fully crispy. This final stage is where you earn your cracker mastery — learning to recognize the perfect color takes a batch or two.
-
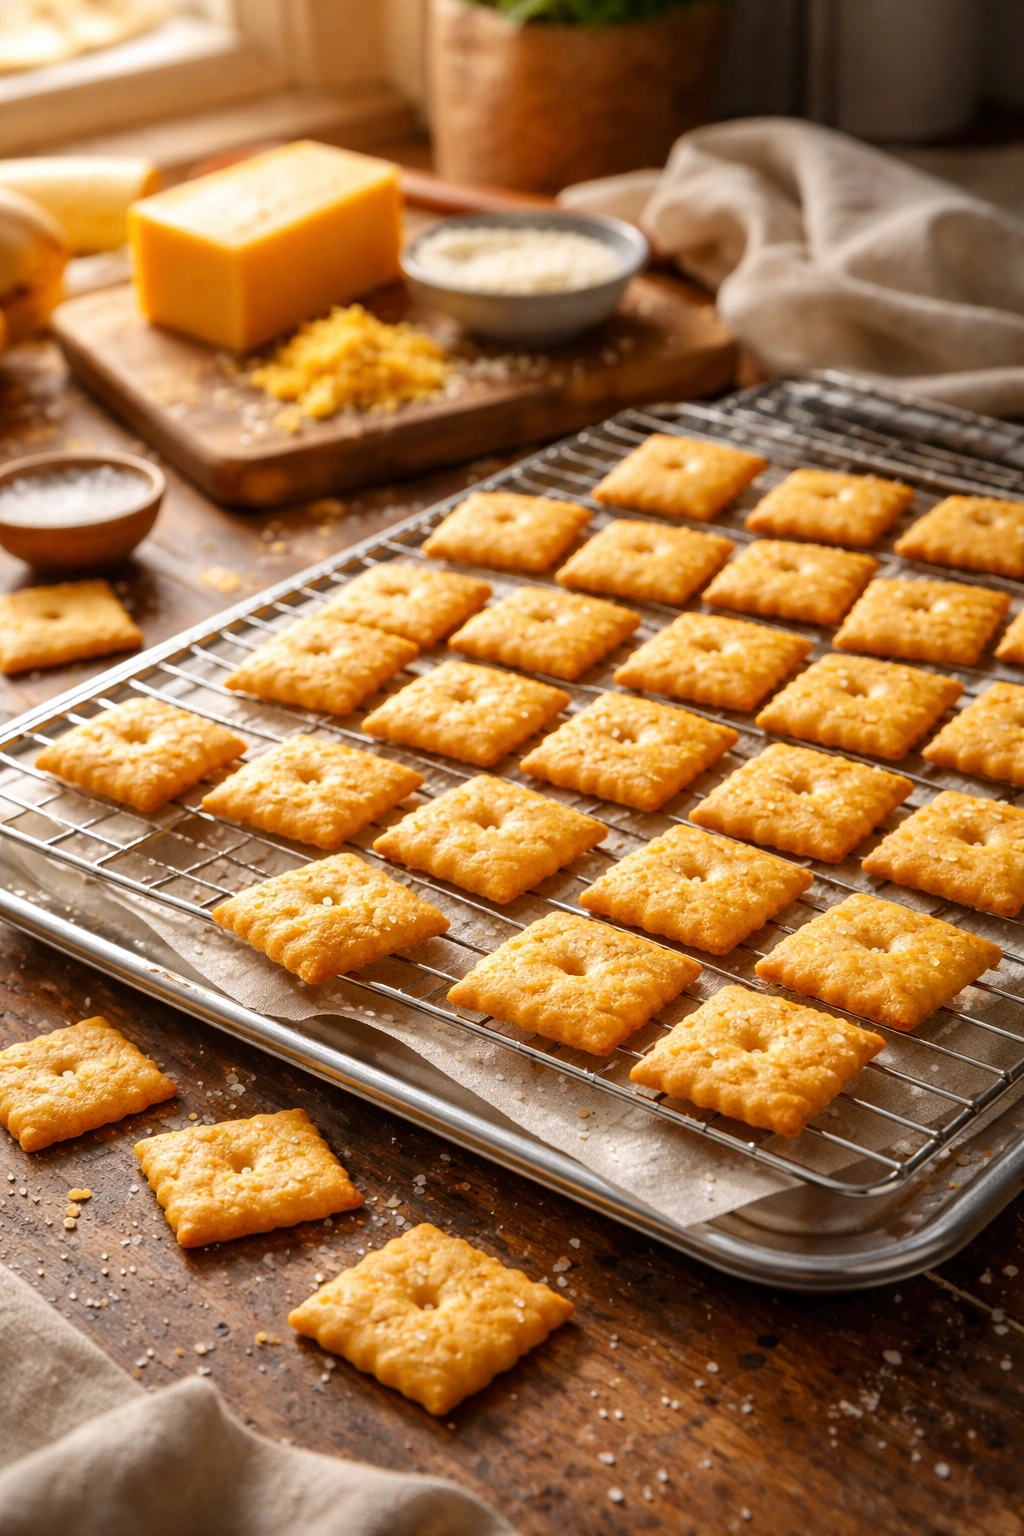
Remove the baking sheets from the oven and let the crackers rest on the pans for 5 minutes. They continue to crisp up as they cool. After 5 minutes, carefully transfer them to a wire cooling rack using a spatula, spreading them in a single layer so they cool quickly and evenly. Do not stack them while still warm — they’ll stick together and steam themselves into softness rather than maintaining their crispy texture.
-
Allow the crackers to cool completely on the rack — at least 20 minutes. Once fully cooled, they’ll be completely crisp and snappable. Any remaining heat causes softness; patience at this stage is your friend.
Common Mistakes and How to Avoid Them
The most frequent mistake is underbaking — pulling the crackers from the oven when they’re still pale and thinking they’ll crisp up more as they cool. They won’t. Undercooked crackers will be slightly chewy and lose their crispness within hours. The color when they come out of the oven is the color you’re getting. Push past pale yellow into that warm golden tone, and you’ll have crackers that stay crispy for days.
Another common issue is wet dough. Some people, especially those accustomed to cookie or bread doughs, add too much water early on, thinking the dough should be smooth and cohesive. This dough is supposed to be crumbly and slightly loose — it comes together from the cheese and butter, not from excess water. Wet dough creates thick, cakey, dense crackers instead of crispy ones. When in doubt, add water by the teaspoon and test between additions.
Many bakers get frustrated with rolling because the dough wants to stick. The solution is simple: flour your work surface generously and flour the top of the dough before you start rolling. You’re not incorporating flour into the dough at this point, so being generous with the dusting flour won’t ruin anything — you can brush off excess before baking. Some people find rolling between two sheets of parchment paper helpful, which works beautifully if you have the space.
Inconsistent cracker sizes cause uneven baking because thinner pieces bake faster than thicker ones. Invest in a square cutter and use it consistently, or take the time to cut by knife as evenly as you can. The more uniform the crackers, the more evenly they’ll brown.
Finally, don’t open the oven door repeatedly during baking. The oven loses temperature each time you peek, and the heat recovery can create uneven browning. Set your first timer for 12 minutes and don’t look until that time is up. After the rotation, check every 2 minutes to catch them at peak color.
Pro Tips for Consistently Perfect Crackers
Understanding that these crackers are fundamentally a shortbread-style dough will help you succeed repeatedly. Shortbread depends on fat (butter and cheese) coating the flour particles to create a delicate, crisp texture when baked. This is the opposite of bread dough, where you want gluten development and structure. With that in mind, every action you take — minimal mixing, no water beyond what’s necessary, light handling — all makes sense because you’re trying to keep the dough delicate, not develop it into something strong and elastic.
The temperature of every ingredient matters more than most bakers realize. Soft butter mixes evenly without creating hard lumps. Cold cheese can be harder to distribute throughout the dough; if your kitchen is very warm, refrigerate the grated cheese for 15 minutes before mixing. Even room-temperature flour behaves differently than cold flour — if you’ve just pulled it from a cold pantry or basement, letting it sit on the counter for a bit helps it incorporate more evenly.
If you’re scaling the recipe up, do it by making multiple batches rather than attempting to make the dough in larger quantities. The dough becomes harder to handle cleanly when the volume is much larger, and rolling it in two halves instead of rolling the entire batch gives you much more control and more even crackers.
Baking sheets absolutely matter. Heavy-duty, professional-grade aluminum sheets conduct heat evenly and don’t warp in the oven. Thin, lightweight sheets create hot spots where one side of your crackers browns before the other side is done. If you only have thin sheets, placing a second sheet underneath (a technique called “double-panning”) insulates the bottoms slightly and helps even out the baking.
An instant-read thermometer is a sneaky useful tool for catching perfect crispness. When the crackers reach an internal temperature of 205°F (96°C), they’re fully dry inside and will be maximally crispy. This takes the guesswork out of the final baking stage, especially useful if your oven temperature isn’t perfectly calibrated.
Creative Flavor Variations
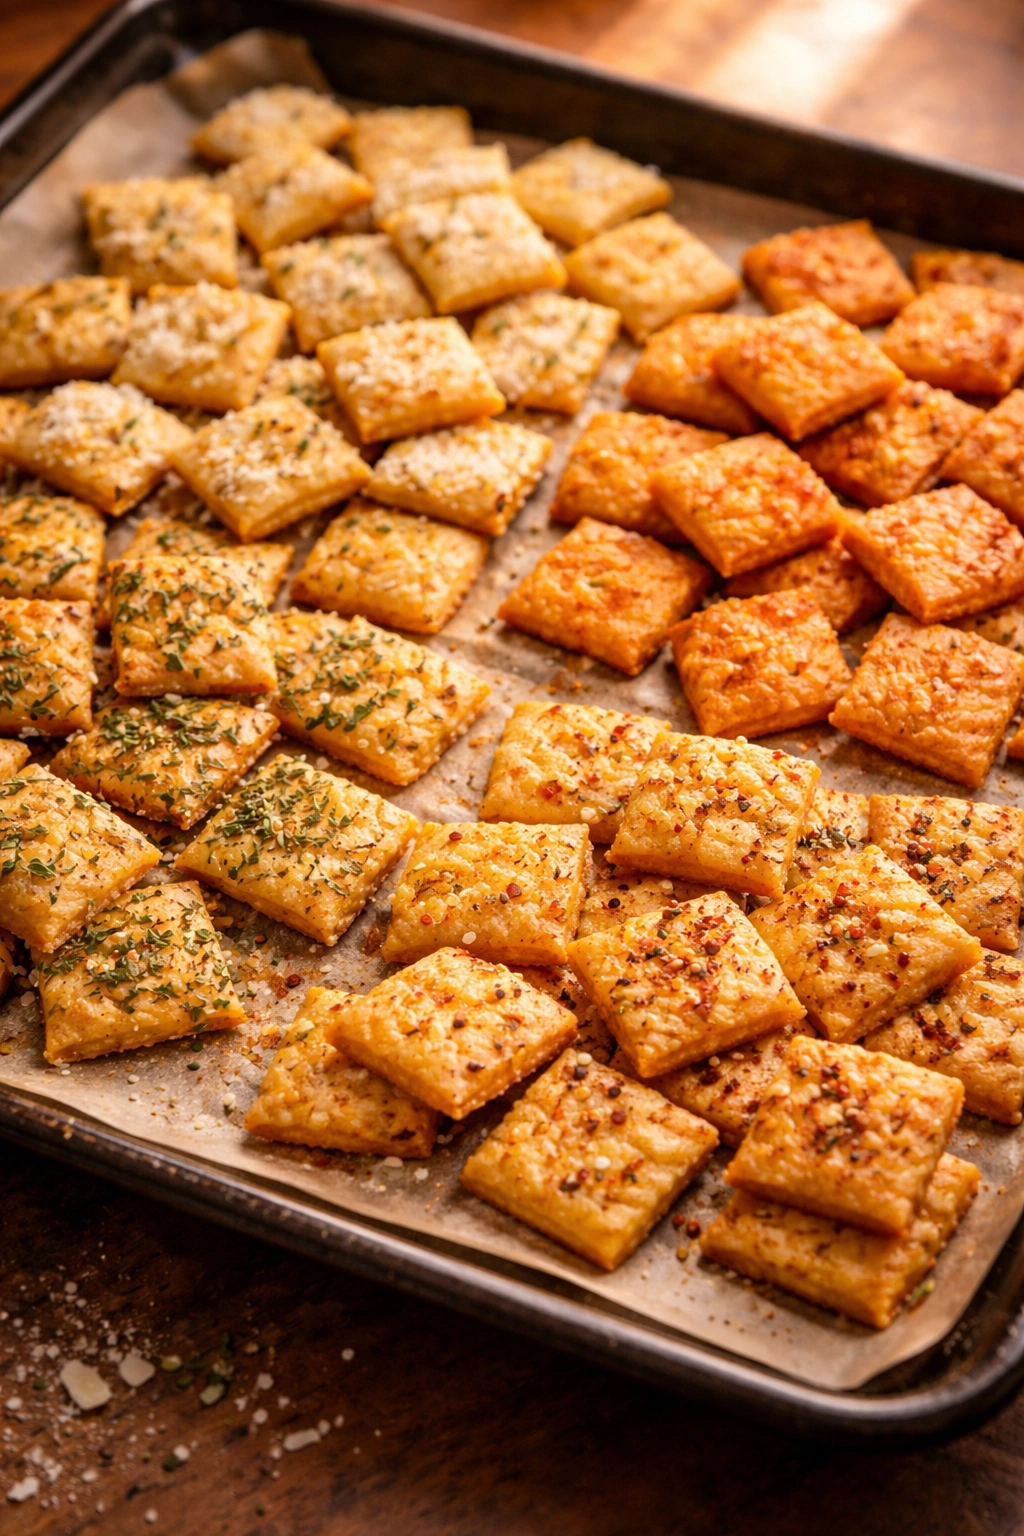
Once you’ve mastered the basic version, the fun begins. White cheddar crackers replace the yellow extra-sharp with white sharp cheddar and deliver an almost sharper, slightly more complex flavor — many people prefer the taste of white over yellow. Smoked cheddar crackers use smoked cheddar in place of regular extra-sharp, creating a subtle smoky undertone that pairs beautifully with soups and chili.
Herbed versions are endlessly customizable. Add 1 teaspoon of finely chopped dried rosemary, thyme, or Italian seasoning to the flour mixture before adding the butter. Fresh herbs don’t work well here because moisture in fresh herbs can throw off your dough hydration. Dried herbs deliver concentrated flavor without adding water.
Spicy cheese crackers come alive when you increase the black pepper to 1 teaspoon and add ¼ teaspoon of cayenne pepper for a gentle heat. Some people enjoy adding ⅛ teaspoon of garlic powder as well — use sparingly, as garlic powder’s flavor is concentrated and assertive.
Everything bagel crackers incorporate the topping blend of sesame seeds, poppy seeds, dried onion, and dried garlic onto the surface before baking. Sprinkle the topping gently onto the unbaked crackers, pressing it down slightly so it adheres during baking.
Sriracha cheese crackers require a slightly different approach. Mix 1 tablespoon of sriracha sauce into the dough with the water, then reduce the water accordingly to maintain the same hydration. The result is a mildly spicy, complex-flavored cracker with a hint of Asian flair.
Aged gouda or gruyère crackers swap out the cheddar for other firm, aged cheeses with distinctive characters. Gruyère delivers a nutty, slightly sweet depth; aged gouda is rich and butterscotch-like. Use the same quantity of cheese as you would cheddar.
Parmesan-rosemary versions replace half the cheddar with finely grated Parmigiano-Reggiano and add ¾ teaspoon of finely chopped dried rosemary. This combination is absolutely sublime and tastes like an elevated, sophisticated version of the original.
Dairy-Free and Gluten-Free Adaptations
Making cheese crackers without dairy is genuinely challenging because cheddar cheese is such a fundamental part of both the flavor and the baking chemistry. That said, strong-flavored dairy-free cheese shreds exist and can work. Cashew-based cheddar-style cheese available at many specialty grocers performs better than some other options — it has a slightly more authentic cheddar flavor and bakes relatively well. Use the same quantity as you would regular cheddar. The dough will behave similarly, though dairy-free cheese doesn’t melt quite as smoothly into the dough, so the texture will be marginally less uniform. The crackers will still taste good and be crispy if baked to the right color.
Nutritional yeast is often suggested as a dairy-free flavoring, and while it does deliver a cheesy flavor note, it’s fundamentally different from actual cheddar and won’t replicate the authentic taste. If you’re interested in trying this approach, use 3 tablespoons of finely ground nutritional yeast in place of 1 cup of the cheddar, then reduce the remaining cheddar to 1 cup of dairy-free cheese. The result tastes distinctly different — less cheesy, more nutritional yeast-forward — but some people genuinely prefer it.
Gluten-free adaptations are more forgiving than you might expect. A gluten-free all-purpose flour blend with a binder (like xanthan gum) works reasonably well in place of regular all-purpose flour. Use the same quantity and follow the same process. The dough will feel slightly different — sometimes wetter, sometimes grittier, depending on the specific blend — so you may need to adjust water slightly. The crackers will bake slightly faster, so watch them carefully. They won’t have quite the same shatter of traditional wheat crackers, but they’ll still be crispy and delicious.
King Arthur Baking Company’s gluten-free flour blend or Bob’s Red Mill’s 1-to-1 blend are excellent choices; both have added xanthan gum already, so you don’t need to add extra. Some people prefer blending 1 cup of gluten-free all-purpose flour with ½ cup of sweet rice flour for a slightly better texture. Again, your hydration may shift slightly, so add water carefully in small increments.
Storage and Make-Ahead Instructions
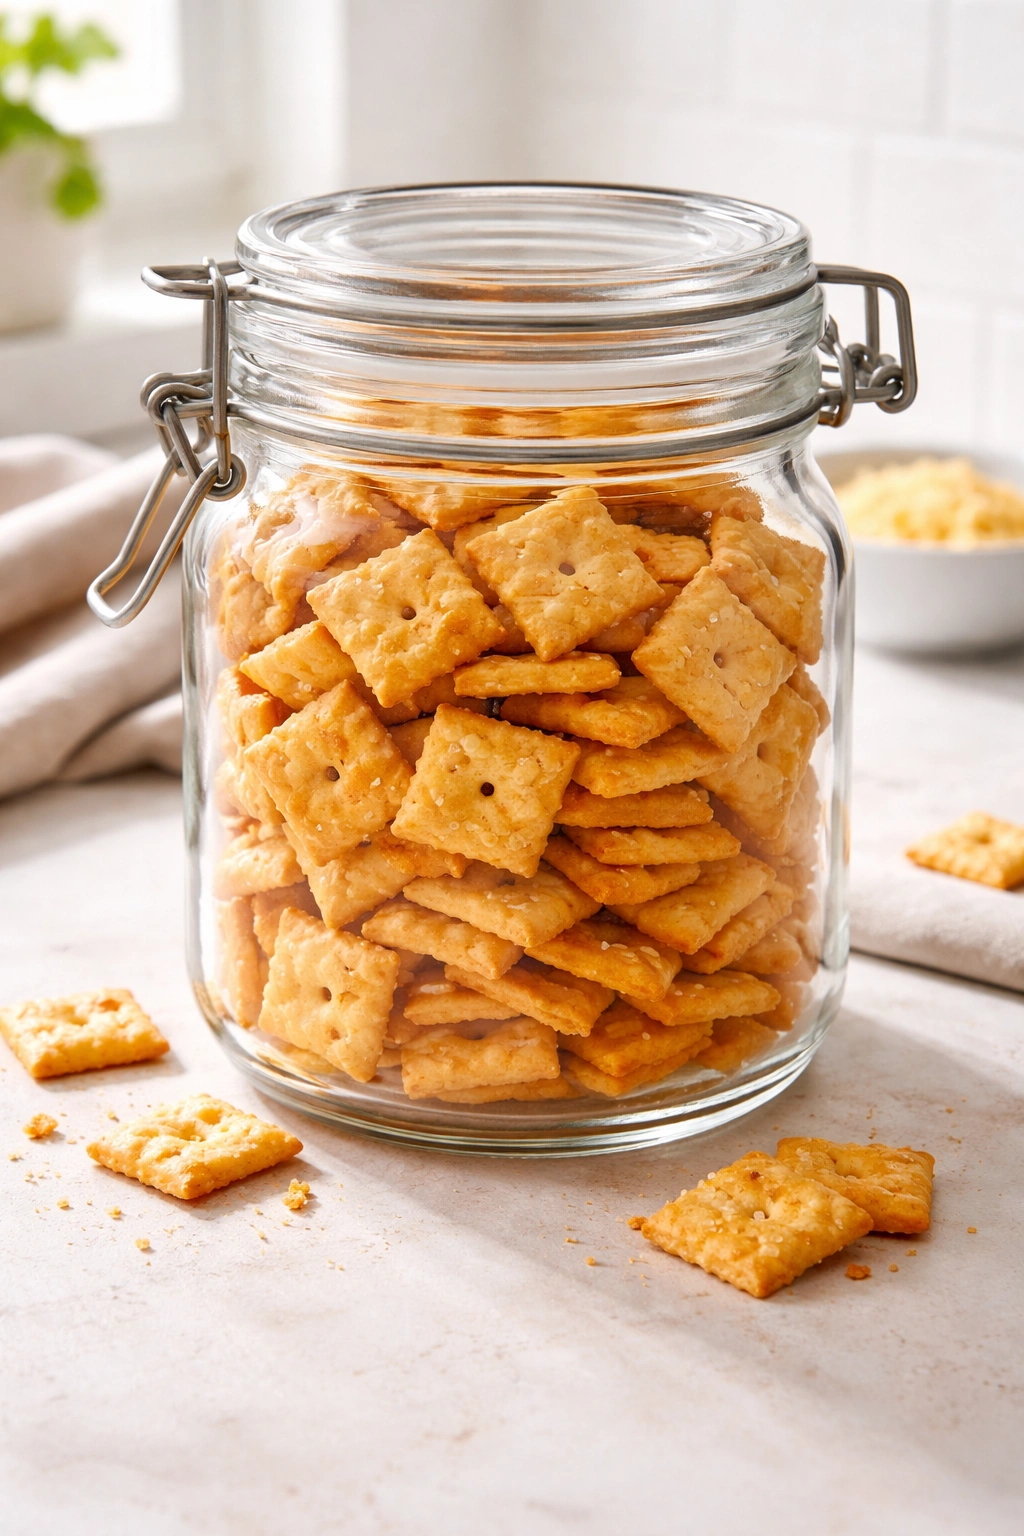
Fully cooled crackers store beautifully in an airtight container for up to one week — sometimes slightly longer depending on your climate and how dry your kitchen is. Glass containers with rubber-sealed lids work well, as do plastic snap-lid containers. The key is airtight; any exposure to humidity will soften them quickly.
You can store the dough before rolling and cutting, though homemade cracker dough doesn’t improve with rest the way bread dough does. If you want to make the dough ahead, prepare it through step 8, then wrap it tightly in plastic wrap and refrigerate for up to two days. Remove it from the fridge about 30 minutes before rolling to let it warm up slightly — cold dough is harder to work with. You can also freeze the dough for up to one month; thaw in the refrigerator overnight before using.
Interestingly, you can also freeze the unbaked, cut crackers on a tray, then transfer them to a freezer bag for storage. Bake them straight from frozen, adding about 2-3 minutes to the baking time. This is an excellent strategy if you want freshly baked crackers whenever the craving strikes without doing all the work at once. Thawing frozen crackers before baking isn’t necessary and actually isn’t recommended — frozen crackers bake more evenly than partially thawed ones.
The baked crackers do NOT freeze well, as freezing and thawing compromises their crispness. They’re best enjoyed fresh or within the first few days of baking. If crackers do eventually lose their crispness from exposure to humidity, you can restore them by spreading them on a baking sheet and crisping in a 300°F (150°C) oven for about 5-8 minutes. Watch them carefully — the goal is to drive out absorbed moisture without browning them further.
Serving Ideas and Pairings
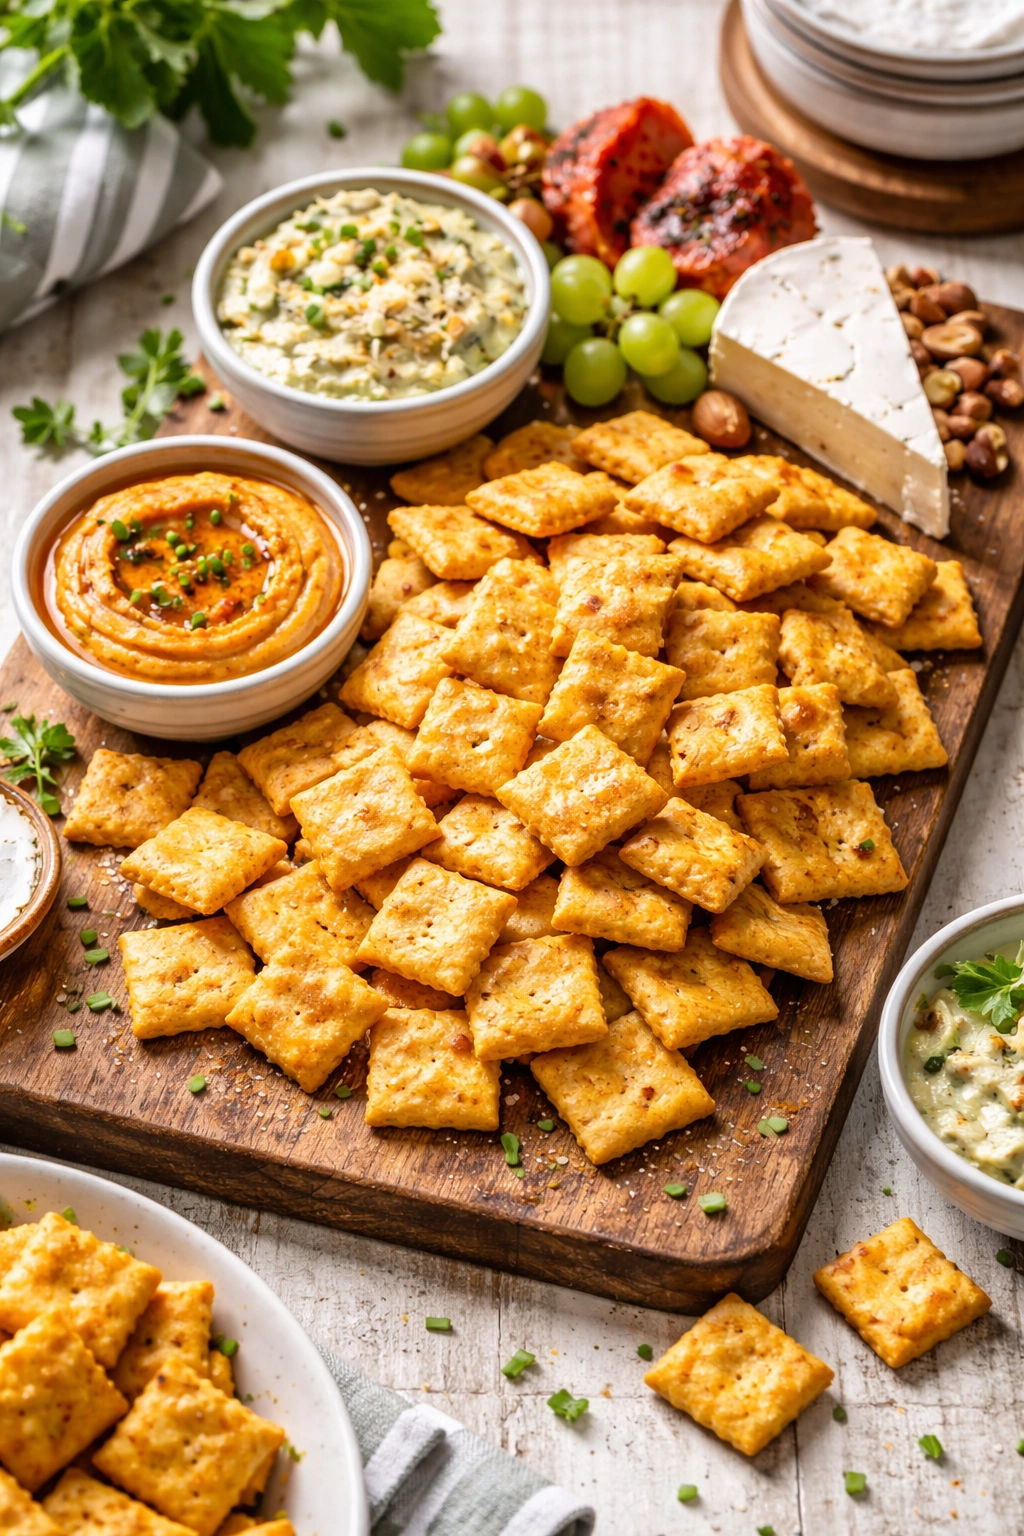
The beauty of homemade cheese crackers is that they’re genuinely addictive on their own — you don’t need anything else. A bowl of warm, just-cooled crackers is a complete snack. That said, they pair magnificently with soups, especially tomato soup, broccoli cheddar soup, or butternut squash soup, where the sharp cheddar flavor in the crackers creates a pleasing dialogue with the soup’s flavors.
They’re exceptional with cheese boards, where they add a textural crunch and cheddar flavor that complements soft cheeses like brie and goat cheese, while also echoing the flavors of harder aged cheeses. Position them next to cured meats and pickles for a stunning charcuterie-style appetizer.
Serve them with dips — a classic choice is a hot artichoke-parmesan dip or a sharp white cheddar queso dip. Hummus, especially roasted red pepper hummus, creates an interesting contrast with the rich cheese flavor. Buffalo chicken dip and these crackers are practically made for each other.
For casual entertaining, package them in small jars or bags with a pretty ribbon or tag, and they become an impressive homemade gift. Everyone loves receiving fresh, homemade food, and these are special enough to feel like a real present while being simple enough that you can make several batches without tremendous effort.
At parties, arrange them on a platter with olives, cornichons, salami, and aged cheese for an incredibly simple but impressive appetizer that people will gravitate toward repeatedly throughout the evening. The combination of textures — crispy crackers, soft cheese, salty cured meat, tangy pickles — creates something far more interesting than any single element alone.
Troubleshooting Guide
If your crackers came out soft instead of crispy: They were underbaked. Crackers don’t crisp up much as they cool — what you pull from the oven is what you’re getting. Next time, look for a deeper golden color and test by tapping; a truly crispy cracker sounds hollow and doesn’t bend. You could also salvage soft ones by spreading them on a tray and crisping in a 275°F (135°C) oven for 8-10 minutes.
If your crackers are fragile and shattering before you even eat them: They were overbaked or you added too much water to the dough, making them extra-thin and delicate. Reduce baking time by 1-2 minutes next time, and be more conservative with water addition.
If your crackers rose up during baking instead of staying flat: Your oven temperature might be too high, causing the bottom to set before the top expands, then the top puffing as it bakes. Verify your oven temperature with an oven thermometer — many home ovens run hotter or cooler than their dial indicates. Alternatively, you may have added slightly too much water to the dough, which can create steam and puffing.
If the cheese didn’t distribute evenly and you have white streaky bits: Either you didn’t mix long enough, or your butter wasn’t fully softened. The cheese needs sufficient mixing time to distribute evenly throughout the fat and flour. Softer butter mixes in more evenly. Make sure every piece of butter is thoroughly incorporated before adding the cheese.
If the dough was wet and sticky and difficult to roll: You added too much water. Keep detailed notes on how much water you actually used and reduce it next time. Also ensure the cheese was grated finely — coarse grated cheese doesn’t incorporate smoothly and can make dough handling difficult.
If some crackers baked faster than others: Your oven likely has hot spots. Always rotate pans halfway through baking. If baking two sheets simultaneously and they brown unevenly, swap which racks they’re on at the rotation point so both sheets spend time on the hotter spot.
If your crackers taste great but are unevenly colored: The first rotation might have been too early or too late. Adjust your first rotation by a minute or two. You could also try rotating after 10 minutes instead of 12, depending on what you observed this time.
Final Thoughts
Once you’ve made homemade cheese crackers once, you’ll understand why this is one of those recipes that people ask about repeatedly and make hundreds of times over the years. The combination of simplicity and impressive results is genuinely rare — there’s almost nothing easier to make, and almost nothing more satisfying to pull from the oven and share.
The real magic isn’t any secret ingredient or technique. It’s simply using quality butter, proper extra-sharp cheddar, and paying attention to that final baking stage where the crackers transform from pale and pliable to golden and crispy. Every time you make a batch, you’re building intuition about your oven’s behavior, your kitchen’s humidity, and exactly what peak crispness looks like in your specific setup. That knowledge is something no recipe can give you — it comes only through repetition.
Start with the classic cheddar version, nail the technique, then feel completely confident experimenting with variations. The dough is forgiving enough that you can try herbed versions, different cheeses, or add-ins without worrying you’ll ruin everything. You’re now the person who makes homemade cheese crackers, and that’s a genuinely cool thing to be known for.