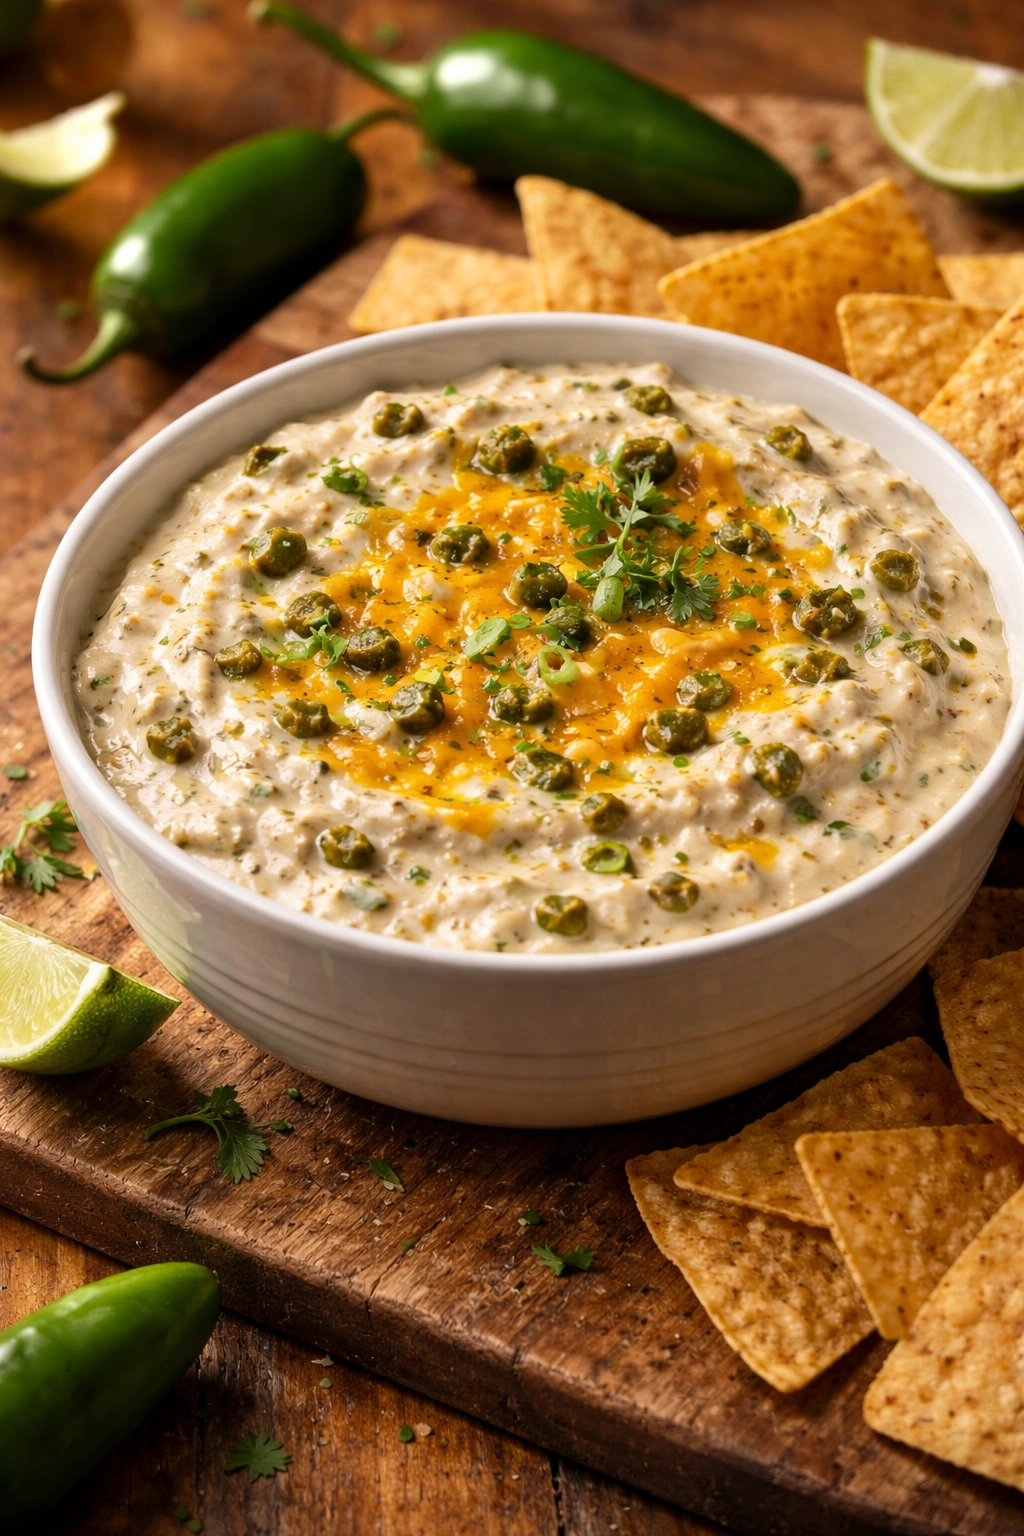
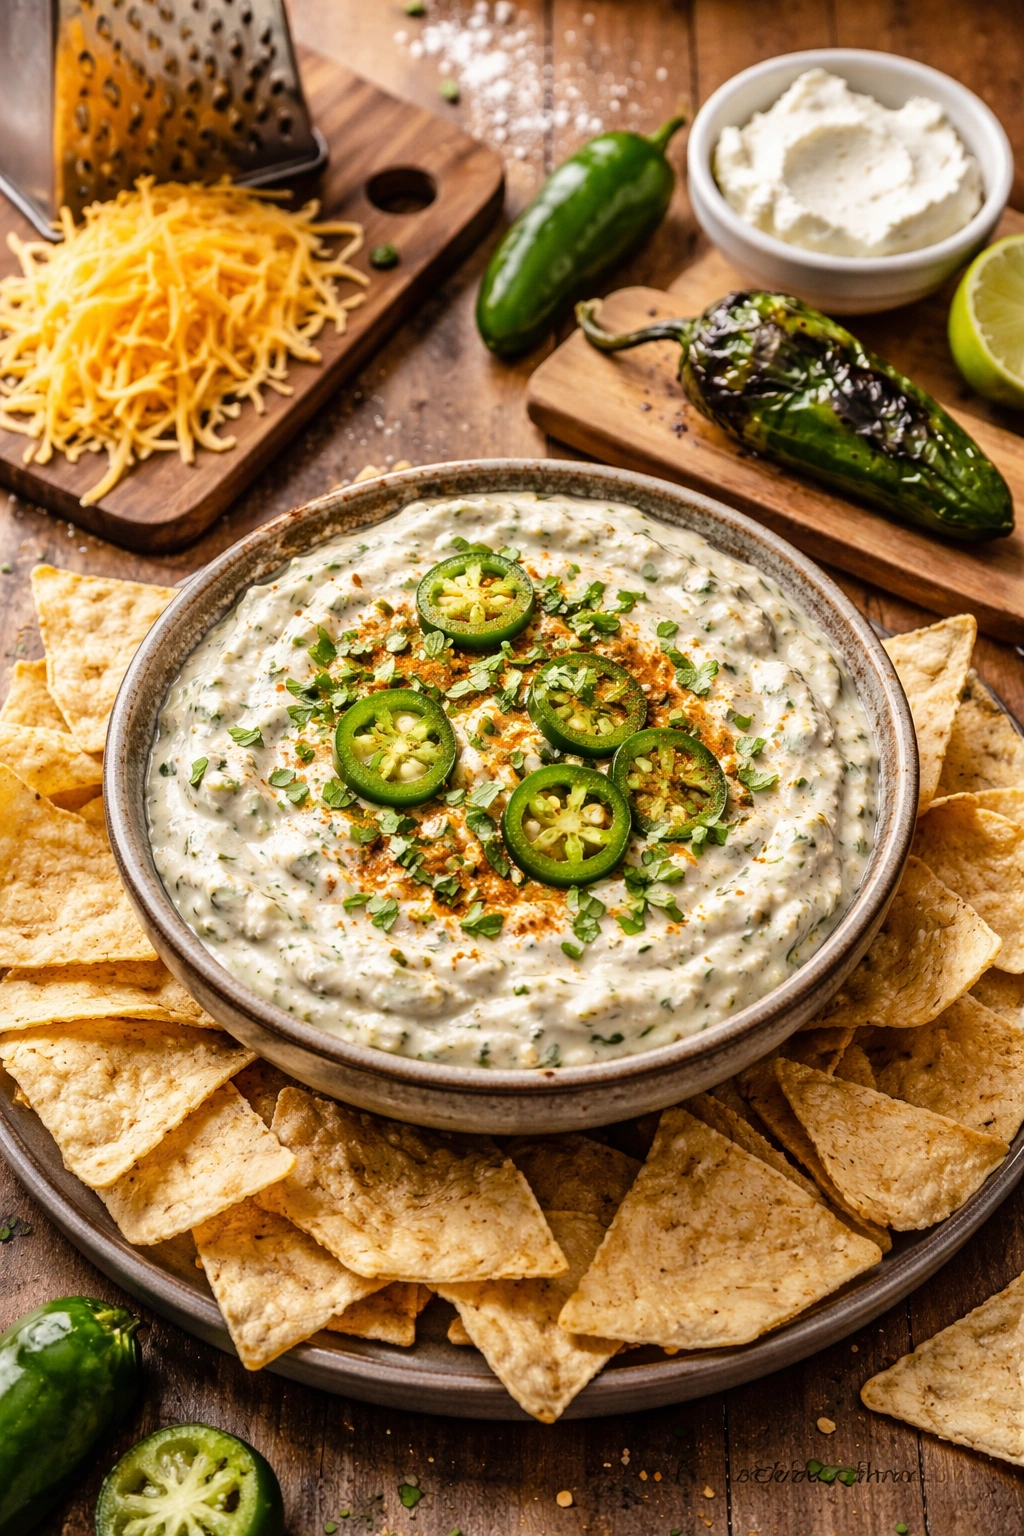
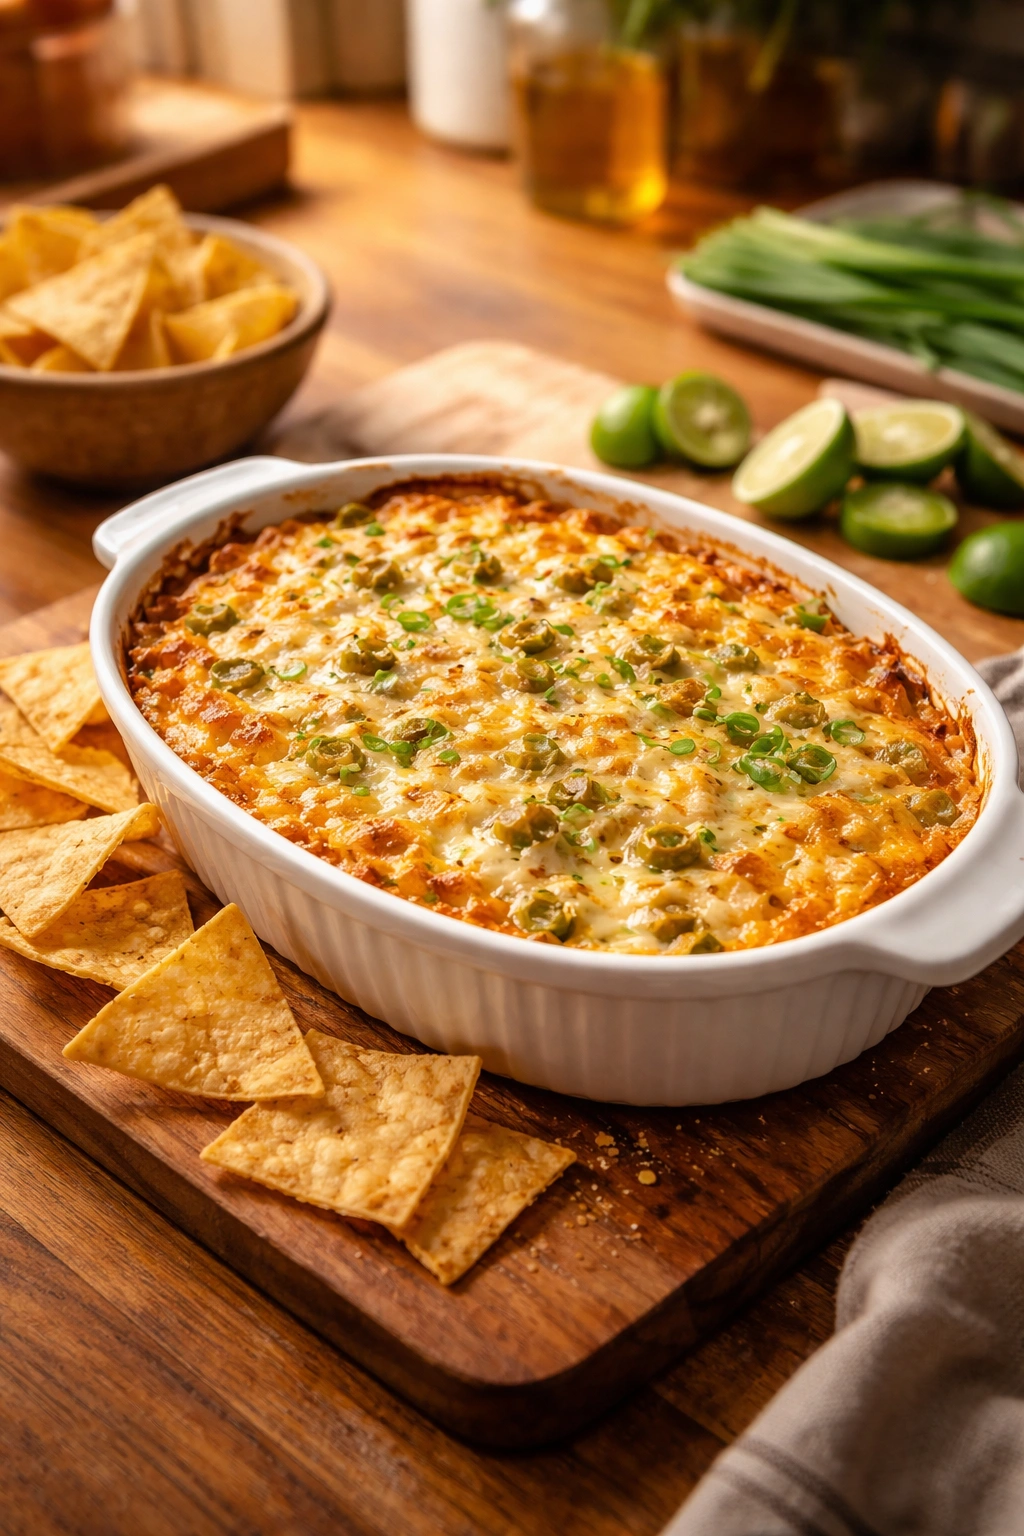
Jalapeño dip is one of those magical appetizers that somehow works at literally every gathering — a casual weeknight hangout, a game day spread, a holiday party, a picnic, a potluck where nobody knows what to bring. It’s the dip that brings people back for second helpings without them even realizing they’re demolishing it bite by bite. The combination of creamy richness, bright heat from the peppers, a whisper of smokiness, and that perfect cheese pull just hits every craving at once.
The beauty of this particular version isn’t that it’s complicated or fussy — it’s exactly the opposite. This is a dip that comes together in about ten minutes, requires zero specialized equipment, and tastes like you fussed over it for hours. It’s got real depth of flavor despite the short ingredient list, and it actually improves as it sits, which means you can make it hours ahead and it’ll be even better by the time your guests arrive. No stress, no last-minute scrambling, no pretension. Just excellent food that makes people happy.
What sets an exceptional jalapeño dip apart from the forgettable ones is knowing which ingredient does what — understanding why cream cheese provides the base, why sharp cheddar adds that distinctive bite, why roasted jalapeños taste entirely different from raw ones, and how a single technique can transform this from “pretty good” to “everyone’s asking for the recipe.” That knowledge is what we’re diving into here.
Why This Jalapeño Dip Works Better Than Most Versions
There’s a fundamental reason this particular dip outperforms the countless variations floating around: it respects the ingredient balance. Too many jalapeño dips lean entirely on heat and creaminess, leaving you with something that’s delicious for exactly three bites before the heat numbs your mouth and the texture gets monotonous. Others go so mild they barely taste like jalapeño dip at all — just generic “cheese dip with a hint of pepper.”
This version builds complex, evolving flavor instead. The roasted jalapeños bring smokiness and depth that raw peppers can’t achieve, the cream cheese provides a neutral canvas that lets flavors sing, and the sharp cheddar adds a bite that keeps your palate engaged. There’s also a touch of lime juice and cumin working quietly in the background, adding brightness and subtle warmth without announcing themselves.
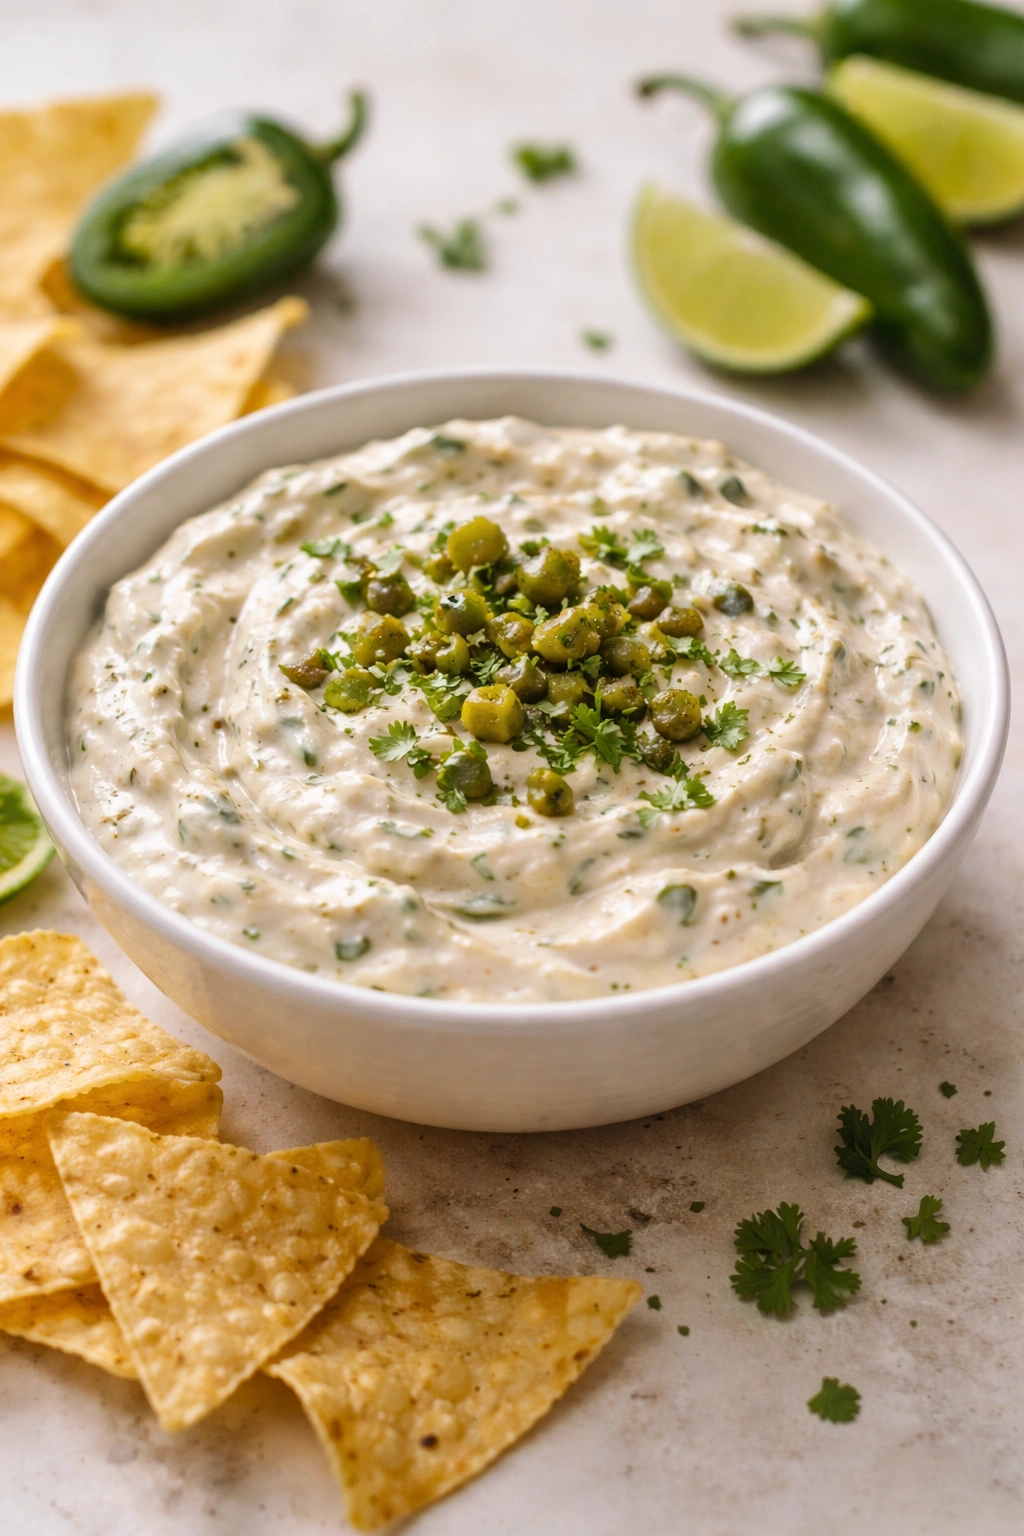
The real differentiator, though, is knowing that a dip’s texture matters as much as its flavor. The cream cheese-to-cheese ratio matters. The cooking method matters. Whether you use sour cream, mayo, or neither matters. This recipe nails that texture balance — it’s creamy enough to work with a chip without being heavy or gluey, but substantial enough that it clings to whatever you’re dipping, whether that’s a crispy tortilla chip, a jalapeño popper, a vegetable stick, or a piece of bread.
Pro tip: Make this dip the morning of your gathering or even the day before. The flavors meld and deepen overnight in a way that makes it taste even better than when it’s freshly made. Cold dip is excellent, but room-temperature dip has the best flavor and texture.
The Story Behind This Simple Dip
Jalapeño dip exists in that sweet spot of American cooking where a recipe is practical enough for Tuesday dinner but impressive enough for entertaining. It likely emerged from classic queso dips and Texas-style cheese dips, but somewhere along the way, someone realized that fresh roasted jalapeños — not the canned kind, though those have their place — made everything better.
The real innovation here is treating it less like a heavy, Tex-Mex dip and more like a sophisticated appetizer that happens to be centered on a perfectly humble ingredient. It’s the kind of dip that works at a casual gathering because it’s unpretentious, but it’s also sophisticated enough that nobody feels like they’re eating “cheap” food. It tastes expensive because the technique is clean and the flavors are well-balanced, not because it has any expensive ingredients.
This dip has roots in the Southwest, obviously, but it’s crossed over into mainstream American entertaining because it genuinely works. It’s mild enough that people who don’t love spicy food can enjoy it without pain, but it’s flavorful enough that pepper lovers find it genuinely interesting. It’s comfort food elevated just enough to feel special.
Yield, Timing & Difficulty

Yield: Makes approximately 2 cups (serves 8 to 12 as an appetizer)
Prep Time: 10 minutes
Cook Time: 20 minutes (oven baking)
Total Time: 30 minutes active time, plus optional chilling
Difficulty: Beginner — no specialized skills required, straightforward mixing and baking, very forgiving with ingredient flexibility.
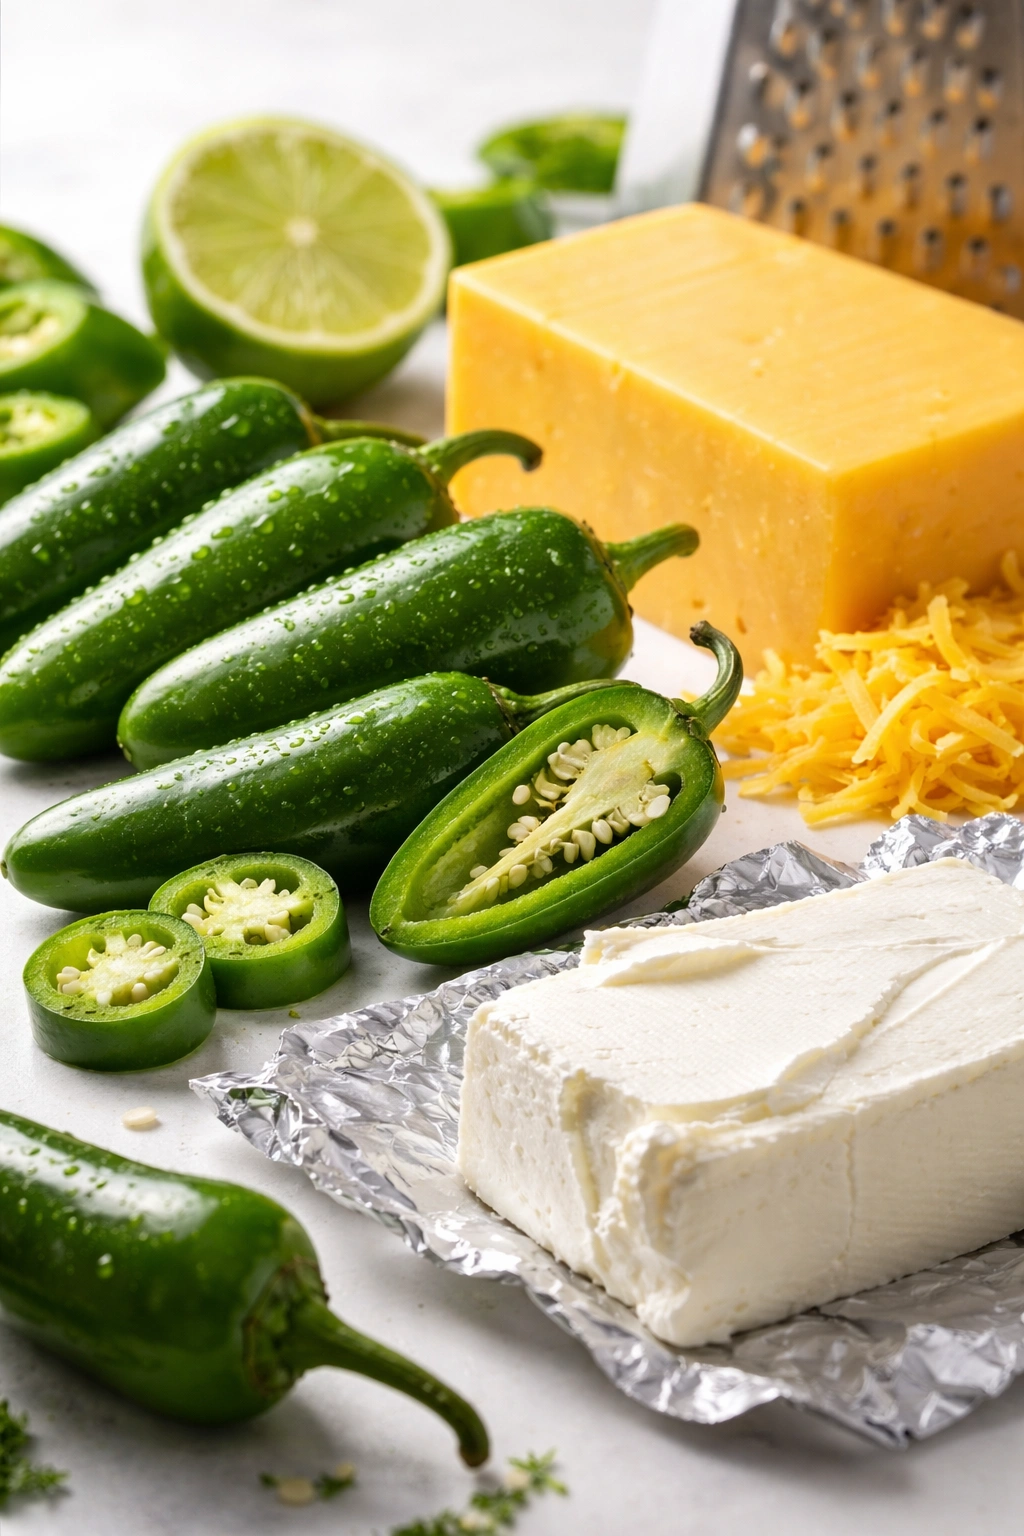
Ingredients
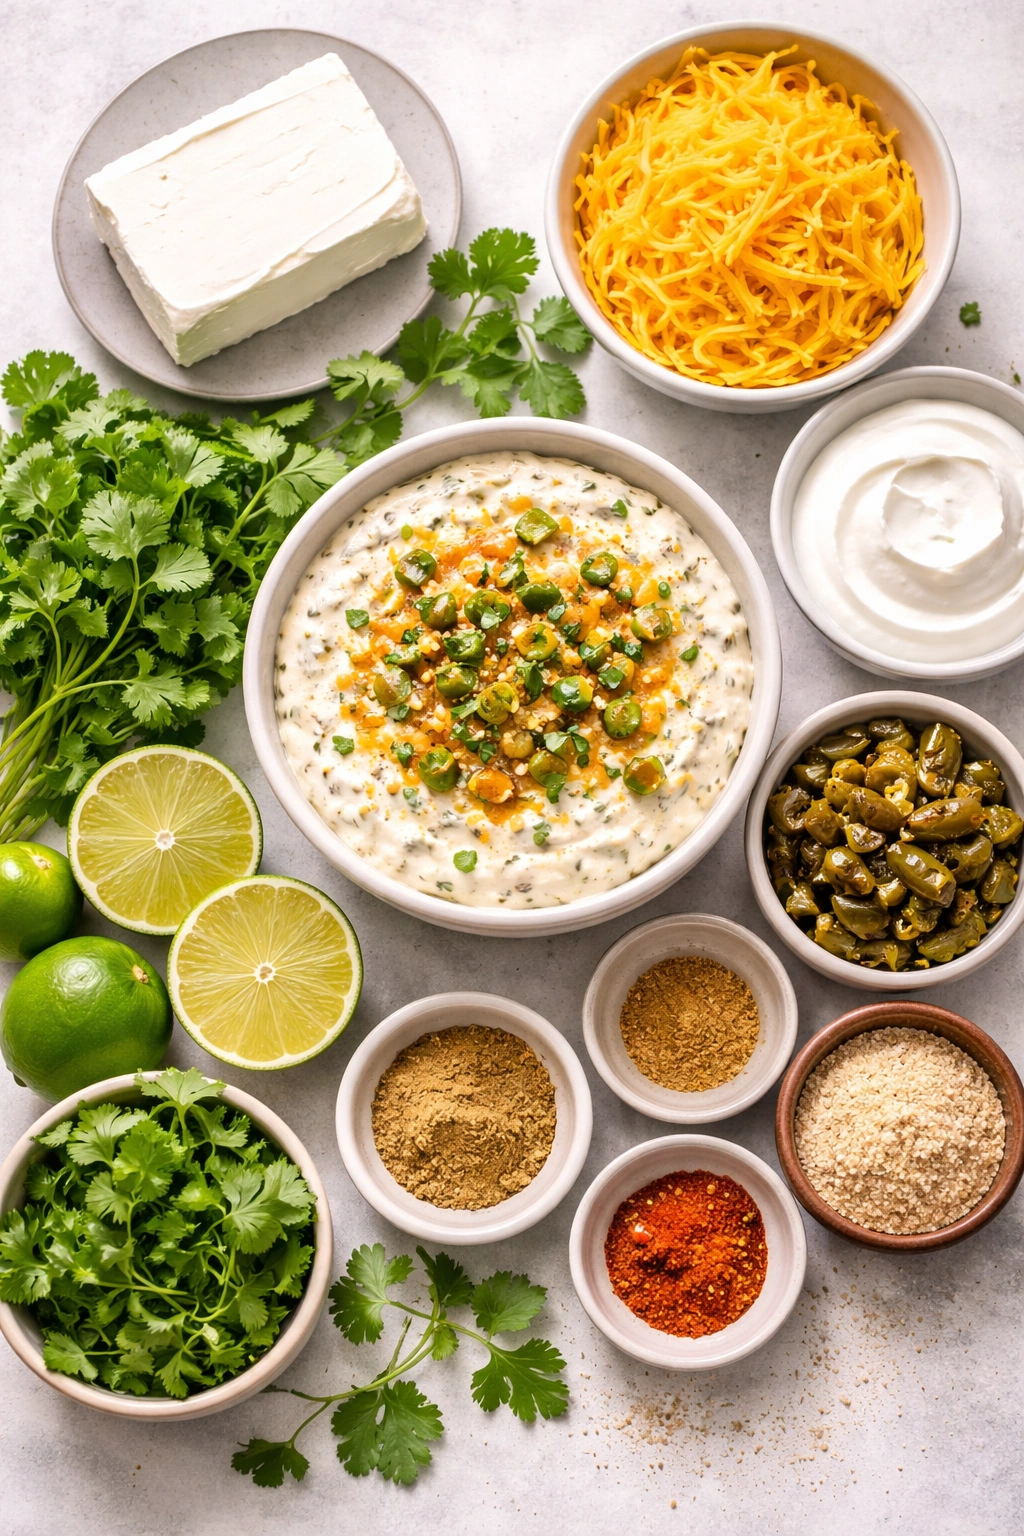
For the Dip:
- 8 oz cream cheese, softened to room temperature
- 1½ cups sharp cheddar cheese, freshly shredded (not pre-shredded — texture matters)
- ½ cup sour cream
- 4 to 5 fresh jalapeños, roasted, peeled, and finely diced
- ¼ cup fresh cilantro, finely chopped (or parsley if you prefer)
- 2 tablespoons fresh lime juice
- 1 teaspoon ground cumin
- ½ teaspoon garlic powder
- ¼ teaspoon cayenne pepper (optional — omit if sensitive to heat)
- Salt and black pepper to taste
- 2 tablespoons panko breadcrumbs (for topping)
- 1 tablespoon melted butter (for tossing with breadcrumbs)
- Optional garnishes: sliced fresh jalapeños, extra cilantro, crispy bacon bits, diced red onion
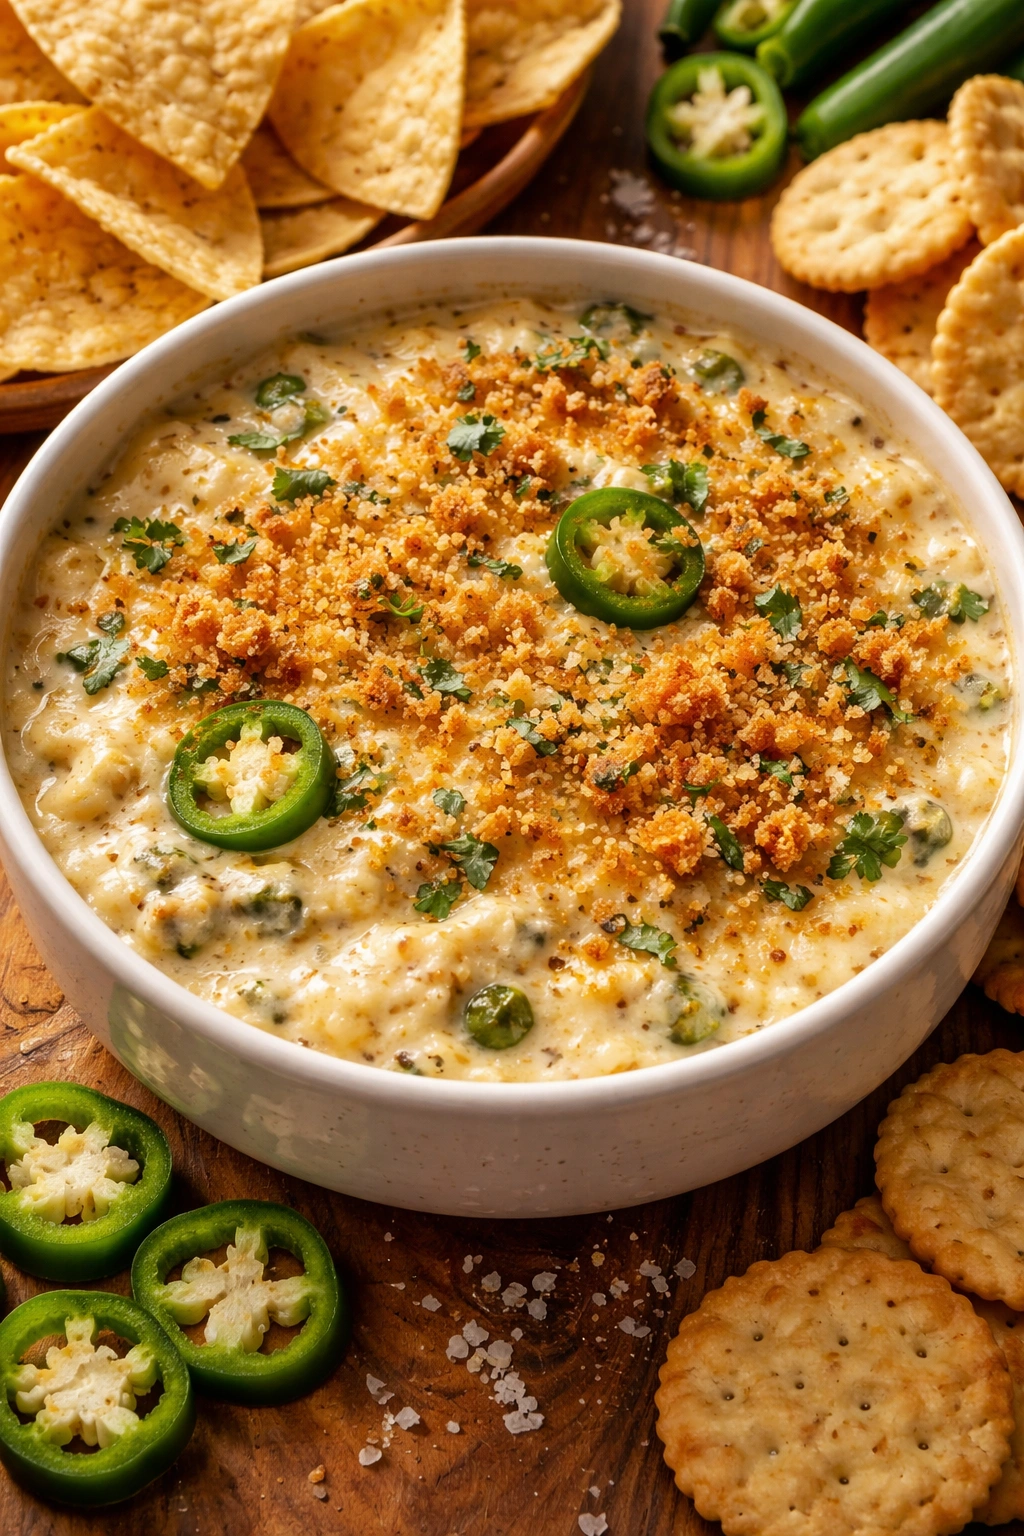
For Serving:
- Tortilla chips, sturdy and salted
- Fresh vegetables (celery, carrots, bell peppers, cucumber)
- Crackers (buttery, sturdy varieties work best)
- Sliced jalapeño poppers
- Toasted bread slices or crostini
The Method: Building Flavor Layer by Layer
Preparing Your Jalapeños:
The most important ingredient here isn’t technically in the dip base — it’s the preparation of the jalapeños themselves. Raw jalapeños will work, but roasted ones taste absolutely different. Roasting mellows the harsh bite, deepens the flavor, adds smokiness, and creates a sweeter, more complex pepper that feels like you actually know what you’re doing in the kitchen.
To roast fresh jalapeños, place them directly on the flame of a gas burner (using tongs to rotate them), or place them on a baking sheet under the broiler, turning every 2-3 minutes. You’re aiming for charred, blistered skin all over — this usually takes 5-8 minutes total. Once they’re charred, place them in a plastic bag for 5 minutes to steam, which makes the skin slip off easily. Rub away the blackened skin under cool running water, remove the seeds and stem, and dice finely. This step alone is what separates exceptional from ordinary.
Prepare the Pan and Preheat:
-
Preheat your oven to 350°F (175°C) and position the rack in the center. Use a small baking dish (approximately 8×8 inches or a 1-quart dish) — something that will give you a nice depth of dip, not a thin spread.
-
Lightly grease the baking dish with butter or nonstick spray. You want the dip to release easily, but you’re not trying to crisp the bottom, so a light coating is all you need.
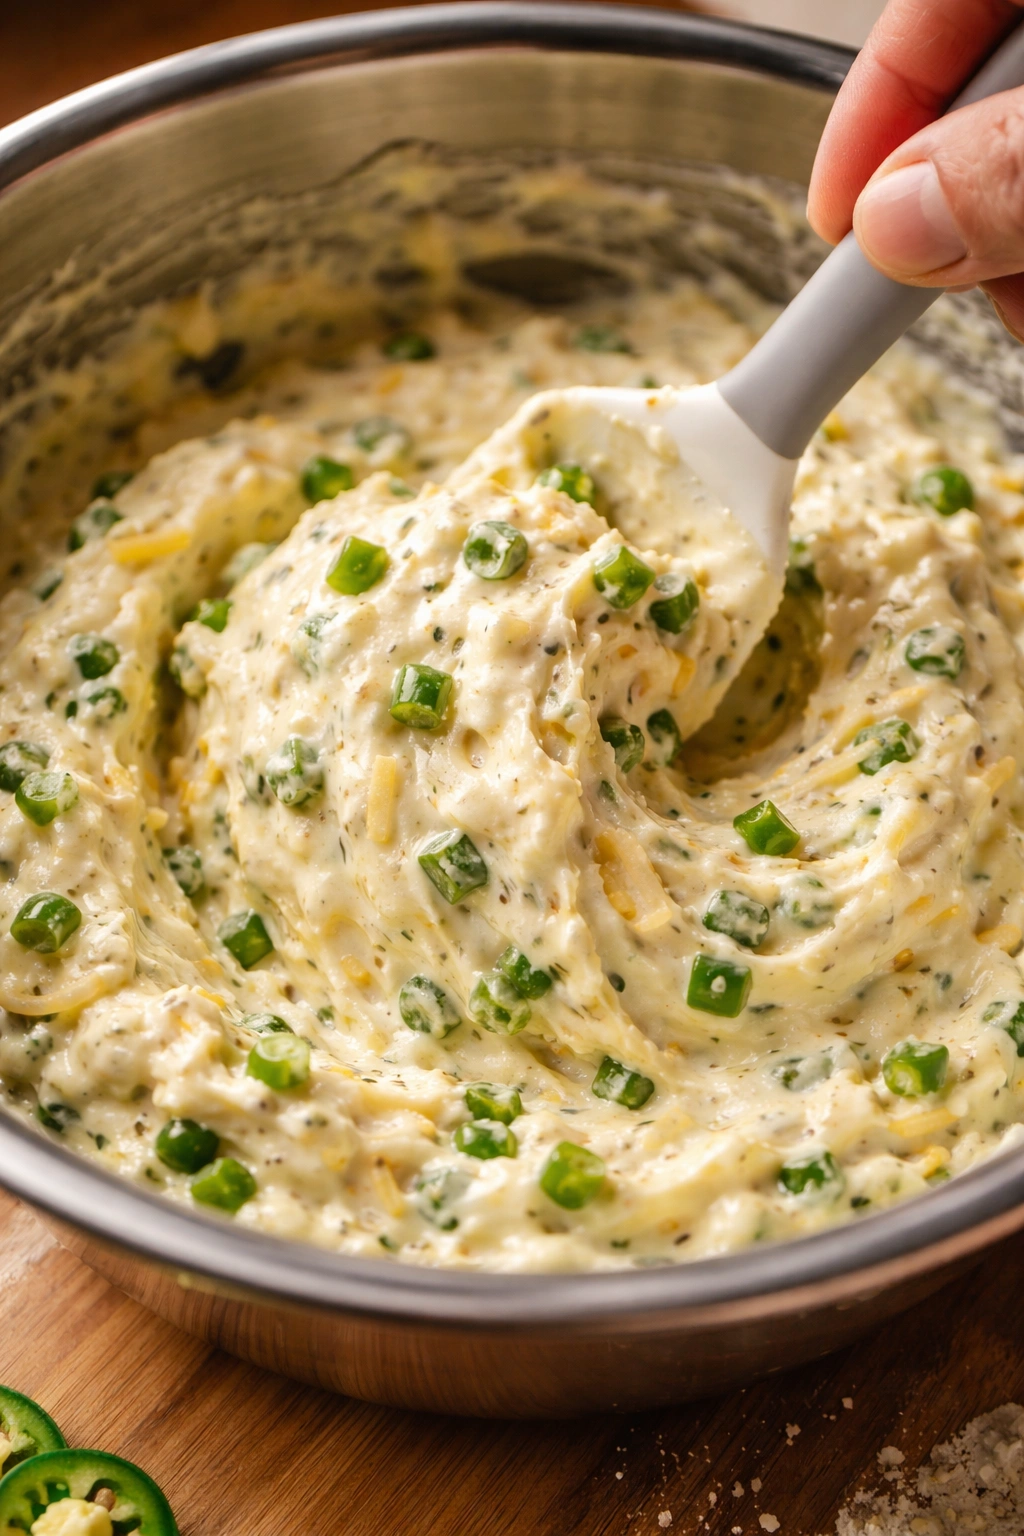
Make the Base:
-
Add the softened cream cheese to a large mixing bowl and use an electric mixer (or simply a sturdy wooden spoon if mixing by hand) to beat it for about 30 seconds until it’s smooth and creamy. Room-temperature cream cheese is absolutely critical here — cold cream cheese will create lumps and be difficult to mix evenly.
-
Add the sour cream to the cream cheese and beat on medium speed for another 30 seconds to 1 minute, until the mixture is smooth and uniform. This creates the creamy base that makes the dip actually feel like dip on your palate.
-
Add the freshly shredded sharp cheddar cheese, one handful at a time, mixing on low speed between additions. This prevents the cheese from clumping and ensures even distribution. The texture should be creamy and spreadable, not dry or crumbly.
-
Fold in the roasted, diced jalapeños with a rubber spatula, using gentle motions to combine without overworking the mixture. This is where you avoid overmixing — you want visible pieces of jalapeño throughout, not a uniform texture.
-
Add the lime juice, cumin, garlic powder, and cilantro. Fold these in gently until completely combined. The lime juice adds brightness and prevents the dip from tasting heavy or one-note.
-
Taste the mixture and season carefully with salt and black pepper. Remember that you’re going to bake this and the flavors will intensify slightly, so go a bit lighter on seasoning than you might think is right — you can always taste again after baking and adjust. If you like heat, this is when to add the cayenne pepper, folding it in slowly and tasting as you go.
Advertisements
Transfer to Baking Dish:
- Pour the dip mixture into your prepared baking dish and smooth the top with an offset spatula or the back of a spoon. You want a relatively even surface that will bake and brown uniformly.
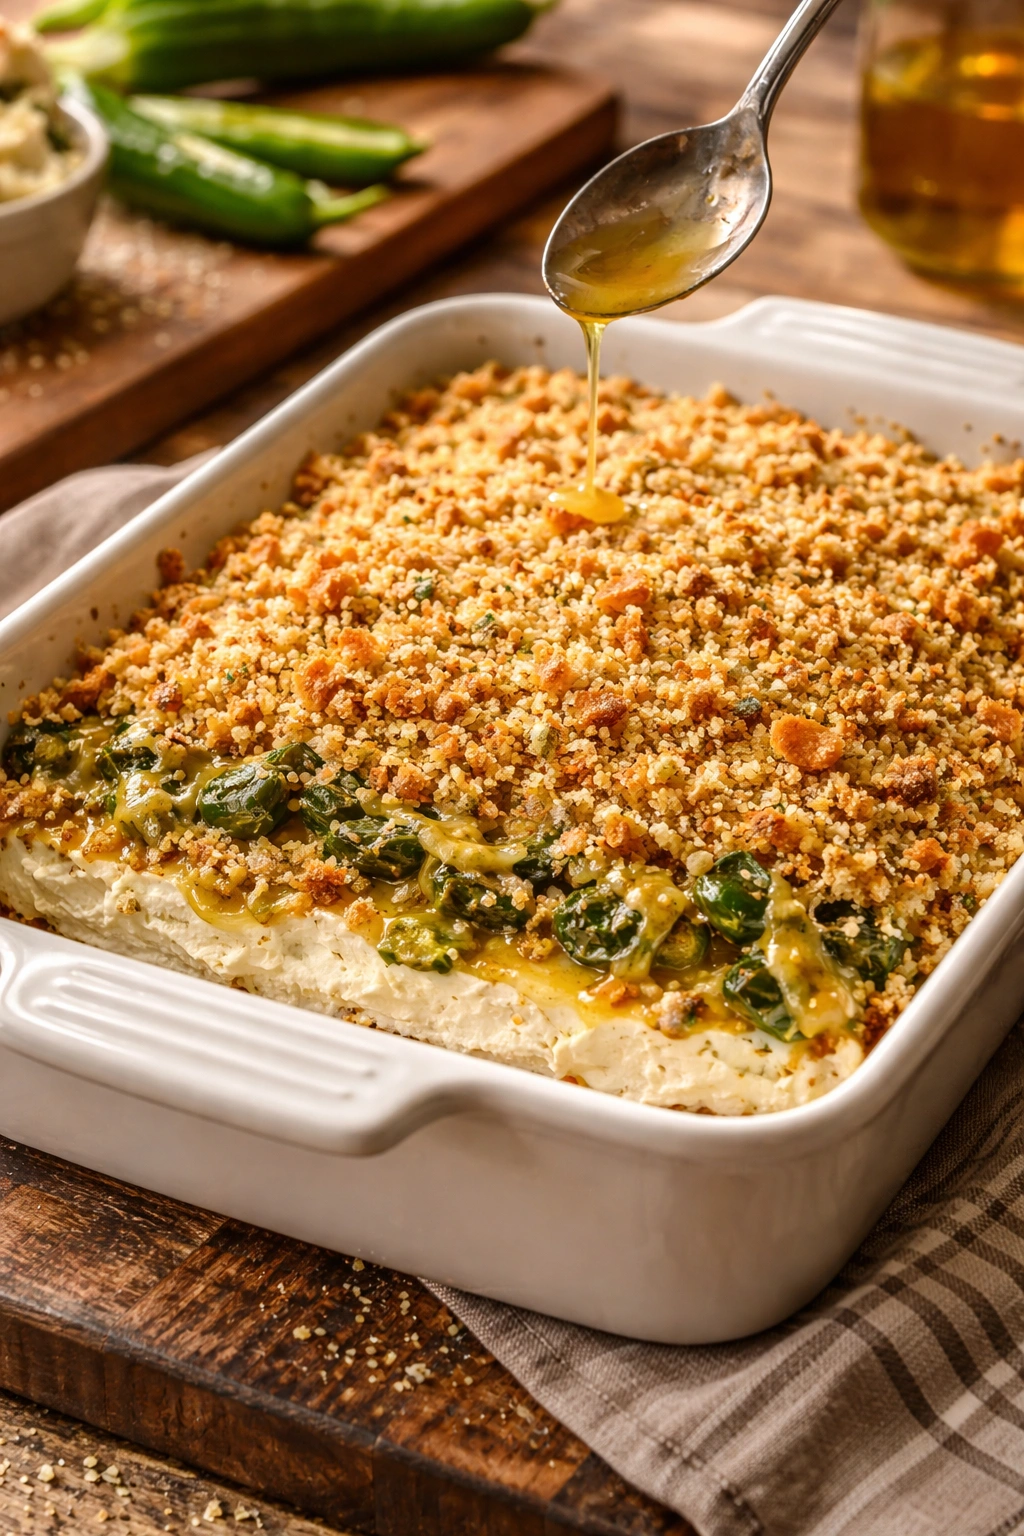
Make the Topping:
-
In a small bowl, toss the panko breadcrumbs with the melted butter, a small pinch of salt, and a crack of black pepper. The breadcrumbs should be evenly coated but not soggy — they’ll crisp up in the oven and provide texture contrast against the creamy dip.
-
Sprinkle the buttered breadcrumb mixture evenly over the top of the dip. You can also scatter a few thinly sliced fresh jalapeño slices over the top for visual appeal, and perhaps some extra cilantro.
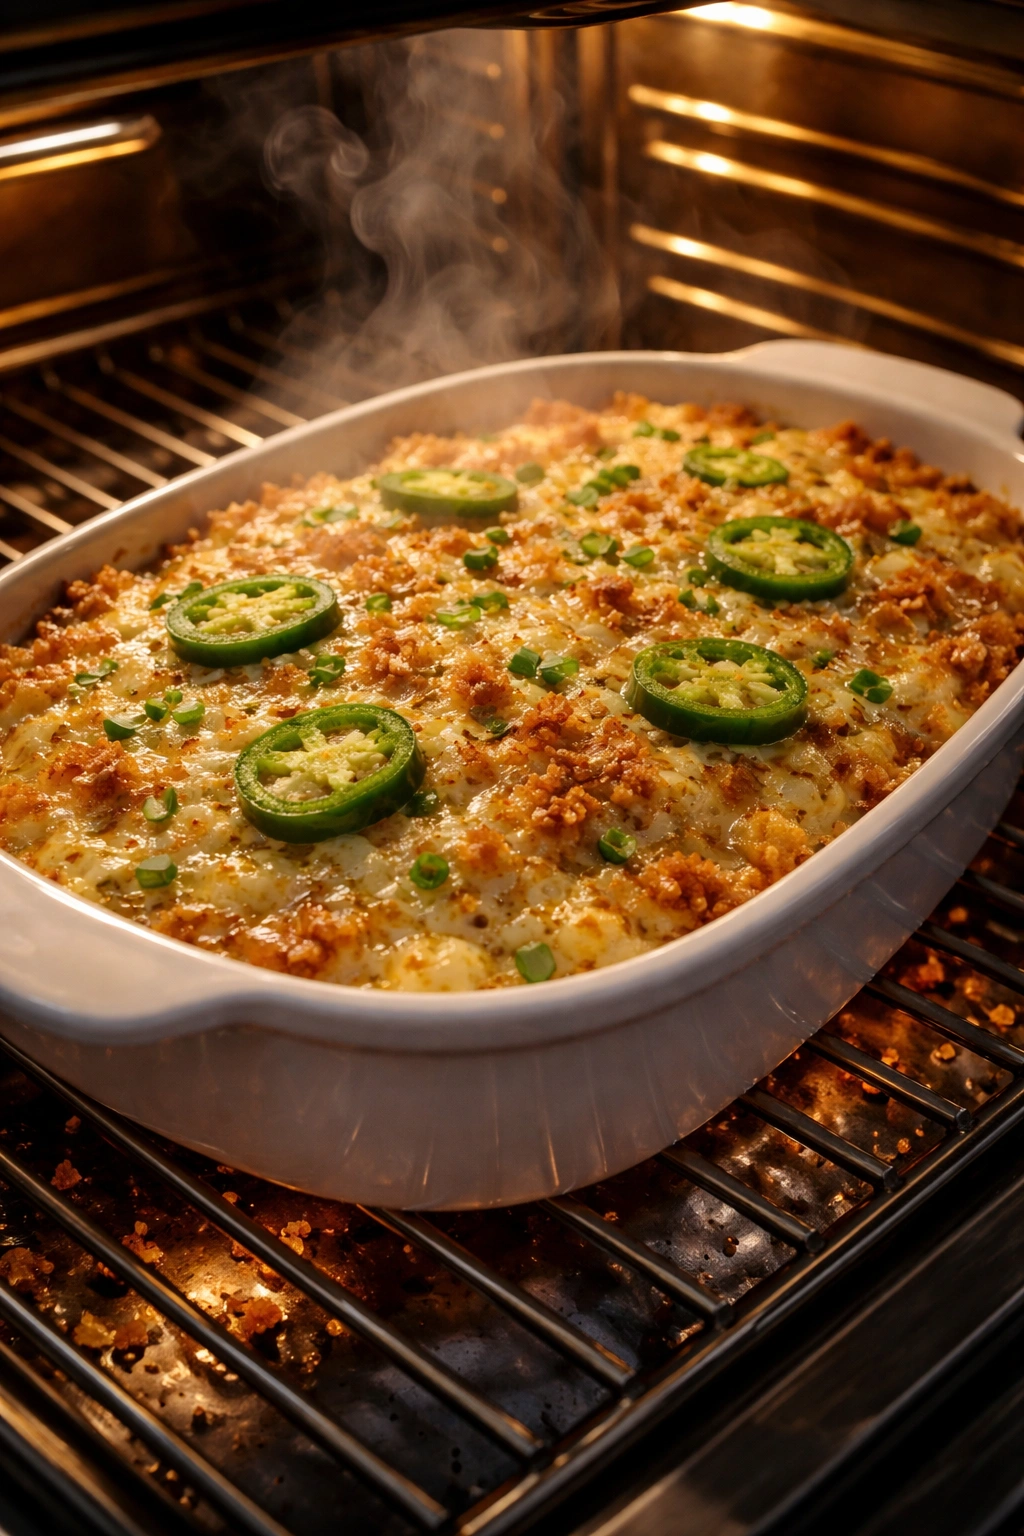
Bake:
-
Bake for 18 to 22 minutes, until the dip is hot all the way through, the edges are bubbling slightly, and the breadcrumb topping is golden brown and crispy. You’re looking for gentle, warm bubbles around the edges, not aggressive boiling — that’s a sign it’s heated through without drying out the edges.
-
Remove from the oven and let it rest for 2-3 minutes before serving. This allows the surface to firm up slightly so the dip maintains its shape around the edges while remaining creamy in the center.
Pro Tips and Common Mistakes to Avoid
Using Pre-Shredded Cheese Is the #1 Mistake
It’s tempting because it saves maybe three minutes, but pre-shredded cheese contains anti-caking agents that create a grainy, slightly separated texture in the baked dip. Fresh-shredded cheese melts smoothly and creates that luxurious, creamy result everyone expects. Shred your own cheese right before mixing — it takes literally two minutes with a box grater.
Don’t Skip the Roasting Step
Raw jalapeños will technically work, but they taste thin and sharp compared to roasted ones. Roasting is where the magic happens. If you genuinely can’t roast fresh peppers, jarred roasted peppers (the ones in the grocery store condiment aisle, not the pickled ones) are an acceptable substitute — just drain them very well and chop them finely.
Temperature of Cream Cheese Actually Matters
Cold cream cheese from the fridge will create lumps and won’t mix smoothly with the other ingredients. Leave it on the counter for 30-45 minutes before you start mixing. You can also cut it into small cubes, which helps it soften faster. Once it’s soft enough that your finger leaves an indent, it’s ready.
Lime Juice Prevents Heavy Flavor
The acid from fresh lime juice brightens everything and prevents the dip from tasting heavy or one-note. Don’t skip it and don’t substitute bottled — fresh lime juice makes a genuine difference here. If you absolutely don’t have limes, a tablespoon of white wine vinegar works in a pinch, but lime is the real deal.
Serve It Warm
Cold dip is fine, but warm or room-temperature dip tastes noticeably better. The flavors are more pronounced, the texture is creamier, and it just feels more luxurious. If you’re making this ahead, reheat it gently in a 300°F oven for 10-15 minutes, covered with foil, right before serving.
Excellent Variations and Flavor Swaps
This base is infinitely adaptable. Here are some genuinely tested variations that maintain the integrity of the dip while taking it in different directions.
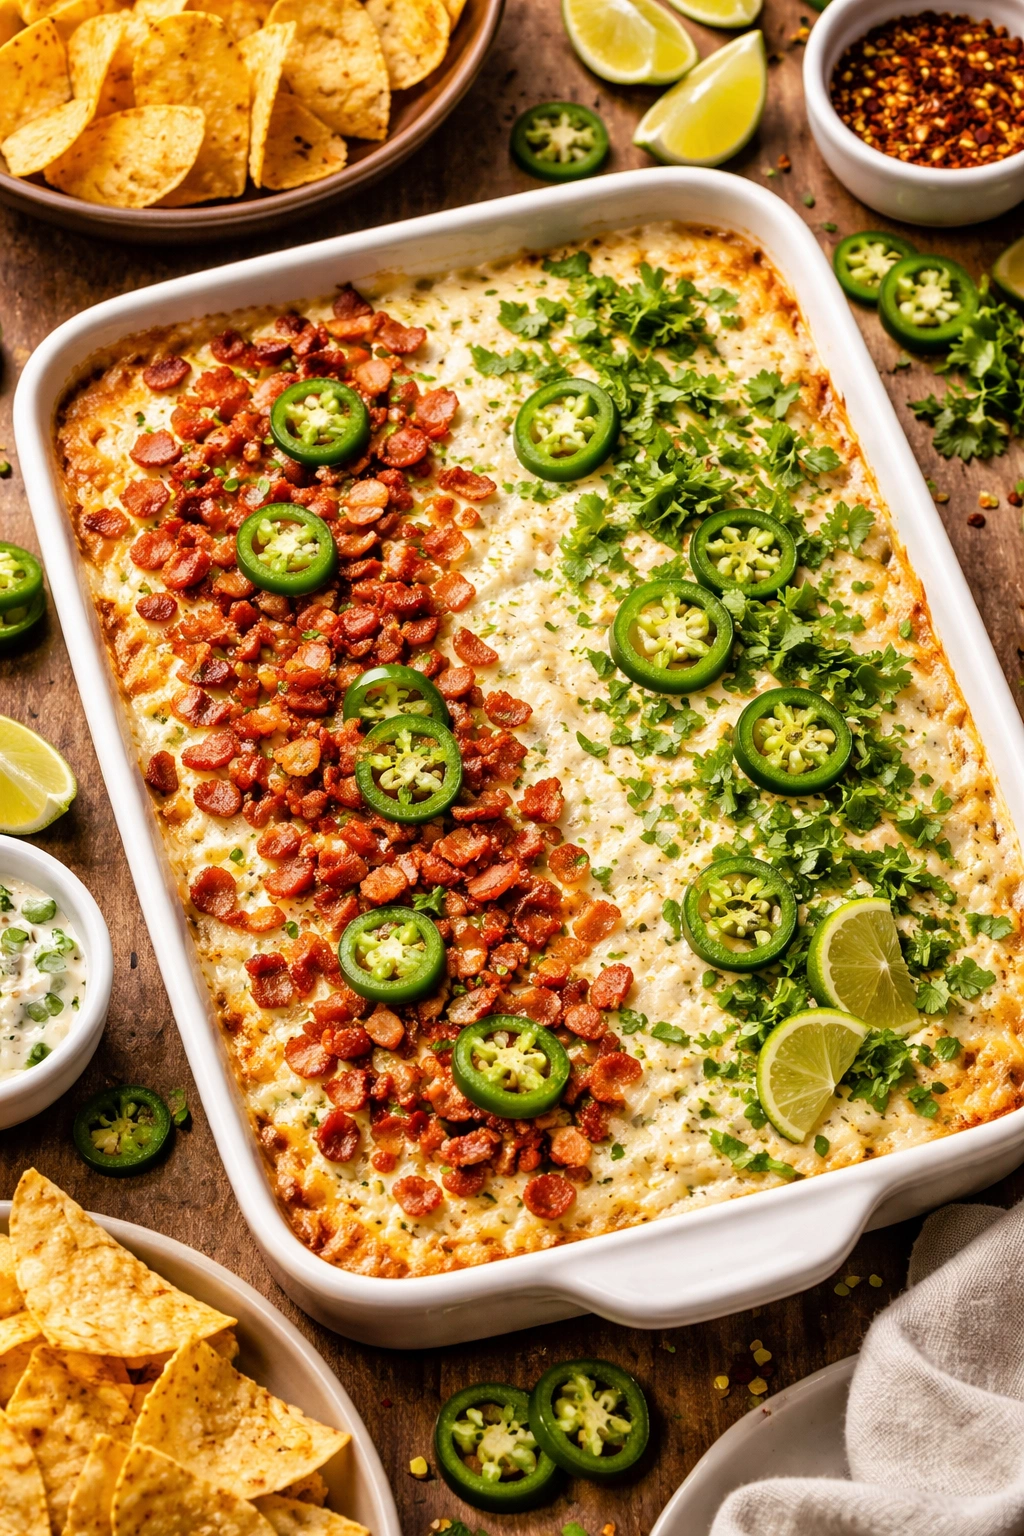
Smoky Bacon Version
Add 6-8 slices of crispy bacon, chopped into small pieces, to the mixture before baking. The bacon adds smokiness that complements the roasted jalapeños perfectly. You can also use bacon bits as a garnish, scattered over the top just before serving. This version appeals to people who might otherwise skip the spicy dip.
Cilantro-Lime Focused Version
If you love bright, herbaceous flavor, increase the cilantro to ⅓ cup and add the zest of one lime along with the juice. This makes the dip taste more like a fresh herb dip with jalapeño heat rather than a cheese dip with jalapeños. Pair it with lime-dusted tortilla chips.
Tex-Mex Layer Version
Make two separate batches of this dip — one with roasted jalapeños and one without. Layer them in the baking dish: a layer of plain cheese dip, then a layer of jalapeño dip, then back to plain. Top with breadcrumbs and bake as usual. The visual appeal is incredible, and people can experience both versions in one bite.
Corn and Black Bean Addition
Add 1 cup of sweet corn (fresh, frozen, or thawed) and ½ cup of drained, rinsed black beans to the mixture before baking. This adds texture, fiber, and a subtle sweetness that balances the heat. Increase the lime juice to 3 tablespoons and add ½ teaspoon of chili powder. Serve this with sturdy tortilla chips.
Roasted Red Pepper Blend
Replace half of the jalapeños with roasted red peppers. This creates a more complex pepper flavor with less heat — the red peppers add sweetness and smokiness. This version appeals to people who love the flavor concept but want less spiciness.
Spicy Version for Heat Lovers
Add ¼ teaspoon of habanero powder or ghost pepper powder along with the cayenne, or stir in a tablespoon of finely minced fresh habanero alongside the jalapeños. Increase the cayenne to ½ teaspoon. This version is noticeably spicy without being inedible to people of normal spice tolerance.
Make It Crunchier
Replace the panko breadcrumb topping with crushed tortilla chips tossed in melted butter, or add a handful of diced candied jalapeños mixed into the breadcrumb topping for sweetness and crunch.
Storage, Make-Ahead, and Leftovers
This dip is genuinely one of the best make-ahead appetizers. It improves as the flavors meld, making it actually perfect for advance prep.
Make-Ahead Options:
You can assemble the entire dip (everything mixed, in the baking dish, topped with breadcrumbs) up to 24 hours in advance. Cover it tightly with plastic wrap and refrigerate. When you’re ready to serve, bake it straight from the cold state — it’ll just take an extra 5-7 minutes to heat through completely. Bake covered with foil for the first 15 minutes if the breadcrumbs are browning too quickly.
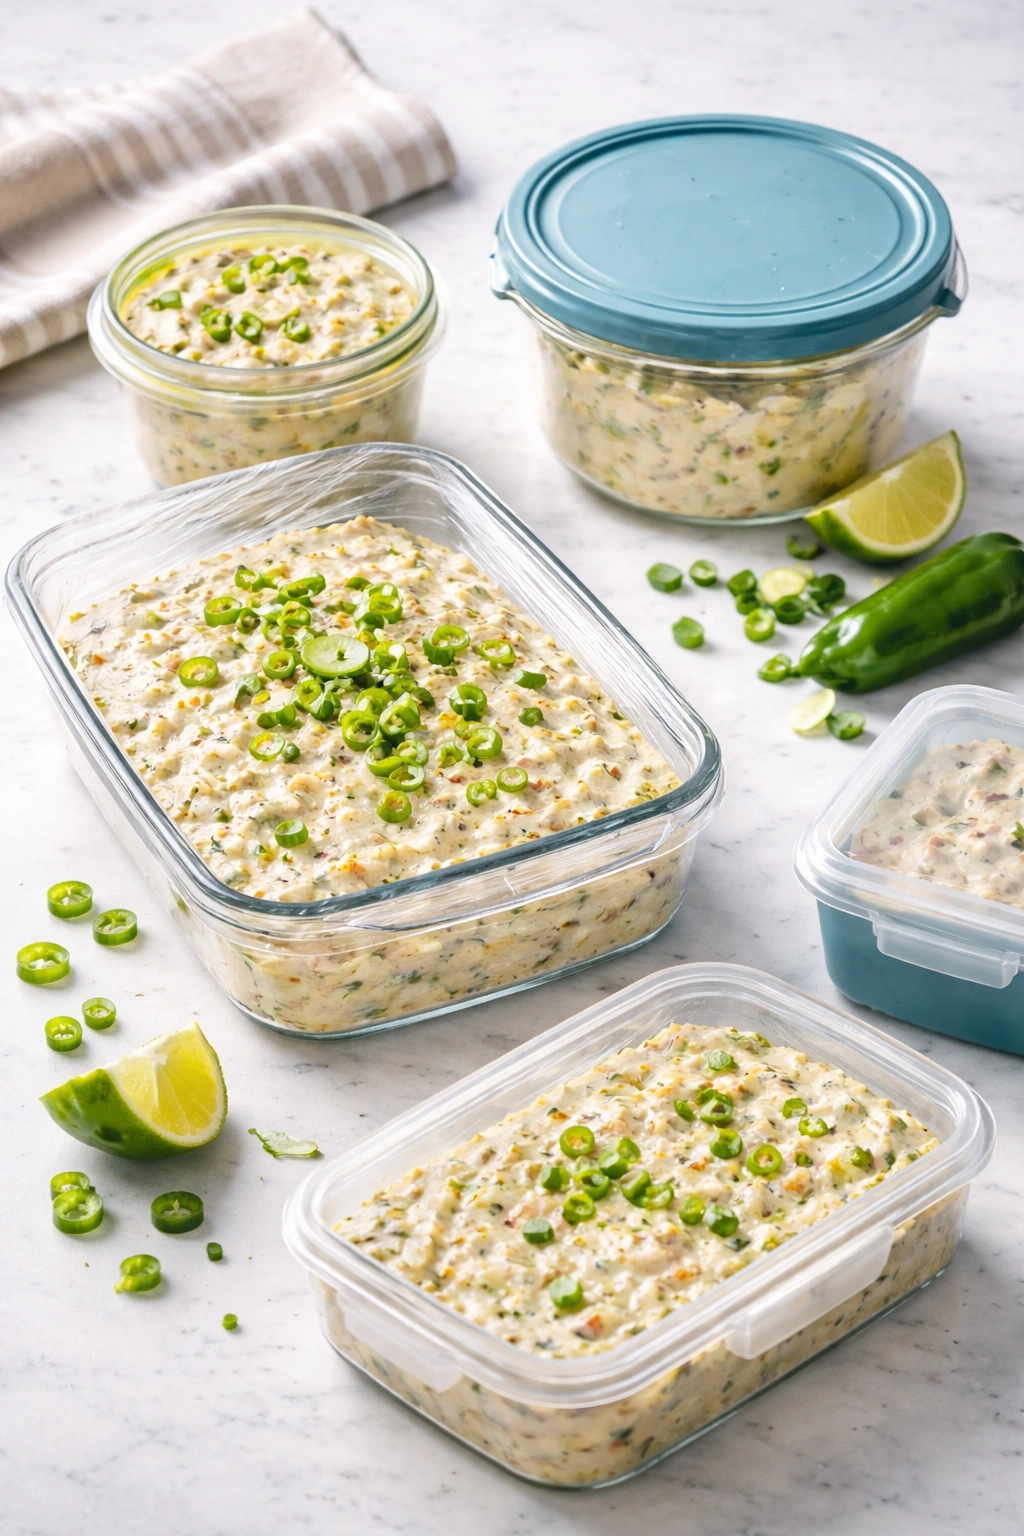
You can also make the dip mixture without the breadcrumb topping, store it in an airtight container in the fridge for up to 3 days, then transfer it to a baking dish and top with fresh breadcrumbs just before baking.
Room Temperature Storage:
If the dip sits out at room temperature (which is the best way to serve it), it’s safe to eat for up to 2 hours. After that, cover it and refrigerate any leftovers.
Refrigerator Storage:
Leftover dip keeps in an airtight container for up to 4 days in the fridge. Reheat gently in a 300°F oven for 10-15 minutes, covered with foil, until warmed through. You can also reheat it in a microwave-safe bowl in 30-second intervals, stirring between, but the oven method preserves the texture much better.
Freezer Storage:
This dip freezes beautifully for up to 2 months, though the texture becomes slightly grainier after thawing. Freeze it in an airtight container or even portioned into smaller containers. Thaw overnight in the refrigerator, then reheat gently in the oven. The flavor actually deepens after freezing and thawing, making it perfect for getting a batch ready for a future gathering.
Don’t Freeze the Breadcrumb Topping:
If you’re planning to freeze, don’t add the breadcrumb topping before freezing. Add fresh breadcrumbs after thawing and just before reheating.
Serving Suggestions and Pairing Ideas
This dip is genuinely versatile enough to work with almost anything, but some pairings shine brighter than others.
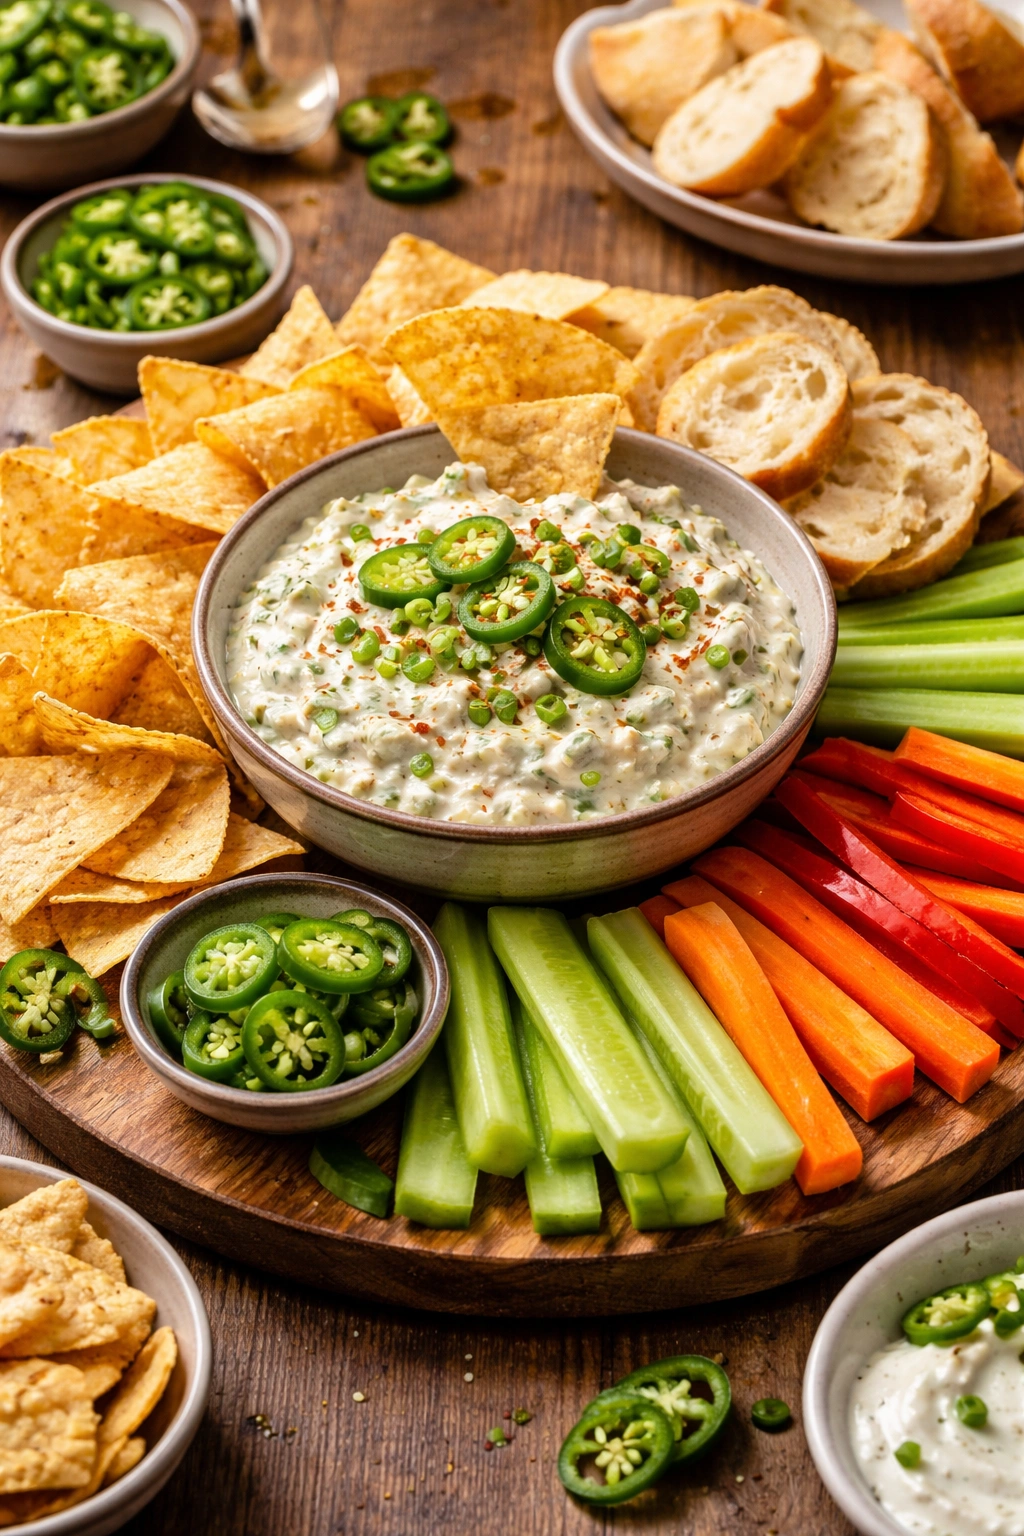
The Classic Chip Option:
Sturdy, salted tortilla chips are the obvious choice, and they’re the right one. Look for thicker chips that won’t shatter or get soggy — something with a substantial bite to them. Blue corn chips are particularly good with this dip because they add earthiness that complements the roasted jalapeños.
Vegetable Pairings:
Crisp raw vegetables are exceptional with this dip. Bell peppers (red, yellow, or orange for sweetness), celery sticks, carrot sticks, cucumber slices, and cherry tomatoes all provide textural contrast and light flavor that makes the creamy dip taste even richer. The brightness of the vegetables plays well with the spice and lime juice.
Bread and Crackers:
Toasted bread slices or crostini made from a sturdy sourdough or ciabatta work beautifully. Buttery crackers are also excellent. The carbs provide a neutral canvas that lets the dip flavors shine. Some people prefer bread to chips because there’s more surface area for dip contact.
Jalapeño Poppers:
If you’re already making something with jalapeños, serve this dip alongside crispy fried or baked jalapeño poppers. The dip echoes the pepper flavor while offering a completely different texture experience.
Party Presentation:
If you’re serving this at a gathering, keep the dip in the baking dish on a trivet (it stays warm longer). Arrange chips and vegetables on a board around it in a casual circle. Place serving spoons nearby — people should be able to dig in easily. If you have space, set out small plates or napkins adjacent to the dip so people don’t have to juggle dripping chips.
Game Day Setup:
At a football game or casual gathering, this dip is perfect in a slow cooker on the warm setting. Transfer it from the oven to a small slow cooker set to warm, and it’ll stay at perfect temperature for hours without drying out. This is actually ideal because the dip won’t cool down between batches of hungry guests.
The Ingredient Quality That Makes the Real Difference
You don’t need fancy ingredients for this dip, but you do need good ingredients — there’s a meaningful difference.
Sharp Cheddar Cheese:
This is where the dip gets its distinctive flavor. Sharp cheddar means it’s been aged longer, developing more complex, tangier flavor compounds. Mild or medium cheddar tastes blander and less interesting. Vermont white cheddar or New York aged cheddar are particularly good, but any sharp cheddar from a quality cheese section will work. Avoid orange-dyed cheese if possible — the natural color indicates it hasn’t been dyed with annatto, which adds a slightly artificial taste to some people.
Fresh Jalapeños Over Canned:
Fresh roasted jalapeños taste vibrant and alive. Canned jalapeños taste pickled and acidic in a way that changes the character of the dip. If you absolutely can’t get fresh, use jarred roasted peppers from the condiment aisle (not pickled), but fresh is genuinely better here.
Real Cream Cheese:
Philadelphia or other major brands of full-fat cream cheese are what you want. The low-fat versions have a different texture and won’t cream properly. Room temperature is the critical detail — not cold from the fridge.
Fresh Lime Over Bottled:
Bottled lime juice tastes flatter and slightly bitter. One fresh lime takes 30 seconds to juice and makes a tangible difference in the finished dip. If you need to use bottled, use it sparingly.
Sour Cream or Greek Yogurt:
Full-fat sour cream is traditional and tastes best, but full-fat Greek yogurt works as a substitute if you want slightly more protein and tang. The low-fat versions don’t work well here — they’re too thin and won’t create the right texture.
Techniques That Make This Dip Foolproof
There are a few key techniques that separate this dip from mediocre versions people might throw together.
Gentle Folding, Not Aggressive Mixing:
Once you’ve mixed the base ingredients, switch from a mixer to a rubber spatula and fold ingredients in by hand. This keeps pieces of jalapeño visible and distinct rather than breaking them down into a uniform paste. It also prevents overworking the mixture, which can make the texture grainy.
Low Oven Temperature:
Baking at 350°F instead of a higher temperature gives the dip time to heat through evenly without the edges drying out or browning too aggressively. Higher temperatures create a skin-like surface while the interior might still be cold.
The Breadcrumb Topping Matters:
Don’t skip it. The contrast between the crunchy, buttered, golden breadcrumbs and the creamy warm dip is what makes people take seconds. It’s also what catches people’s eye visually — a dip with just green and cream-colored surface is less visually appealing than one with golden crispy bits on top.
Lime Juice Stirred In, Not Drizzled After:
Some recipes suggest squeezing lime over the top after baking. This concentrates the sourness. Stirring it into the mixture while cold allows it to distribute evenly and brighten the overall flavor subtly rather than adding a sharp note.
Understanding the Baking Process and Why It Works
There’s actual science happening when this dip bakes, and understanding it helps you nail the result every time.
When cheese bakes, the fat and protein denature and rearrange themselves. The moisture in sour cream and cream cheese creates steam, which helps the dip rise slightly around the edges and develop that light, fluffy texture that’s so appealing. The edges heat faster than the center, which is why you often see gentle bubbles around the perimeter — this tells you the center is getting close to full heat.
The roasted jalapeños release their oils as they warm, infusing the entire dip with flavor. The lime juice (an acid) reacts with the cheese proteins, helping them stay emulsified rather than separating. The breadcrumbs toast in the oven’s dry heat, and the butter they’re coated with helps them crisp rather than harden.
This all happens in 18-22 minutes at 350°F. Not longer. If you bake it longer, the edges start to brown aggressively and the surface can develop a slightly dry crust. If you don’t bake it long enough, the center won’t be as hot and the texture won’t be as light.
Common Questions and Solutions
The dip looks curdled or separated:
This usually means the oven temperature was too high or it baked too long. The proteins in the cheese contracted too aggressively, squeezing out moisture. Prevent this by checking your oven temperature with an oven thermometer (many ovens run hot), and stick to the 18-22 minute baking window.
The dip tastes flat despite the lime:
You might need slightly more salt. Add it one small pinch at a time and taste between additions — salt amplifies other flavors dramatically. Alternatively, the roasted jalapeños might not have been roasted enough; underroasted peppers taste thinner. Next time, char them more thoroughly.
The breadcrumbs soak up too much dip:
The breadcrumbs should crisp slightly on top, but if they’re getting soggy from sitting in warm dip, you might have too much dip in your baking dish. Alternatively, make sure the breadcrumbs are well-coated with butter before topping — this helps them stay crispy longer.
It’s too spicy for some guests:
Make two small batches — one with all the jalapeños and one with half the amount. Or make one batch and serve some plain sour cream or Greek yogurt on the side; people can swirl in a spoonful to cool down their dip. Or serve the dip alongside a mild queso; people can blend the two.
The dip breaks or gets grainy during reheating:
This happens when you reheat too aggressively. Always reheat covered with foil in a low oven (300°F) rather than high heat or microwaving. The low heat prevents the dairy from breaking.
Final Thoughts
This jalapeño dip represents something important in cooking — the principle that excellent food doesn’t require complicated ingredients or lengthy preparation. It requires understanding how basic components work together, respecting the techniques that make a difference, and caring enough about texture and flavor balance to actually pay attention while you’re mixing.
You can make this dip confidently for any gathering, knowing it’ll be eaten and praised. You can make it hours or even a day ahead and have it ready to pop in the oven whenever you need it. You can adapt it to suit any crowd, any heat preference, any dietary angle. It works with chips, vegetables, bread, or eaten straight off a spoon if nobody’s looking.
This is the kind of recipe that people bookmark and make repeatedly because it works every single time. It’s the appetizer that disappears fastest. It’s the thing friends ask you to bring to their events. Once you’ve made it once and tasted how good it actually is, you’ll understand why.