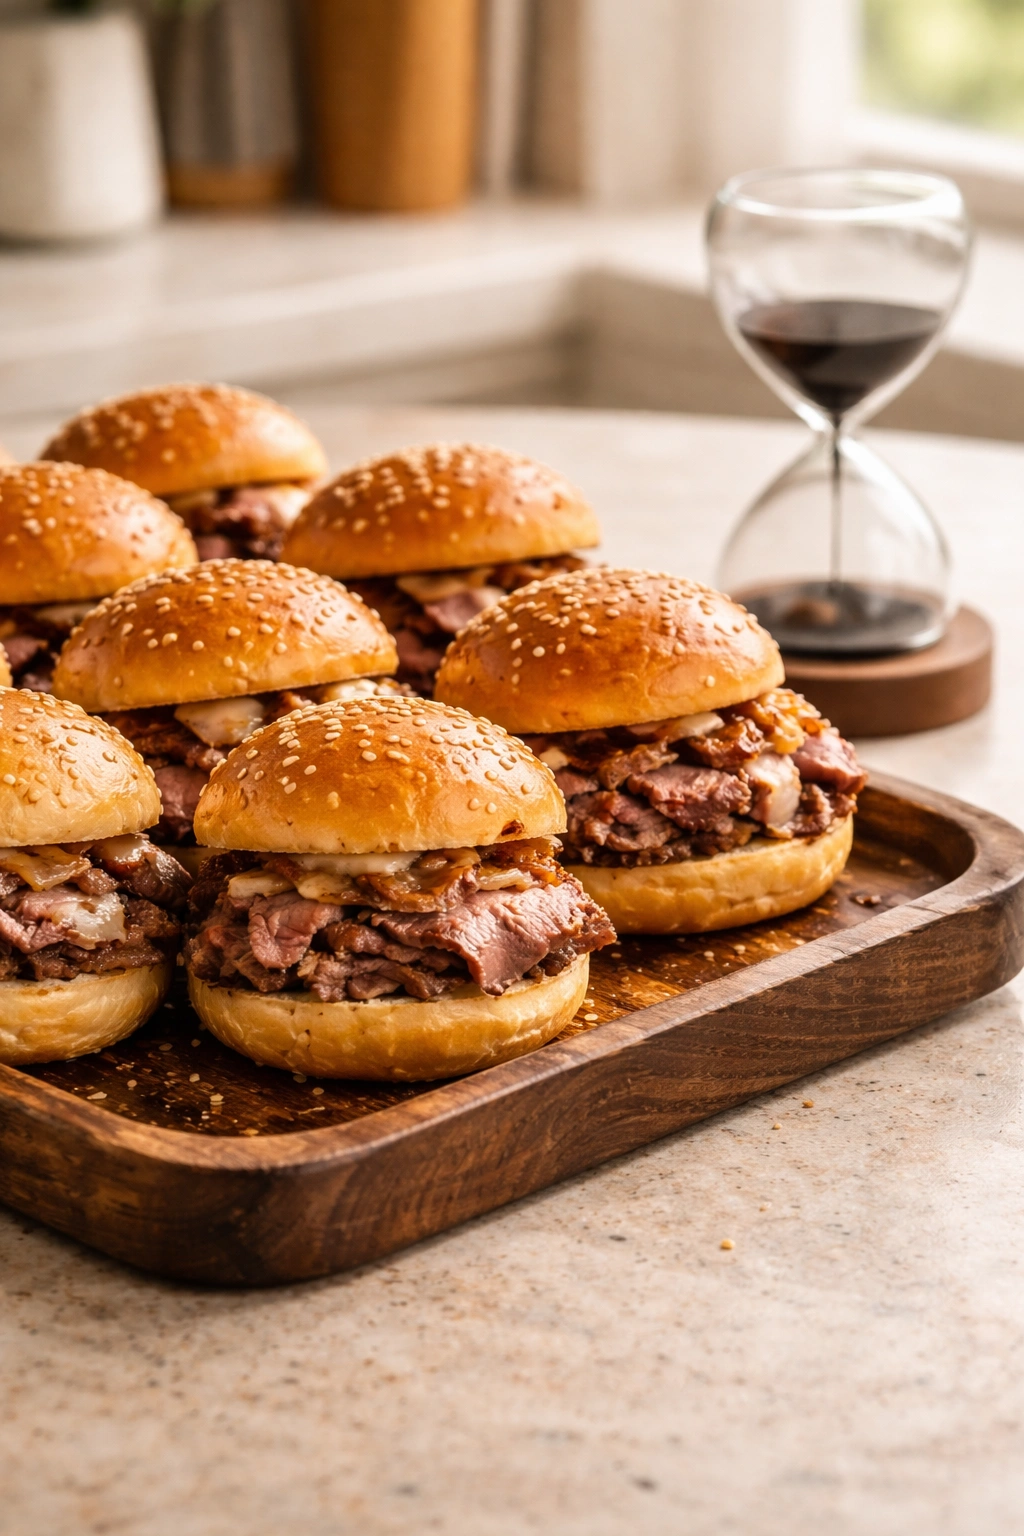
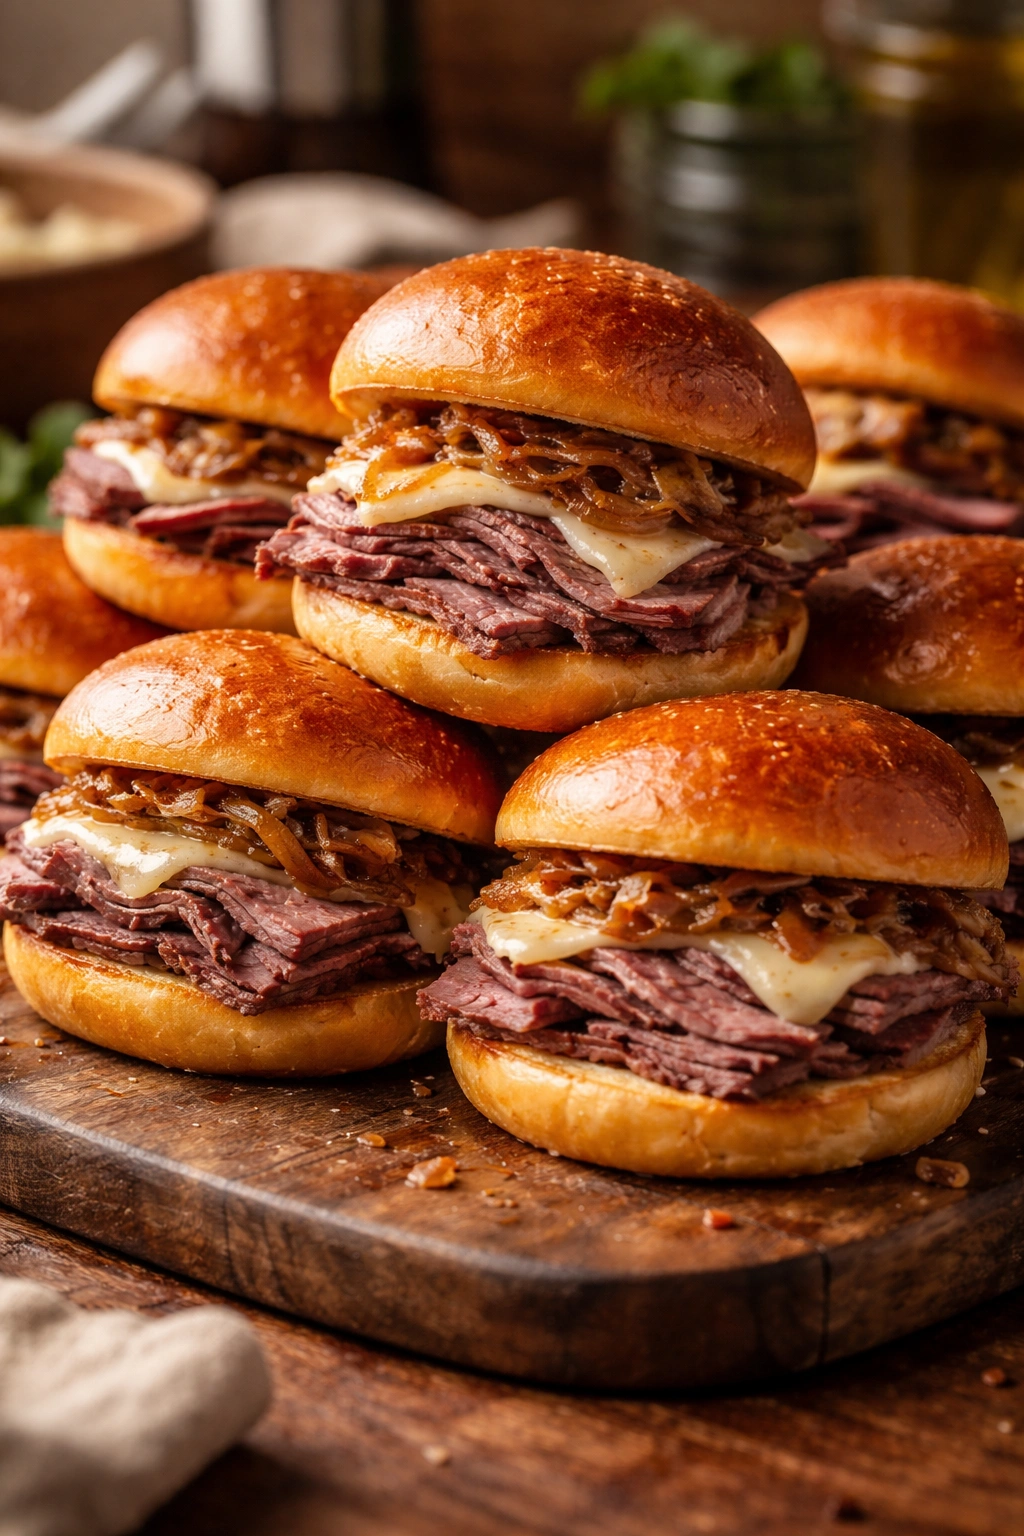
There’s something irresistible about a well-made slider. It’s bite-sized, elegant enough for a dinner party, yet casual enough for a game-day spread. A roast beef slider, done right, delivers the tenderness and richness of a classic roast beef sandwich in a format that invites people to grab one, then another, then another. The key is building layers of flavor — starting with perfectly cooked, thinly sliced roast beef, then layering in creamy horseradish sauce, tangy caramelized onions, and just enough sharpness from aged cheddar to keep everything interesting.
What makes these sliders different from a hastily assembled roast beef sandwich is intention. You’re not just throwing cold cuts between two pieces of bread. You’re starting with either a quality deli roast beef or, better yet, roasting your own beef specifically for these sandwiches, then building each component with care. The caramelized onions alone take time to develop properly — that deep golden color and mellow sweetness that makes people ask what your secret ingredient is. The horseradish cream brings a sophisticated bite that elevates the whole thing beyond basic comfort food.
These sliders are perfect for entertaining because so much of the work happens ahead of time. You can prepare the beef, caramelize the onions, and make the horseradish sauce the day before. On serving day, it’s simply assembly and a quick warm-through in the oven. They disappear fast at parties, which is exactly what you want from an appetizer or casual meal.
Serving and Timing Info
Yield: Makes 12 sliders (serves 4 to 6 as a main course, 8 to 10 as an appetizer)
Prep Time: 30 minutes
Cook Time: 1 hour 45 minutes (mostly hands-off caramelizing and roasting)
Total Time: 2 hours 15 minutes active + optional 1 hour chilling for the horseradish cream
Difficulty: Intermediate — caramelizing onions requires attention and patience, but the roasting and assembly are straightforward.
What Makes a Roast Beef Slider Worth Making
The difference between a forgettable slider and one people actually crave comes down to a few specific choices. First, the beef itself. If you’re buying pre-sliced deli roast beef, look for a quality source — something that was actually roasted, not formed from a loaf. The texture matters. It should tear delicately when you pick it up, not have that processed, uniform thickness of low-grade lunch meat. Better yet, roast a small beef chuck or sirloin specifically for these, then slice it yourself. You get superior flavor and control over the thickness.
Second is the base. These sliders use soft, buttered mini burger buns or Hawaiian rolls — something sturdy enough to hold the fillings without falling apart, but tender enough to eat without your jaw working overtime. You want to actually taste the bun, not fight through cardboard.
Third is the horseradish sauce. This is what people taste first and remember longest. It’s a simple cream mixed with fresh horseradish (the bottled kind works, but if you can find fresh horseradish root, grate it yourself for maximum impact). The sharp, almost spicy bite of horseradish against the richness of beef and cheese is what transforms these from decent to memorable.
Finally, the caramelized onions. They add sweetness, depth, and a luxurious texture that makes people think you spent hours on these. In a way, you did — but it’s mostly hands-off time while the onions slowly turn golden and concentrate their natural sugars.
Ingredients You’ll Need
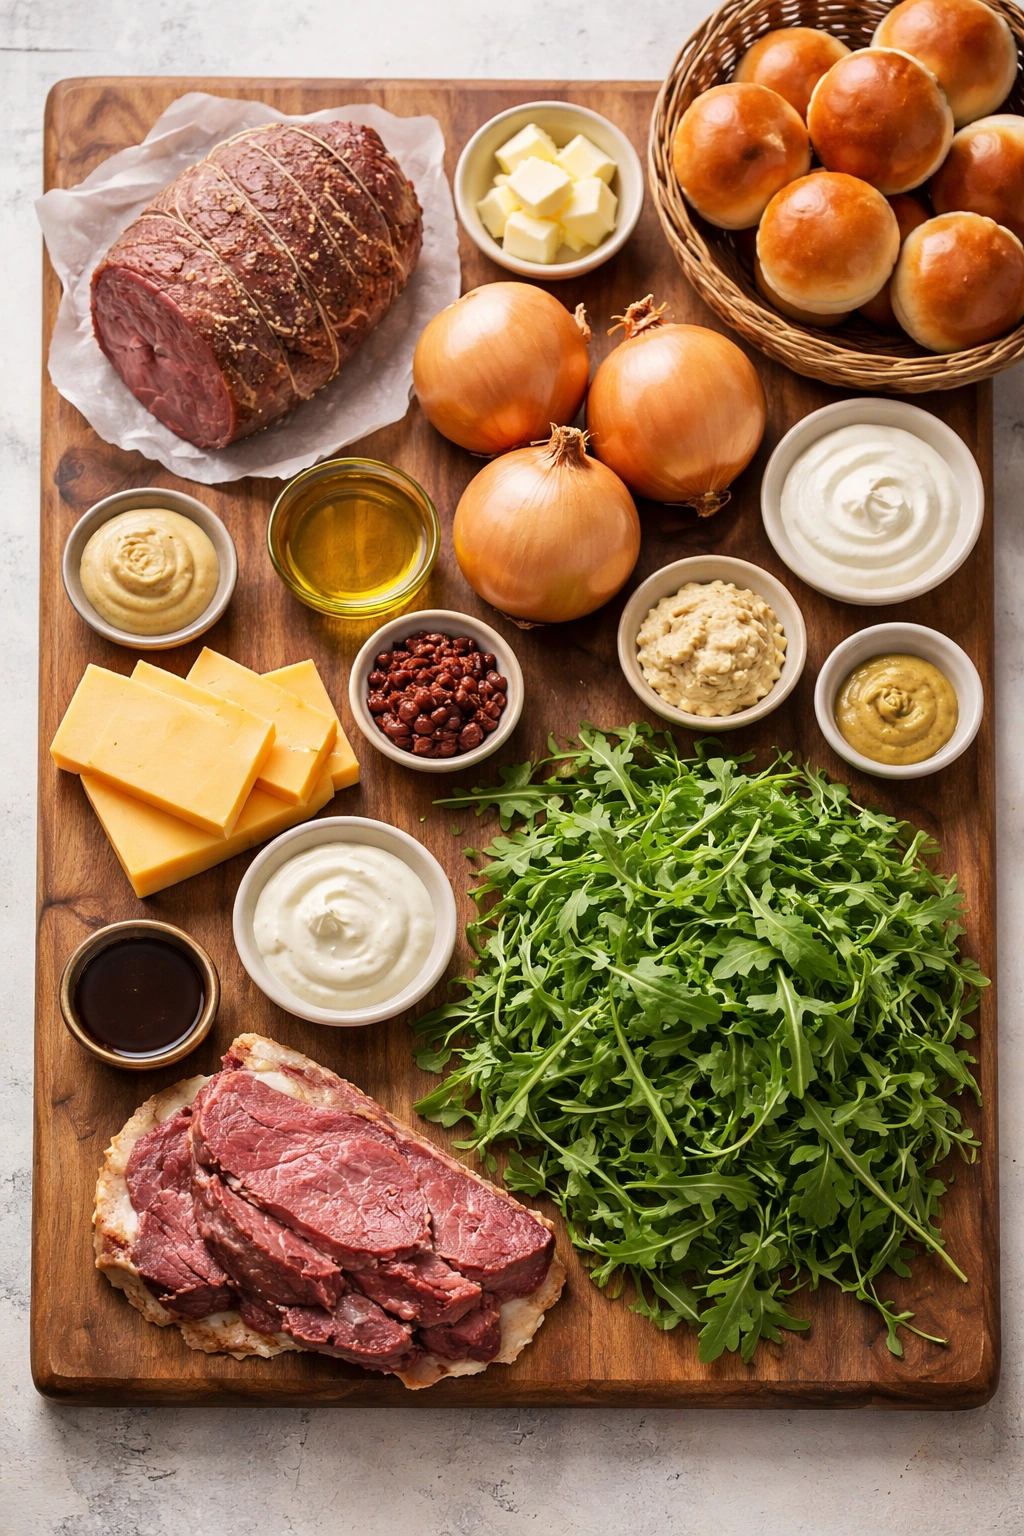
For the Roast Beef (if making your own):
- 2-pound beef chuck roast or sirloin tip roast
- 2 teaspoons kosher salt
- 1 teaspoon freshly ground black pepper
- 1 teaspoon garlic powder
- 1 teaspoon dried thyme
- 2 tablespoons vegetable oil
For the Caramelized Onions:
- 4 large yellow onions, peeled and sliced into thin half-moons
- 3 tablespoons unsalted butter
- 1 teaspoon kosher salt
- ½ teaspoon freshly ground black pepper
- 1 tablespoon balsamic vinegar
- ½ teaspoon fresh thyme leaves (or ¼ teaspoon dried)
For the Horseradish Cream:
- ¾ cup heavy cream or sour cream (or a combination of both)
- 3 tablespoons prepared horseradish, drained well (or 2 tablespoons freshly grated horseradish root)
- 1 tablespoon Dijon mustard
- 1 teaspoon apple cider vinegar
- ¼ teaspoon kosher salt
- Pinch of freshly ground black pepper
For Assembly:
- 12 soft mini burger buns or Hawaiian rolls, split horizontally
- 1 tablespoon unsalted butter, softened
- 12 ounces thinly sliced roast beef (about 1 pound total; use store-bought high-quality deli roast beef or your homemade version, sliced ¼-inch thick)
- 8 ounces aged sharp cheddar cheese, thinly sliced (about 12 slices)
- Fresh arugula or mixed greens (optional but recommended)
How to Make Perfect Roasted Beef for Your Sliders
Prepare the Meat:
-
Remove the beef roast from the refrigerator 30 to 45 minutes before cooking, allowing it to come to room temperature. This ensures even cooking throughout.
-
Pat the beef completely dry with paper towels — moisture is the enemy of browning. Any wet spots on the surface will steam rather than sear.
-
In a small bowl, combine the salt, pepper, garlic powder, and dried thyme. Rub this mixture all over the beef roast, making sure to coat every surface generously.
Advertisements
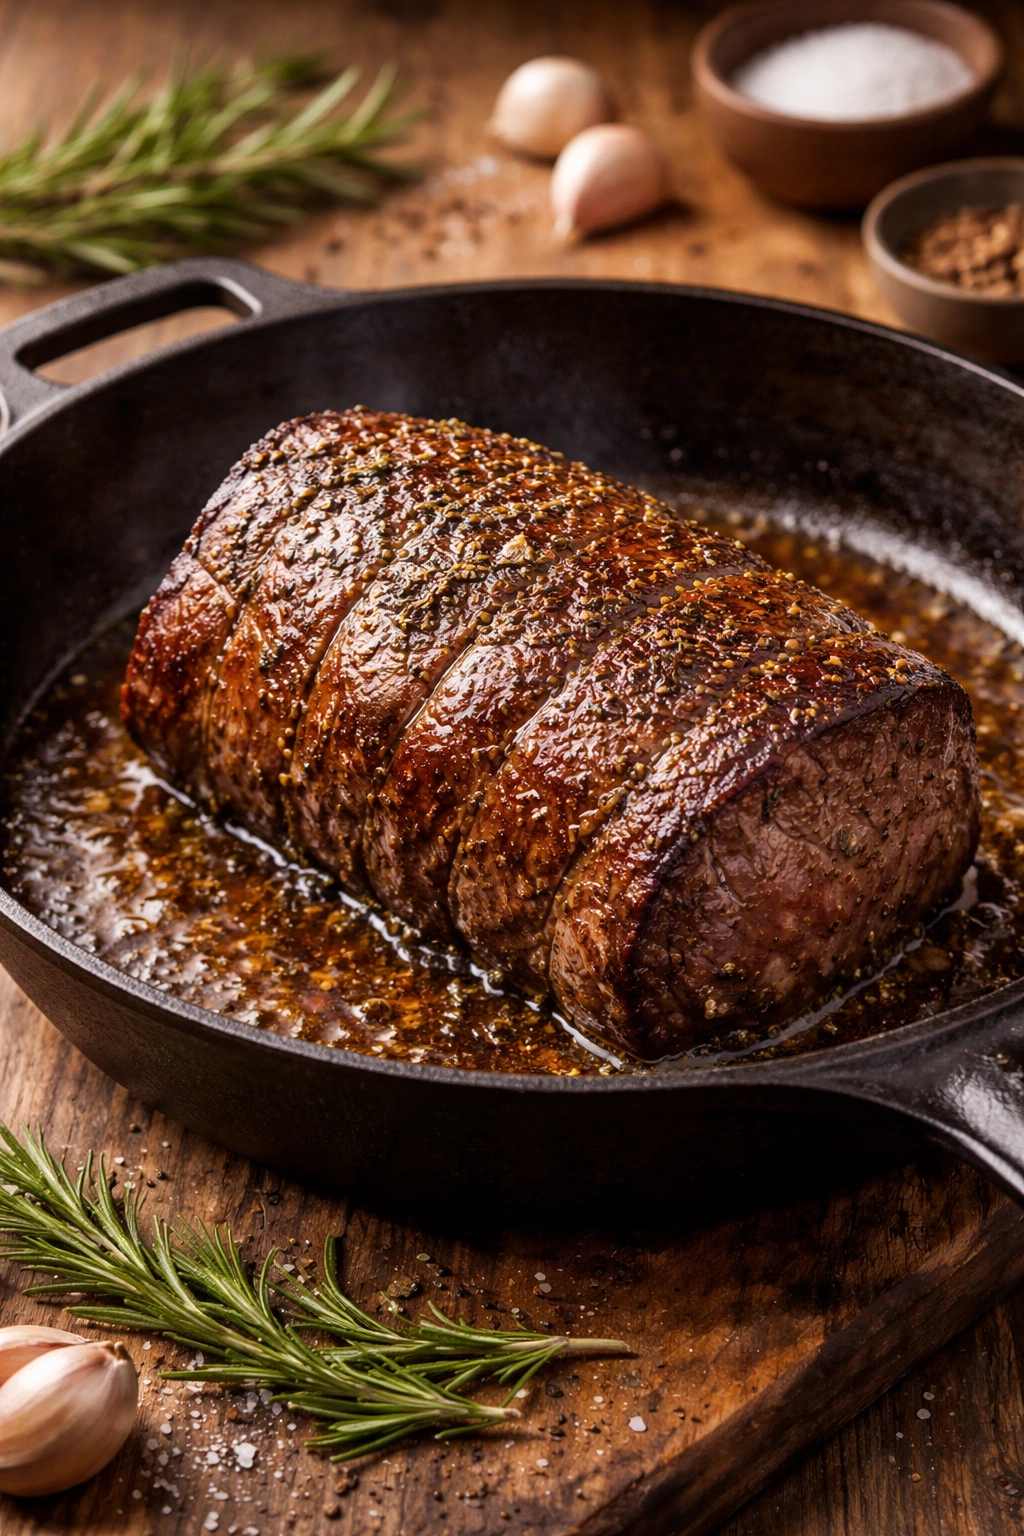
Sear and Roast:
-
Heat the vegetable oil in a large oven-safe skillet over medium-high heat until it shimmers and just barely begins to smoke — about 2 to 3 minutes. Don’t skip this step; proper heat is essential for developing a flavorful golden crust.
-
Carefully place the seasoned beef in the hot skillet. Resist the urge to move it around — let it sit undisturbed for 3 to 4 minutes to develop a rich, golden-brown crust on the bottom. Flip the roast and sear the other side for another 3 to 4 minutes.
-
Sear the ends and sides of the roast (about 1 minute per side) until all surfaces have a deep brown color.
-
Preheat your oven to 325°F (165°C) while the beef is searing.
-
Once the beef is fully seared, transfer the skillet to the preheated oven. Roast for 25 to 35 minutes, until the internal temperature reaches 130°F (54°C) for medium-rare, which is ideal for sliders — it stays tender and juicy even when sliced thin.
-
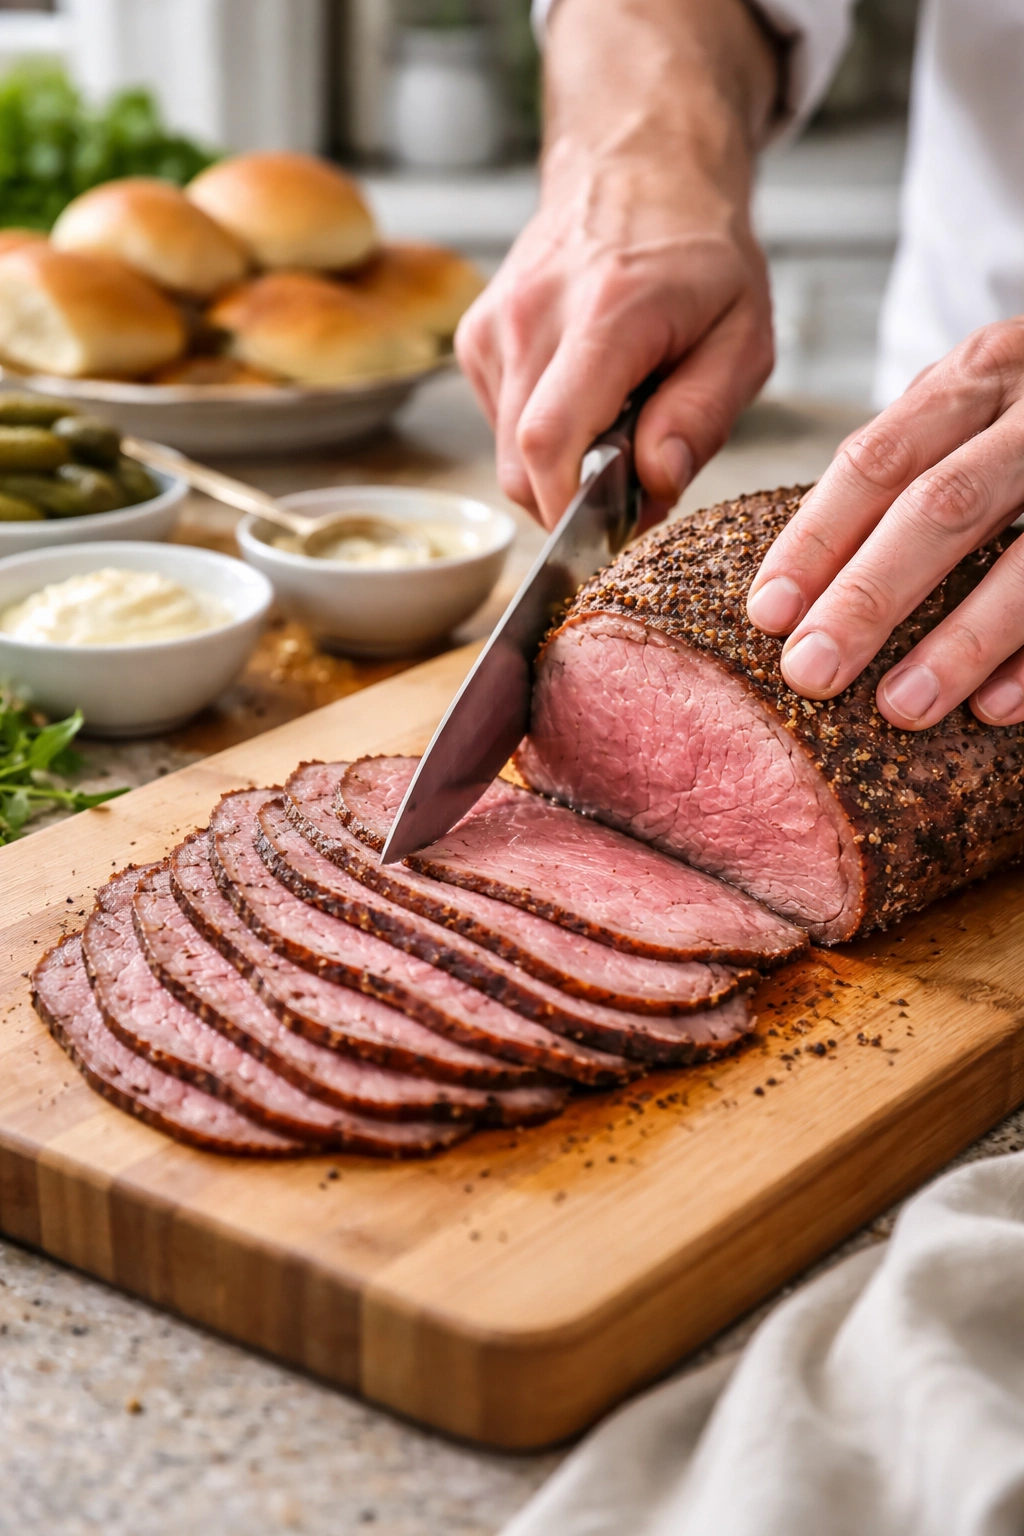
Remove the skillet from the oven and transfer the beef to a cutting board. Let it rest for 10 minutes before slicing. This resting period allows the juices to redistribute throughout the meat, ensuring each bite stays moist and tender.
-
Once rested, slice the beef as thinly as possible — aim for roughly ¼-inch slices. A sharp chef’s knife or, ideally, a slicing knife works best. If you don’t have these tools, ask the butcher counter at your grocery store to slice it for you.
Why This Works: The low oven temperature (325°F instead of 425°F or higher) prevents the outside from overcooking while the center comes up to the perfect medium-rare temperature. The thin slicing is crucial — it ensures the beef stays tender in the slider, not tough and chewy.
Building Perfect Caramelized Onions
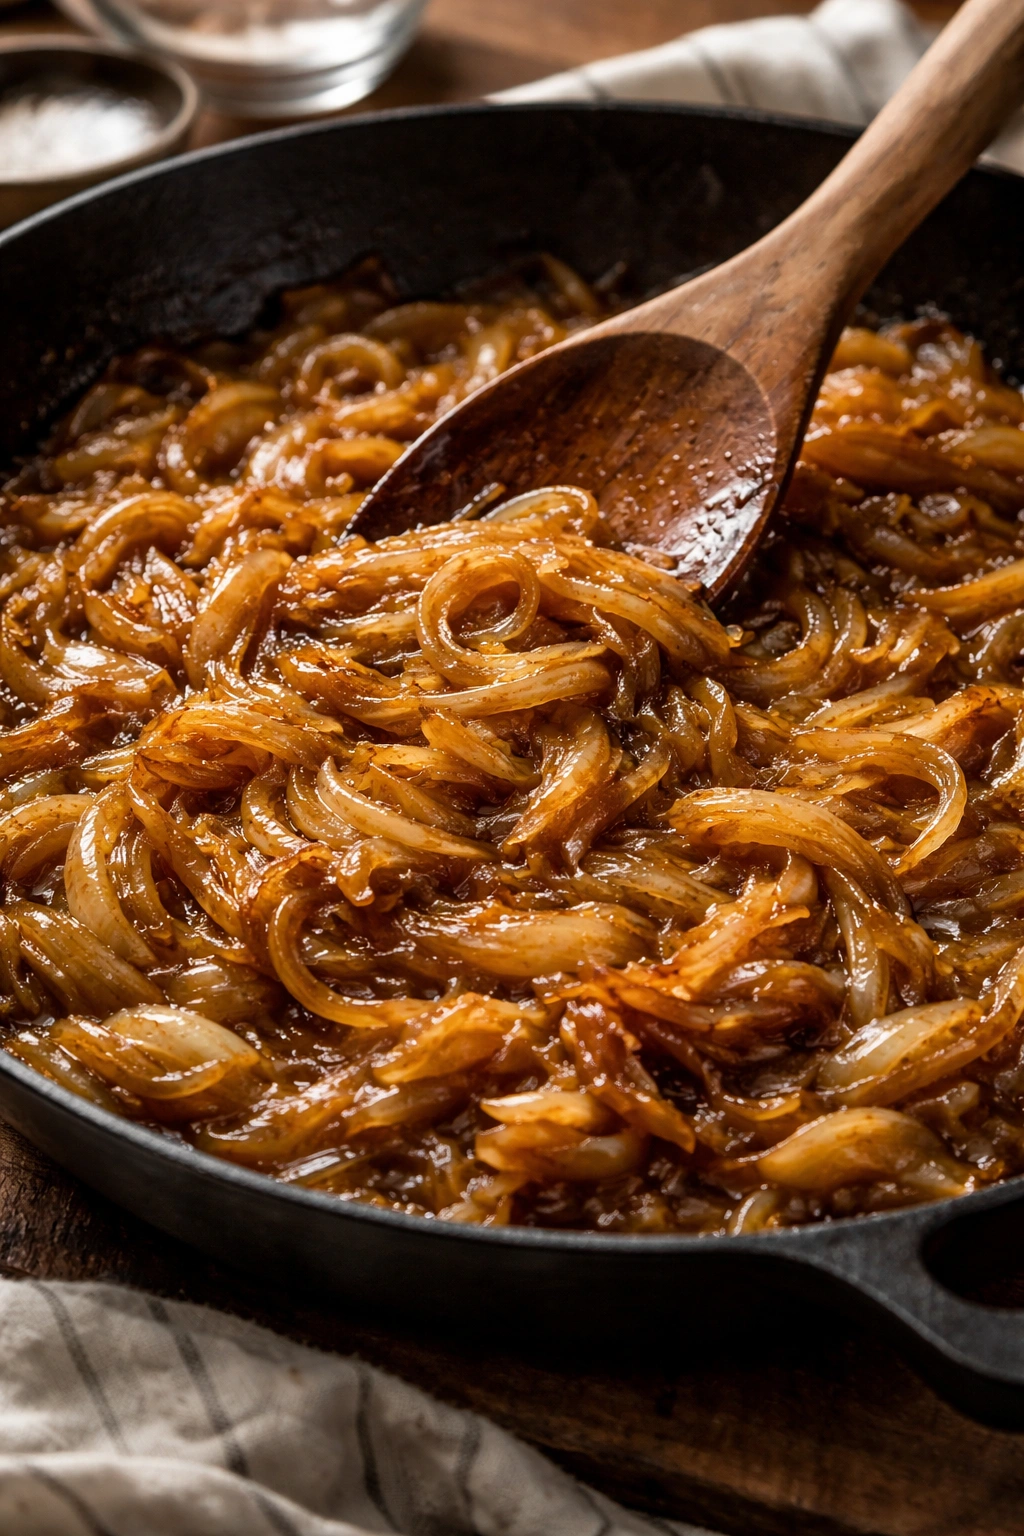
Caramelizing onions is one of those cooking techniques that seems like magic once you understand what’s happening. You’re slowly cooking the onions over medium heat, coaxing out their natural sugars and letting them break down into silky strands. It takes patience, but there’s almost no active work involved.
The Process:
-
Slice your peeled onions into thin half-moons — roughly ¼-inch thick. Thinner onions cook more evenly and break down faster, but not so thin that they disappear.
-
Melt the butter in a large skillet over medium heat. Once it’s foamy, add all the sliced onions at once along with the salt and pepper. Stir well to coat every strand of onion with butter.
-
Cook uncovered over medium heat for 45 to 50 minutes, stirring occasionally (every 8 to 10 minutes is fine — you’re not constantly stirring). What happens during this time is gradual but spectacular: the onions release their liquid, it evaporates, and then the natural sugars begin to brown and caramelize.
-
Watch for color development rather than time. After about 30 minutes, the onions will start turning golden. From that point forward, stir a bit more frequently (every 5 minutes) to ensure even browning and prevent sticking or burning.
-
By 50 minutes, the onions should be deeply golden-brown, almost mahogany-colored in places, and completely soft and jammy. If they’re still pale, continue cooking — caramelization can’t be rushed.
-
Add the balsamic vinegar and fresh thyme leaves in the final minute of cooking, stirring well. The vinegar adds a subtle tanginess that balances the sweetness. This step is optional but highly recommended.
-
Taste and adjust seasoning if needed. The onions should taste rich and slightly sweet with a hint of savory depth.
Pro tip: Make these the day before. They actually taste better after a day in the refrigerator, as the flavors deepen and meld. Simply reheat gently in a skillet over low heat for 5 minutes before assembling your sliders.
Making the Horseradish Cream From Scratch
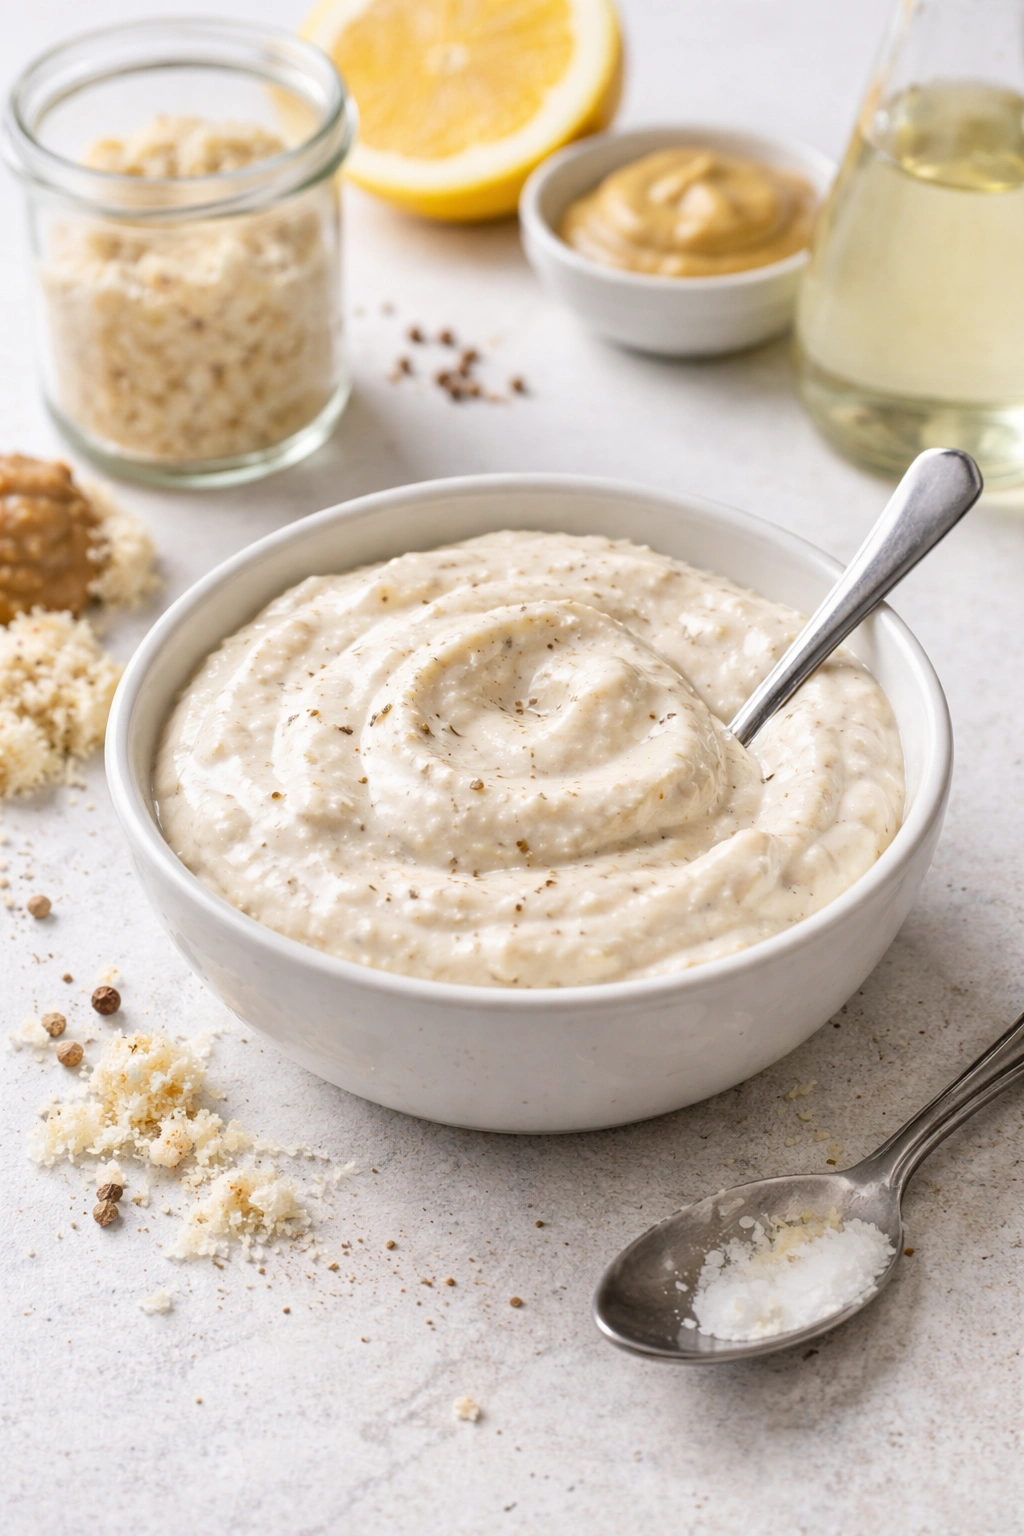
The horseradish cream is what separates these sliders from basic roast beef sandwiches. It brings a sophisticated, slightly spicy kick that makes people pause and ask what the flavor is. The combination of cream and sour cream creates a rich base that softens the intensity of the horseradish without muting it.
Quick Method:
-
In a medium bowl, combine the heavy cream and sour cream. If you want it lighter and more whipped, use all heavy cream and whip it to soft peaks first. If you prefer a tangier, more intense flavor, use all sour cream.
-
Fold in the prepared horseradish, Dijon mustard, apple cider vinegar, salt, and pepper. Stir gently until completely combined — you’re not whipping this, just mixing until homogeneous.
-
Taste and adjust. Too mild? Add another teaspoon of horseradish. Too sharp? Stir in a tablespoon more cream. It should taste noticeably horseradish-forward but balanced by the creaminess.
-
For the best flavor, refrigerate the horseradish cream for at least 30 minutes (or up to 24 hours) before serving. The flavors meld and deepen during chilling.
Why Fresh Horseradish Matters: If you can find fresh horseradish root at a specialty grocery or farmers market, it’s worth using. Peel away the brown skin and finely grate about 3 tablespoons of the white interior directly into the cream. Fresh horseradish has a sharper, more complex heat than the bottled version. Fair warning: grating fresh horseradish releases volatile compounds that can make you tear up — work near ventilation if possible.
Buttering and Toasting the Buns
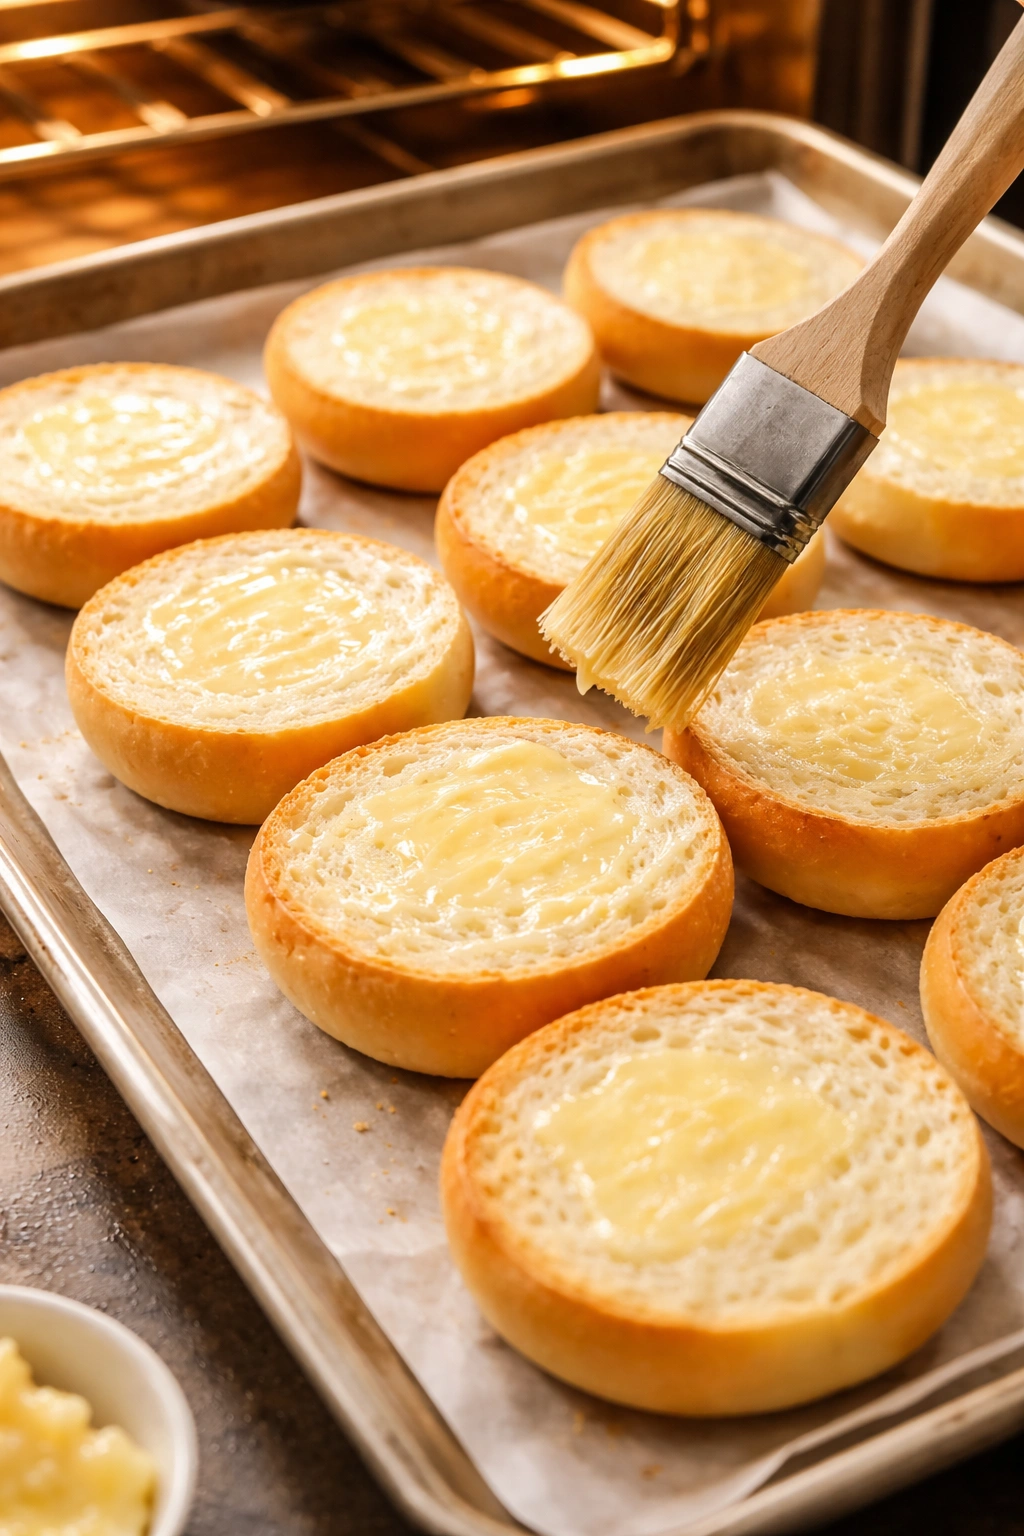
This small step makes a surprising difference in the final texture of your sliders. Buttering and toasting the insides of the buns prevents them from becoming soggy while adding a subtle richness and crunch.
-
Split each mini bun horizontally. If your buns are very soft and delicate, work gently to avoid crushing them.
-
Spread a thin layer of softened butter on the cut sides of each bun half. You need just enough to lightly coat the surface.
-
Place the buns cut-side up on a baking sheet and toast in a 350°F (175°C) oven for 4 to 5 minutes, until they’re golden and crispy on the edges but still tender inside. Don’t walk away — the line between perfectly toasted and burnt is quick.
Advertisements -
Remove from the oven and allow to cool slightly. The buns should still be warm when you assemble the sliders, which helps melt the cheese slightly.
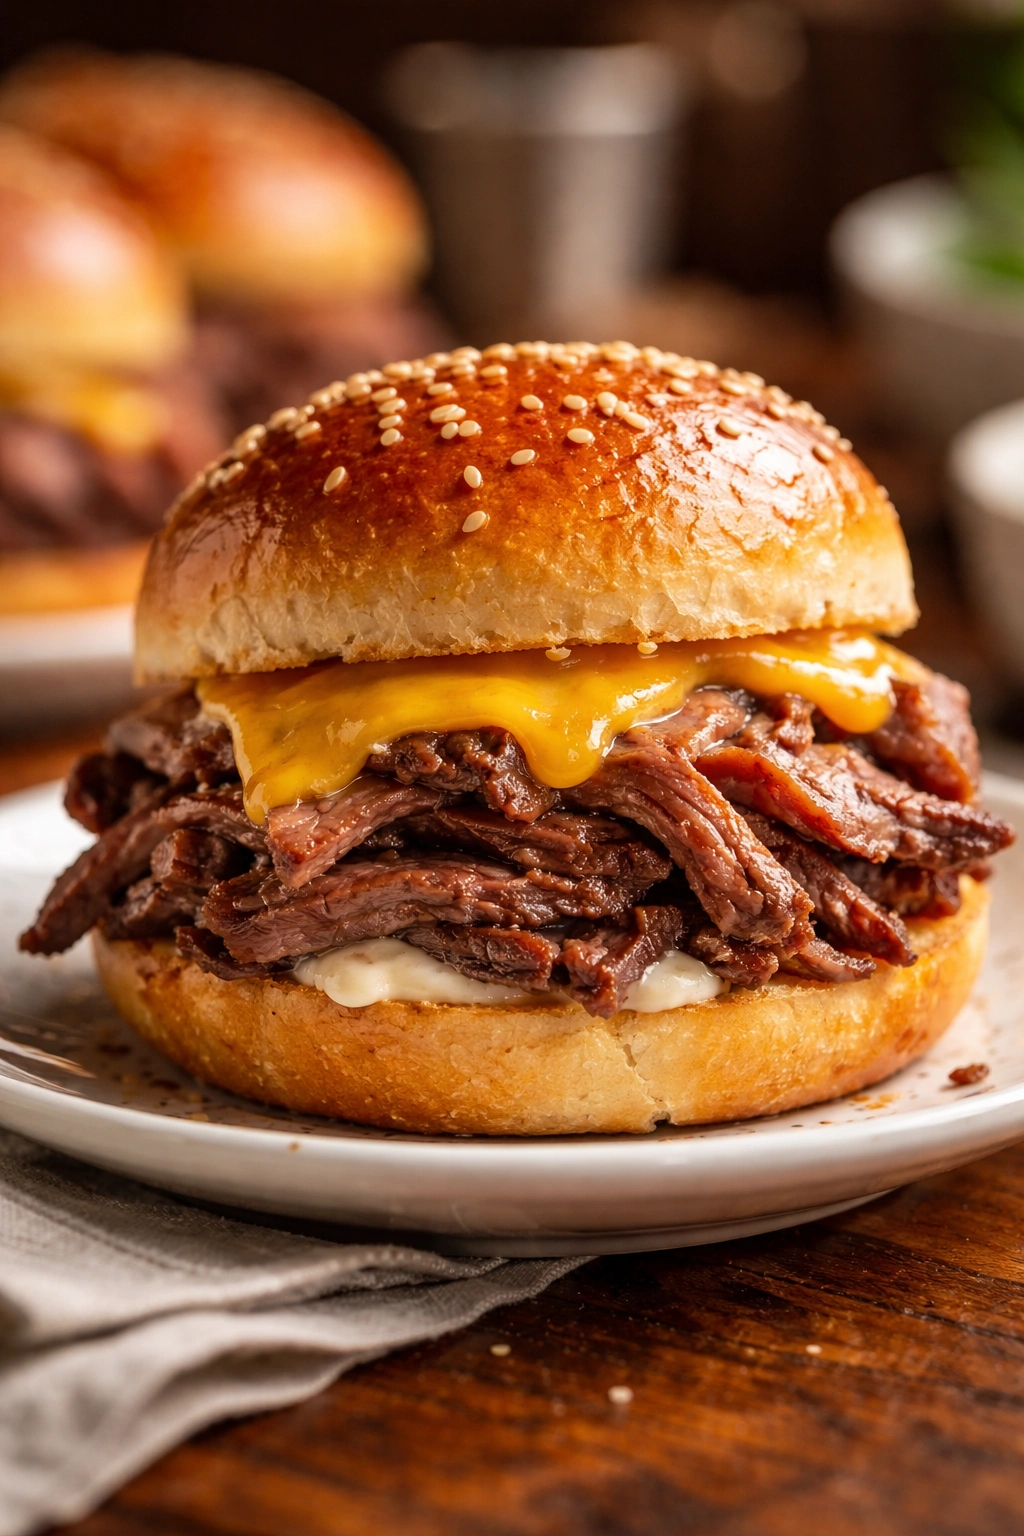
Assembling Your Sliders Step-by-Step
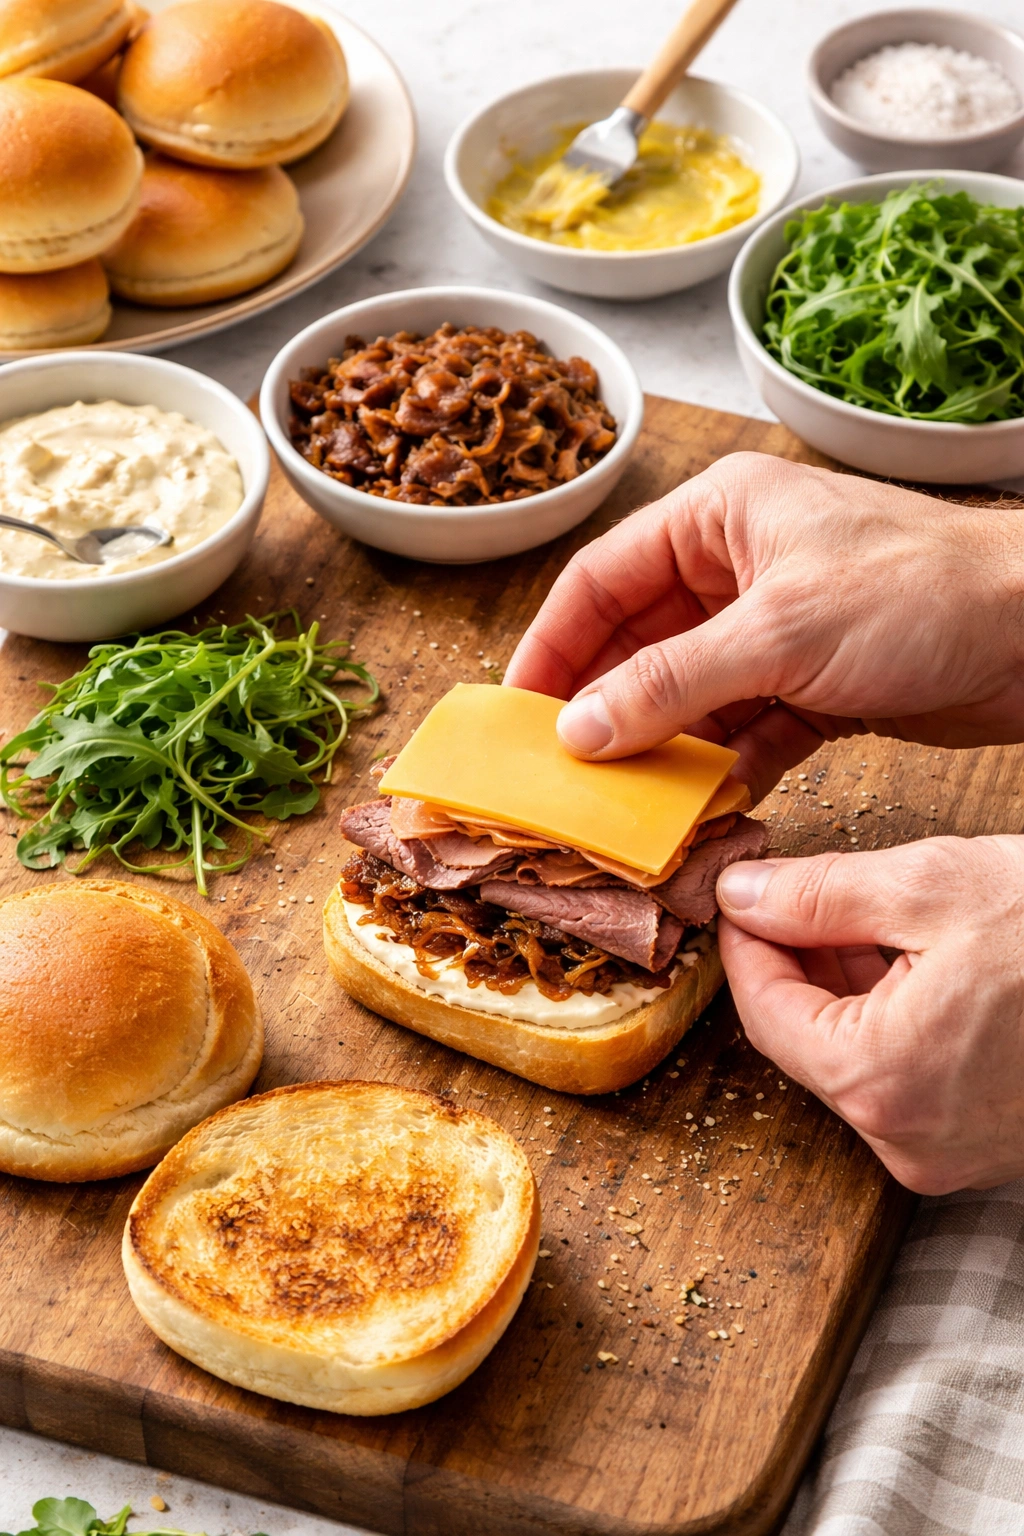
Assembly is straightforward, but there’s a right order that ensures each element shines and nothing overwhelms anything else.
Layer by Layer:
-
Start with a toasted bun bottom, cut-side up. This prevents sogginess better than starting with the top.
-
Spread a generous teaspoon of horseradish cream on the bottom bun. This acts as a flavorful seal and helps prevent moisture from the other ingredients from soaking in too much.
-
Add a small handful of thinly sliced roast beef on top of the cream — about 1½ to 2 ounces per slider. Don’t overstuff. The beef should be folded or loosely piled, not compressed into a solid block.
-
Place a slice of aged sharp cheddar over the warm beef. The residual warmth from the toasted buns will soften the cheese slightly without full melting, which is exactly what you want. Melted cheese can make the slider slippery and harder to eat; a just-softened slice stays in place.
-
Add a small spoonful (about ½ ounce) of caramelized onions on top of the cheese. Don’t overload — you want balance, not a slider that falls apart the moment you pick it up.
-
Optional: place a small handful of fresh arugula or mixed greens on top of the onions. The peppery bite of arugula complements the horseradish beautifully, and the greens add a fresh, crisp texture contrast.
-
Spread a thin layer of horseradish cream on the inside of the top bun, then place it gently on the slider.
Advertisements -
Resist the urge to cut the slider in half — these are meant to be eaten whole. The small size is part of their appeal.
Warming and Serving Your Sliders
If you’re preparing these sliders ahead of time, gentle rewarming is the way to maintain the quality of the beef and melt the cheese just slightly without drying anything out.
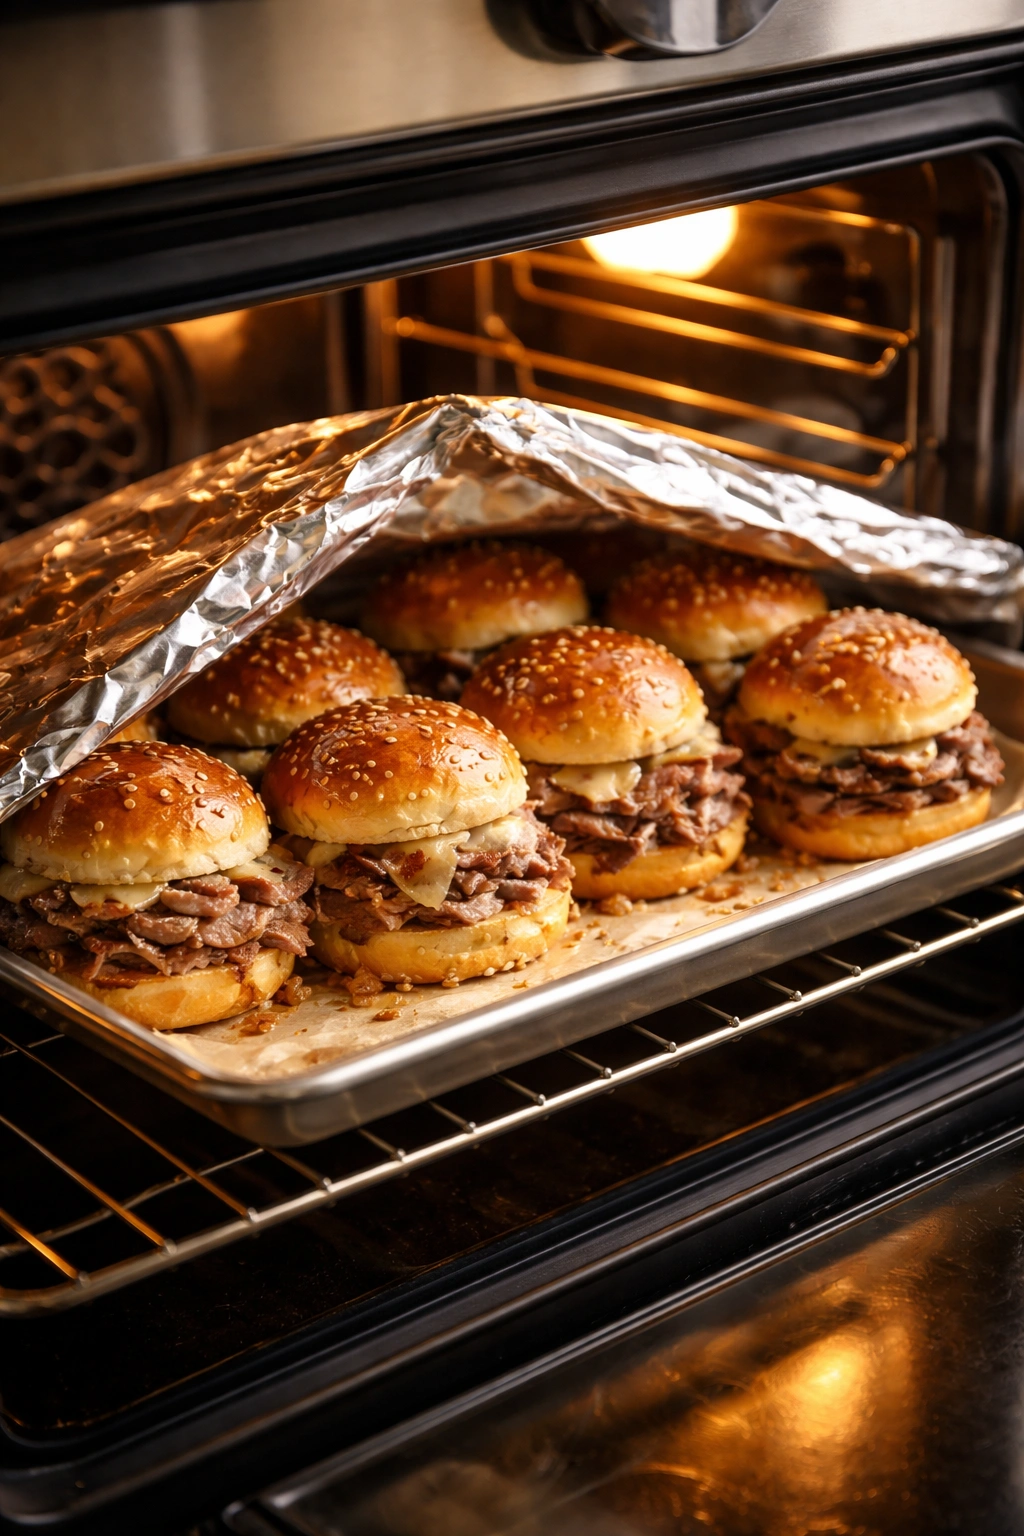
Method 1 — Oven Warming (Best for Multiple Sliders):
-
Assemble the sliders up to 2 hours before serving. Cover them loosely with aluminum foil to prevent them from drying out.
-
Place the covered sliders on a baking sheet and warm in a 300°F (150°C) oven for 8 to 10 minutes. You’re not cooking them — just bringing them gently back to serving temperature.
-
The cheese will soften slightly, the beef will warm through, and the flavors will meld without any ingredient drying out or separating.
Method 2 — Individual Warming (For Small Batches):
-
For just a few sliders, wrap each one individually in a damp paper towel (yes, damp — this creates steam that prevents drying).
-
Microwave for 20 to 30 seconds, just until warm throughout. Check after 20 seconds because microwaving can heat unevenly and quickly turn into overheating.
Serving Hot vs. Room Temperature:
Roast beef sliders are excellent either hot or at room temperature — your choice. Some people prefer them warm, when the cheese is slightly softened and the flavors are bright and aromatic. Others prefer them at room temperature, when the flavors feel more balanced and the beef texture is more noticeable. Make a test batch and see what you prefer.
Tips and Tricks From Experienced Slider Makers
The Secret to Non-Soggy Buns: Toast them and apply the horseradish cream first — this creates a moisture barrier between the bun and the juicier ingredients. It’s a small step that makes a real difference.
Slicing Beef Thinly Without a Meat Slicer: If you don’t have a slicing knife or meat slicer, pop your roasted, rested beef in the freezer for about 20 minutes. It’ll firm up just enough to slice cleanly without becoming frozen. A sharp chef’s knife works perfectly once the beef is properly chilled. Slice against the grain for maximum tenderness.
Making This Without Roasting Your Own Beef: Absolutely fine. Buy 12 ounces of high-quality roast beef from the deli counter — the kind that was actually roasted, not formed. Ask them to slice it slightly thicker than sandwich thickness (about ¼-inch) so it stays tender on the slider. This cuts your total cooking time down to about 1 hour instead of 2 hours 15 minutes.
Horseradish Heat Management: Prepared horseradish from a jar varies in intensity. Start with 2 tablespoons, taste, and add more if you want more heat. Some brands are notably sharper than others, so adjust to your preference.
Onion Burning Prevention: If your onions are browning too fast before they’ve broken down into soft strands, reduce the heat slightly. Caramelization should be a slow process. The onions should smell sweet, never burnt. If you catch them starting to blacken on the edges, turn down the heat and continue cooking.
Make-Ahead Strategy: Prepare the beef, caramelize the onions, and make the horseradish cream the day before. Refrigerate everything in separate containers. On serving day, toast your buns fresh and assemble within an hour of serving. This approach means your slider assembly takes just 15 minutes.
Flavor Variations and Customizations
Crispy Onion Version: Cook your caramelized onions until they’re quite dark and concentrated, then add a handful of crispy fried onions (the kind used on green bean casseroles) in the final minutes. The extra crunch is addictive.
Swiss Cheese and Mushroom Variation: Replace the cheddar with aged Swiss cheese. Sauté sliced mushrooms in butter and layer them under the onions. This creates a more continental, sophisticated flavor profile.
Smoky Variation: If your roast beef is homemade, rub it with smoked paprika and a tiny pinch of cayenne before roasting. This adds subtle smokiness that pairs beautifully with the horseradish.
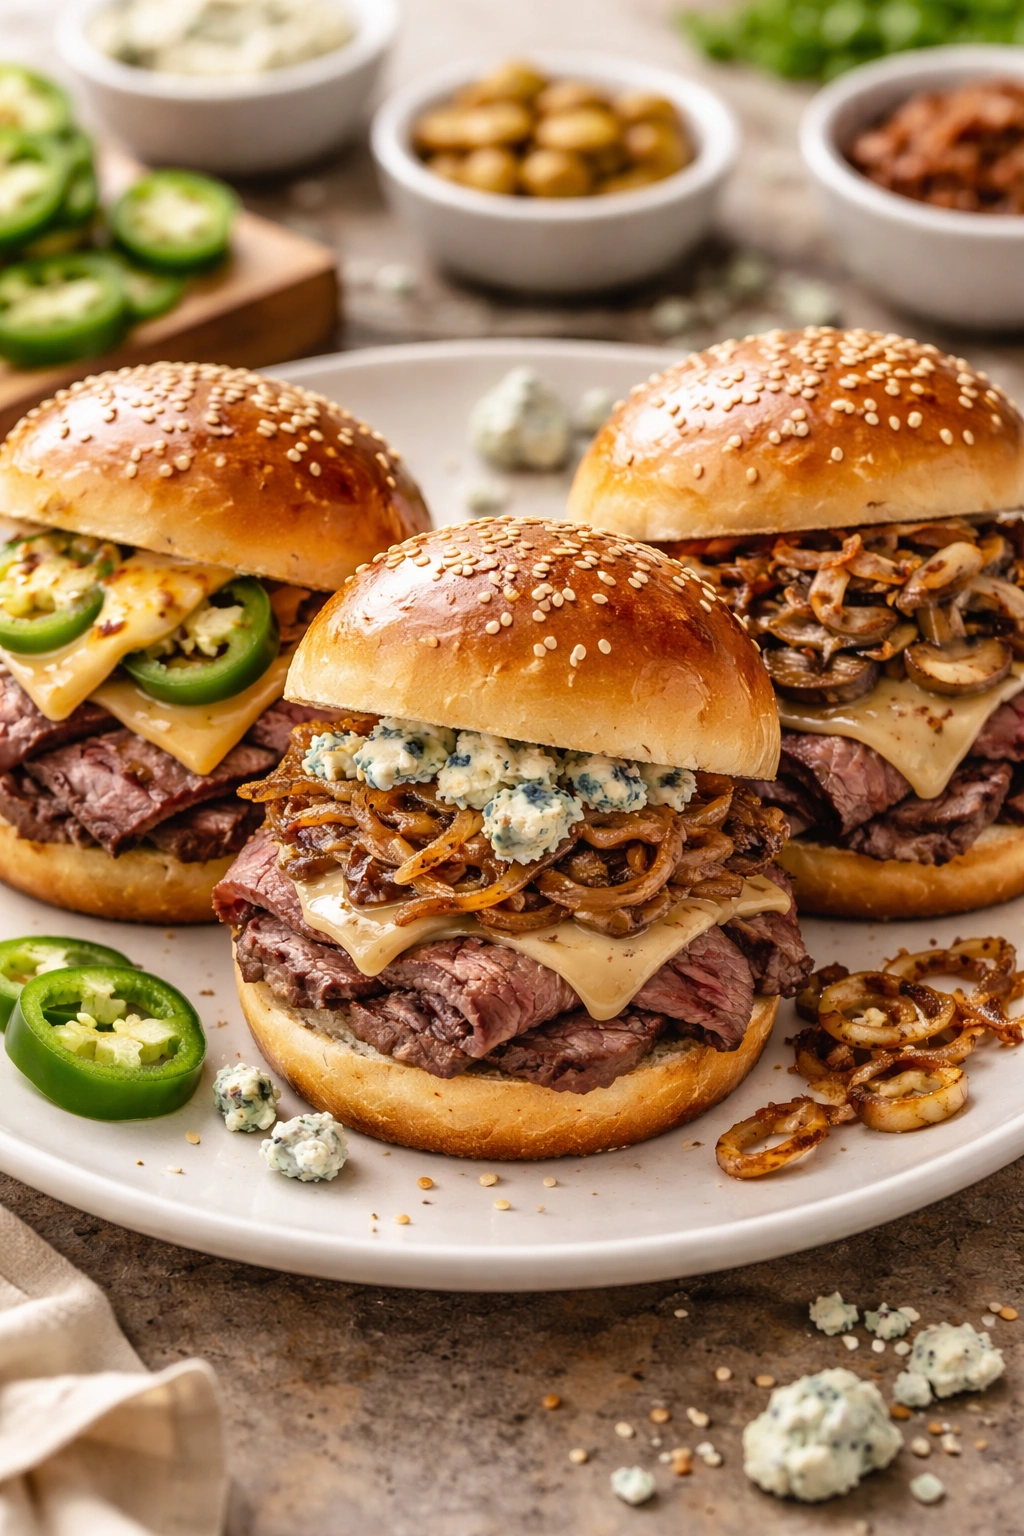
Blue Cheese Lovers: Replace the cheddar with a thin slice of blue cheese or crumbled blue cheese over the warm beef. It melts slightly and creates a bold, tangy flavor combination. Blue cheese pairs exceptionally well with roast beef.
Spicy Variation: Add a thin slice of aged white cheddar with jalapeño, or mix a pinch of cayenne into the horseradish cream. This appeals to people who like heat in their food.
Vegetable-Forward Version: Layer in some tender roasted beets or a thin slice of heirloom tomato under the arugula. The earthiness of beets especially complements roast beef beautifully.
Lighter Version: Use Greek yogurt instead of sour cream in the horseradish cream, and replace half the cheddar with thinly sliced smoked gouda. This creates a tangier sauce and prevents the sliders from feeling too rich.
Storage, Make-Ahead, and Leftover Strategy
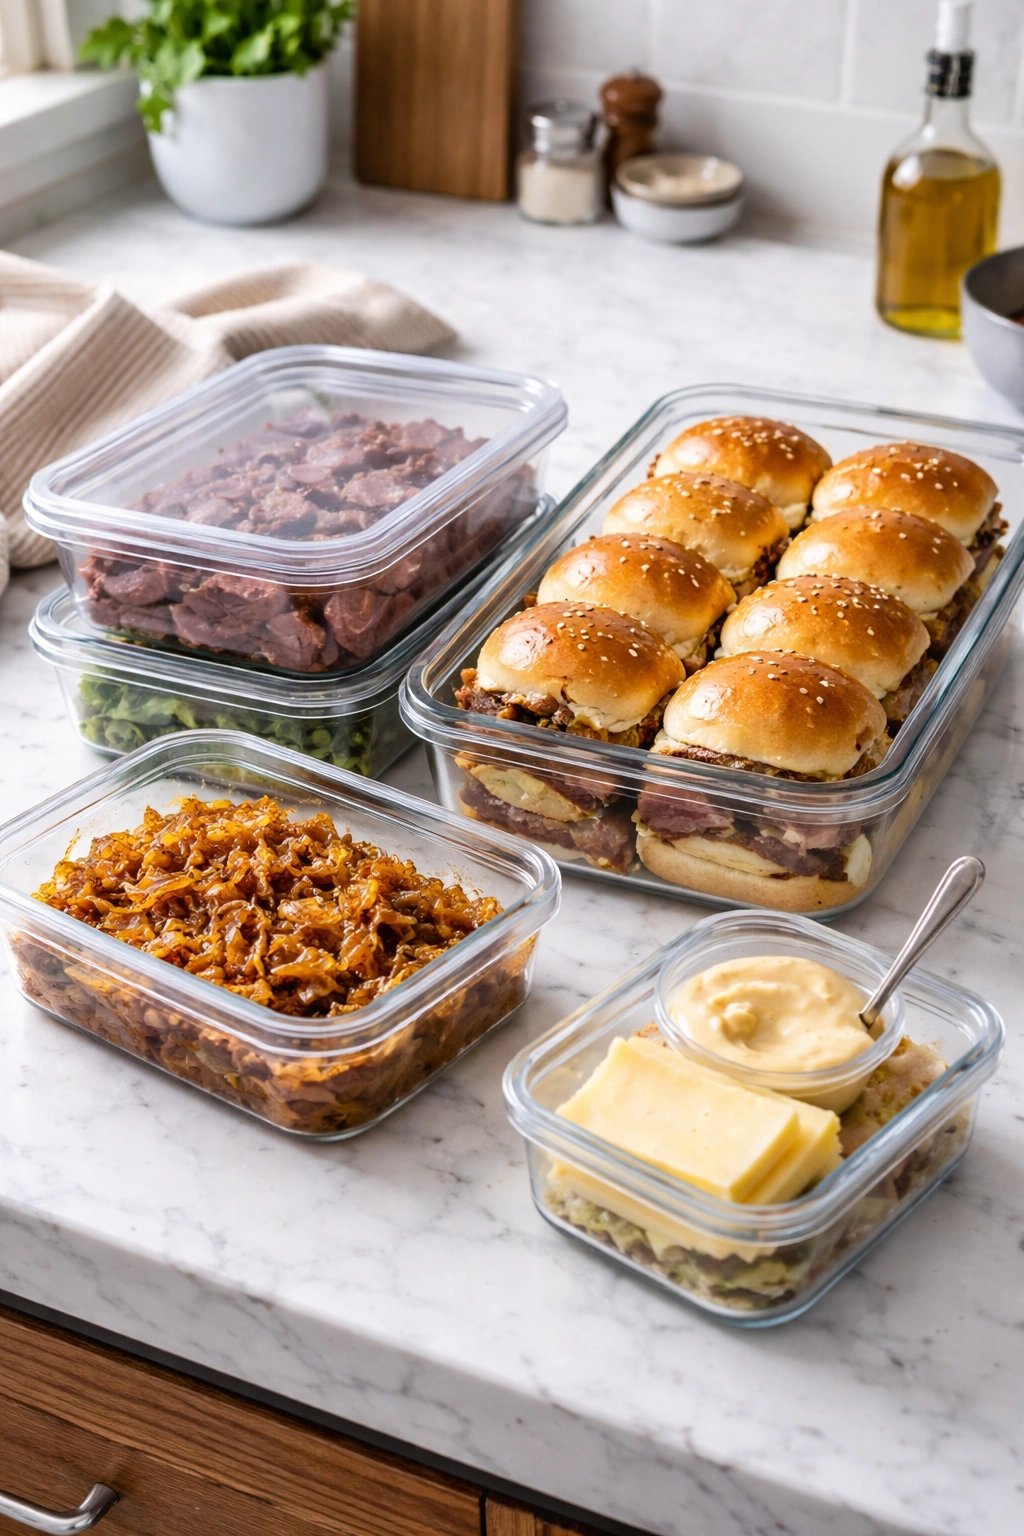
Storing Cooked Roast Beef:
Roasted and sliced roast beef keeps in an airtight container in the refrigerator for up to 4 days. For longer storage (up to 3 months), wrap the cooled beef tightly in plastic wrap and aluminum foil, then freeze. Thaw in the refrigerator overnight before using.
Storing Caramelized Onions:
These actually improve after a day, as the flavors deepen. Keep them in an airtight container in the refrigerator for up to 1 week. They freeze beautifully for up to 3 months. Thaw in the refrigerator and reheat gently over low heat with a splash of water if they seem too thick.
Storing Horseradish Cream:
This keeps in an airtight container in the refrigerator for up to 5 days. It doesn’t freeze well, as the cream can separate during thawing, so make it fresh if you’re planning to freeze components and assemble sliders later. The flavors actually intensify in the fridge, so making it the night before is ideal.
Assembled Slider Storage:
If you’ve fully assembled sliders, they’re best eaten within 30 minutes. If you need to store them, wrap each one individually in plastic wrap and refrigerate for up to 2 hours. They become soggy after that, so don’t assemble too far ahead.
Reheating Assembled Sliders:
Place on a baking sheet, cover with foil, and warm in a 300°F (150°C) oven for 8 to 10 minutes. This maintains the bun texture and warms everything gently without drying it out.
Perfect Serving Suggestions and Pairings

What to Serve Alongside:
Roast beef sliders are substantial enough to stand alone, but a few simple sides round out the meal beautifully. A fresh green salad with a bright vinaigrette (lemon or red wine vinegar-based) cuts through the richness. Crispy oven fries or thin-cut french fries are a classic pairing. Pickled vegetables — particularly pickled beets or pickled cucumbers — add a sharp acidic note that balances the richness of the beef and cheese.
Beverage Pairings:
Beer is the obvious choice: a crisp lager or pilsner cuts through the richness of the horseradish and beef. If you prefer wine, a light red like Pinot Noir or a medium-bodied red with good acidity works well. For non-alcoholic options, ginger ale or a sparkling apple cider complement the horseradish’s peppery bite.
Appetizer Style Presentation:
If you’re serving these at a party or gathering as an appetizer, arrange them on a wooden board or platter with small bowls of extra horseradish cream, caramelized onions, and additional cheese on the side. This allows guests to customize and adds visual interest. Provide small napkins — these are messy in the best way, and people will appreciate the prep.
Occasion Matching:
These sliders work equally well at casual gatherings (game days, picnics, backyard barbecues) and more upscale entertaining (cocktail parties, dinner parties). Their small size makes them feel elegant and manageable, while the flavor profile is casual enough for relaxed crowds. They’re excellent alongside charcuterie and cheese boards, or as a main course for a casual lunch or light dinner.
Plating for Dinner:
If serving as the main course, plate 2 to 3 sliders per person alongside a salad or vegetable. The individual sliders make for an attractive, modern presentation that feels more refined than traditional sandwiches.
Final Thoughts
A roast beef slider done right is proof that good food doesn’t need to be complicated or time-consuming. The secret is respecting each component — quality beef that’s properly roasted and sliced thin, onions that are given the time they need to caramelize, cream that’s properly spiked with horseradish, and a good-quality bun that’s lightly buttered and toasted. When you put these elements together with care, you get something that feels elegant, tastes sophisticated, and disappears from the platter quickly.
The beautiful part is that most of this work happens ahead of time. The beef roasts while you do other things. The onions caramelize while you attend to other tasks. The horseradish cream sits quietly in the refrigerator, developing deeper flavor. On serving day, assembly takes minutes, and reheating takes barely any effort. You spend two hours preparing, and you’ll spend maybe one minute watching people’s faces as they take the first bite.
These sliders are restaurant-quality because they use actual technique and good ingredients, but they’re home-cook friendly because nothing about the process is actually difficult. Start with the beef and caramelized onions, master those two components, and everything else falls into place. Make a batch once and you’ll understand exactly why people ask for the recipe.