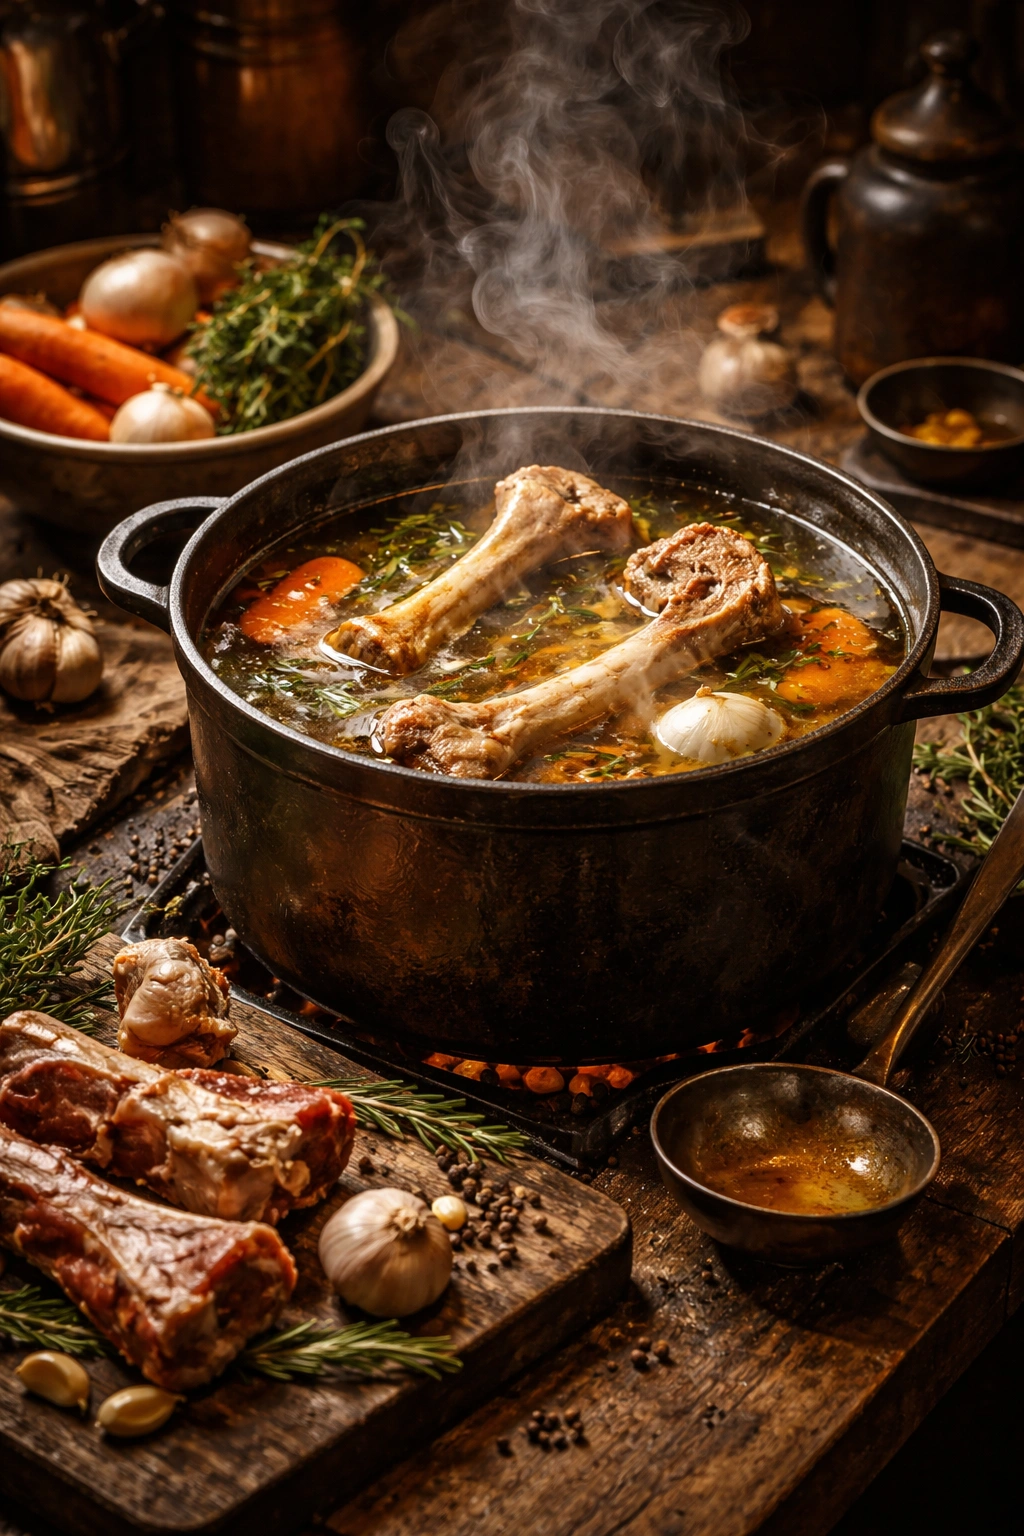
There’s something almost mystical about the aroma of bone broth simmering on the stove—a smell that connects us to centuries of cooking tradition and kitchen wisdom passed down through generations. Unlike the rushed, convenience-driven cooking methods that dominate modern kitchens, bone broth demands patience, attention, and a willingness to let time do the heavy lifting. The rewards are extraordinary: a silky, gelatinous liquid packed with collagen, minerals, and amino acids that no store-bought version can quite replicate. This isn’t just about following a recipe; it’s about understanding the why behind each step, so you can troubleshoot problems, adapt to what you have on hand, and develop an intuitive feel for when your broth has reached its golden peak.
Traditional bone broth making is one of the few cooking methods that hasn’t fundamentally changed in centuries. From Parisian kitchens producing rich stocks for haute cuisine to grandmothers across Eastern Europe simmering pots overnight for restorative soups, the core principles remain unchanged: good bones, clean water, time, and heat. The difference between a mediocre broth and a truly exceptional one often comes down to small details—the type of bones you choose, whether you blanch them first, how long you maintain the temperature, and what aromatic vegetables you add. These aren’t arbitrary steps; each one serves a specific purpose in coaxing maximum flavor and nutrition from your raw ingredients.
What makes the old-fashioned approach distinct is its emphasis on observation over precision timers and temperature control. Traditional broth makers learned to recognize the signs of doneness by looking at the broth’s color, the feel of the bones, and the depth of flavor—not by consulting a chart. You’ll develop that same skill by the time you’ve made your third or fourth batch, and you’ll find yourself adjusting based on what you see and taste rather than what a recipe dictates.
The History and Why Bone Broth Matters
Bone broth didn’t emerge from trendy wellness culture—it’s one of the oldest cooking foundations known to human civilization. Archaeological evidence suggests that our ancestors were boiling bones to extract nutrients for tens of thousands of years, long before anyone had a name for the practice. In Europe, stock-making became the backbone of professional cooking, with culinary schools teaching young chefs that a well-made stock was the foundation of all great cooking.
The Traditional Role in Global Cuisines
Every culinary tradition with significant history has its version of bone broth. Chinese herbal broths, made by simmering bones with ginger and dried mushrooms, have been central to traditional medicine for millennia. French cuisine depends entirely on properly made stocks—bones simmered for 6 to 8 hours or more form the base for sauces, soups, and braises that define the cuisine. Korean miyeok guk relies on seafood-based broths, while Jewish kvell requires a rich chicken bone broth as its foundation. These traditions developed independently, across continents and cultures, because people discovered that slow-cooked bones created something uniquely nourishing and flavorful.
What Makes Homemade Broth Different
Commercial broths and store-bought stock concentrate on shelf stability and convenience—they’re often thickened with gelatin, stabilized with additives, and processed in ways that strip away some of the subtlety. Real bone broth, the kind made at home over many hours, develops complexity that can’t be rushed. The longer bones simmer, the more collagen breaks down into gelatin, which creates that characteristic wobble and mouthfeel. Minerals leach from the bone structure, making the broth mineral-rich in ways that supplement that quality. The marrow and connective tissue contribute deep, savory notes that develop only with extended cooking time.
Choosing the Right Bones for Maximum Flavor and Nutrition
Not all bones are created equal when it comes to broth making. The best bone broths start with bones that provide both flavor and nutritional density, and understanding the differences between them will dramatically improve your results.
Beef Bones and What Each Type Contributes
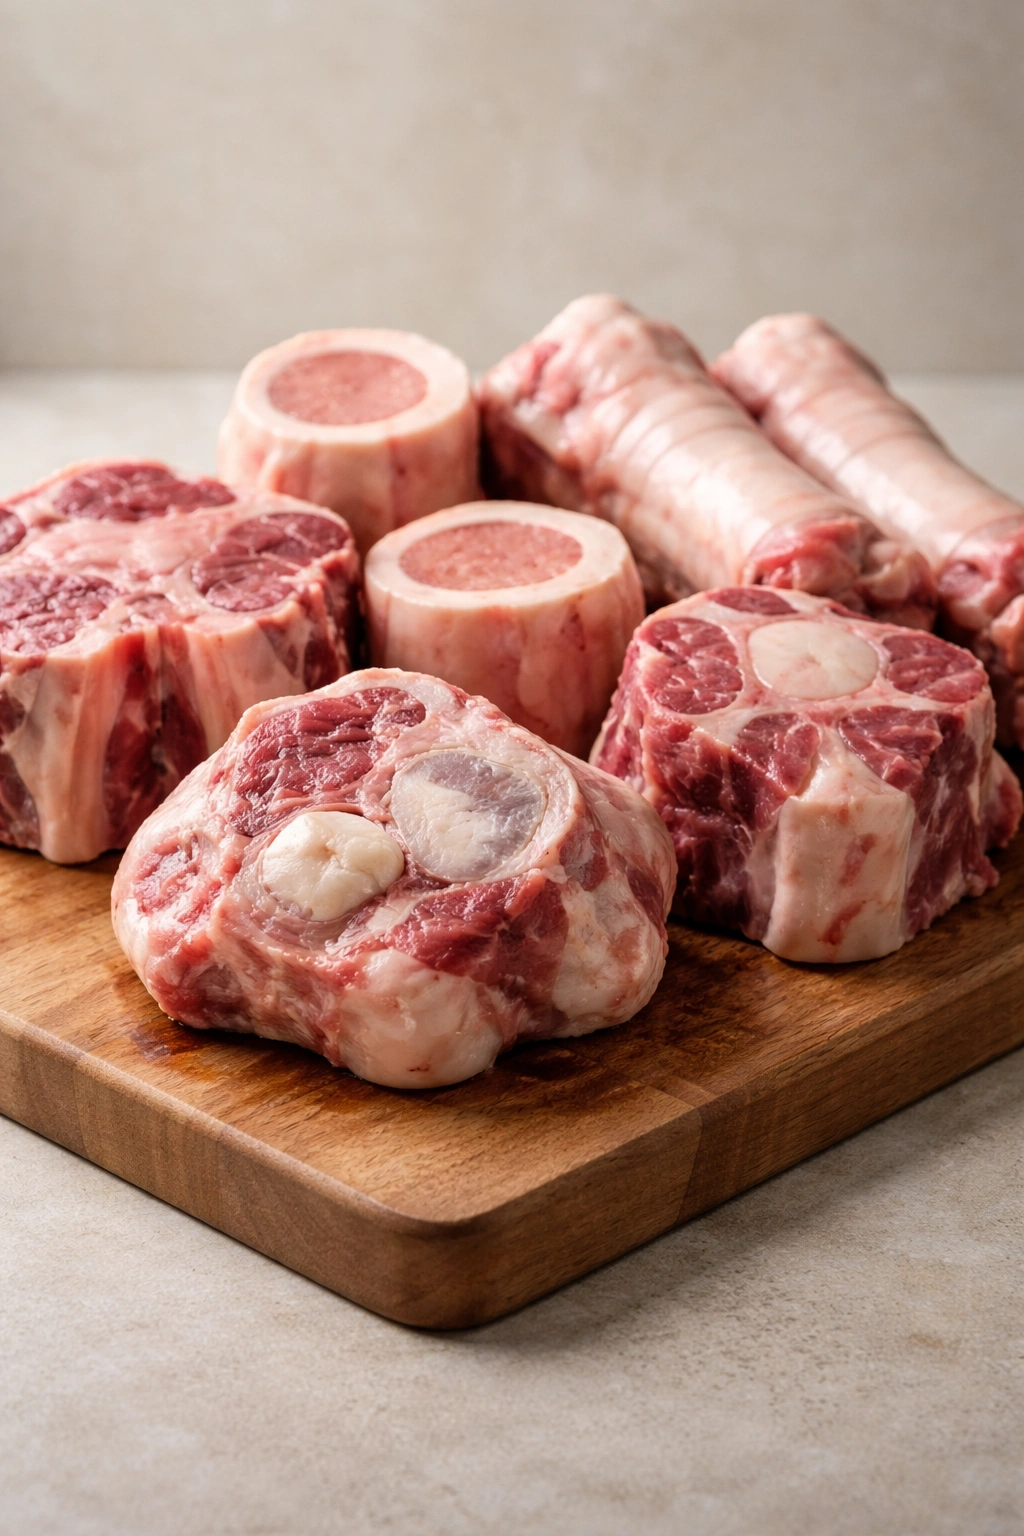
Beef bones are the gold standard for creating rich, deeply flavored broth that’s excellent for soups, gravies, and sipping warm on cold days. Knuckle bones contain significant cartilage and connective tissue—when you crack them open, you’ll see a gelatinous substance inside that breaks down into collagen during cooking. These bones are your best friend for achieving that silky, spoon-coating mouthfeel that signals excellent broth.
Marrow bones (also called “soup bones”) have a large center cavity filled with marrow. This marrow is almost pure fat and nutrients, and it renders into the broth during cooking, creating incredibly rich, savory flavor. A good broth always includes at least some marrow bones for this reason.
Knuckle bones, feet, and neck bones contain the most connective tissue relative to their size. A beef foot (cut into pieces by your butcher) is a powerhouse for gelatin content. Neck bones are meaty—they have muscle attached to the bone, which adds flavor and some substance to the broth, making it more satisfying.
Why You Need a Mix
The best broths combine several bone types rather than relying on just one. Use about 50% knuckle and foot bones (for gelatin), 30% marrow bones (for flavor and fat), and 20% meaty bones like neck or shank bones (for depth and substance). This combination ensures you get maximum gelatin, excellent flavor, good mouthfeel, and a broth that’s genuinely nourishing rather than one-dimensional.
Sourcing High-Quality Bones
Your best bet is a local butcher or farmer’s market where you can speak directly to the person selling the meat. Explain that you’re making bone broth—good butchers will set aside bones from animals they’ve butchered that day or that week, often at a fraction of the cost of pre-packaged “soup bones.” Bones from grass-fed, pasture-raised animals will produce a richer, cleaner-tasting broth, though conventional bones work perfectly fine. Some Asian markets sell bones specifically for broth at very reasonable prices. Never use bones from conventionally raised animals that have been heavily processed or frozen for extended periods—look for bones with good color and no off-smells.
Essential Equipment for Broth Making
You don’t need fancy equipment to make traditional bone broth, but having the right tools makes the process smoother and safer.
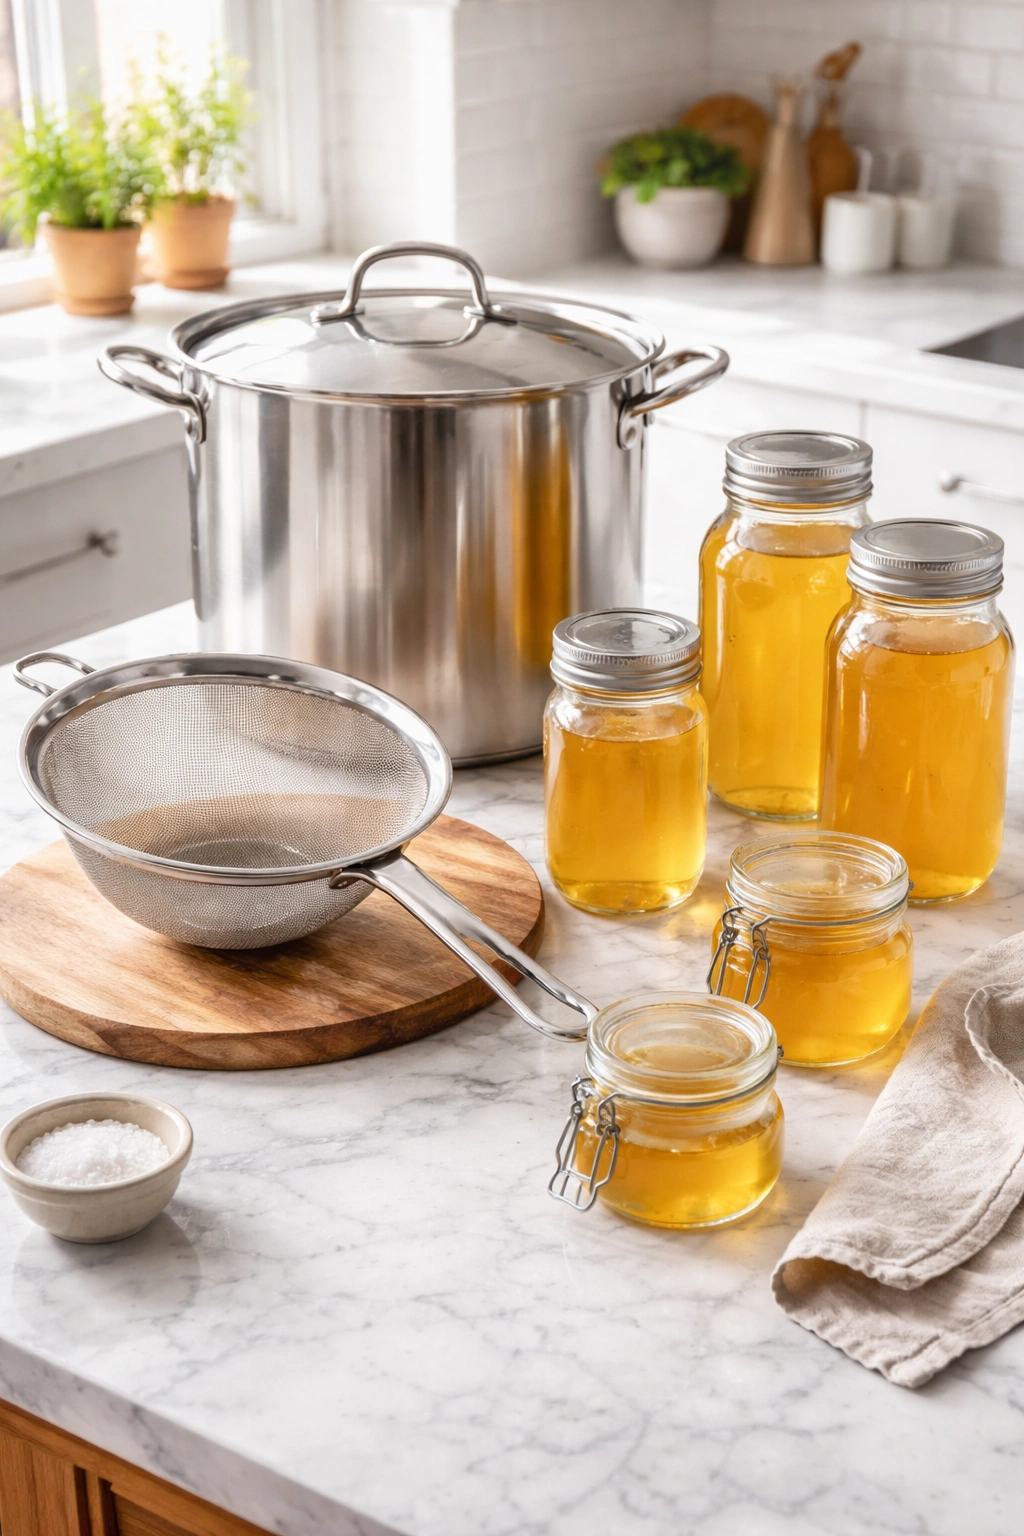
A large pot is essential—you’ll want at least a 12-quart capacity to accommodate bones and water with room for gentle simmering. Stainless steel is best because it won’t react with the acidic vegetables and it distributes heat evenly. Avoid aluminum for long broth-making sessions. A fine-mesh strainer or cheesecloth is non-negotiable for getting a clear broth. You’ll be straining out bones, vegetables, and impurities, and a standard colander won’t catch the fine sediment that clouds homemade broth.
For storage, glass jars with tight-fitting lids are superior to plastic, which can absorb odors and may leach chemicals when you’re reheating broth repeatedly. Wide-mouth jars are easier to fill and seal. A digital thermometer is helpful for monitoring temperature, particularly if you’re using the oven method rather than the stovetop. A ladle with a long handle makes skimming impurities much easier and safer than using a spoon.
Many traditional broth makers prefer the oven method over stovetop simmering because oven heat is more gentle and consistent, reducing evaporation and keeping temperature stable. If you go this route, use a heavy Dutch oven or covered pot that can withstand 200°F for 12 to 24 hours. The oven method requires less attention and produces less mess than the stovetop.
Preparing Your Bones and Vegetables
Preparation is where many home broth makers lose opportunities to create the cleanest, most refined final product.
Cleaning and Rinsing Your Bones
Start with a thorough rinse under cold water, using your hands or a brush to remove any bone dust, blood residue, or debris. Pat them dry with paper towels. If bones have been previously frozen, thaw them completely in the refrigerator before cooking—this prevents the exterior from cooking too quickly while the interior stays cold, which can trap impurities. Don’t skip the rinsing step; it’s the first step in producing a clear, clean-tasting broth rather than a muddy, impure one.
Vegetable Selection and Prep
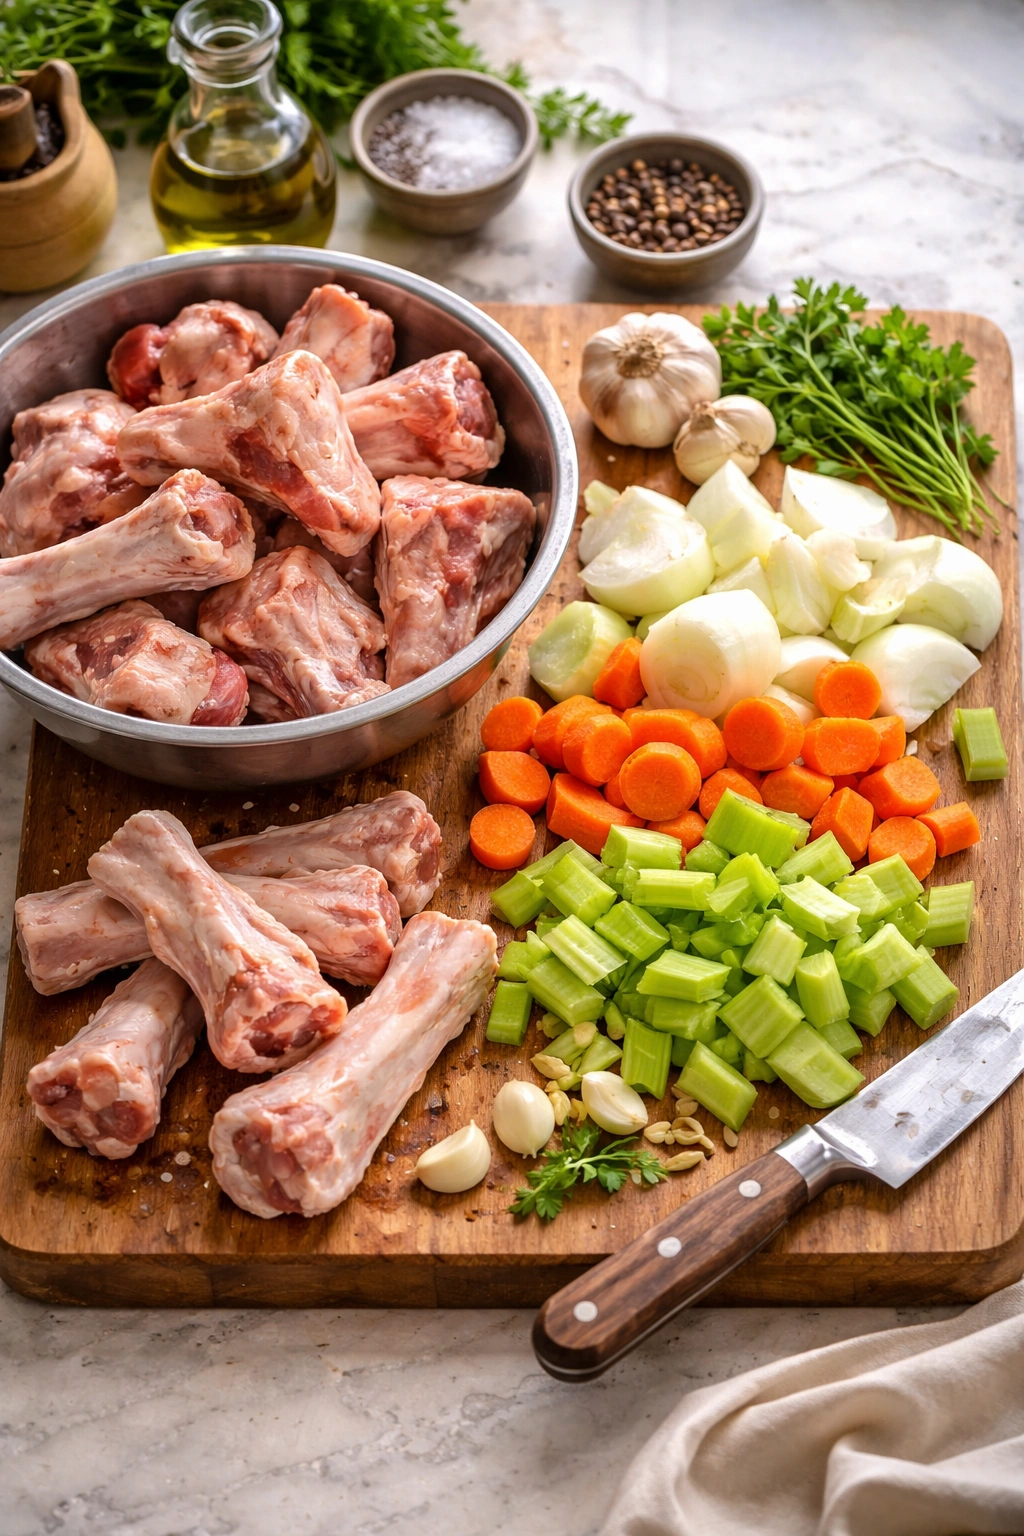
The traditional “mirepoix” base—onion, carrot, and celery—is the aromatic foundation for most broths for good reason. Cut the vegetables roughly into 2-inch chunks rather than fine dice. Don’t peel them; the outer layers and skins add color and mineral content. A carrot end will give you a different contribution than finely minced carrot, so rough cuts are intentional. Save vegetable scraps if you make mirepoix regularly—onion skins, carrot ends, and celery tops are excellent in broth.
For additional aromatic vegetables, garlic cloves (crushed but unpeeled) add depth without overwhelming. Tomato paste (a tablespoon or two) adds umami and acidity. Some cooks add a leek (split lengthwise and rinsed thoroughly) for a lighter sweetness than onion. Keep vegetable additions relatively minimal—you want bones to be the star, with vegetables playing a supporting role.
The Initial Blanching and Cleaning Step
Here’s where old-fashioned broth making diverges from shortcuts. Many recipes skip blanching, but traditional kitchens never did, and there’s a reason.
Why Blanching Matters
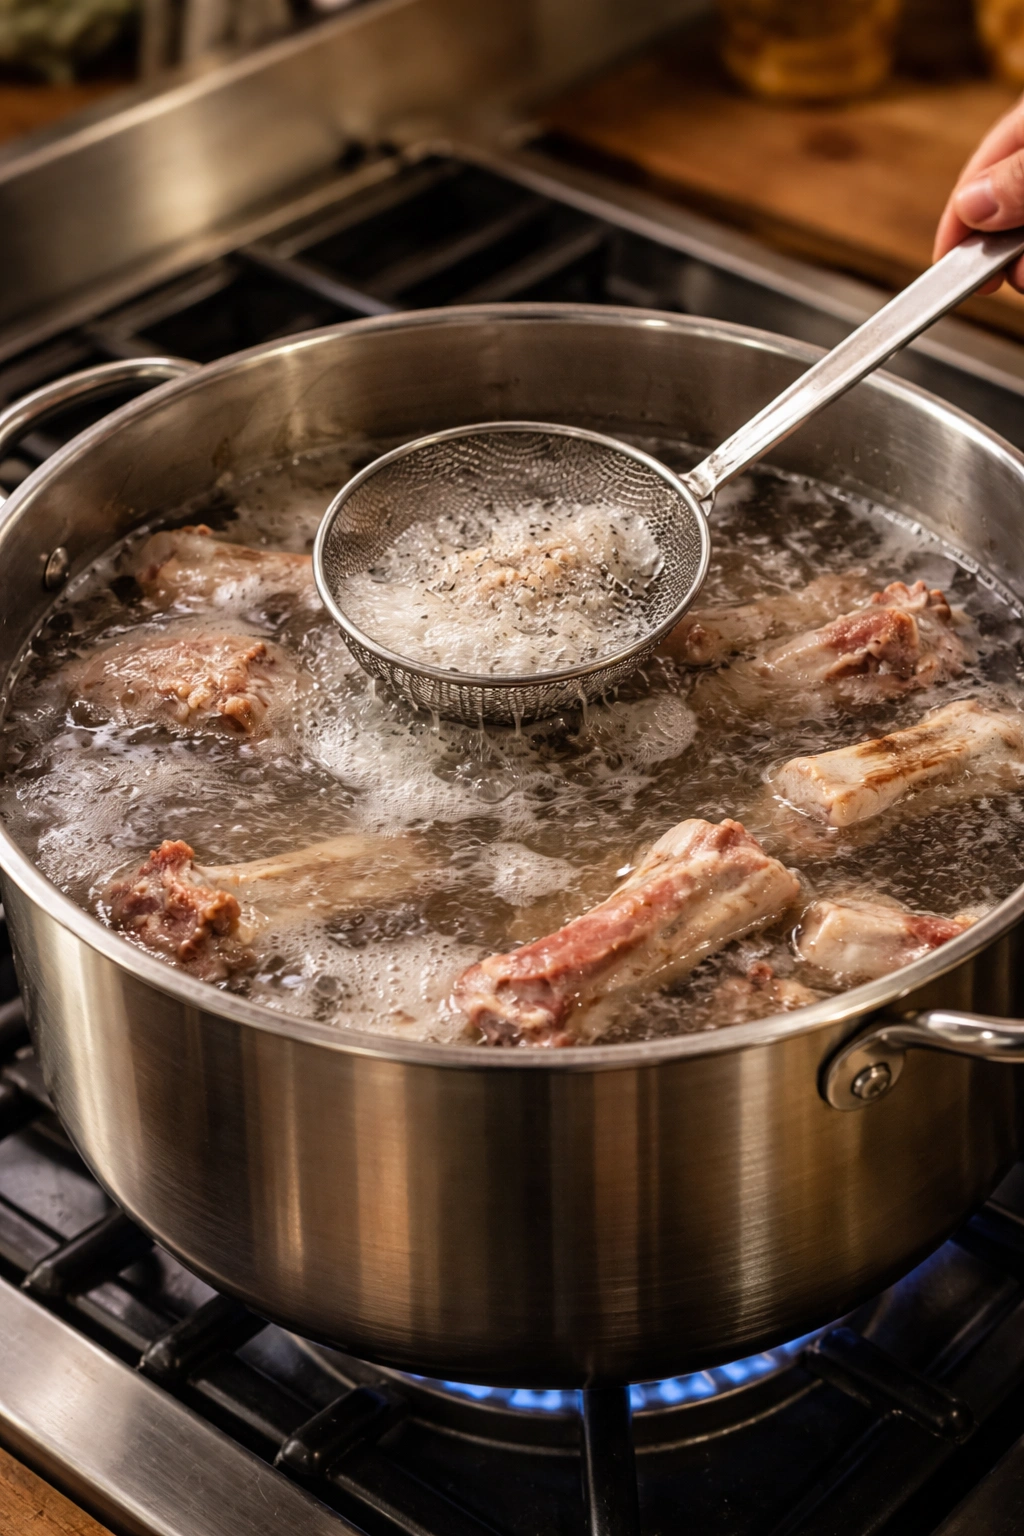
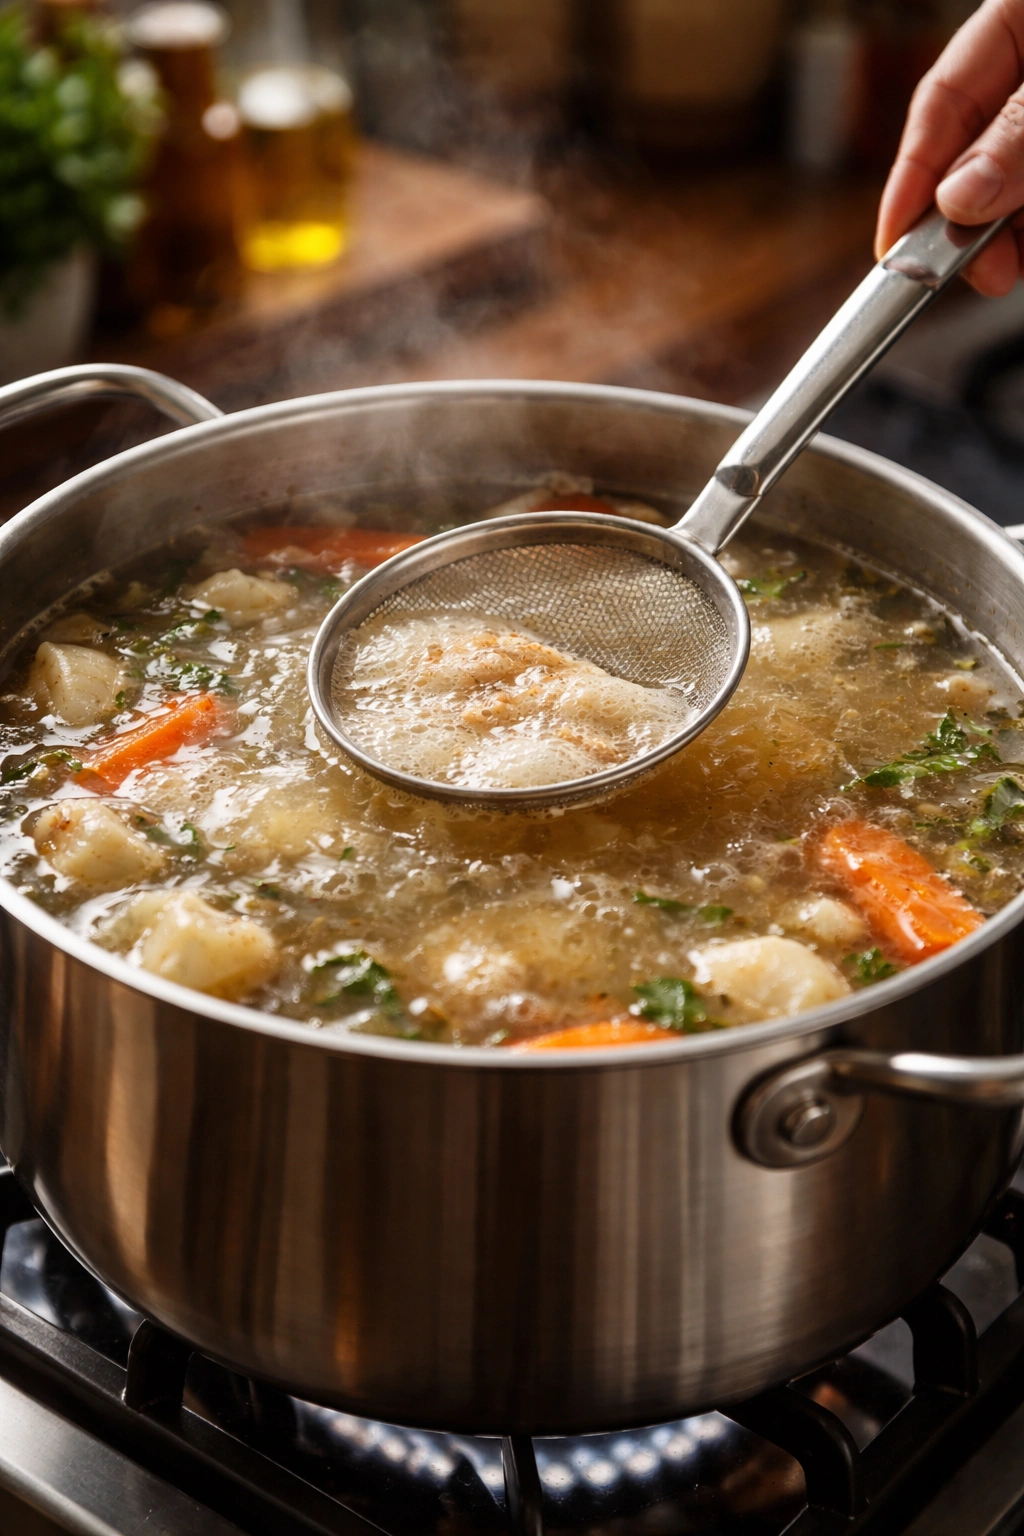
When you first bring bones to a boil in fresh water, impurities—blood, bone marrow particles, coagulated proteins—rise to the surface in the form of a gray or brown foam. This foam isn’t harmful, but leaving it in your broth clouds it and creates a muddy flavor. Blanching removes these impurities, resulting in a crystal-clear, clean-tasting final product. The difference between blanched and unblanched broth is visible and noticeable in flavor.
The Blanching Process
Place your cleaned bones in the pot and cover them with cold water by about 2 inches. Bring the water to a boil, watching carefully so you can begin skimming as soon as the foam appears. Let it boil for 3 to 5 minutes, skimming off all the grayish foam with a fine slotted spoon or skimmer. Don’t rush this—you want to remove as much as possible. Dump the water (along with all that foam) and rinse the bones thoroughly under running water, rubbing them gently to remove any remaining sediment. Rinse the pot as well.
This single step—taking 10 minutes of active work—is what separates restaurant-quality broth from cloudy homemade attempts. Don’t skip it just because it seems like extra effort.
Layering Flavors With Aromatics and Herbs

Once your bones are blanched and the pot is clean, you’re ready to build flavor with aromatic vegetables and herbs.
Building Your Aromatic Base
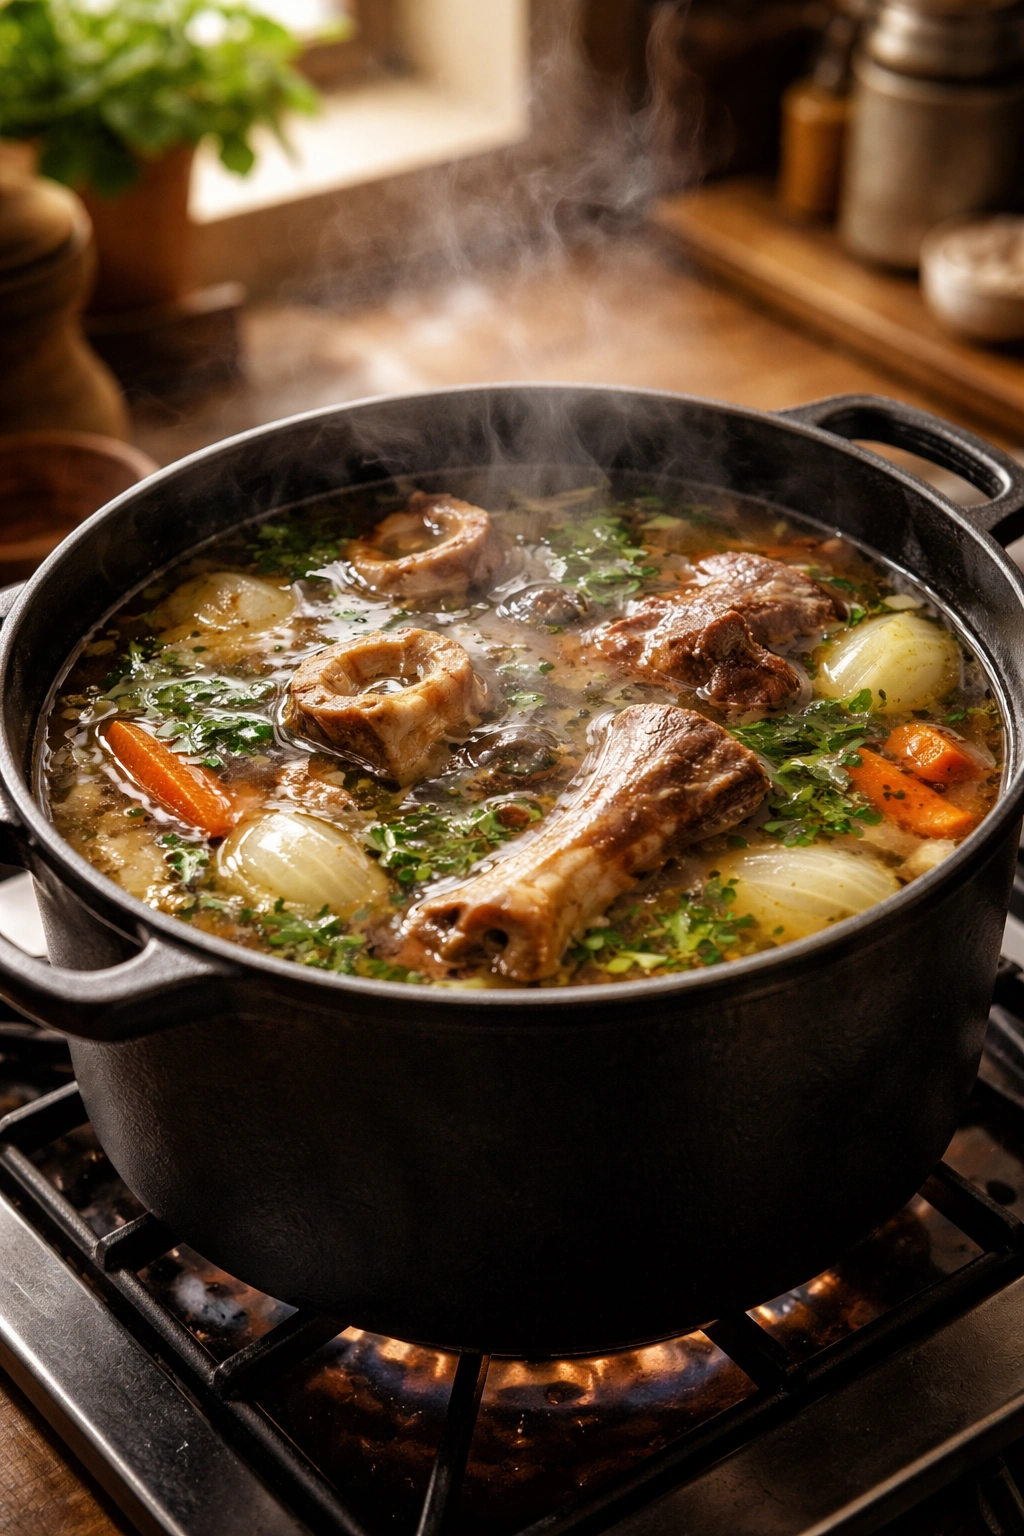
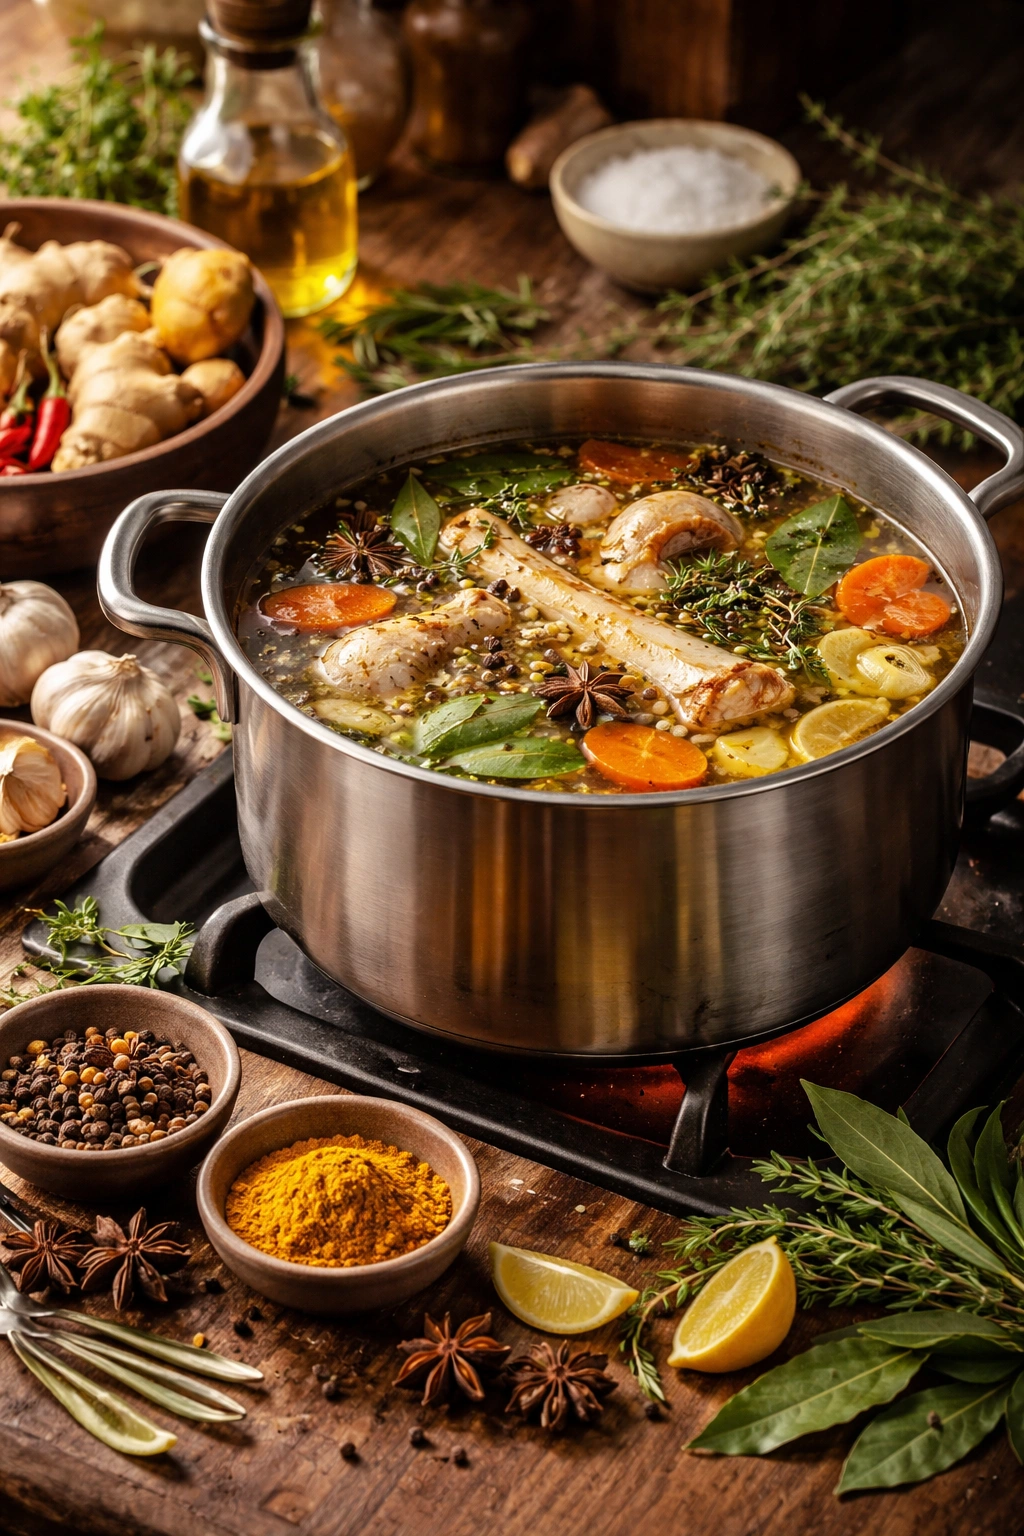
Add your rinsed bones to the clean pot and cover again with cold water, adding enough to submerge everything by an inch or two. Bring this to a gentle simmer over medium heat—not a rolling boil, which will agitate the broth and cloud it. Once it reaches a simmer, add your rough vegetable chunks: onion (halved or quartered), carrots, and celery. Add crushed garlic cloves. This is the foundation layer.
Herb Additions and Timing
Traditional herbs for beef broth include bay leaves, thyme sprigs, and parsley stems. You want full sprigs or whole bay leaves because dried herbs can fragment and cloud your broth. Some cooks prefer to tie herbs together in a bundle (called a bouquet garni) so they’re easy to remove. Peppercorns add subtle warmth—use about 10 to 15 whole black peppercorns. Don’t salt the broth at this stage; the flavor will concentrate during cooking, and you can salt to taste when you finish. Salt now and you’ll oversalt by the end.
If you want deeper, more complex flavor, add a small piece of ginger, several dried shiitake or porcini mushrooms, or a splash of apple cider vinegar (which is traditional in some European broths). The vinegar slightly lowers the pH, helping minerals dissolve into the broth. A teaspoon or two is enough—you don’t want the broth tasting sour.
The Long Simmer: Time and Temperature Explained
The entire magic of bone broth happens during the long, gentle simmer. Time and temperature are the two variables you control to determine the final product.
Temperature Control and Why Gentle Is Better
The ideal temperature for broth is just barely a simmer—a few lazy bubbles breaking the surface every few seconds, not a rolling boil. At this gentle temperature, collagen breaks down slowly into gelatin, minerals dissolve gradually, and impurities don’t get forced back into the liquid. If your broth boils aggressively, two problems occur: it clouds because agitation forces particles into suspension, and it reduces faster, concentrating flavors unevenly.
On the stovetop, reduce heat to low after bringing the broth to an initial gentle simmer. If you have an adjustable burner, dial it down to the point where you see just occasional bubbles. Check it every hour or two to ensure it’s still at that gentle simmer, not sitting static. If you’re using the oven method, preheat to 200°F or 225°F, bring the pot to a bare simmer on the stovetop, then transfer it to the oven covered. The oven’s consistent, gentle heat is actually preferable to stovetop simmering for this reason.
Timing Based on Bone Type and Desired Richness
Chicken bone broth needs 12 to 24 hours maximum—any longer and the bones become so broken down that they lose their structural integrity and fragments cloud the broth.
Beef bone broth benefits from 24 to 36 hours of simmering. At 12 to 18 hours, you’ll have good broth with decent gelatin content. At 24 hours, the gelatin is nearly at its peak, and flavors are deeply developed. Between 24 and 36 hours, the broth becomes increasingly gelatinous and the flavor deepens further. Beyond 36 hours, you’re pushing diminishing returns—the bones have given up most of what they have to give.
Pork bone broth simmers for 18 to 24 hours for good results. Fish bone broth is a special case—it’s never simmered longer than 8 hours because fish bones are delicate and the flavors become bitter if extended too long.
Start checking your broth’s doneness around the 18-hour mark (for beef). You’ll notice the bones have become quite fragile—if you squeeze a knuckle bone, it crumbles easily. The broth itself should be noticeably gelatinous when cool.
How to Know When Your Broth Is Done
Determining doneness is more art than science, which is why traditional broth makers develop an intuitive sense rather than relying on timers.
Visual and Textural Signs
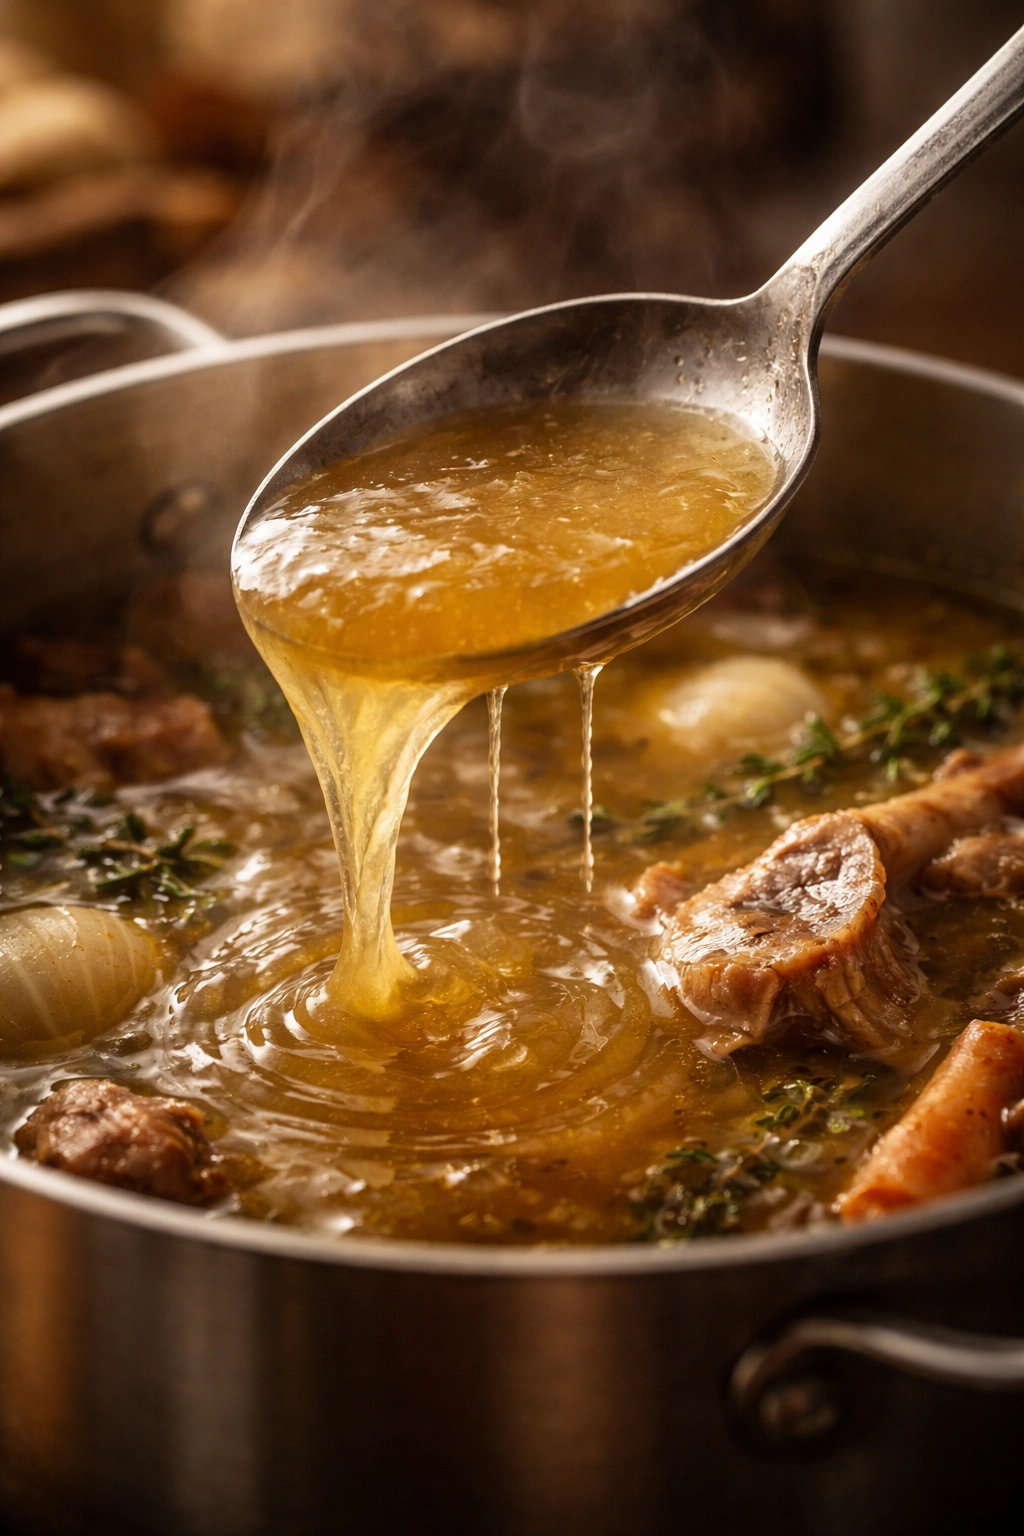
When you dip a spoon into the hot broth and lift it out, tilt it—good broth coats the spoon and flows slowly off the edge, indicating gelatin content. Poor broth runs off immediately like water. After 24 to 36 hours with beef bones, the broth should definitely show this coating behavior.
Smell the broth. It should smell deeply savory, complex, and inviting—not fishy, sour, or off in any way. The aroma should make you want to taste it immediately.
Taste it. The flavor should be savory and satisfying, with subtle sweetness from the vegetables. If it tastes thin or one-dimensional, continue simmering. If it tastes balanced and rich, you’re done. Don’t taste during hour 12 and expect it to be perfect; broth develops in stages, and hour 12 tastes completely different from hour 24.
The Bone Test
Pick up a knuckle bone with tongs and examine it. If it’s still quite hard and requires effort to break, simmer longer. If it crumbles easily or bends, you’ve reached excellent doneness. This visual cue is more reliable than timing because bone size varies.
Temperature Drop Test
For beef broth, let a small sample cool to room temperature. If it’s set in a bowl and has a gelatinous, jiggly consistency like loose pudding, your broth is done. If it stays liquid and doesn’t set, continue simmering. This test works only after the broth cools, so plan ahead if you want to check this way.
Straining and Storing Your Finished Broth
The final steps—straining, cooling, and storing—are as important as everything that came before.
The Two-Stage Straining Process
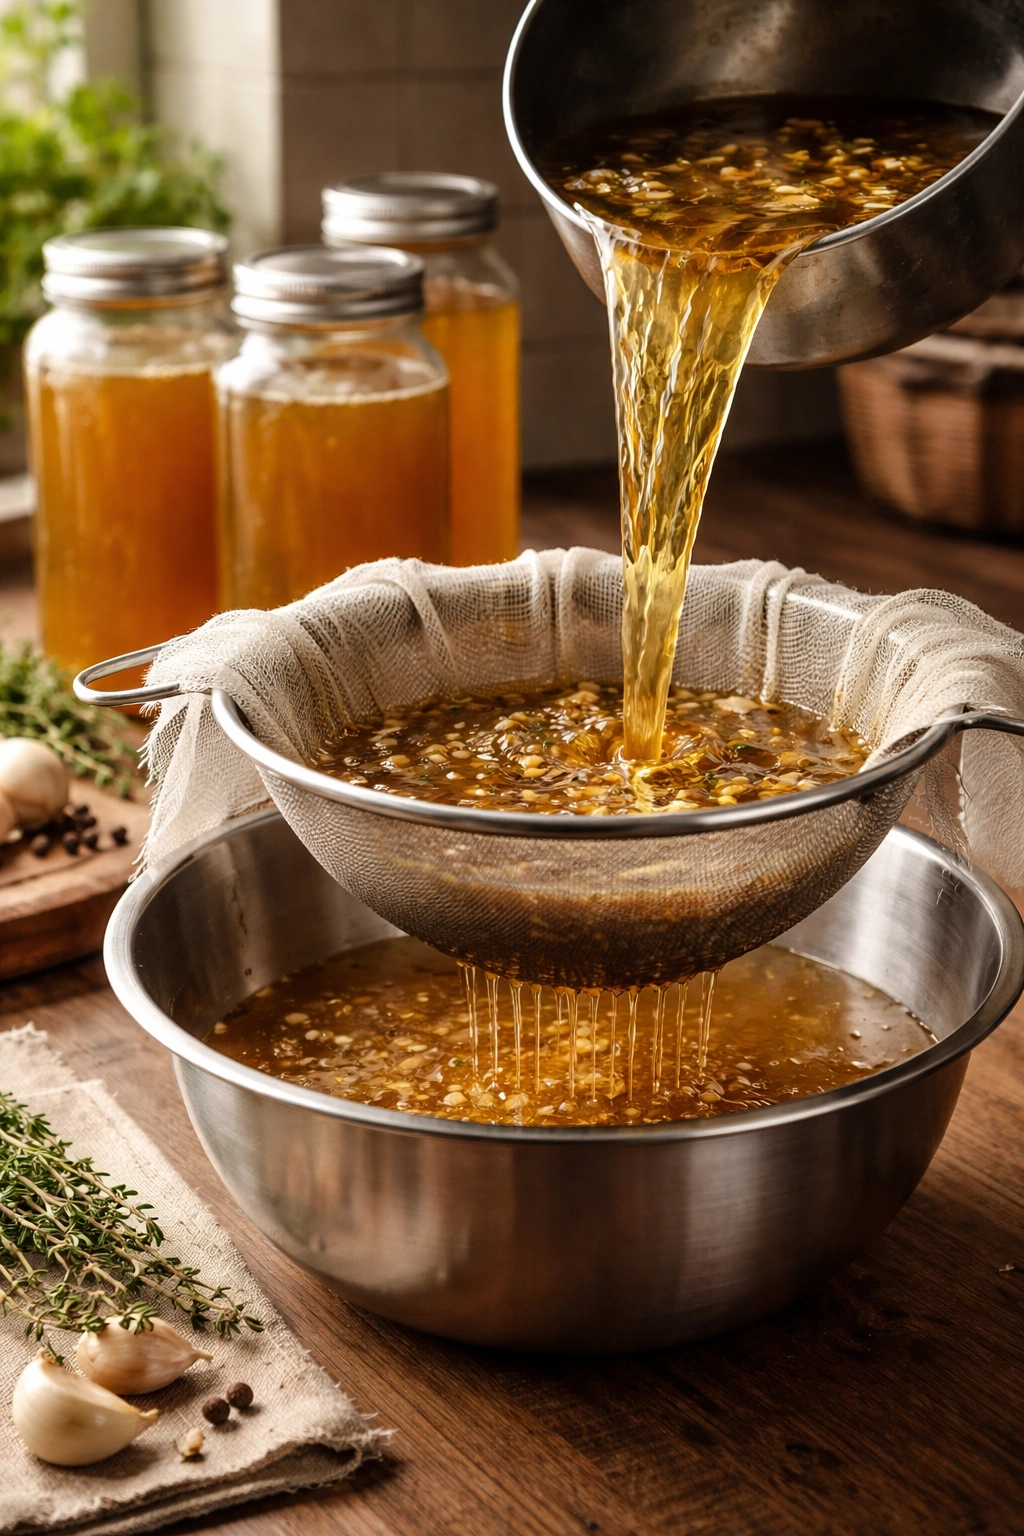
Set a fine-mesh strainer lined with cheesecloth over a large bowl or pot. Carefully pour the broth through the strainer, letting gravity do the work rather than forcing it through. Discard the bones and vegetables. Pour the strained broth back into the pot or into jars for storage. To get truly crystal-clear broth, repeat the straining process: pour the broth through a new cheesecloth-lined strainer into another clean pot. This second pass catches fine particles you missed the first time.
For the clearest possible broth, some traditional cooks strain through a clean cloth napkin or linen rather than cheesecloth. The tighter weave captures more particles, resulting in the kind of pristine clarity you’d see in a French restaurant kitchen.
Cooling Properly and Safely
Never put a pot of hot broth directly into the refrigerator—the dense mass of hot liquid will take hours to cool and will raise the temperature of everything around it, posing food safety risks. Instead, let the broth cool at room temperature for an hour, then transfer to glass jars and refrigerate uncovered or loosely covered for a few hours until fully chilled. Once cold, cover the jars tightly.
Traditionally, broth makers would let large pots cool overnight on the counter, then transfer to storage containers the next day. If you do this, cover the pot loosely with a towel to keep dust out while still allowing steam to escape.
Storing for Maximum Shelf Life
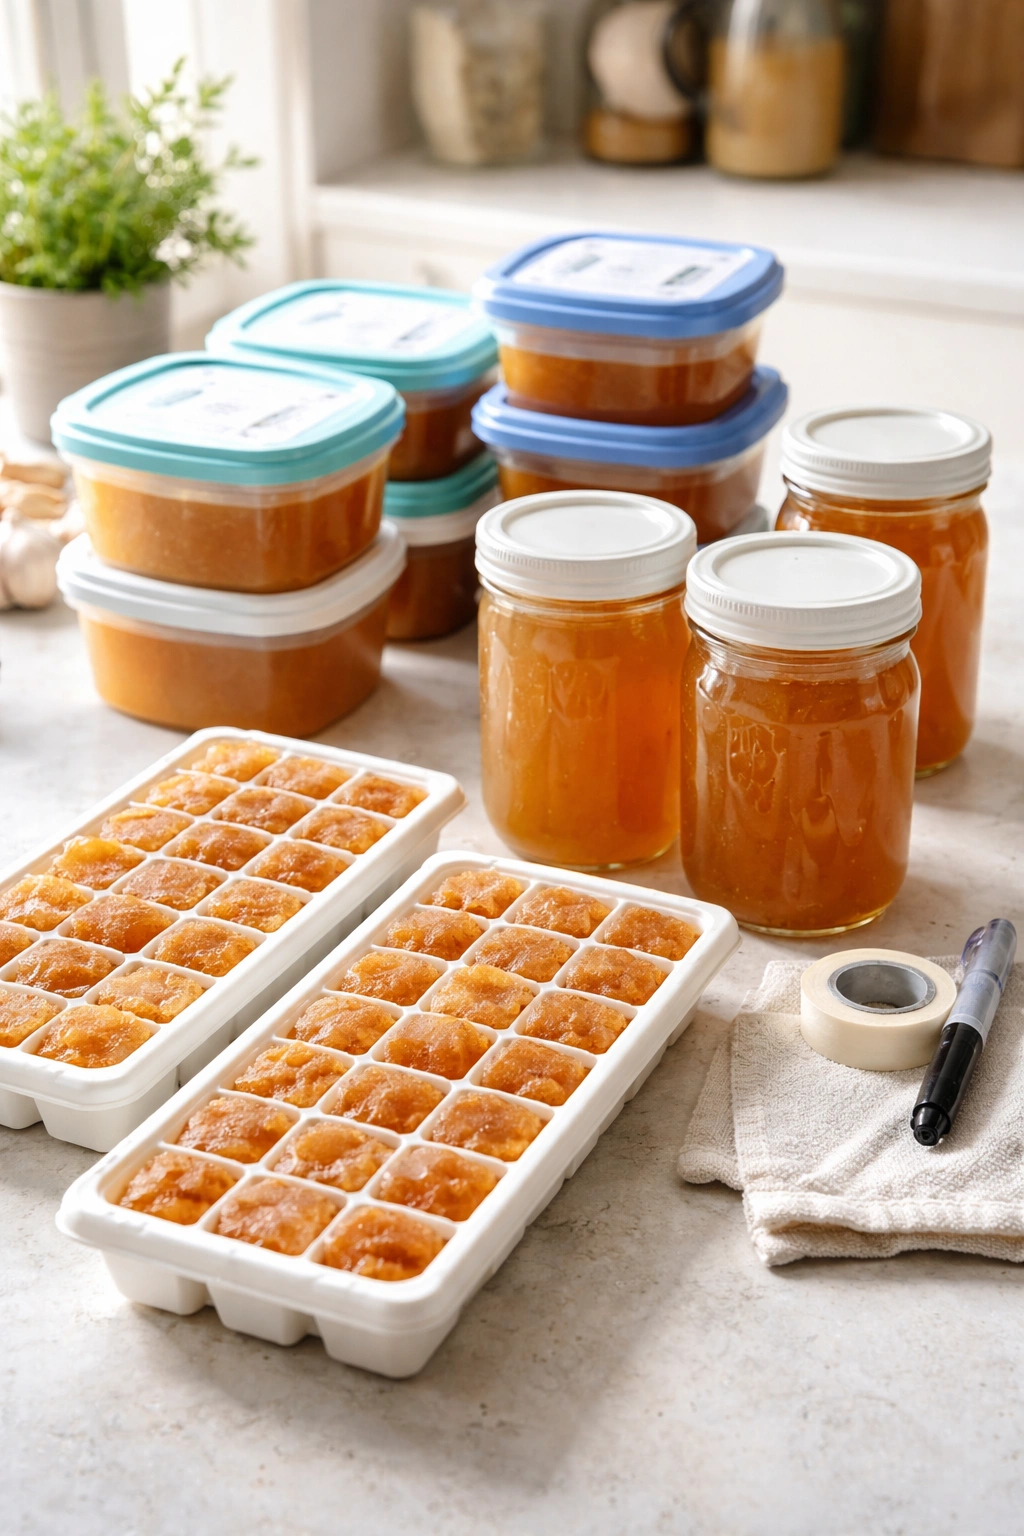
Refrigerated broth keeps for 3 to 5 days in a sealed glass jar. For long-term storage, freezing is essential. Frozen broth keeps for 3 to 6 months. Pour cooled broth into ice cube trays and freeze solid, then pop the cubes into a labeled freezer bag (you can use the cubes as convenient 2-tablespoon portions for cooking). Alternatively, pour into glass jars leaving 2 inches of headspace (broth expands when frozen), cover, and freeze. Never use plastic containers that have previously held other foods if you plan to freeze broth—the gelatin can absorb odors and flavors.
One old trick: freeze broth in a loaf pan, then unmold the frozen block into a freezer bag, which saves space and allows you to thaw just what you need rather than thawing an entire jar.
Troubleshooting: Why Your Broth Might Be Cloudy or Thin
The most common problems in bone broth making are cloudy appearance and lack of gelatin. Both are solvable.
Why Broth Clouds and How to Prevent It
Cloudy broth results from impurities in suspension—sediment that didn’t settle out. This usually means the broth was boiled too vigorously rather than gently simmered. Another culprit is skipping the blanching step; the initial impurities never had a chance to be removed. If you see foam reforming during your simmer, skim it off rather than letting it reincorporate into the broth.
To fix cloudy broth: strain it again through cheesecloth, or use an egg white raft (a classic technique where you whisk egg whites into cool broth, heat slowly, and strain through the coagulated egg whites, which trap particles). For future batches, blanch your bones thoroughly and maintain a gentle simmer throughout.
Why Broth Lacks Gelatin
Insufficient gelatin means the broth was either not simmered long enough, the temperature was too high (which damages collagen), or you didn’t use enough bones with connective tissue and cartilage. Beef bones that have been roasted before broth-making may yield less gelatin because the heat has already altered the collagen structure.
For the next batch, increase simmering time to at least 24 hours, ensure you’re using knuckle bones and feet, and simmer at a much gentler temperature. If your broth is thin but tastes good, use it as-is or reduce it on the stovetop to concentrate the flavors and create more body.
Broth That Tastes Weak or One-Dimensional
This usually indicates insufficient simmering time or too much water relative to bones. Try reducing the broth by simmering it uncovered for several hours—this concentrates flavors significantly. For the next batch, use a higher ratio of bones to water (bones should fill about half the pot, with water added to cover by just an inch), and simmer longer.
Creative Ways to Use Your Homemade Bone Broth

The reason traditional cooks prized bone broth was that it’s endlessly useful. Beyond sipping it warm, consider these applications.
As a Foundation for Soups and Stews
Rich beef broth is the base for classic French onion soup, beef stew, minestrone, and countless slow-cooked braises. Use it anywhere a recipe calls for beef stock or broth. The depth of flavor from your homemade version means you can use less salt and fewer seasonings than commercial recipes call for—the broth itself provides complexity.
For Cooking Grains and Legumes
Simmer rice, quinoa, or lentils in broth instead of water for dramatically improved flavor. The minerals in the broth also aid mineral absorption from the grains. A simple ratio of 2 parts broth to 1 part grain works for most applications.
In Gravies, Sauces, and Pan Reductions
When you deglaze a roasting pan with broth instead of wine, you capture all the flavorful browned bits and create an instant, deeply flavored sauce. Reduce broth down until it’s concentrated and syrupy—this is called a “reduction” and becomes a finishing sauce for roasted meats.
Sipped Simply as a Restorative Drink
Heat a mug of broth with a pinch of sea salt and fresh cracked pepper. Add fresh herbs like thyme or parsley, or a strip of ginger. This is broth in its purest form—a warming, nourishing drink that many cultures traditionally served when someone was recovering from illness or to fortify the body during cold months.
Variations and Flavor Profiles to Explore
Once you’ve mastered the basic technique, you can adjust the broth to suit different cuisines and preferences.
Asian-Inspired Broth
Add a 2-inch piece of fresh ginger (crushed), 4 to 5 dried shiitake mushrooms, a 2-inch piece of kombu (dried kelp), and 6 dried red dates (jujubes). These additions create a broth prized in Chinese and Korean cooking. Omit the traditional mirepoix and instead add a split leek, ginger, and garlic. This broth has a slightly sweet, deeply savory flavor.
Herbed French Broth
Emphasize traditional French herbs: increase the thyme to 4 to 5 sprigs, add 2 bay leaves, 1 whole star anise, and several parsley stems. This creates a classic French fond or broth base that’s excellent for sauces and French soups.
Wine-Based Broth
After blanching bones but before the long simmer, add 1 cup dry white or red wine to deglaze the pot, scraping up any browned bits. Let it reduce by half, then proceed with your normal broth-making. The wine adds tannins and acidity that create additional complexity.
Turmeric and Ginger Wellness Broth
Add a 3-inch piece of fresh turmeric (or 1 tablespoon ground turmeric), a 2-inch piece of ginger, 2 bay leaves, and 10 whole black peppercorns. This creates a golden broth with anti-inflammatory properties. Include the additional vegetables you’d normally use; this version bridges cooking and wellness applications.
Make-Ahead Tips and Freezing for Long-Term Storage
Bone broth is one of the best meal-prep projects because it’s almost entirely hands-off.
Batch-Making Strategy
Devote a weekend afternoon to starting broth in the morning. It’ll be ready the next afternoon. You can make multiple pots simultaneously if you have the stovetop or oven space. Make broth when bones are available—buy from your butcher when they have extras, and freeze them until you have enough to start a large batch. Making one large pot is only slightly more effort than making a small one; you’re still skimming and watching, so batch your effort.
Freezing Without Waste
Portion broth into various container sizes: ice cube trays for small cooking amounts (2 tablespoons per cube), 1-pint containers for single servings, and larger containers for when you’re making soup. Label everything with the date and what type of bones the broth came from. Beef broth made in March tastes identical to beef broth made in September, but clarity helps you rotate through stock.
Combining and Fortifying
You can absolutely combine broths made from different batches—if you have beef broth and pork broth, mixing them creates an interesting hybrid flavor. You can also reduce broth down to a gelatinous glaze (called a demi-glace in professional kitchens) and freeze this in ice cube trays. A single cube of demi-glace whisked into hot water creates instant broth without taking up freezer space.
Using Frozen Broth
You don’t need to thaw broth before using it. Drop a frozen cube directly into a saucepan and heat, or add frozen broth to soups and stews as they simmer. If you’re using it for a cold application like a salad dressing base, thaw it in the refrigerator the night before.
Final Thoughts
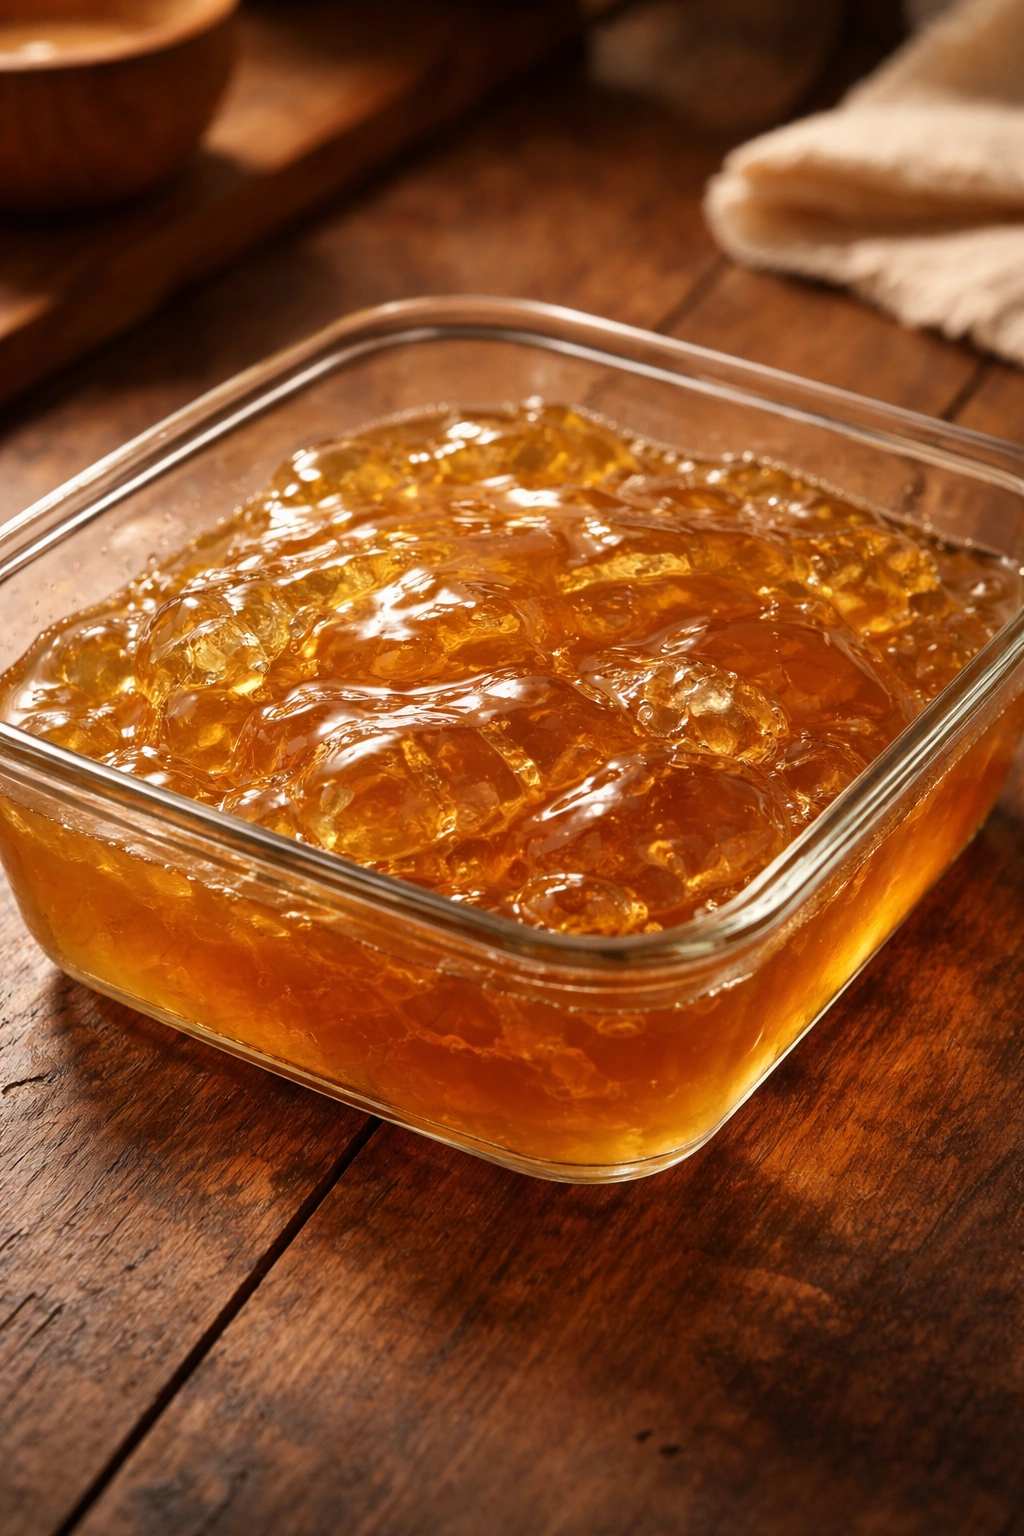
Making traditional bone broth isn’t a shortcut—it’s an investment in flavor, nutrition, and the satisfaction of knowing exactly what went into something you’ll use regularly. The first time you see your broth set into a wobbling mass of gelatin after cooling, you’ll understand what all the centuries of broth-making tradition was about. The flavor will surprise you with its depth and clarity.
More importantly, once you’ve made your own broth three or four times, the process becomes intuitive. You’ll stop watching the clock and start relying on what you see and taste. You’ll begin adding vegetables based on what’s in your kitchen that day. You’ll adjust timings based on the size of your bones and the intensity of your heat. This is where real cooking skill lives—not in following recipes precisely, but in understanding the principles deeply enough to improvise confidently. Traditional broth making teaches you more about flavor development, ingredient quality, and the value of patience than almost any other single cooking skill.
Beef Bone Broth Recipe
Yield: 3 to 4 quarts
Prep Time: 30 minutes
Cook Time: 24 to 36 hours
Total Time: 24 to 36 hours active simmering + 1 to 2 hours for cooling and storage
Difficulty: Intermediate — The actual hands-on work is minimal, but you need to commit to 24+ hours of gentle simmering and understand the blanching and straining process. No special equipment is required beyond a large pot and fine-mesh strainer.
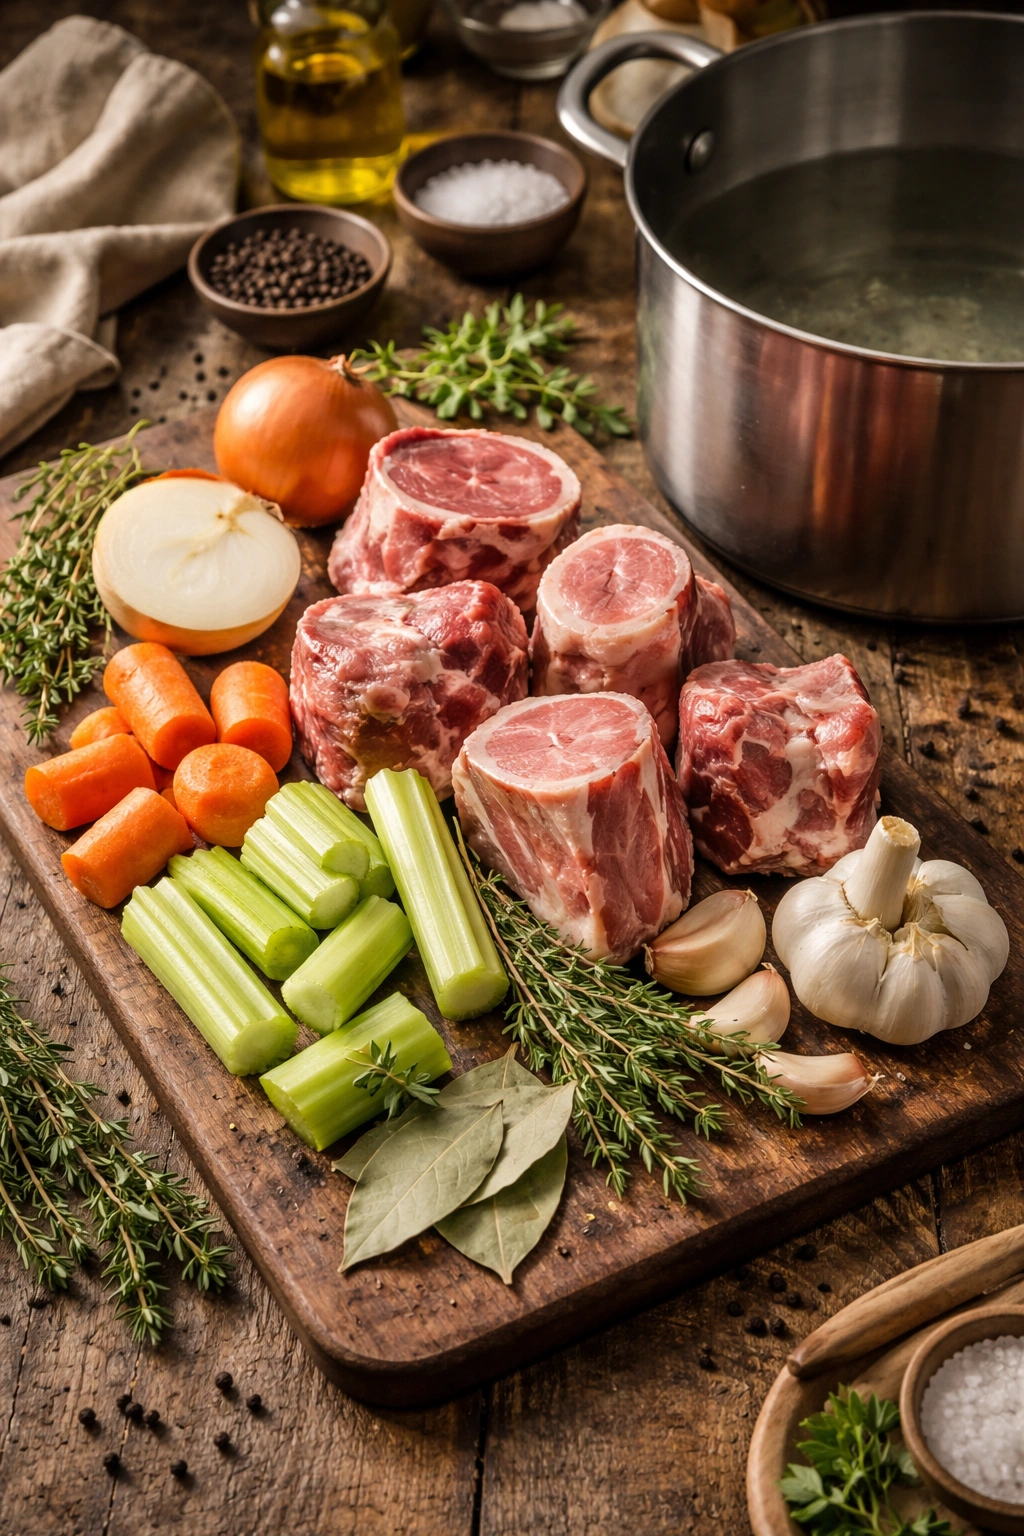
For the Broth:
- 4 to 5 pounds beef bones (a combination of knuckle bones, marrow bones, and neck bones)
- 1 large yellow onion, halved
- 4 to 5 medium carrots, cut into 2-inch chunks (peels left on)
- 3 to 4 celery stalks, cut into 2-inch chunks
- 5 to 6 whole garlic cloves, crushed and left unpeeled
- 5 to 6 sprigs fresh thyme (or 1 teaspoon dried thyme)
- 2 to 3 bay leaves
- 8 to 10 whole black peppercorns
- 1 tablespoon tomato paste (optional, but adds depth)
- 1 teaspoon apple cider vinegar (optional, helps extract minerals)
- Water (approximately 4 to 5 gallons, enough to cover bones by 1 to 2 inches)
- Fine sea salt, to taste (added at the end)
Prepare the Bones and Pot:
-
Rinse the beef bones thoroughly under cold running water, using your hands or a soft brush to remove any bone dust, blood residue, or debris. Pat them dry with paper towels. If the bones were previously frozen, ensure they’re completely thawed before beginning.
-
Place the cleaned bones in your large pot and cover them generously with cold water—you want about 2 inches of water above the bones. Bring the water to a rolling boil over medium-high heat, watching carefully as it comes up to temperature.
Advertisements
Blanch and Clean the Bones:
-
Once the water reaches a full boil, you’ll see a gray or brown foam begin rising to the surface—this is blood, bone marrow particles, and coagulated proteins. Using a fine-mesh skimmer or fine slotted spoon, carefully remove all this foam, working in steady sweeps across the surface. Don’t rush this step; spend a full 3 to 5 minutes skimming, until the foam largely ceases and the broth begins to look clearer.
-
Discard all the water with the foam. Rinse the bones thoroughly under fresh running water, rubbing them gently to remove any remaining sediment. Rinse the pot as well.
Begin the Long Simmer:
-
Return the rinsed, cleaned bones to the pot and cover them again with fresh cold water, adding enough so the bones are submerged by about 1 inch. Bring this to a gentle simmer over medium heat (not a rolling boil—just occasional small bubbles should break the surface). This typically takes 15 to 20 minutes.
-
Once you reach a gentle simmer, add the halved onion, carrot chunks, celery chunks, and crushed garlic cloves. Add the thyme sprigs, bay leaves, and black peppercorns. If using tomato paste and apple cider vinegar, add them now. Do not add salt yet.
-
Reduce the heat to low, maintaining that gentle simmer—only a few lazy bubbles every few seconds. Never let the broth boil aggressively. Check on the broth every hour or two to ensure it’s still at a gentle simmer, not sitting static. If you see any foam reforming during the long cook, skim it off.
Simmer for 24 to 36 Hours:
-
Maintain this gentle simmer for 24 to 36 hours. The longer you simmer beef bones, the more gelatin and mineral content you’ll extract. At 24 hours, you’ll have excellent broth with good gelatin content. Between 24 and 36 hours, the broth becomes increasingly gelatinous and flavorful. Beyond 36 hours, you’re reaching diminishing returns—the bones have given up most of what they have.
-
After about 18 to 20 hours, you can begin checking for doneness. Pick up a knuckle bone with tongs—if it crumbles easily or bends, you’re at good doneness. If it’s still quite hard, continue simmering.
Advertisements -
Taste the broth around hour 24. It should taste savory, complex, and deeply satisfying—not thin or one-dimensional. If it tastes weak, continue simmering.
Strain and Cool:
-
When doneness is reached, carefully pour the broth through a fine-mesh strainer lined with cheesecloth into a large, clean pot or heat-safe bowl, allowing gravity to do the work. Discard the bones and vegetables.
-
For crystal-clear broth, pour the strained broth through a new cheesecloth-lined strainer into another clean pot. This second pass catches fine particles you may have missed the first time.
-
Do not refrigerate the hot broth immediately. Let it cool at room temperature for 1 to 2 hours, then transfer to glass jars and refrigerate uncovered or loosely covered for several hours until fully chilled. Once completely cold, cover the jars tightly.
Season and Store:
-
Once fully chilled, taste the broth and add fine sea salt gradually, tasting after each small addition, until it tastes balanced and satisfying. Start with ½ teaspoon and adjust from there. Remember that if you reduce the broth later, the salt will concentrate, so be cautious not to oversalt at this stage.
-
For refrigerator storage, keep the broth in sealed glass jars for 3 to 5 days. For long-term freezing, pour cooled broth into ice cube trays or freezer containers, leaving 2 inches of headspace in jars (broth expands when frozen). Freeze for up to 3 to 6 months.
Tips for Success
Why your broth turns cloudy: Aggressive boiling forces impurities back into suspension. Maintain a gentle simmer and skim any foam that appears. If your finished broth is cloudy, you can strain it again through cheesecloth.
Why your broth lacks gelatin: You either didn’t simmer long enough, used bones with insufficient connective tissue (use more knuckle bones and feet next time), or the temperature was too high. At minimum, simmer beef bones for 24 hours; 36 hours produces noticeably better results.
The bone color matters: Yellower, older-looking bones often yield superior flavor because they’ve been exposed to air and oxidation. White, very fresh bones work fine but may produce slightly lighter broth.
Temperature consistency is everything: If you’re using the stovetop, a heat-diffuser disk under the pot prevents hot spots that can create localized boiling. For the most consistent results, use the oven method: bring the pot to a bare simmer on the stovetop, cover, then transfer to a 200°F to 225°F oven. The even heat produces the clearest broth.
Salt at the end, not the beginning: Broth reduces during cooking, concentrating salt. Salting at the start often results in oversalting by the end.
Variations Worth Trying
Roasted Bone Broth: Roast bones at 400°F for 20 to 30 minutes until deeply browned before blanching. This creates a darker, richer, more complex broth—excellent for gravies and French sauces.
Asian-Inspired Version: Replace the Western aromatics with a 2-inch piece of crushed ginger, 4 to 5 dried shiitake mushrooms, a 2-inch piece of kombu, and 6 dried red dates (jujubes). Omit the tomato paste. This creates a subtly sweet, deeply savory broth prized in Chinese and Korean cooking.
Wine-Enriched Broth: After blanching, add 1 cup dry white or red wine to the pot and reduce it by half before adding vegetables and the long simmer. The wine adds tannins and complexity.
Herbed Intensely: Double the thyme (8 to 10 sprigs), add 1 whole star anise and 4 to 5 parsley stems. This creates an intensely aromatic French-style broth.
Storage and Make-Ahead
Freezing in portions: Freeze broth in ice cube trays (about 2 tablespoons per cube), then transfer frozen cubes to labeled freezer bags. Use individual cubes for cooking or quickly thawing small amounts.
Demi-glace: Reduce finished broth by simmering uncovered until it’s thick and syrupy, then freeze in ice cube trays. One cube stirred into hot water recreates full-strength broth without occupying as much freezer space.
Combined broths: You can mix beef broth with pork or chicken broth to create interesting hybrid flavors.
Thawing and reheating: You don’t need to thaw broth before using it. Drop a frozen cube directly into a saucepan and heat gently. For soups and stews, add frozen broth as the dish simmers—it will thaw and integrate naturally.
Serving Suggestions and Uses
Serve broth warm as a restorative sip, especially during colder months. Add a pinch of sea salt, fresh cracked pepper, and a strip of fresh ginger or a sprig of thyme.
Use as the base for French onion soup, beef stew, minestrone, or any slow-cooked braise where the broth is essential to the dish’s character.
Simmer grains and legumes in broth instead of water for improved flavor and nutrient absorption.
Deglaze roasting pans with broth instead of wine to create instant, deeply flavored pan sauces for roasted meats.
Incorporate into gravies, reductions, and finishing sauces where the rich, gelatinous quality creates body and luxurious mouthfeel.
Freeze portions and use on an ongoing basis throughout the year whenever a recipe calls for beef stock or broth—your homemade version will dramatically outshine store-bought.