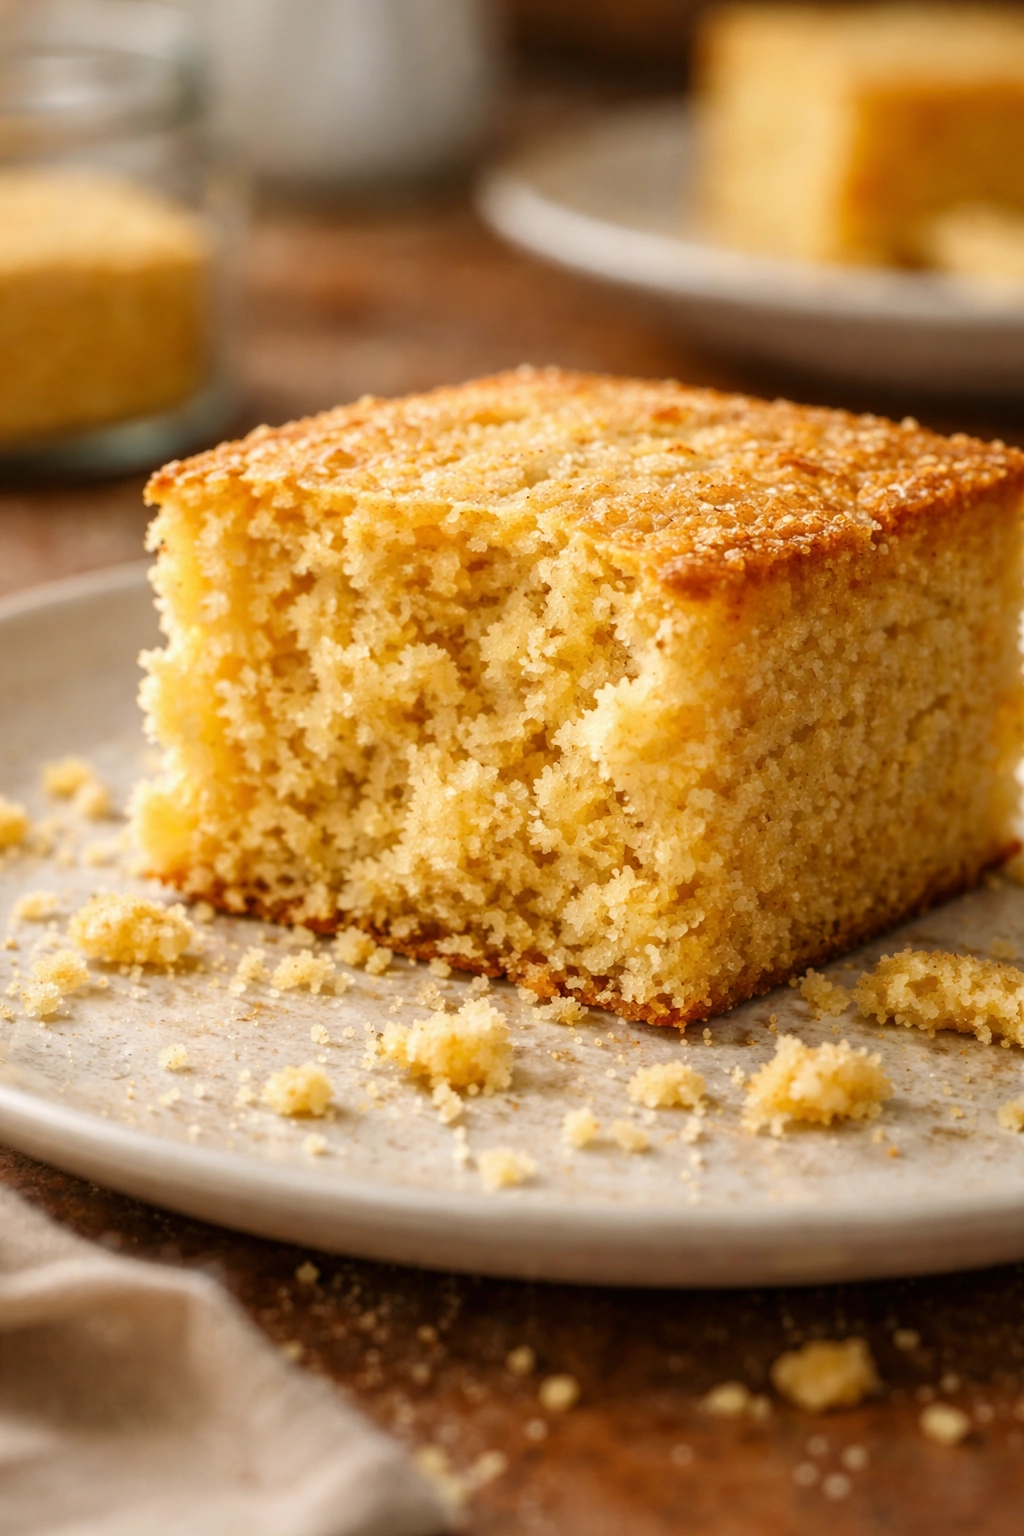
There’s nothing quite like the disappointment of slicing into a pan of homemade cornbread and finding it crumbly, dense, and parched—the kind of cornbread that sucks the moisture right out of your mouth. You were expecting that tender, slightly sweet crumb with a buttery yellow interior, the kind of cornbread that practically melts on your tongue. Instead, you got something that tastes more like pressed sawdust than a beloved side dish. The frustrating part? It doesn’t have to be this way, and the fix isn’t complicated.
Most home bakers make cornbread dry without even realizing it, because they’re following advice that’s either outdated or simply wrong. They use too much cornmeal, not enough fat, or the wrong ratio of wet to dry ingredients. They overbake it by two or three minutes, thinking a golden top equals doneness. They skip the buttermilk entirely because they think regular milk will work just as well. These small mistakes compound, and what should be a simple, foolproof recipe becomes something unpredictable and consistently disappointing.
The good news is that moist, tender cornbread is absolutely achievable every single time—and it’s not about luck or special technique, but rather understanding the exact mechanics of how cornbread bakes and what keeps it soft. Sugar does more than sweeten; it also absorbs and holds moisture in the crumb. Oil creates a more tender structure than butter ever could. Buttermilk’s acidity tenderizes the crumb and adds moisture. Room-temperature eggs mix more smoothly and create a more even batter. And baking time—especially knowing the exact moment when the cornbread is done without being overbaked—changes everything. Once you understand these principles, you’ll make cornbread so moist and delicious that people will ask for your secret.
The Real Reason Most Cornbread Turns Out Dry
The primary culprit behind dry cornbread is the ratio of cornmeal to wet ingredients. Cornmeal is absorbent—it sucks up moisture like a sponge—and if you don’t have enough liquid in your batter, the cornmeal will pull moisture from the other ingredients and leave you with a crumbly, dry result. Many traditional recipes call for equal parts cornmeal and flour, or even more cornmeal than flour, which creates an inherently drier structure.
The second major issue is baking time. Cornbread bakes quickly—usually 20 to 25 minutes—and the difference between perfectly moist and overcooked is often just two or three minutes. Most home bakers either rely on baking time alone (which varies wildly depending on your oven) or they use the toothpick test incorrectly. A toothpick coming out completely clean means your cornbread is overcooked. Slightly moist crumbs clinging to the toothpick mean it’s perfectly done.
The third culprit is insufficient fat. Cornbread isn’t a health food, and it shouldn’t be treated like one. Fat is what creates tenderness and keeps the crumb soft and moist for days. Recipes that skimp on oil or butter produce cornbread that dries out rapidly, even if it’s technically moist when fresh from the oven. The fat acts as an insulator, slowing moisture loss and keeping every bite tender.
Finally, the type of cornmeal matters more than most bakers realize. Stone-ground cornmeal behaves differently than refined, supermarket cornmeal. Cornmeal from different regions and brands can vary in moisture content and coarseness, which affects how much liquid the batter needs. Using the wrong type of cornmeal, or not adjusting your liquid ratios accordingly, leads to inconsistent results.
Choosing Your Cornmeal for Better Moisture
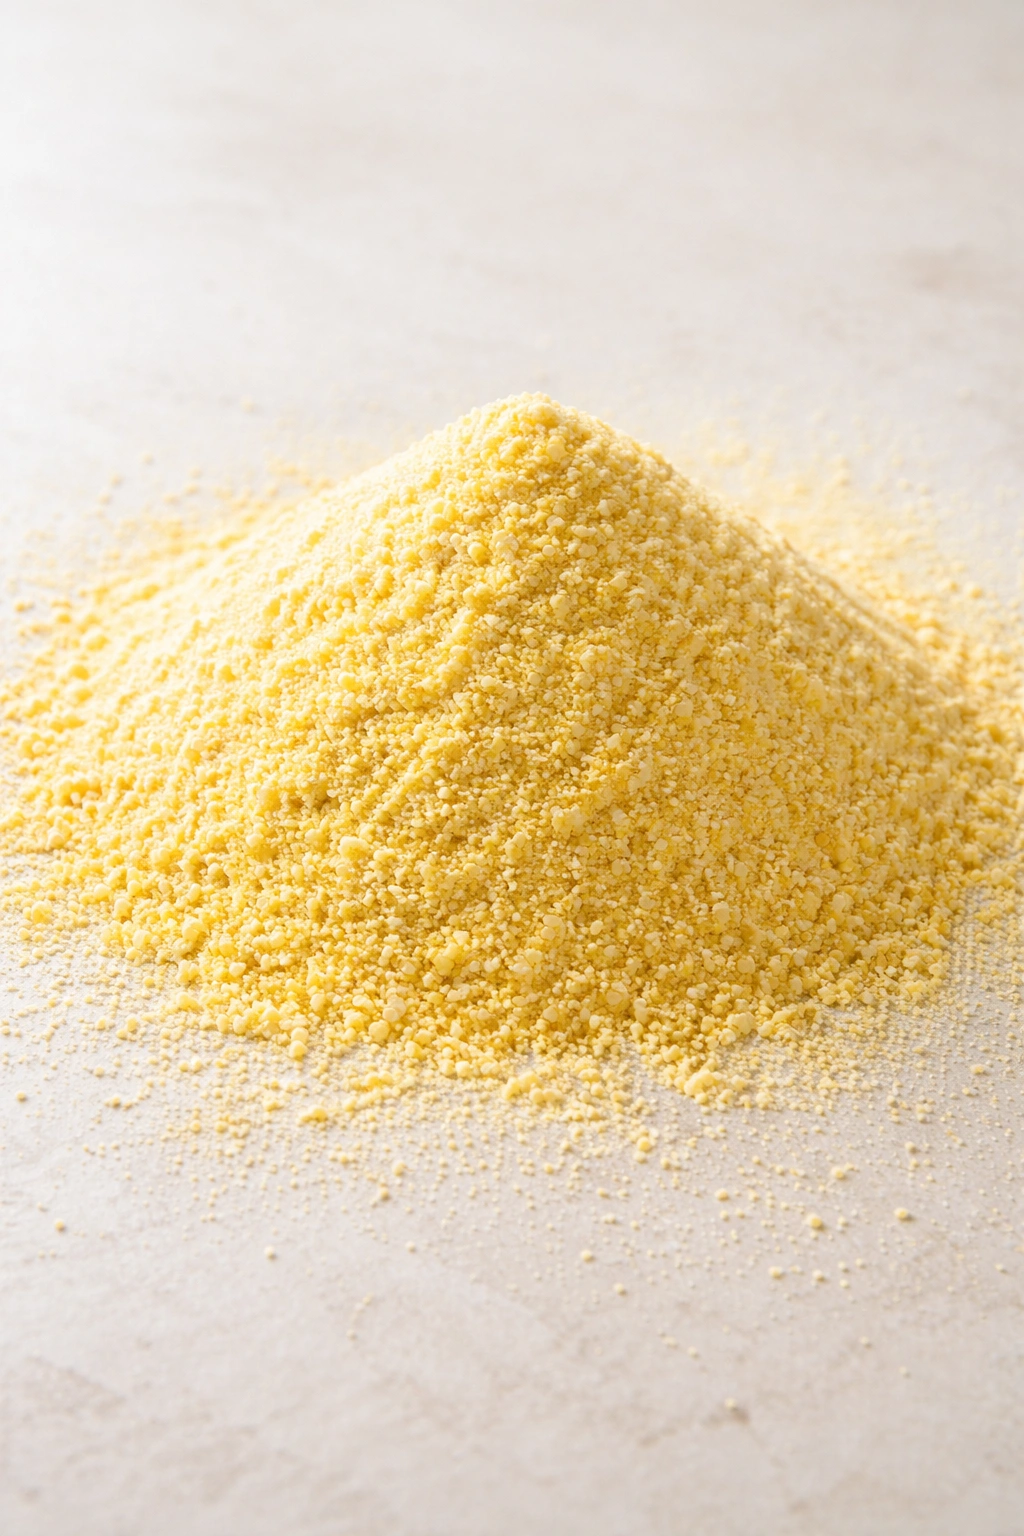
Not all cornmeal is created equal, and the type you choose genuinely affects how moist your finished cornbread will be. Refined cornmeal (the bright yellow stuff in the supermarket baking aisle) is finely ground, uniform in texture, and relatively dry. It absorbs liquid more quickly and evenly than stone-ground alternatives, which makes it easier to create a consistent batter. For this reason, refined cornmeal is actually the better choice for moist cornbread—it allows you to control the liquid content more precisely without ending up with a batter that’s overly thick or stiff.
Stone-ground cornmeal contains the corn germ and some of the bran, which means it has more texture, more corn flavor, but also more moisture already built into it. While it’s delicious, it can be unpredictable in a batter because its moisture content varies from bag to bag. If you love the flavor of stone-ground cornmeal, use it, but you may need to reduce the other wet ingredients slightly to account for its inherent moisture.
The cornmeal-to-flour ratio is critical for moisture retention. The best ratio for moist cornbread is roughly 1 part cornmeal to 1 part all-purpose flour, or even 1.25 parts flour to 1 part cornmeal. This keeps enough cornmeal for authentic corn flavor while allowing the flour to provide structure that holds moisture. Some bakers do 2 parts cornmeal to 1 part flour, which creates a more intensely corny flavor but a drier crumb—avoid this unless you’re specifically going for that style.
Fresh cornmeal makes a difference too. Cornmeal goes rancid over time because of the oils in the corn germ. If your cornmeal has been sitting in your pantry for a year, it’s likely past its prime and won’t contribute the same sweet, clean corn flavor. Buy from a source with high turnover, store it in an airtight container in the freezer, and check that it smells fresh and slightly sweet when you open the bag.
The Buttermilk and Dairy Strategy
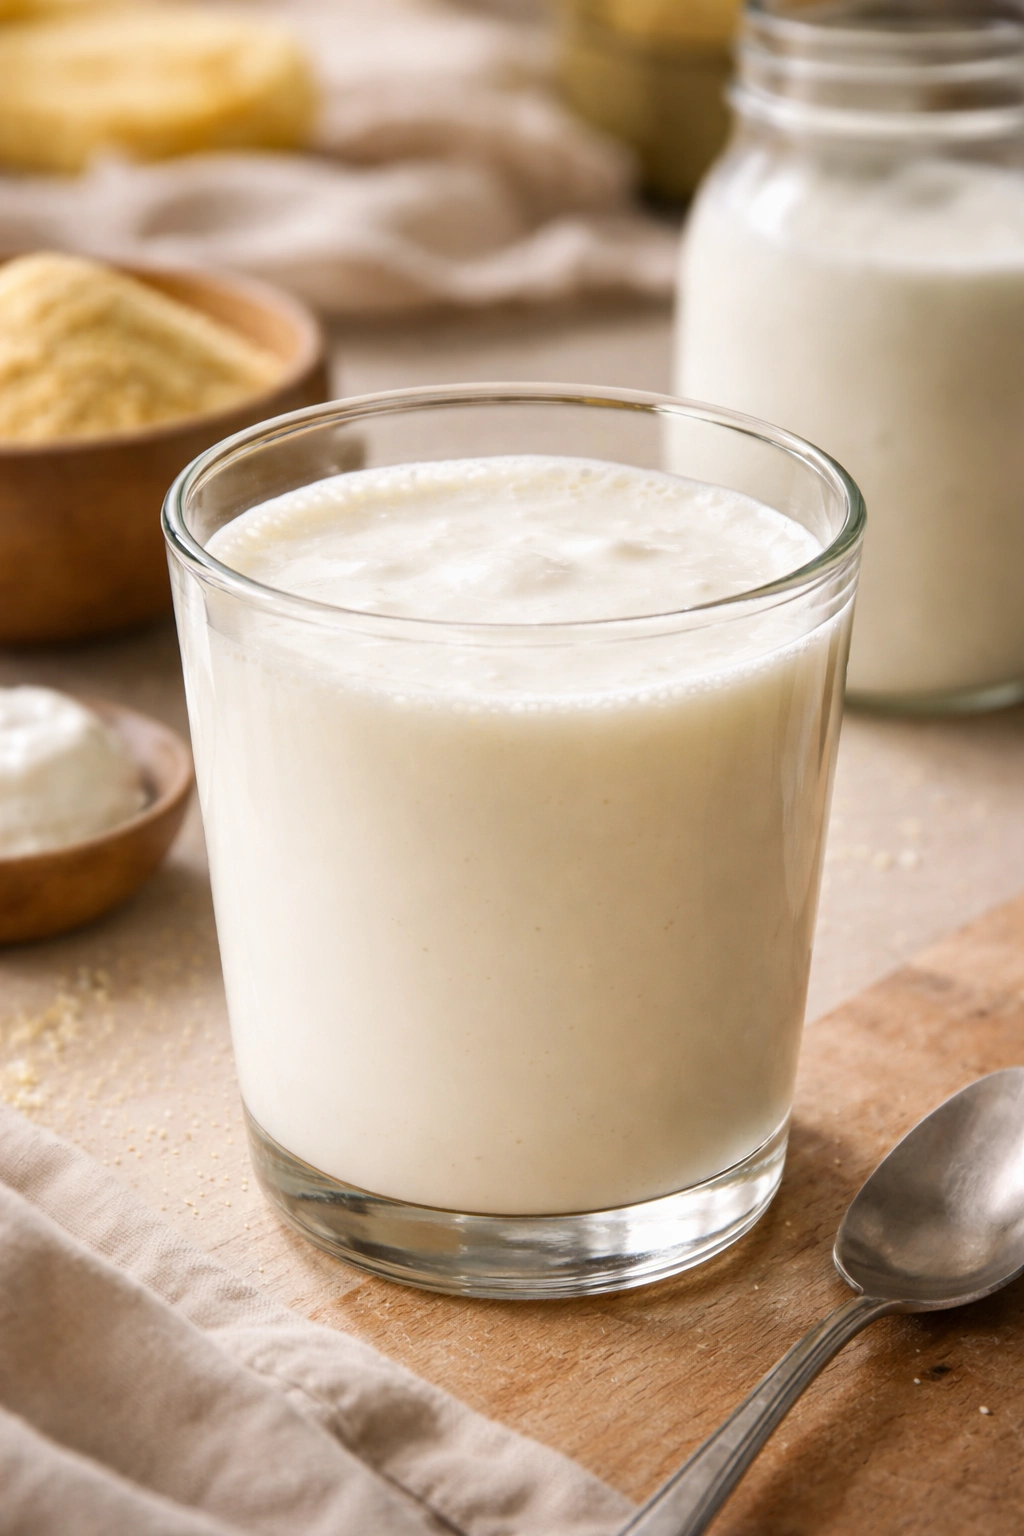
Buttermilk is the secret weapon in moist cornbread. Its lactic acid tenderizes the crumb by interacting with the gluten and the cornmeal, creating a softer, more delicate structure. It also adds moisture and a subtle tang that balances the sweetness. If you use regular whole milk instead of buttermilk, your cornbread will be noticeably drier and less tender, because you’re missing both the acid and the slight richness that buttermilk provides.
If you don’t have buttermilk on hand, make a substitute: pour 1 tablespoon of white vinegar or fresh lemon juice into a liquid measuring cup, then add regular milk until you reach the amount called for in your recipe. Let it sit for 5 to 10 minutes—the acid will thicken the milk slightly and create a buttermilk-like environment. It won’t taste identical to real buttermilk, but it works remarkably well in cornbread.
Some bakers add sour cream to their cornbread batter for extra richness and tenderness. A quarter cup of sour cream swapped in for a quarter cup of the buttermilk creates an incredibly creamy, moist crumb. The sour cream’s fat content and acidity work together to soften the crumb and extend its shelf life. This trick works particularly well if you’re making cornbread a day or two ahead and want it to stay tender.
Don’t skip the buttermilk by substituting it with milk and hoping for the best. The acid is too important to the chemistry of the cornbread. Even a combination of half buttermilk and half regular milk is better than all regular milk, so if you’re short on buttermilk, stretch what you have with regular milk rather than replacing it entirely.
Why Oil Beats Butter for Tender Crumb
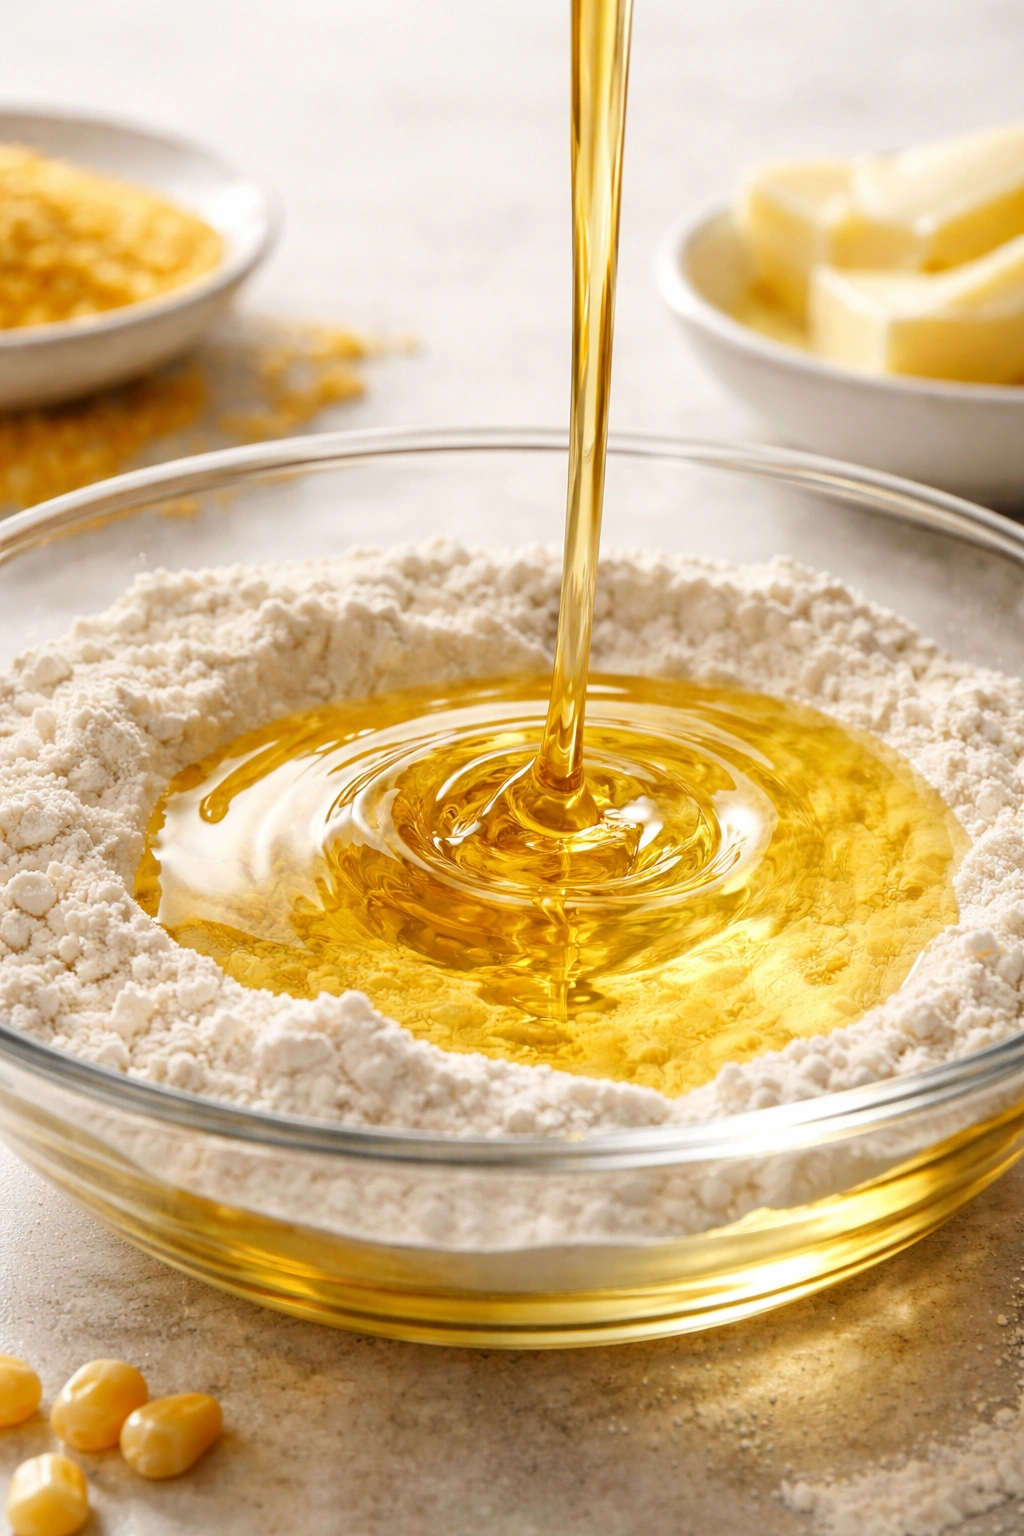
This goes against conventional wisdom for a lot of bakers, but cornbread made with vegetable oil is genuinely more tender and stays moist longer than cornbread made with melted butter. Here’s why: oil coats the flour particles more effectively than butter, creating a tender crumb by preventing excessive gluten development. Butter contains water, which means you’re actually introducing a drying agent into your batter without realizing it.
Oil doesn’t have any water content—it’s pure fat, and fat is what keeps cornbread moist. When oil coats the flour, it prevents too much gluten from forming, which keeps the crumb delicate. When you use melted butter, the water in the butter can cause the flour to hydrate too much, leading to more gluten development and a tougher, denser crumb. Melted butter also imparts a richer flavor that some people associate with comfort food cornbread, but it comes at the cost of texture.
The best compromise is to use mostly oil with a small amount of melted butter for flavor. A blend of three-quarters cup vegetable oil to two tablespoons melted butter gives you the tenderizing power of pure oil with the rich, buttery taste that makes cornbread delicious. This is the ratio that creates the most reliably moist result.
Use neutral-flavored oils—vegetable, canola, or light olive oil. Avoid aggressive flavors like extra-virgin olive oil or coconut oil, which will compete with the corn flavor. The oil should be barely noticeable on the palate, allowing the corn, butter, and buttermilk to shine through.
The Sugar Trick That Changes Everything
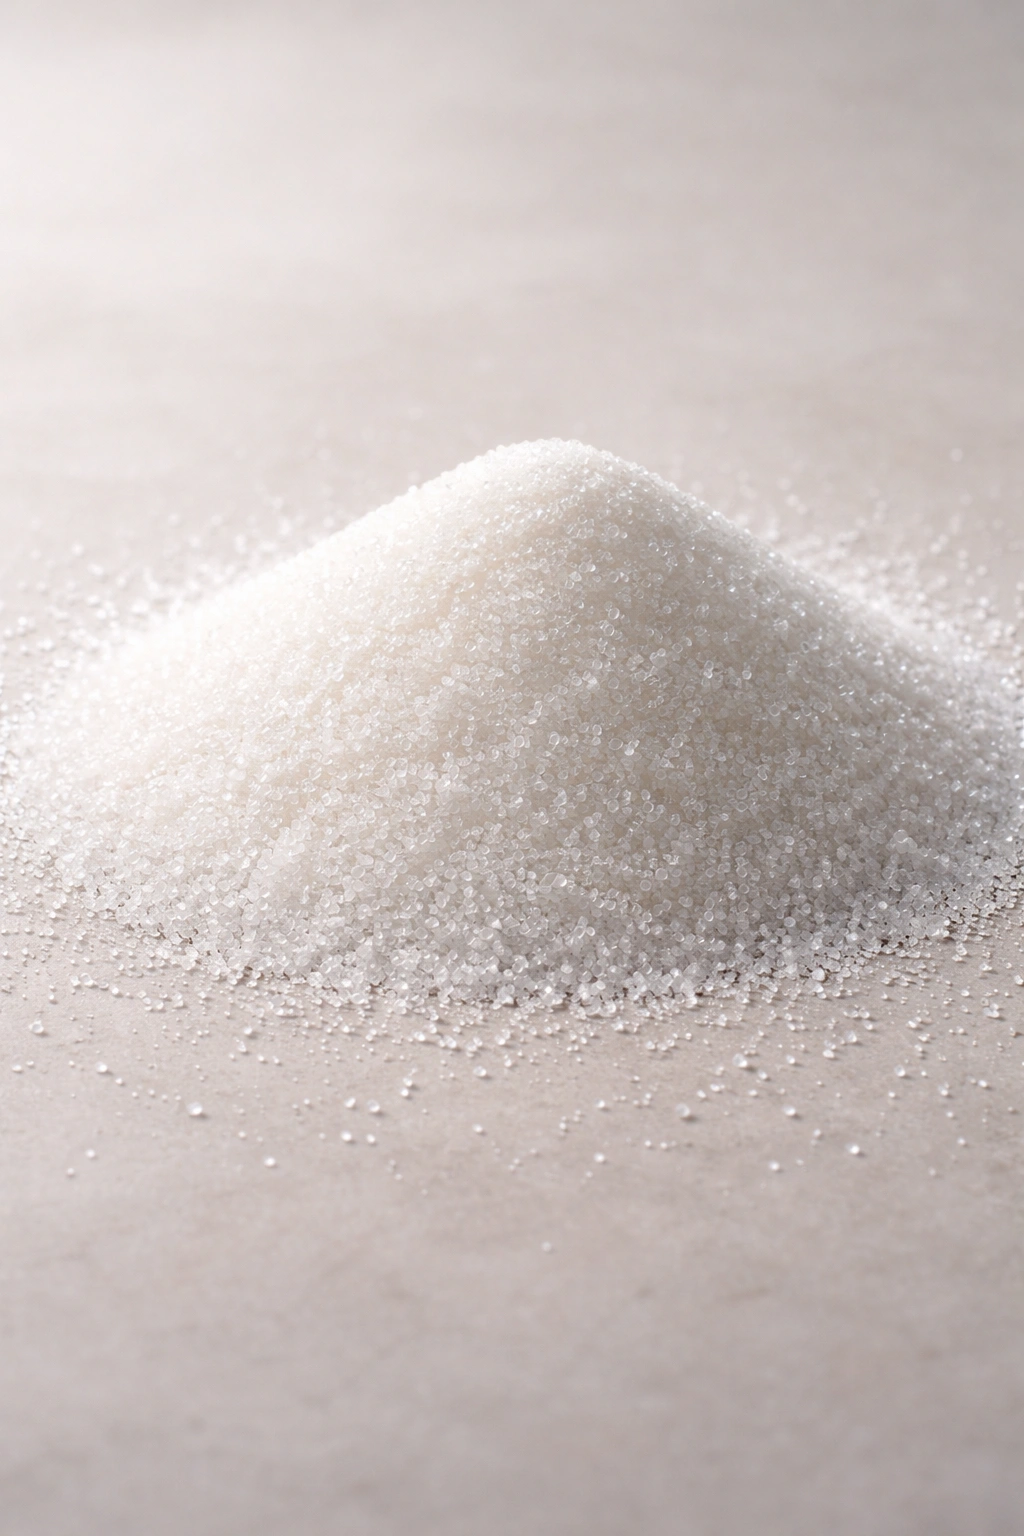
Sugar does three things in cornbread: it sweetens, it aids browning, and most importantly for moisture, it hygroscopic—meaning it attracts and holds water. Sugar keeps the cornbread moist by absorbing moisture during baking and retaining it even after the cornbread cools. A generous amount of sugar (typically three-quarters to one cup per pan of cornbread) is non-negotiable for moisture retention.
Some bakers hesitate to add much sugar, thinking cornbread shouldn’t taste like cake. There’s validity to that perspective if you’re aiming for savory cornbread, but here’s the thing: you can use plenty of sugar without making cornbread taste sweet. The butter, salt, and corn flavor balance out the sugar so effectively that the cornbread tastes savory with a subtle sweetness, not like dessert. The sugar is doing its job in the background, keeping the crumb moist, without announcing itself on the palate.
If you truly want less-sweet cornbread, you can reduce the sugar to half a cup, but don’t go lower than that if you want a moist result. The moisture-holding power of the sugar is too important to sacrifice entirely. You’ll notice the difference immediately in a drier, crumbly crumb if you skip this ingredient or cut it too far back.
Honey can replace some of the sugar—substituting honey for half the sugar creates an even more moisture-retaining batter, because honey is hygroscopic to an even greater degree than granulated sugar. Use honey sparingly (a quarter to a half cup) because it adds distinct flavor, but it’s an excellent option if you love corn and honey together.
Cooking Time, Temperature, and the Toothpick Test
Oven temperature and baking time are where precision matters most. Cornbread bakes at 400°F to 425°F, depending on whether you’re using a glass or metal pan and whether your oven runs hot or cool. Glass pans conduct heat differently than metal, and they often require a slightly lower temperature to prevent over-browning the bottom and sides before the center is done.
Most of the moisture loss in cornbread happens in the last few minutes of baking, as water evaporates from the surface and edges. Many home bakers bake cornbread for 25 to 30 minutes, which is too long. The target baking time is 20 to 25 minutes at 400°F, and it depends entirely on how your oven behaves and the type of pan you’re using.
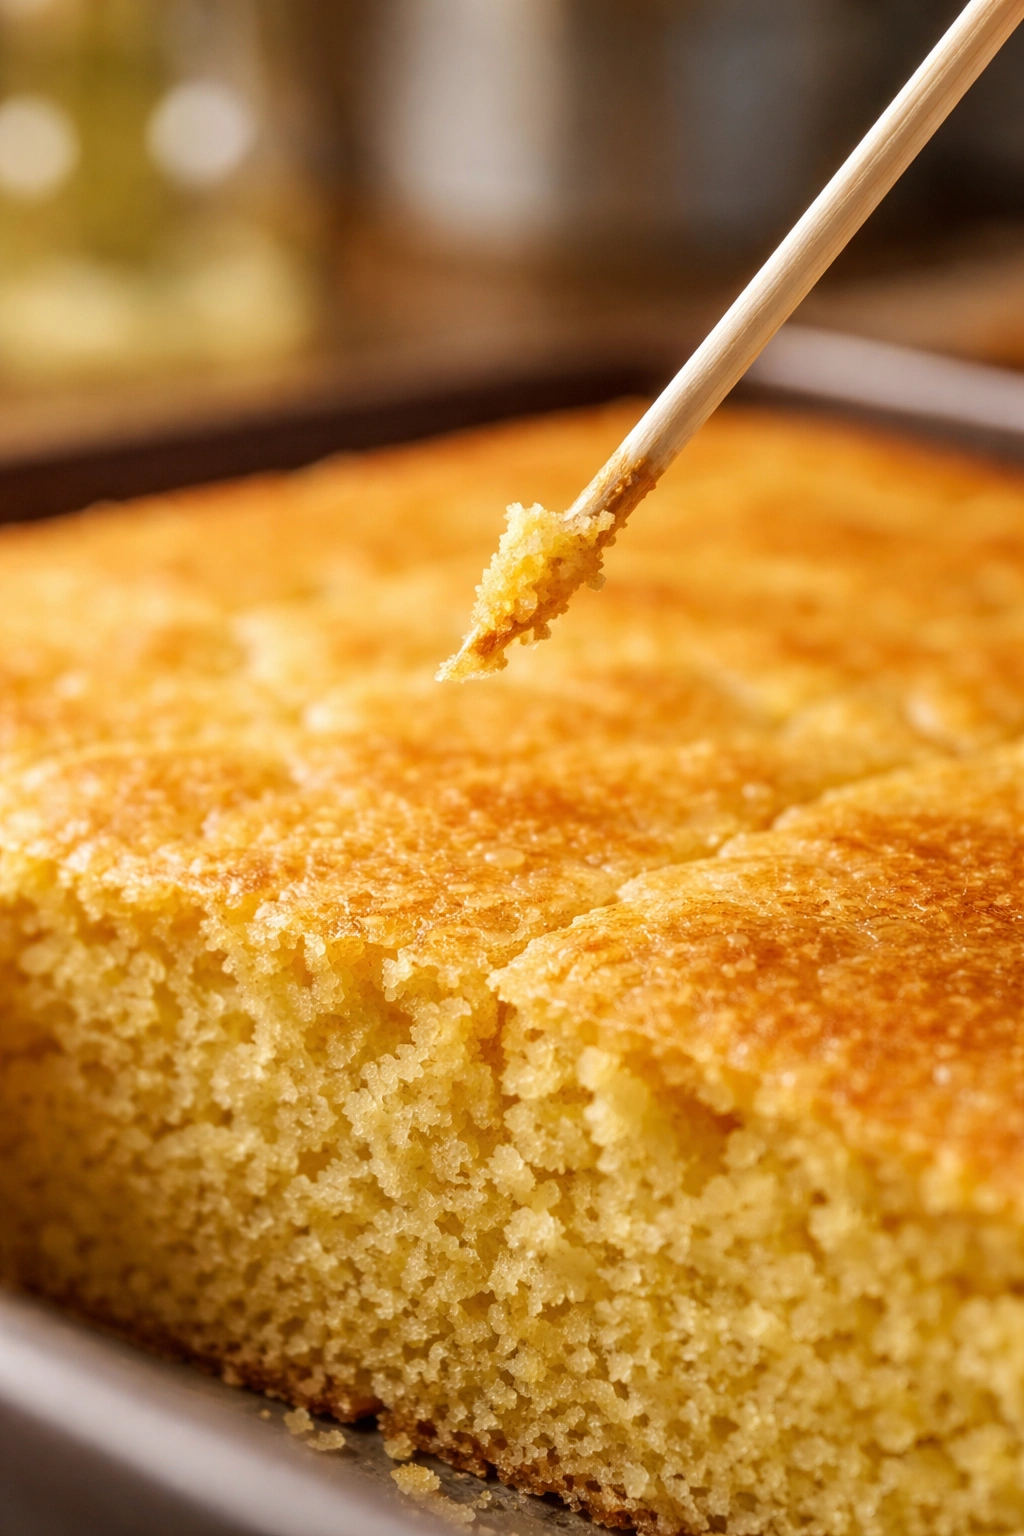
The toothpick test is crucial, but most people use it wrong. You’re not looking for a completely clean toothpick. Insert a toothpick into the center of the cornbread, and it should come out with a few moist crumbs still clinging to it—not raw batter, but actual crumbs. If the toothpick comes out completely clean with no crumbs at all, your cornbread is overcooked. That level of dryness is the difference between moist and disappointing.
Some bakers avoid the toothpick test entirely and instead feel the cornbread’s resistance. A slightly-underbaked cornbread will feel slightly soft and give gently when you touch the center—not jiggling or moving, but with a slight spring. An overcooked cornbread feels firm and unyielding. Once you’ve made cornbread a couple of times, this test becomes intuitive.
Rotate your pan halfway through baking if your oven has hot spots. This prevents uneven browning and ensures consistent baking throughout. Check the cornbread at 20 minutes, and then every minute or two after that until it reaches the toothpick test standard—a few moist crumbs, not a clean insertion.
Serving and Timing Information
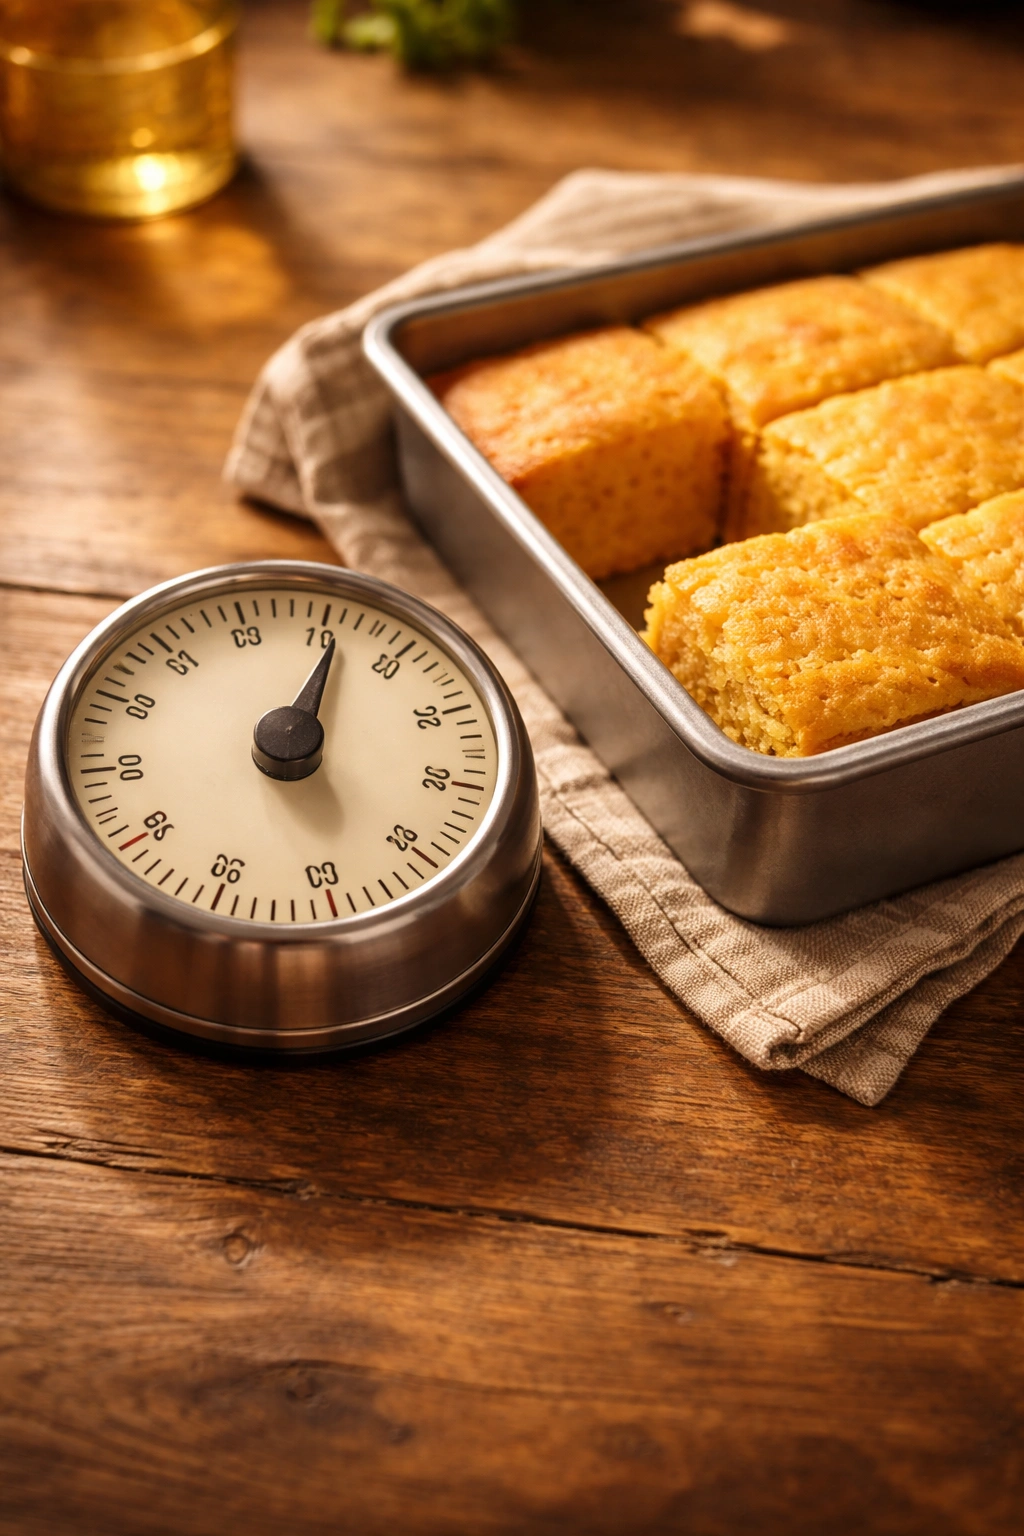
Yield: One 8×8-inch or 9×9-inch square pan, serves 8 to 10
Prep Time: 15 minutes
Cook Time: 22 to 25 minutes
Total Time: 40 minutes
Difficulty: Beginner — this recipe has straightforward instructions, requires no special equipment beyond a standard baking pan, and is nearly impossible to mess up once you understand the moisture principles.
Complete Ingredient List
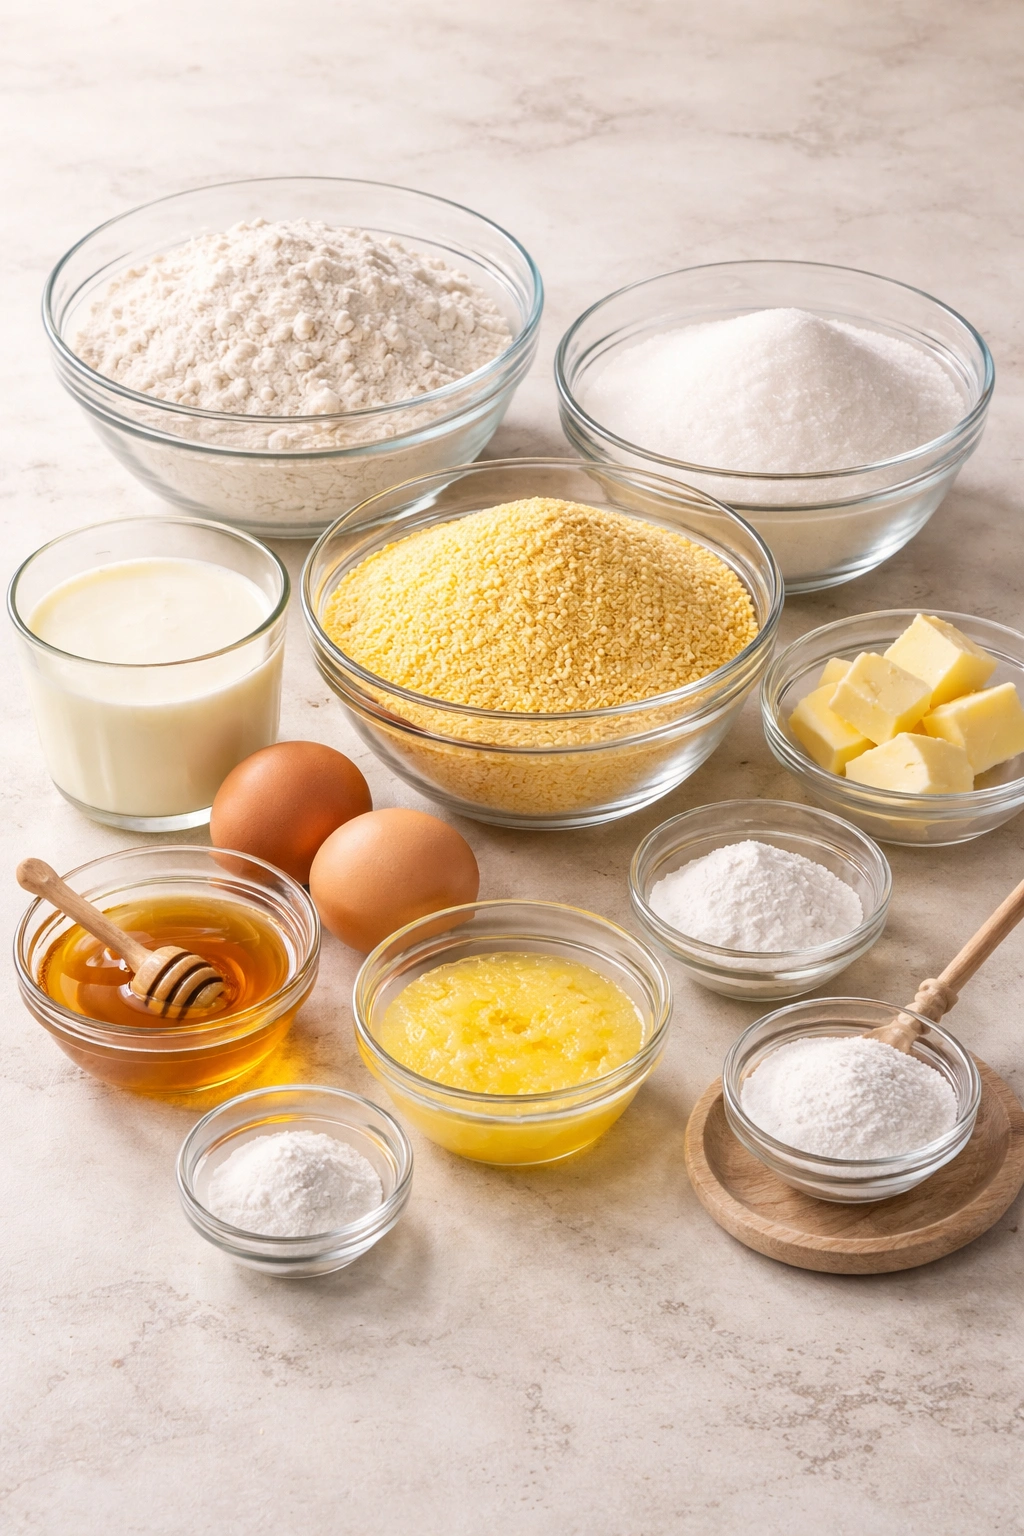
For the Cornbread:
- ¾ cup plus 2 tablespoons (1¾ sticks) vegetable oil or neutral-flavored oil, divided (¾ cup for the batter + 2 tablespoons for greasing the pan)
- 1 tablespoon unsalted butter, melted
- 1 cup yellow cornmeal, refined or stone-ground
- 1 cup all-purpose flour
- ¾ cup granulated sugar
- 1½ teaspoons baking powder
- ½ teaspoon baking soda
- 1 teaspoon fine sea salt
- 1 cup buttermilk, at room temperature (or milk + 1 tablespoon vinegar, made ahead and rested 5 minutes)
- 2 large eggs, at room temperature
- 1 tablespoon honey (optional, for extra moisture and subtle flavor)
For the Honey Butter (optional, for serving):
- 4 tablespoons unsalted butter, softened to room temperature
- 2 tablespoons raw honey
- Pinch of fine sea salt
Step-by-Step Instructions
Prepare the Pan and Preheat:
-
Preheat your oven to 400°F (204°C). Position the oven rack in the center to ensure even heat distribution around all sides of the cornbread pan.
-
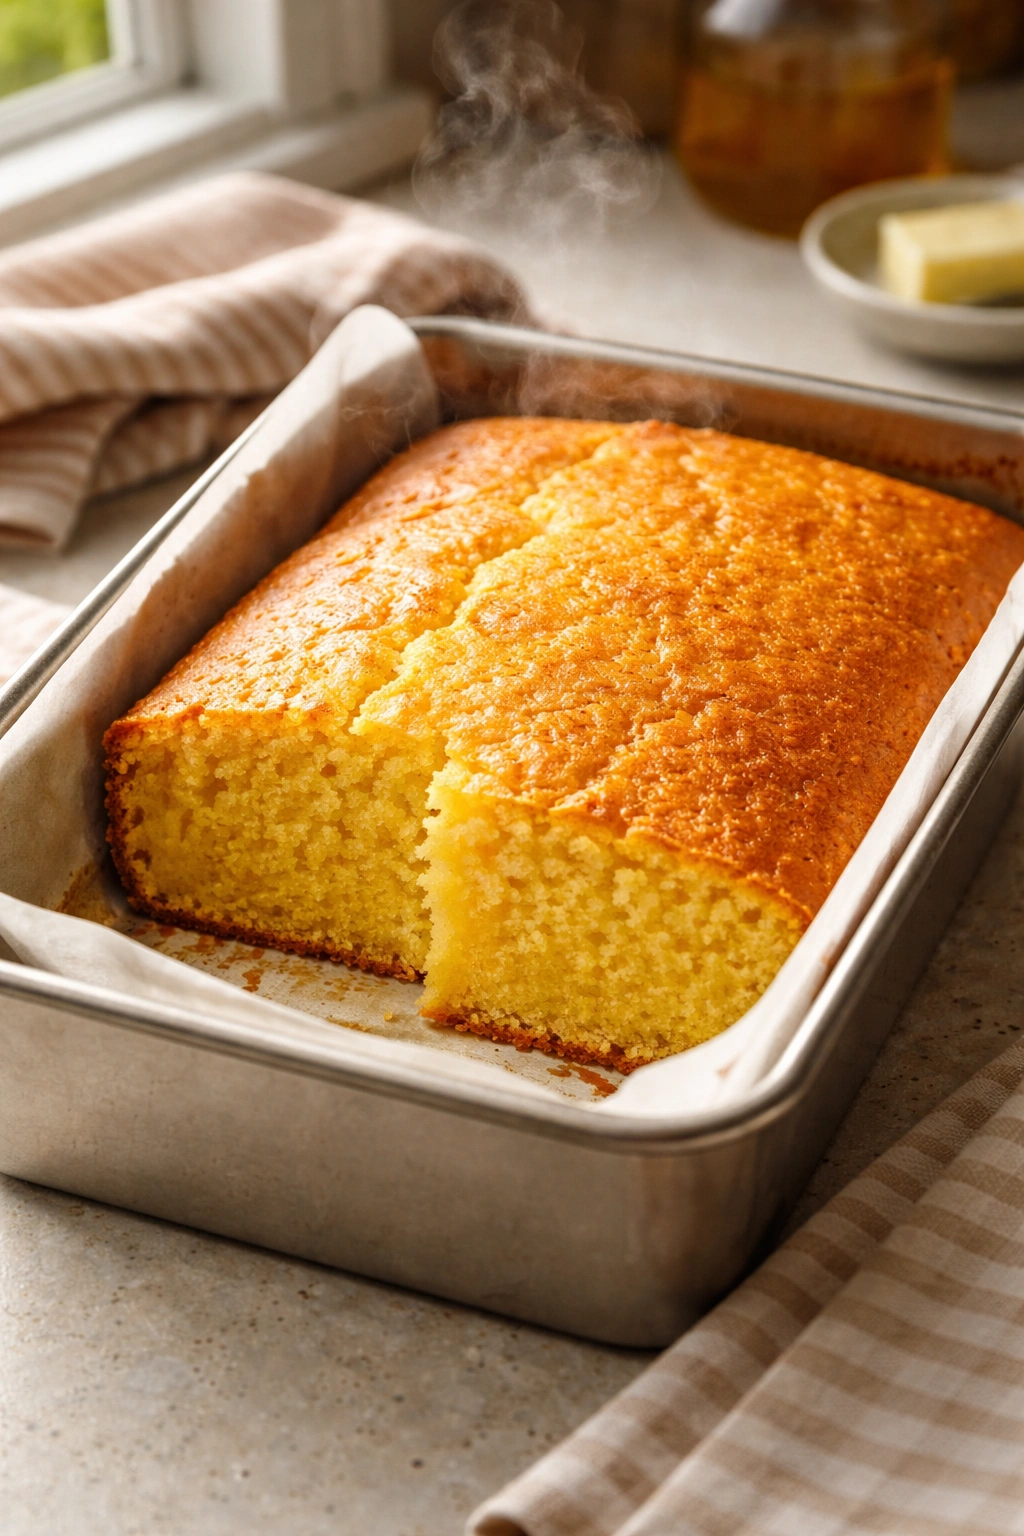
Generously grease an 8×8-inch or 9×9-inch metal baking pan with the 2 tablespoons of vegetable oil, making sure the bottom and all four sides are well coated. A metal pan conducts heat more evenly than glass and produces better browning on the bottom and edges. If you only have a glass pan, reduce the oven temperature to 375°F (190°C) and add 2 to 3 extra minutes to the baking time.
Make the Batter:
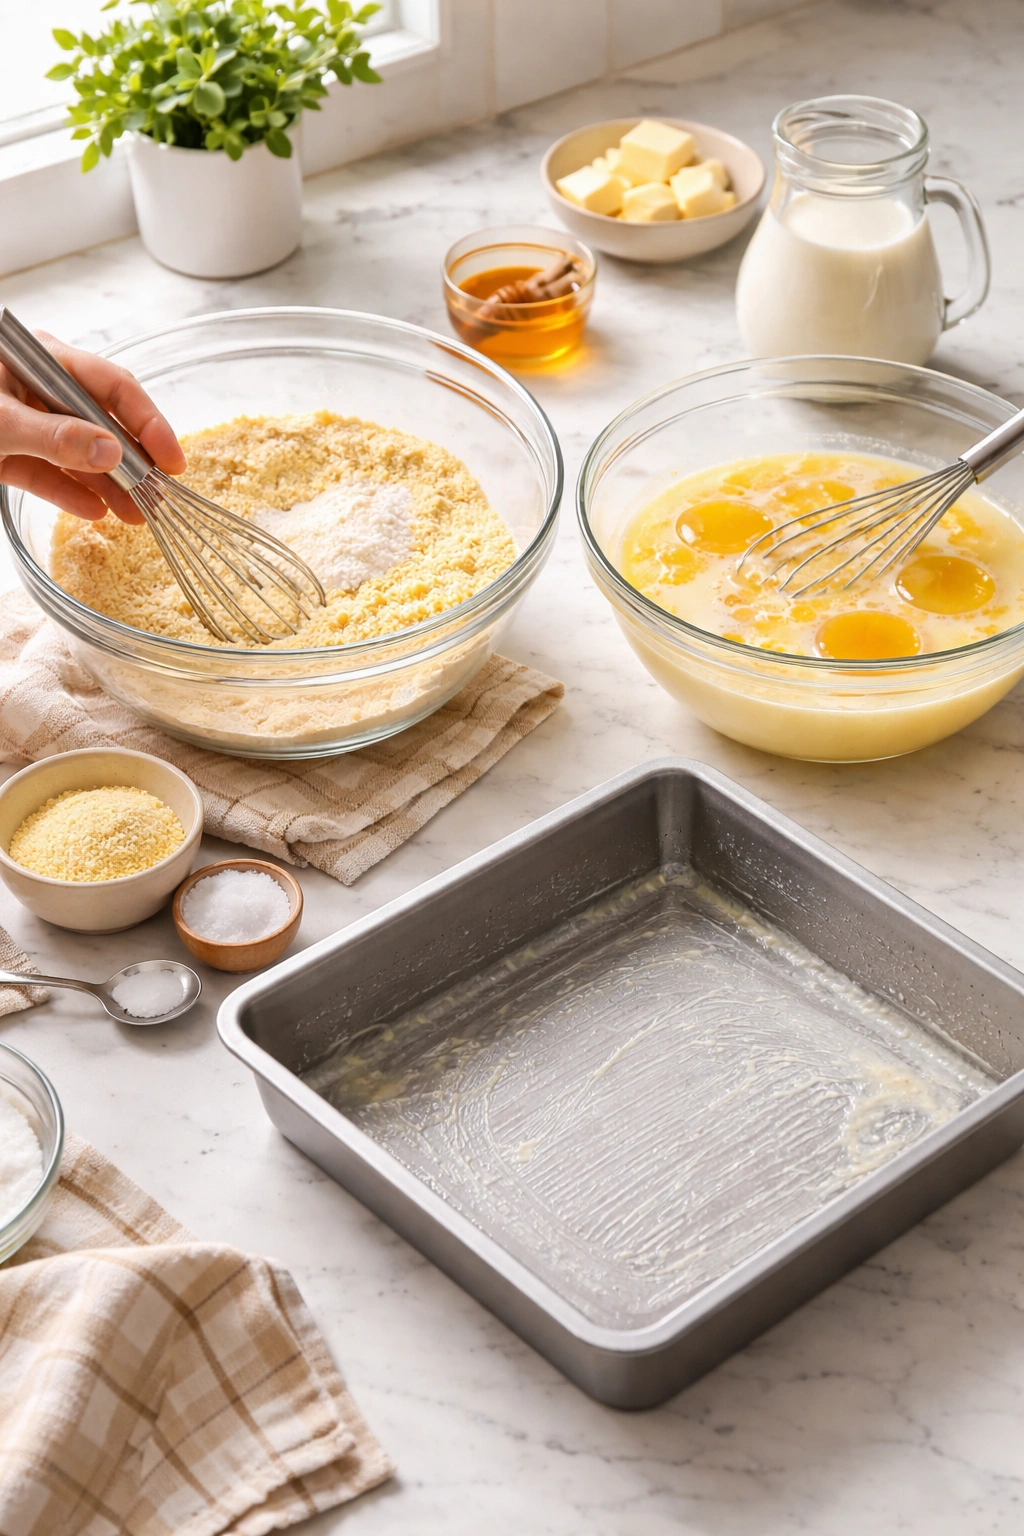
-
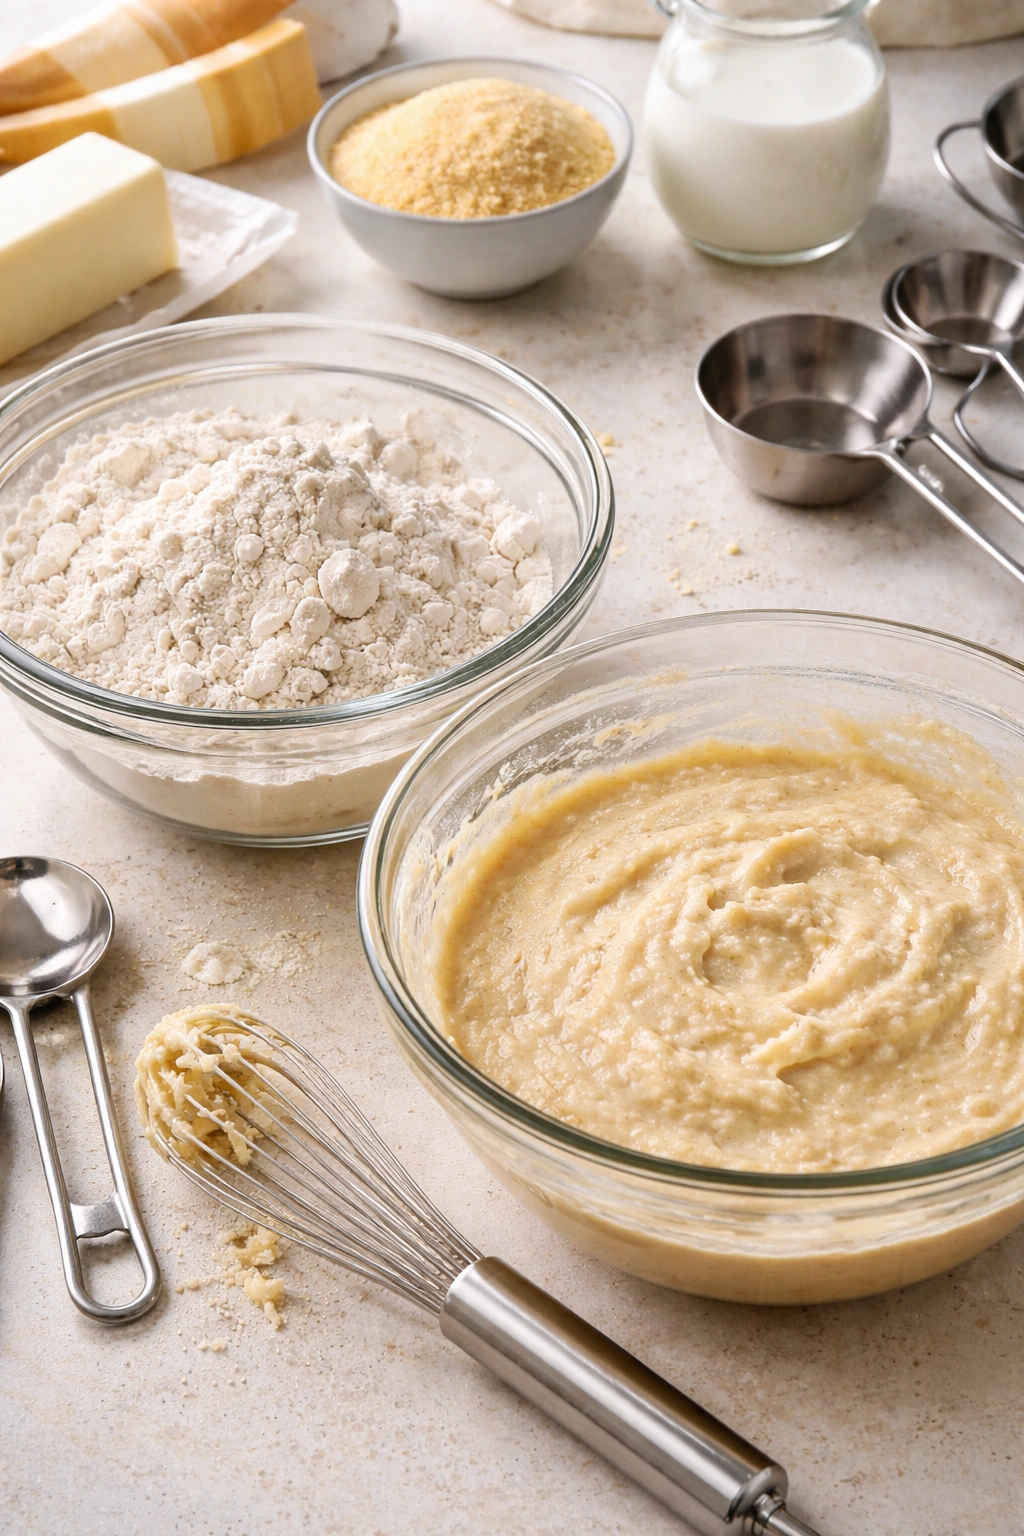
In a large mixing bowl, whisk together the cornmeal, flour, sugar, baking powder, baking soda, and salt until the dry ingredients are evenly distributed. Make sure there are no visible pockets of baking soda or baking powder — these will create bitter-tasting holes if they’re not fully mixed into the dry ingredients.
Advertisements -
In a separate bowl, whisk together the buttermilk, the ¾ cup oil, melted butter, eggs, and honey (if using) until fully combined and smooth. The mixture should look creamy and well-blended, with no visible streaks of egg white.
-
Pour the wet ingredients into the dry ingredients and stir with a spatula or wooden spoon just until the two combine into a cohesive batter. Stop stirring as soon as you no longer see dry flour — overmixing develops gluten in the flour, which makes the cornbread tough and dense. A few small lumps in the batter are perfectly fine and will disappear during baking; overmixing to eliminate every lump is far worse.
-
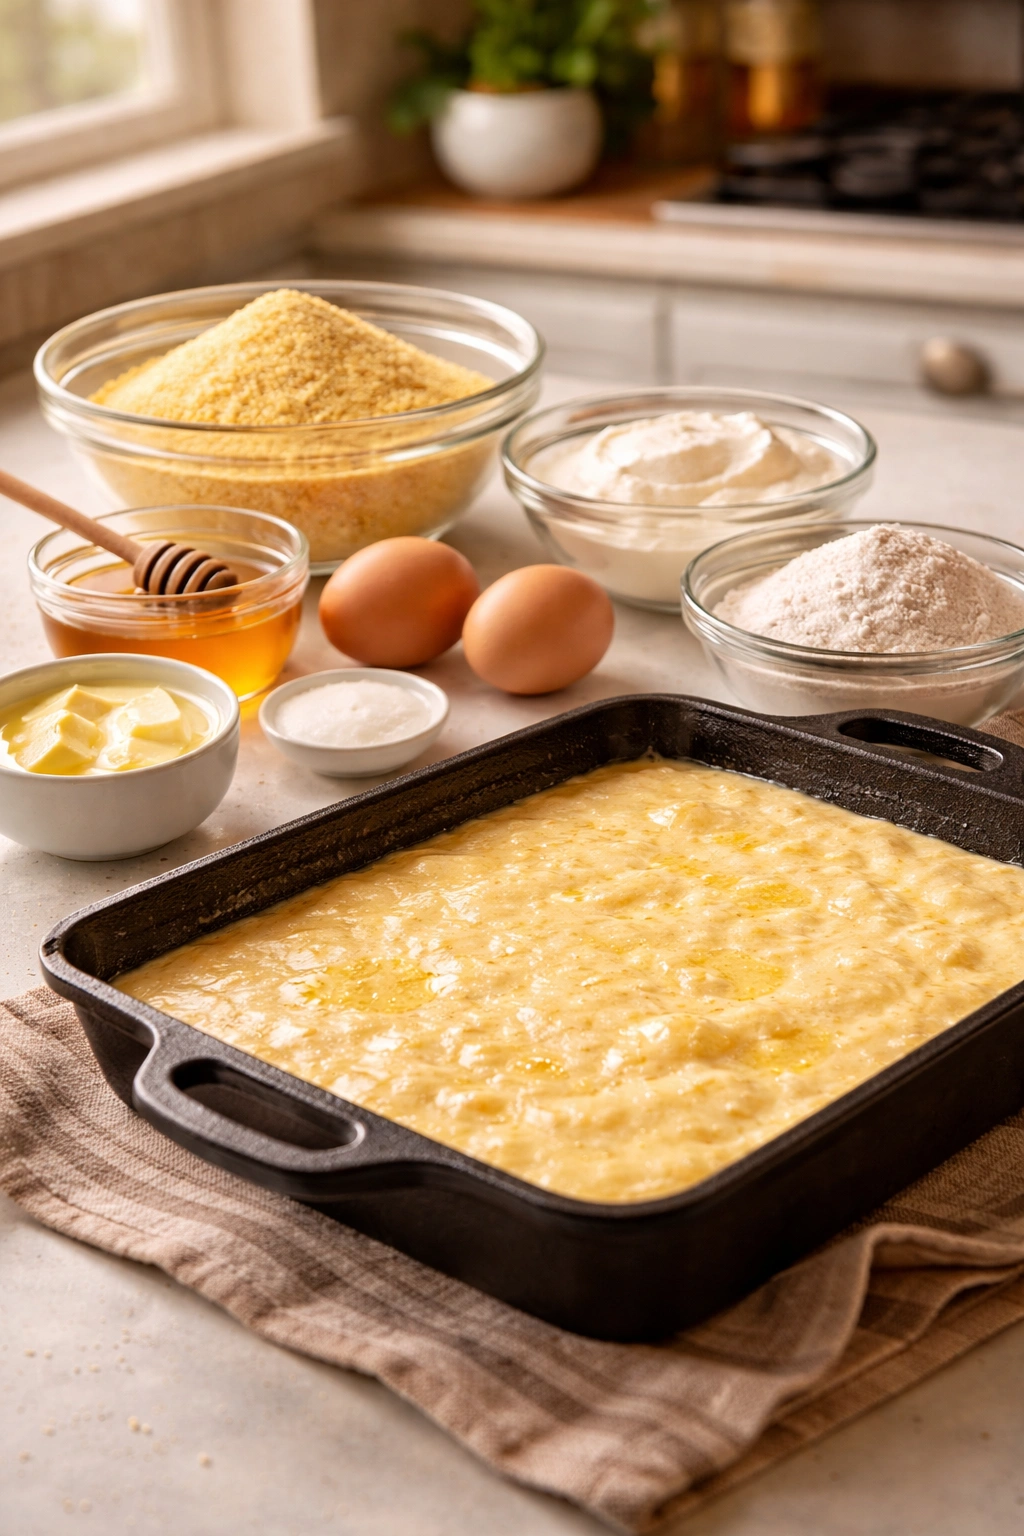
Pour the batter into the hot greased pan and spread it gently into an even layer with a spatula. The pan should be piping hot — this is important for getting a golden, crispy bottom crust. If the pan has cooled down, pop it back in the oven for a minute to reheat before pouring in the batter.
Bake and Cool:
-
Bake for 20 to 25 minutes, rotating the pan halfway through baking (around the 12-minute mark) to ensure even browning if your oven has hot spots. Start checking for doneness at 20 minutes by inserting a toothpick into the very center of the cornbread. The toothpick should come out with a few moist crumbs clinging to it — not clean, and not with raw batter. If it comes out clean, the cornbread is likely overbaked and will be dry.
-
The top should be golden brown and feel firm to the touch when you lightly press it. The edges should pull slightly away from the sides of the pan. Do not overbake in pursuit of a darker color — cornbread is fully done and at its moistest when the center is still slightly underbaked by traditional cake standards.
-
Remove the pan from the oven and set it on a wire cooling rack. Let the cornbread rest in the pan for 5 to 10 minutes — this allows the internal structure to set slightly so the cornbread doesn’t fall apart when you cut it. Do not skip this resting period, as cutting into hot cornbread causes it to crumble.
-
After 10 minutes, run a thin knife around all four edges of the pan to loosen the cornbread, then either slice it directly in the pan and serve, or invert it onto a cutting board and slice it there. The cornbread is best served warm from the oven or at room temperature the same day it’s baked.
Pro Tips for Guaranteed Moist Cornbread
Room-temperature ingredients mix more smoothly and create a more uniform batter with fewer lumps. Take your eggs and buttermilk out of the fridge 30 minutes before baking. This tiny step makes a noticeable difference in how evenly the batter mixes and how consistent the crumb turns out.
Use a preheated pan. Pouring batter into a hot greased pan creates an immediate, golden crust on the bottom of the cornbread, which is both delicious and seals in moisture. If your pan has cooled below 350°F, your cornbread will bake from the inside out rather than getting that beautiful exterior, and the result will be less crispy-edged and drier overall.
Don’t make the common mistake of measuring flour by scooping directly into the bag with your measuring cup. This compacts the flour and you end up with more flour than the recipe calls for, which dries out the cornbread. Instead, spoon flour into your measuring cup and level it off with a knife. Better yet, use a kitchen scale and measure by weight — 120 grams of flour per cup is the standard.
Cool the cornbread completely before cutting. It will continue to set as it cools, and slicing warm cornbread leads to crumbling and a less attractive finished product. Patience here pays off with beautiful slices.
Wrap leftover cornbread tightly in plastic wrap or place it in an airtight container as soon as it’s completely cool. This is the single biggest factor in keeping cornbread moist for multiple days. Unwrapped cornbread exposed to air dries out rapidly.
Common Mistakes That Make Cornbread Dry
Substituting regular milk for buttermilk is the most common mistake, and it directly results in drier cornbread. Buttermilk’s acidity is essential to the chemistry of the crumb. If you don’t have buttermilk, make the vinegar or lemon juice substitution rather than using plain milk.
Using melted butter instead of oil, or using too little fat overall, creates a denser, drier cornbread. Many traditional recipes were developed in an era when fat was rationed, leading to cornbread with less moisture retention. Modern cornbread benefits from generous oil content.
Skipping the sugar or cutting it too far back removes the main ingredient that holds moisture in the crumb. Low-sugar cornbread tastes flatter and dries out within hours, becoming nearly inedible by the next day.
Overmixing the batter develops gluten and creates a tough, dense crumb that feels more like cake made from wheat flour than cornbread. The key is to stop stirring as soon as the dry ingredients disappear into the wet ingredients—lumps are fine.
Using cornmeal that’s been sitting in the pantry for longer than a few months. Old cornmeal loses its sweet flavor and may taste slightly rancid, and it doesn’t contribute the same moisture-rich structure to the cornbread.
Overbaking by even a few minutes. The difference between perfectly moist and noticeably dry cornbread is often just two minutes. Rely on the toothpick test, not on baking time, to determine doneness.
Cutting into the cornbread while it’s still hot from the oven. Hot cornbread hasn’t set fully, and cutting it causes crumbling and makes the interior structure fall apart. Always rest the cornbread for at least 10 minutes before cutting.
Flavor Variations and Mix-Ins
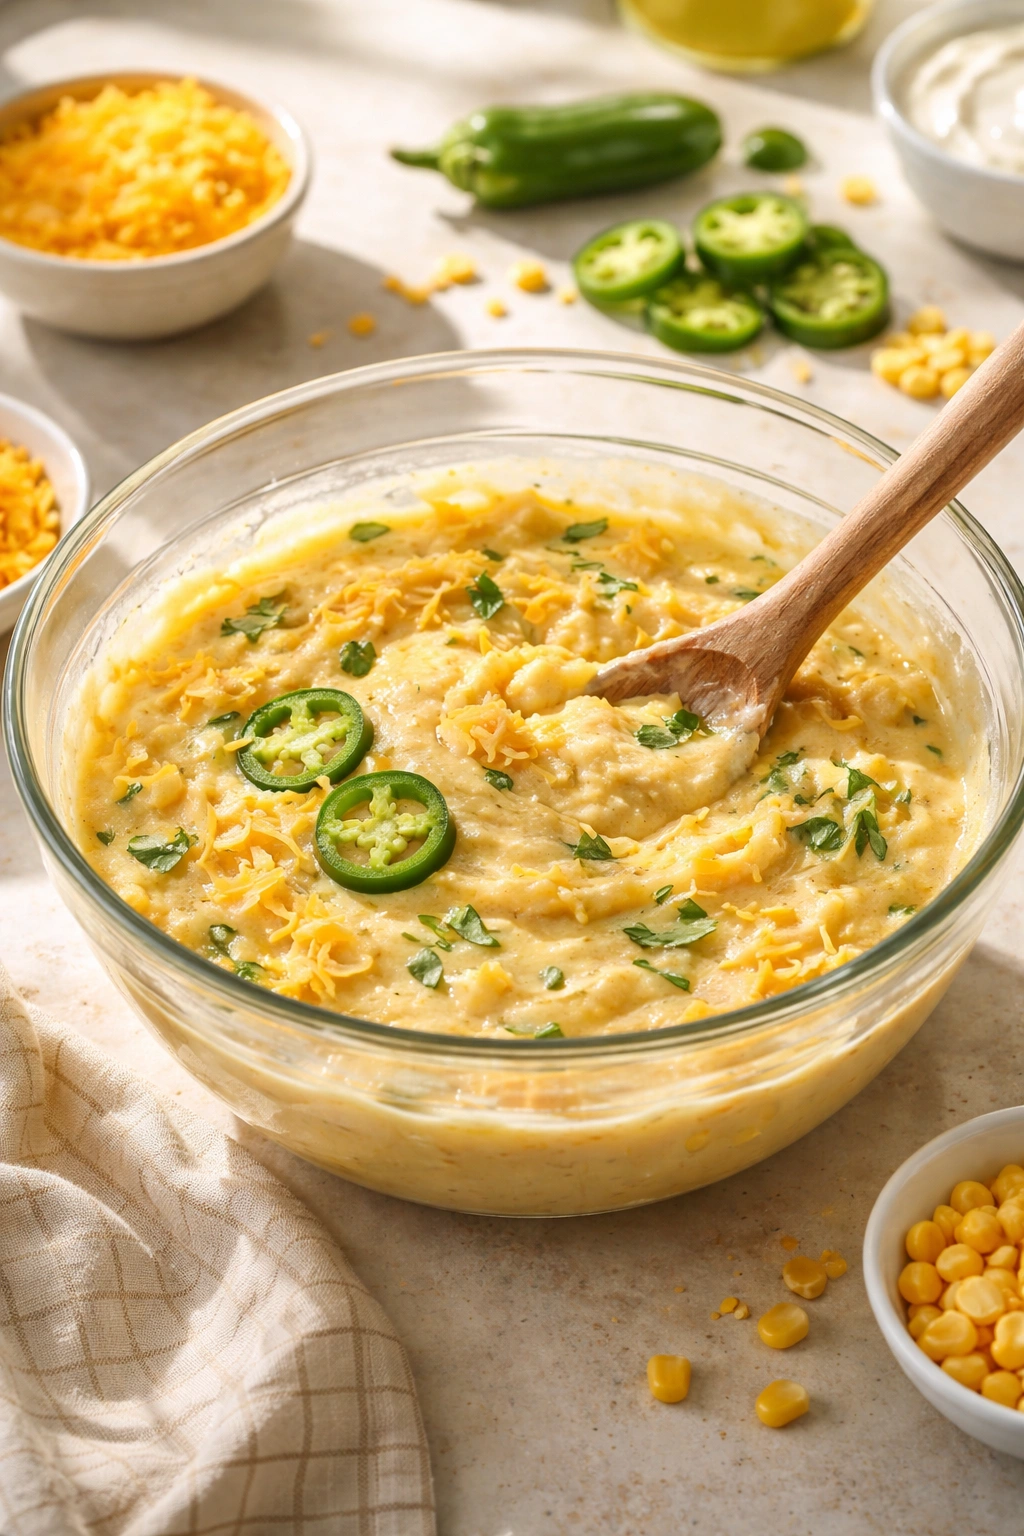
Jalapeño cheddar cornbread is a natural evolution—add one seeded, finely diced jalapeño and one cup of sharp cheddar cheese to the dry ingredients before mixing in the wet ingredients. The cheddar adds richness and moisture, and the jalapeño provides a subtle heat that plays beautifully against the sweetness and corn flavor.
Honey and vanilla cornbread incorporates an extra tablespoon of honey into the batter and a teaspoon of pure vanilla extract, creating a more complex, subtly sweet cornbread with deeper flavor. This version stays moist longer and benefits from being brushed with honey butter immediately after baking.
Creamed corn cornbread substitutes half a cup of the buttermilk with half a cup of canned creamed corn (drained of excess liquid), adding natural corn flavor and extra moisture. This version tastes like pure corn and has an almost creamy interior texture.
Buttermilk-blueberry cornbread folds in one cup of fresh or frozen blueberries (tossed with a tablespoon of flour to prevent them from sinking to the bottom) along with an extra half teaspoon of vanilla extract. The blueberries add juiciness and tartness that keeps the cornbread interesting. If using frozen blueberries, do not thaw them before adding them to the batter.
Cornbread with brown sugar and cinnamon swaps half the granulated sugar for brown sugar and adds a teaspoon of ground cinnamon to the dry ingredients. This creates a more complex, slightly caramel-like sweetness and a cozy spiced flavor without being overtly dessert-like.
Skillet cornbread uses the same batter but bakes it in a preheated cast-iron skillet instead of a square pan. The cast iron creates an exceptionally crispy, golden crust on the bottom and sides. Preheat the skillet in the oven at 400°F for 5 minutes, then carefully add the batter and bake for 22 to 25 minutes. Cast iron retains heat beautifully and produces cornbread with incredibly tender, moist insides and crispy-edged perfection.
Storage, Make-Ahead, and Reheating
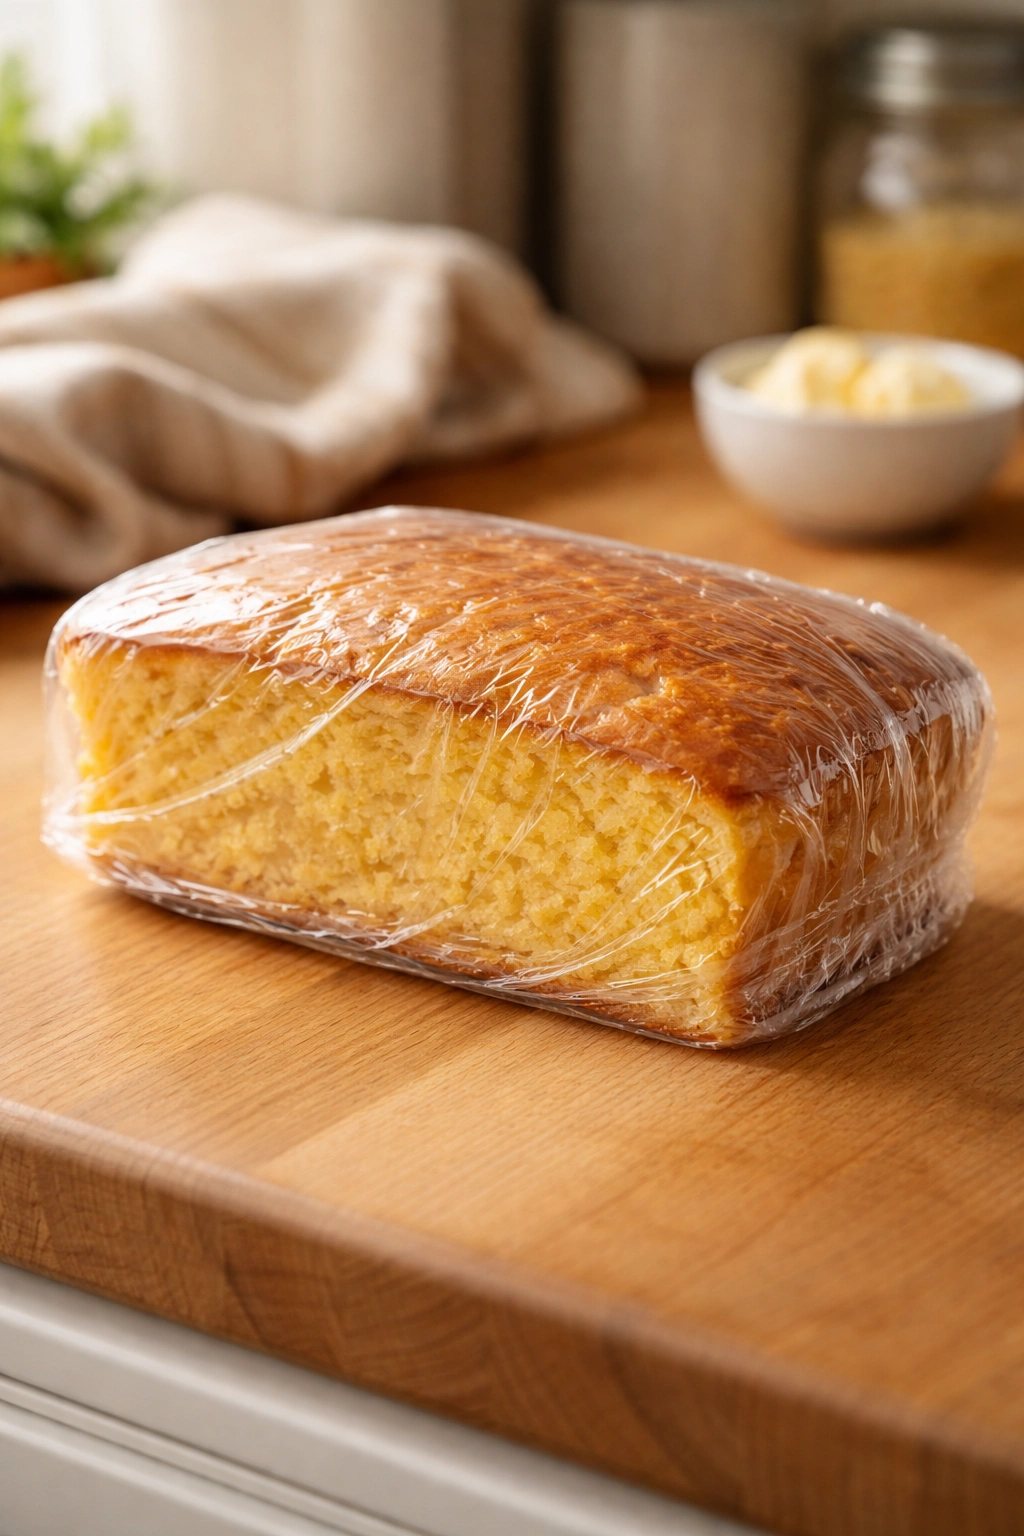
Cornbread stays moist at room temperature for one full day if wrapped tightly in plastic wrap. Do not store it uncovered on the counter, as it will dry out rapidly. After the first day, refrigerate it to extend its life.
Refrigerated cornbread keeps for three to four days in an airtight container or wrapped tightly in plastic wrap. The moisture content actually improves after a day or two as the moisture redistributes evenly throughout the crumb. Second-day cornbread is often more tender than fresh cornbread.
Freeze cornbread for up to three months. Wrap cooled cornbread in plastic wrap and then place it in a freezer-safe bag or airtight container. Thaw frozen cornbread at room temperature for one to two hours before serving, or reheat it directly from frozen in a 300°F (149°C) oven for 15 to 20 minutes, wrapped loosely in foil to prevent over-browning.
Reheating cornbread is best done in a low oven. Wrap the cornbread in foil and warm it at 300°F (149°C) for 10 to 15 minutes until heated through. Microwave reheating is possible but not ideal—it dries out the cornbread. If you must microwave, wrap a single slice in a damp paper towel and microwave for 10 to 15 seconds on high.
Make-ahead option: prepare the batter up to two hours before baking. Cover the bowl with plastic wrap and refrigerate it. Pour it into your preheated greased pan and bake immediately, adding one to two extra minutes to the baking time because the batter will be slightly colder. This is useful if you’re preparing cornbread for dinner but don’t want to bake it until closer to serving time.
Serving Suggestions and Pairings
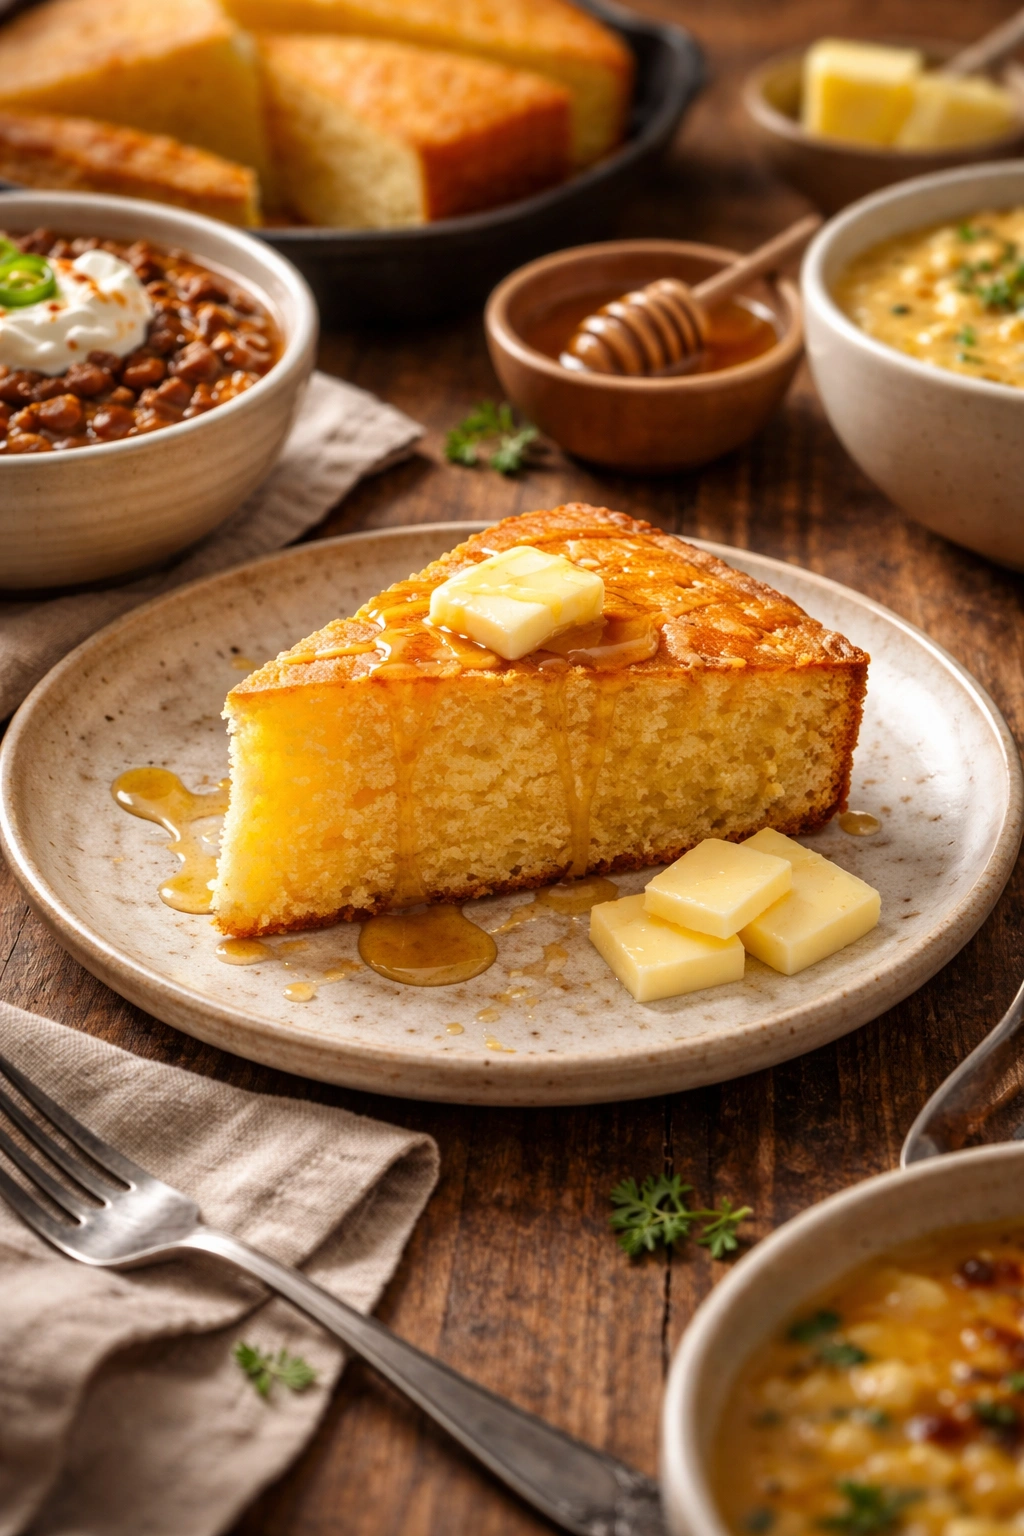
Serve cornbread warm with honey butter—the easiest version is simply softened butter mixed with honey. Whisk together 4 tablespoons of softened butter with 2 tablespoons of honey and a pinch of salt, then spread a generous dollop on a warm slice of cornbread. The heat from the warm cornbread melts the honey butter into every crevice, creating an incredibly luxurious bite.
Cornbread is the classic side to chili, stew, and slow-cooked bean dishes. Its slightly sweet corn flavor balances the heat and depth of spiced, long-cooked dishes. Slice it into wedges and serve alongside in a basket lined with a cloth napkin.
Crumble cornbread into a bowl of chili or vegetable soup for a Southwestern-inspired textural element. The cornbread soaks up the broth slightly while remaining tender, adding another dimension to the dish.
Cornbread makes an excellent base for a Thanksgiving or holiday dressing or stuffing. Cube day-old cornbread and use it in place of some or all of the traditional bread cubes in your stuffing recipe. The corn flavor adds depth and the cornbread’s tender crumb absorbs the broth beautifully.
Serve cornbread at brunch alongside eggs, bacon, and fresh fruit. A wedge of cornbread with a pat of butter becomes a simple, satisfying breakfast side that elevates a simple egg plate.
Pair cornbread with simple salads—a green salad with vinaigrette, a creamy coleslaw, or a charred vegetable salad. The cornbread provides richness and substance that complements fresh, acidic vegetable dishes.
Final Thoughts
Moist cornbread is completely achievable and actually simpler than many bakers realize. The formula is straightforward: the right ratio of cornmeal to flour, enough fat to create tenderness, buttermilk for acidity and moisture, sugar for hygroscopic holding power, and most importantly, baking it just until the center is set without overcooking. These principles work together to create cornbread that’s tender, moist, and delicious fresh from the oven and even better the next day.
The next time you make cornbread, remember that the toothpick test is your friend—pull it out when a few moist crumbs cling to it, not when it comes out clean. Let the cornbread rest in the pan for a full 10 minutes before cutting into it. And don’t skimp on the oil or the buttermilk; these ingredients are non-negotiable for moisture retention. Once you’ve made cornbread this way a couple of times, you’ll never go back to the dry, crumbly versions you might have made before.
Cornbread is meant to be warm, comforting, and deeply satisfying. With these techniques, that’s exactly what you’ll create every single time.