Quick pickles are genuinely one of the easiest ways to transform vegetables into something crave-worthy, and the best part? You don’t need to wait weeks or months for them to develop flavor. The beauty of refrigerator pickles lies in the hot brine method—you pour a steaming vinegar mixture directly over your vegetables, and the heat does most of the work for you. Within 30 minutes, they’re chilled, crunchy, and sharp enough to crack alongside nearly anything. They won’t have the deep, aged complexity of long-fermented pickles, but they’ll have something more immediate and satisfying: bright acidity, snappy texture, and the confidence that you made something delicious without any serious effort.
Most home cooks assume pickling requires special equipment, precise timing, and mysterious canning knowledge. That’s actually the opposite of what quick pickles demand. This method is beginner-friendly, forgiving, and incredibly adaptable. You’ll need a jar, vegetables you like eating, vinegar, and salt. That’s really it. The kitchen time is maybe 10 minutes of actual hands-on work, then you’re waiting for them to chill—which happens in the fridge while you do something else. Whether you’re trying to use up a vegetable bounty, craving something tangy to cut through rich foods, or looking for a make-ahead snack, quick pickles solve that problem instantly.
Why Quick Pickles Beat Long Fermentation
Traditional fermented pickles spend weeks developing flavor through bacterial action, which creates complexity but demands patience and careful temperature management. Quick pickles take a completely different route—they rely on the immediate power of hot vinegar to soften vegetables and infuse them with acidity in real time. The heat opens up the cell structure of the vegetables, allowing the brine to penetrate faster and more thoroughly than it could in cold liquid.
This speed doesn’t sacrifice quality. Fresh-made quick pickles have a particular appeal that seasoned cooks appreciate: they preserve the vegetable’s natural flavor instead of masking it. You taste the cucumber or carrot first, then the bright vinegar and spices come in second. With fermented pickles, the fermentation flavor eventually becomes the star, which is beautiful in its own way but doesn’t work for every application.
The texture advantage is real too. Quick pickles stay crisp and snappy because they haven’t had time to break down. The vinegar penetrates the exterior and a little bit beyond, but the inside stays firm. If you’ve ever had a mushy fermented pickle, you understand why this matters—not everyone loves them soft.
Why 30 Minutes Makes This Practical
Thirty minutes is the threshold where this stops being “someday” cooking and becomes “I’m doing this right now” cooking. No advance planning required. Most of us have the ingredients in our pantry already. You can see and taste the results before dinner, which creates an immediate reward cycle that encourages you to make pickles regularly instead of as a rare project.
The cooling time does the heavy lifting for you. You’re not standing over a stove or doing any complex technique work. The heat does everything—it softens the vegetables slightly, opens their structure, and carries the brine flavors deep inside. Then you let gravity and temperature do the rest while you handle other tasks.
The Science Behind Hot Brine Pickling
Understanding what’s actually happening when you make quick pickles explains why the method works and why certain details matter more than others. Heat does three essential things: it denatures the pectin in vegetable cell walls (which is what keeps them firm), it drives off volatile compounds from the spices that would stick around in cold liquid, and it helps acid penetrate deeper into the vegetable structure.
When you pour hot vinegar mixture over raw vegetables, the initial shock of heat begins softening the exterior immediately. This isn’t the same as cooking the vegetables—they’re not immersed in boiling liquid—so they don’t become mushy. The surface softens just enough to accept the brine, but the interior stays crunchy because it cools before the heat penetrates all the way through.
The vinegar is doing the actual preservation work. Acetic acid is hostile to most microbes, which is why pickled vegetables can sit in the fridge for weeks without spoiling. The salt enhances flavor and plays a role in texture too—it draws water out of the vegetables initially, which concentrates their flavor. But salt also works with the acid to create an environment where unwanted bacteria can’t thrive.
The Role of Spices and Aromatics
Every spice or herb you add to the brine brings flavor compounds that the hot liquid extracts and carries into the vegetables. Mustard seeds are classic because their sharp, slightly bitter flavor stands up to acid well. Peppercorns add heat and complexity. Fresh dill or other herbs contribute aromatic notes that feel fresh rather than cooked.
The timing of when you add these matters slightly. Spices added to the hot brine soften as it cools, releasing their flavors slowly and evenly throughout the liquid. Delicate fresh herbs added at the end stay brighter because the residual heat gently wilts them rather than cooking them into submission. This is a small detail, but it’s the difference between pickles that taste carefully made and pickles that taste a little tired.
Essential Ingredients for Quick Pickles
The core formula is simple: one part vinegar, one part water, salt, and spices. You can adjust this ratio depending on how sharp you want your pickles and what vegetables you’re using. The vegetables themselves are the only variable ingredient—everything else stays consistent across whatever you’re making.
Vinegar is non-negotiable, and the type matters more than most people realize. Distilled white vinegar is the classic choice because its acidity is reliable and neutral. Apple cider vinegar brings warmth and slight sweetness. Red or white wine vinegar adds subtle complexity. Rice vinegar makes things more delicate and works beautifully with Asian-inspired vegetables like daikon or cucumber. Whatever you choose, make sure it’s 5% acidity (check the label), which is the standard for pickling.
Salt does two jobs: it draws moisture out of vegetables and it prevents spoilage. Kosher salt or sea salt work equally well. Avoid iodized table salt because iodine can darken pickles and create an off-flavor. Use about 1-2 tablespoons per cup of brine—this isn’t just a flavor decision, it’s a preservation decision.
Spices and aromatics are where you customize flavor. Mustard seeds, peppercorns, coriander seeds, and chili flakes are the reliable foundation. Fresh dill, garlic, ginger, or thyme add brightness. There’s no wrong combination here—whatever spices you like eating, you’ll like in pickles.
Substitutions That Actually Work
Vinegar swaps: You can use any vinegar at 5% acidity, and the ones mentioned above are just the starting point. If you want funkier, more complex pickles, malt vinegar works. Champagne vinegar makes delicate pickles that work better with tender vegetables like green beans. Just avoid specialty vinegars below 5% acidity—they won’t preserve properly and the flavor tends to be thin.
Sugar: The basic recipe doesn’t include added sugar because good vinegar has enough sweetness and vegetables contribute their own. But if you like slightly sweeter pickles (some people do), add 1-2 tablespoons of sugar per cup of brine. Honey or maple syrup work too, though they’ll change the flavor more noticeably.
Spice swaps: Have fresh thyme instead of dill? Use it. Prefer celery seed over mustard seed? Go for it. The specific spices matter less than having some flavor complexity. The worst quick pickles are made with just vinegar, salt, and water—they taste thin and one-dimensional. Even a couple of whole cloves or a bay leaf makes a noticeable difference.
Equipment You Actually Need
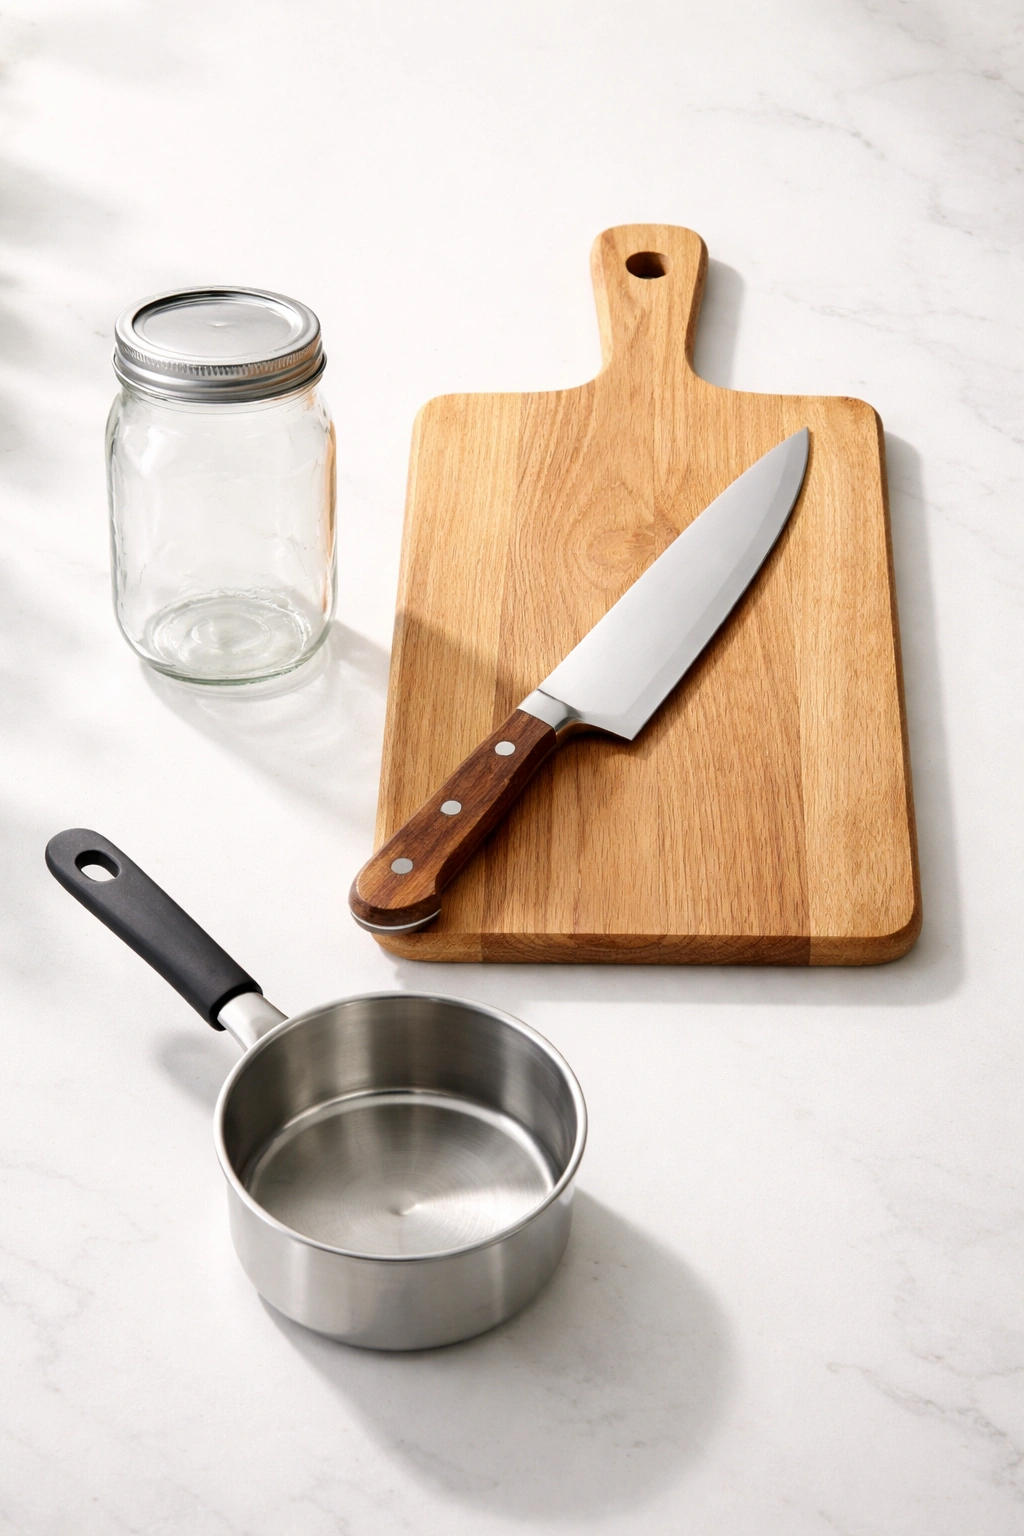
This is the best part: quick pickling requires almost nothing. A jar (glass is best because you can see what’s happening and verify cleanliness, but any clean container works), a cutting board, a knife, and a small pot are literally all the equipment involved. You’re not doing water bath canning, so you don’t need all that specialized gear.
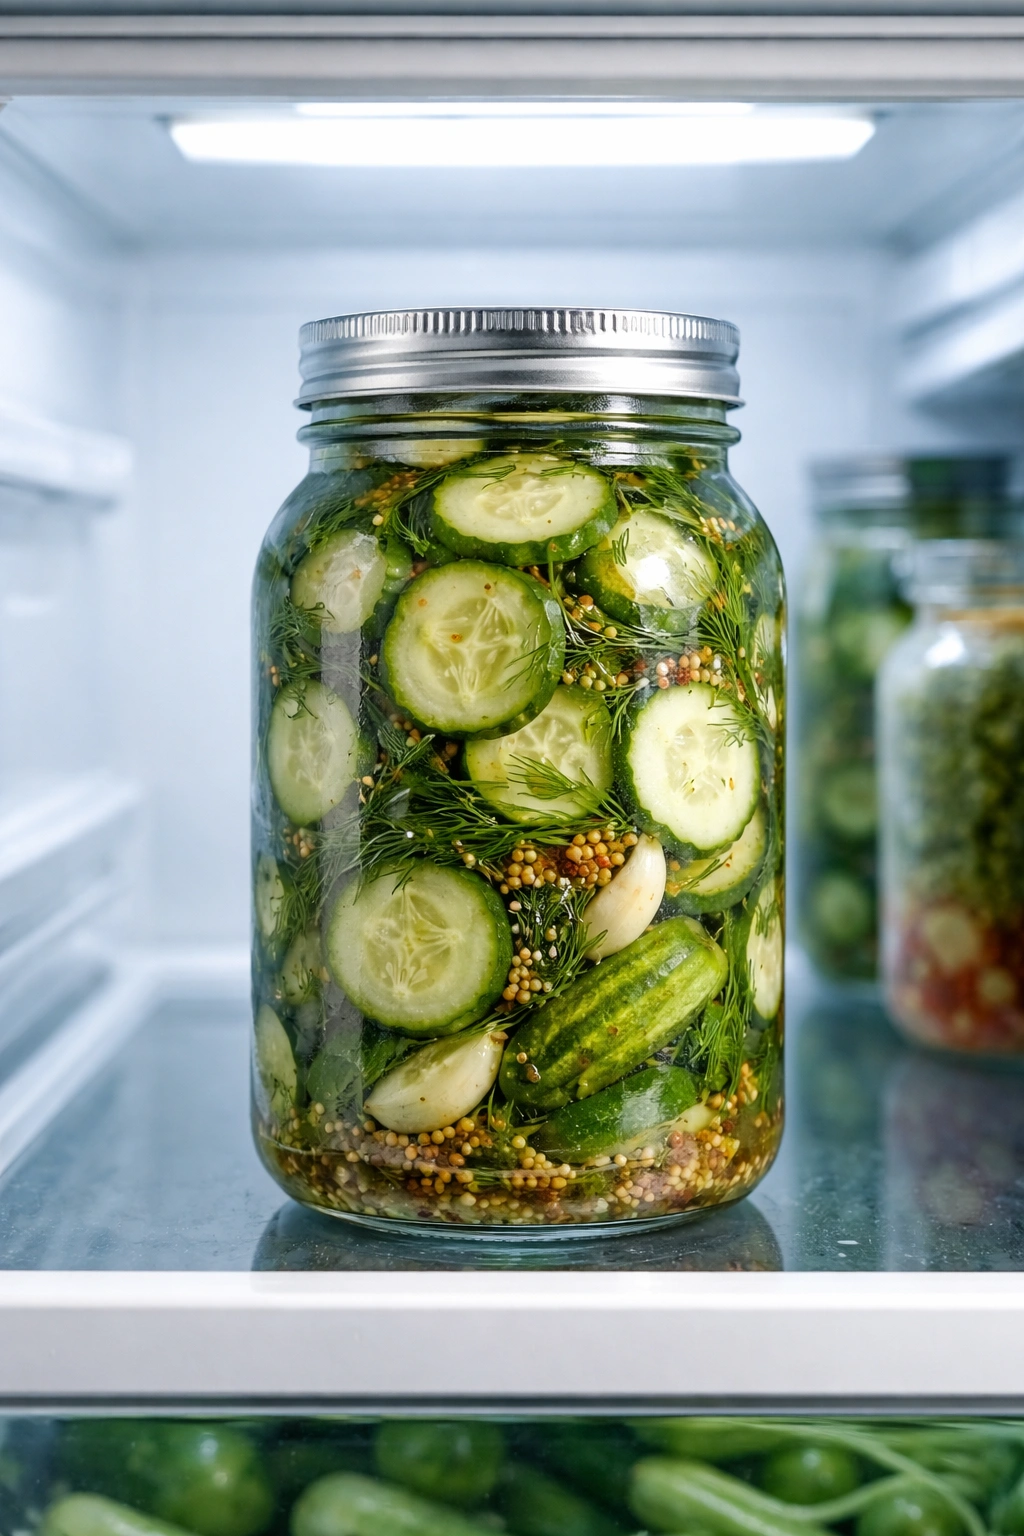
The jar should be clean—wash it with hot soapy water and let it air dry. It doesn’t need to be sterilized for quick pickles because they go straight into the fridge and won’t sit at room temperature. Sizes don’t matter much, but a quart jar is usually comfortable for a standard quick-pickle batch. If you like doing multiple jars at once, a quart jar is perfect because it’s big enough to be worth the effort but still small enough to cool quickly.
The pot needs to fit the volume of brine you’re making—usually a small saucepan handles it. Nothing fancy needed. You’re heating the liquid just long enough to dissolve the salt and warm up the spices. It doesn’t need to boil vigorously.
Why Glass Works Best
Glass shows you exactly what’s in the jar, which means you can assess texture, see if anything looks off, and enjoy the visual appeal while you’re eating. It also doesn’t interact with the acidic brine, so it never imparts any flavor. Plastic containers work fine and are more durable, but they can stain from the vegetables and the brine color, and sometimes they retain flavors from previous pickles if they’ve been used for other foods. If you’re reusing old jars, glass mason jars are cheap and reliable.
The Essential Quick Pickle Recipe
This recipe makes about one quart of pickles, which is four to six servings depending on how you use them. Everything scales up easily if you want more—just multiply all the quantities by however many batches you want. The vegetables listed are what works beautifully in quick brine, but you can substitute based on what you have.
Yield: One quart of pickles (serves 4 to 6 as a condiment or side)
Prep Time: 10 minutes
Cook Time: 2 minutes (brine heating)
Total Time: 30 minutes active + minimum 20 minutes chilling
Difficulty: Beginner — no special skills required, just chopping vegetables and pouring hot liquid. Perfect for anyone making pickles for the first time.
Best Served: Chilled straight from the refrigerator, as a condiment, side dish, or snack.
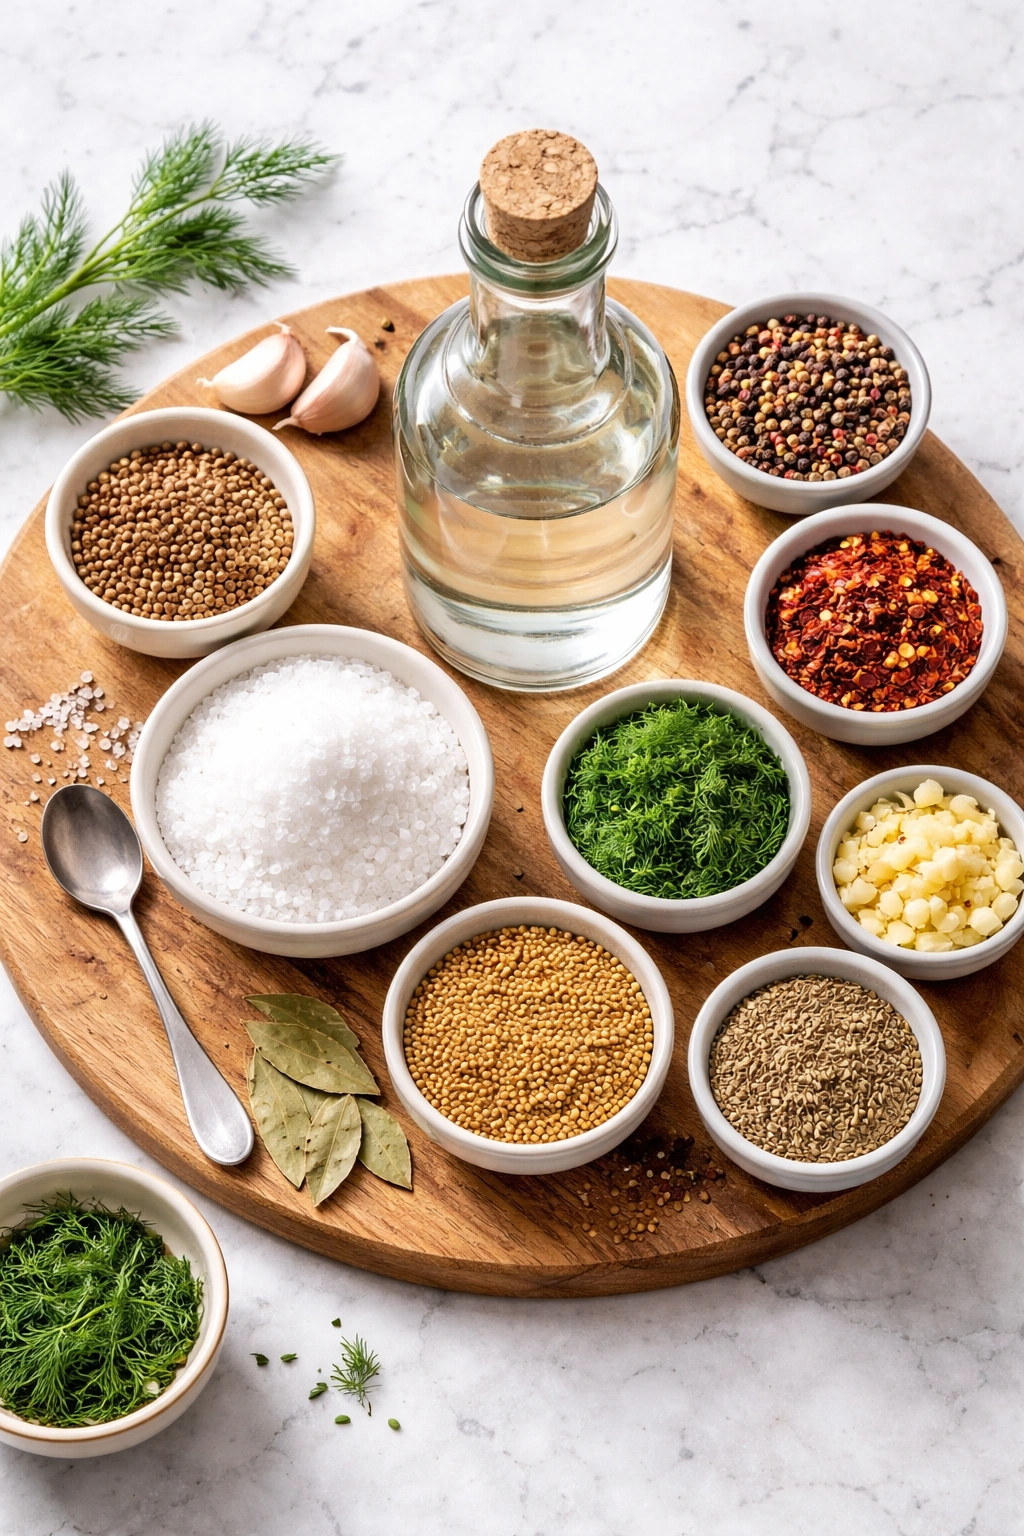
For the Brine:
- 1 cup distilled white vinegar (or apple cider vinegar for a warmer flavor)
- 1 cup water
- 1½ tablespoons kosher salt
- 1 tablespoon sugar (optional, omit if you prefer sharper pickles)
- 2 teaspoons brown mustard seeds
- ½ teaspoon red pepper flakes (or more if you like heat)
- 1 teaspoon whole coriander seeds
- 3-4 whole black peppercorns
- 2 bay leaves
- 4-5 whole garlic cloves, peeled and slightly smashed
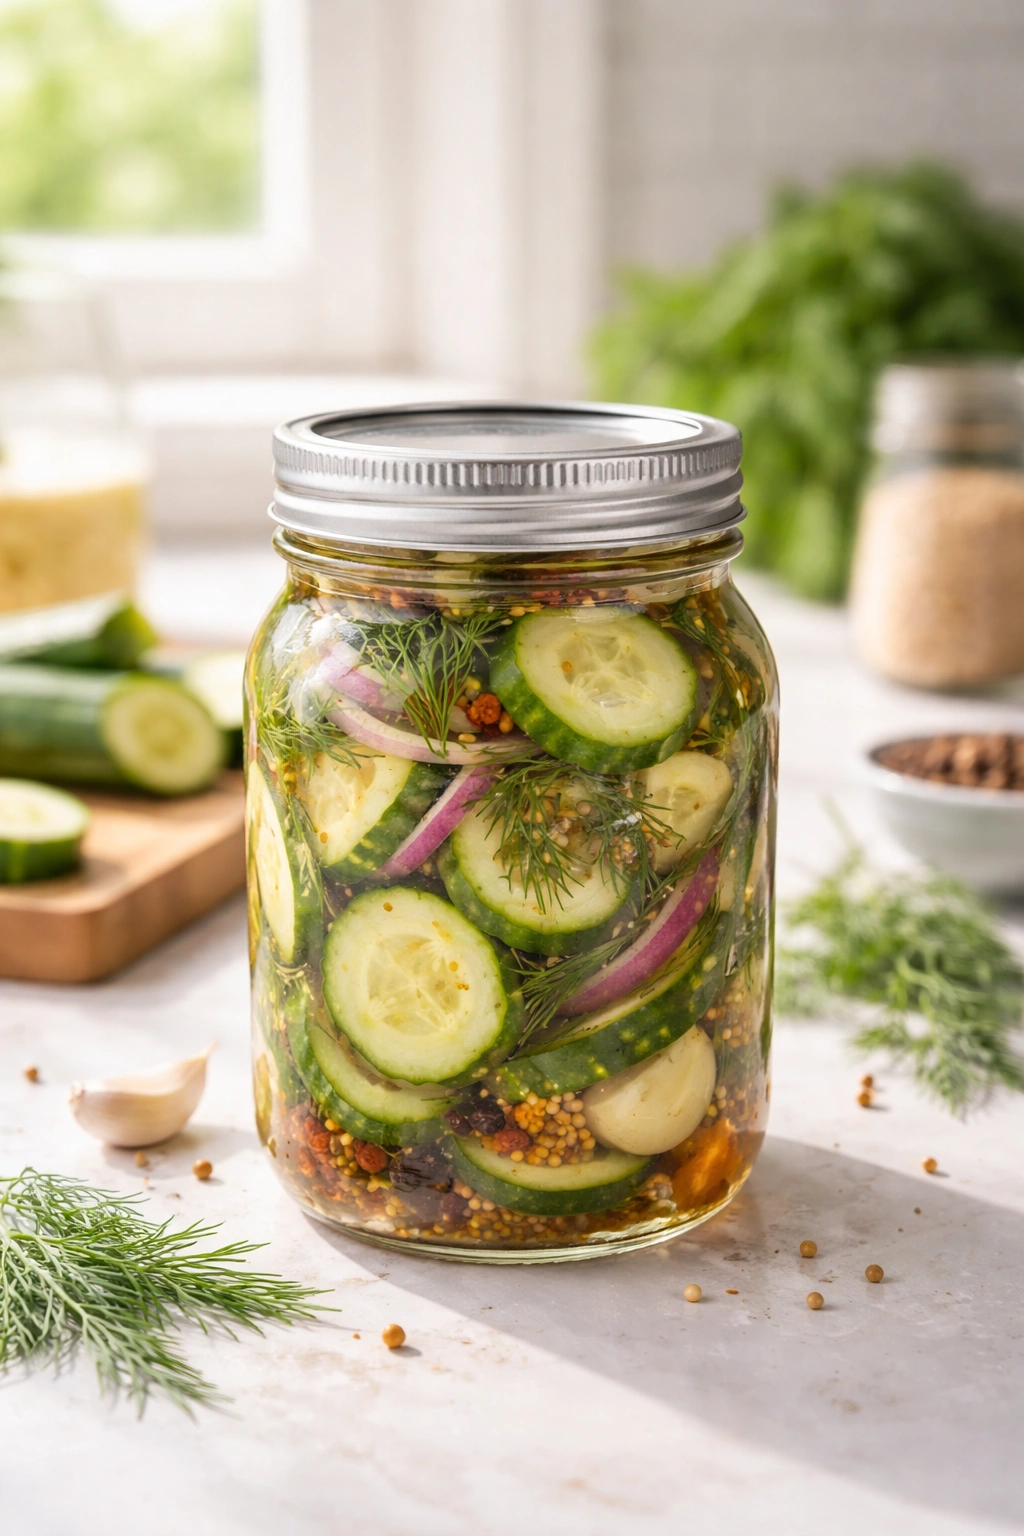
For the Vegetables (choose one or a combination):
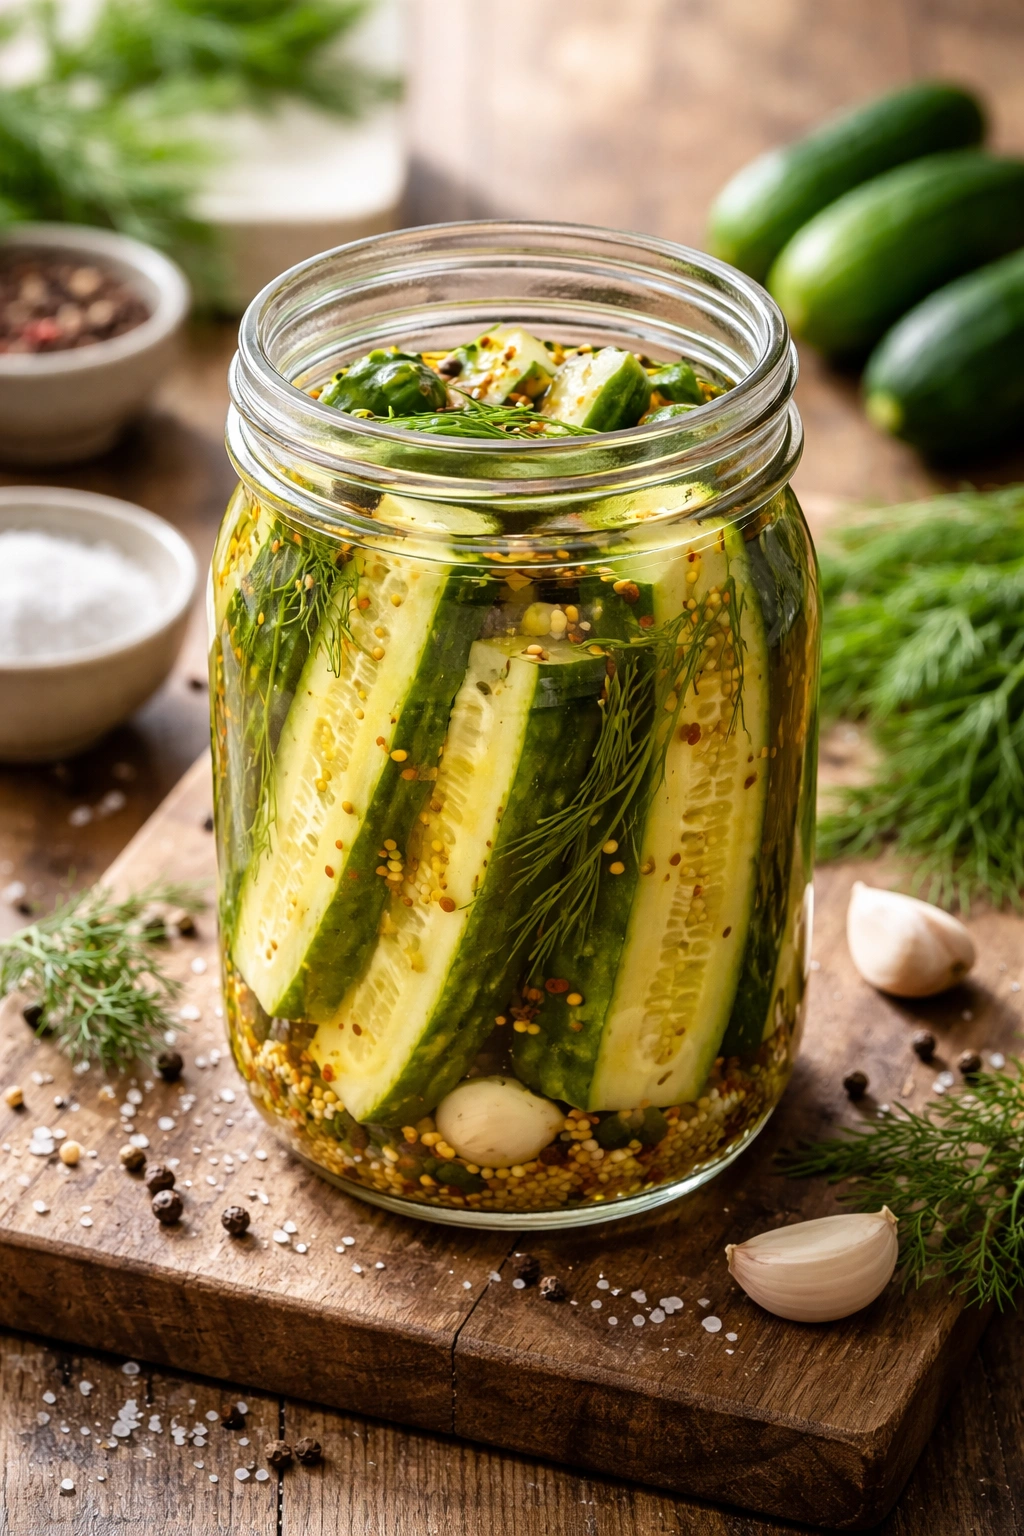
- 1 pound small pickling cucumbers, sliced lengthwise into spears (or sliced into rounds if you prefer)
- Or 1 pound fresh carrots, peeled and cut into 3-inch sticks
- Or 1 pound green beans, trimmed but left whole
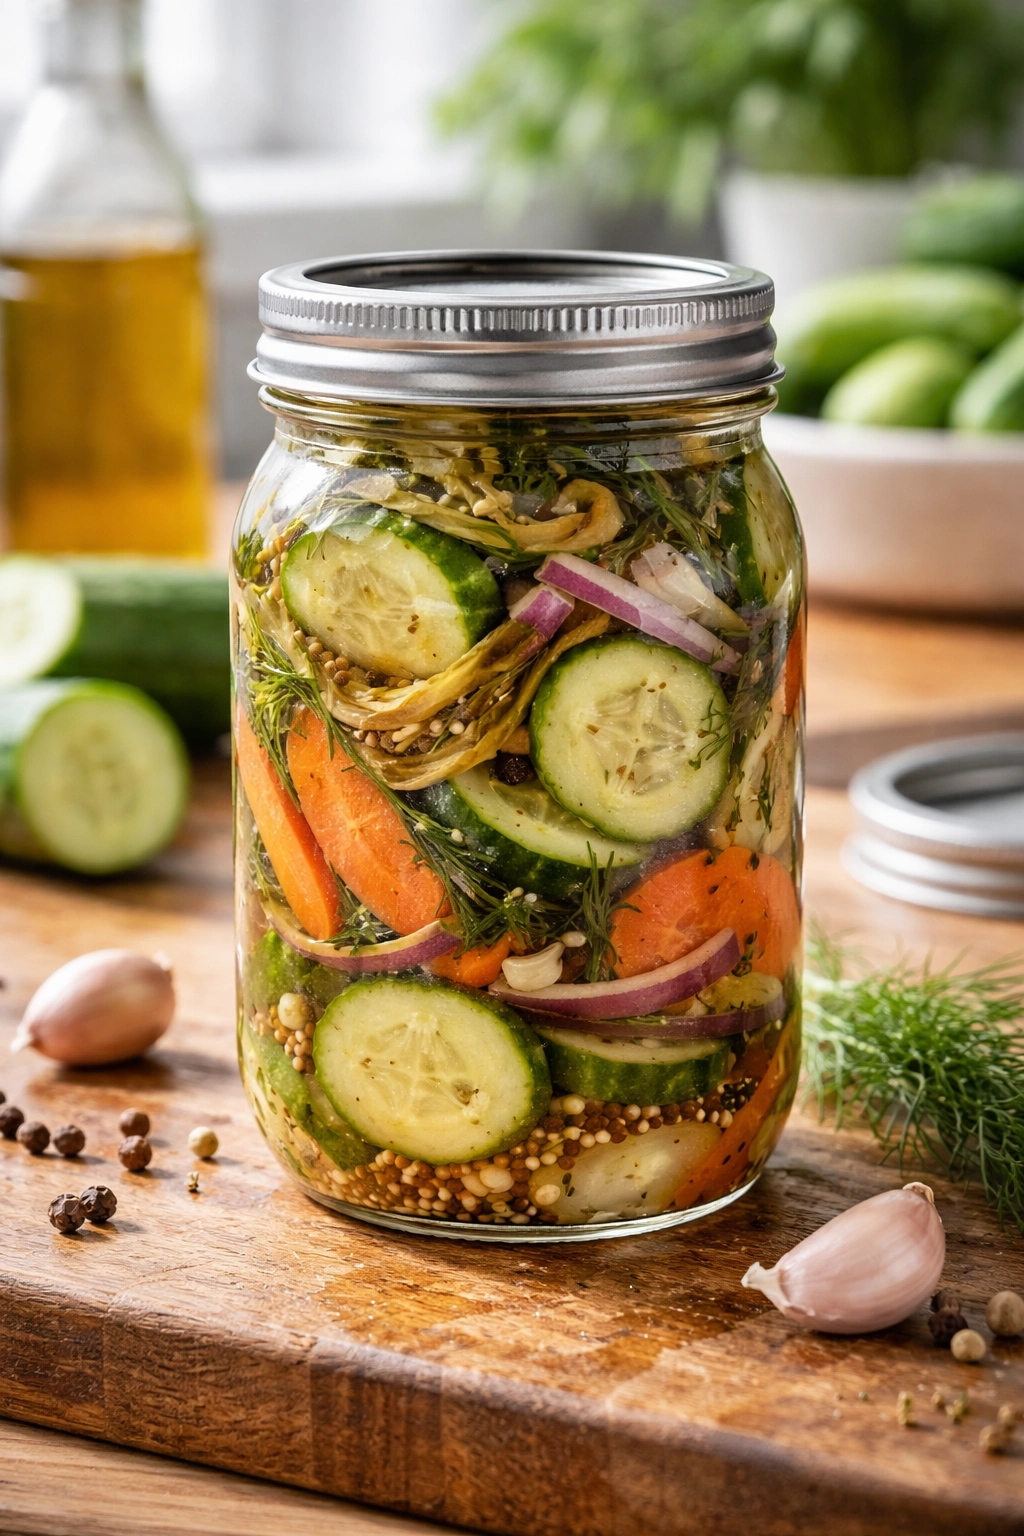
- Or 1 pound mixed vegetables (celery sticks, red onion slices, bell pepper strips, or radishes)
Optional Fresh Finish:
- 4-5 fresh dill fronds (add these after the brine cools, not before)
- A few fresh thyme sprigs (same principle—add when cool)
Prepare the Vegetables:
-
Wash all vegetables thoroughly under cool running water and pat them dry with a clean kitchen towel. Do not skip the drying step—excess water on the vegetables will dilute the brine once it cools, weakening the flavor and preservation.
-
Trim the vegetables as needed: cucumbers are best sliced lengthwise into spears or crosswise into rounds, depending on your preference for thickness. Carrots should be cut into 3-inch-long sticks roughly the thickness of a pencil. Green beans stay whole but trimmed at both ends. Bell peppers work best sliced into strips. Onions should be sliced against the grain for more delicate pieces.
-
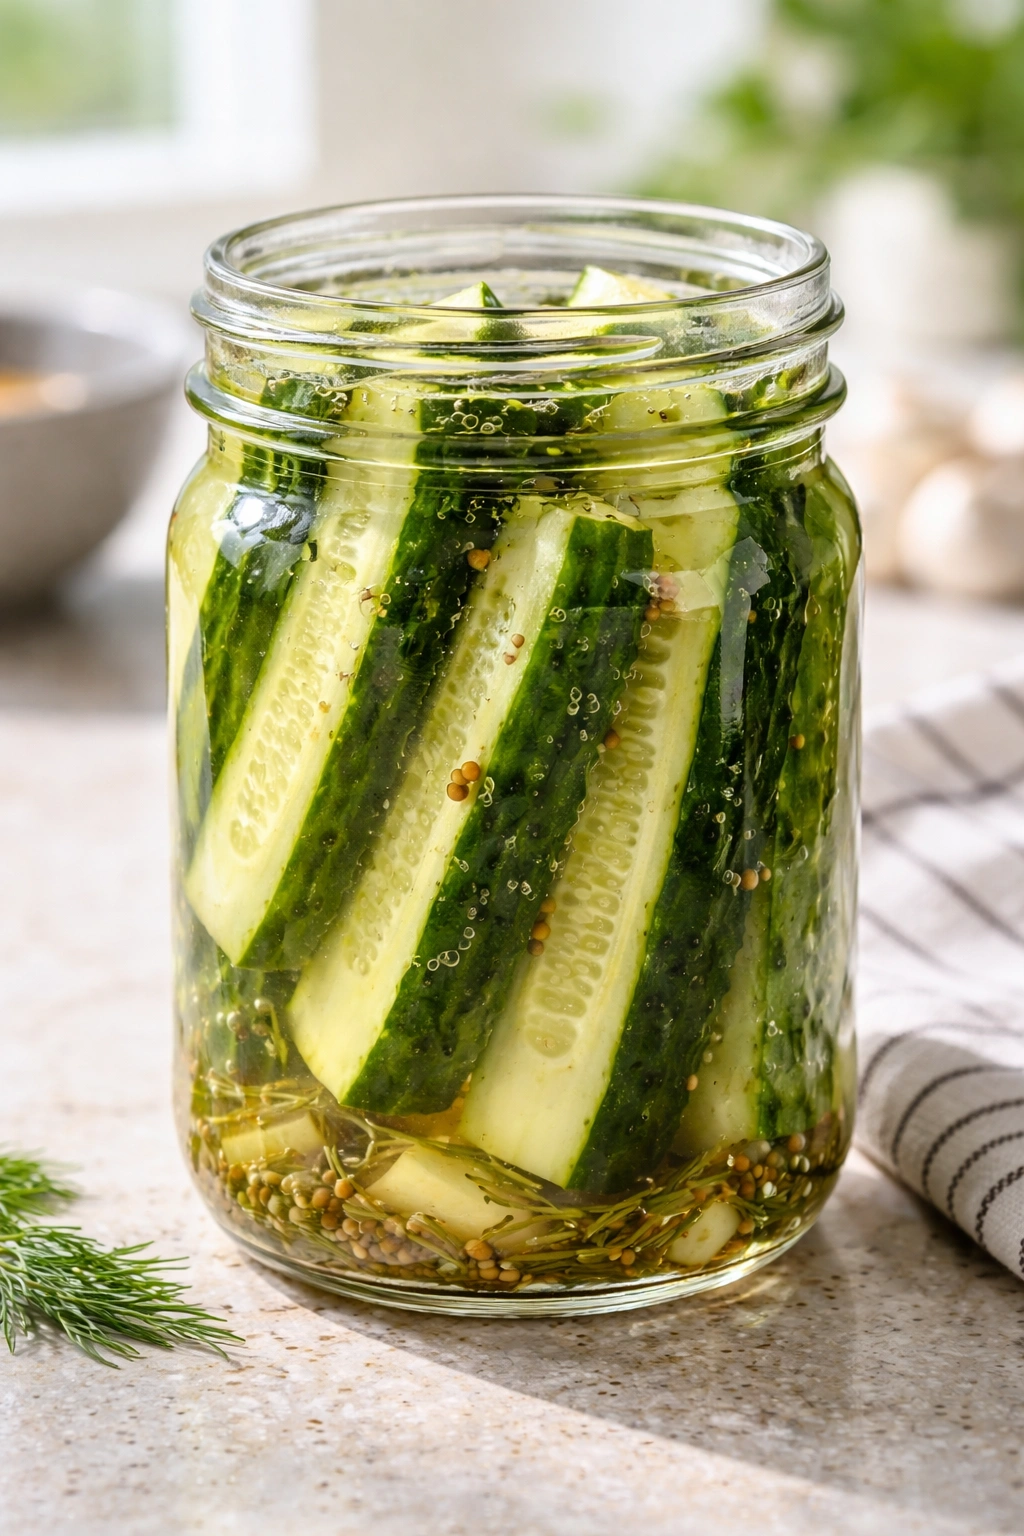
Pack the prepared vegetables into a clean quart-size glass jar, distributing them so they’re snug but not crushed. They should fill the jar about three-quarters of the way. Leave about 1 inch of headspace at the top—this gives room for the brine and prevents overflow when you pour it in.
Make the Brine:
-
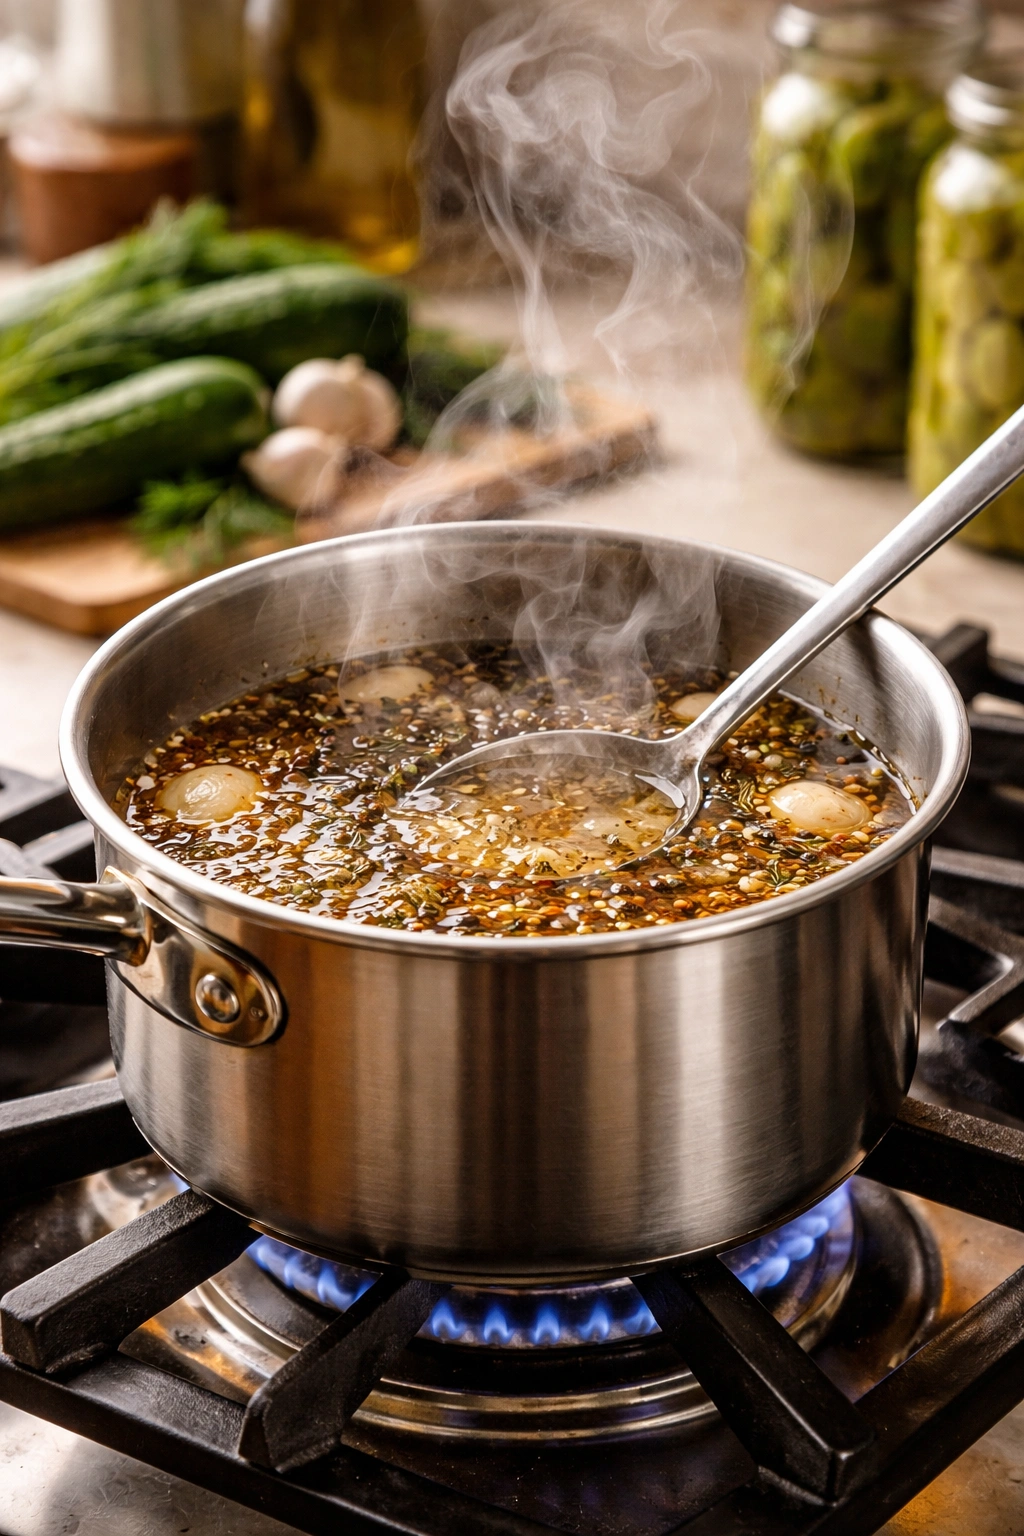
In a small saucepan, combine the vinegar, water, salt, and sugar (if using). The salt needs to fully dissolve, and the sugar needs to be incorporated, but the brine doesn’t need to reach a rolling boil—just heat it until it steams and you can see small wisps of vapor coming off the surface.
-
Once the brine is hot, add the mustard seeds, red pepper flakes, coriander seeds, peppercorns, and bay leaves directly to the pot. Stir everything together and let it warm for exactly 30 seconds off the heat. This gives the spices a moment to release their essential oils into the hot liquid without cooking out all their volatile compounds.
Advertisements -
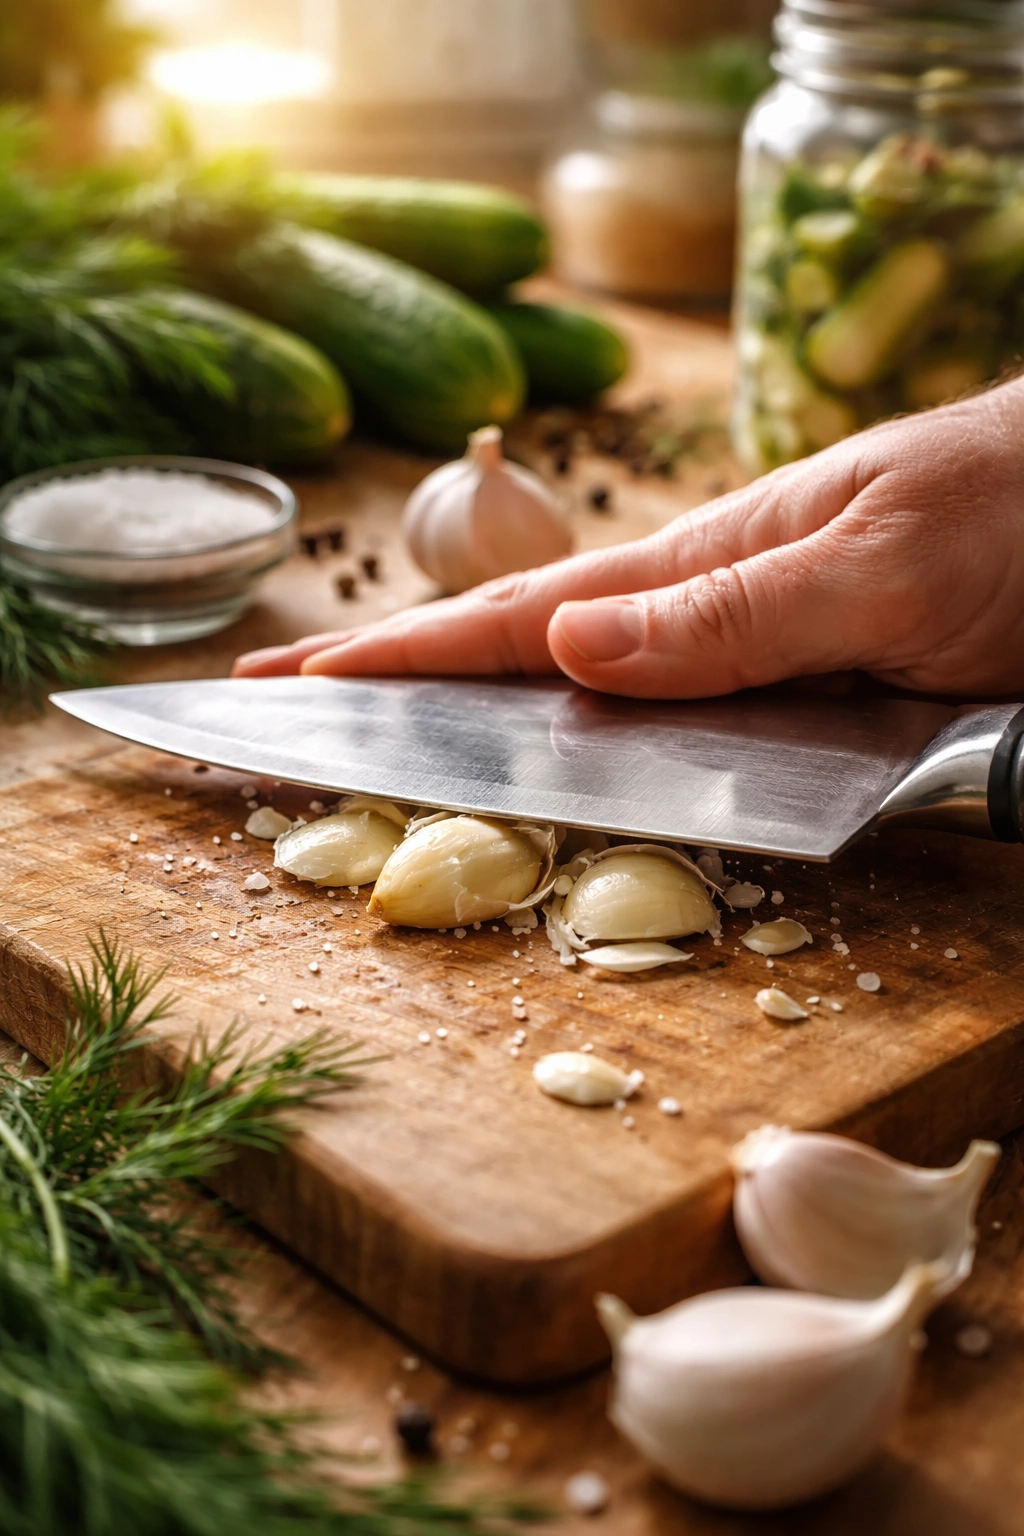
Smash the garlic cloves lightly with the side of your knife or the heel of your hand—this opens them up and allows them to release flavor more easily. Add them to the hot brine and stir once.
Pour and Cool:
-
Carefully pour the hot brine (with all the spices and garlic) directly over the vegetables in the jar. Pour slowly and carefully to avoid splashing yourself. The brine will be visibly steaming. Make sure all the vegetables are submerged beneath the liquid—if some are floating above the brine, use a clean fork to push them down. Vegetables exposed to air can spoil, so full submersion matters.
-
Once the jar is filled, let it sit at room temperature for 5 minutes. This allows the heat to gently soften the exterior of the vegetables and begin the infusion process.
-
After 5 minutes, transfer the entire jar to the refrigerator. It will cool gradually over the next 15-20 minutes. The pickles are safe to eat as soon as they’re chilled, but they’ll taste noticeably better if you give them the full 30 minutes from start to finish. The flavors meld and balance during this cooling period.
-
Before eating, taste one pickle. If you want it sharper, let it sit longer (they get more intensely flavored each day). If it’s already perfect, serve cold and enjoy.
Tips That Actually Make a Difference
The difference between great quick pickles and mediocre ones often comes down to small moves that most recipes never mention. Start with the vegetable quality—firm, fresh-from-the-market vegetables pickle better than ones that have been sitting in your crisper drawer for a week. The fresher they are, the crisper they’ll stay after pickling. If your cucumbers are getting soft or your carrots are wilting, pickle them immediately rather than waiting.
Temperature matters more than most people realize. The brine should be hot enough that you see steam, but not at a rolling boil. This is about 180-190°F, which is easier to achieve if you heat it on medium rather than blasting it on high. Overheated brine can cause vegetables to soften unevenly or make the exterior mushy while the interior stays firm.
Don’t skip smashing the garlic cloves. This one move releases more flavor from the garlic than you’d get if you left them whole. You don’t need to pulverize them—just a firm press with the side of your knife creates enough surface area that the flavor carries into the brine and then into the vegetables.
The Ratio Rule That Always Works
If you ever want to change the recipe or double it, remember this ratio: one part vinegar to one part water, plus 1.5 tablespoons salt per cup of combined liquid. This formula works for any volume and any vegetable combination. You could make a small batch for just yourself or triple the recipe for a party. The balance between acid and water stays perfect every single time.
The salt level is critical because it does preservation work, not just flavor work. Too little salt and you risk spoilage. Too much and the pickles become unpleasantly briny. That 1.5 tablespoon-per-cup ratio hits the exact sweet spot where the brine is flavorful and safely acidic without being overwhelming.
Common Mistakes (And How to Avoid Them)
The biggest mistake people make is using vegetables that are already losing firmness. You can’t restore crispness to a soft carrot or cucumber, so start with the best vegetables available. This is worth a trip to the farmers market if your grocery store’s produce looks tired. The vegetable quality fundamentally limits how good your pickles can be.
Another common pitfall is packing the jar too tightly. Vegetables need to be snug enough that they don’t float, but tightly packed vegetables can’t soak evenly in the brine. The ones in the middle of a tight cluster won’t flavor as quickly as the ones on the outside. Pack them firmly but with enough space that the brine can move around them.
Underfilled jars are another problem. If the vegetables only take up half the jar and you fill it the rest of the way with brine, the ratio is off—you have too much liquid relative to vegetable, and the pickles end up thin-tasting. The vegetables should take up at least three-quarters of the jar space. If you have fewer vegetables than that, make a smaller batch or don’t bother.
The Temperature Trap
Don’t skip the hot brine step and try to make pickles with room-temperature vinegar. It doesn’t work the same way. The heat is what opens up the vegetable cells and allows the brine to penetrate quickly. Cold brine will eventually flavor vegetables, but it takes hours or days instead of 30 minutes. The whole point of this method is speed, and that speed comes from using hot liquid.
Never let the brine boil aggressively. A gentle heat that produces steam is all you need. Hard boiling drives off volatile flavor compounds from the spices and can cause some vegetables (especially delicate ones like green beans) to cook unevenly and develop a wrinkled texture instead of staying firm.
Creating Your Own Flavor Combinations
The basic spice mix in the main recipe is a safe choice that works with literally every vegetable. But once you understand the method, you can build custom flavor profiles. Think about what flavors you already like eating and work backward to ingredients that deliver them.
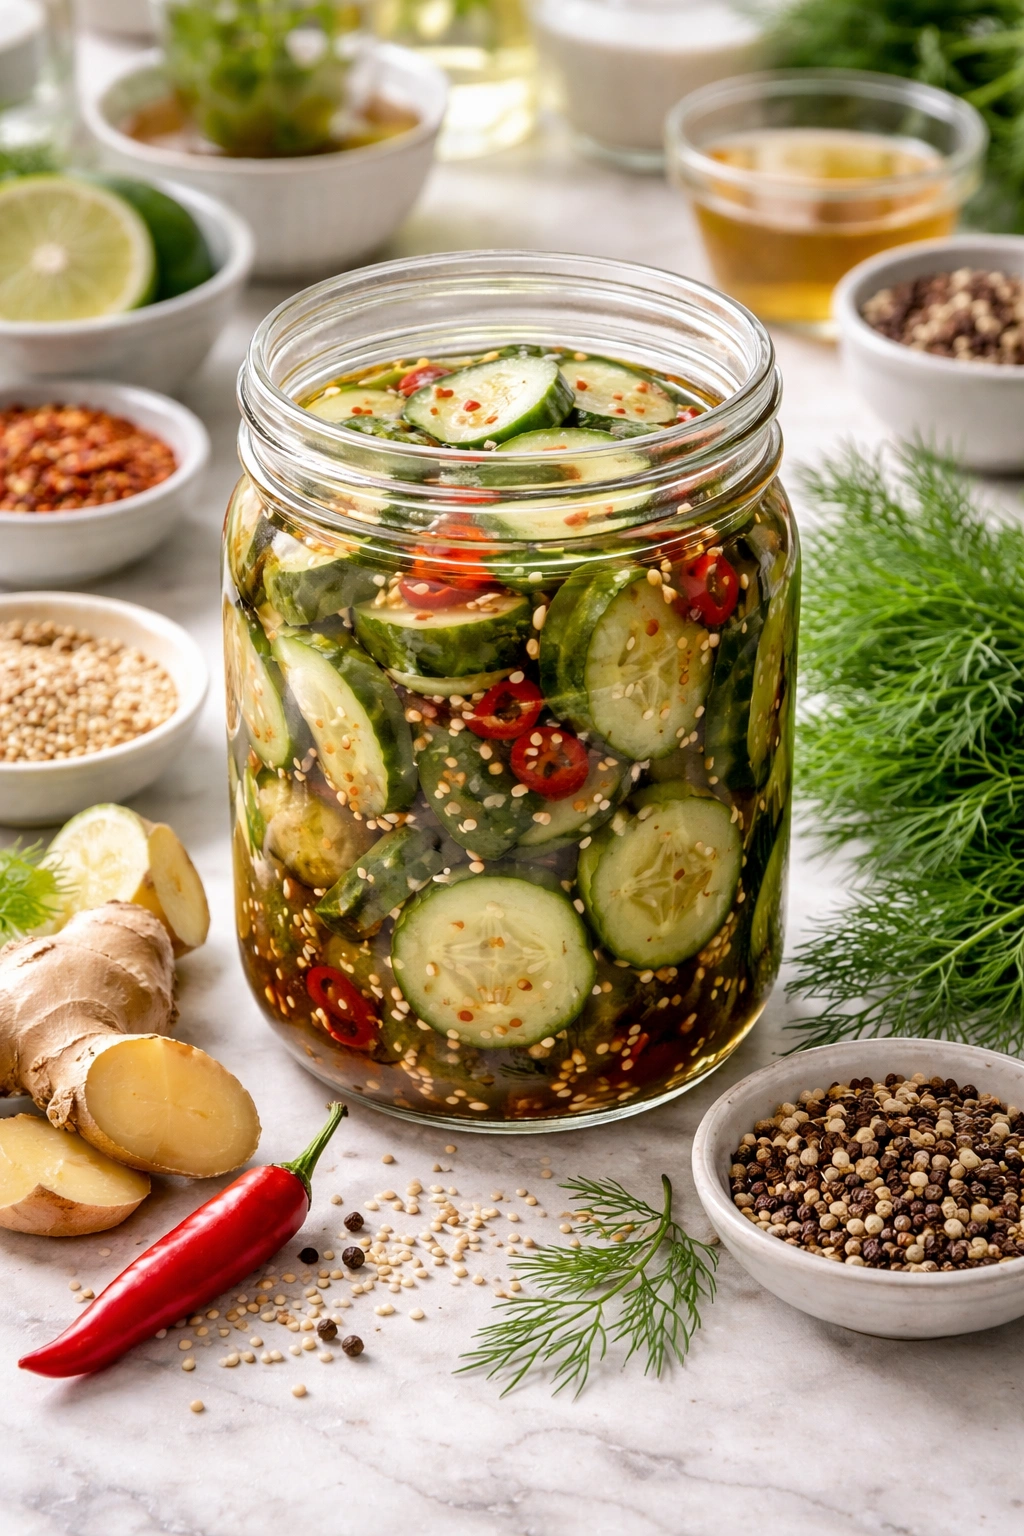
For Asian-inspired pickles: Replace the mustard seeds with 1 teaspoon sesame seeds and add ½ teaspoon white peppercorns, a ¼-inch piece of fresh ginger (smashed), and a pinch of ground Sichuan pepper if you have it. Add fresh cilantro at the end. Switch to rice vinegar and reduce the salt slightly (rice vinegar can taste saltier than white vinegar even at the same acidity level).
For spicy heat-forward pickles: Add ½ teaspoon dried chili flakes to the base recipe, or use 1-2 whole dried chilis instead. Include black peppercorns and fresh garlic as written. A small pinch of turmeric adds color and earthiness. These work beautifully with carrots, onions, or mixed vegetables.
For fresh herb versions: Skip the bay leaves and use fresh dill, thyme, or tarragon instead. Add them to the brine after it’s cooled and poured, not before. The heat will briefly wilt them while preserving their fresh flavor. These are perfect for cucumber pickles or delicate vegetables like green beans.
For sweet-leaning pickles: Add 2-3 tablespoons of honey or brown sugar to the brine base. Include cinnamon, cloves, and star anise for depth. These work brilliantly with carrots or red onions and pair wonderfully with cheese or rich meats.
For dill pickle devotion: This is the simple one—use fresh dill fronds instead of the dried spice mix, plus all the garlic in the base recipe, peppercorns, and mustard seeds. Add the dill after cooling. These are classic for a reason: they’re easy and universally loved.
Vegetable-Specific Combinations
Some vegetables love certain flavor pairings more than others. Cucumbers are flexible and take any flavor direction. Carrots are sweet, so they pair beautifully with warming spices like cinnamon and cloves or fresh herbs like tarragon. Green beans benefit from garlic and dill, or from Thai-inspired flavors like lemongrass and chili. Cauliflower and broccoli want mustard seed, turmeric, and peppercorns—basically the spice profile for Indian pickles.
The safest approach when experimenting is to change only one element at a time. Make your next batch with different vegetables but the same spices, or same vegetables with different spices. This helps you understand what each ingredient contributes. Once you’ve made a few batches, you’ll intuitively understand which flavor combinations work together.
Storage, Reheating, and Make-Ahead
Quick pickles keep in the refrigerator for up to three weeks, though they’re genuinely best consumed within the first two weeks when they’re crispest and brightest. The flavor actually improves over the first 3-5 days as the vegetables continue to absorb the brine, but after a couple of weeks, they can start to soften slightly as the acid gradually breaks down the cell walls.
Check for spoilage before eating pickles that have been stored for more than a week. Look for cloudiness in the brine (usually safe, but can indicate undesired fermentation), slime on the vegetables (a sign to discard), or any off-smell. Properly made quick pickles with the salt and vinegar levels in this recipe should stay good and fresh for weeks, but your nose and eyes are the best judges.
There’s no need to reheat or do anything special with quick pickles—they’re meant to be eaten chilled straight from the jar. They work as a condiment, a side dish, a snack, or a component in other dishes. If you want to soften them slightly for a specific recipe, you could briefly warm them in a pan, but they’re really at their best enjoyed cold.
Make-ahead strategy: You can prepare vegetables the day before and store them in a sealed container in the refrigerator, then make the brine and pour it over them the day you want to serve. This breaks the project into manageable pieces without sacrificing quality. The brine can be made up to 3 days in advance and stored in the fridge, then reheated when you’re ready to pickle. This approach lets you make pickles on your schedule without stress.
Serving Suggestions and Perfect Pairings
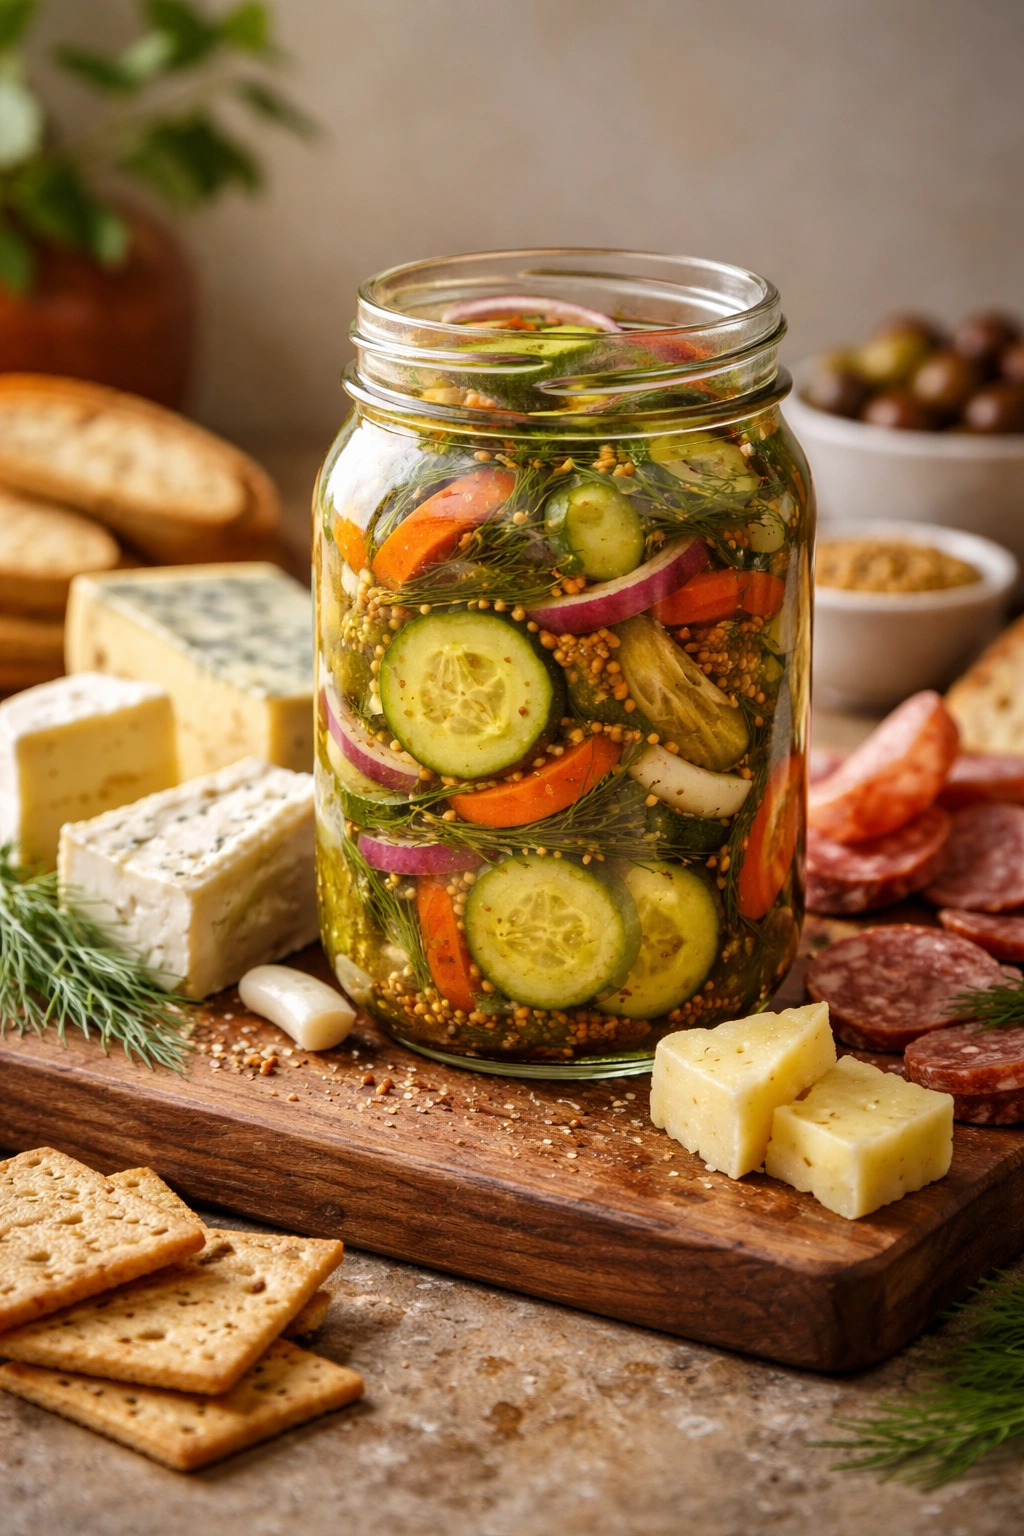
Quick pickles aren’t just a side dish—they’re a flavor weapon that transforms other foods. Serve them alongside rich or fatty foods (cheese boards, charcuterie, grilled meats) where their acidity cuts through richness and cleanses the palate. Add them to tacos or sandwiches for a brightness that plain condiments can’t deliver. Crumble them into grain bowls or salads for textural contrast and sharp flavor.
They pair beautifully with Indian curries, Southeast Asian dishes, and spicy foods in general—the cool crispness and acidity balance heat perfectly. Serve alongside breakfast scrambles or breakfast sandwiches for a fresh counterpoint. Add to charcuterie boards for complexity. Use as a topping for warm soups (especially vegetable or bean soups) where they stay crisp even in heat.
In composed dishes: Chop them and add to cream cheese for an easy spread, mix into tuna salad for brightness, or serve alongside smoked fish where their sharp flavor makes the richness sing. Use them as a topping for grilled chicken or pork, where they work like a fresh salsa. Add whole pickles to a platter of cheeses for visual appeal and flavor contrast.
The beauty is that you’re not limited to one use. One jar of pickles can work in a dozen different meals. Make a batch early in the week and you’ll find yourself reaching for them constantly as you cook.
Final Thoughts
Quick pickles represent everything that’s satisfying about home cooking: ingredients you probably have on hand, a method so simple it feels almost like cheating, and a result that tastes like you spent way more time and effort than you actually did. They prove that good food doesn’t require complexity or special knowledge—it just requires fresh ingredients, a moment of attention, and understanding the mechanics of how heat and acid work together.
Once you make your first batch, you’ll realize how much fresher and crisper they are compared to store-bought versions. That crunch, that brightness, that perfect moment when the brine flavor hits after the vegetable flavor—you can’t buy that consistency. You’ll likely find yourself making pickles regularly, testing new vegetable combinations, customizing spice mixes, and looking for excuses to serve them with meals.
The 30-minute timeframe is genuinely achievable. It’s not about shortcuts or skipping steps—it’s about using the right technique that naturally works in this timeframe. With this method, you’re not waiting for fermentation or processing or anything complicated. You’re just delivering hot brine to fresh vegetables and letting physics and chemistry do the rest while you move on to the next thing. That’s practical cooking at its best.