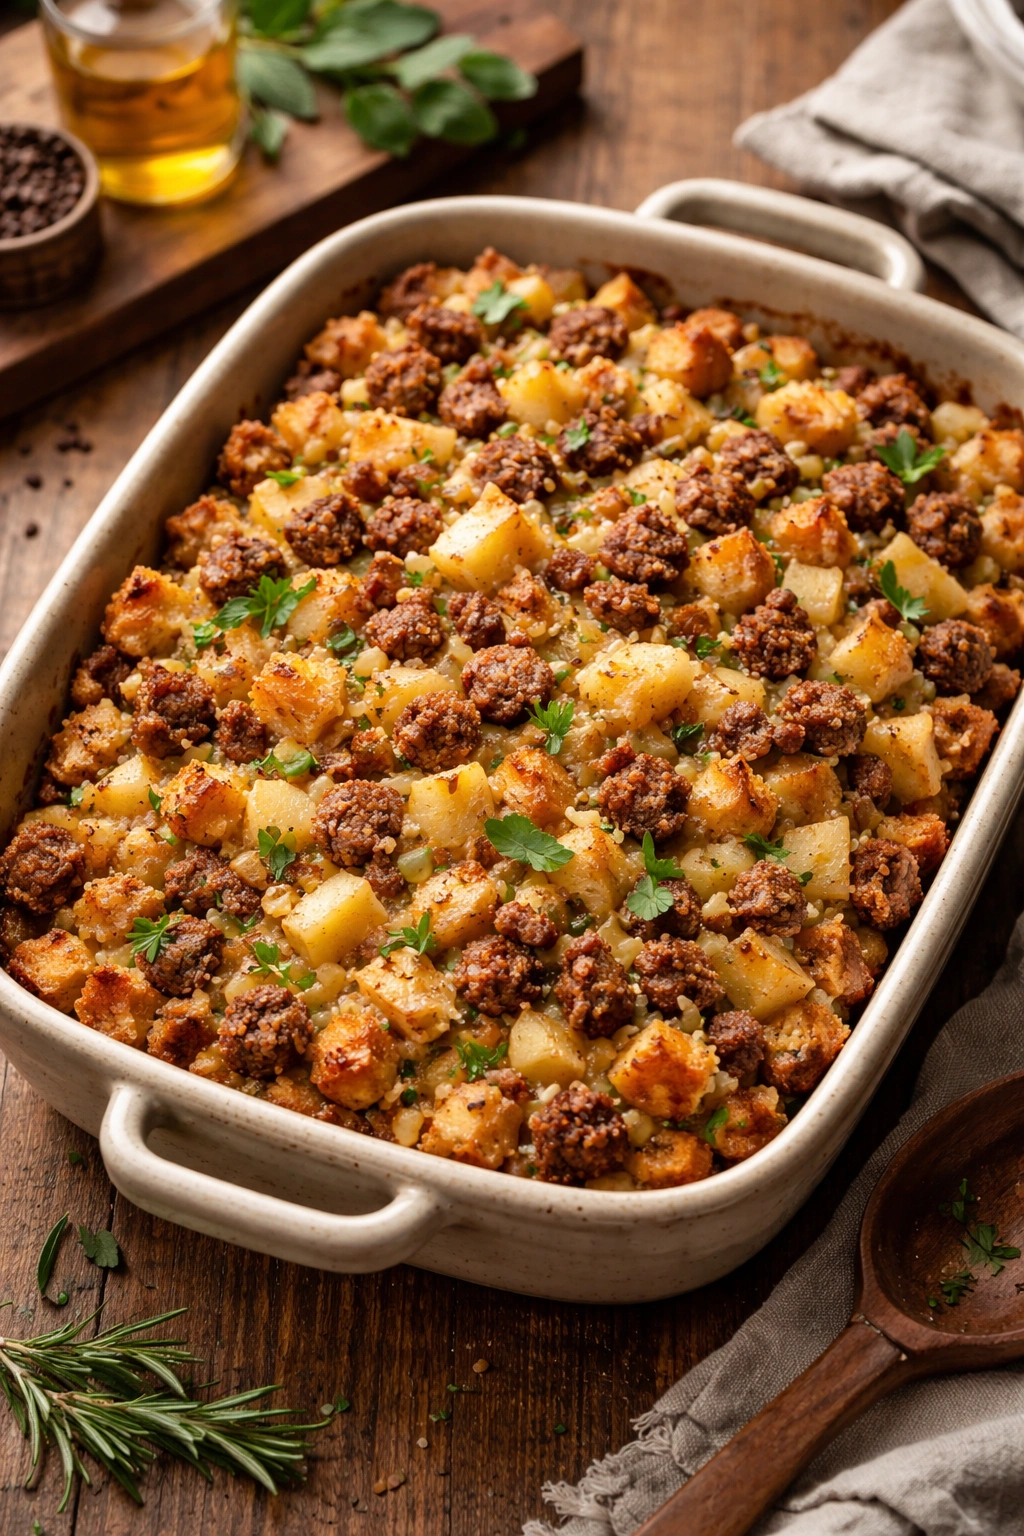
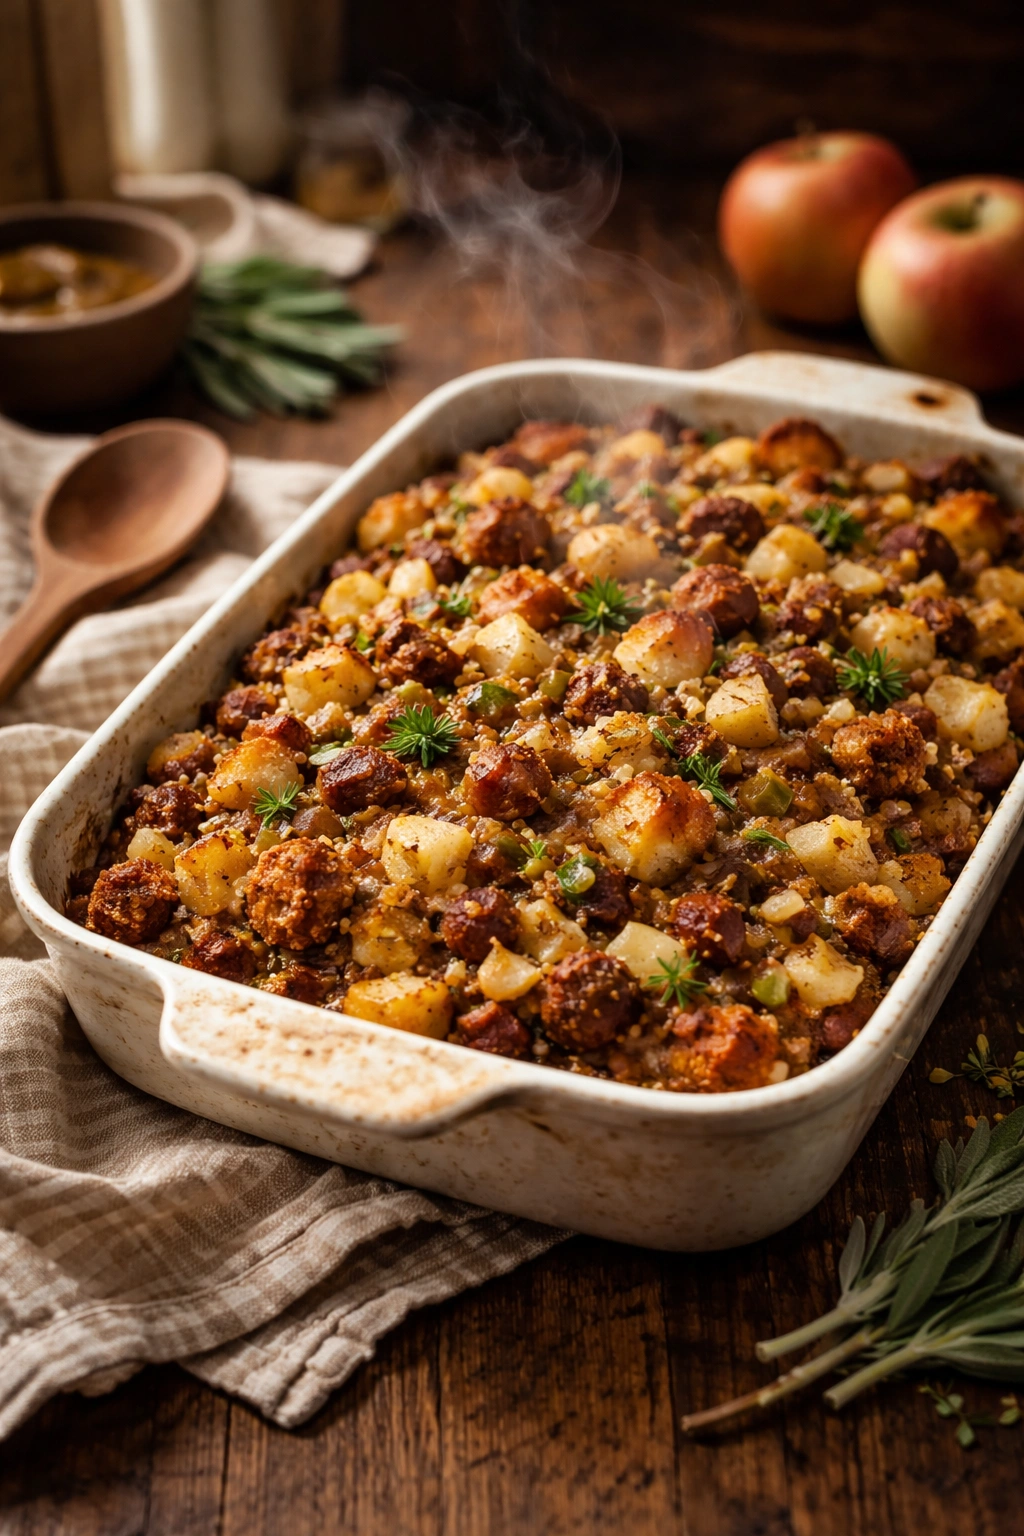
Stuffing holds a peculiar power over holiday tables — it’s the dish that gets people arguing about whether it should be crispy or moist, whether it goes inside the bird or baked separately, and whether it truly deserves a whole plate of its own. But when sausage and apples enter the equation, those debates dissolve. There’s something about the marriage of savory browned sausage, the subtle sweetness of fresh apples, and the earthiness of sage that transforms what could be a simple bread casserole into the kind of side dish that steals the show.
Most people encounter sausage and apple stuffing as a memory — something their grandmother made every year, or a dish that appeared on a friend’s Thanksgiving table and changed their expectations forever. The thing is, you don’t need to wait for the holidays to enjoy it. This is a recipe worth making on a Tuesday in March, alongside roasted chicken, or even as a complete meal on its own. It’s comfort food with sophistication, humble enough to be unpretentious, but flavorful enough to demand respect.
Making this stuffing from scratch isn’t difficult, but it does require understanding a few key principles. Knowing why you toast the bread, how much broth is actually the right amount, which apple varieties hold their shape, and how to layer the flavors of sautéed aromatics with fresh herbs — these insights are what separate a soggy, one-dimensional stuffing from something truly exceptional. This guide walks you through every step, with the confidence of someone who’s made this recipe dozens of times and knows exactly where things go wrong.
Why Sausage and Apple Stuffing Belongs on Your Table
This particular combination has endured for good reason. The sausage provides a rich, savory backbone with just enough spice to keep things interesting. It’s not bland, it’s not overpowering, and it carries enough fat to keep the finished dish moist without needing to drown everything in broth. The apples deliver something equally important — a bright, natural sweetness that isn’t cloying or artificial. Together, they create a flavor profile that works with just about any roasted meat, from turkey to chicken to pork.
What makes this recipe special is that it tastes like it took hours to prepare, when in reality the active cooking time is surprisingly manageable. The real secret is giving the ingredients time to meld together, both during the sautéing stage and, ideally, overnight in the refrigerator before baking. That quiet time allows the herbs to perfume the bread, the sausage’s spices to distribute evenly, and the apple’s natural juices to start breaking down the bread cubes in the most subtle, perfect way.
The beauty of making stuffing from scratch is the control it gives you. You can choose quality bread with real flavor instead of whatever came in a box. You can use fresh herbs that still smell alive instead of dried leaves that lost their essence months ago. You can select apples at their peak instead of whatever showed up in a can or a standard recipe. These choices compound, transforming what could be an afterthought side dish into something genuinely memorable.
The Essential Ingredients for Perfect Homemade Stuffing
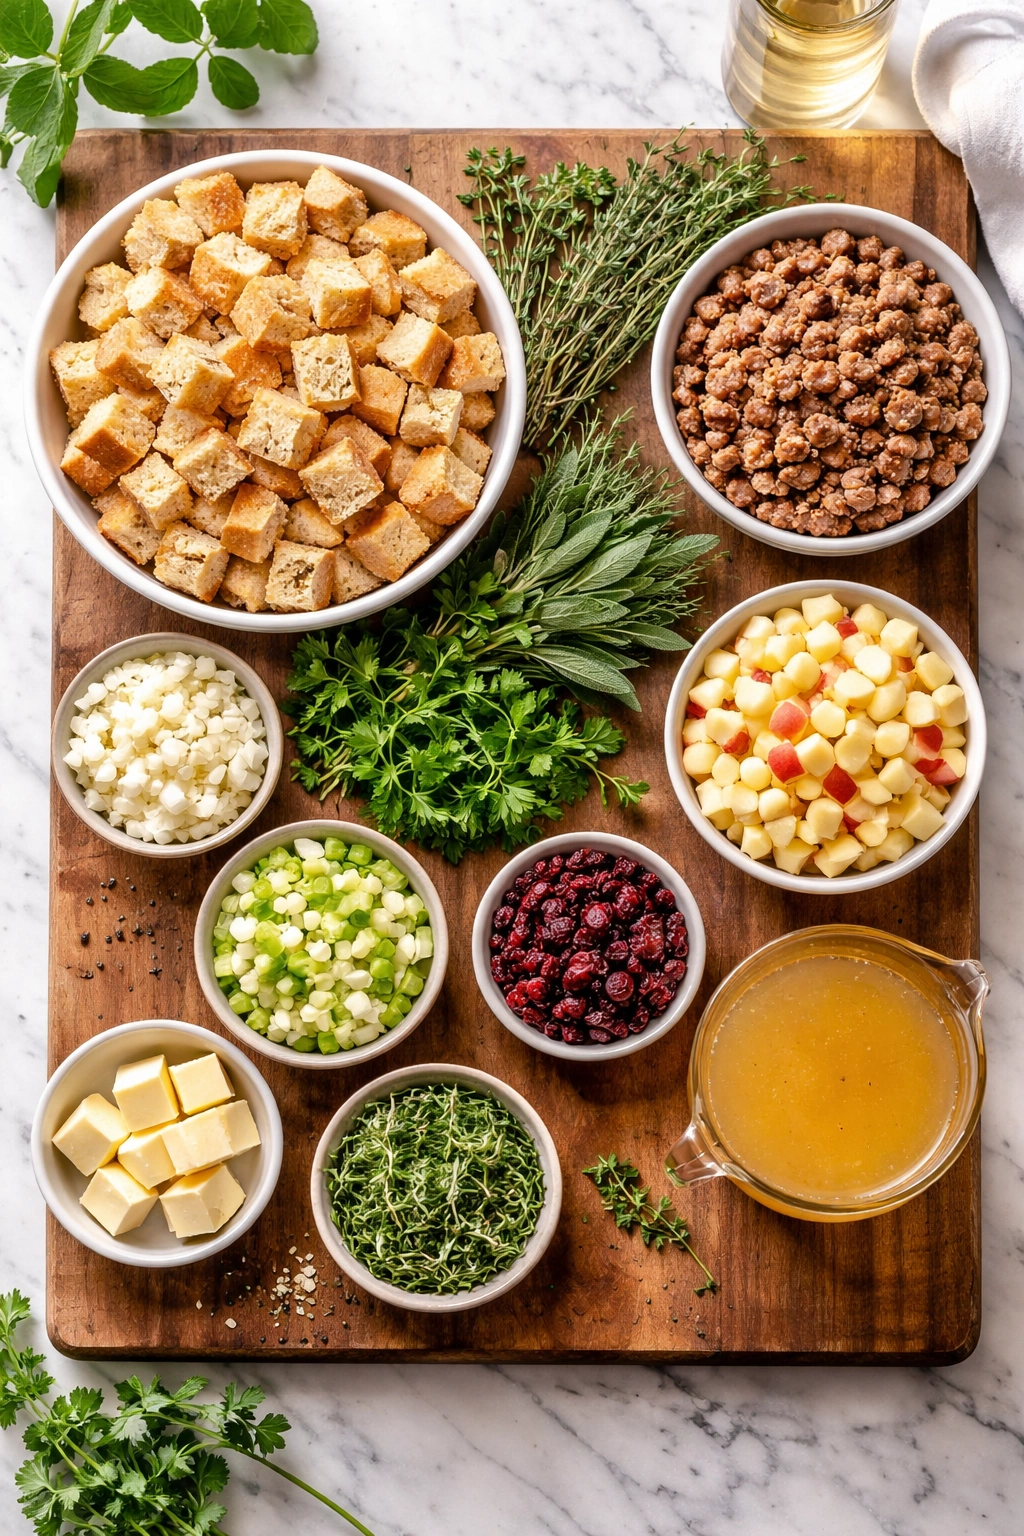
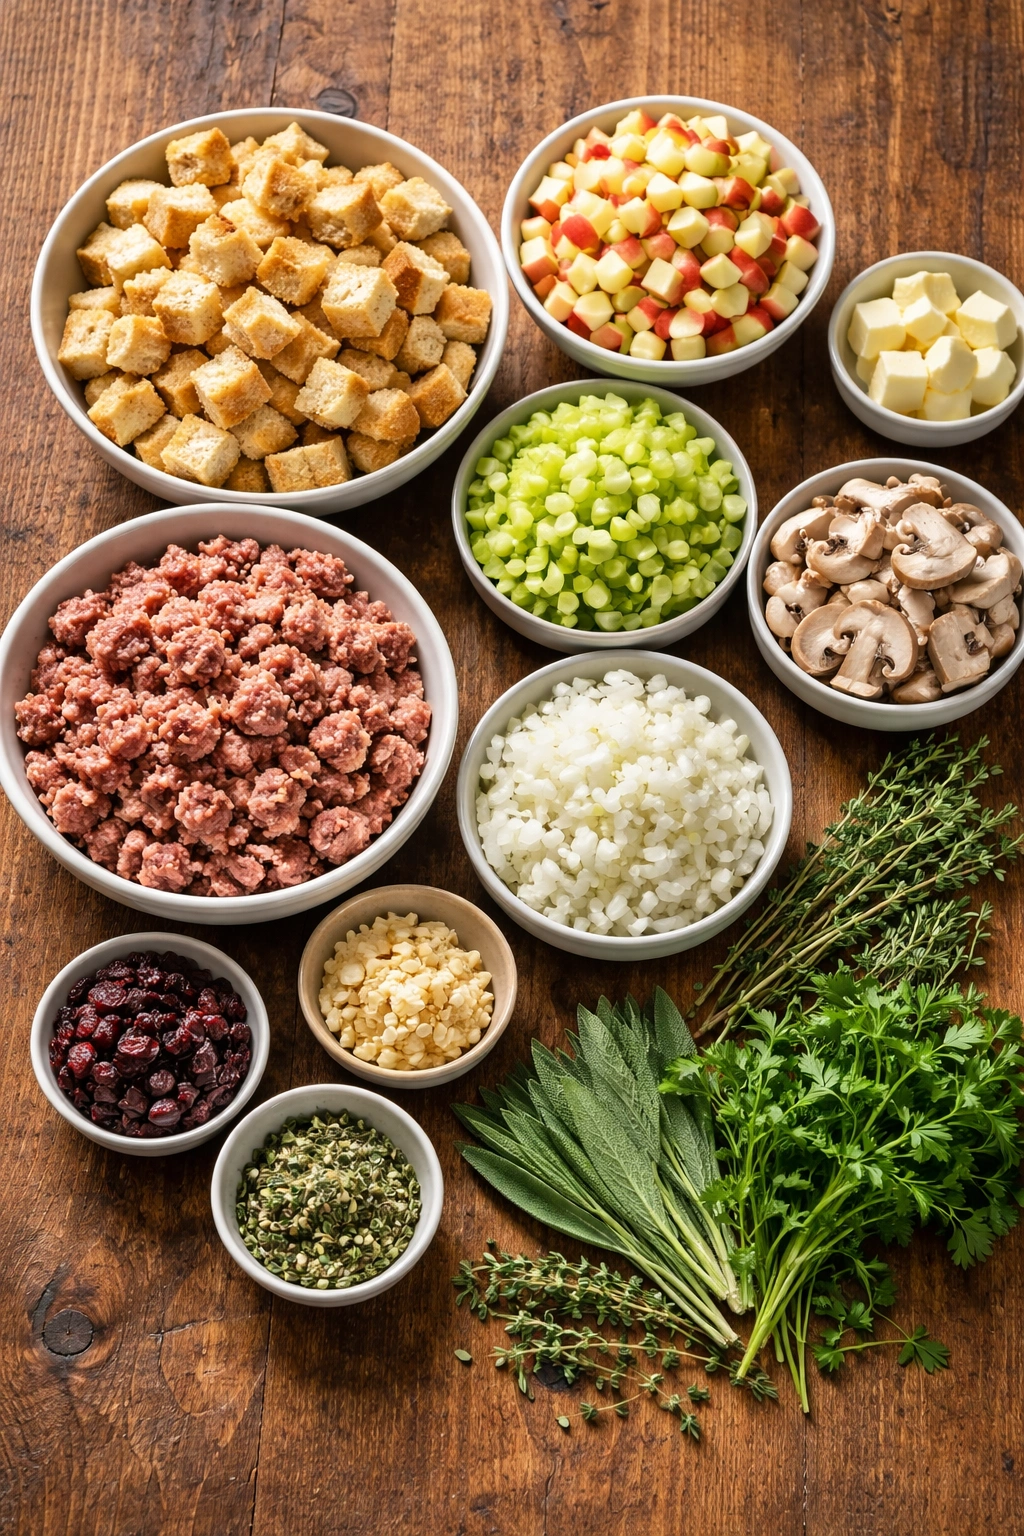
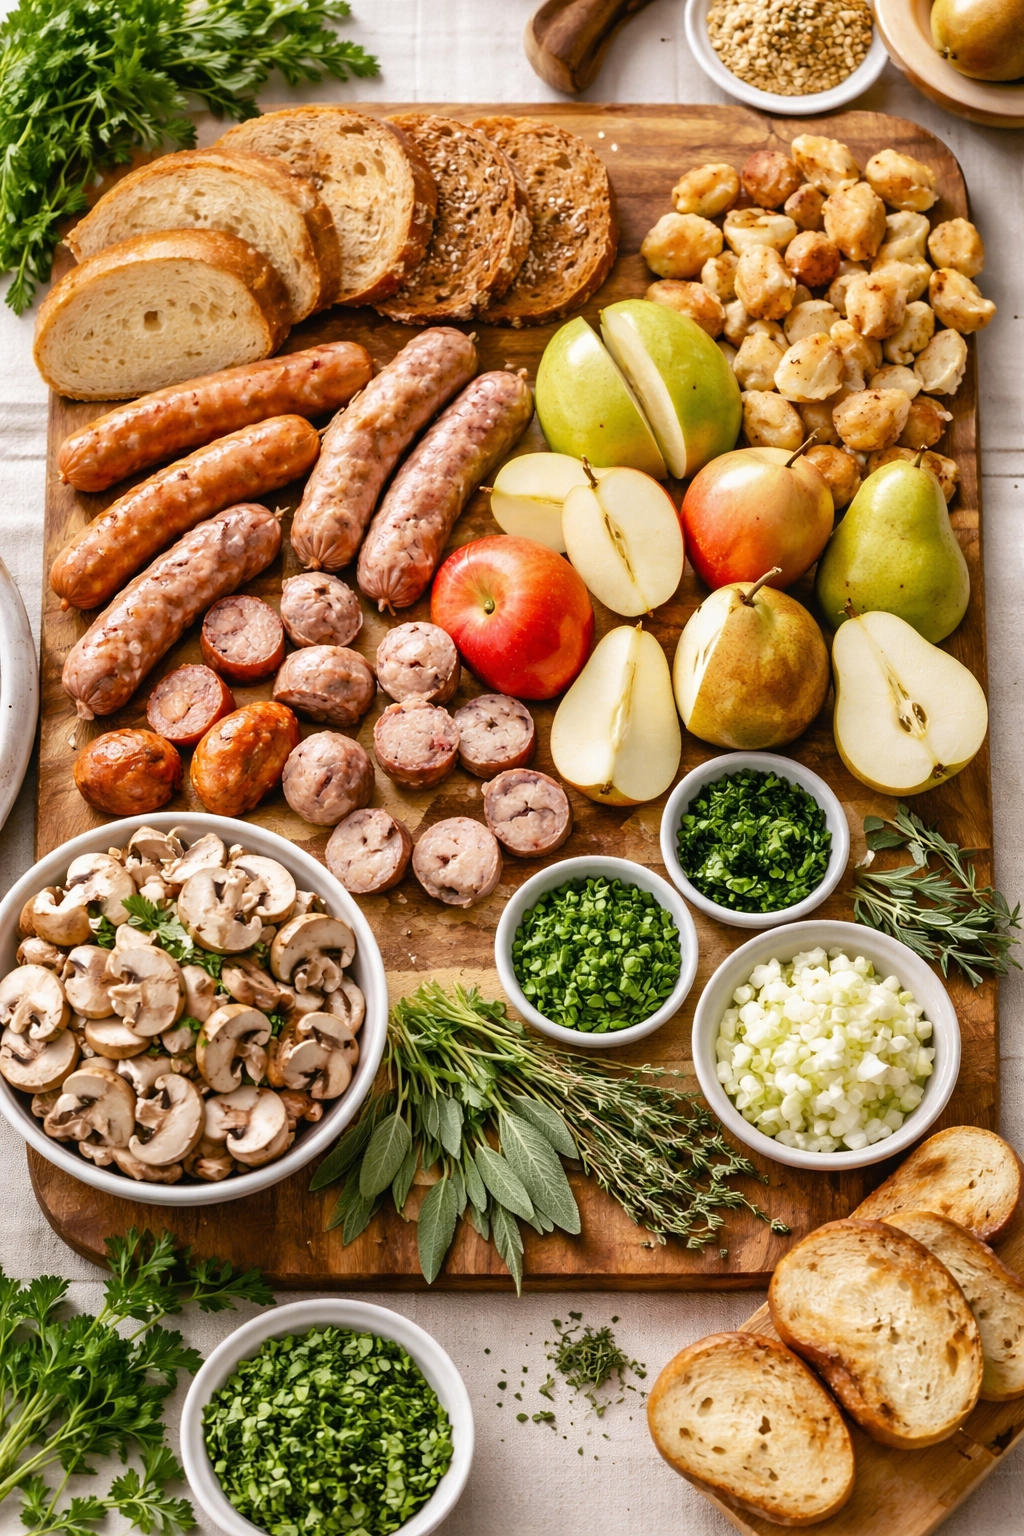
Building great stuffing from scratch starts with understanding the role each ingredient plays. Bread is obviously the foundation, but it needs to be the right kind — crusty enough to have character, but not so hard that the cubes remain stubbornly tough even after toasting. The vegetables (onion, celery, and optionally fennel) provide the classic aromatics that form the savory base, the layer underneath everything else that people taste without consciously realizing it. Herbs are where freshness enters the dish, cutting through richness and adding brightness.
Sausage brings richness and salt, seasoning the entire dish from within rather than sitting as a separate element. A pound of sausage for a standard batch is plenty — it’s not supposed to be sausage with bread added, it’s supposed to be stuffing where sausage is one of the stars. Apples add natural sweetness and a bit of acidity that balances everything. Dried cranberries or cherries (optional) echo the apple’s sweetness while adding textural contrast and subtle tartness. Butter enriches and helps everything cook together evenly. Finally, broth is what binds the whole thing together, the essential moisture that prevents dryness without creating soggy mush.
The herbs you choose matter more than you’d expect. Sage is non-negotiable — it’s the herb that defines stuffing and pairs beautifully with both sausage and apples. Fresh thyme adds an earthy note that deepens the overall flavor. Parsley, especially fresh, brings a clean, almost peppery quality that prevents the dish from feeling heavy. Some recipes include fresh rosemary or even a hint of ground nutmeg. The combination should smell like comfort and holiday when you’re sautéing everything together, with no single herb overpowering the others.
Choosing and Preparing Your Bread
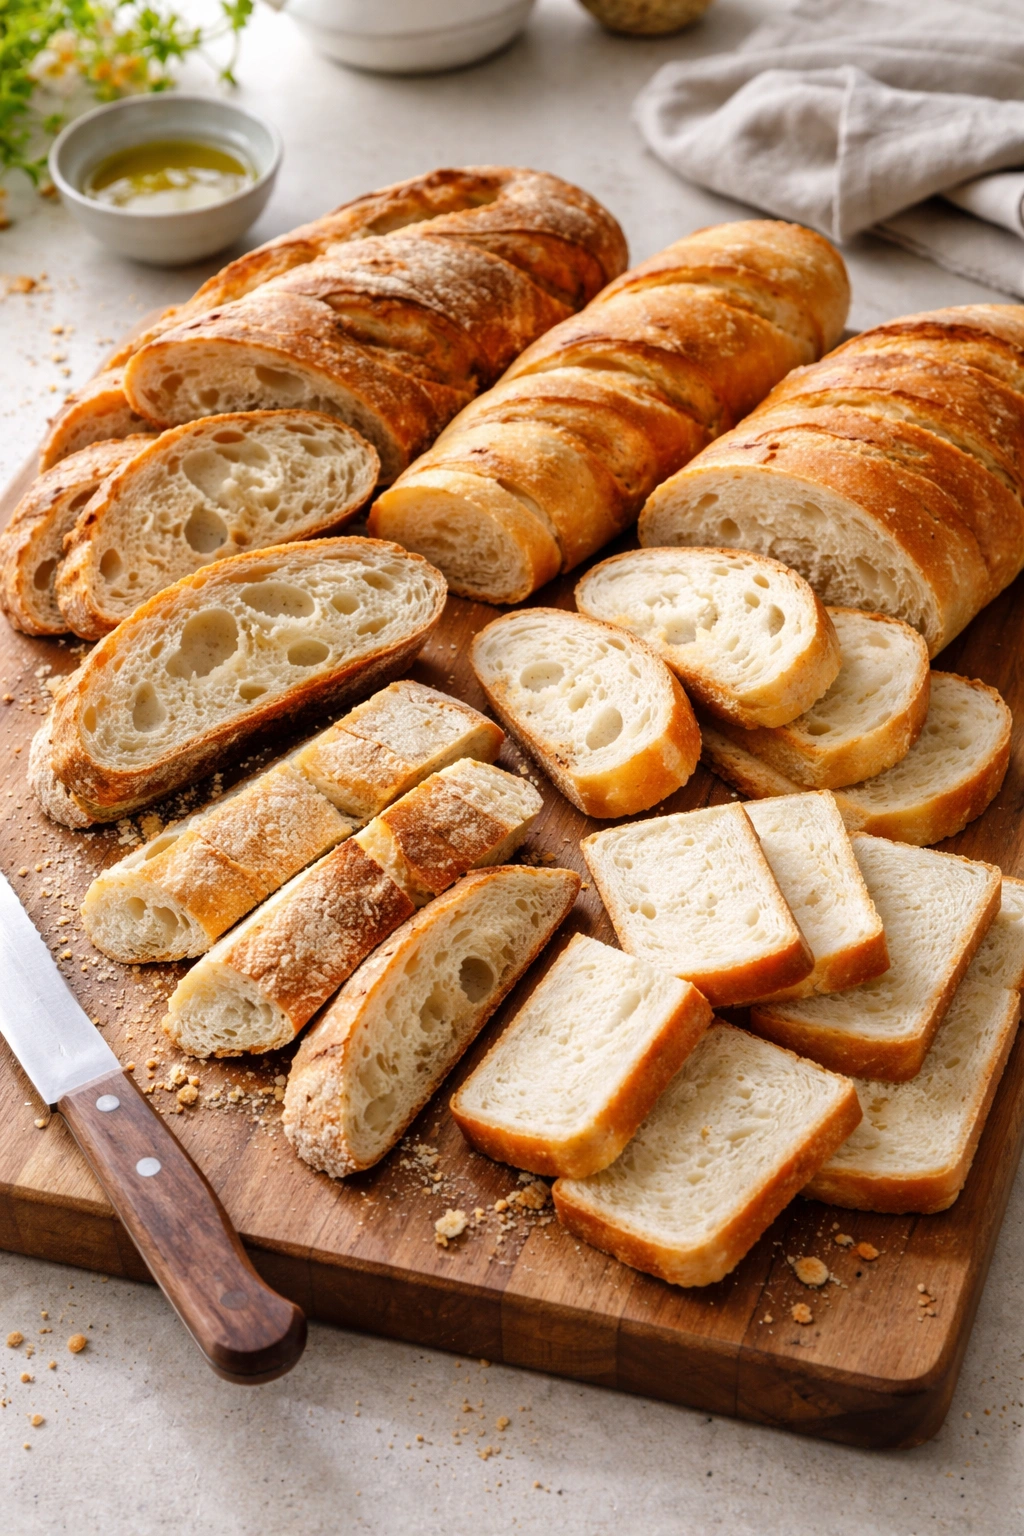
The bread you choose shapes everything that comes after. Crusty sourdough, French bread, Italian loaf, or even day-old sandwich bread all work, but they create subtly different results. Sourdough’s tang plays beautifully with sage and apples, bringing an underlying complexity. A neutral white or wheat bread lets the sausage and apples shine without competing. Avoid soft, pillowy sandwich bread — it turns to mush too easily even with the toasting technique. Look for a bread with actual structure, something that would still have character as a toasted slice.
A one-pound loaf yields roughly eight to ten cups of cubed bread, which is the standard amount for a recipe that serves eight to ten people comfortably. Cut the bread into half-inch to three-quarter-inch cubes — aim for consistency, not perfection. Uneven pieces will cook unevenly, with the smallest ones turning to powder while the largest stay stubbornly solid. Don’t worry about removing crusts; they add flavor and texture.
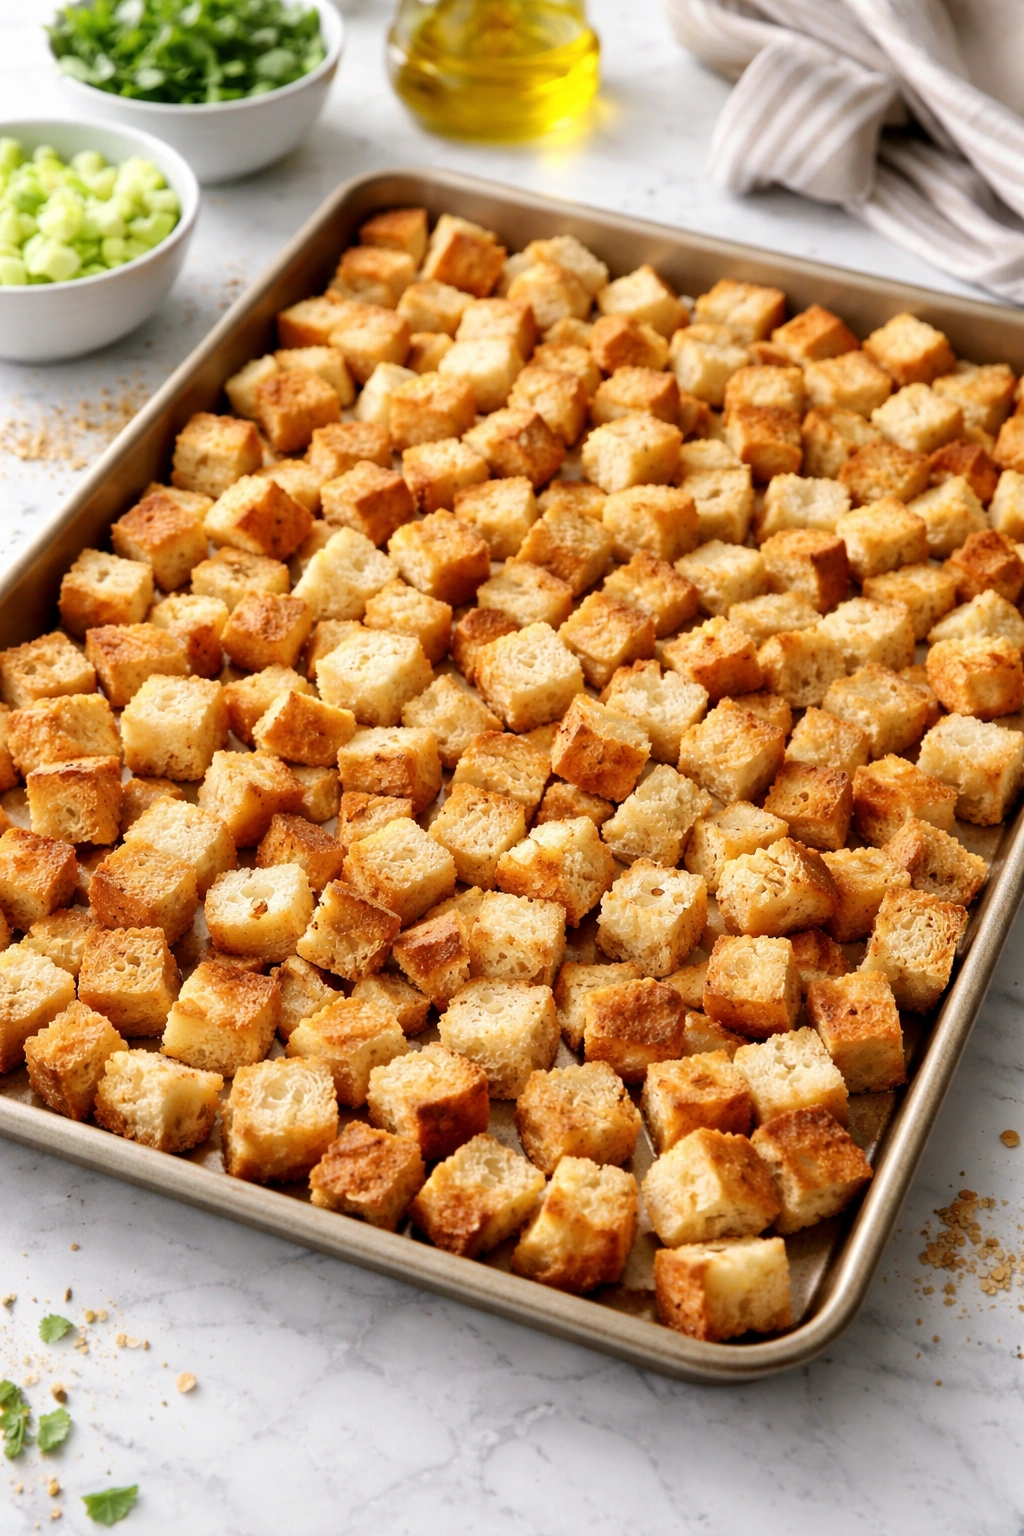
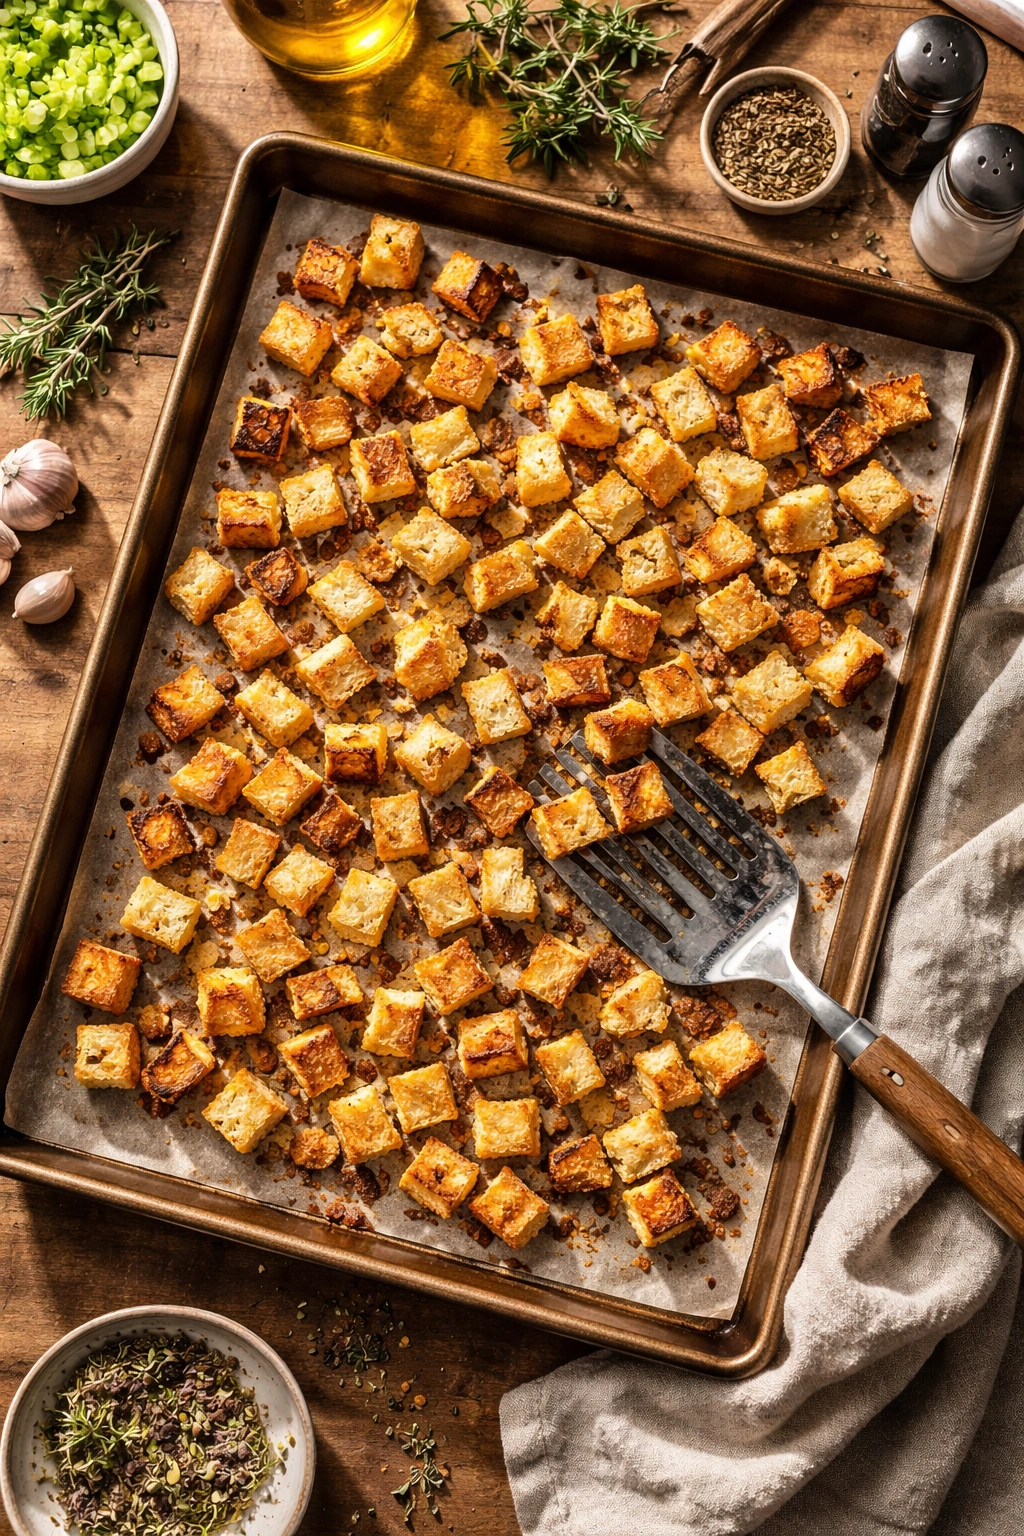
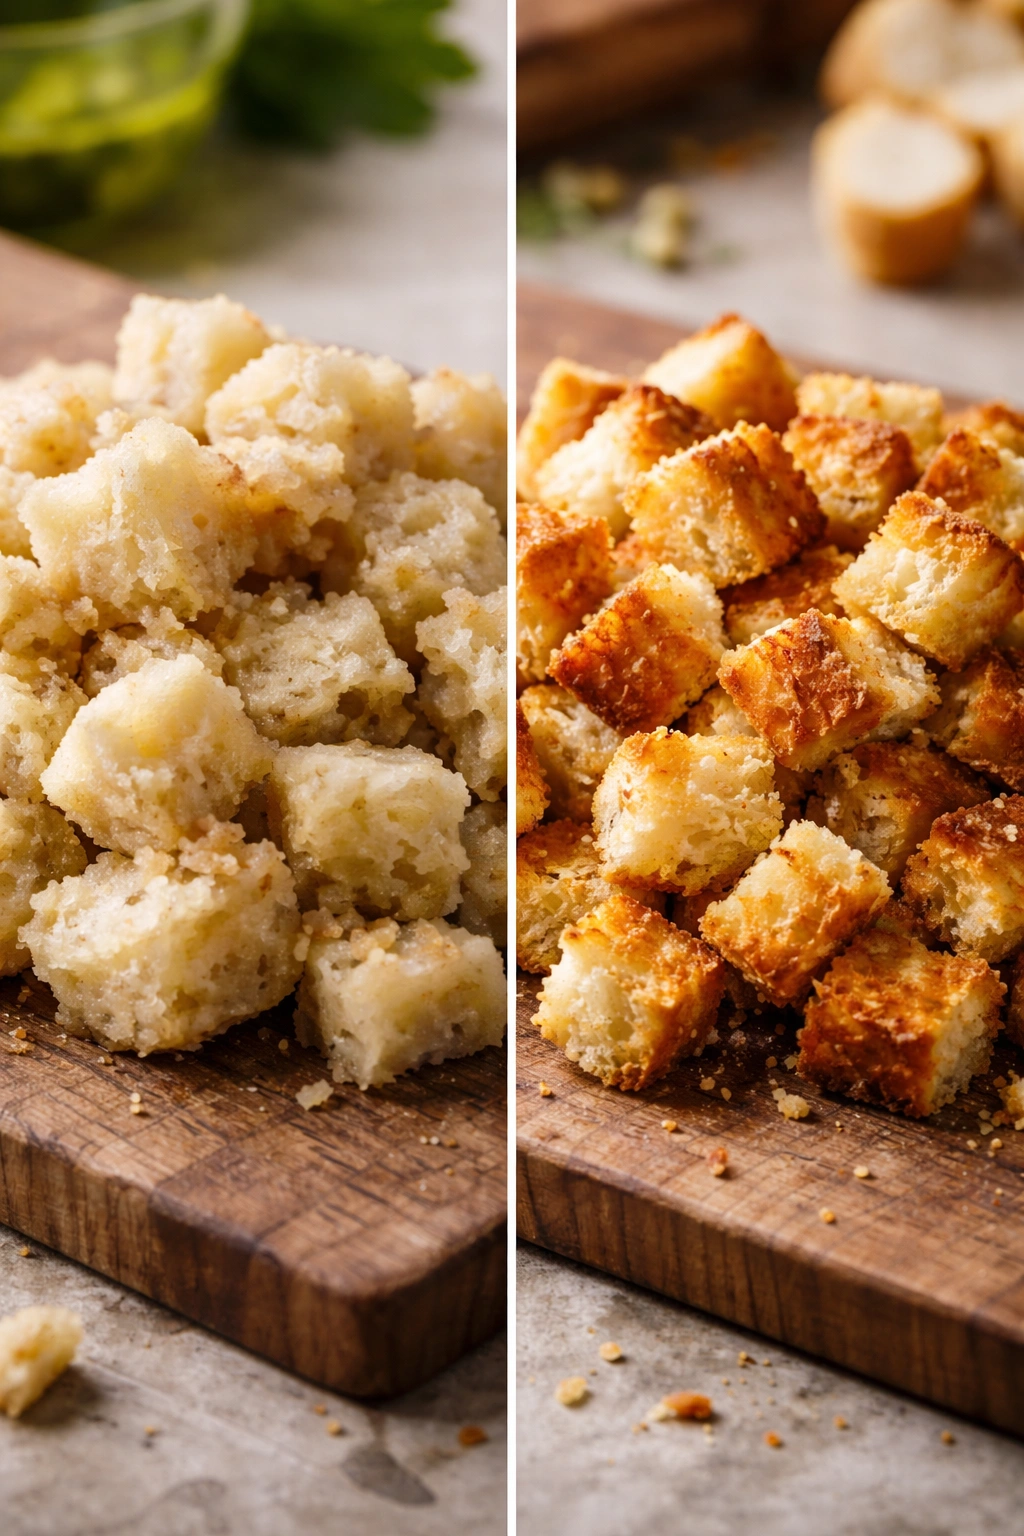
The real magic happens when you toast these cubes before mixing them with the other ingredients. This step is what separates good stuffing from stuffing that becomes a dense, soggy brick. Spreading the cubes on a large baking sheet and baking them at 300°F for about 15 minutes (or at 350°F for about 10 minutes if you’re working faster) dries out the exterior of each piece just enough. The cubes should be lightly golden and feel crispy on the outside while remaining tender inside. This toasting doesn’t fully cook the bread, it just removes surface moisture so the bread can absorb the broth and other liquids evenly rather than immediately turning to mush.
How to Select Apples and Sausage That Work Together
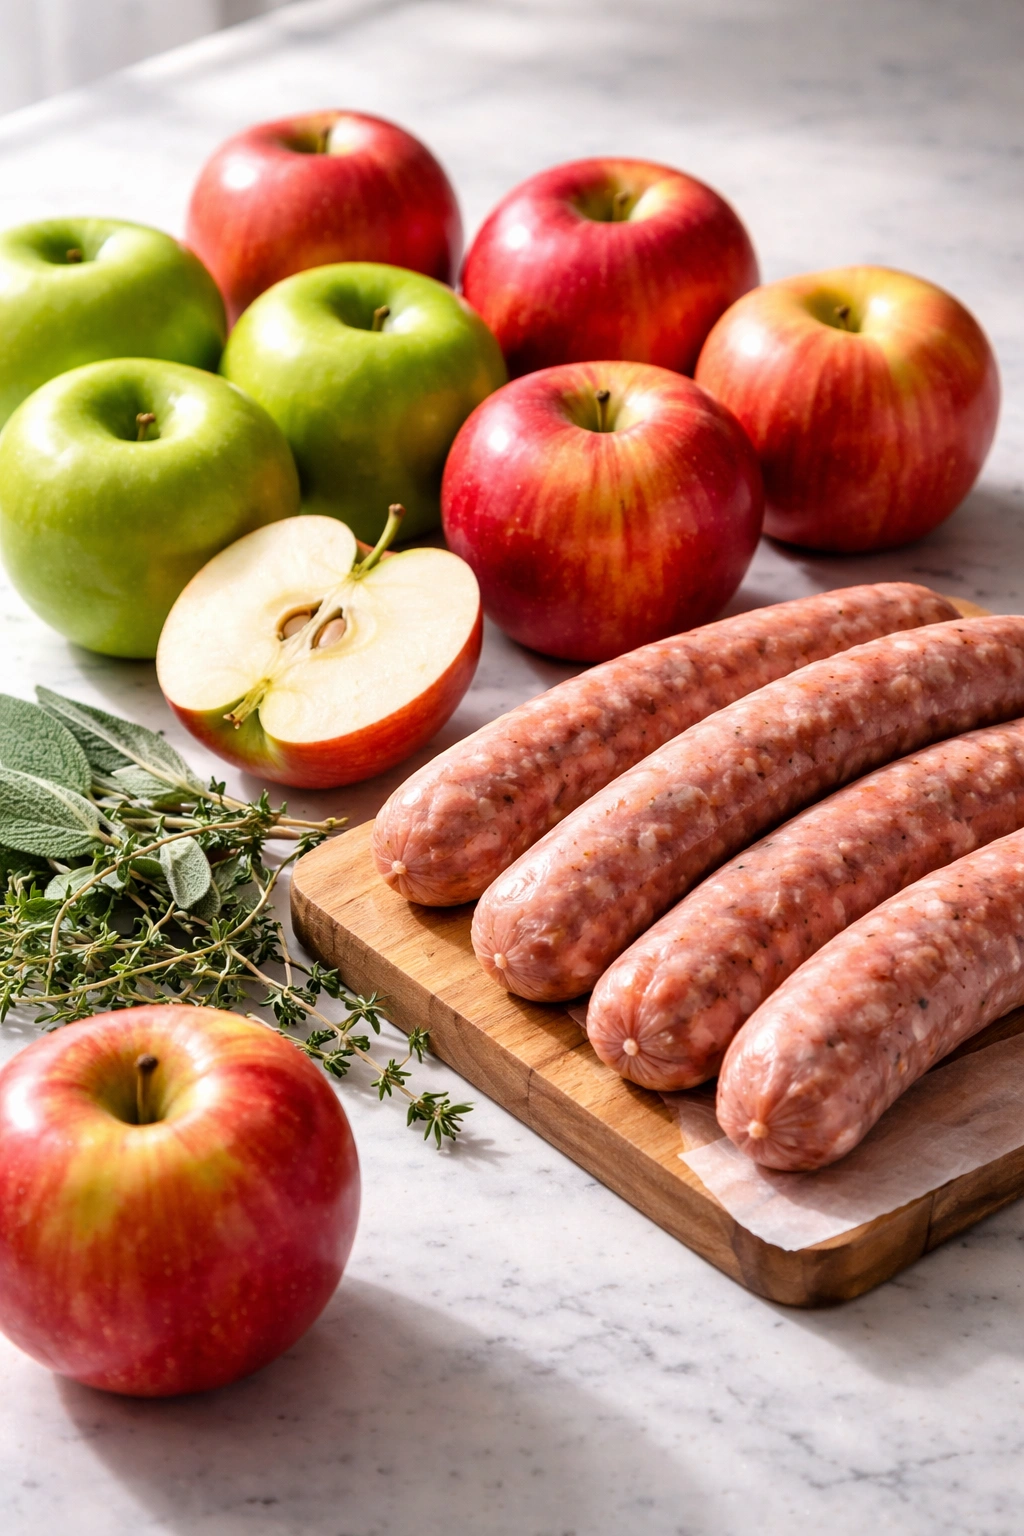
Apple choice matters more than most recipes acknowledge. You need an apple that will hold its shape during the cooking process and one that brings flavor rather than just vague sweetness. Granny Smith apples are the classic choice — tart, crisp, and sturdy enough to stay firm even after being sautéed and then baked. Honeycrisp apples offer a better balance of sweet and tart. Braeburn and Gala apples work beautifully too. Avoid red delicious or yellow delicious apples, which turn mushy and mealy. A good rule is to use apples that are good for baking — if they’d work in an apple pie, they’ll work in stuffing.
Some recipes suggest using a mix of apple varieties to layer the flavors — perhaps one tart apple and one sweeter one. This creates depth, where you get the bright acidity of the Granny Smith paired with the juiciness of a Honeycrisp. Plan on using two medium apples, about two cups when diced. The apples should be peeled, cored, and cut into approximately half-inch pieces so they cook through without completely disintegrating.
Sausage selection is equally important. You have options here, and the choice genuinely changes the character of the finished dish. Sweet Italian sausage is probably the most common — it has a mild spice, plenty of fennel flavor (which pairs beautifully with apples), and enough seasoning that you won’t need to add as much salt yourself. Breakfast sausage, especially turkey breakfast sausage, offers a leaner option that’s slightly milder. Sage sausage, if you can find it, creates an interesting double-sage effect that some people love. Maple-flavored sausage, like certain brands of Jimmy Dean, brings an extra sweetness that complements the apples even further.
What matters is choosing sausage you actually like eating on its own. You’ll taste it clearly in the finished dish, so this isn’t an ingredient to skimp on or buy whatever was on sale. One pound of uncooked sausage is the standard amount — it cooks down and breaks apart as it browns, distributing throughout the dish. Buy it with casings removed if possible, or remove them yourself before cooking. You want ground sausage meat, not links that you have to untangle.
Building Deep Flavor with Aromatics and Herbs
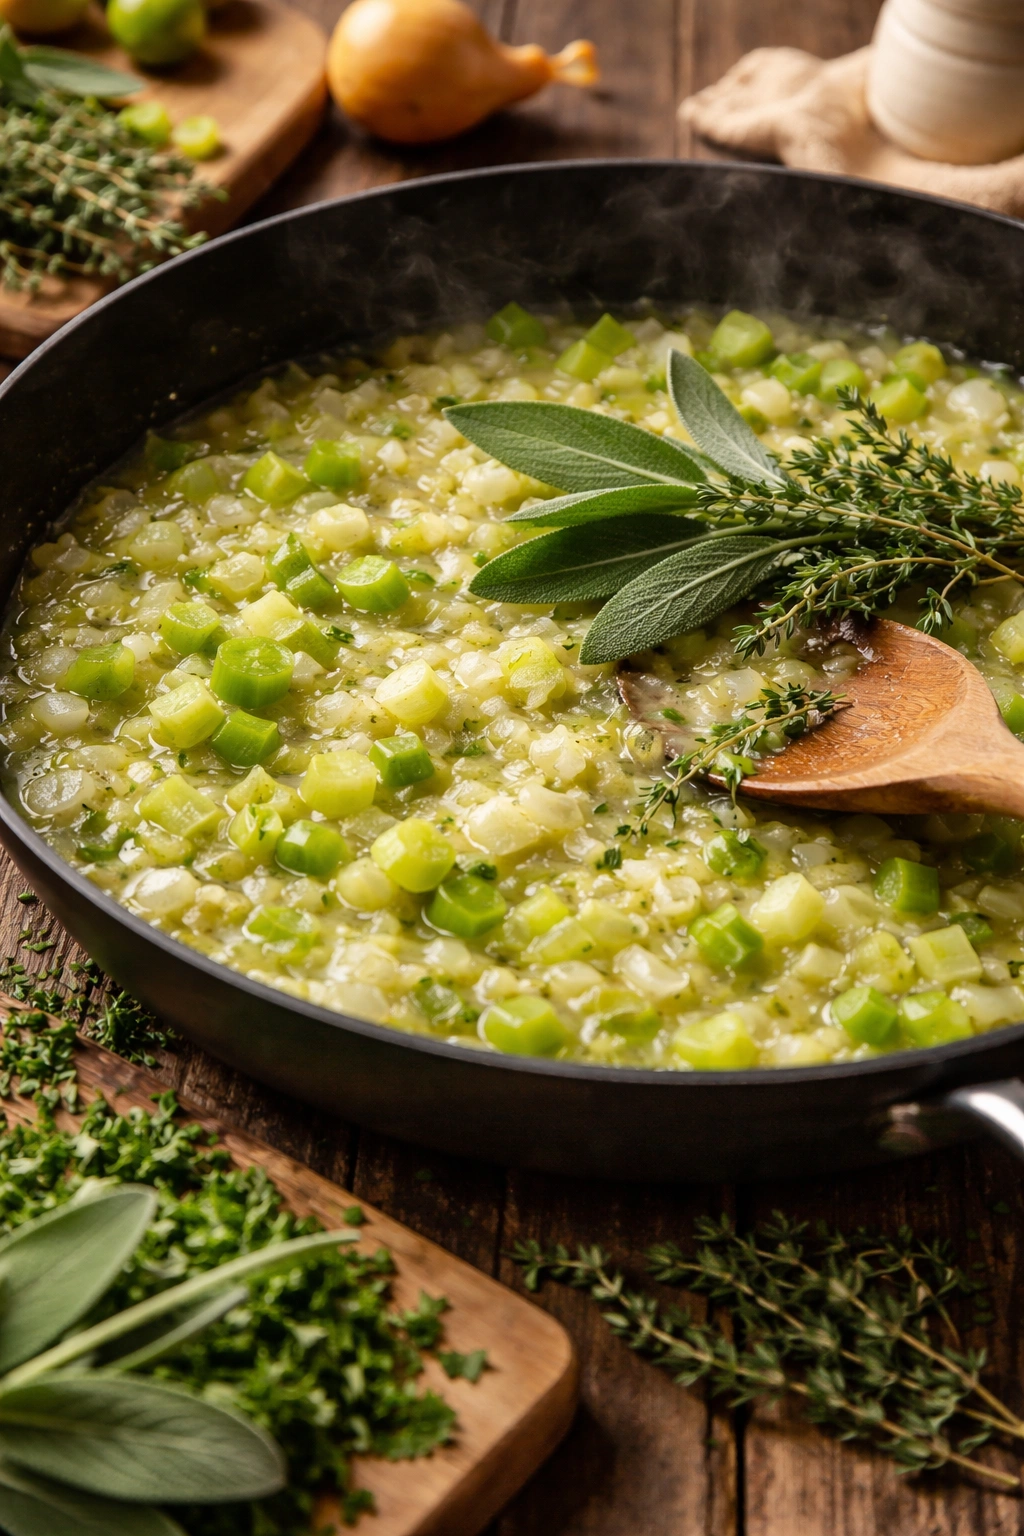
The sautéed aromatic vegetables form the invisible base layer that makes good stuffing taste like home. Start with butter melted in a large skillet over medium heat, then add diced onion and sliced celery. These vegetables need time to soften and sweet, maybe eight to ten minutes of gentle cooking. You’re not trying to caramelize them into a dark brown crust; you’re slowly coaxing out their natural sweetness while the butter carries their flavors throughout the pan. This is where patience pays off — rushing this step means harsh, raw onion flavor that never quite softens even after baking.
Once the onion and celery are tender and fragrant, add the mushrooms (if using — they’re optional but worthwhile for earthy depth). Cook for a few minutes until they release their moisture and begin to soften. Then add your fresh herbs and minced garlic. Fresh sage, about two tablespoons, chopped fairly fine. Fresh thyme, about one tablespoon, also chopped. Fresh parsley will be added later for its bright, fresh quality. If you can’t find fresh herbs, you can substitute dried, but use roughly one-third the amount — dried herbs are more concentrated. This combination should fill the kitchen with an aroma that immediately signals comfort and special occasion.
Now the sausage goes in, having been cooked separately until browned and broken into small pieces. If you cooked the sausage in a separate pan, drain off most of the grease before adding it here — you want enough fat for richness, not so much that it becomes greasy. Cook everything together for another couple of minutes, then add the diced apples. The apples will soften slightly and release their juice, which mingles with the sausage fat and the aromatics, creating the liquid that will eventually moisten the bread.
The Toasting Technique That Changes Everything
Toasting the bread cubes is the single most important technique for preventing soggy stuffing, and it’s worth understanding why. When you spread bread cubes on a baking sheet and toast them in a moderate oven, you’re evaporating surface moisture. This changes the bread’s ability to absorb liquid. A piece of fresh bread cubes soaks up broth immediately and completely, turning to mush almost instantly. A piece of toasted bread has a slightly harder exterior that forces it to absorb liquid more slowly and more evenly.
The toasting doesn’t need to go far. You’re not making croutons that would be hard enough to serve in a salad. You want the cubes to feel crisp to the touch but still break apart easily when pressed. Aim for a pale golden color rather than deep brown. At 300°F, this takes about fifteen minutes. At 350°F, aim for about ten minutes, tossing the cubes halfway through to ensure even toasting. If your oven runs hot, watch carefully — the line between perfectly toasted and overdone happens quickly.
After toasting, spread the cubes on a clean surface or transfer them to a very large bowl and let them cool to room temperature. They’ll crisp up further as they cool. This is the point where you can actually prepare ahead — cooled bread cubes stored uncovered at room temperature will stay fresh for a day or two before assembly. Some people even make bread cubes a few days ahead, keeping them in an airtight container at room temperature until needed.
Yield: Serves 8 to 10 as a side dish
Prep Time: 45 minutes
Cook Time: 50 minutes
Total Time: 1 hour 35 minutes (plus optional overnight refrigeration for maximum flavor)
Difficulty: Beginner to Intermediate — The technique is straightforward, but understanding the balance of moisture prevents soggy results. No special equipment is required beyond standard kitchen tools.
Ingredients for Sausage and Apple Stuffing
For the Bread Base:
- 1 pound crusty bread (sourdough, French, Italian, or country loaf), cut into ½-inch to ¾-inch cubes (about 8 cups)
- 3 tablespoons unsalted butter (plus extra for the baking dish)
For the Sausage and Vegetable Mixture:
- 1 pound uncooked mild or sweet Italian sausage, casings removed
- 3 tablespoons unsalted butter
- 1 medium yellow or white onion, diced (about 1 cup)
- 4 stalks celery, thinly sliced (about 1½ cups)
- ½ teaspoon kosher salt (plus more to taste)
- ¼ teaspoon freshly ground black pepper
- 1 cup fresh mushrooms, roughly chopped (cremini or baby bella work well; optional but recommended)
- 2 tablespoons fresh sage, finely chopped (or 2 teaspoons dried sage)
- 1 tablespoon fresh thyme, finely chopped (or 1 teaspoon dried thyme)
- 1 tablespoon fresh parsley, finely chopped
- 2 medium crisp apples (Granny Smith, Honeycrisp, or Braeburn), peeled, cored, and diced into ½-inch pieces (about 2 cups)
- 2 cloves garlic, minced
- ⅔ cup dried cranberries (optional but adds lovely color and sweetness)
For Assembling the Stuffing:
- 2¼ cups low-sodium chicken broth (or turkey broth, or vegetable broth)
- 3 tablespoons unsalted butter, melted
- ½ teaspoon kosher salt (start with this amount; adjust based on your sausage)
- ¼ teaspoon freshly ground black pepper
- Fresh sage leaves for garnish (optional)
Step-by-Step Instructions
Prepare the Bread:
-
Preheat the oven to 300°F and position the rack in the center. Cut your bread loaf into uniform ½-inch to ¾-inch cubes, aiming for consistency so all pieces cook evenly. Spread the cubes in a single layer on two large baking sheets.
-
Bake the bread cubes for 12 to 15 minutes, tossing halfway through, until the outside of each cube feels crisp and lightly toasted but the inside is still tender. The cubes should be pale golden, not deeply brown. Transfer to a very large bowl and let cool to room temperature. They will crisp up further as they cool.
Toast the Bread and Begin Prep:
- While the bread toasts, prepare your vegetables. Peel and chop the onion into roughly ½-inch dice. Slice the celery into thin half-moons. Peel and dice the apples into ½-inch pieces (do this closer to cooking time if possible to prevent browning). Mince the garlic. Chop the fresh herbs.
Cook the Sausage:
-
In a large skillet over medium-high heat, add the sausage without any fat initially. Break it up with the back of a wooden spoon, crumbling it into small, even pieces as it cooks. This will take about 5 to 7 minutes — you’re looking for the sausage to lose its pink color and begin to brown slightly. Do not crowd the pan or move the sausage constantly; let it sit in the heat long enough to develop a little color on the edges.
-
Once the sausage is cooked through, use a slotted spoon to transfer it to a plate lined with paper towels, leaving as much of the rendered fat as possible in the pan. This fat will be your cooking medium for the vegetables.
Sauté the Aromatics and Apples:
-
Reduce the heat to medium. If the pan seems very greasy, drain off most of the excess sausage fat, leaving about 2 tablespoons. Add the 3 tablespoons of fresh butter to the pan if you’ve drained the fat, or just use the existing sausage fat if it seems adequate.
-
Add the diced onion and sliced celery. Cook, stirring occasionally, for about 8 minutes until the vegetables are softened and the onions are beginning to turn translucent. The cooking should be gentle — you’re not trying to brown them aggressively, just soften them and begin to draw out their sweetness.
Advertisements -
Add the mushrooms (if using), the salt, and black pepper. Cook for another 2 to 3 minutes, stirring occasionally, until the mushrooms release their moisture and begin to soften.
-
Add the minced garlic, fresh sage, and fresh thyme. Stir constantly for about 1 minute so the herbs become fragrant and the raw garlic flavor mellows out. Be careful not to let the garlic brown — it should just become fragrant.
-
Add the diced apples to the pan and stir everything together. Cook for another 3 to 4 minutes, stirring gently, until the apples soften slightly and release some of their juice. You should see liquid beginning to accumulate in the pan.
Combine Everything:
-
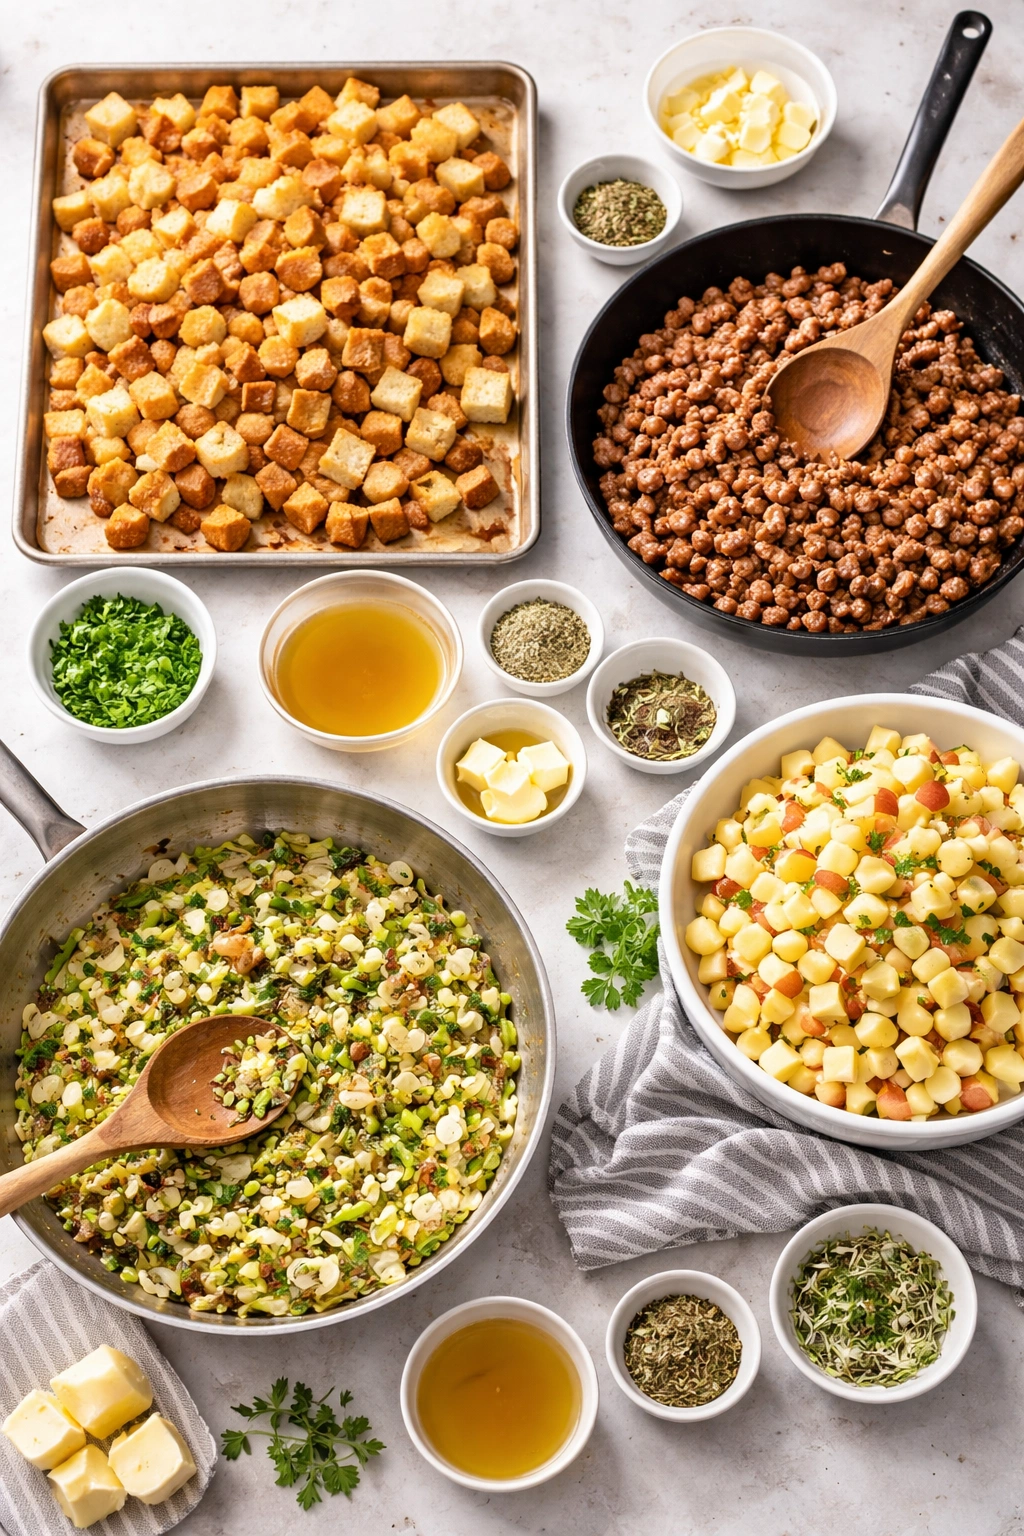
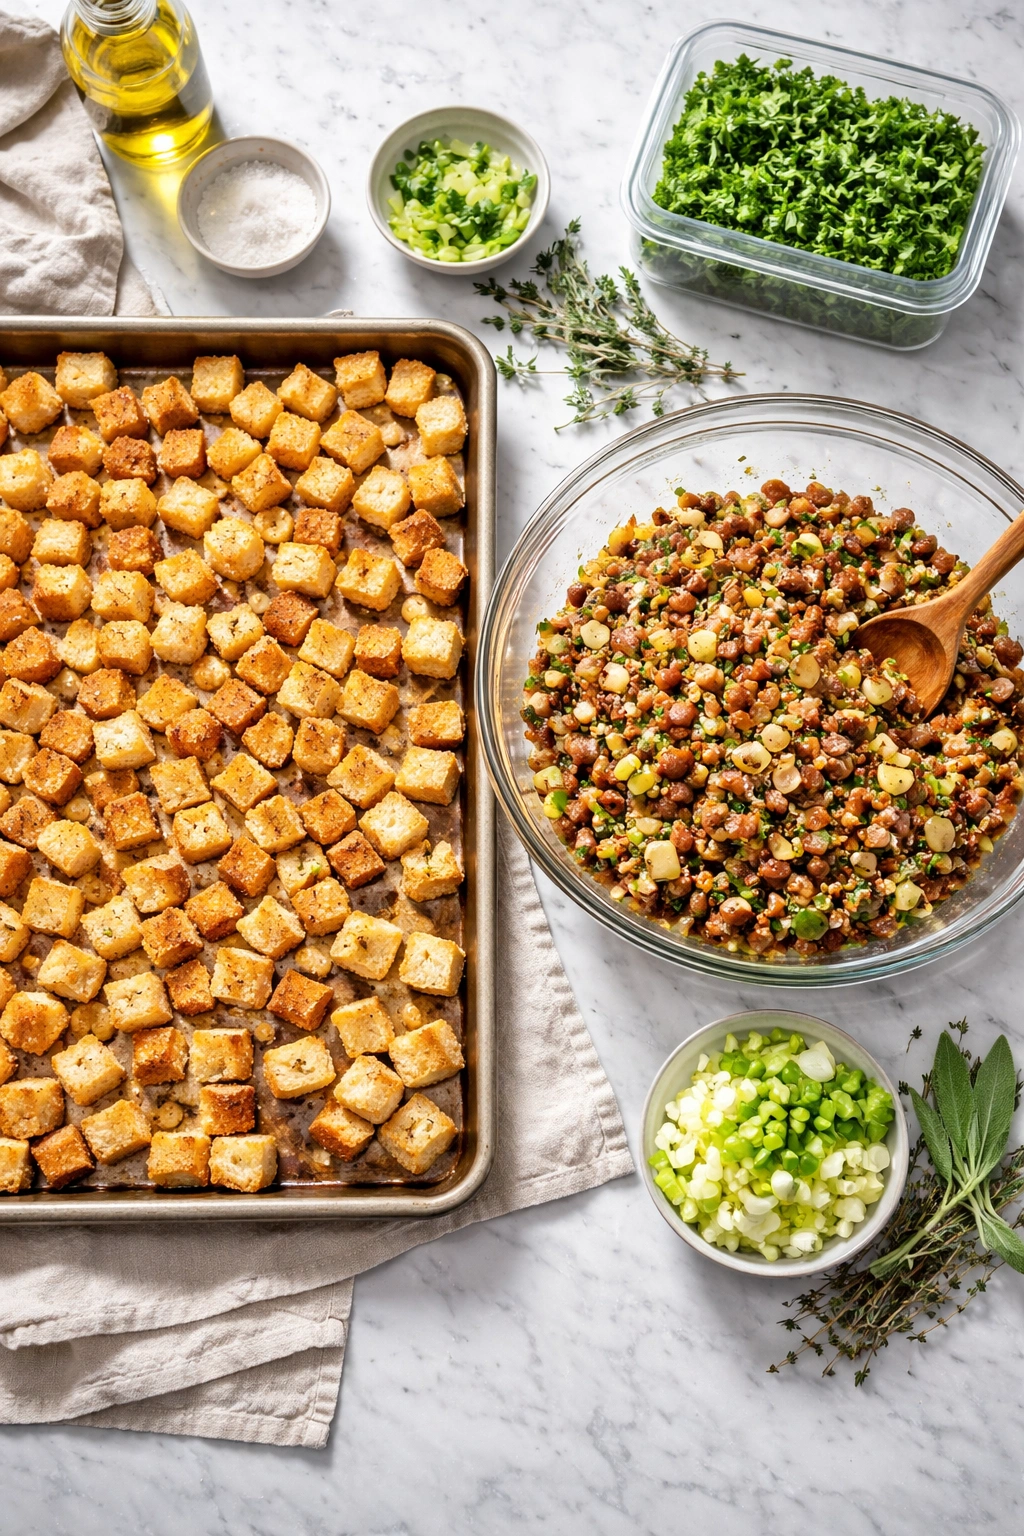
Remove the pan from the heat and stir the cooked sausage back in along with the fresh parsley. The mixture in the pan is now the seasoned sausage and vegetable base that will bring all the flavor to your stuffing.
-
Pour the sausage and vegetable mixture over the toasted bread cubes in your large bowl. Add the dried cranberries if using. Stir gently to combine, using a wooden spoon to fold the mixture so the bread cubes don’t break apart.
Prepare the Liquid and Assemble:
-
In a large liquid measuring cup or small bowl, whisk together the chicken broth, melted butter, and salt. Taste a spoonful of the bread and vegetable mixture before adding all the broth — the salt content will vary depending on which sausage you used. Some sausages are quite salty, others much less so. You may need to add another ¼ teaspoon of salt, or you may need to reduce it. The bread mixture should taste savory and well-seasoned but not salty.
-
Pour about two-thirds of the broth mixture over the bread and gently fold everything together with a wooden spoon, turning the bread from the bottom of the bowl to the top repeatedly, about 8 to 10 times. The bread should be noticeably moist but shouldn’t have liquid pooling in the bottom of the bowl. If it looks quite dry, add a bit more of the reserved broth. If it looks very wet, use less of the remaining broth. The goal is bread that clings together slightly when you press a spoonful but doesn’t leak liquid.
Optional Make-Ahead Step:
- At this point, you can prepare the stuffing to its full assembly and refrigerate it overnight. Cover the bowl tightly with plastic wrap and store it in the refrigerator. This rest period is wonderful for flavor — all those herbs and sausage seasonings have time to fully penetrate the bread, creating a more cohesive, flavorful dish. When you’re ready to bake (the next day or a few hours later), proceed to the baking step.
Bake the Stuffing:
-
Preheat the oven to 350°F and position the rack in the center. Generously butter a 9×13-inch glass baking dish or a similar 3- to 4-quart oven-safe baking dish.
-
Transfer the stuffing mixture to the prepared baking dish, spreading it into an even layer. Do not pack it down too tightly — you want some airflow throughout so the top can crisp while the inside stays moist.
-
Bake uncovered for 40 to 50 minutes, until the top is golden brown and the stuffing is cooked through. The top should have nice crispy patches while the interior remains moist. If the top begins browning too quickly before the inside is set, tent loosely with aluminum foil and continue baking.
-
Remove from the oven and let rest for 5 minutes before serving. The brief rest allows everything to set slightly, making it easier to serve without falling apart. Garnish with fresh sage leaves if desired.
Expert Tips for Never-Soggy Stuffing
The toasting step cannot be skipped or rushed. Many people make this mistake, thinking toasting bread is optional or that it won’t make much difference. It makes all the difference. Untoasted bread cubes are like sponges — they’ll absorb every drop of broth instantly and create a dense, mushy stuffing. Toasted bread has a protective exterior that forces more gradual, even absorption. This is the technique that separates someone’s grandmother’s legendary stuffing from the average box mix.
Moisture control is everything. The bread mixture should be visibly moist but not wet. When you stir it, individual cubes should still be somewhat distinct, not clumped into a soggy paste. If you’re uncertain, err on the side of less broth — you can always add more during baking if it seems to be drying out. More problematically, overly wet stuffing won’t develop a crispy, appetizing top.
Don’t skip the sautéing stage to save time. Yes, you could technically throw all the raw vegetables, apples, and cold sausage into a bowl with the bread and broth and bake it. But you’d miss out on the layer of built-in seasoning and flavor that comes from cooking the sausage and aromatics together first. The rendered sausage fat carries the flavor of the herbs throughout the dish. The slow cooking of the onion and celery develops their sweetness. This isn’t fussiness; it’s the difference between eating and truly enjoying.
Use fresh herbs if at all possible. Dried herbs have their place, but in stuffing where the herbs are so prominent, the difference is noticeable. Fresh sage smells alive and bright. Fresh thyme adds sophistication. Fresh parsley brings a peppery quality that dried parsley simply cannot match. If you can only find dried herbs, use about one-third the amount and accept that the result will be slightly different.
Taste constantly as you go. After cooking the sausage, taste a bit to confirm it has good flavor. After sautéing the aromatics and apples, taste again. This way you catch any seasoning issues before they’re baked into a large dish. Sausages vary in salt content — some brands are quite salty, others mild. By tasting as you go, you can adjust.
When combining the bread, sausage, and vegetables, fold gently rather than stirring vigorously. You want to distribute everything evenly without crushing the bread cubes into smaller pieces. Large, intact cubes create better texture with a mix of toasted exterior and soft interior. Crushed-up bread turns more uniformly mushy throughout.
Don’t bake the stuffing covered. Some recipes suggest covering it with foil for the first portion of baking, then uncovering it. This works if you’re concerned about the top browning too quickly, but ideally, you want the top and edges exposed to direct heat so they crisp up nicely. If browning is happening too fast, tent loosely with foil, leaving some airflow.
Common Mistakes That Ruin Homemade Stuffing (and How to Avoid Them)
Using soft sandwich bread: It breaks down instantly, creating a porridge texture. You need bread with actual structure. Invest in a decent loaf from the bakery section or a crusty bread that would still be pleasant to eat sliced and toasted.
Not toasting the bread cubes: This is the single biggest mistake. Untoasted bread becomes mushy. There’s no way around it. Toast them. Even if you’re rushed, this step takes fifteen minutes and is essential.
Adding the broth to bread that isn’t toasted first: If you’re mixing the raw bread with broth before toasting, you’re ensuring soggy stuffing. Toast first, then combine with the liquid. This order matters.
Using too much broth: Overly wet stuffing doesn’t develop a crispy top, and the texture turns mushy. Add broth gradually and stop when the bread clings together when pressed but isn’t actively wet. You can always add more during baking.
Skipping the vegetable sauté: I understand the temptation to shortcut this. But raw onion and celery in baked stuffing tastes raw and harsh. The few minutes of sautéing completely changes the flavor profile.
Using mediocre sausage: This is one of the places where ingredient quality genuinely matters. You taste the sausage clearly in the finished dish. Good sausage from a quality source will make a noticeable difference.
Packing the stuffing too tightly into the pan: Compacting the stuffing prevents airflow and creates a dense, heavy texture. Spread it into an even layer but don’t press down hard. The finished stuffing should have some tender crumb to it, not be solid and compact.
Baking covered the entire time: Some recipes do this and get acceptable results, but uncovered baking creates the appealing crispy top and edges that most people want. If browning too fast is an issue, tent loosely with foil for part of the time.
Cooking the apples too long beforehand: If you dice your apples hours before cooking, they oxidize and become mushy and brown. Dice them shortly before you’re ready to add them to the pan so they stay firm and fresh.
Forgetting to taste as you go: You might not realize the sausage is very salty, or that you need to adjust seasonings, until you’ve already baked the whole dish. Constant tasting lets you catch and fix issues early.
Variations to Make This Recipe Your Own
Protein Swaps: Italian sausage is classic, but you’re not limited to it. Try sweet breakfast sausage for a milder flavor, or spicy sausage if you like heat. Turkey sausage is leaner if that matters to you. You could even use crumbled bacon or pancetta for a smokier flavor. Vegetarian? Omit the sausage entirely and add extra mushrooms or diced butternut squash for heartiness and earthiness.
Apple and Fruit Changes: Swap apples for pears (use slightly less, as pears are juicier). Add additional sweetness with dried cherries instead of cranberries, or use a mix of both. Some recipes include dried apricots or even diced fresh pineapple for brightness.
Bread Variations: Move away from toasted sourdough and try brioche (which creates a richer, almost custard-like texture), cornbread cubes (for a Southern take), pumpernickel for earthiness, or a mix of white and wheat bread. You could even incorporate a day-old croissant broken into chunks for a luxurious variation.
Vegetable Additions: Add diced mushrooms (cremini, shiitake, or a mix) for earthy depth. Fresh fennel (thinly sliced, about half a bulb) adds a subtle licorice note that pairs beautifully with sausage. Leeks are more subtle than onion and bring sweetness. Some recipes include diced carrots for additional vegetables and subtle sweetness. Fresh corn kernels (when in season) add textural contrast.
Herb Customization: If you don’t like sage, use more thyme and parsley instead. Add fresh rosemary for a more robust flavor (use sparingly, maybe one teaspoon, as rosemary is assertive). Fresh marjoram or oregano brings Italian flavor. A tiny pinch of ground nutmeg adds warmth without being obvious.
Liquid Variations: Use chicken broth, turkey broth, vegetable broth, or even apple cider mixed with broth for additional apple flavor. Some recipes include a splash of dry white wine or apple cider vinegar for brightness and depth.
Wet Ingredient Additions: Traditional recipes sometimes include an egg beaten with the broth — this binds the stuffing slightly and creates a slightly firmer texture more similar to what you’d cook inside a bird. Skip it if you prefer a looser texture.
Make It Richer: Add more butter (up to one additional tablespoon melted into the broth mixture) for a more indulgent texture. Use heavy cream instead of some of the broth for a richer, almost custard-like result. Add dried cherries or apricots along with the cranberries for more complexity.
Texture Changes: If you prefer a much crispier, drier stuffing, reduce the broth by ¼ cup. If you prefer something more moist and almost bread-pudding-like, add an extra ½ cup of broth and include the beaten egg. Bake uncovered the entire time for crispier results, or cover with foil most of the baking time for a moister interior.
How to Prep Stuffing Ahead of Time
Preparing stuffing in advance is one of its greatest advantages, especially during busy holiday periods when oven space and mental energy are both precious commodities. Here’s how to do it properly so the flavors are maximized and the texture remains perfect.
The Two-Stage Approach (Recommended): This method gives you maximum flavor while preserving texture. Stage one, which can be done several days ahead: Toast your bread cubes and store them uncovered at room temperature. Store the dry bread in an airtight container if you’d like, but uncovered works fine for a day or two. Cook your sausage, sauté your aromatics and apples, and mince your herbs. Store this mixture, covered, in the refrigerator for up to three days. Stage two, which should happen the day you plan to serve: Combine the toasted bread, the refrigerated sausage mixture, and the fresh parsley. Mix with the broth and transfer to your baking dish. At this point, you can refrigerate the assembled stuffing for up to eight hours before baking. The brief time in the refrigerator allows flavors to meld slightly without the bread becoming soggy.
The Full Assembly Ahead Approach: You can also assemble the entire dish the day before, including the broth. Cover it tightly with plastic wrap and refrigerate overnight. The stuffing will be noticeably more flavorful after this overnight rest — all those herbs have time to fully penetrate the bread. Remove it from the refrigerator about thirty minutes before baking so it’s not ice-cold when it goes into the oven, then bake according to directions. It may take a few extra minutes to cook through since it’s starting cooler.
The Component Storage Approach (Maximum Flexibility): If you want maximum flexibility in your holiday schedule, you can prepare almost everything separately and assemble it the morning of serving. Toast bread cubes a few days ahead. Cook the sausage and vegetables up to two days ahead. Store herbs separately so they stay fresh. Assemble it all fresh the morning you want to bake. This approach requires a bit more active cooking time on the day of serving, but you’ll have the flexibility to shift things around if your schedule changes.
Make-Ahead Shopping Tip: Buy your bread from the bakery the day before serving. A one-day-old loaf is actually better for cubing and toasting than fresh bread, as it’s already slightly drier. This works perfectly into make-ahead timing.
Storage, Reheating, and Make-Ahead Strategies
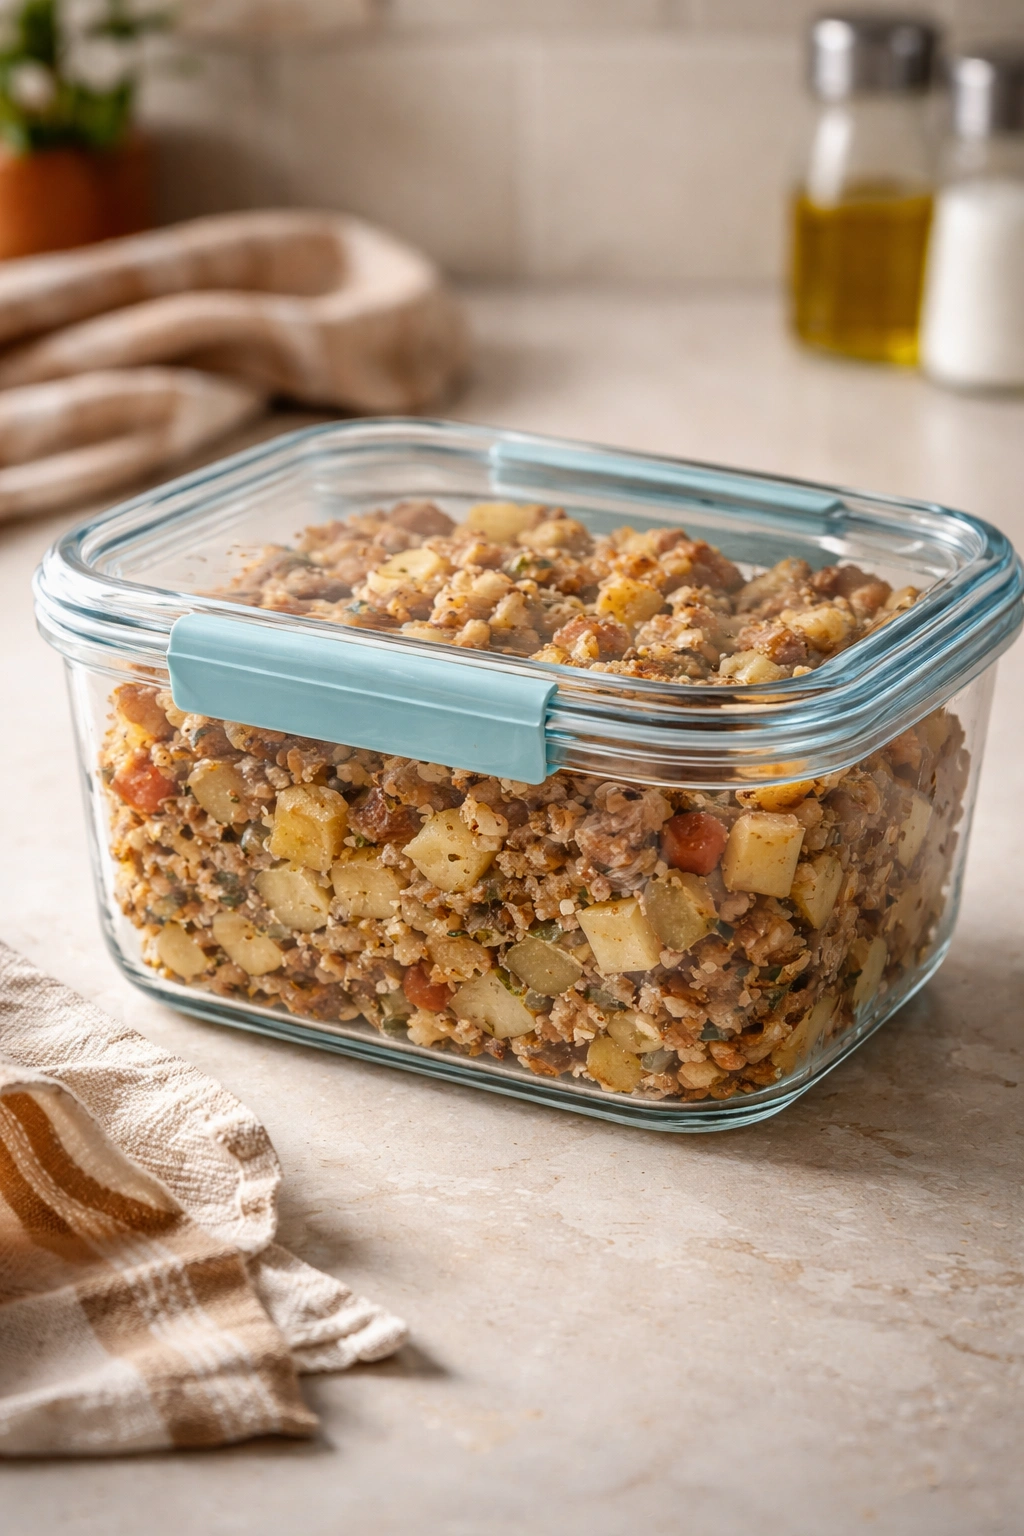
Properly stored leftover stuffing keeps beautifully, and reheats better than you’d expect. The key is storing it covered and reheating gently with just a bit of added moisture to restore the texture.
Refrigerator Storage: Transfer cooled leftovers to an airtight container or cover the baking dish tightly with plastic wrap. Properly stored, stuffing keeps in the refrigerator for up to five days, though it’s best consumed within three days while flavors are brightest. Avoid storing it loosely covered, as the bread will continue to dry out.
Reheating from the Refrigerator: Spread the cold stuffing in an oven-safe dish (no need to transfer if it’s already in a baking dish), drizzle with a few tablespoons of additional broth or a little melted butter, and cover loosely with foil. Bake at 350°F for about twenty minutes, until warmed through. Remove the foil for the last few minutes if you want the top to crisp up again.
Microwave Reheating: For individual portions, microwave a serving in a microwave-safe dish, stirring halfway through, until warmed through (usually two to four minutes depending on portion size). Drizzle a tiny splash of broth on top before microwaving to add moisture. The texture won’t be quite as good as oven reheating, but it’s convenient.
Freezing for Long-Term Storage: Yes, you can freeze baked stuffing. Cool it completely, wrap it tightly in plastic wrap and then aluminum foil (the double wrapping prevents freezer burn), and freeze for up to three months. Thaw in the refrigerator overnight. Bring to room temperature (or close to it), add a bit of broth to restore moisture, and reheat as described above.
Making Stuffing Much Further Ahead: If you want to prepare stuffing more than a day or two ahead, your best bet is to freeze the uncooked assembled dish (the day-before approach). Assemble the entire dish the day before you’d normally bake it, cover tightly with plastic wrap and foil, and freeze. On the day you want to serve, thaw it in the refrigerator overnight. The texture will be slightly softer than fresh-baked, but the flavor will be excellent and it will still be delicious. Bake from thawed according to standard directions, possibly adding a few extra minutes.
The Secret to Prevent-Drying-Out Reheat: When reheating any leftover stuffing, resist the urge to just pop it in the oven dry. That splash of broth, or a few pats of butter on top, makes the difference between stuffing that reheats perfectly and stuffing that becomes unappealingly dry and crumbly.
What to Serve Alongside Your Stuffing
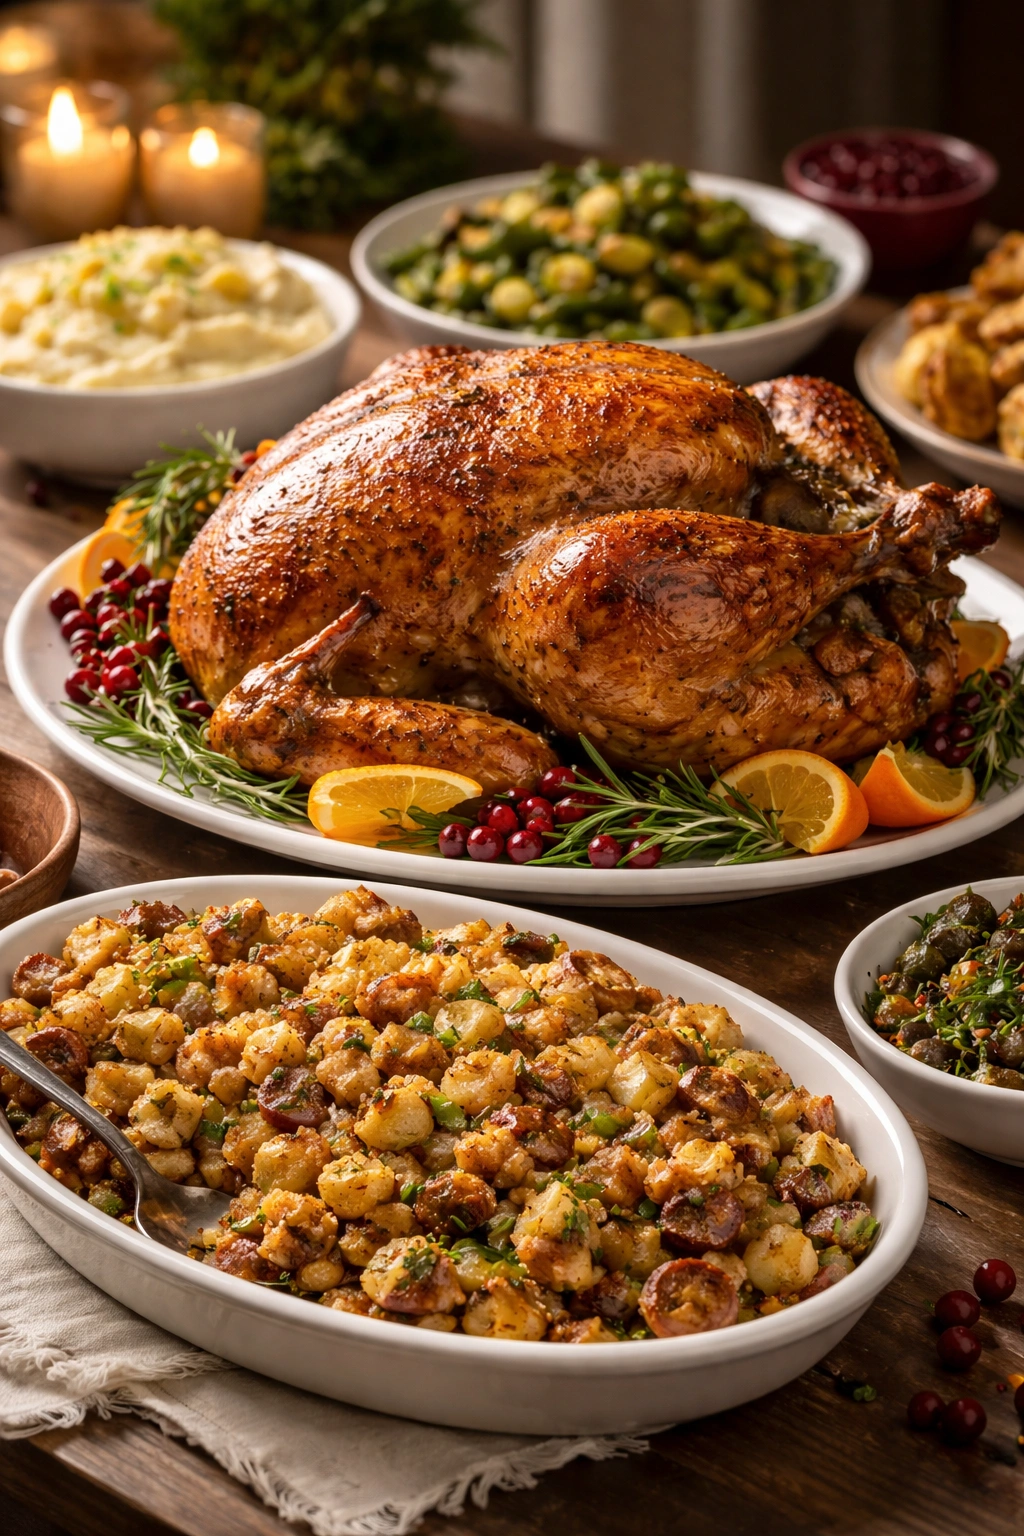
Sausage and apple stuffing is delicious on its own, but it’s traditionally served as part of a larger holiday meal. Pairing it thoughtfully with other dishes creates a balanced, satisfying table.
With Roasted Turkey or Chicken: This is the classic pairing. The richness of the sausage-studded stuffing balances the poultry beautifully. Serve alongside pan gravy made from the bird’s drippings — the savory gravy adds another layer of flavor that ties everything together.
With Pork: A roasted pork loin, pork chops, or pork tenderloin pair wonderfully with this stuffing. The apple and sage in the stuffing echo classic pork flavor pairings, creating a cohesive plate.
As a Standalone Meal: Don’t limit this to holidays. Serve stuffing as a hearty dinner alongside a simple green salad with a bright vinaigrette (to cut through the richness), roasted or steamed vegetables, or a simple broth-based soup.
Side Dish Companions: Mashed potatoes (especially if you drench them in gravy) are traditional. Creamed or sautéed spinach adds green vegetables and slight bitterness to balance richness. Roasted root vegetables (carrots, parsnips, Brussels sprouts) add textural variety. A simple salad with bitter greens and a tangy dressing cuts through the heaviness. Dinner rolls are traditional — soft, buttered rolls let people supplement their meal with more carbs and butter if they wish.
Sauce and Condiment Pairings: Serve with quality gravy made from poultry drippings. A tart cranberry sauce balances the stuffing’s richness. A hot sauce or spicy condiment adds another dimension if anyone craves heat. Even a simple cornbread with honey-butter works alongside stuffing, though that’s a lot of bread-based sides if that matters to you.
Beverage Pairings: A medium-bodied red wine (pinot noir, or a lighter cabernet) has enough tannins to cut through the sausage richness without overwhelming the subtle apple flavor. A full-bodied white wine (like a buttery chardonnay) emphasves the apple and sage notes. Apple cider — either warm spiced or cold and fresh — echoes the apple in the stuffing. Or simply serve with water, unsweetened tea, or coffee.
Final Thoughts
Making sausage and apple stuffing from scratch becomes almost meditative once you’ve done it a few times. You develop a feel for how much broth the bread should absorb, you learn the exact moment when the sausage has browned perfectly without becoming too dark, you start to anticipate when the apples will be tender. This is the kind of recipe that gets better the more times you make it, as you develop intuition about adjustments and discover your own preferred balance of flavors.
The beauty of this particular stuffing is that it’s forgiving in its flexibility. Swap in different apples, different sausages, slightly different herb combinations — and it’s still delicious. It works as a side dish for any roasted meat, or it stands alone as a complete meal. It reheats beautifully and improves with make-ahead preparation. It’s something you can confidently make for a quiet weeknight dinner or scale up for a crowd.
Start with the recipe as written until you understand how all the pieces work together, then adapt it to your preferences. Maybe you’ll discover you prefer a bit more apple, or you’ll fall in love with the way fennel plays with the sausage, or you’ll add dried cherries because they’re your favorite. Those discoveries are what make a recipe truly yours rather than just something you’re following. The core technique — toasting the bread, sautéing the aromatics, building layers of flavor — is what keeps any version successful.