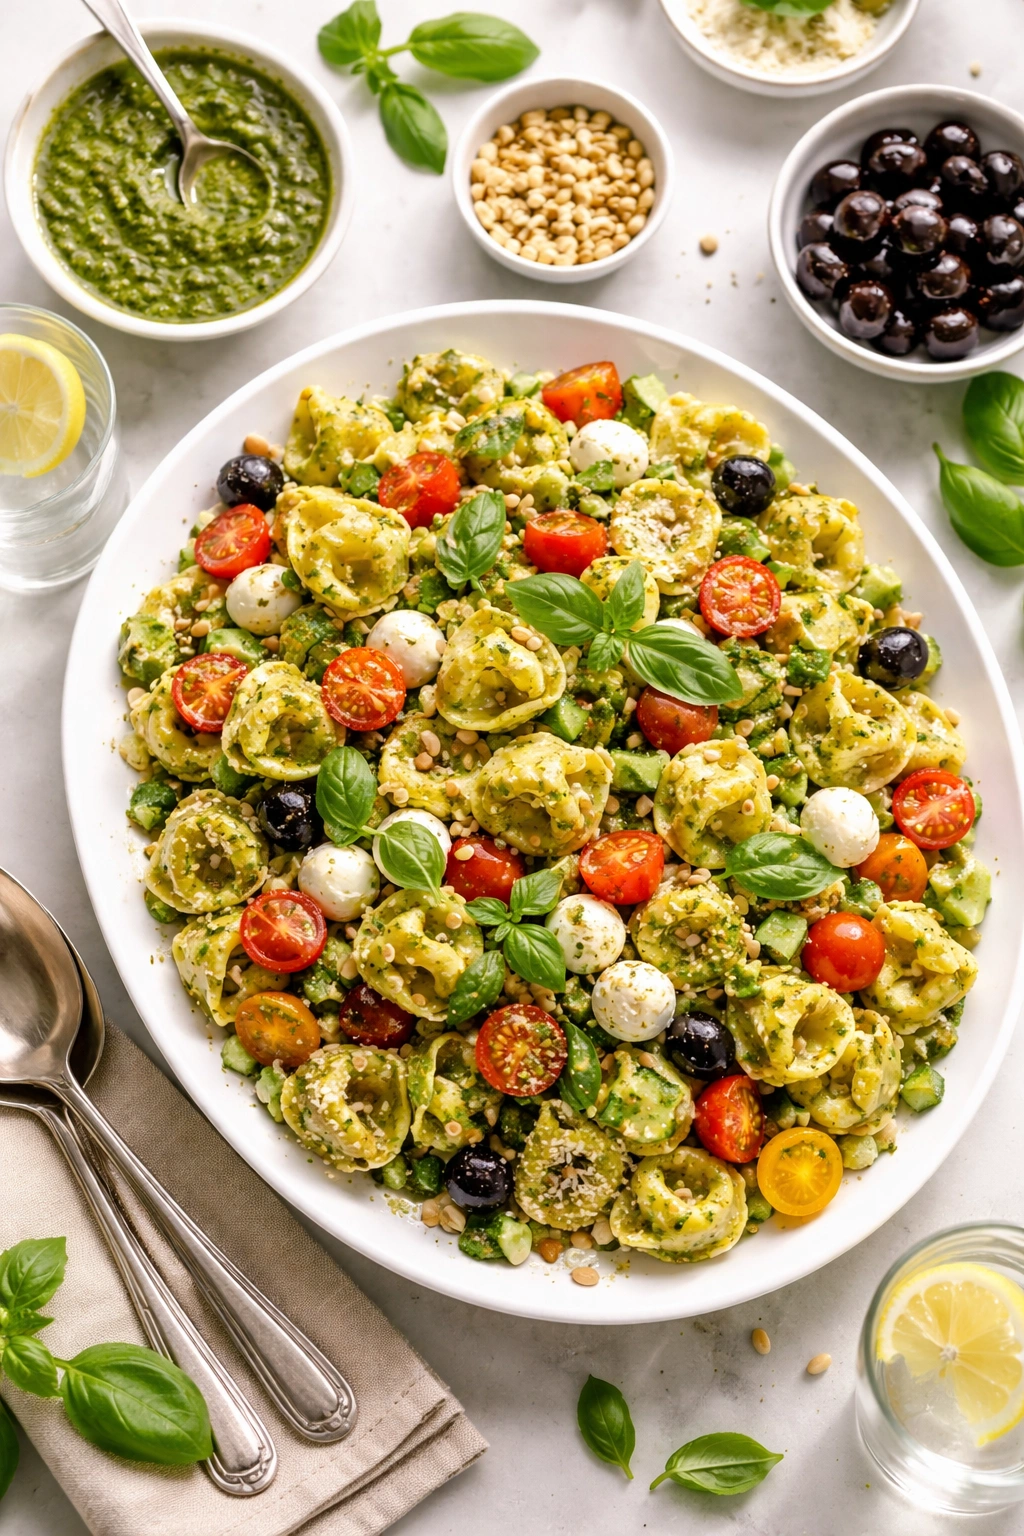
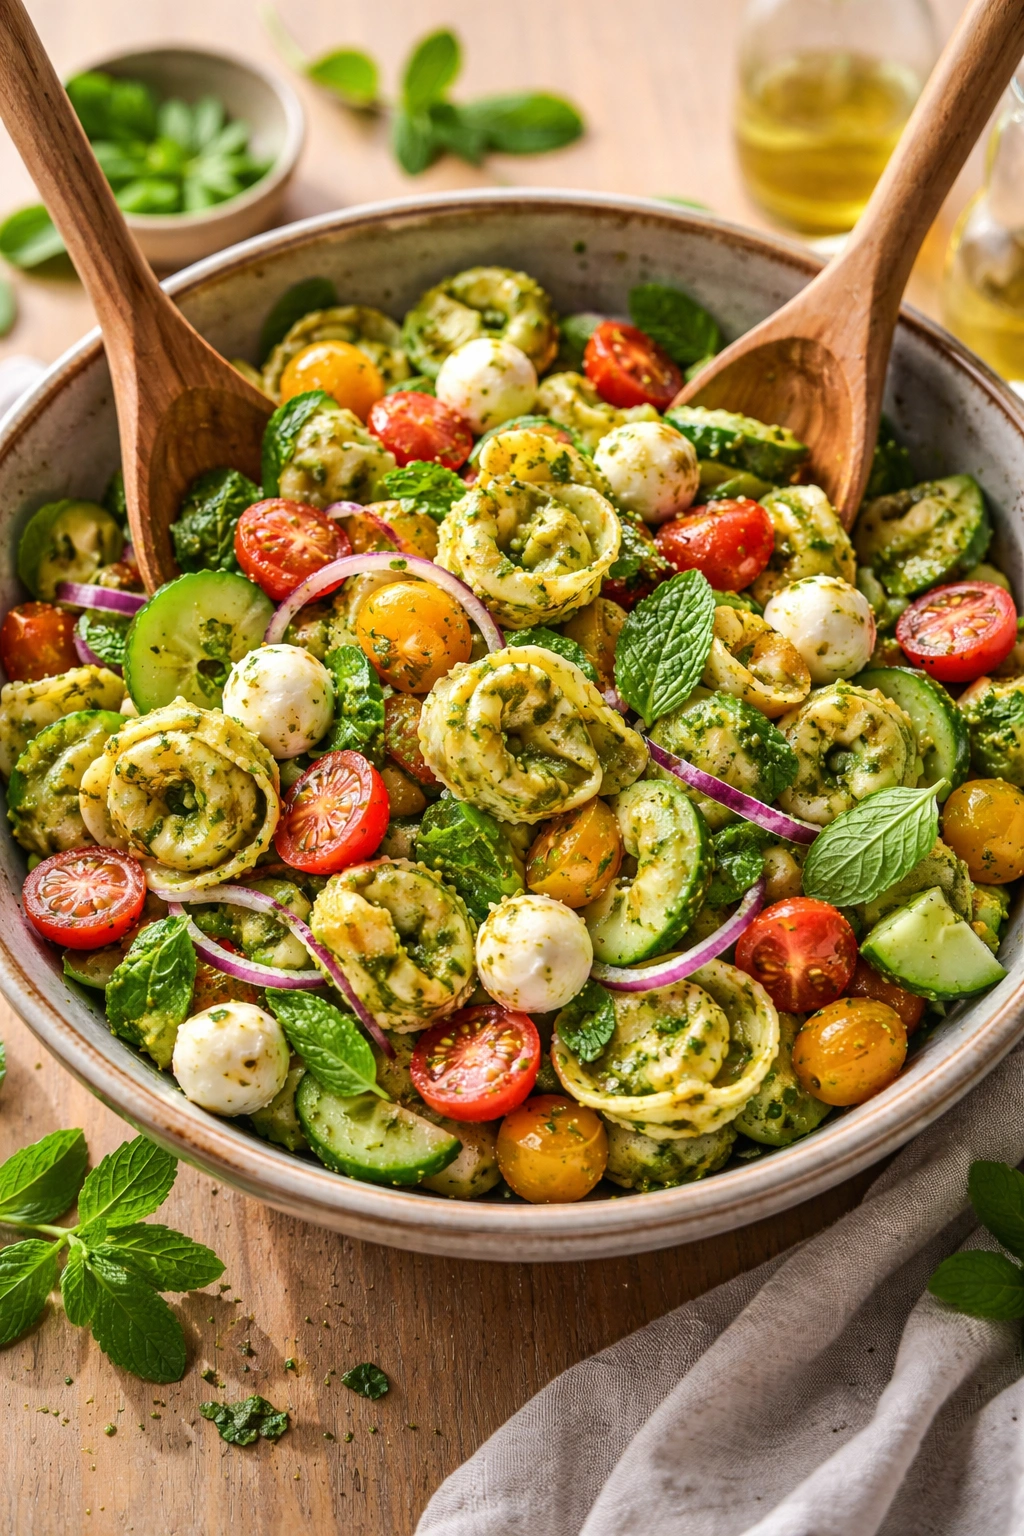
There’s something deeply satisfying about a tortellini pasta salad that’s been properly dressed with pesto — the way those little cheese pillows soak up the herbal, garlicky oil, how the basil fragrance hits you the moment you lift the bowl, the way it comes together as a single, cohesive dish rather than a collection of ingredients sitting in a bowl together. A really good tortellini pesto salad is elegant enough for a dinner party, casual enough for a weeknight lunch, and flexible enough to make with whatever fresh vegetables are calling to you from the market that day.
The best versions don’t rely on a heavy, oily vinaigrette or store-bought pesto that tastes like it’s been sitting on a shelf since last season. Instead, they’re built on genuinely fresh basil, good olive oil, and a technique that lets each element shine without overwhelming the delicate pasta itself. When you make the pesto fresh and toss it while the tortellini is still slightly warm, something magical happens — the flavors deepen, the oil distributes evenly, and everything tastes intentional and complete.
This isn’t a recipe that demands exotic ingredients or difficult technique. What it does demand is attention to the small details — choosing tender basil leaves, tasting as you go, understanding when your dressing is perfectly balanced. Get those right, and you’ll have a salad that people ask you to bring to every gathering, the one that disappears first from the table, the one people actually remember eating.
Why This Tortellini Salad Becomes the Star of Every Gathering
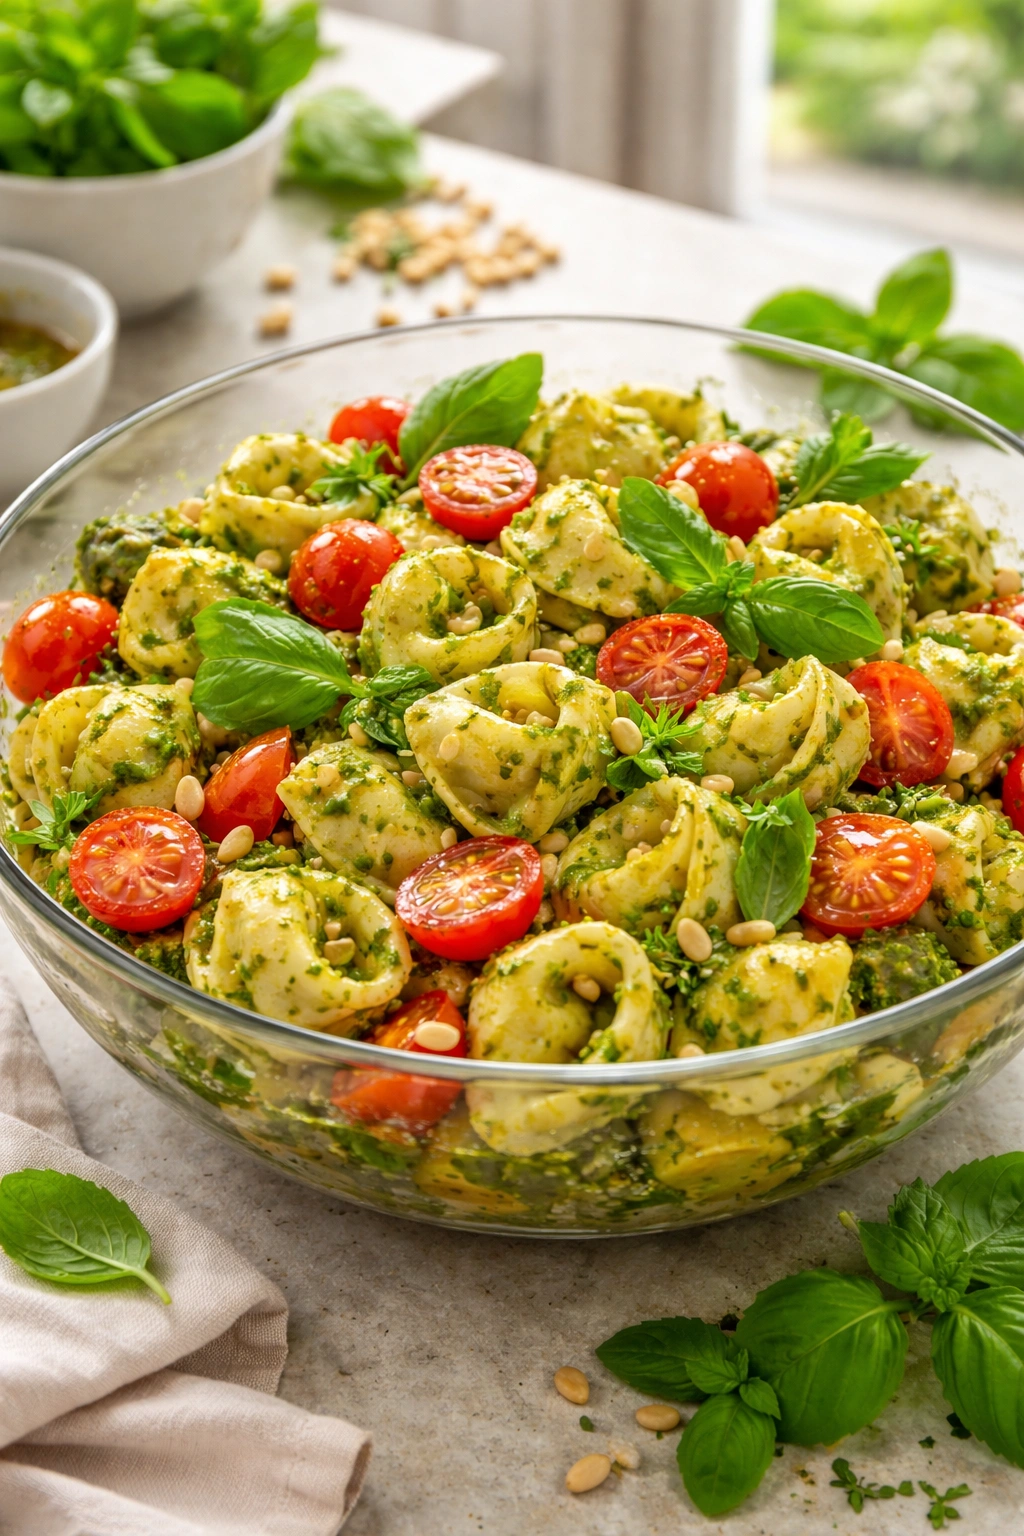
A great tortellini pesto salad works because it hits multiple satisfaction points at once. The texture contrast between the soft pasta pillows and any vegetables you add, the way the pesto clings to every surface, the fact that it tastes good whether it’s served immediately or after sitting for a few hours — these qualities make it genuinely useful in real life, not just in recipe photos.
Unlike heavier pasta salads weighed down by mayonnaise-based dressings, a pesto-dressed version feels lighter and fresher without tasting plain. The basil provides complexity and a distinctive flavor that says someone actually put thought into this, while the olive oil keeps things luxurious without becoming heavy. People will absolutely come back for seconds, and they won’t feel uncomfortably full afterward — that’s the sign of well-balanced dish construction.
The other magic ingredient here is flexibility. You can make this salad in countless ways depending on what’s available, what season you’re in, and who you’re feeding, and it will still be delicious. That adaptability is why this salad shows up at summer picnics, potlucks, and weeknight dinners — once you understand the core technique, you own the recipe in a way that feels intuitive rather than locked into one specific formula.
The Magic of Homemade Pesto vs Store-Bought
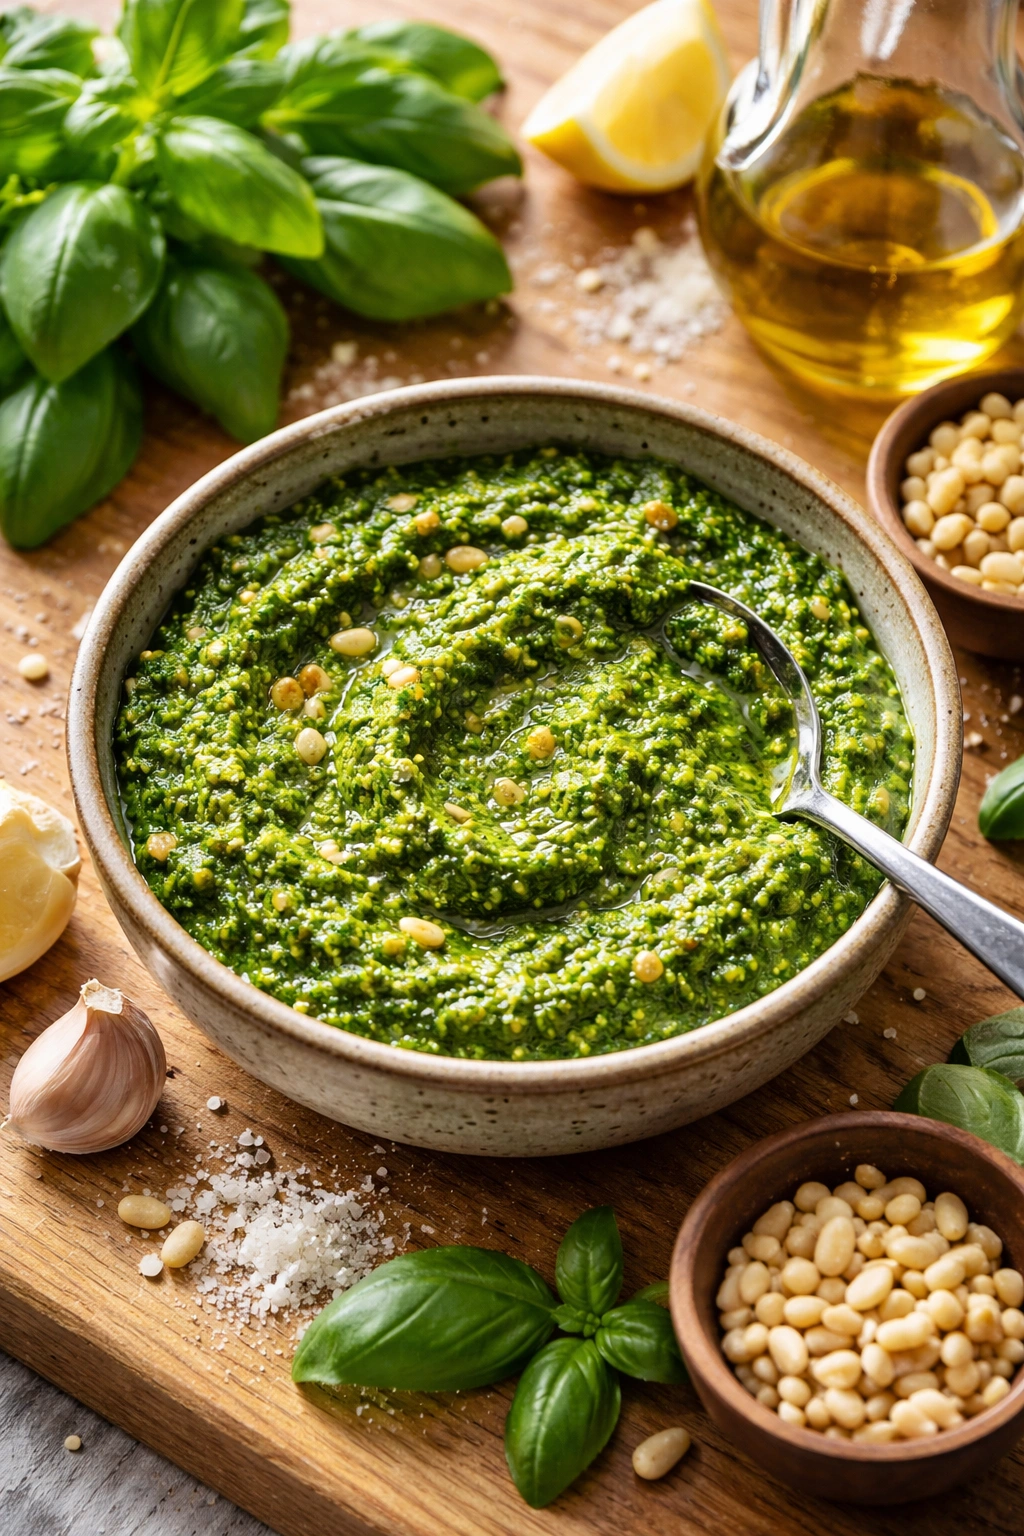
Here’s what separates a genuinely great tortellini salad from a forgettable one: the pesto tastes bright, alive, and herbaceous rather than dull and oxidized. Fresh basil pesto has a vibrancy that no shelf-stable jar can match, and once you’ve tasted the real thing, you’ll understand why it matters so much in a dish like this where pesto is literally the backbone of the flavor profile.
Store-bought pesto often contains a long list of stabilizers, extra oils, and sometimes even heat treatment during manufacturing that darkens the basil and mutes its flavor. It’s convenient, absolutely, but it can’t replicate the clarity you get from basil that went from the garden or farmer’s market into your food processor within hours. When pesto is that fresh, you can actually taste individual components — the peppery bite of the basil, the brightness of the garlic, the richness of the nuts — rather than one blended, slightly muted flavor.
Making pesto at home is genuinely simple and takes about five minutes of active work. You’re not fermenting anything, you’re not making a complicated emulsion, you’re just combining fresh basil with a few other ingredients and pulsing until you reach the texture you prefer. The reward is a salad that tastes noticeably better than versions made with jarred pesto, and honestly, the taste difference is significant enough that it’s worth the minimal extra effort. Plus, you control the salt level, the garlic intensity, and the oil amount — that control alone is worth the five minutes.
Choosing the Right Tortellini for Maximum Flavor
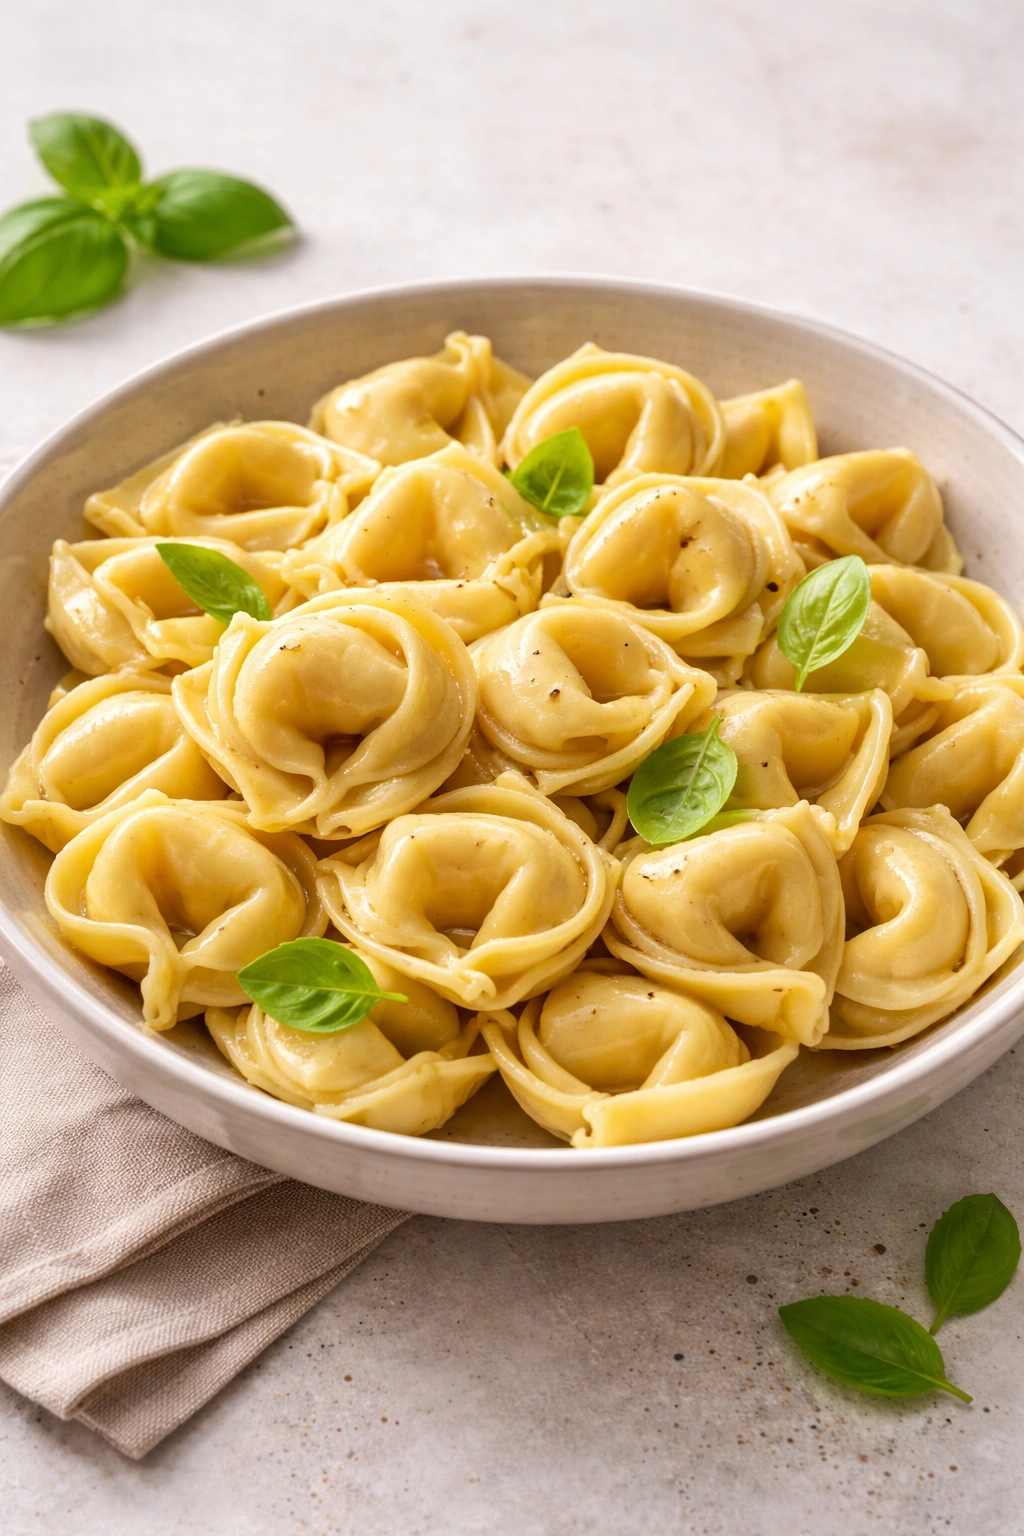
Not all tortellini are created equal, and your choice here will noticeably affect how the finished salad tastes and feels. Fresh tortellini — the kind you find in the refrigerated pasta section, usually near the fresh ravioli — offers the best texture and flavor. The pasta is tender, delicate, and takes on dressing beautifully. They cook in just 3 to 4 minutes, which means less risk of overcooking them into mushiness. These are the ones I reach for almost every time, and they make a tangible difference in the final salad.
Dried tortellini (the kind in the pasta aisle) are a perfectly valid backup and will absolutely work if that’s what you have. They need longer cooking time — usually 8 to 10 minutes — and they’ll be slightly chewier than fresh. They don’t absorb dressing quite as readily as fresh ones, but they’re more shelf-stable and sometimes offer interesting flavor variations that fresh versions don’t have.
When it comes to filling, cheese-filled is the classic choice for pesto salad because it’s both neutral and complementary. Spinach and cheese works beautifully too, adding an earthy undertone. I’d skip the meat-filled varieties for this particular salad — they’re wonderful in other contexts, but here they compete with the pesto rather than letting it shine. The filling you choose should enhance or subtly complement the basil, not fight for attention.
Quality matters here more than you might think. If you have access to freshly made tortellini from a local pasta shop, you’ve won the ingredient lottery for this salad. If you’re buying from a grocery store, read the ingredient list — you want to see actual cheese in there, not a long list of additives and cellulose. The pasta itself should be soft but not gluey when it’s cooked.
Fresh Basil Selection and Basil Quality That Actually Matters
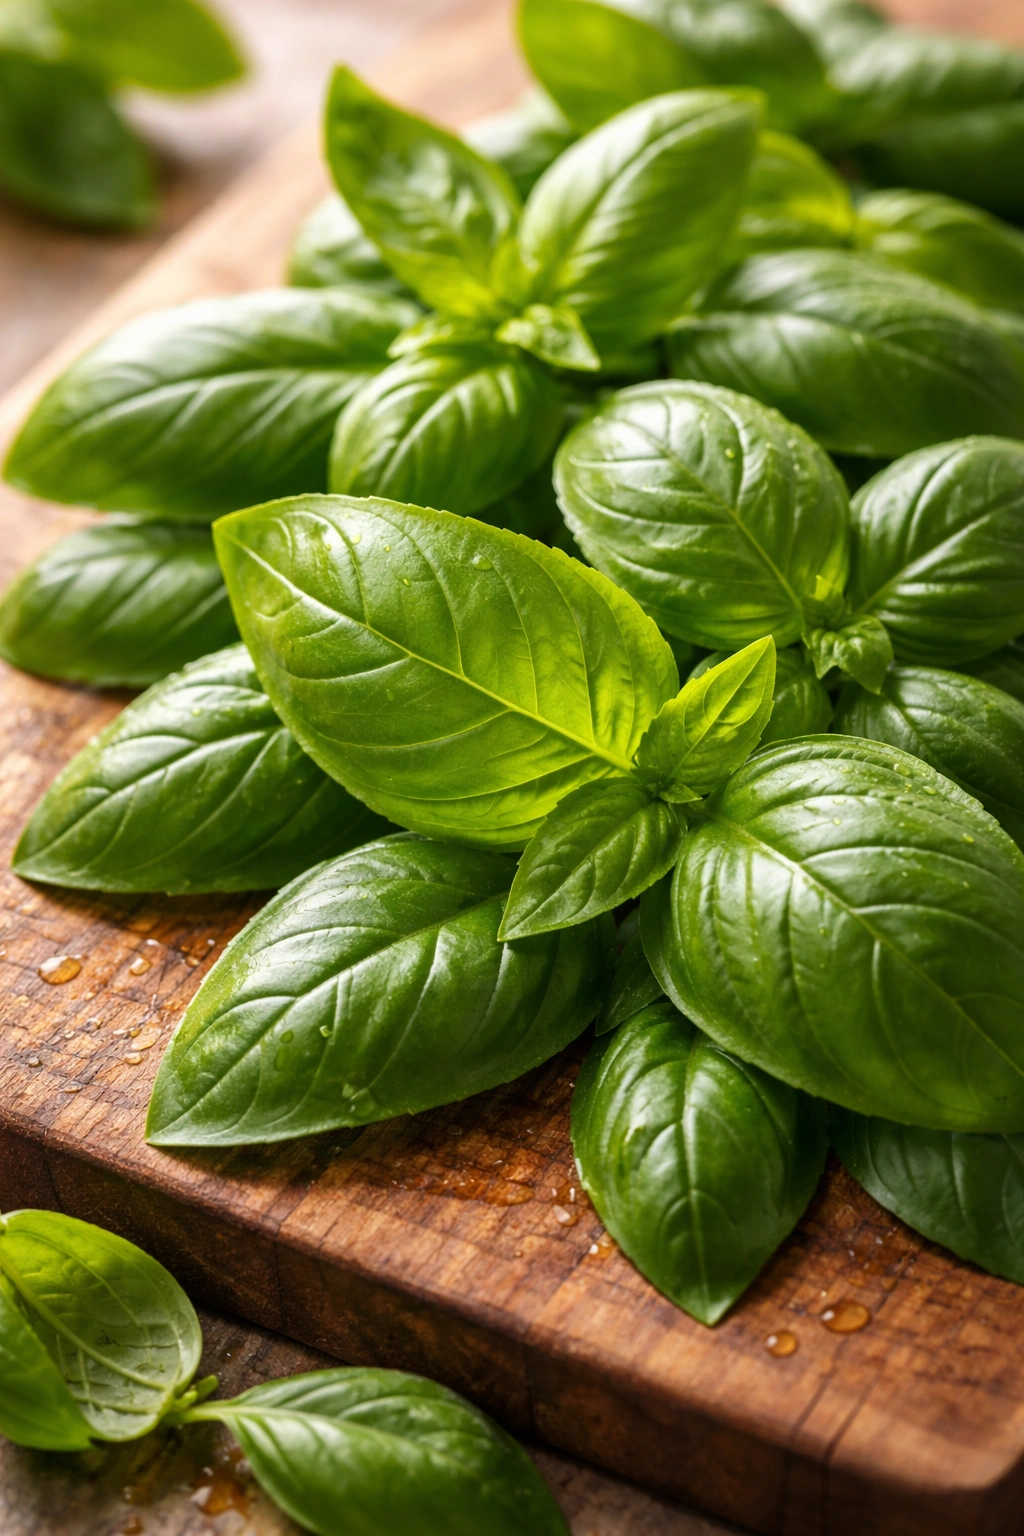
The single ingredient that will most dramatically affect whether your pesto tastes spectacular or mediocre is the basil itself. You want young, tender basil leaves that haven’t been sitting around, so the best place to buy basil is somewhere with high turnover — a farmer’s market, a quality grocery store with good produce sections, or an actual basil plant if you’re growing it.
When you’re selecting basil at the market, look for leaves that are bright green, not dark or browning at the edges. The leaves should feel fresh and springy when you touch them, not wilted or limp. Smell the bunch if you can — it should have a clear, bright basil aroma, not a faint smell or a musty one. Avoid bunches where the stems are brown or slimy; that’s a sign the basil is past its prime.
The size of the leaves matters more than people realize. Large, older basil leaves taste bitter and slightly peppery, while young, tender leaves are sweet and bright. If you’re buying a bunch with large mature leaves, you can still use it, but you’ll need to taste carefully as you make the pesto and potentially use less garlic to balance the bitterness. Ideally, you want a mix of medium and smaller leaves — they’re easier to work with and taste cleaner.
Once you get the basil home, store it like cut flowers. Trim the bottom of the stems, place them in a glass of water on your counter (not in the refrigerator), and use it within a day or two for best flavor. If you need to store it longer, you can place the whole bunch in a plastic bag in the refrigerator for up to a week, though the flavor will gradually fade. Never, ever put basil in the freezer unwashed or while still wet — it turns black and unpleasant.
Yield, Prep Time, and Recipe Overview
Yield: Serves 6 to 8 as a side dish, 4 to 5 as a main course salad
Prep Time: 20 minutes (includes washing basil, making pesto, and preparing vegetables)
Cook Time: 15 minutes (mostly waiting for water to boil and pasta to cook)
Total Time: 35 minutes active time + 30 minutes chill time (optional but recommended)
Difficulty: Intermediate — no special equipment required, but the success of the dish depends on proper pesto technique and tasting as you go. The steps are straightforward even for a first-time pasta salad maker.
This recipe creates approximately 6 cups of finished salad, which serves comfortably as a summer side for a backyard gathering or as the centerpiece of a lighter lunch. It’s forgiving enough to make on weeknight notice, but special enough to bring to potlucks and dinner parties feeling confident.
The Complete Ingredient List
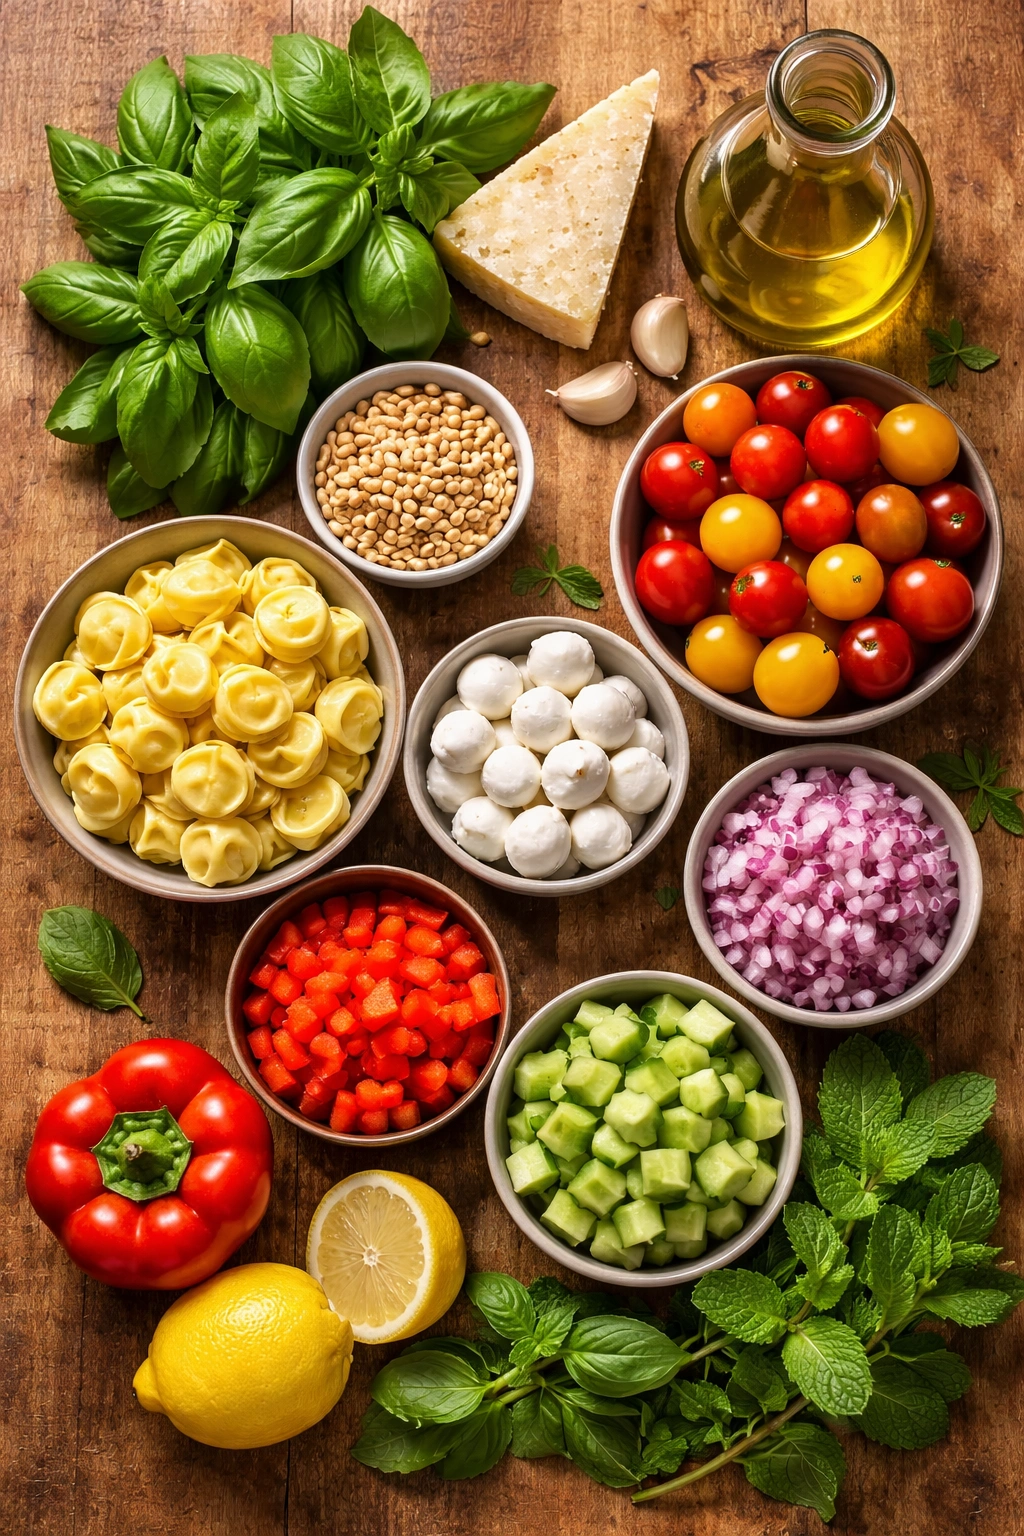
For the Fresh Basil Pesto:
- 2 cups fresh basil leaves, loosely packed (roughly 2 ounces), stems removed
- ⅓ cup pine nuts (or walnuts or almonds as substitutes)
- ⅓ cup freshly grated Parmigiano-Reggiano cheese, plus more for serving
- 2 medium garlic cloves, peeled and smashed
- ¼ teaspoon fine sea salt (or kosher salt)
- ⅛ teaspoon freshly ground black pepper
- ½ cup best-quality extra-virgin olive oil (use oil you actually enjoy drinking, not a cooking oil)
- 1 tablespoon fresh lemon juice
For the Salad:
- 1 pound fresh cheese-filled tortellini (or spinach and cheese if you prefer)
- 2 cups cherry tomatoes (a mix of colors if available), halved or quartered depending on size
- 1 medium red bell pepper (or yellow), diced into roughly ½-inch pieces
- 1 cup diced fresh mozzarella cheese (about 6 ounces), cut into bite-sized cubes
- ¾ cup thinly sliced fresh cucumber (English cucumbers are less watery)
- ½ small red onion, very thinly sliced
- ½ cup loosely packed fresh mint leaves (optional but highly recommended), roughly torn
- 1 teaspoon fine sea salt (for the pasta cooking water)
- Extra-virgin olive oil for finishing (if the salad seems dry after tossing)
- Freshly grated Parmigiano-Reggiano cheese for serving
- Freshly ground black pepper for serving
Making the Pesto Base From Scratch
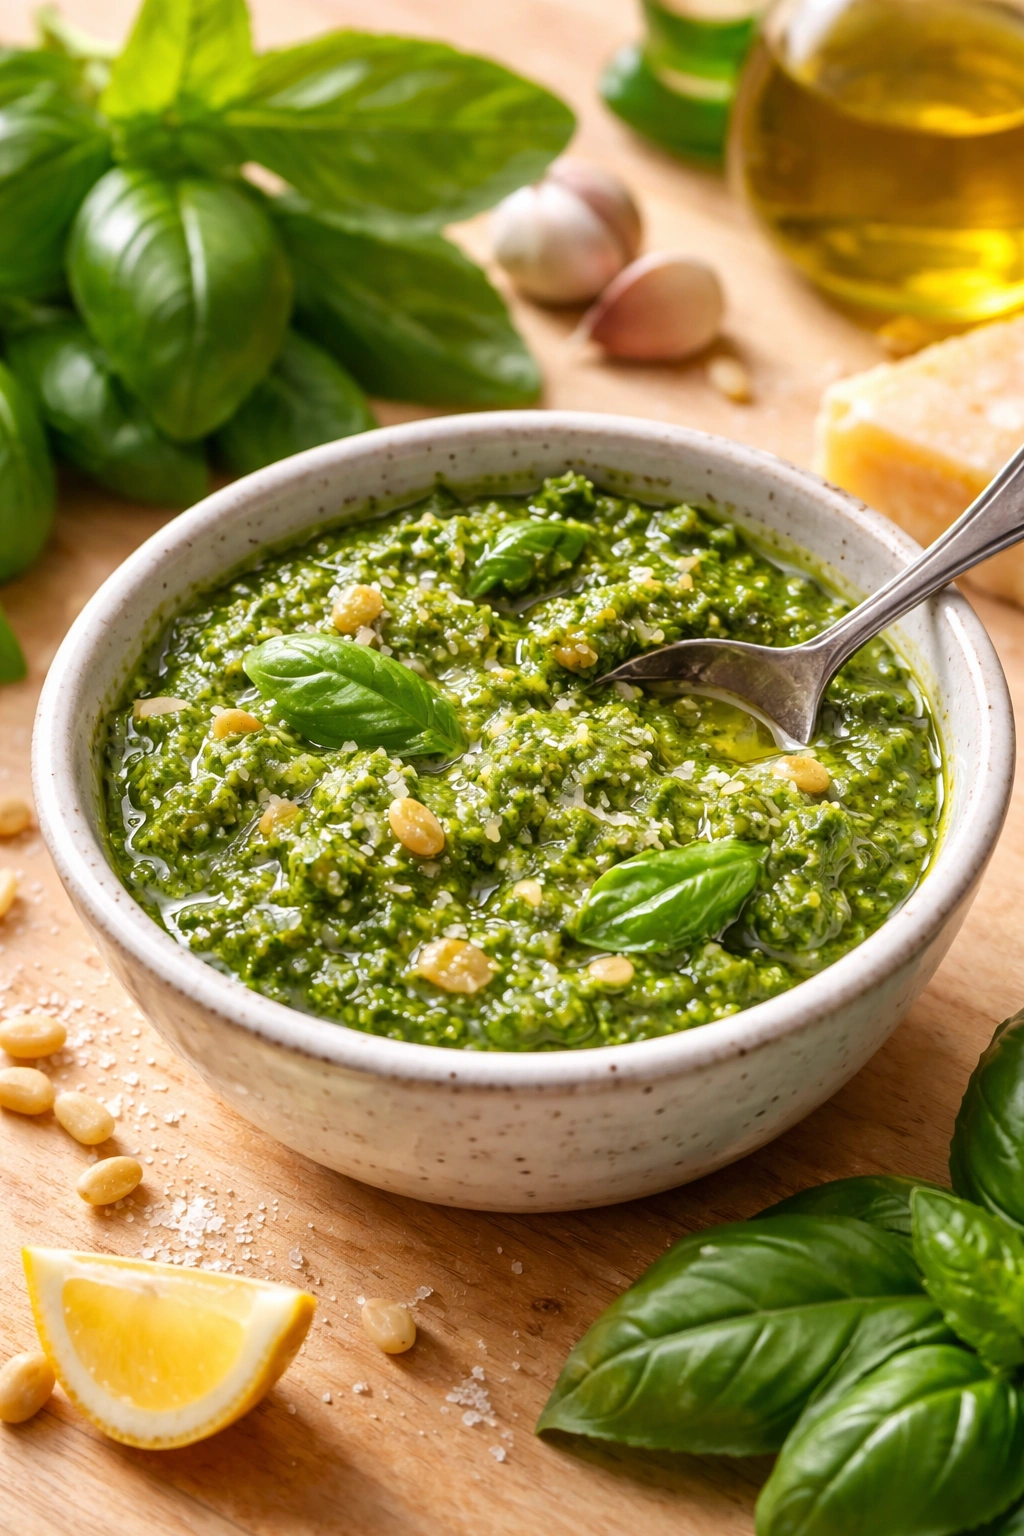
The foundation of this entire salad is pesto that actually tastes like fresh basil, not like a green paste made of oil. The technique is straightforward, but paying attention to the process itself makes a real difference in flavor and texture.
Start by washing your basil and making absolutely sure it’s completely dry. Wet basil will make your pesto watery and dilute the flavor. I pat the leaves with a clean kitchen towel or spin them in a salad spinner — the dryness matters. Measure out your 2 cups of loosely packed leaves, removing the stems and discarding any bruised or darkened leaves.
Add the basil, pine nuts, Parmigiano-Reggiano, garlic, salt, and pepper to a food processor. Pulse this mixture 5 to 6 times — you’re looking for a chunky, textured mixture at this stage, not a smooth purée. This chunky texture is important because it means the basil hasn’t been fully broken down and oxidized yet.
Now here’s where most pesto recipes go wrong: they add all the olive oil at once and process until smooth, which overheats the basil and mutes its flavor. Instead, drizzle the olive oil very slowly — about 2 tablespoons at first — while pulsing the food processor 3 to 4 times. You want the oil to incorporate without creating too much friction and heat. Scrape down the sides of the processor with a spatula.
Add another few tablespoons of oil and pulse again. Continue this process, adding oil in small amounts and pulsing between additions, until you’ve incorporated all the oil. The final pesto should be chunky and textured, with visible bits of basil and nuts throughout. If you’ve overprocessed and it’s become a smooth purée, you’ve lost some brightness in the flavor — it will still be delicious, just not as vibrant.
Taste the pesto and add the lemon juice. The acidity brightens the flavors and prevents the pesto from tasting overly rich. Stir well with a wooden spoon to combine. At this point, you can use it immediately, or cover it and refrigerate for up to 2 days. If you’re making it ahead, press plastic wrap directly onto the surface of the pesto to prevent it from darkening and oxidizing.
Cooking the Tortellini to Perfect Tenderness
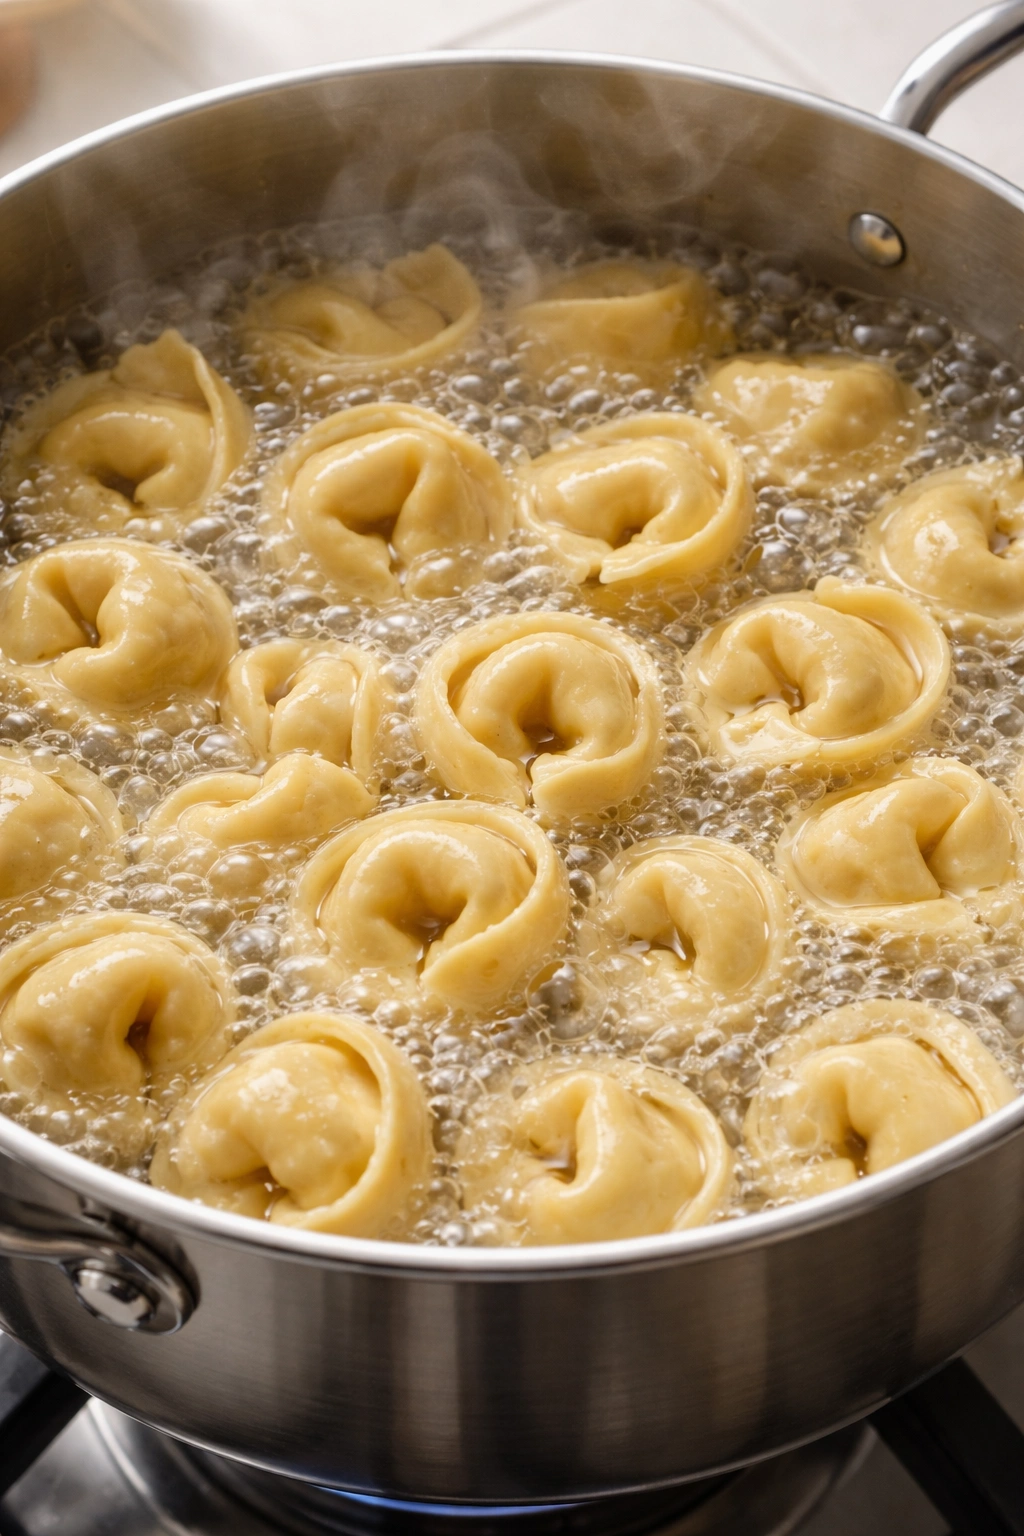
The pasta cooking step is where many people stumble — they either cook the tortellini until they’re soft enough to burst and lose their shape, or they undercook them so they’re still slightly tough and doughy in the center. Getting that window right is the difference between a salad that feels refined and one that feels sloppy.
Fill a large pot with 6 quarts of water (a generous amount so the pasta has plenty of room to move around and cook evenly). Add 1 teaspoon of fine sea salt — the water should taste like the sea, not like a salt flat. Bring the water to a rolling boil, and don’t skip this step; cold water pasta will stick together and cook unevenly.
Add the tortellini to the boiling water and stir immediately with a wooden spoon to separate any that might be sticking together. Set a timer and begin testing 2 minutes before the package suggests. Fresh tortellini usually take 3 to 4 minutes total; dried take 8 to 10 minutes.
You’ll know they’re done when they float to the surface and have been floating for about 1 minute, which indicates they’re cooked through. But here’s the key: pull one out and cut it in half. The pasta should be tender all the way through — not doughy at the center, but not so soft that it tears easily. The cheese filling inside should be heated through but still hold its shape. This is the moment to pull them out.
Reserve 1 cup of the starchy pasta cooking water (before you drain), then drain the tortellini in a colander. Do NOT rinse them — the starch on the outside helps the pesto adhere. While they’re still warm and steaming, transfer them to a large mixing bowl. This warmth is actually helpful; warm pasta absorbs dressing more effectively than cooled pasta.
Assembling and Tossing Your Complete Salad
The magic moment happens in the next few minutes, so pay attention. Add about three-quarters of the prepared pesto to the warm tortellini and toss gently with two large spoons or a salad server, being careful not to break the tortellini. You want to coat everything evenly, but you’re handling delicate pasta so rough tossing will damage it.
Let the warm pasta and pesto sit together for 2 to 3 minutes. This resting period allows the warmth to slightly soften the pesto and helps the flavors meld. The warmth of the pasta will also help infuse the basil flavor throughout.
Now add your prepared vegetables: the cherry tomatoes, bell pepper, fresh mozzarella, cucumber, and red onion. If you’re using fresh mint, add about three-quarters of it now (reserve some for garnish). Toss everything very gently with the spoons, trying to combine without breaking the tortellini or crushing the tomatoes.
Taste a bite of the salad and assess. Does it need more pesto? The flavors should be bright and herbaceous, not bland. If it tastes dull, you can add the remaining reserved pesto or drizzle in a little more olive oil and a squeeze of lemon juice. Does it need more salt? Taste and add a pinch if needed — remember that the pasta was already salted, and the cheese is salty, so you don’t need much. Freshly ground black pepper is essential here; add a generous amount right before serving.
If the salad seems dry after a few minutes (some of the tomato juice will be absorbed by the pasta), drizzle in a little additional olive oil — this is actually a sign your salad is balanced and absorbing dressing properly.
Storage Tips and Make-Ahead Strategies
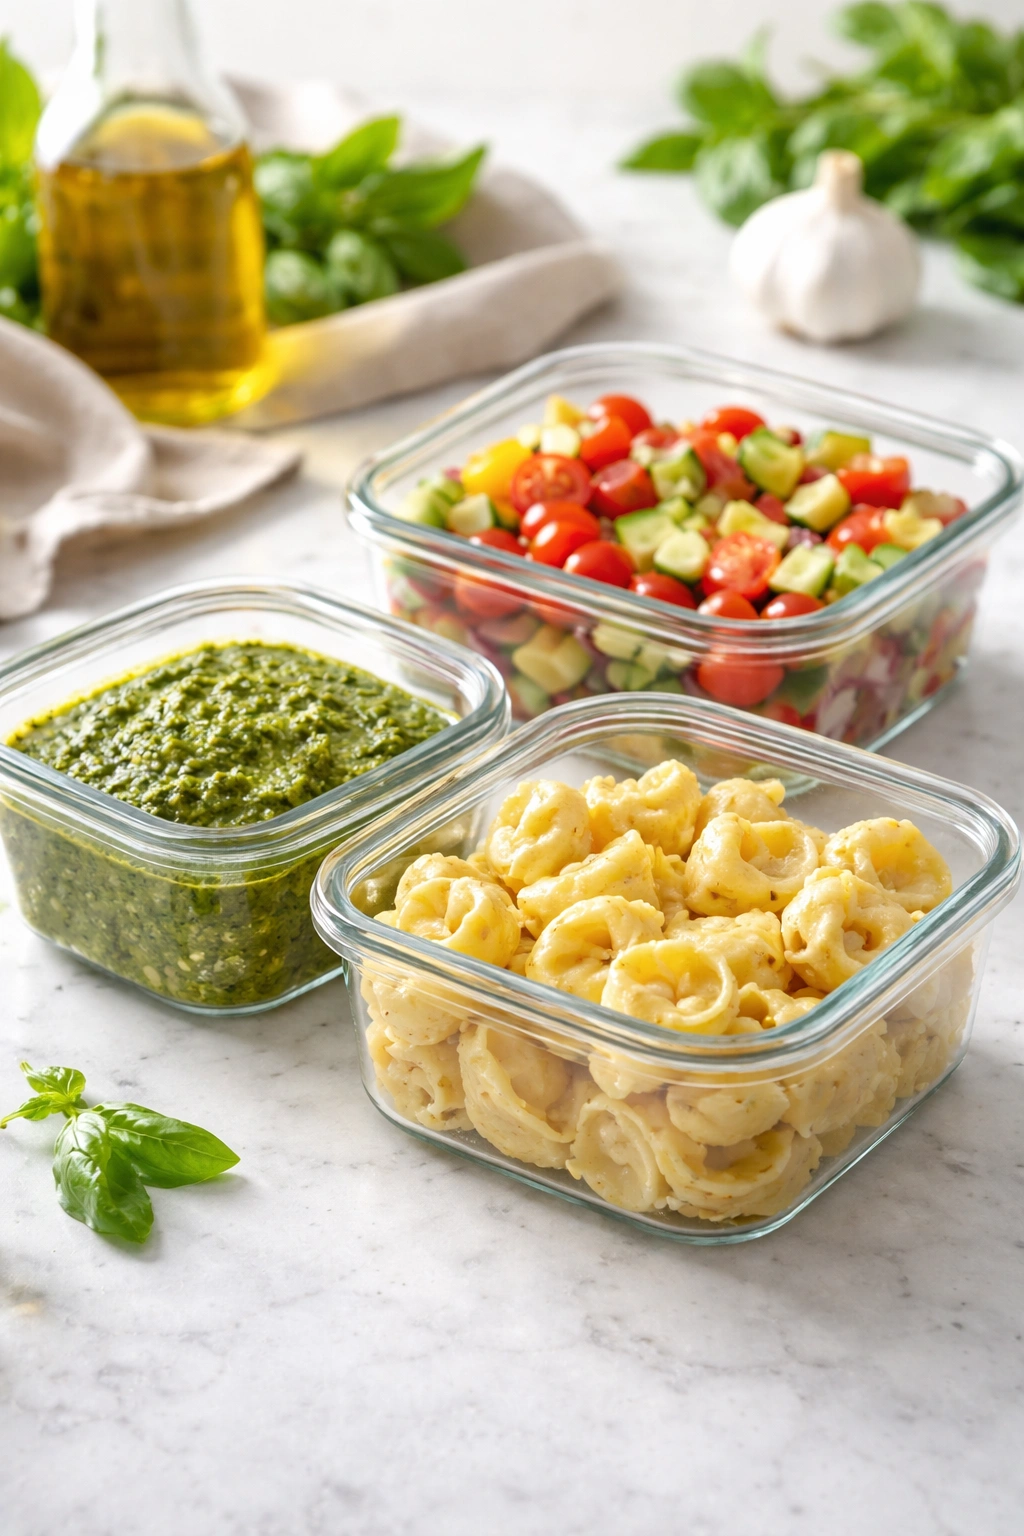
This salad is genuinely convenient because it tastes good at multiple temperature points and holds up well over time, which makes it perfect for planning ahead or bringing to gatherings.
You can make the pesto up to 2 days ahead and refrigerate it, covered, with plastic wrap pressed directly onto the surface. You can also cook the tortellini and refrigerate them in a separate container for up to 24 hours, though the texture will be slightly firmer than if you use them fresh. Keep the vegetables prepared but separate — cherry tomatoes and cucumber can be cut up to 8 hours ahead, while the red onion is best sliced no more than 3 to 4 hours before serving (it discolors slightly if cut too far in advance).
The salad is best assembled 30 minutes to 2 hours before you plan to serve it. This gives the flavors time to meld while the texture remains fresh and bright. If you’re making it further ahead than that, you can assemble it up to 24 hours in advance, but add any fresh mint garnish and the final grinding of black pepper just before serving so they taste fresh.
If the salad has been sitting for several hours or overnight and the pesto seems to have been absorbed, leaving the salad looking a bit dry, simply drizzle in a little more olive oil and a squeeze of fresh lemon juice. This will freshen the appearance and flavor without making it heavy. The flavors actually deepen slightly as the salad sits, so a next-day salad often tastes better than a freshly made one.
For storage, transfer any leftover salad to an airtight container and refrigerate for up to 3 days. The texture will gradually soften and the flavors will continue to meld, which some people prefer and others find less appealing than the first or second day. It’s still delicious and perfectly safe to eat, just different.
Variations and Seasonal Ingredient Swaps
The beauty of this recipe is how easily it adapts to what’s available, what season you’re in, or what dietary preferences you’re accommodating. The core pesto and tortellini stay the same, but everything else can shift based on your needs.
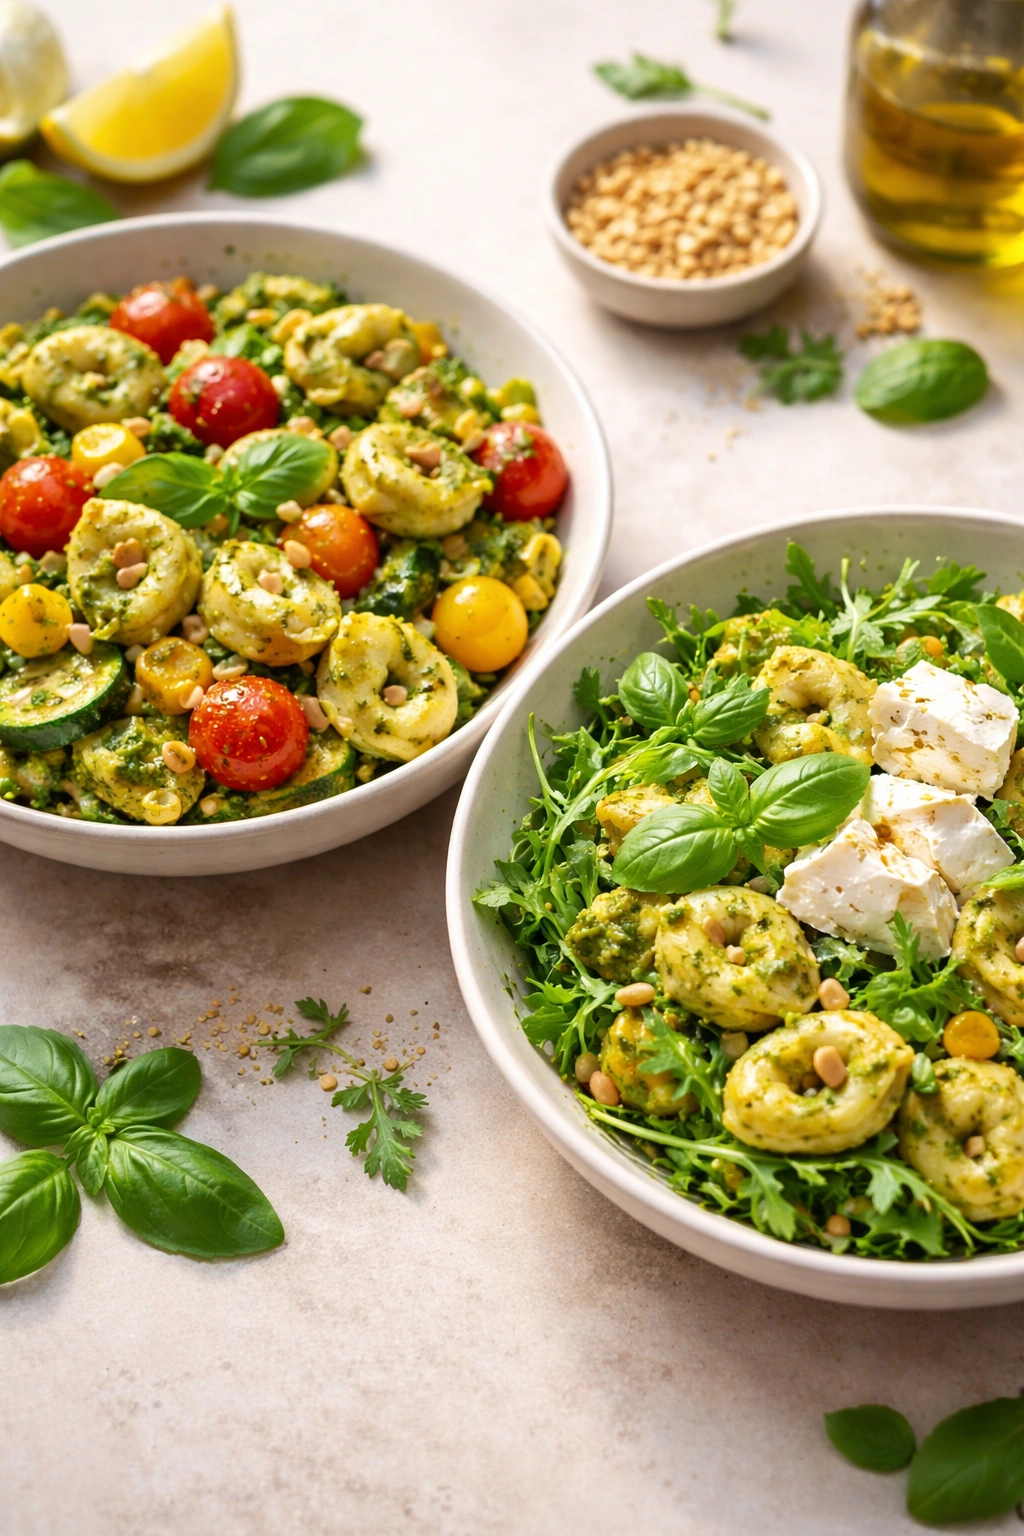
Summer Variations
Summer gardens and farmer’s markets provide endless options. Try adding blanched green beans (cook them 3 to 4 minutes in the same boiling water before the tortellini, drain, and chill), fresh corn kernels cut right off the cob, or thinly sliced summer squash. Heirloom tomatoes in any color offer beautiful visual variety and different flavor notes — some are sweet, some are slightly acidic, some have complex savory undertones. Add grilled zucchini slices, fresh arugula tossed in at the last moment, or torn fresh burrata cheese instead of cubed mozzarella for creaminess.
Spring and Early Summer
Peas — whether fresh shelled peas or thawed frozen peas that have been blanched for just a moment — add sweetness and brightness. Fresh asparagus cut into 1-inch pieces and blanched, tender spring onions, or fresh radishes sliced thin all work beautifully.
Fall Variations
Roasted red peppers (jarred are fine) add sweetness and a silky texture. Sun-dried tomatoes (oil-packed, drained), roasted pine nuts added at the end for crunch, or toasted walnuts mixed into the pesto instead of all pine nuts shift the flavor profile toward autumn richness. Add fresh spinach or arugula, roasted beets cut into bite-sized pieces, or thinly sliced fresh fennel for complexity.
Winter Options
While fresh basil is less abundant in winter, you can still make this salad. Dried oregano or a mix of dried herbs can substitute for some of the basil (use about half the amount since dried herbs are concentrated). Add roasted Brussels sprouts, thinly shaved radicchio for bitterness, or sun-dried tomatoes. Toasted nuts become more important in winter versions for textural contrast and richness.
Protein Additions
To turn this into a heartier main course salad, add diced rotisserie chicken, grilled shrimp, or crumbled crispy bacon stirred in at the last moment. White beans or chickpeas also work, adding substance without overpowering the pesto flavors. For vegetarian versions, simply load up on vegetables and cheese — the mozzarella provides enough richness that you won’t miss meat.
Alternative Herb Pestos
If you can’t find good basil or want a different flavor profile, you can make pesto with fresh mint (which is often more available), arugula, parsley, or a blend of several herbs. The technique remains exactly the same. Mint pesto is particularly lovely in summer versions. Parsley pesto (with a bit of basil if possible) is milder and works beautifully for people who find basil pesto too strong.
Gluten-Free and Dietary Adaptations
For gluten-free diners, most brands of fresh tortellini have gluten-free versions available, usually near the regular pasta. The salad works equally well with these. If dairy is a concern, use dairy-free mozzarella (the quality varies widely, so taste before buying large amounts) and make the pesto with nutritional yeast instead of Parmigiano-Reggiano.
Serving Ideas and Meal Pairing Suggestions
A tortellini pesto salad is genuinely versatile — it works as a side dish at a barbecue, as the centerpiece of a lighter lunch, as a make-ahead contribution to a potluck, or even as a light dinner option on warm evenings.
As a Side Dish
Serve it alongside grilled chicken, fish, or steak. The brightness of the pesto and fresh vegetables provide a fresh contrast to rich grilled meats. A generous spoonful next to grilled salmon is particularly lovely. It’s also beautiful served alongside simple grilled vegetables.
As a Main Course Salad
Add protein as mentioned above, and serve with crusty bread for soaking up any pesto that pools at the bottom of the bowl. A simple side of green salad rounds things out, adding even more freshness. Serve at room temperature or slightly chilled, depending on the weather and your preference.
For Potlucks and Gatherings
This salad transports beautifully and actually improves after a few hours of sitting, which makes it ideal for taking places. It looks beautiful in a serving bowl — the colors of the vegetables, the green pesto, the white cheese — and it tastes impressive without anyone needing to know it took 35 minutes total. Transport it in a covered container and bring a wooden spoon for serving.
Wine and Beverage Pairings
The herbaceous brightness of the pesto pairs beautifully with crisp white wines — Pinot Grigio, Sauvignon Blanc, or Vermentino all work well. For non-alcoholic options, serve with sparkling water with fresh lemon and mint, or a light iced tea.
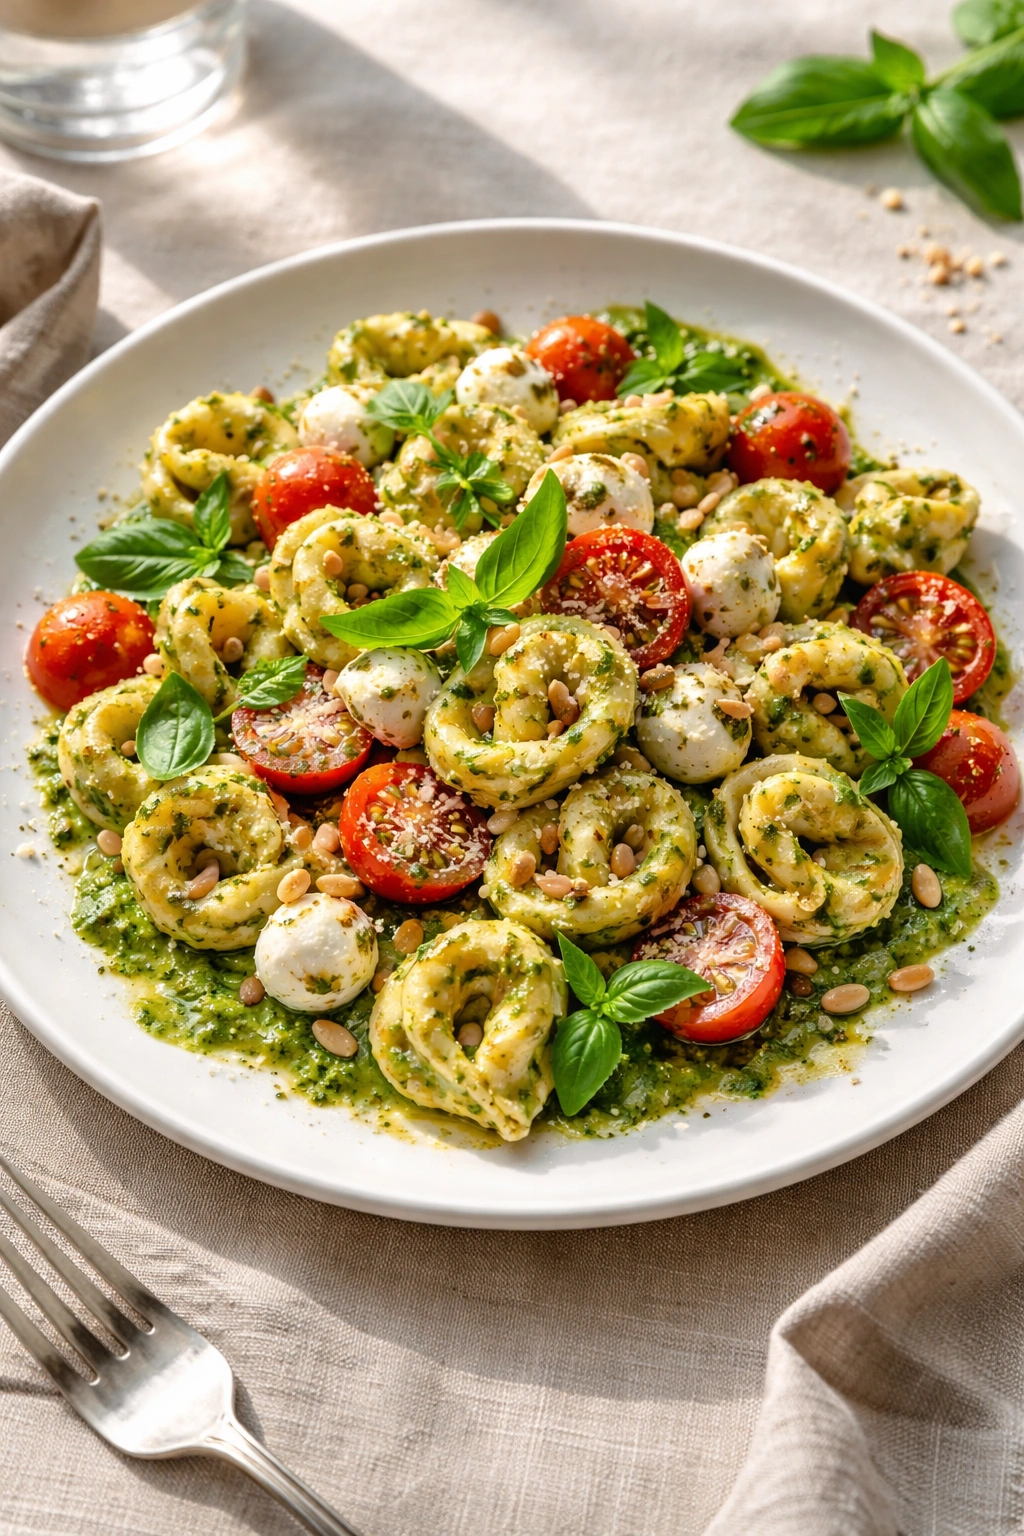
Garnish and Presentation
Just before serving, grate fresh Parmigiano-Reggiano over the top, add a generous grind of fresh black pepper, and scatter any reserved fresh basil or mint across the surface. If you have a high-quality finishing olive oil, a light drizzle over the top adds visual appeal and a final hit of richness. Serve with a wooden serving spoon, and if people are skeptical about basil-based dishes, watch their faces change when they taste it.
Final Thoughts

A great tortellini pesto salad hinges on one central principle: let the fresh basil actually taste like fresh basil. When you do that — when you make pesto that’s bright and herbaceous, choose warm tortellini that absorbs the dressing, add vegetables that complement rather than compete, and taste as you go — you end up with something genuinely special. It doesn’t require exotic ingredients or complex technique, just attention to the fundamentals and a willingness to taste and adjust until the flavors feel balanced and right.
The salad takes about 35 minutes from start to finish, which makes it accessible for weeknight dinners while being impressive enough for gatherings where you want to bring something thoughtful. It improves slightly as it sits, travels beautifully, and adapts endlessly to whatever vegetables are in season or whatever dietary needs your table has. Once you’ve made it once, you’ll understand intuitively how it works and how to adjust it for your own taste — that’s when a recipe moves from something you follow to something you actually own.