Taco night doesn’t have to be complicated or time-consuming. Whether you’re juggling work, kids, or just a hectic schedule, the beauty of tacos is that they’re inherently simple, flexible, and forgiving. You’ve got endless options to work with, and most can be ready in under 30 minutes. The key is having a few go-to recipes that you can execute on autopilot, without needing to reference a cookbook or hunt down specialty ingredients.
The taco recipes below are my absolute favorites for getting a satisfying dinner on the table when time is tight. Each one starts with real shortcuts and smart strategies that experienced home cooks use to save time without sacrificing flavor. Some rely on pantry staples and pre-made components; others take advantage of kitchen equipment like the slow cooker or Instant Pot to do the heavy lifting for you. The common thread is that every single one of them tastes genuinely delicious—the kind of meal that makes people ask for seconds and forget that you threw it together on a Tuesday night.
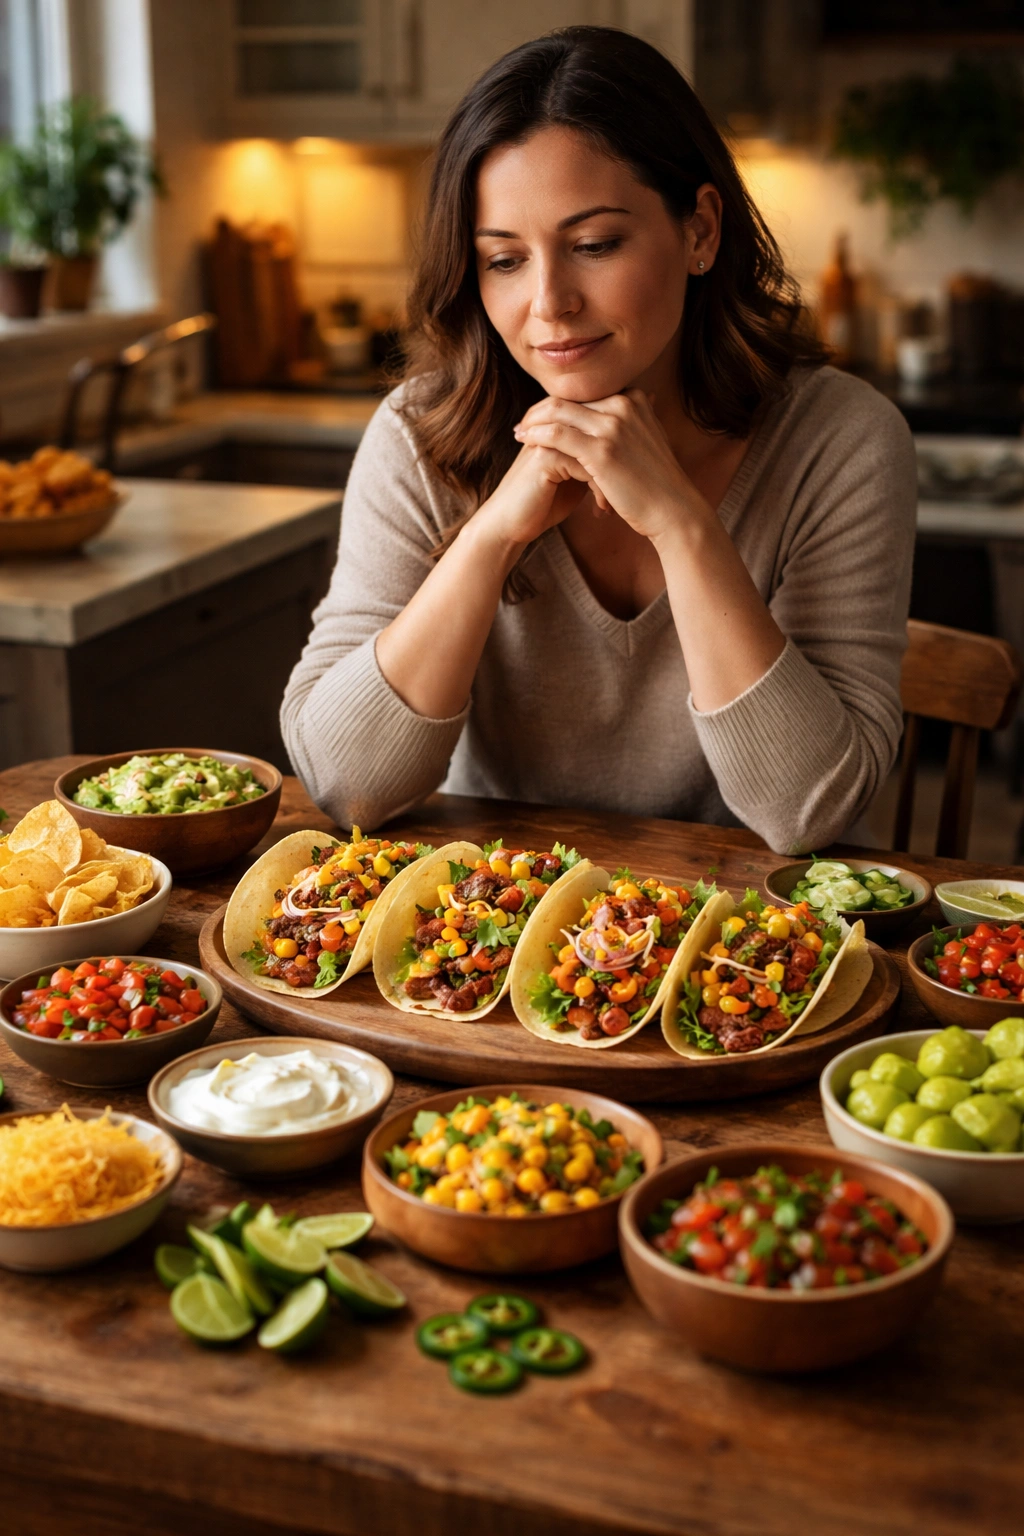
I’ve structured each recipe to give you not just the mechanics of how to make it, but the real-world tips that actually matter: which lean-to-fat ratio works best for ground beef, how long to simmer so the meat stays moist, why warming your tortillas changes everything, and how to assemble a taco bar that lets everyone build exactly what they’re craving. You’ll also find make-ahead ideas and storage tips, because the best weeknight dinner is often the one you’ve partly prepared in advance.
Let’s dive into these ten recipes and transform your taco night from stressful to completely doable.
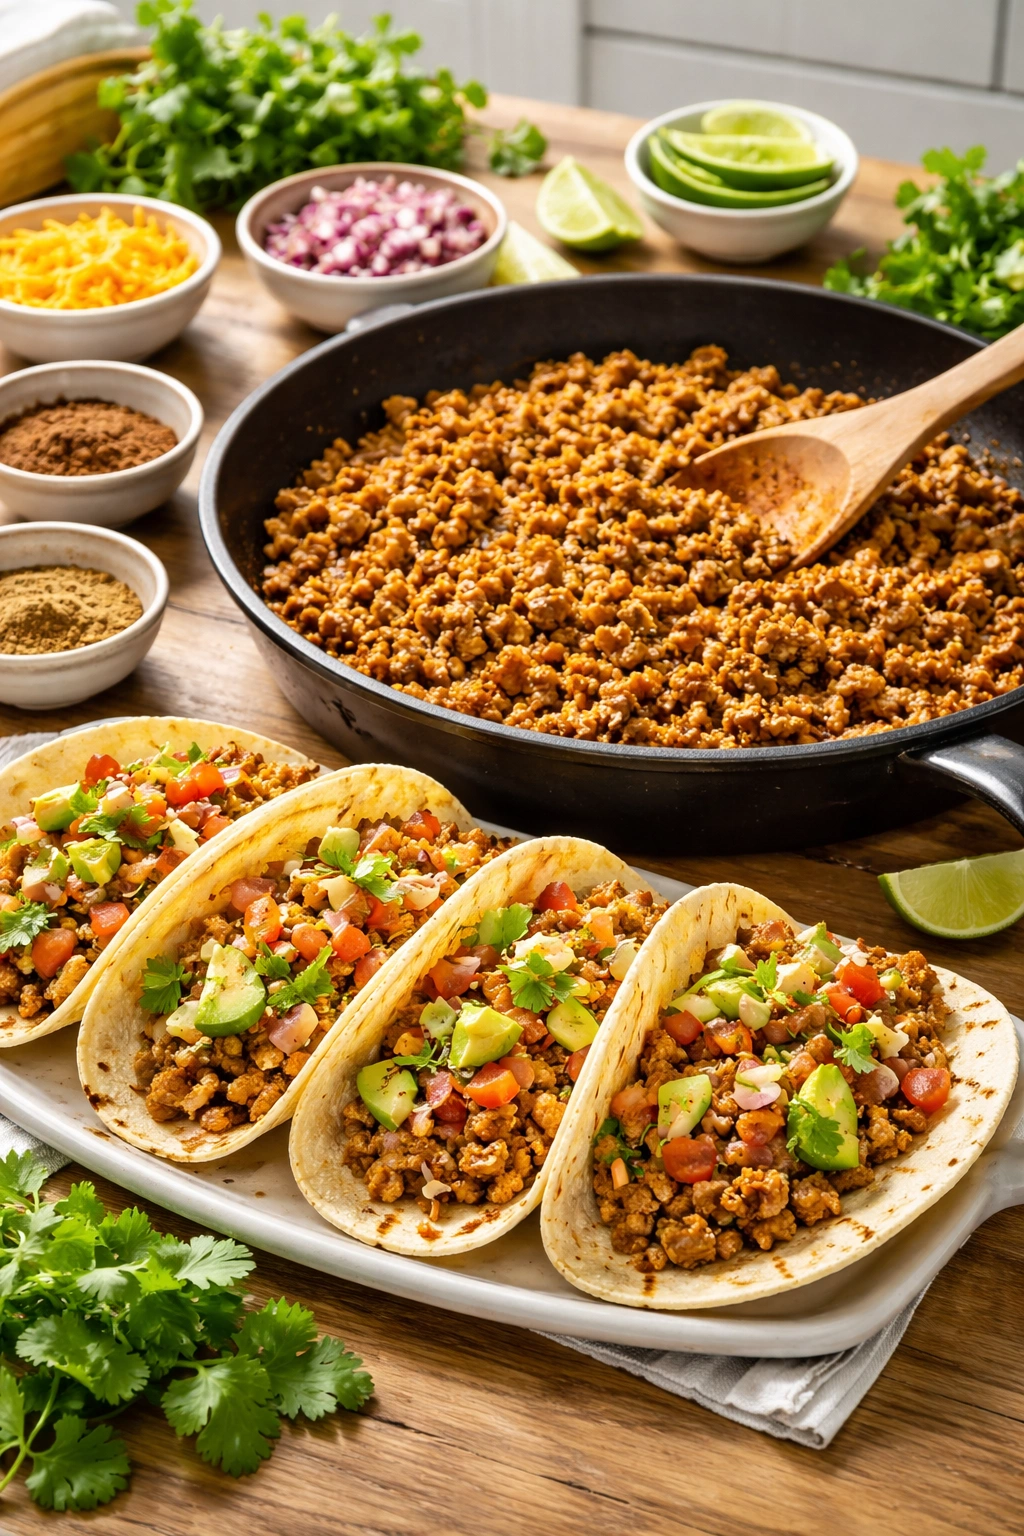
1. Classic Ground Beef Tacos with Homemade Seasoning
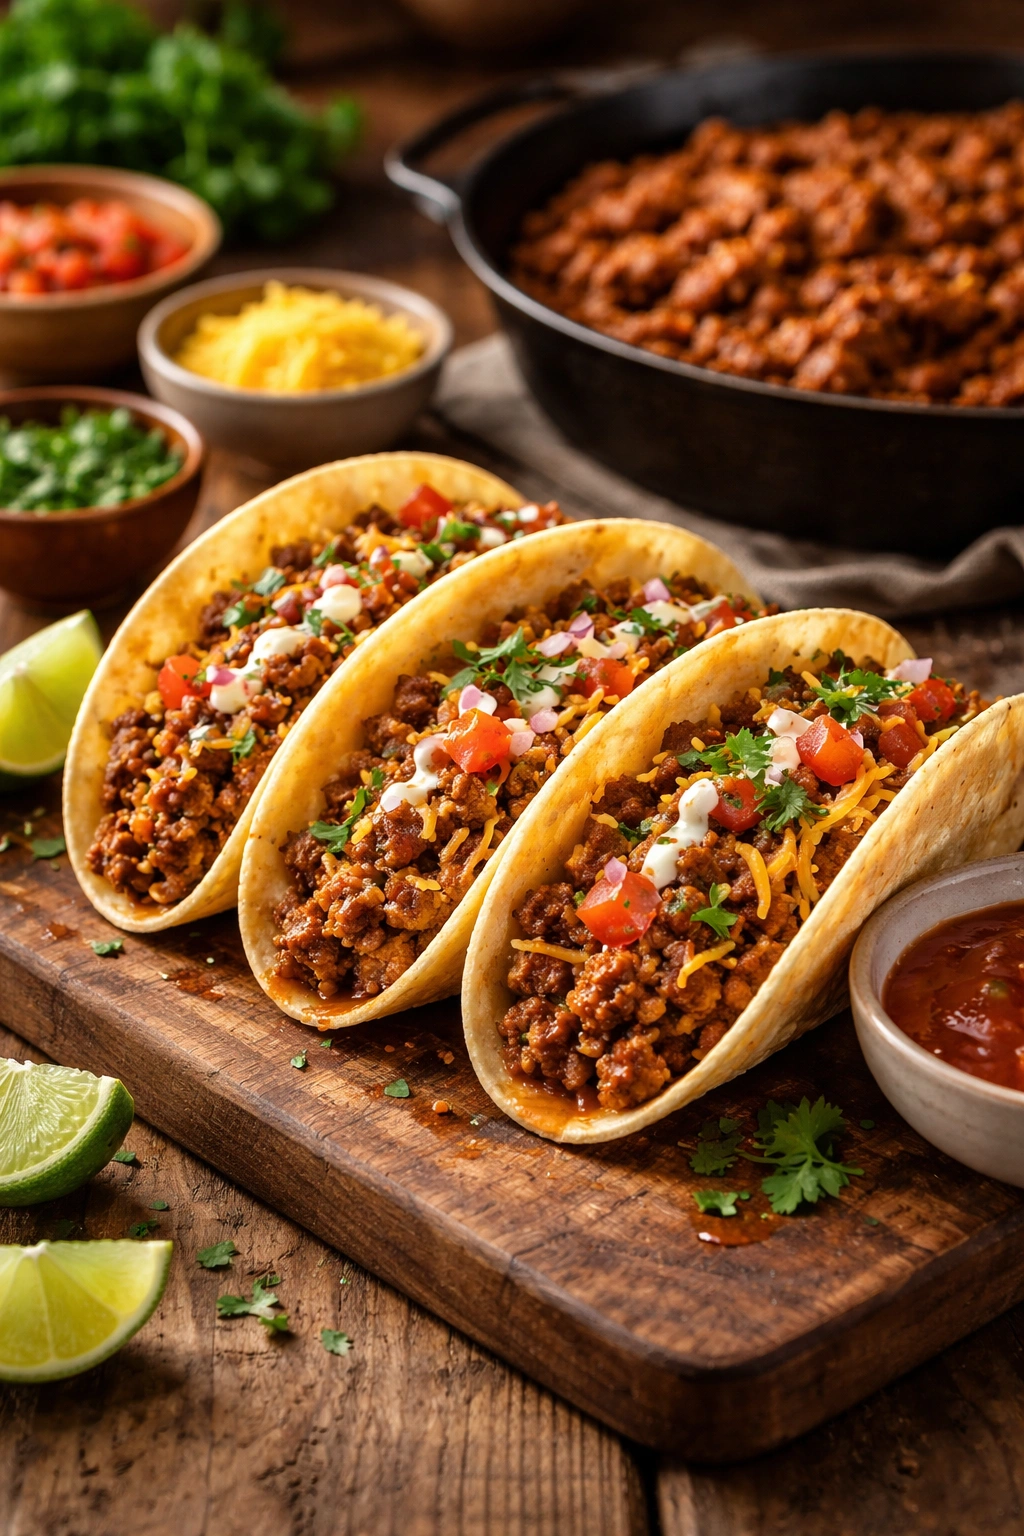
If you’ve been buying taco seasoning packets without thinking twice, this recipe will change your perspective. Homemade seasoning takes just three minutes to mix and costs far less, plus you control exactly how much salt and spice goes into your tacos. The result is moist, flavorful beef that tastes significantly better than the packet version because you’re using actual spices instead of a blend that’s been sitting on a shelf.
Yield: Serves 4 to 5 | Makes approximately 10-12 tacos
Prep Time: 10 minutes
Cook Time: 15 minutes
Total Time: 25 minutes
Difficulty: Beginner — This is genuinely the easiest taco recipe to master. No special techniques or equipment needed.
Why This Recipe Works
The magic here is in the seasoning blend and the water-to-meat ratio. Unlike dry seasoning packets that can sometimes leave your meat tasting over-salted, this homemade blend layers warm spices that bloom as they cook. The tomato sauce and water create a light sauce that keeps the meat moist rather than dry and crumbly, which is what happens when you brown beef without any liquid.
Key Ingredients You’ll Need
For the Taco Meat:
- 1 pound ground beef (85% to 90% lean is ideal)
- 1 tablespoon olive oil or grapeseed oil
- 1 medium yellow onion, finely diced
- 2 teaspoons chili powder
- 1 teaspoon ground cumin
- ½ teaspoon garlic powder
- ½ teaspoon dried oregano
- ¼ teaspoon onion powder
- ¼ teaspoon salt, or more to taste
- ⅛ teaspoon black pepper
- ½ cup tomato sauce or crushed tomatoes
- ½ cup water
- 2 teaspoons cider vinegar or white balsamic vinegar
For Serving:
- 8 to 10 corn or flour tortillas, warmed
- Shredded cheddar or Mexican cheese blend
- Shredded romaine lettuce, finely chopped
- Diced tomatoes or pico de gallo
- Sliced avocado or guacamole
- Sour cream
- Fresh salsa
- Diced red onion
- Fresh cilantro, optional
Step-by-Step Instructions
Cook the Aromatics and Spices:
-
Heat the oil in a large skillet over medium-high heat until shimmering. Add the diced onion and cook for about 4 minutes, stirring occasionally, until the onion begins to soften and turn translucent at the edges.
-
Add the chili powder, cumin, garlic powder, oregano, onion powder, salt, and black pepper directly to the onions. Stir constantly for about 1 minute until the spices become fragrant and release their oils — you’ll smell the warm, toasted aroma rise from the pan.
Brown the Beef:
-
Add the ground beef to the skillet with the spiced onions. Using a wooden spoon or spatula, break the meat into smaller pieces as it cooks, stirring occasionally, until it’s no longer pink and has browned on the edges, about 5 to 7 minutes.
-
If you’re using 85% lean beef, you’ll likely have some fat accumulated in the bottom of the skillet. Tilt the pan and carefully drain off any excess fat (you can use a paper towel to blot the surface), leaving just a thin coating. If you used 90% lean beef, there may be almost no fat to drain, which is fine.
Finish the Sauce:
-
Pour in the tomato sauce, water, and vinegar. Stir everything together thoroughly, making sure the seasonings are evenly distributed throughout the meat. Bring the mixture to a gentle simmer over medium heat.
-
Reduce the heat to medium-low and let it simmer uncovered for 8 to 10 minutes, stirring occasionally. The liquid should reduce noticeably — by the end, the beef should be coated in a light sauce, not swimming in liquid, but not completely dry either. If it reduces too much, add a few extra tablespoons of water. Taste and adjust the salt if needed.
Warm the Tortillas:
- While the meat simmers, warm your tortillas. For corn tortillas, quickly char them in a dry skillet over medium-high heat for about 20 to 30 seconds per side until they’re warm and slightly pliable. For flour tortillas, wrap them in foil and warm them in a 350°F oven for about 5 minutes, or toast them one at a time in a dry skillet for about 20 seconds per side.
Assemble:
- Transfer the taco meat to a serving bowl. Arrange your toppings in small bowls on the table — this is where a taco bar format really shines. Let everyone assemble their tacos exactly how they like them.
Pro Tips for Perfect Ground Beef Tacos
Buy the Right Meat: Aim for 85% to 90% lean ground beef. Anything leaner can taste dry; anything fattier requires more aggressive draining and results in greasier tacos.
Double the Batch: Make two pounds of taco meat instead of one. Use half for tonight’s dinner and freeze the other half in an airtight container or freezer bag. When you make tacos again next week, you can skip the cooking and just reheat it gently in a skillet with a splash of water.
The Warm-Tortilla Rule: Cold tortillas crack and fall apart. Warm ones are pliable and flexible, making it infinitely easier to fill them without disaster. This single step transforms taco night.
Toast Hard Shells in the Oven: If you’re using hard taco shells, arrange them in a single layer on a baking sheet and warm them in a 350°F oven for 2 to 3 minutes. They’ll taste fresher and crisp up perfectly.
Storage and Make-Ahead
Cooked taco meat keeps in an airtight container in the refrigerator for 3 to 4 days. You can reheat it gently on the stovetop with a splash of water to loosen it up. It also freezes beautifully for up to 3 months. Thaw in the refrigerator and reheat the same way.
2. Slow Cooker Salsa Chicken Tacos
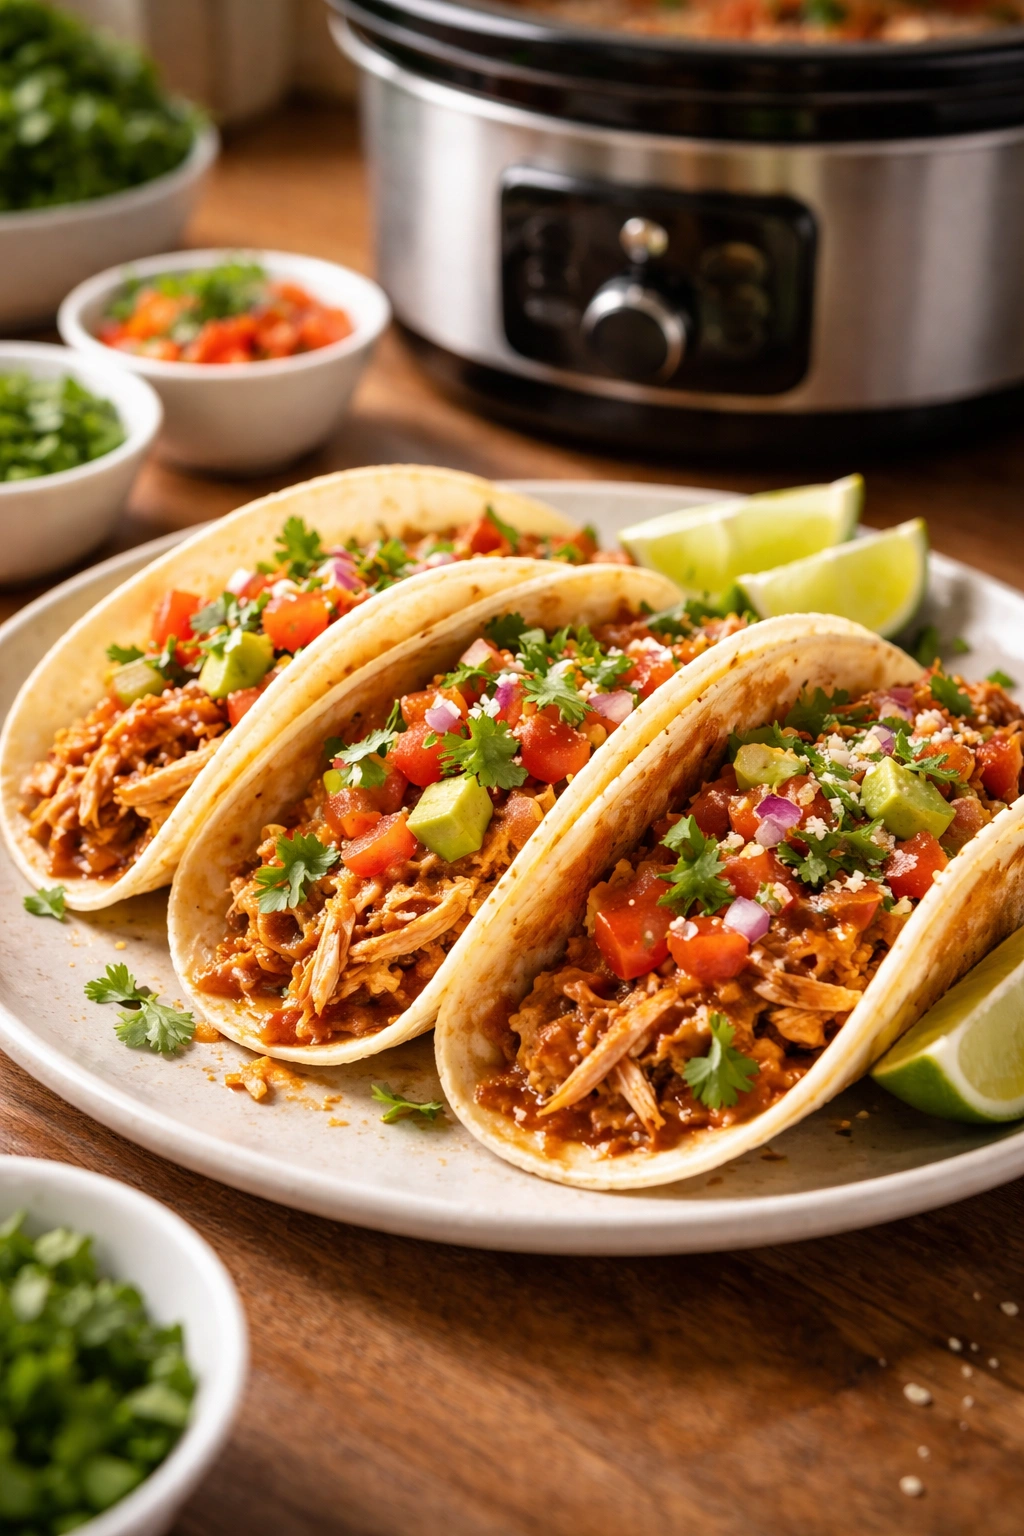
When you need dinner ready by the time you walk through the door, this is your recipe. Chicken breasts or thighs go into the slow cooker with salsa in the morning, and by evening you’ve got tender, shredded chicken that requires virtually no effort. It’s the definition of a weeknight lifesaver.
Yield: Serves 4 to 6 | Makes 12 to 16 tacos
Prep Time: 10 minutes
Cook Time: 4 to 6 hours on low, or 2 to 3 hours on high
Total Time: 4 to 6 hours (mostly hands-off)
Difficulty: Beginner — Drop ingredients in a slow cooker and walk away. There’s no skill required, just planning ahead.
Why Slow Cooker Chicken Works for Weeknights
Slow cookers are the ultimate weeknight secret weapon because they do all the work while you’re living your day. The long, gentle heat breaks down the chicken into silky shreds without drying it out. Salsa provides all the seasoning you need, so there’s zero complexity in the flavor department — just delicious, already-seasoned chicken ready to go into a taco.
Ingredients
For the Slow Cooker:
- 2 pounds boneless, skinless chicken breasts (or a mix of breasts and thighs)
- 2 cups fresh salsa (from the refrigerated section) or jarred salsa
- 1 packet (1 oz) low-sodium taco seasoning, or 2 tablespoons homemade taco seasoning
- 1 medium yellow onion, halved
- 1 lime, halved
- 1 teaspoon ground cumin
- Salt and pepper to taste
- Optional: 1 jalapeño, sliced, for heat
For Serving:
- 12 to 16 corn or flour tortillas
- Shredded Mexican cheese blend
- Shredded cabbage (white or napa)
- Diced avocado or guacamole
- Fresh cilantro, chopped
- Diced red onion
- Fresh lime wedges
- Sour cream
- Hot sauce
Step-by-Step Instructions
Prepare the Slow Cooker:
-
Place the chicken breasts in the slow cooker insert. If your breasts are particularly thick, you can pound them to a more even thickness so they cook at the same rate, but this isn’t essential.
Advertisements -
Pour the salsa over the chicken until it’s mostly covered. Add the taco seasoning and cumin, then add the onion halves and squeeze the lime juice over everything. Add the lime halves themselves to the cooker as well — they’ll infuse subtle flavor.
-
If using fresh jalapeños for extra heat, scatter them over the top. Season lightly with salt and pepper, though remember the salsa and seasoning packet already contain salt.
Cook on Low:
-
Cover the slow cooker and cook on low for 4 to 6 hours, depending on your cooker’s intensity. The chicken is done when it shreds easily with two forks and has no pink inside — an internal temperature of 165°F if you’re checking with a meat thermometer.
-
Alternatively, cook on high for 2 to 3 hours if you’re short on time.
Shred the Chicken:
-
Once cooked, carefully remove the chicken to a cutting board or the insert of the slow cooker itself. Using two forks, shred the chicken into bite-sized pieces directly in the cooking liquid. This keeps it moist and allows it to soak up the salsa flavor. Stir everything together gently.
-
The chicken can keep warm in the slow cooker on the warm setting (if your model has one) for up to 30 minutes before serving. Or transfer it to a serving bowl.
Assemble:
- Warm your tortillas using the same method as described in the ground beef taco recipe. Load each tortilla with shredded chicken and pile on your favorite toppings.
Pro Tips for Slow Cooker Chicken Tacos
Thighs vs. Breasts: If you want extra flavor and juiciness, use chicken thighs (bone-in, skin-on or boneless) instead of breasts. They’re more forgiving and less likely to dry out. Just increase your cooking time by 30 minutes if using bone-in thighs.
Salsa Quality Matters: Fresh salsa from the refrigerated section of the grocery store makes a noticeable difference compared to shelf-stable jarred versions. It has brighter, fresher flavor that translates directly to your tacos.
Don’t Skip the Lime: Squeezing fresh lime juice over the chicken before cooking adds brightness that cuts through the richness and prevents the flavor from feeling one-note.
Make It Spicier: If your family loves heat, use spicy salsa, add the jalapeños, and serve with a bottle of hot sauce on the side. Everyone can adjust their own heat level.
Storage and Make-Ahead
This recipe is the ultimate make-ahead dish. Prepare it in the morning, cook it all day, and dinner is ready when you need it. Leftover chicken keeps in the refrigerator for 3 to 4 days and is phenomenal in salads, nachos, quesadillas, and burrito bowls. You can also freeze the cooked chicken in its cooking liquid for up to 3 months.
3. Sheet Pan Fish Tacos with Cilantro Slaw
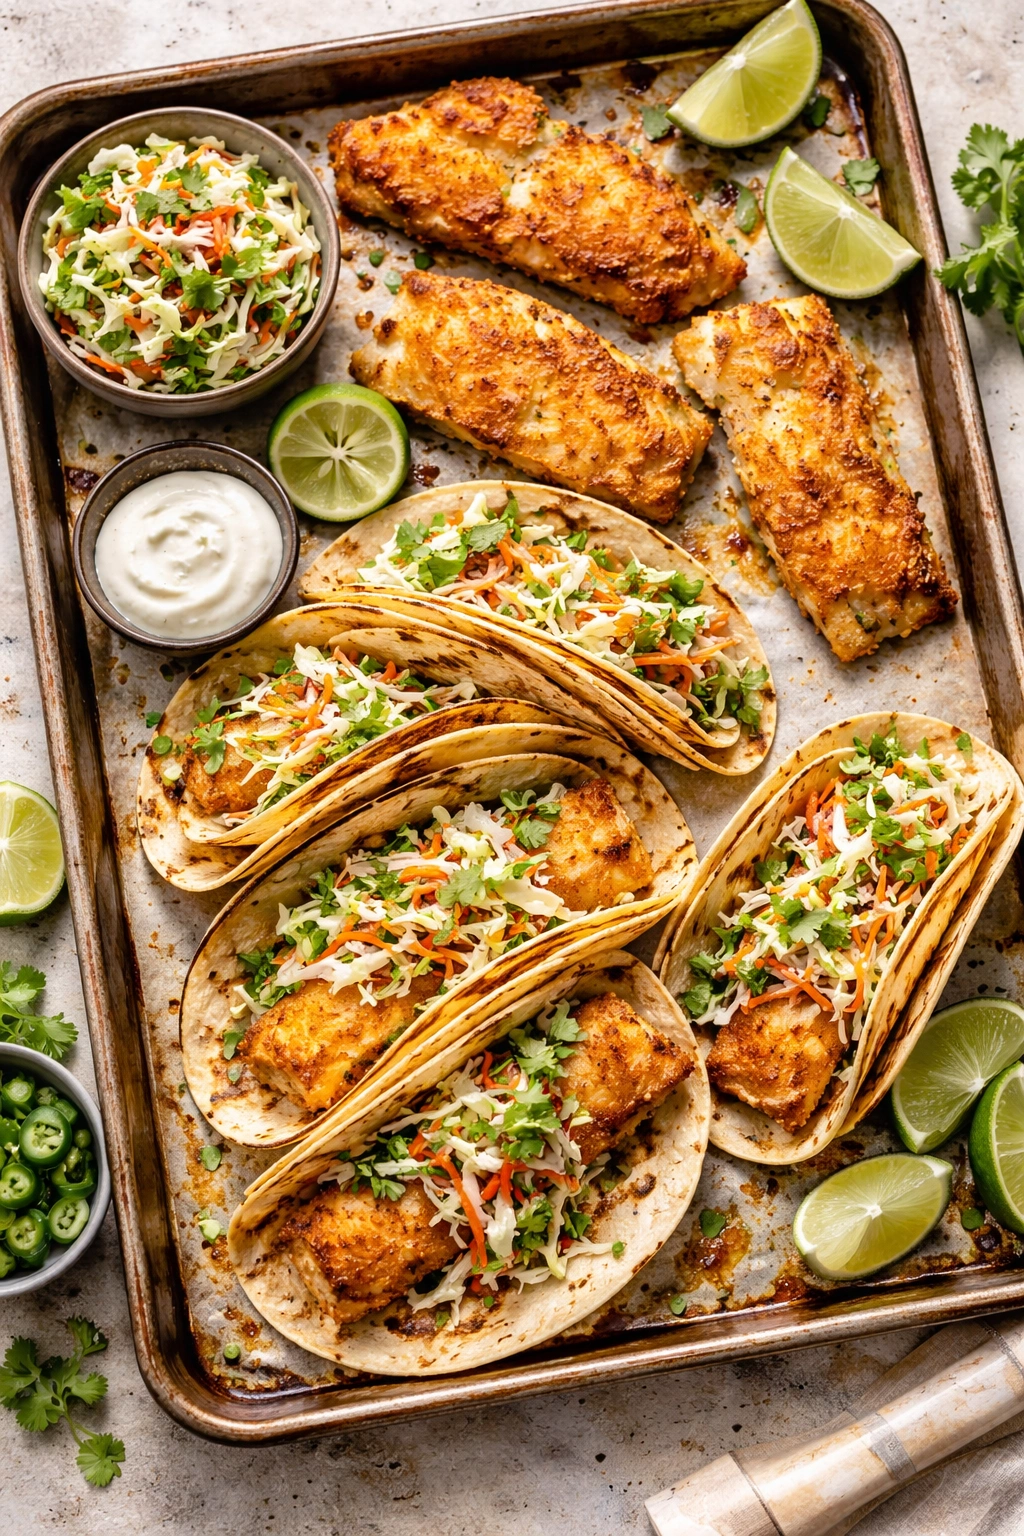
Fish tacos feel fancy and restaurant-quality, yet they come together in under 20 minutes. White fish like cod or tilapia cooks so quickly that the entire meal — from oven to table — happens in less time than it takes to order takeout. The bright, fresh flavors and satisfying crunch of the slaw make these feel like a treat, not a weeknight shortcut.
Yield: Serves 4 | Makes 8 tacos
Prep Time: 15 minutes
Cook Time: 12 minutes
Total Time: 27 minutes
Difficulty: Beginner — The only skill required is not overcooking the fish, and the oven does that for you automatically.
Why This Fish Taco Recipe Deserves Regular Rotation
Sheet pan dinners mean fewer dishes, which is already a major weeknight win. But these fish tacos also deliver restaurants-quality flavor — crispy on the outside, tender and flaky inside, with a bright, crunchy slaw that provides textural contrast. Cod and tilapia are mild, forgiving fish that take about 12 minutes at 400°F and come out perfectly cooked if you don’t overthink it.
Ingredients
For the Fish:
- 1 pound white fish fillets (cod, tilapia, or halibut)
- 2 tablespoons olive oil
- 2 teaspoons chili powder
- 1 teaspoon garlic powder
- 1 teaspoon paprika
- ½ teaspoon cumin
- ½ teaspoon salt
- ¼ teaspoon cayenne pepper (optional, for heat)
- Zest of 1 lime
- 1 tablespoon fresh lime juice
For the Cilantro Slaw:
- 3 cups thinly sliced green or napa cabbage
- ¼ cup fresh cilantro, finely chopped
- 2 tablespoons fresh lime juice
- 2 tablespoons olive oil
- ½ teaspoon salt
- ¼ teaspoon black pepper
For Serving:
- 8 corn tortillas, warmed
- Sliced avocado or guacamole
- Diced tomatoes or pico de gallo
- Crumbled cotija cheese or queso fresco
- Sour cream
- Hot sauce
- Lime wedges
Step-by-Step Instructions
Prepare the Fish:
-
Preheat your oven to 400°F. Line a sheet pan with parchment paper for easy cleanup.
-
Pat the fish fillets dry with paper towels — this is important because excess moisture prevents the fish from developing a slight golden crust. Moisture also means steam, and steam cooks the fish but doesn’t crisp it.
-
In a small bowl, combine the chili powder, garlic powder, paprika, cumin, salt, and cayenne pepper. Add the lime zest and stir until evenly combined.
-
Drizzle the fish fillets lightly with olive oil on both sides, then sprinkle the spice mixture evenly over the top of each fillet, pressing gently so it adheres. Arrange the fillets in a single layer on the prepared sheet pan, leaving a few inches between each fillet so air can circulate.
-
Roast in the preheated oven for 12 to 15 minutes, depending on the thickness of your fillets. The fish is done when it flakes easily with a fork and has turned opaque throughout. If you have an instant-read thermometer, aim for an internal temperature of 145°F.
Advertisements
Make the Slaw While the Fish Roasts:
-
In a medium bowl, combine the sliced cabbage and cilantro. In a separate small bowl, whisk together the lime juice, olive oil, salt, and black pepper to make a light dressing.
-
About 5 minutes before the fish is done, pour the dressing over the slaw and toss gently until everything is coated. Let it sit for a minute so the cabbage softens slightly. The slaw is best served at room temperature, though warm is fine too.
Assemble:
- Warm your corn tortillas in a dry skillet for about 20 seconds per side. Load each tortilla with a piece of fish, a generous handful of cilantro slaw, a slice of avocado, and a sprinkle of cotija cheese. Finish with a squeeze of fresh lime and serve immediately.
Pro Tips for Fish Tacos
Don’t Overcook: This is genuinely the only way to mess up fish tacos. Fish cooks so fast that a minute or two over is the difference between tender and dry. Set a timer and check early.
Dry Your Fish: Moisture on the surface prevents browning and crisping. Pat it completely dry before seasoning.
Napa Cabbage vs. Green Cabbage: Napa cabbage is slightly sweeter and more delicate; green cabbage is peppery and crisp. Both work beautifully. Use whichever you prefer or have on hand.
Swap the Fish: Any mild white fish works here — halibut, flounder, sole, or even frozen cod. Thicker fillets may need an extra few minutes; thinner fillets may need one less.
Storage and Make-Ahead
The spiced fish is best eaten immediately while warm, though leftovers can be served cold in a taco salad the next day. The cilantro slaw keeps in the refrigerator for up to 2 days, though it’s best served within a few hours of dressing. You can prep the cabbage and cilantro the night before and make the dressing right before serving.
4. Instant Pot Carnitas Tacos
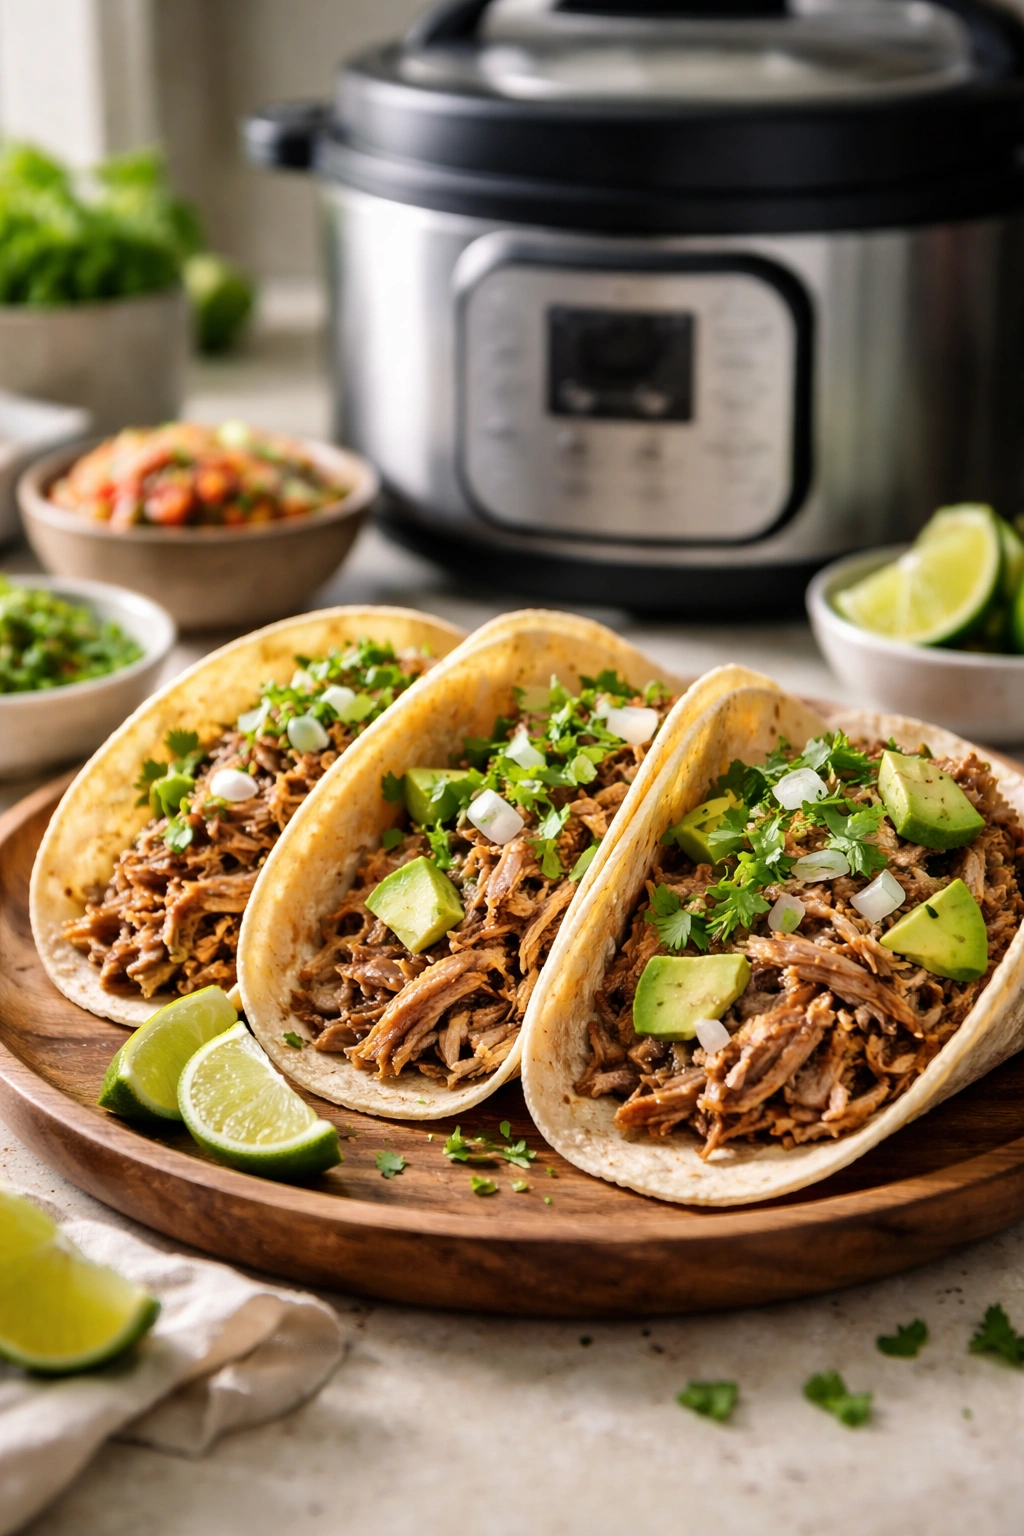
Carnitas are shredded pork cooked low and slow until falling-apart tender, traditionally a labor-intensive dish that simmers for hours. The Instant Pot collapses that cooking time to 45 minutes, delivering the exact same melt-in-your-mouth texture and deep, savory flavor. These are the kind of tacos that make people think you spent all afternoon in the kitchen.
Yield: Serves 6 | Makes 18 tacos
Prep Time: 15 minutes
Cook Time: 45 minutes (including pressure build and release)
Total Time: 1 hour
Difficulty: Intermediate — You need an Instant Pot, but the process is straightforward. This is very doable for anyone comfortable with a pressure cooker.
Why Carnitas Are Worth the Instant Pot
Carnitas literally means “little meats” in Spanish and refers to pork that’s cooked in its own fat until so tender it practically melts. The Instant Pot achieves what would normally take 3 to 4 hours in about 45 minutes, making this fancy restaurant dish completely feasible for a weeknight. The pork shreds so easily you barely need to touch it.
Ingredients
For the Carnitas:
- 3 pounds boneless pork shoulder, cut into 2-inch chunks
- 1 tablespoon salt
- 1 teaspoon black pepper
- 1 teaspoon dried oregano
- ½ teaspoon ground cumin
- ¼ teaspoon cayenne pepper
- 1 medium yellow onion, quartered
- 4 garlic cloves, minced
- Zest of 1 orange
- ½ cup fresh orange juice or lime juice
- ½ cup water
- 2 bay leaves
- 1 tablespoon olive oil (for searing)
For Serving:
- 18 small corn tortillas, warmed
- Diced white onion
- Fresh cilantro, chopped
- Sliced radishes
- Lime wedges
- Hot sauce
- Pickled onions, optional
Step-by-Step Instructions
Sear the Pork:
-
Turn your Instant Pot to the sauté function and let it heat for about 2 minutes. While it’s heating, pat the pork chunks dry with paper towels and season them with salt, pepper, oregano, cumin, and cayenne.
Advertisements -
Add the olive oil to the pot and let it heat until shimmering. Working in batches so you don’t overcrowd the pot, sear the pork pieces for about 2 minutes on each side until they develop a golden-brown crust. This step isn’t absolutely essential, but it adds depth of flavor. If you’re extremely short on time, you can skip it and move straight to the next step.
-
Return all the pork to the pot and add the onion quarters, garlic, orange zest, orange juice, water, and bay leaves. Stir everything together.
Pressure Cook:
-
Close the lid and set the valve to sealing. Cook on high pressure for 30 minutes.
-
When the timer goes off, carefully turn the valve to venting to release the pressure quickly. Open the lid and check that the pork is incredibly tender and shreds easily with two forks. It should fall apart with minimal effort.
Shred and Finish:
-
Remove the pork from the cooking liquid using a slotted spoon and place it on a large cutting board or in a bowl. Using two forks, shred the pork into bite-sized pieces. Discard the bay leaves and large pieces of onion.
-
If you want crispy, caramelized edges on your carnitas (which is traditional and delicious), turn the Instant Pot back to the sauté function and return the shredded pork to the pot. Let it cook uncovered for about 5 to 10 minutes, stirring occasionally, until some of the meat edges get crispy and golden. This step is optional but transforms the texture.
Assemble:
- Serve the carnitas warm in small corn tortillas with your choice of toppings. The traditional assembly is just white onion, cilantro, and lime, which lets the richness of the pork shine through.
Pro Tips for Perfect Carnitas
Pork Shoulder is Key: This cut has enough marbling and connective tissue to become incredibly tender under pressure. Don’t try this with a leaner cut.
Skip the Searing If You’re Rushed: The searing adds flavor, but if you’re in a time crunch, pressure cooking alone will still produce tender, delicious carnitas.
Don’t Waste the Cooking Liquid: Save it. It’s packed with flavor and freezes beautifully. Use it as a base for soup, or reheat carnitas in it the next day to keep them moist.
Make Ahead and Reheat: Carnitas are one of the easiest dishes to make ahead. Store them in the refrigerator with their cooking liquid for up to 5 days, or freeze for up to 3 months. Reheat gently on the stovetop or in the microwave, adding a splash of liquid to prevent drying out.
Storage and Make-Ahead
This is genuinely the ultimate make-ahead dish. You can prepare it on the weekend and use it for tacos, quesadillas, nachos, and taco salads throughout the week. The longer it sits in its cooking liquid, the more flavorful it becomes.
5. Ground Turkey Tacos with Homemade Spice Blend
Ground turkey is leaner, more affordable, and often overlooked for tacos. But when you season it properly with a fresh spice blend and use enough liquid to keep it moist, it’s every bit as delicious as ground beef — and slightly lighter on your stomach. This recipe makes turkey the star, not a begrudging substitute.
Yield: Serves 4 | Makes 10 to 12 tacos
Prep Time: 10 minutes
Cook Time: 15 minutes
Total Time: 25 minutes
Difficulty: Beginner — This is as easy as the beef version, just with a leaner meat that needs a touch more care to avoid drying out.
Why Ground Turkey Works for Weeknight Tacos
Turkey is often cheaper than beef at the grocery store, making this a budget-friendly option without sacrificing flavor. The key to perfect ground turkey tacos is using enough liquid and not overcooking it. Turkey lacks the fat content of beef, so it dries out faster if you cook it too aggressively.
Ingredients
For the Taco Meat:
- 1.5 pounds ground turkey (93% lean or leaner)
- 1 tablespoon olive oil
- 1 medium yellow onion, finely diced
- 3 garlic cloves, minced
- 2 teaspoons chili powder
- 1 teaspoon ground cumin
- ½ teaspoon garlic powder
- ½ teaspoon dried oregano
- ¼ teaspoon onion powder
- ¼ teaspoon salt
- ⅛ teaspoon black pepper
- ⅛ teaspoon cayenne pepper (optional)
- ½ cup tomato sauce
- ¾ cup water
- 2 teaspoons apple cider vinegar
For Serving:
- 10 to 12 corn or flour tortillas
- Shredded Monterey Jack or cheddar cheese
- Shredded lettuce
- Diced tomatoes
- Diced red onion
- Sliced jalapeños
- Sour cream
- Guacamole or sliced avocado
- Fresh cilantro
- Lime wedges
Step-by-Step Instructions
Cook the Aromatics:
-
Heat olive oil in a large skillet over medium heat. Add the diced onion and cook for about 3 minutes, stirring occasionally, until it becomes soft and fragrant.
-
Add the minced garlic and cook for about 30 seconds more until the garlic releases its aroma.
-
Add all your dry spices — chili powder, cumin, garlic powder, oregano, onion powder, salt, black pepper, and cayenne — and stir constantly for about 1 minute until the spices bloom and smell warm and toasted.
Brown the Turkey:
-
Add the ground turkey to the skillet, breaking it apart with a wooden spoon as it cooks. Stir frequently, breaking the turkey into small pieces. Cook for about 5 to 7 minutes until the turkey is no longer pink and has browned slightly on the edges.
-
Because turkey is so lean, you likely won’t have fat to drain. If there is any excess liquid, tilt the pan slightly and blot with a paper towel, but don’t overdo it — you need enough fat to keep the meat moist.
Advertisements
Build the Sauce:
-
Add the tomato sauce, water, and apple cider vinegar. Stir everything together thoroughly, scraping up any browned bits from the bottom of the pan. These bits are flavorful and should be incorporated into the sauce.
-
Bring the mixture to a gentle simmer over medium heat, then reduce the heat to medium-low. Let it simmer gently for about 8 to 10 minutes, stirring occasionally. The liquid should reduce so that the turkey is coated in a light sauce, not swimming in liquid.
-
Taste and adjust the salt and spices. Turkey is more delicate than beef, so taste before you add extra salt — you may find you want less.
Assemble:
- Warm your tortillas and set up your taco bar. Turkey tacos benefit from generous toppings since the meat itself is lean and benefits from the richness of cheese, sour cream, and guacamole.
Pro Tips for Ground Turkey Tacos
Don’t Overcook: Turkey dries out faster than beef. Aim for that simmering time of 8 to 10 minutes — no longer. If the meat starts looking dry during simmering, add a few more tablespoons of water.
Use the Fattier Poultry: If your market carries ground turkey thighs, use that instead of ground turkey breast. It’s significantly more flavorful and forgiving because it has more fat. Your tacos will be noticeably better.
Add More Acid: The apple cider vinegar is important here because it adds brightness that cuts through the richness of the cheese and sour cream toppings. Don’t skip it.
Load Up on Toppings: Unlike beef tacos, which can stand up to minimal toppings, turkey tacos shine with generous amounts of cheese, avocado, and sour cream. Use these rich toppings to complement the leaner meat.
Storage and Make-Ahead
Cooked ground turkey keeps in an airtight container in the refrigerator for 3 to 4 days. It freezes well for up to 3 months. Thaw in the refrigerator and reheat gently on the stovetop with a splash of water.
6. Easy Skillet Shrimp Tacos with Lime and Garlic
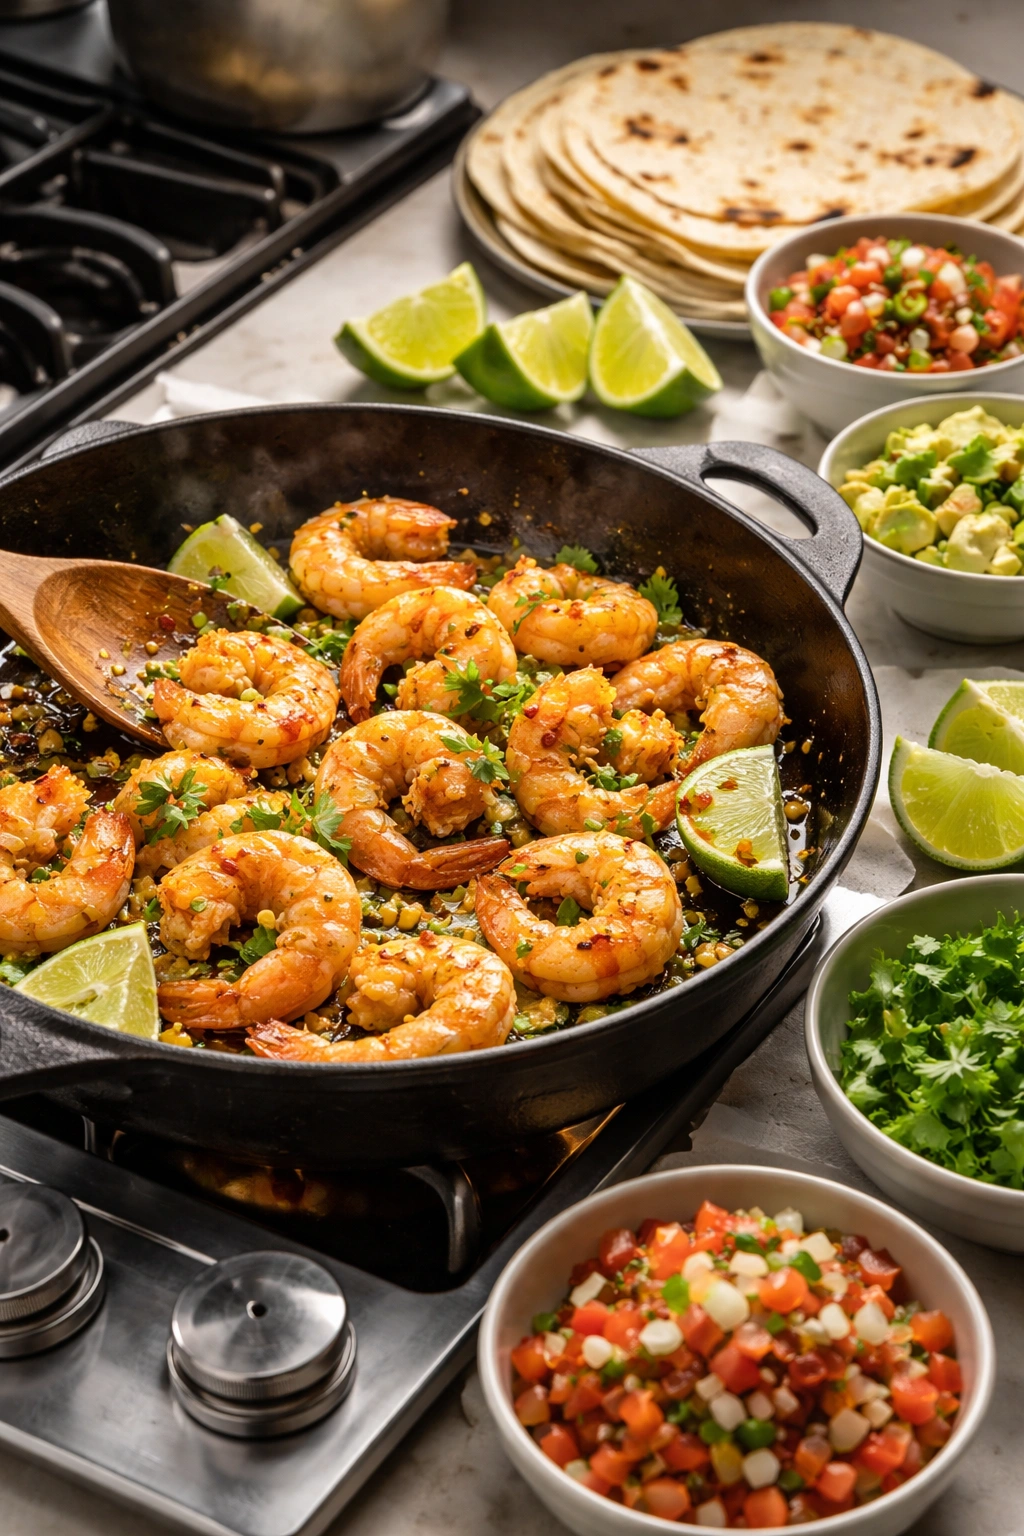
Shrimp is the fastest protein you can cook — it goes from raw to done in about 3 minutes. These tacos are shrimp at its simplest: seared in a skillet with garlic and lime, then tucked into tortillas with crisp toppings. The entire dinner from start to finish takes less than 20 minutes, and it tastes like you put in serious effort.
Yield: Serves 4 | Makes 12 tacos
Prep Time: 15 minutes (mostly prep, minimal cooking)
Cook Time: 8 minutes
Total Time: 23 minutes
Difficulty: Beginner — The only potential pitfall is overcooking the shrimp, but the window for that is generous if you pay attention.
Why Shrimp Tacos Belong in Your Weeknight Rotation
Shrimp is expensive enough to feel special, but cooks so fast that it’s genuinely easier than beef or chicken. It needs minimal seasoning because shrimp’s natural sweetness shines with just garlic, lime, and a pinch of salt. The tacos come together so quickly that you can make them on a truly hectic night and still have dinner on the table before anyone gets cranky.
Ingredients
For the Shrimp:
- 1.5 pounds large shrimp (16-20 count), peeled and deveined
- 3 tablespoons olive oil, divided
- 6 garlic cloves, minced
- 1 teaspoon chili powder
- ½ teaspoon ground cumin
- ¼ teaspoon salt
- ⅛ teaspoon black pepper
- Zest of 2 limes
- 3 tablespoons fresh lime juice
- ½ teaspoon red pepper flakes, optional
For Serving:
- 12 corn or flour tortillas, warmed
- Shredded cabbage (white or napa)
- Diced tomatoes
- Sliced avocado
- Fresh cilantro, chopped
- Diced red onion
- Crumbled cotija or feta cheese
- Lime wedges
- Hot sauce
Step-by-Step Instructions
Prepare the Shrimp:
-
Make sure your shrimp is completely dry. Pat each piece with paper towels if needed — any moisture will prevent proper searing and steam the shrimp instead of cooking it beautifully.
-
In a small bowl, combine the chili powder, cumin, salt, black pepper, and red pepper flakes if using. Set aside.
Sear the Shrimp:
-
Heat 1.5 tablespoons of olive oil in a large skillet over medium-high heat. Let it heat until it shimmers and just begins to smoke slightly.
-
Add the minced garlic to the oil and cook for about 20 seconds, stirring constantly, until fragrant. Don’t let the garlic brown or it will taste bitter.
-
Add the shrimp in a single layer to the skillet. Don’t stir them for at least 1 minute — let them sear on one side and develop a slight golden crust.
-
Sprinkle the spice blend over the shrimp, then flip each piece and cook for another 1 to 2 minutes until the shrimp is pink and opaque throughout. Shrimp is done as soon as it turns pink and loses its translucent appearance — this typically happens around 3 minutes total, 1.5 minutes per side.
Finish with Lime:
- Remove the skillet from heat. Drizzle the lime juice over the cooked shrimp, add the remaining 1.5 tablespoons olive oil, and toss gently. The lime juice and oil will create a bright, simple sauce that coats the shrimp.
Assemble:
- Warm your tortillas in a dry skillet for about 20 seconds per side. Load each tortilla with several shrimp pieces, a generous handful of shredded cabbage, diced tomato, avocado, and cilantro. Finish with a squeeze of fresh lime and serve immediately.
Pro Tips for Perfect Shrimp Tacos
Don’t Overcook: Shrimp goes from perfectly done to rubbery in about 30 seconds. Once they turn pink and opaque, they’re done. Remove them from the heat.
Use Dry Shrimp: Moisture is the enemy of good searing. Thaw shrimp completely and pat thoroughly dry before cooking.
Size Matters: Large shrimp (16-20 count) are easier to eat in tacos and less likely to be overcooked. Smaller shrimp cook even faster and can become tough.
Build a Proper Cabbage Slaw: Raw shredded cabbage provides essential crunch and freshness that balances the richness of the shrimp. Don’t skip it.
Storage and Make-Ahead
Cooked shrimp is best eaten immediately. You can prepare and cook the shrimp up to a few hours ahead and keep it in the refrigerator, then reheat very gently (just a minute or so in the skillet). Don’t refrigerate it longer than this or it will become tough.
7. Crockpot Black Bean and Veggie Tacos
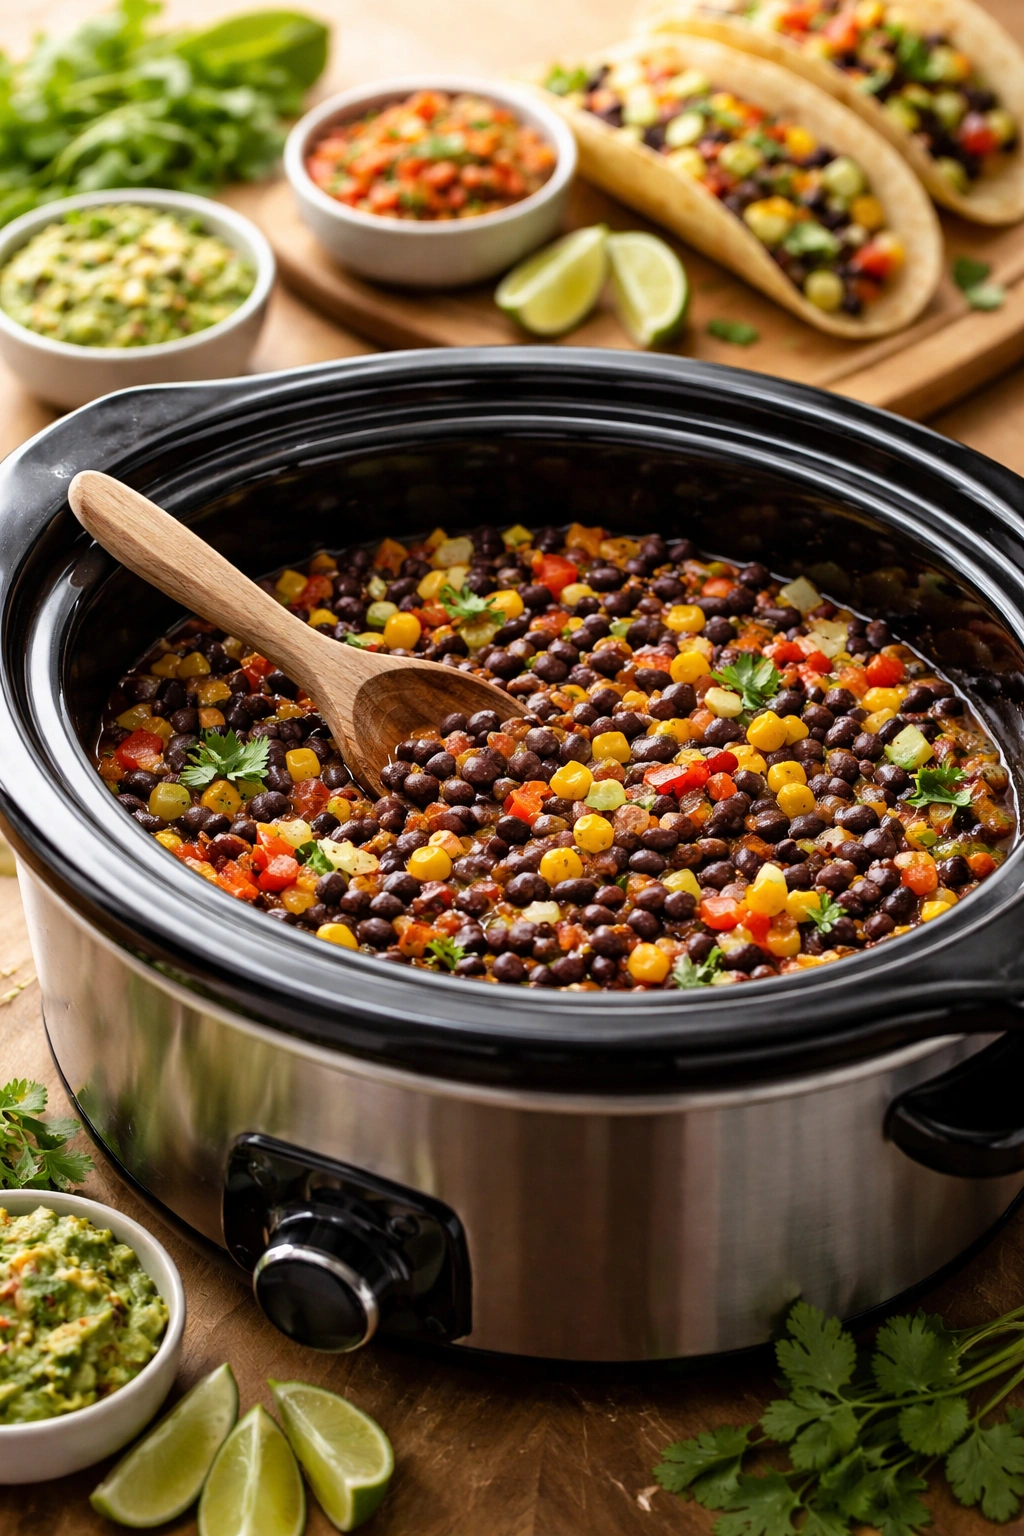
Not every taco night needs to center on meat. These vegetarian tacos are hearty, satisfying, and proof that plant-based doesn’t mean boring. Black beans provide substantial protein and fiber, while sautéed peppers and onions add caramelized sweetness. Slow cooking all of this together creates deep, developed flavors that taste far better than the sum of individual parts.
Yield: Serves 4 to 5 | Makes 12 to 16 tacos
Prep Time: 15 minutes
Cook Time: 4 hours on low, or 2 hours on high
Total Time: 4 to 4.5 hours (mostly hands-off)
Difficulty: Beginner — This is genuinely easier than making meat tacos. Chop, dump, and let the slow cooker work.
Why These Vegetarian Tacos Win Over Everyone
These tacos aren’t a compromise version of real tacos — they’re genuinely delicious in their own right. The combination of black beans, sautéed peppers, and warming spices creates tacos that satisfy vegetarians and meat-eaters alike. Slow cooking allows all the spices to bloom and the vegetables to develop deep caramelized edges.
Ingredients
For the Slow Cooker:
- 2 cans (15 ounces each) black beans, drained and rinsed
- 2 medium bell peppers, diced (red, orange, or yellow work beautifully)
- 1 large red onion, diced
- 3 garlic cloves, minced
- 1 can (14.5 ounces) diced tomatoes with green chiles (Rotel brand is traditional)
- 2 tablespoons tomato paste
- 1 tablespoon chili powder
- 1 teaspoon ground cumin
- 1 teaspoon dried oregano
- ½ teaspoon paprika
- ½ teaspoon salt
- ¼ teaspoon black pepper
- ¼ teaspoon cayenne pepper, optional
- 2 tablespoons olive oil
- 1 cup vegetable broth or water
- 2 tablespoons lime juice
- 1 tablespoon balsamic vinegar
For Serving:
- 12 to 16 corn or flour tortillas, warmed
- Shredded cheddar or Mexican cheese blend
- Shredded lettuce or cabbage
- Diced tomatoes
- Sliced avocado or guacamole
- Sour cream
- Diced red onion
- Fresh cilantro, chopped
- Lime wedges
- Pickled onions, optional
Step-by-Step Instructions
Sauté the Aromatics:
-
Heat olive oil in a large skillet over medium-high heat. Add the diced bell peppers and red onion, and cook for about 5 to 7 minutes, stirring occasionally, until the vegetables begin to soften and the onion starts to turn translucent.
-
Add the minced garlic and cook for about 30 seconds until fragrant. Then add the tomato paste and stir constantly for about 1 minute, allowing the paste to caramelize slightly.
-
Add the chili powder, cumin, oregano, paprika, salt, black pepper, and cayenne if using, and stir for about 1 minute until the spices bloom and release their aroma.
Add to Slow Cooker:
-
Transfer the cooked vegetables and spices to your slow cooker. Add the black beans, diced tomatoes with green chiles, vegetable broth, lime juice, and balsamic vinegar. Stir everything together thoroughly.
-
Cover and cook on low for 4 hours, or on high for 2 hours. The mixture should be warm, fragrant, and the flavors should have melded together beautifully.
Advertisements -
Taste and adjust the salt and spices. Add more lime juice if you want extra brightness, or more chili powder if you want more heat.
Assemble:
- Warm your tortillas and set up your taco bar with all your favorite toppings. These tacos are excellent with generous amounts of avocado, cheese, and sour cream.
Pro Tips for Vegetarian Tacos
Don’t Skip the Sauté Step: Sautéing the vegetables before adding them to the slow cooker develops caramelized edges and depth of flavor that you can’t get by dumping raw vegetables directly in the cooker. This single step transforms these tacos.
Make Them Spicier: If your family loves heat, increase the chili powder to 1.5 tablespoons, use the full amount of cayenne, and serve with hot sauce on the side.
Add Texture: Because there’s no meat, toppings that add texture — shredded cabbage, avocado, crispy cheese — become even more important. Don’t skip them.
Use Good Beans: If you have time, cook dried black beans from scratch. They have better texture than canned. But canned beans absolutely work and make this an easy weeknight meal.
Storage and Make-Ahead
This filling keeps in the refrigerator for 4 to 5 days, making it excellent for meal prep. You can also freeze it for up to 3 months. Reheat gently on the stovetop or in the microwave, adding a splash of water or broth if it’s too thick.
8. Buffalo Chicken Tacos with Blue Cheese Slaw

Buffalo sauce is tangy, spicy, and dangerously addictive — which makes it perfect for tacos. Rotisserie chicken shredded and tossed in buffalo sauce comes together in literally five minutes, then pairs with cool blue cheese slaw for a taco that tastes indulgent but comes together faster than you’d think possible. These are the tacos you make when you’re running behind schedule but still want something that tastes special.
Yield: Serves 4 | Makes 10 to 12 tacos
Prep Time: 15 minutes
Cook Time: 5 minutes
Total Time: 20 minutes
Difficulty: Beginner — This is as straightforward as tacos get. Buy a rotisserie chicken, shred it, mix with sauce, and serve.
Why Buffalo Chicken Tacos Are a Game-Changer
Rotisserie chicken is legitimately one of the best shortcuts available to home cooks. It’s already cooked, seasoned, and shredded — all you do is tear it apart and toss it with sauce. The blue cheese slaw provides cooling contrast to the spicy buffalo sauce, creating a perfect balance that makes these tacos feel sophisticated despite the minimal effort.
Ingredients
For the Buffalo Chicken:
- 1 store-bought rotisserie chicken
- ¾ cup buffalo sauce (Frank’s RedHot is traditional)
- 2 tablespoons butter
- 2 tablespoons blue cheese crumbles, optional but delicious
- ½ teaspoon Worcestershire sauce
- ¼ teaspoon garlic powder
For the Blue Cheese Slaw:
- 3 cups shredded green cabbage
- ⅓ cup crumbled blue cheese
- ¼ cup Greek yogurt or sour cream
- 2 tablespoons mayonnaise
- 1 tablespoon white vinegar
- ½ teaspoon salt
- ¼ teaspoon black pepper
- ⅛ teaspoon cayenne pepper, optional
For Serving:
- 10 to 12 corn or flour tortillas, warmed
- Sliced red onion
- Sliced celery, optional but traditional
- Diced tomatoes
- Lime wedges
- Extra buffalo sauce for drizzling
- Ranch dressing, optional
Step-by-Step Instructions
Make the Blue Cheese Slaw:
-
In a large bowl, combine the shredded cabbage and crumbled blue cheese.
-
In a smaller bowl, whisk together the Greek yogurt or sour cream, mayonnaise, white vinegar, salt, black pepper, and cayenne if using.
Advertisements -
Pour the dressing over the cabbage and blue cheese, and toss everything together until evenly coated. Set aside. The slaw can be made up to a few hours ahead and tastes better after it sits for a bit.
Prepare the Chicken:
-
Remove the meat from the rotisserie chicken by tearing it apart with your fingers or using two forks. You should have about 3 cups of shredded chicken. Discard the skin and bones.
-
In a large skillet over medium heat, melt the butter and add the buffalo sauce, Worcestershire sauce, and garlic powder. Stir until combined and heated through, about 1 minute.
-
Add the shredded chicken to the sauce and toss gently until every piece is coated with the buffalo sauce. Cook for about 2 to 3 minutes until the chicken is heated through and absorbs some of the sauce. If using blue cheese crumbles, fold them in gently at the very end.
Assemble:
-
Warm your tortillas in a dry skillet or directly over a gas flame for about 20 seconds per side.
-
Load each tortilla with buffalo chicken, a generous handful of blue cheese slaw, sliced red onion, and a squeeze of lime. Serve with extra buffalo sauce on the side and ranch dressing if desired.
Pro Tips for Buffalo Chicken Tacos
Use Good Buffalo Sauce: Frank’s RedHot is the classic choice for a reason. It has tang, heat, and a flavor that translates beautifully to tacos. Don’t use generic hot sauce as a substitute.
Don’t Skip the Blue Cheese Slaw: The cool, creamy slaw isn’t just a topping — it’s essential to balancing the spicy, tangy sauce. It mellows the heat and provides texture contrast.
Make the Slaw Ahead: The blue cheese slaw actually tastes better if it sits for 30 minutes to an hour, allowing the flavors to marry. Make it while you’re at work and finish assembly at home.
Add Celery: Thin slices of crisp celery are traditional with buffalo dishes and add a wonderful fresh crunch. Include them if you have them.
Storage and Make-Ahead
Buffalo chicken keeps in an airtight container in the refrigerator for 3 to 4 days. The blue cheese slaw keeps for about 3 days. Both reheat beautifully. You can make the slaw the night before and the chicken an hour or two before serving.
9. Copycat Chipotle Chicken Tacos
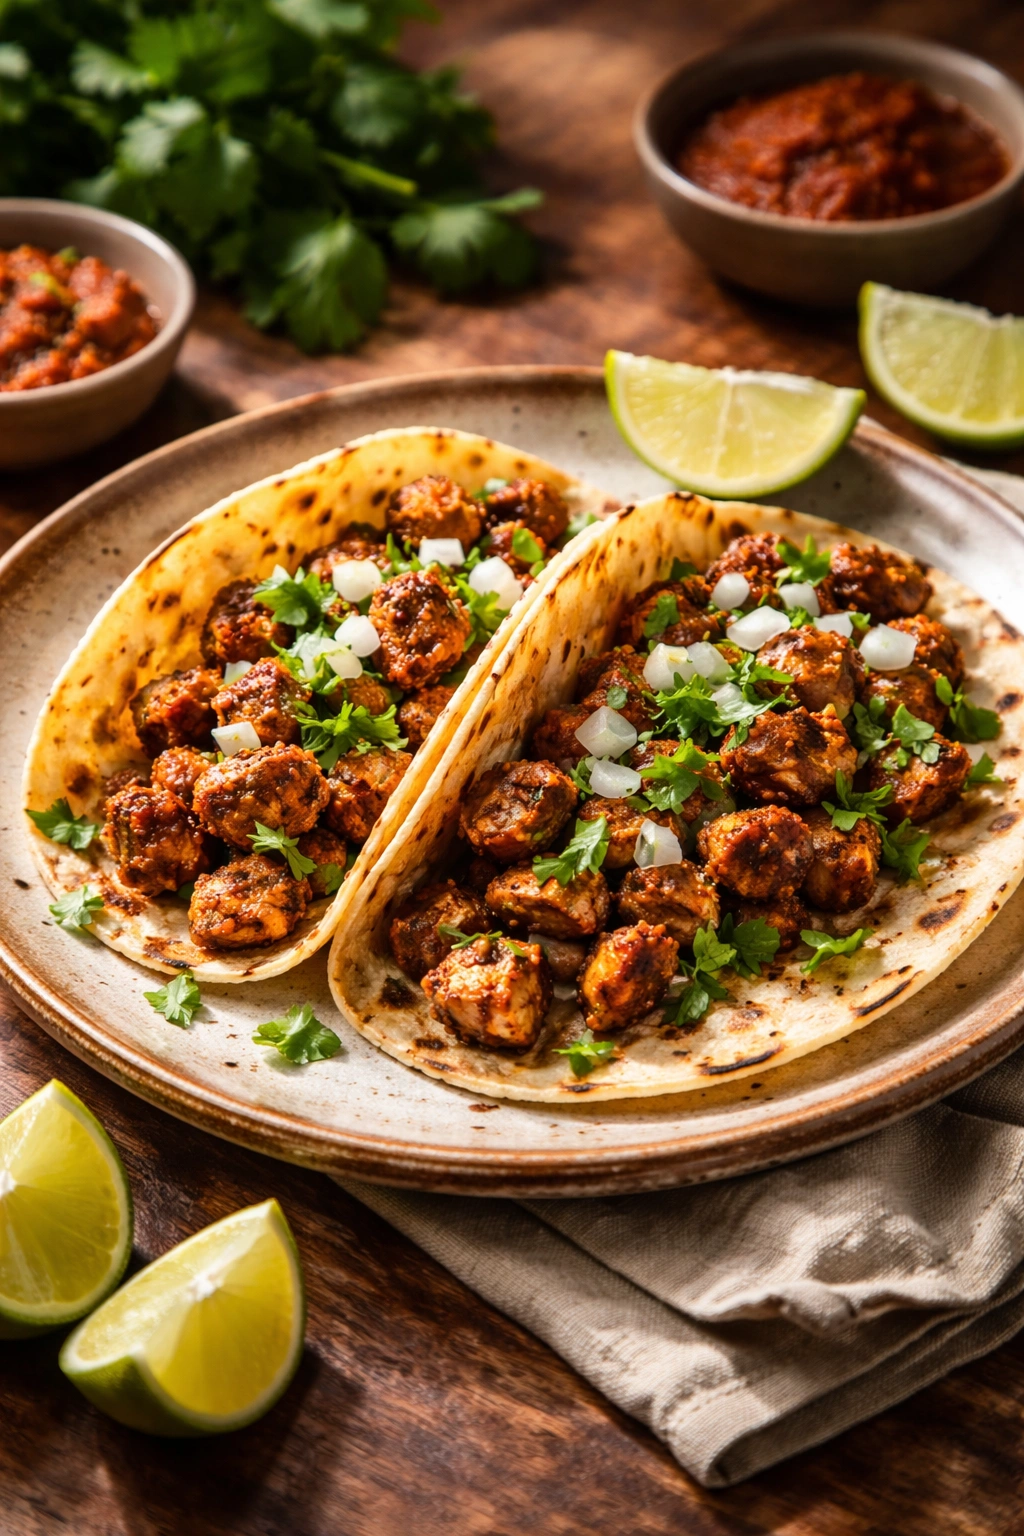
Chipotle’s chicken has a signature smoky, charred flavor that tastes like it’s been grilled over an open flame. You can replicate it at home in a skillet with a combination of spices that create that unmistakable depth. The chicken is juicy, well-seasoned, and tastes delicious in tacos or over rice for a burrito bowl.
Yield: Serves 4 to 5 | Makes 12 to 16 tacos
Prep Time: 10 minutes
Cook Time: 20 minutes
Total Time: 30 minutes
Difficulty: Beginner — Standard skillet cooking with no special techniques required.
Why This Copycat Works So Well
The secret to restaurant-quality chicken is combining both paprika and smoked paprika with complementary spices. The paprika provides color and gentle pepper flavor, while the smoked paprika adds that essential smoky depth. Lime juice and vinegar brighten everything at the end. The result tastes shockingly close to the real thing without any special equipment.
Ingredients
For the Chicken:
- 2 pounds boneless, skinless chicken breasts
- 2 tablespoons olive oil
- 1 medium yellow onion, diced
- 4 garlic cloves, minced
- 1 tablespoon paprika
- 2 teaspoons smoked paprika
- 2 teaspoons ground cumin
- 1 teaspoon dried oregano
- 1 teaspoon salt
- ½ teaspoon black pepper
- ¼ teaspoon cayenne pepper
- ¼ teaspoon ground cloves (this is the secret ingredient)
- 2 tablespoons tomato paste
- ½ cup chicken broth
- 3 tablespoons fresh lime juice
- 1 tablespoon white vinegar
For Serving:
- 12 to 16 corn or flour tortillas, warmed
- Shredded Mexican cheese blend
- Shredded lettuce or cabbage
- Diced tomatoes or pico de gallo
- Diced red onion
- Sliced avocado
- Fresh cilantro, chopped
- Lime wedges
- Sour cream
Step-by-Step Instructions
Prepare the Chicken:
- If your chicken breasts are particularly thick, pound them to a more even ½-inch thickness so they cook evenly. This step isn’t essential but helps ensure even cooking.
Start the Aromatics:
-
Heat olive oil in a large skillet over medium-high heat. Add the diced onion and cook for about 4 minutes, stirring occasionally, until the onion becomes soft and starts to turn golden at the edges.
-
Add the minced garlic and cook for about 30 seconds until fragrant, then add the tomato paste and stir constantly for about 1 minute, allowing the paste to caramelize slightly against the skillet.
Bloom the Spices:
- Add the paprika, smoked paprika, cumin, oregano, salt, black pepper, cayenne, and ground cloves. Stir constantly for about 1 minute until the spices release their oils and smell warm and fragrant.
Cook the Chicken:
-
Add the chicken breasts to the skillet in a single layer, nestling them into the spiced onion mixture. Don’t move them for about 3 to 4 minutes to allow them to develop a golden crust on the bottom.
-
Flip the chicken and cook for another 3 to 4 minutes on the second side. The chicken should be mostly cooked through at this point, though it doesn’t need to be completely done yet.
Advertisements -
Pour in the chicken broth, lime juice, and vinegar. Bring the mixture to a simmer, then reduce heat to medium-low. Let it simmer for about 5 to 7 minutes until the liquid has reduced by about half and the chicken is completely cooked through (an internal temperature of 165°F).
-
Remove the chicken from the skillet and place it on a cutting board. Using two forks or a pair of forks, shred the chicken into bite-sized pieces. Return the shredded chicken to the skillet and let it simmer in the sauce for another minute, coating it completely.
Assemble:
- Warm your tortillas and load each one with shredded chipotle chicken, cheese, lettuce, tomato, avocado, cilantro, and a squeeze of lime. Serve with sour cream and extra lime wedges on the side.
Pro Tips for Copycat Chipotle Chicken
Ground Cloves is Non-Negotiable: It sounds unusual, but this tiny amount of ground cloves is what separates this from a basic seasoned chicken. It adds warmth and depth that replicates the Chipotle flavor profile.
Use Smoked Paprika: Regular paprika won’t give you that smoky flavor. Smoked paprika is essential here.
Don’t Overcook: Chicken breasts dry out quickly if overcooked. Aim for 165°F internal temperature and no further. The residual heat will continue cooking the chicken slightly after you remove it from heat.
Shred While Warm: Shredding warm chicken is much easier than shredding cold chicken. Do this right after cooking.
Storage and Make-Ahead
Cooked chipotle chicken keeps in an airtight container in the refrigerator for 3 to 4 days. It’s excellent for meal prep — you can use it in burrito bowls, taco salads, nachos, and quesadillas throughout the week. It freezes beautifully for up to 3 months. Reheat gently on the stovetop or in the microwave with a splash of broth to prevent drying out.
10. Baked Crispy Taco Shells with Seasoned Beef

There’s something deeply satisfying about a taco you can hold without it falling apart, with meat that stays in the shell instead of spilling everywhere. Baking taco shells in the oven with cheese creates a crispy, golden shell that stands upright on its own. The beef inside is perfectly seasoned, and everything comes together so efficiently that this feels more like assembly than cooking.
Yield: Serves 4 to 5 | Makes 12 to 14 baked tacos
Prep Time: 15 minutes
Cook Time: 12 minutes
Total Time: 27 minutes
Difficulty: Beginner — This is literally just assembling tacos on a baking sheet and letting the oven do the work.
Why Baked Tacos Are Different
Baking tacos in the oven means everyone’s tacos finish at exactly the same time — no one eats cold tacos while you’re still assembling. The cheese gets melted and crispy, the shells get slightly crispy, and the whole thing comes together as an integrated taco rather than meat loosely held in a shell. It’s a small change that makes a huge difference to the eating experience.
Ingredients
For the Beef:
- 1.5 pounds ground beef
- 1 medium yellow onion, finely diced
- 3 garlic cloves, minced
- 2 teaspoons chili powder
- 1 teaspoon ground cumin
- ½ teaspoon garlic powder
- ½ teaspoon salt
- ¼ teaspoon black pepper
- ½ cup tomato sauce
- ½ cup water
- 1 tablespoon lime juice
For Assembling:
- 14 small hard taco shells (the kind that stand upright)
- 2 cups shredded cheddar or Mexican cheese blend
- Shredded lettuce
- Diced tomatoes
- Diced red onion
- Sour cream
- Salsa
- Sliced avocado or guacamole
Step-by-Step Instructions
Make the Seasoned Beef:
-
Heat a large skillet over medium-high heat. Add the ground beef and cook, breaking it apart with a spoon, until it’s no longer pink and has browned, about 5 to 7 minutes.
-
Drain any excess fat if necessary (or skip this step if using 90% lean beef).
Advertisements -
Reduce the heat to medium and add the diced onion, minced garlic, chili powder, cumin, garlic powder, salt, and black pepper. Stir constantly for about 1 minute until fragrant.
-
Add the tomato sauce, water, and lime juice. Bring to a simmer and let it cook for about 5 to 10 minutes until the liquid has mostly reduced and the mixture is thick and saucy but not completely dry. Taste and adjust seasonings.
Preheat and Assemble:
-
While the beef simmers, preheat your oven to 375°F.
-
Arrange the hard taco shells upright in a 9 x 13-inch baking dish (you can usually fit 14 shells snugly in one dish). If they’re having trouble standing upright, lean them against each other for support.
-
Spoon the seasoned beef evenly into each taco shell, filling each one about halfway. Don’t overfill or the tacos will be difficult to handle.
-
Sprinkle about 2 to 3 tablespoons of shredded cheese over each filled taco shell, distributing it evenly across the top.
Bake:
-
Place the baking dish in the preheated oven for 10 to 12 minutes until the cheese is melted and slightly golden, and the taco shells are warm and slightly more crispy than they were raw.
-
Carefully remove from the oven (the dish and shells will be hot) and let sit for about 1 minute so the cheese sets slightly.
Advertisements
Add Toppings and Serve:
- Set out bowls of lettuce, tomatoes, red onion, sour cream, salsa, and avocado. Let everyone add their preferred toppings to their tacos directly from the baking dish, or carefully transfer tacos to plates first if preferred.
Pro Tips for Baked Crispy Tacos
Fill Just Right: If you overfill the shells, the meat will spill out during baking and the shells won’t crisp properly. Fill them about halfway — there’s room for toppings after baking.
Don’t Overbake: Twelve minutes is usually perfect. Much longer and the shells can start to burn on the edges. Set a timer and check at the 10-minute mark.
Make a Taco Bar: Instead of adding all the toppings before baking, let people customize their own after the tacos come out of the oven. This way everyone gets exactly what they want.
Double the Batch: Make a double batch of the seasoned beef ahead of time. You can freeze half and use it for baked tacos next week.
Storage and Make-Ahead
These tacos are best served immediately while warm. Leftovers can be refrigerated for 2 to 3 days and reheated in a 350°F oven for about 5 minutes, though they won’t be as crispy as fresh. The seasoned beef can be made up to 4 days ahead and stored in an airtight container, or frozen for up to 3 months.
Final Thoughts
Taco night works because of flexibility, not complexity. Each of these ten recipes proves that weeknight taco dinners don’t require special skills or hard-to-find ingredients. Ground beef or shrimp or chicken, a few pantry spices, warm tortillas, and toppings that people actually enjoy — that’s genuinely all you need.
The secret that restaurants never tell you is that the best taco meals happen when everyone assembles their own. Set out the protein, put all the toppings in bowls, and let people build exactly what they’re craving. This approach means you’re not spending time on individual customization, and everyone walks away satisfied because they controlled exactly what went into their taco.
Pick one of these recipes and make it this week. Try another next week. Over time, you’ll develop favorites — the ones your family requests, the ones you can make on autopilot even after a brutal day. That’s when taco night stops feeling like cooking and starts feeling like something you genuinely look forward to. Once you reach that point, you’ll understand why taco night is as beloved as it is.