The Instant Pot promises to transform your weeknight dinners from complicated to completely doable — but only if you’re cooking something that actually works well in a pressure cooker. There’s a significant difference between a recipe that technically cooks in an Instant Pot and one that comes out genuinely delicious while teaching you valuable pressure-cooking skills along the way.
If you’re new to pressure cooking, starting with the right recipes matters more than you might think. You want meals that are forgiving enough to handle minor timing tweaks, recipes with ingredients that respond well to high-pressure cooking, and dishes simple enough that you’re not juggling multiple complicated steps while still learning how your machine behaves. The goal is to build confidence, not to frustrate yourself with recipes that require perfect timing or advanced technique.
The eight meals in this guide have been selected specifically because they teach you fundamental pressure-cooking principles while delivering genuinely impressive results that’ll make you fall in love with your Instant Pot. Each recipe shows you something important about how the machine works — whether that’s managing liquid ratios, timing protein correctly, or understanding when to use quick versus natural pressure release. By the time you’ve made a few of these, you’ll have the foundation to tackle nearly any Instant Pot recipe you find.
1. Perfect Tender Chicken Breasts with Simple Gravy

Chicken breast is the ideal starter recipe for Instant Pot beginners because it teaches you the most critical lesson: how pressure cooking can deliver results that are genuinely better than stovetop cooking. Most home cooks have experienced rubbery, overcooked chicken breasts more times than they’d like. The Instant Pot makes that nearly impossible — the moisture-sealing environment keeps chicken juicy even when cooked for several minutes.
Why This Works for Beginners
The recipe requires almost no prep work beyond seasoning chicken and adding liquid. You’re not chopping vegetables or managing complex layering. More importantly, this meal introduces you to the basic pressure-cooking cycle: add ingredients, close the lid, set the timer, and let the machine do the work. You’ll see firsthand how much time pressure cooking saves compared to traditional methods, and you’ll get moist, sliceable chicken that you can use for multiple meals throughout the week.
What to Expect and How to Succeed
Place four boneless, skinless chicken breasts flat in the inner pot with one cup of chicken broth and your choice of seasonings (salt, pepper, garlic powder, and dried herbs all work beautifully). Set the Instant Pot to high pressure for eight minutes of cooking time. When the timer beeps, you can either quick-release the pressure immediately or let it naturally release for five minutes — both methods work, though natural release gives you slightly more tender results.
The beauty of this recipe is its flexibility. You can use this cooked chicken for salads, sandwiches, tacos, pasta dishes, or serve it directly with rice and roasted vegetables. The cooking liquid left in the pot becomes the foundation for a simple pan gravy: just scoop out the chicken, switch the Instant Pot to sauté mode, and whisk in a cornstarch slurry to thicken the broth into a silky sauce that goes with everything.
Pro tip: If you’re cooking from frozen, add three extra minutes to the cooking time and use a quick pressure release instead of natural release — frozen chicken needs that extra time to cook through evenly.
2. No-Fuss Rice That Comes Out Perfect Every Time
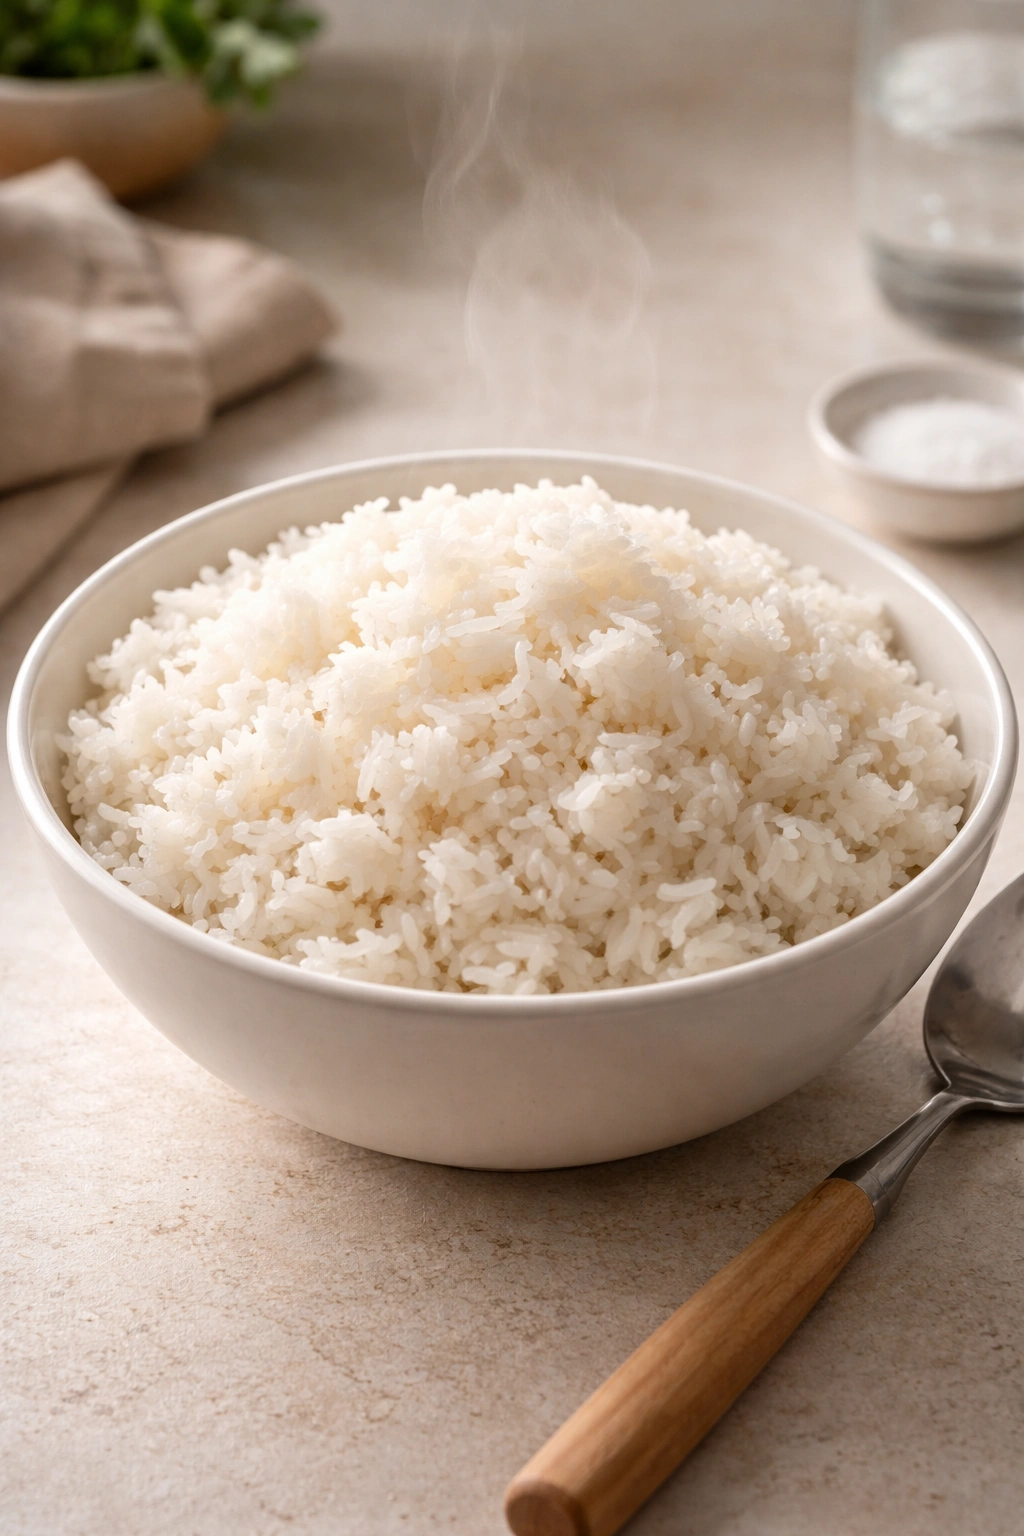
Learning to cook rice in your Instant Pot might seem like a small thing, but it’s genuinely life-changing because rice is a component of so many meals. The pressure cooker removes the guesswork entirely — no more watching the pot nervously, no more checking if it’s done, no more mushy or undercooked rice.
Why This Works for Beginners
Rice is wonderfully forgiving in a pressure cooker, which makes it perfect for learning the basic mechanics. You use a simple one-to-one ratio: one cup of rice to one cup of liquid. This simplicity means you can focus on understanding how the machine pressurizes, releases, and cooks rather than worrying about whether you’ve got the recipe right. Plus, you’ll use this skill constantly once you master it.
The Foolproof Method
Rinse one cup of white rice under cold water until the water runs mostly clear — this removes excess starch and prevents gummy rice. Place the rinsed rice in the inner pot with one cup of water or broth and a pinch of salt. Close the lid, set to high pressure for four minutes, and walk away. When the timer beeps, let the pressure release naturally for ten minutes, then quick-release any remaining pressure. Fluff with a fork and serve.
For brown rice, use a one-to-one-and-a-quarter ratio of liquid to rice, and cook for twelve minutes at high pressure with a full natural release. Basmati rice uses the same one-to-one ratio but cooks for just three minutes. The key difference between these varieties is how long they take to become tender, but the method stays identical.
Worth knowing: Rinsing rice makes a remarkable difference in the final texture. It takes sixty seconds but completely changes the outcome from slightly sticky to fluffy and individual. Don’t skip this step even though it seems unnecessary.
3. Hearty Beef Stew with Melt-in-Your-Mouth Meat
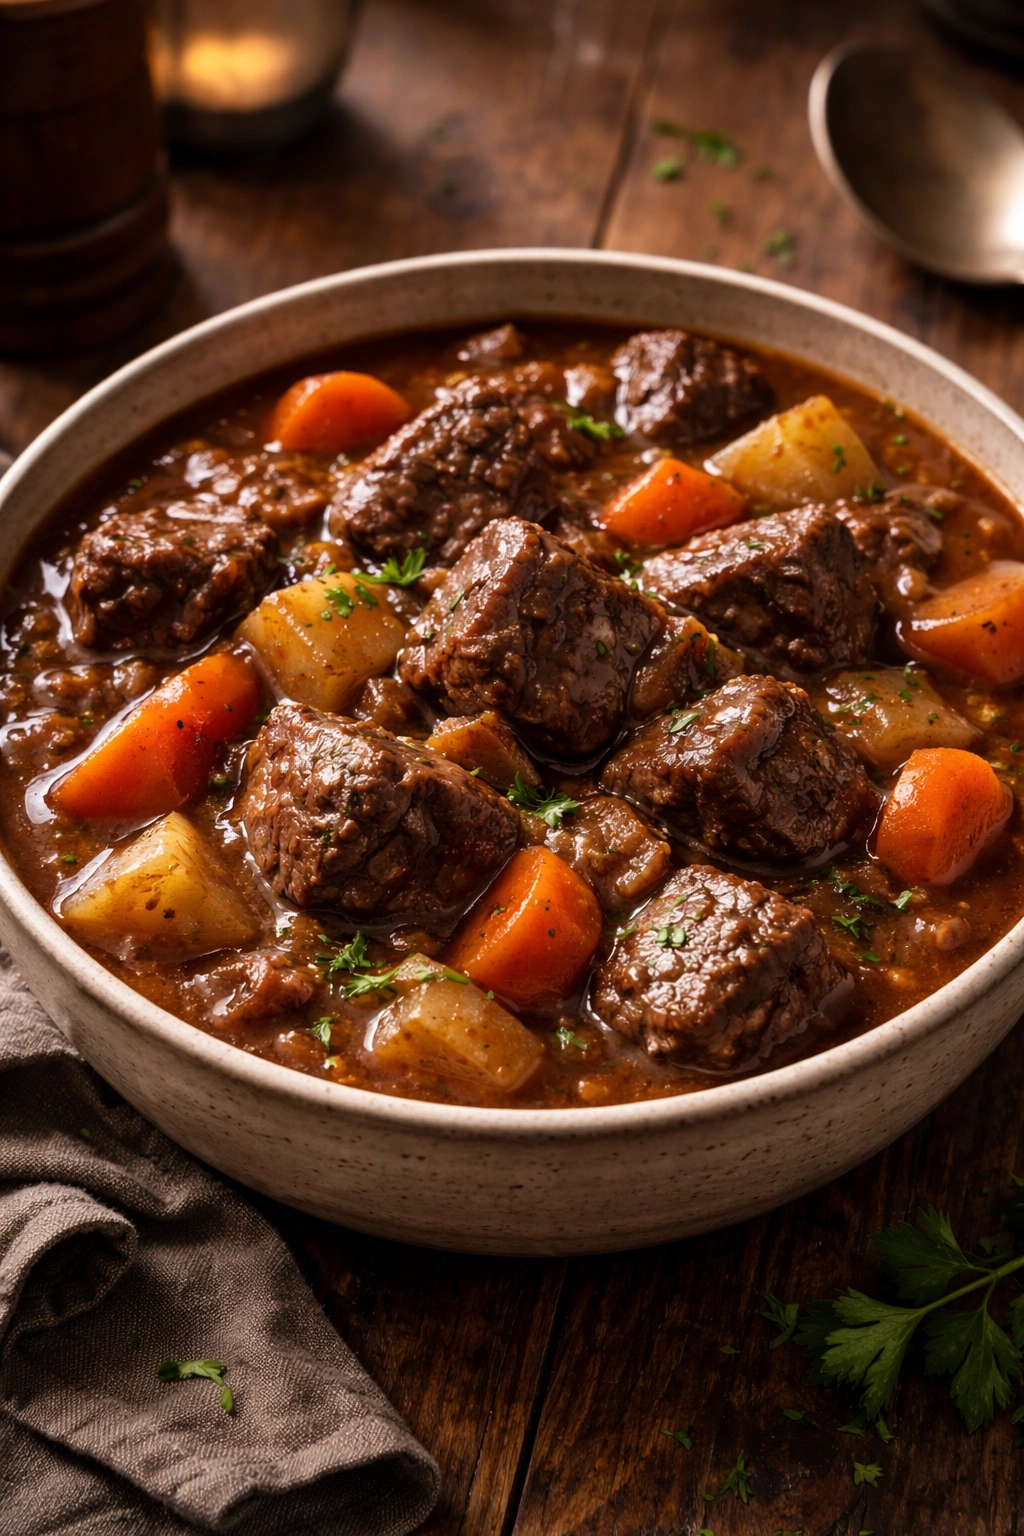
Beef stew is the classic comfort food that pressure cookers absolutely excel at creating. Tough cuts of beef that typically require hours of slow simmering become perfectly tender in just thirty minutes under pressure. This meal teaches you that pressure cooking doesn’t mean sacrificing depth of flavor — in fact, the concentrated cooking environment intensifies savory, meaty flavors.
Why This Works for Beginners
Beef stew shows you that the Instant Pot is especially good at one thing: breaking down tough proteins and tough vegetables into something incredibly tender. The browning step at the beginning might feel like an extra thing to learn, but it’s essential for building flavor, and the sauté function on your Instant Pot means you do everything in one pot. There’s no juggling multiple cookware pieces or complicated plating.
How to Build the Stew
Brown two pounds of cubed beef chuck in batches using the sauté function — don’t crowd the pot or the meat will steam instead of brown. Once the meat is browned, remove it and sauté diced onions, carrots, and celery for about five minutes. Add minced garlic, then return the beef to the pot along with four cups of beef broth, one tablespoon of tomato paste, two bay leaves, one teaspoon of dried thyme, salt, and pepper.
Close the lid and set to high pressure for thirty minutes. When the timer beeps, let the pressure release naturally — this full release gives the meat time to relax and become supremely tender. About ten minutes before serving, add cubed potatoes if you’d like them in the stew, switch to sauté mode, and let them cook in the already-simmering broth until fork-tender.
Real talk: The browning step takes time, but it genuinely matters for the final flavor. Don’t skip it thinking you’ll save time — it’s only ten minutes and makes the difference between average stew and restaurant-quality stew.
4. Creamy Pasta That Cooks Right in the Sauce

Making pasta in your Instant Pot feels almost like cheating because the noodles cook directly in the sauce, absorbing flavor from the inside out. This recipe teaches you about managing liquid ratios and understanding how pasta absorbs liquid differently than other foods.
Why This Works for Beginners
One-pot pasta recipes are deceptively simple, but they teach an important principle: different ingredients require different amounts of liquid. Pasta needs less liquid than you’d think because it’ll absorb moisture as it cooks. This recipe removes the stress of boiling a separate pot of water and waiting for it to drain — everything happens in your Instant Pot, and cleanup is essentially nonexistent.
Building Your Pasta Dinner
Heat one tablespoon of olive oil using the sauté function and cook diced onions and minced garlic for about two minutes. Add one pound of ground beef (or omit it for vegetarian), breaking it into small pieces as it cooks, about five minutes total. Pour in one jar of marinara sauce (about twenty-five ounces) and four cups of beef broth or water.
Add one pound of pasta — penne, rigatoni, or spaghetti all work — and stir well to separate the noodles and make sure they’re submerged in liquid. Close the lid, set to high pressure, and cook for one minute less than the pasta box recommends (so if the box says eight minutes, cook for seven minutes under pressure). Quick-release the pressure, stir, and finish by stirring in one cup of shredded mozzarella and half a cup of heavy cream.
Worth knowing: The pasta continues cooking slightly during the pressure release, so timing it one minute short of the package directions prevents mushy noodles. Stir immediately after quick-releasing to prevent sticking and to distribute the cheese and cream evenly.
5. Foolproof Hard-Boiled Eggs Without the Green Ring

Hard-boiled eggs demonstrate something surprising: the Instant Pot makes eggs easier to peel and more reliably cooked than any other method. This recipe seems almost too simple, but it’s incredibly useful because you’ll make these constantly for meal prep, snacks, and salads.
Why This Works for Beginners
This recipe removes all the guesswork from egg cooking. You’re not timing boiling water on the stove, you’re not trying to figure out when to transfer them to an ice bath, and you’re not dealing with that frustrating green ring that forms when eggs overcook. The pressure cooker’s consistent environment means your eggs come out perfectly every single time.
The Simple Method
Place a trivet (the metal rack that came with your Instant Pot) in the bottom of the inner pot and add one cup of water. Carefully place cold eggs on the trivet in a single layer — you can fit up to a dozen eggs this way. Close the lid, set to high pressure for five minutes, and walk away.
When the timer beeps, immediately turn the venting knob to release pressure quickly. Transfer the eggs to a bowl of ice water as soon as they’re cool enough to handle, and let them chill for at least five minutes. The ice bath stops the cooking process and makes peeling dramatically easier — you’ll notice the membrane between the shell and white separates cleanly from the ice bath method.
Pro tip: Older eggs peel much more easily than very fresh eggs, so if you’re buying eggs specifically for boiling, look for ones that have been in the store for a few weeks. The age works in your favor here, unlike with scrambled or fried eggs where freshness matters.
6. Tender Fall-Apart Pulled Pork with Minimal Effort
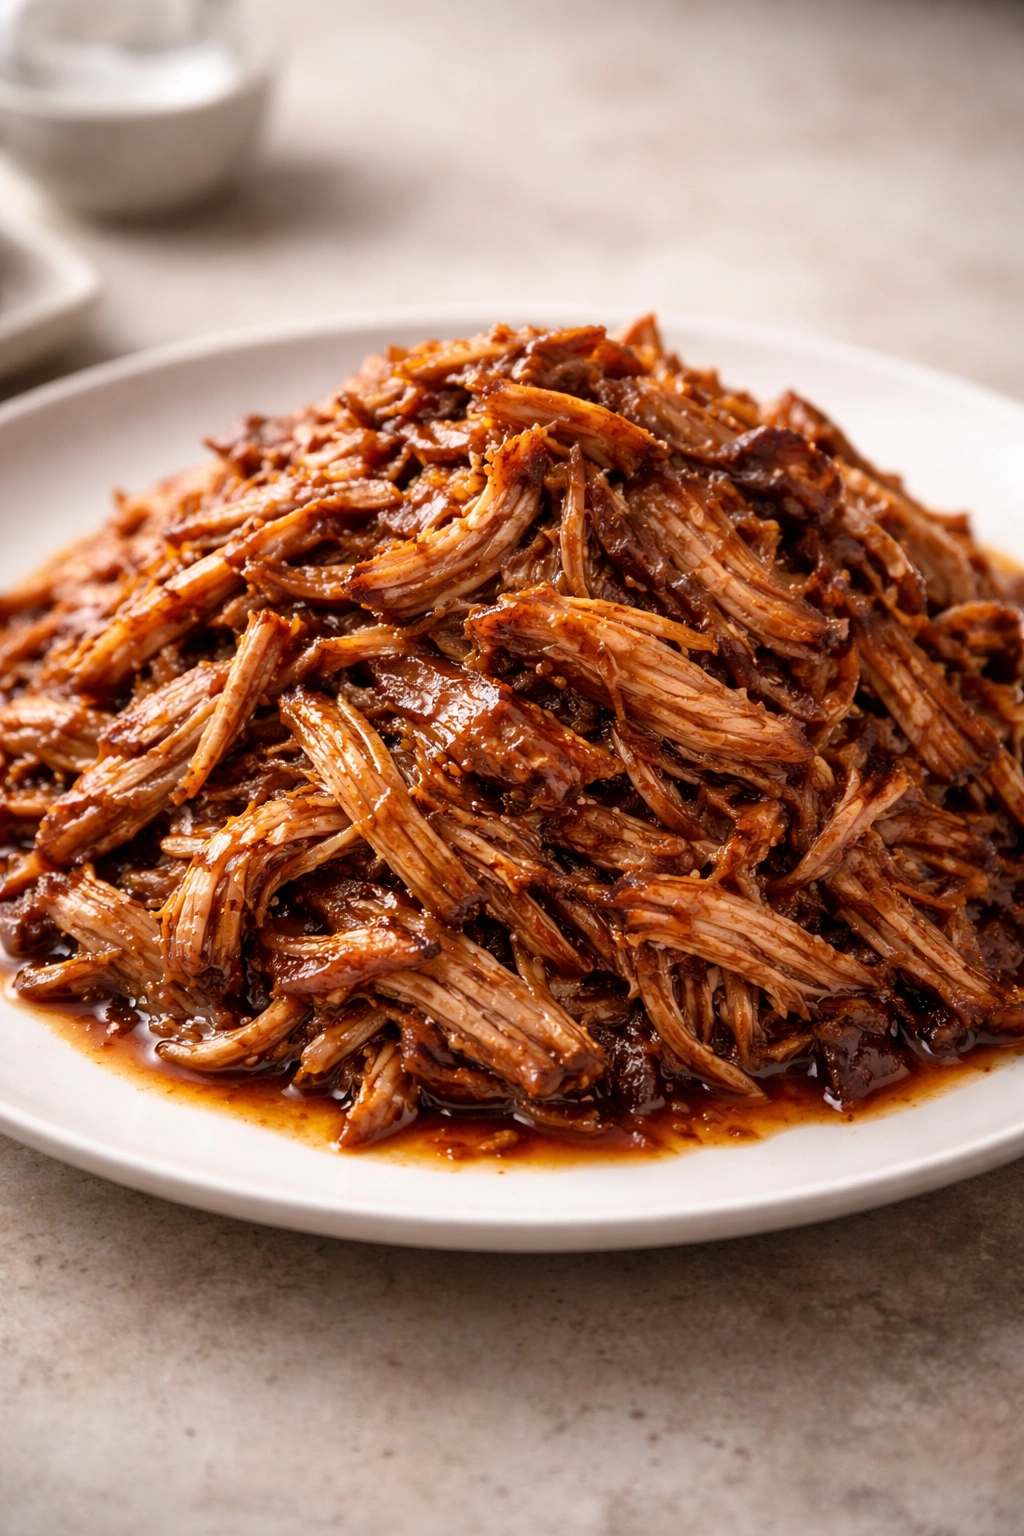
Pulled pork is the recipe that convinces skeptics that pressure cooking is genuinely magical. A tough cut of meat that traditionally takes eight hours low-and-slow becomes perfectly shredded in ninety minutes. This meal teaches you about working with larger cuts of meat and managing longer cooking times.
Why This Works for Beginners
Pulled pork has a massive flavor payoff relative to the hands-on work required. You’re essentially dumping seasoning on a pork shoulder, adding liquid, and letting the machine work. By the end, you have protein for a week’s worth of meals — pulled pork sandwiches, tacos, nachos, or salads. The versatility and ease make this recipe feel like a genuine accomplishment.
How to Make It
Rub a four-to-five-pound pork shoulder with a dry rub made from two tablespoons of brown sugar, one tablespoon of paprika, one tablespoon of garlic powder, one tablespoon of onion powder, two teaspoons of salt, and one teaspoon of black pepper. Add two cups of apple juice or chicken broth to the inner pot, then place the trivet inside and set the seasoned pork on top of it (keeping it above the liquid prevents it from steaming).
Close the lid and set to high pressure for ninety minutes. When the timer beeps, let the pressure release naturally — this slow release keeps the meat moist and tender. Once you can safely open the lid, the pork will shred easily with two forks. Drain the liquid, then toss the shredded pork with your favorite barbecue sauce and serve on buns or use it in your favorite recipes.
Worth knowing: Cooking on a trivet rather than submerged in liquid is important for achieving crispy exterior bits when you reheat the meat afterward. If you submerge it completely, the entire pork becomes uniformly tender but loses textural contrast.
7. Silky Tomato Soup That Tastes Like You Simmered It for Hours

Tomato soup demonstrates how pressure cooking concentrates flavors and creates depth that would normally require long, slow simmering. This creamy, comforting soup teaches you about blending and finishing techniques that transform simple ingredients into something restaurant-quality.
Why This Works for Beginners
Soup is one of the best pressure cooker applications because everything cooks together, flavors meld deeply, and cleanup is minimal. Tomato soup specifically teaches you about using canned ingredients (which are already cooked and just need flavor development) and how to create creaminess without relying on cream by using vegetables like carrots that naturally sweeten and thicken as they cook.
Building Your Soup
Sauté three cloves of minced garlic and one diced onion in the sauté setting for about two minutes until fragrant. Add two 28-ounce cans of crushed tomatoes, two cups of chicken or vegetable broth, two diced carrots, one bay leaf, one teaspoon of dried basil, half a teaspoon of dried oregano, salt, and pepper. Close the lid, set to high pressure for eight minutes, and let the pressure release naturally.
Remove the bay leaf, then use an immersion blender to blend the soup until completely smooth — or carefully transfer it in batches to a standard blender. Stir in half a cup of heavy cream or use an equal amount of whole milk mixed with a little butter for a lighter version. Taste and adjust seasonings, then serve with grilled cheese sandwiches or crusty bread for dipping.
Pro tip: Don’t add cream before cooking — dairy can sometimes curdle under high pressure. Always add it after cooking and during the finishing phase when the temperature has dropped and the heat is gentler.
8. Moist and Tender Whole Chicken That Doubles as Stock

A whole chicken in the Instant Pot is the recipe that teaches you that pressure cooking doesn’t just make things faster — it makes them better. You get juicy, tender meat and rich chicken broth all in one step, giving you the foundation for countless meals and two proteins in one cooking session.
Why This Works for Beginners
This recipe feels like a genuinely advanced accomplishment even though it requires almost no skill. You literally just season a chicken, add liquid, and walk away. By the end, you have shredded chicken meat, whole chicken portions if you prefer, and homemade broth. It’s the kind of recipe that makes you feel like you’ve mastered something, which builds confidence for tackling more complex dishes.
The Straightforward Method
Place the trivet in the bottom of the inner pot with one and a half cups of water or chicken broth. Pat a four-to-five-pound whole chicken dry and season it inside and out with salt, pepper, and any herbs you like (thyme, rosemary, and garlic are classic). Place the chicken breast-side up on the trivet.
Close the lid and set to high pressure for twelve minutes per pound of chicken — a four-pound chicken cooks for about twelve-thirteen minutes. When the timer beeps, let the pressure release naturally for fifteen minutes, then quick-release any remaining pressure. The chicken will be so tender that you can shred it with two forks or use a hand mixer for faster shredding.
Save the liquid in the pot — this becomes your homemade chicken broth for soups, risotto, or cooking rice. If you want a clearer broth, strain it; if you want something richer, leave the drippings in. Freeze the broth for later use, and you’ve made two things at once.
Worth knowing: Letting the pressure release naturally is essential for keeping the chicken moist. Quick-releasing too fast can cause moisture loss. If you’re in a genuine time crunch, quick-release is acceptable, but you’ll notice a slight difference in tenderness.
Finding Your Instant Pot Rhythm
These eight recipes are designed to teach you one recipe type at a time — protein, grains, soups, and complete meals. They’re forgiving enough to handle a few minutes difference in timing, they use ingredients that pressure-cook reliably, and they don’t require any fancy equipment or advanced technique beyond basic cooking skills.
The confidence you build from successfully making these meals transfers directly to everything else you cook. Once you understand how your Instant Pot pressurizes, how to time foods correctly, and how to manage liquid ratios, you can adapt nearly any traditional recipe for pressure cooking. Start here, perfect these eight meals, and watch your weeknight dinner stress transform into weeknight dinner satisfaction.
Your Instant Pot isn’t just a faster way to cook — it’s genuinely better at extracting flavor, keeping proteins moist, and combining ingredients into something greater than the sum of its parts. These eight beginner meals prove that point with every bite, building both your skills and your confidence in the process.