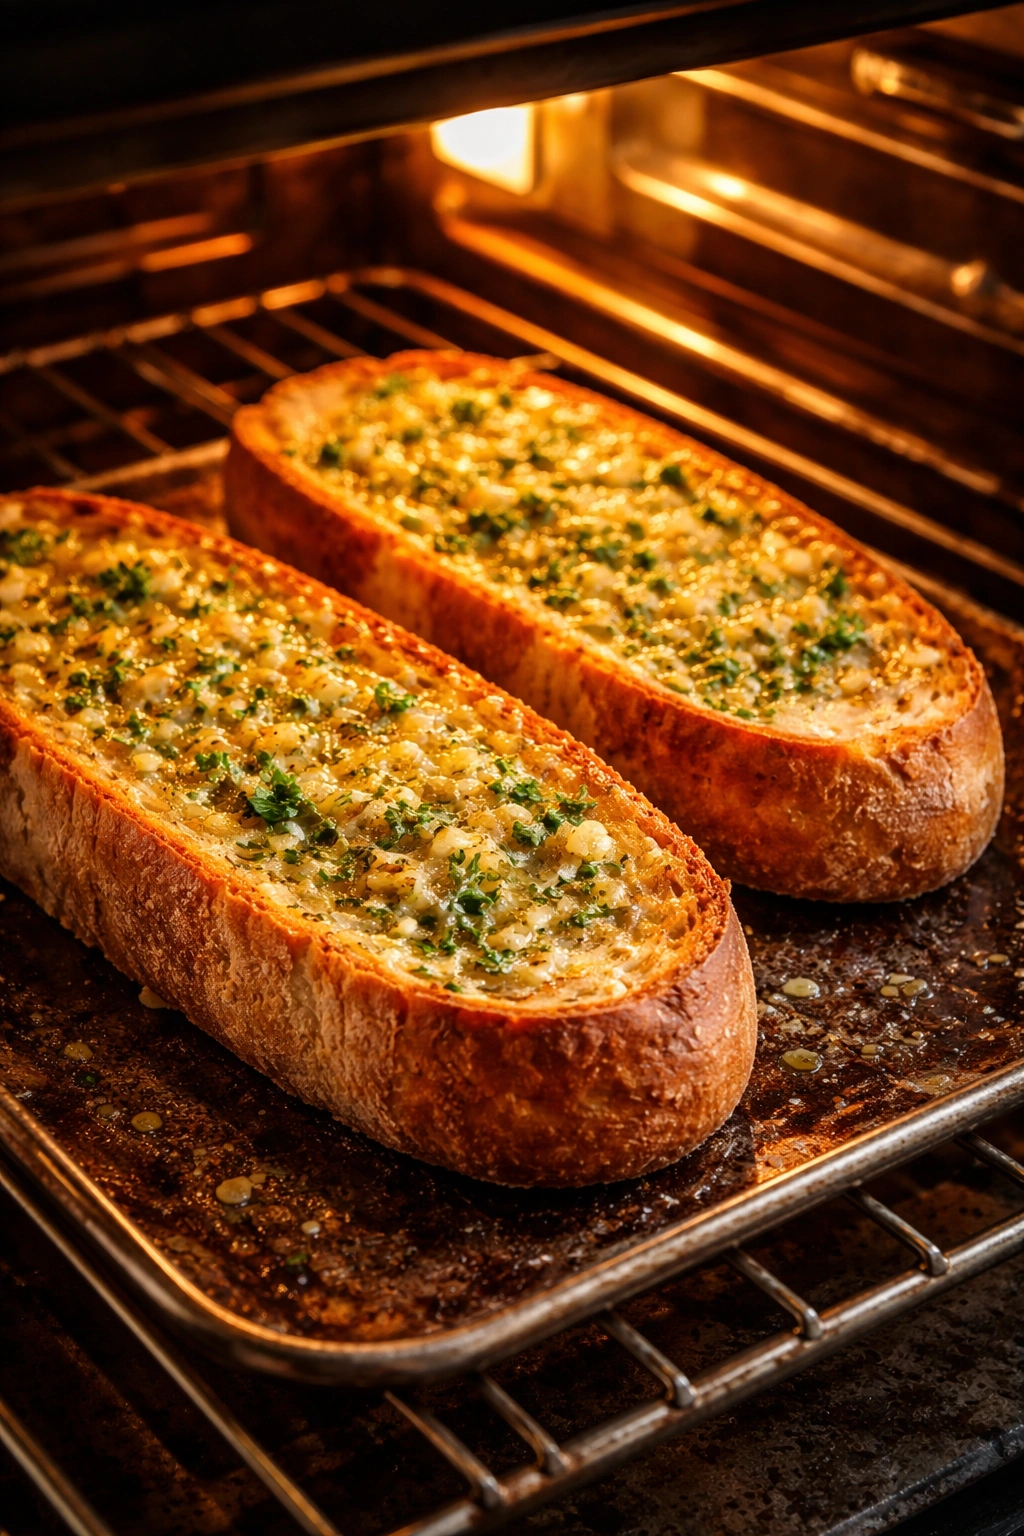
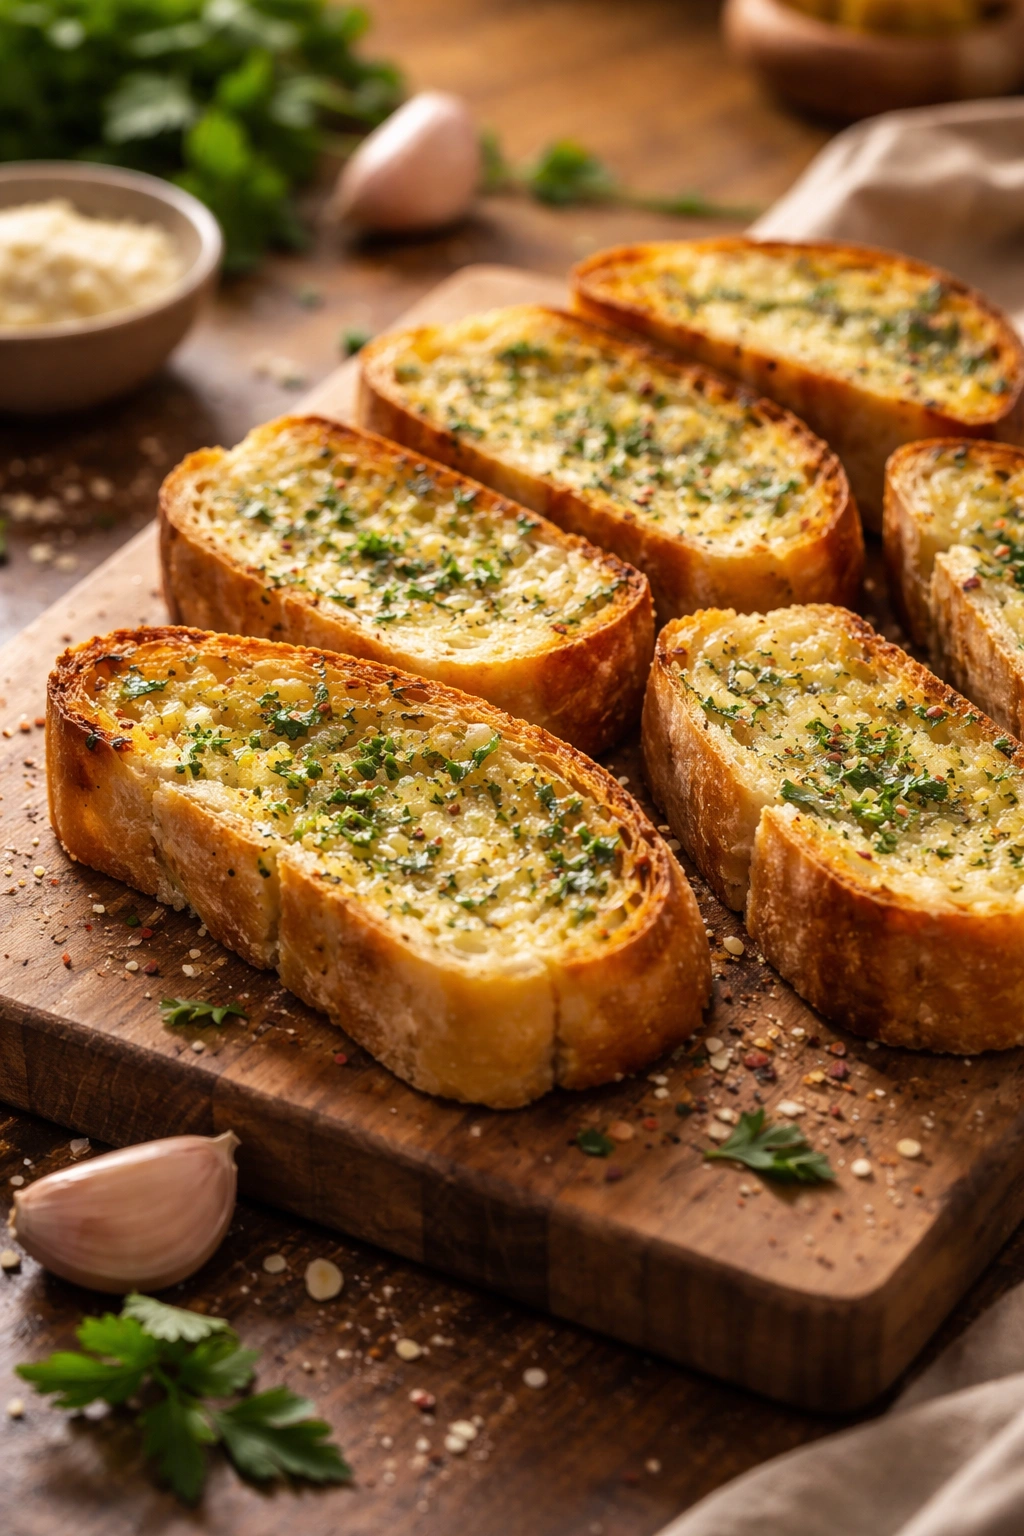
The aroma alone is worth it. That’s the first thing you notice when garlic bread hits a hot oven — the butter begins to foam, the minced garlic releases its fragrant oils, and suddenly your kitchen smells like an Italian restaurant. The best part? You can create that exact experience in your own home in about ten minutes, without any fancy equipment or secret ingredients that take hours to source. This isn’t the stale, pre-made garlic bread you find in the freezer aisle, either. This is the real thing — crusty on the outside, soft and buttery inside, with garlic flavor that’s been properly toasted rather than raw and sharp.
Most people assume homemade garlic bread requires a long fermentation, a special Italian loaf from a bakery, or some professional baker’s trick. The reality is simpler and way more achievable. The key is understanding that you’re not trying to bake bread from scratch — you’re transforming something you likely already have at home into something that tastes genuinely restaurant-quality. A simple loaf, some butter, fresh garlic, and a hot oven is literally all you need. The speed comes from using heat strategically and keeping the technique straightforward.
What makes this particular approach different is the technique of toasting the garlic-butter mixture directly in the oven rather than just spreading cold butter and hoping it works. This gives you two major advantages: the garlic flavors actually develop and deepen instead of staying raw-tasting, and the butter infuses properly so every bite is consistently flavorful. You’ll also get that crucial textural contrast — a crispy, golden exterior with a tender, moist crumb underneath — in just the time it takes to preheat your oven and slice a loaf.
The Story Behind Quick Garlic Bread
Garlic bread became an American steakhouse staple in the mid-20th century, though the concept has European roots going back centuries. The brilliance of the dish is that it transforms a simple carbohydrate into something that commands attention at the table. It’s simultaneously humble and impressive — it costs pennies to make but tastes indulgent enough to feel special.
The traditional Italian approach involves toasting bread rubbed with raw garlic and quality olive oil. The American version adapted this by adding butter, which creates a richer, more decadent result. Most restaurants simply prepare garlic butter ahead of time and spread it on bread, then toast it until the edges brown. This process takes about 5-8 minutes of active oven time, which is where our 10-minute total comes from.
The beauty of this method is that it applies the best principle from both traditions: you get the garlic flavor development that comes from toasting, plus the richness of good butter, without the pretension or complexity. It’s the kind of dish that works equally well as a side to pasta, a dipping bread for soup, a late-night snack, or a vehicle for showing off how easily you can produce restaurant-quality food at home.
Why This Recipe Actually Works
The success of fast garlic bread hinges on several technical factors that most home cooks overlook. First, you’re using butter as your medium rather than olive oil alone. Butter has a lower smoke point than oil, but it also carries fat flavor in a way that makes the garlic taste more pronounced and caramelized when exposed to high heat.
Second, you’re not trying to bake the bread itself — you’re assuming the bread is already adequately cooked and just needs to be heated through and crisped. This removes the entire bread-baking phase from your equation, which is where most of the time goes. You’re leveraging work that’s already been done (whether by a bakery or your grocery store), which is smart, not cheating.
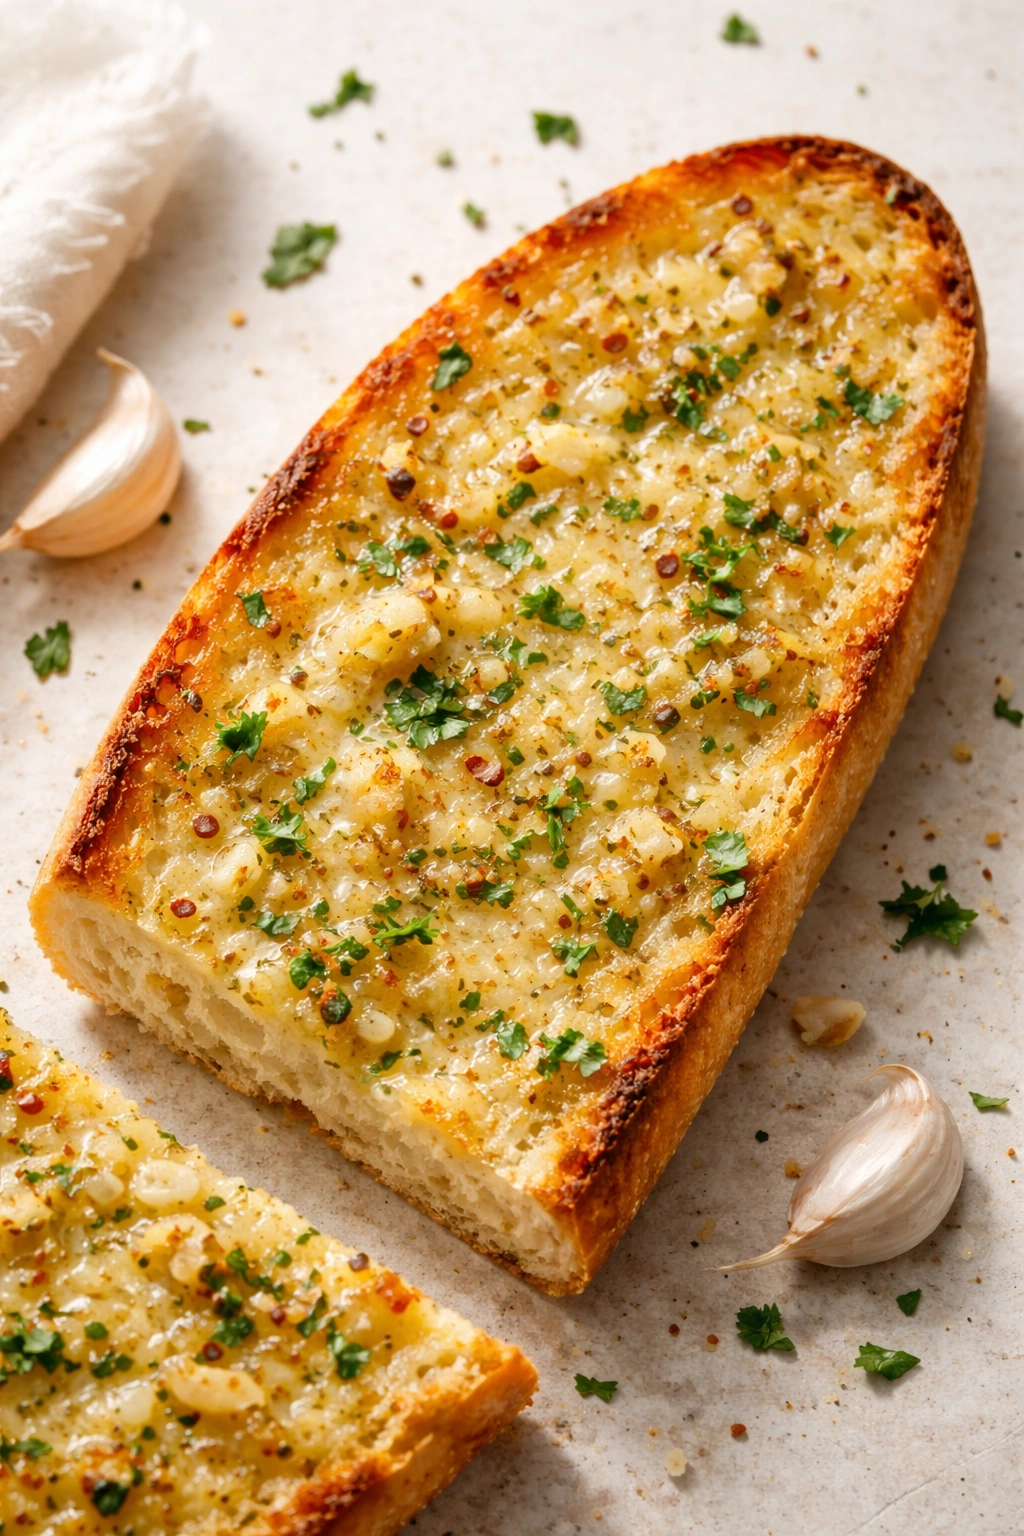
Third, the toasting time creates what’s called the Maillard reaction on the garlic’s surface. This chemical reaction between amino acids and sugars under heat creates hundreds of new flavor compounds that taste savory, rich, and complex — the opposite of raw, sharp garlic that many people find overpowering. This is why garlic bread made this way tastes so much better than cold-butter-spread bread: the flavor has been transformed, not just applied.
Fourth, slicing the loaf horizontally rather than vertically creates more surface area for the butter to reach. This distributes the flavor throughout the bread more evenly and also increases the amount of exposed surface that can turn golden and crispy in the oven.
Yield: Serves 4 to 6 | Makes one 12-14 inch loaf, cut into 8-10 pieces
Prep Time: 5 minutes
Cook Time: 8-10 minutes
Total Time: 13-15 minutes
Difficulty: Beginner — no special equipment needed, just a sharp bread knife and an oven. The steps are straightforward and forgiving; this recipe is nearly impossible to mess up.
Best Served: Immediately while the bread is warm and the butter is still melting
Ingredients You’ll Need
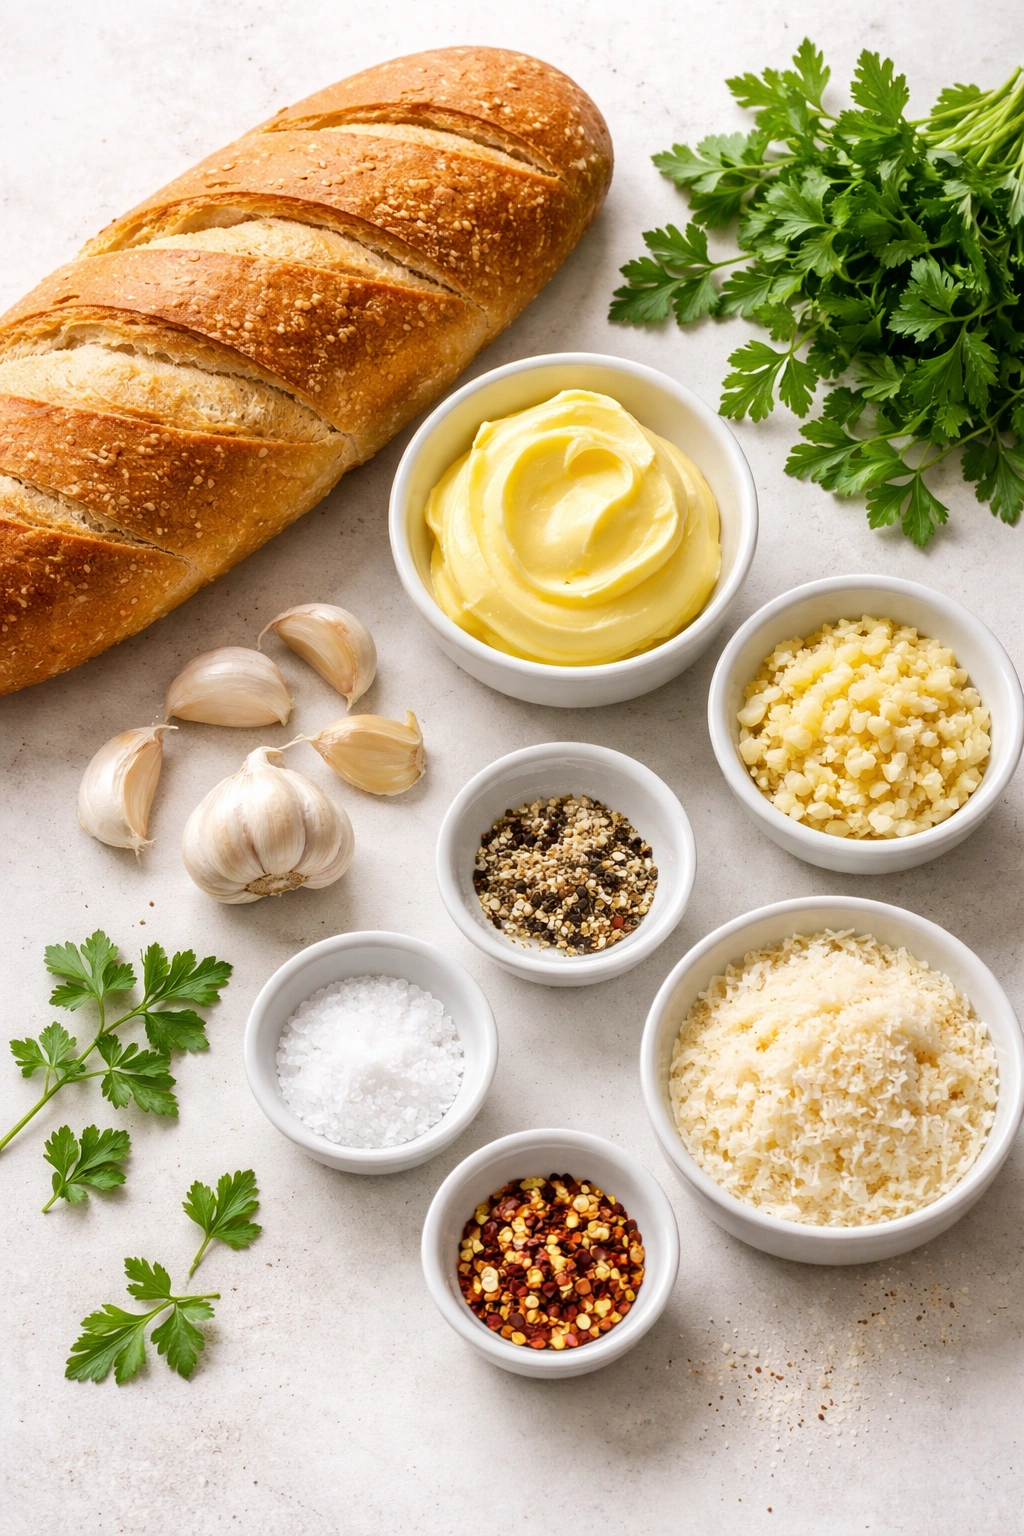
For the Garlic Bread:
- 1 loaf crusty Italian bread or French baguette (12-14 inches long), or one medium ciabatta loaf
- 6 tablespoons (¾ stick) unsalted butter, softened to room temperature
- 4 to 5 cloves garlic, minced very finely (about 2 tablespoons), or 1½ teaspoons jarred minced garlic if you prefer (though fresh is noticeably better)
- ½ teaspoon fine sea salt
- ¼ teaspoon freshly ground black pepper
- 2 tablespoons finely chopped fresh parsley, or 1 teaspoon dried Italian seasoning (optional but recommended)
- ¼ teaspoon red pepper flakes (optional, for a subtle heat)
- 2 tablespoons finely grated Parmesan cheese (optional, adds a savory umami layer)
How to Make 10-Minute Garlic Bread Step-by-Step
Prepare and Preheat:
-
Preheat your oven to 425°F (220°C) and position the rack in the center or upper-middle position — you want the bread close enough to the heat source to toast nicely but not so close that it burns on top before the butter fully infuses.
-
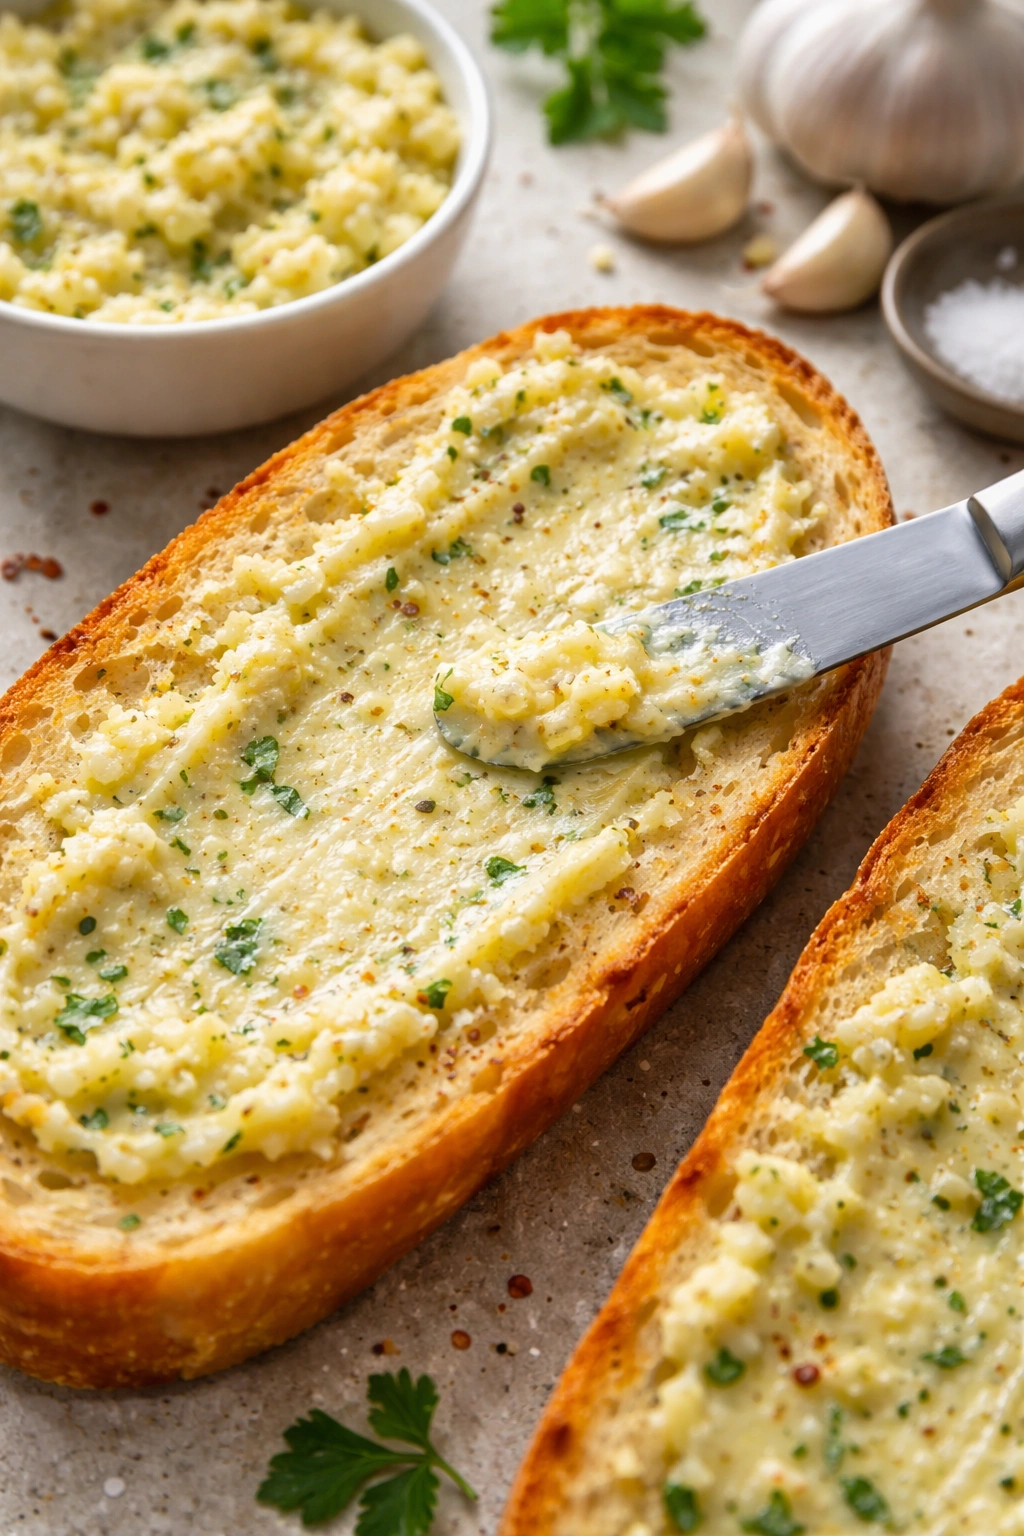
While the oven preheats, prepare your garlic butter. In a small bowl, combine the softened butter, minced garlic, salt, black pepper, and parsley or Italian seasoning (if using). Stir everything together until the garlic is evenly distributed throughout the butter and the mixture looks relatively smooth. Don’t over-work it; you’re just combining, not whipping.
Advertisements -
Taste a tiny bit of the mixture on your finger or a piece of bread. The garlic flavor should be noticeable but not overpowering — if it tastes too mild, add another minced clove of garlic. If it’s too sharp (this is rare with this amount, but can happen with very pungent garlic), let it sit for 30 seconds and taste again, as the raw heat sometimes mellows slightly.
Assemble the Bread:
-
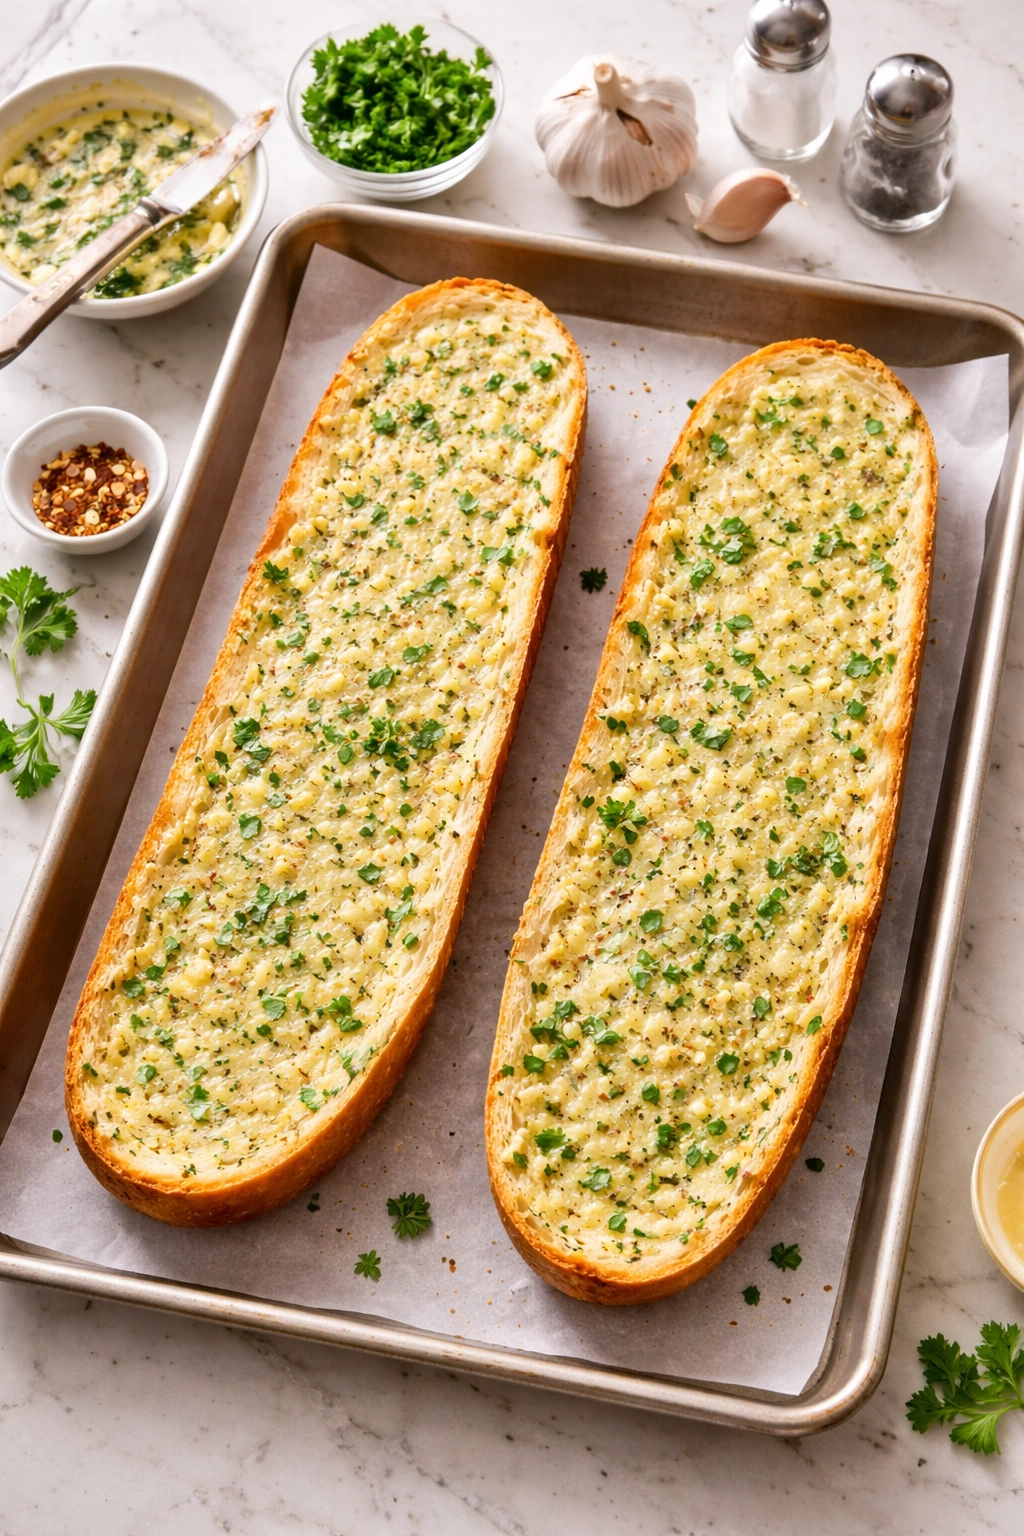
Using a sharp serrated bread knife, slice the loaf horizontally in half, cutting from one end to the other. You’ll have two long pieces: a top piece and a bottom piece. The cut should be clean and relatively even — aim to slice through the middle of the loaf rather than cutting off just the top crust. If the bread is very hard and your knife is struggling, run the blade under hot water and dry it quickly; a warm knife cuts warm bread much more cleanly than a cold knife.
-
Place both pieces of bread cut-side up on a large baking sheet (or two smaller sheets if needed). If your baking sheet doesn’t have a rim, that’s fine, but a rimmed sheet prevents any butter from dripping onto the oven floor.
-
Divide the garlic butter mixture between the two bread halves, spreading it evenly across the cut surface of each piece with a small offset spatula, butter knife, or the back of a spoon. The butter should cover the entire cut surface, reaching all the way to the edges and into any crevices or holes in the crumb. You’re not trying to create a thick layer — just even coverage so every bite gets garlic flavor.
Toast and Finish:
-
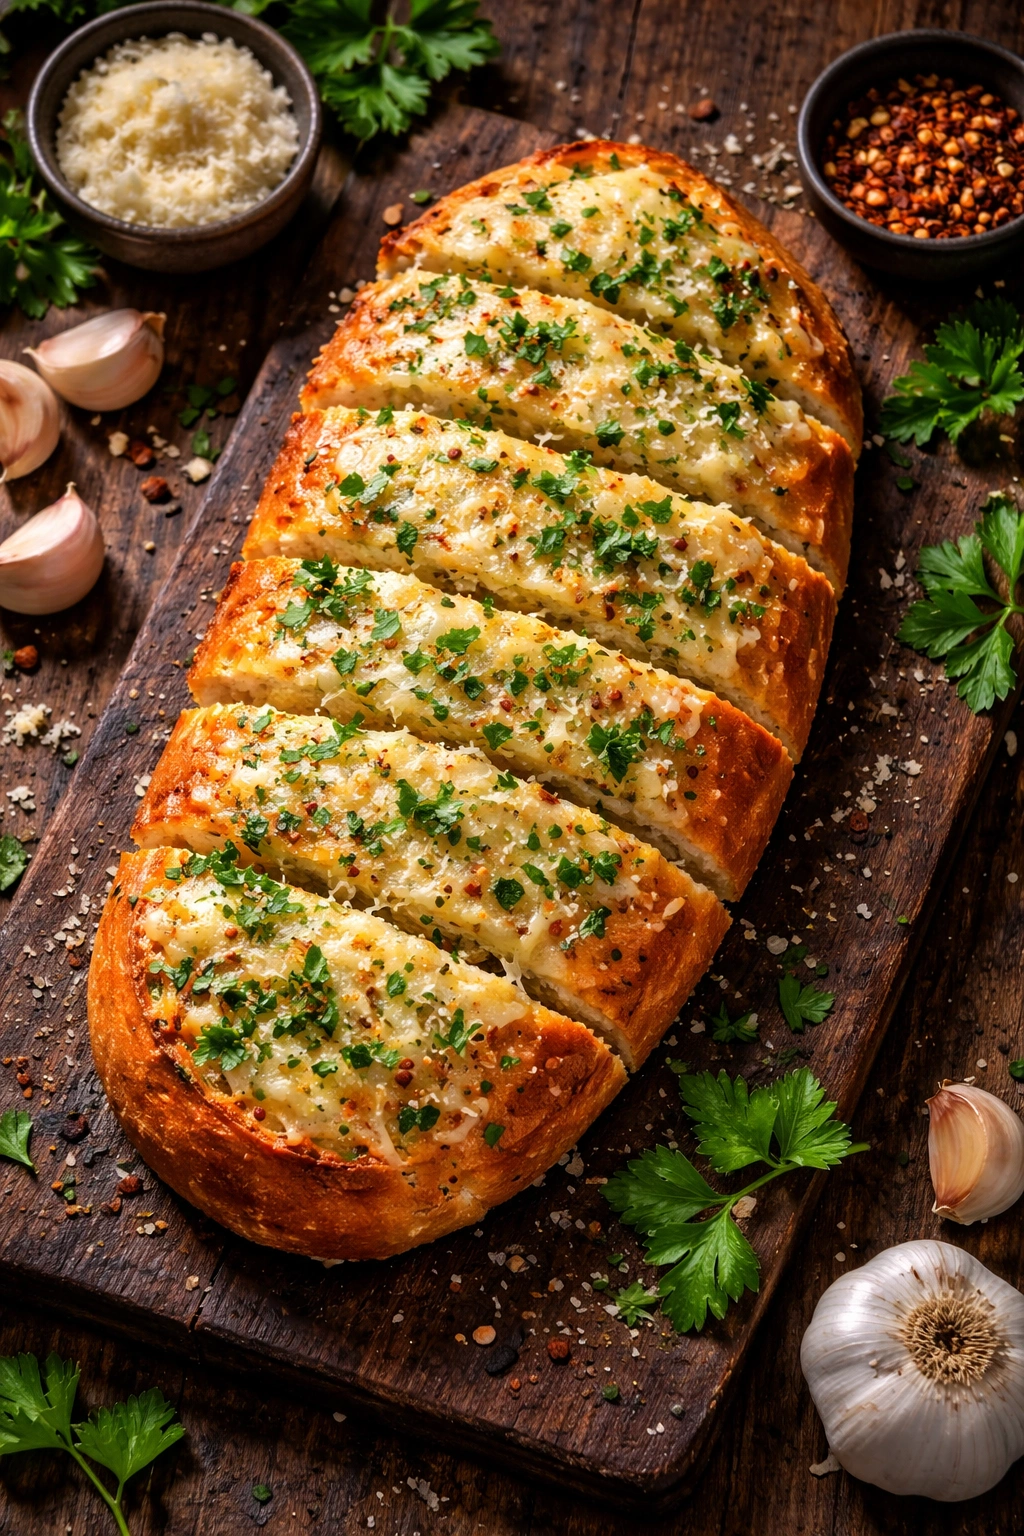
Place the baking sheet in the preheated oven and bake for 8 to 10 minutes, until the edges of the bread are golden brown and the exposed crust has turned a deeper, caramelized golden color. The exact time depends on your oven and how dark you like your bread — most ovens need 8 minutes, but some run hot and might finish in 6-7 minutes. Start checking at the 7-minute mark by opening the oven door carefully and looking at the bread. You’re looking for golden-brown color on the edges and a light browning on the garlic-butter side. The butter should be bubbling slightly at the edges but not smoking.
-
Remove the baking sheet from the oven using an oven mitt — the baking sheet will be very hot, and any residual butter can splatter, so use both hands and be careful. Let the bread sit for 30 seconds (this helps the heat set the texture and makes it less likely to be soggy when you slice it).
-
If you’ve sprinkled Parmesan cheese on top before baking, skip this step. Otherwise, you can optionally sprinkle a small amount of finely grated Parmesan and a tiny pinch of additional fresh parsley on the bread while it’s still hot — the residual heat will lightly toast the cheese and make it stick slightly.
-
Using a sharp serrated knife, slice the two bread halves into pieces roughly 2 inches wide (or your desired thickness). Cut straight down through the crust in clean motions rather than sawing back and forth, which crushes the bread. You should get 8-10 pieces total.
Advertisements -
Transfer to a serving plate or bread basket and serve immediately while the bread is still warm and the butter is melting through the crumb.
Secrets and Tips for Perfect Garlic Bread Every Time
The difference between okay garlic bread and truly excellent garlic bread often comes down to small details that most recipes gloss over. One of the most important is the texture of the butter when you spread it. It needs to be soft enough to spread smoothly without tearing the bread, but not so warm that it becomes greasy or absorbed unevenly. The ideal temperature is when you can press your finger into it and leave an impression without effort, but it’s still definitely solid. If your kitchen is cold, take the butter out 10-15 minutes before you start. If your kitchen is warm, you might only need 5 minutes.
The quality and freshness of your garlic makes a dramatic difference. Fresh garlic cloves that are firm and heavy (not dried-out or sprouting) will taste noticeably better than old garlic or the jarred pre-minced kind. The best approach is to mince it yourself using a microplane zester or a very sharp knife, but jarred minced garlic absolutely works in a pinch and saves time — just know that the flavor will be slightly more muted and less nuanced.
Mincing the garlic very finely is important because it increases the surface area, which allows the garlic flavor to distribute more evenly through the butter and to toast more thoroughly in the oven. If your garlic pieces are large, some will toast while others remain slightly raw, creating an inconsistent flavor throughout the bread.
A common mistake is spreading cold butter on bread and expecting it to distribute evenly. Cold butter doesn’t mix with the garlic, and it doesn’t spread properly — you end up with thick patches and thin patches. Room-temperature butter blends seamlessly with the garlic and spreads in a thin, even layer that touches every part of the bread.
Another mistake is using salted butter. Salted butter has salt added specifically to extend shelf life and create a particular flavor profile, but when you’re making garlic bread where you’re controlling the salt amount precisely, unsalted butter gives you that control. If you only have salted butter, reduce the salt you add separately by about half.
Don’t skip the oven preheating step. An oven that hasn’t fully preheated will give you bread that’s lukewarm or unevenly cooked on the outside while the inside is barely warm. A fully preheated oven at 425°F works quickly — you get a golden exterior and a warm, melting-butter interior in one unified step.
Watch the broiler setting carefully. Some ovens have a tendency to scorch toppings if the rack is too close to the heating element when the broiler is on. This recipe uses regular bake, not broil, specifically to avoid that issue. You want even toasting, not charring.
Variations and Flavor Twists You Can Try
Once you’ve made this recipe a couple of times and understand the basic technique, you can start experimenting with flavor variations. The beauty of garlic bread is that it’s a delivery vehicle — the butter is your medium, and you can change what rides in that butter.
Herb Variations: Swap the parsley for fresh basil, fresh oregano, or fresh thyme. You can also combine herbs — a mixture of basil, parsley, and a tiny bit of oregano creates an Italian seasoning blend that tastes more complex than any single herb alone. Fresh herbs are always better than dried when you have them available, but dried work perfectly well in a pinch.
Spicy Garlic Bread: Increase the red pepper flakes to ½ teaspoon or add a tiny pinch of cayenne pepper. Some people also add a shake of smoked paprika, which adds heat and a subtle smoky flavor without the burn of cayenne. If you like serious heat, add a finely minced jalapeño (seeds removed if you want less spice) to the butter mixture.
Cheese-Forward Version: Add 3-4 tablespoons of finely grated Parmesan, cheddar, or even mozzarella to the butter mixture before spreading. Bake as normal. The cheese will melt into the bread and create pockets of extra richness. Some people also add a tablespoon of grated Romano cheese, which is sharper and more assertive than Parmesan.
Lemon Garlic Bread: Add the zest of one lemon (the colored part only, not the bitter white pith) to the butter mixture, and reduce the salt slightly because lemon brings its own salinity. The brightness cuts through the richness and creates a fresh, almost coastal flavor. A tiny squeeze of fresh lemon juice also works, but don’t add too much or the butter will split.
Roasted Garlic Version: If you have time to roast garlic (which takes about 30 minutes), use roasted garlic cloves instead of raw minced garlic. Roasted garlic is sweeter, mellower, and more caramelized than raw garlic — completely different flavor profile, but equally delicious. Mash the roasted cloves into the butter with a fork.
Anchovy Lovers: Stir in one very finely minced anchovy fillet into the butter. This sounds like an odd choice, but anchovy adds a deep umami saltiness that makes all the other flavors more intense and complex. You won’t taste “anchovy” — you’ll taste deeply savory garlic bread. This is optional and definitely not for everyone, but it’s the secret ingredient in some classic preparations.
Garlic and Rosemary: Add 1 tablespoon of very finely chopped fresh rosemary (or 1 teaspoon of dried) to the butter. Rosemary has a piney, almost minty quality that pairs beautifully with garlic, especially if you’re serving the bread alongside roasted meats or hearty soups.
Vegan Version: Replace the butter with vegan butter in a 1:1 ratio (6 tablespoons vegan butter). Some vegan butters have a slightly lower melting point, so watch the bread carefully in the oven — it might be done a minute or two earlier than the standard recipe. Parmesan can be replaced with nutritional yeast (1-2 tablespoons) for a savory, cheesy flavor without dairy.
Gluten-Free Version: Use a crusty gluten-free bread loaf. The texture and density will be different from wheat bread, so check it a minute or two earlier in the oven. Gluten-free bread tends to brown more quickly and can dry out if over-toasted. The technique remains identical — just watch it carefully.
Storage, Make-Ahead Options, and Reheating
Garlic bread is always best eaten immediately, while the butter is melting and the bread still has that just-toasted warmth. But there are ways to prepare it ahead and reheat it without too much loss of quality.
Make-Ahead to the Buttering Step: You can prepare the garlic butter mixture up to 2 days in advance and store it in a small covered container in the refrigerator. When you’re ready to make garlic bread, simply slice the bread and spread the cold butter directly onto it — the spreading will take a bit more effort, but it works perfectly. Then bake as instructed. This is the most flexible option for busy people: the butter is ready, and you just need about 10 minutes of oven time.
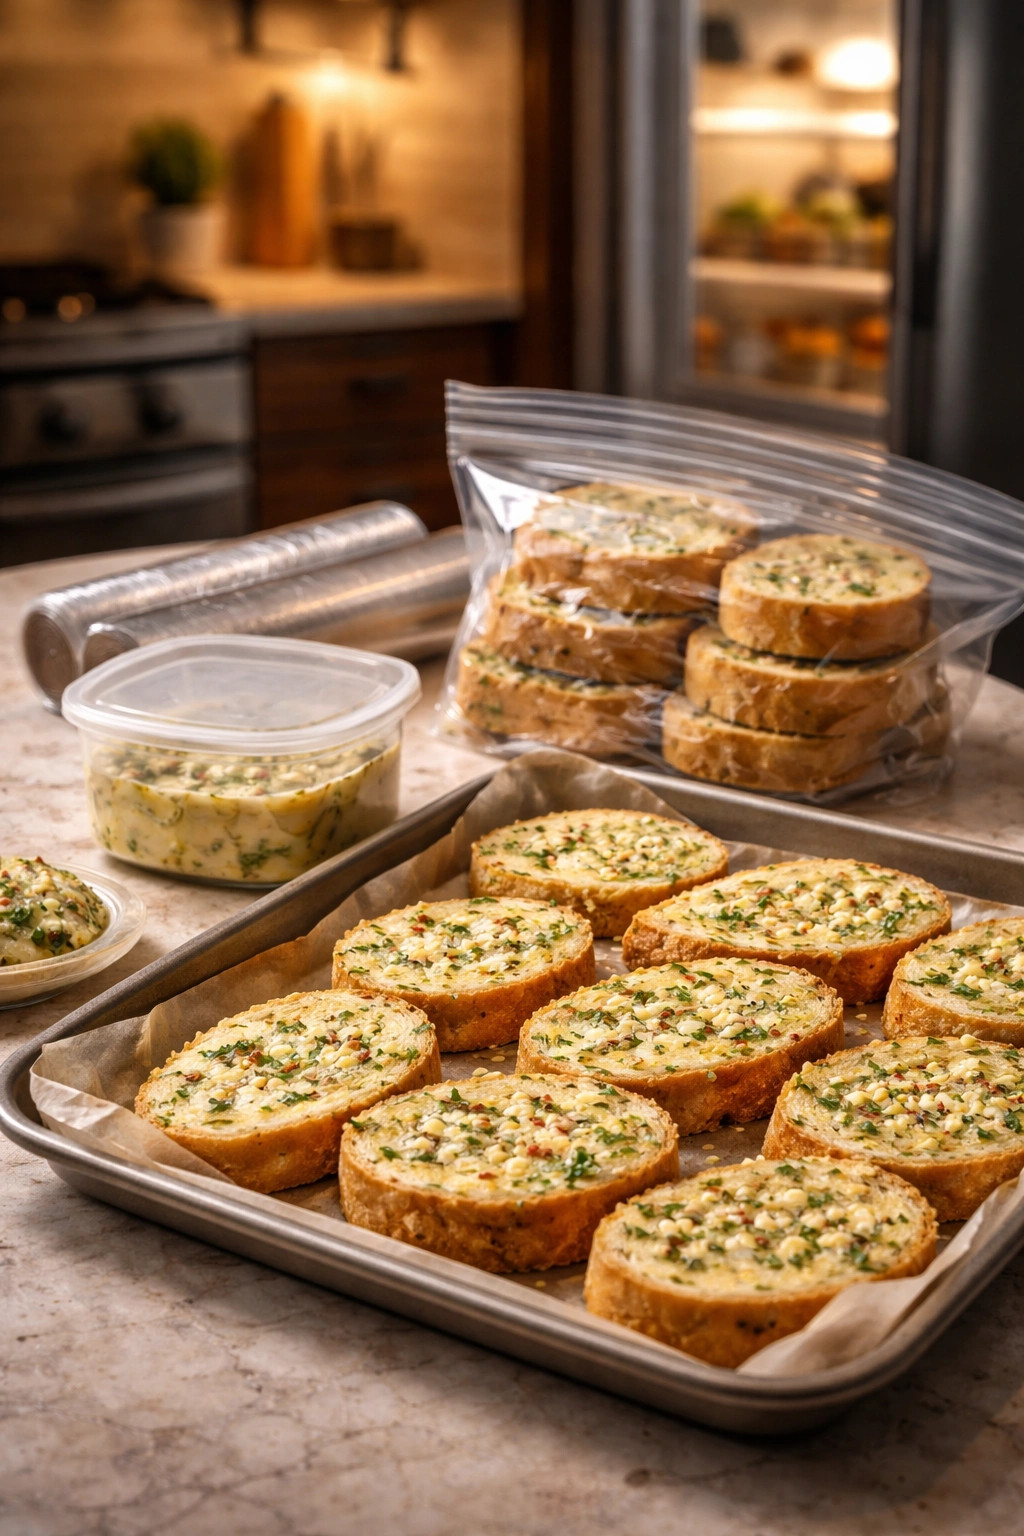
Fully Assembled, Unbaked: You can slice the bread and spread it with garlic butter, place it on a baking sheet, cover the sheet tightly with plastic wrap, and refrigerate for up to 8 hours. When you’re ready to bake, simply preheat the oven and bake directly from the fridge — you might need an extra 1-2 minutes of baking time since the bread starts cold. This is perfect if you want to prep dinner earlier in the day.
Freezing Raw Garlic Bread: If you assemble the bread completely as described above, you can freeze it (uncovered on a baking sheet for 1 hour, then transferred to a freezer bag) for up to 1 month. Bake directly from frozen — add about 2-3 minutes to the cooking time. This is excellent for people who want homemade garlic bread on hand at all times without any prep work.
Storing Baked Garlic Bread: Once baked, garlic bread keeps at room temperature in a covered container or wrapped in foil for up to 1 day. After that, it becomes noticeably staler. It doesn’t freeze particularly well after baking because the texture becomes tough and dry when thawed.
Reheating Leftover Baked Garlic Bread: The best method is to wrap the bread loosely in foil and warm it in a 350°F oven for about 5 minutes, until it’s heated through and the butter has re-melted slightly. This is better than microwaving, which creates an odd rubbery texture. If you have only a piece or two, toasting it briefly in a toaster oven works well too.
Serving Suggestions and Pairings
Garlic bread is incredibly versatile and works with far more dishes than most people realize. The most obvious pairing is with Italian food — pasta with red sauce, lasagna, baked ziti — where the bread soaks up extra sauce and adds textural contrast. It works equally well with seafood pasta, creamy pasta dishes, and risotto.
Beyond Italian, garlic bread is phenomenal alongside soup, especially tomato-based soups, hearty vegetable soups, or cream soups. The bread becomes an edible spoon for soups that don’t require an actual spoon. It’s also wonderful with chili, where it serves the same function.
Garlic bread works as an appetizer before any meal. At a dinner party, setting out warm garlic bread while guests arrive buys you time in the kitchen and creates an immediate sense of hospitality — the kitchen smells incredible, and people feel welcomed.
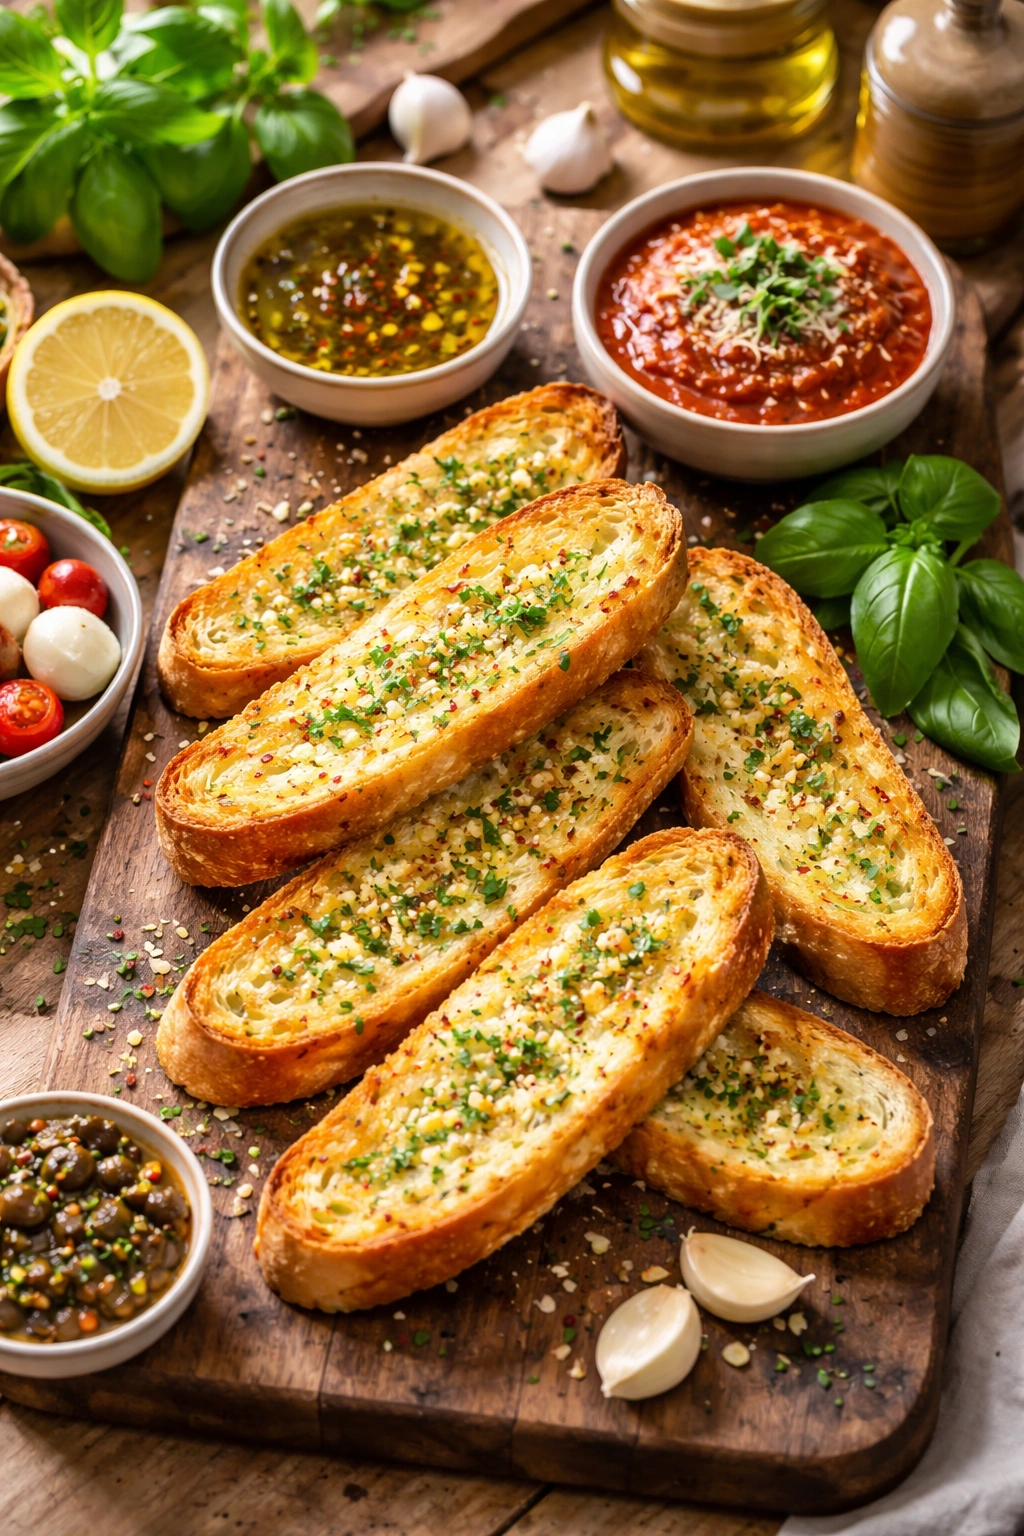
For casual entertaining, garlic bread works as part of a bread and dips situation: serve it warm with an olive tapenade, roasted red pepper hummus, herbed cream cheese, or even good quality marinara for dipping. This is less traditional but absolutely delicious.
It also works as part of a charcuterie or grazing board, torn into pieces and scattered among cheeses, cured meats, olives, and other items. The warmth and richness balance the saltiness of cured meats beautifully.
For plating at a dinner table: Serve garlic bread in a bread basket lined with a cloth napkin, so it stays warm. Arrange the pieces leaning against each other at a slight angle rather than stacked flat on top of each other, which makes them look less appealing. If you’ve made it for company, bring it to the table immediately after removing it from the oven, before it cools.
For casual serving: Just put it on a plate and let people help themselves. Garlic bread isn’t precious — it’s meant to be eaten with fingers, dipped into sauces, and enjoyed without pretense.
Final Thoughts
Garlic bread is proof that some of the most satisfying dishes are also the simplest. There’s no fermentation, no complicated techniques, and no ingredients you can’t pronounce. What makes this version work in 10 minutes is understanding that you’re not baking bread — you’re toasting bread that’s already been baked and infusing it with flavor using two things: butter and heat.
The technical secret is the toasting, which transforms raw garlic into something mellow, caramelized, and deeply savory through the Maillard reaction. This is why garlic bread made this way tastes nothing like raw garlic spread on bread — you’re getting genuine flavor development, not just flavor application.
Once you’ve made this a few times, you’ll realize that this technique works with endless variations, and you’ll naturally start tweaking it to your preferences: more garlic if you’re obsessed with garlic, fresh herbs if your garden is overflowing, cheese if you want richness, red pepper flakes if you like heat. The base is flexible enough to become whatever version of garlic bread you’re craving in that moment.
Most importantly, you can now make genuinely impressive garlic bread faster than you could order it from a restaurant. That’s not just convenient — it’s the kind of small kitchen skill that makes cooking feel less like a chore and more like something you actually enjoy doing.