Making nut butter at home is one of those kitchen skills that feels fancy but is genuinely simple — and once you taste the difference between homemade and store-bought, you’ll never look back. There’s something deeply satisfying about watching raw nuts transform into creamy, luxurious spread with just a food processor and patience. You control every ingredient, skip the added oils and stabilizers, and end up with something that tastes infinitely better than anything in a jar on a shelf.
The beauty of homemade nut butters is their versatility. Spread them on toast, swirl them into oatmeal, use them as a dip for fruit, bake them into cookies, or blend them into smoothies. They’re packed with healthy fats, protein, and minerals — making them genuinely nutritious, not just delicious. Plus, once you understand the technique, you can make any nut butter variation you want. This week, we’re exploring four different homemade nut butter recipes, each with its own personality and best uses. Whether you prefer the earthiness of almond, the richness of cashew, the boldness of peanut, or something more adventurous, you’ll find something here worth making.
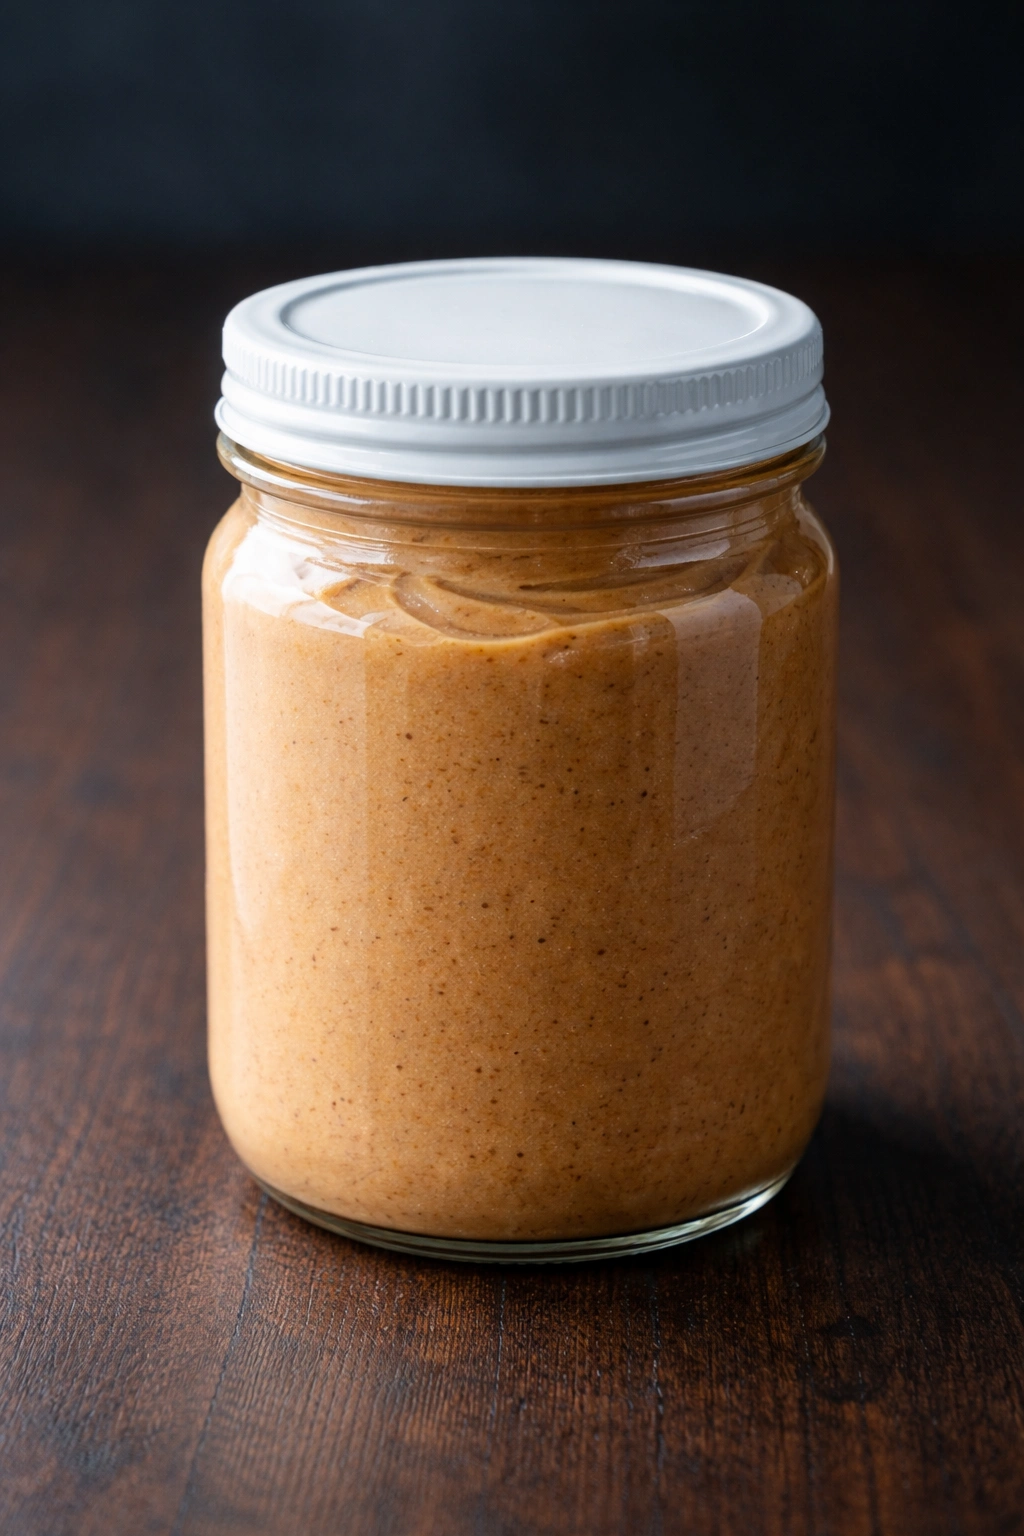
1. Classic Almond Butter
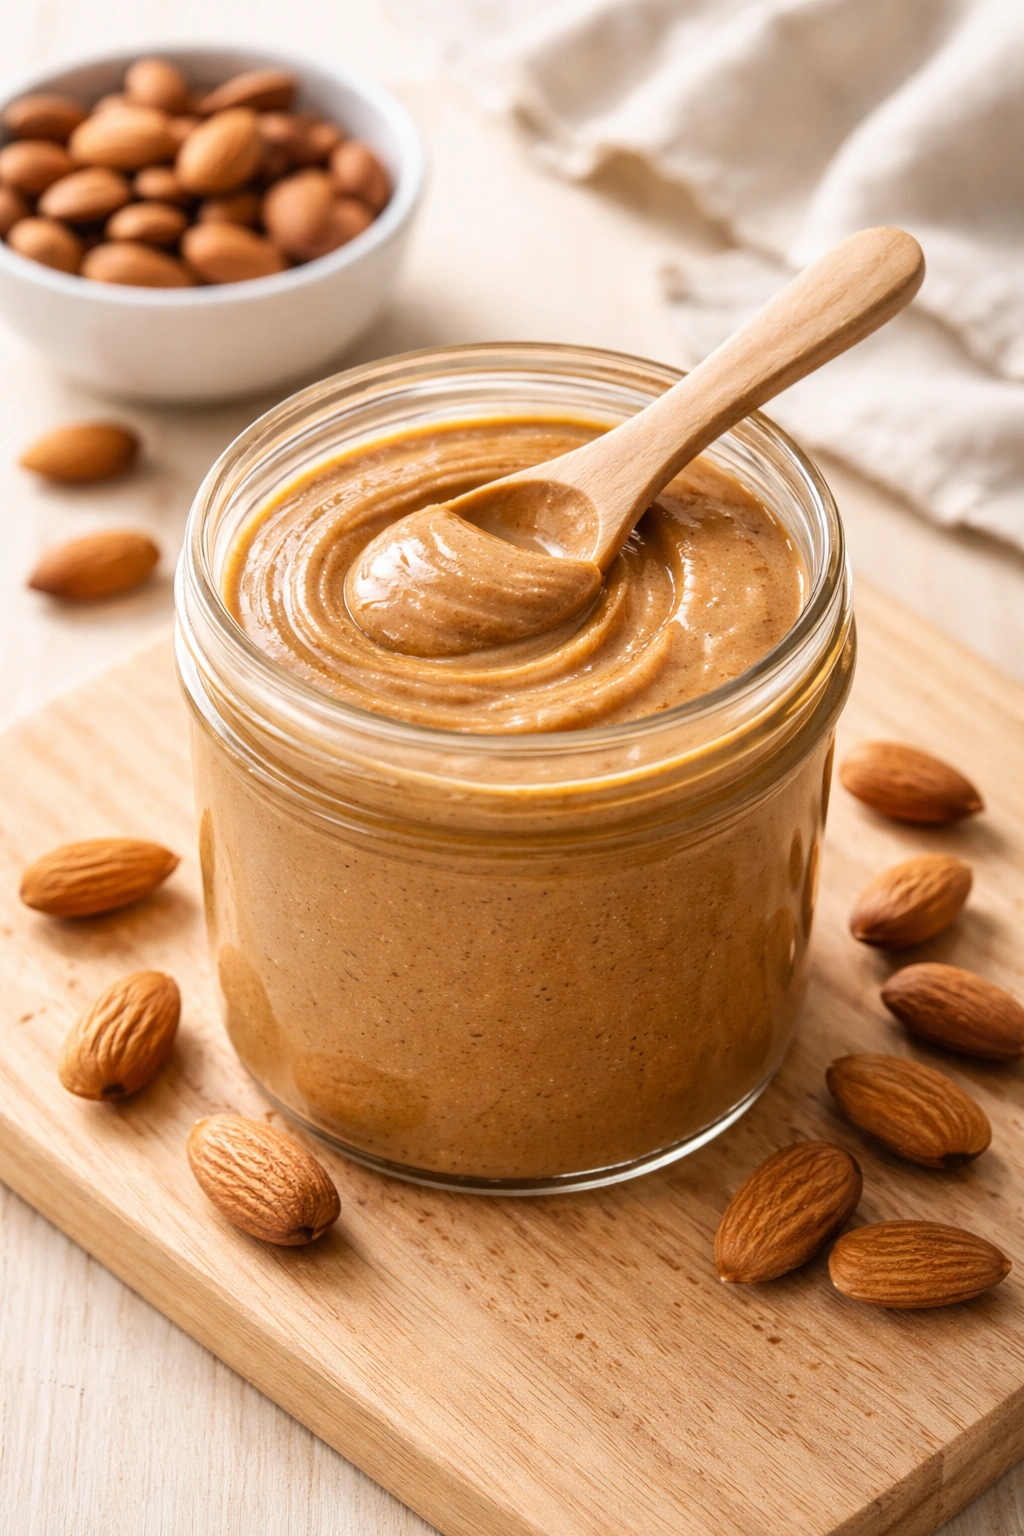
Almond butter is the everyday workhorse of nut butters — smooth, naturally sweet, and pair-able with nearly everything. This version is pure simplicity: just roasted almonds and a tiny pinch of salt. No oil added, no sweetener, no complicated steps. The almonds release their own natural oils as they’re processed, creating that perfect creamy texture without any additives whatsoever.
Almond butter has a mild, slightly sweet flavor that works equally well in savory and sweet applications. Toast it on whole grain bread with sliced banana and honey, layer it into smoothie bowls, or use it as a base for energy bites. It’s also fantastic in baking — replace some of the fat in cookie or brownie recipes with almond butter for a subtle nutty depth.
Yield: Makes about 1½ cups (12 servings of 2 tablespoons each) Prep Time: 10 minutes (mostly hands-off) Cook Time: 0 minutes (no cooking required) Total Time: 10 minutes Difficulty: Beginner — You literally just process one ingredient. The trickiest part is patience while the food processor runs.
Ingredients:
- 2 cups raw or roasted unsalted almonds
- ¼ teaspoon fine sea salt
Instructions:
-
If you’re using raw almonds rather than pre-roasted, spread them on a baking sheet and roast them at 300°F (150°C) for 12 to 15 minutes, stirring halfway through, until fragrant and just beginning to brown at the edges. Roasting develops deeper flavor and makes the almonds more digestible. Let them cool completely before processing.
-
Pour the cooled almonds into a food processor fitted with the blade attachment (a regular blender won’t work effectively for this — a food processor is essential).
-
Process on high speed. You’ll go through distinct phases over the next 8 to 10 minutes. First, the almonds will chop into smaller pieces. After about 2 minutes, they’ll begin to look powdery. This is when many people panic and think something’s wrong. It’s not — you’re exactly where you need to be. Keep processing.
Advertisements -
After 5 to 6 minutes total, the natural oils in the almonds will begin to release, and the mixture will start to clump together. Scrape down the sides of the processor, then continue processing. The clumps will gradually break down and smooth out.
-
By 8 to 10 minutes, you’ll have a thick, creamy, spoonable almond butter. If it’s still slightly chunky, continue processing for another minute. The butter will continue to smooth out as it sits.
-
Add the sea salt and pulse briefly to combine. Taste it — if you like it slightly saltier, add another pinch.
-
Transfer the almond butter to an airtight glass jar and store at room temperature.
Real Talk About the Process: The food processor will get warm during processing — this is completely normal and actually helps the almond oils release more smoothly. If your processor feels hot to the touch, take a 2-minute break, then resume. Also, don’t use a mini food processor — you need a standard 11- to 14-cup processor with enough capacity and motor power to handle the almonds.
Common Mistakes to Avoid:
The biggest mistake is stopping too early. If you quit processing when the almonds look like flour, you’ll end up with almond powder instead of almond butter. You must keep going even when it looks unpromising. The transformation from powder to paste happens gradually between minutes 5 and 8.
Another misstep is using blanched almonds. Raw blanched almonds (skins removed) process faster but produce a slightly less flavorful, less nutrient-dense butter. Use raw almonds with skins on, or buy pre-roasted unsalted almonds for the deepest flavor.
Flavor Variations to Try
- Honey Almond Butter: Blend 1 tablespoon of raw honey into your finished almond butter. It adds subtle sweetness without overwhelming the almond flavor.
- Cinnamon Spiced Almond Butter: Add ½ teaspoon of ground cinnamon and a pinch of nutmeg while processing. Delicious in smoothies or on apple slices.
- Cocoa Almond Butter: Mix 1 tablespoon of unsweetened cocoa powder and 1 teaspoon of honey into finished almond butter. It’s like Nutella’s sophisticated cousin.
Storage and Shelf Life: Almond butter keeps for 2 to 3 weeks at room temperature in an airtight container, or up to a month in the refrigerator. You may notice the oil separating slightly from the solids — this is natural and harmless. Simply stir it back together before using. You can also store almond butter in the freezer for up to 3 months; thaw it in the fridge overnight before using.
Best Served: Immediately after making, while it’s at its freshest and smoothest. Spread on warm toast while the bread is still slightly steamy for optimal absorption.
2. Rich Cashew Butter with Vanilla and Sea Salt
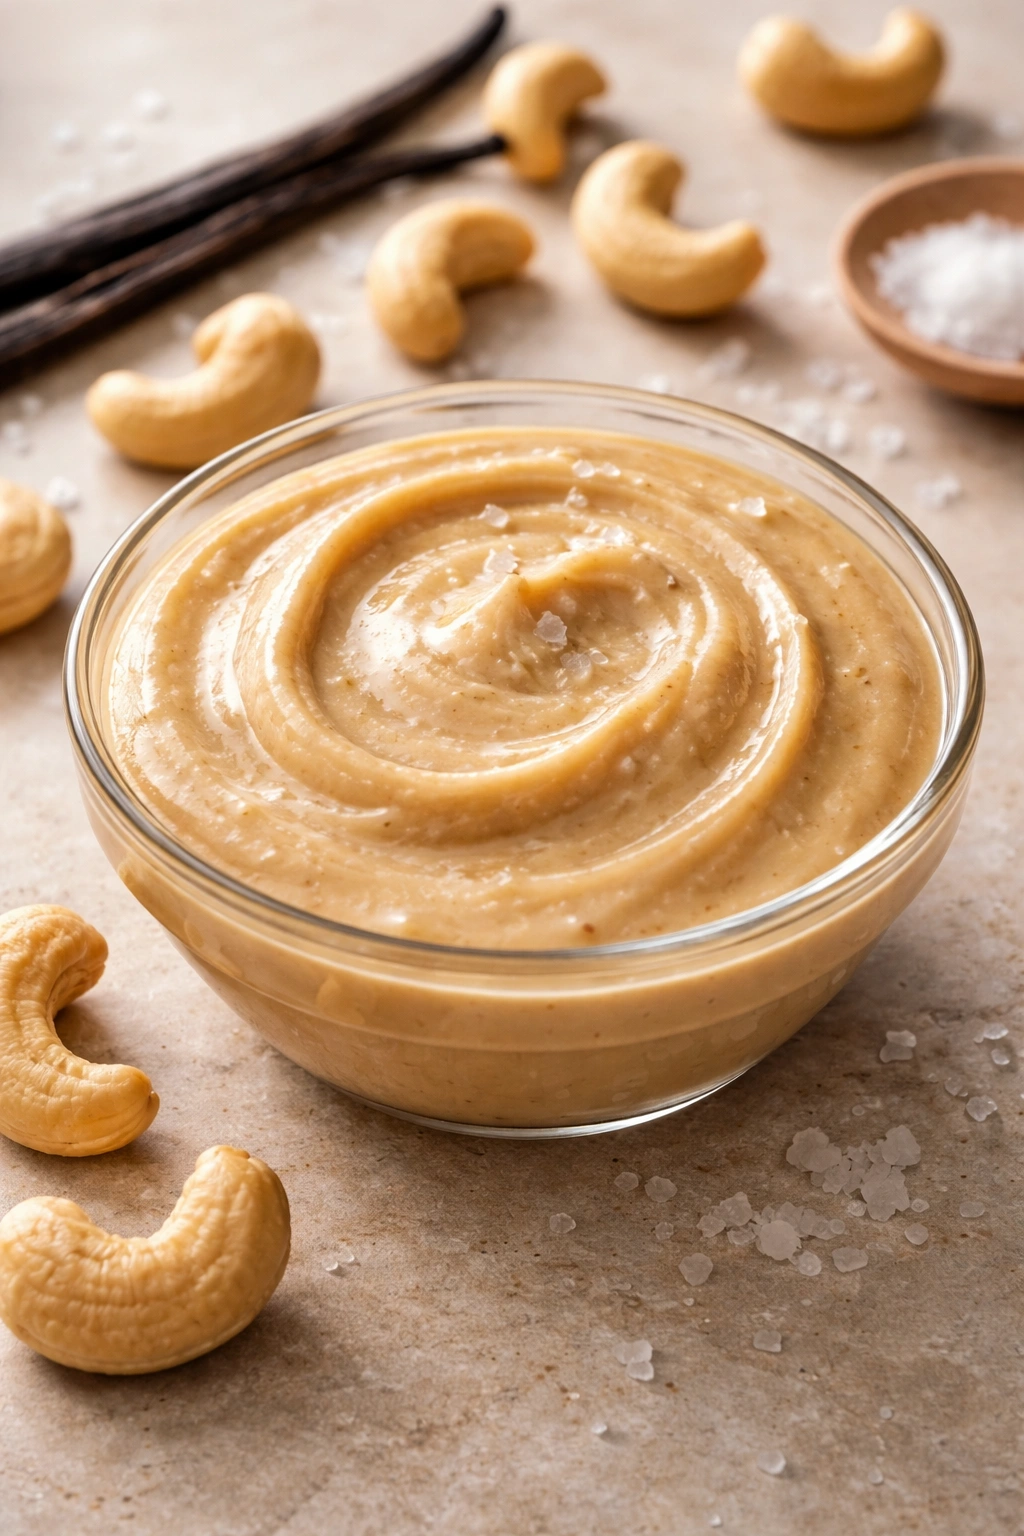
Cashew butter is pure indulgence — silkier and more delicate than almond butter, with a naturally sweet, buttery flavor that needs very little embellishment. This version adds just a whisper of vanilla and a touch of fleur de sel (a finishing sea salt with crystalline texture), elevating it into something you’d swear came from a fancy food boutique.
Cashews contain less fiber and have a higher fat content than almonds, which means cashew butter is naturally creamier and requires less processing time. The trade-off is that cashew butter is slightly less nutrient-dense, but it’s absolutely delicious — perfect for anyone with almond sensitivities, or anyone who simply prefers the more refined, buttery flavor profile.
Yield: Makes about 1½ cups (12 servings of 2 tablespoons each) Prep Time: 5 minutes Cook Time: 12 to 15 minutes (roasting time) Total Time: 20 minutes Difficulty: Beginner — Even simpler than almond butter because cashews process faster and require less stirring.
Ingredients:
- 2 cups raw unsalted cashews
- 1 teaspoon pure vanilla extract
- 2 pinches of fleur de sel or finishing sea salt (regular table salt is too fine and will taste salty rather than enhance)
Instructions:
-
Spread the raw cashews on a baking sheet in a single layer and roast them at 300°F (150°C) for 12 to 15 minutes, stirring once halfway through, until they’re golden and fragrant. Roasting develops the cashew flavor significantly — do not skip this step even though it takes time. Unbaked cashew butter tastes flat and slightly waxy by comparison.
-
Allow the roasted cashews to cool completely — warm cashews won’t process as smoothly. Once cooled, transfer them to your food processor.
-
Process on high speed. Cashews are softer and contain more natural oils than almonds, so they’ll turn into butter faster — usually in 4 to 6 minutes rather than 8 to 10. Watch carefully so you don’t over-process them.
-
After 2 minutes, the cashews will break into smaller pieces and look somewhat powdery. After 3 to 4 minutes, you’ll see them beginning to release oils and start clumping. After 5 to 6 minutes, the clumps will smooth into a luxuriously creamy, pourable butter.
-
Add the vanilla extract and 2 pinches of fleur de sel. Pulse just until incorporated — 3 to 4 pulses is plenty. Do not over-mix after adding vanilla or you’ll lose that fresh vanilla flavor.
Advertisements -
Taste the finished butter. The fleur de sel should enhance the natural cashew sweetness, not make it taste salty. If you can taste salt clearly, you’ve added enough (or possibly too much). It should be subtle.
-
Spoon the cashew butter into an airtight glass jar. It will thicken slightly as it cools.
Why Cashew Butter Processes Faster: Cashews have a higher fat and lower fiber content than other nuts, which means they break down more quickly and easily. This is why some recipes call for adding a tablespoon of coconut oil or butter to help other nut butters process — cashews need no such help. If you process them too long, you risk ending up with cashew oil separated from solids, so err on the side of stopping a minute earlier rather than later.
The Vanilla and Salt Decision: Pure vanilla extract (not imitation) adds depth without tasting artificial. Fleur de sel is non-negotiable here — it’s a finishing salt with larger crystals and a more delicate mineral flavor than table salt. If you can’t find it, Maldon salt works as a substitute. Regular fine sea salt tends to dissolve completely and make the butter taste too salty rather than elegantly seasoned.
Creative Flavor Additions
- Maple Cashew Butter: Add 1 teaspoon of pure maple syrup (not pancake syrup). The combination of vanilla and maple tastes like a sophisticated dessert spread.
- Espresso Cashew Butter: Stir in ½ teaspoon of instant espresso powder. It deepens the cashew flavor and makes the butter delicious on coffee cake or in chocolate creations.
- Cardamom Cashew Butter: Add a pinch of ground cardamom for an exotic edge. It’s stunning swirled into yogurt or paired with stone fruits.
Storage and Shelf Life: Cashew butter keeps for 2 to 3 weeks at room temperature, or up to 6 weeks in the refrigerator. It won’t develop the oil separation that almond butter does because of its naturally high fat content — it’ll stay smooth and spoonable throughout storage. You can freeze it for up to 3 months; it thaws to its original creamy texture.
Best Served: Cashew butter is luxurious enough to eat straight from the spoon. It’s also incredible on apple slices, drizzled on warm pancakes, or blended into high-end smoothie bowls. The subtle vanilla and salt elevate even the simplest applications.
3. Peanut Butter with Cinnamon and Honey
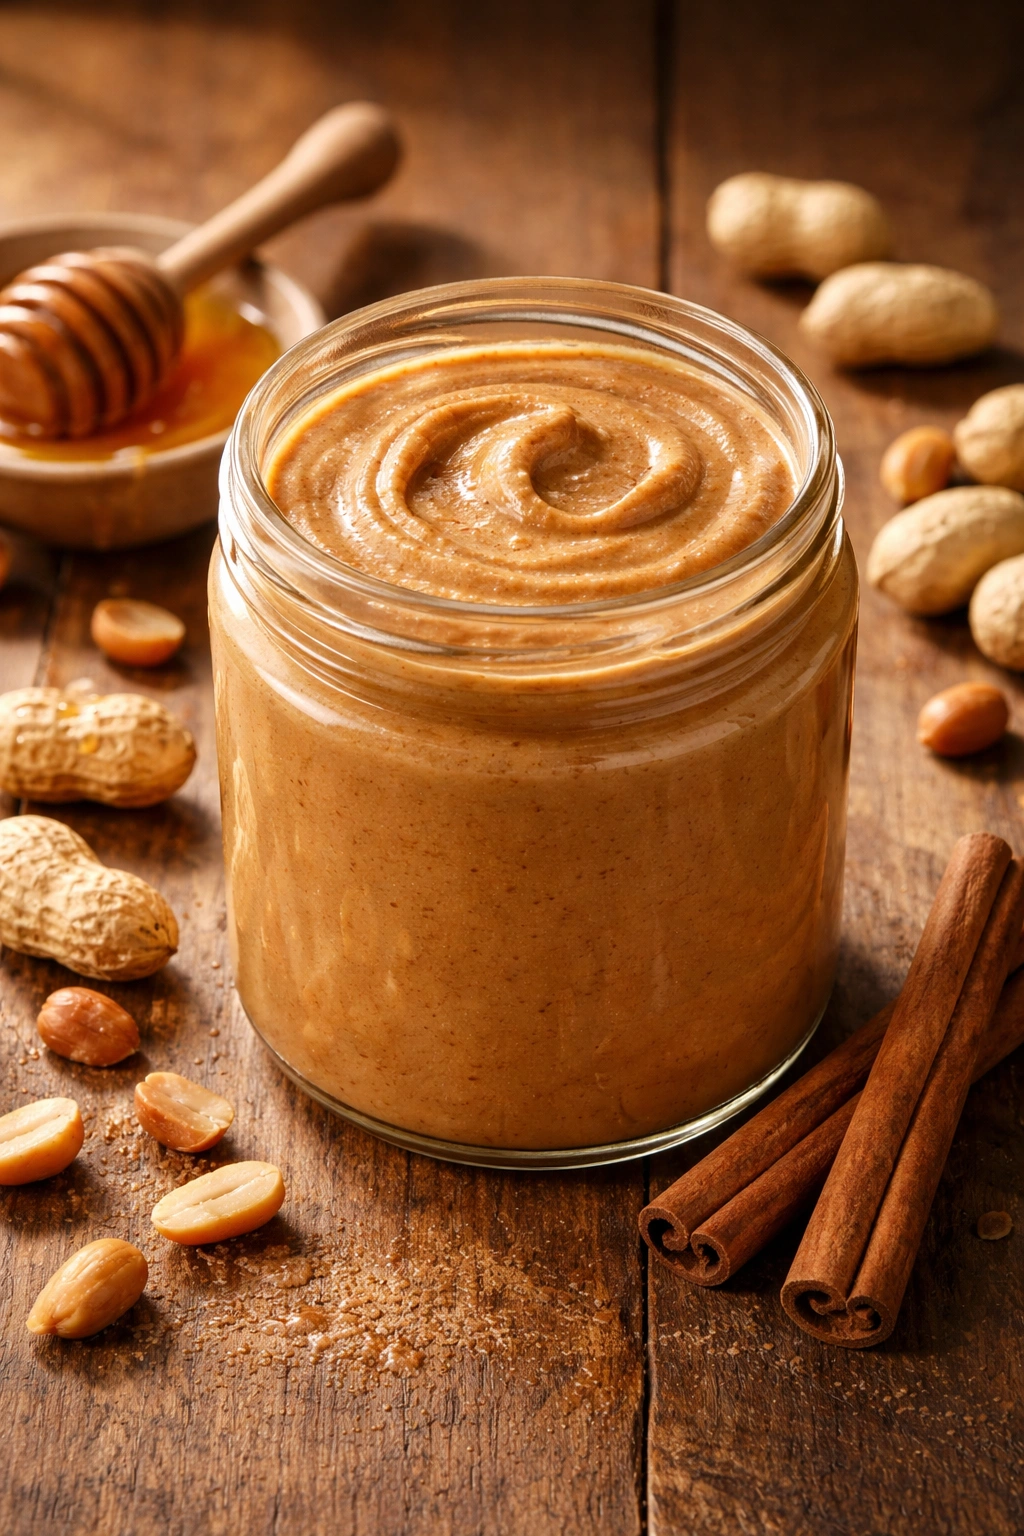
Peanut butter is the classic for a reason — it’s rich, naturally sweet, versatile, and beloved across cultures. Homemade peanut butter tastes exponentially better than most commercial versions because it’s made with just peanuts, no hydrogenated oils, no corn syrup, and no gum stabilizers. This version adds warm cinnamon and floral honey, transforming ordinary peanut butter into something sophisticated enough to serve to guests.
Technically, peanuts are legumes rather than tree nuts, but they process into butter exactly the same way and deliver that creamy, satisfying mouthfeel everyone expects from peanut butter. The cinnamon and honey complement the peanut flavor without overpowering it, creating a spread that works equally well in sweet and savory contexts.
Yield: Makes about 1¾ cups (14 servings of 2 tablespoons each) Prep Time: 5 minutes Cook Time: 0 minutes (use pre-roasted peanuts) Total Time: 5 minutes (if using pre-roasted, unsalted peanuts) Difficulty: Beginner — This is the fastest nut butter to make because you’re using pre-roasted nuts. Perfect if you want homemade nut butter but don’t have much time.
Ingredients:
- 2½ cups pre-roasted unsalted peanuts (or 2 cups if using raw peanuts that you’ll roast yourself)
- 2 tablespoons raw honey
- 1 teaspoon ground cinnamon (or to taste)
- ¼ teaspoon fine sea salt
Instructions:
-
If you’re starting with raw peanuts, roast them at 325°F (163°C) for 10 to 12 minutes, stirring occasionally, until fragrant and lightly browned. If you’re using pre-roasted unsalted peanuts (the easiest option), proceed directly to step 2.
-
Pour the roasted peanuts into your food processor and process on high speed. Peanuts contain very high natural oil content, so they’ll turn into butter faster than almonds — usually in 3 to 5 minutes. You’ll watch the texture transition from crushed peanuts to peanut flour to a clumpy paste to smooth, creamy butter. The speed depends on how much you’re processing and your food processor’s power, but it’s noticeably faster than other nuts.
-
When the peanut butter reaches a smooth, spoonable consistency, stop processing. Add the honey, cinnamon, and salt.
-
Pulse 8 to 10 times until the honey and cinnamon are evenly distributed throughout. Do not over-process at this stage — you want visible cinnamon flecks throughout the butter, and over-mixing will break them down and create a uniform brown color rather than a speckled appearance.
-
Taste a small spoonful. The cinnamon should add warmth without tasting like cinnamon candy. If you want more cinnamon flavor, add another ¼ teaspoon and pulse briefly. The honey should be subtle, sweetening the butter without making it taste like a dessert spread.
-
Transfer to an airtight jar. The cinnamon will settle slightly as the butter sits — just stir before serving if you prefer uniform distribution.
Why This Works So Well: The warm spice of cinnamon bridges the gap between a savory and sweet application. You can use this peanut butter on toast with avocado and sea salt, or on apple slices with a drizzle of additional honey. The honey adds sweetness without requiring much volume — too much honey would make the butter overly thick and grainy when it sets.
The Pre-Roasted Peanut Shortcut: Buying pre-roasted unsalted peanuts (rather than raw) saves you 12 minutes and is absolutely worth it. The flavor is identical, and the texture of the finished butter will be exactly the same. This makes homemade peanut butter accessible even on busy weeknights.
Flavor Variations Worth Trying
- Chocolate Cinnamon Peanut Butter: Stir in 2 tablespoons of unsweetened cocoa powder and increase the honey to 3 tablespoons. It tastes like a homemade Reese’s spread.
- Spiced Peanut Butter: Add ¼ teaspoon each of ground ginger, nutmeg, and cloves along with the cinnamon. It’s warming and complex, perfect for breakfast toast.
- Maple Peanut Butter: Replace the honey with 2 tablespoons of pure maple syrup and reduce the cinnamon to ½ teaspoon. More autumnal and less sweetly floral.
Storage and Shelf Life: Peanut butter keeps for 3 to 4 weeks at room temperature, or up to 2 months in the refrigerator. The cinnamon acts as a natural preservative, so this version stays fresher longer than plain peanut butter. You may see some oil separation — simply stir it back in. You can freeze peanut butter for up to 4 months.
Best Served: Straight from the jar on a spoon (we don’t judge), spread on warm whole grain toast with banana slices, or swirled into hot oatmeal where the butter melts luxuriously. It’s also incredible in smoothie bowls, mixed into plain yogurt, or used as a dip for apple slices and celery.
4. Pistachio Butter with Roasted Garlic and Herbs
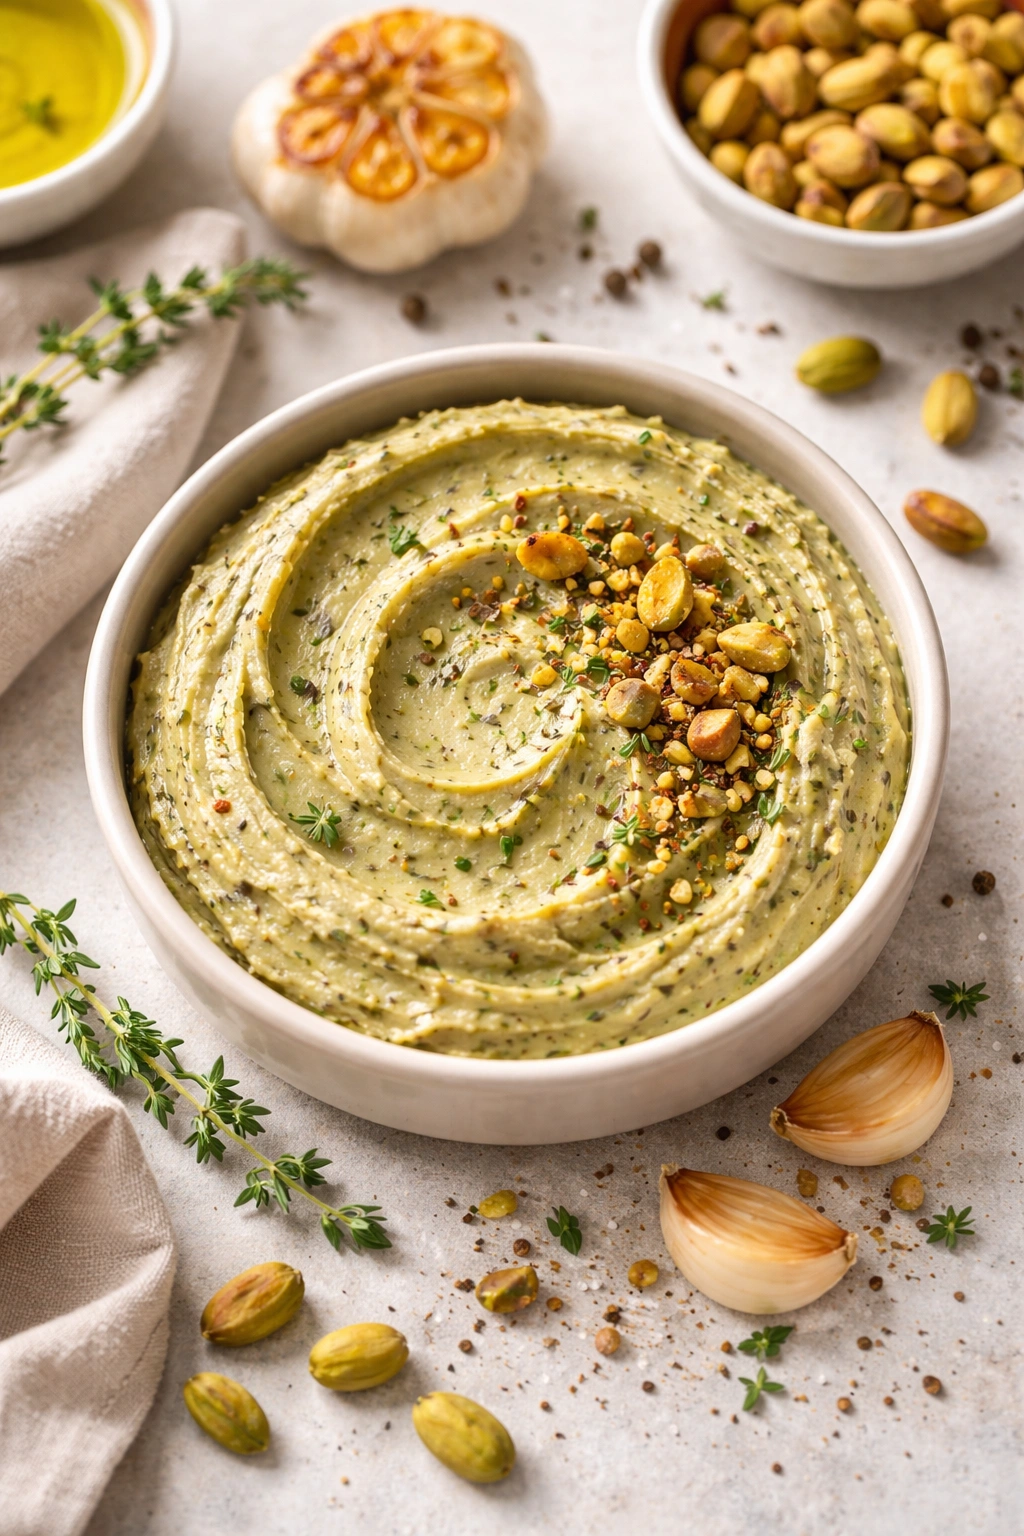
This savory pistachio butter is where things get adventurous. Pistachio has a naturally slightly salty, almost briny flavor that pairs beautifully with roasted garlic, fresh herbs, and a touch of lemon zest. The result is a spread that’s neither sweet nor savory in the traditional sense — it’s sophisticated and utterly unique, perfect for people who want something beyond the typical breakfast spread.
Pistachio butter is less common than almond or peanut, which means making it at home is genuinely special and impressive. The vibrant natural color (pale greenish-beige) is beautiful on its own, and the flavor is complex and earthy in a way that demands attention. Use this butter on crostini with roasted vegetables, spread under grilled chicken, stirred into pasta as a sauce, or simply on crusty bread with fresh herbs.
Yield: Makes about 1¼ cups (10 servings of 2 tablespoons each) Prep Time: 10 minutes Cook Time: 15 minutes (roasting nuts and garlic) Total Time: 25 minutes Difficulty: Intermediate — The roasting process requires a bit more attention, and the flavor balancing takes some care to avoid overpowering the delicate pistachio.
Ingredients:
- 2 cups raw or pre-roasted unsalted pistachios (about 10 ounces)
- 3 cloves garlic, peeled and halved
- 1 tablespoon fresh rosemary leaves (or 1½ teaspoons dried)
- 1 tablespoon fresh thyme leaves (or 1 teaspoon dried)
- Zest of 1 large lemon (about 1 tablespoon)
- ¼ teaspoon fine sea salt
- Pinch of freshly ground black pepper
Instructions:
-
If using raw pistachios, place them on a baking sheet and roast at 325°F (163°C) for 12 to 15 minutes, stirring halfway through, until fragrant and just beginning to brown. If using pre-roasted unsalted pistachios, proceed to step 2.
-
On a separate small baking sheet, place the garlic clove halves. Drizzle them lightly with olive oil (about ½ teaspoon total) and sprinkle with a tiny pinch of salt. Roast the garlic alongside the pistachios during the last 10 minutes of pistachio roasting, or roast them together if your timing works out. The garlic should be golden, soft, and sweet when done — about 10 to 12 minutes total roasting time. The garlic should be caramelized and mellow, not raw or harsh.
-
Let both the pistachios and roasted garlic cool to room temperature — warm pistachios won’t process smoothly.
-
Add the cooled pistachios and roasted garlic to your food processor. Process on high speed for 5 to 7 minutes, until the pistachios break down into smaller pieces, then flour, then begin releasing oils and forming a paste. Pistachio butter comes together more slowly than peanut butter but faster than almond butter.
Advertisements -
When the mixture reaches a smooth, spoonable consistency, add the fresh rosemary and thyme leaves (or dried herbs). Add the lemon zest, sea salt, and black pepper.
-
Pulse 6 to 8 times until the herbs and lemon are evenly distributed. You want to see flecks of green herbs throughout the butter — the visual contrast is part of the appeal, and over-processing breaks down the herbs into dust.
-
Taste a small amount on a spoon. The garlic should add sweet, mellow depth without tasting overwhelming or raw. The herbs should be aromatic but not dominate. The lemon zest should add brightness without making it taste lemony. If any flavor needs adjustment, you can pulse in more herbs or zest, but remember that flavors intensify slightly as the butter sits for a day.
-
Transfer to an airtight glass jar. This butter is especially beautiful in a clear jar where people can see the herb specks.
The Roasted Garlic Critical Detail: Do not use raw garlic. Raw garlic will taste sharp, harsh, and overwhelmingly pungent in the finished butter. Roasting mellows garlic into something sweet, savory, and complex — completely different from its raw state. This is the most important step for getting the flavor right.
Using Fresh vs. Dried Herbs: Fresh herbs taste brighter and more alive, but dried herbs are more intense in flavor. If you’re using dried herbs (which is totally fine), use about one-third the quantity of fresh herbs — so ½ teaspoon dried rosemary and ⅓ teaspoon dried thyme instead of the full tablespoon and tablespoon of fresh. Taste and adjust.
Serving Ideas That Showcase This Butter
- On Crostini: Toast thin baguette slices, spread with pistachio butter, top with roasted red peppers and fresh basil.
- With Grilled Vegetables: Dollop on warm roasted carrots, beets, or Brussels sprouts.
- Mixed Into Pasta: Thin it with a little pasta water and toss with warm pasta, lemon juice, and fresh greens. It becomes a silky, herbaceous sauce.
- On Grilled Fish: Spread under grilled salmon or halibut where it melts into a rich, savory topping.
- With Crusty Bread: Simply spread on toasted whole grain bread with a crack of sea salt. The simplicity lets the pistachio shine.
Make-Ahead and Flavor Development: Pistachio butter actually benefits from sitting for a day before serving — the roasted garlic flavor deepens, the herbs distribute more evenly, and the flavors meld into something more cohesive and mature. Make it today, serve it tomorrow.
Storage and Shelf Life: Pistachio butter keeps for 2 to 3 weeks at room temperature, or up to 6 weeks in the refrigerator. The herbs and garlic act as natural preservatives. You may see slight separation of oil — simply stir it back in. You can freeze pistachio butter for up to 3 months; thaw it in the refrigerator overnight.
Best Served: At room temperature where the texture is spreadable and the flavors are most vibrant. Cold pistachio butter becomes thick and harder to spread, and chilled flavors are always more muted.
Key Tips for Success With Any Homemade Nut Butter

Temperature matters. Roasting nuts before processing deepens flavor dramatically and helps them release their natural oils more smoothly. But processing warm nuts can cause separation and weird texture. Always cool your roasted nuts completely before processing.
Patience with the process. Nut butters take time to transform from flour to paste. The exact timing depends on your food processor’s power, the humidity in your kitchen, and the type of nut. Don’t give up during the powdery or clumpy phases — you’re exactly where you need to be.
Quality nuts make quality butter. If your starting nuts taste stale or musty, your finished butter will too. Buy nuts from a source with good turnover, store them in a cool place, and use them relatively soon after purchase. Nuts can go rancid, especially once they’re cut or processed.
Salt is essential, not optional. Even just ¼ teaspoon of sea salt in a batch of nut butter enhances the natural flavor of the nuts without making the butter taste salty. It’s the difference between okay nut butter and genuinely delicious nut butter.
Your food processor is the only tool that works. Blenders, immersion blenders, and stand mixer food grinders simply don’t have the right combination of speed and bowl capacity to properly process nuts into smooth butter. Invest in a decent food processor if you don’t already have one — it’s the single most important piece of equipment for making homemade nut butter.
Storage Guidelines That Keep Nut Butters Fresh
Homemade nut butters keep longer than you might expect because they contain no water, which means bacteria and mold have nothing to feed on. They do contain natural oils that can eventually go rancid, but that takes time in proper storage conditions.
Room temperature storage works for 2 to 4 weeks depending on the nut type. Keep the jar in a cool, dark place — a pantry is perfect, but avoid storing it next to the stove or anywhere warm. Peanut butter and pistachio butter last longest at room temperature (3 to 4 weeks) because of their natural oils and compounds. Almond and cashew butter last about 2 to 3 weeks.
Refrigerator storage extends the life to 4 to 8 weeks. The cold slows down oxidation and any rancidity development. The texture becomes thicker and less spreadable when cold, so you may need to let it warm up to room temperature before using, or scoop it out with a spoon and let it warm in your mouth.
Freezer storage keeps nut butters fresh for 3 to 4 months. Freeze in an airtight container or even ice cube trays (where small portions can thaw quickly). Thaw in the refrigerator overnight before using. Nut butters thaw to their original smooth texture.
Signs of spoilage are rare but possible. If your nut butter develops a rancid smell (sharp, musty, unpleasant), or if you notice mold, discard it. If the texture becomes grainy and separated oil won’t mix back in, the nut butter is likely rancid. Fresh nut butter smells pleasant and nutty, not off or strange.
Final Thoughts

Once you’ve made homemade nut butter, the store-bought versions feel underwhelming. You taste the real flavor of actual nuts instead of an industrial approximation, and you know exactly what’s in your food — which matters when you’re eating something multiple times a week.
The best part? Making nut butter is genuinely easy once you understand what to expect. The food processor does all the work, and the whole process is finished in under 15 minutes from start to finish (including roasting time for most nuts). You can make a batch on Sunday and have fresh, delicious nut butter ready for the whole week of breakfasts, snacks, and cooking projects.
Start with whichever recipe appeals to you most — whether that’s the everyday reliability of almond butter, the decadence of cashew, the boldness of peanut, or the adventurousness of pistachio with roasted garlic. Once you nail one, the others become incredibly simple because you understand the technique. By this time next week, you’ll have your favorite homemade nut butter stocked in your pantry, and you’ll be wondering why you ever bought the store version.