There’s something almost magical about the smell of baked apples with spices warming your kitchen on a cool evening. The apples soften into a tender, jammy filling while the heat draws out their natural sweetness, mingling with cinnamon, nutmeg, and caramel until the whole house smells like autumn condensed into one dessert. Baked apples hit that rare sweet spot—they’re simple enough to make on a weeknight, impressive enough to serve to guests, and deeply comforting in a way that feels personal rather than fussy.
What makes baked apples so special is their versatility and accessibility. You don’t need fancy equipment or advanced techniques. A regular oven, a baking dish, and ingredients you likely already have on hand are all you need. Unlike a pie that requires dough-rolling skills or a cake that demands precision with flour measurements, baked apples are forgiving. If you slightly overfill them, they’re still delicious. If they bake a few minutes longer than the recipe says, they just get creamier inside. This makes them perfect for home cooks of any skill level, and it’s why they’ve remained a beloved dessert across generations and cultures.
The recipes in this collection range from the classics—the kind your grandmother might have made—to more creative combinations that play with unexpected flavor pairings like bourbon and cinnamon, or almond butter with dates. Each one is designed to feel like a warm hug on a cool night, meant to be enjoyed with a scoop of vanilla ice cream melting into the warm apple cavity, or a pour of custard sauce, or simply on their own with a cup of tea. Pick a recipe that speaks to you, gather a handful of ingredients, and let your oven do most of the work.
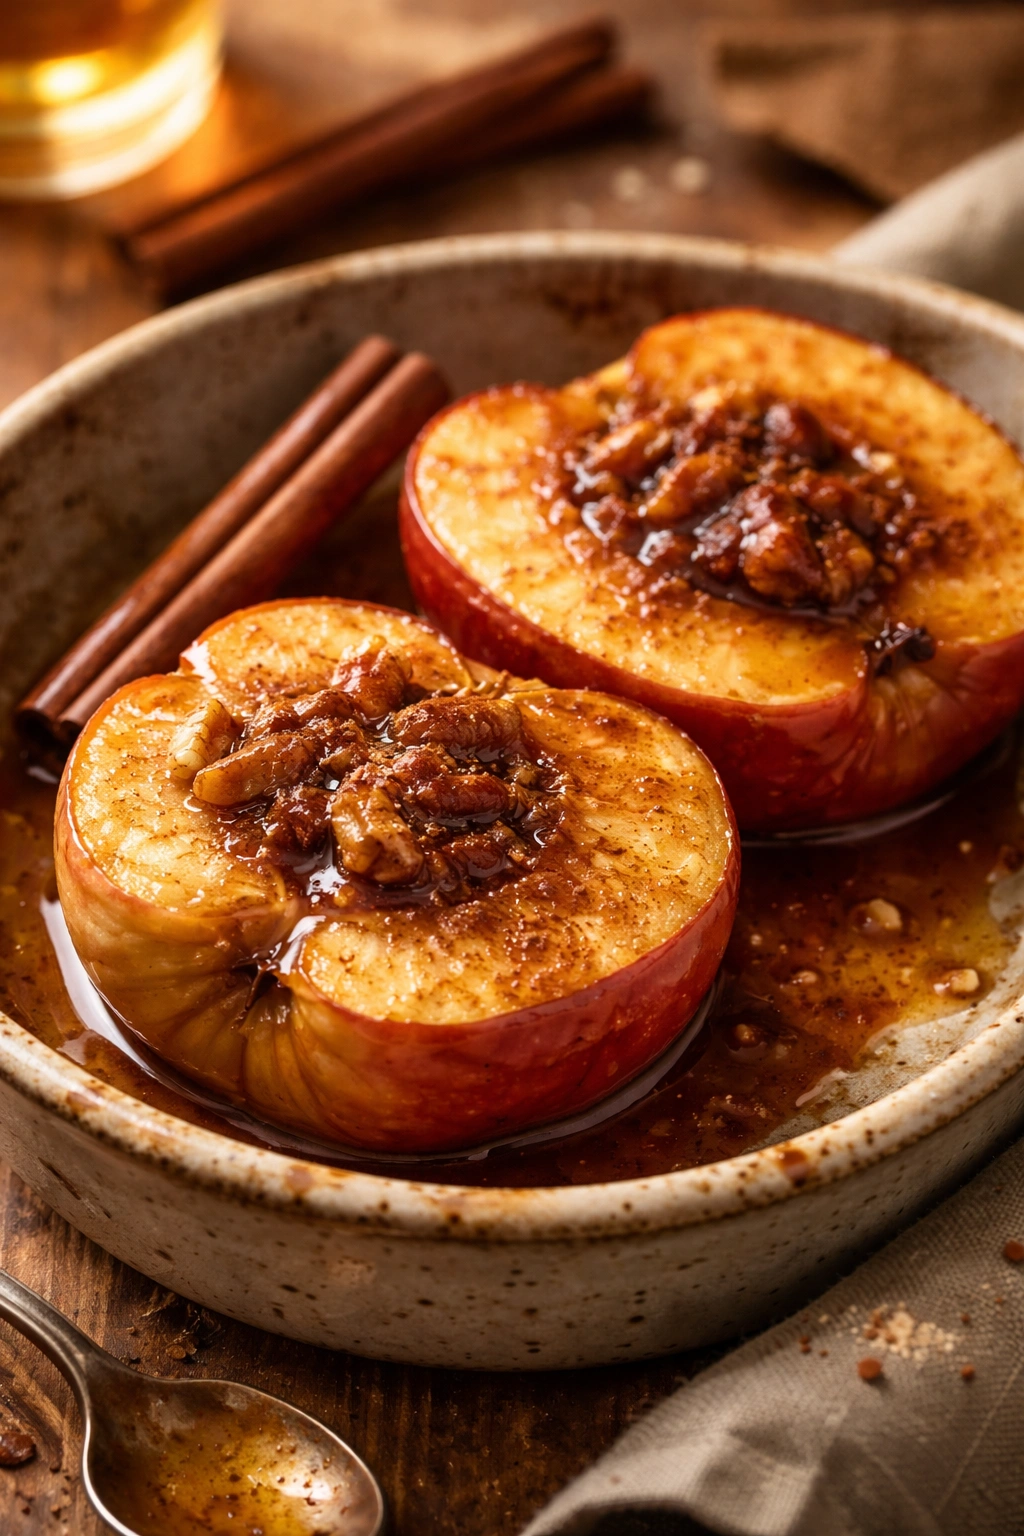
1. Classic Baked Apples with Cinnamon and Brown Sugar

This is the baked apple recipe you return to again and again—the one so straightforward and satisfying that it never gets old. There are no fancy components to fuss with, no complicated layering, just tender apples infused with warm spices and the deep sweetness of caramelized brown sugar. The filling is barely more than a spoonful of butter, brown sugar, and cinnamon mixed together, but when that melts into the apple as it bakes, it creates a concentrated sweetness that feels indulgent without being over the top.
What makes this version work is choosing the right apples and baking them until they’re perfectly tender but not collapsing. Firm baking apples like Granny Smith, Honeycrisp, or Pink Lady hold their shape while their flesh becomes creamy and soft inside. The cinnamon infuses throughout, not just flavoring the filling but eventually permeating the entire apple as the juices redistribute during baking.
Yield: Serves 4 | Prep Time: 15 minutes | Cook Time: 35-40 minutes | Total Time: 50-55 minutes | Difficulty: Beginner — this recipe requires only coring apples and stirring together a simple filling, making it ideal for anyone new to baked apple recipes.
Ingredients:
- 4 large firm baking apples (Granny Smith, Honeycrisp, or Pink Lady), washed and patted dry
- 4 tablespoons unsalted butter, softened to room temperature
- ½ cup packed brown sugar
- 2 teaspoons ground cinnamon
- ¼ teaspoon fine sea salt
- ¼ teaspoon freshly grated nutmeg
- ½ cup water
- 2 tablespoons honey (optional but recommended for extra depth)
- Vanilla ice cream or whipped cream for serving (optional)
Instructions:
Prepare the Apples:
- Preheat the oven to 375°F (190°C) and position the rack in the center of the oven.
- Using an apple corer or a small sharp knife, carefully remove the core from each apple, creating a cavity about ¾-inch in diameter. Start at the top and push the corer down about three-quarters of the way into the apple, stopping just before you break through the bottom — you want a pocket to hold the filling, not a tunnel that leaks. Set the cored apples upright in a baking dish just large enough to hold them snugly, leaving about an inch of space between each apple.
Make and Fill:
- In a small bowl, mix together the softened butter, brown sugar, cinnamon, salt, and nutmeg until you have a sandy, cohesive paste. Divide the mixture evenly among the four apples, spooning it into each cavity and pressing it gently to pack it in. Don’t worry if some spills over slightly — it will pool in the bottom of the dish and flavor the liquid as the apples bake.
- Pour the water around (not into) the apples, and drizzle the honey over the top of each apple if using. The water creates steam that helps the apples cook evenly and keeps the filling from drying out.
Bake:
- Bake for 35 to 40 minutes, until a fork inserted into the flesh of an apple slides through with very gentle resistance and the skin appears slightly wrinkled. The apples will soften considerably — don’t stop baking too early or you’ll miss the creamy, jammy texture that makes them special.
- Remove from the oven and let cool for 5 to 10 minutes (they’re extremely hot and quite delicate at this point). Drizzle each apple with the pan juices that have accumulated in the bottom of the dish — this is liquid gold and adds tremendous flavor.
How to Serve:
Divide the apples among serving bowls and spoon the warm pan juices over each one. Top with vanilla ice cream, a dollop of whipped cream, or a splash of heavy cream if you like. The warmth of the baked apple will gently melt the ice cream, creating a sauce that mingles with the pan juices.
Practical Tips:
The key to success is choosing apples that are truly firm and fresh. Soft apples that have been sitting in storage won’t hold their shape, and you’ll end up with applesauce rather than a whole baked apple. Give the apple a gentle squeeze before coring — it should feel solid. If your apples are smaller than average, reduce the baking time to 30 minutes and check for doneness with a fork. Conversely, very large apples may need up to 45 minutes.
Variations:
- With Raisins and Walnuts: Add 2 tablespoons of chopped toasted walnuts and 3 tablespoons of raisins plumped in warm water to the brown sugar filling for added texture.
- Salted Caramel: Replace the brown sugar with ½ cup salted caramel sauce mixed with 2 tablespoons of softened butter, then top with a pinch of fleur de sel before baking.
- Maple Spiced: Substitute 3 tablespoons of pure maple syrup for the brown sugar, and add ⅛ teaspoon of ground ginger and a tiny pinch of ground cloves to the filling.
Storage and Make-Ahead:
Baked apples are best served the same day they’re made, while the contrast between the warm, creamy filling and the tender fruit is most pronounced. However, they keep beautifully in an airtight container in the refrigerator for up to 3 days. Reheat gently in a 300°F (150°C) oven for 10 minutes before serving with fresh whipped cream or ice cream. You can also assemble the apples entirely in advance (up to 8 hours ahead), cover them with plastic wrap, and refrigerate until you’re ready to pop them in the oven — simply add 2-3 minutes to the baking time if starting from cold.
2. Baked Apples Stuffed with Oats and Maple Syrup
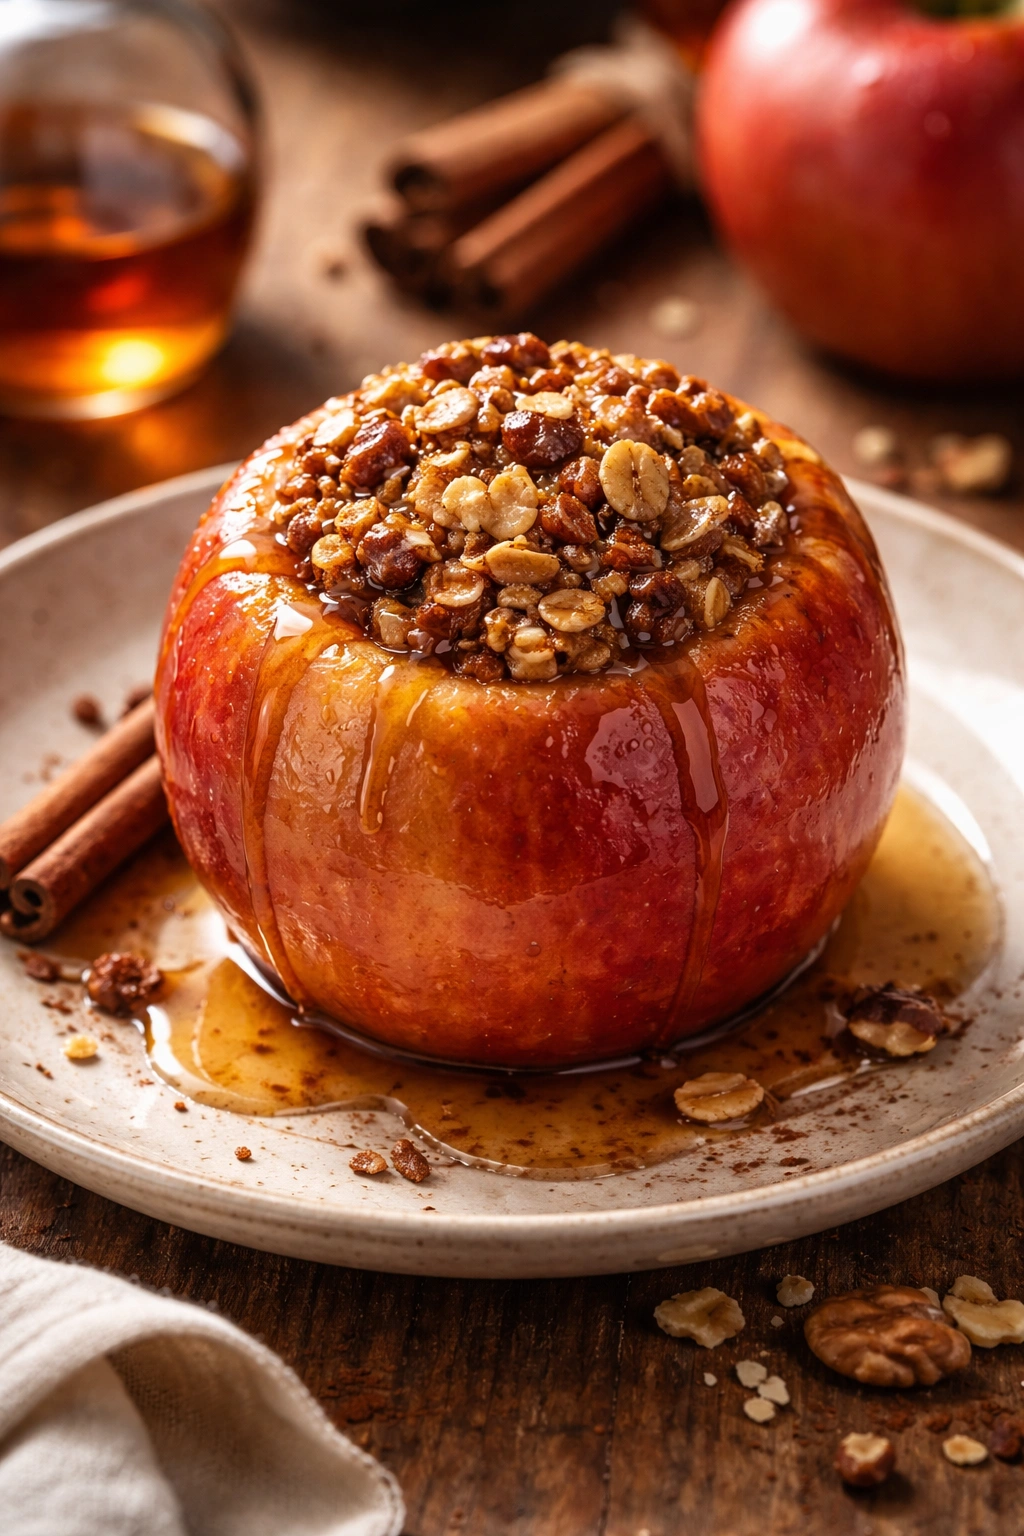
If you love the comfort of oatmeal and the sweetness of maple, this recipe marries those two loves into a single baked apple. The filling tastes like a warm bowl of oatmeal with maple syrup drizzled over the top, except it’s baked right inside the apple, so every bite has that perfect balance of creamy fruit, chewy oats, and golden maple flavor. The oats add substance and an appealing texture that makes these feel almost like a breakfast-meets-dessert dish, hearty enough to satisfy but still distinctly a treat.
This version also works beautifully with add-ins like chopped pecans, dried cranberries, or a handful of chia seeds stirred into the filling for extra nutrition and interest. The maple syrup caramelizes slightly at the edges of the filling, creating a toffee-like sweetness that deepens as the apple bakes.
Yield: Serves 4 | Prep Time: 15 minutes | Cook Time: 38-42 minutes | Total Time: 55 minutes | Difficulty: Beginner — aside from chopping the nuts, all steps are straightforward and require minimal technique.
Ingredients:
- 4 large firm baking apples (Granny Smith, Honeycrisp, or Braeburn), washed and patted dry
- 4 tablespoons unsalted butter
- ¾ cup old-fashioned rolled oats (not instant)
- ⅓ cup pure maple syrup
- ¼ cup chopped pecans or walnuts, lightly toasted
- 3 tablespoons packed brown sugar
- 1 teaspoon ground cinnamon
- ¼ teaspoon fine sea salt
- ⅛ teaspoon ground nutmeg
- ½ cup water or apple cider
- 2 tablespoons dried cranberries or raisins (optional)
Instructions:
Prepare the Filling and Apples:
- Preheat the oven to 375°F (190°C) with the rack positioned in the center.
- In a medium bowl, combine the oats, pecans, brown sugar, cinnamon, salt, and nutmeg. Stir in the maple syrup and melted butter until the mixture is completely combined and every oat is coated. If using dried cranberries, fold them in now.
- Using an apple corer or small sharp knife, remove the core from each apple, creating a ¾-inch cavity and being careful not to pierce the bottom. Stand each apple upright in a baking dish with about 1 inch of space between them.
Fill and Bake:
- Spoon the oat filling generously into each apple, pressing it down gently and mounding it slightly at the top — the mixture will compress slightly as the apple bakes. Any filling that spills into the bottom of the dish is fine and will flavor the baking liquid.
- Pour the water or apple cider around the apples (not into them), adding just enough liquid to create about ¼ inch of liquid in the bottom of the dish.
- Bake for 38 to 42 minutes, until the apples are fork-tender and the skin has begun to wrinkle slightly. The oat filling should look set but will still be slightly moist — that’s perfect.
How to Serve:
Transfer each apple to a serving bowl and spoon some of the warm pan liquid around the base. Serve with a dollop of whipped cream, a pour of heavy cream, or a small scoop of vanilla or cinnamon ice cream if desired. The oats will continue to absorb the apple juices as they rest, becoming increasingly creamy.
Practical Tips:
Toasting the nuts before adding them to the filling intensifies their flavor and adds a pleasant crunch that contrasts beautifully with the soft apples and chewy oats. Spread them on a small baking sheet in your oven while it preheats — they’ll be ready in about 5 minutes. Don’t skip this step; raw nuts tend to taste flat by comparison.
The maple syrup gives these apples a distinct, sophisticated sweetness, so taste your filling before baking — if you’d prefer it less sweet, use only ¼ cup maple syrup and increase the brown sugar to ½ cup instead. Some people find the pure maple flavor slightly strong; if that’s you, this substitution works perfectly.
Variations:
- With Cinnamon Cream Cheese: Mix 2 ounces of room-temperature cream cheese with the oat mixture for a tangy, creamy filling that’s delightfully rich.
- Apple Pie Spiced: Add ⅛ teaspoon of ground ginger, ⅛ teaspoon of ground cloves, and a pinch of ground allspice to the oat mixture for a deeper spice profile.
- Coconut and Macadamia: Replace the pecans with toasted macadamia nuts and stir in 3 tablespoons of unsweetened shredded coconut to the filling.
Storage and Make-Ahead:
These apples taste best served warm the same day they’re baked, but they keep well in a covered container in the refrigerator for up to 3 days. Reheat in a 325°F (165°C) oven for 8-10 minutes. The filled apples can be assembled up to 4 hours ahead and refrigerated before baking — add 2-3 minutes to the baking time if you start with cold apples.
3. Caramel Apple Crisp
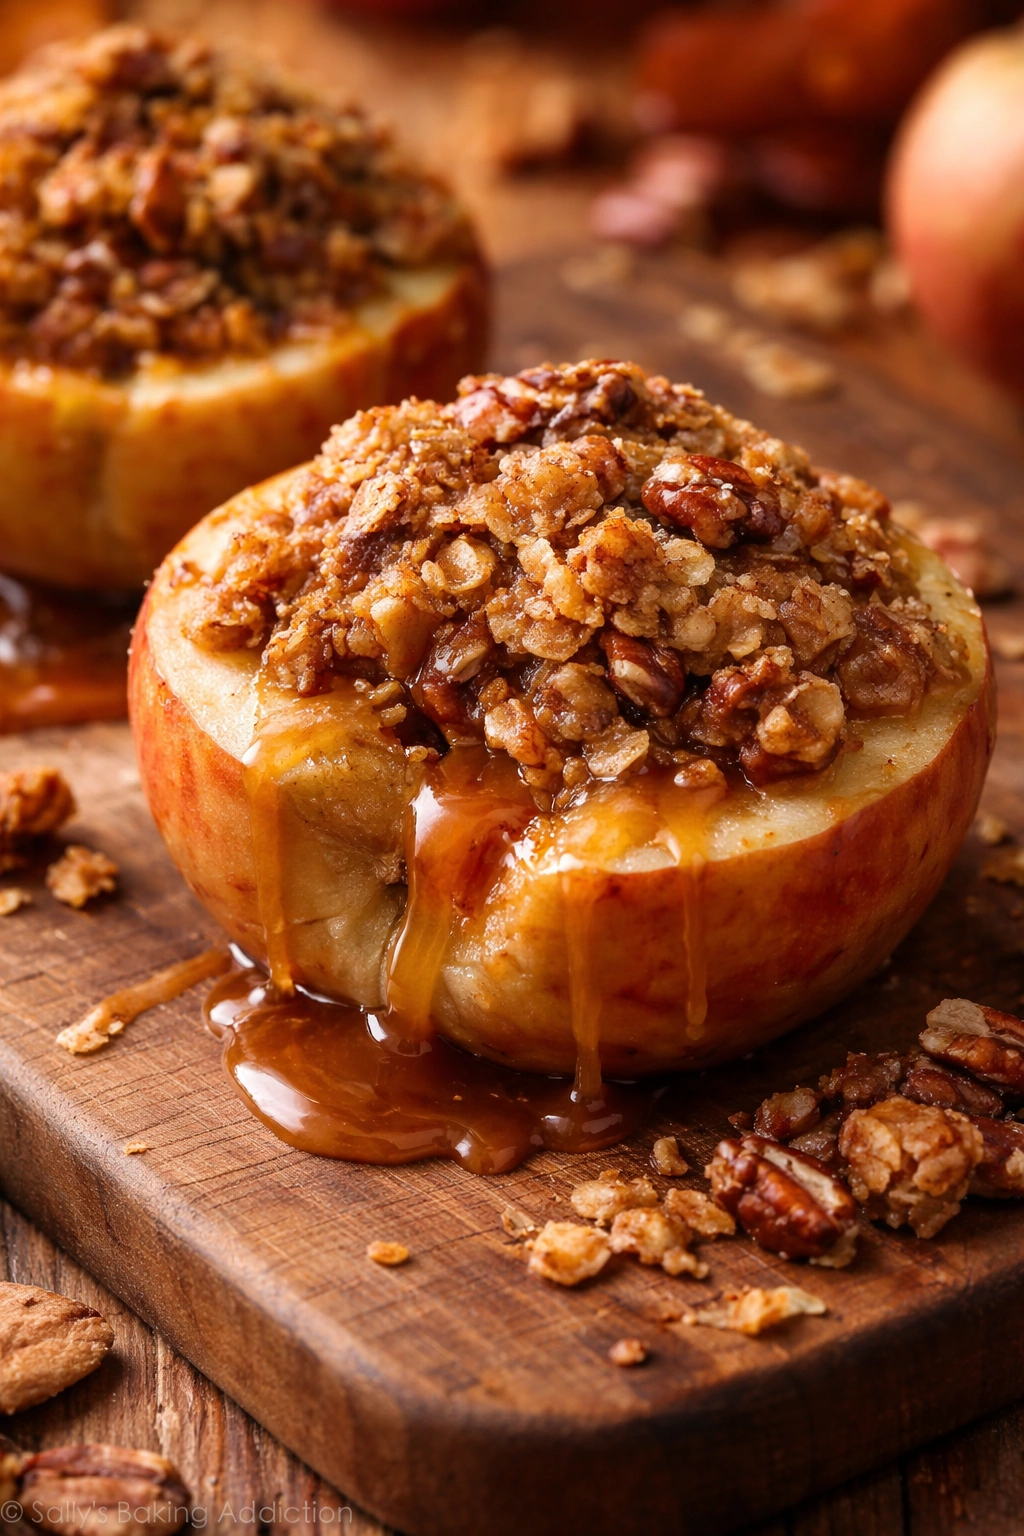
This recipe breaks the traditional baked apple mold slightly by adding a crispy topping—like an apple crumble, but cooked inside the apple itself. The contrast between the tender fruit, the smooth caramel sauce, and the crunchy oat-pecan topping is what makes this sing. The caramel gets driven deep into the apple as it bakes, caramelizing further and creating an intensely sweet, almost toffee-like flavor. This is the one to make when you want something that feels genuinely special, with multiple textures and layers of flavor.
The crisp topping bakes just enough to become golden and crunchy without burning, staying fresh and textured even as the apples below soften completely. It’s like having a hand-held apple crisp experience that’s somehow more indulgent than the original.
Yield: Serves 4 | Prep Time: 20 minutes | Cook Time: 40-45 minutes | Total Time: 60-65 minutes | Difficulty: Intermediate — assembling the crisp topping requires one extra step, but it’s still quite approachable for confident beginner bakers.
Ingredients:
For the Apples and Caramel:
- 4 large firm baking apples (Honeycrisp or Braeburn work beautifully here), washed and patted dry
- ½ cup store-bought salted caramel sauce (or homemade if you prefer — see variations)
- 2 tablespoons unsalted butter, melted
- ¼ cup apple cider or water
- 1 tablespoon vanilla extract
For the Crisp Topping:
- ¾ cup old-fashioned rolled oats
- ½ cup all-purpose flour
- ⅓ cup packed brown sugar
- ¼ cup chopped pecans, lightly toasted
- ⅛ teaspoon fine sea salt
- ½ teaspoon ground cinnamon
- 4 tablespoons unsalted butter, cold and cut into small cubes
- 2 tablespoons honey
Instructions:
Make the Crisp Topping:
- Preheat the oven to 375°F (190°C) with the rack in the center. Make the crisp topping while the oven preheats.
- In a medium bowl, combine the oats, flour, brown sugar, pecans, salt, and cinnamon. Add the cold butter cubes and work them into the flour mixture using your fingertips or a pastry cutter, breaking the butter into smaller pieces until the mixture resembles coarse breadcrumbs — some pea-sized pieces of butter should still be visible.
- Drizzle in the honey and toss with a fork until the mixture comes together into a chunky, slightly moist topping. Don’t overmix — it should look shaggy and textured, not compacted.
Prepare and Bake the Apples:
- Using an apple corer, remove the core from each apple, creating a cavity approximately ¾ inch in diameter that goes about three-quarters of the way down the apple. Be gentle and careful not to break through the bottom.
- Stand the apples upright in a baking dish with about 1 inch between them. Fill each cavity halfway with salted caramel sauce, then press about 3 tablespoons of the crisp topping into each apple cavity, filling it almost to the rim. Gently press the topping so it adheres to the caramel and fruit. Don’t pack it too tightly — the topping needs a bit of space to crisp as it bakes.
- Distribute any remaining crisp topping around the base of the apples in the baking dish.
- Mix the apple cider with the melted butter and vanilla extract, then pour this mixture around (not into) the apples. This liquid will create steam and flavor the finished apples.
- Bake for 40 to 45 minutes, until the apples are fork-tender and wrinkled at the skin, and the crisp topping is deep golden brown and visibly crispy at the edges. The caramel may bubble up around the edges of the topping — this is desirable and creates a beautiful presentation.
How to Serve:
Let the apples cool for 5 minutes, then transfer each one to a serving bowl with a spoon. The residual heat will keep the caramel soft, and the crisp topping will shatter slightly as you eat it, mixing with the fruit and creating pockets of crunch throughout. A scoop of vanilla ice cream is not just optional here — it’s practically essential, melting into the warm apple and caramel.
Practical Tips:
If you can’t find good salted caramel sauce at your grocery store, you can easily make your own by heating ½ cup of heavy cream until it’s steaming, then whisking it into 8 ounces of chopped high-quality caramel candies (like Altoids or Ghirardelli), stirring until smooth, and letting it cool for a few minutes before using.
The key to a crispy topping is keeping the butter cold before mixing it into the dry ingredients. If your kitchen is very warm or your hands are warm, cut the butter into cubes and return it to the refrigerator for 5 minutes before proceeding.
Variations:
- Homemade Caramel Sauce: Heat 1 cup of heavy cream over medium heat until it begins to steam. In a separate heavy-bottomed saucepan, melt ½ cup of unsalted butter over medium heat, then carefully add 1 cup of brown sugar and ¼ teaspoon of fine sea salt. Stir constantly for 2 minutes, then slowly add the warm cream, stirring constantly (it will bubble — this is normal). Pour into a bowl to cool for 5 minutes before using. This makes more caramel than you’ll need for this recipe, but it keeps beautifully in the refrigerator for several weeks.
- With Sea Salt Flakes: Sprinkle a tiny pinch of fleur de sel or Maldon sea salt directly on the caramel inside each apple before adding the topping to emphasize the sweet-salty contrast.
- Pecan Pie Variation: Add 2 tablespoons of bourbon or whiskey to the apple cider baking liquid, and stir 1 tablespoon of bourbon into the caramel sauce before filling the apples.
Storage and Make-Ahead:
Caramel Apple Crisp is best served warm on the day it’s made, when the contrast between textures is most pronounced. However, it keeps in a covered container in the refrigerator for up to 2 days and can be reheated gently at 300°F for 10-12 minutes. The crisp topping will soften slightly during storage and reheating, but it will regain some crispness as it cools. You can assemble the apples completely (through filling them) up to 6 hours ahead and refrigerate; just add 3-4 minutes to the baking time if starting from cold.
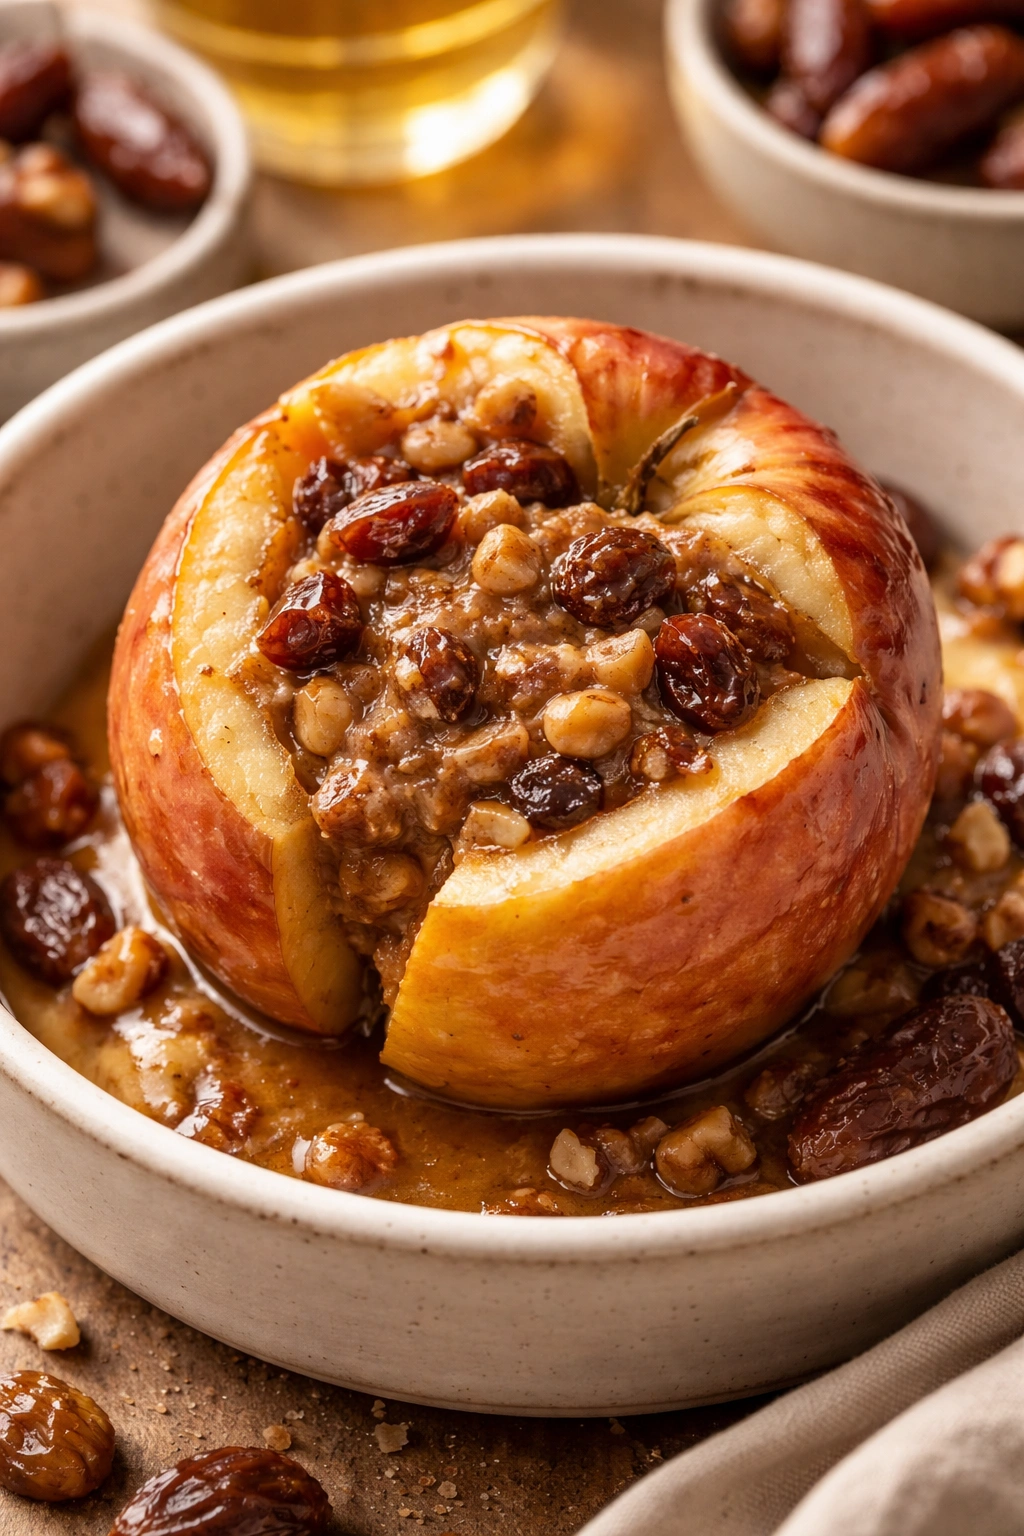
4. Baked Apples with Walnut and Dried Fruit Filling
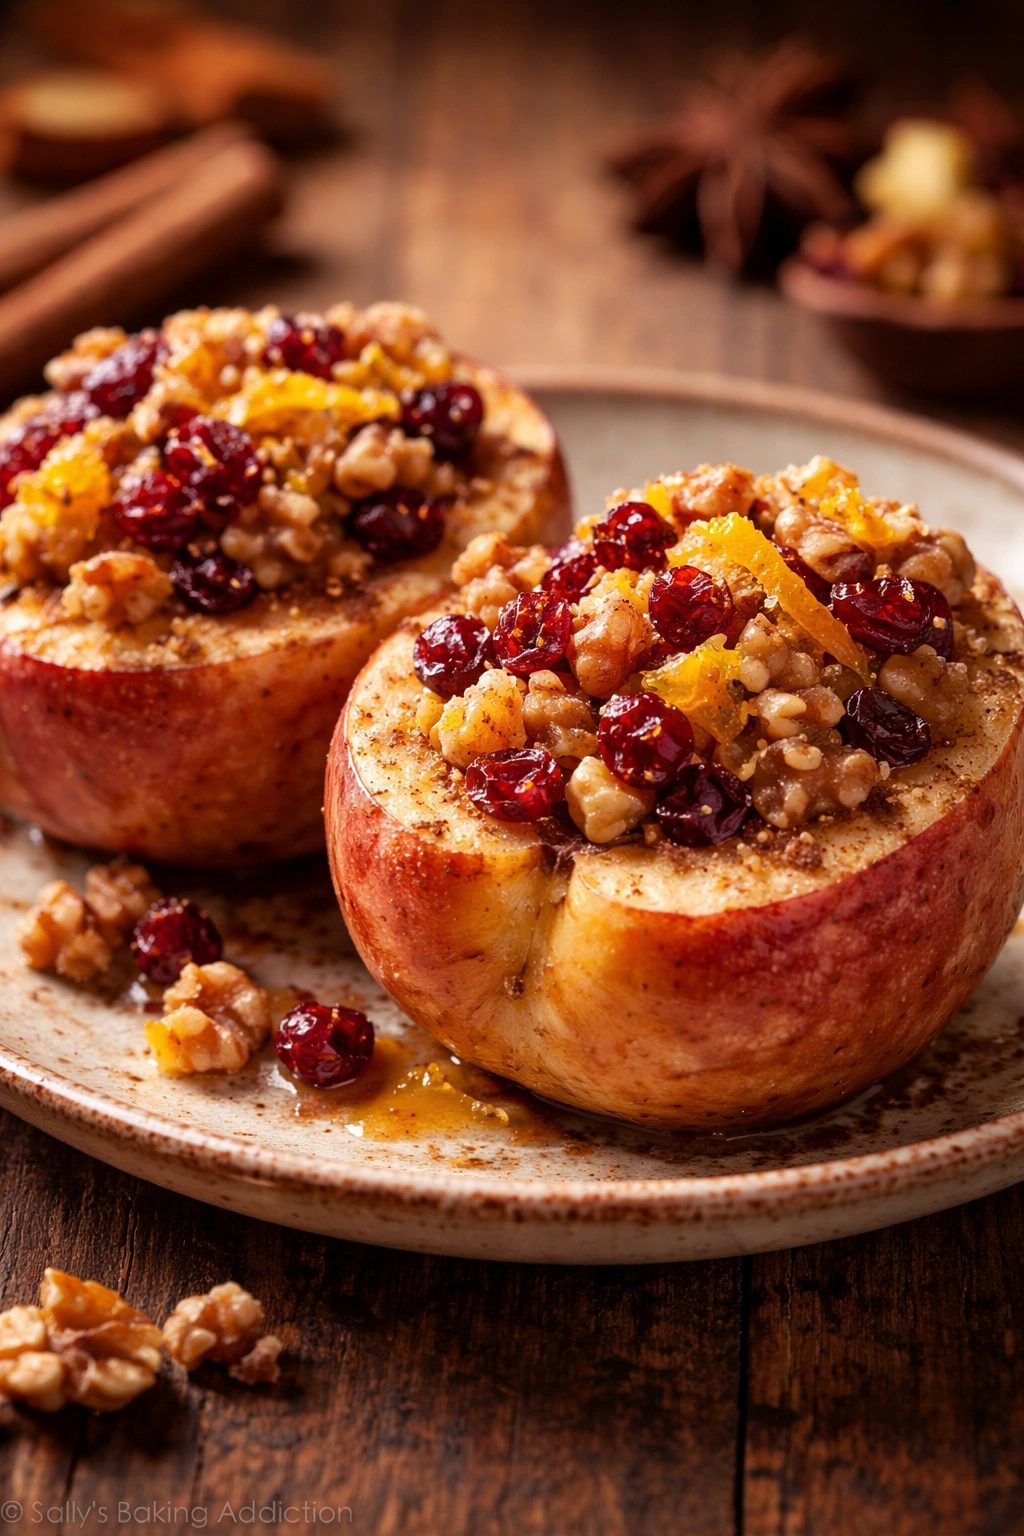
This version takes inspiration from the flavors of traditional spiced fruit cakes and biscotti—dried fruits, nuts, warm spices, and a hint of citrus—all packed into a single baked apple. The filling is substantially more textured than simpler versions, creating pockets of chewy fruit and crunchy nuts throughout. When you bite into the apple, you hit an apple chunk, then a piece of walnut, then dried cranberry or apricot—it’s like a composed salad of all these textures living together in harmony.
The combination works especially well because the acidity of dried cranberries balances the richness of the walnuts and butter, while the subtle citrus zest prevents the filling from tasting too heavy or spice-forward. This recipe also makes excellent candidates for make-ahead cooking and improves after a day or two in the refrigerator, as the flavors meld together.
Yield: Serves 4 | Prep Time: 20 minutes | Cook Time: 38-42 minutes | Total Time: 60 minutes | Difficulty: Intermediate — chopping nuts and drying fruit requires a bit more hands-on work, though all steps remain quite approachable.
Ingredients:
- 4 large firm baking apples (Honeycrisp, Braeburn, or Pink Lady), washed and patted dry
- 4 tablespoons unsalted butter, softened
- ⅓ cup walnuts, finely chopped
- ¼ cup dried cranberries, chopped
- ¼ cup dried apricots, finely chopped
- 3 tablespoons raisins or sultanas
- ¼ cup packed brown sugar
- 1 teaspoon vanilla extract
- ½ teaspoon ground cinnamon
- ¼ teaspoon freshly grated orange zest
- ⅛ teaspoon ground cardamom (optional but highly recommended)
- ⅛ teaspoon fine sea salt
- Pinch of ground nutmeg
- ½ cup apple cider or water
- 1 tablespoon honey
Instructions:
Prepare the Filling:
- Preheat the oven to 375°F (190°C) with the rack positioned in the center.
- In a medium bowl, combine the softened butter, chopped walnuts, cranberries, apricots, raisins, brown sugar, vanilla, cinnamon, orange zest, cardamom (if using), salt, and nutmeg. Stir until the mixture is evenly combined and every piece of fruit is coated in butter — use a spoon or your hands to gently work everything together.
Core and Fill the Apples:
- Using an apple corer, carefully remove the core from each apple, creating a cavity approximately ¾ inch wide that extends about three-quarters down the apple. Stand each apple upright in a baking dish with about 1 inch of space between them.
- Divide the walnut-fruit filling evenly among the four apples, spooning it into the cavity and pressing it down gently — this filling is chunky and denser than simpler versions, so you may not be able to pack it quite as deeply, and some might mound over the top of the apple. This is fine and looks lovely.
Bake:
- Pour the apple cider around (not into) the apples, then drizzle the honey over the top of each apple and its filling.
- Bake for 38 to 42 minutes, until a fork inserted into the apple flesh meets only gentle resistance and the skin is visibly wrinkled. The filling should look set and slightly caramelized at the edges where it meets the apple flesh.
- Remove from the oven and let rest for 5 minutes before serving.
How to Serve:
Transfer each apple to a serving bowl and spoon the warm pan juices around the base. Serve with a dollop of whipped cream, crème fraîche, or a scoop of vanilla ice cream. The filling is already quite rich, so you don’t necessarily need a sauce — the apple and its juices are often enough.
Practical Tips:
Toasting the walnuts lightly before chopping them (5 minutes in a 350°F oven or in a dry skillet on the stovetop) deepens their flavor considerably and removes any potential staleness. If your walnuts taste bitter or slightly off, toasting will help mask that slightly and bring out their natural sweetness instead.
When chopping the dried fruit, dip your knife occasionally in warm water — this prevents the pieces from sticking to the blade and makes the whole job faster and cleaner. Alternatively, use kitchen shears to snip the fruit directly into the bowl.
Variations:
- With Candied Ginger: Add 2 tablespoons of finely chopped candied ginger to the filling and reduce the brown sugar to 3 tablespoons for a spiced, slightly peppery twist.
- Pistachio Version: Substitute pistachios for the walnuts, dried cherries for the cranberries, and use only 2 tablespoons of apricots. Add ⅛ teaspoon of rose water to the filling for an elegant, delicate flavor.
- Whiskey-Soaked Fruit: Before making the filling, place the dried fruit in a small bowl and pour 3 tablespoons of whiskey or brandy over it. Let it sit for at least 15 minutes (or up to overnight) to plump up and absorb the liquor, then drain any excess liquid and proceed with the recipe.
Storage and Make-Ahead:
These apples actually improve after a day or two as the flavors meld and the liquid redistributes throughout. They keep beautifully in a covered container in the refrigerator for up to 4 days. You can assemble them completely up to 8 hours ahead and refrigerate before baking — add 2-3 minutes to the baking time if starting from cold. Reheat gently in a 300°F oven for 10 minutes before serving.
5. Spiced Baked Apples with Vanilla Custard Sauce
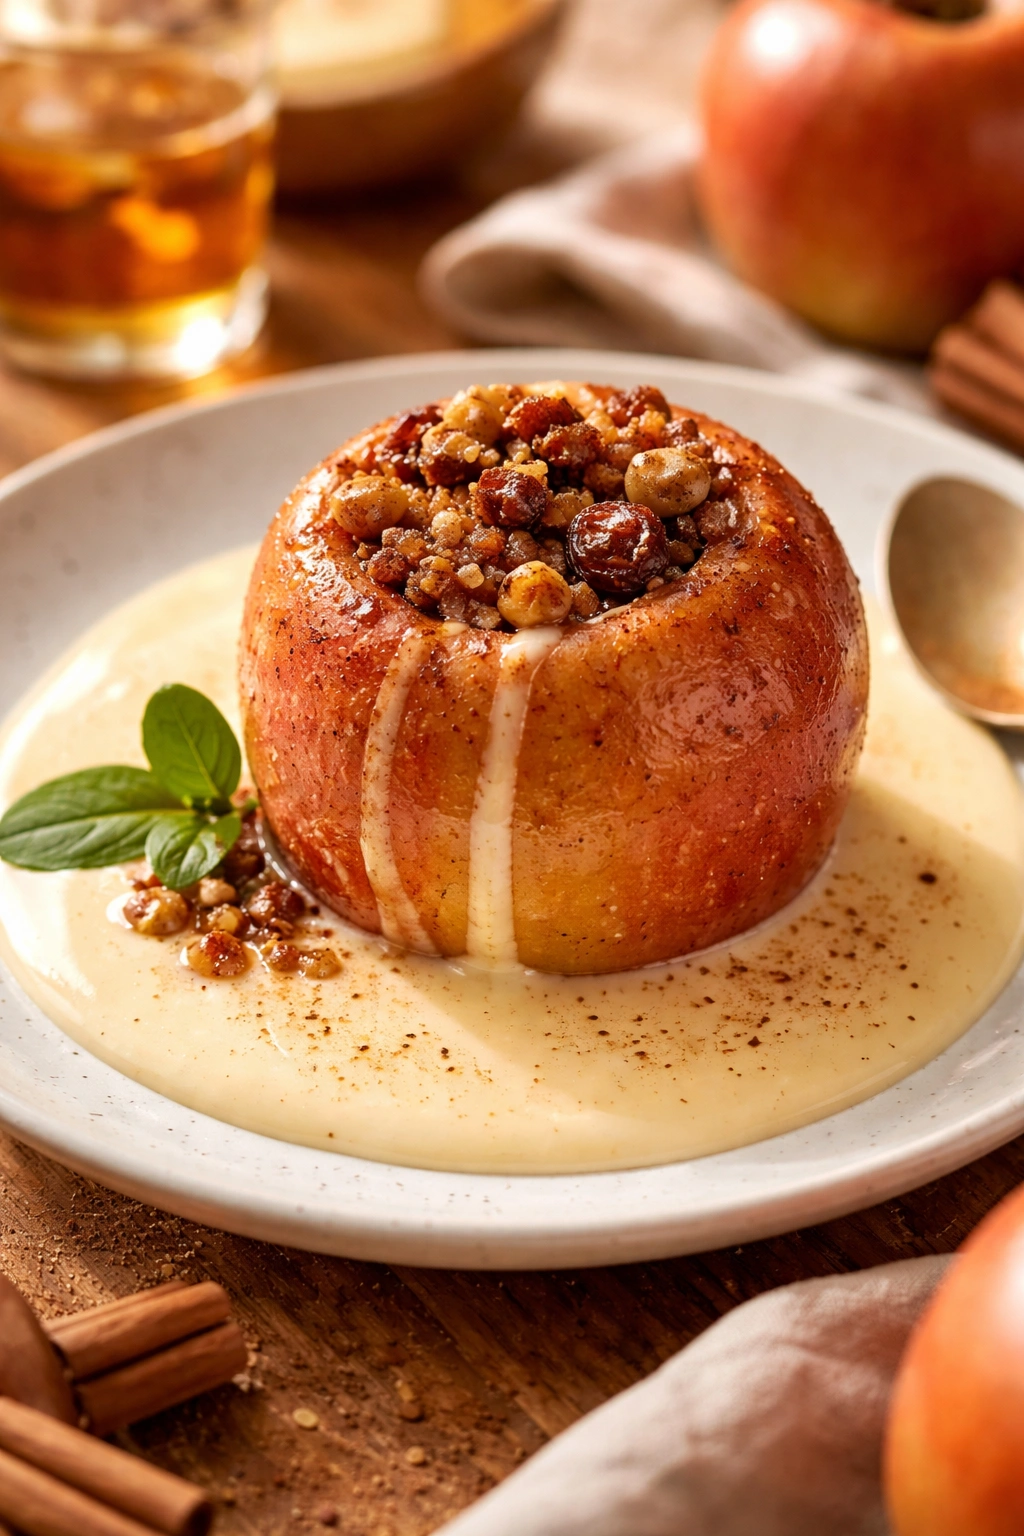
This recipe elevates the simple baked apple into something you might find at a sophisticated bistro or upscale bakery, primarily because of the silky vanilla custard sauce that pools around each one. The custard is warm, luxurious, and perfectly balanced between sweetness and vanilla flavor without tasting overly eggy. The apples themselves are filled with a warm spice mixture—cinnamon, nutmeg, cloves, and just a whisper of black pepper—that creates a dessert that feels almost holiday-worthy.
The custard sauce is key here and worth making fresh rather than substituting store-bought alternatives. It comes together in about 10 minutes and transforms the entire dish from simple to restaurant-quality. The warm custard mingling with the apple juices and warm fruit is an unbeatable combination.
Yield: Serves 4 | Prep Time: 25 minutes | Cook Time: 40 minutes | Total Time: 65 minutes | Difficulty: Intermediate — making the custard sauce requires gentle heat and attention, but the technique is straightforward and forgiving once you understand the basic principle.
Ingredients:
For the Baked Apples:
- 4 large firm baking apples (Honeycrisp or Braeburn), washed and patted dry
- 4 tablespoons unsalted butter, softened
- ½ cup packed brown sugar
- 1½ teaspoons ground cinnamon
- ½ teaspoon ground nutmeg
- ⅛ teaspoon ground cloves
- Tiny pinch of ground black pepper
- ¼ teaspoon fine sea salt
- ½ cup water or apple cider
- 1 tablespoon vanilla extract (will be added to the water)
For the Vanilla Custard Sauce:
- 1 cup whole milk
- ½ cup heavy cream
- 1 vanilla bean (or 1½ teaspoons pure vanilla extract if vanilla bean is unavailable)
- 4 large egg yolks, room temperature
- ¼ cup granulated sugar
- Pinch of fine sea salt
- 1 tablespoon unsalted butter
Instructions:
Prepare the Apples:
- Preheat the oven to 375°F (190°C) with the rack in the center.
- Using an apple corer, remove the core from each apple, creating a ¾-inch cavity that extends about three-quarters down the fruit. Stand them upright in a baking dish with about 1 inch between them.
- In a small bowl, combine the softened butter, brown sugar, cinnamon, nutmeg, cloves, black pepper, and salt, mixing until you have a sandy, cohesive paste. Divide evenly among the apples, spooning it into each cavity and pressing gently to pack it in.
- Combine the water with the vanilla extract, then pour this around (not into) the apples.
- Bake for 38 to 42 minutes, until the apples are fork-tender and the skin is wrinkled.
Make the Custard Sauce While the Apples Bake:
- Start the custard about 20 minutes before the apples will be done. Pour the milk and cream into a medium saucepan. If using a vanilla bean, split it lengthwise with a sharp knife, scrape out the seeds with the tip of the knife, and add both the seeds and the pod to the cream mixture. Heat over medium heat until small bubbles form around the edges — do not let it boil. If using vanilla extract instead, skip this step and add the extract at the end.
- While the cream heats, place the egg yolks in a medium heatproof bowl. Add the granulated sugar and salt, then whisk vigorously for about 2 minutes until the mixture becomes pale and ribbony.
- Once the cream is heated (and the vanilla bean has steeped for at least 5 minutes if using), remove it from heat and let it cool for 2 minutes. Remove the vanilla bean pod if present.
- Slowly pour the warm cream into the egg yolk mixture while whisking constantly. The key is adding the cream gradually — if you dump it all in at once, the eggs will scramble. Add about one-third of the cream while whisking steadily, then you can add the remainder a bit faster.
- Pour the custard mixture back into the saucepan and place it over medium-low heat. Cook, stirring constantly with a wooden spoon or silicone spatula, for 6 to 8 minutes, until the custard thickens enough to coat the back of the spoon and a finger dragged across it leaves a trail that doesn’t immediately flow back together. The temperature should reach 160°F (71°C) if you have a thermometer.
- Remove from heat, strain through a fine-mesh sieve into a clean bowl (this catches any small bits of cooked egg that may have formed), and stir in the butter. If using vanilla extract instead of a vanilla bean, add it now. The custard will continue to thicken slightly as it cools to serving temperature.
Serve:
- Transfer each warm baked apple to a serving bowl. Pour a generous amount of warm custard sauce around and over each apple. The warm custard will mingle with the apple juices, creating an elegant, luxurious sauce.
Practical Tips:
The custard sauce is forgiving if you pay attention and stir constantly. The worst that can happen is you end up with slightly less thick sauce, which is still delicious — it just becomes more of a cream sauce than a full custard. If you’re nervous about custard-making, remember that 160°F is well below the point where eggs fully scramble (which happens around 185°F), so you have a comfortable margin of error.
If you don’t have a vanilla bean and vanilla extract is unavailable, use ½ teaspoon of vanilla powder mixed with the milk for a subtle vanilla flavor, or simply make a clean, unsweetened cream sauce by omitting vanilla entirely and adding just the butter and salt. It’s delicious this way too.
Variations:
- With Bourbon or Brandy: Add 1½ tablespoons of bourbon or brandy to the warm custard sauce after straining for a grown-up version.
- Honey Custard: Replace ¼ of the granulated sugar with honey (so use 3 tablespoons sugar and 1 tablespoon honey) for a more complex sweetness.
- With Rum Raisins: Plump ¼ cup of raisins in 3 tablespoons of dark rum for 10 minutes, then fold them into the apple filling along with the spice mixture.
Storage and Make-Ahead:
These apples are best served warm the same day, but the baked apples keep beautifully in the refrigerator for up to 3 days. The custard sauce can be made up to 2 days ahead and reheated gently over low heat with a splash of milk to restore its pourable consistency. Reheat the apples in a 300°F oven for 8-10 minutes, then serve with warm custard sauce.
6. Baked Apples with Cream Cheese and Pecan Streusel
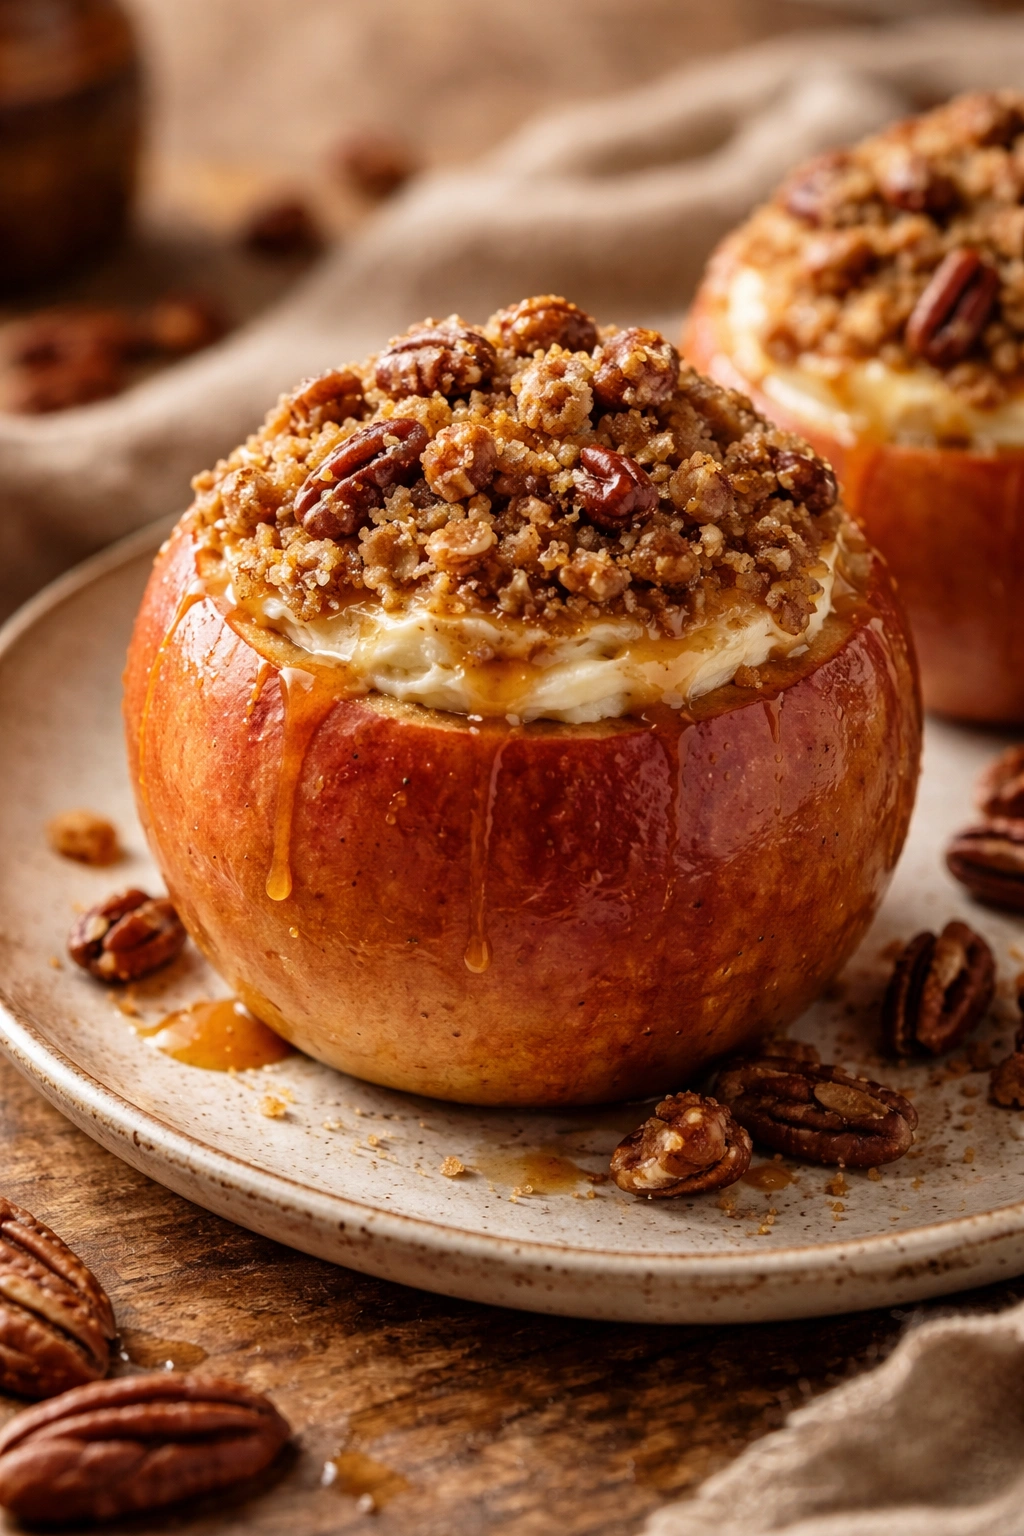
This recipe is pure indulgence—creamy, tangy cream cheese filling studded with brown sugar and vanilla, topped with a buttery, crunchy pecan streusel that bakes into a nearly caramelized crust. The cream cheese provides richness and a subtle tang that cuts through the apple’s natural sweetness, preventing the dessert from feeling one-dimensional or cloying. The streusel bakes just until it’s golden and crispy at the edges but still slightly soft underneath, creating a texture that’s almost fudgy in spots.
This is the baked apple to make when you want something that feels decadent but is still fundamentally wholesome—the apple is the star, the cream cheese and pecan streusel are just there to amplify the apple’s natural appeal.
Yield: Serves 4 | Prep Time: 20 minutes | Cook Time: 40-45 minutes | Total Time: 65 minutes | Difficulty: Intermediate — making the cream cheese filling and streusel topping requires a couple of extra steps, though all of them are straightforward and hard to mess up.
Ingredients:
For the Apples:
- 4 large firm baking apples (Honeycrisp, Braeburn, or Granny Smith), washed and patted dry
- ½ cup water or apple cider
- 2 tablespoons honey or maple syrup
- ½ teaspoon vanilla extract
For the Cream Cheese Filling:
- 4 ounces cream cheese, softened to room temperature
- 3 tablespoons unsalted butter, softened
- ⅓ cup packed brown sugar
- 1 tablespoon honey
- 1 teaspoon vanilla extract
- ¼ teaspoon fine sea salt
- 2 tablespoons chopped pecans (optional but adds texture)
For the Pecan Streusel Topping:
- ¾ cup pecans, finely chopped (about 3 ounces)
- ⅓ cup packed brown sugar
- ⅓ cup all-purpose flour
- ⅛ teaspoon fine sea salt
- ⅛ teaspoon ground cinnamon (optional)
- 4 tablespoons unsalted butter, cold and cut into small cubes
Instructions:
Make the Cream Cheese Filling and Streusel:
- Preheat the oven to 375°F (190°C) with the rack in the center.
- In a small bowl, beat together the softened cream cheese and butter using a fork or small whisk until they’re completely combined and fluffy. Fold in the brown sugar, honey, vanilla, and salt until uniform. If using the optional chopped pecans in the filling, fold them in now.
- In another small bowl, combine the chopped pecans, brown sugar, flour, salt, and cinnamon (if using). Add the cold butter cubes and work them into the flour mixture using your fingertips, rubbing the butter into the dry ingredients until the mixture resembles coarse breadcrumbs — some pea-sized pieces of butter should still be visible.
Core and Fill the Apples:
- Using an apple corer, remove the core from each apple, creating a ¾-inch cavity extending three-quarters down the fruit. Stand them upright in a baking dish with about 1 inch between them.
- Divide the cream cheese filling evenly among the apples, spooning it into each cavity. The filling will be thick and creamy — you should be able to mound it slightly above the rim of the apple. Press it down very gently.
- Top each filled apple with a quarter of the pecan streusel, about 3 tablespoons per apple. Press the streusel down very gently so it adheres to the cream cheese filling — don’t pack it too tightly or it won’t crisp properly.
Bake:
- Mix the water with the honey and vanilla, then pour this around (not into) the apples.
- Bake for 40 to 45 minutes, until the apples are fork-tender and the streusel topping is deep golden brown and visibly crispy at the edges. The cream cheese filling should look set but still jiggles slightly if you gently shake the pan.
- Remove from the oven and let cool for 5 to 10 minutes — the cream cheese and streusel will be extremely hot and need time to set slightly.
How to Serve:
Transfer each apple to a serving dish and spoon some of the pan juices around the base. The streusel will remain crispy and crunchy even as the apple softens, and the cream cheese will taste rich and silky. You can serve these with a small dollop of whipped cream or crème fraîche if desired, though they’re already quite rich and often don’t need it.
Practical Tips:
The cream cheese must be at room temperature before you beat it with the butter — if it’s cold, you’ll end up with a lumpy mixture. Leave it on the counter for 30 minutes, or cut it into small cubes and let them warm up for 15 minutes.
Keep the butter for the streusel as cold as possible — this is what makes it crispy rather than compacted. If your kitchen is very warm, refrigerate the streusel mixture for 5 minutes before sprinkling it on the apples.
Variations:
- With Toffee Bits: Fold ¼ cup of toffee bits into the cream cheese filling for a salted caramel flavor.
- Maple Cream Cheese: Reduce the honey in the cream cheese filling to 1 teaspoon and add 1 tablespoon of pure maple syrup. Use maple syrup instead of honey in the baking liquid.
- Salted Caramel Streusel: Sprinkle a tiny pinch of fleur de sel or Maldon sea salt directly onto the streusel topping before baking to emphasize the sweet-salty contrast.
Storage and Make-Ahead:
These apples are best served warm or at room temperature the same day they’re made, when the streusel is crispiest. They keep in a covered container in the refrigerator for up to 3 days, though the streusel will soften slightly (it will regain some crispness if reheated). You can assemble the apples completely (core, fill with cream cheese, and top with streusel) up to 4 hours ahead and refrigerate before baking — add 2-3 minutes to the baking time if starting from cold.
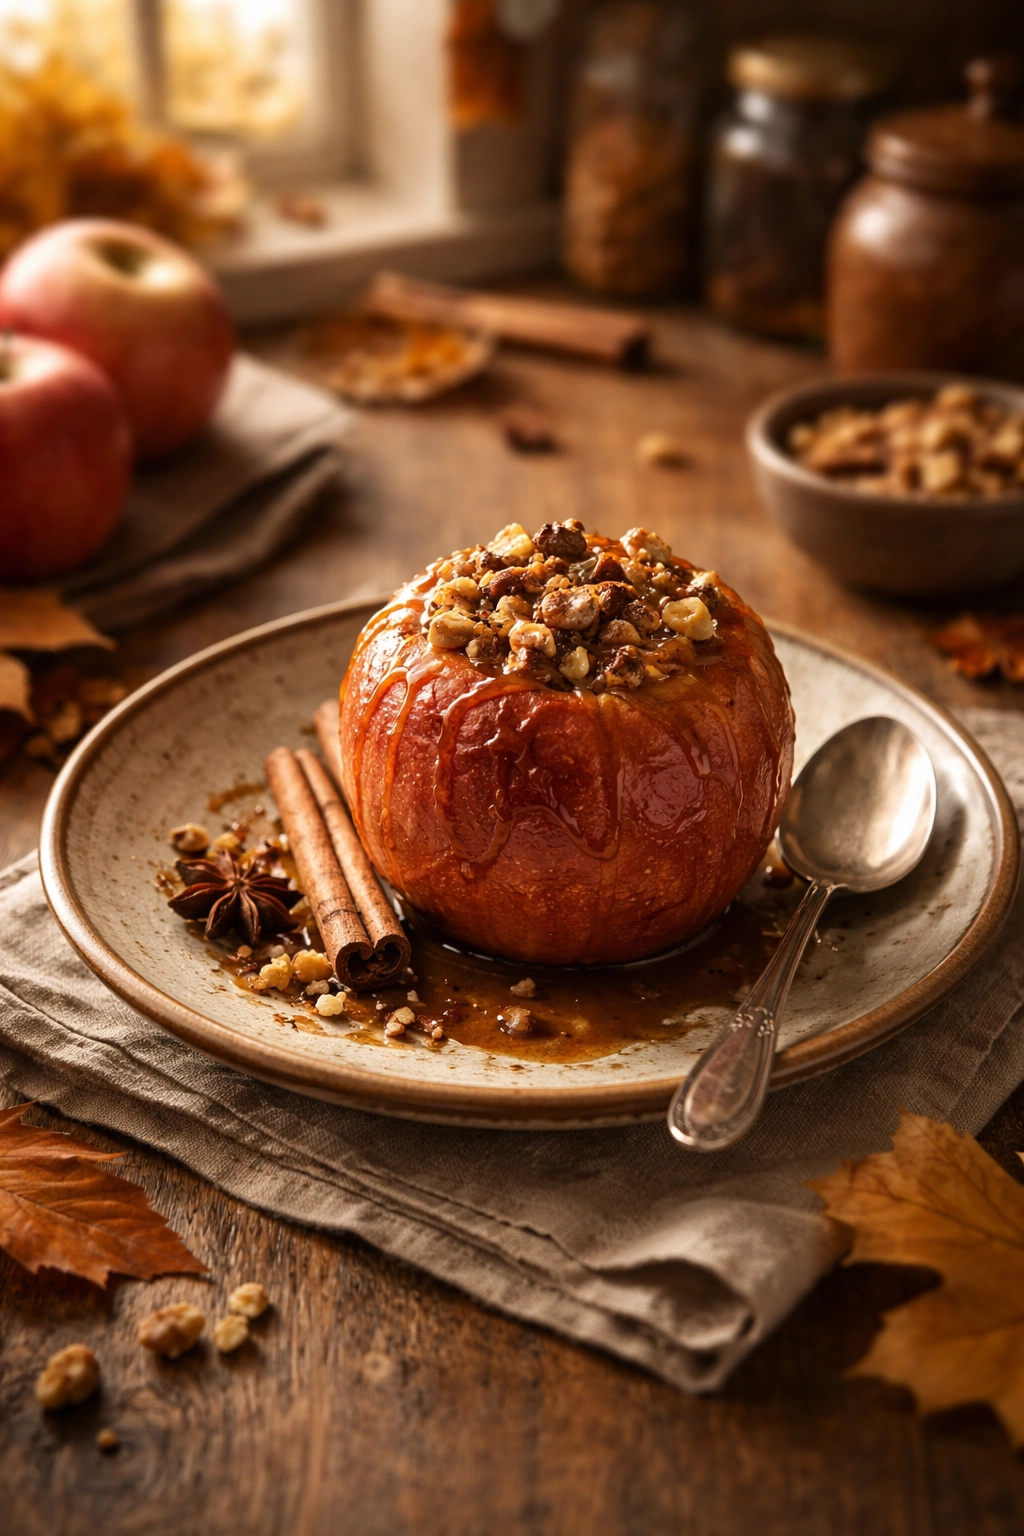
7. Bourbon Baked Apples with Cinnamon
If you like the idea of a warm, spiced dessert with a subtle adult edge, these bourbon-spiked baked apples deliver exactly that. The bourbon adds a warming, slightly smoky note that deepens the apple’s natural flavor and plays beautifully with cinnamon. This isn’t a recipe where the alcohol overpowers the apple—that’s not the goal—but rather where it rounds out the profile and creates a dessert that feels sophisticated and grown-up.
The filling contains both bourbon and butter, which creates a caramel-like sauce inside the apple as it bakes. The bourbon alcohol cooks off during baking, leaving behind only the complex flavor. This version is excellent for serving to guests or for a special evening when you want something that feels a bit elevated.
Yield: Serves 4 | Prep Time: 15 minutes | Cook Time: 38-42 minutes | Total Time: 60 minutes | Difficulty: Beginner — standard baked apple technique, no extra steps or expertise required.
Ingredients:
- 4 large firm baking apples (Honeycrisp, Braeburn, or Pink Lady), washed and patted dry
- 5 tablespoons unsalted butter, softened to room temperature
- ½ cup packed brown sugar
- 3 tablespoons bourbon or whiskey (use a bourbon or whiskey you’d actually drink — the flavor will be recognizable)
- 2 teaspoons ground cinnamon
- ¼ teaspoon fine sea salt
- ⅛ teaspoon ground nutmeg
- ⅛ teaspoon ground black pepper
- ½ cup water
- 1 tablespoon honey
- Maldon or fleur de sel sea salt for garnish (optional, but really enhances the bourbon notes)
Instructions:
Prepare the Filling and Apples:
- Preheat the oven to 375°F (190°C) with the rack positioned in the center.
- In a small bowl, combine the softened butter, brown sugar, cinnamon, fine sea salt, nutmeg, and black pepper. Stir until you have a cohesive, sandy paste. Add the bourbon and stir until completely incorporated — the mixture may look slightly thinner and looser now, which is normal.
- Using an apple corer, remove the core from each apple, creating a ¾-inch cavity extending three-quarters down the fruit. Stand them upright in a baking dish with about 1 inch between them.
- Divide the bourbon filling evenly among the apples, spooning it into each cavity and pressing down very gently. Be careful with this step — the bourbon makes the filling a bit more liquid, so if you press too hard, it may spill out. Any filling that does overflow into the bottom of the dish will flavor the baking liquid, which is fine.
Bake:
- Mix the water with the honey, then pour this around (not into) the apples.
- Bake for 38 to 42 minutes, until a fork inserted into the apple flesh slides through with only gentle resistance and the skin is visibly wrinkled. The bourbon aroma will be noticeable while they bake — this is completely normal and dissipates as the apples cool.
- Remove from the oven and let rest for 5 minutes before serving.
How to Serve:
Transfer each apple to a serving bowl and spoon the warm pan juices (which will now taste distinctly bourbon-tinged) around the base. If using sea salt, sprinkle a tiny pinch over the top of each apple — the salt brings out the bourbon notes and adds sophistication. Serve with a dollop of whipped cream or crème fraîche if desired, though these are quite rich on their own. A small pour of bourbon over the top would be decadent but entirely optional.
Practical Tips:
The quality of the bourbon matters more than the quantity. Use a bourbon you actually enjoy drinking — cheap, harsh bourbon will taste harsh in the apple, while a smooth, quality bourbon will contribute a beautiful warmth and depth to the filling.
If you’re not a bourbon person, you can substitute other spirits: rye whiskey (spicier notes), brandy (richer, more delicate), or dark rum (warmer, slightly molasses-forward). Each will create a different flavor profile, all of which are delicious.
Variations:
- Bourbon Pecan: Add ¼ cup of finely chopped toasted pecans to the bourbon filling for added texture and richness.
- Bourbon Vanilla: Add 1 teaspoon of vanilla extract to the filling for a rounder, smoother flavor.
- Bourbon and Brown Butter: Brown the butter first: melt 5 tablespoons of butter in a saucepan over medium heat, swirling occasionally, until it smells nutty and the solids on the bottom turn golden (about 5 minutes). Let it cool for a few minutes, then skim off the top foam and use it to make the filling. The brown butter adds incredible depth and richness.
Storage and Make-Ahead:
These apples taste best served warm the same day, but they keep beautifully in a covered container in the refrigerator for up to 3 days. Reheat in a 300°F oven for 10 minutes before serving. You can assemble the apples completely up to 6 hours ahead and refrigerate — add 2-3 minutes to the baking time if starting from cold.
8. Baked Apples with Almond Butter and Dates
This final recipe is for anyone who gravitates toward nuttier, more complex desserts. Almond butter provides richness and a subtle earthiness that plays beautifully with the sweetness of dates, creating a filling that tastes almost like a spiced date paste studded with whole dates. The combination is naturally dense and satisfying, with a sophisticated sweetness that doesn’t feel at all candy-like.
This version also happens to be naturally gluten-free and works well for people following different dietary approaches, making it a great option to have in your repertoire if you’re regularly cooking for guests with varied needs. The almond butter melts into the apple as it bakes, creating a silky, almost caramel-like sauce.
Yield: Serves 4 | Prep Time: 20 minutes | Cook Time: 38-42 minutes | Total Time: 60-65 minutes | Difficulty: Beginner — all steps are straightforward, though you do need to pit and chop the dates, which takes a few extra minutes.
Ingredients:
- 4 large firm baking apples (Honeycrisp, Braeburn, or Granny Smith), washed and patted dry
- ½ cup natural almond butter (or regular almond butter if you prefer), at room temperature
- ¾ cup Medjool dates (about 12-14 dates), pitted and roughly chopped
- 3 tablespoons unsalted butter, softened
- ¼ cup packed brown sugar
- 1 teaspoon vanilla extract
- 1 teaspoon ground cinnamon
- ¼ teaspoon fine sea salt
- ⅛ teaspoon ground cardamom (optional but highly recommended)
- ⅛ teaspoon ground nutmeg
- ½ cup water or apple cider
- 1 tablespoon honey
- 2 tablespoons sliced almonds, for garnish (optional)
Instructions:
Make the Filling:
- Preheat the oven to 375°F (190°C) with the rack in the center.
- In a medium bowl, combine the almond butter (make sure it’s well-mixed — if it has separated into oil and paste, stir it together before measuring), softened butter, chopped dates, brown sugar, vanilla, cinnamon, salt, cardamom, and nutmeg. Stir thoroughly until all the dates are evenly coated and distributed throughout. If your dates are very dense, they’ll soften slightly as you stir them in, which is desirable.
Core and Fill the Apples:
- Using an apple corer, remove the core from each apple, creating a ¾-inch cavity extending about three-quarters down the fruit. Stand them upright in a baking dish with about 1 inch between them.
- Divide the almond butter–date filling evenly among the apples, spooning it into each cavity and pressing down gently. This filling is denser and richer than simpler versions, so you probably won’t be able to pack it quite as deeply — it will likely mound above the rim of the apple. This is desirable and looks beautiful.
Bake:
- Mix the water with the honey, then pour this around (not into) the apples.
- Bake for 38 to 42 minutes, until a fork inserted into the apple flesh meets only gentle resistance and the skin is wrinkled. The filling should look set and slightly caramelized at the edges.
- Remove from the oven and let cool for 5 minutes.
How to Serve:
Transfer each apple to a serving bowl and spoon the warm pan juices around the base. If using sliced almonds, sprinkle a small handful over the top of each apple — they add a pleasant textural contrast. Serve with a dollop of Greek yogurt, crème fraîche, or whipped cream if desired, though the richness of the almond butter means these are often satisfying on their own. A small pour of honey drizzled over the top is also lovely.
Practical Tips:
Natural almond butter (the kind with no added sugar) is preferable here because it allows the date sweetness to shine. If you only have sweetened almond butter on hand, reduce the brown sugar in the filling to 3 tablespoons to avoid overpowering sweetness.
Medjool dates are ideal because they’re soft and meaty — Deglet Noor dates are firmer and less sweet, which will work but won’t create quite the same silky texture in the filling. If you can’t find Medjool dates, soak your dates in warm water for 10 minutes to soften them before chopping.
Variations:
- With Sea Salt and Chocolate: Stir 2 tablespoons of finely chopped dark chocolate (70% cocoa) into the filling and top each apple with a tiny pinch of fleur de sel before baking — the salt will amplify the chocolate and date flavors beautifully.
- Maple Almond Butter: Replace the brown sugar with 3 tablespoons of pure maple syrup for a slightly less sweet, more sophisticated filling.
- Coconut and Almond: Add ¼ cup of unsweetened shredded coconut to the filling and use coconut water instead of regular water for the baking liquid.
- With Tahini: Add 2 tablespoons of tahini to the filling for an interesting sesame note that complements the almond butter and dates beautifully.
Storage and Make-Ahead:
These apples improve slightly after a day or two as the flavors meld together. They keep beautifully in a covered container in the refrigerator for up to 4 days. You can assemble them completely up to 8 hours ahead and refrigerate — add 2-3 minutes to the baking time if starting from cold. Reheat gently in a 300°F oven for 10 minutes before serving.
Final Thoughts
Baked apples are one of those rare desserts that somehow manage to be both deeply indulgent and genuinely wholesome, requiring minimal equipment and technique but delivering impressive results. The recipes in this collection represent different flavor profiles and approaches—from the classic simplicity of cinnamon and brown sugar to the adult sophistication of bourbon and spice, to the nuttier elegance of almond butter and dates. Each one stands on its own merit, and yet the underlying technique remains the same: a good apple, a flavorful filling, gentle heat, and patience.
The beauty of baking apples is their forgiving nature. Your apples don’t all have to be exactly the same size, the filling doesn’t have to be perfectly even, and if they bake a few minutes longer than planned, they’ll simply become creamier inside rather than ruined. This makes them perfect for weeknight desserts when you want something comforting without stress, or for more formal entertaining when you want a dessert that feels special but requires minimal last-minute fussing.
Pick whichever recipe calls to you based on your mood and what you have on hand. Start with the classic if you’ve never baked apples before — it’s the perfect entry point and will teach you the fundamentals that apply to all the others. Once you’re comfortable with that version, branch out and try the variations I’ve suggested, or create your own combinations based on ingredients you love. The apple is incredibly forgiving and will welcome nearly any filling you dream up. That’s what makes baked apples such a joy to return to again and again.