The smell of falafel crisping in the oven is one of those kitchen moments that catches you off guard—you’re expecting the usual deep-fry smell, but instead you get this toasted, nutty aroma that’s somehow even more appetizing. Here’s the thing that most people don’t realize: baked falafel can absolutely rival the crispy, golden exterior of its fried counterpart, but without the heavy oil coating, the lingering kitchen smell, or the guilt that comes afterward. You get all the texture and flavor, just leaner and actually easier to pull off consistently.
The trick isn’t some complicated secret technique. It’s about understanding how falafel works at a fundamental level—what makes it fluffy inside and crispy outside—and then deliberately choosing methods and ingredients that maximize those qualities in the oven. When you nail it, the difference between a good baked falafel and a mediocre one comes down to a handful of specific decisions: the moisture level of your dough, the baking temperature, how long you actually let them rest, and some honest understanding about what “crispy” really means when you’re not submerging something in oil.
I’ve made falafel dozens of ways over the years, and I’ve learned what works and what’s just wishful thinking. This guide walks you through exactly how to build falafel that emerges from your oven with a satisfying crunch on the outside and a fluffy, almost creamy center—no deep fryer required.
Why Baked Falafel Deserves a Second Look
Most people default to frying falafel because that’s the traditional method, and tradition exists for good reasons. But baked falafel has become increasingly popular, not because it’s a diet-friendly compromise, but because when it’s done right, it’s genuinely delicious. The texture is different—not worse, just different in a way that turns out to be better for a lot of people.
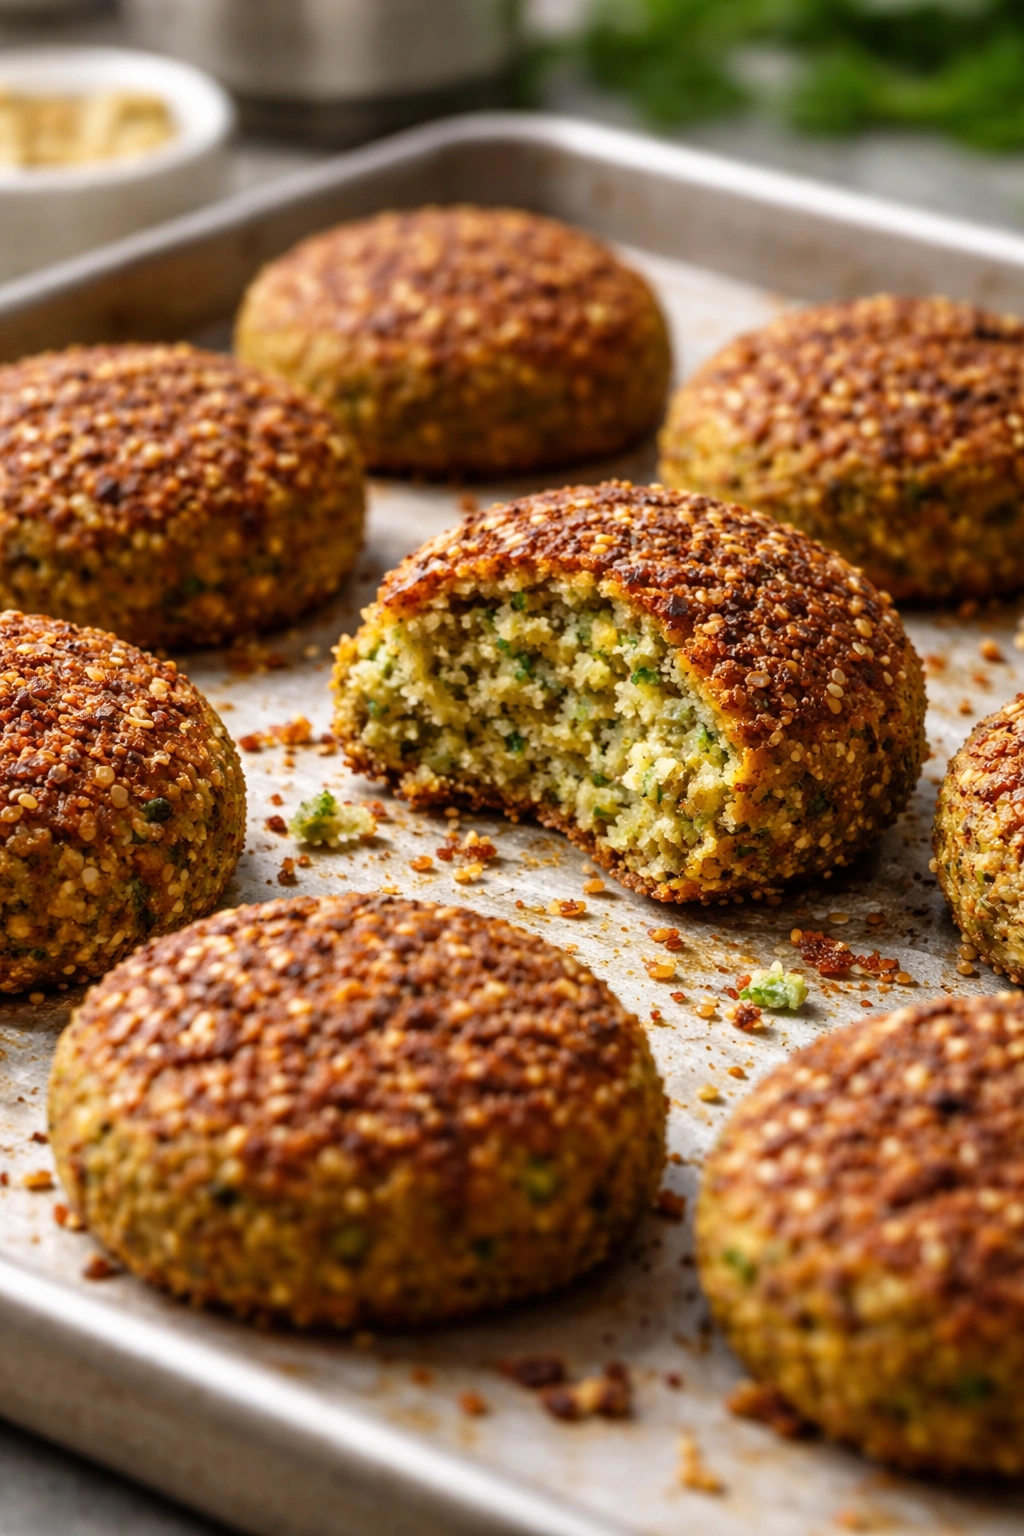
When you fry falafel, the outside cooks so fast from the oil heat that by the time the inside is fluffy, the exterior is often thick and heavy, almost dense with absorbed oil. Baked falafel cooks more slowly and evenly, which means you get a crispy, thin shell and a genuinely light interior. There’s less greasiness lingering on your palate, which is why you can actually taste the spices and chickpeas without that overwhelmingly rich mouthfeel.
The practical benefits matter too. You don’t need a deep fryer, you don’t need several cups of oil, and you don’t need to spend 45 minutes dealing with splattering hot oil and then disposing of used cooking oil responsibly. You turn on your oven, shape some dough, and 25 minutes later you’re plating something restaurant-quality. That’s genuinely appealing when you’re feeding a crowd or prepping components for a meal.
The Science of Achieving Crispy Texture Without Deep Frying
Here’s what happens when you bake something at high heat: moisture on the surface evaporates rapidly, and the starch and protein begin to brown through the Maillard reaction, creating color and crispness. With falafel specifically, that crispy exterior comes from the chickpea flour and spices on the outside drying out while the moisture inside stays contained by the density of the dough.
The catch is that if your falafel dough has too much moisture, the exterior never gets truly crispy—it stays slightly soft or becomes chewy as steam keeps escaping from the interior. Too little moisture and your falafel becomes dense and dry all the way through. The ideal consistency is somewhere between cookie dough and wet sand: it should hold together completely, but it should be noticeably firmer than, say, hummus.
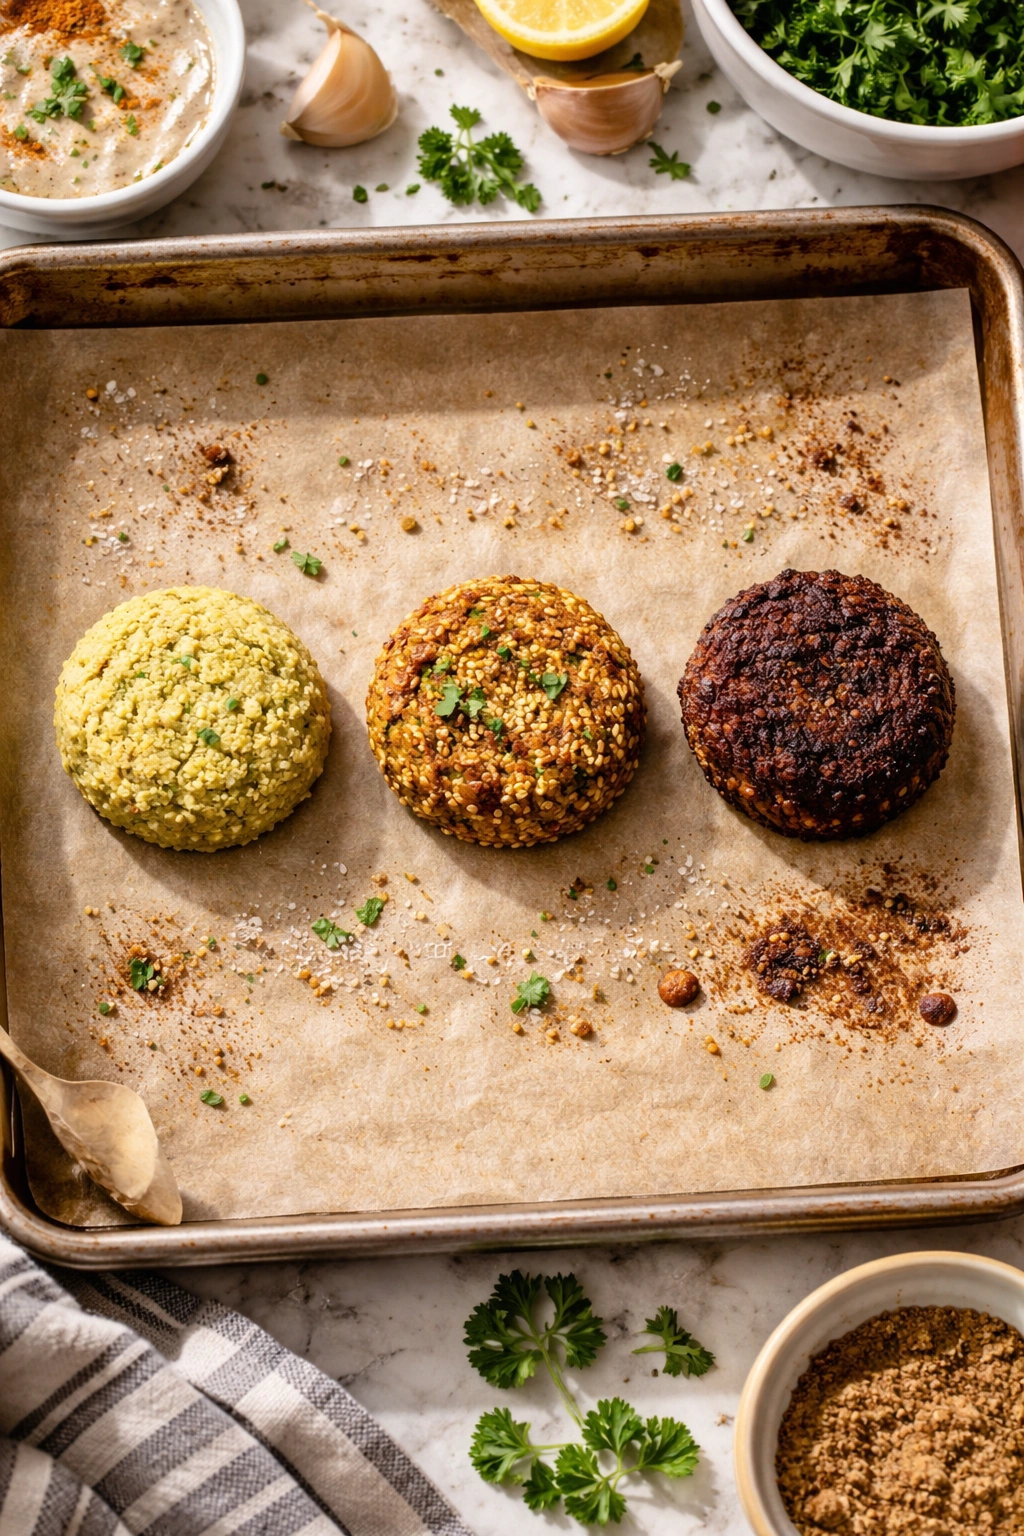
When you bake at a high enough temperature—we’re talking 400°F (200°C) or hotter—the exterior browns and crisps quickly while the interior has just enough time to cook through before overcooking. If your oven temperature is too low, the outside never gets crispy enough because by the time it would, the interior is already overcooked and dry. This is the single biggest mistake most people make when attempting baked falafel at home.
There’s also the matter of how the falafel makes contact with the baking surface. A baking sheet with air underneath, especially if you’re using parchment paper, allows heat to circulate around the falafel. The air gap matters because it creates space for moisture to escape from the bottom. Some recipes skip this step and bake directly on the sheet, which traps steam and produces softer bottoms.
Choosing the Right Chickpeas and Why It Actually Matters
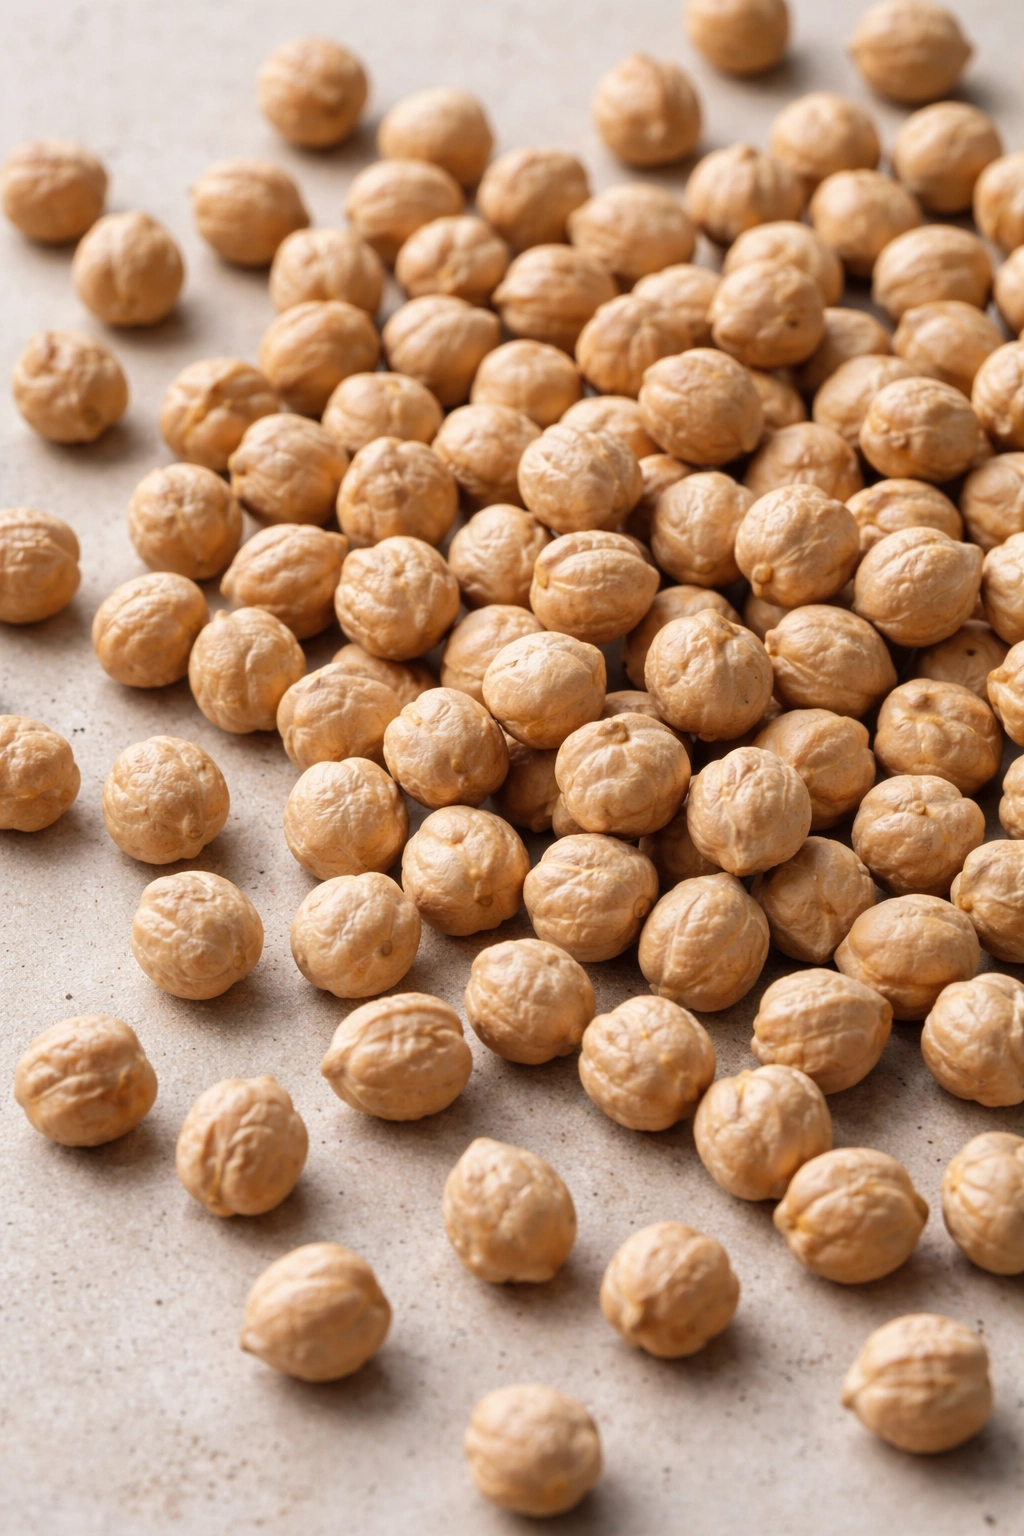
This is one of those details that separates okay baked falafel from genuinely excellent baked falafel: the type of chickpeas you start with determines almost everything downstream. You need dried chickpeas that you’ve soaked but not cooked, not canned chickpeas, and definitely not chickpea flour. Here’s why.
Canned chickpeas are already fully cooked, which means they’re soft and hold a lot of absorbed water. When you blend them, you get a wet, heavy paste that requires flour additions to firm up. All that extra flour changes the texture of the finished falafel—it becomes denser and less creamy inside. Dried chickpeas that have been soaked overnight are still raw, so when you blend them, you’re working with a naturally firmer, slightly starchy base that already has the right binding properties.
The other important detail is that you want medium-sized chickpeas if you can get them, or at least chickpeas that are all roughly the same size. If some of your chickpeas are tiny and others are large, they won’t all soften during soaking at the same rate, and you’ll end up with an inconsistent texture in your falafel. This matters more than most recipes acknowledge.
There’s also something almost intangible about working with whole chickpeas—you get more surface area when you blend them, more nuance in the texture of the finished product, and a better distribution of the natural starches and proteins that make falafel, well, falafel. Chickpea flour gets you 75% of the way there, but you miss out on something that’s hard to quantify but very easy to taste.
Proper Soaking and Drying Techniques That Change Everything
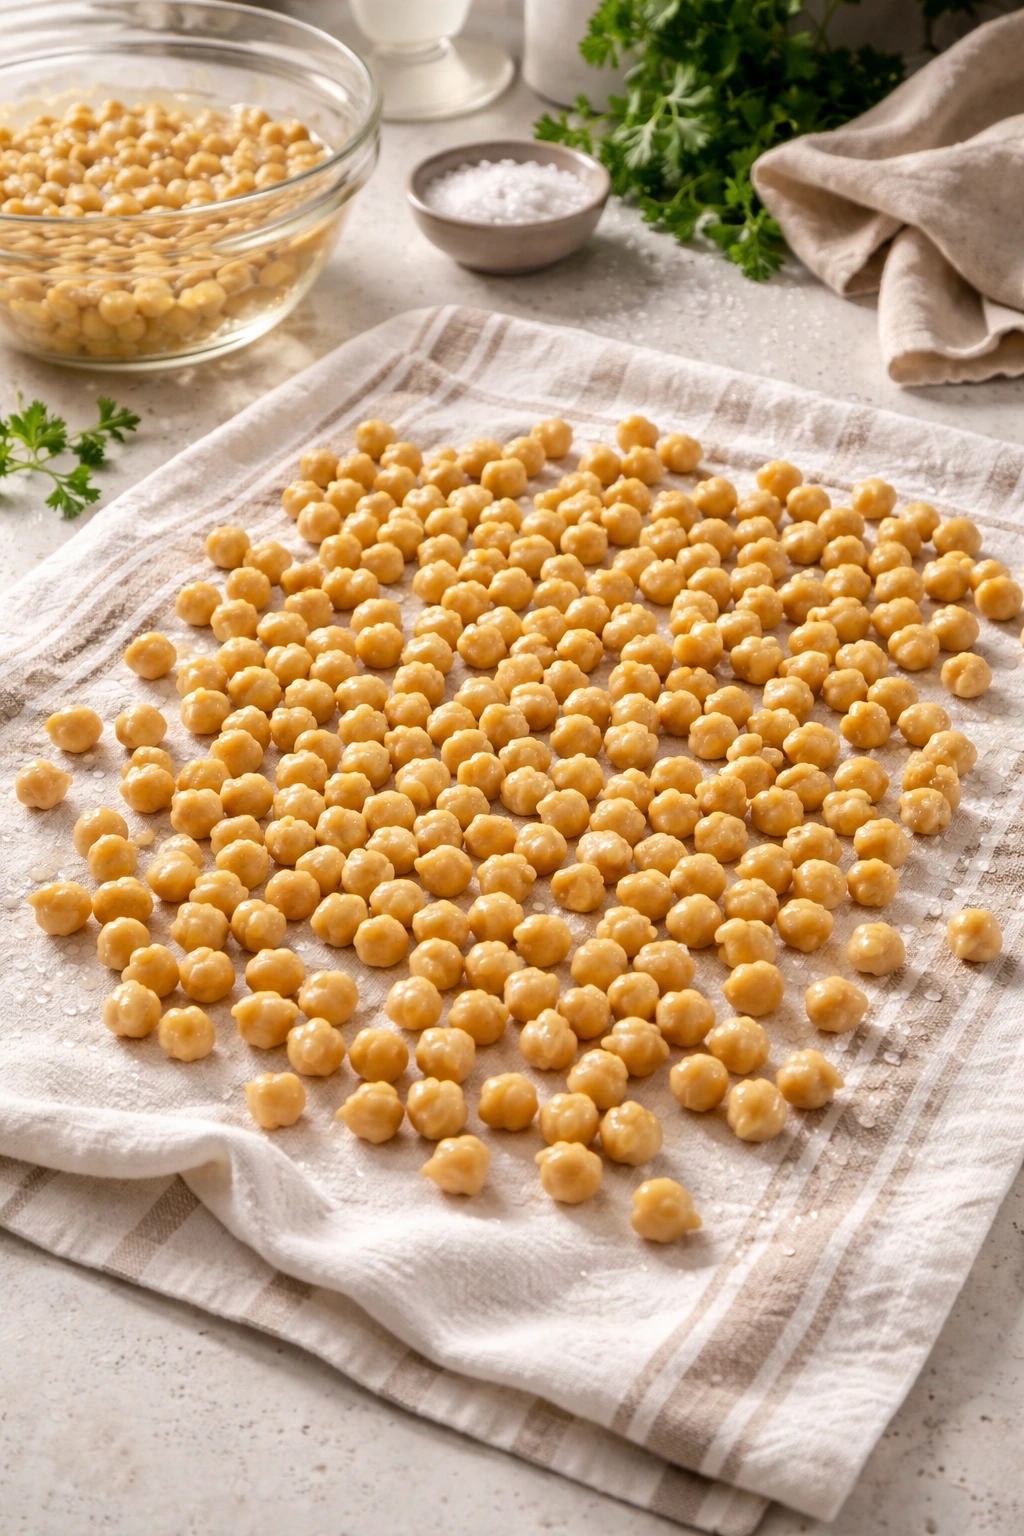
Soaking your chickpeas is straightforward, but the drying step afterward is where most home cooks skip steps and then wonder why their falafel isn’t as crispy as they wanted. You’re going to soak your dried chickpeas in cold water for 12 to 24 hours—they should roughly double in size and feel tender but still completely raw inside when you break one open. If you can cook through them easily with your fingernail after soaking, they’ve gone too long and you should start over.
After soaking, drain them completely and then spread them on a clean kitchen towel. Let them sit for at least 15 to 20 minutes—this allows surface moisture to evaporate. This small step is absolutely crucial. Wet chickpeas will create wet falafel dough, which will then require more flour, which pushes you toward dense falafel. Don’t skip the drying step thinking you’ll just blend them and let the flour compensate. It doesn’t work that way. The dough texture is established early, and no amount of flour adjustment later will fix the fundamental issue of too much moisture.
Some people like to gently rub the chickpeas with the towel while they’re sitting, which removes even more surface moisture. It’s not necessary, but it doesn’t hurt either. You’re looking for chickpeas that feel dry on the outside but are still tender inside. They should not feel wet or sticky to the touch.
Building Your Falafel Dough: The Role of Each Ingredient
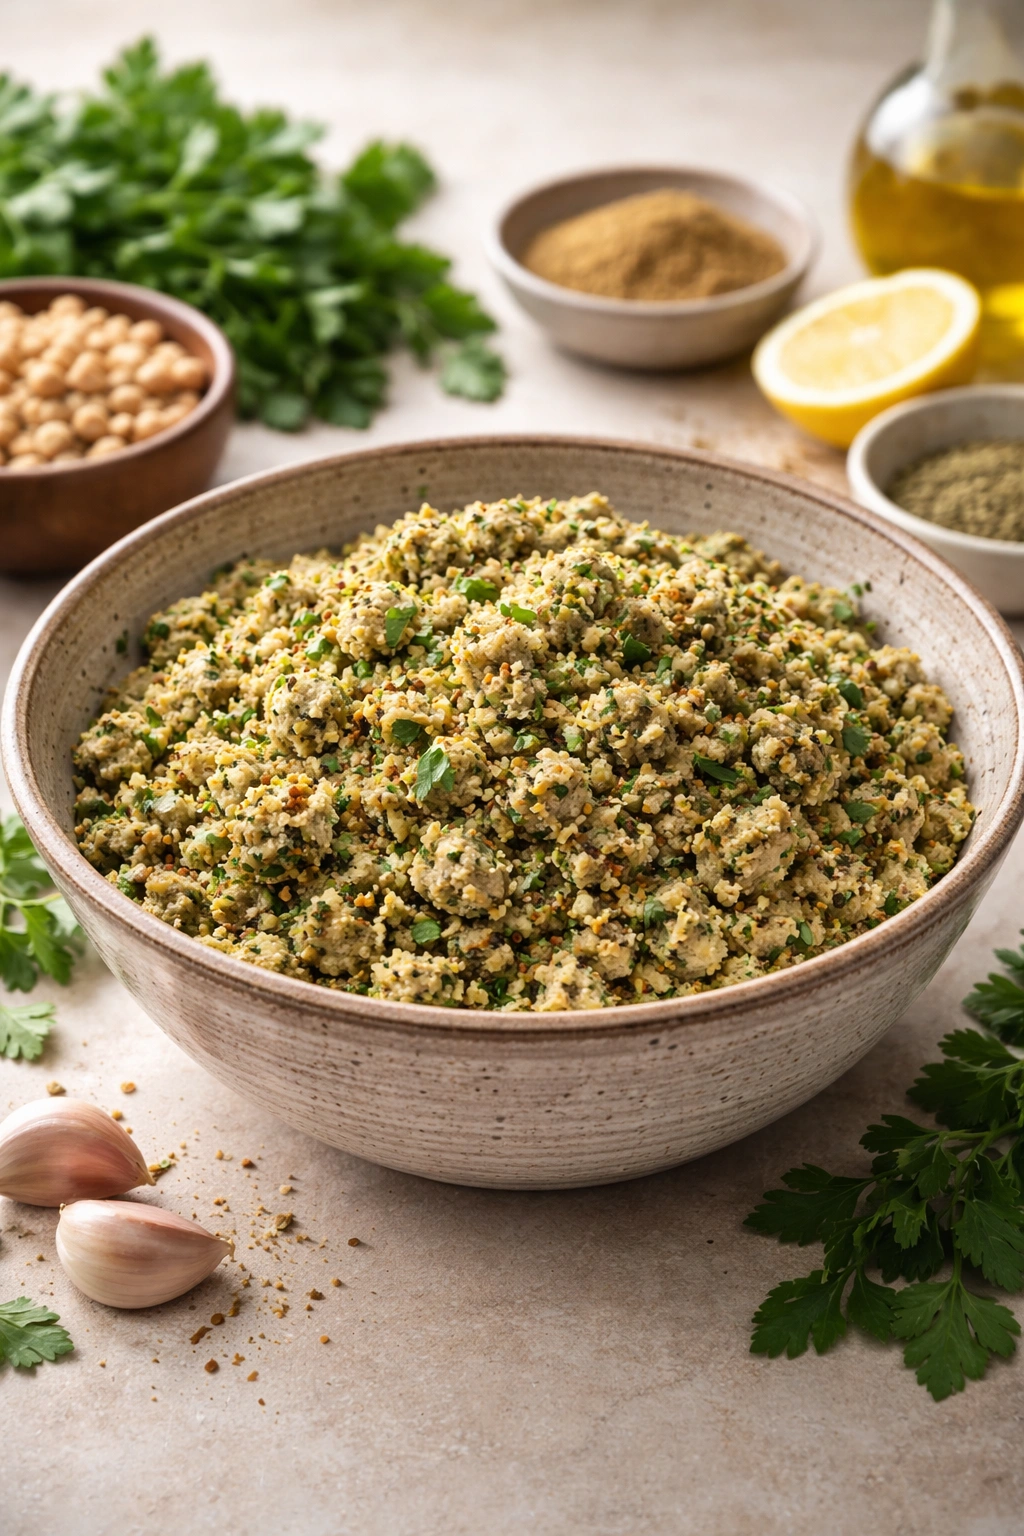
Your falafel dough is made from soaked chickpeas, fresh herbs, spices, some kind of binder (usually flour), and sometimes onion. Every single component serves a function, and understanding what each one does helps you troubleshoot if something goes wrong.
The chickpeas are your base and provide the bulk of the flavor, the bulk of the protein, and the natural binding power from their starches. The herbs—typically parsley and cilantro—add fresh brightness and moisture. Fresh herbs contribute about 80% water by weight, which is why the amount of herbs you add actually affects your dough’s final moisture level.
The spices—cumin, coriander, maybe a touch of cayenne—are where the warm, complex flavor comes from. This is not the time to be shy with spices, but you also need them to be reasonably fresh. Stale spices taste like dust instead of adding character.
Your binding agent is usually a combination of chickpea flour and all-purpose flour (or sometimes just one or the other). The flour’s job is to firm up the dough enough that it holds its shape when you form it into balls or patties. The amount you need depends entirely on how much moisture your fresh herbs and chickpeas added—which is why no two batches are exactly identical, and why you need to develop a feel for the right consistency rather than blindly following exact flour amounts.
Some recipes use a beaten egg as a binder instead of flour. I find this produces slightly softer falafel with a more breadcrumb-like interior texture, which some people prefer. It’s a valid approach, but the flour-based version stays firmer and holds up better to sauce and toppings without falling apart.
Essential Equipment and Oven Setup
You don’t need fancy equipment to make excellent baked falafel. A food processor is genuinely helpful, but if you don’t have one, a blender works fine—you may just need to do it in batches and work in shorter pulses to avoid overblending. Some people use a box grater and mortar and pestle, which takes longer but absolutely works.
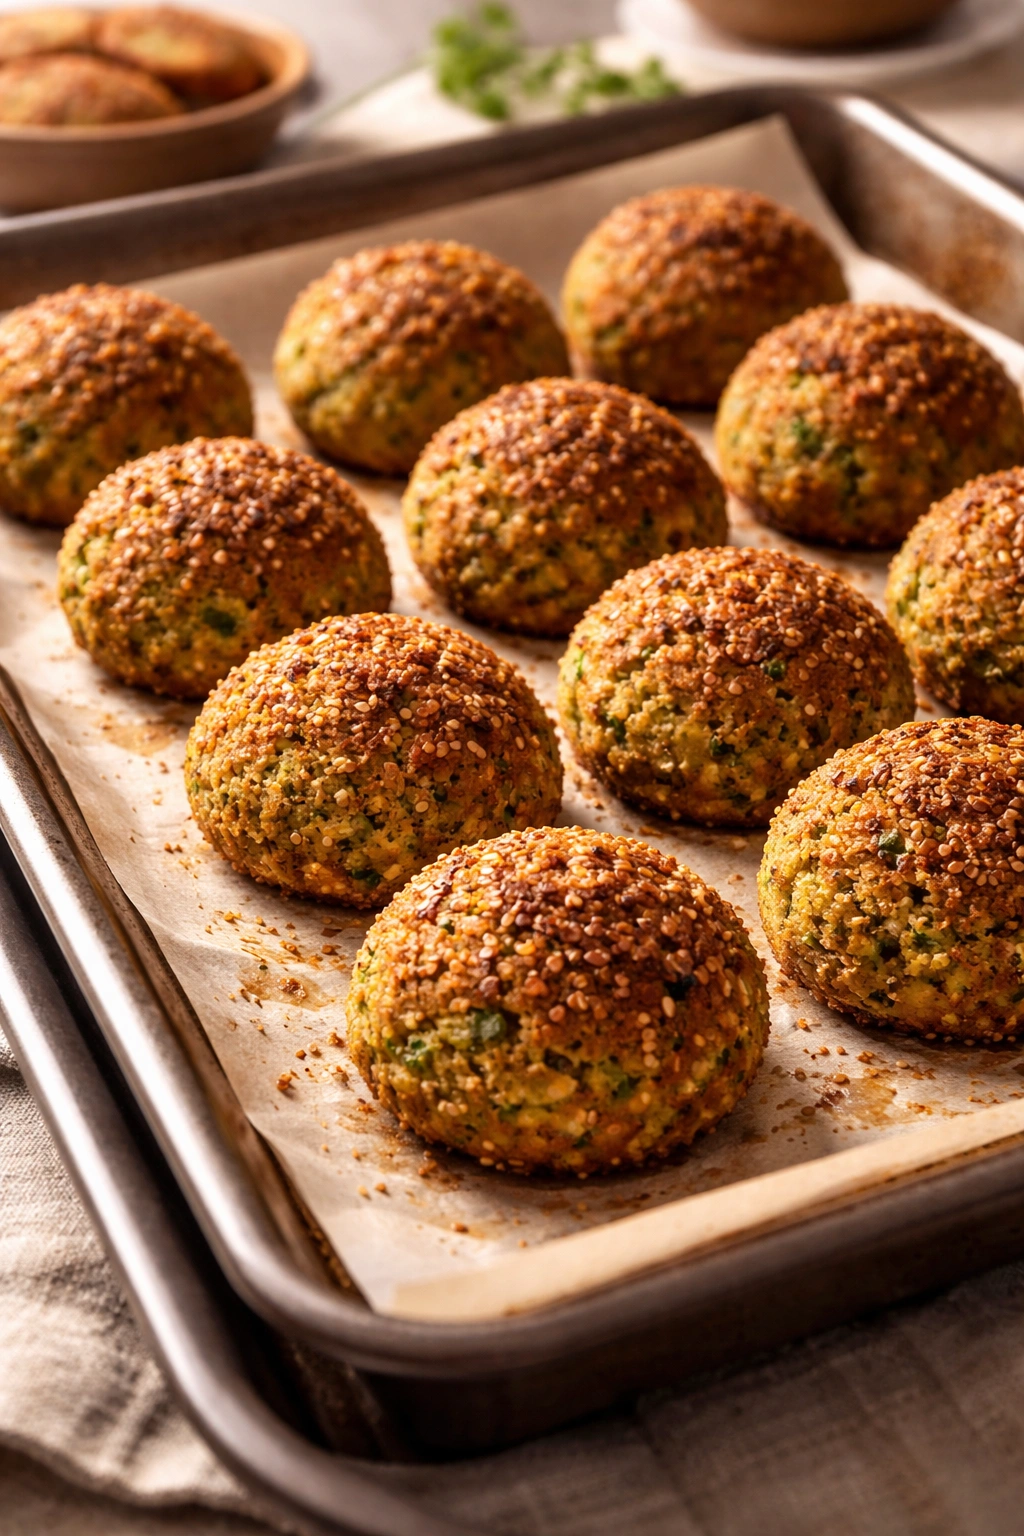
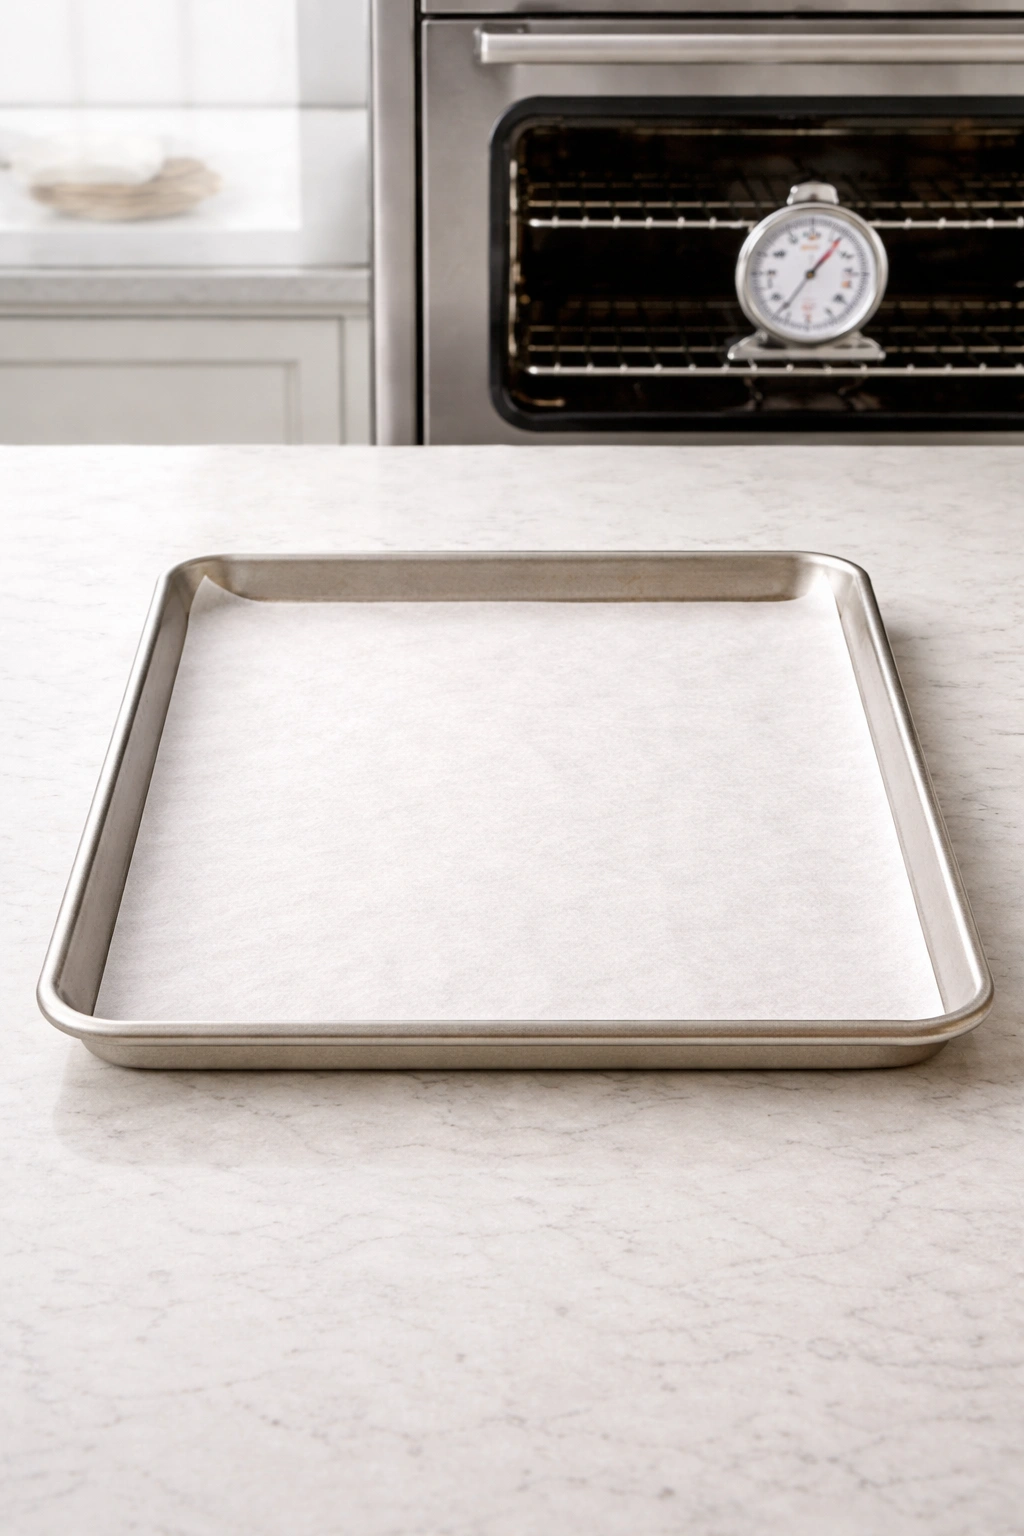
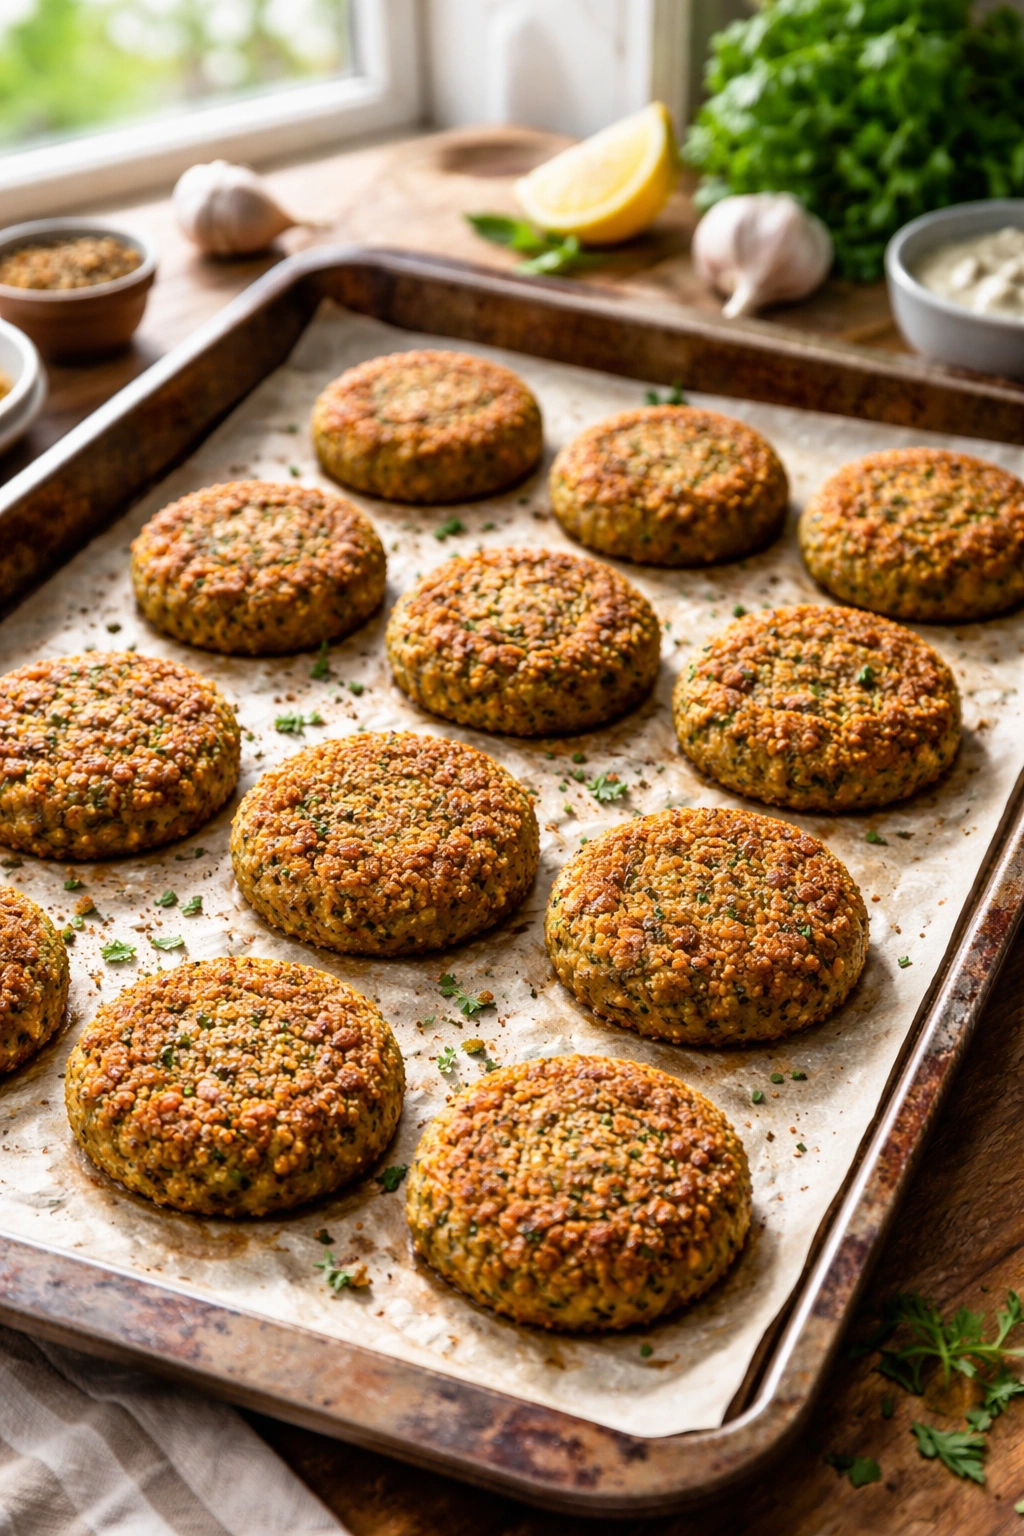
For baking, you want a heavy-bottomed baking sheet that doesn’t warp under high heat. Lightweight aluminum sheets tend to heat unevenly and can cause hot spots where some falafel browns way faster than others. A dark-colored sheet absorbs more heat, which actually helps crisp the bottoms, though you do need to watch that they don’t brown too fast. Line your sheet with parchment paper—this is non-negotiable if you want crispy bottoms, because parchment allows moisture to escape from the underside of the falafel while preventing sticking.
Your oven temperature is the single most important factor. Most home ovens run slightly cold or slightly hot, which is why a reliable oven thermometer is one of the best investments you can make. Check your actual oven temperature and not just what the dial says. If you’re consistently getting pale, soft falafel, your oven is probably running cool. If they’re burning before the insides cook, it’s running hot.
Arrange your falafel so they’re not touching each other on the baking sheet. Air circulation around each piece is what allows the sides to get crispy all the way around. If they’re packed close together, the sides that touch each other will steam instead of crisping.
The Complete Recipe
Yield: Makes 24 to 28 falafel | Prep Time: 20 minutes (plus 12-24 hours soaking) | Cook Time: 25 minutes | Total Time: 45 minutes active + overnight soaking | Difficulty: Intermediate — The soaking step is essential and takes planning, but the mixing and baking are straightforward for anyone comfortable using a food processor.
For the Falafel:
- 2 cups dried chickpeas, soaked overnight in cold water (about 4 cups soaked), drained and dried on a clean kitchen towel
- 1 cup fresh flat-leaf parsley, lightly packed and roughly chopped
- ½ cup fresh cilantro, lightly packed and roughly chopped
- 4 green onions (scallions), white and light green parts only, roughly chopped
- ½ small yellow onion, roughly chopped
- 3 cloves garlic, roughly chopped
- 2 teaspoons ground cumin
- 1½ teaspoons ground coriander
- ¼ teaspoon cayenne pepper (or less if you prefer mild)
- 1 teaspoon fine sea salt
- ½ teaspoon black pepper
- ½ cup all-purpose flour or chickpea flour
- 2 tablespoons fresh lemon juice
- Oil spray for baking sheet (olive oil spray preferred)
For Serving:
- Tahini sauce or yogurt dip for serving
- Fresh lemon wedges
- Cucumber slices, tomato wedges, or mixed salad greens
- Warm pita bread or flatbread
Prepare Your Ingredients:
-
Remove your soaked chickpeas from the refrigerator at least 30 minutes before starting, so they come to room temperature. Spread them on a clean kitchen towel and let them sit for 15 to 20 minutes to dry out any surface moisture.
-
Roughly chop all your herbs, green onions, onion, and garlic. Keep them separate from your dried chickpeas for now.
Advertisements -
Measure out your spices into a small bowl: ground cumin, ground coriander, cayenne, salt, and black pepper. This makes the next step go faster.
Make the Falafel Dough:
-
Add your dried, room-temperature chickpeas to a food processor (work in two batches if your processor is smaller than 8 cups). Pulse 8 to 10 times, until the chickpeas are broken down into roughly sand-sized pieces but not yet a paste. This should take about 15 to 20 seconds total. Do not overblend—you want texture, not purée.
-
Add the herbs, green onions, onion, and garlic to the food processor with the partially blended chickpeas. Pulse another 8 to 10 times, until everything is evenly mixed and the herbs are finely chopped throughout. The mixture should look like coarse breadcrumbs.
-
Transfer the mixture to a large mixing bowl. Add your measured spices, salt, black pepper, and fresh lemon juice. Using a wooden spoon or your clean hands, fold and mix everything together until fully combined. The mixture should smell intensely of herbs and spices, and should feel slightly damp but definitely not wet.
-
Sprinkle the flour over the mixture, a quarter cup at a time, folding gently after each addition. Stop when the mixture is firm enough to hold together when you squeeze a handful—it should not be sticky or wet on your hands, but it should not be dry either. You want a texture that’s similar to packable cookie dough or wet sand. If it’s too wet, add another tablespoon of flour. If it’s too dry and crumbly, add 1 teaspoon of water at a time until it comes together. Let the dough rest in the bowl for 10 to 15 minutes.
Shape and Bake:
-
Preheat your oven to 400°F (200°C). Line a baking sheet with parchment paper and lightly spray it with oil spray. Check your oven temperature with an oven thermometer if you have one—many home ovens run 10 to 15 degrees cool.
-
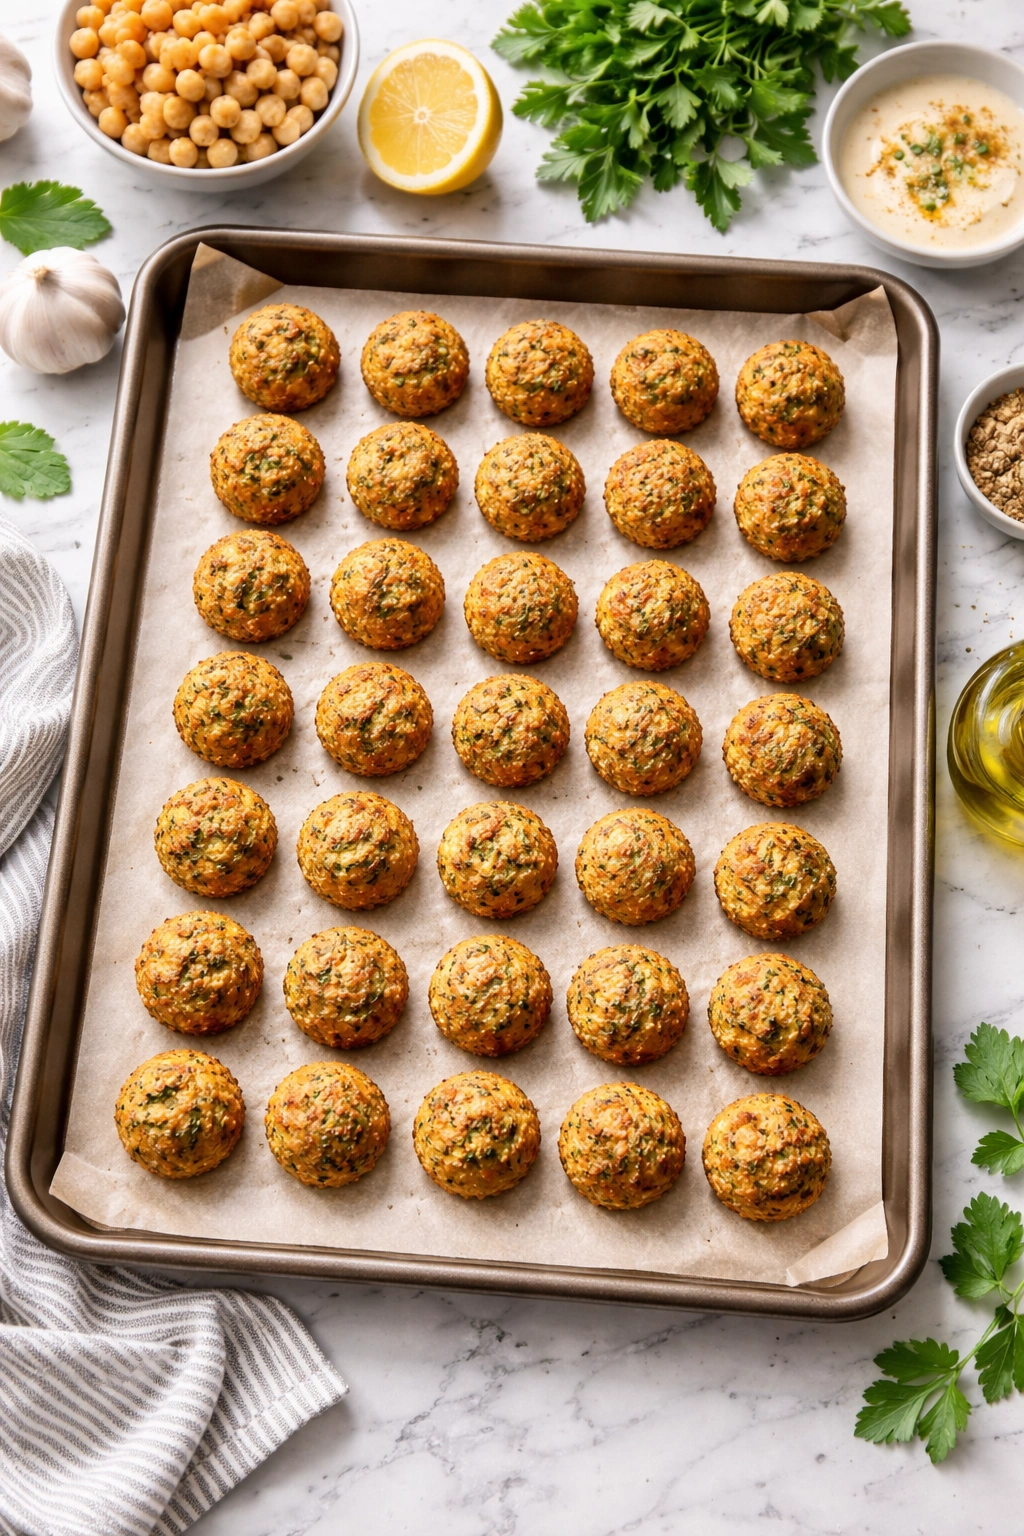
Scoop the dough using a 1-tablespoon cookie scoop or two spoons, and gently roll each portion between your palms into a ball about the size of a large walnut (roughly 1½ inches in diameter). Gently flatten each ball into a disk about ¾ inch thick. Do not press too hard—you want them compact but not dense.
-
Place each falafel on the prepared baking sheet, leaving about 1½ inches between them so air can circulate. Do not skip this spacing—falafel that touch each other will steam instead of crisping on their sides.
Advertisements -
Lightly spray the tops of the falafel with oil spray—just a light misting, not a heavy coating. This helps them brown and crisp.
-
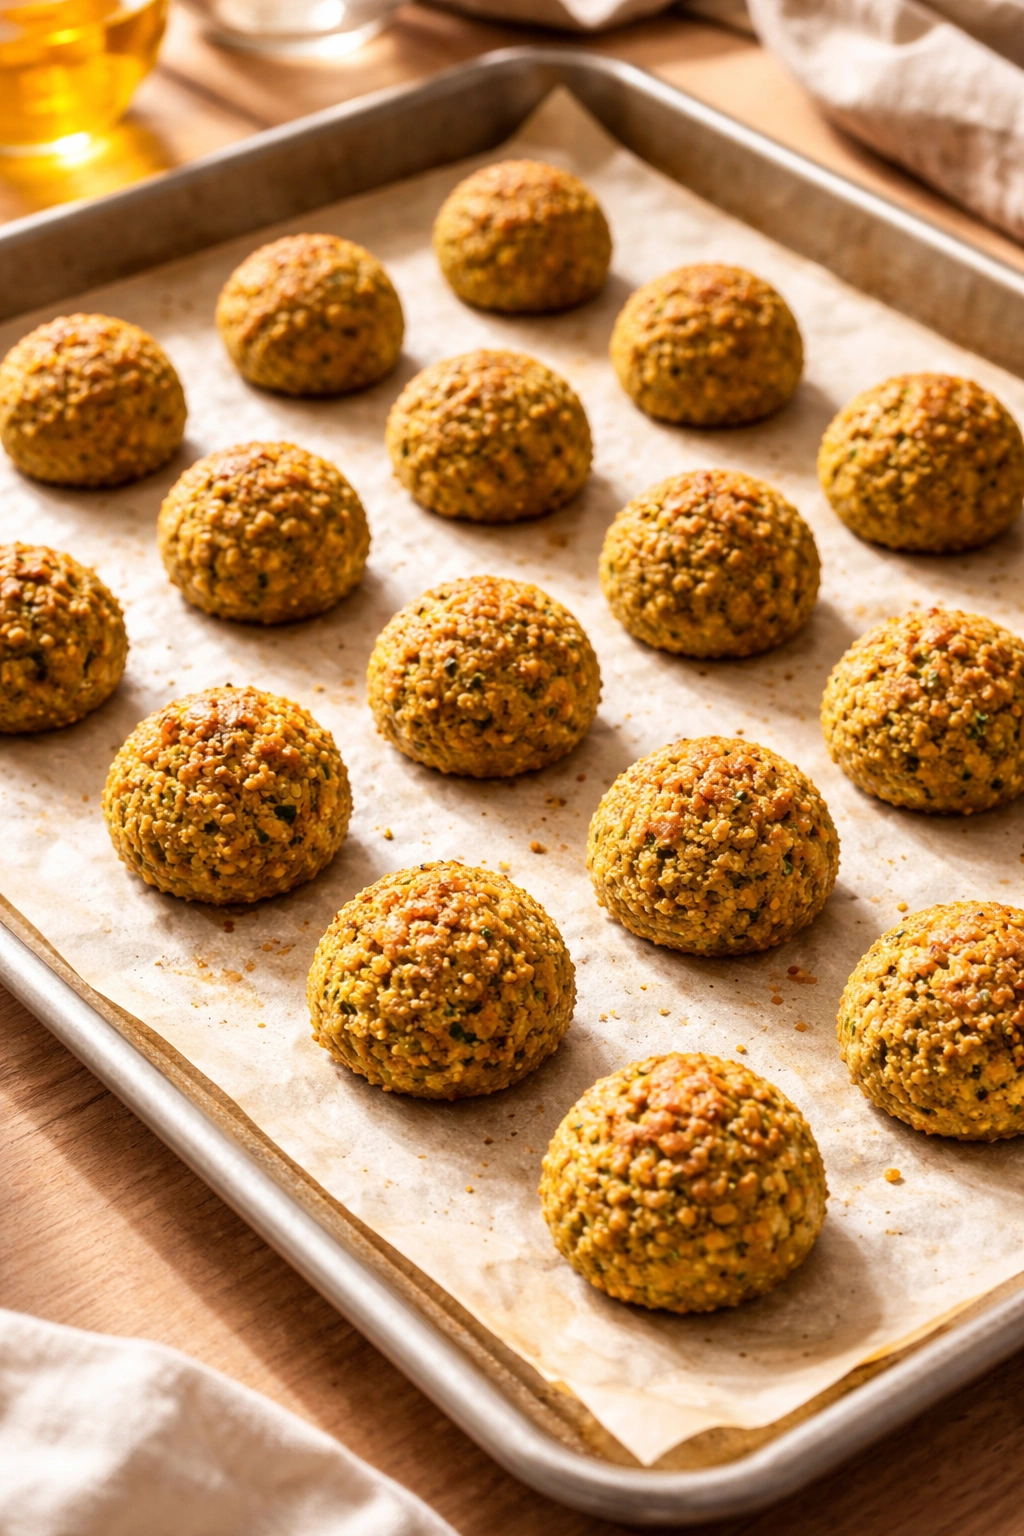
Bake for 20 to 25 minutes, rotating the baking sheet halfway through. The falafel should be deep golden brown on the outside and a toothpick inserted into the center should come out clean with no raw dough clinging to it. The exteriors should feel crisp to the touch.
-
Remove from the oven and let cool on the baking sheet for 5 to 7 minutes before serving. They’ll continue to firm up slightly as they cool. If you try to bite into them immediately, the outsides are crispy but the very inside is still steaming hot and slightly softer—they reach peak texture after a few minutes of resting.
Tips for Consistently Excellent Baked Falafel
The difference between falafel that’s merely good and falafel that’s genuinely excellent usually comes down to attention to a few specific details. Don’t skip the soaking time. There’s no shortcut here—dried chickpeas need the full 12 to 24 hours to soften completely. Trying to speed this up produces inferior results.
Check your oven temperature with an actual thermometer if you’re getting disappointing results. I’ve tested this in a dozen different home ovens, and most run between 10 and 25 degrees cooler than the dial suggests. If your oven runs cool, bump the temperature up by 25 degrees and keep a closer eye on browning. Dark spots aren’t the enemy—they’re a sign that you’re actually getting that crispy exterior.
Let your dough rest for at least 10 minutes before shaping. This allows the flour to fully hydrate and makes the dough much easier to work with. You’ll notice a huge difference in how the dough holds together.
Don’t make your falafel too large. Oversized falafel tend to be dense and undercooked inside, or they brown too much on the outside before the inside finishes cooking. Stick to the walnut-size recommendation—if anything, err on the smaller side.
Rotate your baking sheet halfway through cooking. Even oven heat is an ideal, and your oven almost certainly has hot spots. Rotating ensures even browning all around. If you notice one corner browning much faster than the others, you’ve located your hot spot—keep an eye on that area in future batches.
Space your falafel far enough apart that you can see the sheet between them. Crowded falafel produces steamed, soft-sided falafel. You want every side exposed to circulating air.
Common Mistakes and How to Fix Them
The most common issue is falafel that’s soft or chewy on the outside instead of crispy. This almost always means either your oven ran too cool, your dough had too much moisture, or they didn’t bake long enough. Check your oven temperature first with an actual thermometer. If the temperature is correct, the issue is probably moisture in your dough—add slightly more flour next time, making sure your soaked chickpeas are truly dried on the surface before blending.
Dense, dry falafel that doesn’t have that fluffy interior usually means your dough was overworked. Stop blending once you reach the breadcrumb texture described in step 4 above. Overblending creates a paste, which bakes into dense falafel no matter what else you do.
Falafel that falls apart during handling almost always means your dough didn’t have enough binder (flour) or you rested it before shaping for long enough. Let the dough rest the full 10 to 15 minutes and be careful when forming—gentle handling is better than vigorous squeezing.
Pale, underbrowned falafel that are otherwise cooked through indicates your oven temperature is too low. Raise the temperature by 25 degrees next time. If they’re burning before the inside cooks, your oven is running too hot—reduce the temperature by 15 degrees and start watching them around the 18-minute mark.
Flavor Variations That Actually Work
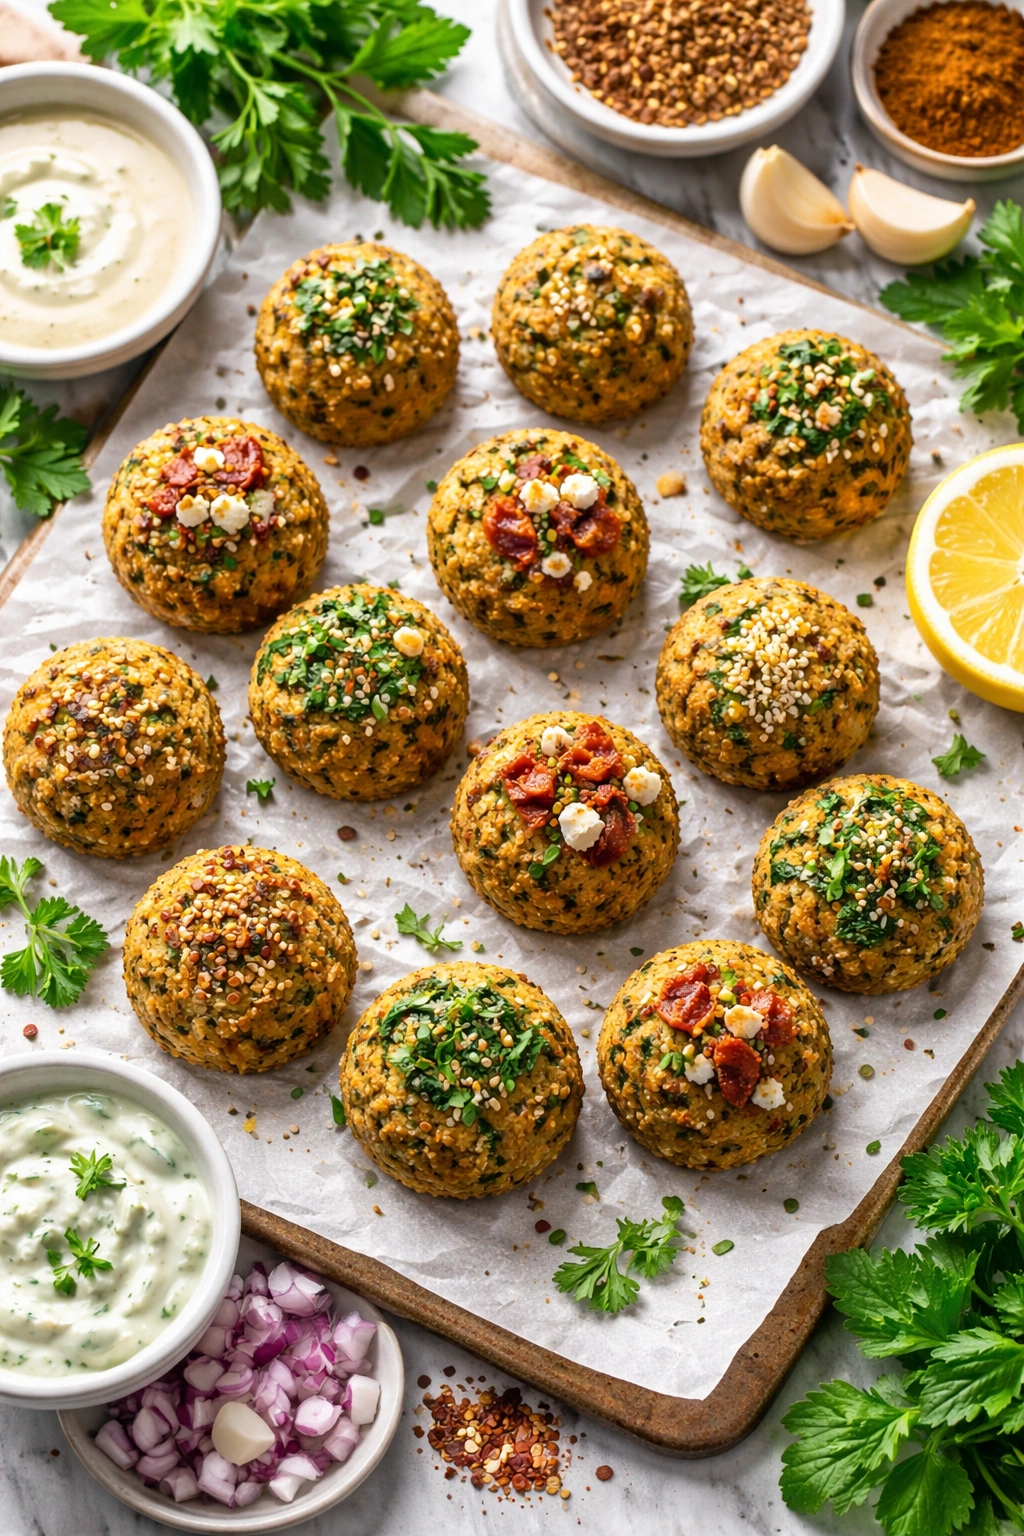
Once you nail the basic technique, you can absolutely experiment with flavor variations while keeping the texture perfect. The key is that these variations should be herb or spice swaps or additions, not structural changes that affect moisture level.
A Lebanese-style version includes ½ teaspoon of ground allspice and a pinch of ground cloves, which adds a warm, almost sweet note. Some traditional recipes use ¼ teaspoon of ground cinnamon instead of the cayenne, which produces a subtly different flavor profile.
For an Indian-inspired variation, substitute 1 teaspoon of garam masala for the cumin and coriander, add ¼ teaspoon of turmeric, and replace half the parsley with mint. Add a tablespoon of minced fresh ginger to the mixture as well.
If you want to add more heat, you can increase the cayenne to ½ teaspoon and add a fresh serrano or jalapeño, minced very fine. Just be mindful that the water content of fresh peppers might mean you need slightly more flour.
Some people love adding a tablespoon of pomegranate molasses or lemon juice for tanginess, though the recipe above already includes lemon juice. Adding both works if you reduce the flour slightly.
Storage, Make-Ahead Options, and Reheating
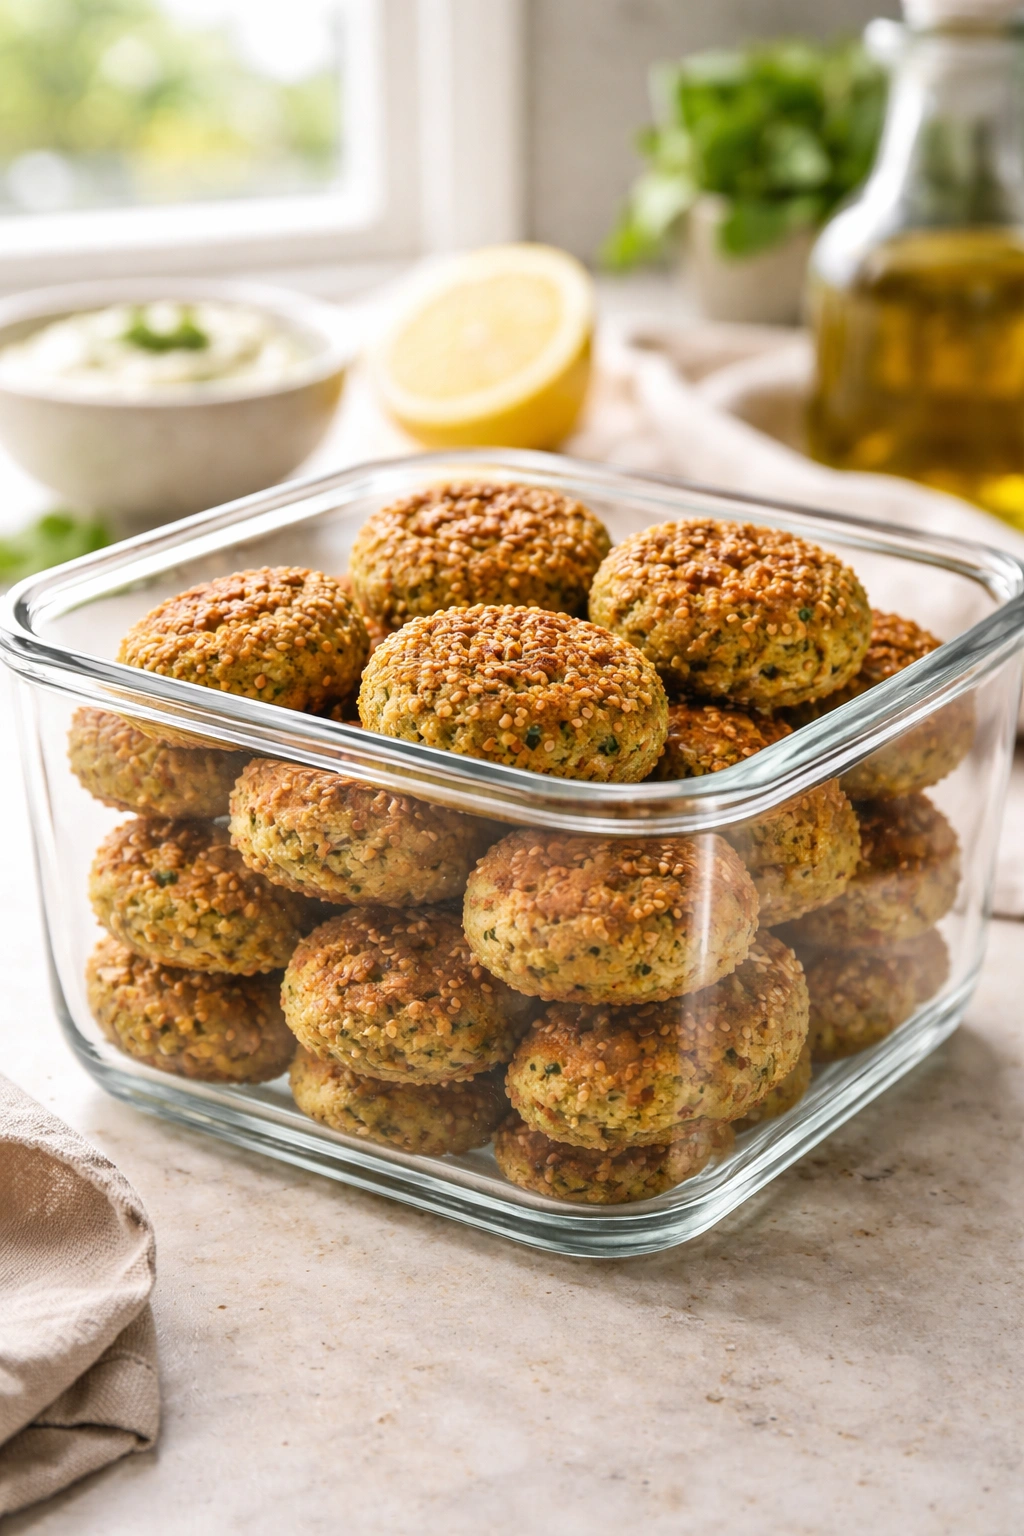
Baked falafel keeps well in the refrigerator for up to four days in an airtight container. They stay softest and most flavorful for the first two days. You can reheat them in a 350°F (175°C) oven for 8 to 10 minutes to re-crisp the exteriors. Don’t microwave them—that steams them and makes them soft.
You can also freeze unbaked falafel. Shape them, freeze them on a baking sheet uncovered for at least two hours (until solid), and then transfer them to a freezer bag for up to three months. When you’re ready to bake, add about 5 minutes to the cooking time and bake from frozen.
If you want to get truly ahead, you can make the dough up to two days in advance and store it covered in the refrigerator. The flavors actually deepen slightly as the herbs and spices fully hydrate. Just let the dough come to room temperature for about 30 minutes before shaping, as cold dough is more difficult to work with.
Most people don’t know you can also freeze fully baked falafel. Cool them completely, freeze them on a baking sheet, then transfer to a freezer bag for up to three months. Reheat from frozen at 400°F (200°C) for 12 to 15 minutes to re-crisp them.
Serving Suggestions and the Best Accompaniments
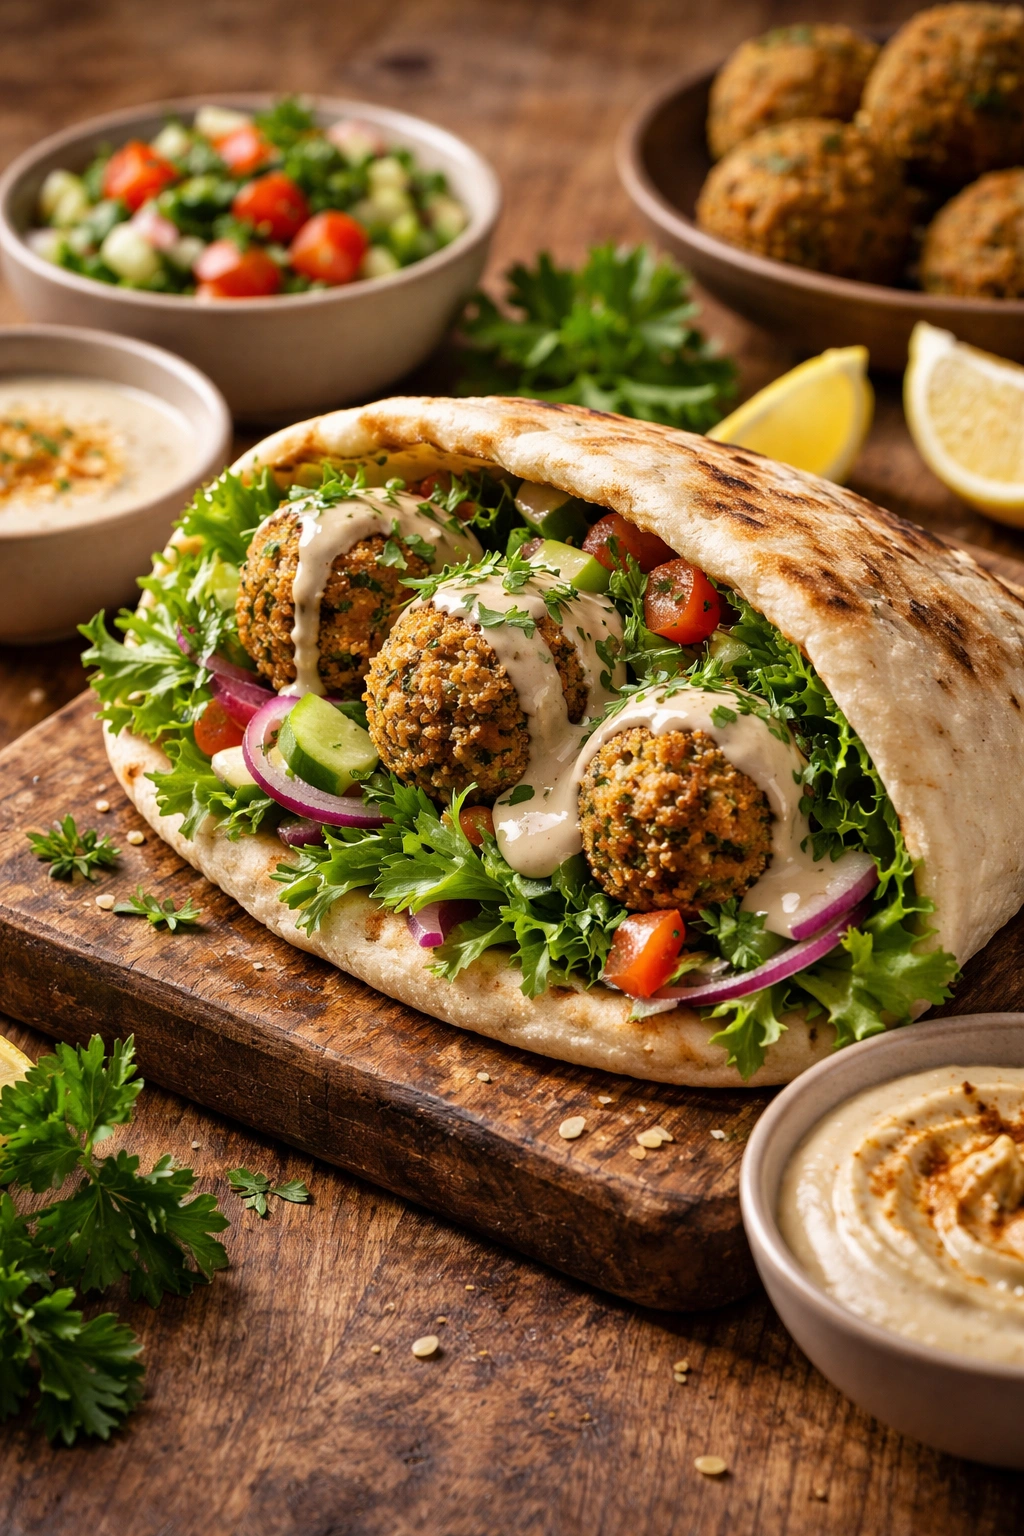
Falafel deserves better than being relegated to a side dish. Serve them as the main event. A traditional approach is to stuff them into warm pita with lettuce, tomato, cucumber, and tahini sauce—that’s genuinely excellent. But you can also serve them over grain bowls with roasted vegetables, on salads for added protein and texture, or with a spread of hummus and a selection of fresh vegetables.
Tahini sauce is the traditional pairing. Mix tahini with lemon juice, garlic, and cold water until it reaches a drizzleable consistency. A garlicky yogurt sauce works beautifully too—especially if you add some fresh dill and a squeeze of lemon. Harissa mayo is a bit more modern but genuinely delicious if you like heat.
For vegetables, anything fresh and crunchy works: cucumber slices, tomato wedges, shredded red cabbage, shredded carrots, pickled turnips, or mixed greens. Pickled vegetables add a brightness that cuts through the richness of the falafel nicely.
A squeeze of fresh lemon right before eating elevates the whole experience. Something about that sharp acidity makes the spices pop and makes the whole thing feel less heavy.
If you’re serving them to a crowd, arrange the falafel on a platter with bowls of sauce, stacks of pita, and a selection of fresh vegetables, plus extra lemon wedges. Let people build their own—it feels more casual and festive than plating individual sandwiches.
Why Baked Falafel Becomes a Kitchen Staple
Once you’ve made truly excellent baked falafel a few times, you’ll find yourself making it regularly. It’s not because it’s healthier than fried versions—though it is. It’s because it tastes good, it’s actually easier than dealing with hot oil, and there’s something deeply satisfying about pulling a sheet of golden, crispy falafel from the oven.
The technique is reproducible. You’re not fighting temperature swings in hot oil or trying to time a perfect golden moment in a deep fryer. You shape them, you set them in the oven, and they come out reliably excellent. That consistency is worth something.
There’s also the reality that baked falafel stores better, reheats better, and is easier to pack for picnics or lunch boxes. Fried falafel gets soggy if you store them with any moisture, but baked versions hold their texture longer. You can actually make a batch and eat them over several days without them falling apart.
Once you understand the technique—the moisture level, the temperature, the spacing, the resting time—you can adapt it forward. You understand why it works, which means you can troubleshoot when something goes sideways, and you can confidently create variations that still work because you’re not blindly following a recipe.
Final Thoughts

Excellent baked falafel exists in that sweet spot between crispy and tender, between flavorful and approachable. It’s the kind of recipe that rewards careful attention to small details—the drying of your chickpeas, your oven temperature, how you space them on the sheet—but once you’ve figured out the specifics of your own kitchen, it becomes almost automatic.
The fact that you can achieve restaurant-quality results without a deep fryer, without wasting oil, and without cleanup is genuinely wonderful. But the real win is that when they’re done right, these falafel are just delicious. They’re not a compromise or a diet version of something better. They’re excellent in their own right, and they’ll make you wonder why everyone doesn’t bake theirs this way.