There’s something almost magical about the smell of onions slowly caramelizing in butter—that deep, nutty aroma that fills your kitchen and whispers of something comforting about to happen. French onion soup is the kind of dish that seems impossibly elegant when you’re eating it, yet somehow simple enough to make at home. The truth is, it really is that simple, and once you understand the fundamentals, you’ll find yourself making it again and again on those days when you crave pure, unapologetic comfort.
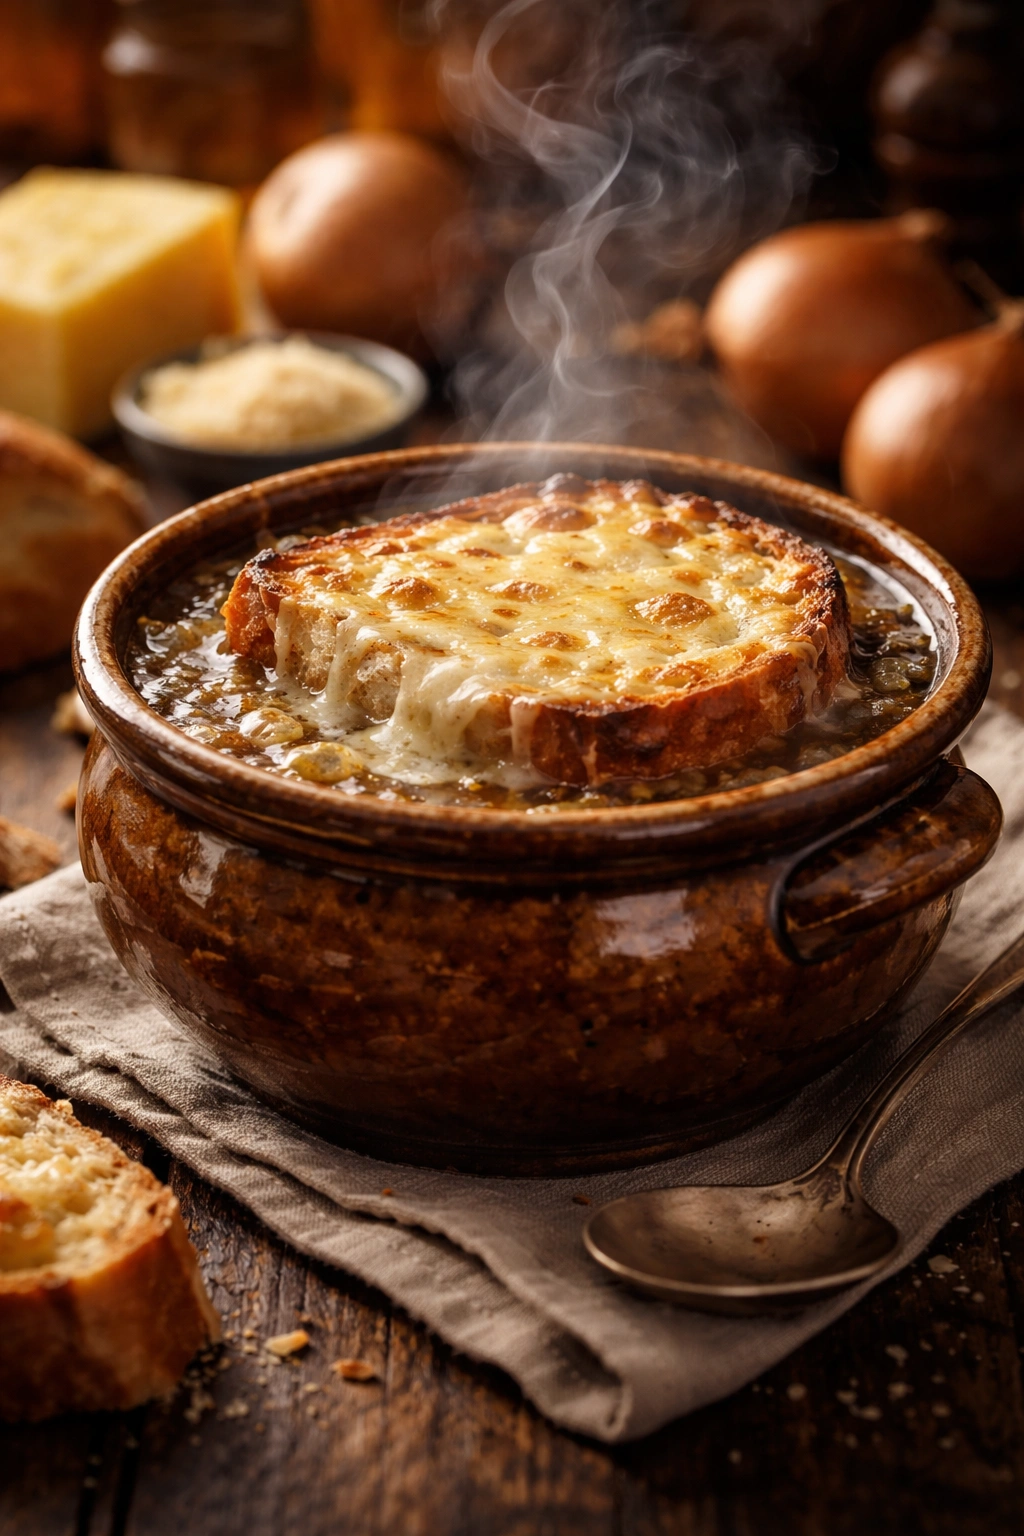
What makes French onion soup truly special isn’t any secret ingredient or complicated technique—it’s the patience you invest in getting those onions right. This isn’t a soup that rushes; it’s built on time and gentle heat, which transform humble yellow onions into something almost unrecognizable. The sweetness deepens, the color shifts from pale to golden to amber, and you end up with a broth that tastes like it’s been simmering for hours (even though most of the work is hands-off). Add a crusty toast topped with melted cheese, and you’ve created a bistro-quality bowl that rivals anything you’d order in Paris—right in your own kitchen.
Making French onion soup from scratch means doing it the honest way: starting with raw onions, a good broth, and nothing but time. There are no shortcuts here that don’t cost you something in flavor, and that’s exactly the point. This guide walks you through every step, from selecting the right onions to bringing that first spoonful to your mouth.
The Rich History Behind This Humble Dish
French onion soup has one of the most charming origin stories in classical cuisine. Legend has it that King Louis XV of France, while hunting, took refuge in a cabin where the only food available was butter, onions, and bread. With nothing else at hand, he combined these three simple ingredients into what would become the foundation for one of France’s most beloved soups. Whether or not the story is true, it perfectly captures the essence of French onion soup: taking the most basic ingredients and transforming them through technique and time into something extraordinary.
The soup truly earned its place in French culinary tradition, though, through the working class of Paris. It was originally considered a “poor person’s soup” because onions were abundant and inexpensive—a way to create something hearty and nourishing from ingredients that cost very little. By the 18th century, Parisian bistros had elevated it into the restaurant staple it remains today. The traditional version served in these establishments—soupe à l’oignon gratinée—came with a thick, dark broth, a slice of bread, and melted cheese browned under intense heat.
What’s interesting is how the modern version differs from the historical recipes. Many older recipes called for cooking the onions until they were almost black, creating a deeply bitter, intensely dark soup. Modern cooking has shifted toward a lighter caramelization that preserves the natural sweetness of the onions while still developing those complex, savory flavors. This approach produces a soup that’s both more balanced and more forgiving—you don’t have to walk the razor’s edge between perfectly caramelized and burnt.
Understanding the Science of Caramelization
Caramelization is the magic that makes French onion soup special, and it’s worth understanding how and why it happens. When you apply heat to onions, their natural sugars don’t simply dissolve—they undergo a complex chemical reaction called the Maillard reaction. This is the same process that browns bread, sears meat, and creates the crispy edges on roasted vegetables. It’s responsible for the deep, complex flavors that make caramelized onions taste nothing like raw ones.
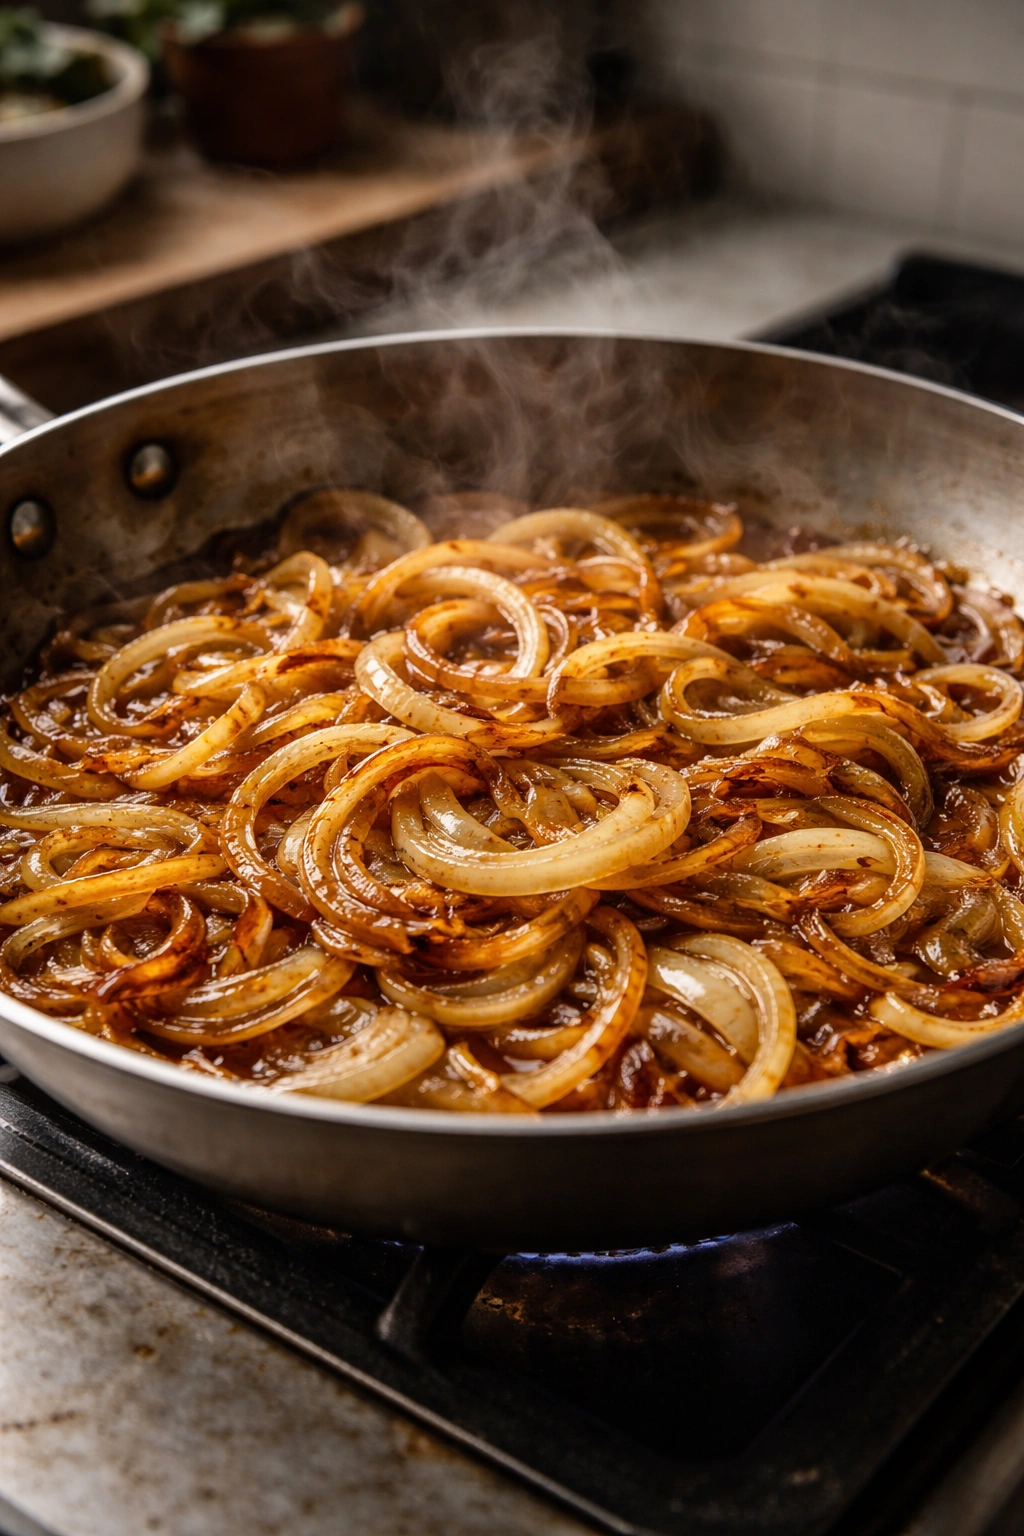
Here’s the crucial part: this process requires time and patience. You can’t rush caramelization by cranking up the heat. If you cook onions over high heat, the exterior will brown quickly, but the inside stays raw and sharp-tasting. The result is burnt onions that taste acrid rather than sweet. True caramelization requires steady, medium or medium-low heat, frequent stirring, and anywhere from 45 minutes to two hours, depending on how much onion you’re cooking and the width of your pot.
The natural water content in onions first needs to evaporate—this softens them and begins to concentrate their sugars. As you continue cooking, those concentrated sugars undergo browning reactions, gradually shifting the color and flavor. The key is this: you’re not looking for the darkest brown possible; you’re looking for a rich, golden-brown color that indicates the onions are fully caramelized and sweet, not bitter. This happens well before onions turn dark brown or black, and it’s actually the point where the flavor is at its best.
Selecting the Perfect Onions for Maximum Flavor
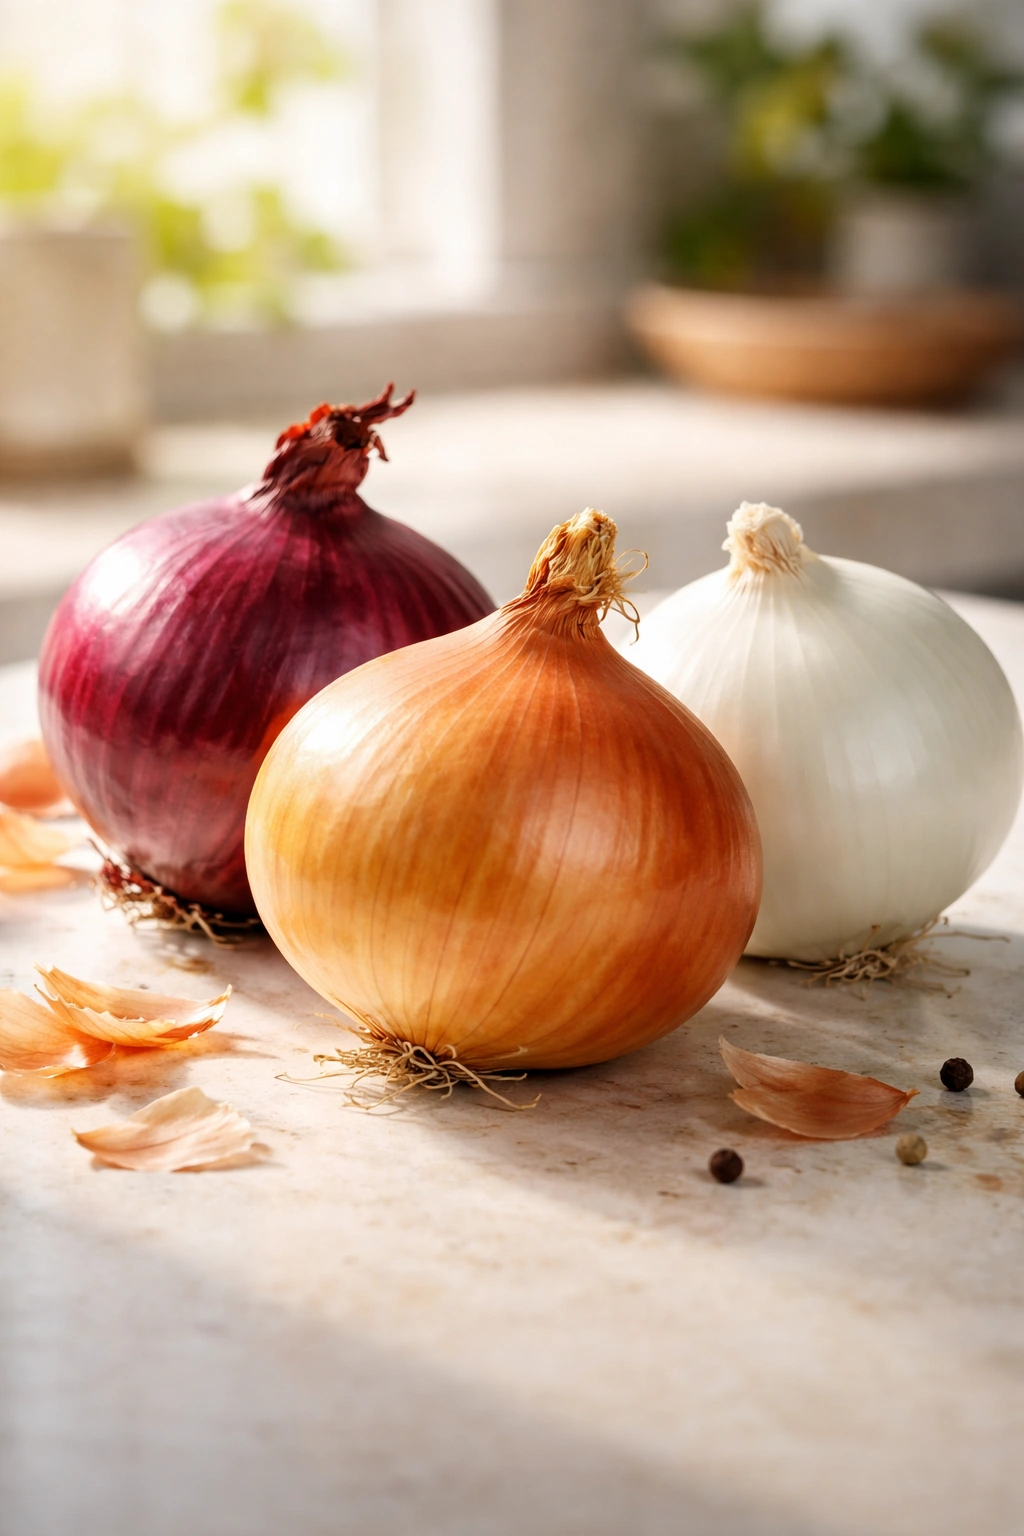
The type of onion you choose matters more than many recipes acknowledge. Yellow onions are the classic choice because they have a good balance of natural sugars and compounds that develop complexity when cooked. They’re not as sweet as Vidalia or other sweet onion varieties, and they’re not as sharp or astringent as white onions. This balance is why they’re considered the gold standard for French onion soup.
That said, you have options. Red onions will give you a more complex flavor with slightly deeper notes, though they’ll lose some of their color and turn grayish as they cook—this doesn’t affect the taste and many cooks don’t mind it. Sweet onions like Vidalia will make a soup that’s notably sweeter; some people love this, while purists might argue it masks some of the savory depth. White onions bring a sharper flavor that can feel more assertive in the finished soup.
The real insight here is that mixing varieties creates a more interesting soup. If you use equal parts yellow, red, and sweet onions (or throw in a few shallots for extra depth), you’ll end up with more complexity and nuance than using one variety alone. You don’t get just one flavor note; you get multiple layers that work together. This is why some of the best restaurant versions use mixed onions—it’s not about impressing anyone, it’s about getting the most flavorful result.
When you’re shopping, choose onions that are firm and have no soft spots. You want to slice them yourself rather than buying pre-sliced onions, which lose quality quickly and can have an off flavor from being cut days before you cook them. Plan on about one large onion per person, or roughly 5-6 onions for a pot that serves 4-6 people as a main course or starter.
The Foundation: Choosing and Using Quality Broth
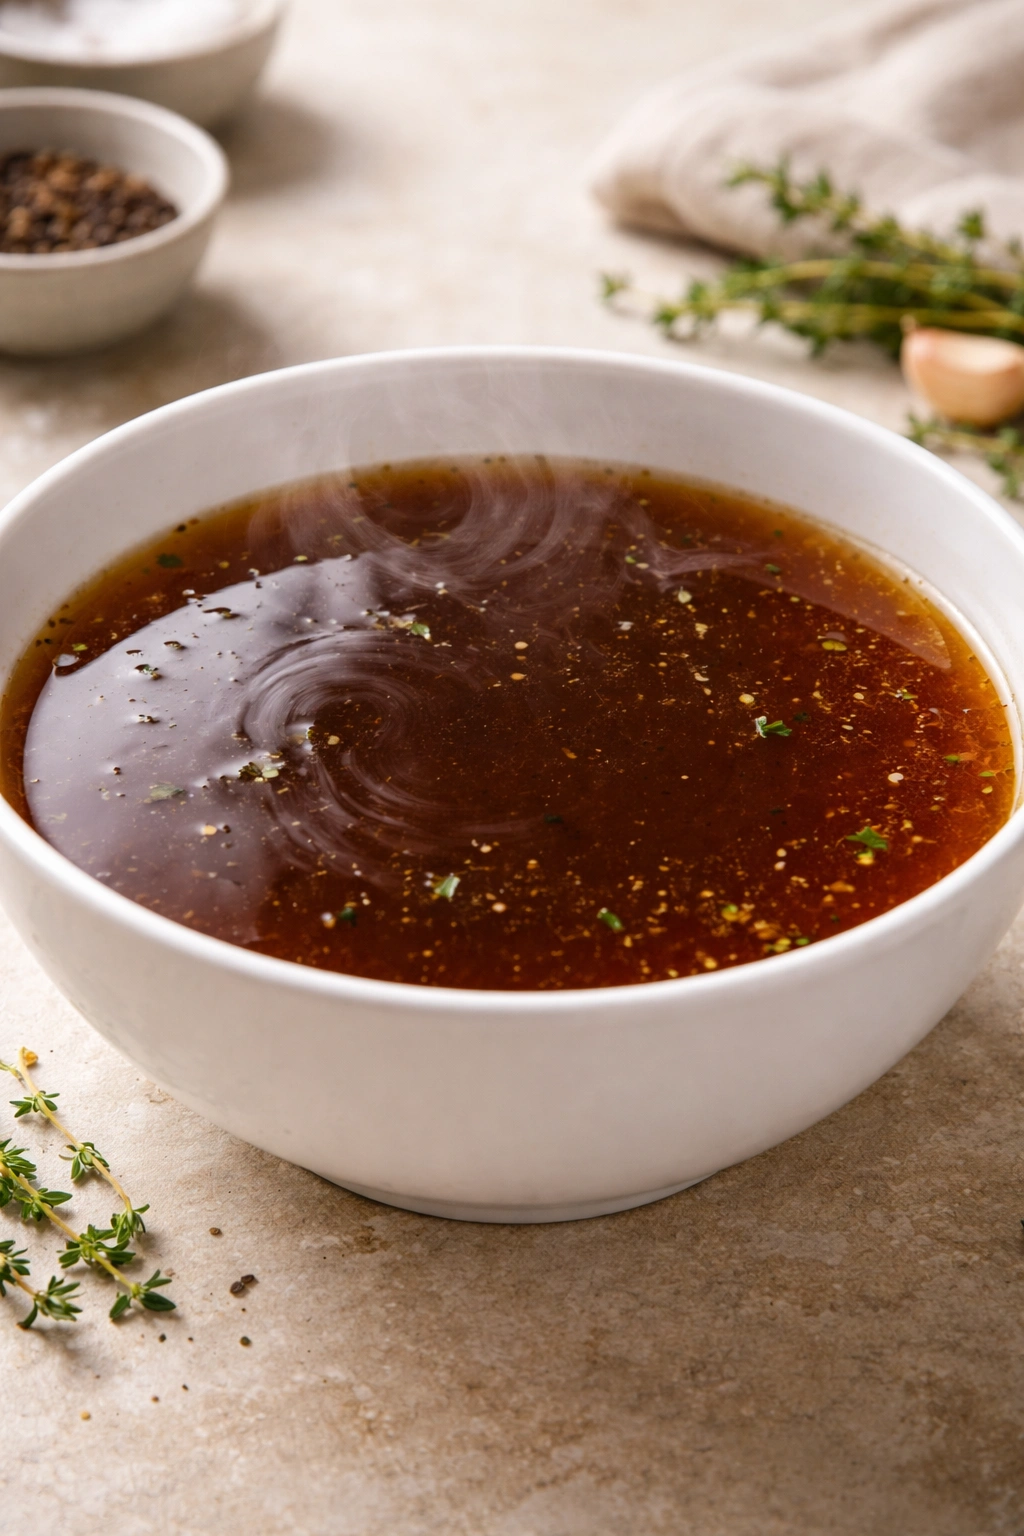
The broth is the second most important component of French onion soup (after the onions), and this is where many home cooks compromise unnecessarily. Store-bought beef broth, in most mainstream supermarket brands, is not good enough for this soup. It tends to be thin, overly salty, and one-dimensional—it won’t give you the rich, savory base you need.
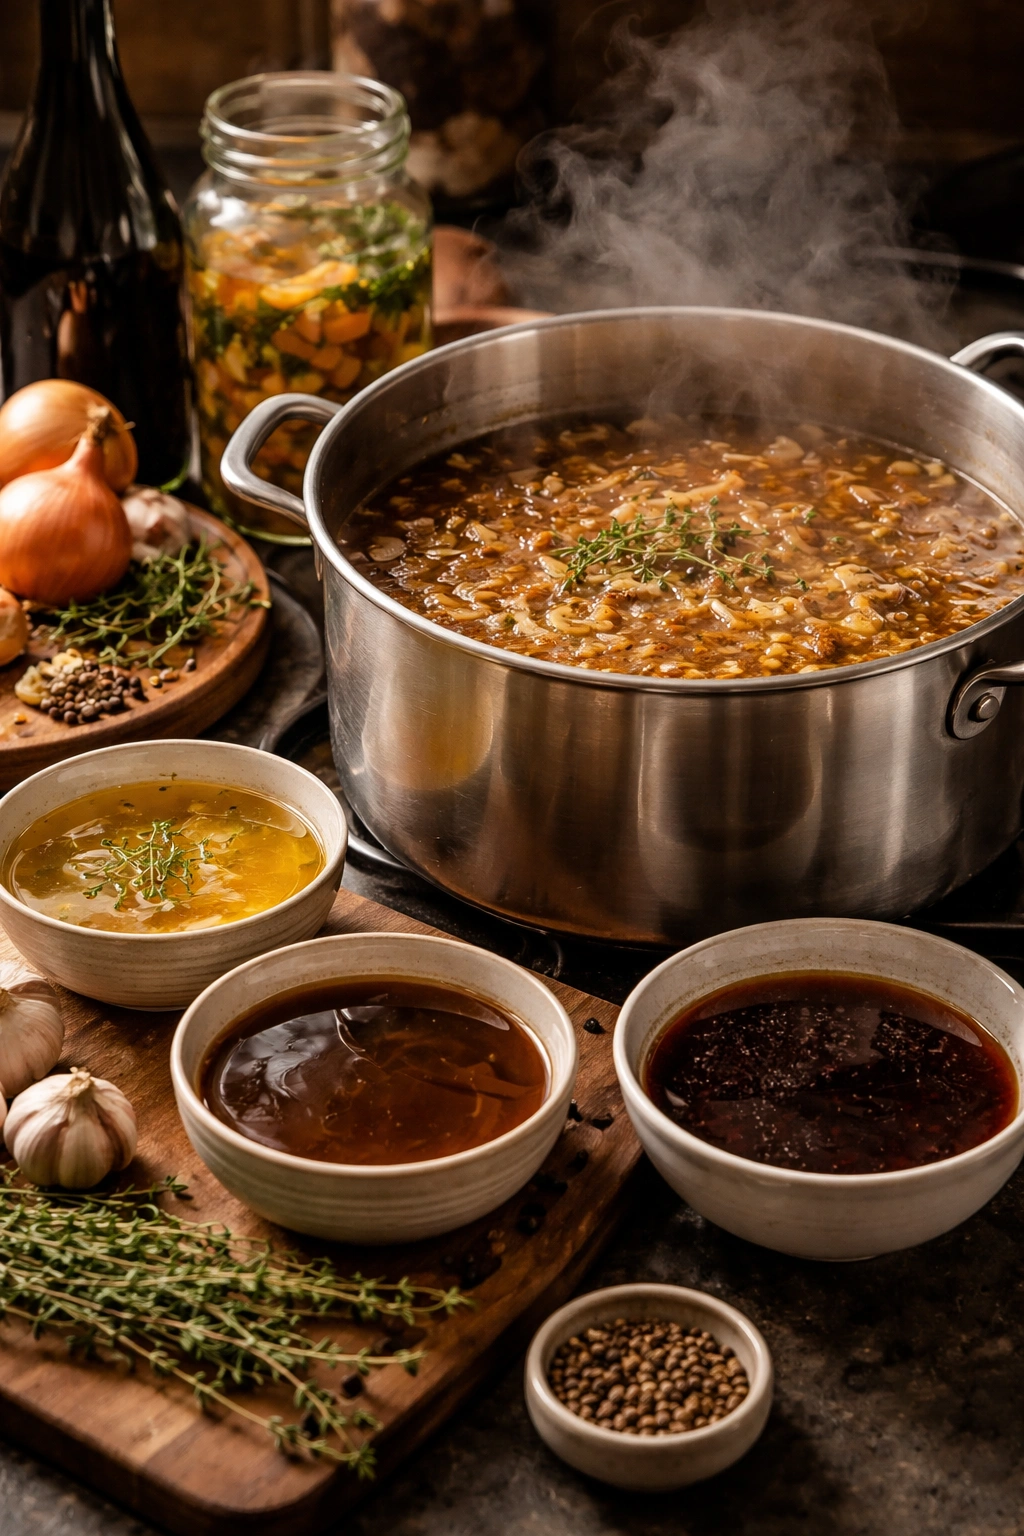
You have several genuinely good options here. The best choice, if you have the time, is homemade beef stock made from bones and aromatics, simmered for many hours until deeply flavored. This is the gold standard. If you’re using a pressure cooker, you can make excellent beef stock in 45 minutes to an hour, which is far more practical than traditional stovetop methods. A second excellent option is quality store-bought beef stock from a local butcher—many butcher shops sell their own stock, and it’s typically far superior to grocery store versions. Look for stock that’s made from bones and has no added sugar or excessive salt.
If you can’t find good beef stock, here’s an honest truth: a high-quality chicken stock will give you better results than mediocre beef stock. A great chicken stock (homemade or from a quality brand like Swanson’s low-sodium or bone broth brands) will make a lighter but genuinely delicious French onion soup. Some classical recipes even call for a combination of beef and chicken stock, which gives you body from the beef while the chicken keeps things from feeling heavy.
Many recipes call for 6-8 cups of liquid total, depending on how brothy or thick you like your soup and how many servings you’re making. The broth becomes flavored by the caramelized onions and the fond (the browned bits on the bottom of the pot), so it deepens significantly as everything simmers together.
Butter, Wine, and Other Critical Components
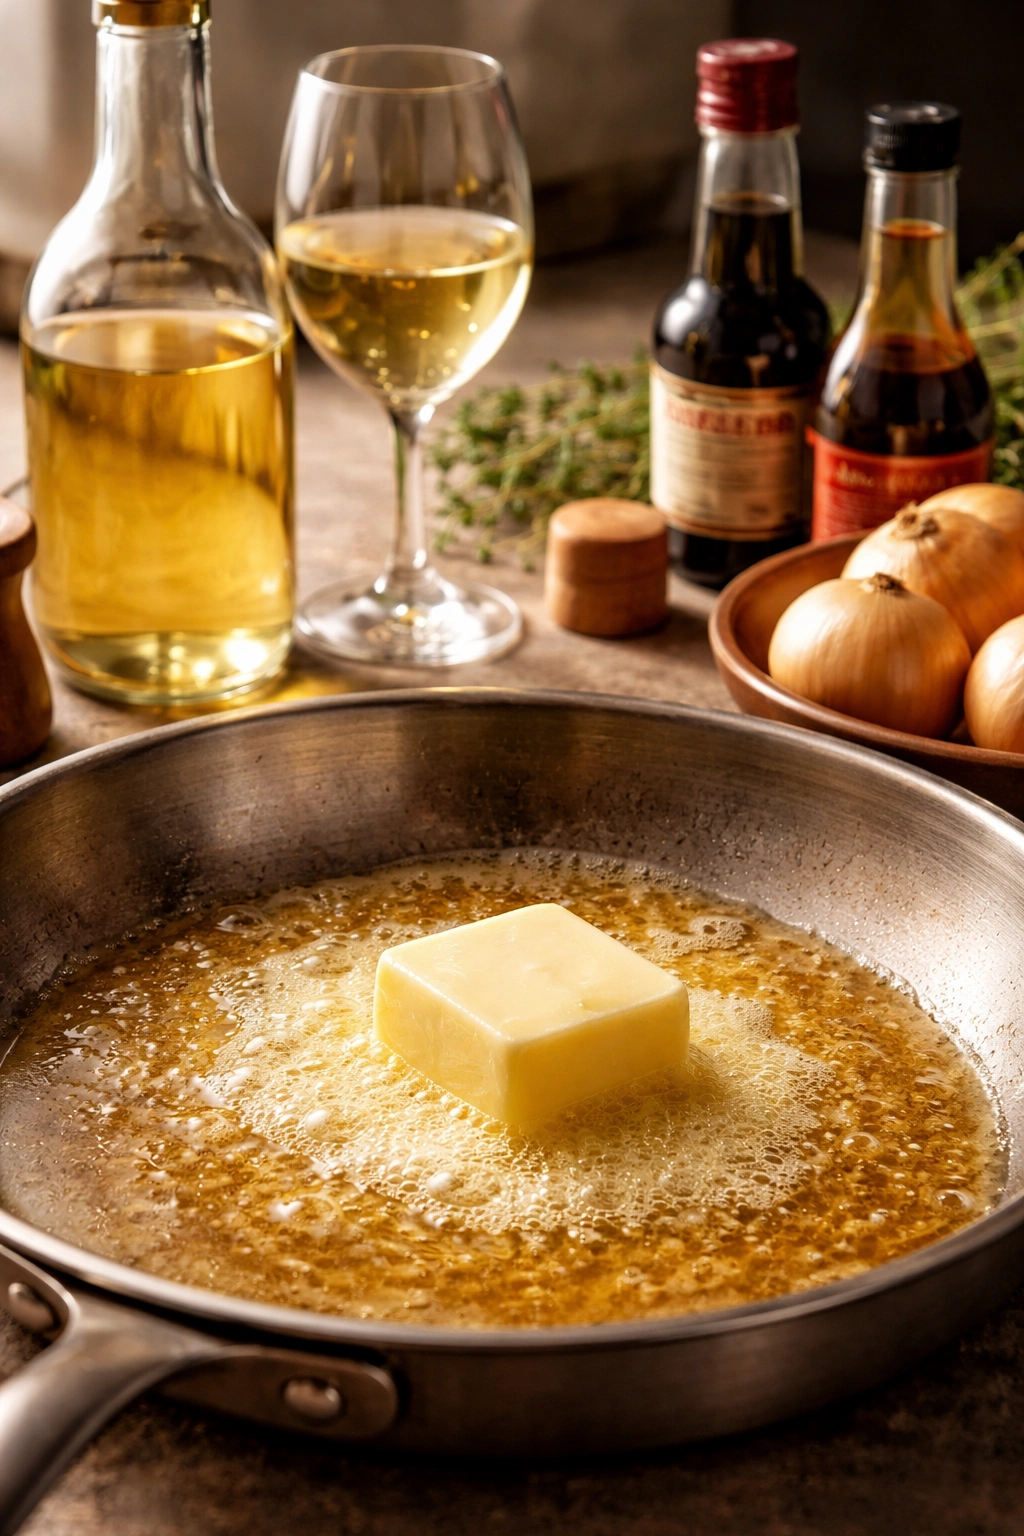
The fat you use for caramelizing onions should be unsalted butter—not olive oil alone, and not salted butter (which limits your control over the final saltiness of the soup). Butter has milk solids that brown and accelerate the caramelization process. Some recipes use a combination of butter and a small amount of olive oil, which works well, but butter is essential. You’ll need roughly 4-6 tablespoons for 5-6 large onions.
Wine (whether dry white, red, or sherry) is traditionally used to deglaze the pot—that is, to scrape up all the flavorful browned bits stuck to the bottom. The wine sizzles against the hot pot, loosens these bits, and adds its own depth to the soup. A dry white wine, dry red wine, or sherry all work beautifully. Avoid sweet wines or anything you wouldn’t drink yourself. If you don’t cook with alcohol, you can skip the wine entirely and use extra broth for deglazing, though the soup will be slightly less complex.
Worcestershire sauce is optional but worthwhile—just a tablespoon adds umami depth and a subtle savory note that most people can’t quite identify but notice is missing if you leave it out. Fish sauce works similarly and is used by some cooks (it doesn’t make the soup taste fishy; it simply adds depth).
Fresh thyme and a bay leaf are the traditional herb additions, but they’re optional. They add a subtle savory note that complements the sweetness of the onions beautifully. Dried herbs can work in a pinch, but fresh herbs are noticeably better here.
Balsamic vinegar or cider vinegar in small amounts (around a teaspoon) can help balance the sweetness of the caramelized onions if needed. This is more of a fine-tuning element than a requirement, but it’s useful to have available.
Equipment That Makes a Real Difference
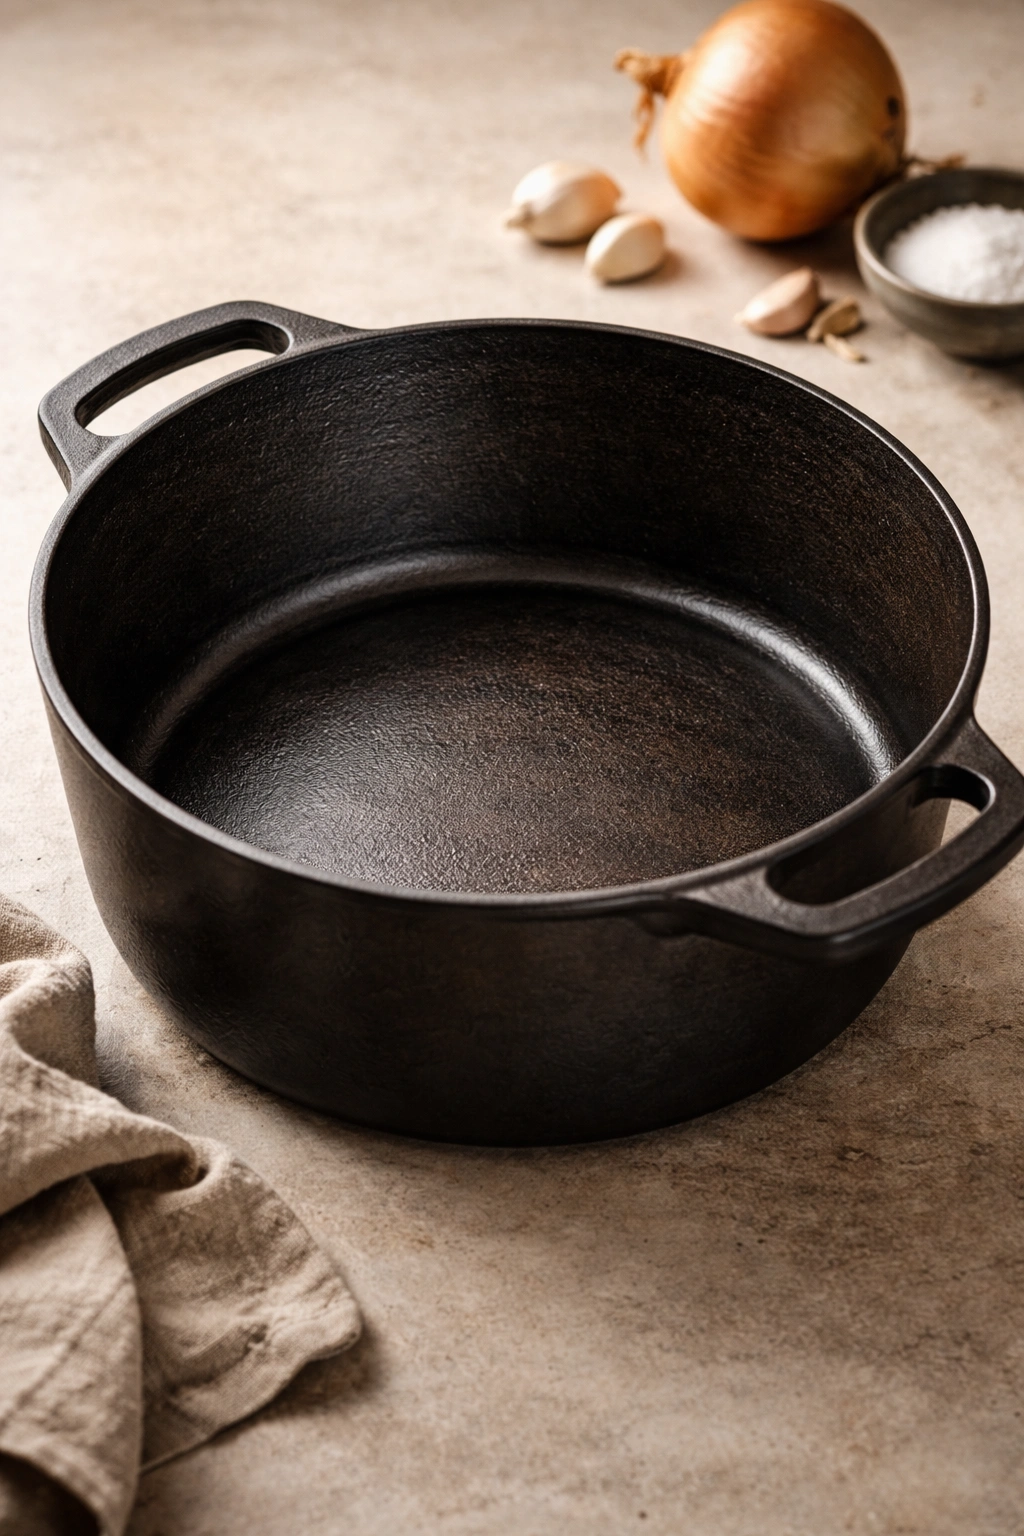
The pot you use for caramelizing onions affects how quickly and evenly they brown. Cast iron and carbon steel pots are ideal—their seasoned surfaces allow onions to brown beautifully with less sticking and less need for deglazing. Stainless steel works well too, though you might need to deglaze more often (which is fine; it’s just an extra step). Enameled cast iron is the one cookware type that underperforms here—for reasons that aren’t entirely clear, onions brown much more slowly in enameled pots, requiring extra water and patience.
The pot should be large enough that the onions aren’t piled too high when raw—ideally they come up no more than two-thirds of the way up the pot. If onions are crowded too densely, steam builds up and they braise rather than caramelize. A pot around 5-6 quarts works perfectly for a full batch.
For finishing the soup, oven-safe crocks or bowls are traditional and create that dramatic presentation of melted cheese. That said, not everyone has these special bowls, and they’re honestly not necessary. You can toast the bread and cheese separately on a baking sheet, then top the soup with these crispy cheese toasts just before serving. It’s less theatrical but equally delicious.
Preparing Your Mise en Place
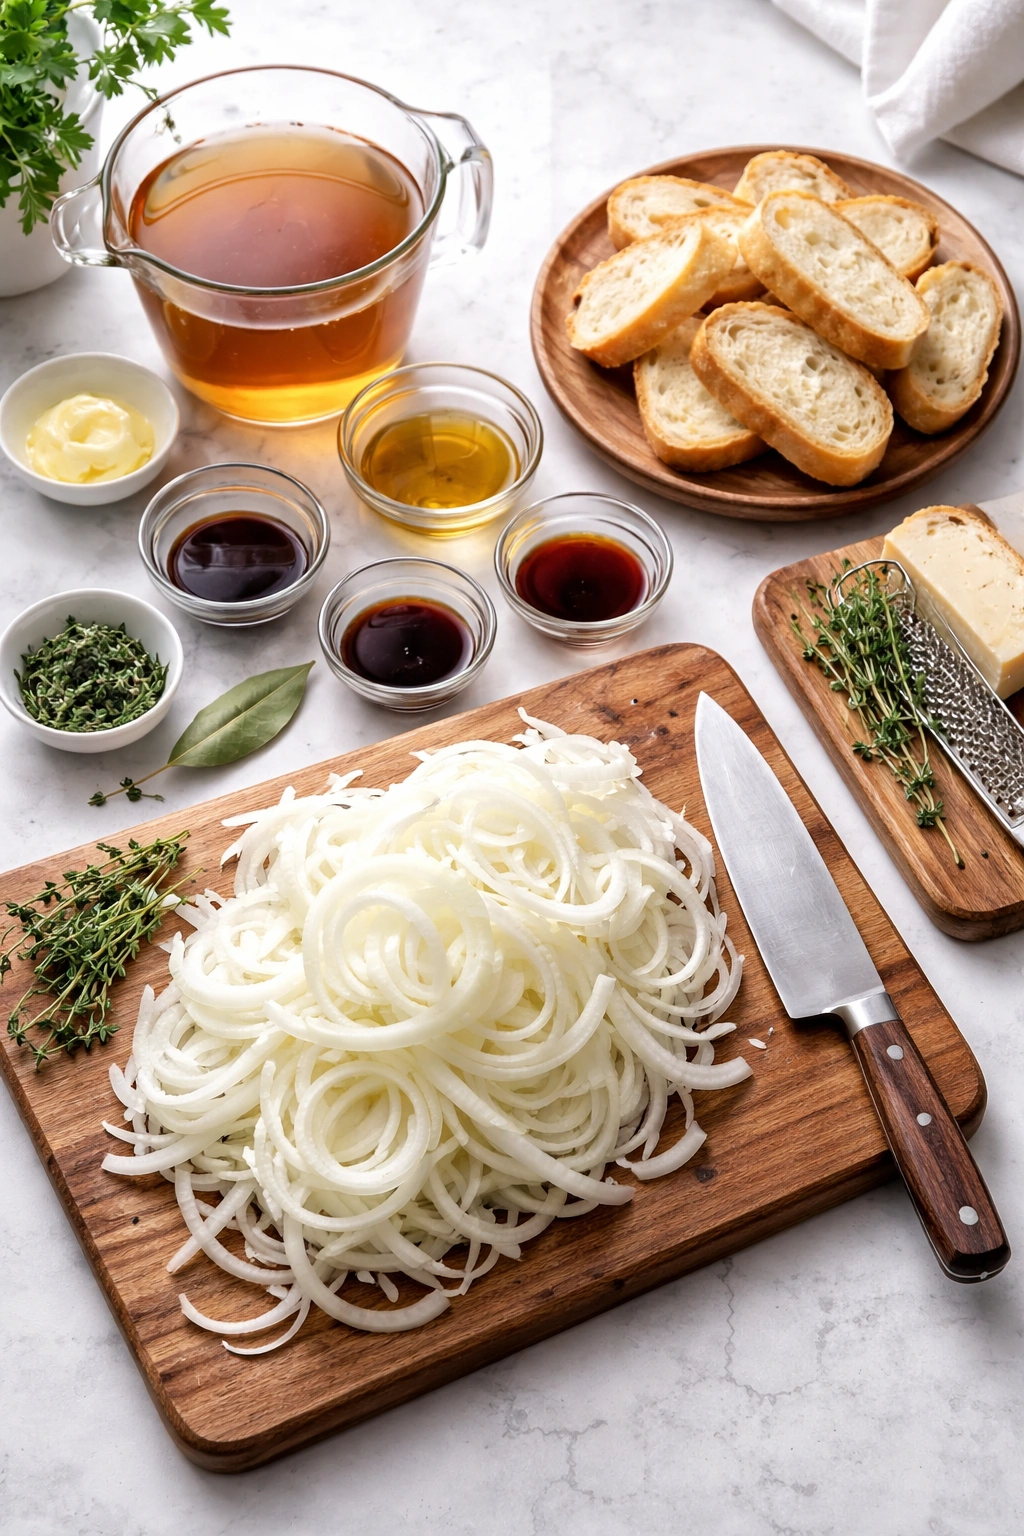
Before you start cooking, prep all your ingredients and set them within arm’s reach. This is called mise en place in French, and it makes cooking far less stressful. For French onion soup, this means:
-
Slice all your onions before you start cooking them. This takes the most time upfront (roughly 15-20 minutes for 5-6 large onions), but it means once you start cooking, you can focus on the caramelization process. Slice them thinly and consistently—you want pieces that are roughly the same size so they cook evenly.
-
Measure out your broth into a pot or large container nearby, so you can add it without scrambling to pour it.
-
Measure your wine, Worcestershire sauce, and any vinegar into small bowls or cups. This ensures you won’t accidentally over-pour during cooking.
-
Clean and trim your fresh herbs if using them, and have your bay leaf ready.
Advertisements -
Toast your bread and prepare your cheese just before serving (or have it ready to do so).
This preparation takes maybe 20-30 minutes total, but it means the actual cooking is far more relaxed and you’re less likely to make mistakes.
Step-by-Step Instructions for Perfect French Onion Soup
Yield: Serves 4-6 | Makes about 8 cups
Prep Time: 25 minutes
Cook Time: 1 hour 45 minutes to 2 hours
Total Time: 2 hours 10 minutes to 2 hours 25 minutes
Difficulty: Intermediate — The technique is straightforward, but caramelizing onions requires patience and occasional stirring over an extended period. The payoff is absolutely worth the time investment.
For the Soup:
- 5-6 large yellow onions (about 3 pounds), peeled, halved, and thinly sliced
- 4 tablespoons unsalted butter, divided
- 1 teaspoon kosher salt, plus more to taste
- ½ teaspoon granulated sugar (optional, helps if onions are less sweet)
- 3 cloves garlic, minced
- ½ cup dry white wine, dry red wine, or dry sherry (or additional beef broth if not using wine)
- 7-8 cups good-quality beef stock or broth (can use a mixture of beef and chicken stock)
- 2 sprigs fresh thyme (or ½ teaspoon dried)
- 1 bay leaf
- 1 tablespoon Worcestershire sauce (optional but recommended)
- ½ teaspoon balsamic vinegar or cider vinegar (optional, for balancing sweetness)
- Freshly ground black pepper to taste
For Serving:
- 8-12 slices French baguette, cut at an angle about ¾-inch thick
- 2 tablespoons unsalted butter, softened
- 2 cloves garlic, minced or cut in half
- 1½ cups shredded Gruyère cheese (or a mix of Gruyère, Swiss, and Parmesan)
- Fresh chives or parsley for garnish (optional)
Caramelize the Onions:
-
Melt 2 tablespoons of butter in a large (5-6 quart) pot or Dutch oven over medium-high heat. Once the butter is foaming, add all the sliced onions and stir constantly for about 2 minutes to coat them evenly with the butter.
-
Reduce the heat to medium and continue cooking, stirring occasionally (every 3-5 minutes), for about 20 minutes. The onions will begin to soften and release their moisture, becoming translucent and starting to release their liquid. At this point, the onions will look wet and uncooked—this is completely normal and expected.
-
After 20 minutes of medium heat, increase the heat slightly to medium-high. Add the teaspoon of salt and the ½ teaspoon sugar (if using). The salt draws out more moisture and helps the onions cook down further, while the sugar helps them brown.
-
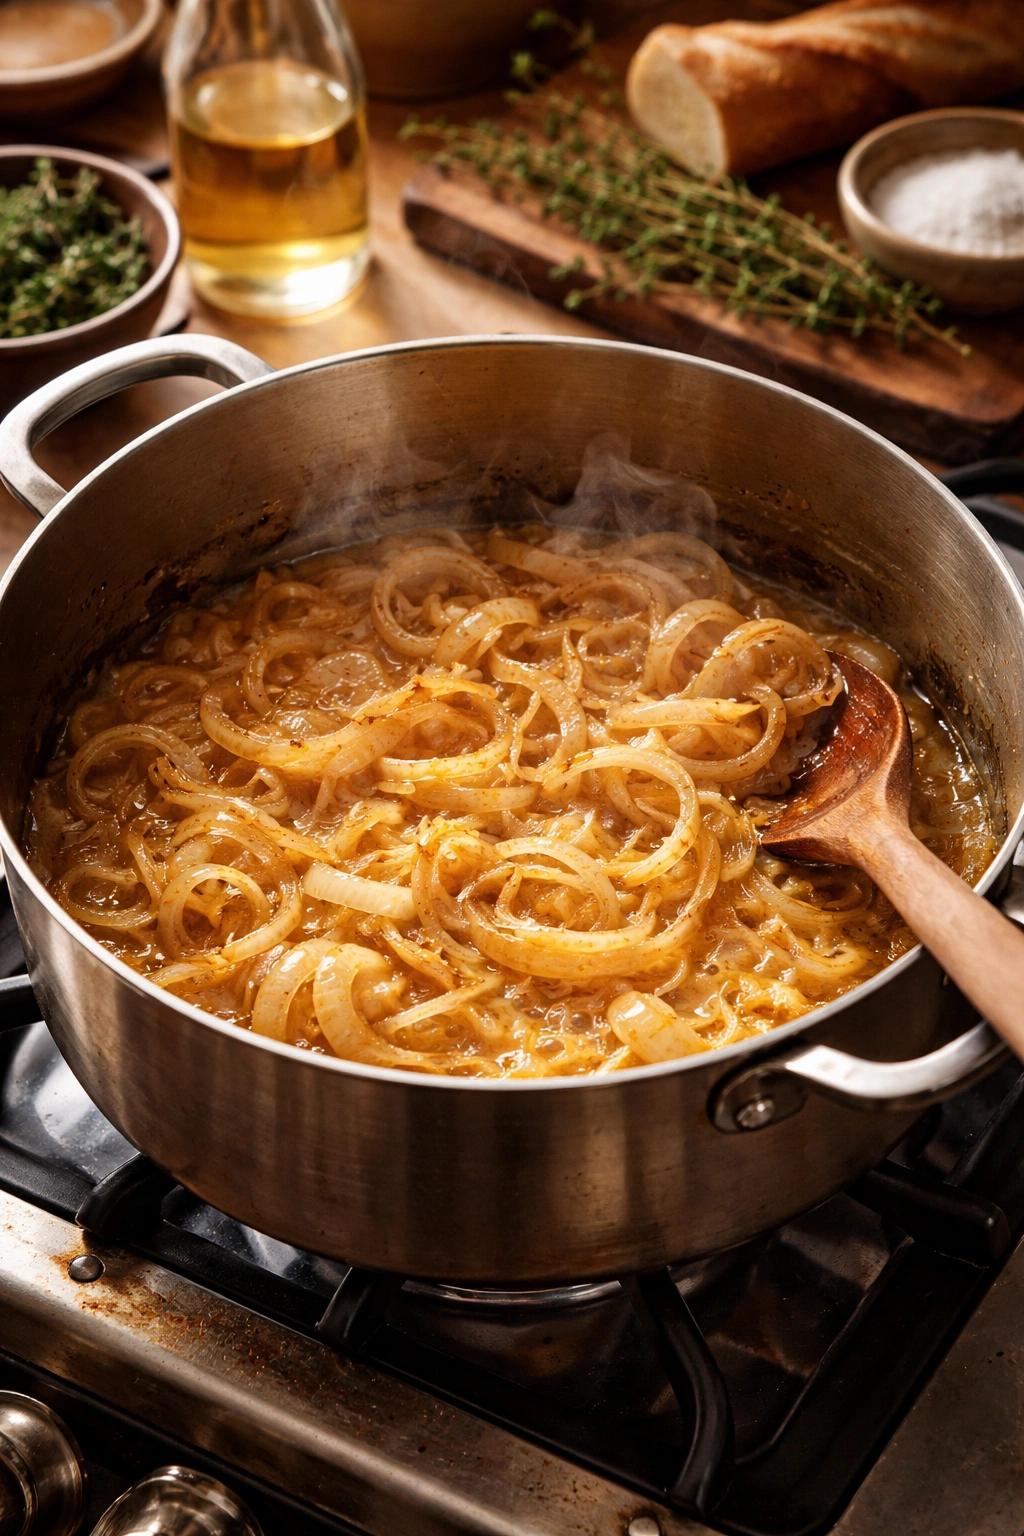
Continue cooking for another 35-45 minutes, stirring more frequently now—every 5 minutes or so. Watch as the onions gradually transform: they’ll go from translucent and wet to soft and beginning to brown, then progressively deeper in color. The liquid they release will evaporate, and they’ll start to stick slightly to the bottom of the pot. If you see dark, crusty bits forming on the bottom, reduce the heat slightly and add a splash of water to deglaze, scraping up these browned bits. These bits add flavor, but you don’t want them to burn.
Advertisements -
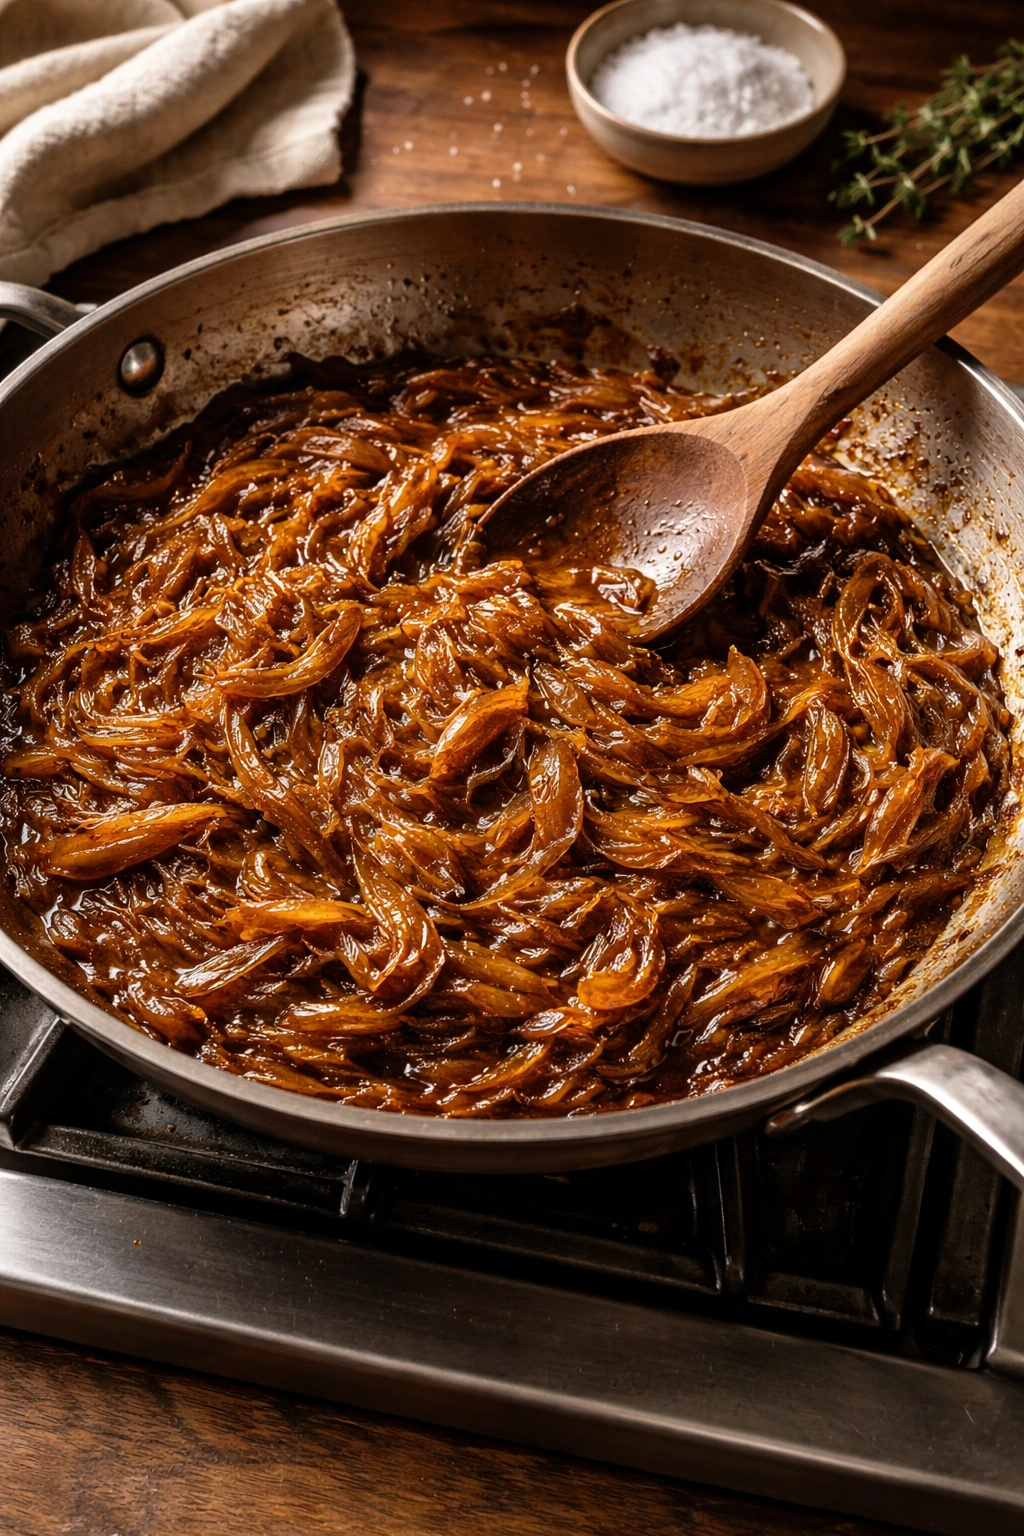
By the 45-60 minute mark total, the onions should be deeply golden to amber in color, incredibly soft, and quite reduced in volume (they’ll have decreased by about 75% from their raw state). The color should be rich and warm—a deep golden brown, not dark brown or nearly black. Taste a small spoonful of the onions; they should taste predominantly sweet with a savory undertone. Add the remaining 2 tablespoons of butter to help with deglazing.
-
Add the minced garlic and cook for about 30 seconds, just until fragrant. Be careful not to let the garlic brown or burn, which would give it a bitter taste that would persist throughout the soup.
Build the Broth:
-
Pour in the wine (or additional broth if not using wine), stirring constantly and scraping the bottom and sides of the pot thoroughly with a wooden spoon. You should hear a sizzle, and you’re working to dissolve and incorporate all the flavorful browned fond into the liquid. Let this simmer for 2-3 minutes, until the raw wine smell mostly dissipates.
-
Add the beef stock, thyme sprigs, and bay leaf. If using Worcestershire sauce, add it now. Stir well to combine everything.
-
Increase the heat to medium-high and bring the soup to a gentle simmer. Once simmering, reduce the heat to medium-low so it bubbles gently rather than vigorously. Cover the pot partially (lid slightly ajar) and let it simmer gently for 20-30 minutes. This allows the flavors to meld and the broth to deepen.
-
After simmering, remove and discard the thyme sprigs and bay leaf. Taste the soup and season with salt and pepper as needed. Add the balsamic or cider vinegar if the soup tastes too sweet or lacks complexity. Remember that the cheese topping will add saltiness, so don’t oversalt at this stage.
-
Keep the soup warm on low heat (it should stay above 160°F / 71°C) while you prepare the bread and cheese topping.
Prepare the Bread and Cheese:
-
About 15 minutes before you’re ready to serve, preheat your oven’s broiler to high, positioning the rack so it’s about 4-6 inches from the heat source.
Advertisements -
Arrange the baguette slices on a large baking sheet in a single layer. Mix the softened butter with the minced garlic. Brush both sides of each bread slice with this garlic butter.
-
Broil the bread for 2-3 minutes total, flipping halfway through, until both sides are golden and crispy. Watch the bread carefully—every oven is different, and bread can go from golden to burnt surprisingly quickly. Don’t step away from the oven during broiling. Remove the baking sheet and keep the broiler on.
Finish and Serve (Two Options):
Option 1 — Crocks Under the Broiler (Traditional Method):
-
Place oven-safe crocks or bowls on a rimmed baking sheet. Ladle the hot soup into each crock, filling it about two-thirds full.
-
Top each crock with one piece of toasted garlic bread. Sprinkle generously with shredded cheese, dividing it evenly among the bowls (about ¼ cup per bowl).
-
Transfer the baking sheet to the broiler and broil until the cheese is melted, bubbly, and lightly browned in spots—usually 2-4 minutes. Watch carefully to prevent burning. The cheese will soften and may begin to pull away from the edges of the bread, creating a golden crust around the edges.
-
Carefully remove the baking sheet from the oven (the crocks and soup are extremely hot—use oven mitts and warn anyone eating that the dishes are hot for several minutes). Garnish with fresh chives or parsley if desired, and serve immediately.
Option 2 — Cheese Toast Topping (Easier Method):
-
Top each piece of toasted bread generously with shredded cheese. Place them on the baking sheet and broil until the cheese is melted and lightly browned, about 2-3 minutes.
Advertisements -
Ladle the hot soup into regular bowls. Top each bowl with one or two cheese toasts, pressing them down slightly so they partially submerge into the soup.
-
Garnish with fresh chives or parsley if desired, and serve immediately.
The Art of Getting Caramelization Right
The most common mistake people make with French onion soup is rushing the caramelization step. You cannot caramelize onions properly in 30 minutes, no matter what some recipes claim. A proper caramelization—where the onions are soft throughout, deeply golden, and uniformly cooked—requires between 45 minutes and two hours, depending on your pot, the amount of onions, and the actual heat of your stove.
Here’s what’s actually happening during this time: First (minutes 0-20), you’re releasing the onions’ water content and softening them. This is the translucent phase, and it looks like the onions aren’t really doing anything except releasing liquid. Don’t panic; this is necessary. Second (minutes 20-40), the moisture is evaporating, and the onions are becoming softer and smaller, starting to brown at the edges. Third (minutes 40-60+), true caramelization is happening—the sugars are browning, the color is deepening, and the flavor is becoming sweeter and more complex.
The key signal that your onions are properly caramelized is not a specific time but a visual and taste cue. When you bite into them (carefully—they’re hot), they should taste predominantly sweet with a savory undertone. The color should be a rich, warm golden brown, similar to caramel candy. They should be so soft they almost dissolve on your tongue.
If your onions are still pale after 45 minutes, your heat might be too low, or your pot might be too wide (which allows more water to evaporate, actually slowing the browning). If they’re browning too fast and threatening to burn, your heat is too high—turn it down and don’t worry about taking longer.
One advanced technique: Some cooks add a minuscule pinch of baking soda (like ¼ teaspoon) near the end of caramelization. This raises the pH, speeding up browning reactions significantly. However, this should only be done if your onions are taking much longer than expected, and you need to be very careful with the amount—too much will turn onions into mush and give them an off flavor. Most home cooks won’t need this trick if they’re patient with medium or medium-low heat.
Tips from Experienced Cooks
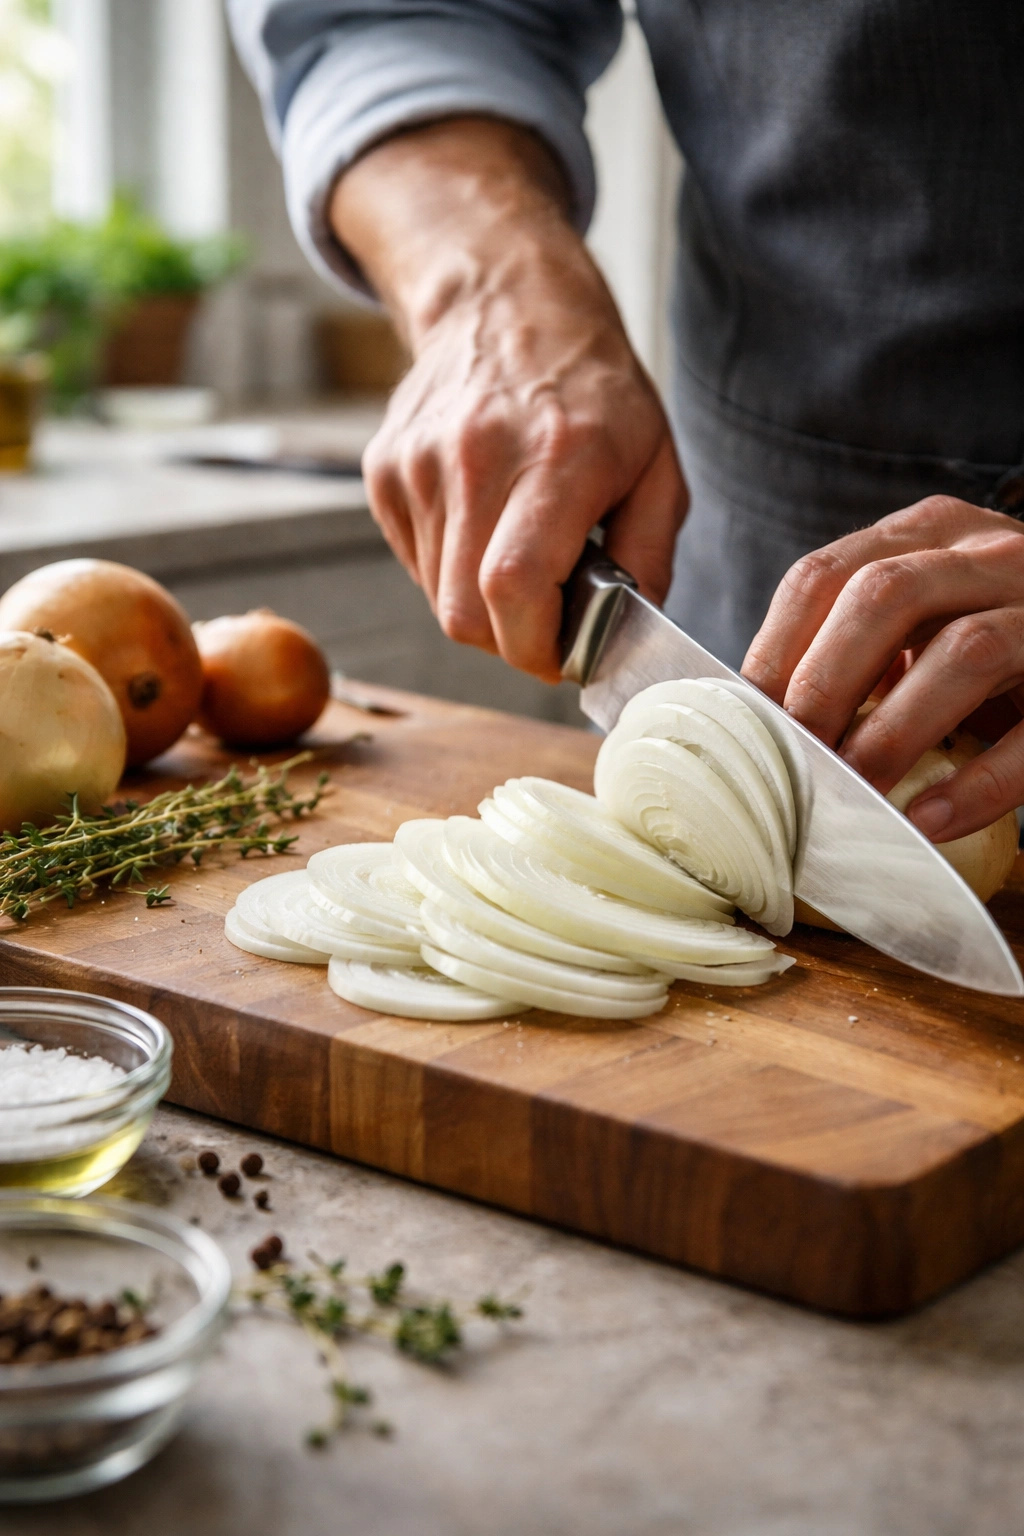
Invest in a really sharp knife. You’ll be slicing about 3 pounds of onions, and a dull knife crushes them rather than slicing cleanly, bruising the cells and releasing more of their liquids. A sharp knife makes the prep work easier and faster, and your onions will cook more evenly.
Don’t add all your broth at once. Some cooks prefer to add the broth slowly, tasting as they go, rather than pouring in all 7-8 cups at once. This gives you more control over the final flavor and consistency. You can always add more broth if the soup is too concentrated, but you can’t take it out.
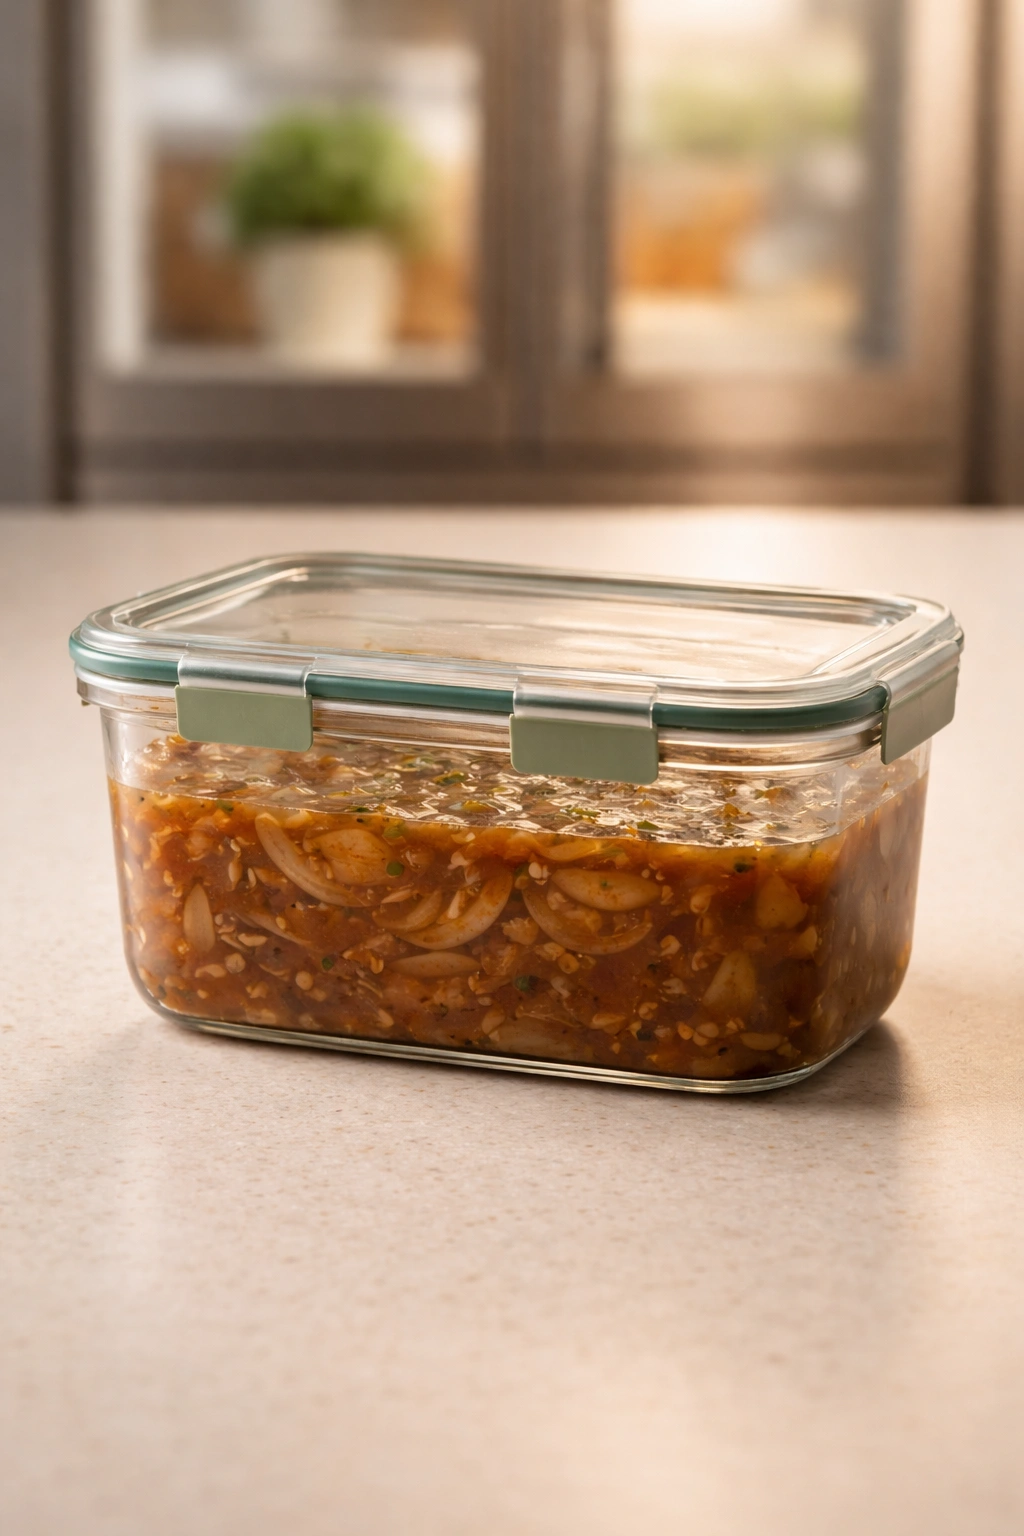
Make your own caramelized onions in advance. You can caramelize the onions up to several days ahead, storing them in an airtight container in the refrigerator. Then on the day you want soup, you can finish it in about 30 minutes by deglazing, adding broth, and simmering. This makes French onion soup much more approachable for a weeknight meal if you do the heavy lifting on a weekend.
Taste obsessively. French onion soup is forgiving, but its success depends on balance. Taste after adding the broth, taste after the soup simmers, taste before serving. The finished soup should taste deeply savory and slightly sweet, with a hint of umami depth from the Worcestershire sauce (if using). If it tastes one-dimensional, you might need a pinch more salt, a tiny splash of vinegar for brightness, or a touch more Worcestershire for depth.
Toast your bread close to serving. Toast the bread just 15 minutes or so before you’re ready to eat. If you toast it much earlier, it can start to soften as it sits, and it won’t have that crucial crunch when it hits the hot soup.
Common Mistakes and How to Fix Them
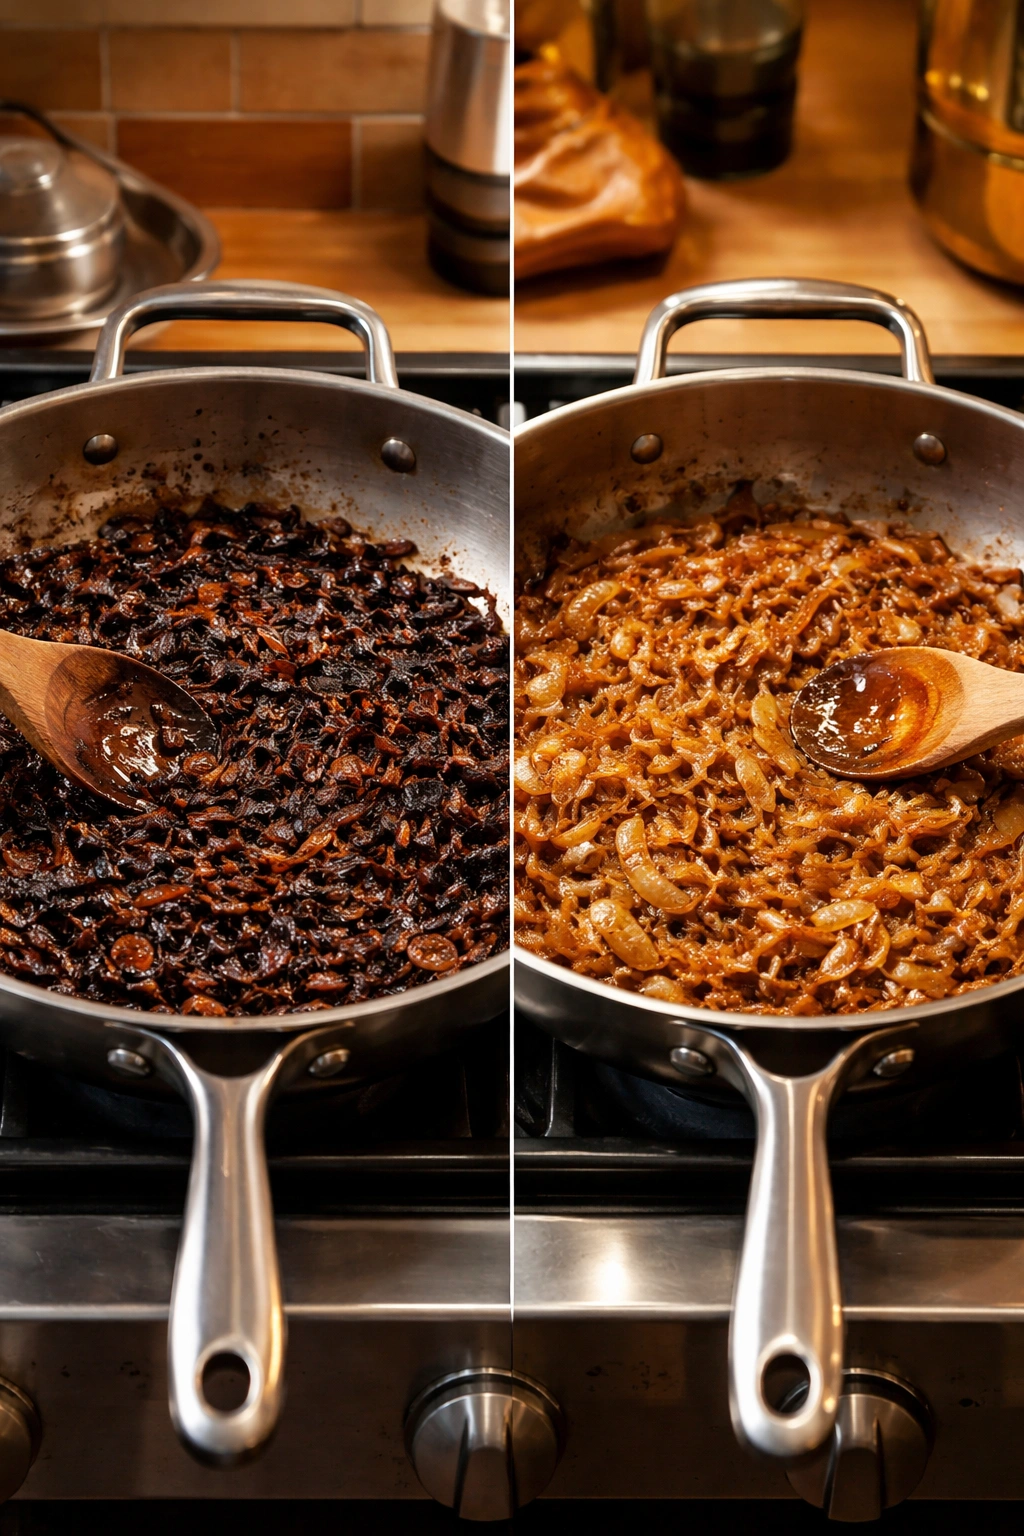
“My onions are burnt, not caramelized.” This is the most common issue, and it happens when heat is too high or onions aren’t stirred frequently enough. Burnt onions taste acrid and bitter, and unfortunately, they’re difficult to salvage. Prevention is the only cure here: use medium or medium-low heat, and stir every 5 minutes or so. If you notice the fond (browned bits) on the bottom getting very dark, add a splash of water to deglaze.
“My soup tastes thin and watery.” This usually means one of three things: your broth wasn’t high-quality to begin with (go back and invest in better stock), you didn’t caramelize the onions enough (they should be deeply golden and soft throughout), or you used too much liquid. You can try simmering the soup uncovered for another 10-15 minutes to reduce it and concentrate flavors. Alternatively, if the flavor is good but just light-bodied, add a tablespoon of tomato paste, which adds both body and umami.
“The soup is too salty.” Resist the urge to add salt too early. Season at the end, remembering that the cheese topping adds significant saltiness. If you’ve already over-salted, add more broth (unsalted or low-sodium) to dilute it.
“My cheese didn’t melt properly.” Make sure your broiler is preheated and hot, and that the soup is already hot when you top it and put it under the broiler. Cold soup will take longer to heat through, and the cheese might burn before the soup warms. Also, shred cheese from a block rather than using pre-shredded cheese, which often has anti-caking agents that prevent smooth melting.
“The bread got soggy.” Make sure your bread is toasted until genuinely crisp, and serve the soup immediately after broiling. Some bread inevitably softens as it sits in the hot soup, but properly toasted bread holds up longer. If you prefer crunchier bread, use the second serving method (toasting the cheese bread separately and placing it on top of the soup rather than letting it sit in the liquid during broiling).
Variations and Ways to Adapt the Recipe
Vegetarian or Vegan Version: Substitute all beef and chicken broth with vegetable broth. Use vegetable-based Worcestershire sauce (or leave it out). For a richer flavor, add a tablespoon of soy sauce or tamari, which adds umami depth. For vegan, use dairy-free cheese or nutritional yeast mixed with breadcrumbs for a topping. The soup won’t have quite the same savory depth as the traditional version, but it’s genuinely delicious in its own right.
Red Wine and Deeper Flavor: Some cooks prefer using red wine for deglazing instead of white wine, which gives the soup a deeper, slightly earthier flavor. Use a dry red wine (Pinot Noir or Merlot work well) in the same amount. Some recipes use port wine or sherry, which adds a different kind of depth and sweetness.
Lighter Version with Chicken Broth: If you want a lighter, less rich soup, use all chicken broth instead of beef. This creates a more delicate soup that’s still deeply flavorful. Some cooks swear this is actually closer to traditional Parisian bistro versions. You might want to add a bit more Worcestershire sauce or a splash of soy sauce to maintain umami depth.
Beef Broth with Beef Shank: For an even richer soup, simmer the finished soup with a piece of beef shank or beef chuck for an additional 30-45 minutes. Remove the meat before serving (or shred it and return it), and you’ll have a soup with extraordinary depth. This turns it into more of a complete meal.
With Herbs and Aromatics: Add fresh rosemary (1-2 sprigs) along with the thyme for a more herbaceous flavor. Some cooks add a smashed garlic clove to the bread toasting process for extra garlic flavor. A small splash of balsamic vinegar (¼ to ½ teaspoon) at the end adds subtle sweetness and complexity.
Mushroom Addition: For an earthy twist, sauté about 8 ounces of sliced mushrooms (cremini, shiitake, or a mix) separately until golden, then add them to the finished soup. This adds earthiness and umami that complements the caramelized onions beautifully.
Cheese Variations: While Gruyère is traditional, feel free to experiment. Swiss cheese is a perfect substitute. A mix of Gruyère and sharp Cheddar is delicious. Fontina melts beautifully and adds a slightly creamier texture. Some cooks use Emmental, Jarlsberg, or even aged Gouda. The key is using cheese that melts smoothly and has enough flavor to stand up to the soup.
Storage, Make-Ahead, and Reheating
Storing the Finished Soup: French onion soup keeps well in the refrigerator for up to 3-4 days in an airtight container. Store the soup without the bread and cheese topping; the bread gets soggy and the cheese doesn’t reheat as nicely. When you’re ready to eat, reheat the soup gently on the stovetop or in a microwave, then top with fresh cheese toast.
Make-Ahead Strategy: The caramelized onions can be made 2-3 days ahead, stored in an airtight container in the refrigerator. This is one of the best ways to manage the recipe if you want to serve it on a busy weeknight. Simply finish the soup the day you serve it: reheat the onions, deglaze, add broth, simmer for 20 minutes, and serve. Total active cooking time becomes roughly 30 minutes instead of 2+ hours.
Freezing: You can freeze the finished soup (without bread and cheese) for up to 3 months in freezer-safe containers. It actually freezes quite successfully because it’s mostly liquid. Thaw it overnight in the refrigerator, then reheat gently on the stovetop. Top with fresh cheese toast before serving.
Freezing Caramelized Onions: If you want to go even further ahead, freeze just the caramelized onions (before deglazing) in an airtight container for up to 3 months. Then you can make fresh soup by simply thawing the onions, proceeding with the recipe from the deglazing step onward.
Reheating: The best method is gentle reheating on the stovetop over medium-low heat, stirring occasionally, until the soup reaches a simmer again. This takes about 10-15 minutes and preserves the texture and flavor better than a microwave (though the microwave works if you’re short on time). Never boil the soup vigorously when reheating, as this can make it taste harsh.
Serving Suggestions and Pairings
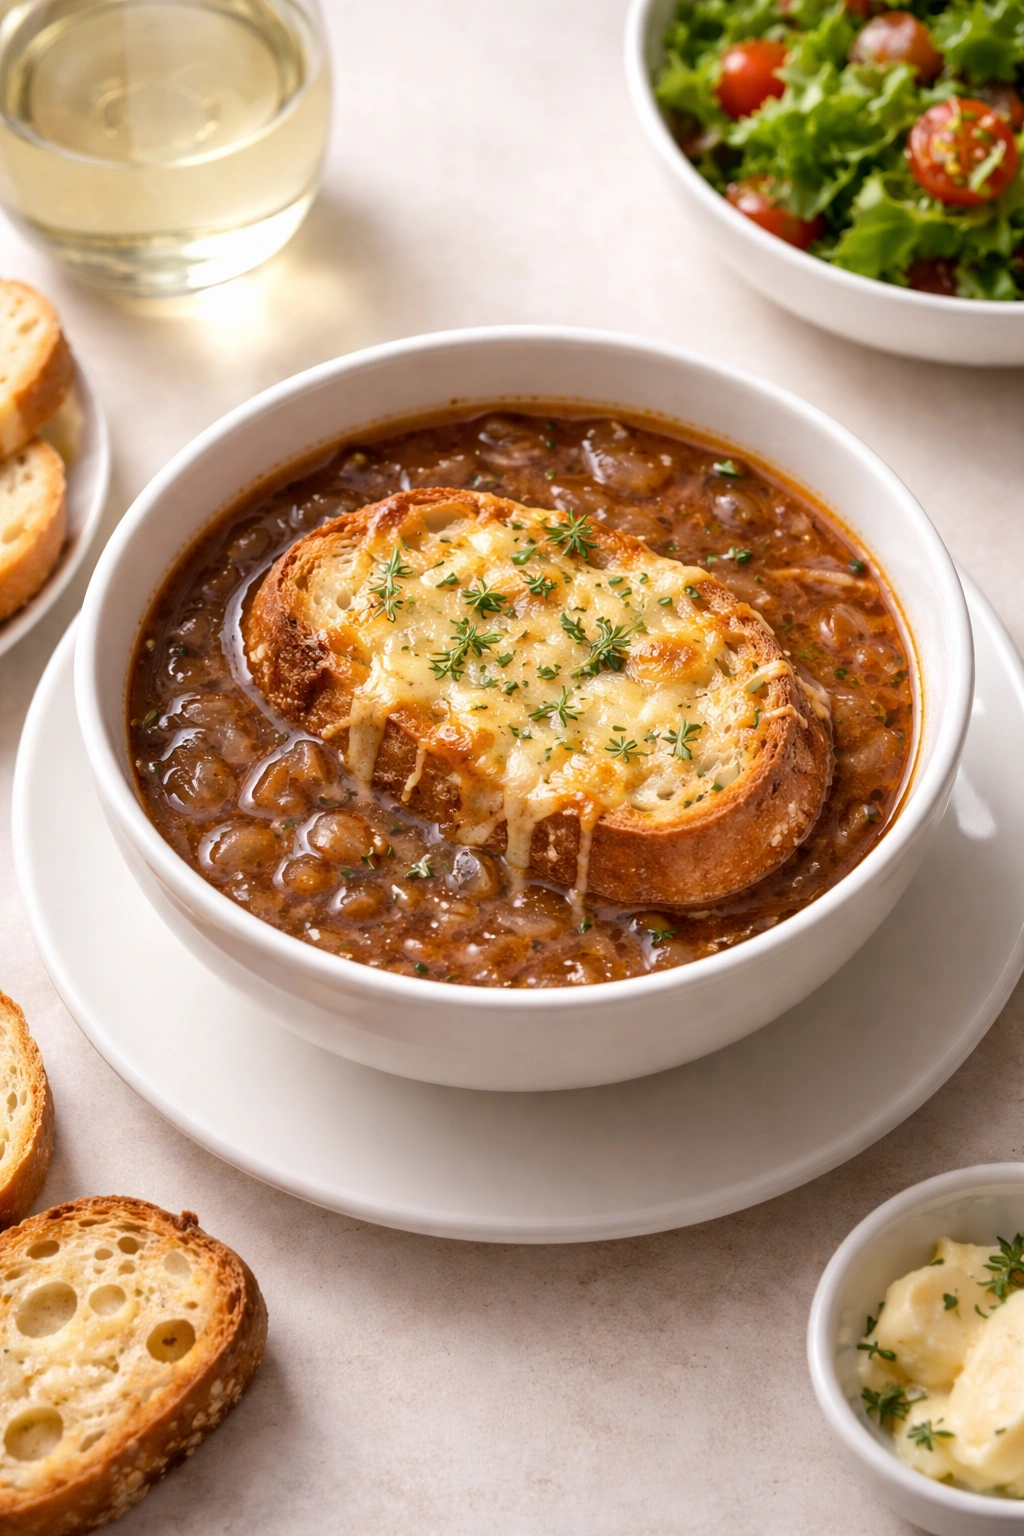
French onion soup is traditionally served as a course on its own—a starter in a formal French meal. A single crock or bowl (8-10 ounces) is a perfect first course before a lighter main dish. However, it’s hearty enough to serve as a light main course if paired with a simple salad and bread, or even on its own as a warming supper.
Salad Pairings: A crisp green salad with a sharp Dijon vinaigrette cuts through the richness of the soup beautifully. A simple arugula or mixed greens salad works perfectly. The acidity and brightness of the salad balance the deep, sweet flavors of the soup.
Bread Pairings: Serve crusty baguette slices (beyond what you use for topping the soup) with softened butter on the side for dipping and soaking up the broth. Some people serve the soup with crunchy garlic bread or toasted rosemary focaccia on the side.
Wine Pairings: The same wines you might use for deglazing work well for drinking alongside: a dry white wine like Sauvignon Blanc or Pinot Grigio, or a lighter red wine like Pinot Noir. If you used red wine in the soup, continue with red wine for drinking. Sherry pairs beautifully if you used sherry in the recipe.
Main Course Pairing: Serve French onion soup before a simple grilled steak, roasted chicken, or seared fish. The soup’s rich, savory flavors set up a perfect palate for a protein-focused main course. In a casual setting, some people pair it with a French dip sandwich—the beef and soup complement each other beautifully.
Seasonal Variations in Serving: While French onion soup is typically thought of as a cold-weather dish, there’s no reason not to serve it whenever you crave it. In cooler months, it’s deeply comforting and warming. In warmer months, you might serve a smaller portion as part of a multi-course meal, or cool it to room temperature (though it’s not typically served cold).
Understanding Why This Matters

Making French onion soup from scratch teaches you something important about cooking: time and patience can do things that fancy techniques and exotic ingredients can’t. You’re not using any ingredient that’s hard to find or expensive (except perhaps the quality broth, which is still very affordable). You’re not using any advanced technique. What you’re using is heat, time, and attention to detail to transform humble onions into something extraordinary.
This soup is also deeply forgiving. If your caramelization takes longer than expected, that’s fine—it just means you’re getting extra-sweet onions. If you can’t find Gruyère, a dozen other cheeses work. If you don’t have fresh thyme, the soup is still delicious without it. Once you understand the fundamentals, you can adjust based on what you have on hand and what you prefer.
There’s also something special about serving this soup to people. It’s humble enough that it doesn’t feel pretentious, but impressive enough that everyone assumes you’ve worked much harder than you actually have. It’s a dish that earns genuine appreciation and requests for the recipe.
Final Thoughts
French onion soup made completely from scratch is one of those rare dishes where the effort is modest and the reward is genuinely exceptional. The hardest part is simply waiting for the onions to caramelize—the actual skill level is quite beginner-friendly. Once you make it once, you’ll understand why this soup has remained a beloved classic for centuries.
The next time you have a few hours and access to a pot, some onions, and good broth, give this recipe a try. Don’t rush the caramelization; let the onions take their time transforming. Taste as you go, adjust the seasonings until everything feels balanced, and enjoy the process. The result will be a bowl of soup that tastes like you’ve spent all day in a Parisian bistro kitchen—even though most of the time you were simply letting heat and time do the work.