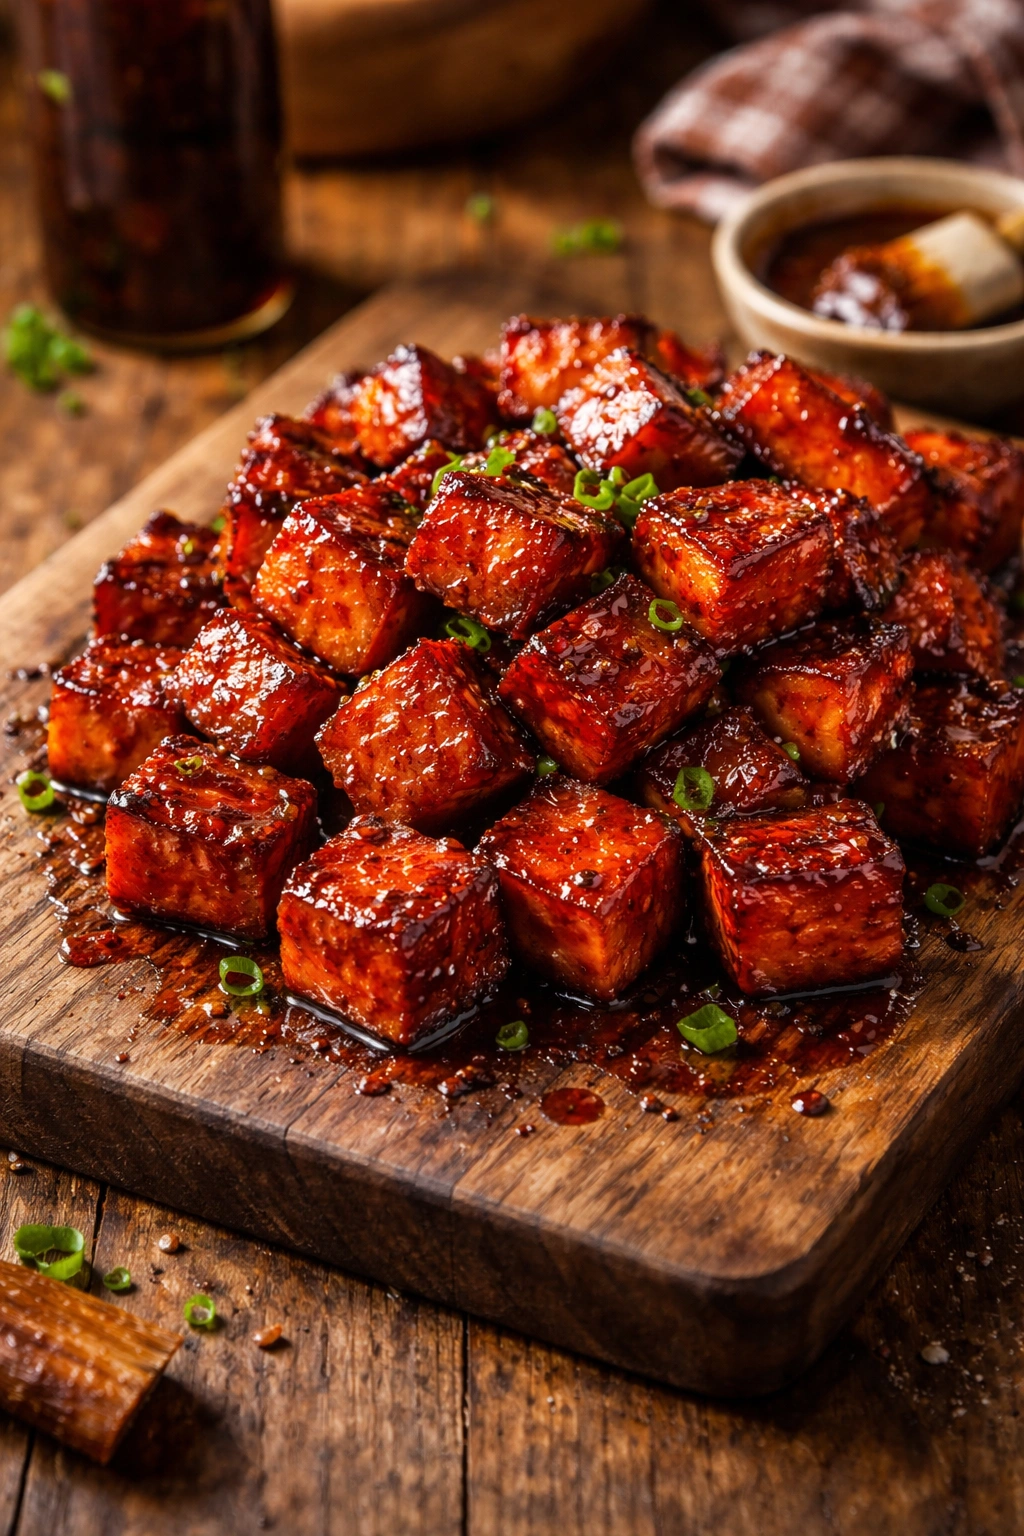
Bologna burnt ends have become a beloved snack that bridges the gap between barbecue tradition and creative home cooking. These caramelized, crispy-edged cubes deliver a perfect balance of savory, sweet, and smoky flavors in every bite — making them ideal for game day gatherings, casual entertaining, or honestly just a satisfying afternoon snack. What started as a clever way to use leftover ends of brisket at barbecue joints has evolved into its own category, and bologna offers an accessible, forgiving ingredient that produces restaurant-quality results without requiring hours of tending a smoker.
The beauty of bologna burnt ends lies in their simplicity paired with impressive results. You’re working with one of the most affordable proteins available, transforming it through a straightforward cooking method into something that tastes far more impressive than the ingredient list suggests. Whether you choose the controlled environment of your oven or the authentic smoke of a backyard smoker, you’ll end up with deeply caramelized exterior edges, tender interiors, and that coveted sticky-sweet glaze that makes them absolutely craveable.
The Origin Story Behind Bologna Burnt Ends
Bologna burnt ends represent one of barbecue’s most delightful accidents-turned-traditions. The original burnt ends came from the pointed tips of a brisket that pit masters would trim away before cooking. Rather than waste these flavorful scraps, creative barbecuers started cubing them, coating them in sauce and butter, and returning them to the smoker until the edges caramelized into crispy, glossy-coated nuggets. The result was so good that burnt ends became a deliberate item at barbecue restaurants.
Someone brilliant realized that bologna — an ingredient with natural smoke receptiveness and a texture that works beautifully when cut into cubes — could deliver the same effect in a fraction of the time. Bologna burnt ends cook in 45 minutes to an hour, compared to several hours for traditional brisket burnt ends. They’ve become a staple at backyard cookouts, food truck menus, and competitive barbecue competitions, often stealing the spotlight from more traditional offerings.
The appeal isn’t just convenience, though. Bologna burnt ends have their own distinct character that’s separate from brisket burnt ends. The meat has a different density and fat content, which means the exterior caramelizes differently and the interior develops a unique texture. It’s not trying to replicate brisket — it’s its own delicious thing that happens to share a cooking method and flavor profile with its namesake.
Why You Should Make Bologna Burnt Ends at Home
The gap between homemade and restaurant bologna burnt ends is surprisingly small, which is why this dish has exploded in popularity. You’re not dealing with temperamental pastry, complex timing requirements, or equipment that costs thousands of dollars. A basic oven or a modest charcoal grill gets you 90% of the way to exceptional results.
Making them at home also lets you control the exact flavor profile and sweetness level. Commercial versions vary wildly — some lean heavily into brown sugar sweetness, while others emphasize the smoke. When you make them yourself, you control the spice blend, the ratio of butter to brown sugar, the type of glaze, and the smoking wood if you’re using a smoker. You can make them exactly how you like them.
There’s also something genuinely satisfying about producing this crowd-pleasing appetizer with minimal fuss. The ingredient cost is negligible, you don’t need specialized equipment beyond what most people already have, and the cooking process is genuinely forgiving. Slightly longer in the oven? They’re still delicious. Heavier hand with the cayenne pepper? You’ve now created a spicy version your family might prefer. This is a recipe that welcomes experimentation rather than punishing it.
Selecting the Right Bologna and Building Your Flavor Foundation
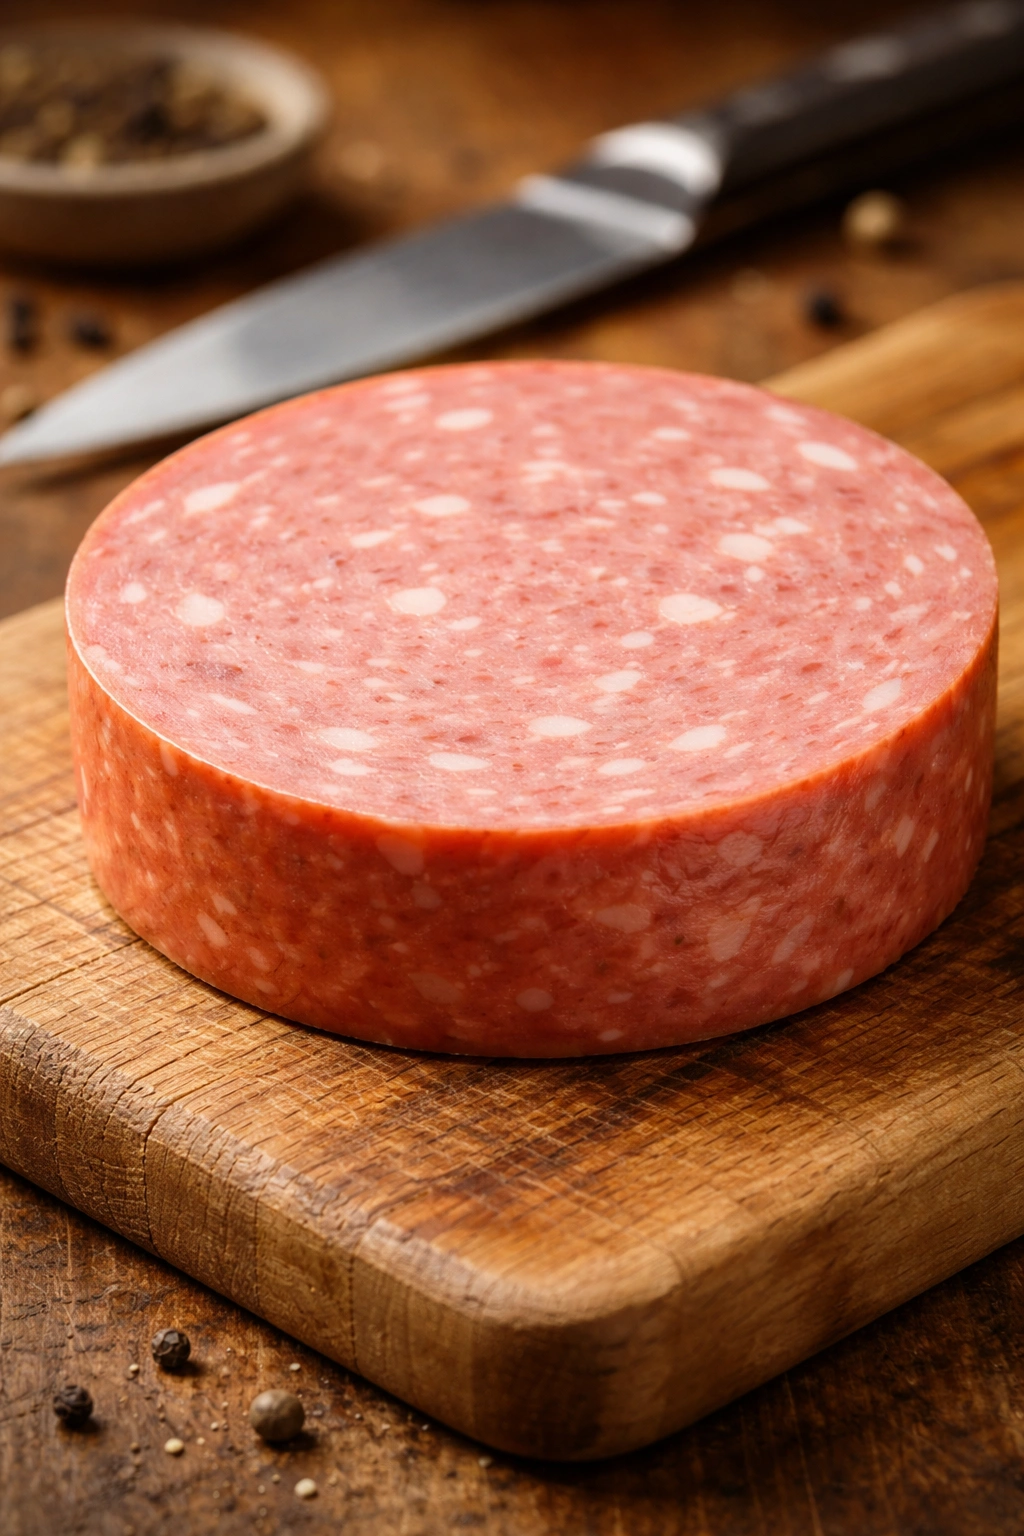
The bologna you choose makes a meaningful difference in your final result. Oscar Mayer and Ball Park are both reliable choices, widely available and trusted by competition pit masters. These brands have the right balance of fat content and texture — enough fat to render and baste the meat during cooking, but not so much that it becomes greasy.
Avoid ultra-thin-sliced bologna and anything labeled as a “reduced fat” or “light” product. These lack the necessary fat to develop that gorgeous caramelized crust and maintain tenderness through the cooking process. You want the classic jumbo bologna that comes in those thick package rounds. Beef bologna has slightly different flavor characteristics than pork bologna — beef versions tend toward earthier notes, while pork bologna is a bit sweeter. Either works beautifully; it comes down to your preference.
Some people swear by specialty bologna from butcher shops or farmers markets, and these can absolutely be used. Just confirm before purchasing that it has enough fat content. A butcher counter attendant can tell you whether a specific product will perform well when cubed and cooked hot. The key factor is fat, not brand prestige.
Essential Equipment and Tools You’ll Need

The bare minimum setup is astonishingly simple. You need a sharp knife to cube the bologna (a serrated bread knife works great, or any knife at least 4-6 inches long), a cutting board, and either an oven with a baking sheet and aluminum foil or a smoker. That’s genuinely it.
If you’re using the oven method, grab a disposable aluminum pan — the 9×13-inch size is perfect and eliminates cleanup. A meat thermometer is optional but helpful for confirming you’ve reached your target texture. If you’re smoking them, you’ll need your usual smoking setup: grates, a thermometer, and smoking wood.
Many experienced cooks use disposable aluminum pans placed on the oven rack or on the smoker, specifically because the rendered fat and glaze collect in the bottom and baste the meat continuously as it cooks. Don’t use a regular baking sheet for the oven method if you can avoid it — the sides are too high and the heat distribution isn’t as even. A shallow disposable aluminum pan gives you the best results and makes cleanup trivial.
Yield, Timing, and Difficulty
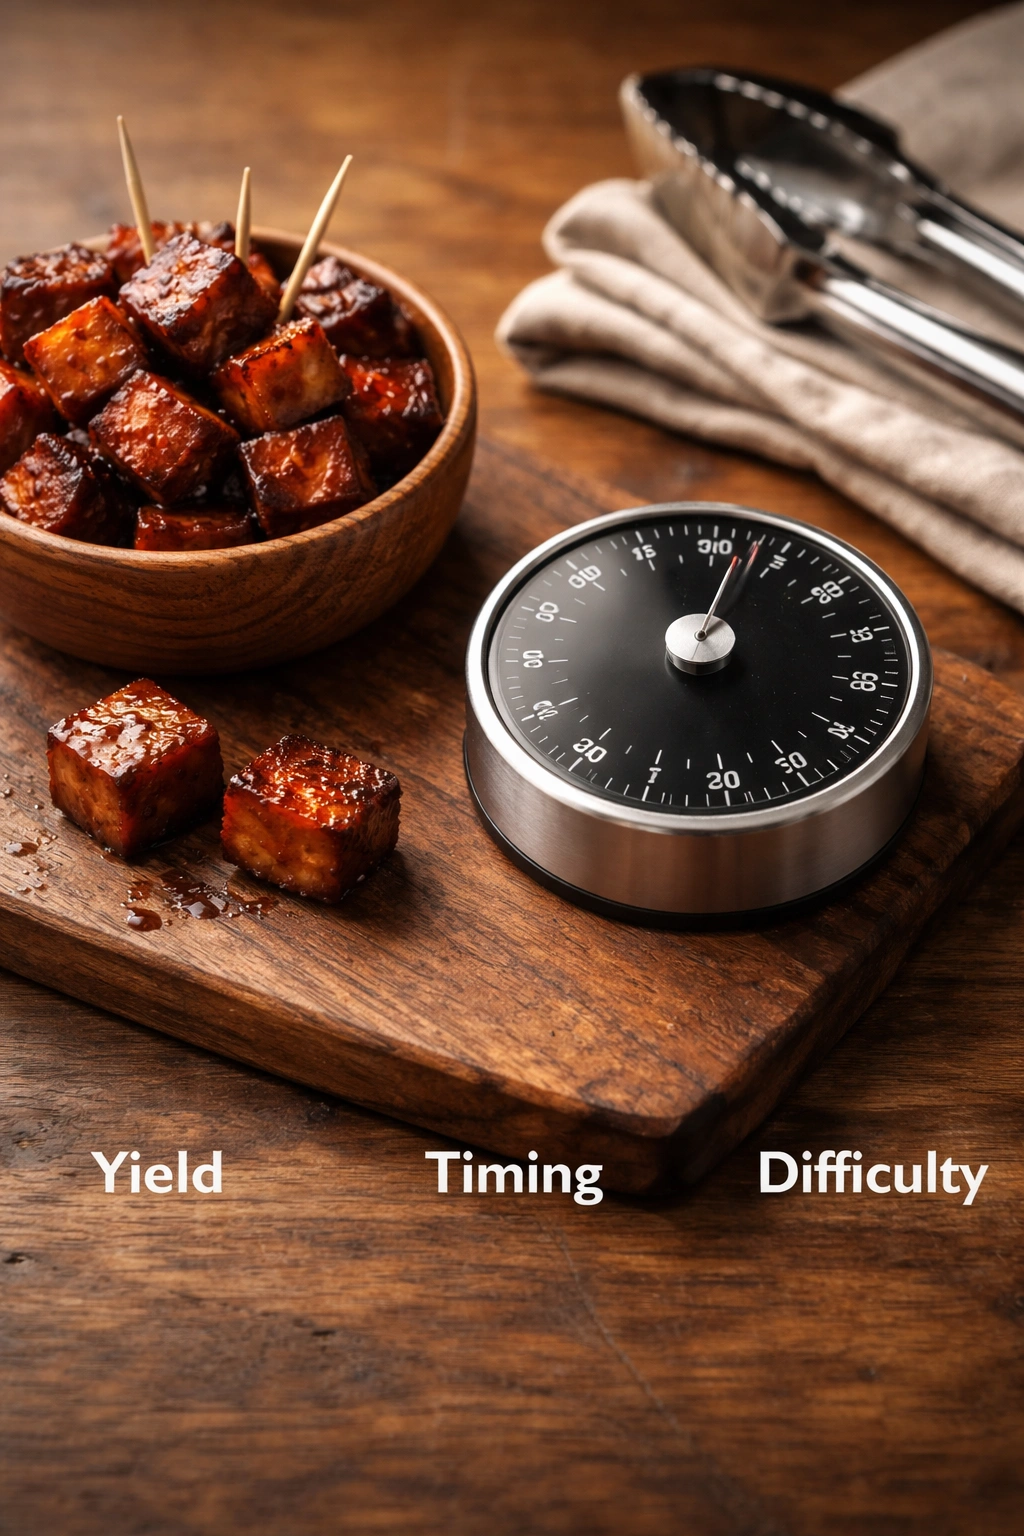
Yield: Serves 6 to 8 as an appetizer | Makes approximately 40-50 burnt ends pieces
Prep Time: 15 minutes (washing bologna, slicing, and cubing)
Cook Time: 50 minutes to 1 hour for oven method | 45 minutes to 1 hour 15 minutes for smoker method (depending on temperature and your smoker’s characteristics)
Total Time: 1 hour 5 minutes to 1 hour 20 minutes (oven method includes 5 minutes rest at end; smoker method includes time for preheating)
Difficulty: Beginner — No special cooking skills required, straightforward ingredient list, and the cooking process is extremely forgiving. Success comes from following the basic formula and watching for visual doneness cues rather than hitting precise temperatures.
Complete Ingredient List
For the Burnt Ends:
- 2 pounds (approximately 2 large packages) beef bologna, unsliced
For the Glaze and Sauce:
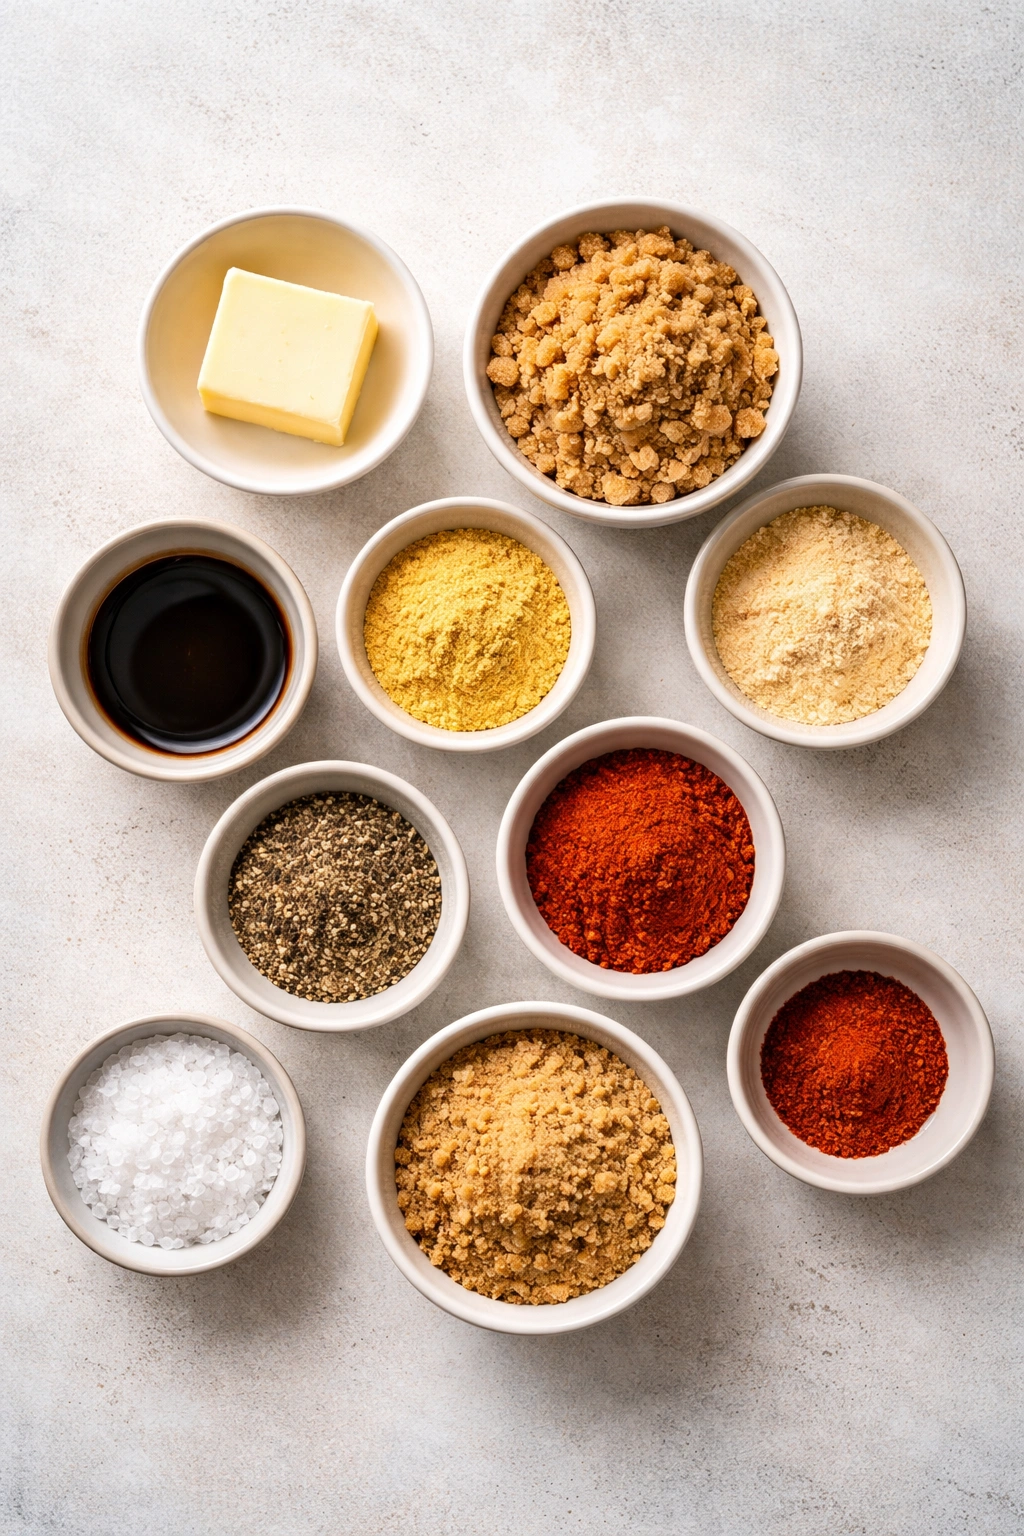
- 6 tablespoons (¾ stick) unsalted butter
- ⅓ cup packed brown sugar
- 2 tablespoons yellow mustard (ballpark yellow mustard or brown mustard, your preference)
- 1 tablespoon apple cider vinegar (or distilled white vinegar)
- 1 tablespoon soy sauce or tamari
- 1 tablespoon Worcestershire sauce
- ½ teaspoon garlic powder
- ½ teaspoon onion powder
- ¼ teaspoon smoked paprika
- ¼ teaspoon cayenne pepper (adjust to your heat preference; start with ⅛ teaspoon if you prefer milder)
- ⅛ teaspoon black pepper
- ⅛ teaspoon fine sea salt (taste before adding, since the soy sauce adds saltiness)
Optional Additions and Flavor Variations:
- ½ teaspoon liquid smoke (if making in the oven and you want a deeper smoky flavor)
- 1 teaspoon honey (adds subtle sweetness and glossier finish)
- ½ teaspoon bourbon or vanilla extract (adds depth to the sweet notes)
Step-by-Step Cooking Instructions
Prepare the Ingredients:
-
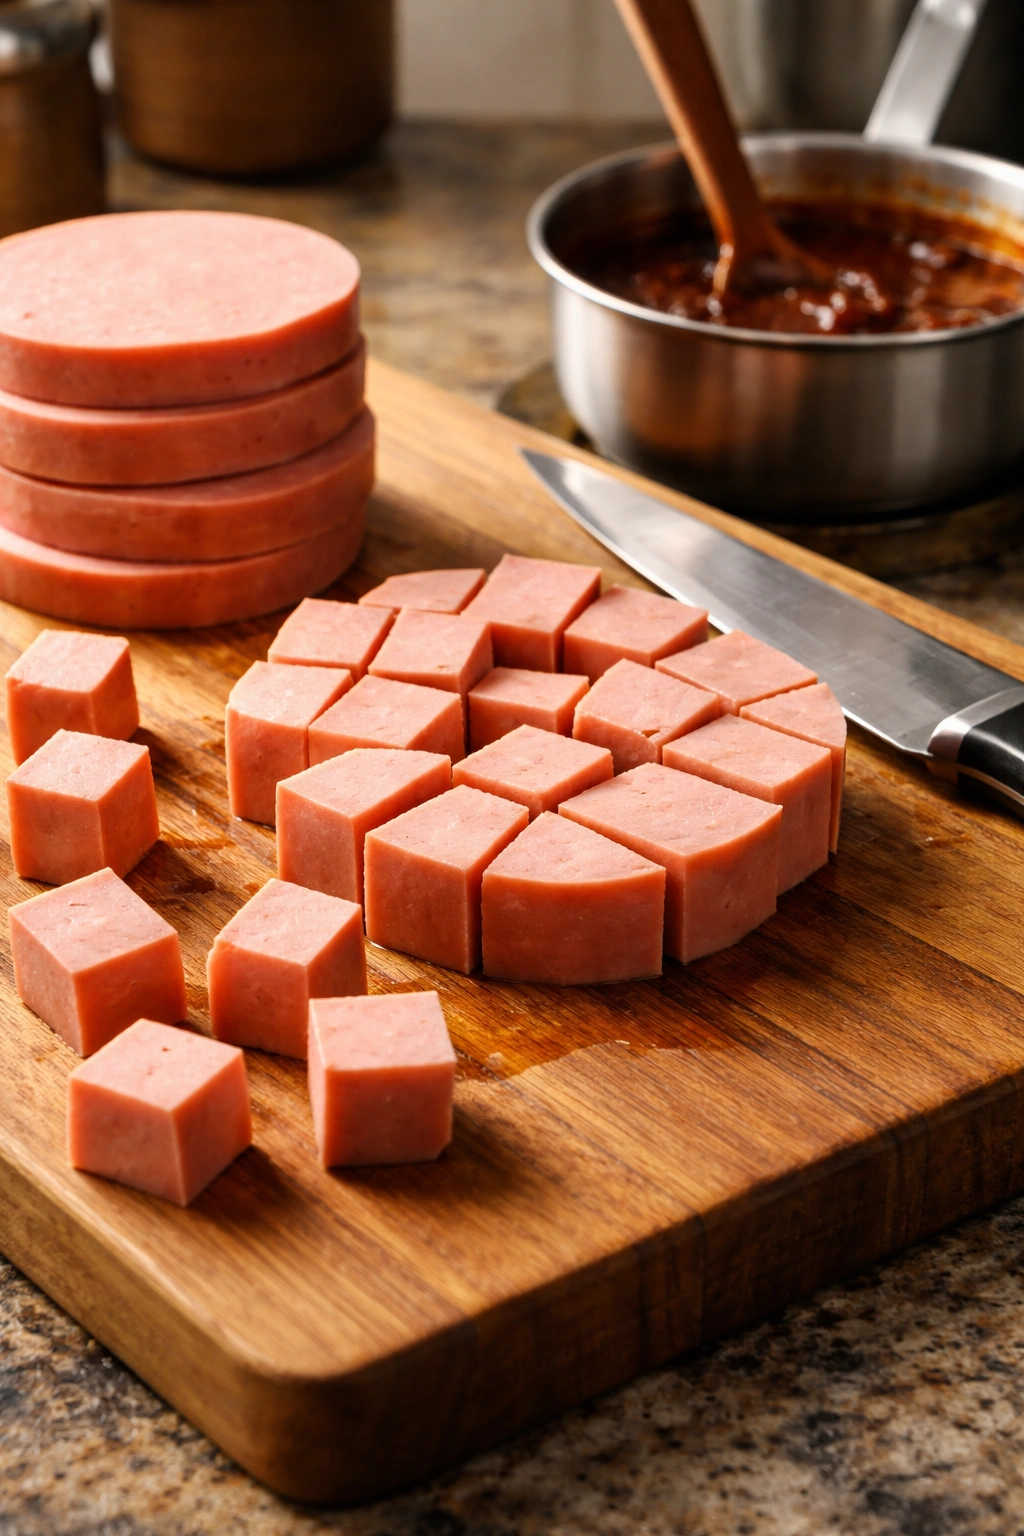
Remove the bologna from its packaging and allow it to come to room temperature for about 5 minutes — this makes slicing cleaner and easier. Using a sharp chef’s knife or serrated bread knife, slice each bologna round into pieces approximately ¾-inch thick. You should get roughly 8-10 slices per bologna round, which yields about 40-50 total pieces after cubing.
-
Take each slice and stack them (you can stack 2-3 slices without issue), then cut them into strips about ¾-inch wide, then cut across those strips to create roughly ¾-inch cubes. The exact shape doesn’t matter — you’re aiming for pieces that are similar in size so they cook evenly, somewhere between ½-inch and 1-inch cubes. Place all cubed bologna in a bowl and set aside.
-
In a small saucepan, combine the butter, brown sugar, mustard, apple cider vinegar, soy sauce, Worcestershire sauce, garlic powder, onion powder, smoked paprika, cayenne pepper, black pepper, and salt. Heat over medium-low heat, stirring occasionally, until the butter is completely melted and the brown sugar has dissolved into a cohesive glaze. This should take about 3-4 minutes. Taste the glaze and adjust the seasonings — if it’s too spicy, add ½ teaspoon more brown sugar; if it’s not spicy enough, add another pinch of cayenne. The glaze should be aromatic, slightly thick (not runny), and balanced between sweet, savory, tangy, and spicy.
For Oven Method:
-
Preheat your oven to 375°F (190°C) and position a rack in the upper-middle portion of the oven — this helps the tops caramelize better.
-
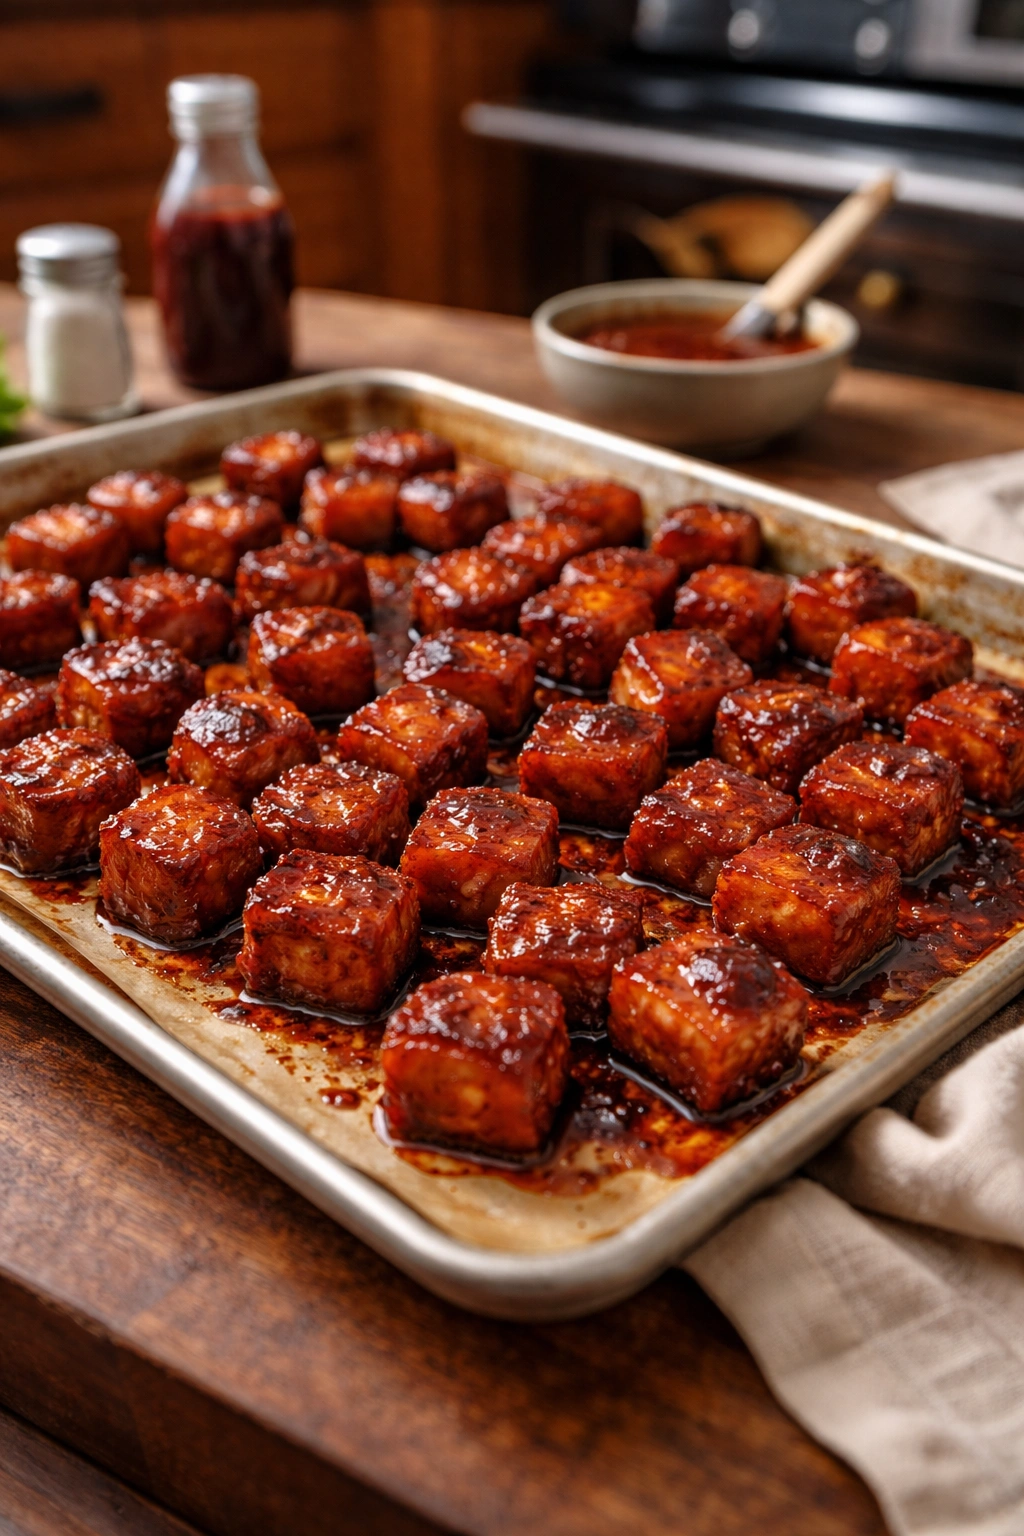
Pour the cubed bologna into a disposable 9×13-inch aluminum pan (or a similarly sized shallow baking pan). Drizzle the glaze mixture over the bologna cubes, then gently toss everything together with a spoon or your hands until every piece is coated. The bologna cubes should be evenly distributed across the pan and the glaze should coat each piece. Spray lightly with cooking spray or drizzle a tiny bit of oil over the top — this helps the edges caramelize more effectively.
-
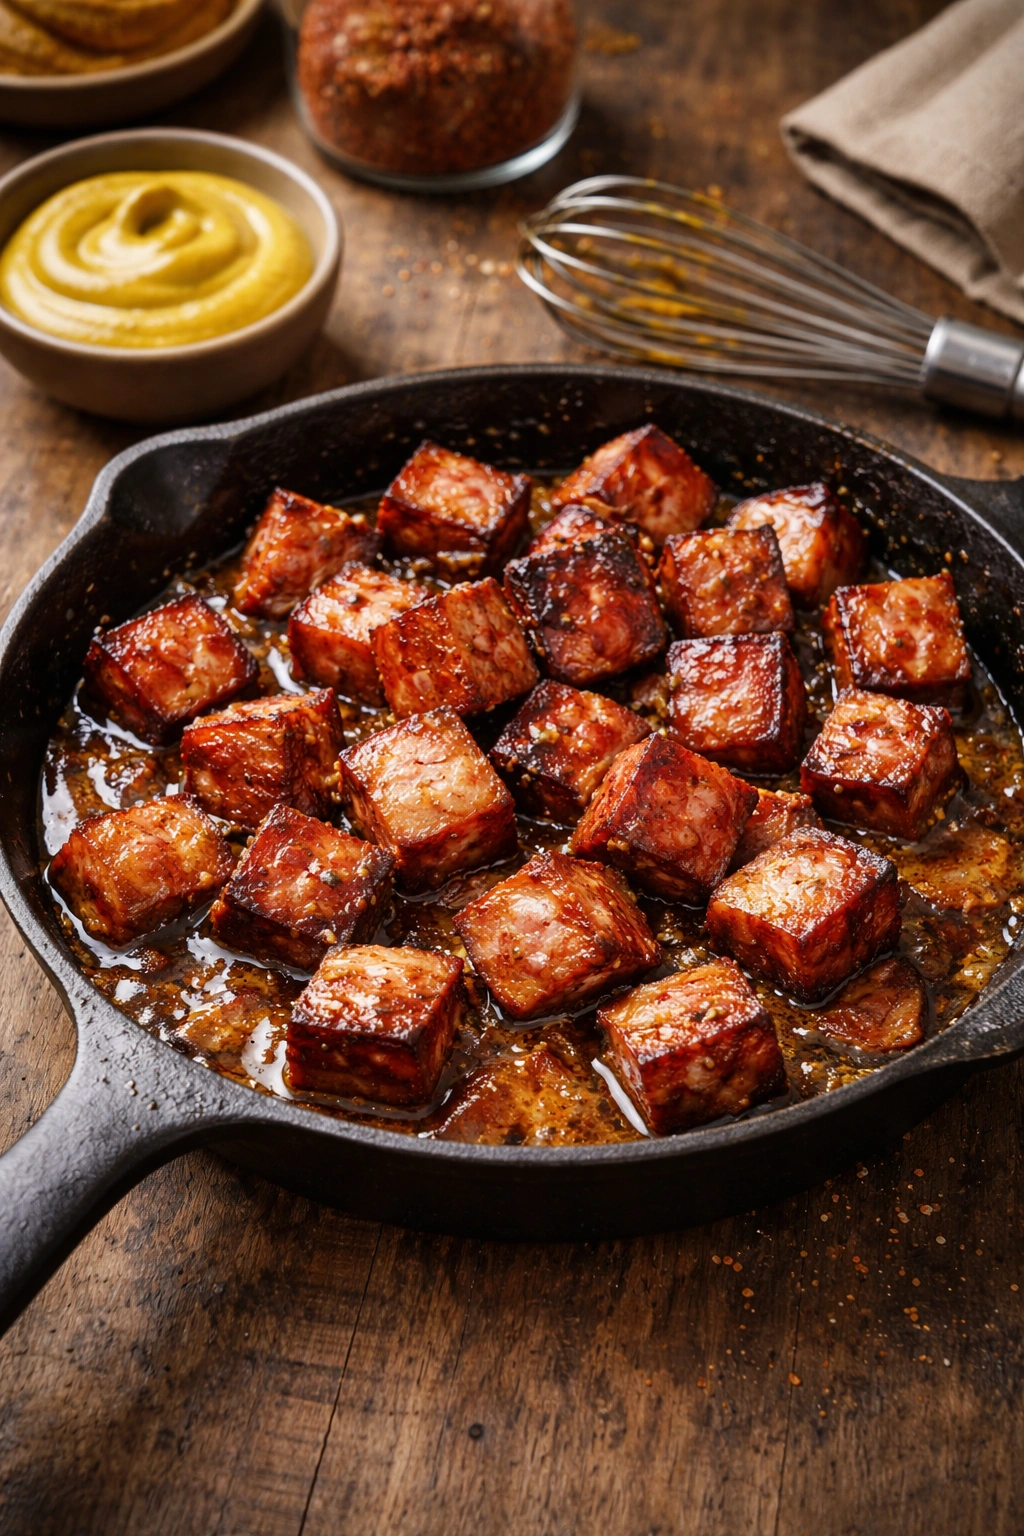
Place the uncovered pan directly on the oven rack (not on a lower rack, as you want the heat to reach the tops) and bake for 30 minutes. At the 30-minute mark, carefully remove the pan (it will be hot and the rendered fat will be bubbling), stir the contents gently, and return it to the oven. Resist the urge to stir too aggressively — you want some cubes to maintain contact with the bottom and sides of the pan, as this is where caramelization happens.
Advertisements -
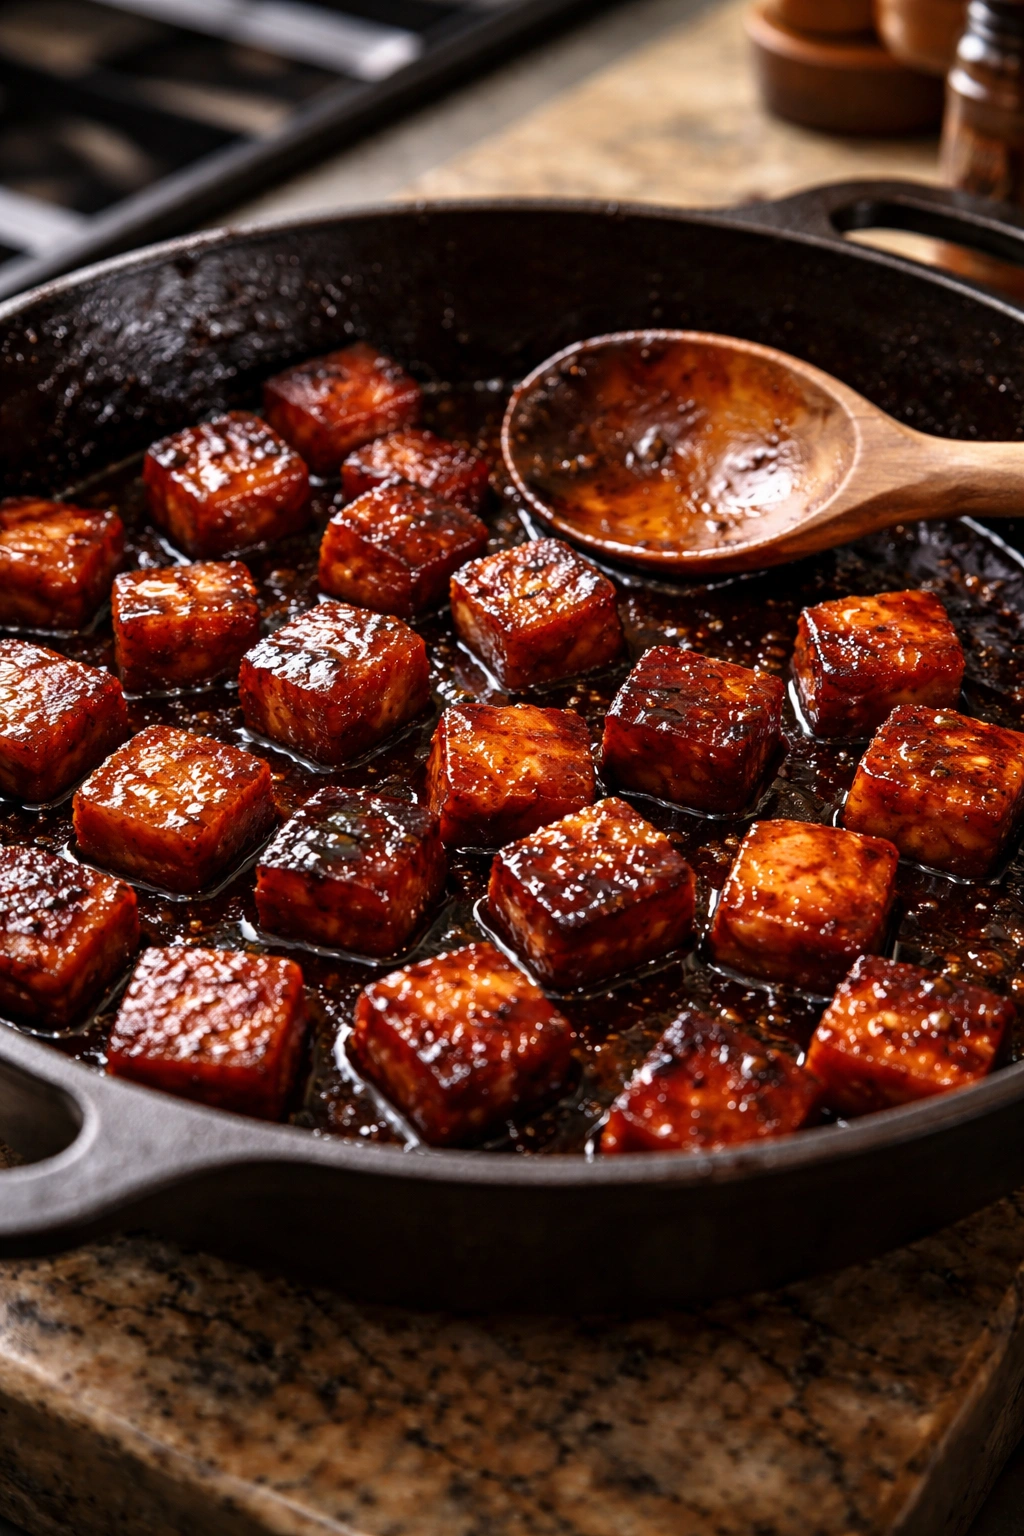
Bake for another 15-20 minutes, until the edges are deeply caramelized and darkened (they’ll look slightly burned in spots, which is exactly what you want), and the glaze has reduced and thickened into a sticky, glossy coating. The edges should be crispy and firm, not soft. You’ll know they’re done when the glaze coats each piece thickly and the cubes are dark mahogany brown at the edges with occasional charred spots. If your oven runs cool, you might need another 5-10 minutes; if it runs hot, they might be ready at the 40-minute mark. Start checking at 40 minutes and every 2-3 minutes after that.
-
Remove the pan from the oven and let it rest for 5 minutes. This allows the exterior to set up slightly and makes them easier to handle. Serve directly from the pan or transfer to a serving platter with a slotted spoon, leaving excess glaze in the bottom (you can drizzle it over the burnt ends or offer it as a dipping sauce).
For Smoker Method:
-
Preheat your smoker to 275°F (135°C) with your preferred smoking wood. Oak, hickory, or apple wood all pair beautifully with bologna burnt ends. You want the smoker to be stabilized at temperature before you add the bologna — this takes 15-25 minutes depending on your smoker type.
-
Place the cubed bologna in a disposable aluminum pan. Drizzle the glaze mixture over the cubes and toss gently to coat every piece evenly. Spray or oil the top lightly.
-
Place the uncovered pan directly on the smoker grate at the level closest to (but not directly above) your heat source. Smoke for 30 minutes without opening the door — opening the smoker causes temperature fluctuations and extends cooking time.
-
After 30 minutes, carefully open the smoker and stir the contents. You’ll notice that the glaze has begun to reduce and the bologna has started rendering fat. Return the pan to the smoker and smoke for another 15-25 minutes until the edges are dark and caramelized, the glaze has thickened into a sticky coating, and the cubes have taken on visible color from the smoke. The texture should be firm on the outside with slightly softened centers. Check at the 40-minute total mark and then every 3-5 minutes.
-
Remove the pan from the smoker and let it rest for 3-5 minutes. Transfer to a serving vessel using a slotted spoon, or serve directly from the pan.
Pro Tips and Common Mistakes to Avoid
The Importance of the Glaze Consistency:
Your glaze should be pourable when it goes into the pan but never watery. If it looks too thin, return the saucepan to low heat for another minute or two. The glaze clings to the bologna during cooking and reduces further as the moisture evaporates, creating that glossy, sticky coating that makes these so addictive. If your glaze is too thin, your burnt ends will cook unevenly and won’t develop the proper caramelized exterior.
Resist the Urge to Stir Too Frequently:
One of the biggest mistakes people make is stirring constantly, which prevents the bottom pieces from ever touching the hot pan surface. The glaze and rendered fat need to concentrate in spots to create caramelization. Stir once at the halfway point and that’s it — maybe a gentle toss at the very end if you want to redistribute them slightly, but constant stirring produces boiled bologna instead of caramelized burnt ends. You want some pieces sitting still in that hot pan.
Watch for Doneness by Visual Cues, Not Time:
Every oven and smoker performs differently. Some run 25 degrees hotter than the dial indicates, some have hot spots. Start checking around the 40-minute mark and look at the edges of the cubes. They should be noticeably darker than the original bologna color, with visible browning and slight charring. The glaze should coat them thickly and look sticky rather than wet. If you taste-test one and it’s still soft throughout with barely any caramelization, you need more time. If the glaze is dark and crispy but the interior is still completely raw and squishy, your heat is too high or you’re cooking them too long. Well-executed burnt ends should have a firm, slightly chewy exterior with tender (not raw or mushy) interiors.
Brown Sugar Packing Matters:
When measuring your brown sugar, pack it firmly into the measuring cup — don’t just scoop and shake it loose. Packed brown sugar is denser and gives you the actual amount the recipe calls for. Loose brown sugar will throw off your proportions and make your glaze less sweet and thick.
Rendered Fat Is Your Friend:
That pool of fat in the bottom of the pan isn’t waste — it’s actually rendering from the bologna and serving as a basting agent. Leave it there and let it coat the pieces. This fat is what creates the glossy, crispy exterior. If you drain it away, your burnt ends will be dry and won’t caramelize properly. Embrace the fat.
Temperature Consistency on the Smoker:
If you’re smoking, resist opening the door constantly to check progress. Every time you open the smoker, the temperature drops and you’re extending your cooking time. Open once at 30 minutes to stir, check again at 40 minutes, then every 3-5 minutes if needed. But leave the door closed as much as possible.
Oven Method vs. Smoker Method — Which Should You Choose?
Both methods produce excellent results, but they have distinct advantages depending on your situation, outdoor setup, and flavor preferences.
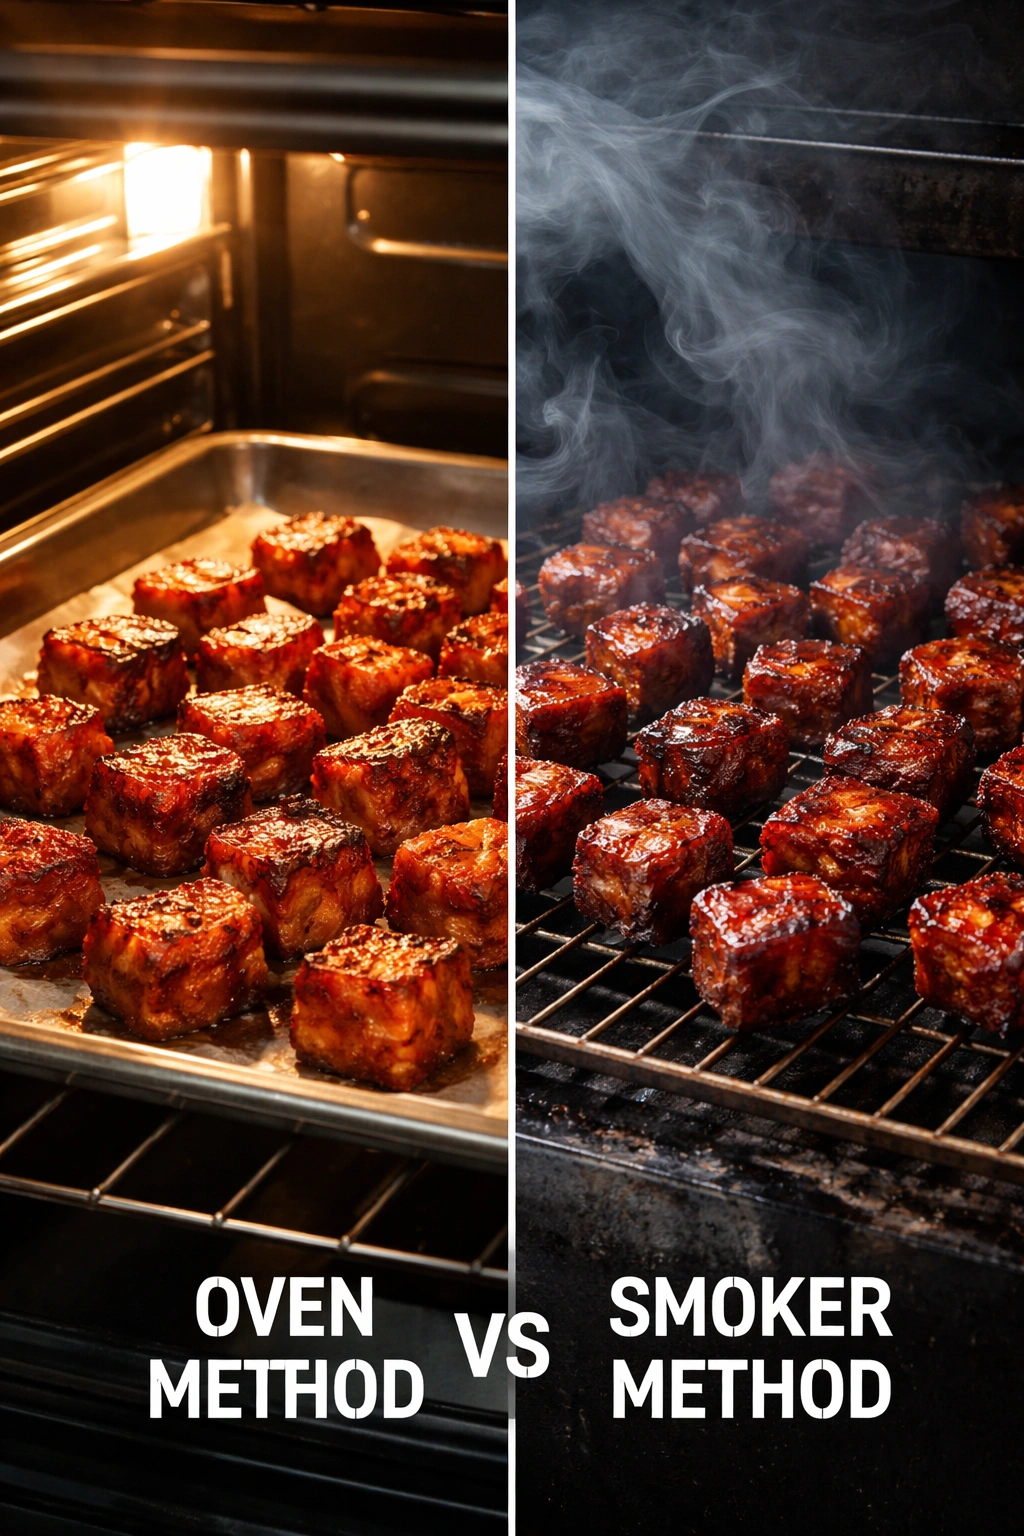
The Oven Method works beautifully in any weather and produces consistent results regardless of outdoor temperature. You have precise temperature control, and you’re not dependent on whether your smoker is cooperating that day. The glaze caramelizes evenly and develops that gorgeous mahogany-brown exterior. Oven-method burnt ends have a slightly brighter, more defined sweetness from the brown sugar because they’re not competing with smoke flavor. This method is ideal if you’re cooking year-round, don’t have a smoker, or prefer the pure, unsmoked flavor. The downside is there’s zero smoke flavor — they taste like sweetened, caramelized bologna without any barbecue depth.
The Smoker Method imparts a subtle smoke flavor that adds sophistication and barbecue authenticity. The smoke creates complexity that the oven method can’t replicate. Smoking also creates an environment where the bologna renders its fat evenly throughout the cooking process, often producing a slightly more tender finished product. The ritual of smoking is part of the appeal for many cooks. The downside is that smoking takes longer, requires equipment setup, is weather-dependent, and produces variable results depending on your smoker’s personality. Smokers also make it harder to achieve extremely crispy edges because of the moisture in the smoke environment.
The honest truth: Oven-method burnt ends are often actually crispier on the outside and more visually appealing than smoker versions because the dry heat creates more aggressive caramelization. If your primary goal is crispy edges and glossy coating, the oven is your tool. If you want authentic barbecue flavor and don’t mind slightly softer edges in exchange, the smoker is your choice. Both taste fantastic.
Variations and Creative Flavor Adaptations

Spicy Jalapeño Version:
Add ⅓ cup diced pickled jalapeños (drained well) directly to your glaze mixture before heating. The jalapeños add sharp, bright heat that balances beautifully with the brown sugar sweetness. This version has a vinegar-forward flavor that’s less obviously “burnt ends” and more distinctly spicy-savory.
Bourbon Barbecue Variation:
Replace the apple cider vinegar with 2 tablespoons bourbon whiskey. Add ½ teaspoon vanilla extract and bump the brown sugar up to ¼ cup. This creates a deeper, more sophisticated flavor with subtle caramel notes. The bourbon adds warmth without being overtly alcoholic since it cooks off.
Honey-Brown Butter Version:
Reduce the brown sugar to 2 tablespoons, add 3 tablespoons honey, and take the time to brown the butter (cook it over medium heat, stirring occasionally, until it turns golden brown and smells nutty — about 5 minutes). Brown butter adds incredible depth. This version tastes less sweet and more complex, with toasted, nutty undertones.
Asian-Inspired Glaze:
Replace the mustard with 1 tablespoon minced ginger, double the soy sauce to 2 tablespoons, and add 1 tablespoon sesame oil plus ½ teaspoon sriracha. Reduce the brown sugar to 2 tablespoons. This creates a savory-spicy glaze with Asian flavor notes that feels entirely different from traditional burnt ends.
Maple-Chipotle Smoke:
Use maple syrup instead of all the brown sugar (use ⅓ cup maple syrup), add 1 teaspoon smoked chipotles in adobo sauce (minced and drained), and if smoking, use mesquite or oak wood. This creates a spicy-sweet glaze with genuine depth. The smokiness of the chipotle means you can use milder smoking wood if desired.
Garlic-Lover’s Version:
Increase the garlic powder to 1½ teaspoons and add 2 tablespoons minced fresh garlic sautéed in butter before adding the other ingredients. Fresh garlic becomes sweet and mellow during cooking and adds genuine garlic depth rather than powdered garlic flavor.
Storage, Make-Ahead Planning, and Reheating
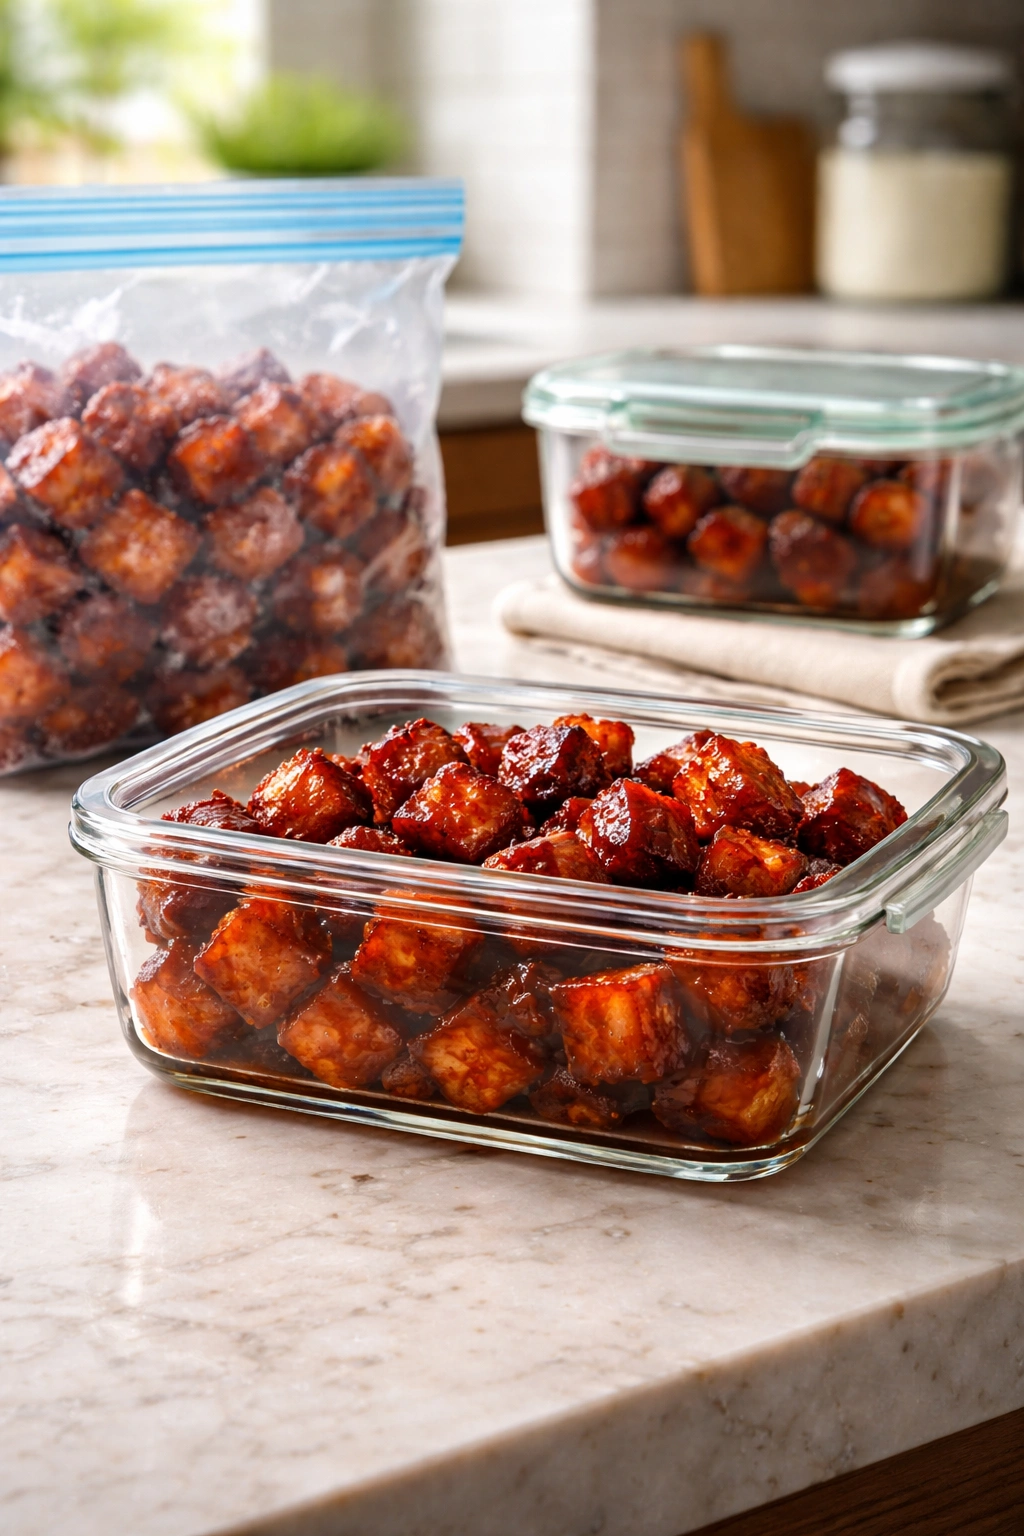
Refrigerator Storage:
Cooked burnt ends keep beautifully in the refrigerator for 3-4 days when stored in an airtight container. The glaze firms up as they cool, which some people prefer because it makes them less messy to eat. To reheat, transfer them to an oven-safe dish, cover with foil, and warm them at 325°F (160°C) for 10-12 minutes until heated through. They’ll regain much of their initial texture, though they won’t be quite as crispy as fresh.
Freezer Storage:
Burnt ends freeze excellently for 2-3 months. Cool them completely, then transfer to a freezer-safe container or freezer bag, pressing out as much air as possible. Thaw overnight in the refrigerator and reheat using the method above. They defrost evenly and reheat successfully because the glaze protects the bologna from drying out.
Make-Ahead Strategy:
You can prepare the glaze up to 2 days in advance and refrigerate it. You can also cube the bologna the morning you plan to cook it. The actual cooking should happen within a few hours of eating for maximum crispy texture, but they’re genuinely good even when made several hours ahead. The glaze softens slightly as they cool, creating a different (but still delicious) texture.
Pro Tip for Parties:
If you’re making these for a gathering, cook them about 1-2 hours before serving. Serve them from a warm slow cooker set to the low setting — this keeps them warm without further cooking and allows guests to grab them throughout the event. If a slow cooker isn’t practical, reheat them shortly before guests arrive.
Serving Suggestions and Perfect Pairings
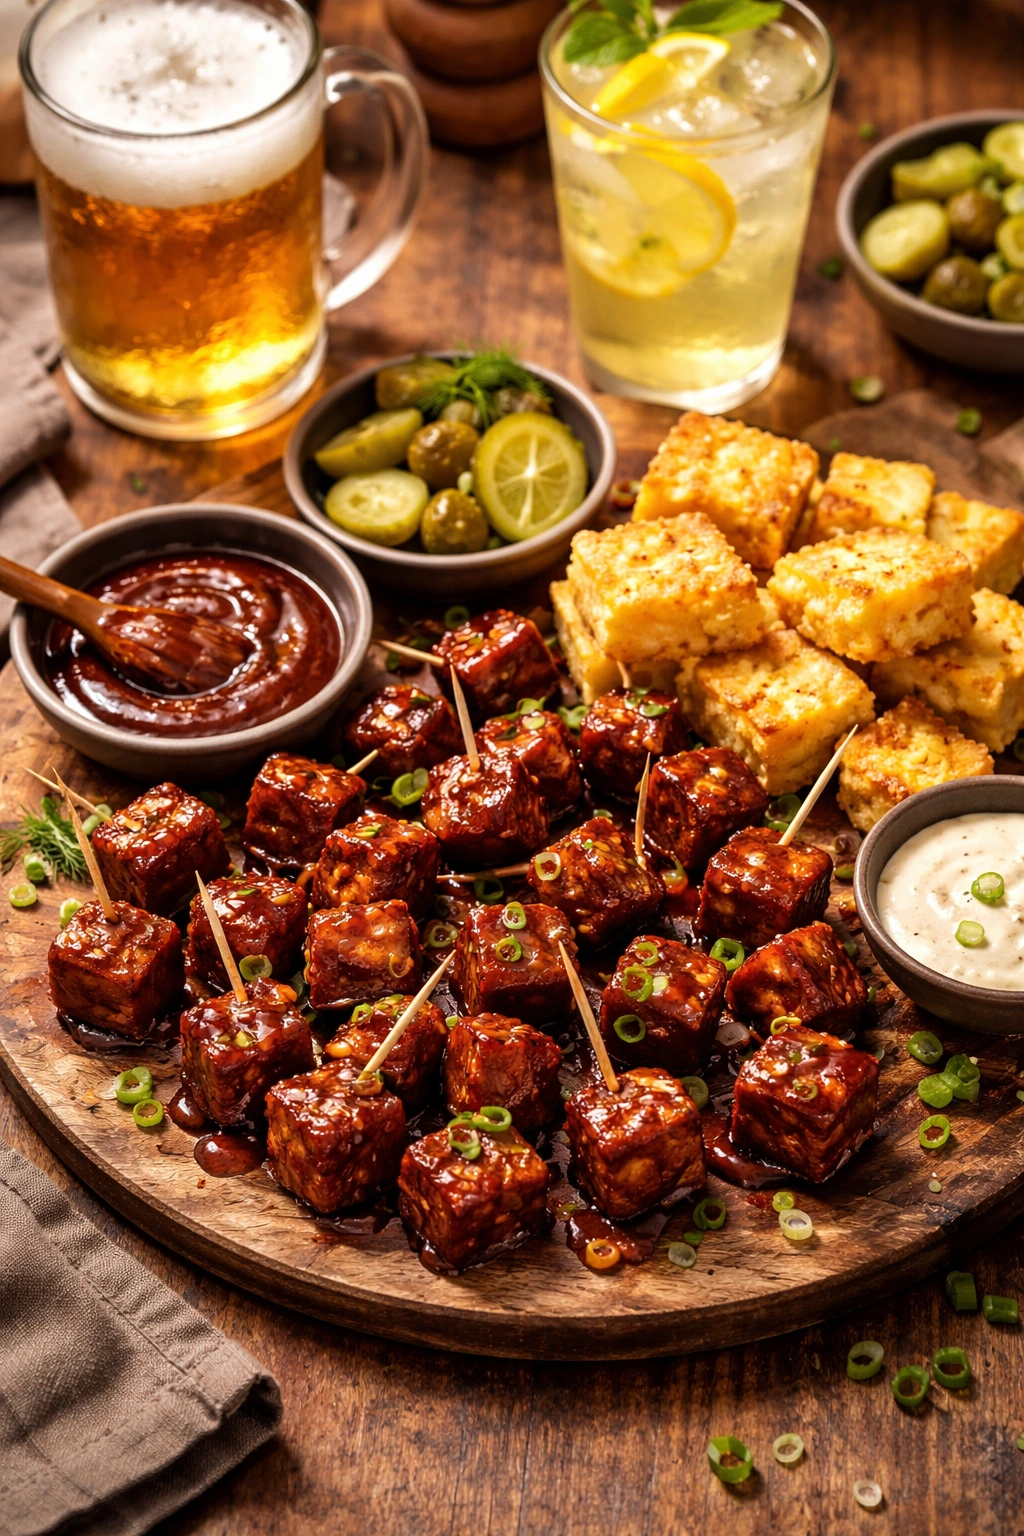
As an Appetizer:
Serve burnt ends on small wooden skewers or toothpicks for easy grabbing. Place them on a platter with extra glaze in a small bowl for dipping. This presentation works beautifully for parties and casual entertaining.
Beverage Pairings:
Cold beer is the obvious choice — lager, pilsner, or blonde ale all complement the sweet and savory flavors. If you’re not a beer person, try sparkling lemonade or iced tea with lemon. The brightness cuts through the richness of the glaze beautifully. Bourbon works if you’re serving these as a more upscale appetizer.
Side Accompaniments:
Crispy cornbread pieces balance the sweet glaze. Coleslaw with a tangy dressing provides cooling contrast. Jalapeño cornbread doubles down on the spice-and-sweet theme. Pickles or pickled vegetables offer palate-cleansing acidity.
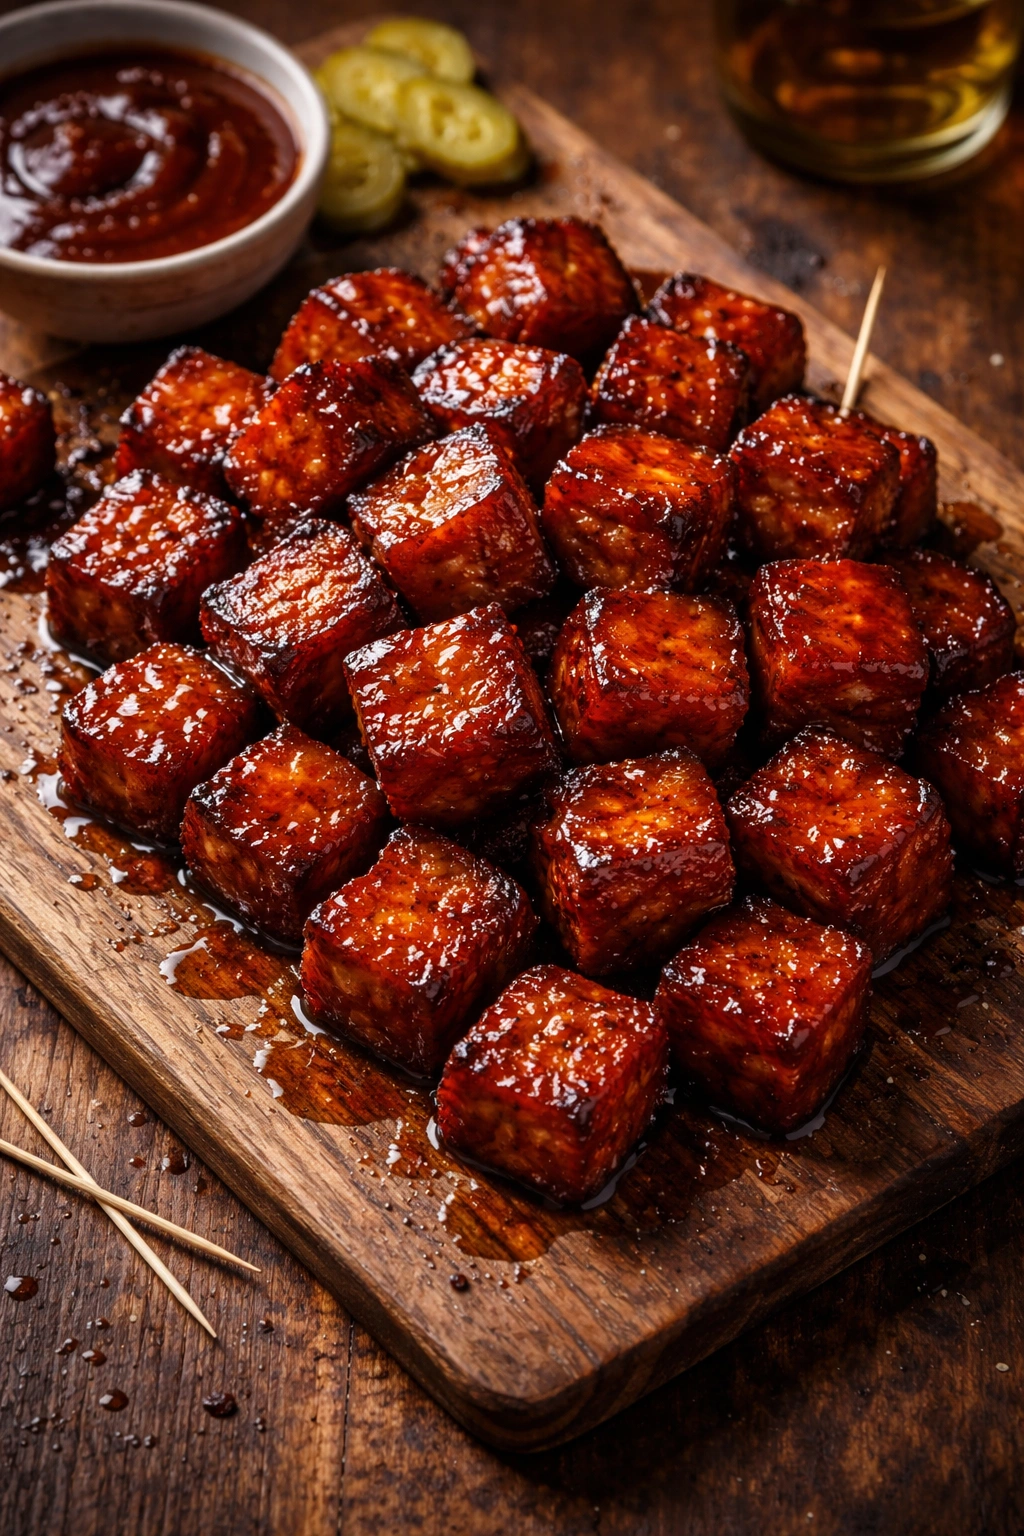
Plating and Presentation Ideas:
Transfer them to a serving platter while hot so the glaze is still glossy and appealing. A light dusting of fresh cracked black pepper or smoked paprika over the top adds visual interest and subtle extra flavor. A small handful of sliced green onions scattered over them adds freshness and color. Toasted sesame seeds work beautifully if you’ve made the Asian-inspired version.
Meal Integration:
Beyond appetizers, bologna burnt ends work as a side dish at a casual barbecue spread. Serve them alongside traditional fare like pulled pork, ribs, or brisket. They’re also surprisingly good served over rice, in a quesadilla, or incorporated into a loaded nachos situation. Some cooks even chop them into smaller pieces and mix them into baked beans.
Troubleshooting: What to Do When Something Goes Wrong
The Glaze Separated or Looks Broken:
If your glaze split or looks oily and separated, remove it from heat and add a tablespoon of mustard or Worcestershire sauce, then whisk vigorously. These acidic ingredients help re-emulsify the mixture. If that doesn’t work, strain the glaze through a fine-mesh sieve, discard the separated solids, and start with fresh ingredients — this is rare, but it happens if the heat got too high.
The Burnt Ends Are Still Soft and Haven’t Caramelized:
Your heat likely wasn’t high enough, or you stirred them too frequently. Next time, increase oven temperature to 400°F or smoker temperature to 300°F. Also, stir only once at the halfway point. If this happens mid-cook, increase the temperature 25 degrees and continue cooking — they’ll catch up.
The Burnt Ends Are Completely Charred and Crispy Throughout:
You cooked them too long or too hot. The interiors should still have some tenderness. Next time, start checking at 40 minutes and remove them as soon as the glaze is dark and the edges are deeply caramelized. If this happens and they’re still edible (just less tender), embrace the extra crispiness and serve them as an extra-crunchy appetizer. Many people genuinely prefer this texture.
The Glaze Burned on the Bottom and Stuck to the Pan:
Your heat was probably too high or you didn’t have enough glaze. Use the disposable aluminum pan next time and make sure you have a full coating of glaze on every piece. You can also line your pan with foil for easier cleanup if something sticks.
They Taste Too Salty:
You likely used regular soy sauce and also added salt. Taste your glaze before cooking next time, and omit the additional salt if you’re using soy sauce. If this happens, serve them alongside something unsalted — cornbread or rice — to balance.
They Taste Too Sweet:
Cut back on the brown sugar to 3 tablespoons next time, or increase the vinegar to 1½ tablespoons. You can also add a pinch of cayenne pepper to balance sweetness with heat.
Final Thoughts
Bologna burnt ends represent the perfect intersection of simplicity and impressive results. You’re starting with an inexpensive, humble ingredient and through a straightforward cooking method producing something that tastes restaurant-quality and earns genuine compliments. Whether you choose the oven’s reliable convenience or the smoker’s authentic smoke flavor, you’re working with a recipe that welcomes you to experiment, adapt, and make it your own.
The real magic of this dish is how forgiving it is. There’s no precise egg-like timing, no elaborate technique to master, no expensive equipment required. You cube bologna, coat it in a simple glaze, and let heat do the work. The variables you do control — the glaze ingredients, the cooking temperature, the cooking time — give you plenty of room to tailor the flavor to your exact preferences.
Make these for your next gathering and watch them disappear. Have them ready on a weeknight when you need an impressive appetizer with minimal effort. Experiment with different glaze combinations until you discover your signature version. This is the kind of recipe that becomes a repeat performer, the one people request by name. Start with the classic version, master it, and then make it entirely your own.