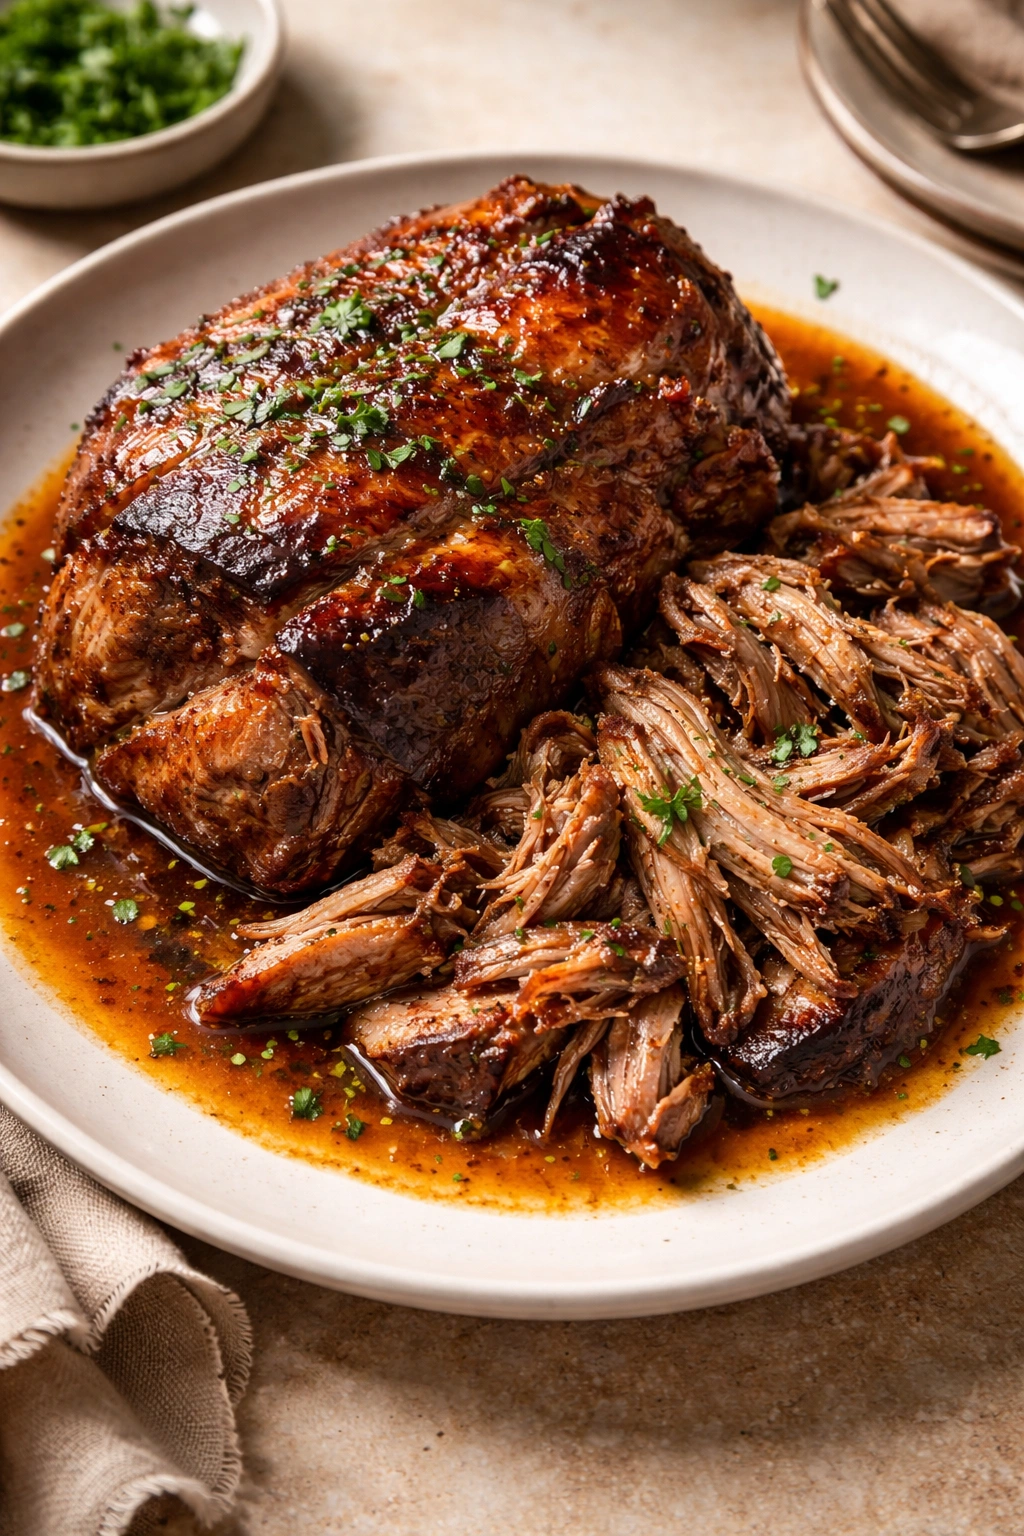
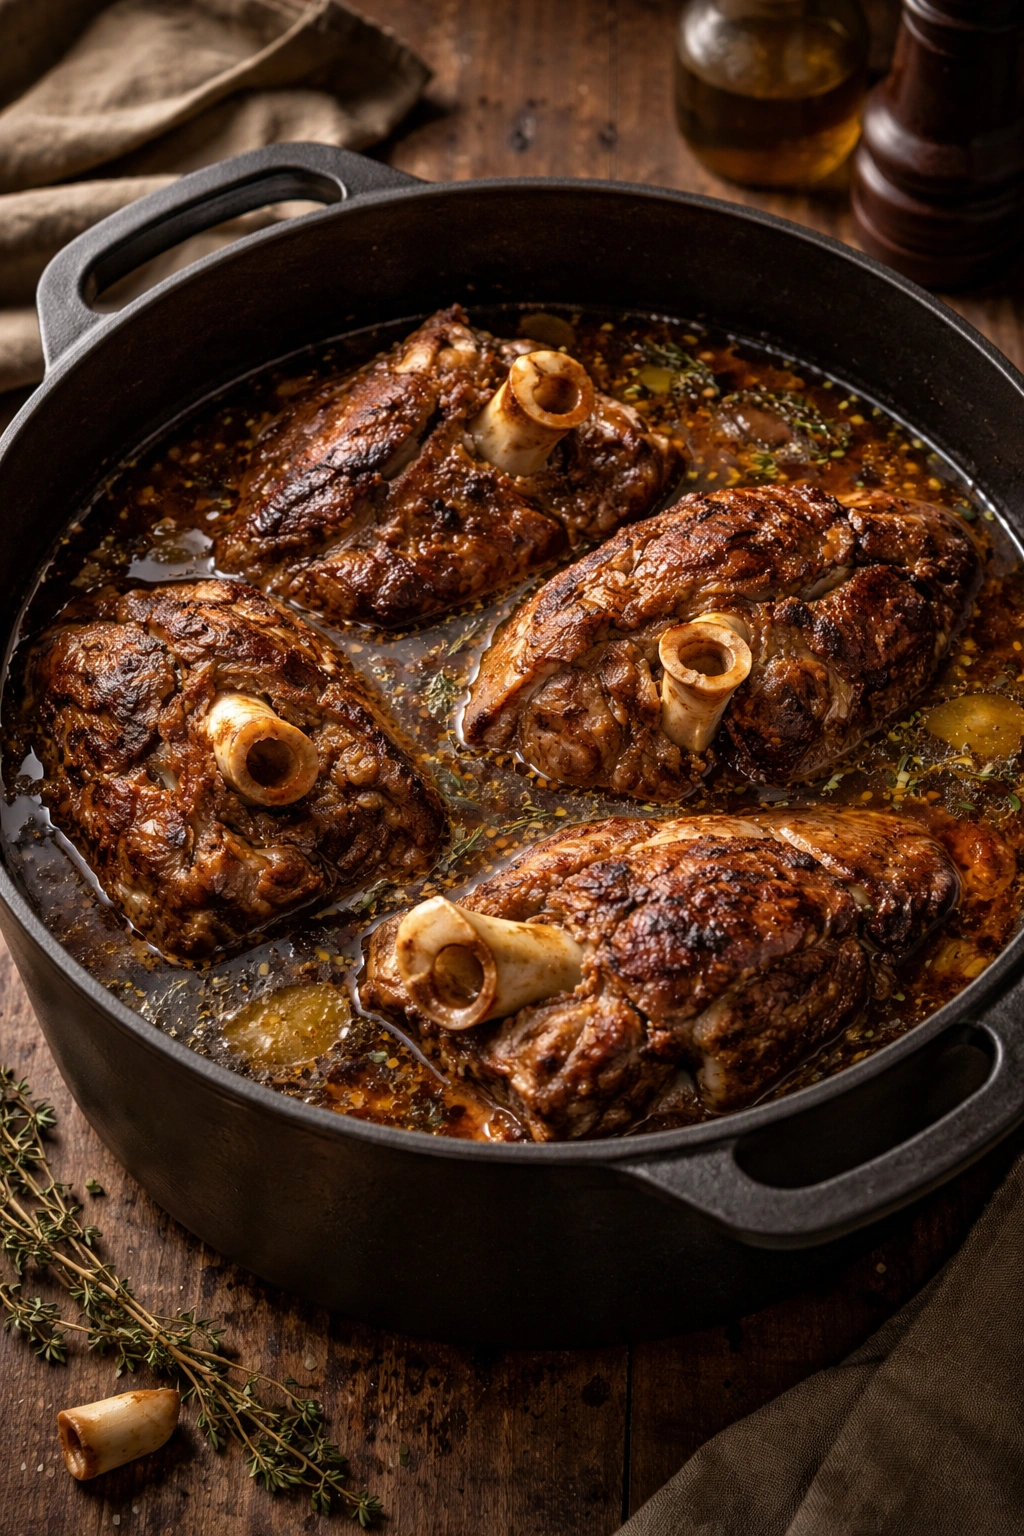
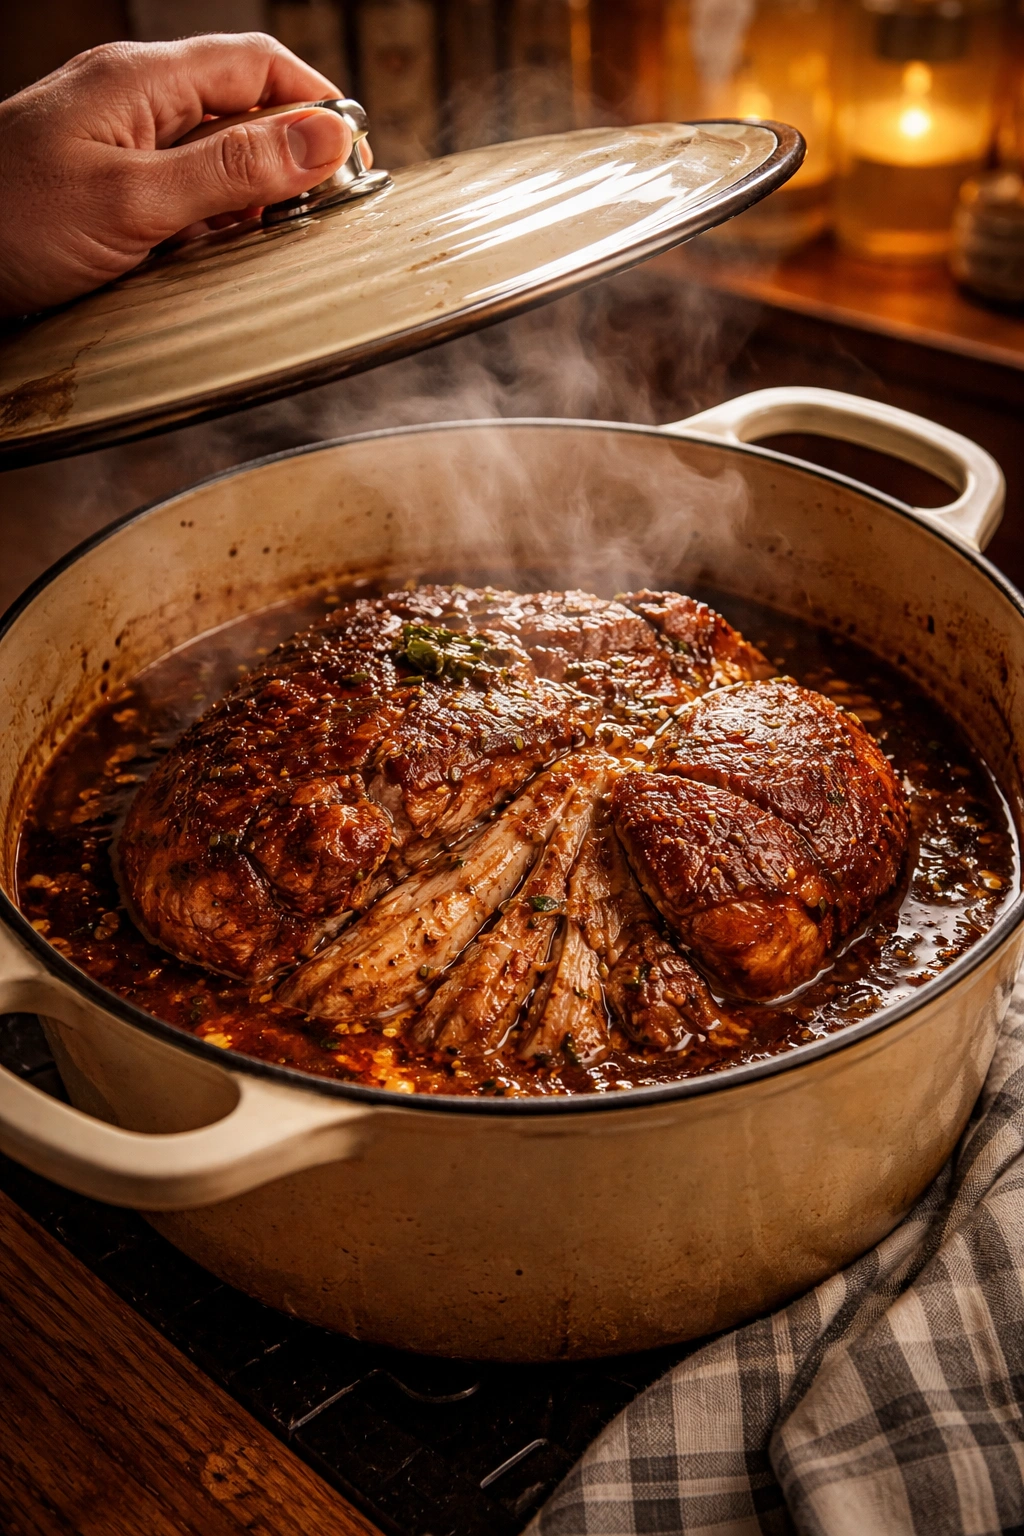
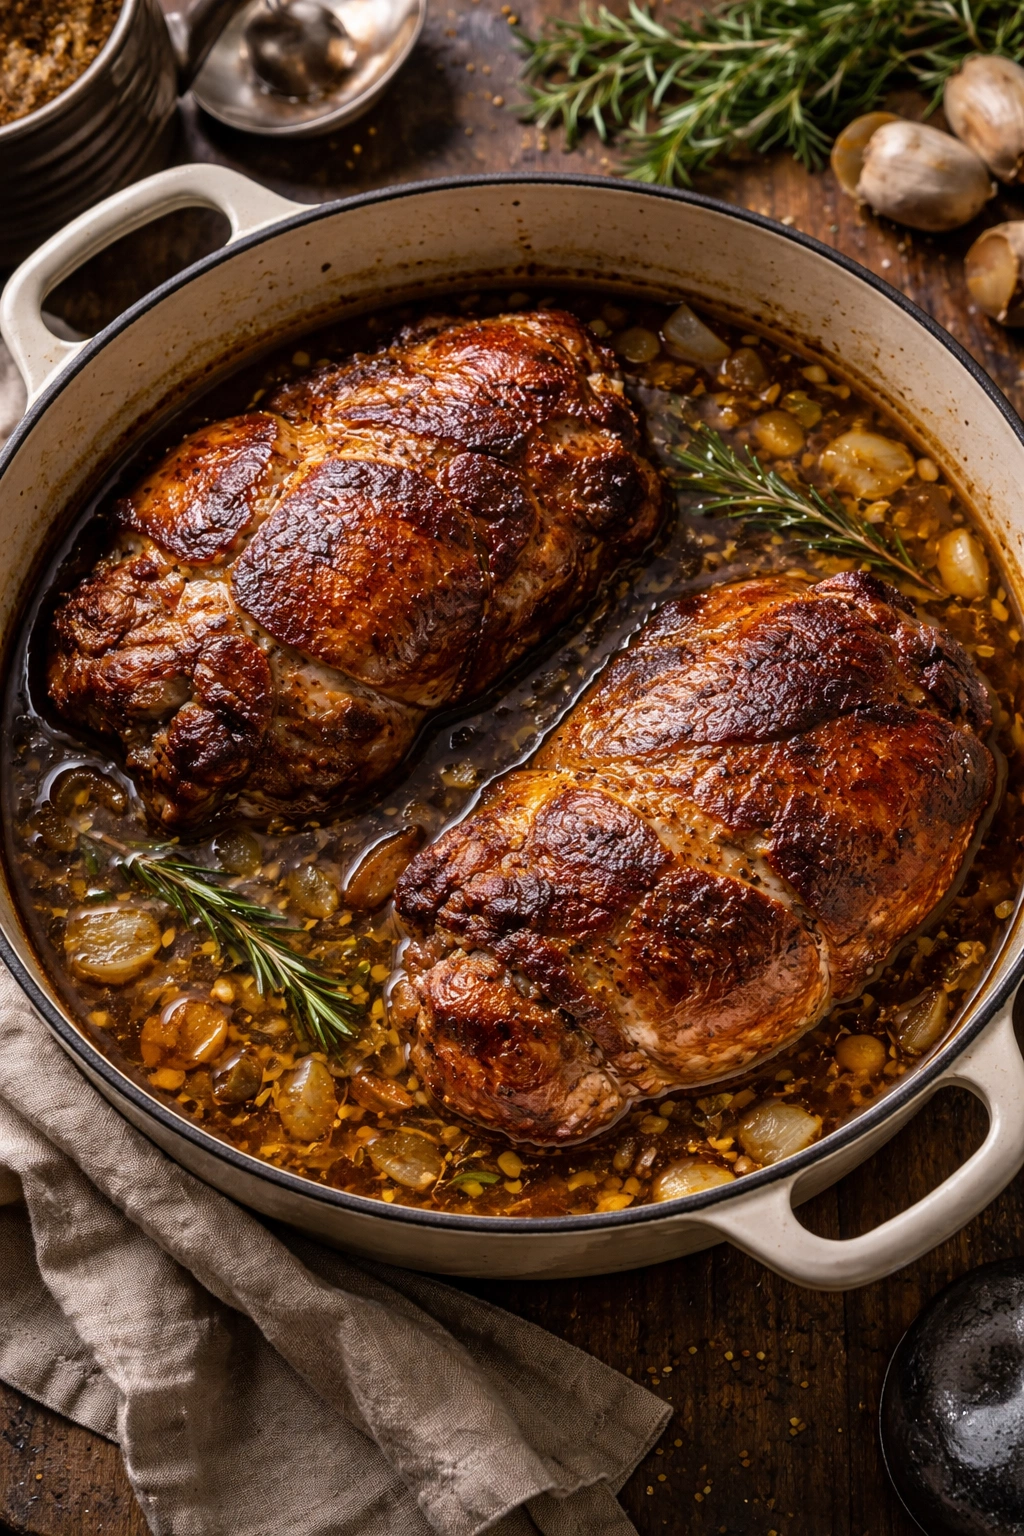
There’s something almost magical about lifting the lid off a Dutch oven after hours of slow cooking to find a massive pork shoulder transformed into tender, succulent meat that shreds apart with the gentlest pressure of a fork. Braised pork shoulder represents one of the most rewarding dishes you can make—the kind of meal that fills your entire home with an irresistible aroma and delivers restaurant-quality results with surprisingly minimal hands-on effort. If you’ve never braised pork shoulder before, or if your previous attempts didn’t yield that coveted fall-apart texture, this guide will walk you through every principle, technique, and trick that separates mediocre results from truly exceptional ones.
The beauty of this dish lies in its seeming contradiction: you start with one of the toughest, most economical cuts of pork available, yet through patience and proper technique, you end up with meat so tender and flavorful that it rivals any premium cut. That transformation isn’t magic—it’s chemistry and physics working in perfect harmony. Understanding how braising actually works gives you the confidence to nail this recipe every single time, whether you’re cooking for a casual weeknight dinner or impressing guests at a holiday gathering.
Why Pork Shoulder Is Perfect for Braising
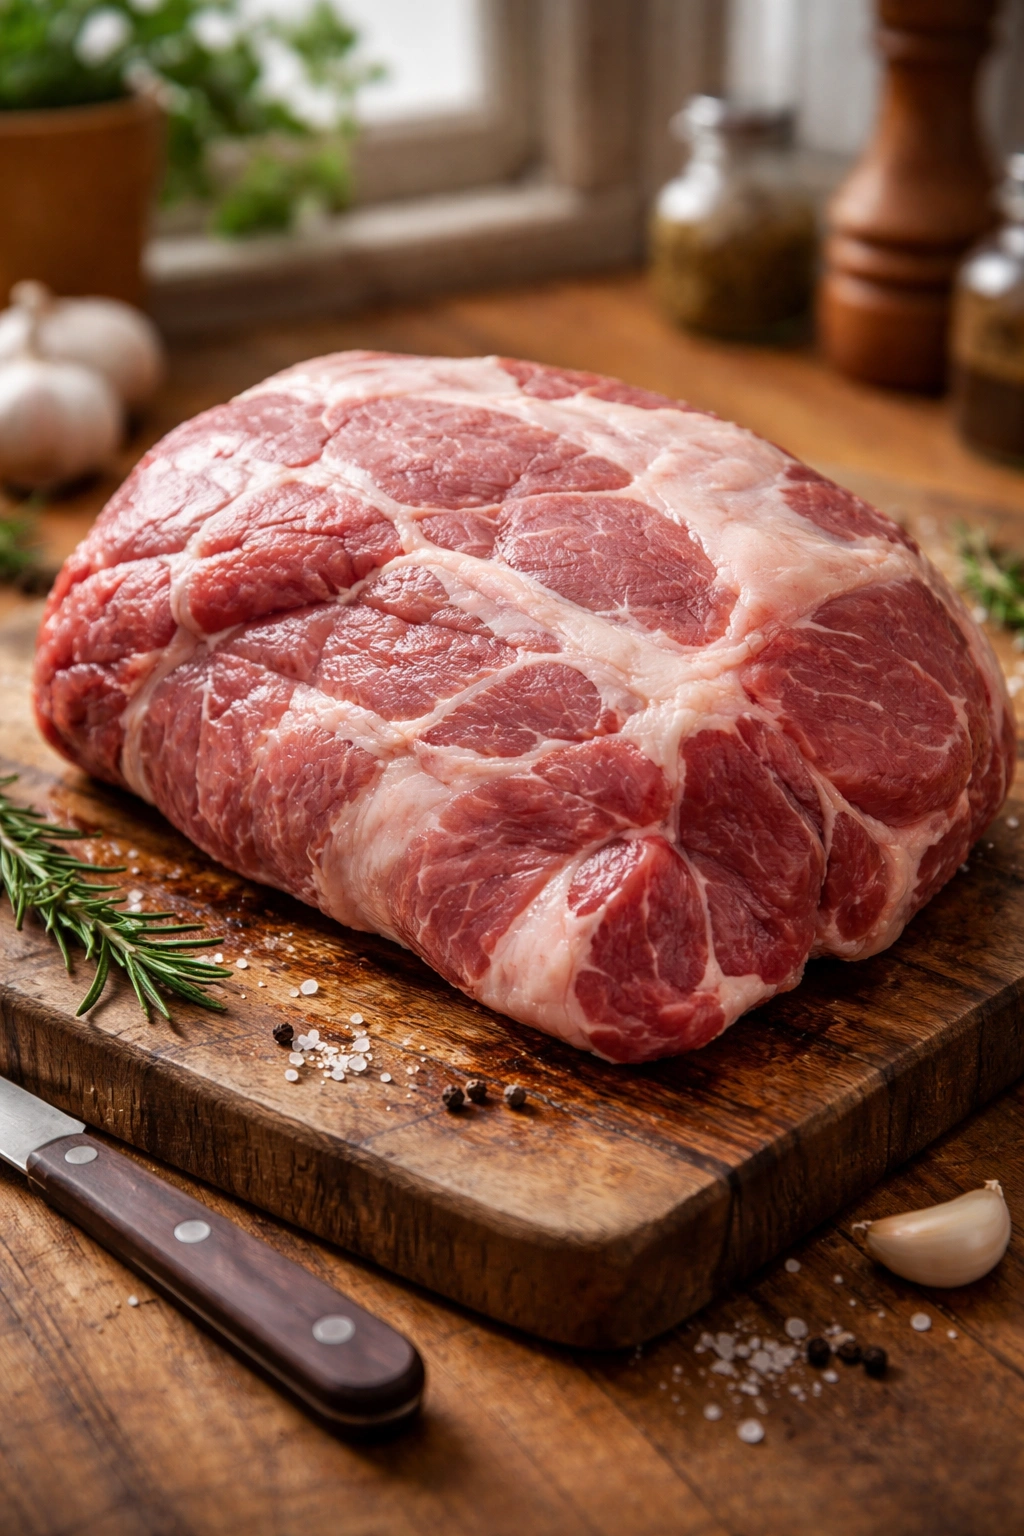
Pork shoulder, also called pork butt despite coming from the shoulder rather than the rear of the animal, is packed with connective tissue and marbling that makes it seem unpromising at first glance. This is precisely what makes it ideal for braising. The meat contains abundant collagen—a tough protein that becomes gelatinous when exposed to low, moist heat over extended time. Rather than fighting against this characteristic, braising leverages it to create meat that’s incredibly moist and full of body.
The fat distributed throughout the meat is equally important. As the pork cooks slowly in liquid, this fat renders down gradually, adding rich flavor and keeping the meat impossibly juicy. A good pork shoulder will have visible white marbling throughout—that’s exactly what you want to see. The more fat present, the more forgiving the cooking process becomes, because the meat is harder to dry out.
This cut is also significantly more affordable than premium roasts, making braised pork shoulder an economical choice for feeding a family or preparing multiple servings for meal prep. You’re not paying a premium for tenderness; you’re creating that tenderness yourself through technique and time.
Understanding the Braising Process
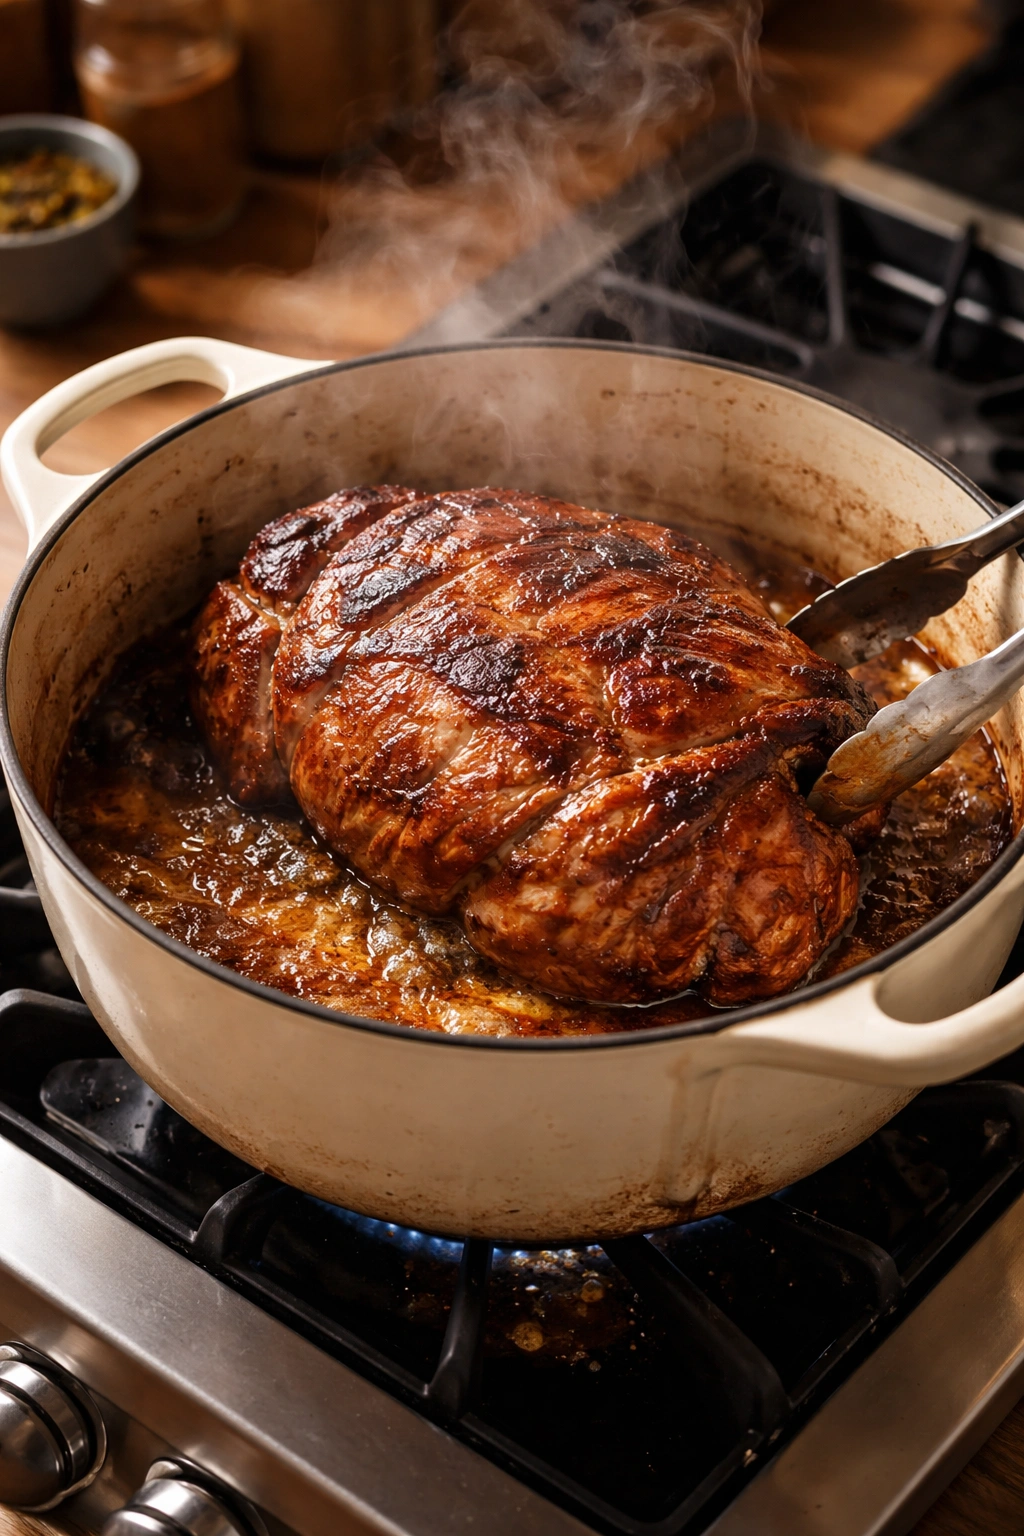
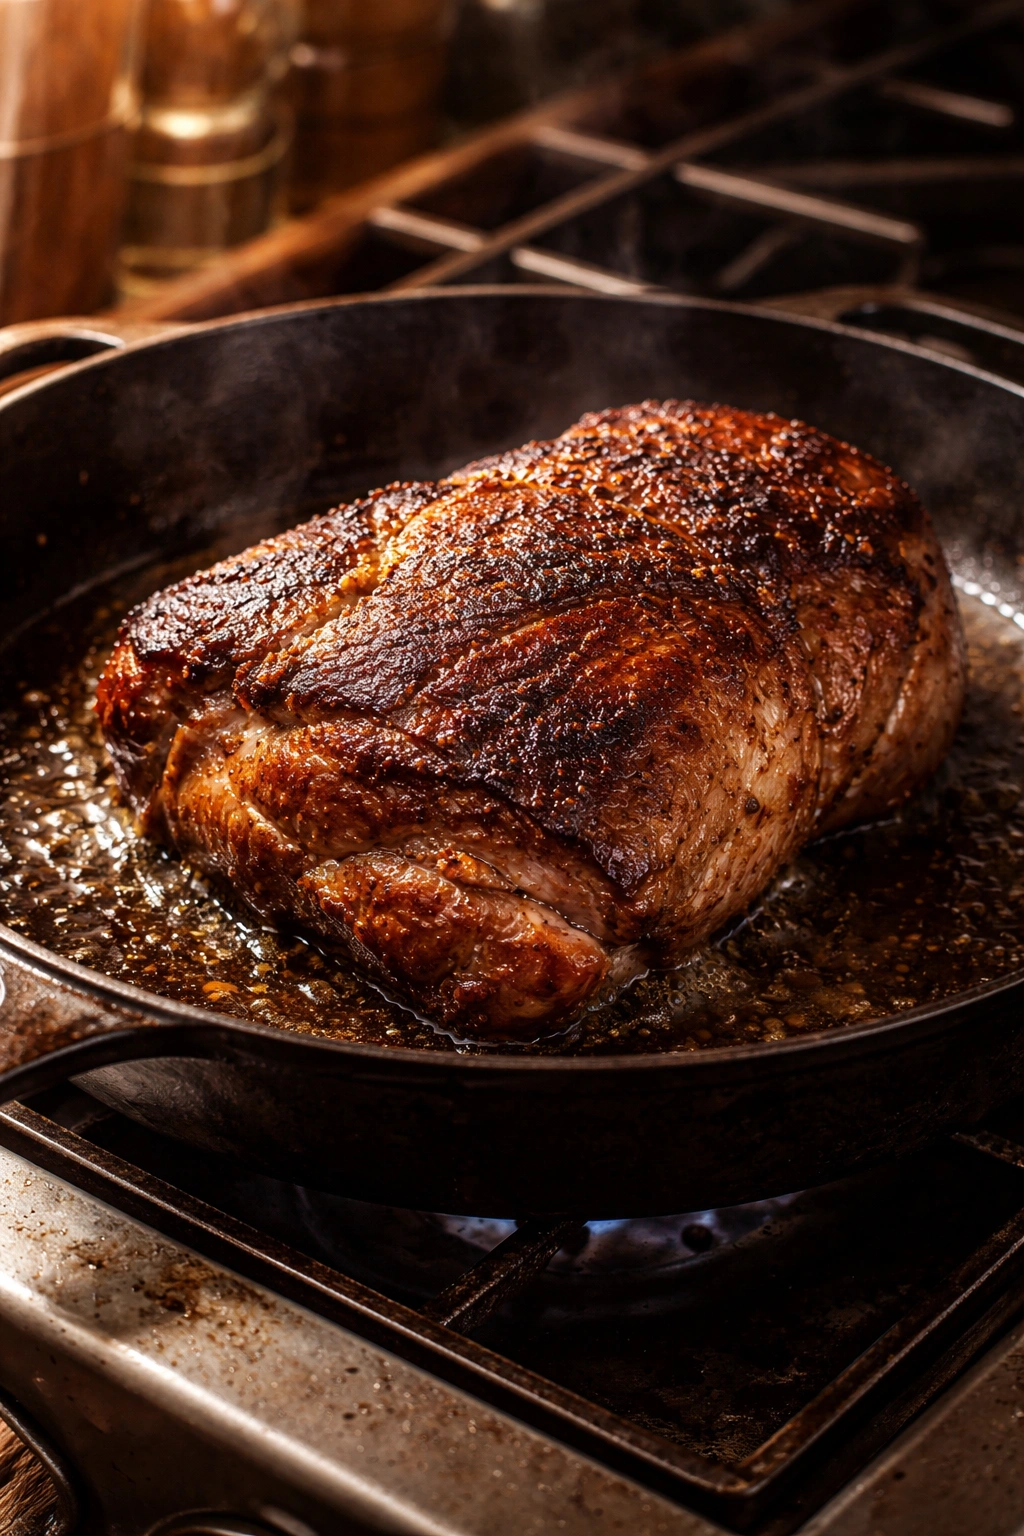
Braising works through a combination of moist and dry heat applied over an extended period. You start by searing the meat directly in hot oil—this is the dry heat component that creates a flavorful browned crust through the Maillard reaction. Those deeply browned bits stuck to the bottom of the pot are liquid gold; they’ll dissolve into your braising liquid and become the foundation of an incredible sauce.
Once the pork is browned and set aside, you build an aromatic base with onions, garlic, and other vegetables. The vegetables soften and release their sugars and flavors into the pot. You then deglaze the pot with liquid—wine, broth, cider, or a combination—scraping up every last bit of browned flavorful residue from the bottom.
The pork returns to the pot, submerged partially or completely in this braising liquid, and then moves to a low oven where it spends hours cooking slowly at a gentle simmer. The moist heat from the surrounding liquid penetrates the meat while the low temperature ensures it cooks through without drying out. The collagen breaks down into gelatin, which gives the finished sauce incredible body and richness. The long cooking time also allows all the flavors—from the aromatics, herbs, and braising liquid—to infuse the meat deeply.
Choosing Your Pork Shoulder
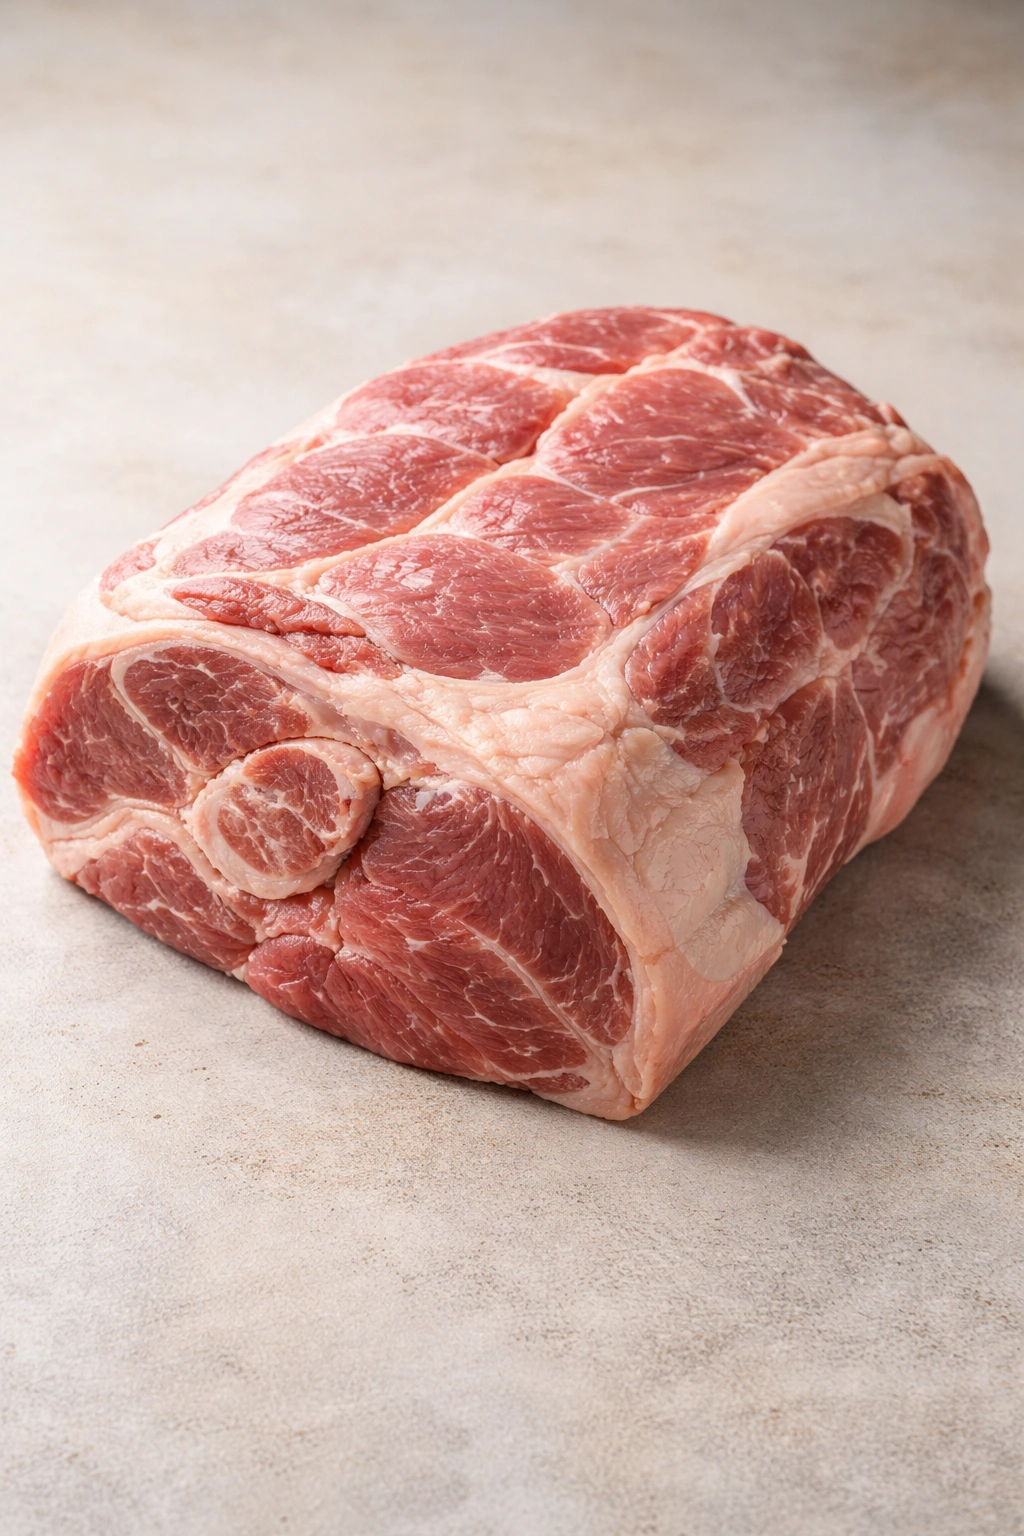
Not all pork shoulders are created equal. Look for one with good marbling—visible white fat running through the meat—rather than a lean roast. A bone-in shoulder will add extra flavor to your braising liquid, but boneless works beautifully too and is easier to portion and serve. Most grocery stores carry pork shoulder, but your local butcher can often provide superior quality with better marbling.
The size matters based on your needs. A 3-4 pound boneless shoulder serves 6 generously and fits comfortably in a standard Dutch oven. Larger roasts, up to 5-6 pounds, work fine but require proportionally more braising liquid and slightly longer cooking time. Some cooks prefer cutting the shoulder into 2-3 large chunks before braising, which allows the meat to cook more evenly and makes portioning easier at the end.
Trim any excess exterior fat before cooking—you want a thin cap of fat remaining on the surface, as this adds flavor and prevents drying, but thick, waxy exterior fat doesn’t contribute to the final dish and should be removed.
Essential Equipment and Ingredients
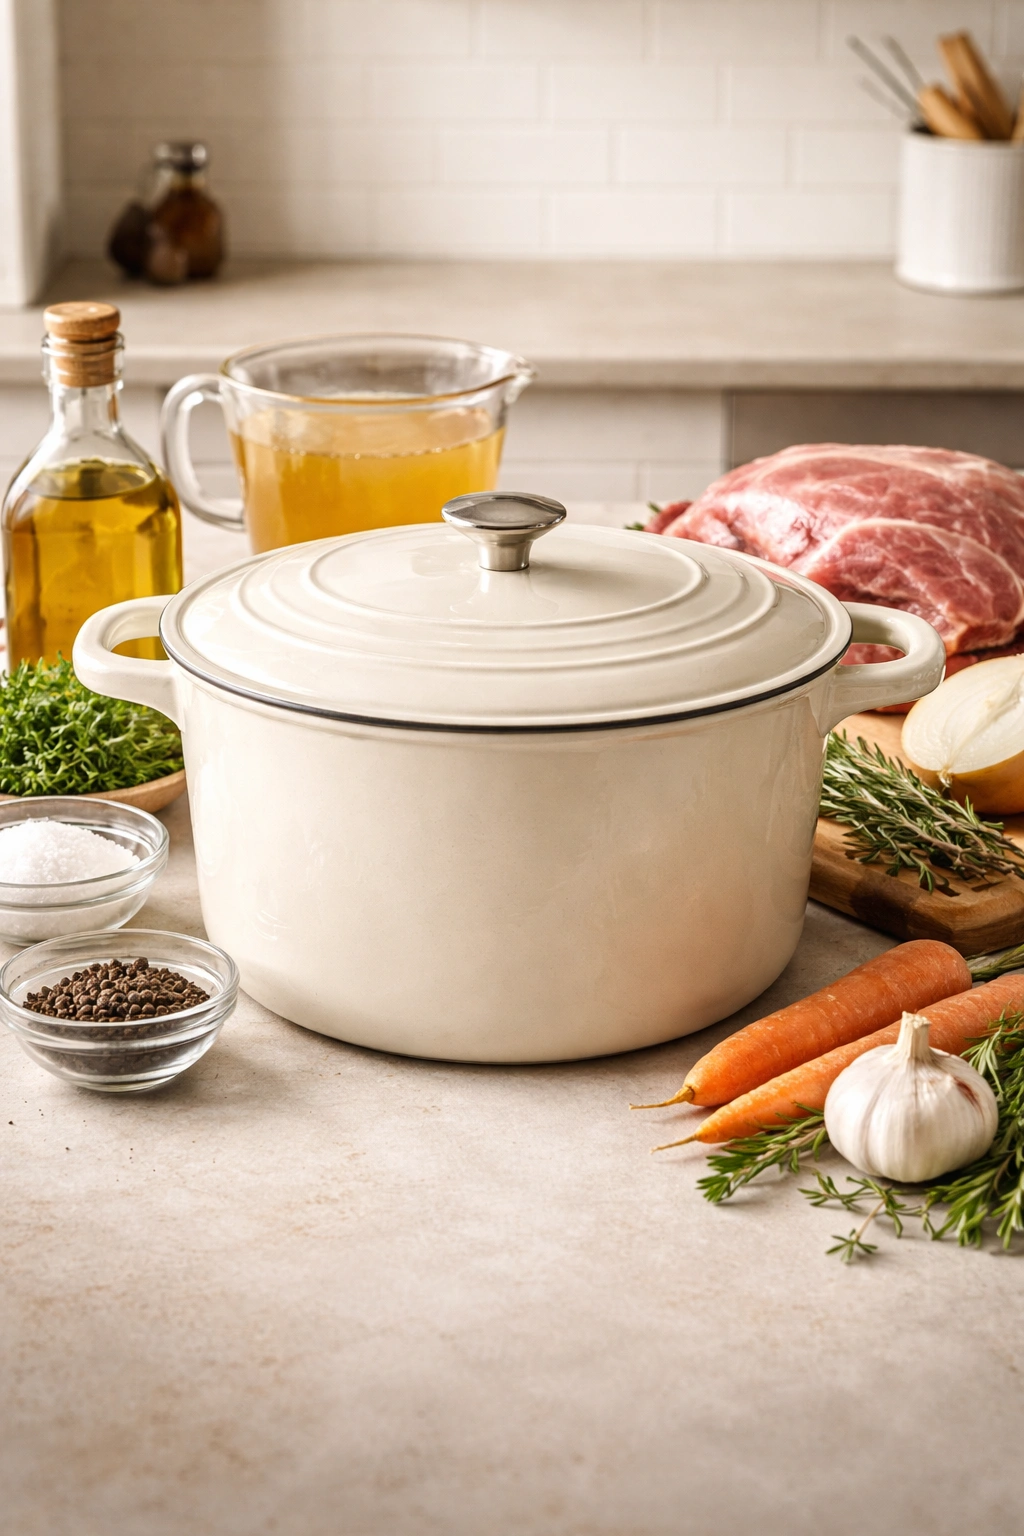
You absolutely need a Dutch oven or similar heavy, covered pot for braising. A Dutch oven’s thick walls heat evenly, its tight-fitting lid traps moisture, and its oven-safe construction means it can move seamlessly from stovetop to oven. Cast iron or enameled cast iron are both excellent; a large, heavy-bottomed pot with a well-fitting lid will work in a pinch, covered with aluminum foil if necessary.
Beyond the Dutch oven, have on hand a sharp chef’s knife for prepping vegetables, paper towels for patting the pork dry before searing, a wooden spoon for stirring and scraping up fond, and an instant-read meat thermometer to gauge doneness. The thermometer is genuinely helpful—pork shoulder reaches its most tender texture around 190-205°F internal temperature, which is well above the safe eating temperature of 145°F.
For the actual braising liquid, you have tremendous flexibility. At minimum, you need salt, pepper, and some form of liquid (broth, wine, cider, or combinations thereof). Most successful versions include aromatics like onions and garlic, herbs like thyme or rosemary, and often an acidic element like wine or apple cider vinegar to brighten the sauce and help tenderize the meat.
The Essential Pork Shoulder Recipe
Yield: Serves 6 | Prep Time: 20 minutes | Cook Time: 2 hours 45 minutes to 3 hours 15 minutes | Total Time: 3 hours 15 minutes to 3 hours 45 minutes | Difficulty: Beginner — The steps are straightforward and forgiving; the oven does most of the work while you relax.
For the Braised Pork:
- 3 to 4 pounds boneless pork shoulder roast, trimmed of excess exterior fat
- 2 teaspoons kosher salt, divided
- 1 teaspoon freshly ground black pepper, divided
- 2 tablespoons extra-virgin olive oil
- 1 large yellow onion, roughly chopped into large chunks
- 4 to 6 cloves fresh garlic, minced or crushed
- 1 large carrot, cut into 1-inch pieces (optional but recommended)
- 2 celery stalks, cut into 1-inch pieces (optional but recommended)
- ½ cup dry white wine, dry apple cider, or additional broth (omit if avoiding alcohol)
- 2 cups low-sodium chicken or vegetable broth
- 2 tablespoons apple cider vinegar or white wine vinegar
- 2 bay leaves
- 4 sprigs fresh thyme, or 1½ teaspoons dried thyme
- 2 sprigs fresh rosemary, or ½ teaspoon dried rosemary
- ½ teaspoon smoked paprika (optional, adds subtle depth)
Prepare the Pan and Preheat:
-
Position the oven rack in the center and preheat the oven to 325°F (165°C). This low, steady temperature is essential for even cooking and prevents the outside of the meat from toughening before the interior becomes tender.
-
Remove the pork shoulder from the refrigerator 30 to 45 minutes before cooking if possible—allowing it to come closer to room temperature ensures more even cooking throughout.
-
Pat the pork completely dry using paper towels. This step is critical; moisture on the surface of the meat will prevent browning. Don’t rush this—use multiple paper towels if needed.
Advertisements -
Sprinkle the pork generously on all sides with 1 teaspoon kosher salt and ½ teaspoon black pepper, distributing the seasoning evenly across the entire surface.
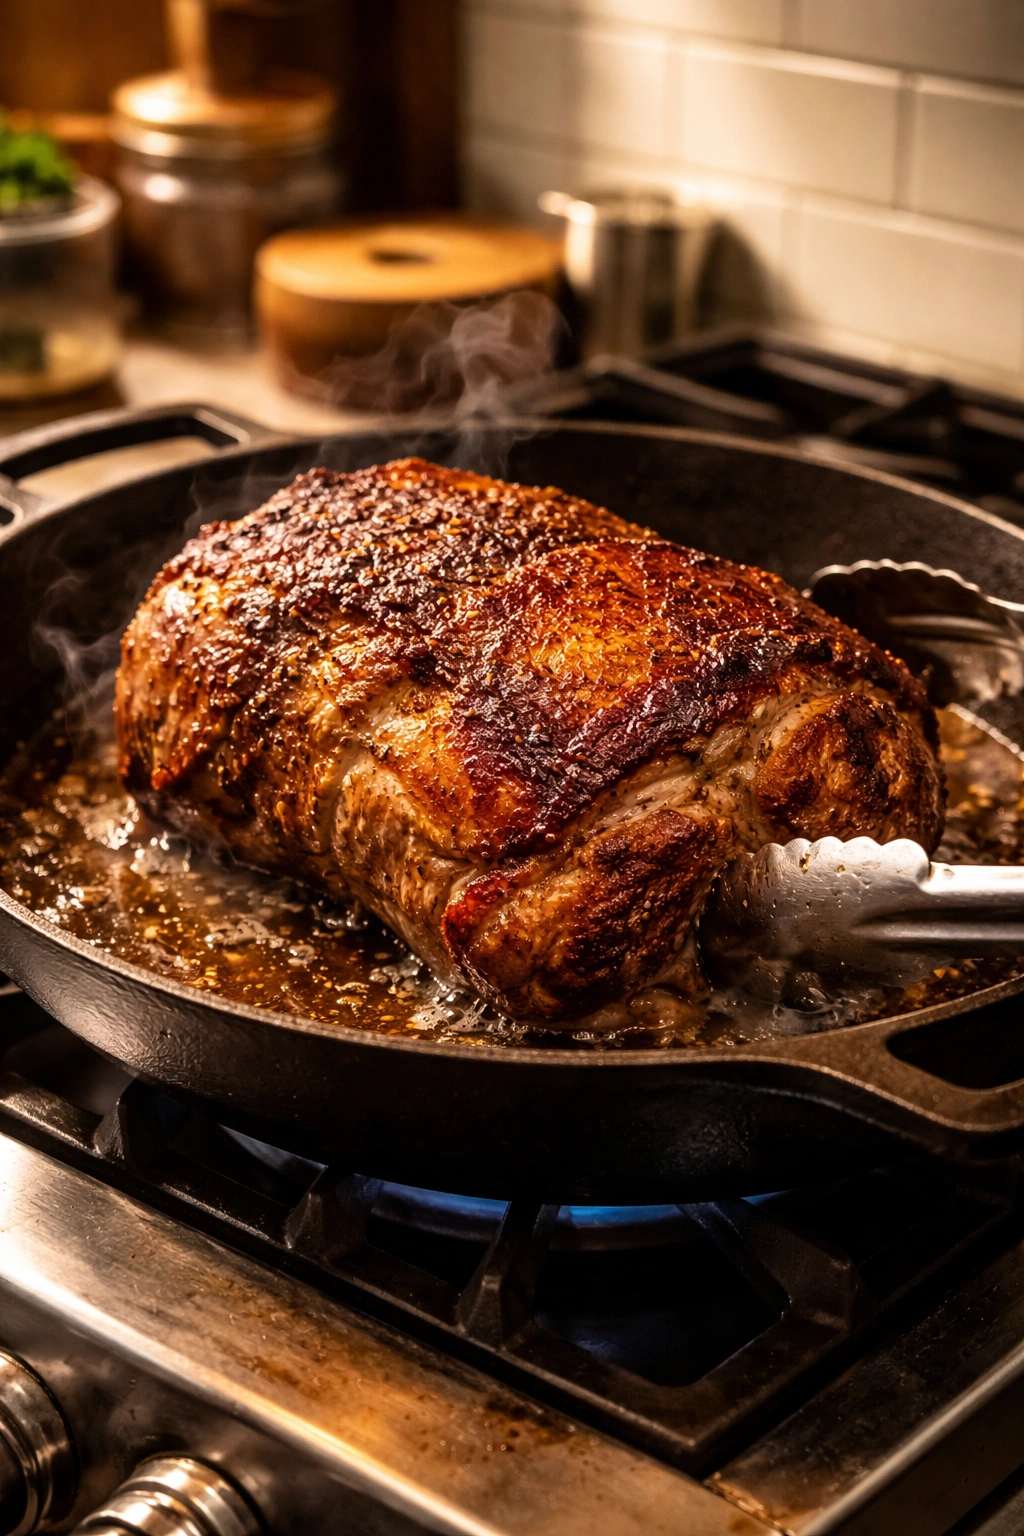
Sear the Pork:
-
Heat the olive oil in your Dutch oven over medium-high heat for 1 to 2 minutes until the oil shimmers and moves easily across the bottom when you tilt the pot. The oil must be hot enough that the pork sizzles immediately when it touches the surface—if it doesn’t, wait another 30 seconds.
-
Carefully place the pork in the pot. It will sizzle vigorously—that’s exactly what you want. Resist the urge to move it for the first 3 to 4 minutes; this undisturbed time allows a flavorful golden-brown crust to develop through the Maillard reaction.
-
Using tongs, flip the pork and sear the second side for another 3 to 4 minutes until it’s deeply browned. The goal is a mahogany-colored crust on at least the top and bottom surfaces—perfect browning on every side is nice but less critical than good browning on major surfaces.
-
Transfer the seared pork to a clean plate and set aside. Don’t be concerned if it releases a bit of liquid; that’s normal and doesn’t indicate a problem.
Build the Braising Liquid:
-
Reduce the heat to medium and add the chopped onion to the same pot. The onion will sizzle in the fat remaining in the bottom—this is perfect. Stir occasionally for 4 to 5 minutes until the onion pieces soften and begin to turn translucent at the edges.
-
Add the minced garlic and stir constantly for 30 to 60 seconds until fragrant. Be careful not to let the garlic brown and turn bitter; you’re looking for an even coating of softened garlic throughout the onions, nothing more.
-
If using carrots and celery, add them now and stir for another 1 to 2 minutes, allowing them to soften slightly and release their flavors.
Advertisements -
Pour in the wine (or additional broth if avoiding alcohol) and use a wooden spoon to scrape the bottom and sides of the pot thoroughly, dislodging every browned bit stuck to the surface. These fond pieces are concentrated flavor—don’t leave any behind. Continue scraping while the liquid bubbles for 1 to 2 minutes until the wine reduces by about half, concentrating its flavor.
-
Add the broth, vinegar, bay leaves, thyme, rosemary, and paprika. Stir to combine and bring the liquid to a gentle boil, which should take 2 to 3 minutes.
-
Return the browned pork shoulder to the pot, positioning it so the liquid comes about halfway up the sides of the meat. The pork doesn’t need to be completely submerged, but it should be at least half-covered by liquid to braise effectively.
Braise in the Oven:
-
Cover the Dutch oven with its lid and carefully transfer it to the preheated 325°F oven. Set a timer for 2 hours.
-
After 2 hours, carefully open the oven (the steam will be very hot), use tongs to flip the pork over to the other side, and return the pot to the oven. This flip ensures even cooking and allows the upper surface to absorb the braising liquid.
-
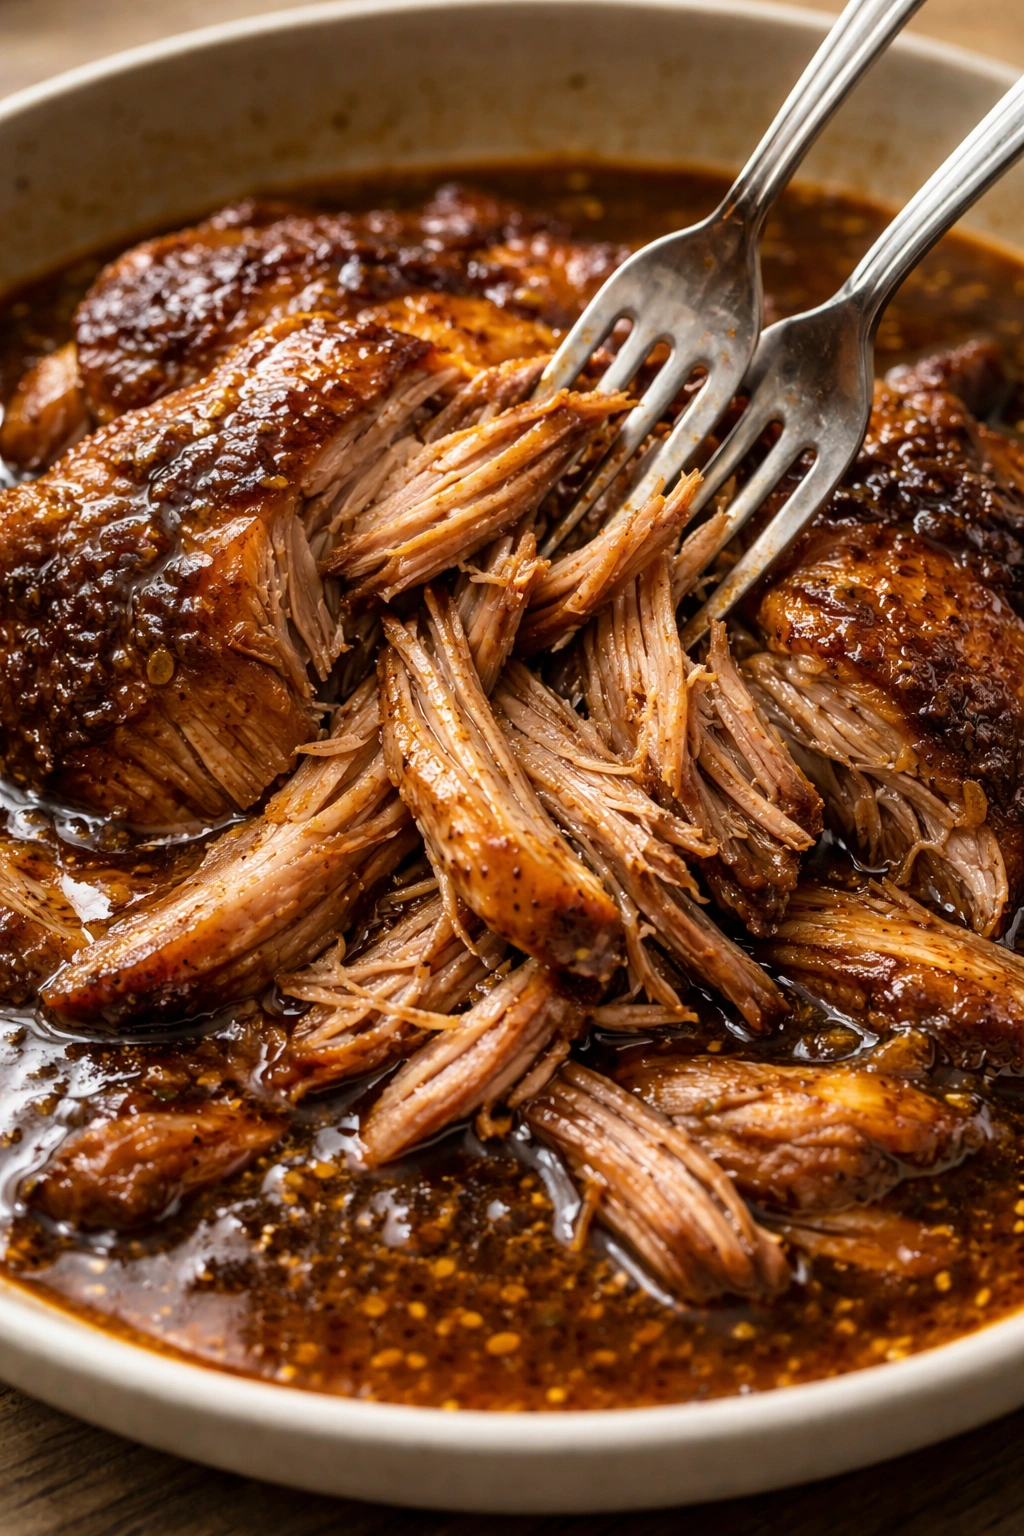
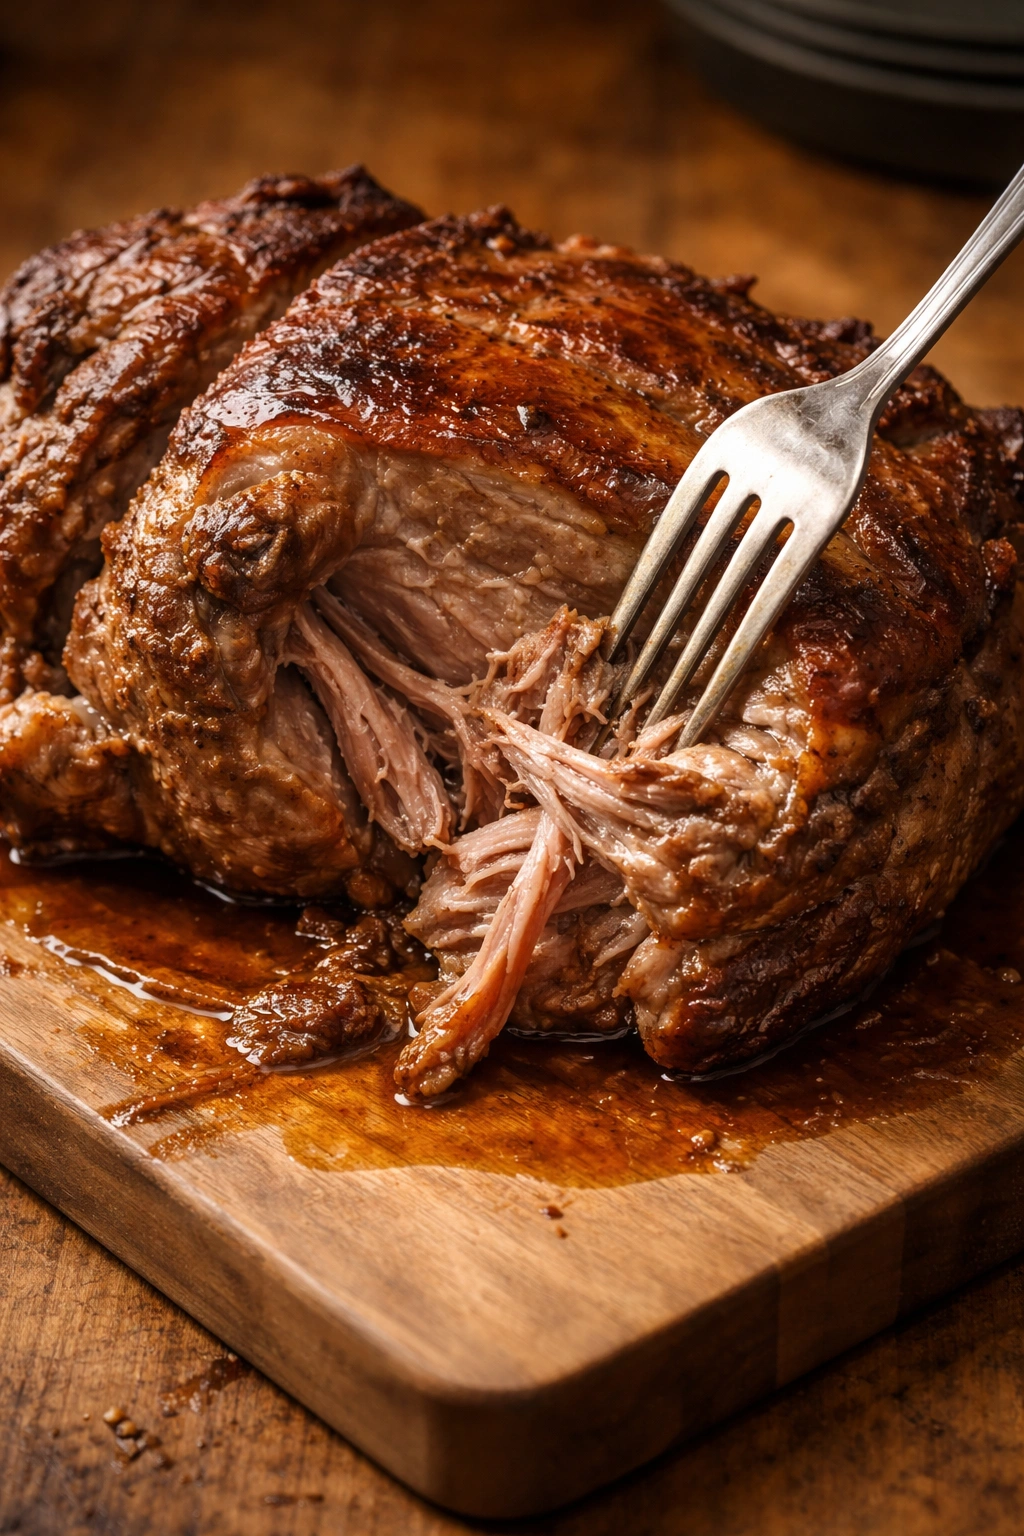
Set the timer for another 45 minutes to 1 hour. The pork is finished when it reaches an internal temperature of 190°F (88°C) to 200°F (93°C) measured in the thickest part, and when it pulls apart easily with a fork—the meat should shred apart with very gentle pressure. The exact timing depends on the size and shape of your pork shoulder; start checking at the 45-minute mark.
Rest and Serve:
-
Carefully remove the hot Dutch oven from the oven and let it sit undisturbed for 10 to 15 minutes. This resting period allows the meat’s juices to redistribute throughout, ensuring it stays moist when you cut or shred it.
-
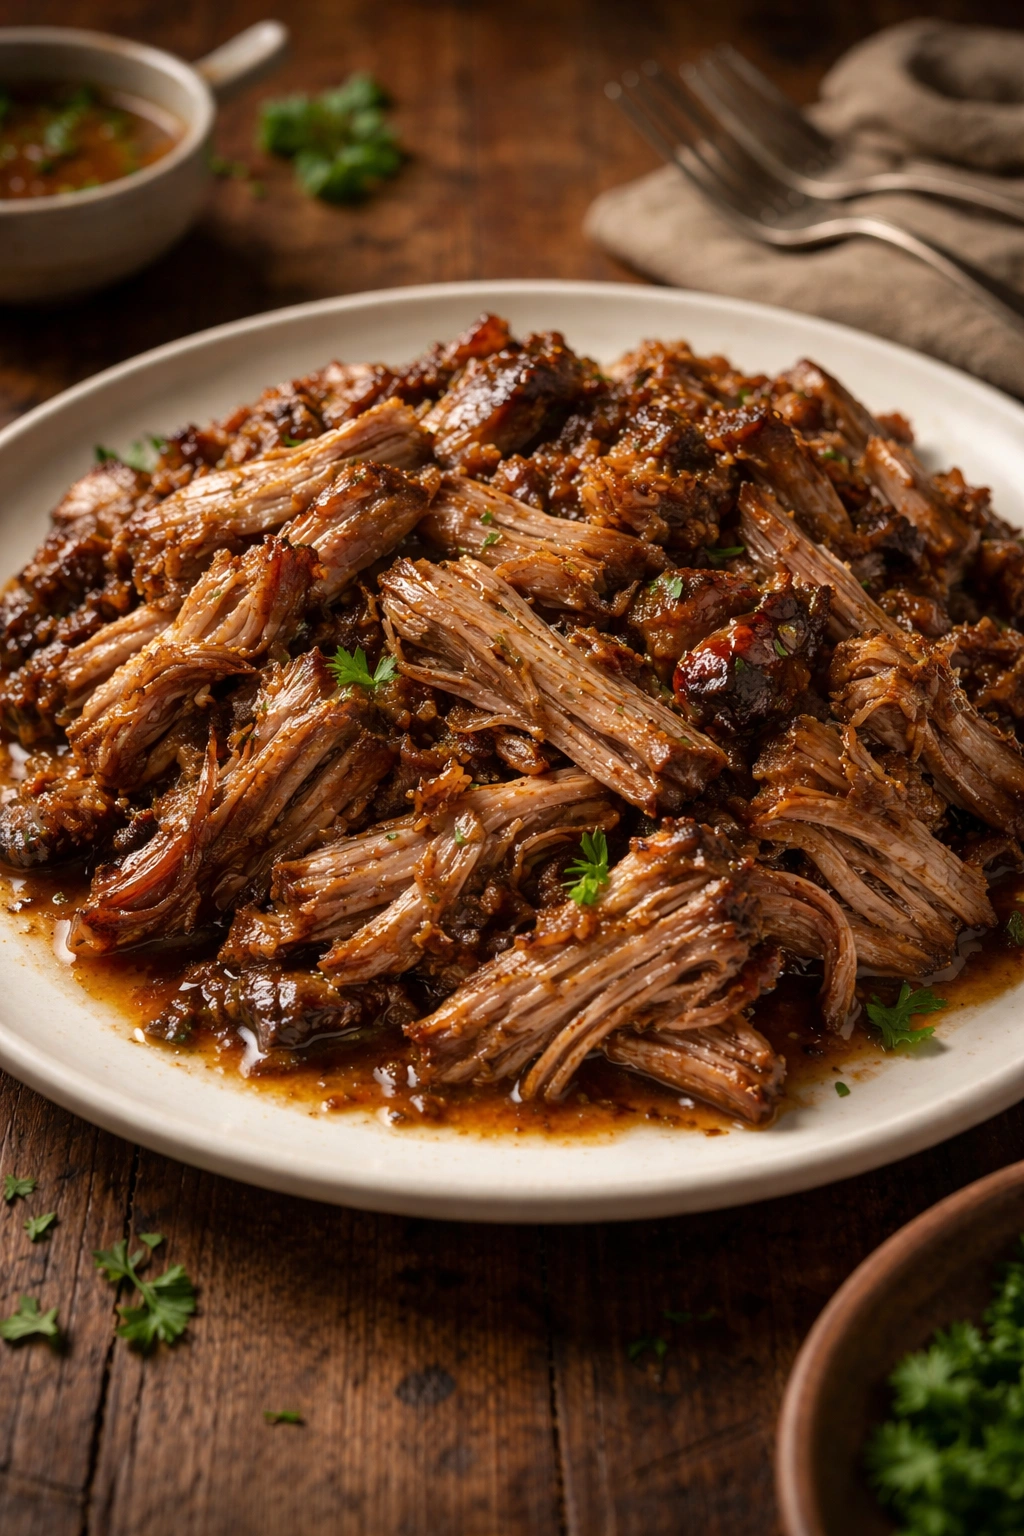
Using tongs and a slotted spoon, carefully transfer the pork to a cutting board or serving platter. Don’t worry if it falls apart slightly during transfer—this actually indicates perfect doneness.
Advertisements -
Strain the braising liquid through a fine-mesh sieve into a bowl, pushing the softened vegetables through if you’d like them incorporated into the sauce (or remove them for a cleaner presentation). Skim off any visible fat from the surface if you prefer a lighter sauce, or leave it for additional richness and mouthfeel.
-
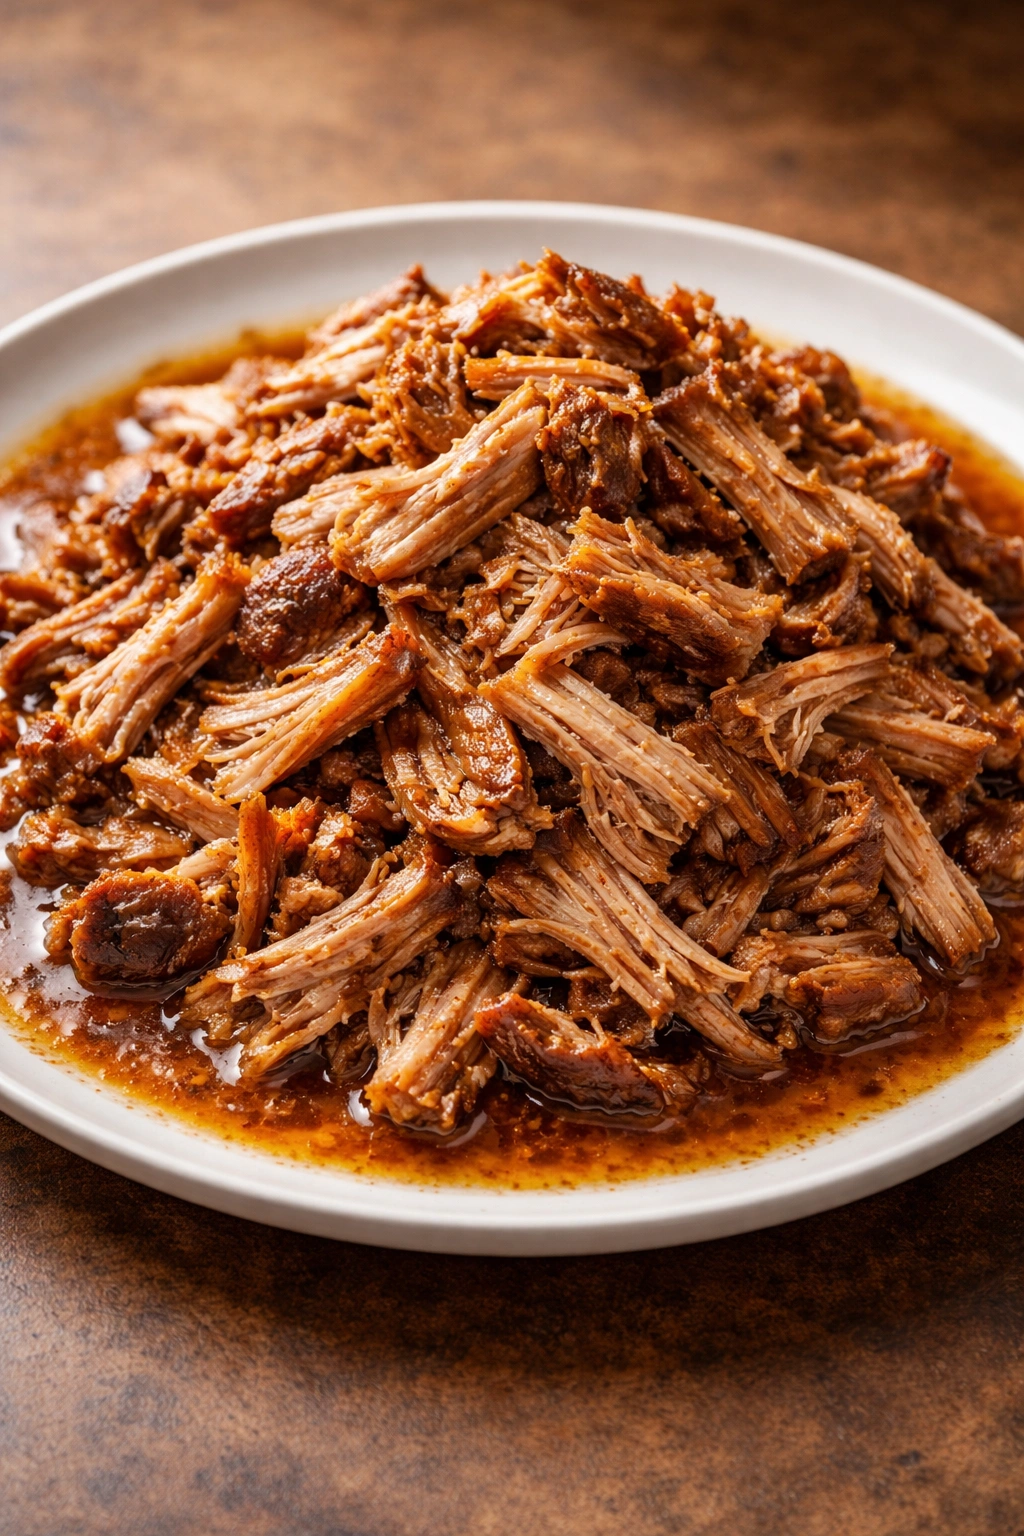
Slice, shred, or chop the pork into your desired portion sizes and arrange it on a serving platter. Spoon the warm braising liquid generously over the top. The sauce should be flavorful and slightly rich from the rendered pork fat and gelatin from the collagen breakdown.
The Science Behind Perfect Tenderness
Achieving that signature fall-apart texture comes down to understanding what’s happening at the cellular level. Pork shoulder contains a high percentage of connective tissue made primarily of collagen. Raw collagen is tough and chewy, making the meat difficult to eat. When exposed to moist heat between 160°F (71°C) and 210°F (99°C) for extended periods, collagen gradually converts into gelatin—a soft, almost melting substance that gives braised meat its characteristic tender, succulent quality.
This conversion doesn’t happen instantly; it requires time. That’s why low-and-slow cooking trumps high-heat roasting for this cut. A pork shoulder roasted at 425°F might be done in 90 minutes, but the meat will be tough and dry because the collagen hasn’t had time to break down. Braising at 325°F for 3 hours allows the collagen to convert completely, yielding meat that practically melts in your mouth.
The surrounding braising liquid serves multiple purposes beyond just preventing drying. It maintains a gentle cooking environment where meat proteins cook through without seizing up and contracting excessively. The liquid also extracts flavors from the meat itself, creating a sauce that’s essentially pork-infused stock—incredibly rich and satisfying.
Pro Techniques That Make a Difference
The sear is non-negotiable. Don’t skip this step or rush through it. A proper sear takes 3 to 4 minutes per side minimum. The browned crust that forms (through the Maillard reaction) contains hundreds of complex flavor compounds that don’t exist in unseared meat. The difference between a properly seared shoulder and an unseared one is the difference between a deeply flavorful braise and one that tastes flat and one-dimensional.
Pat the meat completely dry before searing. Even a thin layer of moisture prevents browning and creates steam instead of crust. This is the single easiest way to ensure success.
Don’t overcrowd the pot with vegetables. The aromatics are there to flavor the braising liquid and sauce, not to be a major component of the dish. Roughly chop them large; they’ll soften significantly during cooking, and you can strain them out or leave them in depending on your preference.
Keep the oven temperature low and stable. Higher temperatures like 375°F might seem like they’d save time, but they actually make the problem worse. The exterior of the meat cooks faster than the interior, the proteins contract more aggressively, and the meat ends up tougher. Resist the temptation to increase the temperature.
Flip the pork halfway through. This simple step ensures even cooking and even absorption of the braising liquid. It adds less than 30 seconds of active time and makes a noticeable difference in the final texture.
Use an instant-read meat thermometer. Guessing when the pork is done leads to either underdone meat or overcooked meat. Pork shoulder reaches the sweet spot for texture and food safety around 190-200°F. Below that, it may still be tough; above that, it becomes increasingly stringy and starts losing moisture.
Variations and Flavor Adaptations
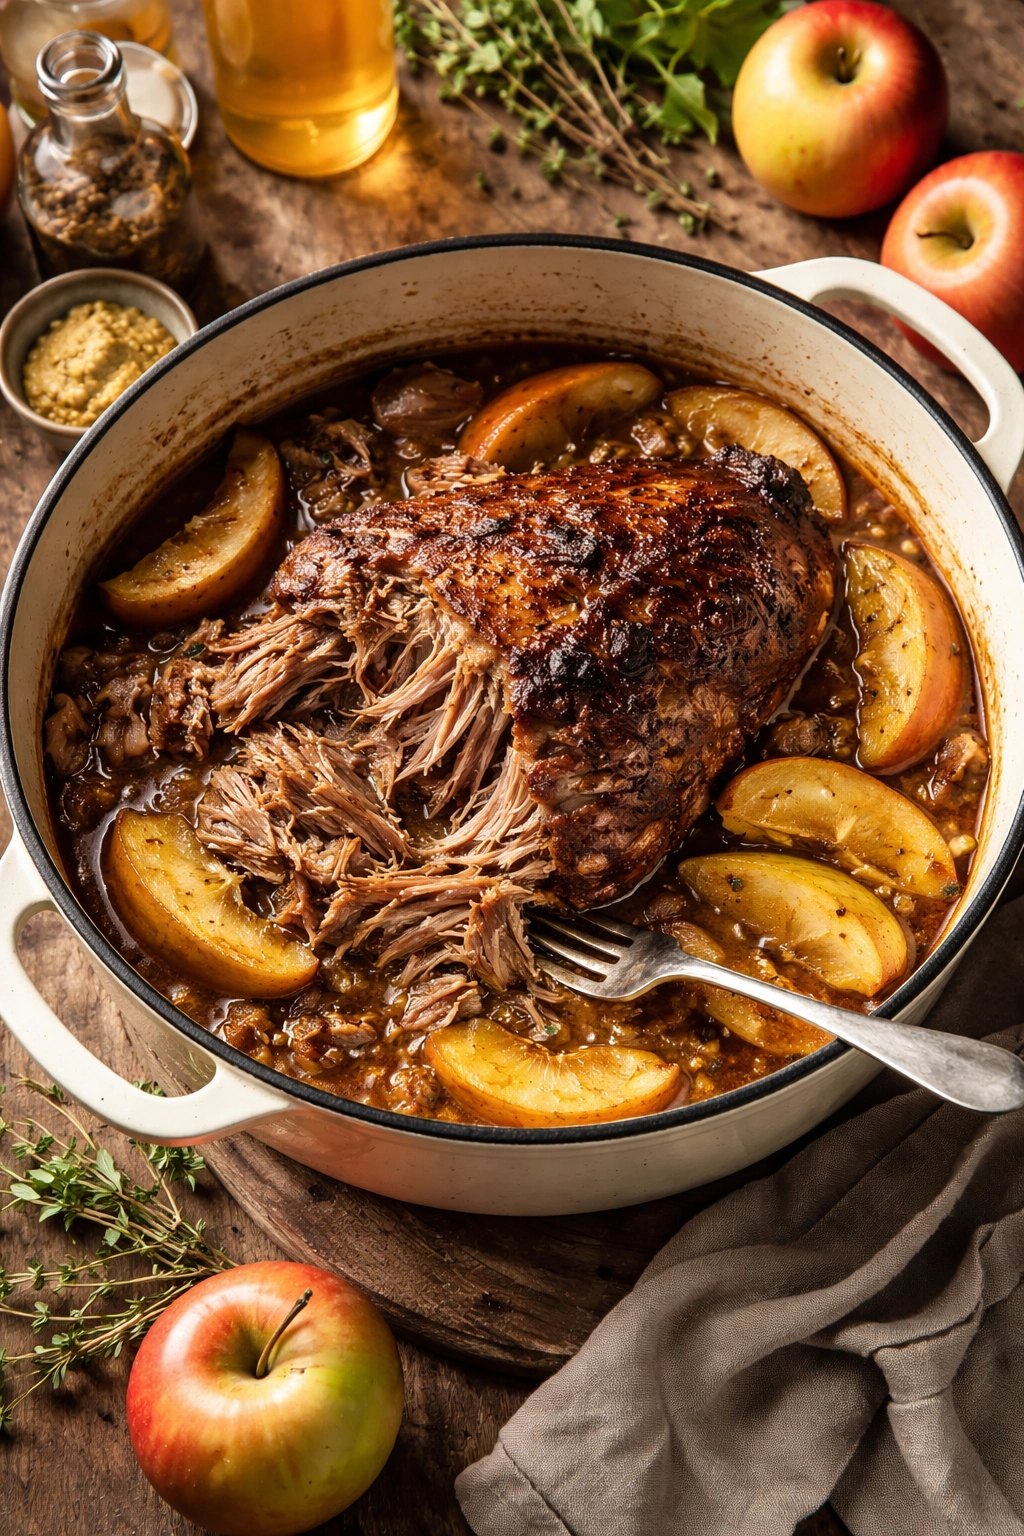
The basic braised pork shoulder recipe is endlessly adaptable. For an apple cider version, substitute half the broth with unfiltered apple cider and add 2 tart apples (like Granny Smith), cored and quartered, for the last 30 minutes of cooking. The apples become tender and sweet while the cider adds complexity and a subtle sweetness that balances the rich meat.
For a wine-forward braise, increase the wine to 1 cup and reduce the broth accordingly. A dry white wine (Sauvignon Blanc or Pinot Grigio) works beautifully and adds acidity that brightens the sauce. A dry red wine creates a darker, earthier sauce that pairs wonderfully with mushrooms and root vegetables added during the last hour of cooking.
For a Tuscan-inspired version, use red wine as your primary liquid, add 1 can of diced tomatoes, increase the herbs (especially rosemary), and consider adding 1 tablespoon of tomato paste during the aromatics phase to deepen the sauce. Finish with a squeeze of fresh lemon juice just before serving.
For a spicy variation, add ½ to 1 teaspoon of red pepper flakes to the braising liquid, or use chipotles in adobo sauce blended into the liquid. The gentle heat plays beautifully against the rich, savory meat.
For a beer braise, substitute 1 cup of the broth with a dark ale or porter. The malty, slightly bitter notes add complexity that pairs exceptionally well with mustard and smoked paprika.
For vegetables roasted directly in the braise, add 1-pound of cubed potatoes, carrots, and parsnips for the last 45 minutes to 1 hour of cooking. These root vegetables become incredibly tender and absorb the braising liquid, turning the dish into a complete one-pot meal. Add them earlier if you prefer them more broken down; add them later if you prefer them with more structure.
Common Mistakes and How to Avoid Them
The most frequent mistake is rushing the browning step or not browning the pork at all. Home cooks often want to get to the “slow cooking” part quickly, but those first 10 minutes of searing are what separate good braises from exceptional ones. Commit to proper browning.
Another common error is too-high oven temperature. Even 350°F is noticeably hotter than ideal and can result in tougher meat. 325°F is the sweet spot for braising pork shoulder. If your oven runs hot, verify the actual temperature with an oven thermometer.
Overcooking is less common than undercooking, but it’s possible. If the pork reaches 200°F and is fork-tender, it’s done. Continuing to cook it indefinitely doesn’t improve it; the meat just becomes increasingly stringy and loses moisture. A meat thermometer prevents this entirely.
Some people make the braising liquid too salty, which makes the finished dish inedible. Season conservatively, knowing that the liquid will reduce and concentrate during cooking. It’s always easier to add salt at the end than to remove it.
Storage, Make-Ahead Preparation, and Reheating
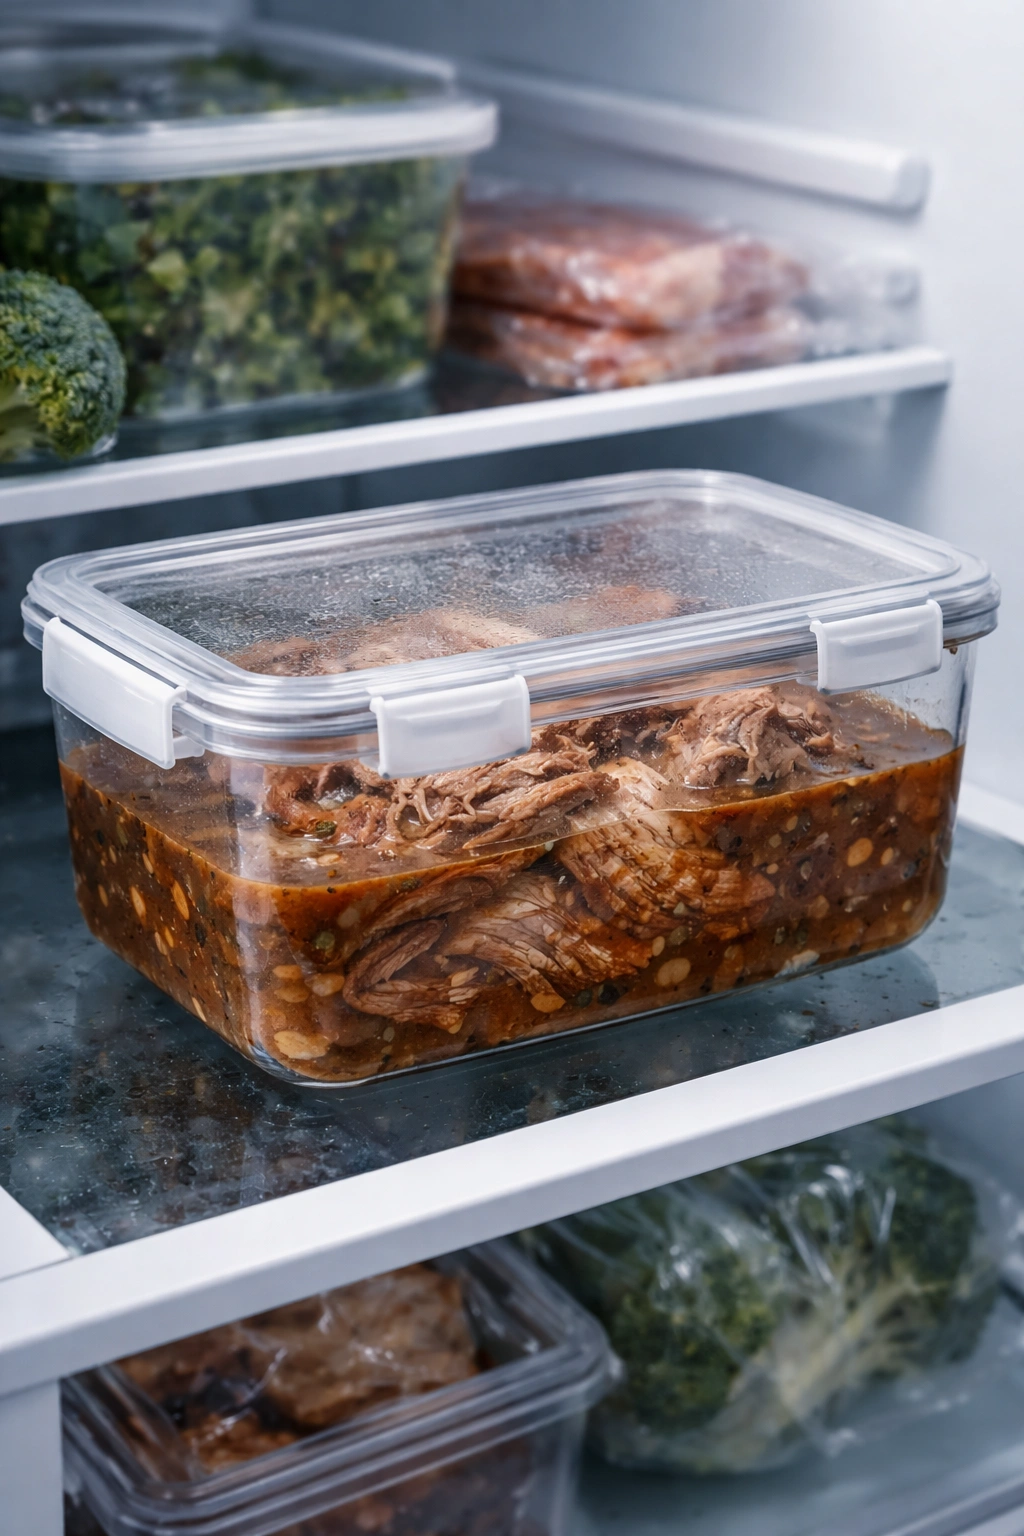
Braised pork shoulder is genuinely better the next day after the flavors have melded together overnight. Store it in an airtight container with the braising liquid covering the meat—the liquid protects it from oxidation and keeps it moist. It keeps in the refrigerator for up to 5 days.
For freezing, the dish is equally reliable. Store it in a freezer-safe container or a zip-top bag (remove as much air as possible) with enough braising liquid to keep the meat moist. It freezes beautifully for up to 3 months. Thaw overnight in the refrigerator before reheating.
To reheat, place the pork in a covered Dutch oven or skillet with the braising liquid and warm it gently in a 325°F oven for 15 to 20 minutes, or on the stovetop over low heat for 10 to 15 minutes, stirring occasionally. The low temperature prevents drying out. If the sauce seems thin after thawing, place it in a saucepan over medium-high heat and simmer uncovered for 5 to 10 minutes until it reduces and thickens slightly.
The entire recipe can be prepared through the searing and braising liquid preparation the day before. Cover and refrigerate, then bring the pork back to room temperature for 30 minutes before putting it in the oven. Adding an extra 15 minutes to the total cooking time accommodates the colder starting temperature.
Serving Suggestions and Perfect Pairings
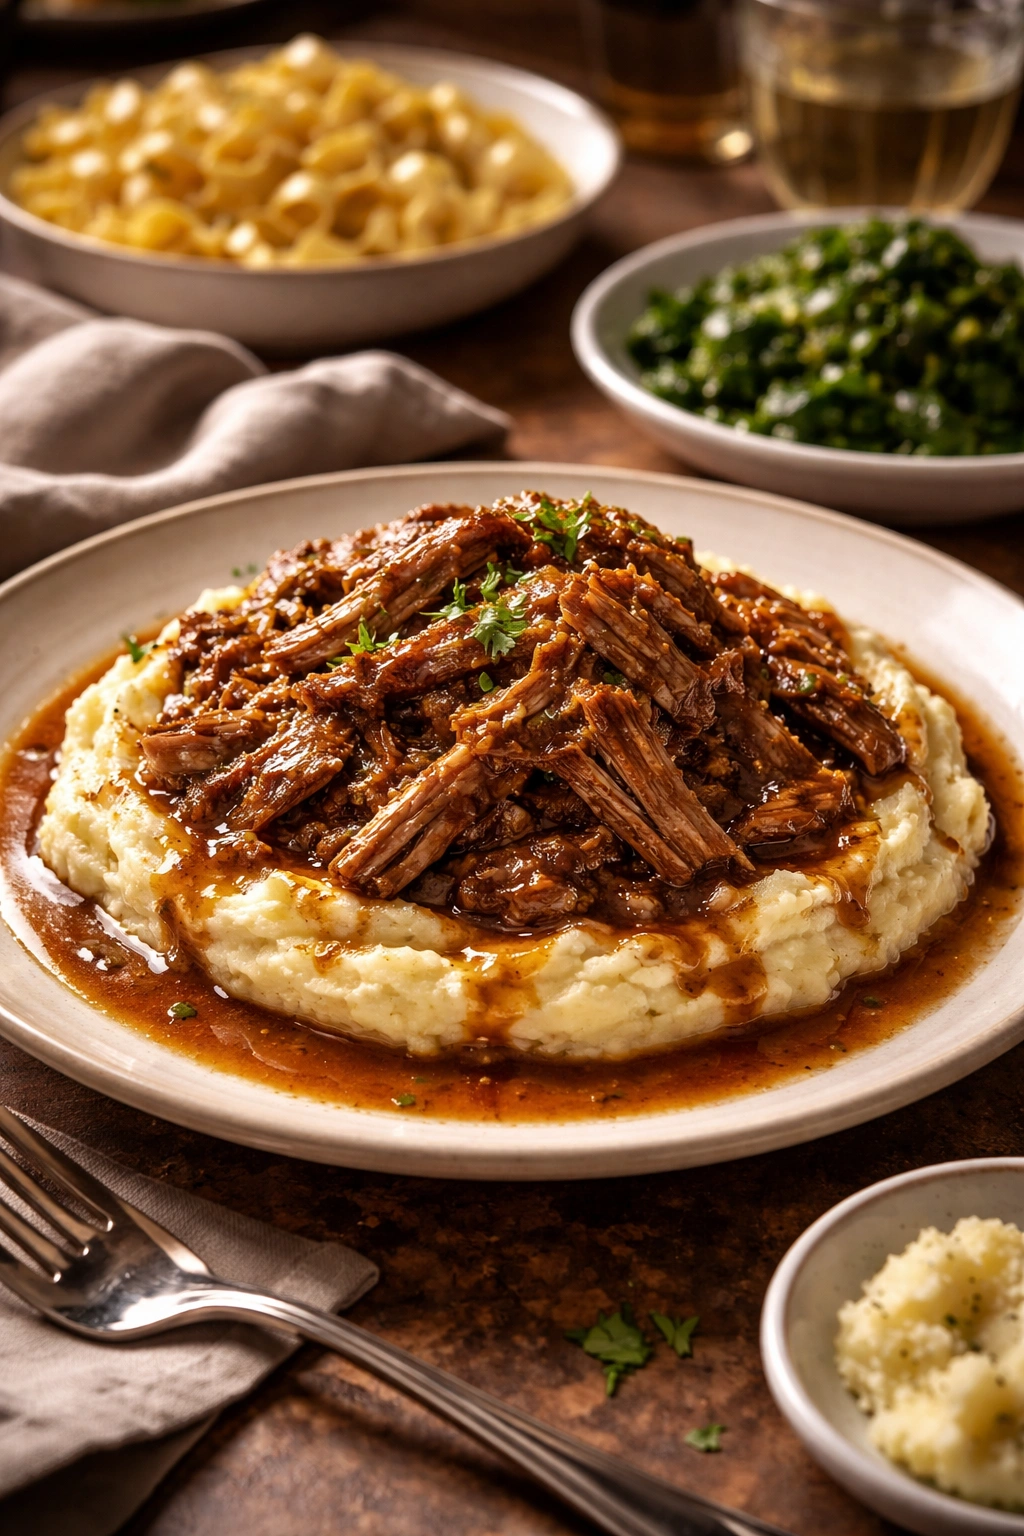
This pork shoulder is so tender and flavorful that it shines as the main component of a meal, but it benefits enormously from thoughtful sides. Creamy mashed potatoes are the classic pairing—the rich, buttery starch soaks up the braising liquid beautifully and provides a neutral canvas that lets the pork flavor shine.
Egg noodles or buttered egg pasta work similarly well, especially when the braising liquid is spooned over them generously. The sauce clings to the noodles and creates a restaurant-quality presentation.
Roasted root vegetables—carrots, parsnips, sweet potatoes, and regular potatoes roasted until caramelized—echo the sweetness of the apple cider if you used it and add color and textural contrast.
Polenta is an excellent option if you want something different. Creamy polenta, spooned onto a plate and topped with the shredded pork and sauce, creates an elegant presentation perfect for dinner guests.
Crusty bread is essential for soaking up every last drop of that incredible sauce. A good crusty bread with a chewy interior is more useful than any side dish.
Green vegetables like sautéed green beans with garlic, roasted broccoli, or a simple arugula salad add brightness and cut through the richness of the pork, keeping the meal balanced.
For drinks, a medium-bodied red wine pairs beautifully (Pinot Noir, Sangiovese, or even a lighter Syrah). If you braised with white wine, serve that same wine with dinner.
Frequently Asked Questions

Can I Make This in a Slow Cooker?
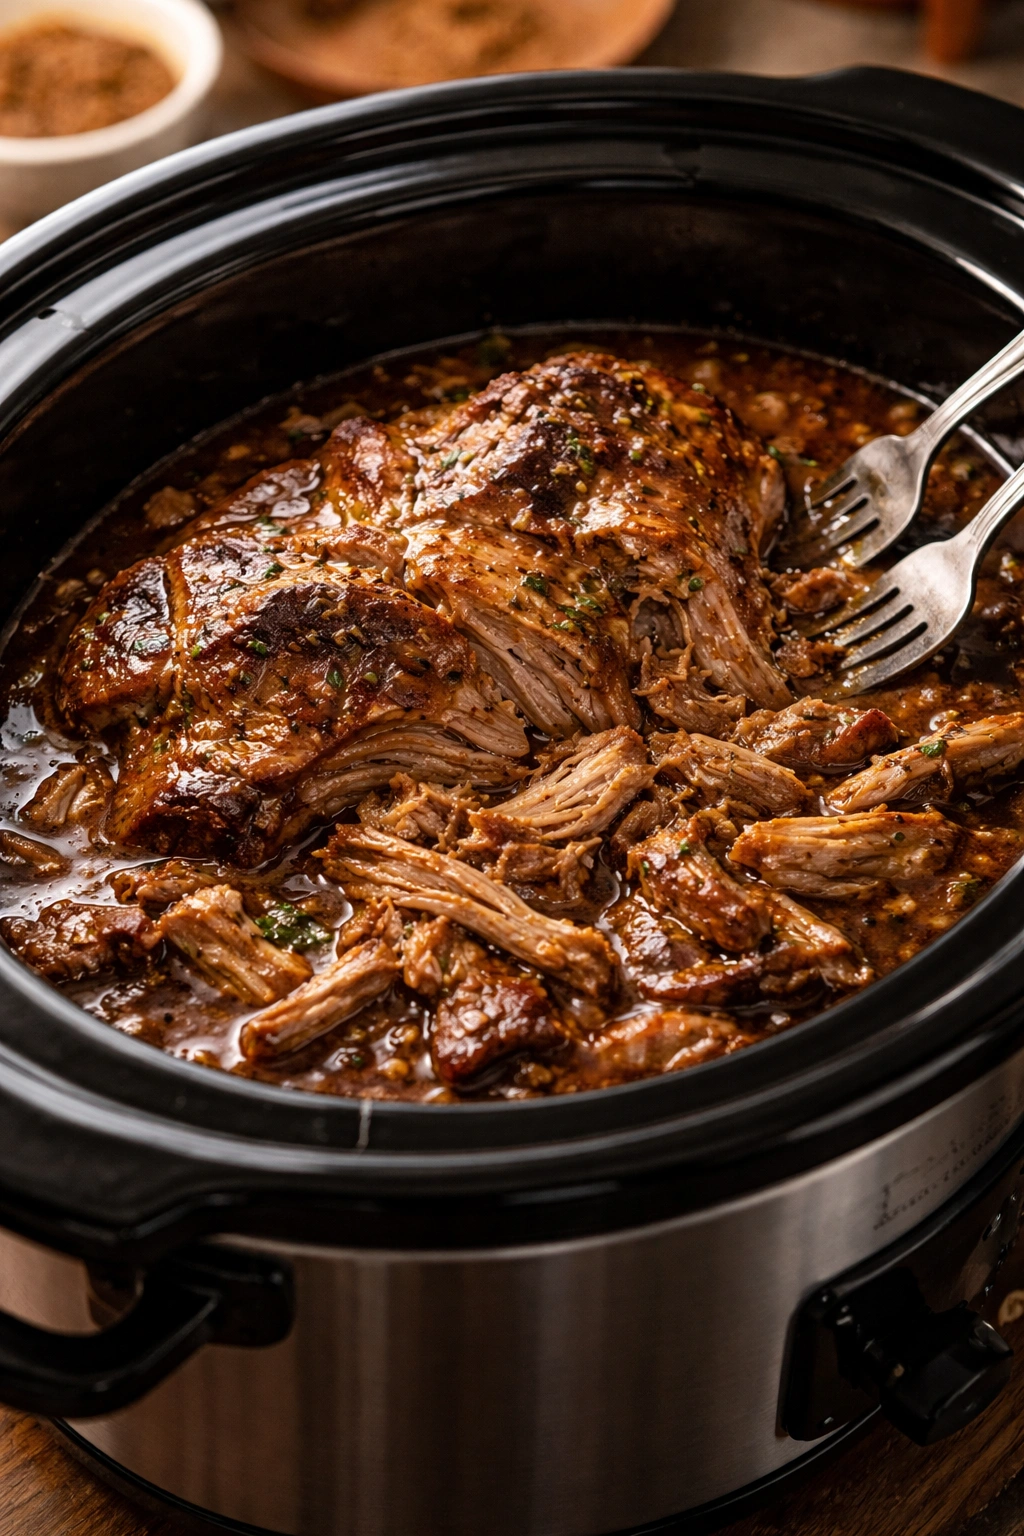
Absolutely. The challenge is that slow cookers don’t brown meat effectively, so you need to sear the pork separately in a skillet before transferring it to the slow cooker with the braising liquid and aromatics. Once everything is in the slow cooker, cook on low for 8 to 10 hours or on high for 4 to 5 hours. The meat should shred easily with a fork when done. The advantage is hands-off cooking; the disadvantage is slightly less concentrated sauce flavor compared to oven braising.
What If I Only Have Bone-In Pork Shoulder?
Bone-in shoulders work beautifully and actually add extra flavor to the braising liquid through the bone marrow and cartilage. Use a 5 to 6-pound bone-in shoulder to account for the bone weight. Increase the cooking time by 30 to 45 minutes since there’s more total mass to cook through. Everything else remains the same.
Can I Reduce the Cooking Time?
Not really, if you want that tender, fall-apart texture. Attempting to speed up the process by increasing temperature results in tougher meat. If you’re truly short on time, the slow cooker method on high heat reduces it to 4 to 5 hours, though the oven method genuinely produces superior results.
How Much Meat Will I Have After Cooking?
Pork shoulder loses about 25-30% of its weight during braising as fat and water render out. A 3.5-pound raw pork shoulder yields approximately 2.5 pounds of cooked meat. Account for this when planning quantities for your guests.
What If My Pork Isn’t Falling Apart at the Time I Expected?
Continue cooking. Every pork shoulder is slightly different in terms of fiber structure and fat distribution. If it’s not yet fork-tender at the expected time, cover it and return it to the oven for another 30 minutes. Check it again. Patience is genuinely rewarded here.
Can I Make Multiple Shoulders at Once?
Yes, multiple shoulders can braise together in a large Dutch oven or a standard oven-safe roasting pan if you have enough braising liquid. Make sure they’re not stacked directly on top of each other; they should have space for the liquid to circulate around them. The cooking time remains similar as long as the liquid maintains that gentle simmer.
Why Did My Sauce Turn Out Thin?
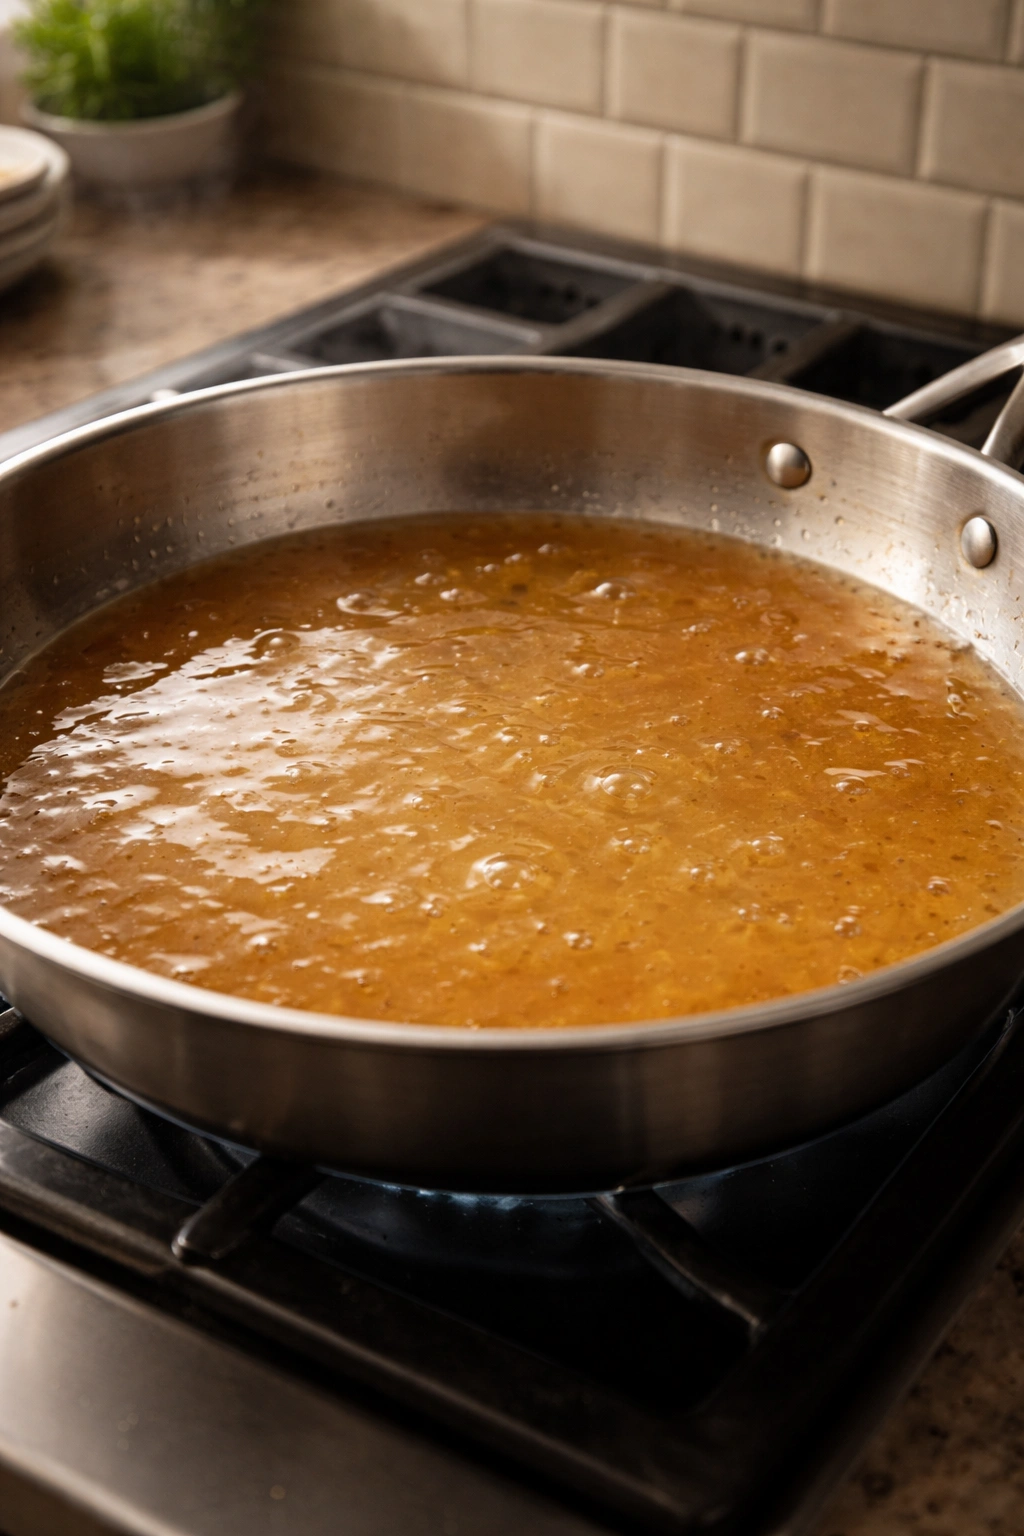
The braising liquid is typically thin by design—it’s meant to be a light sauce, not a gravy. If you prefer it thicker, remove the cooked pork and vegetables, strain the liquid into a saucepan, and simmer it over medium-high heat uncovered until reduced by 25-50%, concentrating the flavors and thickening it slightly. Alternatively, mix 1 tablespoon of cornstarch with 2 tablespoons of cold water, whisk it into the simmering liquid, and cook for 1 to 2 minutes until thickened.
Final Thoughts
Braised pork shoulder is one of those rare dishes that looks impressive and tastes restaurant-quality yet requires minimal skill and maximum reward. The technique is forgiving—short of major mistakes like using extremely hot heat or forgetting to sear the meat, this recipe nearly always succeeds. The pork shoulder’s natural characteristics work in your favor; it’s nearly impossible to truly ruin if you follow the basic principles of low temperature, moist heat, and adequate time.
What makes this dish truly special is that it transforms an inexpensive, humble cut into something that tastes expensive and special. That transformation—from tough to tender, from ordinary to extraordinary—is what cooking is really about. Whether you’re feeding a crowd at a holiday gathering or meal-prepping for the week ahead, braised pork shoulder delivers consistent, reliable, deeply satisfying results that’ll have everyone asking for seconds and requesting the recipe.