Getting kids to eat something genuinely nutritious without a battle is one of parenting’s great victories. Chicken tenders check all the boxes—they’re lean protein, relatively quick to prepare, and something most children will actually put in their mouths without protest. But here’s the thing: the same breaded tenders night after night get boring fast, and boredom at the dinner table often leads to those “I’m not hungry” conversations that test every parent’s patience.
The secret isn’t inventing entirely new dishes. Kids love chicken tenders because of the texture and familiarity. What works is taking that trusted format and dressing it up with different seasonings, glazes, and dipping sauces that feel fresh and exciting without requiring a completely different cooking technique. You’re not asking them to eat something unfamiliar—you’re just changing the flavor profile while keeping the comforting structure exactly the same.
The recipes below aren’t fancy or difficult. They’re designed to come together in 30 minutes or less, use ingredients you likely have on hand, and convert even skeptical eaters into fans. Each one hits a different flavor note, so you can rotate through them depending on what sounds appealing, what’s in your pantry, and what kind of side dishes you’re planning. Some are sweet, some are savory, some are tangy—but all of them have one thing in common: kids genuinely love them.
1. Honey Garlic Chicken Tenders

Honey garlic is one of those flavor combinations that makes kids light up without them realizing how much actual nutrition they’re consuming. The sweetness of honey appeals to younger palates while the garlic adds depth that older kids appreciate, and the combination caramelizes slightly in the oven creating an irresistible glaze.
Why This Recipe Works for Picky Eaters
The magic here is that you’re coating the chicken in a glaze rather than a heavy breading, which means the tenders stay moist and tender on the inside while developing a slightly sticky, golden exterior. Kids don’t feel like they’re eating something “healthy”—they experience it as a sweet, garlicky treat. The glaze also makes the tenders naturally adherent, so they stay moist even if they sit for a few minutes before being eaten, which is realistic in a busy household.
What You’ll Need
- 1.5 pounds boneless, skinless chicken breasts, cut into tender-sized strips (about 3 inches long)
- 3 tablespoons honey
- 4 cloves garlic, minced very fine (or 1 teaspoon garlic powder for less texture)
- 2 tablespoons soy sauce or tamari
- 1 tablespoon olive oil
- 1 teaspoon cornstarch mixed with 1 tablespoon water
- Salt and pepper to taste
- Optional: 1 teaspoon ginger powder for extra warmth
Mix the honey, minced garlic, soy sauce, and olive oil in a bowl. Arrange chicken tenders on a parchment-lined baking sheet, brush generously with the glaze on all sides, then bake at 400°F for 15-18 minutes until cooked through. In the last 2 minutes, brush with an additional glaze layer. The cornstarch slurry can be stirred into leftover glaze and drizzled over the finished tenders for an even glossier finish.
Pro Tip
Make extra glaze and serve it in a small bowl for dipping. Kids love having control over how much sauce they want on each bite, and dipping sauces always feel more special than something already coating the food.
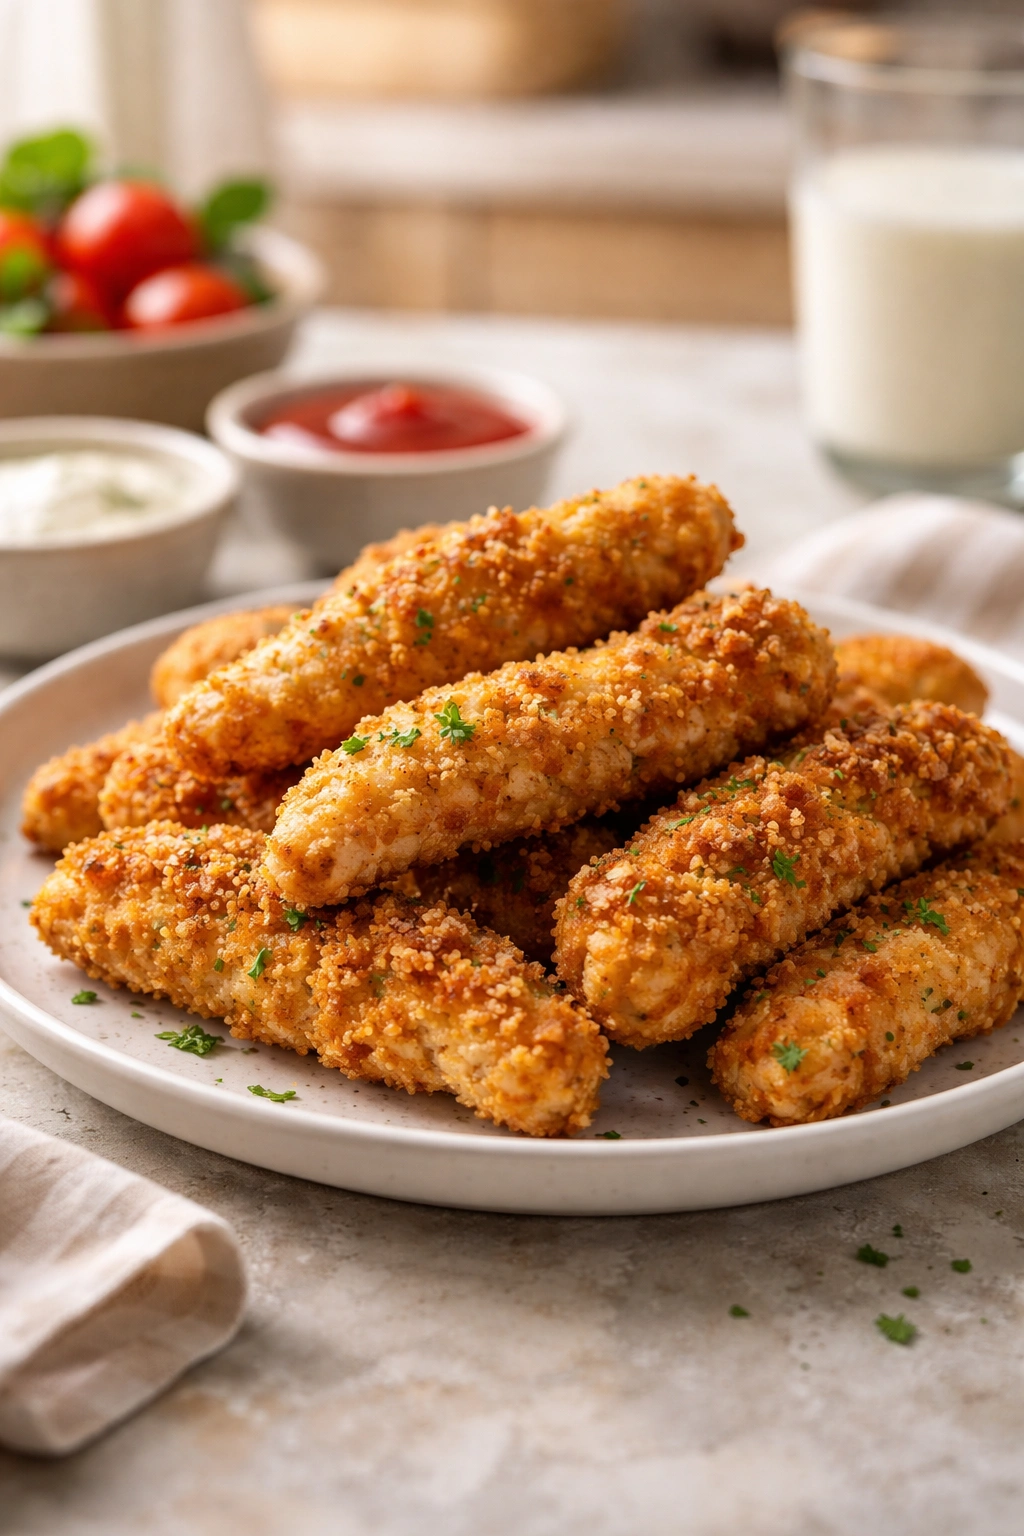
2. Crispy Parmesan Crusted Chicken Tenders
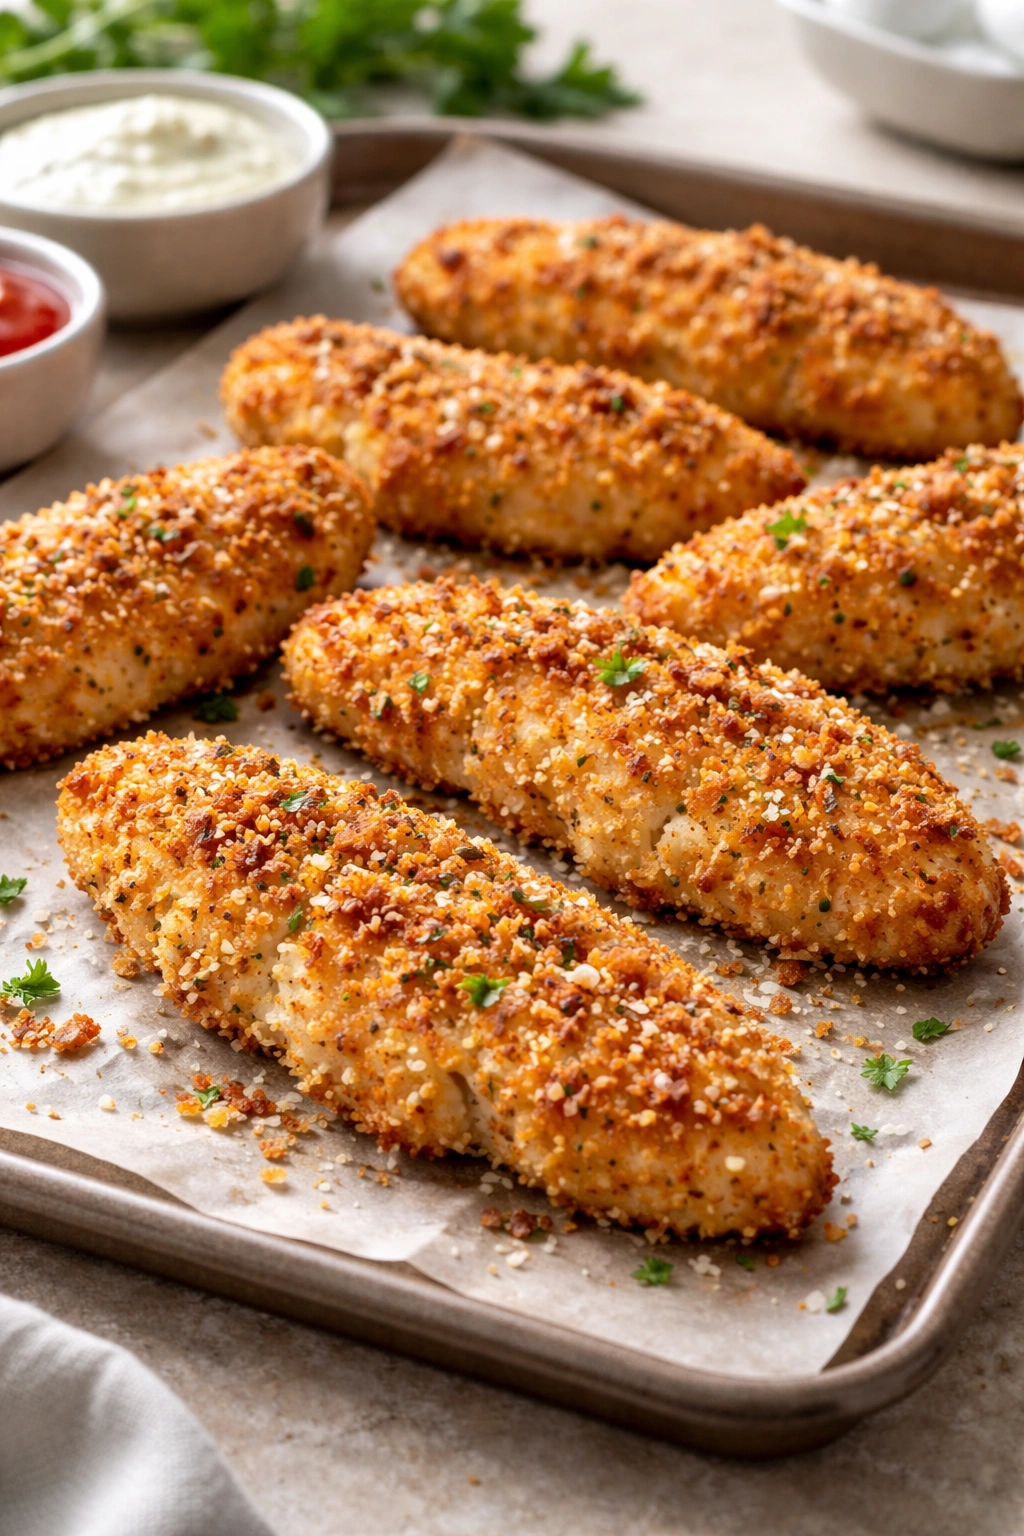
Parmesan adds a savory, umami punch that kids recognize as “cheese,” which immediately makes something more appealing. Combined with panko breadcrumbs and a touch of Italian seasoning, you get tenders that are crunchy on the outside and juicy inside—the textural contrast that makes kids actually excited to eat chicken.
Why Kids Request This One Repeatedly
There’s something about the combination of cheese and breadcrumbs that feels like a snack rather than a “healthy dinner,” even though chicken breast is leaner protein than most of what kids would choose. The parmesan gets slightly crispy in the oven, creating little pockets of intense, salty, savory flavor throughout. Plus, it’s the kind of thing kids feel confident they like before they even taste it because they recognize “parmesan” as something good.
What You’ll Need
- 1.5 pounds chicken breast tenders
- 1 cup panko breadcrumbs
- 1/2 cup finely grated Parmesan cheese (use a microplane for the finest texture)
- 2 tablespoons Italian seasoning (or 1 tablespoon dried oregano + 1 tablespoon dried basil)
- 1/4 cup all-purpose flour
- 2 large eggs, beaten
- Salt and pepper
- Cooking spray or oil for coating
Combine panko, Parmesan, Italian seasoning, salt, and pepper in one shallow bowl. Place flour in a second bowl and beaten egg in a third. Pat chicken tenders dry, coat lightly in flour, dip in egg, then press firmly into the panko mixture, coating all sides. Arrange on a parchment-lined baking sheet, spray lightly with cooking spray, and bake at 400°F for 16-18 minutes until golden and crispy.
Quick Facts
- The panko stays crunchier longer than traditional breadcrumbs because of its larger, airier structure
- Finely grated Parmesan distributes more evenly than chunks, creating consistent flavor throughout
- Pressing the coating gently into the chicken helps it stick during baking rather than falling off
Worth knowing: If you have time, refrigerate the breaded tenders for 30 minutes before baking. This helps the coating adhere better and creates an even crispier exterior.
3. Sweet and Sour Chicken Tenders

Sweet and sour taps directly into the flavors kids already love from takeout meals, but when you make it at home, you control the sweetness level and avoid the artificial coloring that often comes in restaurant versions. The sauce is sticky and glossy, making the meal feel like something special without being complicated.
Why This Tastes Better Than Takeout
Homemade sweet and sour sauce comes together in minutes with actual fruit juice and vinegar instead of high-fructose corn syrup. Your version will taste brighter and more complex, and because you’re making it fresh, you can adjust the balance of sweet and sour to match your family’s preferences. Many kids who are suspicious of “sauce” will actually eat this because the ratio of meat to coating to sauce feels balanced.
What You’ll Need
- 1.5 pounds chicken breast tenders
- 1/2 cup panko or regular breadcrumbs
- 1/4 cup all-purpose flour
- 2 large eggs, beaten
- Salt and pepper
- For the sweet and sour sauce: 1/2 cup pineapple juice, 1/4 cup rice vinegar, 2 tablespoons ketchup, 2 tablespoons brown sugar, 1 tablespoon soy sauce, 1 teaspoon cornstarch, and a pinch of ginger powder
Bread the chicken tenders following the standard breading method (flour, egg, breadcrumbs) and bake at 400°F for 16-18 minutes. While the tenders cook, combine all sauce ingredients in a small saucepan, bring to a gentle simmer, and cook for 2-3 minutes until thickened and glossy. Toss the baked tenders in the sauce or serve it alongside for dipping.
How to Serve It
Pair with white rice and steamed broccoli for a complete meal that feels restaurant-quality. Kids love the visual appeal of glossy, sauce-coated chicken on a plate, and the sweetness helps them accept the vegetable sides without complaint.
4. Buffalo Chicken Tenders with Ranch Dip
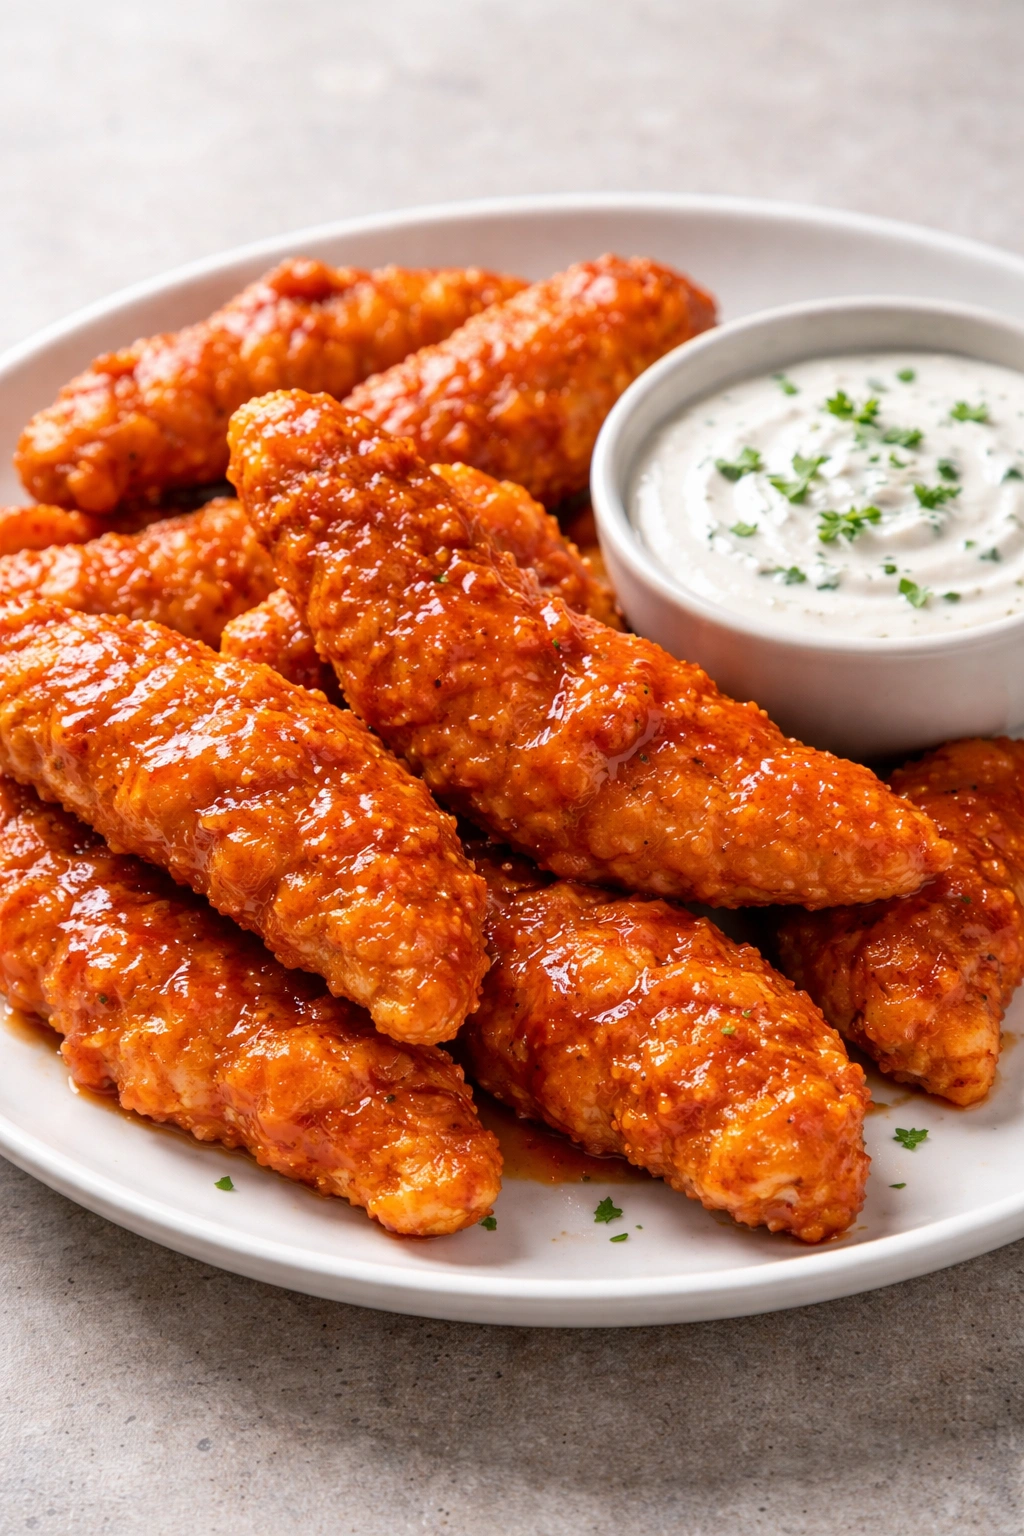
Buffalo sauce is bold and tangy, which sounds like it wouldn’t appeal to kids, but the truth is that many children love it once they try it. The key is balancing the heat level—this version is flavorful and slightly spicy without being overwhelming, and the creamy ranch dip on the side cools everything down.
Why Even Cautious Eaters Often Love This
Buffalo sauce has complexity that kids find interesting—it’s not just hot, it’s tangy and buttery and slightly sweet from the honey or brown sugar. The cooling effect of ranch dip gives kids control over how much spice they’re eating, which makes them more confident trying something bolder. Many parents are surprised to find that kids who won’t eat “spicy” food will happily demolish buffalo tenders.
What You’ll Need
- 1.5 pounds chicken breast tenders
- 3/4 cup hot sauce (Frank’s is the classic choice)
- 4 tablespoons butter
- 1 tablespoon honey
- 1/2 teaspoon garlic powder
- Panko breadcrumbs, flour, and eggs for breading
- Salt and pepper
- 1 cup ranch dip (store-bought or homemade) for serving
Bread and bake the chicken tenders as usual at 400°F for 16-18 minutes. While they bake, warm the hot sauce, butter, honey, and garlic powder together in a small saucepan until the butter melts and everything combines smoothly. Toss the hot tenders in the buffalo sauce and serve immediately with ranch dip on the side.
Quick Facts
- Frank’s hot sauce is milder than many alternatives, making it kid-friendly while still having authentic flavor
- Honey adds a subtle sweetness that rounds out the sharpness of the vinegar in hot sauce
- The butter makes the sauce cling to the chicken rather than running off onto the plate
Pro tip: Set out small bowls of ranch dip so each child can control how much they use. Some will barely touch it, while others will go through multiple bowls—either way, everyone’s happy.
5. Teriyaki Glazed Chicken Tenders
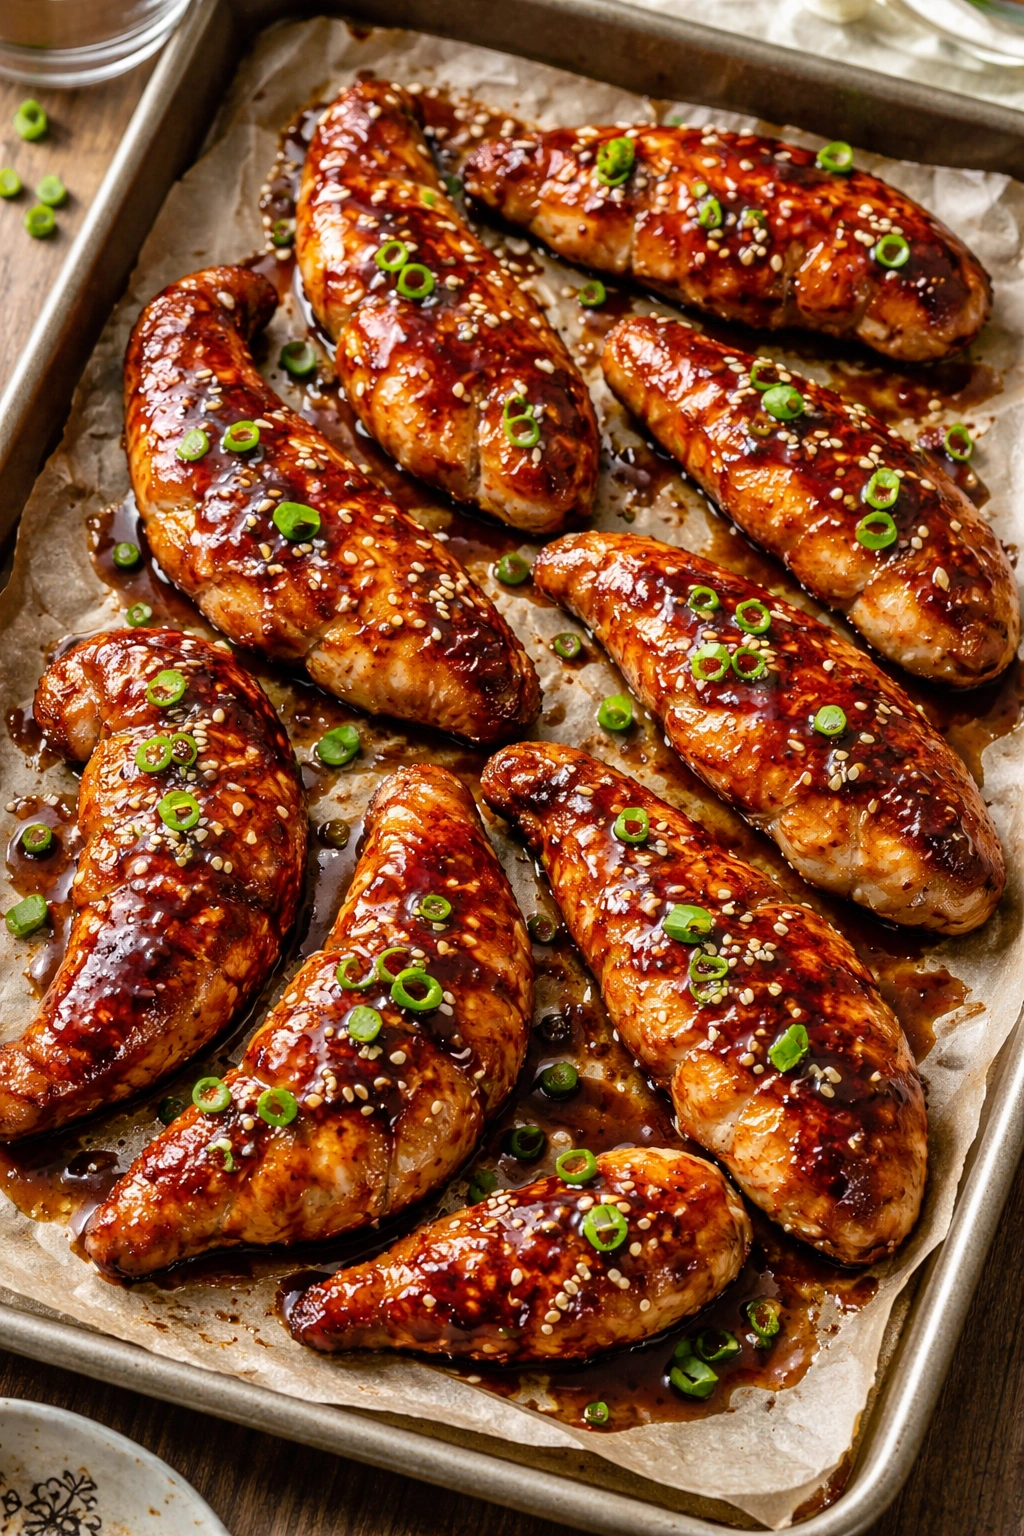
Teriyaki is naturally sweet and savory at the same time, which makes it universally appealing to kids without feeling babyish. The glaze gets slightly caramelized in the oven, creating depth of flavor that’s way more interesting than straight-up sweet.
Why This One Gets Requested at School
There’s something about Asian-inspired flavors that kids find exciting—maybe because it’s different from what they eat all the time, or maybe because teriyaki tastes like takeout. The combination of soy sauce, honey, ginger, and garlic creates a complexity that kids’ palates are ready for around age 5 or 6, even if their parents assume they won’t like it.
What You’ll Need
- 1.5 pounds chicken breast tenders
- 1/3 cup soy sauce or tamari
- 3 tablespoons honey or brown sugar
- 2 tablespoons rice vinegar
- 2 cloves garlic, minced
- 1 teaspoon ginger, minced (or 1/2 teaspoon ground ginger)
- 1 tablespoon sesame oil
- 1 teaspoon cornstarch mixed with 1 tablespoon water
- Sesame seeds for garnish (optional)
Combine soy sauce, honey, vinegar, garlic, ginger, and sesame oil in a bowl. Arrange chicken tenders on a parchment-lined baking sheet and brush generously with the teriyaki mixture on all sides. Bake at 400°F for 15-18 minutes. During the last minute of cooking, brush with additional glaze. Stir the cornstarch slurry into any leftover glaze and brush over the finished tenders for a glossy finish.
What to Serve Alongside
Teriyaki tenders pair beautifully with steamed jasmine rice and sautéed bok choy or broccoli. If you want to keep sides simple, plain white rice and snap peas work equally well. Sprinkle sesame seeds over everything for visual appeal and a subtle nutty crunch.
6. Crispy Fried Chicken Tenders with Honey Mustard
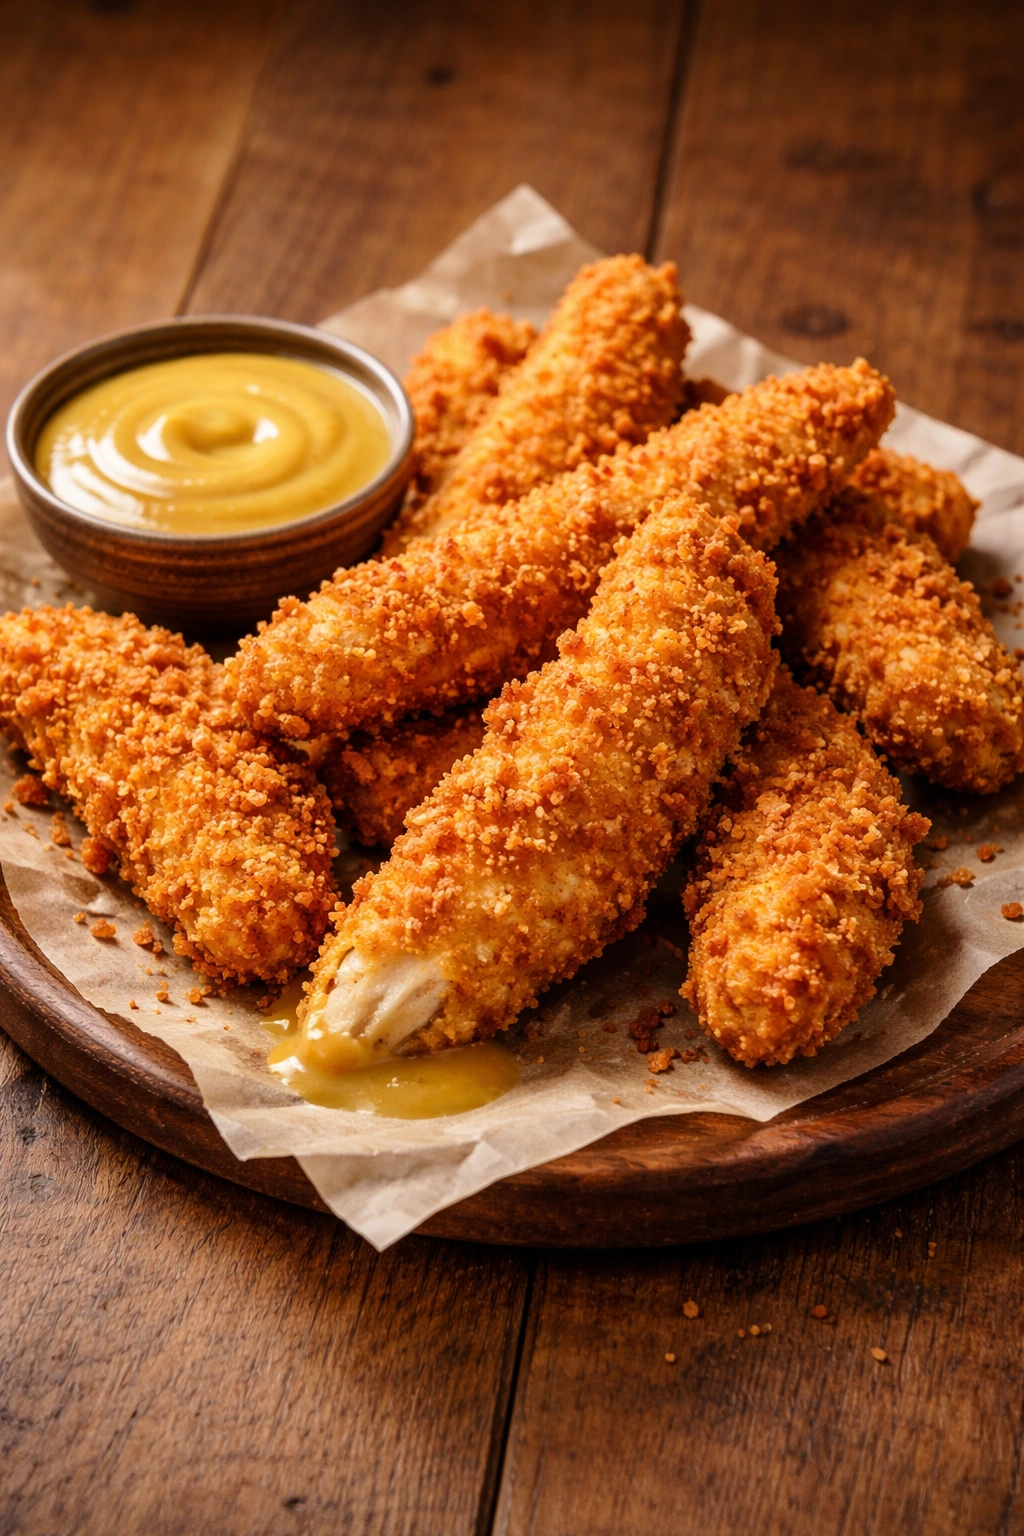
Sometimes you need to go back to basics. A perfectly crispy fried chicken tender with a simple, tangy-sweet honey mustard dip is genuinely all many kids need to be satisfied. This version uses the oven instead of a deep fryer, making it less messy and more manageable for weeknight dinners.
Why This Deserves to Be a Regular Rotation
There’s a reason fried chicken is universally beloved—the contrast between the crunchy exterior and the juicy, tender inside hits something primal. This recipe captures that magic without the oil splatter and cleanup of traditional frying. The chicken stays juicy because you’re not overcooking it, and the panko coating gets genuinely crispy in a hot oven with a light spray of cooking oil.
What You’ll Need
- 1.5 pounds chicken breast tenders
- 1 cup panko breadcrumbs
- 1/4 cup all-purpose flour
- 1 teaspoon paprika
- 1/2 teaspoon garlic powder
- 1/2 teaspoon onion powder
- 1/4 teaspoon cayenne (optional, for older kids)
- 2 large eggs, beaten
- Salt and pepper
- Cooking spray
- For the honey mustard: 1/3 cup Dijon mustard, 2 tablespoons honey, 1 tablespoon apple cider vinegar
Combine panko, flour, paprika, garlic powder, onion powder, salt, and pepper. Coat tenders in the flour mixture, then dip in egg, then press into the panko mixture. Arrange on a parchment-lined baking sheet and spray generously with cooking oil on all sides. Bake at 425°F for 16-18 minutes until deeply golden and crispy. While the tenders cook, whisk together Dijon mustard, honey, and apple cider vinegar for the dipping sauce.
The Secret to Crispiness
High heat and adequate oil are non-negotiable. Don’t skip the cooking spray step—it’s what creates that fried-chicken texture in the oven. A light coat on the top of the tenders before baking and another light coat halfway through ensures crispiness all over.
Worth knowing: Letting the breaded tenders sit in the refrigerator for 30 minutes before baking helps the coating stick better and creates an even crispier finish.
7. Pesto Crusted Chicken Tenders

Pesto might sound too sophisticated for kids, but many children love the combination of fresh basil, garlic, and Parmesan when it’s presented in a format they recognize. The green coating looks impressive and interesting, which alone makes kids more willing to try something new.
Why This Converts Pesto Skeptics
Pesto can taste intense when eaten as a sauce, but when it’s mixed into a breading, the flavors distribute more evenly and feel less overwhelming. Kids experience it as a savory, cheesy coating rather than a strong herb situation. Plus, there’s something about the visual appeal of bright green chicken that makes them feel like they’re eating something special.
What You’ll Need
- 1.5 pounds chicken breast tenders
- 1 cup panko breadcrumbs
- 1/2 cup fresh basil (or 2 tablespoons dried basil mixed with 2 tablespoons parsley)
- 1/4 cup grated Parmesan cheese
- 2 cloves garlic, minced
- 2 tablespoons olive oil
- 2 tablespoons pine nuts or walnuts, finely chopped (optional)
- Zest of 1 lemon
- 2 large eggs, beaten
- 1/4 cup all-purpose flour
- Salt and pepper
- Cooking spray
Pulse basil, Parmesan, garlic, olive oil, nuts, and lemon zest in a food processor until combined but still textured. Mix with panko breadcrumbs. Coat tenders in flour, dip in egg, then press into the pesto-panko mixture. Arrange on a parchment-lined baking sheet, spray lightly with cooking oil, and bake at 400°F for 16-18 minutes until golden and cooked through.
Serving Suggestion
Serve with a simple marinara sauce for dipping and a side of roasted potatoes. The combination of pesto-crusted chicken with tomato sauce feels elevated without being complicated, and kids get a chance to taste how different flavors work together.
8. Maple Dijon Chicken Tenders
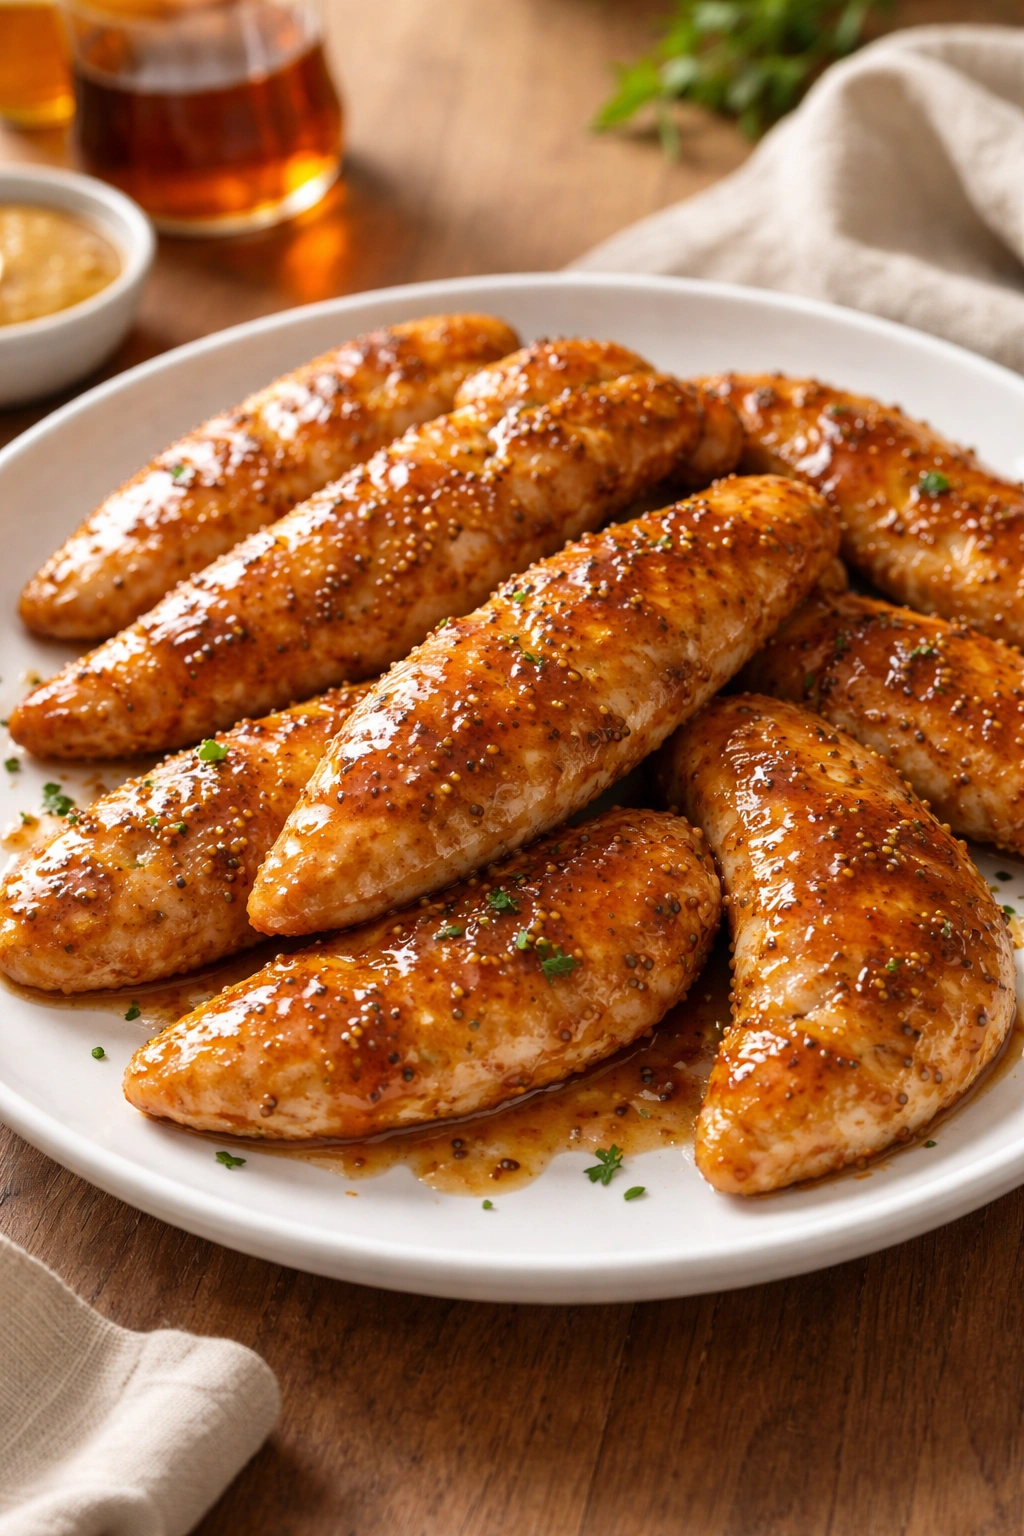
Maple Dijon combines sweet and savory in a way that feels autumn-inspired but works year-round. The mustard adds tang while the maple syrup provides sweetness, and together they create a glaze that’s way more interesting than basic honey.
Why Kids Eat More When the Flavor Is Interesting
Maple Dijon hits multiple flavor notes at once—sweet, savory, tangy—which keeps kids’ interest longer. A plate of plain chicken tenders might get picked at, but tenders with a distinctive, flavorful glaze often get cleaned completely. The maple flavor is recognizable and approachable without being childish.
What You’ll Need
- 1.5 pounds chicken breast tenders
- 1/3 cup pure maple syrup (not pancake syrup, which has corn syrup)
- 3 tablespoons Dijon mustard
- 1 tablespoon apple cider vinegar or white vinegar
- 1 tablespoon olive oil
- 1/2 teaspoon ground thyme (or dried thyme)
- Salt and pepper
- Optional: 1/4 teaspoon smoked paprika for depth
Whisk together maple syrup, Dijon mustard, vinegar, olive oil, thyme, salt, and pepper. Arrange chicken tenders on a parchment-lined baking sheet and brush generously with the glaze on all sides. Bake at 400°F for 15-18 minutes, brushing with additional glaze halfway through.
Quick Facts
- Pure maple syrup has deeper flavor than pancake syrup and caramelizes better in the oven
- Dijon mustard is less sharp and more sophisticated than yellow mustard, creating a balanced glaze
- The amount of glaze is generous enough that tenders stay moist throughout baking
Pro tip: Reserve a small portion of the raw glaze to brush over the finished tenders right before serving for maximum shine and flavor.
9. Lemon Herb Chicken Tenders

Lemon and herbs create a bright, fresh flavor that makes chicken feel lighter and more flavorful without being heavy. This version is perfect in spring and summer but works any time you want something that doesn’t feel rich or overly saucy.
Why This Works for Kids Who Like Clean Flavors
Not every child loves heavy sauces or elaborate glazes. Some kids prefer something straightforward—chicken that tastes like chicken, but better. Lemon and herbs accomplish this perfectly. The brightness of lemon hits the palate cleanly, and the herbs add complexity without confusion.
What You’ll Need
- 1.5 pounds chicken breast tenders
- Zest of 2 lemons
- 3 tablespoons fresh lemon juice
- 3 tablespoons olive oil
- 1 tablespoon fresh rosemary, minced (or 1 teaspoon dried)
- 1 tablespoon fresh thyme, minced (or 1 teaspoon dried)
- 3 cloves garlic, minced
- Salt and pepper
- Optional: 1/4 teaspoon red pepper flakes for kids who like heat
Combine lemon zest, lemon juice, olive oil, rosemary, thyme, garlic, salt, and pepper in a bowl. Pat chicken tenders dry and arrange on a parchment-lined baking sheet. Brush generously with the herb mixture on all sides. Bake at 400°F for 16-18 minutes.
Serving Ideas
Serve with a side of roasted potatoes and steamed green beans for a complete, elegant meal that feels special without requiring extra effort. The acidity of the lemon pairs beautifully with buttery potatoes and mild green vegetables.
10. Breaded Chicken Tenders with Honey Mustard and a Homemade Dipping Sauce Bar

Sometimes the best approach is to let kids customize their own dipping experience. Serve perfectly breaded, crispy chicken tenders alongside 3-4 different dipping sauce options so each child can choose what appeals to them.
Why Dipping Sauce Stations Actually Increase Vegetable Consumption
When kids have control over which sauce they use, they feel ownership over their meal. They’re more engaged, more willing to eat, and paradoxically more adventurous. The novelty of choosing between multiple sauces makes the whole experience feel more special, which translates into better eating.
What You’ll Need
- 1.5 pounds chicken breast tenders, breaded and baked according to your preferred method
- For Honey Mustard: 1/3 cup Dijon mustard, 2 tablespoons honey, 1 tablespoon apple cider vinegar
- For Garlic Aioli: 1/2 cup mayonnaise, 2 cloves garlic minced and smashed with a pinch of salt, 1 tablespoon lemon juice
- For Sweet Chili: 1/3 cup sweet chili sauce (store-bought works fine), 1 tablespoon honey, squeeze of lime juice
- For BBQ Ranch: 1/4 cup ranch dip, 1/4 cup BBQ sauce, 1 tablespoon honey
Setting Up the Station
Arrange the tenders on a central platter and place small bowls of each sauce around it so kids can reach them easily. Label each sauce with a simple card so there’s no confusion. The visual appeal of multiple colorful sauces makes the meal feel more exciting and restaurant-like.
Pro Tip
Make the sauces while the tenders bake so everything is ready at the same time. Each sauce comes together in under 5 minutes and tastes way better than bottled alternatives.
Worth knowing: If you’re serving this to a group of kids with varying spice tolerances, keep the sweet chili sauce mild or have a cooling yogurt dip available on the side for those who want to tone down the heat.
Final Thoughts
The real secret to making chicken tenders something kids genuinely look forward to isn’t about reinventing the wheel—it’s about respecting the format that works and rotating through enough variations that novelty keeps things interesting. Chicken tenders are a blank canvas, and that’s their superpower.
Vary your glazes, seasonings, and dipping sauces throughout the month so that “chicken tenders again” never becomes boring. One night it’s honey garlic, next week it’s teriyaki, then you circle back to a homemade honey mustard. What seemed repetitive becomes a rotation of different meals that all share a comforting, familiar base.
Pay attention to which ones your kids request specifically—those are the winners that deserve regular rotation. And don’t underestimate the power of letting kids help with assembly. When they brush on the glaze or dip the tenders in breadcrumbs, suddenly they’re invested in actually eating what they’ve helped create. Start there, lean into the flavors that resonate with your family, and you’ll find that dinner conversations shift from negotiation to genuine enjoyment.