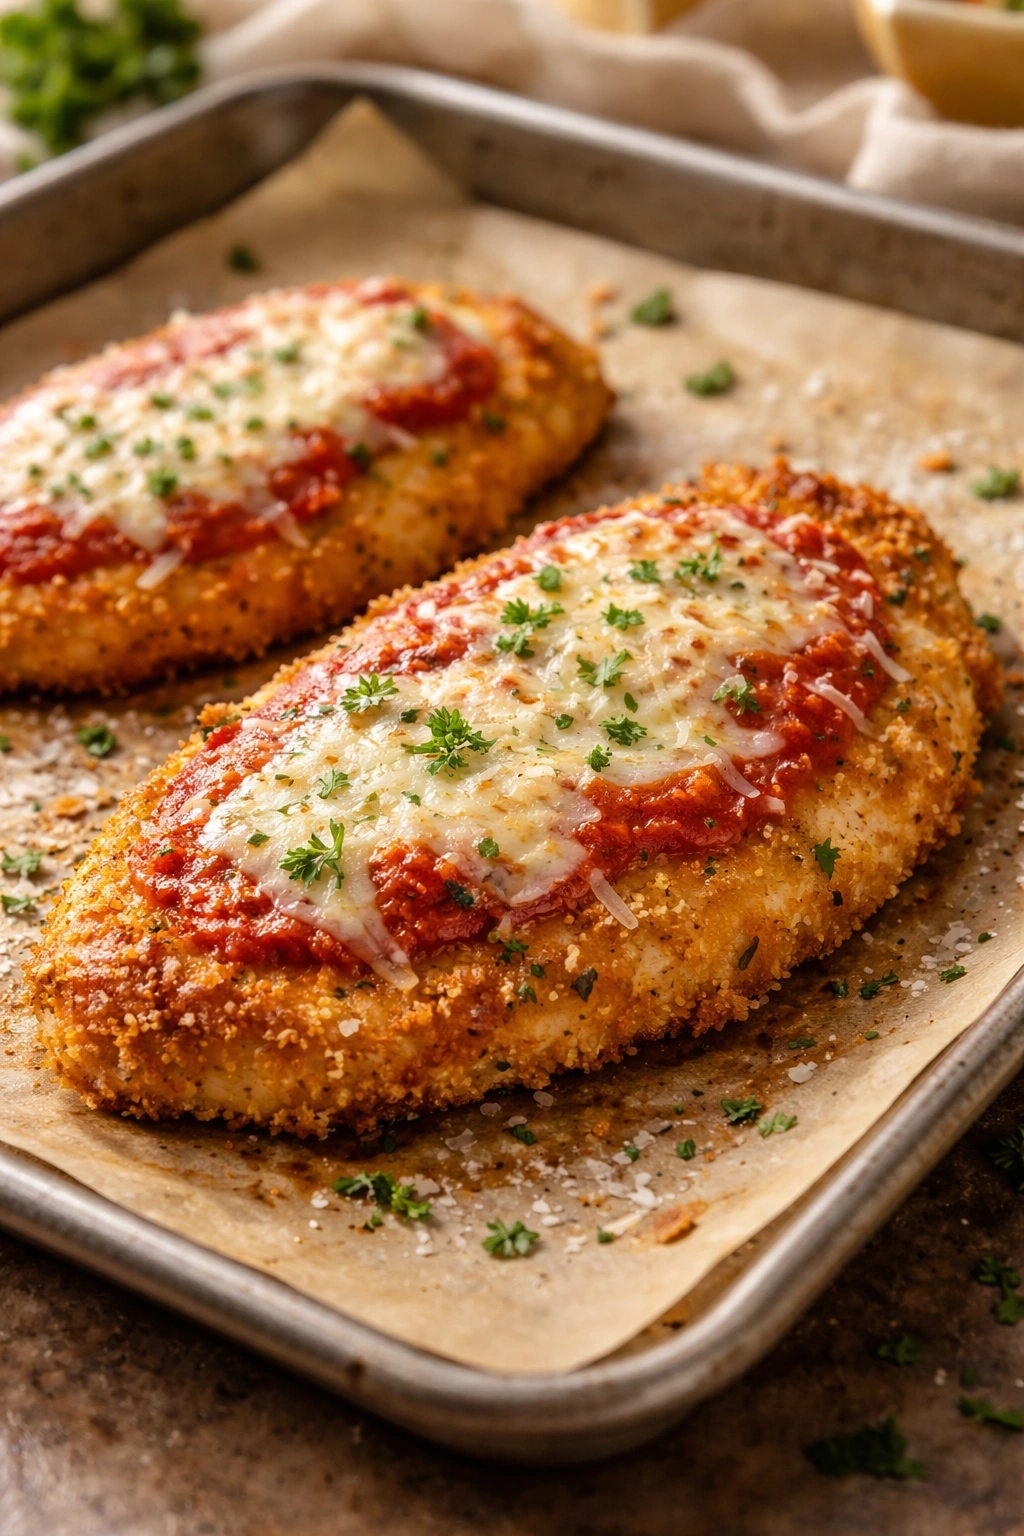
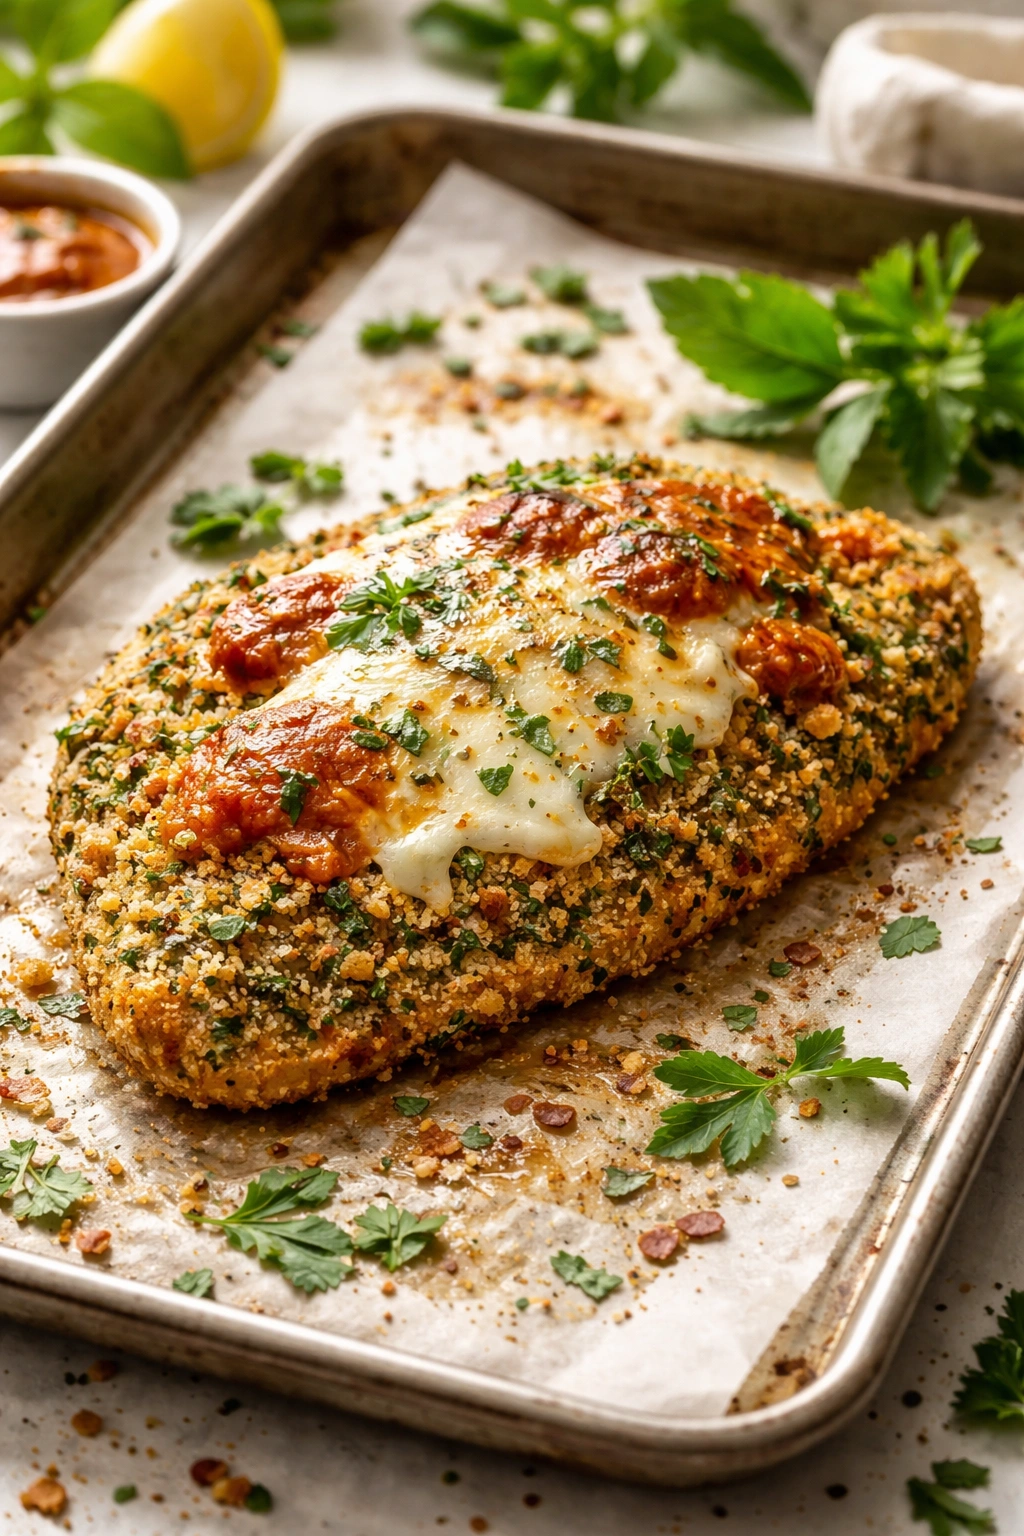
There’s something almost magical about chicken Parmesan—that combination of crispy, golden breading, tangy marinara sauce, and melted cheese has made it a beloved staple in Italian-American restaurants and home kitchens alike. Yet most recipes for this classic dish demand serious time investment: pounding chicken, making sauce from scratch, managing multiple cooking stages, and dealing with the inevitable oil splatters from deep frying. What if I told you that you can have restaurant-quality chicken Parmesan on your table in 30 minutes or less, without sacrificing flavor, texture, or that deeply satisfying cheese pull that makes this dish so irresistible?
The secret isn’t complicated. It’s about smart shortcuts that don’t feel like shortcuts, strategic ingredient choices that amplify flavor, and a streamlined technique that gets you from raw ingredients to a bubbling, beautiful dish faster than you can order takeout. This isn’t a compromised version—it’s a refined one. You’re using the oven’s residual heat strategically, choosing ingredients that work efficiently with your time, and eliminating steps that don’t actually matter while preserving every element that does.
Over the years, countless home cooks have discovered that the biggest time killers in traditional chicken Parmesan recipes are unnecessary. Deep frying takes forever, heats up your kitchen, and creates a grease cleanup nightmare. Pounding chicken for fifteen minutes until your hands hurt isn’t actually required if you choose the right cut. Making sauce from scratch tastes wonderful but doesn’t taste dramatically different from a high-quality jarred sauce when you know which brands to reach for and how to elevate them. Once you understand which steps actually deliver results and which ones are just tradition, you realize you can make this dish faster than you’d expect—and better than most restaurants manage.
Why Quick Chicken Parmesan Is Actually Easier Than You Think
The traditional restaurant approach to chicken Parmesan involves deep-frying breaded cutlets until they’re golden, transferring them to a casserole, smothering them in sauce and cheese, and finishing them under a broiler. It’s designed for volume in a commercial kitchen, not for speed in your home. But when you reverse-engineer the recipe for a single batch on a regular weeknight, you can skip the mess and drama of hot oil entirely.
Baking or pan-frying with minimal oil delivers identical crispness without the hassle. The panko breadcrumb coating you’ll use creates a crunchy exterior that rivals anything you’d get from deep frying—panko’s larger, drier crumbs brown beautifully even with just a light oil coating. You’re not choosing between crispy and fast; you’re getting both. The oven does most of the work while you relax, and the entire process stays contained to a couple of baking sheets and a skillet instead of creating an oil-splattered stovetop.
Choosing chicken tenderloins or sliced chicken breasts means you skip the aggressive pounding that eats up precious minutes. Tenderloins are naturally thin and delicate; a gentle tap with your palm flattens them to perfect, even thickness in seconds. If you’re using regular chicken breasts, slicing them lengthwise creates thin cutlets that need minimal pounding compared to pounding thick breasts into submission. The result is the same—tender, evenly cooked chicken—but you’re not exhausted before you’ve even started cooking.
High-quality store-bought marinara sauce is genuinely excellent these days, especially from brands that skip added sugar and heavy thickeners. You’re not sacrificing flavor by using jarred sauce; you’re making a smart time investment. If you want to elevate it further—and you easily can in under five minutes—add fresh basil, a pinch of sugar to balance acidity, or a splash of pasta water to thin it slightly. This single decision reclaims ten to fifteen minutes that you’d otherwise spend simmering tomatoes, and the end result is indistinguishable from a homemade version in a dish where so many other flavors are competing for attention anyway.
Choosing Your Chicken: The Shortcut That Actually Works
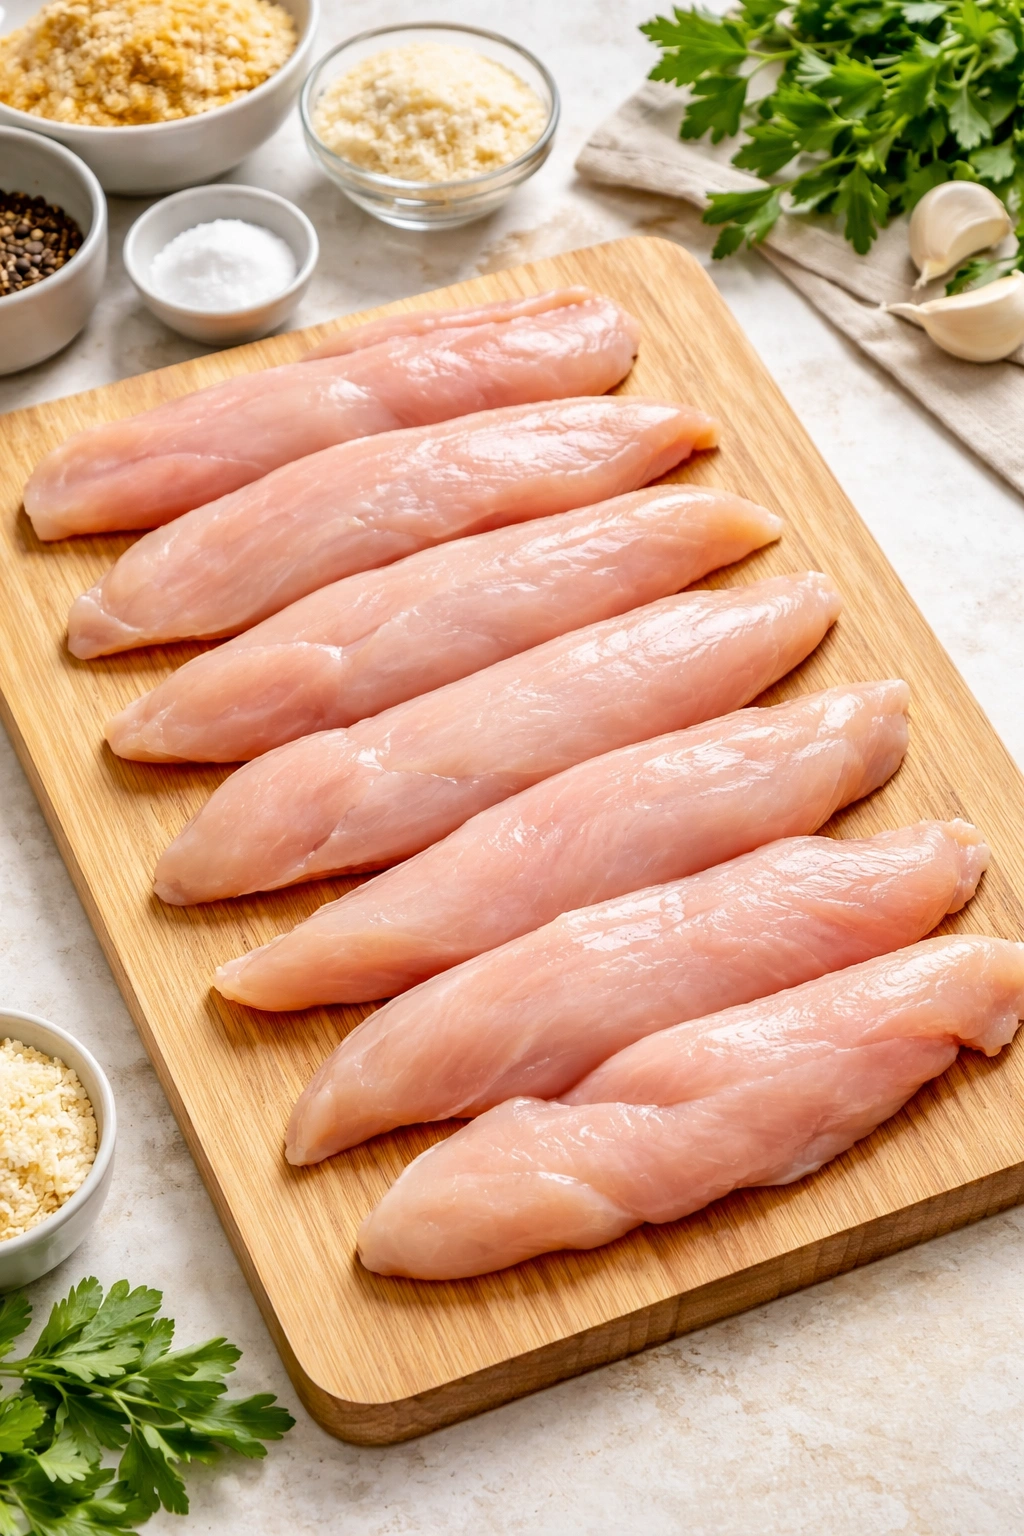
The cut of chicken you choose determines whether you’ll spend ten minutes pounding or ten seconds prepping. This decision is the single biggest factor in whether your 30-minute timeline is realistic or optimistic. Chicken tenderloins are the secret weapon here. These are the small, tender pieces that naturally separate from the underside of a chicken breast. They’re already thin, already tender, and they cook quickly and evenly without any pounding at all.
If your grocery store doesn’t stock chicken tenderloins separately (they sometimes package them with chicken breasts), you can achieve nearly identical results by slicing boneless, skinless chicken breasts lengthwise into two thin cutlets. This method takes perhaps 30 seconds per breast and gives you uniform pieces that only need the gentlest tap with your palm to reach the perfect ¼-inch thickness. You’re looking for pieces thin enough to cook through in the oven without the breading burning, but thick enough to stay juicy and tender.
Avoid thick-cut chicken breasts if you’re trying to stay under 30 minutes. Pounding them to even thickness when they’re ¾-inch or thicker becomes time-consuming and risks tearing the meat. High-quality chicken matters more than you’d think. Organic or pastured chicken has better texture and flavor, stays more tender throughout cooking, and actually cooks more predictably than commodity chicken. It’s worth the small additional cost when you’re building a dish that comes together so quickly—you don’t have other flavors and long cooking times to hide behind.
Pat your chicken dry with paper towels before breading, whether you’re using tenderloins or sliced breasts. This single step, which takes 20 seconds, makes an enormous difference in how the breading adheres and browns. Moisture is the enemy of crispness, and removing surface moisture before you bread means your coating will be genuinely crispy rather than merely crunchy. Season generously with salt and pepper at this stage—don’t rely on the breadcrumb mixture to do all the seasoning work.
The 30-Minute Chicken Parmesan Breading Strategy
Here’s where traditional recipes waste time: they set up an elaborate three-bowl breading station and then proceed to bread each piece individually while simultaneously juggling heating oil and managing timing. A smarter approach sequences your breading efficiently and gets everything prepped before any heat ever touches a pan or oven.
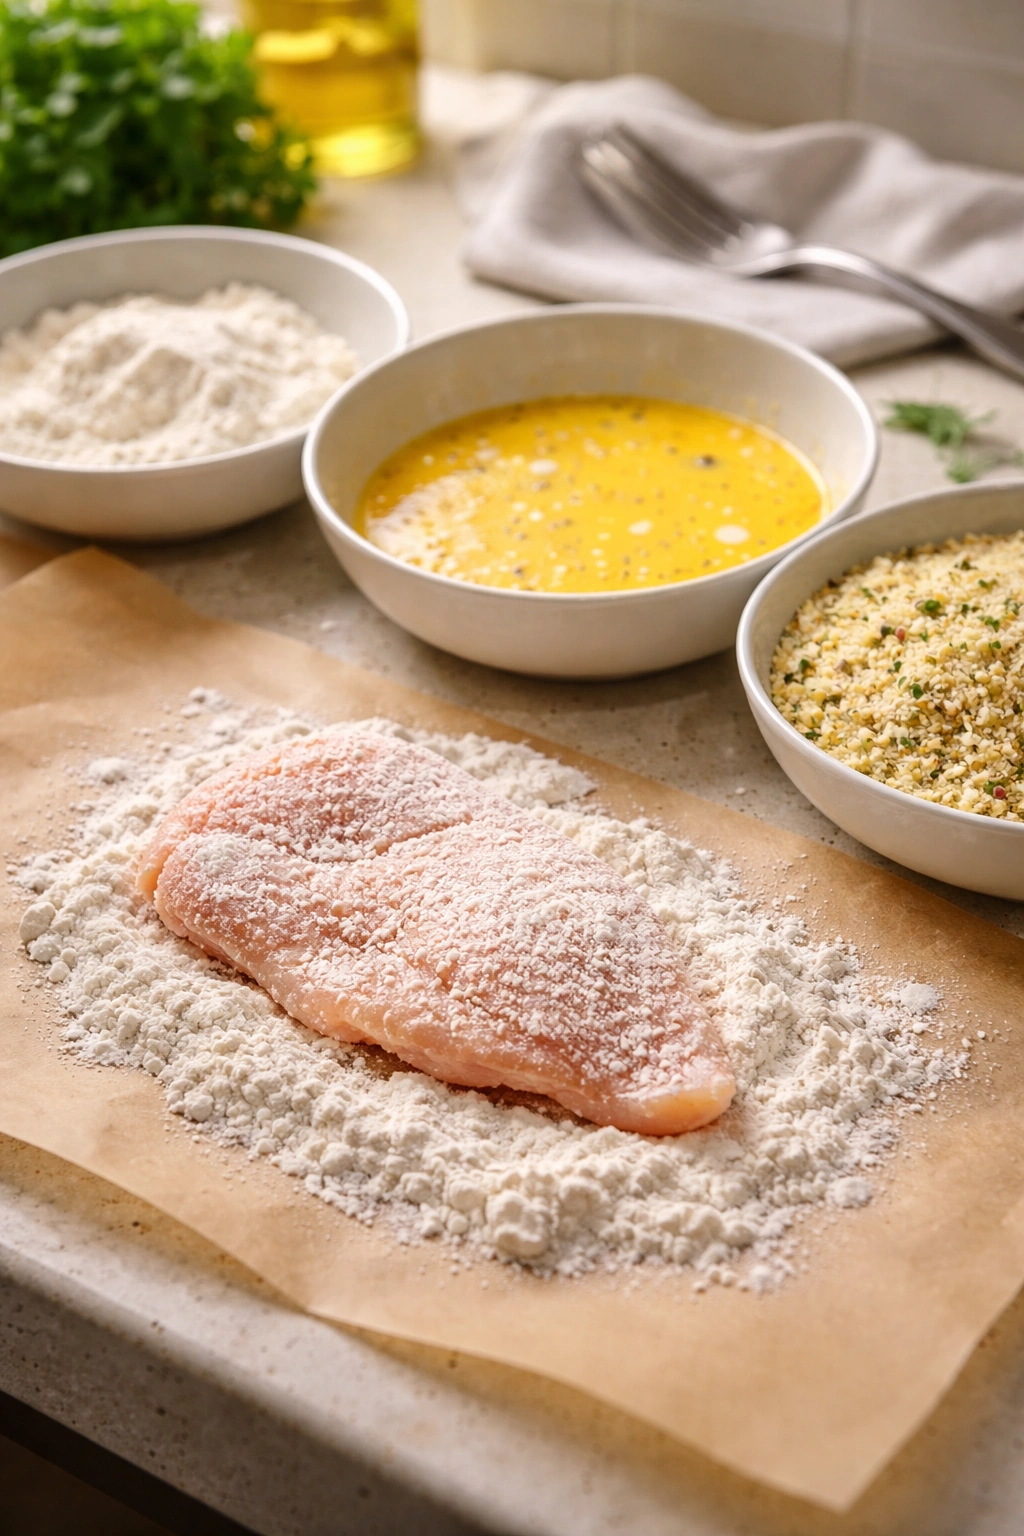
Set up your three shallow bowls in order: flour, beaten egg, breadcrumb mixture. The flour contains salt and pepper mixed throughout—this does most of your seasoning work and helps the egg adhesive stick to the chicken. The egg is your binding agent; beat it gently just to combine it, nothing fancy needed. The breadcrumb mixture is where your flavor lives: combine Italian-seasoned breadcrumbs with panko for the perfect balance (Italian breadcrumbs adhere more thoroughly, panko creates extra crunch), then add grated Parmesan cheese, dried oregano, and a pinch of garlic powder.
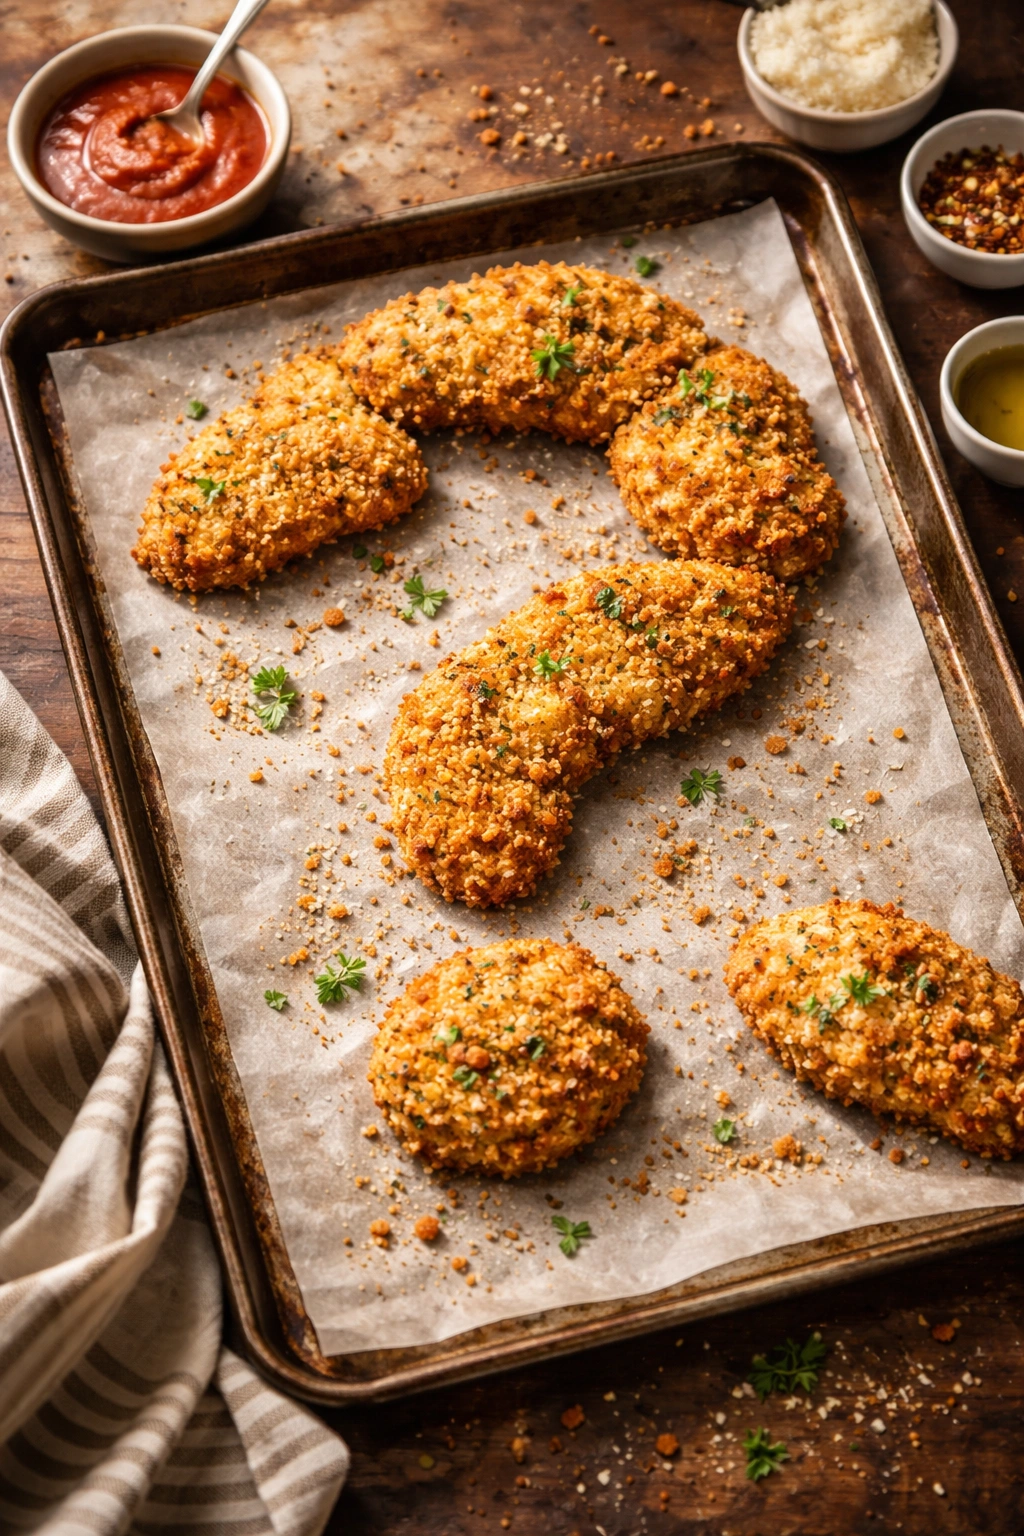
Work in an assembly-line fashion: dredge each piece in flour, tap off excess, dip in egg, dredge in breadcrumbs, press gently so the coating adheres, and place on a prepared baking sheet. This takes maybe 15 seconds per piece for four cutlets—less than a minute total. If you’re organized about it and use one hand for wet ingredients and one for dry (seriously, this matters), you’ll barely get your hands messy. The entire breading process should take three to four minutes maximum.
Here’s the efficiency secret that changes everything: bread all your chicken before you apply any heat. Once everything is breaded and arranged on a baking sheet, you can take a breath, gather your remaining ingredients, and start cooking from a place of calm organization rather than scrambling. This is the exact opposite of traditional recipes that require you to bread one piece and immediately fry it before the oil cools. Your breaded chicken can sit on a baking sheet at room temperature for 15 minutes without any problem—the coating actually adheres better if it’s been sitting for a few minutes.
Setting Up Your Kitchen for Speed
Before you start any actual cooking, spend two minutes thinking about organization. Have your oven preheated to 425°F before you’ve even opened the chicken package. This is non-negotiable for staying under 30 minutes. An oven that takes five to ten minutes to preheat while you’re standing there waiting will wreck your timeline immediately.
Measure your marinara sauce into a bowl or small saucepan before you start breading. If you’re using jarred sauce, this is the moment to taste it and decide if you want to adjust it—add a tiny pinch of sugar if it tastes acidic, a splash of pasta water if it’s too thick, or a few torn basil leaves for brightness. You can even warm it gently on a low burner while your chicken cooks, but truly, room-temperature sauce works fine and is one fewer thing to manage.
Have your cheese measured and ready: shredded mozzarella in a bowl, extra grated Parmesan nearby. Clear a space in your oven for your baking sheet. Line it with parchment paper if you want zero cleanup afterward, or don’t if you don’t mind two minutes of scraping. Gather everything you need within arm’s reach of your cooking area. The fewer times you’re opening cabinets or looking for things mid-cooking, the faster your timeline stays on track.
Understanding Pan-Fry vs. Bake vs. Air Fryer for the 30-Minute Version
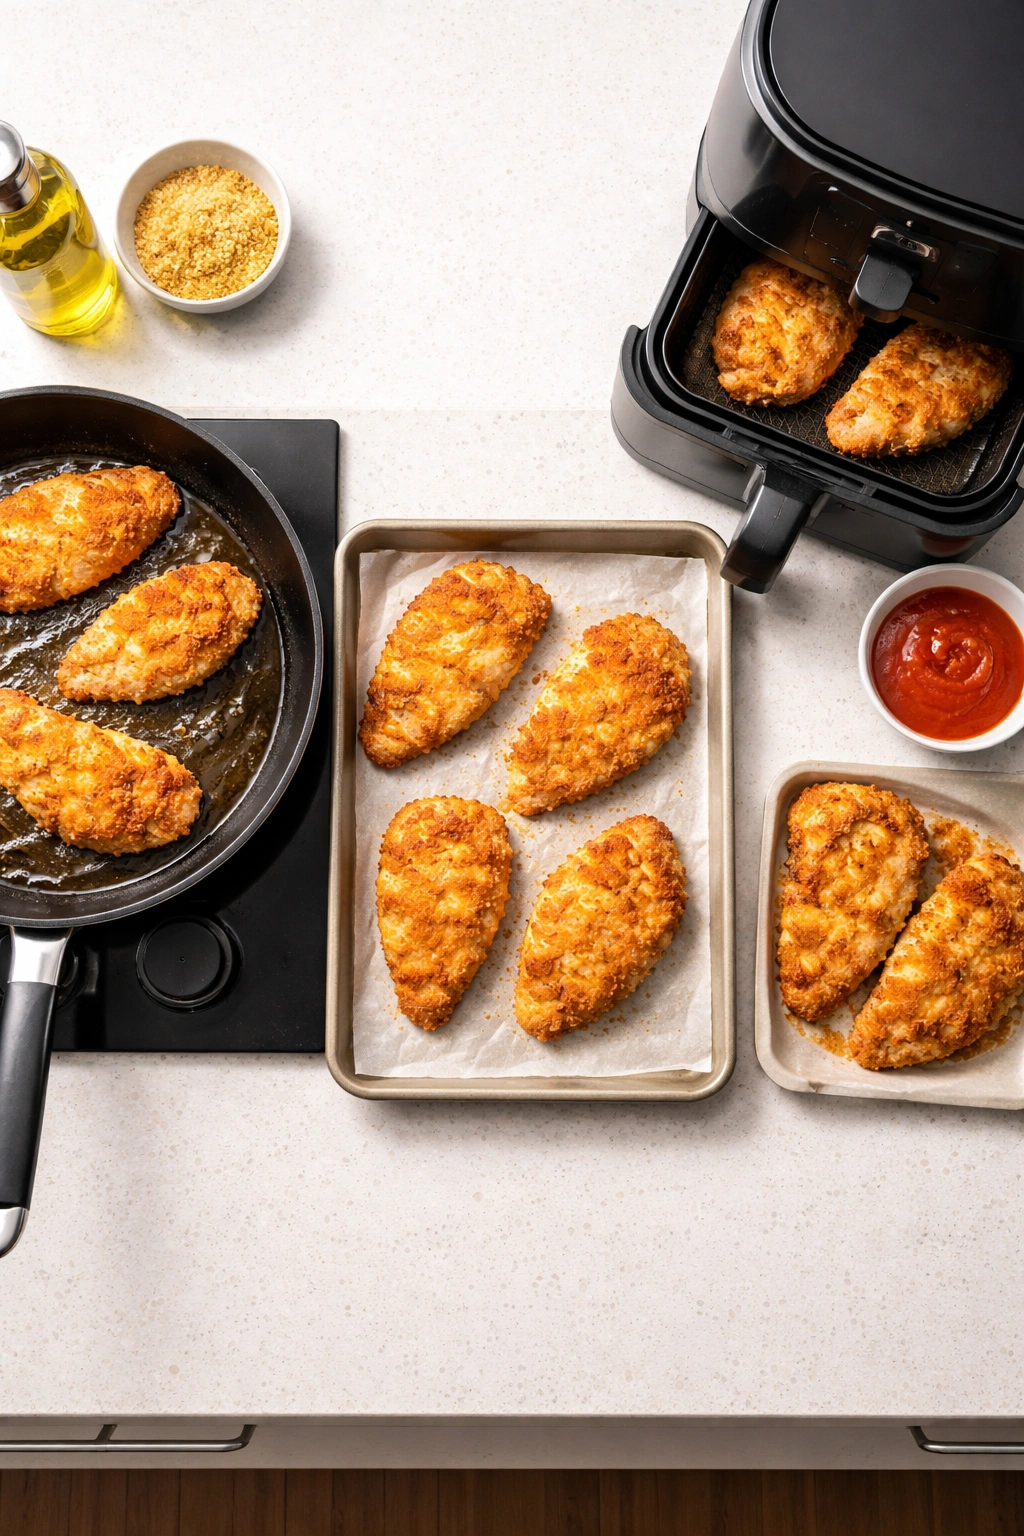
The method you choose for getting your breaded chicken golden determines exactly where your 30 minutes goes. All three approaches work beautifully and produce excellent results; the choice is really about your preference and available equipment.
Pan-frying in a large skillet with a thin layer of olive oil is the fastest approach and produces the most evenly golden exterior. Heat your oil over medium-high heat until it shimmers, then add 3 to 4 pieces of chicken (don’t overcrowd), and cook for 2 to 3 minutes per side until deeply golden. The chicken doesn’t need to cook through completely at this stage; it finishes in the oven. This method takes about 10 minutes total for four cutlets. You’ll get beautiful color, excellent texture contrast, and the cooking happens while you’re actively present and can manage it precisely.
Baking breaded chicken on a lightly oiled baking sheet is the hands-off approach and still produces excellent results. Lightly brush or spray both sides of your breaded cutlets with olive oil, arrange them on a parchment-lined baking sheet, and bake at 425°F for 15 minutes until golden and cooked through. This is simpler (you can walk away), requires less active attention, and produces slightly less crispy exterior but still perfectly satisfactory results. This method works beautifully if you’re baking rather than pan-frying.
Air fryer chicken Parmesan is genuinely excellent and faster than both other methods. Arrange breaded cutlets in the air fryer basket in a single layer, spray both sides lightly with oil, and cook at 400°F for 8 to 10 minutes, shaking the basket halfway through. You get the crispiest exterior of all three methods, the shortest cooking time, and minimal mess. If you have an air fryer, this is probably your fastest path to the table.
Whichever method you choose, don’t skip the oil coating entirely, even if you’re baking. Oil is what makes breading crispy and golden; without it, you’ll get a pale, dense, sad crust that none of your sauce and cheese can salvage.
Yield: Serves 4 (each serving is 1 cutlet with sauce and cheese) | Makes 4 cutlets
Prep Time: 15 minutes
Cook Time: 20–25 minutes (depending on method chosen)
Total Time: 35–40 minutes
Difficulty: Beginner — No special skills required, straightforward breading and basic cooking technique. Even a first-time cook can execute this successfully.
Best Served: Immediately while the cheese is still bubbling and the chicken edges are crispy. This dish is best hot and fresh; while leftovers reheat well, the texture is most satisfying right out of the oven.
Ingredients for Quick Chicken Parmesan
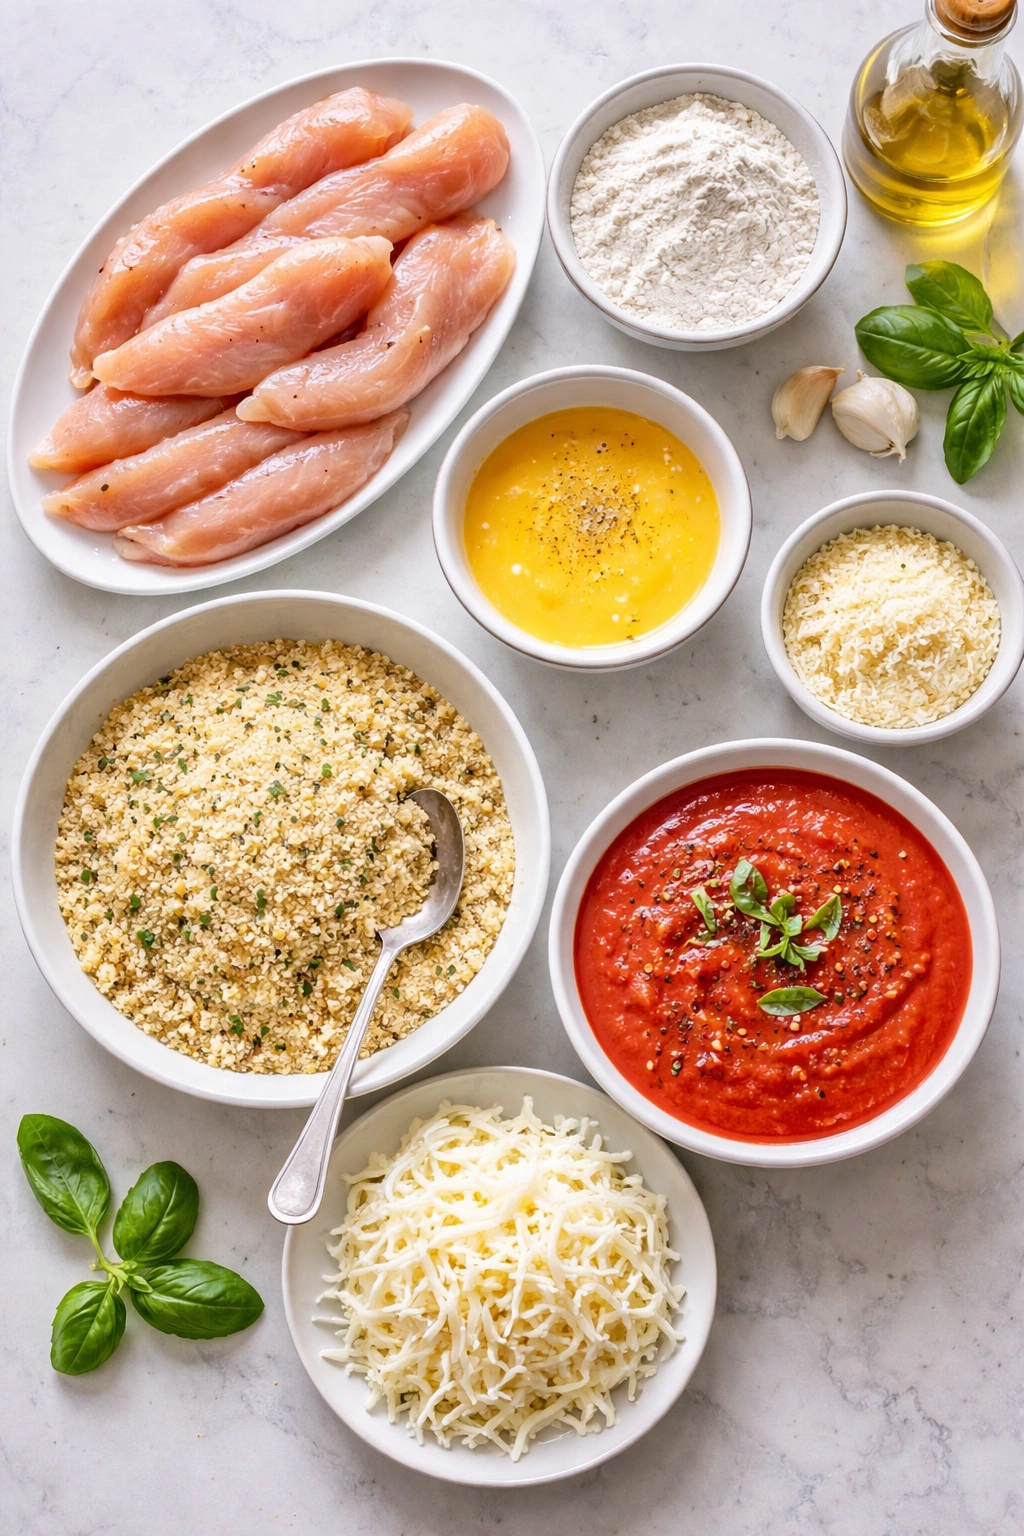
For the Chicken and Breading:
- 4 boneless, skinless chicken tenderloins (about 1.5 pounds total) or 2 chicken breasts, sliced lengthwise into 4 cutlets
- 1 teaspoon kosher salt, divided
- ½ teaspoon freshly ground black pepper, divided
- ⅓ cup all-purpose flour
- 2 large eggs
- ½ cup Italian-seasoned breadcrumbs
- ½ cup panko breadcrumbs
- ½ cup freshly grated Parmesan cheese (not pre-shredded)
- ½ teaspoon dried oregano
- ¼ teaspoon garlic powder
- 2 to 3 tablespoons olive oil (for pan-frying) or cooking spray (for baking)
For Topping and Serving:
- 1 cup high-quality marinara sauce (store-bought is perfectly fine; brands like Rao’s, Victoria, or San Marzano are excellent)
- 1 cup shredded low-moisture mozzarella cheese
- ¼ cup additional freshly grated Parmesan cheese
- Fresh basil leaves, roughly torn, for garnish (optional but genuinely improves the dish)
- 2 teaspoons olive oil, divided among the four pieces (for drizzling after topping)
Optional for Serving:
- 1 pound fresh pasta, cooked and tossed with butter and pasta water (for serving underneath)
- Arugula salad with lemon vinaigrette
- Roasted vegetables (zucchini, broccoli, or asparagus)
Step-by-Step Instructions for 30-Minute Chicken Parmesan

Prepare and Preheat:
-
Preheat your oven to 425°F and position a rack in the center. If you’re pan-frying, you can do this while you’re breading.
-
Pat your chicken tenderloins or sliced breasts completely dry with paper towels—this matters more than you’d think for crispy breading.
-
If using whole chicken breasts, place one breast on a cutting board and slice horizontally through the middle to create two thin cutlets. Repeat with the second breast. You should now have 4 pieces total.
-
Using the palm of your hand or the smooth side of a meat mallet, gently flatten each piece to an even ¼-inch thickness. Press firmly but don’t pulverize—you’re evening out thickness, not tenderizing. This should take about 15 seconds per piece.
-
Arrange all four pieces on a clean plate or baking sheet and season generously on both sides with ¾ teaspoon of the salt and ¼ teaspoon of the pepper. Don’t be shy with seasoning—this is your primary seasoning layer.
Set Up Your Breading Station:
-
Pour the flour into a shallow bowl (a pie dish works perfectly) and whisk in the remaining ¼ teaspoon salt and ¼ teaspoon pepper evenly.
Advertisements -
Crack the eggs into a second shallow bowl and beat them gently with a fork until just combined—you’re not making an omelet, just mixing the whites and yolks together.
-
In a third shallow bowl, combine the Italian breadcrumbs, panko breadcrumbs, ½ cup grated Parmesan, dried oregano, and garlic powder. Stir well and break up any clumps of cheese with your fingers. The mixture should be light and evenly distributed.
-
Arrange your three bowls in a row: flour on the left, egg in the middle, breadcrumb mixture on the right. This is your assembly line.
-
Line a large baking sheet with parchment paper (for easy cleanup) or leave it bare. Set it to the right of your breading station. Have a second baking sheet ready if you’re baking instead of pan-frying.
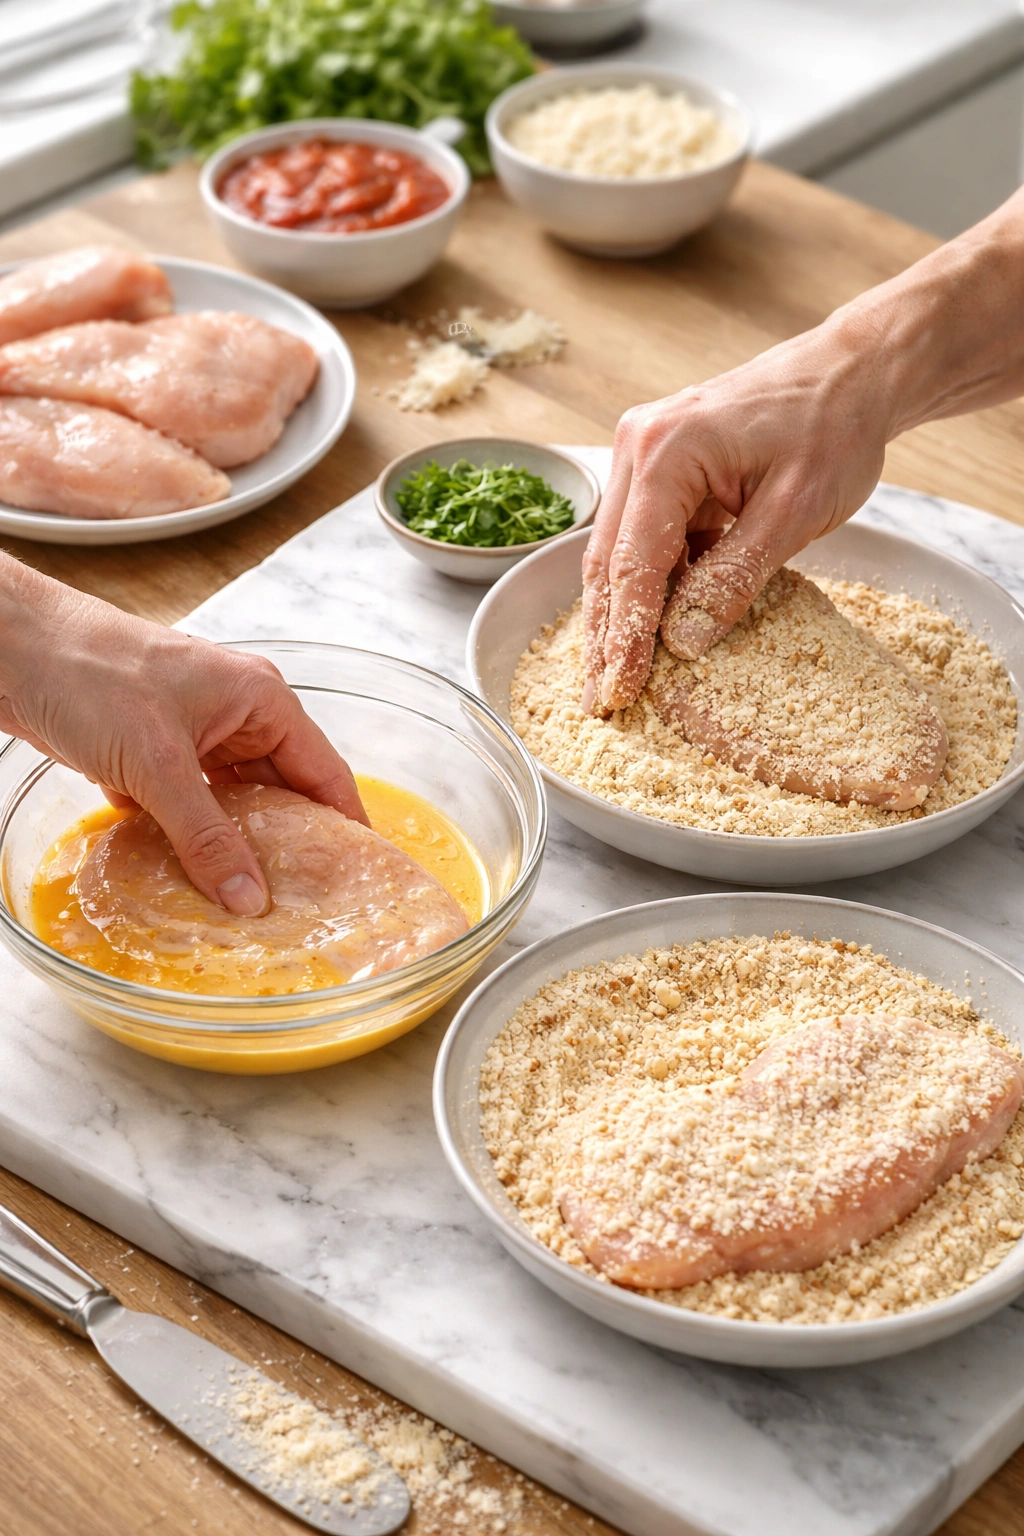
Bread the Chicken:
-
Working with one piece at a time, dredge it in the flour mixture, coating both sides evenly and tapping off excess so the flour clings but doesn’t cake on.
-
Dip the flour-coated piece into the beaten egg, turning to coat both sides, then let excess egg drip off back into the bowl for a second.
-
Transfer the egg-coated piece to the breadcrumb mixture and turn it to coat both sides completely. Press gently with your fingertips so the breadcrumbs adhere and form a cohesive crust—don’t cram them on, just press enough that they stick. The coating should look uniform and slightly textured.
-
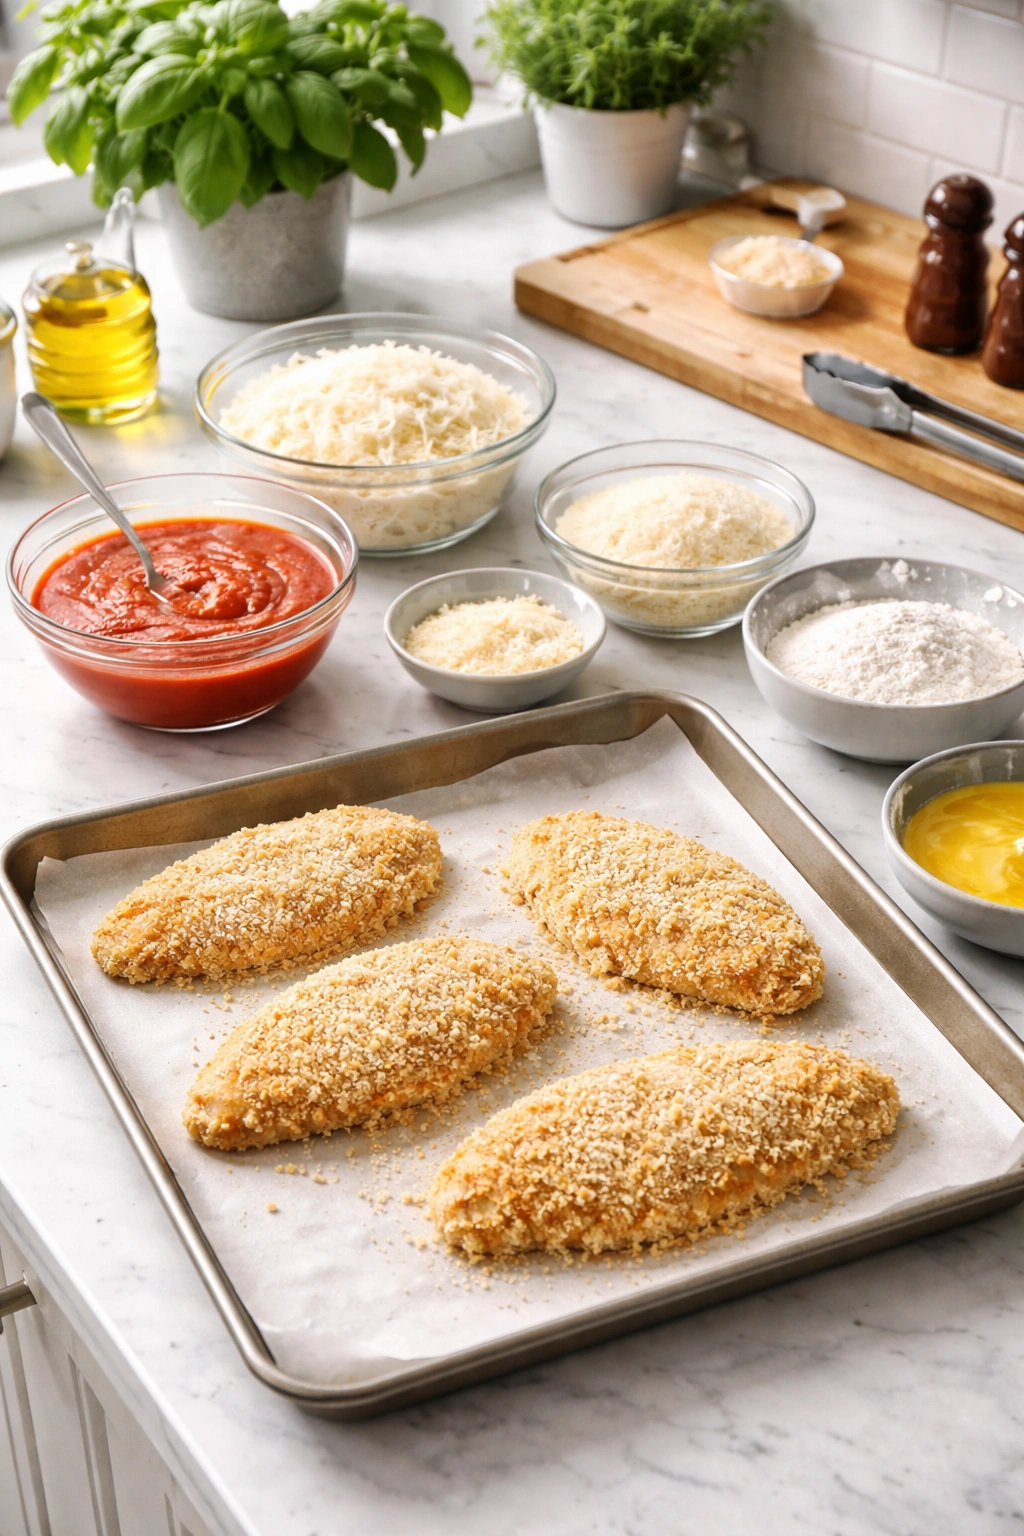
Place the breaded piece on your prepared baking sheet and repeat with the remaining three pieces. Arrange them in a single layer with about 1 inch of space between them so they cook evenly.
-
Let the breaded chicken rest on the baking sheet for 3 to 5 minutes. This rest time allows the coating to adhere more firmly. This is not wasted time; it actually improves your results by ensuring the breading doesn’t flake off during cooking.
Advertisements
Cook the Chicken—Choose Your Method:
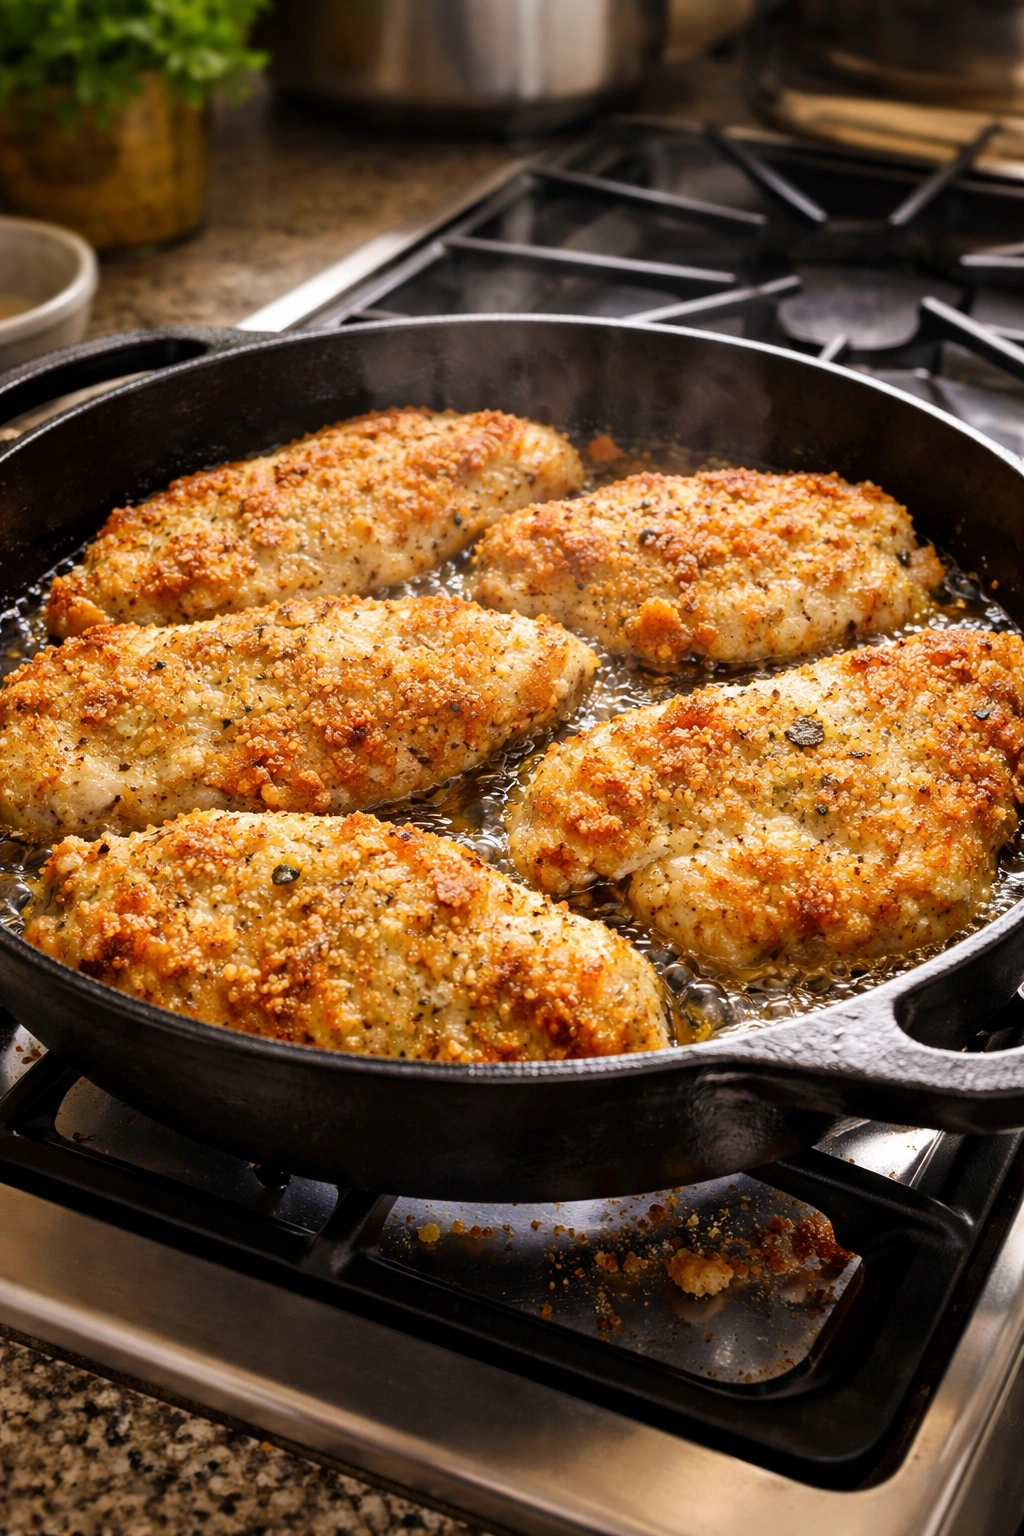
For Pan-Frying (fastest, crispiest results):
-
While your chicken is resting, heat 2 to 3 tablespoons of olive oil in a large skillet over medium-high heat until the surface shimmers and a breadcrumb dropped into it immediately sizzles.
-
Carefully add all four breaded cutlets to the hot oil (they should sizzle immediately but not violently). Do not move them for 2 to 3 minutes. Resist the urge to poke, flip, or fuss. Let the breading make contact with the hot oil and brown.
-
After 2 to 3 minutes, flip each cutlet and cook the other side for another 2 to 3 minutes until golden brown. The chicken doesn’t need to be cooked through completely at this point—it will finish cooking in the oven. You’re aiming for a deep golden color on the outside.
-
Transfer the pan-fried chicken to a clean baking sheet (or back to your original one if it’s clean) arranged in a single layer.
For Baking (hands-off, still excellent):
-
Lightly brush both sides of each breaded cutlet with olive oil, or spray both sides with cooking spray. The oil is essential—without it, your crust will be pale and dense.
-
Arrange the oiled cutlets on your parchment-lined baking sheet in a single layer with about 1 inch between each piece.
-
Bake for 15 to 18 minutes until the chicken is cooked through (internal temperature of 165°F at the thickest part) and the breading is golden brown. The breading won’t be quite as dark as pan-fried chicken, but it will be crispy and golden.
Advertisements
Top with Sauce and Cheese:
-
Remove your chicken from the oven (don’t turn the oven off). If you pan-fried, the chicken is on a baking sheet at room temperature. If you baked, it’s on a hot baking sheet fresh from the oven.
-
Spoon approximately 3 to 4 tablespoons of marinara sauce over each cutlet, spreading it gently to cover most of the surface but leaving about ½ inch around the edges bare so the breading stays crispy.
-
Top each cutlet with approximately ¼ cup shredded mozzarella cheese, distributing it evenly. Don’t skimp on cheese, but don’t bury the chicken under a mountain of it either—you want to see the breaded crust peeking through.
-
Sprinkle about 1 tablespoon of the additional grated Parmesan over each cutlet, on top of the mozzarella. This adds flavor and creates a slightly crispier, more golden top layer.
-
Drizzle each cutlet with about ½ teaspoon of olive oil on top (yes, really—this creates beautiful browning on the cheese).
Final Bake:
-
Return the topped chicken to your 425°F oven for 5 to 7 minutes. You’re waiting for the mozzarella to melt completely and start bubbling at the edges, and for the Parmesan on top to begin turning golden. Watch carefully at the 5-minute mark so you catch it at peak melted-but-not-burnt perfection.
-
If you prefer deeply golden, slightly browned cheese (which is genuinely delicious), switch your oven to broil for the final 1 to 2 minutes. Stay right there and watch it—broiler-assisted browning can go from perfect to overdone in 30 seconds. You’re looking for light golden spots on the cheese, not blackened char.
-
Remove from the oven and let rest for exactly 2 minutes before serving. This brief rest allows the cheese to set slightly so it doesn’t slide off when you plate it, and allows the chicken to relax so it stays juicy when you cut into it.
Advertisements
Serve:
- Transfer each cutlet to a serving plate or pasta bed. Serve immediately while the cheese is still melted and the breading is still crispy. If you’re serving over pasta, toss the hot pasta with butter and pasta water first, then nestle your chicken Parmesan on top.
Pro Tips That Actually Make a Difference
The “wet hand, dry hand” technique prevents breadcrumb chaos. Designate your left hand (or right, depending on which you’re less attached to) as your “wet hand” for the egg dipping step, and your other hand as your “dry hand” for the flour and breadcrumb steps. This prevents you from creating a breading-crusted hand that makes everything difficult. It seems small until you’re halfway through breading four cutlets with gummy, caked-on breadcrumb hands.
Don’t skip the Parmesan in the breading mixture. The sharp, umami punch of Parmesan added to the breadcrumbs elevates the entire dish. It toasts and gets slightly crispy during cooking, creating another layer of flavor that makes people ask for your recipe. You’ll use ½ cup in the breading and another ¼ cup on top—total of ¾ cup—and every single tablespoon matters.
Buy the best marinara sauce your budget allows and don’t apologize for using it. A premium marinara with good tomato flavor and minimal added sugar makes a genuine difference. You can absolutely use a basic jar sauce, and it will still taste good, but upgrading here is one of the few places where spending an extra dollar or two on ingredients creates a noticeably better result.
Parmigiano-Reggiano, freshly grated, is incomparably better than pre-shredded Parmesan. Pre-shredded cheese is coated in anti-caking agents that prevent it from melting and mixing smoothly; freshly grated cheese melts into a silky layer. If you only buy one wedge of real cheese for this recipe, make it the Parmesan. A microplane grater makes this job fast and easy.
Low-moisture mozzarella cheese is essential. Don’t use fresh mozzarella or whole milk mozzarella for this dish—they contain too much water and will create a watery, separated sauce under your chicken. Low-moisture or part-skim mozzarella has the right water content to stay creamy without weeping.
Oil on the outside of your breading matters enormously. Whether you’re pan-frying or baking, don’t skip the step of coating the chicken with oil before or during cooking. Oil is what creates browning, crispness, and golden color. Without adequate oil, you’ll have a sad, pale, dense crust that won’t be satisfying no matter how good everything else is.
Common Mistakes That Slow You Down or Ruin Results
Overcrowding the pan when pan-frying reduces your cooking temperature and steams the chicken instead of browning it. If you’re cooking more than four cutlets, work in batches. Better to spend an extra five minutes getting truly crispy chicken than to rush and end up with pale, soggy breading.
Pounding chicken into oblivion when using regular chicken breasts wastes energy and doesn’t improve results. A gentle flattening to even thickness is all you need. Aggressive pounding bruises the meat and can create a mushy texture.
Using wet chicken is the single biggest reason breading doesn’t crisp properly. Your chicken must be completely dry when you bread it. Don’t skip the paper towel step; it’s the difference between crispy and soggy.
Burying the chicken under excessive sauce defeats the purpose of having a crispy crust. Use 3 to 4 tablespoons per cutlet, not a half-cup. You want the sauce to complement the chicken, not obliterate it. Extra sauce belongs on the side or on the pasta underneath, not piled on top where it softens everything.
Skipping the oil on top of breaded cutlets before baking results in pale, dense crust. Whether you’re pan-frying or baking, breading needs oil to brown and crisp. Don’t try to get healthier by eliminating oil—you’ll just end up with disappointing results that no one wants to eat.
Cooking at too low a temperature means soggy breading and pale color. Your oven should be at 425°F for the final cheese-and-sauce bake, and if you’re baking the chicken from the start, start at 425°F. Lower temperatures allow moisture to escape slowly, which makes everything soggy rather than crispy.
Not letting the breading rest before cooking means it flakes off during cooking. The 3 to 5 minutes on the baking sheet before cooking matters. This rest time allows the egg binder to set slightly, gluing the breadcrumbs more firmly to the chicken.
Variations and Adaptations for Different Preferences
For a lighter, healthier version: Skip the pan-frying entirely and bake the breaded chicken on an oiled baking sheet for 15 to 18 minutes at 425°F. You’ll use less oil overall and still get excellent results. The chicken won’t be quite as golden-brown as pan-fried chicken, but it will be crispy, tender, and delicious. Time savings: about 5 minutes.
For a crunchier, extra-crispy crust: Use all panko breadcrumbs with no Italian breadcrumbs mixed in. Panko creates maximum crunch at the cost of slightly less even coverage. Add dried oregano and garlic powder directly to the panko to maintain flavor.
For gluten-free chicken Parmesan: Substitute gluten-free all-purpose flour and gluten-free panko breadcrumbs in equal amounts. The results are genuinely excellent; most people won’t notice any difference. Ensure your marinara sauce is also gluten-free if this matters to you.
For an herb-forward version: Add fresh basil, fresh parsley, or fresh oregano to the breadcrumb mixture. Use ¼ cup fresh herb (finely minced) combined with ¾ cup total breadcrumbs. This creates a more vibrant, herbaceous crust that’s genuinely beautiful.
For chicken Parmesan sandwiches: Serve your finished cutlets on toasted ciabatta or hoagie rolls with extra marinara sauce and a handful of fresh arugula. This creates a crunchy, cheesy, satisfying sandwich that’s ready in the same 30-minute timeframe.
For lower-carb serving: Skip pasta entirely and serve your chicken Parmesan on top of roasted zucchini noodles, spaghetti squash, or even a big bed of fresh spinach wilted with garlic. The juices from the chicken and sauce are delicious on these lighter bases.
For a more intensely flavored sauce: While your chicken is cooking, warm your marinara sauce in a small saucepan and stir in 2 tablespoons of fresh basil, 1 minced garlic clove, and a pinch of red pepper flakes. Simmer for 2 to 3 minutes, then use this enhanced sauce for topping your chicken.
For chicken Parmesan over pasta: Cook your pasta while your chicken is in the oven for its final cheese-melting stage. Toss the hot pasta with butter, a splash of pasta water, and a generous handful of grated Parmesan. Create a nest of pasta on each plate, then top with your finished chicken Parmesan.
Storage, Reheating, and Make-Ahead Strategies
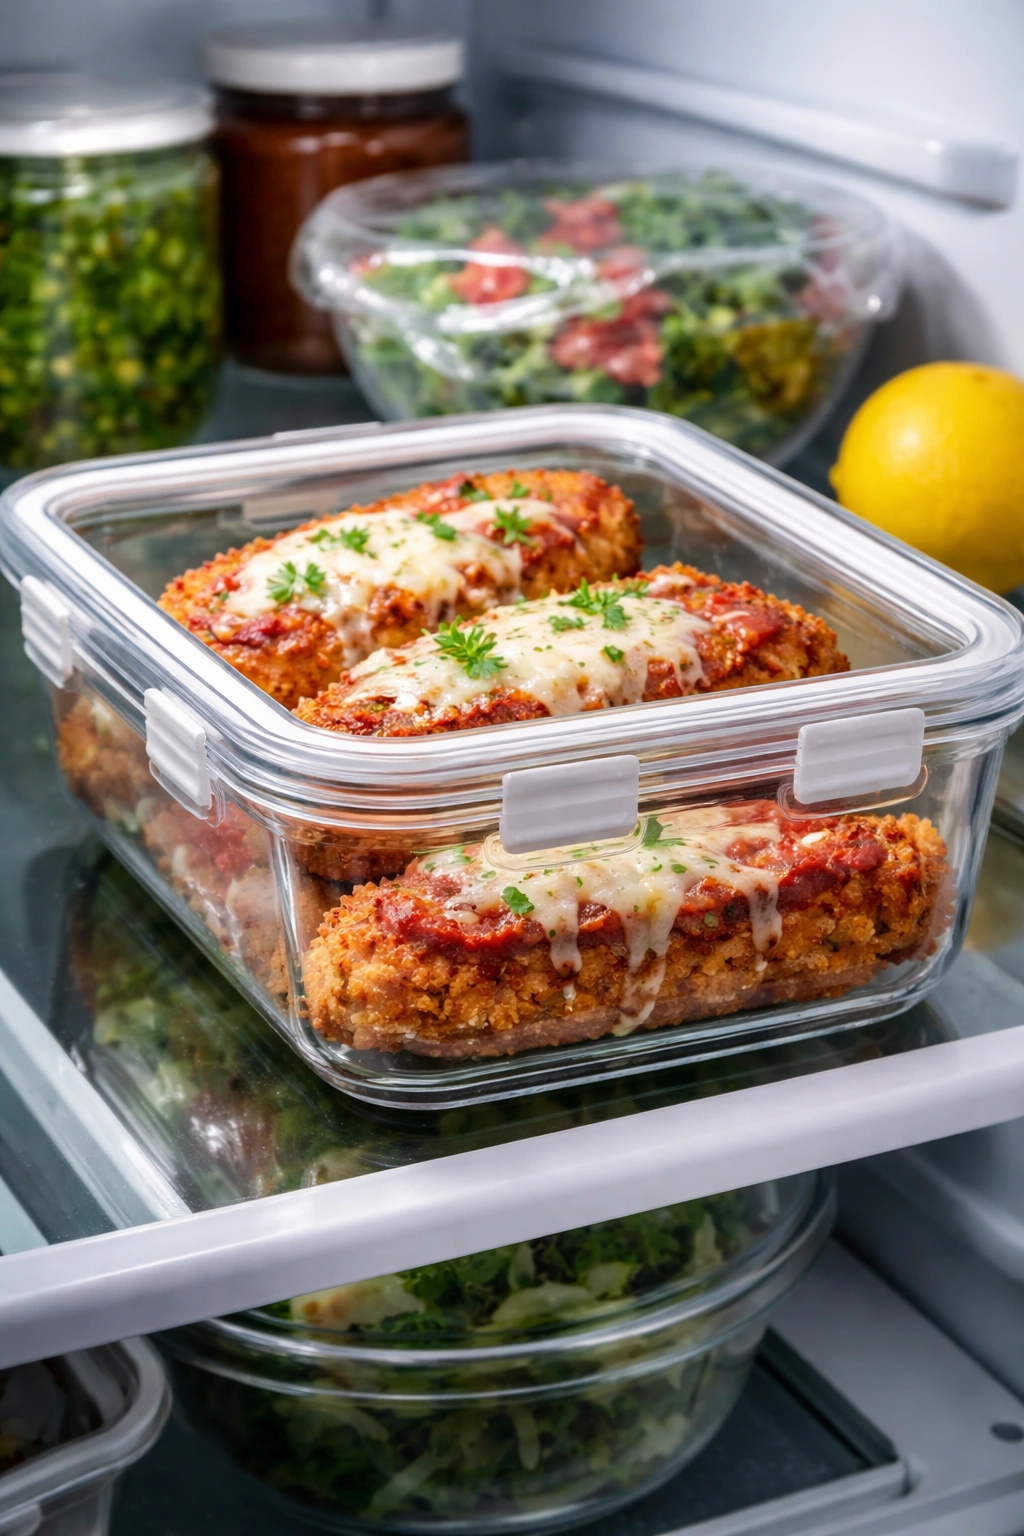
To Store: This dish is best enjoyed immediately while everything is hot and crispy, but leftovers keep beautifully. Let cool completely, then transfer to an airtight container and refrigerate for up to 3 days. The breading will soften slightly with storage (this is normal and unavoidable), but it reheats well.
To Reheat: Reheat leftover chicken Parmesan in a 350°F oven for 10 to 12 minutes, loosely covered with foil, until warmed through. This method re-crisps the exterior much better than microwaving. Microwaving works in a pinch (1 to 2 minutes), but you’ll lose all the textural contrast you worked to achieve. Stovetop reheating in a lightly oiled skillet over medium heat for 3 to 4 minutes also works beautifully for single pieces.
To Freeze: You can freeze finished chicken Parmesan for up to 2 months. Let it cool completely, then transfer to an airtight container with parchment separating layers. Thaw overnight in the refrigerator, then reheat as directed above. Alternatively, you can freeze just the breaded, uncooked cutlets on a baking sheet, then transfer to a freezer bag once firm. Cook directly from frozen, adding 2 to 3 minutes to your initial cooking time.
Make-Ahead Option 1 (Breaded but Uncooked): Bread your chicken in the morning and refrigerate it, covered, for up to 8 hours before cooking. This works beautifully for weeknight meal prep—you come home, preheat the oven, and you’re eating in 30 minutes. You can also freeze breaded-but-uncooked cutlets for up to 3 months; cook from frozen without thawing, adding a few extra minutes to the initial cooking time.
Make-Ahead Option 2 (Cooked but Not Topped): Pan-fry or bake your chicken in the morning, let it cool, then refrigerate it uncovered until completely cold before covering. When you’re ready to finish, let it come to room temperature for 10 minutes, then top with sauce, cheese, and oil, and bake at 425°F for 5 to 7 minutes until the cheese melts. This gets you to the table in about 15 minutes from the fridge.
Best for Meal Prep: Freeze cooked, untopped chicken cutlets in a freezer bag with parchment between layers. Thaw overnight, bring to room temperature, then assemble and bake as directed. This gives you restaurant-quality chicken Parmesan on busy nights while still taking under 30 minutes from thaw to table.
Serving Suggestions and Pairings
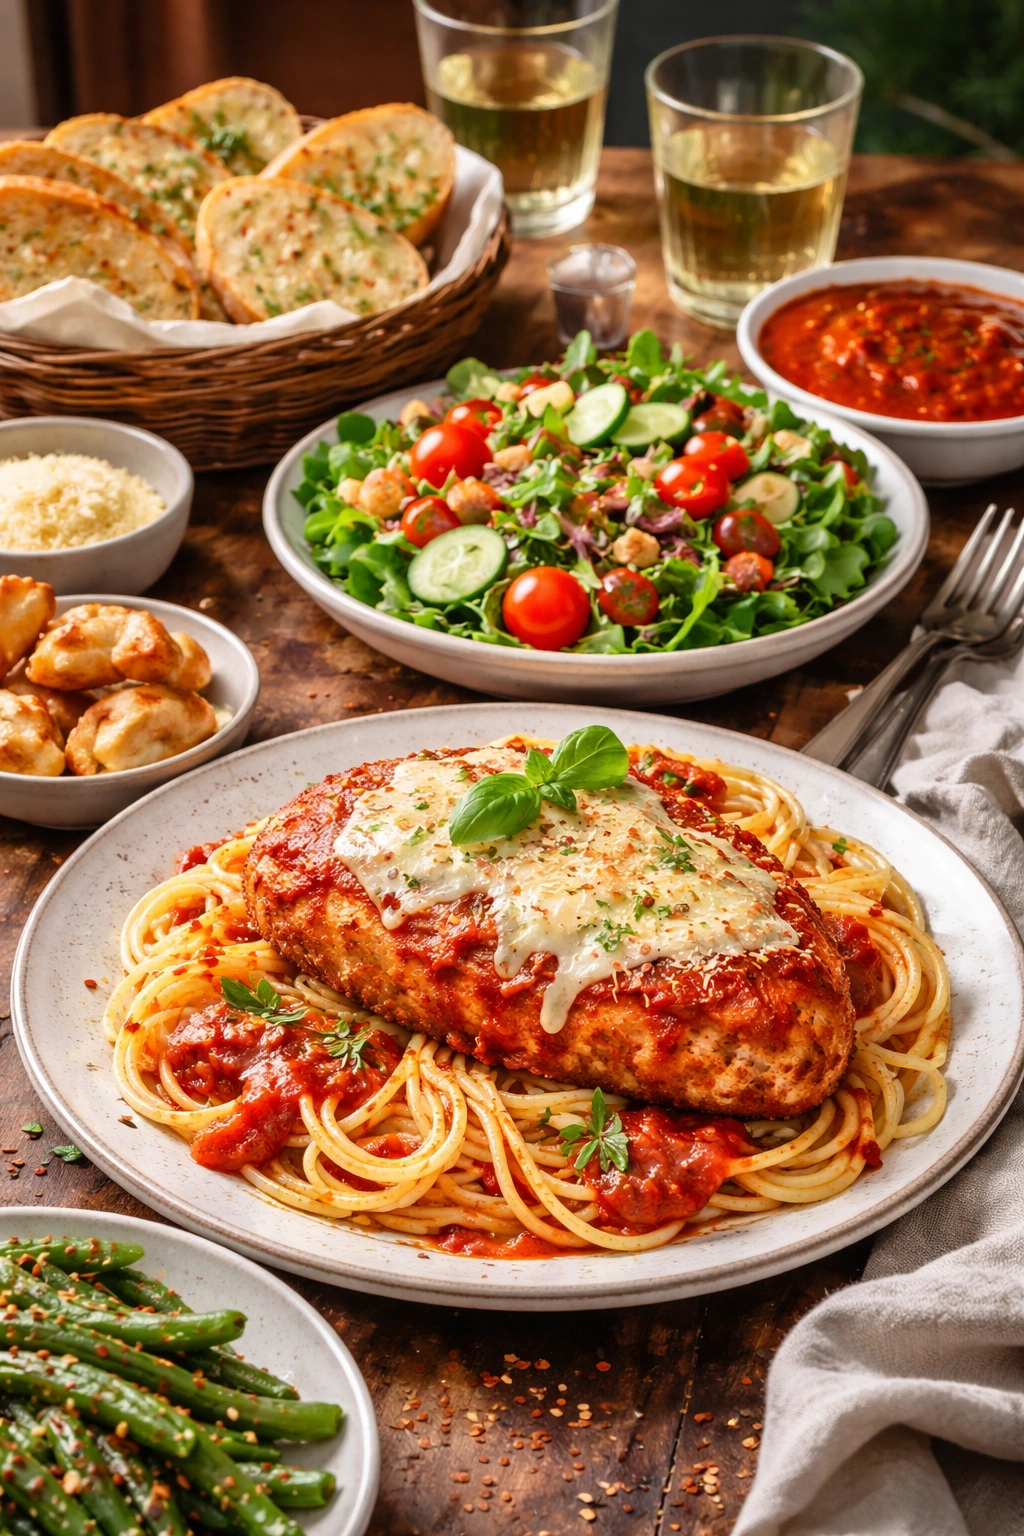
Classic pasta pairing: Serve over fresh egg pasta tossed with butter, Parmesan, and a splash of pasta water. This is the traditional preparation and it’s traditional for good reason—the creamy pasta contrasts beautifully with the crispy chicken and tomato sauce.
For a lighter option: Arrange chicken Parmesan on top of a big arugula salad dressed with lemon juice, olive oil, and shaved Parmesan. The peppery arugula and acidic lemon provide fresh contrast to the rich, cheesy chicken. This version feels restaurant-quality but lighter.
Vegetable sides that work beautifully:
- Roasted zucchini or summer squash with garlic and herbs
- Roasted broccoli or broccolini with a squeeze of lemon
- Sautéed spinach or kale with garlic
- A simple tomato and basil salad
- Roasted asparagus with Parmesan
Bread for sauce-soaking: Serve with garlic bread, focaccia, or toasted ciabatta on the side. The leftover sauce on the plate is too good to waste, and crusty bread is the perfect vehicle.
Beverage pairings: A crisp white wine like Pinot Grigio, Vermentino, or Chianti pairs beautifully. If you prefer non-alcoholic options, sparkling water with lemon, homemade lemonade, or iced tea all work well. The acidity cuts through the richness of the cheese.
Make it a sandwich: Layer finished chicken Parmesan on a crusty roll with fresh mozzarella, fresh basil, and extra marinara sauce. This transforms your dinner into lunch material and is genuinely excellent.
Frequently Asked Questions
Can I make chicken Parmesan without frying it in a pan?
Absolutely. Coat your breaded cutlets lightly with olive oil or cooking spray on both sides, arrange them on a parchment-lined baking sheet, and bake at 425°F for 15 to 18 minutes until golden and cooked through. The results are excellent and genuinely crispy when you use adequate oil. You’ll skip the pan-frying step entirely and save about 10 minutes, keeping you well under the 30-minute target. The tradeoff is slightly less golden color than pan-fried chicken, but the texture and flavor are virtually identical.
How do I prevent my chicken from getting dry?
Use an instant-read thermometer and remove your chicken from the oven when it reaches an internal temperature of 160°F to 162°F, not 165°F. Carryover cooking will bring it to the safe 165°F as it rests, and the difference between 160°F and 165°F at removal is the difference between juicy and dry. Thinner cutlets (¼-inch or less) cook faster and more evenly than thicker pieces, so proper pounding or choosing tenderloins matters. Don’t skip the rest period after cooking—those 2 minutes allow the juices to redistribute throughout the meat.
What’s the difference between using fresh mozzarella versus low-moisture mozzarella?
Fresh mozzarella contains significantly more water, which releases during cooking and creates a watery sauce that separates from the cheese. Low-moisture mozzarella melts into a creamy, cohesive layer and stays on top of your chicken rather than pooling around it. For this dish, low-moisture is the right choice. Fresh mozzarella is delicious in other applications (Caprese salad, pizza), but save it for those and use low-moisture here.
Can I make this recipe in an air fryer?
Yes, and it’s actually the fastest method. Arrange breaded cutlets in your air fryer basket in a single layer, spray both sides lightly with olive oil, and cook at 400°F for 8 to 10 minutes, shaking the basket at the halfway point. The chicken will be done and crispy when you remove it. Top with sauce and cheese, and either return it to the air fryer at 350°F for 2 to 3 minutes until cheese melts, or heat the cheese separately and place it on top just before serving. Total time: about 25 minutes.
Should I use store-bought or homemade marinara sauce?
Either works beautifully. High-quality store-bought sauce (Rao’s, Victoria, San Marzano brands) is genuinely delicious and saves significant time—this is one of the places where premium jarred ingredients really are worth the small extra cost. If you want to make sauce from scratch, that’s wonderful too, but do it ahead of time so it doesn’t cut into your 30-minute cook time. The difference in taste between good jarred sauce and homemade is much smaller than the difference between good sauce and bad sauce, so prioritize sauce quality over sauce origin.
Can I use rotisserie chicken for this?
You could theoretically shred rotisserie chicken and use it as a filling in a crepe or something, but that’s not really “chicken Parmesan.” The appeal of this dish is the contrast between the crispy, breaded exterior and the juicy, tender interior. Using pre-cooked chicken loses that textural element entirely. Make the fresh version; it’s ready in the same timeframe.
Final Thoughts
The reason chicken Parmesan has remained popular for so many years isn’t hard to understand: it’s crispy, cheesy, flavorful, and genuinely satisfying in every way that matters. The breaded crust provides textural contrast, the melted cheese is rich and comforting, the sauce adds brightness and acidity, and it all comes together in a way that feels both elegant and deeply comforting. The traditional version is wonderful, but it doesn’t have to be complicated or time-consuming to be excellent.
You can have this dish on your table in under 30 minutes by making smart choices about ingredients, cut of chicken, and cooking technique. The secrets aren’t complicated: choose thin chicken that cooks quickly, use excellent marinara sauce so you don’t need to make your own, skip the deep-frying chaos and pan-fry or bake instead, and keep your sauce application minimal so you preserve the crispness you worked to achieve. Every shortcut here is actually an improvement—less mess, less time, better results, same delicious final dish.
The next time you’re craving chicken Parmesan on a weeknight, don’t default to calling a restaurant. Head to your kitchen instead. You’ll have restaurant-quality results faster than you could wait for delivery, with better flavor than most restaurants achieve, and the satisfaction of knowing exactly what went into your food. Once you’ve made this version, you’ll realize how simple it actually is and you’ll make it constantly. It’s the kind of recipe that becomes a regular weeknight staple because it delivers every single time.