Crispy zucchini chips are one of those snacks that feels almost too good to be true — a way to transform a humble summer squash into something with the golden crispiness of a fried appetizer, without any of the deep-frying mess or oil-soaked aftermath. The secret lies in understanding zucchini’s water content and how to remove it strategically, then applying heat in a way that shatters the exterior while keeping just enough of the tender interior intact. When you nail this technique, you’ll create chips that shatter audibly when you bite into them, are coated in a savory parmesan crust that sticks to your fingers, and taste nothing like the limp, mushy zucchini fries you might have encountered at a mediocre restaurant.
The beauty of this particular recipe is that it requires almost no special equipment and ingredients you likely already have on hand. There’s no deep fryer, no complex spice blending, and no pastry skills required. What matters most is the temperature of your oven, how thinly you slice the zucchini, and the critical dehydration step that most home cooks skip — which is precisely why their zucchini chips fail. Once you understand why each step exists and what it’s accomplishing, you’ll find that making crispy parmesan zucchini chips becomes one of your most reliable, foolproof appetizers or snacks.
These chips work equally well as a casual snack straight from the baking sheet, a crowd-pleasing appetizer at a party, a protein-paired side dish for dinner, or even a healthier alternative to traditional fried chips when you’re craving something with serious crunch. Because they’re baked rather than fried, they contain a fraction of the fat and calories of traditional chip options, yet they deliver the satisfaction that comes from real textural contrast and bold flavor.
Why Zucchini Makes the Perfect Snack Vegetable
Zucchini is often overlooked as a boring, watery vegetable that gets mushy when cooked. But that’s only true if you cook it wrong. The reality is that zucchini has an incredible ability to become crispy and golden when treated correctly, because its high water content, once removed, leaves behind a structure that crisps beautifully in high heat. Unlike denser vegetables that might remain tough or burn on the outside before softening on the inside, zucchini responds almost perfectly to the exact conditions we’re creating in this recipe.
The flavor profile of zucchini is also ideal for savory applications. It’s mild enough that it won’t overpower other flavors, yet it has just enough subtle sweetness to balance the sharp, umami punch of parmesan cheese. This makes zucchini chips incredibly versatile — they pair well with Mediterranean herbs, spicy seasonings, Asian flavors, or simple salt and pepper. The vegetable itself gets almost out of the way, letting the seasonings and the textural contrast become the star of the show.
Why This Snack Actually Tastes Good
The combination of parmesan, zucchini, and heat creates an almost irresistible flavor experience. As the parmesan bakes, it undergoes the Maillard reaction — the chemical process that creates savory, nutty, deeply flavorful brown compounds. This is the same process that makes a grilled steak smell incredible or turns the crust on bread golden and complex. The parmesan isn’t just sitting on top of the zucchini; it’s transforming into something genuinely delicious through this chemical reaction, and the result tastes far more sophisticated than the sum of its simple parts.
Beyond flavor, there’s the textural satisfaction of eating something truly crispy. Humans are hardwired to enjoy crunch — it signals freshness, it’s satisfying to bite through, and it activates pleasure centers in our brains. A crispy chip, whether made from potato, carrot, or zucchini, taps into that primal satisfaction in a way that soft foods simply cannot match.
The Nutritional Advantage
If you’re looking for a snack that actually contributes something positive to your diet, parmesan zucchini chips deliver. Zucchini is composed of about 95 percent water, but that remaining 5 percent is fiber, vitamin C, potassium, and antioxidants. The parmesan adds protein, calcium, and a rich dose of satisfying fat that helps your body absorb fat-soluble vitamins. Unlike processed snack chips that are engineered to be addictive through specific salt and fat ratios, these chips are a genuinely whole-food option that still manages to be absolutely delicious and crave-worthy.
The Secret to Achieving Maximum Crispiness
The single most important factor in creating truly crispy parmesan zucchini chips is removing moisture from the zucchini before it ever enters the oven. This might sound obvious, but it’s the step that separates successful recipes from disappointing ones. Zucchini contains an enormous amount of water, and if you don’t remove much of it before baking, that water turns to steam inside the oven, and steam is the enemy of crispiness. Steam creates humidity around the chips, which softens them, making them limp and chewy instead of crispy and shattered.
There are several methods for removing this moisture, and understanding which one works best will transform your results. The most effective approach combines multiple techniques: slicing the zucchini to the right thickness, salting to draw out additional moisture, and then patting thoroughly dry before any coating touches the vegetable. This multi-step approach might feel laborious the first time you do it, but once you understand why each step matters, it becomes automatic — and the results are worth every extra minute.
The Perfect Slice Thickness
Start by understanding that slice thickness directly controls final texture. Too thick, and your chips won’t crisp through — the exterior will brown while the interior remains soft and almost mushy. Too thin, and your chips will become paper-thin and shatter into fragments that are difficult to eat. The ideal thickness is approximately ⅛ inch, which is thin enough to allow heat to penetrate completely and create crispiness throughout, but thick enough that the chips remain structurally intact and substantial enough to coat with parmesan and handle without falling apart.
A mandoline slicer is incredibly helpful here because it allows you to control thickness precisely. If you don’t own a mandoline, a very sharp knife works as well — just take your time and try to slice each piece as uniformly as possible. Uniform slicing is important because thicker and thinner pieces will bake at different rates; if some chips are ready to come out of the oven while others are still steaming, you’ll end up with inconsistent results. Aim for consistency across all your slices.
Salt-Drawing and the Pat-Dry Method
Once your zucchini is sliced, arrange the pieces on a clean kitchen towel or several layers of paper towels. Sprinkle lightly with fine sea salt — not so much that it tastes salty on its own, but enough to draw moisture out of the zucchini flesh. The salt works by osmosis, drawing water from inside the zucchini to the surface. Let this sit for about 10 minutes.
After 10 minutes, you’ll see visible moisture on the surface of the zucchini slices. Now comes the crucial step: pat everything completely dry with fresh paper towels or a clean kitchen towel. Don’t just give it a casual pat — actually press the towel against each slice with deliberate pressure to absorb as much surface moisture as possible. Any water remaining on the zucchini surface will steam during baking and prevent crispiness, so this step genuinely matters. It’s worth spending a full minute on this drying step to ensure your chips turn out perfectly crispy.
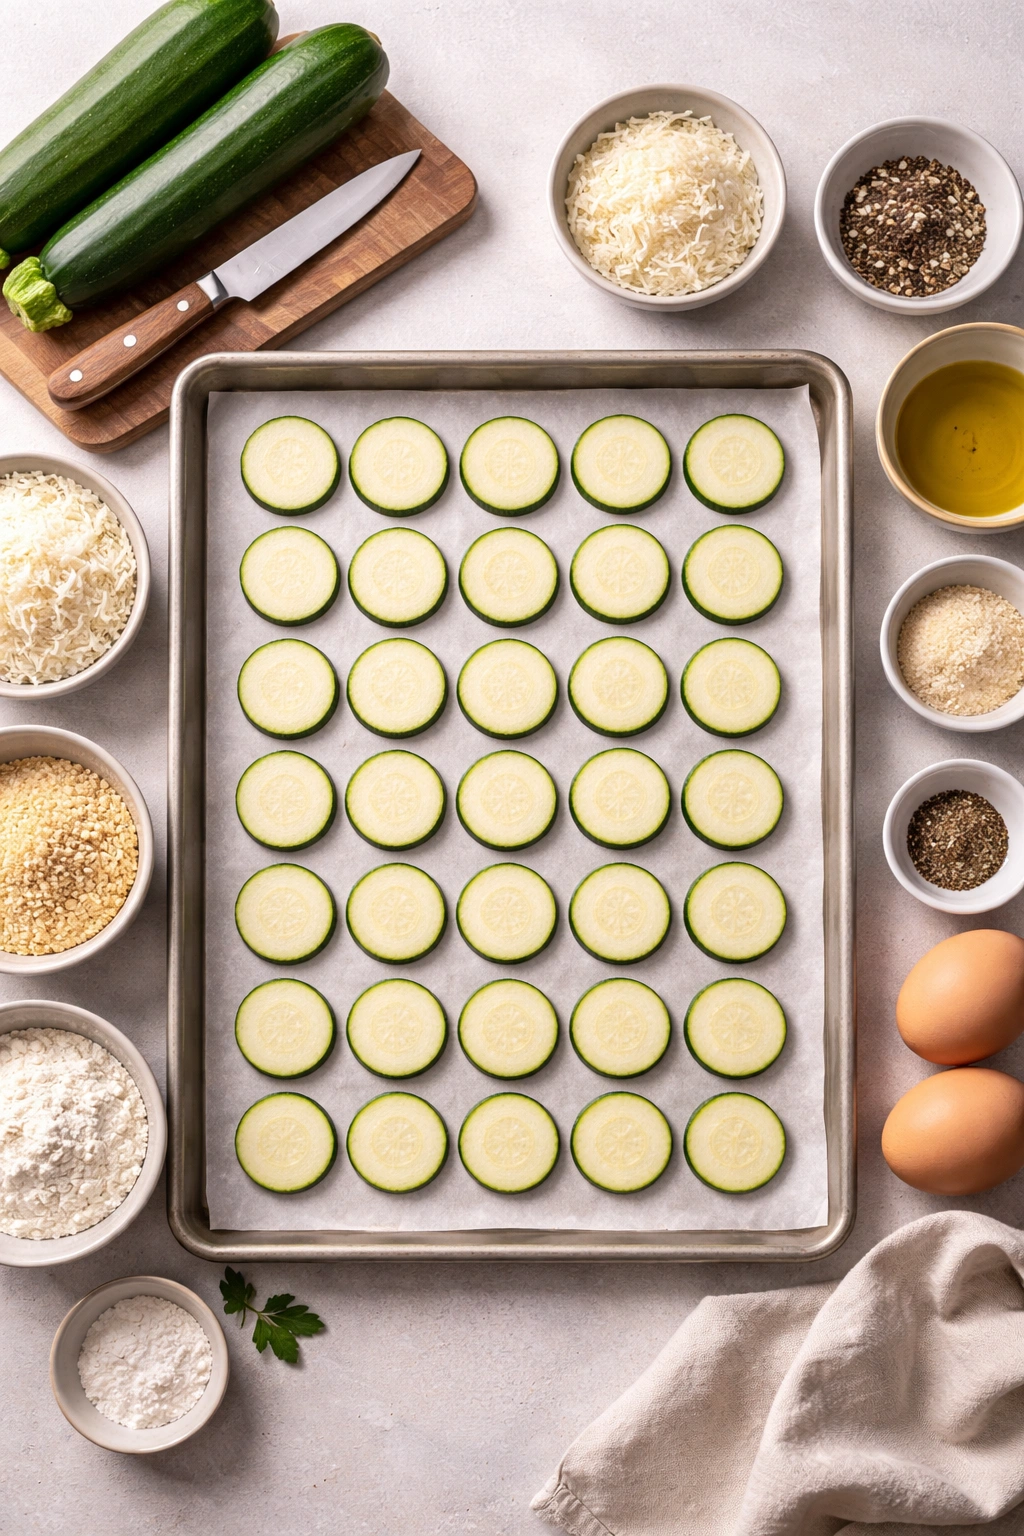
Gathering Your Ingredients for the Crispiest Results
Yield: Makes approximately 40-50 chips (serves 3-4 as a snack, 6-8 as an appetizer)
Prep Time: 20 minutes (includes slicing, salting, and drying)
Cook Time: 20-25 minutes
Total Time: 40-45 minutes
Difficulty: Beginner — No special skills required; the steps are straightforward, and there’s minimal hands-on work during baking.
For the Zucchini Chips:
- 3 medium zucchini (about 1½ pounds total), sliced lengthwise into ⅛-inch-thick strips
- 1 teaspoon fine sea salt (for drawing out moisture)
- ¾ cup freshly grated parmesan cheese, packed into the measuring cup
- ⅓ cup panko breadcrumbs (regular breadcrumbs work, but panko creates extra crispiness)
- 1 teaspoon garlic powder
- ½ teaspoon black pepper, freshly ground
- ¼ teaspoon cayenne pepper (optional, omit if you prefer no heat)
- 2 large eggs
- 1 tablespoon whole milk or heavy cream
- Cooking spray or 1 tablespoon olive oil for the baking sheets
Additional Notes on Ingredients:
The parmesan cheese should be freshly grated if at all possible. Pre-shredded parmesan from a bag contains anticaking agents that create a slightly grainy texture and won’t melt and brown as beautifully as freshly grated cheese. If you have a block of parmesan in your refrigerator, use a microplane or the small holes of a box grater — the finer the grate, the more evenly it will coat and the better the texture of your finished chips.
Panko breadcrumbs deserve special mention because they create a noticeably crisper crust than regular breadcrumbs. Panko is made from bread without the crusts, which means the individual crumbs are larger and create air pockets in your coating. These air pockets turn golden and crispy in the oven, while regular breadcrumbs tend to pack down into a denser crust. If you can only find regular breadcrumbs, they’ll still work fine — just know your chips might be slightly less dramatically crispy.
The eggs and milk create a binding mixture that helps the parmesan and breadcrumb coating adhere to the zucchini. The small amount of milk tempers the egg slightly and makes the mixture easier to coat the zucchini with.
Preparing Your Zucchini for Perfect Texture
Start by choosing zucchini that are medium-sized and firm — neither tiny nor enormous. Smaller zucchini tend to be more tender, while very large zucchini can contain large seeds and more water. Medium zucchini give you the best balance of texture and water content. Run your fingers along the skin; it should feel smooth and firm, not soft or wrinkled.
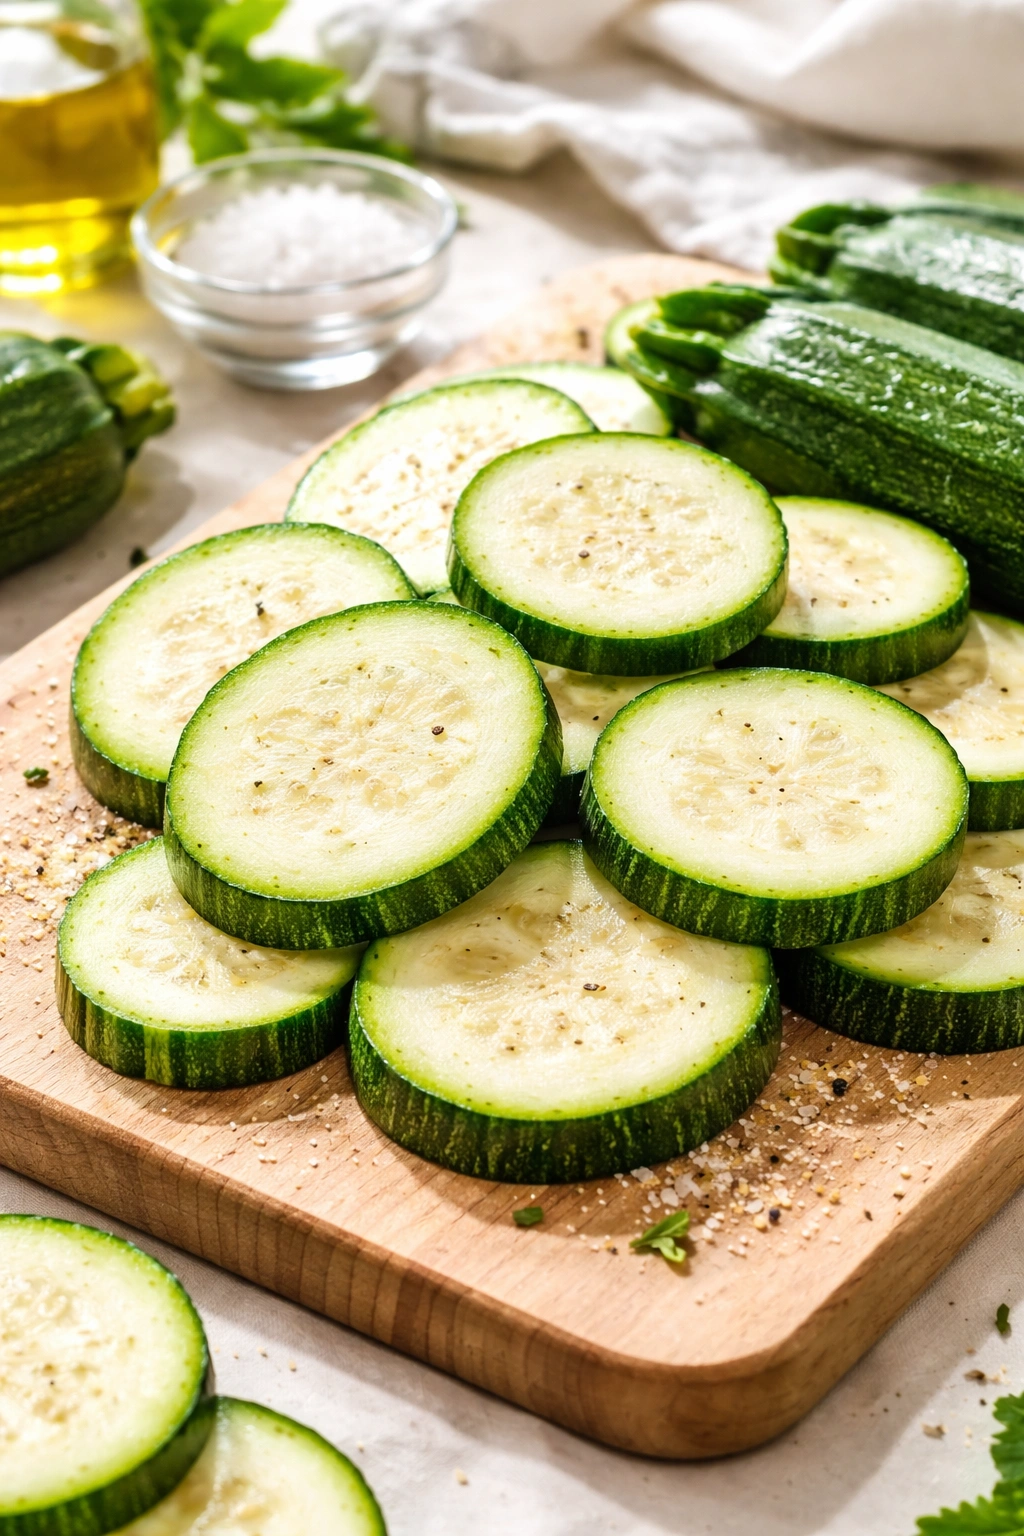
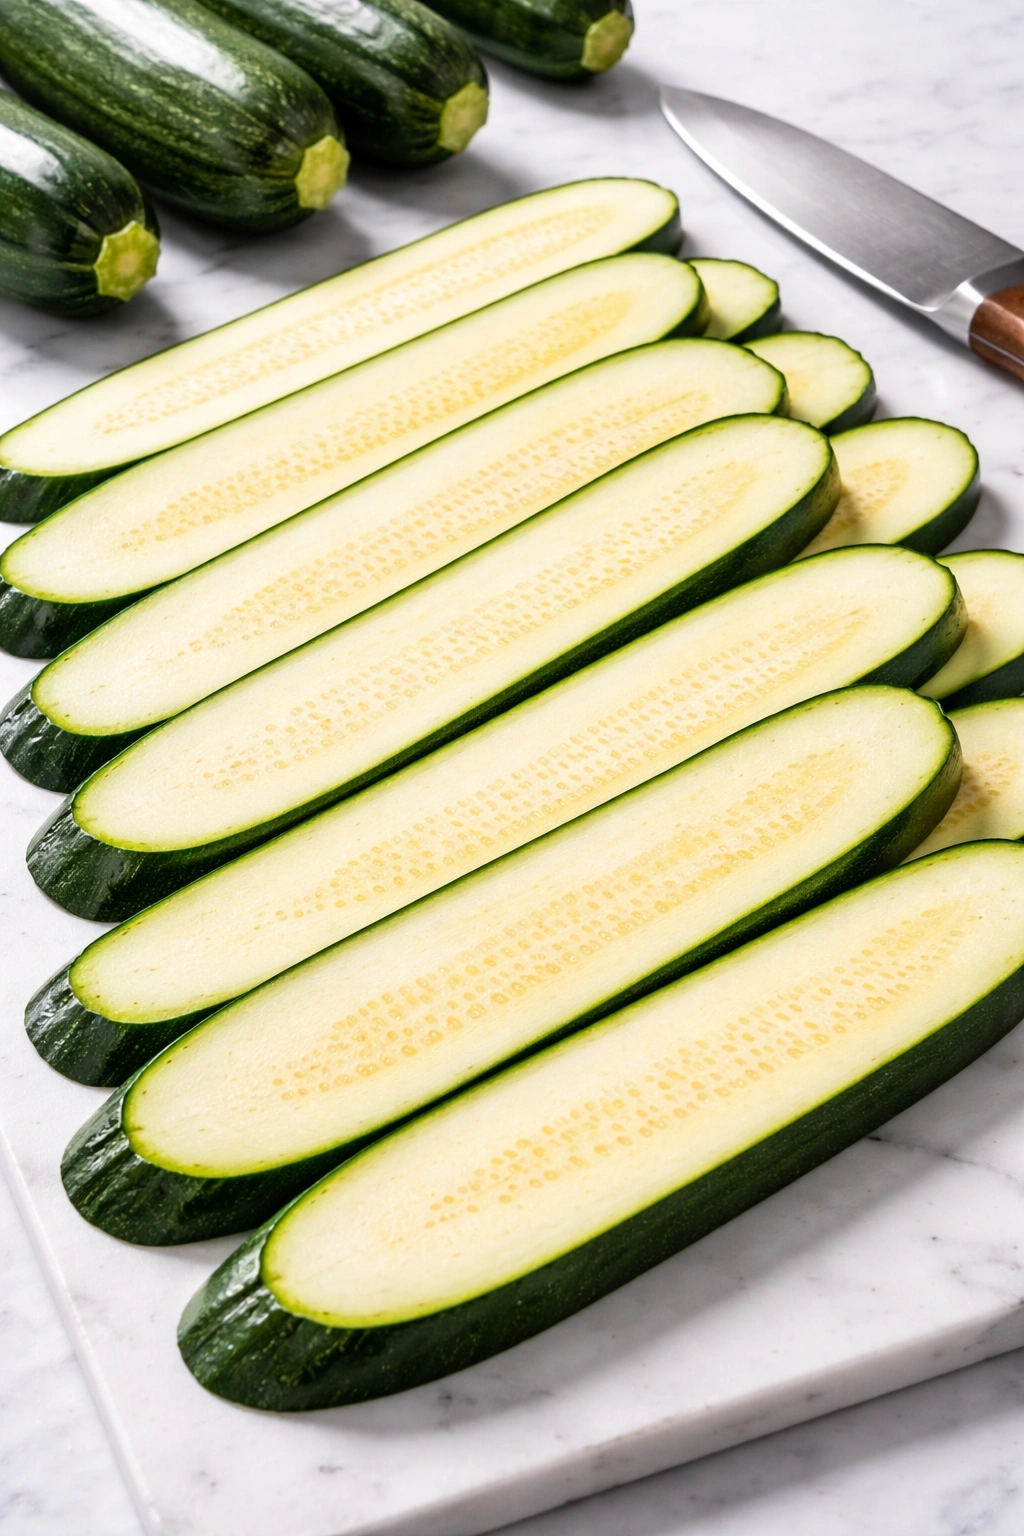
Wash the zucchini thoroughly under cool running water and pat them completely dry with a clean towel. Now comes the slicing. You can slice zucchini lengthwise into long, flat planks (which works beautifully for this recipe), or slice them into circular coins if you prefer. The lengthwise approach creates chips with more surface area, which means more of that incredible parmesan coating per chip. Circular coins are equally valid and create a slightly different eating experience — they’re a bit more portable for dipping.
If slicing lengthwise, cut each zucchini in half first, then lay each half flat on your cutting board with the cut side down — this creates a stable surface so your knife won’t slip. Slice from one end to the other, creating strips approximately ⅛ inch thick. If using a mandoline, follow the manufacturer’s instructions and use the guard provided — mandolines are incredibly sharp and make short work of finger flesh if you’re not careful.
The Critical Moisture-Removal Step
Lay all your zucchini slices in a single layer on paper towels or a clean kitchen towel. Sprinkle with the fine sea salt and let sit undisturbed for exactly 10 minutes. During this time, you’ll see moisture appear on the surface of the zucchini — this is exactly what you want to happen.
After 10 minutes, take fresh paper towels and press each slice firmly against the towel, holding the pressure for a second or two. Work methodically through all your slices, patting both the top and bottom surfaces. Once you’ve gone through all of them, take a second batch of fresh paper towels and repeat the process. The second drying round removes additional moisture that has continued to rise to the surface. You’re not trying to make the zucchini completely moisture-free — that’s impossible. You’re trying to remove enough surface moisture that steam won’t prevent crispiness during baking.
Coating and Seasoning Your Chips for Maximum Flavor
In a shallow bowl, combine the panko breadcrumbs, grated parmesan, garlic powder, black pepper, and cayenne (if using). Mix everything together thoroughly so the parmesan and seasonings are evenly distributed throughout the breadcrumbs. The goal is to create a seasoning mixture where every bite of a chip tastes consistent — no chips that are under-seasoned because the parmesan landed mostly on one side.
In a separate shallow bowl, whisk together the eggs and milk until the mixture is uniform. Now set up your coating station: your bowl with the egg mixture on one side, your bowl with the breadcrumb mixture on the other side, and your baking sheets (prepared with cooking spray or oil) ready to receive the coated chips.
The Coating Technique That Ensures Even Coverage
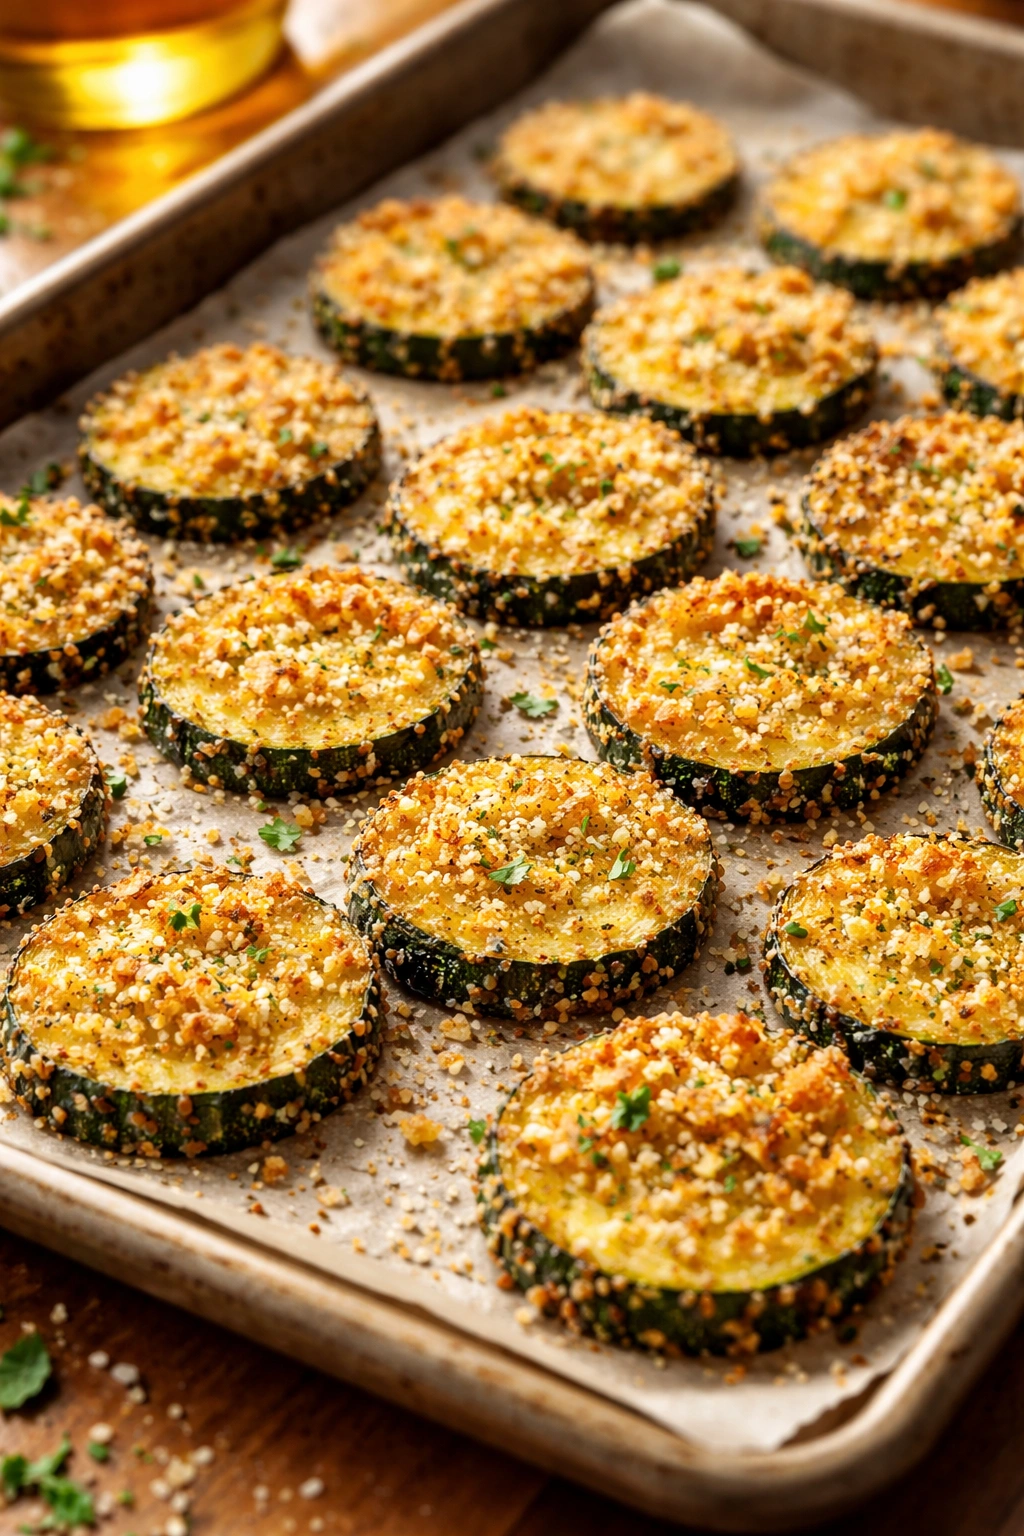
Take one slice of zucchini and dip it into the egg mixture, making sure both sides are covered. Let any excess egg drip back into the bowl — you want a thin coating, not excess egg that drips off. Transfer the zucchini slice to the breadcrumb mixture and coat thoroughly on both sides, pressing gently so the breadcrumb mixture adheres. The coating doesn’t need to be perfectly smooth or thick; it just needs to cover the zucchini surfaces. Place each coated slice on your prepared baking sheet, arranging them in a single layer with a bit of space between each one (about ½ inch is fine).
Don’t overcrowd the baking sheets. If chips are too close together, they’ll trap steam and won’t crisp properly. Depending on the size of your baking sheets and the size of your zucchini slices, you might be able to fit all your chips on one or two standard baking sheets. If you run out of space, that’s fine — you can bake in batches. The timing remains the same regardless.
Once all your zucchini slices are coated and arranged, lightly spray them with cooking spray or drizzle lightly with olive oil. This might seem counterintuitive when you’re trying to create crispy chips, but the oil is crucial. It helps the parmesan brown and crisp up properly during baking, and the amount is so small that it doesn’t make the chips greasy. Without this light oil spray, the parmesan might brown unevenly and the crispiness won’t develop as dramatically.
The Baking Method That Delivers Restaurant-Quality Crispness
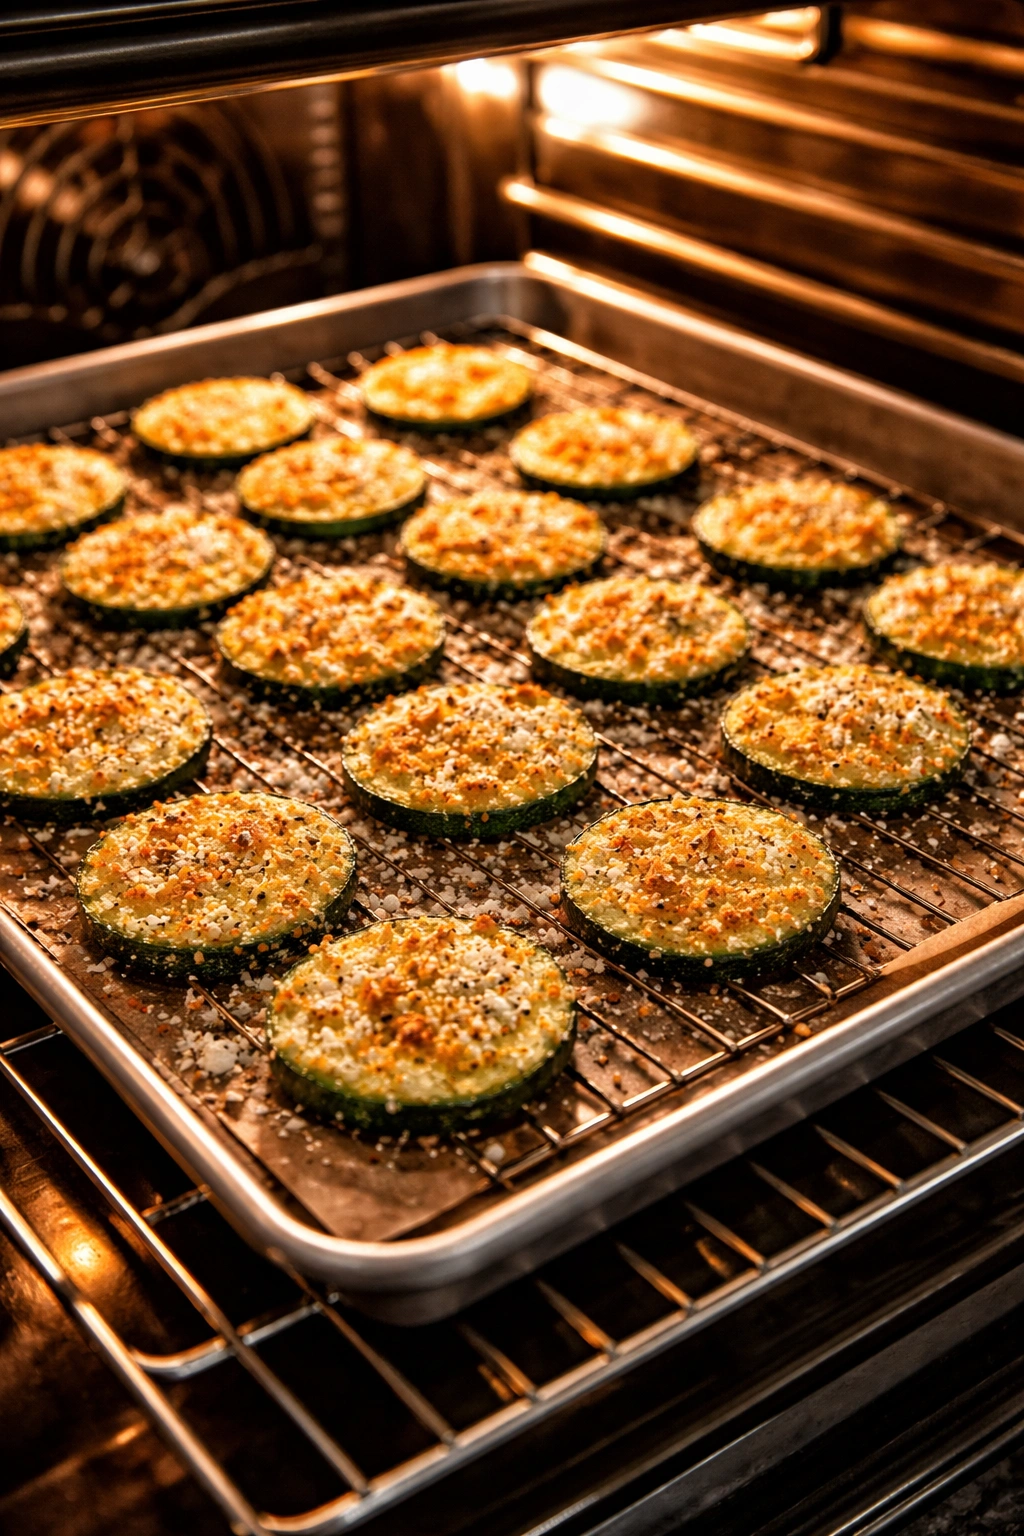
Preheat your oven to 400°F (200°C) and position one rack in the upper third of the oven and one rack in the center. If you’re only baking one sheet, position the rack in the upper third. The upper-third positioning is important because it exposes the chips to more direct heat from the top heating element, which crisps the parmesan coating beautifully.
Once the oven is fully preheated, place your first sheet of chips on the upper rack. Set a timer for 12 minutes. While they’re baking, you can coat your second batch of chips (if you have one) and have them ready to go.
The Critical Halfway-Point Check
At exactly 12 minutes, check your chips. At this point, they should be starting to turn light golden brown, but they’re not done yet. Here’s where you need to make a judgment call based on what you’re seeing: if the parmesan is already turning deeper golden and the edges of the zucchini look like they might be crisping, you might be done in as little as 20 minutes total. If the parmesan is still pale gold, add another 5-8 minutes.
Every oven is slightly different in terms of actual temperature and air circulation, so the exact timing might vary slightly from kitchen to kitchen. This is why paying attention visually matters more than blindly following a timer. You’re looking for the moment when the parmesan coating has turned a deep golden brown and the edges of the zucchini slices look crispy and slightly dark.
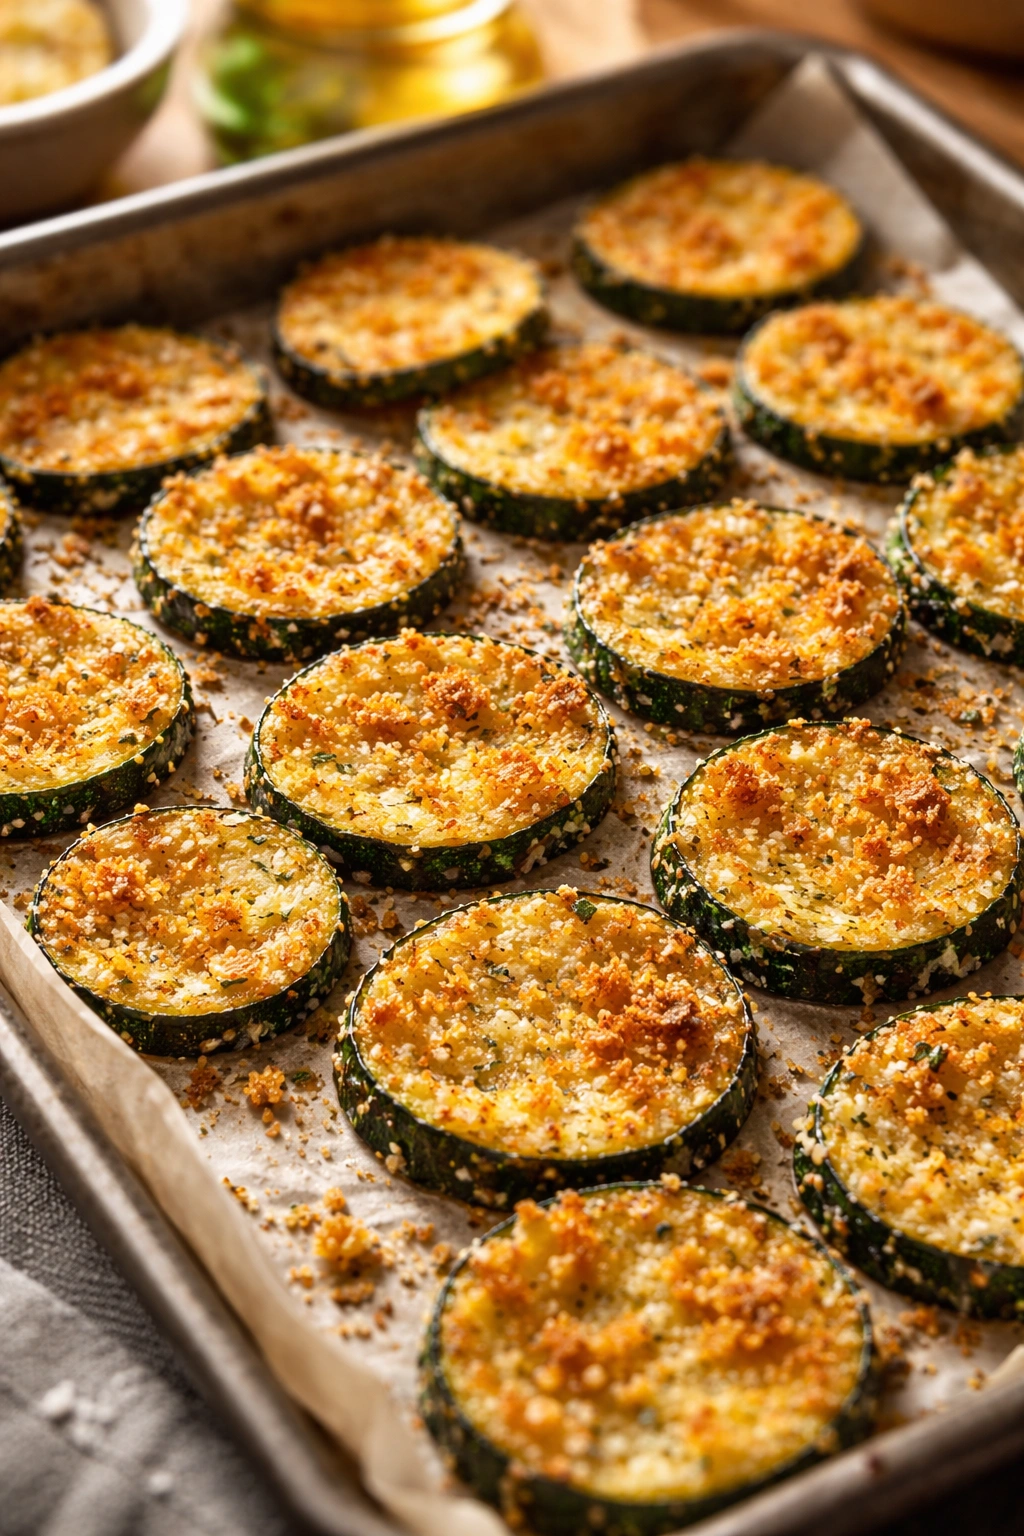
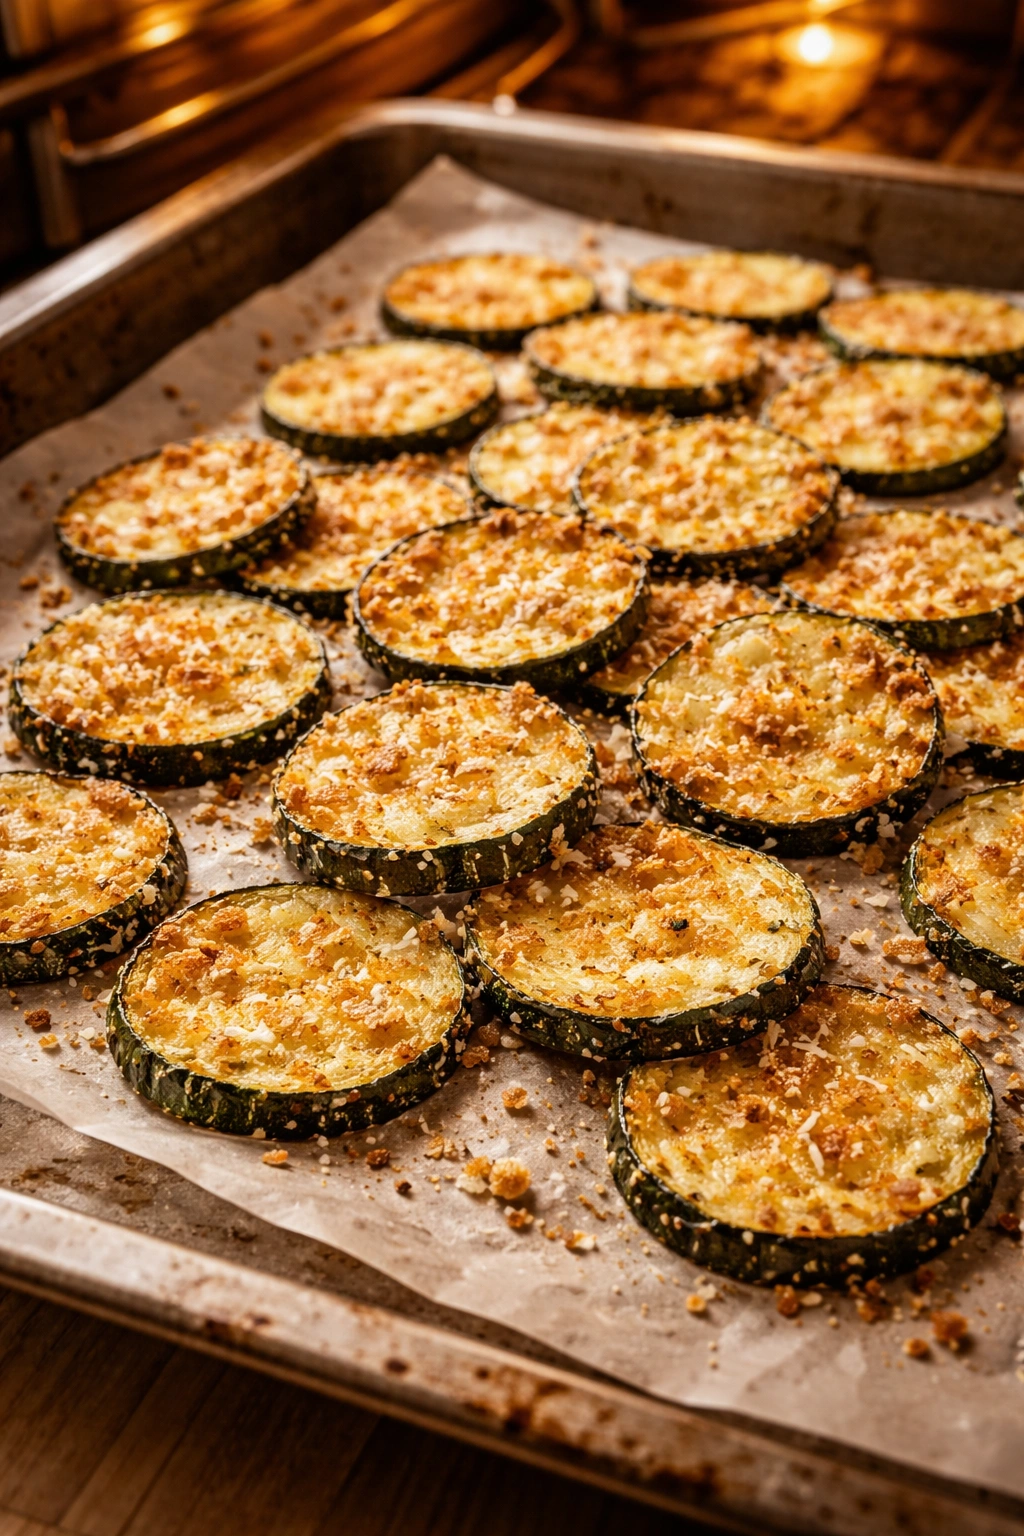
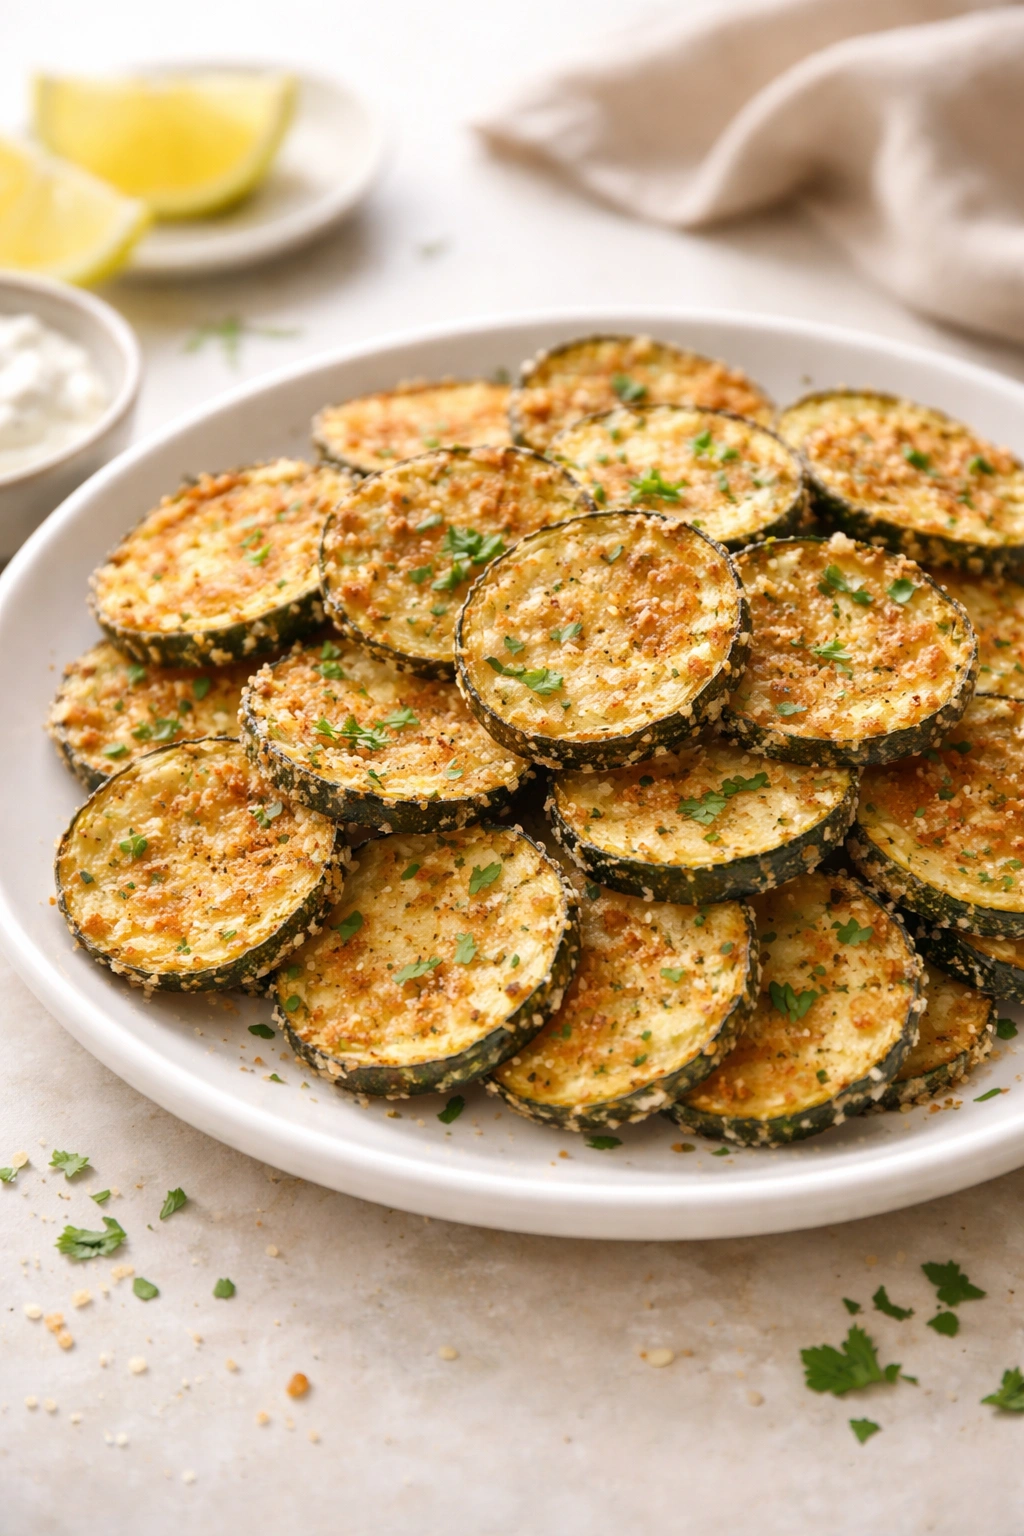
How to Know They’re Perfectly Done
The chips are perfectly done when the parmesan coating is a rich, dark golden brown, and when you look at the edges of the zucchini slices (where the coating meets the exposed zucchini flesh), they should look slightly darker and crispy — not pale or soft-looking. The edges should look like they might shatter if you bit into them.
Remove the chips from the oven and let them cool on the baking sheet for 5 minutes. This cooling time is important because the chips continue to crisp and firm up as they cool — if you try to eat them immediately, they’ll be soft and flexible. After 5 minutes, try one to see if it has the crispiness you’re looking for. If it’s still slightly soft, transfer the entire sheet back to the oven for another 2-3 minutes. Once you achieve the crispiness you want, you can transfer the chips to a serving plate or storage container.
Common Mistakes That Make Zucchini Chips Soggy
The number one reason homemade zucchini chips come out soggy is inadequate drying. If you skip or rush the salting and patting-dry step, your chips will almost certainly be disappointing. The moisture you’re removing in that step is what would otherwise turn to steam and soften your chips during baking. There’s no shortcut here — it takes what it takes to remove that moisture properly.
The second common mistake is oven temperature that’s too low. If you bake your chips at 350°F instead of 400°F, they won’t develop the crispy exterior because the temperature isn’t high enough for the parmesan to brown and the zucchini to lose moisture quickly. The chips will bake slowly, and by the time the parmesan browns, the zucchini has already steamed and softened inside. Higher heat is actually better here because it quickly removes remaining moisture and crisps the coating before the zucchini has time to become soft.
Other Mistakes Worth Mentioning
Overcrowding the baking sheet is another common issue. If chips are touching or very close together, they trap steam between them, and the trapped steam prevents crispiness. Leave at least ½ inch of space between each chip so air can circulate freely.
Using pre-shredded parmesan (the kind from a bag) instead of freshly grated also impacts results. The anticaking agents prevent the parmesan from melting and browning as evenly, and the resulting crust is less crispy. If you’re only planning to make these chips occasionally, it’s worth buying a small wedge of parmesan and grating it fresh for the difference it makes.
Finally, some home cooks don’t apply any oil to their chips before baking, thinking they’re creating a healthier option. The irony is that without that light coating of oil, the parmesan browns less evenly and the chips are less crispy. The small amount of oil is actually integral to creating the texture you’re after. You can always dab the finished chips with a paper towel if you’re concerned about excess oil.
Creative Flavor Variations Beyond Basic Parmesan
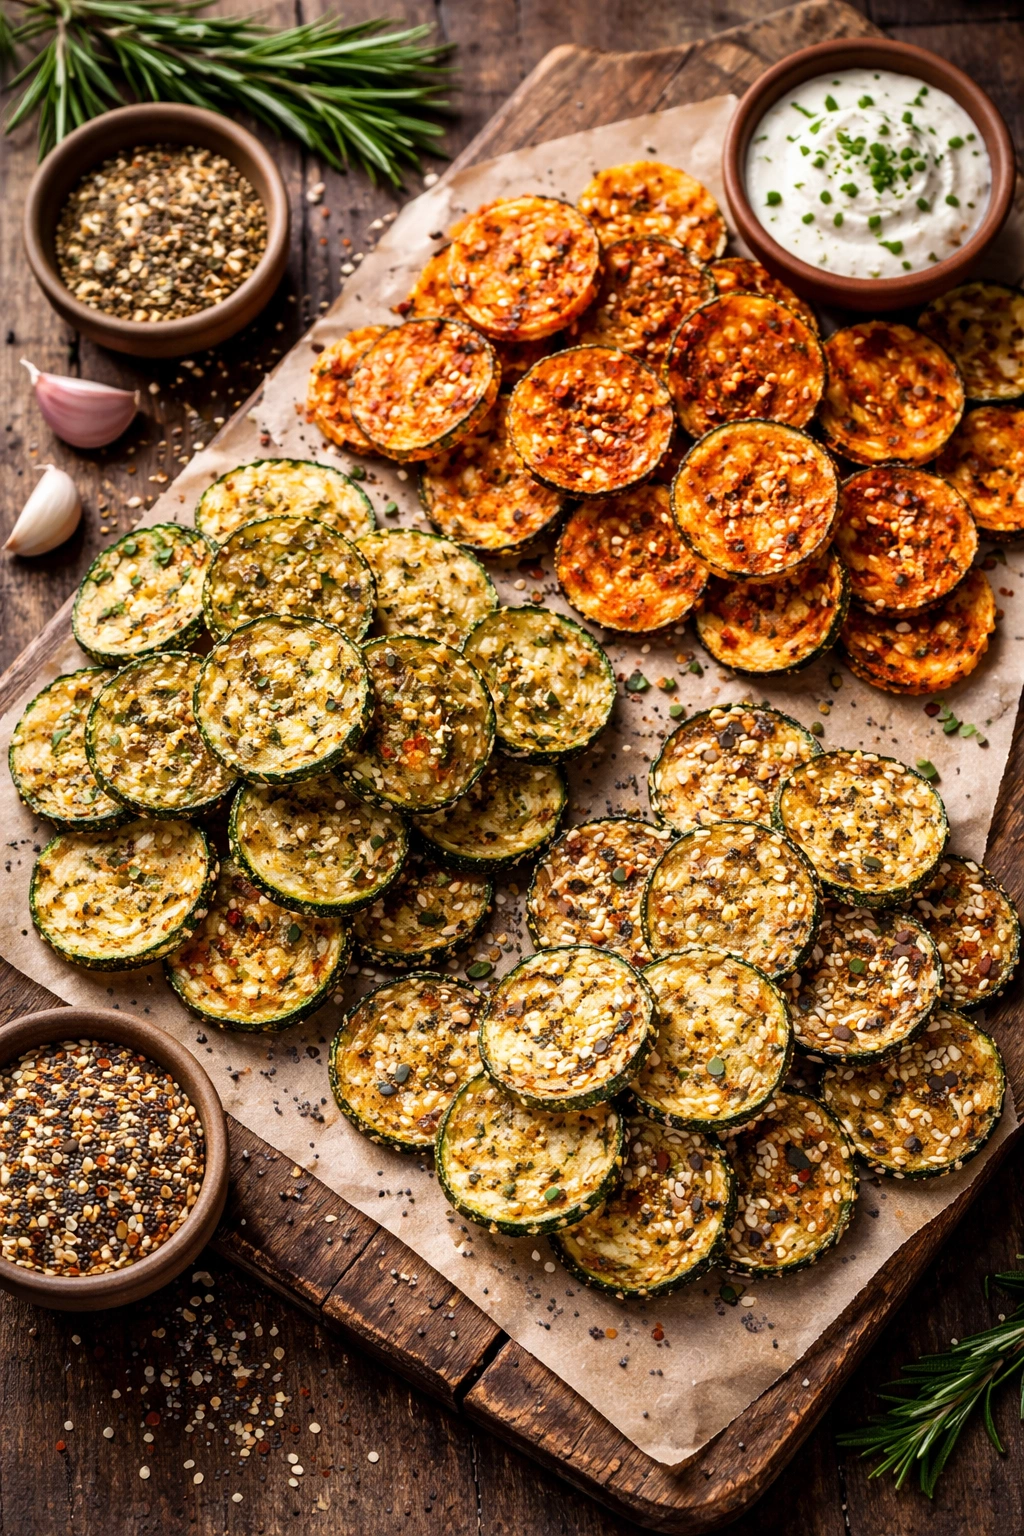
Once you’ve mastered the basic recipe, the variations are endless. The foundation of crispy-coated zucchini is so strong that it serves as a canvas for almost any flavor combination you can imagine.
Italian Herb Variation
Replace 1 tablespoon of the breadcrumb mixture with 1 teaspoon dried Italian seasoning, ½ teaspoon dried basil, and ½ teaspoon dried oregano. Keep the parmesan at the same amount. This creates chips with a distinctly Mediterranean flavor profile that pair beautifully with a simple marinara sauce for dipping. The herbs toast slightly in the oven, becoming more fragrant and flavorful.
Spicy Buffalo Style
Add 1 teaspoon of Frank’s RedHot sauce (or another vinegar-forward hot sauce) to your egg mixture before coating the chips. This creates a slightly spicy coating that tastes reminiscent of buffalo wings. Serve these with a cool ranch or blue cheese dip for an appetizer that tastes far more indulgent than its baked construction.
Everything Bagel Seasoning
Instead of the garlic powder, black pepper, and cayenne, mix 2 tablespoons of everything bagel seasoning into your breadcrumb-parmesan mixture. Everything bagel seasoning includes garlic, onion, sesame seeds, poppy seeds, and salt — it’s complex, deeply savory, and creates unexpectedly delicious results when combined with crispy parmesan zucchini.
Lemon Pepper and Herb
Add the zest of one lemon to your breadcrumb mixture along with 1 teaspoon of lemon pepper seasoning, and replace half the parmesan with gruyere cheese for a sophisticated variation. The lemon brightens the entire flavor profile and works beautifully with the nutty, rich gruyere.
Cajun and Crispy
Combine the garlic powder with 1 teaspoon of Cajun seasoning, ½ teaspoon smoked paprika, and a pinch of cayenne. Replace the regular parmesan with a mixture of half parmesan and half finely grated sharp white cheddar for a spicy, complex coating that tastes like a New Orleans snack.
How to Store and Reheat Your Zucchini Chips
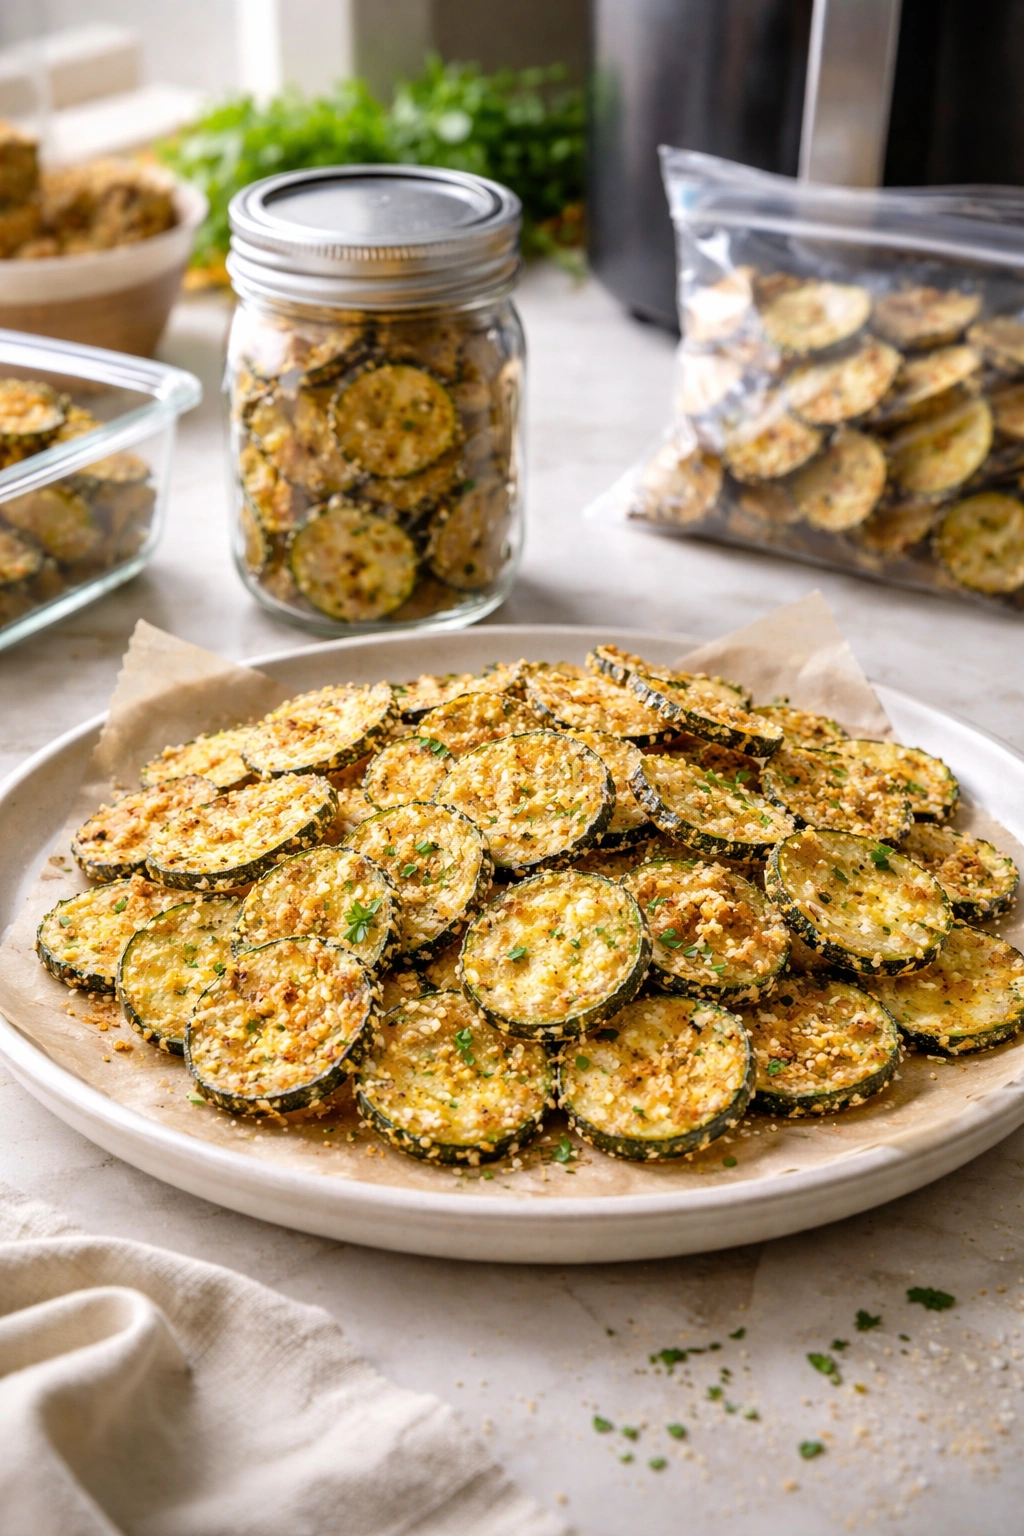
Crispy parmesan zucchini chips are best enjoyed fresh from the oven, while the parmesan coating is still crackling and the zucchini is at its most tender-crispy. However, they do keep well when stored properly, and they can be successfully reheated.
At Room Temperature: Chips will stay reasonably crispy at room temperature for up to 2-3 hours, making them ideal for a party or picnic. After a few hours, they’ll begin to soften slightly, but they’re still delicious. If you’re planning to serve them at a gathering, make them no more than a few hours before serving.
In the Refrigerator: Store cooled chips in an airtight container in the refrigerator for up to 3 days. The parmesan coating will soften slightly over this period, but the chips will still taste good. You can eat them cold directly from the container, or reheat them to restore most of the original crispiness.
In the Freezer: Yes, you can freeze these chips, and they actually reheat beautifully. Place completely cooled chips in a single layer on a baking sheet, freeze for about 2 hours until solid, then transfer them to a freezer bag or container. They’ll keep for up to 2 months. To reheat frozen chips, place them on a baking sheet and bake at 375°F for about 8-10 minutes until they’re heated through and crispy again. Don’t thaw them first — bake them straight from frozen.
The Best Reheating Method
The oven is hands-down the best way to reheat zucchini chips because it restores the crispiness that makes them special. A microwave will warm them quickly, but it will make them tough and chewy instead of restoring crispiness. If you must use a microwave (though I’d encourage you to use the oven instead), place chips on a paper-towel-lined microwave-safe plate and heat for 30-45 seconds at 50% power — this will warm them without turning them rubbery.
The air fryer is another excellent reheating option if you have one. Place room-temperature chips in the air fryer basket in a single layer and air fry at 350°F for about 5 minutes until heated through and crispy. Frozen chips take about 8-10 minutes in the air fryer.
Serving Suggestions and Dipping Sauce Pairings
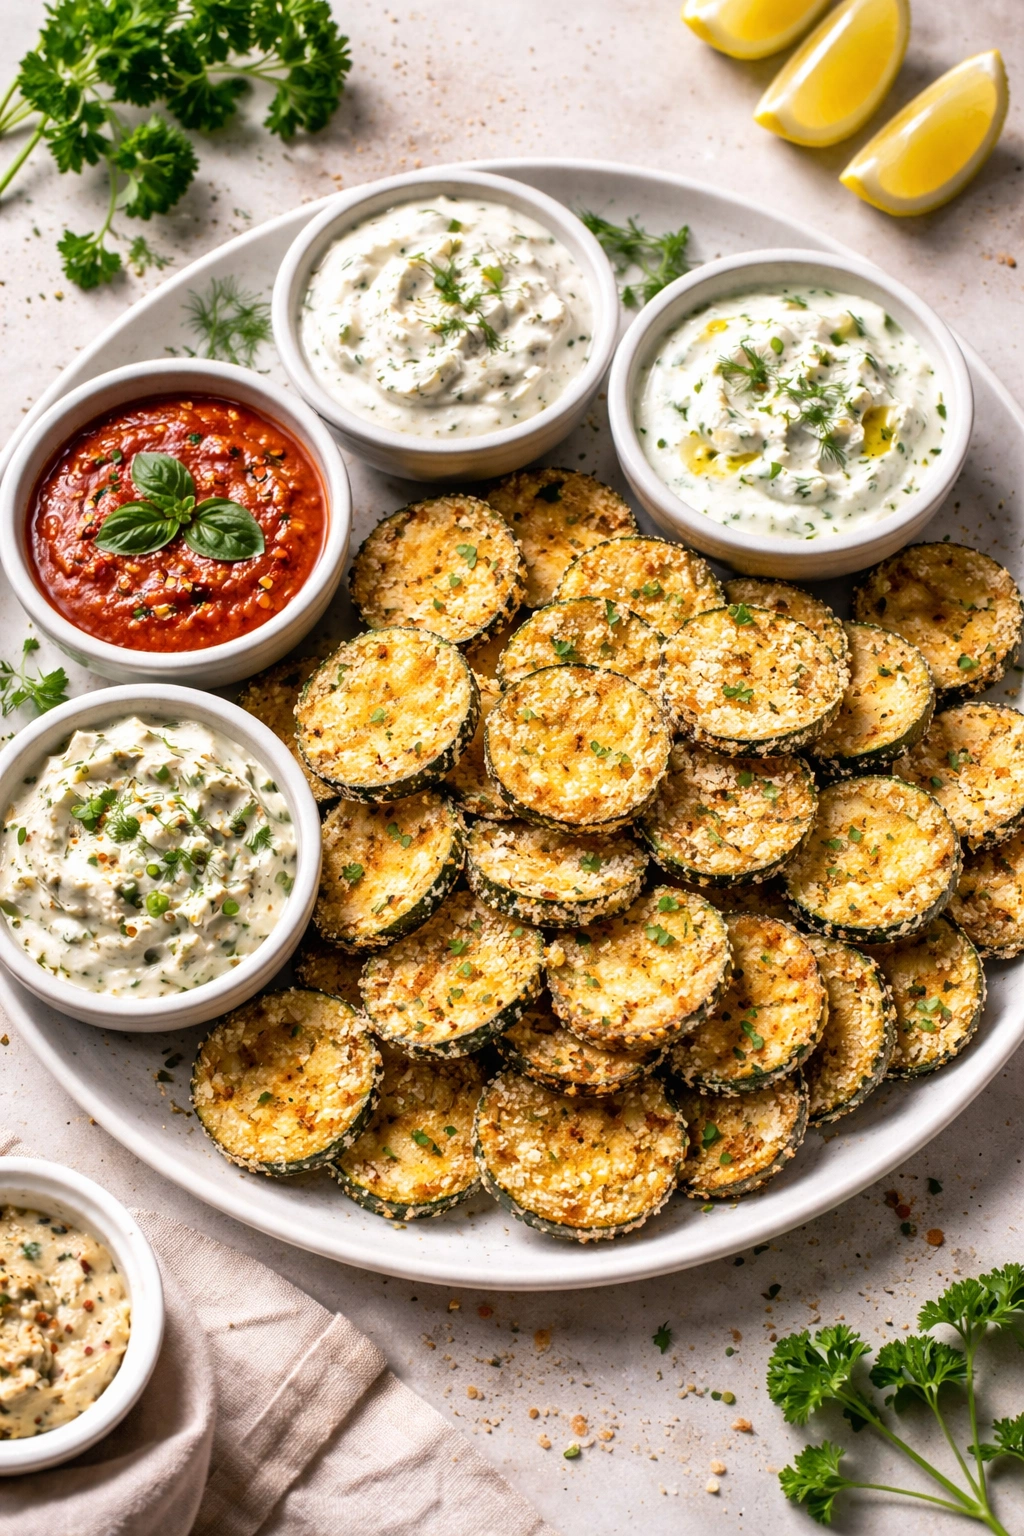
The way you serve these chips dramatically impacts the eating experience. They’re delicious eaten plain, straight from the baking sheet while still slightly warm, when the parmesan is most fragrant and the texture contrast is most pronounced. But pairing them with the right dips and accompaniments elevates them from a good snack to something genuinely memorable.
Cool, Creamy Dips
Cool dips create an interesting temperature contrast and balance the richness of the parmesan coating. A simple Greek yogurt-based ranch (mix Greek yogurt with ranch seasoning powder and a splash of milk) works beautifully. So does a simple tzatziki made from Greek yogurt, grated cucumber, minced garlic, fresh dill, and lemon juice. The cool, herby brightness of tzatziki contrasts gorgeously with the warm, savory chips.
For a creamier option, make a simple hot artichoke dip by combining cream cheese, sour cream, canned artichoke hearts (chopped), grated parmesan, minced garlic, and fresh lemon juice, then warm it gently. The chips become edible scoops for this rich, savory dip.
Acidic and Bright Sauces
Marinara sauce, whether homemade or high-quality store-bought, is a classic pairing. The acidity cuts through the richness of the parmesan and creates a flavor combination that tastes almost like an Italian appetizer. Similarly, a simple garlic aioli (mayonnaise mixed with minced garlic, lemon juice, and a tiny bit of saffron if you’re feeling fancy) provides richness and brightness simultaneously.
For a lighter option, mix Greek yogurt with equal parts marinara sauce, and you get both the richness and the brightness. Top with fresh basil and red pepper flakes for an even more sophisticated result.
As a Snack All On Its Own
Don’t overlook serving these chips with absolutely nothing — just warm, straight from the oven, with maybe a little fleur de sel sprinkled on top while they’re still hot. The simplicity lets the parmesan coating, the crispy texture, and the subtle sweetness of the zucchini shine. This is the version to make when you want something satisfying but not overly fussy.
In a Meal Context
Parmesan zucchini chips work beautifully as a side dish alongside grilled proteins. Serve them alongside grilled chicken, roasted fish, or a steak, alongside roasted potatoes or rice. They add textural interest and a vegetable component without feeling heavy. They’re also excellent alongside soup — the warmth and heartiness of soup pairs beautifully with the crispy, textural chips.
For a lighter lunch, serve chips on a bed of mixed greens alongside fresh mozzarella, tomatoes, and a simple balsamic vinaigrette. The chips add unexpected crunch and richness to a fresh salad.
Final Thoughts
Crispy parmesan zucchini chips prove that healthy snacking doesn’t require deprivation or foods that taste like sad cardboard. With the right technique — primarily the careful removal of moisture and the use of proper oven temperature — you can create something genuinely crave-worthy that happens to be made almost entirely from whole foods.
The beauty of this recipe lies in how forgiving it is once you understand the mechanics. Make them once, pay attention to what happens at each stage, and you’ll develop an intuition for how your specific oven behaves. From there, it’s just a matter of adjusting timing slightly based on what you see, and you’ll have perfect results every single time.
Whether you’re making these for yourself as a satisfying snack, preparing them for a party where you want to offer something better than packaged chips, or looking for a way to use up summer zucchini, these crispy parmesan chips deliver. They’re proof that vegetables can be genuinely delicious when you respect their nature and treat them with the right technique.