There’s a moment that happens every time you make pesto from scratch—that exact second when the basil, garlic, pine nuts, cheese, and oil transform from individual ingredients into something completely alive with flavor. If you’ve only ever bought jarred pesto, you’re missing one of the most revelatory kitchen experiences: the sharp, grassy brightness of fresh basil hitting your tongue in a way that’s almost shocking compared to what sits on grocery store shelves.
The truth is, homemade basil pesto isn’t complicated or time-consuming. You don’t need fancy equipment or obscure ingredients. You don’t need to fuss or follow a rigid formula. What you need is about five minutes, a handful of pantry staples, and the right technique so that every batch tastes like summer in a spoon. Once you understand what’s actually happening when you make pesto, you’ll never look at the jarred version again.
What Makes Fresh Basil Pesto Different
Jarred pesto sits on warehouse shelves, travels in trucks, and spends time on store shelves—and during all that time, flavor is fading. The bright, peppery basil taste slowly converts into something mellower and more muted. Heat-processing kills some of the delicate aromatic compounds that make fresh pesto so alive. And let’s be honest: commercial pesto often uses less basil and more filler than what you’d make at home.
When you make pesto at home using raw, fresh basil that you literally just picked or bought, you’re capturing flavor at its peak. Those volatile oils in the basil leaves—the ones that give pesto its signature taste—haven’t had time to break down or oxidize. The garlic is sharp and clean, not mellowed by cooking. The nuts taste buttery and toasty because they’re still in their prime state. The cheese, whether Parmigiano-Reggiano or Pecorino Romano, hasn’t been sitting around losing its edge.
This is also where you control exactly what goes into your pesto. You can choose your cheese, adjust the garlic level to match your preference, select which nuts you want (or avoid them entirely if you need to), and pick your olive oil quality. You’re not eating whatever someone else decided was “good enough” for mass production.
The flavor difference between homemade and jarred is profound enough that once you’ve made it fresh, you’ll understand why people get genuinely passionate about pesto. It’s not pretentious—it’s just noticing when something tastes exponentially better.
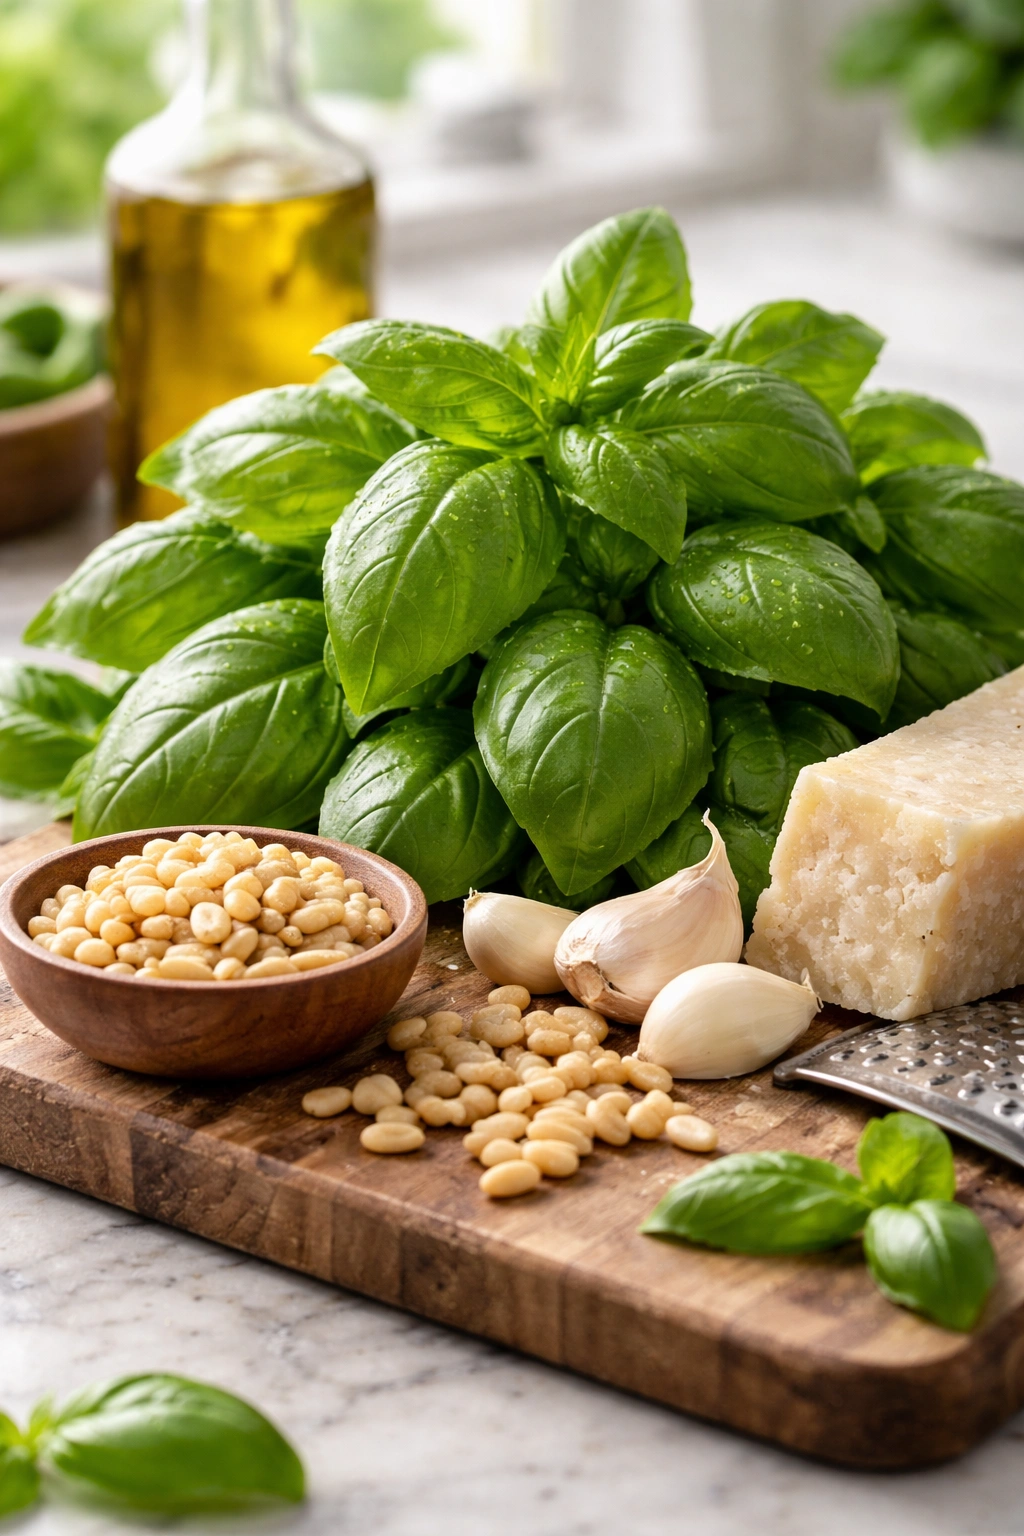
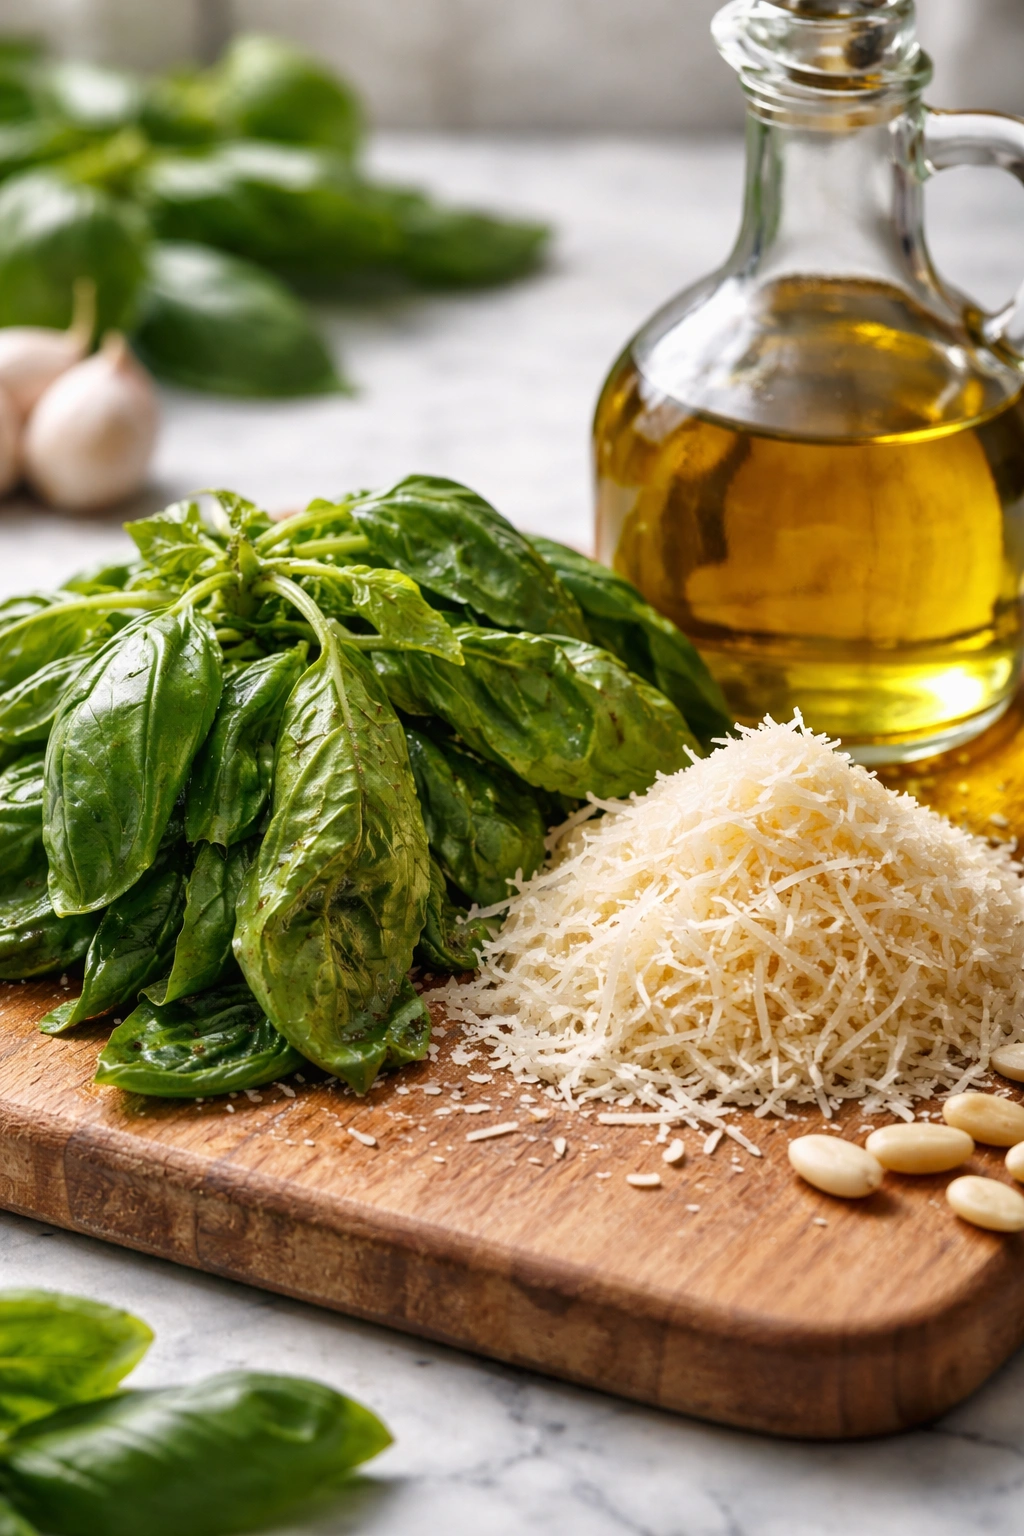
Choosing the Best Basil and Other Key Ingredients
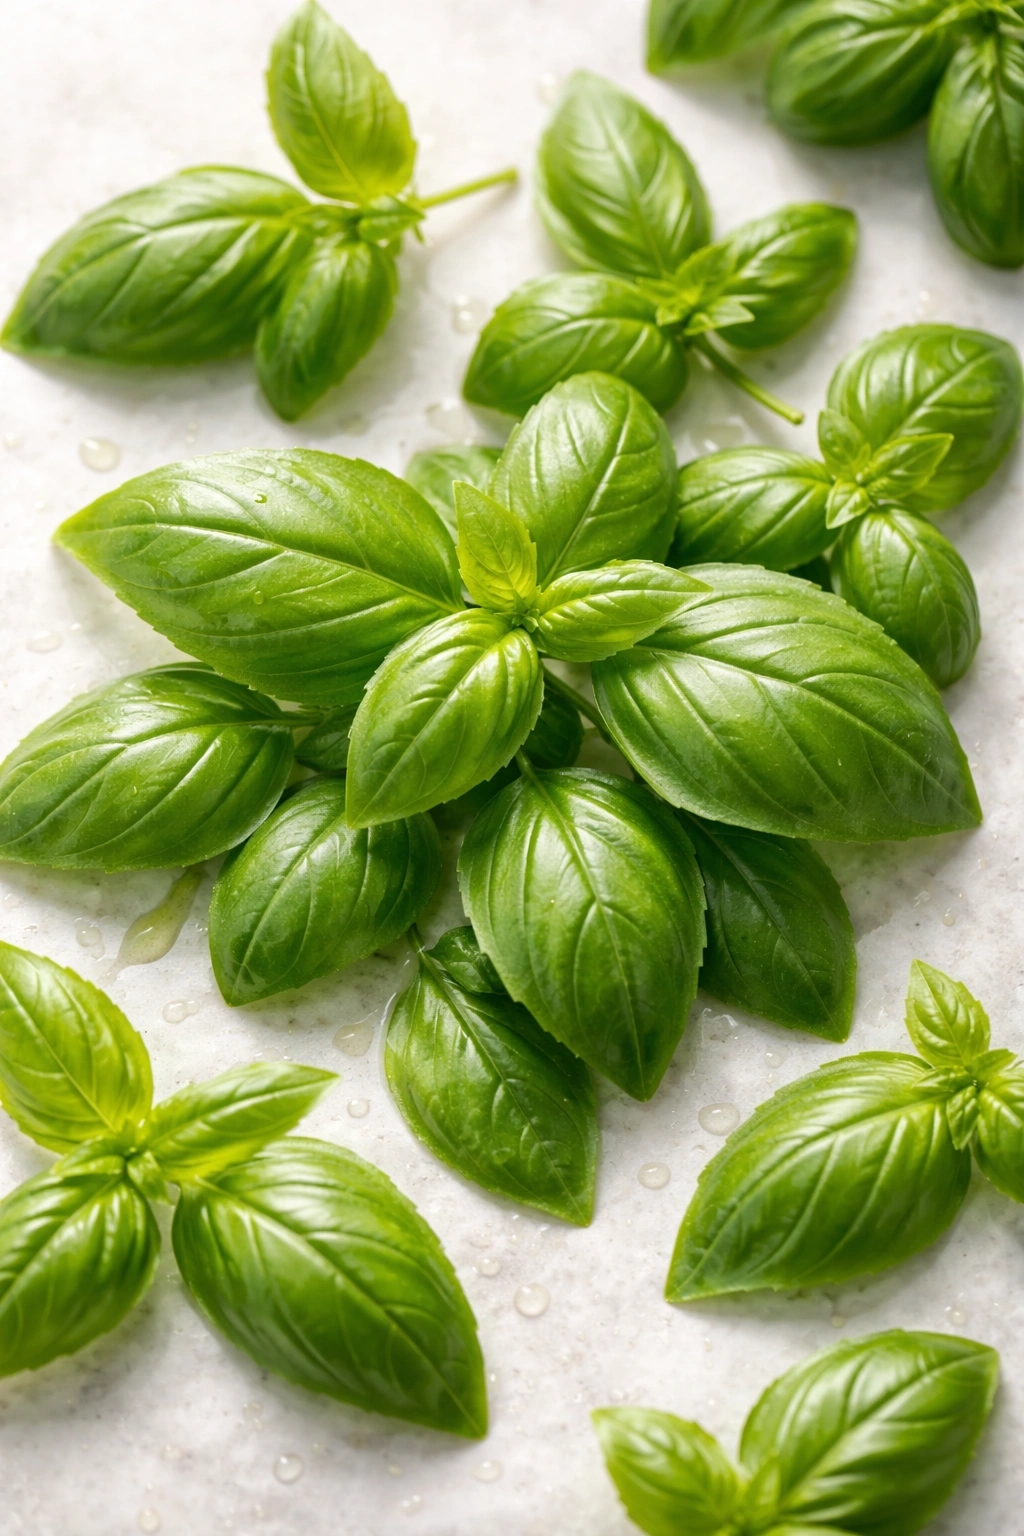
Basil is the entire foundation, so it deserves your attention. You want fresh, tender basil leaves that are bright green and smell intensely aromatic when you crush one in your hand. This is not the time for those sad, wilted basil bunches that have been sitting in the grocery store cooler for two weeks. If possible, visit a farmers market where you can see basil that was picked that morning. The difference is real.
Look for young leaves rather than the tougher, more mature leaves near the base of the plant. Those young leaves are delicate, flavorful, and won’t add any bitter tannins to your pesto. If your basil has flower buds forming, pinch those off first—they can add bitterness. You’ll need about two cups of loosely packed basil leaves for a proper batch, though you can adjust up or down depending on how intensely basil-forward you like your pesto.
Garlic brings pungency and depth. Use fresh garlic cloves—two to three cloves depending on size and your tolerance for garlic. Raw garlic is much more assertive than cooked garlic, so go lighter than you’d think and taste as you go. Elephant garlic is milder if you want pesto that’s more subtle; regular garlic cloves work if you want that classic sharp edge.
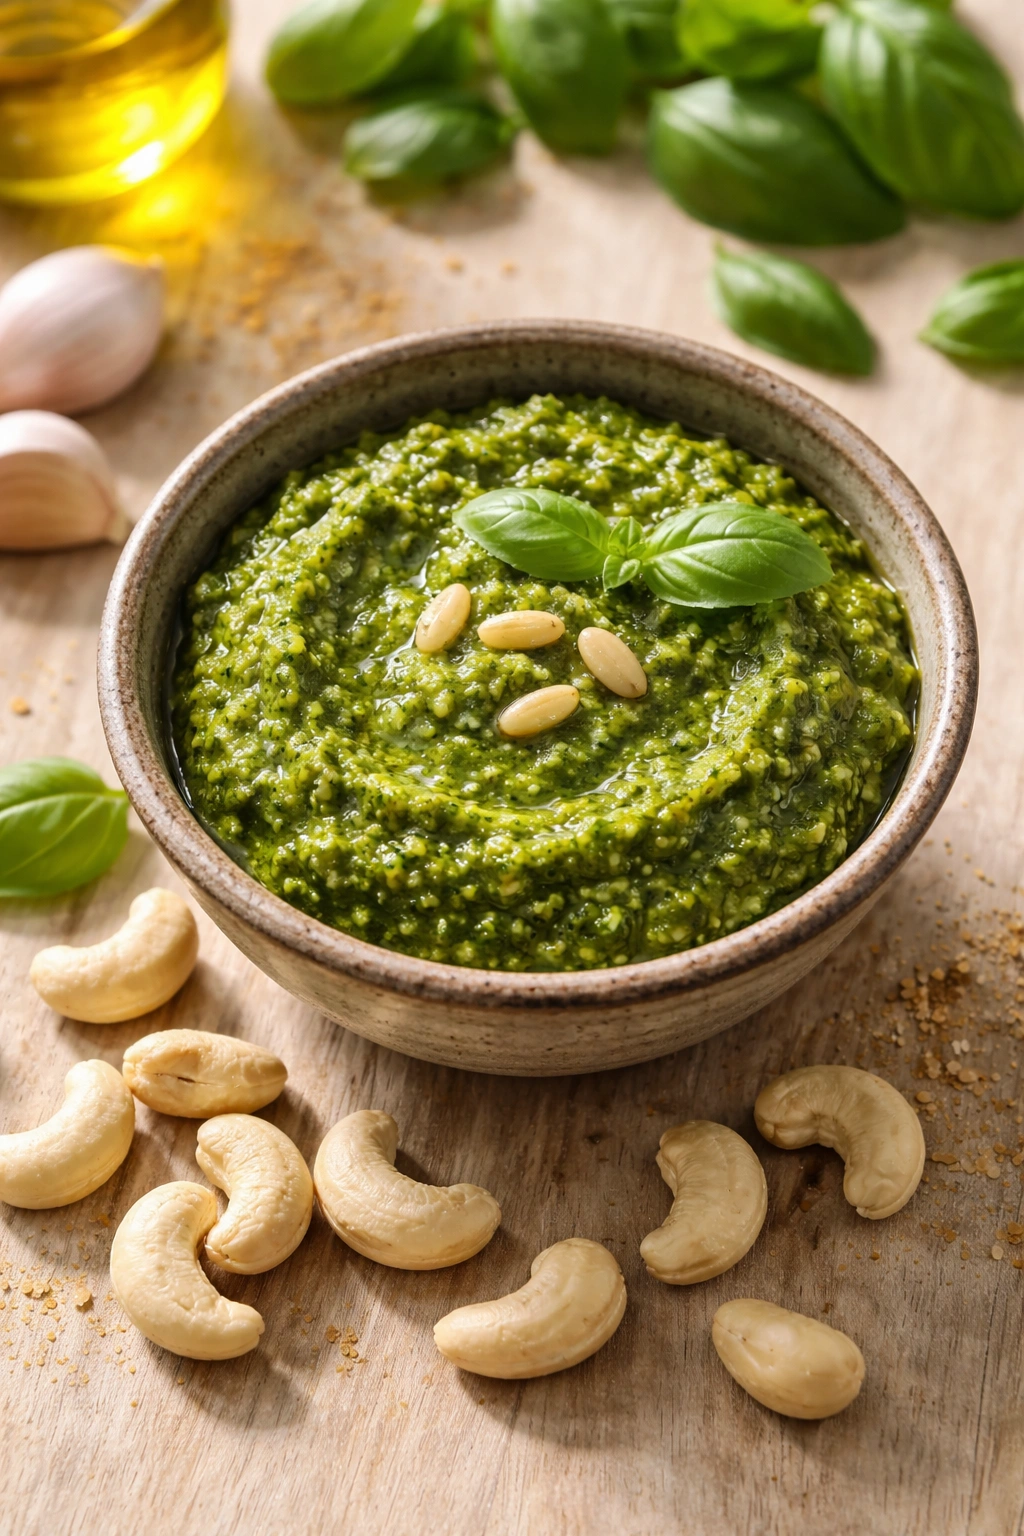
Pine nuts are the traditional choice, and for good reason: they’re buttery, mild, and won’t overpower the basil. You’ll want about ⅓ to ½ cup of pine nuts, and they should be fresh since they’re fatty and can turn rancid over time. If pine nuts break your budget (and honestly, they often do), walnuts, sunflower seeds, or almonds all work beautifully and create slightly different flavor profiles that are equally delicious.
Cheese binds everything together and adds umami depth. Parmigiano-Reggiano is the classic choice—authentic, nutty, and complex. Pecorino Romano is saltier and sharper. A blend of both is often the sweet spot. You’ll want about ⅓ to ½ cup of finely grated cheese, and it absolutely should be freshly grated, not the pre-grated stuff in a green can. That pre-grated version has anti-caking agents that make your pesto grainy instead of smooth.
Olive oil is the binder and final flavor layer. Use good-quality extra virgin olive oil—not the most expensive bottle in the store, but something that tastes like olives when you taste it plain. You’ll need about ½ to ¾ cup, and whether you use all of it depends on how thick you want your pesto. I like mine thick enough to coat pasta with body, which usually means closer to ½ cup.
Salt and a squeeze of fresh lemon juice round out the flavor, adding brightness and preventing oxidation that can turn your pesto dark and dull.
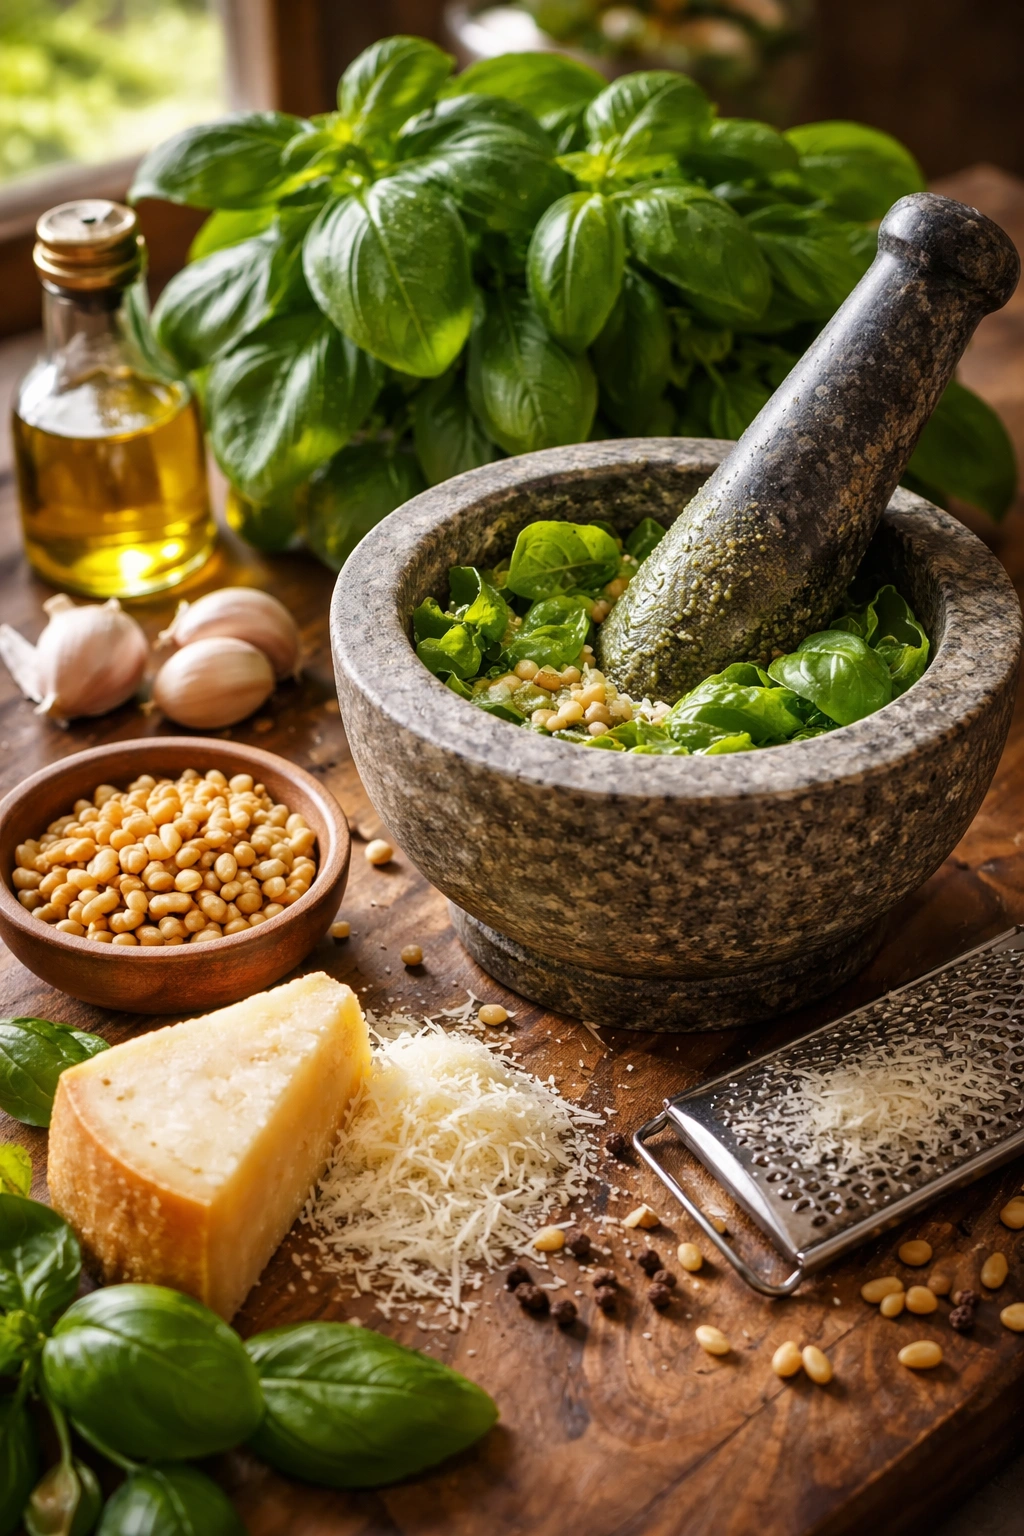
Equipment Options: Mortar and Pestle vs Food Processor vs Blender
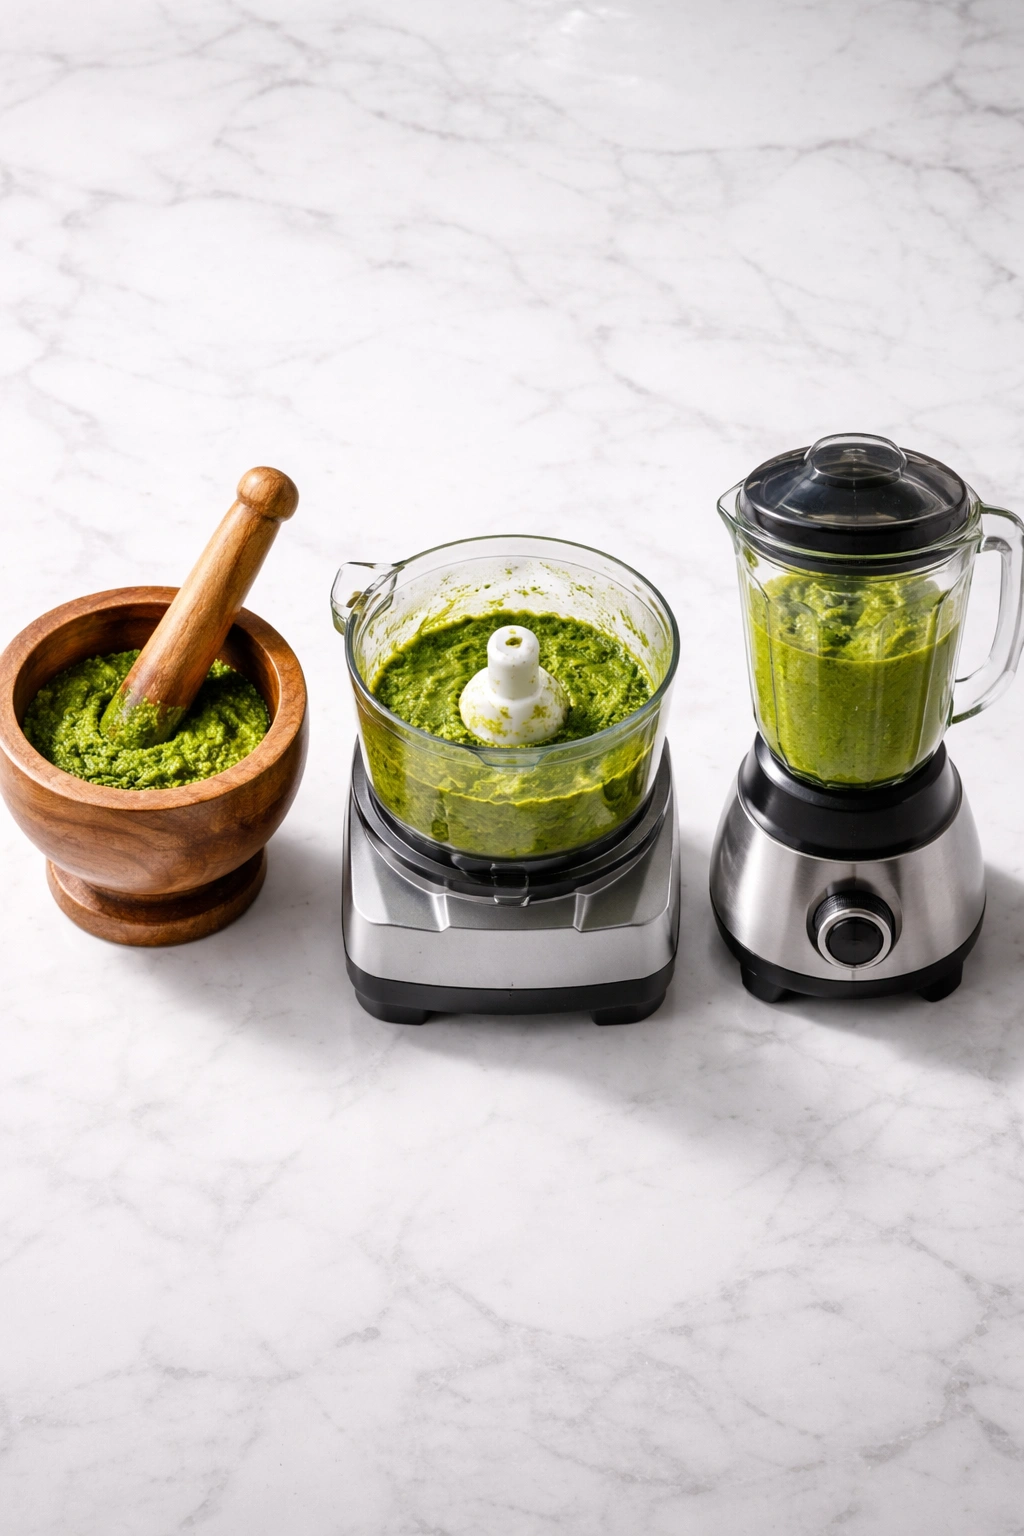
This is where homemade pesto gets interesting, because you have legitimate choices depending on what equipment you have and what texture you prefer.
A mortar and pestle is the traditional method and genuinely produces the best texture. Working by hand allows you to bruise and slowly incorporate ingredients in a way that doesn’t heat them up or overwork them. The result is pesto with distinct flakes of basil and texture, not a uniform paste. If you have a mortar and pestle and don’t mind using a little elbow grease, this produces the most beautiful, flavor-forward pesto. Plan on about five to seven minutes of active work, and your wrist will get a mini workout.
A food processor is the fast option—basically a one-minute solution if you’re in a hurry. The downside is that the blade spins fast enough to slightly warm the basil and generate friction that can oxidize the leaves and dull the bright green color. Your pesto will taste good but may look slightly darker. The texture will be smoother and more uniform, which some people prefer.
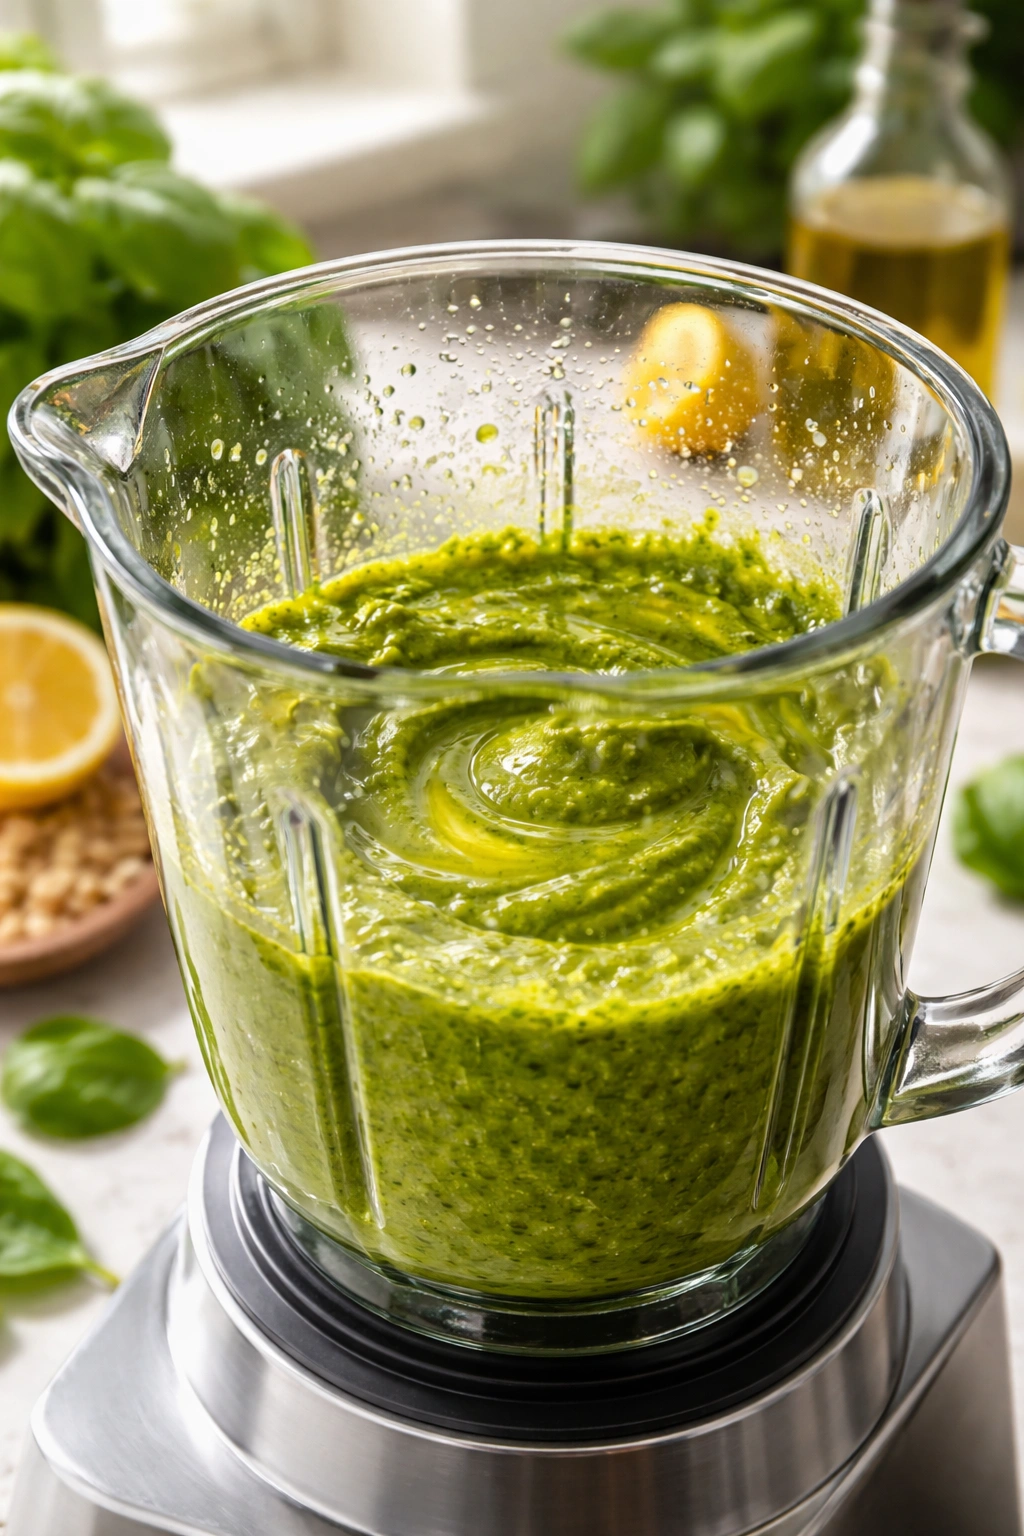
A blender (whether stick blender or traditional pitcher blender) is the middle ground. A stick blender gives you some control over texture and speed. A regular blender can work but tends to create a smoother, more liquid pesto and heats things up more than you’d like. If you go this route, use the pulse function rather than continuous blending.
Realistically, most home cooks use a food processor because it’s fast and the texture is still excellent. Don’t agonize over this choice—the difference in flavor between methods is smaller than the difference between homemade and jarred. Your equipment choice is less important than using fresh ingredients.
The Proper Technique for Maximum Flavor
Whether you’re using a mortar and pestle or a food processor, the technique matters because you’re trying to release the aromatic oils without heating or oxidizing the basil.
Start by toasting your nuts lightly in a dry skillet over medium heat for two to three minutes, stirring occasionally, until they’re fragrant. This awakens their flavor and makes them more buttery. Let them cool for a minute before adding to your pesto—you want them at room temperature, not hot.
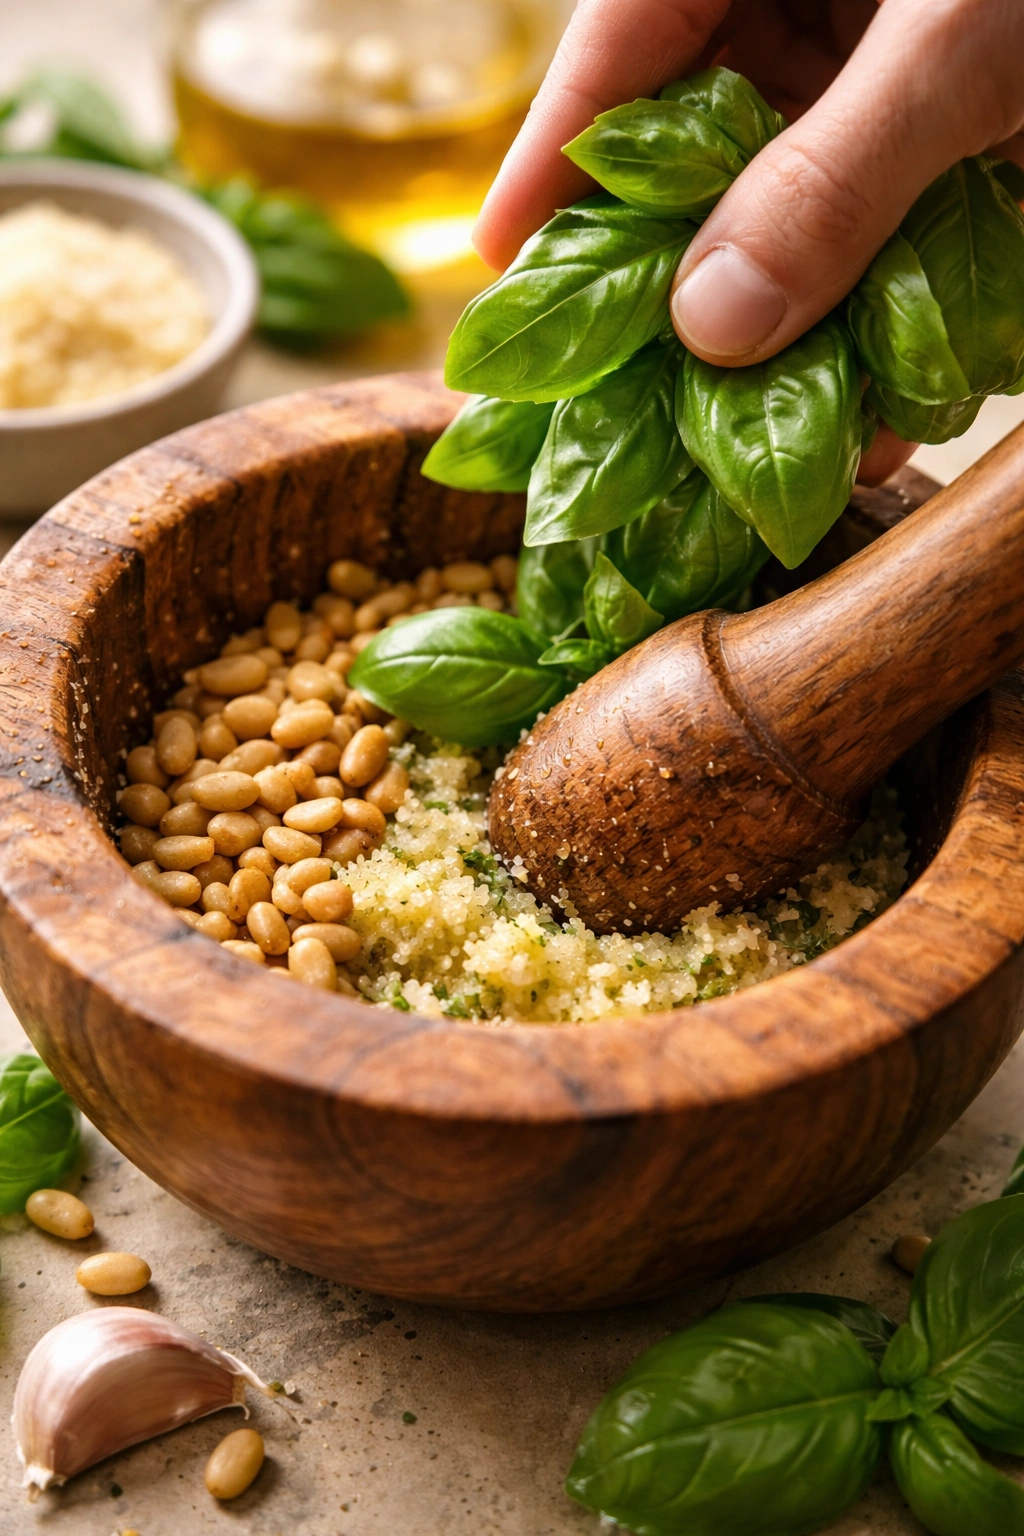
If you’re using a mortar and pestle, start with the garlic and a pinch of salt. Pound it into a paste, which breaks down the cell walls and releases the pungent compounds. Add the toasted nuts and grind them gently, breaking them down but not pulverizing them. Add the basil in several handfuls, pressing and grinding gently rather than pounding aggressively. The idea is to bruise the leaves and release the oils, not to smash them into oblivion. Add your cheese and lemon juice. Finally, drizzle in your olive oil slowly while grinding, which helps everything emulsify and come together smoothly.
If you’re using a food processor, pulse the garlic first until it’s minced. Add the cooled toasted nuts and pulse until roughly chopped. Add the basil in handfuls and pulse—this is the key word, pulse, not continuous processing—until the basil is broken down but still visible as distinct pieces. Add the cheese and lemon juice, pulse once or twice to combine. Finally, add your olive oil in a slow stream while pulsing just until everything comes together into a thick paste.
The difference between success and failure often comes down to this final step: adding the olive oil gradually rather than all at once. When you add oil slowly while pulsing or grinding, it emulsifies with the basil and nuts and creates a smooth, thick sauce. If you dump it all in at once, you end up with something that’s greasier and thinner than you want.
Taste constantly as you go. This is your chance to dial in flavors to your exact preference. Need more garlic? Add another clove. Want it thicker? Add more cheese. Want more lemony brightness? Squeeze in more juice. Your pesto should taste intensely like basil with supporting notes of garlic, nuts, and cheese—not a muddled blur of flavors.
Yield, Prep Time, Cook Time, and Difficulty
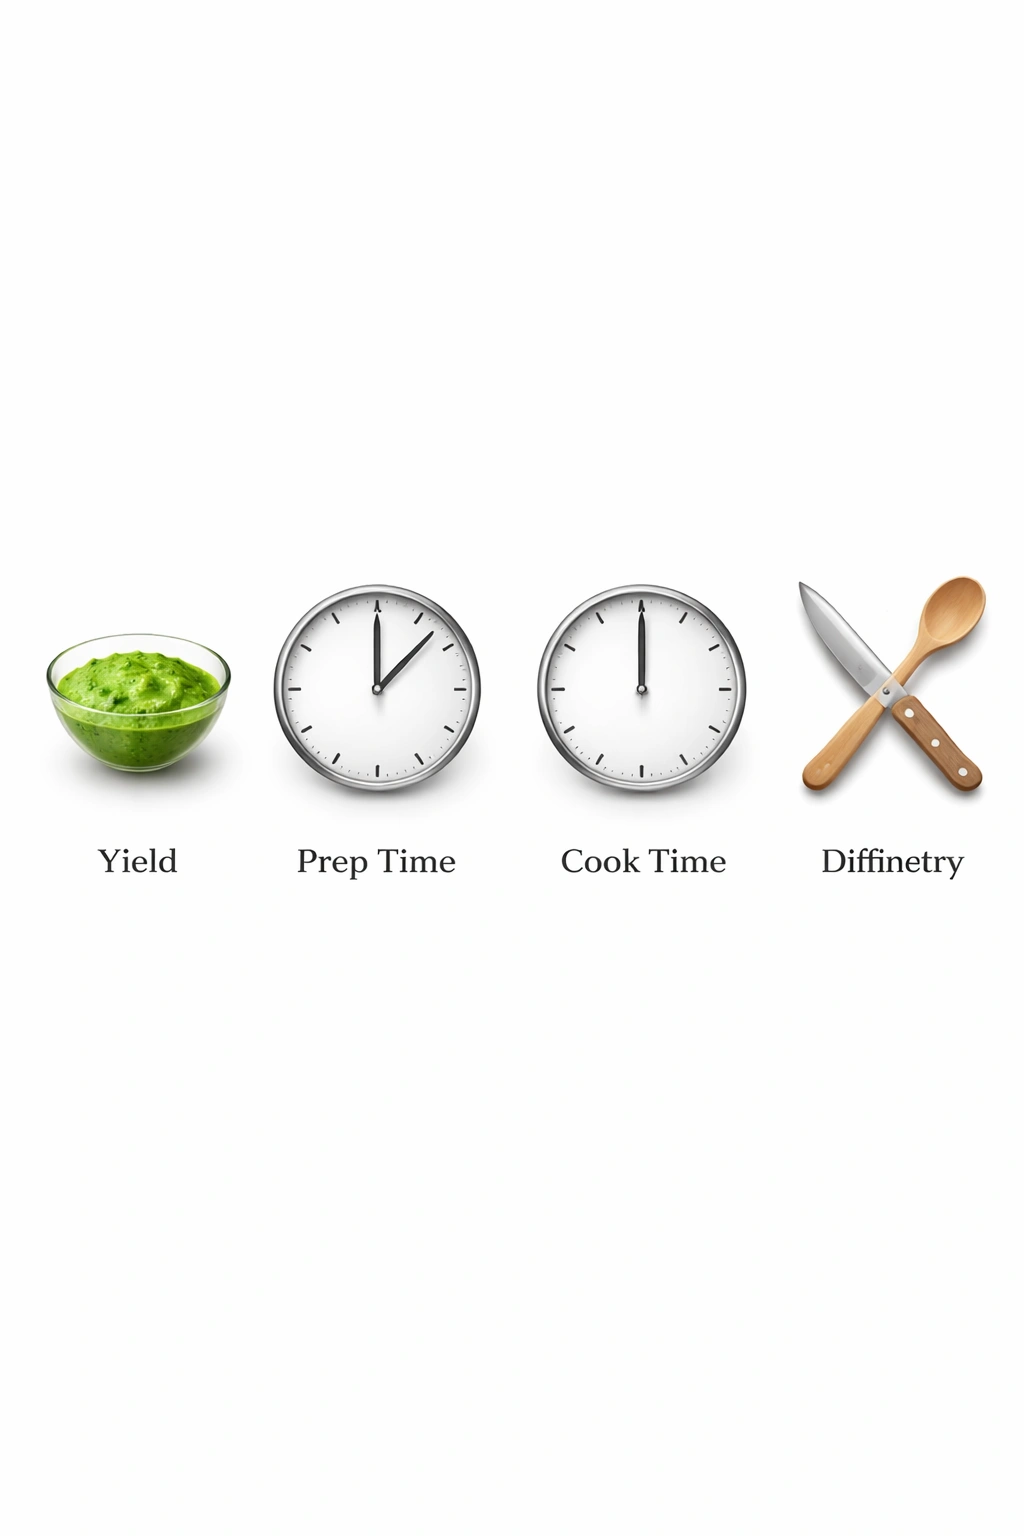
Yield: Makes about 1 cup (enough to sauce 1 pound of pasta or 4 servings as a condiment)
Prep Time: 10 minutes (including toasting nuts and gathering ingredients)
Cook Time: None (all raw ingredients combined)
Total Time: 10 minutes active
Difficulty: Beginner — no special technique required, minimal equipment options, and straightforward steps even if you’ve never made pesto before.
Ingredient List for Fresh Basil Pesto
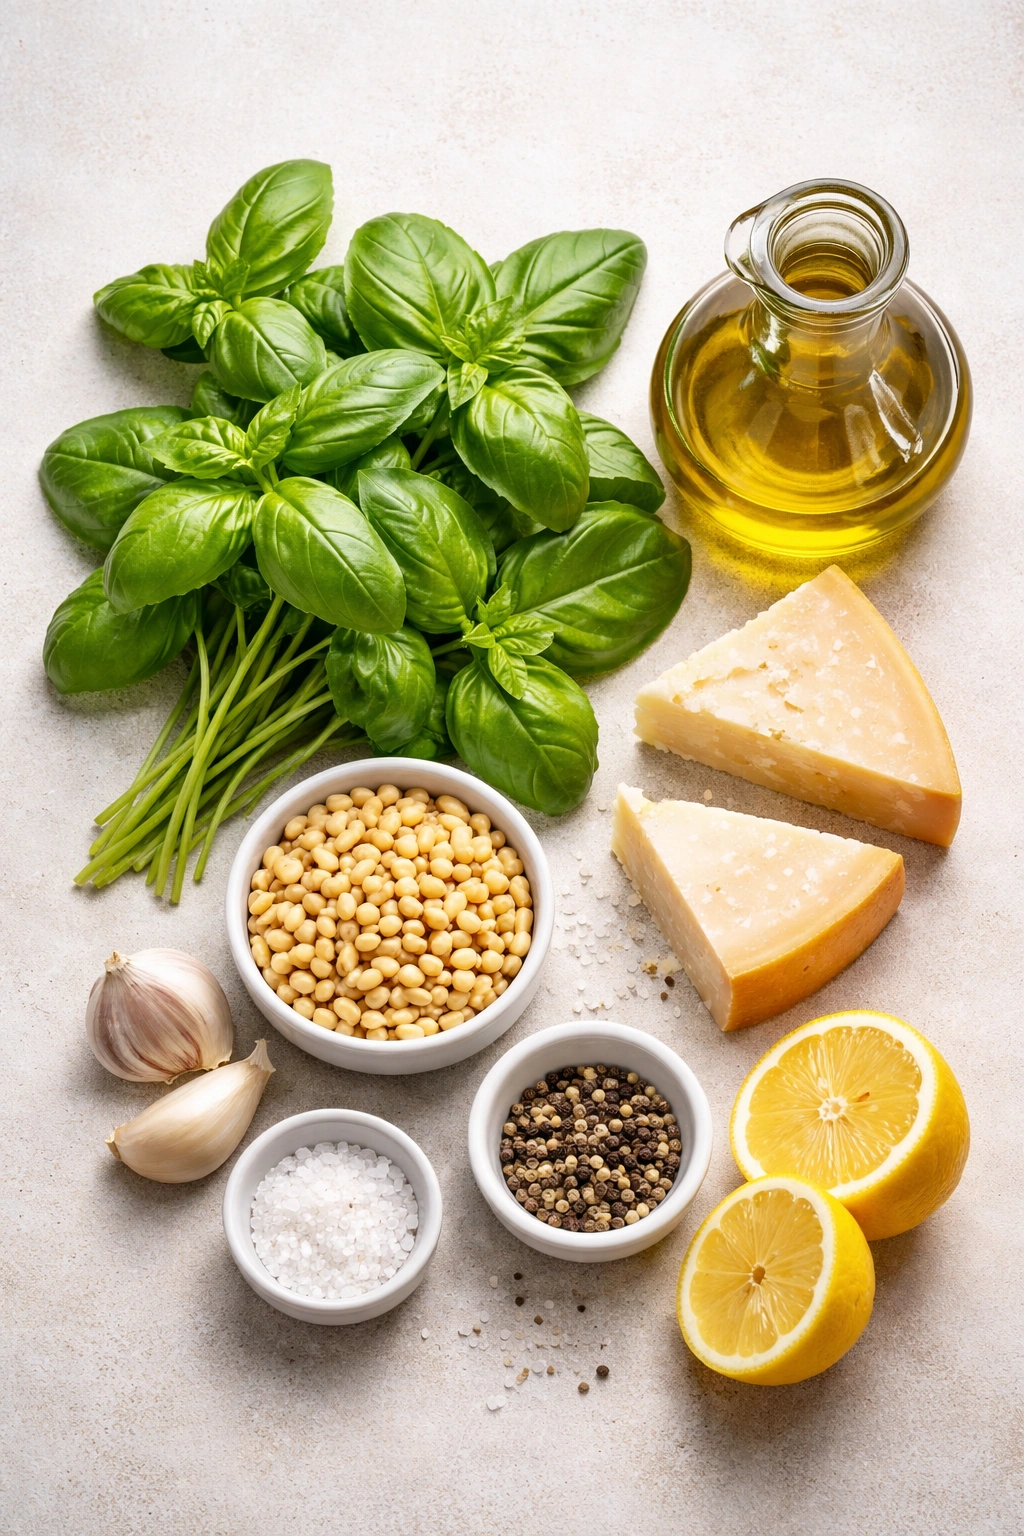
For the Pesto:
- 2 cups fresh basil leaves, loosely packed, stems removed
- 2 to 3 garlic cloves, roughly chopped (adjust to taste)
- ⅓ to ½ cup raw pine nuts (or walnuts, sunflower seeds, or blanched almonds)
- ⅓ to ½ cup freshly grated Parmigiano-Reggiano cheese
- ¼ cup freshly grated Pecorino Romano cheese (optional, but adds complexity)
- ½ to ¾ cup extra virgin olive oil, divided
- Juice of ½ lemon (about 1 tablespoon), freshly squeezed
- Fine sea salt to taste (start with ¼ teaspoon)
- Freshly ground black pepper to taste (optional)
Optional Add-Ins for Variations:
- 2 tablespoons fresh mint leaves (for a brighter, more refreshing version)
- ¼ cup sun-dried tomatoes, packed in oil and drained (for pesto that’s earthier and slightly sweet)
- 2 tablespoons fresh lemon zest (for a brighter, more citrusy version)
- 1 tablespoon balsamic vinegar (for depth and sweetness)
Step-by-Step Instructions for Making Fresh Basil Pesto
Prepare Your Ingredients:
-
Wash and thoroughly dry the basil leaves—moisture is the enemy of smooth pesto. Spin them in a salad spinner or pat dry with paper towels until they’re completely dry to the touch. Set aside.
-
Peel the garlic cloves and give each one a rough chop. The size doesn’t matter at this stage since they’ll be incorporated into the pesto.
-
Measure out your cheese and grate it finely if using whole cheese. Set aside separately from the basil so you can add it later—you don’t want to add grated cheese too early in the process, or it’ll get clumpy as the oils are released.
Toast the Nuts:
- Heat a dry skillet over medium heat. Add the pine nuts and cook, stirring constantly, for 2 to 3 minutes until fragrant and lightly golden. Do not walk away from the stove during this step — nuts go from perfectly toasted to burnt in about 30 seconds, and burnt nuts will ruin your entire batch. Immediately transfer them to a small plate to cool for at least 1 minute. This toasting step is critical because it brings out the buttery, rich flavors in the nuts that make pesto taste so good.
Make the Pesto (Mortar and Pestle Method):
-
If using a mortar and pestle, add the cooled toasted nuts to the mortar along with a small pinch of salt. Use the pestle to grind them gently, crushing them into rough pieces but not pulverizing them into powder. You want visible texture, not nut butter.
-
Add the minced garlic and continue grinding gently, working it into a rough paste with the nuts. The salt helps break down the garlic cell walls and releases its sharp, pungent oils.
-
Add the basil in two or three handfuls. Use the pestle to press and roll the leaves gently against the mortar’s sides rather than pounding. The goal is to bruise the leaves and release their aromatic oils without heating them or damaging the bright green color. This step takes patience—it’s a gradual process, not a violent one.
Advertisements -
Once the basil is broken down and the mixture is starting to look cohesive, add the grated cheese and lemon juice. Grind gently once or twice to incorporate.
-
Drizzle in your olive oil very slowly—about a tablespoon at a time—while continuing to grind gently. This gradual addition is what allows the oil to emulsify with the other ingredients and create a smooth, cohesive sauce rather than a greasy, separated mixture. As you add the oil, you’ll feel and see the pesto becoming thicker, creamier, and more luxurious.
-
Once all the oil is incorporated, stop grinding. Taste the pesto and adjust salt, lemon juice, garlic, or cheese to match your preference. More salt will amplify all the flavors, so add it in small pinches and taste between additions.
Make the Pesto (Food Processor Method):
-
If using a food processor, add the minced garlic to the bowl fitted with the metal blade. Pulse until the garlic is minced into small pieces.
-
Add the cooled toasted nuts and pulse 4 to 5 times until the nuts are roughly chopped into small pieces but not powdered.
-
Add the basil in two large handfuls and pulse 6 to 8 times. This is the crucial step — you’re pulsing, not continuously blending. Pulse, let the blade stop, look at the texture, pulse again. You want the basil broken down but still visible as distinct green flakes, not blended into a uniform green paste.
-
Add the grated cheese and lemon juice and pulse 2 to 3 times just until combined.
-
With the food processor running on low speed, slowly pour in your olive oil in a thin stream through the feed tube. Stop as soon as all the oil is incorporated. Do not continue processing — you’re done the moment the oil is mixed in. The pesto will look thick and luxurious.
-
Taste and adjust seasonings as needed. If the pesto seems too thick, you can pulse in a tablespoon or two more olive oil. If it seems too thin, you can pulse in more grated cheese.
Advertisements
Transfer and Store:
- Transfer your finished pesto to a clean jar or container. It’ll keep in the refrigerator in an airtight container for up to 1 week.
Common Mistakes That Ruin Your Pesto
Bruised or wilted basil sounds like a small detail, but it dramatically affects flavor. If your basil is already damaged or old when you start, your pesto will taste dull and slightly bitter rather than bright and grassy. Buy basil the day you plan to make pesto when possible, or store it upright in a water-filled glass at room temperature (never in the fridge, where cold makes basil turn black).
Using pre-grated cheese is a surprisingly common mistake. That green canister of pre-grated Parmesan has anti-caking agents that make pesto sandy and grainy instead of smooth and creamy. Always grate your cheese fresh, right before making the pesto. It takes two minutes and transforms your result.
Adding the olive oil all at once creates a separated, greasy pesto instead of an emulsified, creamy sauce. The oil needs to be added slowly while the other ingredients are being worked or pulsed—this is what allows it to bind properly. Think of it like making mayonnaise: add egg yolk to oil all at once and it breaks. Add oil to egg yolk slowly while whisking, and it emulsifies beautifully. Same principle with pesto.
Over-processing, especially in a food processor, is perhaps the most common modern mistake. When you blend basil too aggressively, you’re breaking down the cell walls and releasing too much of the bitter tannins that live in the leaves. You also generate friction and heat that oxidize the basil and turn your bright green pesto into a dull, brownish-green. The key is restraint—pulse until things are mixed, then stop. Don’t aim for a perfectly uniform paste.
Not tasting and adjusting to your preference leaves you with pesto that doesn’t match your palate. Some people love aggressive garlic; others find it overwhelming. Some want it thick and clingy; others like it looser. The only person who knows what tastes good to you is you, so taste constantly as you make it and adjust everything—salt, lemon juice, garlic, cheese, oil—to create something you genuinely want to eat.
Storage, Make-Ahead, and Freezing Tips
Fresh pesto keeps in an airtight container in the refrigerator for up to one week, though it’s honestly best within the first three or four days while the basil flavor is brightest. Over time, the basil flavor fades and the pesto darkens slightly due to oxidation—this is normal and doesn’t mean it’s bad, just less peak.
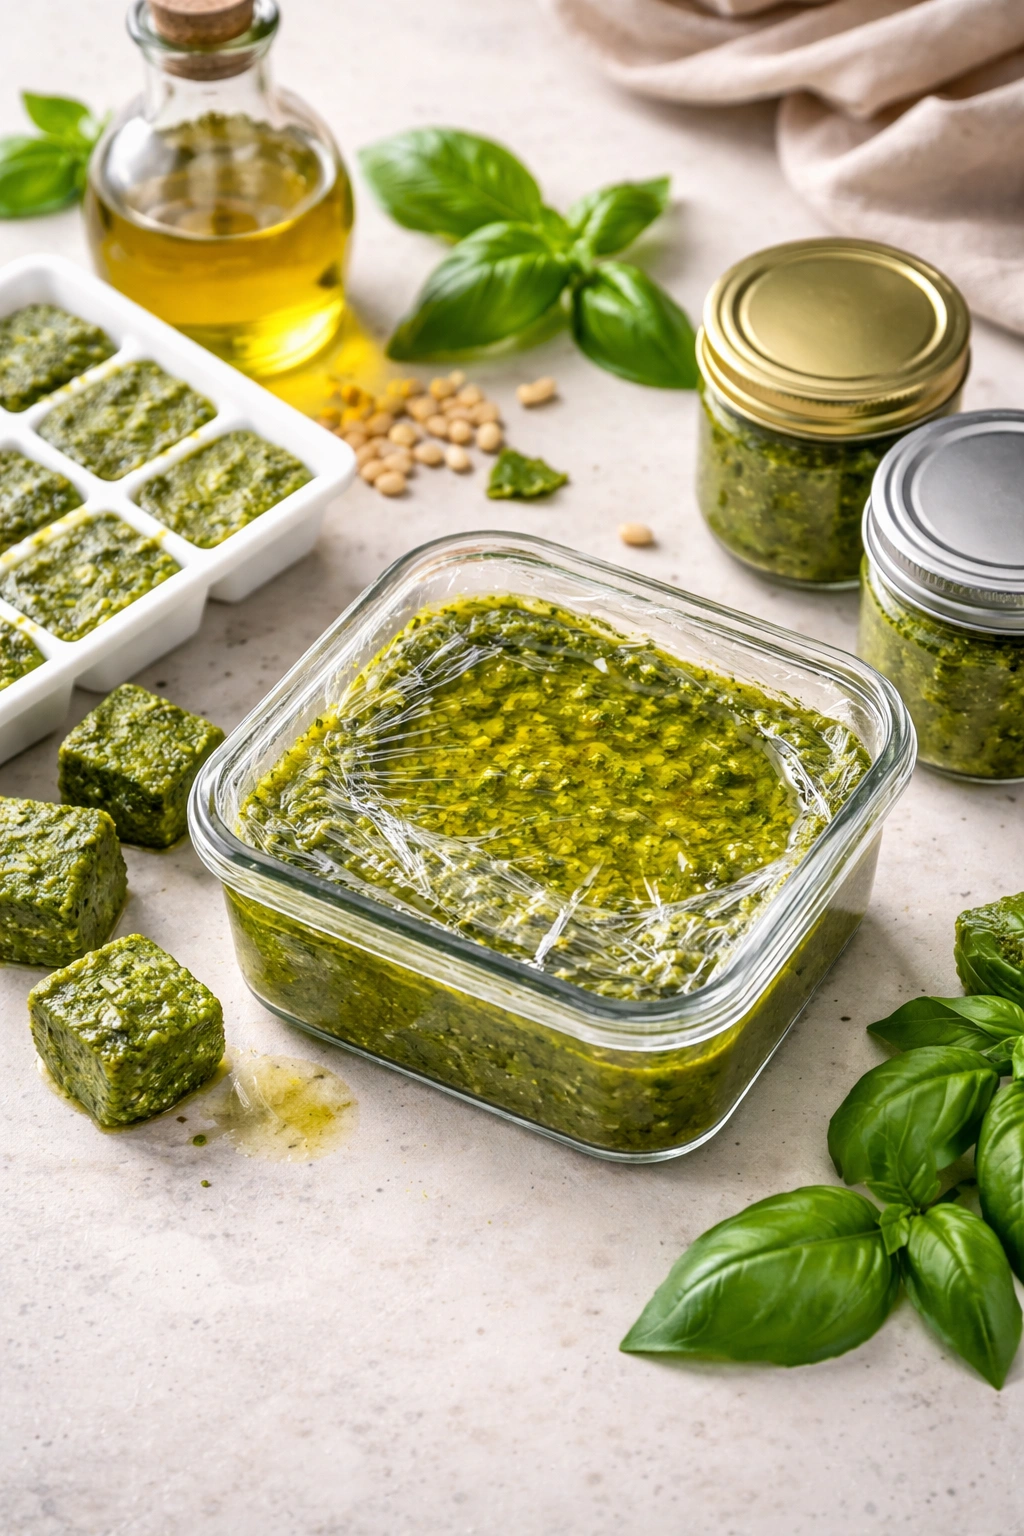
To slow oxidation and keep your pesto vibrant green longer, press a piece of plastic wrap directly onto the surface of the pesto before sealing the container. This eliminates air exposure, which is what causes browning. Alternatively, drizzle a thin layer of olive oil on top of the pesto—the oil creates a seal that protects the basil underneath.
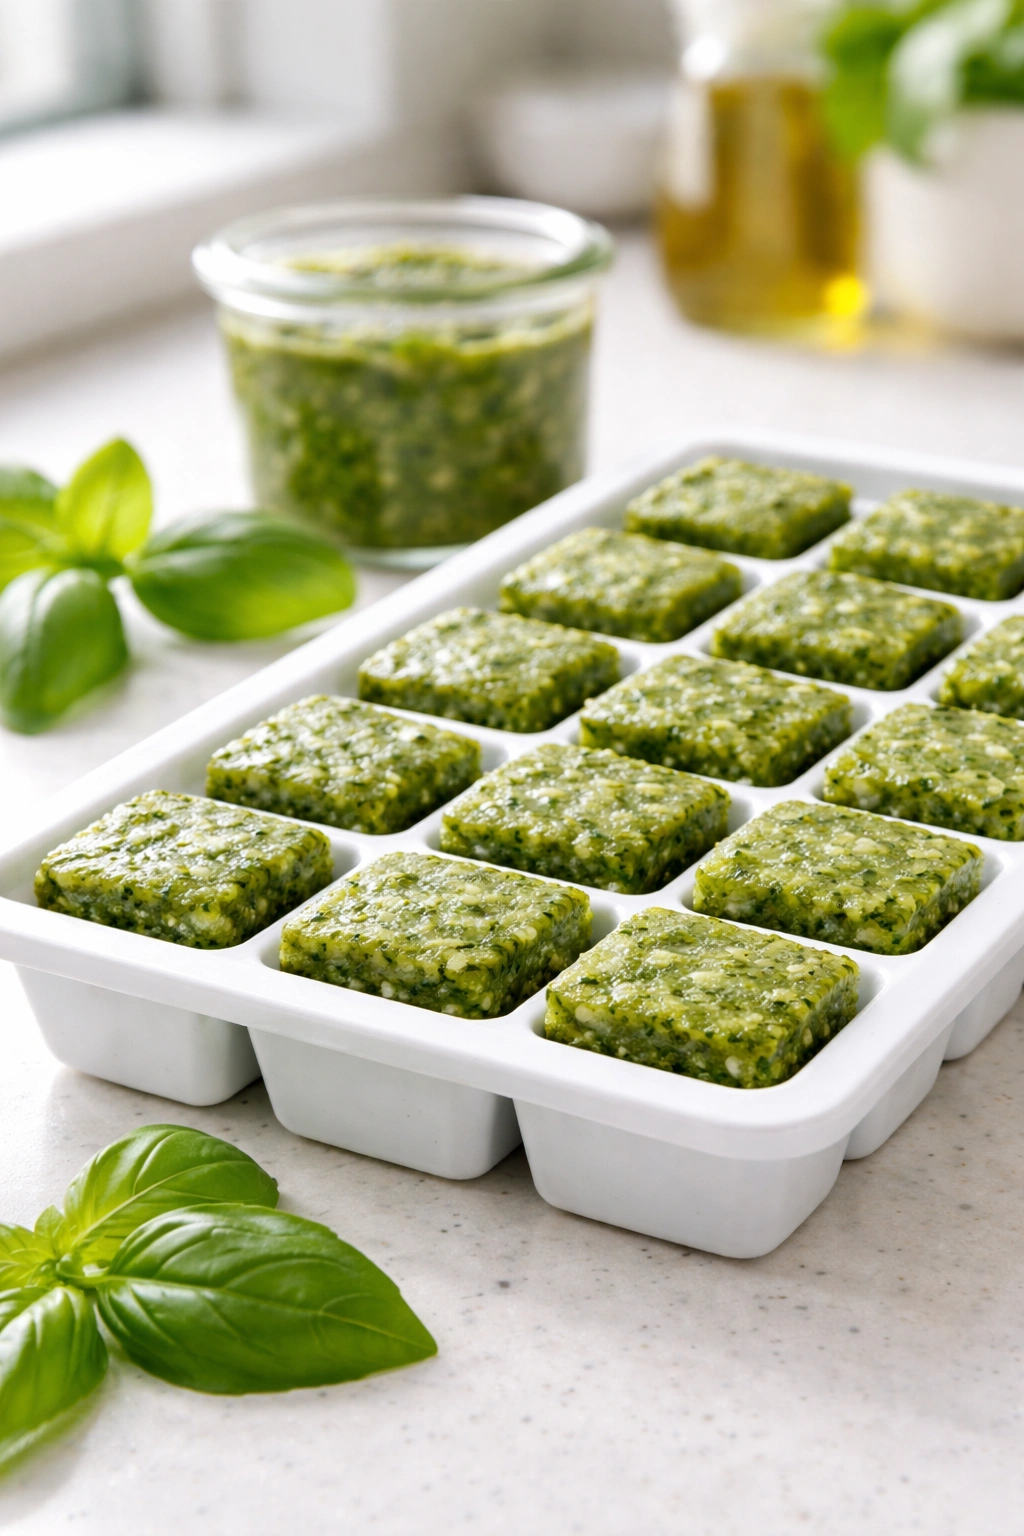
Pesto freezes beautifully and actually extends its shelf life dramatically. You have two excellent options: freeze it in ice cube trays so you have individual portions you can pop out as needed (perfect for adding to soups, spreading on sandwiches, or tossing with pasta), or freeze it in an airtight container for up to three months. Frozen pesto won’t look as bright green as fresh—the color dulls slightly—but the flavor remains excellent. Thaw it in the refrigerator before using, or simply drop frozen cubes directly into warm pasta and let them melt into the pasta and sauce.
The best approach is to make pesto when basil is abundant and inexpensive, freeze what you won’t use immediately in ice cube trays, and enjoy it throughout the year. There’s something lovely about opening your freezer in the dead of winter and having summer basil pesto available instantly.
One trick: if you’re freezing pesto, omit the cheese when you make it. Freeze the basil, garlic, nuts, lemon, and oil mixture, then add fresh grated cheese when you thaw and use it. This preserves the cheese flavor better and gives you more control over how much cheese ends up in each batch. It adds only 30 seconds to your preparation when you defrost.
Variations and Flavor Twists

Mint and Basil Pesto adds bright, almost cooling notes that work beautifully with lighter pasta, fish, or chicken. Use 1½ cups basil and ½ cup fresh mint leaves, prepared the exact same way as the original recipe. The mint brings a peppery freshness that’s distinctive and crave-worthy.
Sun-Dried Tomato Pesto transforms the original into something earthier and slightly sweet. Add ¼ cup sun-dried tomatoes packed in oil (drained and roughly chopped) to the original recipe. They add umami depth and visual interest—swirls of red through the green. This version is particularly stunning on crostini or tossed with goat cheese.
Lemon Basil Pesto doubles down on citrus brightness by adding 2 tablespoons of finely grated lemon zest to the recipe, along with the juice. This creates a pesto that’s sharp, clean, and perfect with light pasta, seafood, or vegetables. Some people add a small handful of fresh tarragon or chervil to this version for additional herbal complexity.
Walnut and Thyme Pesto swaps pine nuts for walnuts (cheaper and earthier) and adds 1 tablespoon of fresh thyme leaves. This creates a deeper, more herbaceous pesto that tastes almost autumnal—great with roasted vegetables, white beans, or hearty soups.
Garlic Scape Pesto can be made in spring when garlic scapes are in season. Replace half the basil with chopped garlic scapes (the tender curly green parts that grow from garlic bulbs before the bulb matures). This creates a milder, slightly sweet garlic flavor that’s wonderfully subtle.
Arugula Basil Pesto blends a handful of peppery arugula with the basil for a more complex, slightly spicy bite. Arugula brings peppery notes that make pesto taste more sophisticated and less straightforwardly sweet.
Each variation should be frozen in the same ice cube trays, labeled clearly, so you have a variety of pesto flavors ready year-round.
Dairy-Free and Vegan Pesto Options
If you need to avoid dairy, you have excellent options that taste genuinely great, not like a compromise.
Nutritional Yeast Pesto skips cheese entirely and uses ½ cup of nutritional yeast (the large-flake kind rather than powder) in place of the Parmigiano-Reggiano and Pecorino. Nutritional yeast adds a savory, umami-rich, vaguely cheesy flavor that isn’t identical to actual cheese but is genuinely delicious. The pesto won’t look quite as beautiful since it won’t have the yellow cheese flecks, but the flavor is savory, bright, and satisfying.
Cashew and Basil Pesto replaces pine nuts with ¾ cup raw cashews (soaked in hot water for 15 minutes and drained) and skips cheese entirely. The soaked cashews create a naturally creamy, rich sauce that doesn’t need dairy. Add 2 tablespoons of nutritional yeast and you’ve got a pesto that’s creamy, rich, and completely plant-based. Some people add 1 to 2 tablespoons of white miso for additional umami depth.
Sunflower Seed Pesto uses ½ cup raw sunflower seeds in place of pine nuts (which can be expensive) and adds ¼ cup nutritional yeast for savory depth. This version is budget-friendly, allergy-friendly, and honestly tastes just as good as the traditional version—just slightly different. The sunflower seeds bring a mild, slightly sweet note that works beautifully with the basil.
Olive and Basil Pesto reduces the nuts entirely and adds ¾ cup pitted green olives (or a mix of green and Kalamata olives). This creates a pesto that’s salty, briny, and complex, with a Mediterranean vibe. It’s particularly good on crostini, with grilled vegetables, or tossed with white beans. Omit the extra salt since the olives provide plenty.
All these variations work with the same technique and time commitment. The core idea remains: fresh basil, aromatics, fat (whether nuts or seeds or olives), acid (lemon), and flavor boosters (cheese or nutritional yeast or miso). The specific ingredients can shift based on your needs or preferences.
Serving Suggestions and What Pesto Pairs With

Pasta is the obvious pairing, but there’s more subtlety here than just dumping pesto on noodles. The best approach is to reserve one cup of starchy pasta water before draining, then toss your drained pasta with pesto and splash in pasta water until you’ve got a silky sauce that coats each strand beautifully. The starch in the water helps the pesto cling to the pasta rather than sliding off. Fresh basil pesto with al dente pasta and a shower of Parmigiano-Reggiano is genuinely simple, elegant, and hard to improve upon.
Grilled chicken becomes restaurant-quality when topped with fresh pesto right before serving. Spread it on a finished piece of grilled or roasted chicken—the heat of the chicken doesn’t cook the pesto, just slightly warms it and allows the flavors to deepen. A dollop on top makes the dish look intentional and tastes incredible.
Crostini and toast give you a vehicle for serving pesto as an appetizer. Spread a thin layer on toasted bread, top with a crumble of fresh cheese or a sliver of fresh mozzarella, and you’ve got an elegant appetizer that takes five minutes but tastes like you fussed.
Cream cheese and pesto swirled together creates an instant dip for vegetables, crackers, or bread. Just soften cream cheese and fold in a generous dollop of pesto, then taste and adjust. This works for entertaining because you can make it an hour ahead.
Vegetables roasted with pesto are transformed. Toss roasted cherry tomatoes, zucchini, summer squash, or green beans with pesto right after they come from the oven. The heat intensifies the basil flavor and everything becomes more savory and complex.
Fish particularly white fish like halibut or sea bass benefits from a small dollop of pesto placed on top right before serving. You want enough to add flavor and visual interest without overwhelming the delicate fish.
Soup, particularly vegetable or bean soup, becomes more interesting when you stir in a spoonful of pesto just before serving. It adds herbal brightness and richness without changing the soup’s character.
Eggs, whether scrambled, in a frittata, or in an omelet, gain incredible dimension when you fold in a spoonful of pesto. The herbal, garlicky, nutty notes complement eggs in a way that seems simple but feels revelatory when you taste it.
Sandwiches become elevated instantly when you use pesto instead of traditional mayo. Layer it on, add fresh mozzarella, tomato, and prosciutto, and you’ve created something that tastes intentional and delicious rather than routine.
Troubleshooting Problems and Fixes
If your pesto separated during storage and now looks oily on top with thicker mixture below, you can re-emulsify it. Put the pesto in a food processor or blender, run it on low for 10 to 15 seconds, and stop. It’ll come back together. This separation is purely visual and the pesto is still completely edible—it’s just the oil separating from the basil mixture over time.
If your finished pesto is too thick and won’t coat pasta properly, pulse in one tablespoon of extra virgin olive oil at a time until you reach the consistency you want. If it’s too thin and won’t cling to pasta, pulse in one tablespoon of freshly grated cheese at a time until it thickens up.
If your pesto tastes flat or dull, you need to add more salt or lemon juice—these two ingredients act as flavor amplifiers. Start with ¼ teaspoon of salt or the juice of ⅛ lemon and taste again. Often pesto that seems bland just needs a tiny bit more of these brightening ingredients.
If your pesto has turned dark brown or black, the basil was overworked or the ingredients oxidized. This isn’t actually a problem—it still tastes good—but you can prevent it next time by working more gently and pulsing (rather than blending continuously) if using a food processor. Oxidation is purely visual; it doesn’t indicate the pesto has gone bad.
If you used old basil and your pesto tastes slightly bitter, unfortunately there’s no fix. Bitterness comes from the basil leaves’ tannins being released during processing, and you can’t un-bitter pesto. But this is why starting with fresh, tender basil matters—it eliminates this problem before it starts.
Final Thoughts
Fresh basil pesto is one of those recipes that seems like it should be complicated but absolutely isn’t. You need five minutes, a few pantry staples, and the understanding that slow and gentle wins over fast and aggressive. Whether you’re using a mortar and pestle or a food processor, the same principle applies: coax the flavors together rather than forcing them.
The real magic isn’t in exotic ingredients or fancy technique. It’s in taking fresh basil at its peak and honoring it—not beating it into submission, not burying it under heavy ingredients, just letting it shine with gentle support from garlic, nuts, cheese, and oil. Every batch you make will taste slightly different depending on the exact basil you use, the garlic clove size, even the humidity in your kitchen. These variations aren’t flaws; they’re evidence that you’re making something real, not a uniform commercial product.
Make a batch when basil is abundant. Freeze what you don’t use immediately in ice cube trays. Come December, you’ll open your freezer and have summer captured in frozen cubes. That’s the real gift of knowing how to make pesto from scratch—not just one perfect jar, but the ability to preserve this bright, alive flavor and pull it out whenever you want a taste of summer.