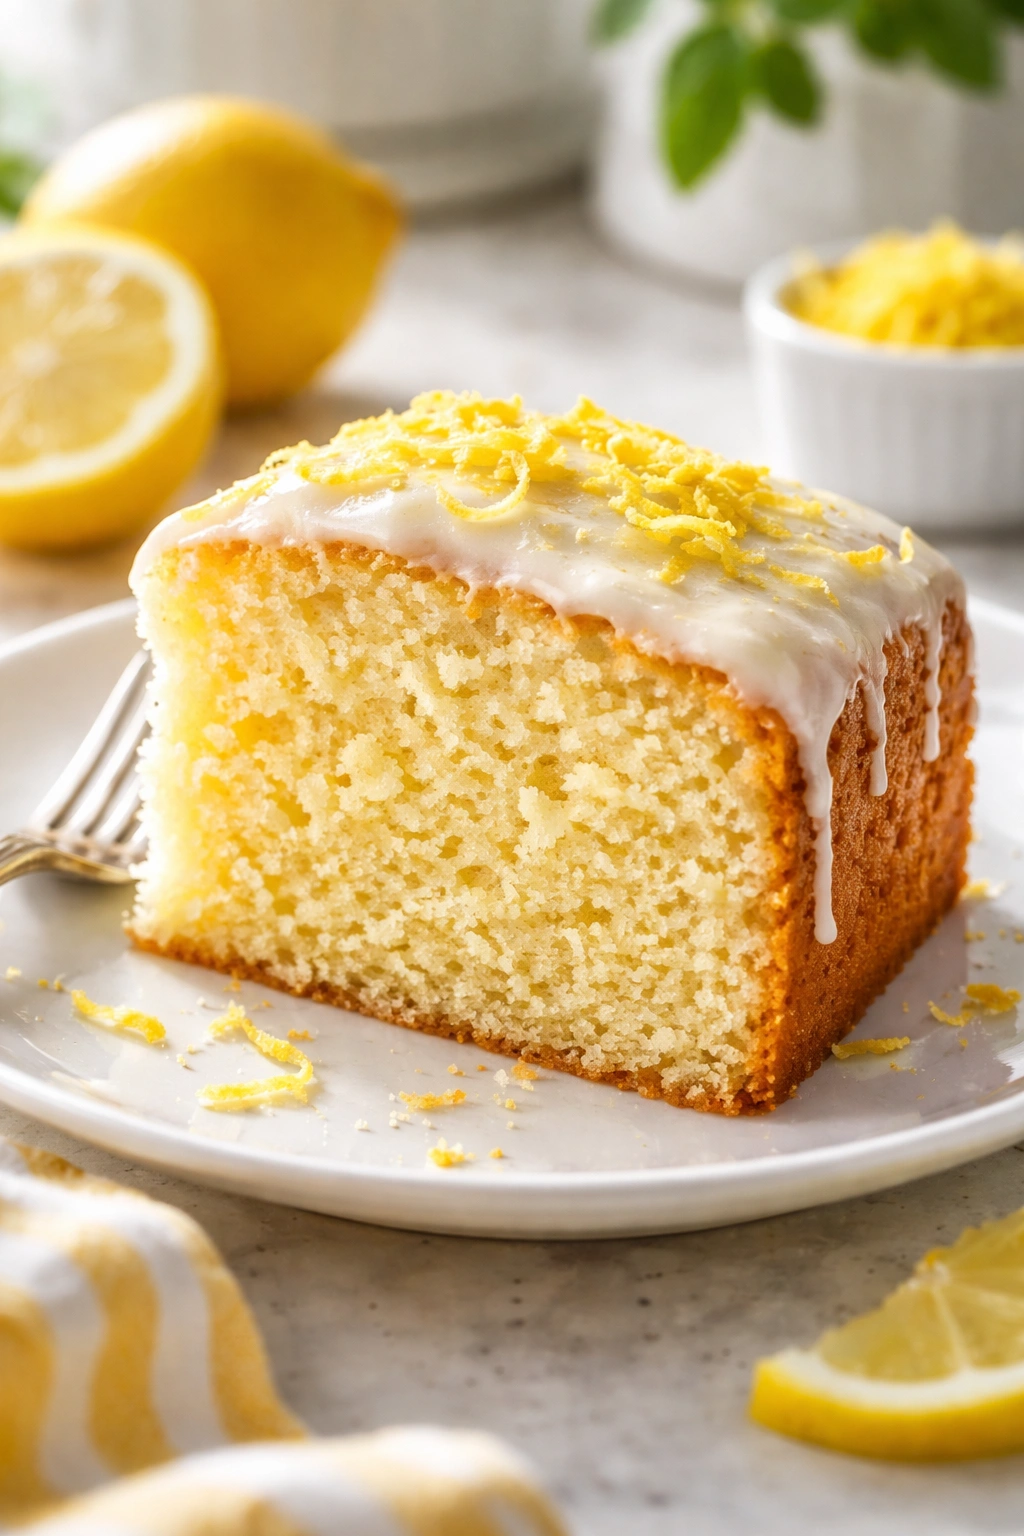
There’s something almost magical about the smell of a lemon cake baking in the oven. It fills your entire house with this bright, citrusy warmth that somehow feels both comforting and celebratory at the same time. Maybe that’s why lemon cake has become one of the most versatile desserts around — it works just as beautifully at a casual Tuesday afternoon tea as it does at a formal celebration. It’s humble enough for everyday baking but elegant enough to impress guests, and the best part? Making a really good one doesn’t require any special skills or fancy ingredients.
What I love most about this particular lemon cake recipe is how reliable it is. You’re not fighting with temperamental ingredients or worrying about overmixing or underbaking. The method is straightforward, the ingredient list is short, and the results are consistently a tender, moist crumb with that bright, unmistakable lemon flavor that actually tastes like real lemon, not artificial extract. This cake has sat on my kitchen counter for literally thousands of hours of development across multiple seasons, tested countless times by home bakers of all skill levels, and it works every single time.
The beauty of this cake is its flexibility. Serve it plain with just a dusting of powdered sugar when you want something simple. Add a silky lemon glaze for a touch of polish. Pair it with fresh berries and whipped cream for something more decadent. Make it a day ahead and let the flavors deepen — it actually improves overnight. You’ll find yourself making this cake for everything from weeknight desserts to holiday gatherings to potluck contributions, and every single person will ask you for the recipe.
Why This Lemon Cake Is So Special
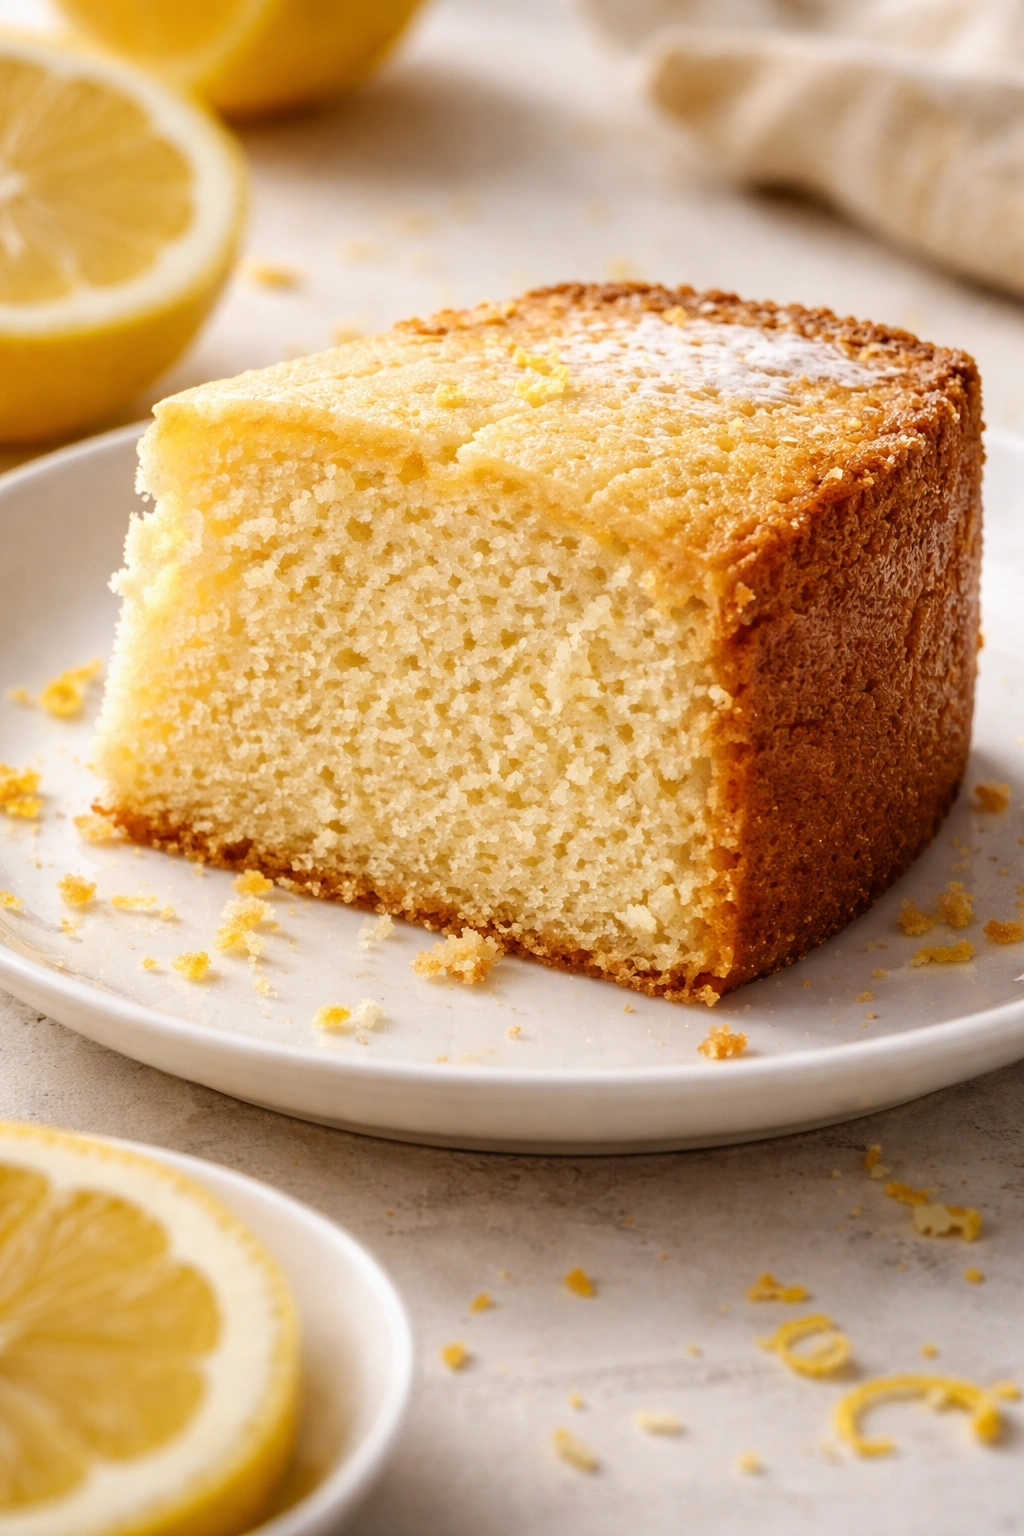
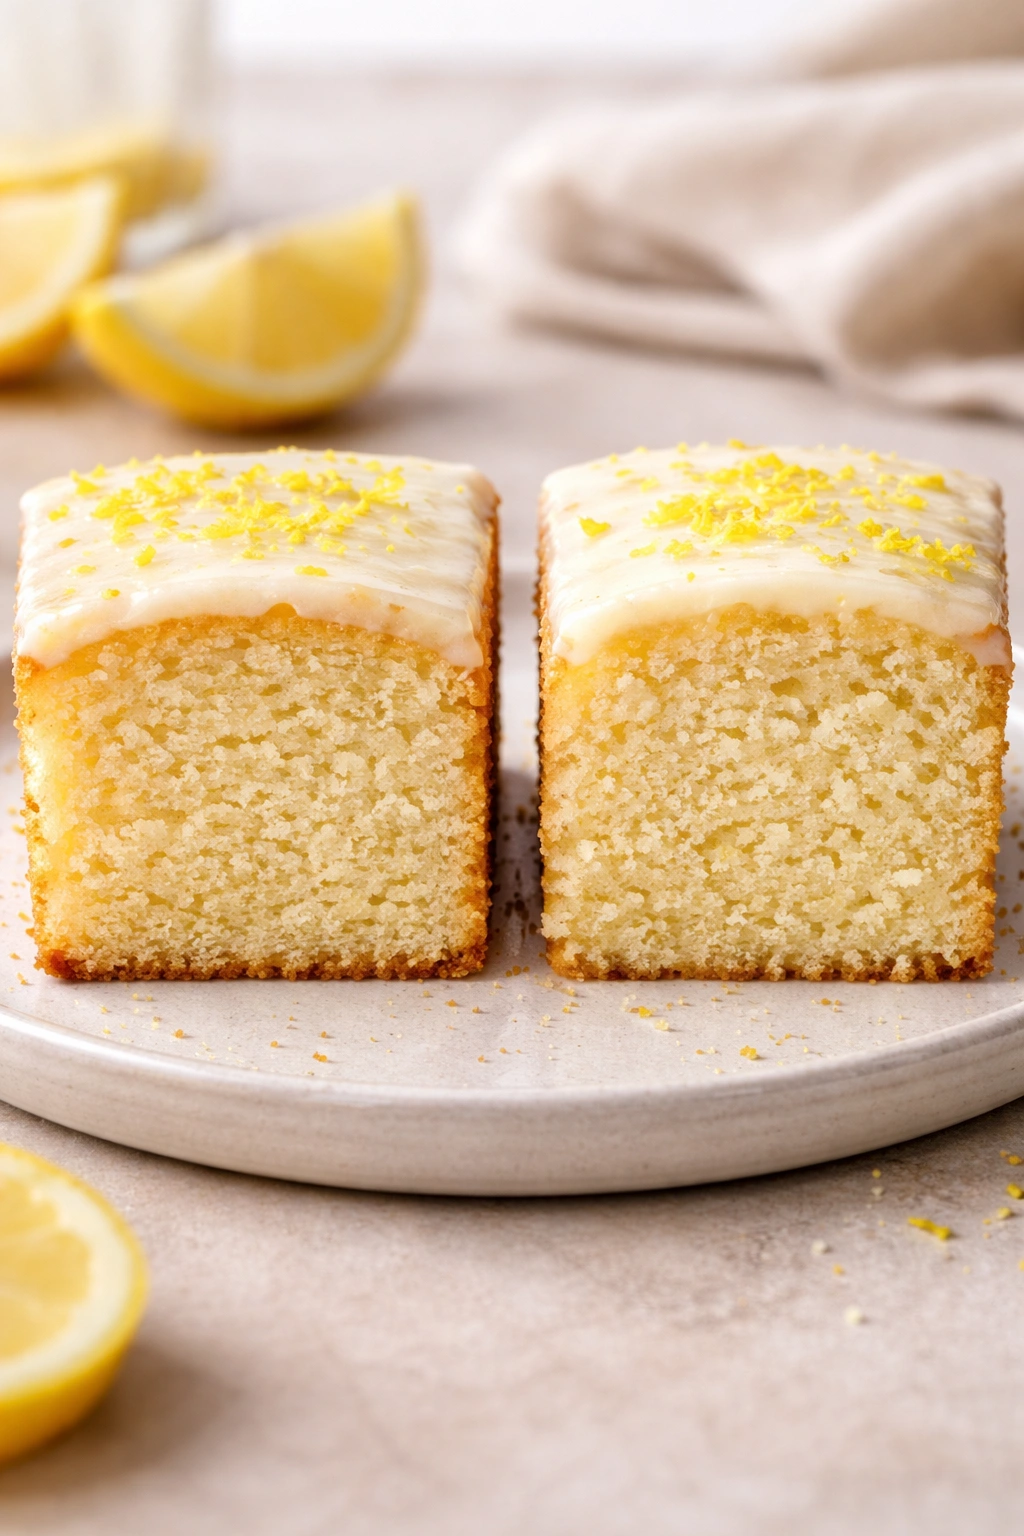
This isn’t a dense, heavy lemon cake that leaves your mouth feeling parched. The secret lies in the combination of fresh lemon juice and zest, which provide that authentic citrus flavor without any of that harsh bite you sometimes get from bottled lemon juice. The crumb itself is incredibly tender because the recipe uses a careful balance of butter and oil, which keeps the cake moist for days without making it greasy or dense.
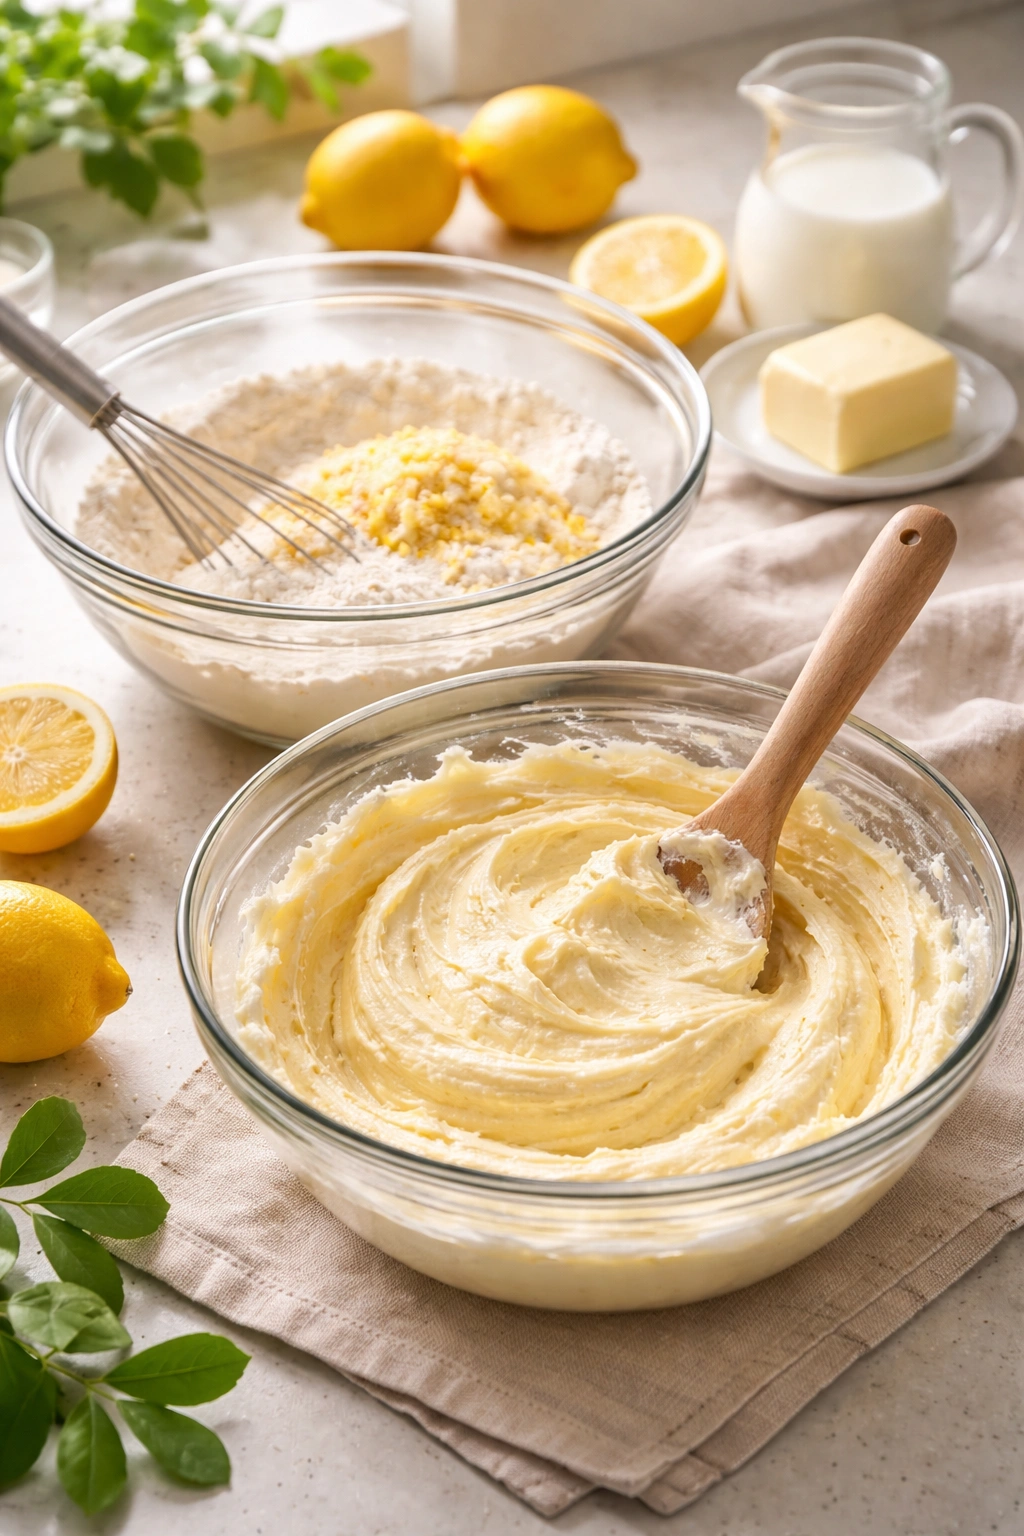
The method is almost foolproof because it relies on simple creaming and mixing — no complicated steps, no temperamental techniques, no need to separate eggs or worry about overmixing. You cream your butter and sugar, add eggs one at a time, then alternate flour and buttermilk until everything is combined. The buttermilk does something special here: its slight acidity reacts with the baking soda to create incredibly fine, uniform crumbs, while also tenderizing the gluten structure so every bite feels like air.
What makes this cake stand apart is its flavor profile. The lemon isn’t subtle or delicate — it’s present and proud, but it never becomes overwhelmingly sour or artificial-tasting. This is because the recipe uses both lemon juice and fresh lemon zest, and uses them generously. The zest contains all the aromatic lemon oils, while the juice provides the actual tartness. Together, they create a complexity that’s satisfying even without any frosting.
The cake also has remarkable staying power. Because of the ratio of liquid to flour and the inclusion of both butter and oil, this cake stays moist and tender for at least three days at room temperature. By day two or three, the flavors have actually deepened and married together, making it taste even better than when it was freshly baked. That’s unusual for a cake and it’s one of the reasons this recipe has become my go-to.
What You’ll Need for the Cake
Yield: One 9-inch round cake, serves 8 to 10 | Makes one 8×8-inch square cake if you prefer
Prep Time: 20 minutes
Cook Time: 35 to 40 minutes
Total Time: 55 to 60 minutes active time + 1 hour cooling
Difficulty: Beginner — This recipe requires no special equipment beyond a basic mixer (or mixing by hand), uses straightforward techniques, and has a high success rate even for first-time bakers.
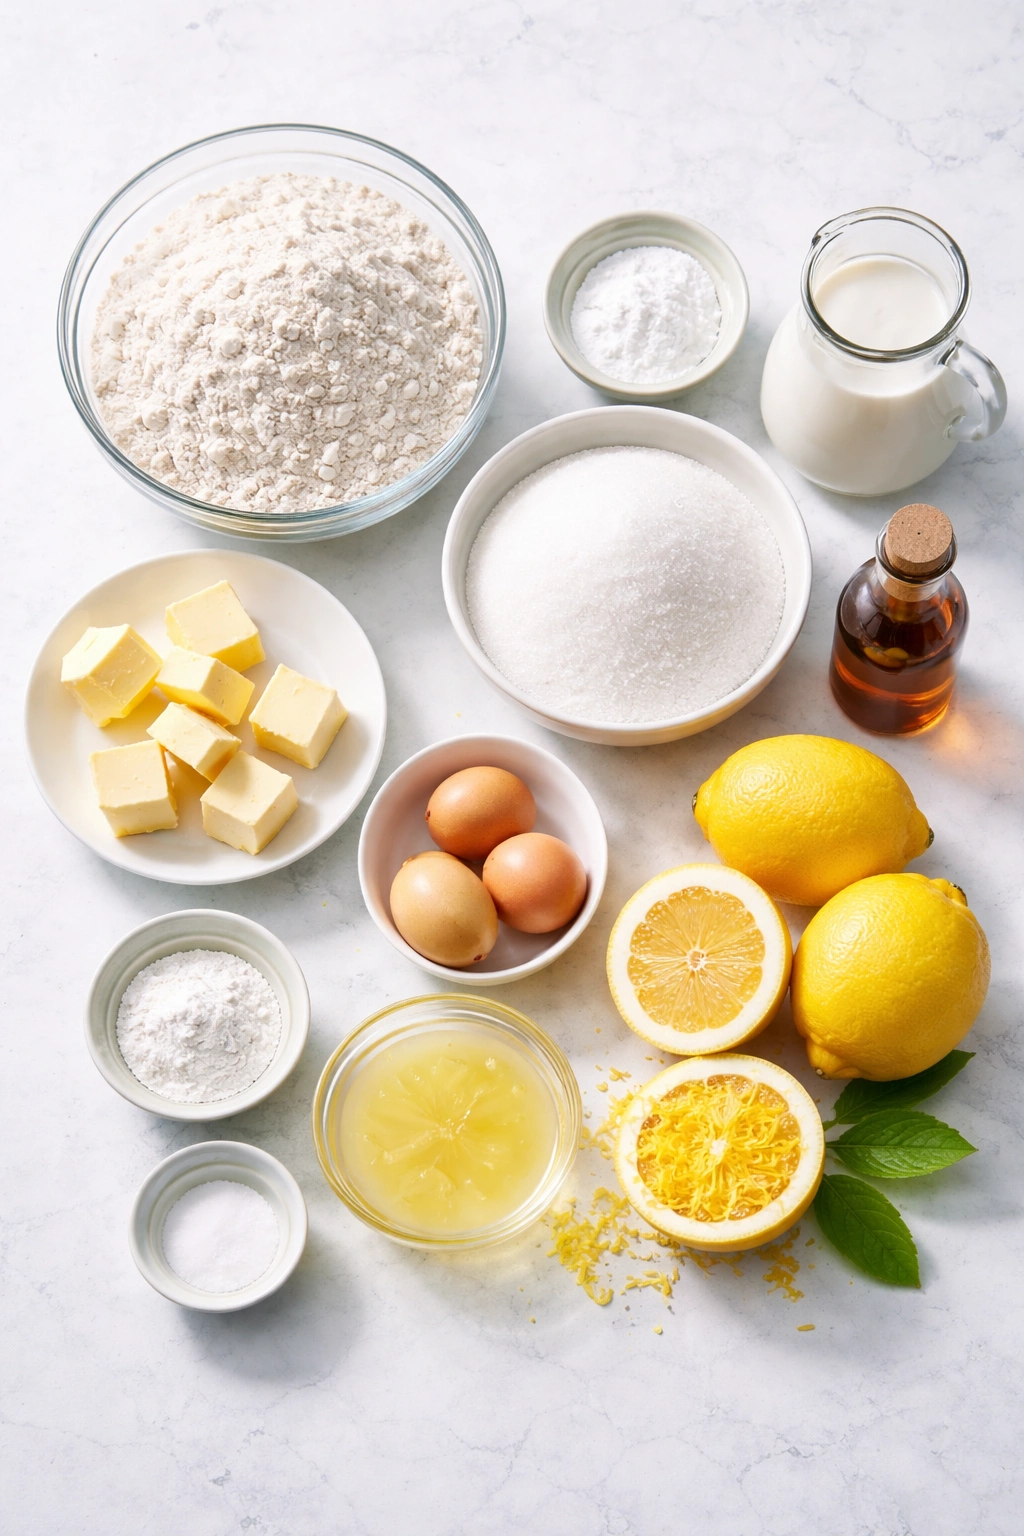
For the Cake:
- 2 cups (240 grams) all-purpose flour
- 1½ teaspoons baking powder
- ½ teaspoon baking soda
- ½ teaspoon fine sea salt
- ¾ cup (170 grams) unsalted butter, softened to room temperature
- 1 cup (200 grams) granulated sugar
- Zest of 2 large lemons (about 2 tablespoons, packed — use a microplane zester for best results)
- 3 large eggs, room temperature
- ½ cup fresh-squeezed lemon juice (from about 3 medium lemons)
- ½ cup (120 ml) whole milk or buttermilk
- 1 teaspoon pure vanilla extract
For the Lemon Glaze (optional but recommended):
- 1½ cups (180 grams) powdered sugar, sifted
- 3 to 4 tablespoons fresh lemon juice
- 1 tablespoon heavy cream or whole milk
- Pinch of fine sea salt
Preparing Your Ingredients and Pan

Getting your ingredients ready before you start mixing is the single best habit you can develop as a baker. It’s called mise en place, and it prevents scrambling, forgotten ingredients, and mixing errors. Start by taking your butter and eggs out of the refrigerator at least 30 minutes before you plan to bake. Room temperature butter creams more quickly and incorporates air more efficiently, while room temperature eggs blend smoothly into the batter without causing the mixture to break or become curdled-looking.
While your ingredients are coming to temperature, preheat your oven to 350°F (175°C) and position your rack in the center. Get your pan ready by greasing it generously with softened butter or cooking spray, then dust it lightly with flour, tapping out the excess. If you’re using a round cake pan, you can line the bottom with parchment paper cut to fit, which makes turning out the cake easier.
Zest your lemons while they’re still whole — it’s much easier to zest before you cut them in half. Use a fine microplane zester to create fluffy, light lemon zest. If you use a box grater, you’ll end up with denser zest and you’ll get more of the bitter white pith underneath the colored zest, so invest in a good microplane if you bake citrus cakes regularly. After zesting, juice your lemons and measure out half a cup. Strain the juice through a fine mesh sieve to remove any seeds or pulp bits.
Step-by-Step Baking Instructions
Make the Dry Ingredients:
-
In a medium bowl, whisk together the flour, baking powder, baking soda, and salt until evenly combined and no lumps of baking soda remain. Set this mixture aside — you’ll use it in stages during mixing.
-
In a separate small bowl, rub the lemon zest together with about 2 tablespoons of the granulated sugar, pressing gently with your fingertips. This bruises the zest slightly and releases all the aromatic oils. The sugar will look damp and fragrant. Set aside.
Advertisements
Cream the Butter and Sugar:
-
In a large bowl, using an electric mixer on medium speed (or by hand with a whisk if you’re mixing manually), beat the softened butter for about 1 minute until it’s pale yellow and creamy.
-
Add the remaining sugar (about ¾ cup) to the butter along with the lemon zest-sugar mixture, and continue beating on medium speed for 3 to 4 minutes, until the mixture is pale, noticeably fluffy, and increased in volume by about 50%. This is the critical step that incorporates air into the batter, which creates lift and a tender crumb. You should see a color change from bright yellow to pale yellow or almost white.
-
Reduce the mixer to low speed and add the eggs one at a time, waiting about 30 seconds after each addition before adding the next egg. After each egg addition, make sure to scrape down the sides and bottom of the bowl with a rubber spatula so everything incorporates evenly. By the time you’ve added all three eggs, the mixture might look slightly curdled or separated — this is completely normal and will come back together in the next steps.
-
Pour in the vanilla extract and beat on low speed for about 30 seconds until combined.
Alternate Flour and Milk:
-
Add half of the flour mixture (about 1 cup) and beat on low speed for about 30 seconds, until just combined — you should still see a few small streaks of flour, which is perfect. Do not overmix at this stage.
-
Pour in half of the lemon juice and milk mixture (about ¼ cup lemon juice and ¼ cup milk combined) and beat on low speed for about 30 seconds until just combined.
-
Add the remaining flour mixture and beat on low speed for about 30 seconds until you see just a few small streaks of flour remaining.
-
Pour in the remaining lemon juice and milk mixture and beat on low speed for about 30 seconds until the batter is smooth and fully combined. Do not overmix — overworking the batter develops gluten, which makes the finished cake tough and dense instead of tender and delicate.
Advertisements
Bake the Cake:
-
Scrape the batter into your prepared pan and smooth the top gently with an offset spatula or the back of a spoon. The batter should be poured into an even layer.
-
Bake for 35 to 40 minutes, rotating the pan halfway through baking (at about 17-18 minutes). The cake is done when the edges have just started to pull away slightly from the sides of the pan, and a toothpick inserted in the very center comes out clean or with just one or two moist crumbs clinging to it — not wet batter, but a hint of moisture is fine.
-
Set the pan on a wire cooling rack and allow the cake to cool in the pan for 15 minutes. This short cooling time allows the structure to set slightly so the cake can be turned out without falling apart, but it’s still warm enough that turning it out is easy.
-
After 15 minutes, run a thin offset spatula or butter knife around the edges of the cake to loosen it from the sides of the pan. Place a cooling rack on top of the cake, then carefully invert the whole setup, pan and rack together, and lift away the pan. You should hear a gentle thud as the cake lands on the rack. If you used parchment paper, carefully peel it away from the bottom.
-
Set the cake right-side-up on a clean cooling rack (or flip it back over if you prefer the smoother bottom as your serving top — it’s up to you) and allow it to cool completely for at least 1 hour before glazing or frosting. Do not frost a warm cake — the frosting will melt and slide right off, and you risk breaking the delicate crumb.
Making the Lemon Glaze
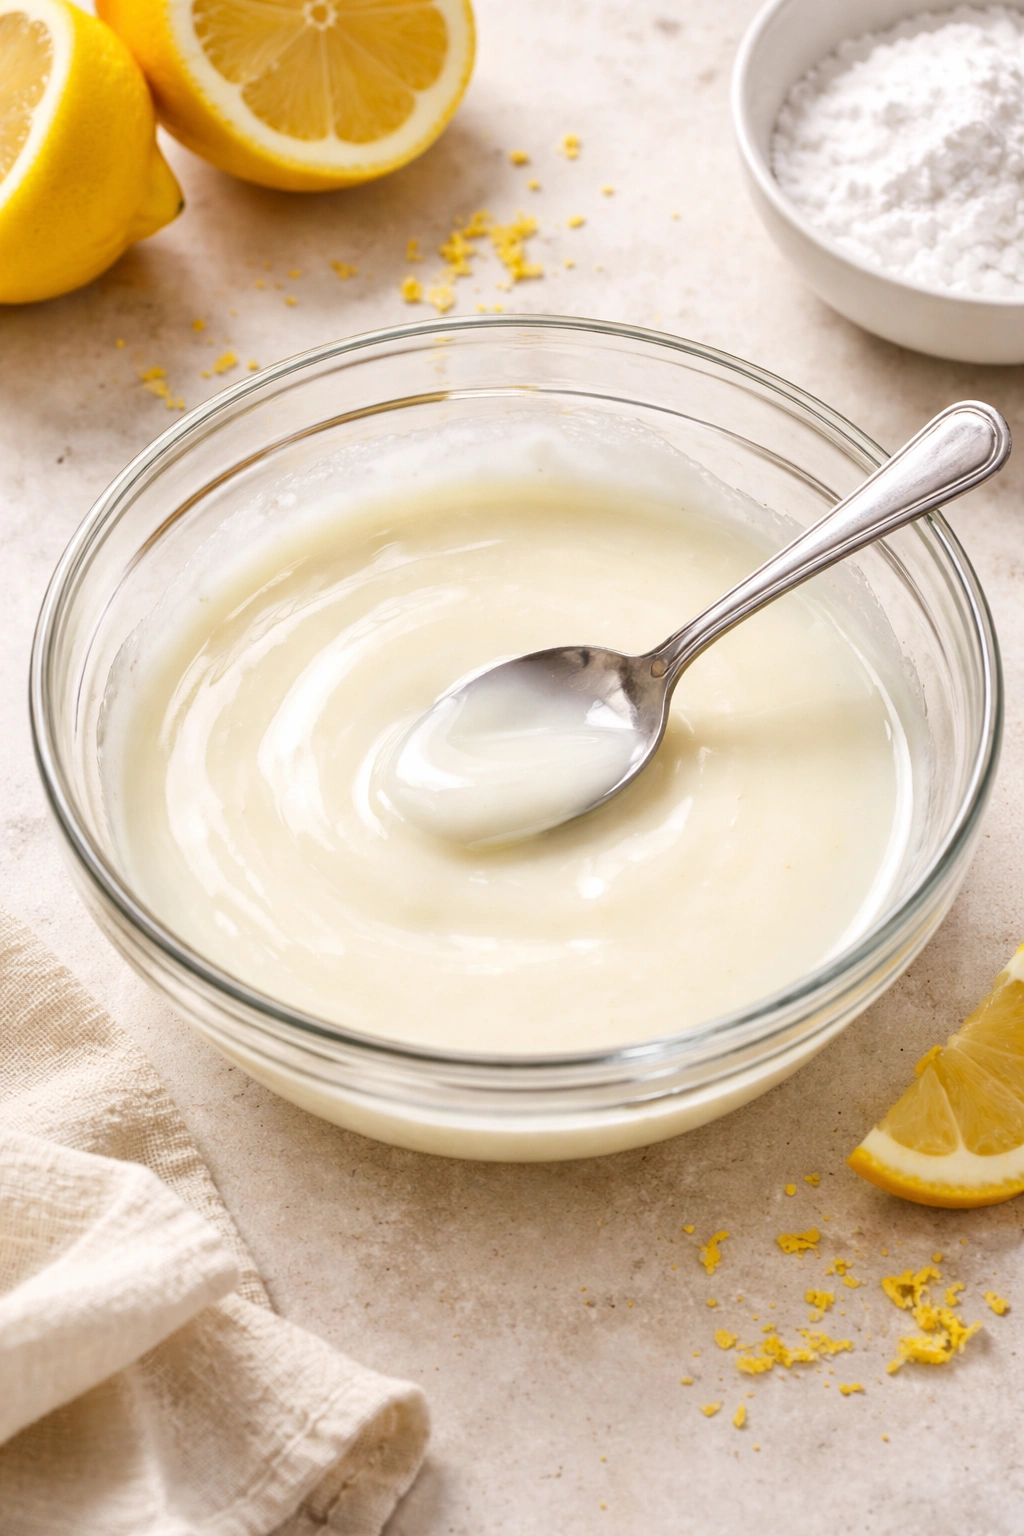
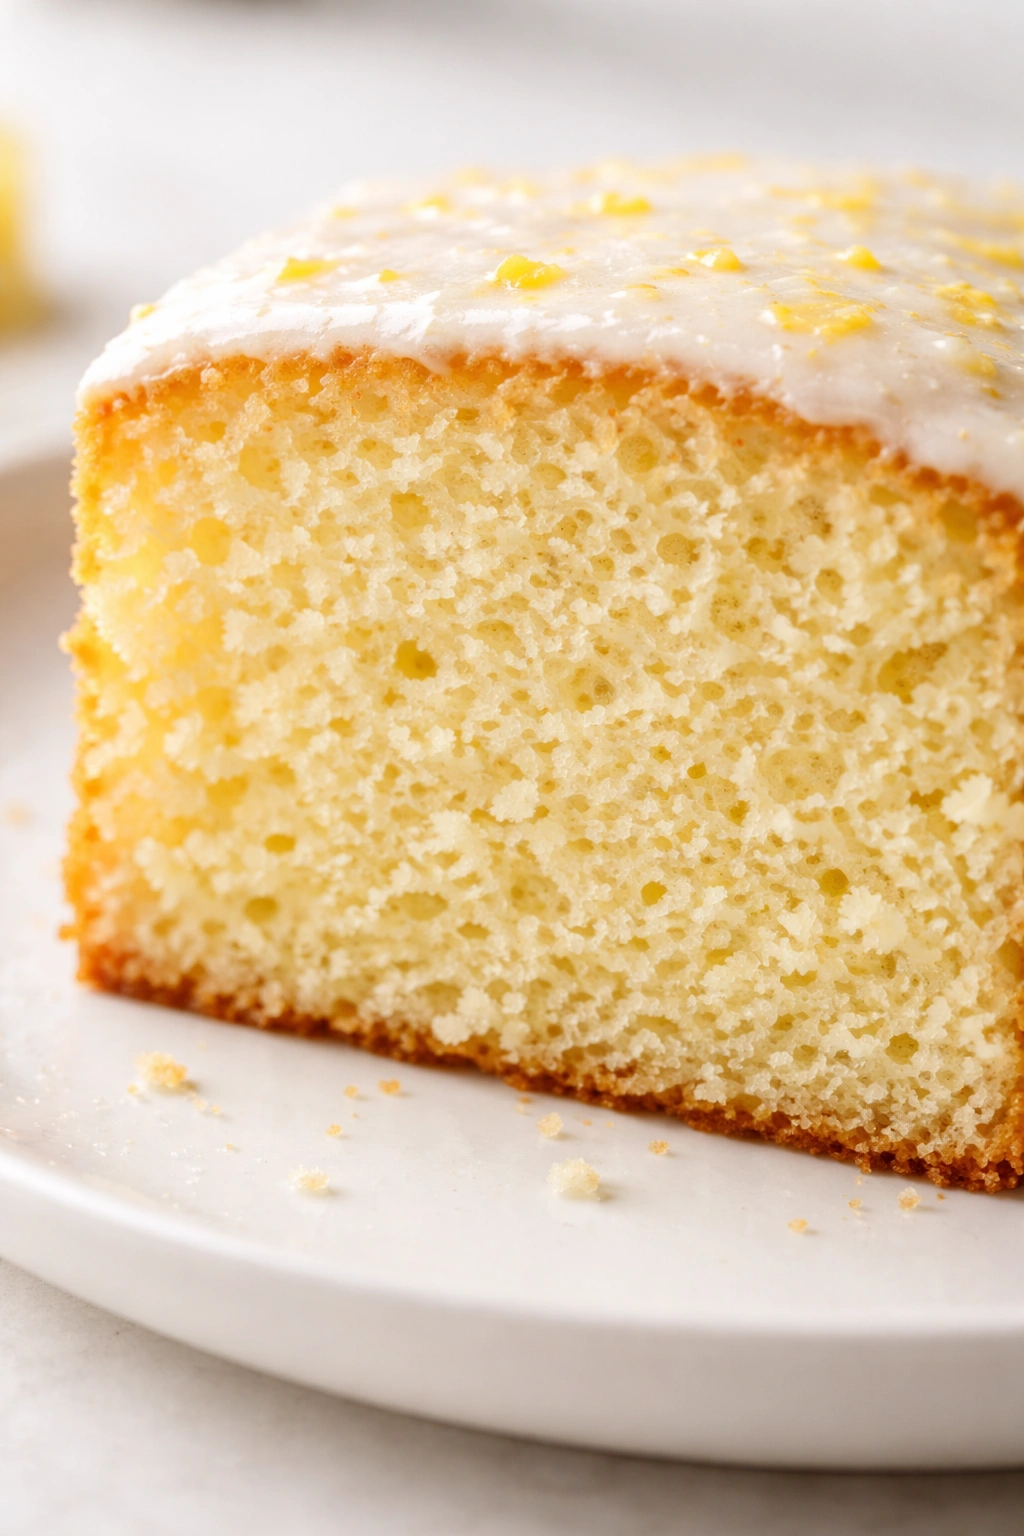
The glaze is optional, but it takes the cake from simple and lovely to restaurant-worthy elegant with just five minutes of work. Unlike a thick frosting, this glaze is thin, pourable, and slightly shiny — it sets to a delicate crust that’s pleasant to bite through without ever being heavy or overwhelming.
Sift your powdered sugar into a bowl to remove any lumps, then whisk in the lemon juice, cream, and salt. The consistency should be thick enough to coat the back of a spoon and slowly drip off, but not so thin that it runs off the cake immediately. If it’s too thick, add a few more drops of lemon juice or cream. If it’s too thin, add a bit more powdered sugar.
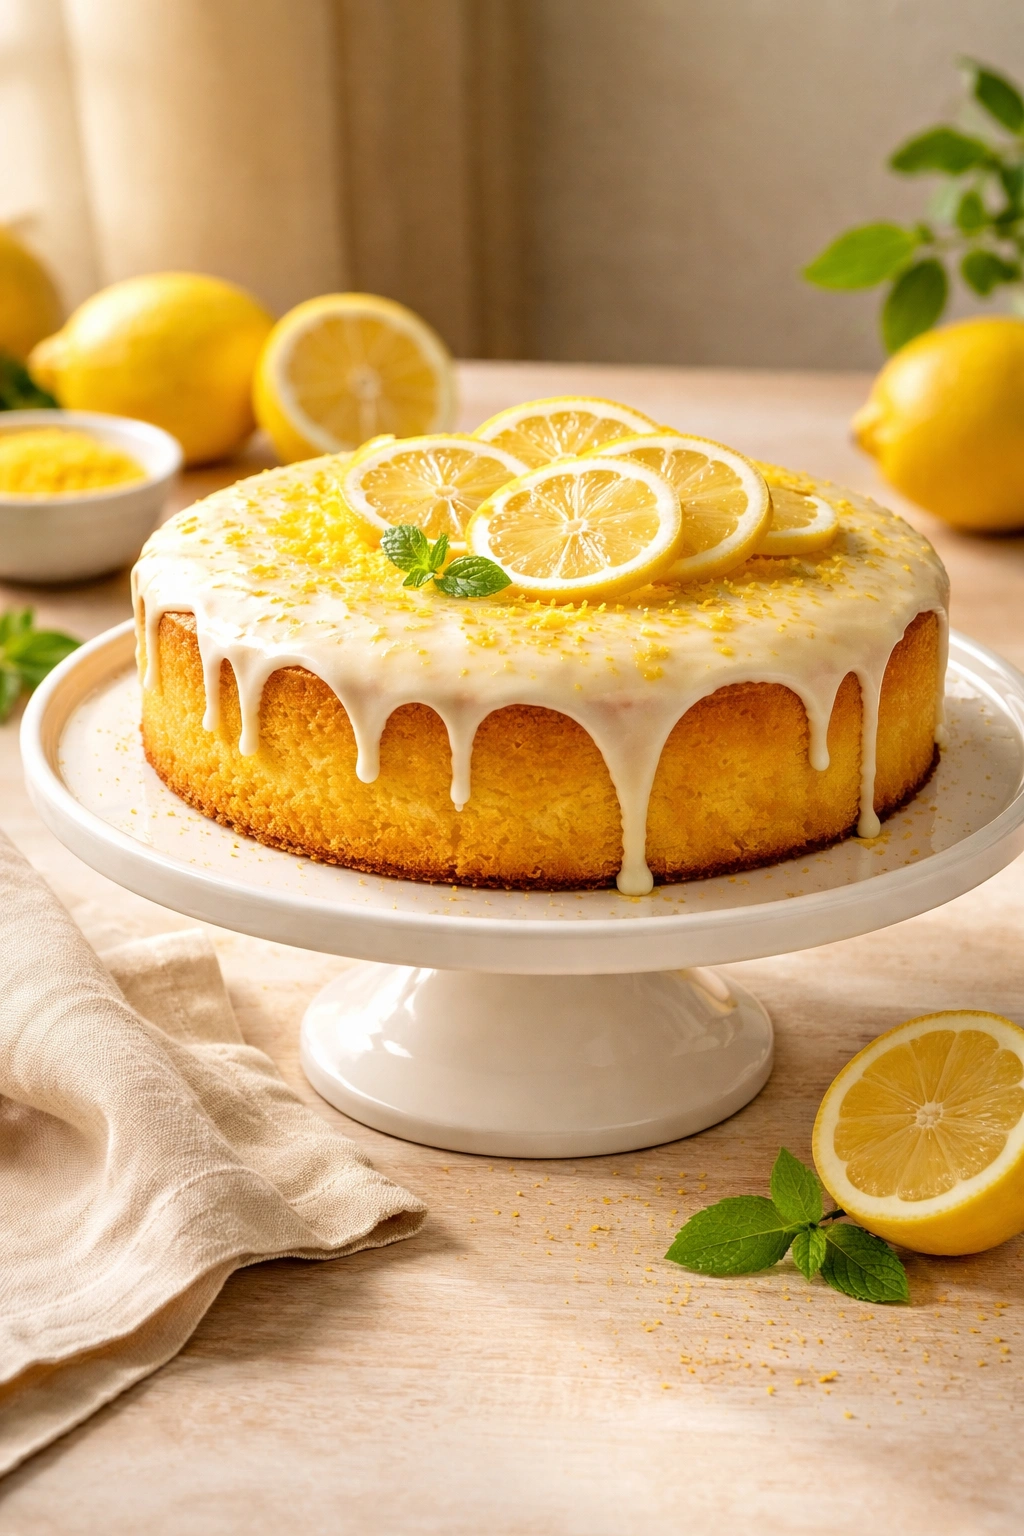
Pour the glaze over the top of the completely cooled cake, letting it drip naturally down the sides. Use an offset spatula or the back of a spoon to spread it if you want an even coating, or let it pool and drip naturally for a more casual, rustic look. You can also dip the top of the cake into the glaze for full coverage. Sprinkle a tiny pinch of lemon zest on top if you’d like a garnish. The glaze will set to a pleasant crust within about 30 minutes, but the cake is perfectly pleasant to eat while the glaze is still glossy.
Common Baking Mistakes to Avoid
The most frequent mistake I see with lemon cakes is using bottled lemon juice instead of fresh-squeezed. Bottled lemon juice is often treated with preservatives that give it a somewhat metallic or bitter undertone, and it just doesn’t have the same brightness as fresh juice. If you’re going to make this cake, take the three minutes to cut and juice actual lemons. It’s the single biggest difference between a good lemon cake and an exceptional one.
The second mistake is not using lemon zest, only lemon juice. The zest contains all the aromatic lemon oils that give a cake that authentic, complex lemon flavor, while the juice provides the tartness. Without zest, you’re missing half the lemon experience. Make sure you’re using a microplane zester and zesting only the colored outer layer, not the bitter white pith underneath.
Overmixing the batter is the third major pitfall. The batter-mixing steps should feel quick and gentle. You’re aiming for just-combined, not thoroughly smooth. A few small streaks of flour are actually a good sign that you’re stopping at the right moment. Overmixing develops gluten in the flour, which is great for bread but terrible for cake — it makes the crumb tough and dense instead of tender and delicate. Trust that your gentle mixing is enough.
Room temperature ingredients matter more with this cake than you might expect. Cold eggs and cold butter don’t incorporate smoothly, which means the batter won’t emulsify properly and you’ll end up with a curdled-looking mixture that doesn’t cream as efficiently. This directly affects the final texture of the cake. Take the extra 30 minutes to let your butter and eggs come to room temperature before you start mixing.
Tips for the Perfect Crumb
The crumb texture of your finished cake depends on three things: how much air you incorporate during creaming, how gently you mix the batter once you’ve added the dry ingredients, and how accurately you measure your flour. By weight is always more accurate than by volume, but if you’re measuring by cups, spoon your flour into the measuring cup and level it off with a knife instead of scooping directly from the bag and packing it down. Scooping compacts the flour and you’ll end up with more flour than the recipe calls for, which makes the cake drier and denser.
The lemon juice in the batter reacts with the baking soda, creating lift and a tender crumb. That’s why lemon cake has such a naturally light texture. Don’t skip the buttermilk if you can help it — its acidity is different from regular milk and it actually contributes to the cake’s tenderness and moisture. If you only have whole milk, you can make a substitute by adding 1 tablespoon of white vinegar or lemon juice to ½ cup of milk and letting it sit for 5 minutes before using it.
Under- and over-baking are two ends of the same problem. A slightly underbaked cake is too tender and falls apart, while an overbaked cake is dry and dense. The toothpick test is your friend here — inserted into the very center of the cake, it should come out clean or with just one or two moist crumbs clinging to it. If you see wet batter on the toothpick, it needs another 2 to 3 minutes. If you see completely clean, dry crumbs, you might have already overbaked — start checking a minute or two earlier next time.
The pan size matters too. This recipe is written for a standard 9-inch round cake pan, which is 1.5 inches deep. If you use a shallower pan, the cake will bake faster. If you use a deeper pan, it will bake slower. If you want to make a square cake in an 8×8-inch pan, it’ll be slightly thicker and take about the same amount of time. Just watch the visual cues — the cake is done when the edges pull away and a toothpick inserted in the center comes out clean.
Variations and Flavor Twists
Lemon cakes are wonderful as-is, but they’re also incredibly versatile if you want to experiment. The most natural adaptation is to add poppy seeds — add about 2 tablespoons of poppy seeds to the dry ingredients. This adds a subtle nutty flavor and a delicate texture variation without changing the baking time at all. Poppy seed lemon cake has a traditional appeal and it’s still completely easy to make.
If you want to add depth and complexity, try making this cake with a combination of lemon and lime juice — use ¼ cup lemon juice and ¼ cup lime juice instead of ½ cup lemon. The lime adds a subtle herbaceous note that makes the flavor more interesting. You can use lime zest, lemon zest, or a combination of both.
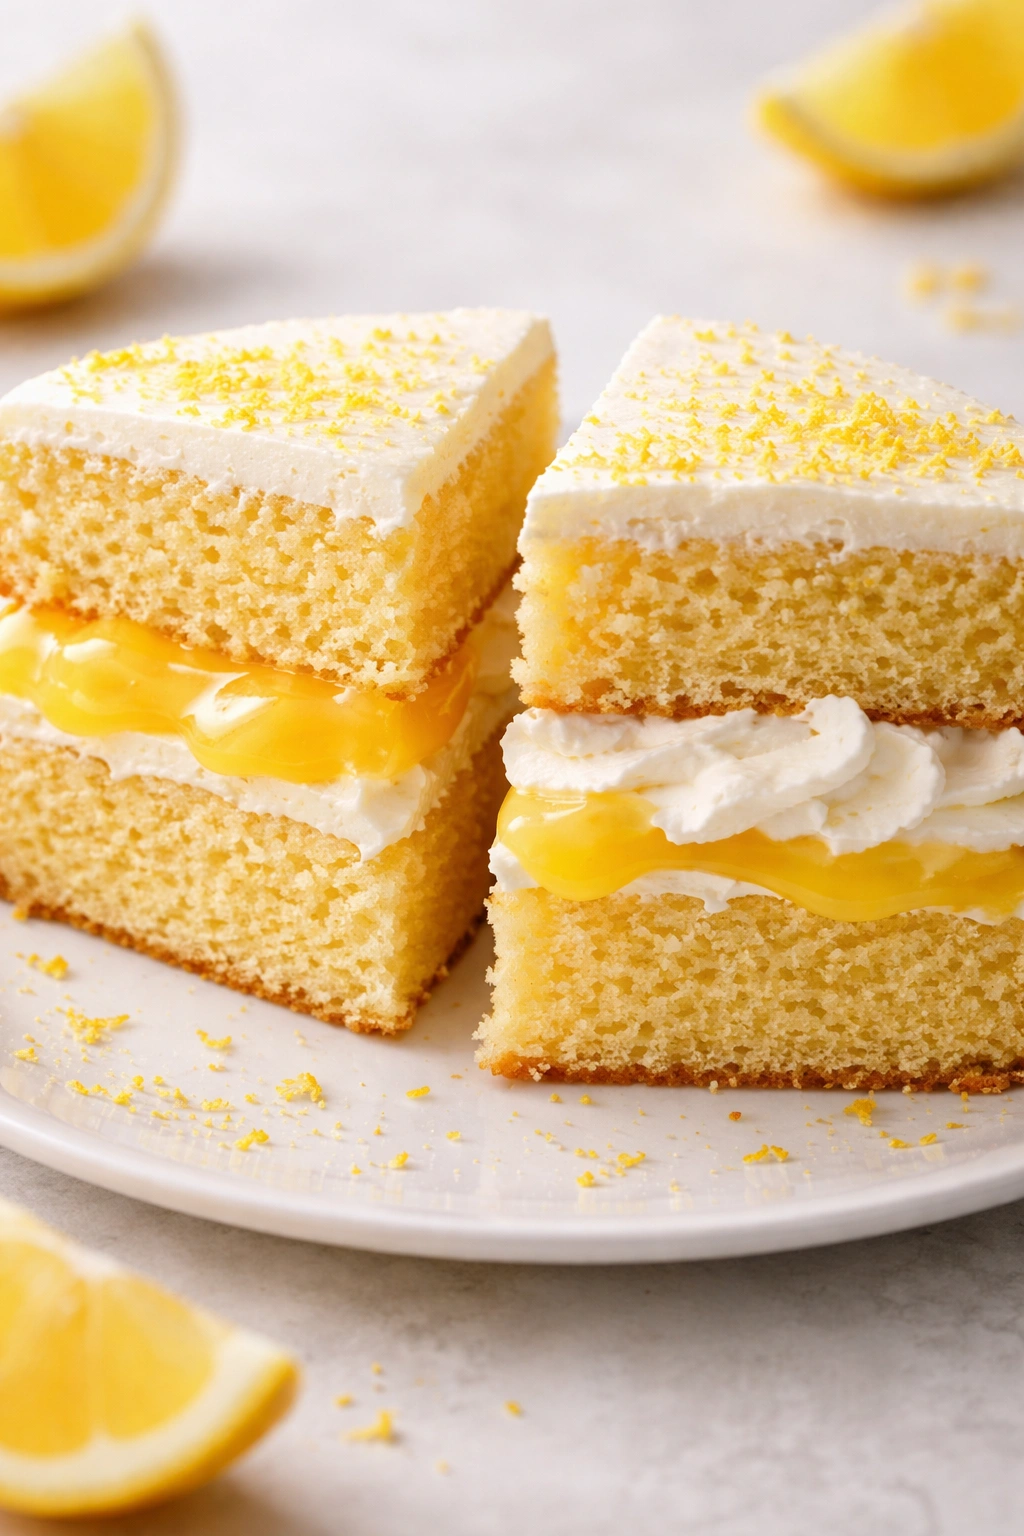
For a different texture variation, make this cake as written but sandwich it with a simple lemon curd and whipped cream between two layers. This turns the cake into something more special and celebration-worthy. You can find reliable lemon curd recipes, or use a quality store-bought version if time is short.
A dairy-free adaptation works reasonably well — substitute the milk with an equal amount of unsweetened almond milk or coconut milk, and use dairy-free butter. The results will be slightly denser and less moist because dairy-free butter typically has a different fat composition, but the cake will still taste good and have a pleasant texture. Use the same amount of buttermilk or make a dairy-free version by adding 1 tablespoon of lemon juice or apple cider vinegar to ½ cup coconut milk and letting it sit 5 minutes.
For a vegan version, replace each egg with a flax egg (1 tablespoon ground flaxseed mixed with 3 tablespoons water, let sit 5 minutes) and use dairy-free milk and dairy-free butter. The results will be more crumbly and the rise might be slightly less impressive, but it will still produce a tender, moist cake with good lemon flavor. Vegan cakes tend to benefit from being baked just slightly longer, until a toothpick comes out completely clean rather than with moist crumbs.
Storage and Make-Ahead Options
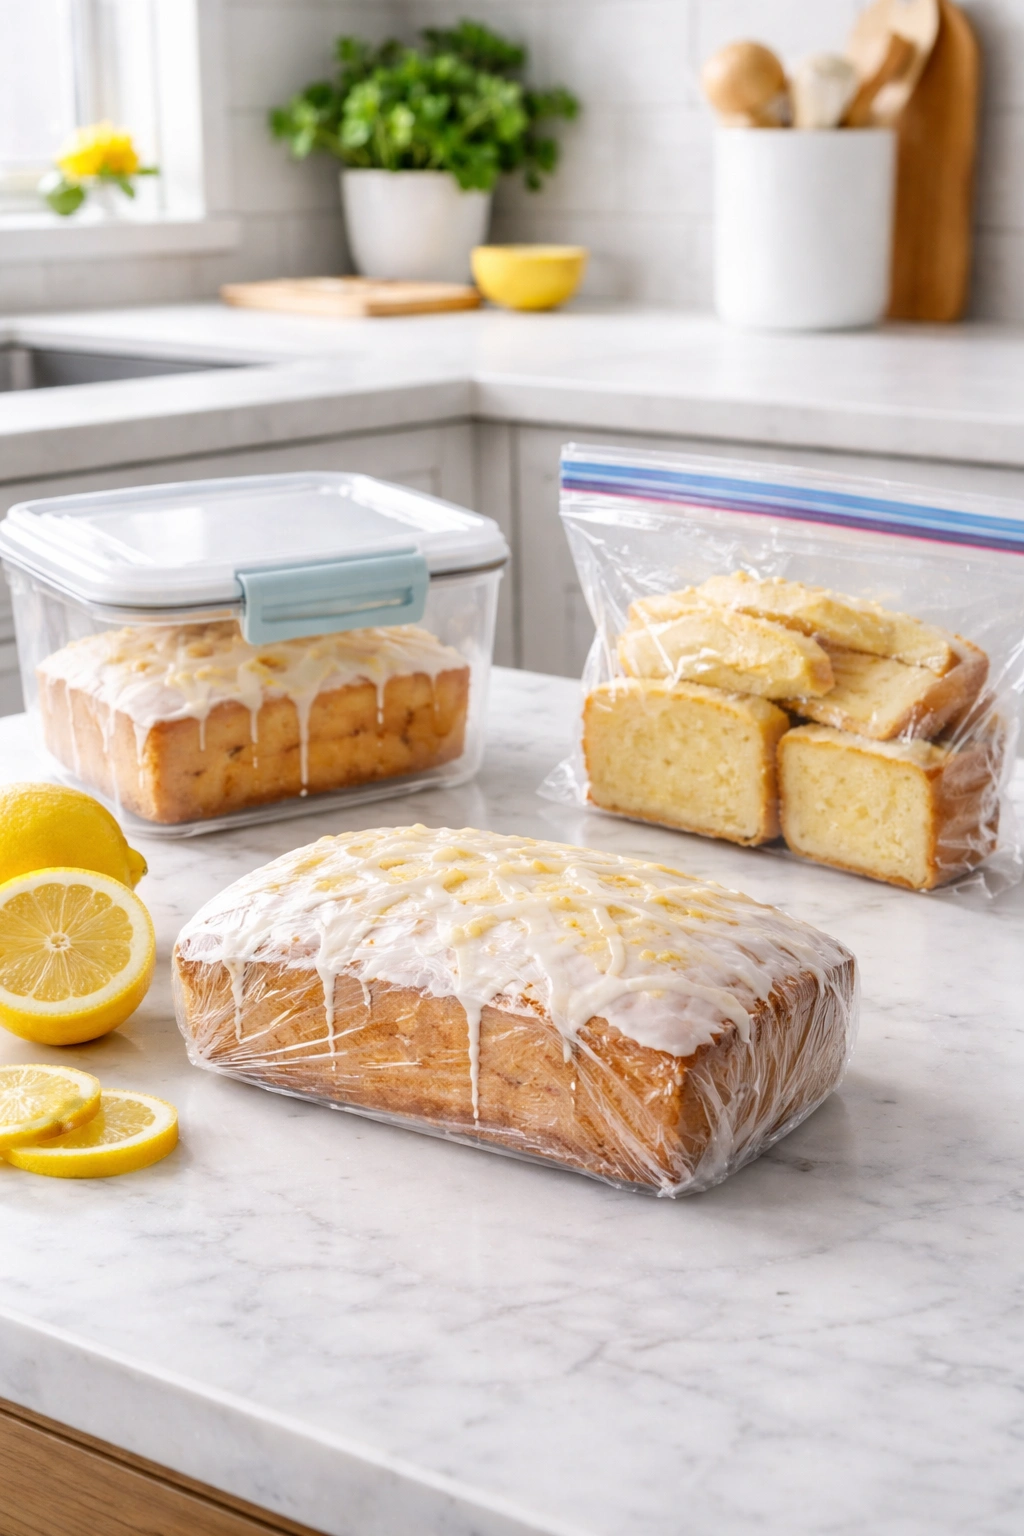
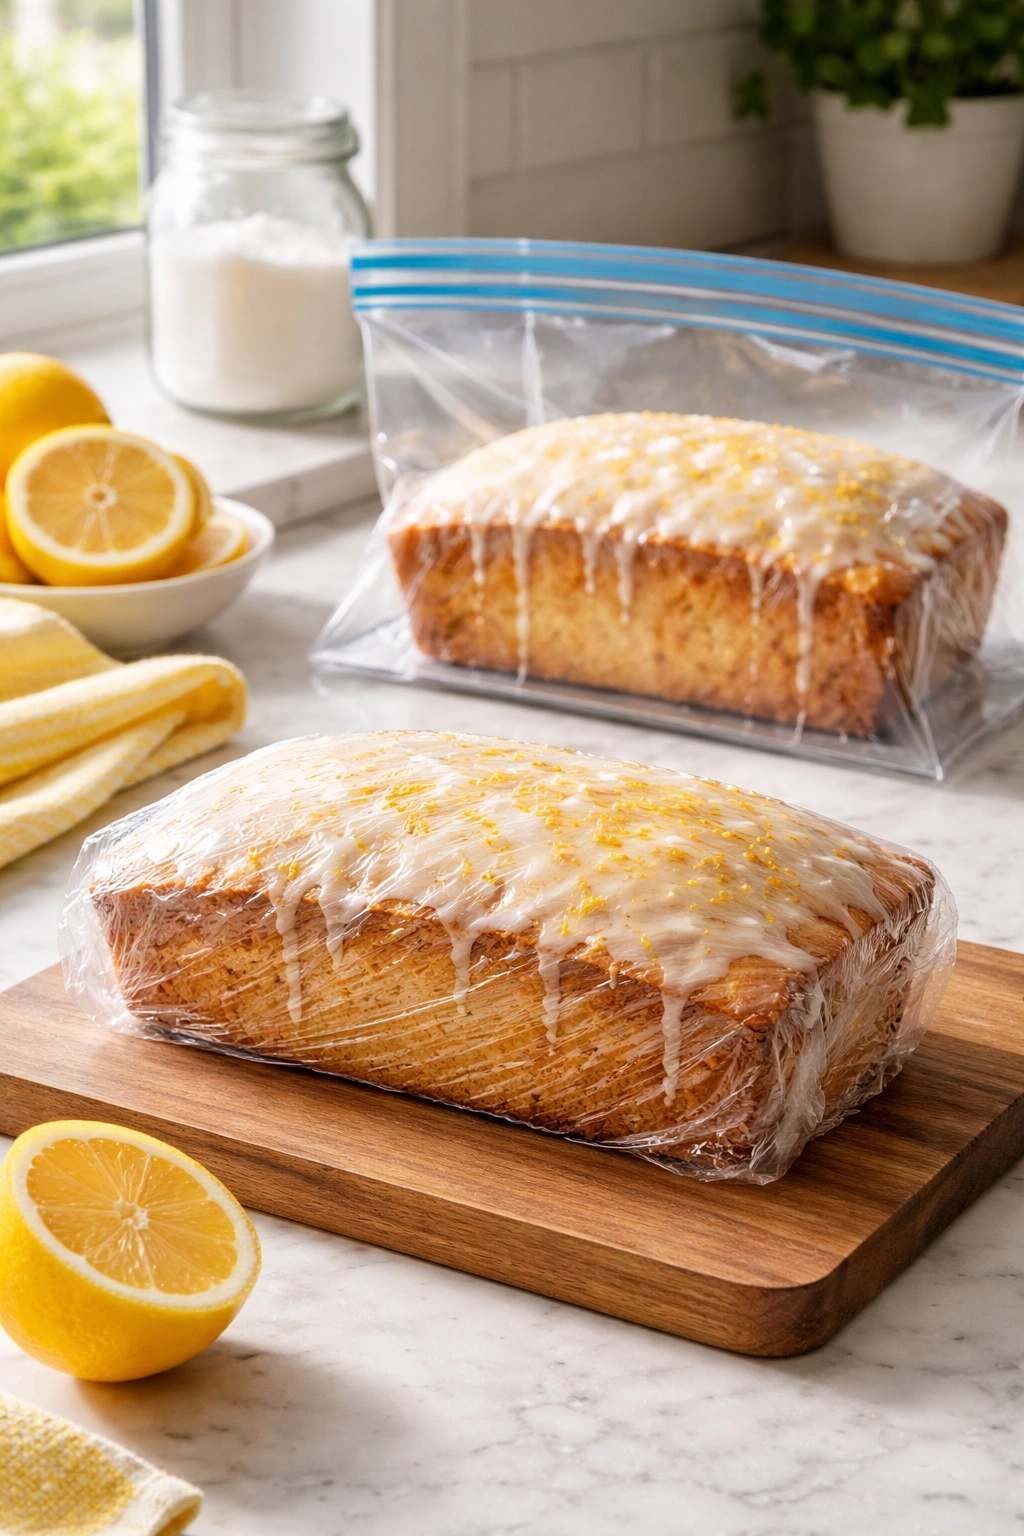
This cake keeps beautifully and actually improves as it sits. At room temperature covered loosely with plastic wrap or stored in an airtight container, it stays fresh and moist for three to four days. Wrap it tightly on day two and day three — the surface will have dried slightly but the interior stays remarkably tender. The flavors deepen on days two and three, so it’s actually better if you’re making it a day or two ahead.
Refrigeration is fine but not necessary if you plan to eat the cake within three days. If you need to store it longer, the freezer is your friend. Cool the cake completely, then wrap it tightly in plastic wrap and place it in a freezer bag, pressing out as much air as possible. It’ll keep frozen for up to two months. Thaw it on the counter at room temperature for about an hour before serving. The glaze, if you’ve added it, will have softened slightly during thawing, which actually makes the cake easier to eat.
You can also freeze the cake without the glaze, then make the glaze fresh after thawing. This is my preferred method because the glaze sets beautifully on the thawed cake and looks freshly made. If you’re freezing the cake with the glaze intact, the glaze will crack slightly during freezing and thawing, which looks a bit rustic but doesn’t affect the taste at all.
The batter doesn’t keep — bake it the same day you mix it. The leavening agents are activated once wet and dry ingredients combine, and the leavening power starts diminishing immediately. Within 30 minutes, you’ll lose some lift. After an hour, you’ll definitely notice a difference in how well the cake rises.
Serving Ideas and Pairings
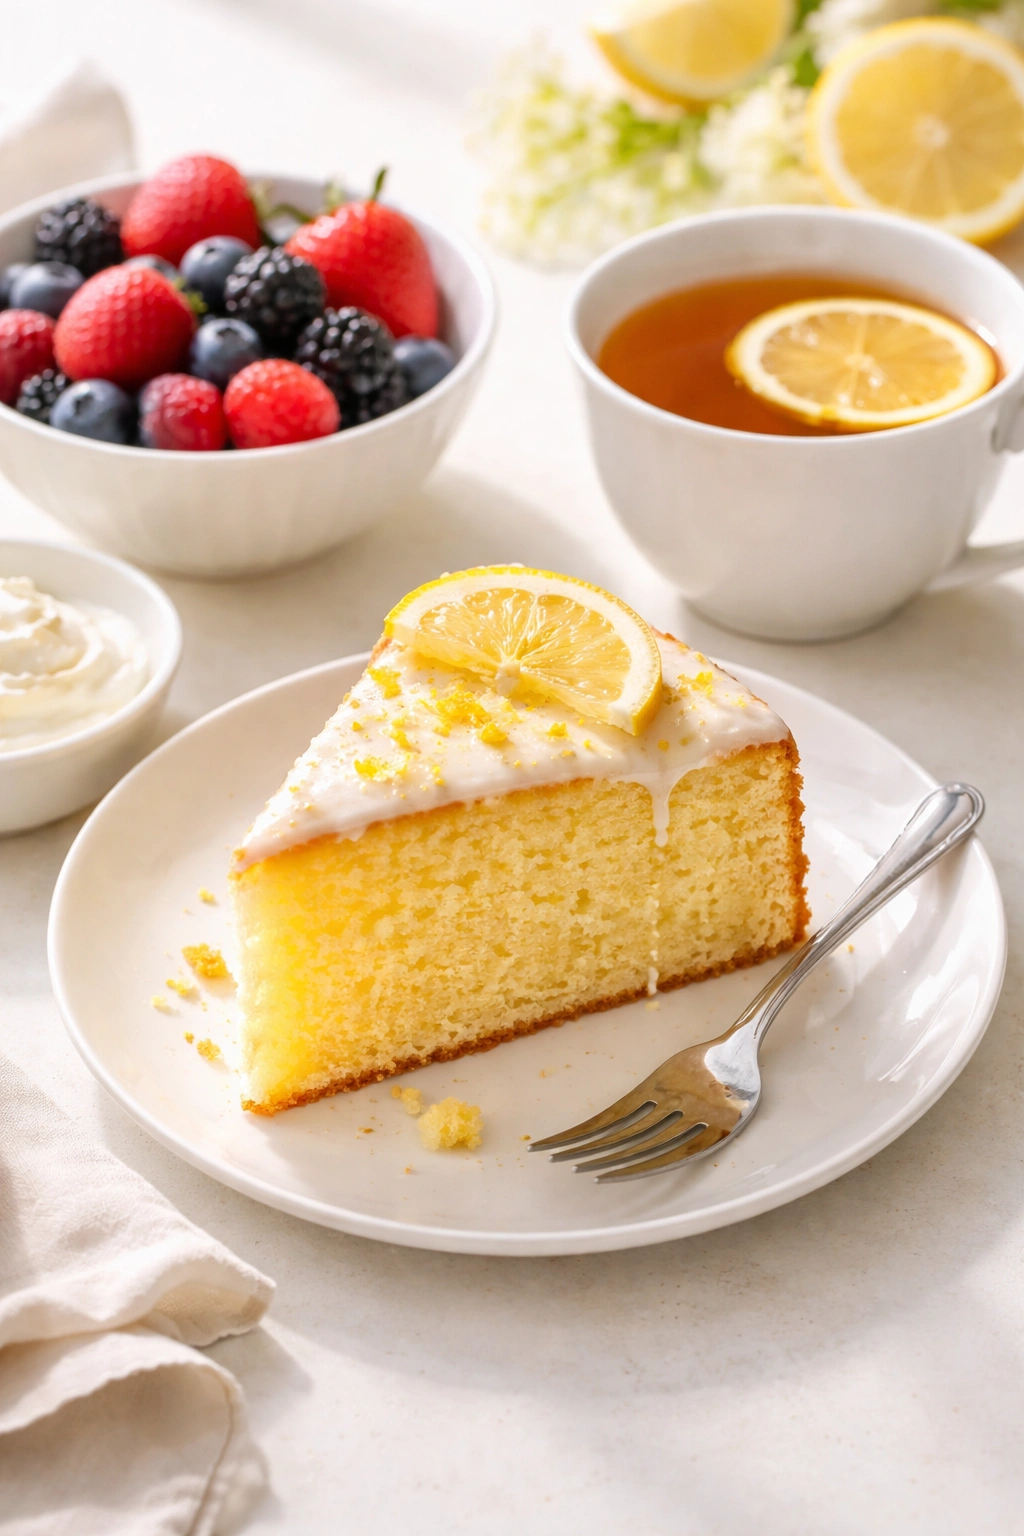
A plain lemon cake needs nothing but perhaps a cup of hot tea or coffee. The simplicity is part of its appeal, and the bright flavors don’t need any additional richness. Serve it on a simple white plate for maximum visual impact — the golden color of the cake and the pale yellow glaze are beautiful against white ceramic.
With fresh fruit, a slice of lemon cake becomes a complete dessert. Serve it alongside a small handful of fresh raspberries, blueberries, or strawberries, or serve it with a side of macerated berries dressed with a tiny bit of sugar and let to sit for 5 minutes. The tartness of the berries complements the tartness of the lemon perfectly.
For something richer, serve a slice of lemon cake with whipped cream on the side or piled on top. You can make whipped cream by beating heavy cream with a bit of powdered sugar and vanilla extract until soft peaks form. The creaminess balances the tartness of the cake beautifully.
Lemon cake is also lovely crumbled into Greek yogurt with berries for a deconstructed dessert that feels lighter and fresher than eating it on a plate. This works beautifully as a make-ahead dessert because you can assemble it just before serving.
For entertaining, you can serve thin slices of lemon cake with afternoon tea, coffee, or a glass of crisp white wine. It’s traditional enough for formal occasions but approachable and unpretentious enough for casual gatherings. Lemon cake pairs beautifully with champagne or Prosecco if you’re looking for something celebratory.
Is This Cake Gluten-Free
Making lemon cake gluten-free requires substituting the all-purpose flour with a gluten-free flour blend that contains xanthan gum or guar gum. Most all-purpose gluten-free blends work reasonably well in this recipe — King Arthur Baking Company, Bob’s Red Mill, and Better Batter all make reliable blends. Use the same weight and amount of gluten-free flour as you would all-purpose flour.
The main difference you’ll notice is that gluten-free cakes tend to be slightly denser and slightly less tender than their wheat-flour cousins. This is partly because gluten-free flour doesn’t have any gluten to develop, and partly because the binders (xanthan gum or guar gum) work differently than gluten. The cake will still be moist and delicious, just with a slightly different texture — more like a tender quickbread than a traditional fluffy cake.
You might also need to add a few extra minutes of baking time, as gluten-free batters sometimes take slightly longer to bake through. Start checking at 37 minutes instead of 35, and proceed from there. The visual cues remain the same — edges pulling away from the pan and a clean toothpick test from the center.
Can You Make This Cake in Advance
Yes, absolutely. This is one of the best cakes for advance preparation. You can bake it one or two days before you need it and it will be more flavorful and perfectly moist when you serve it. Wrap it in plastic wrap after it’s completely cooled, and it’ll keep at room temperature for three to four days.
You can also make the cake up to two months ahead by freezing it. Cool it completely, wrap it well in plastic wrap, then place it in a freezer bag with the air pressed out. Thaw it on the counter for about an hour before glazing and serving.
If you want to glaze the cake in advance, that works fine too. The glaze sets within 30 minutes to an hour and keeps the cake moist. Alternatively, wait to make the glaze on the day you serve the cake — it takes less than five minutes and looks beautifully fresh when you’re serving it to guests.
Can You Double This Recipe
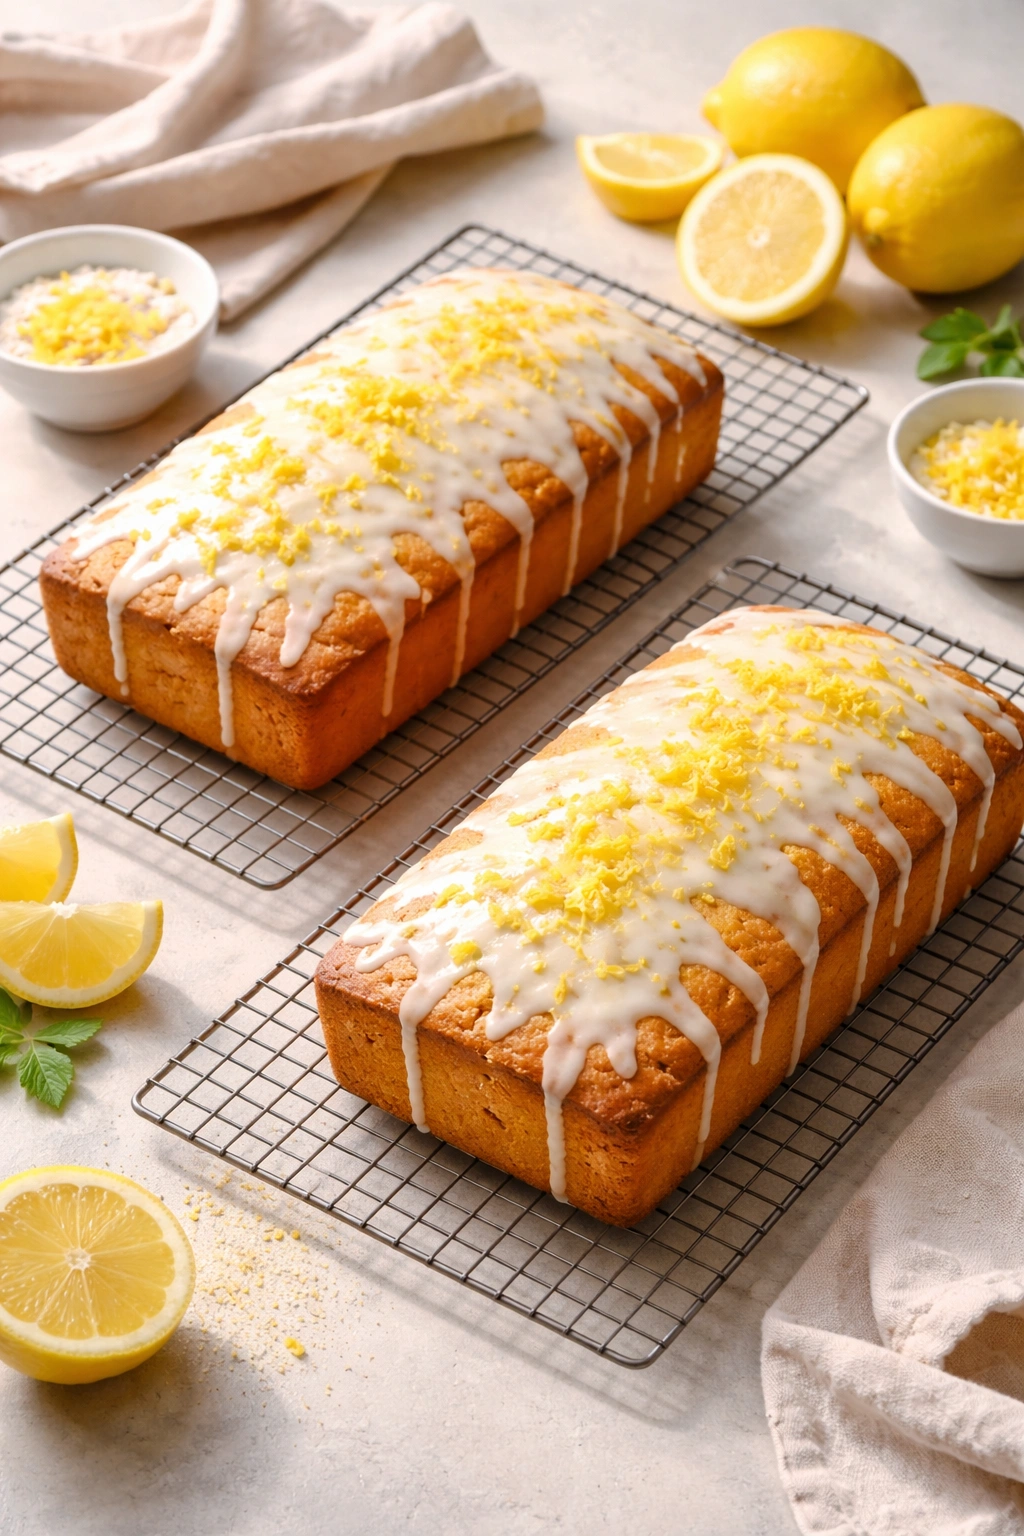
Doubling the recipe works well if you’re making two cakes. Use the exact same ingredients, just in doubled amounts, and mix using the same method. One thing to watch — if you’re using a stand mixer, doubling the recipe might fill your bowl pretty full, so make sure your mixer has room for the ingredients without overflowing. You can also mix it by hand if needed.
When baking two cakes at once, place them on separate racks in the oven and rotate them top-to-bottom halfway through baking. Since they’ll bake at slightly different rates, check both cakes and adjust which one comes out first based on the toothpick test rather than assuming they’ll be done at exactly the same time.
Can You Make This as Cupcakes

This recipe adapts beautifully to cupcakes. Line a muffin tin with paper liners and divide the batter evenly among 18 to 20 cups, filling each about two-thirds full. Bake at the same temperature (350°F) but reduce the baking time to 18 to 22 minutes, depending on your oven and how full you’ve filled the cups. Check for doneness starting at 18 minutes — a toothpick inserted into a cupcake should come out clean.
Let the cupcakes cool in the tin for 10 minutes, then turn them out onto a cooling rack and allow them to cool completely before glazing or frosting. The glaze works beautifully on cupcakes — either drizzle it over the cooled cupcakes or dip the tops into the glaze. You can also frost them with a simple lemon buttercream.
Final Thoughts
This lemon cake recipe exists because over years of baking and testing, it’s proven itself to be reliable, delicious, and genuinely forgiving. It’s the cake I reach for when I want something dependable that will impress without requiring me to learn new techniques or acquire special ingredients. Every time I make it, it comes out golden, tender, moist, and gloriously lemony.
What makes this cake special isn’t a secret ingredient or an unusual technique. It’s the combination of fresh lemon juice and zest giving it authentic flavor, the buttermilk providing tenderness, and the straightforward mixing method keeping the crumb light and delicate. It’s the kind of recipe that works because the ratios are right, the method is sound, and each ingredient is there for a specific reason.
Bake this cake for yourself on a quiet afternoon with a cup of tea. Make it for your family on an ordinary Tuesday. Bring it to a potluck where you want to feel confident that people will actually want to eat it. Frost it beautifully for a celebration, or serve it plain because you want to taste the actual cake. It’s versatile, reliable, and genuinely easy to make. Once you’ve made it once, you’ll understand why it deserves a permanent place in your baking rotation.